2014 Nashua Cal Ripken T-Ball, Rookie and Minors Practice and Game Management Guide
|
|
|
- Joleen Harrell
- 6 years ago
- Views:
Transcription

1
2 Thank you for volunteering! This document is meant to act as a guide, and is by no means firm direction as to how a coach should manage a practice or game. For volunteers coaching for the first time, we hope this guide will offer you tips that will help make this a very enjoyable experience. Baseball should be fun for coaches as well. For more experienced coaches, use as much or as little of this guide as you wish, and we ask for your feedback with regards to methods you like to use in practices or games, that may not be included here. You are not alone in this. There is a large support structure at your disposal.

3 General guidelines for these levels Keep them safe Keep it simple Keep it fun Keep them busy Keep them focused Not all players are created equal, both in skills and desire Explaining to the players Why we do something is just as important as showing them How we do something. Players who have fun, feel safe, and stay busy will learn and return
4 Keep them safe 1. Constant management of players handling bats. Especially younger levels where they just don t know any better. No player should grab a bat unless approved/watched by a coach 2. Constant management of horseplay. With bats and balls on the move, there is no room for horseplay Keeping players in small groups and busy with drills greatly reduces horseplay 3. Constant management of who/where players are throwing. This is the Nose part of Nose-Toe-Throw (talked about later) making sure both players noses are pointed at each other (they are looking) Pair up younger players by skill level. Don t pair up a hard thrower with a player who does not move his/her glove to stop a ball 4. Utilize your parents to help keep conditions safe. Young players must be continually coached on the importance of safety

5 Keep it Simple and Fun 1. Keep it simple But you will quickly understand that some players can be offered more challenging drills. Reference the slide related to Not all players are created equal. Younger minds do not respond well to long explanations. You will do better with a visual presentation, and very short verbal commands Younger minds do not respond well to mature baseball terms. You will find yourself using terms like Knocker Knuckles, Nose-Toe-Throw, Alligator, etc. 2. Keep it fun Especially younger levels. Baseball can be slow, so it has to be fun. The coach should have fun as well. If you are too serious, the younger kids will think this is work instead of fun. Baseball is complicated at the older levels for younger players make it Simple & Fun
6 Keep them Busy and Focused 1. Keep them busy Players standing around are not learning and start picking daisy s. Utilize multiple skills stations with help from your coaches/parents. Have a practice plan prepared before you arrive at the field. It will make for an effective and efficient use of your time, keep the kids moving and learning, and allows you to provided it to coaches and parents so that they know what the drills will be without needing you to tell them. 2. Keep them focused Drifting minds create safety concerns (not looking at balls coming at them, etc.) and loss of learning Constant verbal reinforcement will mentally bring them back Multiple stations offers a better adult-to-player ratio on the field which helps with keeping players focused. Drills should be short 5-10 minute events then change it up!
7 Not all players are created equal 1. Especially in T-Ball, where player/family expectations differ. Some players have been waiting for baseball ever since they could hold a glove and ball, while others are being dragged to the field because their parents want them to play the game. You will have some players arrive wearing cleats, baseball pants and eyeblack, with others arriving in clothes they wore to school that day, with the price tag still attached to the glove because it has never been used. 2. As coaches we need to adapt for two primary reasons Safety: You do not want a 5 year old fire-baller, throwing rockets from 10 feet away to a 5 year old who does not know how to use a glove. At this age, the fire-baller does not know any better ( my dad can always catch it ) One of the most difficult tasks as a coach is to find ways to keep our player development balanced, not holding better players back, while at the same time not pushing lesser skilled kids too hard. Grouping by skill level allows coaches to tailor station instruction focus for each group

8 Fundamentals For All Levels


9 All Levels: Baseball Ready Position Shoulders and feet should be squared off, facing the batter. Why: If the player is not facing the batter, it restricts quick lateral movement to one side. Ex: if the 3 rd baseman is facing the pitcher as opposed to the batter, reaction to a hit down the 3 rd base line will be slowed as the body has to rotate around. Knees slightly bent and BUTT DOWN! Why: Provides balance, and equal ability to quickly move in any direction. Note: The player should pretend to sit on the edge of a chair. For younger players, you can use a 5 gallon bucket to demonstrate. Tell players it much easier to start low and quickly stand tall (they have the ground to push against), rather than to stand tall and quickly get low. Feet slightly wider than shoulder width apart. Why: Too close and you cannot get the butt down. Too wide, and the hips lock, preventing quick lateral movement. Weight should be slightly forward. Why: Sitting on the heels influences the player to make the first move backwards. We want them moving to the ball. Note: You should be able to gently press back on a players forehead without knocking them over. When playing the infield both hands should be presented out in front of the body, about knee height. Why: Allows for quick reaction to hard hit balls both on the ground and at face level. Note: At the T-Ball age, it will be hard to keep their hands of the knees while in the infield. Constant reminder required. When playing the outfield, the players hands can be on their knees. The players head should be up, eyes focused on the batter (both infield and outfield). Infield Ready Position Outfield Ready Position You will find that Baseball Ready is a command that needs to be issued constantly

 Aligning the Knocker Knuckles (reference the single yellow line drawn over the knuckles in Figure A) Why: The players wrists, elbows and shoulders are relaxed in this position, as well as being")
10 All Levels: Hitting Basics The Bat should be an extension of the Hands and Eyes Aligning the Eyes, Hands and bat will improve contact. Younger players often stand ram-rod straight, and drop their hands to waist high as they start the swing. Known as a Hitch, it not only delays how fast the barrel gets into the strike zone, but more importantly, it separates the Hands from the Eyes, and in turn the Bat from the Ball A.) Aligning the Knocker Knuckles (reference the single yellow line drawn over the knuckles in Figure A) Why: The players wrists, elbows and shoulders are relaxed in this position, as well as being more flexible which provides the ability to quickly adjust to a balls location. Things are not locked B.) Do Not over-rotate the hands, misaligning the knuckles (reference the two yellow lines drawn over knuckles in Figure B) Why: This restricts a fluid motion in the swing, flaring the elbows and placing tension on both the wrists and forearms. The wrists will lock as the bat comes thru the strike zone, restricting the ability to quickly adjust to a low & away pitch. The bat head will also come thru the strike zone slightly higher than the player believes. They can put their hands thru the ball but the bat head may not perfectly follow. Notice the difference in how the elbows are flared (relaxed vs. tight) A C.) Weight transfer to the front leg, Include the upper body in the swing, and SQUISH the Bug with the back foot. Why: Keeping weight on the back leg during the swing reduces energy moving to the ball (lower part of the body is not moving forward), and can introduce a back shoulder drop which moves the head during the swing and often produces a big upper cut (bad news trying to hit a fastball). If the hitter uses the upper body properly during the swing, the natural reaction of the back foot is to squish the bug, produced as the knee of the back leg is drawn forward as the hips rotate (belt buckle facing the pitcher). B Squish the Bug C More instruction is offered in the Rookies and Minors section of this document


11 All Levels: 1 st Base Position First find the bag then square up to the fielder with the ball and look for the throw. Why: TIME. Waiting for the fielder to make the play, and then finding the bag, allows the runner to advance far up the line. There is plenty of time to find the bag while the fielder is making the play and preparing to throw. The foot on the throwing hand side should hold the bag. Why: Holding the bag with the throwing hand side allows the player to stretch farther to meet the ball. Why: Better Balance. With the glove side foot holding the bag, the player can be handcuffed on a throw that is on the throwing hand side. In Photo A to the right, if the ball were to arrive to the players left, the glove arm would have to cross over the outstretched leg, creating balance issues (like playing the game Twister). The glove and glove side foot should move together. If the ball is moving to the left, the foot should move left also, not just the arm. Make contact with just the heel on the top edge of the bag Why: SAFETY. Standing on top of the bag presents the opportunity for the runner to step on the ankle of the player. Let the ball come to you do not run out to meet it. Why: It takes much longer to go out and meet the ball, and then turn and run back to the bag. But if the ball is going wide leave the bag. Why: A ball getting by the 1 st baseman will often allow the runner to advance to 2 nd base, as well as other runners to advance. Coming off the bag to make the stop will at least hold the runners. If the 1 st baseman fields the ball and is making the play at the bag, or if the pitcher is covering the bag, the fielder should not cross over the bag and run into Foul Territory. Why: SAFTEY. This creates an opportunity for a collision, as both the fielder and runner race for the bag. The fielder should approach the bag, but step on the inside edge of the bag only, and stay in Fair Territory. A Wrong Foot B The primary role at 1 st Base is to cover the bag. Do not stray too far to field a ball

12 All Levels: Pop-ups & Fly Balls SPRINT to where the ball is going to land. Why: Many players slowly track the ball as they move, chasing it as it moves to the landing spot as opposed to sprinting to where they think it will land. It is much more difficult to catch a ball while on the move, as the head is bouncing around. Of course trying to catch it assumes that they got to the ball before it hits the ground. Try to get behind the ball Why: It is much easier to make an adjustment to the ball by moving forwards toward the infield, as opposed to try and quickly adjust going backwards moving in the same direction as the ball. Glove UP: It is important to see both the Ball and the Glove. Why: With the glove below the eyes the fielder must guess on where to exactly place the glove to intercept the ball. Also, as the ball transitions from above the eyes to below the eyes, it (appears to) pick up speed, because it is no longer coming at the fielder, but is now dropping past them. With experience, catching a ball with a glove below the eyes is achievable, but for younger players not recommended. Feet slightly wider than shoulder width apart. Why: Just like the ready position, this provides good balance and the ability to quickly move laterally if needed. Slight bend in the knees. Why: Allows the fielder to quickly adjust height to meet the ball without moving just the glove, helping to keep eyes and glove aligned. DO NOT HOLD THE BALL in the outfield. Why: This will allow runners to advance freely. When in doubt where to throw just get it anywhere into the infield. Try to keep the ball ahead of the lead runner Why: Throwing behind the runner will let them freely advance to the next base. Ex.: On a hit to left field, with a runner advancing towards 2 nd base, if the throw is made towards 2 nd base, the runner will easily see this and make the turn for 3 rd. By the time the ball gets to 2 nd, and then to 3 rd, it is to late. For younger players, have them remember: Ball up high Pinky s towards the Sky
 At 1 st Base when there is no chance to turn and advance to 2 nd base safely, the runner must run through the bag and turn out.")

 At 1 st Base, when trying to advance towards 2 nd Base, players should be shown the proper path that would be taken IF they are running at full speed")

 Rounding 2 nd Base, the player should stay on the inside of the bag Why: SAFETY.")

13 All Levels: Running the Bases A.) At 1 st Base when there is no chance to turn and advance to 2 nd base safely, the runner must run through the bag and turn out. Why: At the higher levels, a turn towards 2nd base that appears to be an intent to advance, allows the runner to be tagged out. Begin teaching the turn out at T-Ball levels using cones as a visual aide. Extend the cones for a distance past the bag before turning to teach the players to run at full speed through the bag. B.) At 1 st Base, when trying to advance towards 2 nd Base, players should be shown the proper path that would be taken IF they are running at full speed through the 1 st base bag. Why: Younger players will often stop at 1 st before turning to head towards 2 nd base, or run through 1 st base before turning, which takes time. As with the drill to run through the bag at 1 st, cones can be used to show the proper path to be taken at full speed. C.) Rounding 2 nd Base, the player should stay on the inside of the bag Why: SAFETY. In some cases, stepping on the top of the bag can present a slip hazard (even with rubber cleats), which can cause and ankle injury. Also, going around to the outside of the bag will slow the runner down, as there is nothing to push off of, as when they use the inside of the bag. D.) Rounding 3 rd Base when a coach is not sending the runner home, we want the player to advance beyond the bag and stop to see how the play develops (Take a turn and hold) Why: Positions the player closer to the plate should the ball is mishandled on a throw from the outfield or at 1 st Base, without getting too far away from the bag. Use cones to show both the path taken to round the bag, as well as making a wall to show the players where they should stop A A B C D D Even in T-Ball, have coaches use hand signals to indicate running through the bag or making the turn
14 Tee Ball
15 Baseball Basics Field Sheet: Tee Ball Hitting Knocker knuckles are lined up Eyes focus on top of ball Keep the head still Front shoulder tucked into chin Keep hands back Short Soft Stride (if the player is comfortable with striding) Level swing, hands move thru the ball Back shoulder comes forward to meet the chin Squish the Bug Fielding Shoulders and toes squared to hitter Feet slightly wider than shoulders Weight slightly forward, balanced on front balls of the feet Knees slightly bent Butt DOWN Head UP Use the Alligator to field a ground ball Point the Bill of the Cap at the ball all the way to the glove. Throwing Make sure the person being thrown to is looking (NOSE) Step towards your target (TOE) Point at your target with your glove Arm comes over the 1:00 or 11:00 o clock. (THROW) Hand should end up near the opposite hip. PIZZA SLICES To help fielders identify the general area they should cove at each infield position slice your infield into pieces by drawing lines with a bat. Safety Note: If hitting, maintain a Keep Out Zone in front of the plate using cones, to separate fielders from the player swinging a bat. Hitting Drills Selecting a bat Setting up in the box Hit the word (Contact) Top of the Ball (Contact) Double T (Contact) Bat Behind Back / a.k.a. Squish the Bug (Power) Stick it in the fence (Power) Run the Bases Fielding Drills Baseball Ready Position The Bill of the Cap Hand Circles The Alligator Soccer Goalie Pizza Slices Pinkies to the sky if the ball is up high Pop-ups w/ Tennis Balls Throwing Drills Nose-Toe-Throw Slap 5 Loose Grip Throw to the Bucket (placed at 1 st Base) Throw to the player (placed at 1 st Base) Around the Horn This is a quick reference guide you can take to the field with you

16 Your first Tee Ball practice 1. Greet your players at their level Go down on one knee so that you are not towering over them when you meet. 2. Be prepared to provide information Answer questions before they are asked Have league information that parents can refer to as you get the practice going. Parents always want to know who is coaching their child. Let them know! Have a crisp practice plan! This will help with a productive use of the time, and keeps the kids from getting bored. Sample: Your informational handout does not need to be this formal, and can even be a verbal discussion with the parents. Also tap parents to help. Most people love to help, but wait to be asked.
17 1. Have a practice plan Your first Tee Ball practice 2. Enlist parents to help: At stations Frees up coaches to work on mechanics / fundamentals. No experience needed. Just need to roll a ball, catch a ball, or help keep kids out of the hitting area. Keeping track of the time Letting you know when it is time to switch stations 3. Assess players on the basics Used to pair up groups at following practices, based upon similar skill level. T-Ball Practice Plan - Day 1 Station Strengths No Name Stars Game Ball Field Throw Hit 1 Sammy Group Matt Group Conor Group Ben Group Katie Group Nick Group Pierce Group Paige Group Jessy Group Aidan Group Start Ratings: 1 = Beginner, 2 = Fair, 3 = Strong Grouping by skill level allows coaches to tailor station instruction focus for each group Coach 5:30 Group 5:40 Group Rotate Stations every 10 Minutes - Evaluate each player as they move through your station - Rating 1, 2 or 3 5:45 6:15 Steve Jim Bill 6:30 5 min Group Drill Warm-ups (10 min) Ready Position Alligator Nose-Toes-Throws Knuckle Knockers Fielding 5 tosses each - Repeat Glove fingertips on ground to stop a rolling hit - Trap the ball in the glove with other hand Throwing 5 tosses each - Repeat Looking at target - Stepping & Pointing at the target - Throwing to target Hitting 5 hits each - 1 cycle The Bases Comments Stretching. Some time allotted for stragglers to arrive Basic demonstration of the throwing mechanics - Will spend more time at stations Basic demonstration of the hitting grip - Will spend more time at stations Ready & Alligator - 2 parents roll balls so two kids are working. Coach works on mechanics Work Throwing - 2 parents to catch so two kids are working. Coach works mechanics Work the grip and basic swing - Coach working mechanics - 1 players at a time (safety!) Knuckles aligned - Proper stance alignment with the plate Identify each base and home plate to the kids Assessment taken at 1 st practice, and used to pair groups at following practices Basic demonstration of a good Baseball Ready position - Will spend more time at stations Basic demonstration of the fielding position - Will spend more time at stations Pair players up in future practices based upon similar strengths Kids run forward to 1st, sideways to 2nd (in ready position), sideways to 3rd, Forward to home Kids run the bases at 10 second intervals, yelling the base name as they touch it Finish w/ a base race (running forward) - set intervals so players have to run hard to catch the next Sample: Your practice plan does not need to be this formal
18 Keeping young kids safe around Bats 1. Constant management of players handling bats Any player near a bat in motion should be wearing a helmet. Tee Ball level (these kids just don t know any better so you have to be overly cautious) Any player bringing a bat to the field should immediately present it to a coach Bats should be placed against the backstop behind home plate (not near/in a dugout) No player should touch a bat unless with a coach who can quickly control the bat For T hitting stations, a keep out area should be established (suggest using orange cones) providing players with a visual reference of where not to go. And so that you can focus on the hitting drill, enlist a parent to keep other kids out A baseball that gets away from a throwing drill will always be followed by a player chasing it THE BOX for players wtg to hit BATS FENCE / BACK STOP KEEP-OUT AREA CONES T STATION PARENT Coach safety tip. Take physical control of the head of the bat if you get in close to a batter
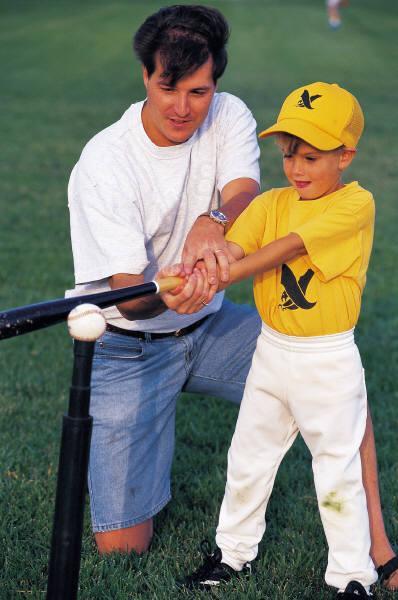
19 Tee Ball Drills - Hitting The Bat should be an extension of the Hands and Eyes Aligning the Eyes, Hands and Bat will improve contact. Younger players often stand straight, and drop their hands to waist high to swing, separating the Hands from the Eyes, and in turn the Bat from the Ball. One variable that can alter where the player believes the bat is travelling, is not having the knuckles aligned correctly. Aligning the Knocker Knuckles (knuckles used to knock on a door) of both hands allows the bat to be a true extension of the arms thru the strike zone. Why: Over-rotating the hands so that the Knocker Knuckles are not aligned, most often produces a high bat head, as the wrist of the leading hand locks as the bat comes through the strike-zone, causing the trailing hand to roll over and upwards, taking the bat head with it. Reference photos of knuckle alignment in the Fundamentals for All Levels section above, on the slide for Hitting Basics. Selecting the Bat (ensuring the bat is not too big for the player) - Have the player select a bat and hold it with one hand at the very end (down by the knob). - Have them raise their arm parallel to the ground, with the bat extended straight out. - For T-Ball aged players, they should be able to hold it there for a couple seconds. - If they cannot switch to a shorter / less heavy bat. Why: A heavy bat at this age often produces a drop of the hands, resulting in the player knocking the T over as opposed to hitting the ball. If they do happen to hit the ball, too big of the bat slows bat speed resulting in a less than dramatic hit. Most kids at this age want to hit the bomb off the T, but parents often buy too big of a bat, keeping their child from reaching this dream. Hitting a ball consistently is just as much about focus, as it is about mechanics
20 Tee Ball Drills - Hitting Setting up in the Batters Box: Have the player lay their bat over the plate, so that the tip covers the far side of the plate. Have the player place their FRONT foot at the knob end of the bat, and then bring the back foot into position and pick up the bat. This ensures that the sweet part of the bat can cover the entire plate, even when hitting the ball out in front of the plate NOTE: When using a T, the player should always lay the bat across the true plate, not the base of the T (see below) If hitting off of a T towards the infield, have the batter set up as instructed above but place the T in FRONT of the plate (A) not on the plate. Why: This teaches the kids to hit the ball out in front of the plate, providing power thru arm extension and bat speed. For advanced players, place the T slightly to the side of the plate (B & C) to help understand hitting inside and outside pitches. When hitting into a fence or backstop: Place a rubber home plate on the ground or draw one in the dirt, so that you can give the batter something to align with. Place the T out in front of this temporary plate to promote hitting the ball out front. Use only Safety balls. Safety Balls will stick to the fence when hit hard, offering younger players reference of a good hit. The T height should be set no higher than the Jersey Letters. Why: Setting the T too high promotes two bad habits. 1.) Swinging at a pitch out of the strike zone (too high) and 2.) Produces a swing for the fence upper cut which if retained a higher levels, reduces contact with fast pitching where balls come in flat. T Plate A B C Coach safety tip: Teach the kids not to swing at the T until you say swing
21 Tee Ball Drills - Hitting Hit the Word. Select a word on the ball (i.e., CHAMPRO, etc.) instruct them to stare at it and then instruct them to hit the word with their hands (the bat will follow). Why: At the T, young players eyes often drift towards you, parents, other players, etc., and not the ball. Staring at the word gives them a very specific task to perform, providing focus. Note: after telling them to stare at the word if you offer any further verbal guidance they will look at you. You will need to keep reminding them to look at the word not at me. This drill is also the first training a coach offers related to see the ball as it leaves the pitchers hand. Hitting the Top of the Ball helps players who drop the hands while swinging. Place the ball on the T with the focus word on top, and ask players to swing straight thru the word, or thru the Top of the Ball. This helps focus their eyes. When they begin to hit the ball down, rotate the ball so the focus word is at the back, which should now produce line drives. Why: Young players often drop the hands when swinging (you will always be picking up the T). This is often due to a long stride, which shifts the upper body weight backwards, dropping the rear shoulder and the hands, but some players just drop the hands. Double T: For a player that continues to drop the hands and hit the T. Place a 2nd T behind the T holding the ball, and adjust it slightly higher. Instruct the player to hit the ball without hitting the T in the back. They will struggle at first, but will eventually produce a downward swing (trading power for contact at first, but this will improve Hitting a ball consistently is just as much about focus, as it is about mechanics
22 Tee Ball Drills - Hitting Shoulder-to-Shoulder (helping players understand how a load the hands, and follow through on a swing) This can be done in groups (with no bats) at a station. Have the hitter(s) move into a load, pretending to get ready to hit. If the players hands are in the correct position, and the eyes are looking out towards a pitcher, the front shoulder should be drawn back and touching the chin. But most players at this age do not draw the hands back far enough, addressing the ball on the Tee with their hands in front of their chest, or at best right next to the back shoulder. To correct this, tell the player to keep looking forward, and gently press on their front elbow, moving it backwards until the shoulder touches the chin. Note that the player will often ignore your instructions to continue looking forward and will turn their head to watch what you are doing. This will cease after a couple of reminders. Once the front shoulder is touching the chin, have the hitter(s) execute a swing and have them FREEZE at the end. On the follow thru, the back should end up near the chin (shoulder to shoulder). If it does not, the player is not following thru far enough with the swing, losing power. WATCH ITEM: Younger players often want to bring the chin forward to their shoulder, as opposed to bringing the shoulder back into the chin which moves the head as opposed to moving the hands and upper body into the correct position. Having the Front Shoulder up by the Chin also helps keep the head from pulling out
23 Tee Ball Drills - Hitting Short Soft Stride (helping players understand how a long stride creates too much body movement) Many players at this age take a long stride, often resulting in them hitting the Tee. With a bat in your hand, face your players and extend the bat out straight towards them, at about the height you would like to hit a ball at. Without swinging (hold you hands right where they are), take a short stride, and ask the players to watch how much the bat drops. Reset, and now take an extra long stride. Ask them if the bat dropped farther than the first stride. Explain that it is harder to hit a baseball when their head and bat are both dropping. Have them work on small strides. Power will come with the use of the hips, as explained in Squish the Bug below. Squish the Bug / Bat Behind the Back (helping players understand the proper follow through motion) Many players at this age fail to follow through properly. They might take a stride but use only the arms to hit the ball, failing to get the hips involved, resulting in the loss of power. To demonstrate how they should end their swing, have them place a bat in the small of their back, holding on to it with the crook of their elbows. Without moving their feet, ask them to twist the upper body (to the left for righty hitter, to the right for lefty hitters). This movement will produce a natural bending at the knee of the back leg, resulting in the lifting of the heel on their back foot, with the front ball of the back foot grinding into the ground, as if they were squishing a bug. After doing this a few times, have them take a couple swings with a bat to reaffirm the desired motion, and then move them directly into a T hitting drill. Have them focus on the follow through motion that results in the hip rotation, ending with the squishing of a bug. A moving head makes it difficult to hit a moving ball with a moving bat
24 Tee Ball Drills - Hitting Stick into the fence (encouraging players to swing with power, accuracy, and level!) Set up the T about 10 feet in front of the back-stop. Have the player face the back-stop, and using the soft Safe-T style balls, have the player attempt to stick the ball into the chain link. This is where we teach players to make a Level Swing with Power, in stead of the BIG uppercut. Players who maintain an uppercut swing as they progress up the levels, will struggle against faster pitching and trying to hit a ball moving on a flat trajectory. Give each player 10 balls to hit. Should any of them stick into the fence be sure to announce it to all other players at the other stations to create excitement. If you are planning to hand out any awards (iron on stars for their hats, etc.) for exceptional performance, this is always a good one to acknowledge. Run the Bases (to teach players how to run through the 1 st Base Bag and Turn Out into Foul Territory) Set up Cones leading from 1 st Base, out towards the Right Field foul pole, and then turning out into Foul territory about 15 feet beyond the bag. Reference photos in the section titled All Levels: Running the Bases Teach the players to run at full speed through the bag and turn out (following the cones) After the players have this down, also set up cones to make a turn towards 2 nd Base. Have a Coach at 1 st Base telling players to run through the bag, or to go to 2 nd End practices with the players running the bases. As they touch each base, have them YELL which base it is. FIRST SECOND THIRD HOME. (many players do not know what the bases are called)


25 Tee Ball: Catching with Pinkies & Thumbs A hard thing for young players to understand is how to position their glove when receiving a ball that is High / Low (above/below the waist). Why: Most kids are first introduced to baseball by ground ball after groundball so they are used to fielding with their palms up. This positions their THUMBS pointing to the SKY or their PINKIES touching each other. As we transition them to receiving throws above the waist they naturally continue to keep the palms up / thumbs up / pinkies together, which presents a SAFETY issue. Balls will easily by-pass a glove presented at face level with the palm facing up, presenting a potential injury. There are TWO ways to help players transition, the first being a rhyme: If the THROW is up High PINKY S TO THE SKY If the THROW is down Low THE THUMBS GOTTA GO (to the sky) Most players will naturally field a low ball with palms up, but you will get the occasional player who will want to smother the ball by slapping the glove down on top of it. These players will need the Thumbs to the Sky discussion. You can also simply explain that for any ball below the waist, the pinkies will touch. For anything above the waist, the thumbs will touch. For teaching very young players to catch pop-ups Start them out with whiffle or tennis balls, as they are not as scared of these Up HIGH PINKY S to the SKY Or Thumbs together Down LOW, the THUMB s gotta GO (thumbs to the sky), Or Pinkies together By bringing a tennis racket to the field with you, you can also have a parent running a pop-up station. Not everyone can consistently hit a pop-up ball with a bat, but it is almost guaranteed with a racket. Height and/or lateral movement of the pop-up should be based upon each players skill level. As you transition to more solid Safety balls, if there is still concern with a player getting hit in the face, have them wear a batting helmet with a face guard.


26 Tee Ball: The Alligator Players at this age often field a groundball by placing the glove flat on the ground (palm facing up), which the ball will often skip over. Also, because hands are not yet strong, the glove often stays in a V shape, providing very little leather to stop the ball. To present as much glove as possible to the ball, instruct the players to have the palm of their glove face the ball and to gently press the finger tips of their glove into the ground. Why: Gently pressing helps spread the glove out, and makes a wall for the ball. The throwing hand should be ready just above the glove, with the wrists almost touching each other (like an open alligator mouth). Elbows should not be fully extended, or pulled in against the body. A slight bend will help with the players range and cushion the catch. As ball enters glove the throwing hand follows and captures the ball (the alligator s mouth closes on its food). Player now moves into a throwing position / motion. (ref next slide) The hand above the glove also protects the face on a bad bounce
 Bring both hands up to the hip (right hip for righties, left for lefties).")

 While bring the throwing arm back, this completes turning of the upper body so the glove side shoulder is now pointing at the target. B.) Have the player point to the target with their glove.")
27 Tee Ball: Nose-Toe-Throw After capturing the ball, the player stands up and faces their target. (the Nose part of Nose-Toe-Throw BOTH noses are pointed at each other) Why: SAFETY. The player throwing the ball must be sure that the player they are throwing to is looking at them before release. A.) Bring both hands up to the hip (right hip for righties, left for lefties). Why: Kids this age will often have their shoulders squared to the target, and will use just the arm to throw. Bringing the glove hand up to the hip helps aide the turning of the upper body adding torque which provides power and accuracy. B.) Have the player step (with the foot on the glove side) so that their Toe is pointing at the target. (the Toe part of Nose-Toe-Throw) B.) While bring the throwing arm back, this completes turning of the upper body so the glove side shoulder is now pointing at the target. B.) Have the player point to the target with their glove. Why: This helps with aiming, as well as with power when the player pulls the glove back into the body (Ref. C below) C.) Throw the arm should come over the top at the 1:00 o clock position for righties, and the 11:00 o clock position for lefties. Why: Helps keep the ball on-line to the target. Coming across the body sprays the ball depending upon the release point C.) During the throw, the glove should be pulled back into the body. Why: This adds power by squaring the upper body to the target, introducing the stronger core muscles to the motion On the follow-thru, have the player pretend to Slap Five with the target, reducing a side-arm motion. (ref the Slap Five drill on the next slide). Why: This keeps the ball on line with the target, as well as improving velocity by ensuring the player follows through with the motion. A B C

28 Tee Ball Drills Fielding/Throwing Fielding / Throwing: Pizza Slices (to counter the piling on process of all players running to the ball). Use a stick or the end of a bat to draw lines in the dirt, splitting the infield into sections. One section should be for a player at the mound, and then sections for the different infield positions. Players in the outfield can see the lines to understand their area. Always place cones in front of any hitter, instructing pitchers to stay out of this area for safety reasons. Hand Circles (to help players understand the importance of extending their arms while fielding a ball) While in a baseball ready position, have players tuck their elbows in against their body and have them draw circles in the air with their hands. Now have them slightly extend their arms (but not fully extended) and have them draw circles again. Explain how the bigger circles created with the arms extended will give them bigger range of their glove while fielding a ball. Slap five (to teach proper arm direction, extension, and follow-through during a throw) Have a coach or parent on one knee, facing a player, with their arm extended and palm up (slap five position). The player (facing the coach), will be holding a small dish towel in their throwing hand, and on the coaches commend of throw will attempt to slap five using the dish towel. Players that come around side-arm will not make good contact. Players coming over the top at the 1:00 (righty) or 11:00 (lefty) positions will make solid contact. As players progress and make consistent good contact, coaches should work on the players follow through motion, where the dish towel should end up slapping the player on the hip on the glove hand side. Coaches should also begin work the players stride during this drill, ensuring the foot is heading to the target.
29 Tee Ball Drills Fielding/Throwing Fielding / Throwing: Bill of the Cap (to help young players keep their head down while fielding a ground ball). Have the player drop his/her glove, and take a ready position. Have coach take a knee about 15 feet in front of the player and roll a ball to them, instructing the player to always point the bill of their cap at the ball, all the way until the ball is in their hands. Once they get this down, have them put their glove back on and try it again. As they progress, the coach can move back and roll the ball quicker, and possibly off to the side. Loose Grip (to help young players who have chosen to use the iron grip ) Players should treat the ball like an egg, holding it gently in their finger tips. However, younger players often hold the ball deep in the palm of their hand in a Kung Fu grip that often results in the throw being driven into the ground a few feet in front of them, as if spiking the ball after a touch down. To help with this, place one of their middle fingers between the ball and the palm of their hand. Have them begin with short distance and gentle throws (it will feel awkward), and work their way up in both distance and velocity. Once the control is there, have them remove their finger from under the ball and have them throw. Throw to the Bucket at 1 st Base (to help young players with throwing accuracy) Set up a 5 gallon pail at first base, and split your players up into 3 groups, placing one group at 2 nd Base, one at Short Stop, and one at 3 rd Base. Assign a parent to each team to track the score. Have each team throw 2 throws each to the bucket, with one point for every ball that go into the bucket. After 2 throws each, change positions and begin again. Total points for all 3 stations wins.
30 Tee Ball Drills Fielding/Throwing Fielding / Throwing: Throw to the Player at 1 st Base (to help young players understand how to cover 1 st Base). This is a Station Drill, which should only have 3-4 players working it at one time. Unlike the Bucket drill on the last page, where numerous players can throw from all the positions at the same time, this drill now has a player at 1 st Base so there can be only one throw at a time. If you place your whole team at this drill you will lose their attention quickly as they will, get bored. Place players at 1 st, 2 nd, Short Stop and 3 rd base. If there are only 3 players in a group, eliminate 3 rd. Have coach hit (or roll) a ball to the player at each position. This player throws to 1 st Base. Note that most throws from 3 rd and Short Stop will fall very short this is normal. If they fall short, have the player covering 1 st Base to run out and pick it up, and run back to 1 st Base to finish the play. Be sure to hit or roll a ball to the player covering 1 st Base, as this will happen often during a T-Ball game. SAFETY Tip: This is where we begin to teach players covering 1 st Base to NOT run across the bag and into foul territory, as this create the opportunity for a collision with the runner. Teach the player covering 1 st Base to run at the bag, touch the inside of the bag (the side facing 2 nd Base) with their foot, and then turn back into fair territory (running out toward Right Field) After every player makes 2 throws, rotate them (1 st to 3 rd, 3 rd to SS, SS to 2 nd, 2 nd to 1 st ) and continue. Around the Horn (to help young players understand how to cover 2 nd ) It is never too early to begin teaching throws to 2 nd base, followed by a throw to 1 st base. Set players at Short Stop, 2 nd and 1 st base, and have a coach hit (or roll) a ball to the Short stop. The Short Stop throws to the player now covering 2 nd base, who in turn throws to 1 st base. Hit or roll a ball to the player in the 2 nd base position, who throws to the Short stop covering the bag. No need to hit a ball to the 1 st baseman in this drill. This play is most often too advanced for T-Ball. There will be many dropped balls! Have the players finish the play so they get used to the motion.
31 Tee Ball Drills Fielding/Throwing Soccer Goalie: Set up 2 cones about 15 feet apart, and place one player centered between the cones. With a coach on a knee about 15 feet in front of the player, roll the ball in an attempt to score a goal on the player. As players begin to stop balls aimed at them, begin rolling the ball deeper into the corners of the goal, making the players move from side to side. For advanced players set the cones farther apart. This is where we work the Baseball Ready position, and lateral movement. Tip: You will begin to see players anticipate where the ball is going to go, and begin to move before you roll the ball, which we want to discourage (i.e., the player should wait the ball to come off the bat before making the first move). To discourage, look at one corner, and when they move that way, roll it into the other corner. Begin to teach players about Backing Up the play: Take one of the players waiting for their turn in the goal, and set them up about 15 feet behind the goalie. Have them move in the same direction as the rolling ball, backing up the player making the stop. Competition: Coach against Player Each player gets 5 rolls. If they stop the ball, they get a point, if the coach scores a goal Back-up Player Goalie Roll for corners Coach Waiting Players This works: Baseball Ready Position, Lateral movement, Backing up the play

32 Rookies and Minors
33 Baseball Basics Field Sheet: Rookies & Minors Hitting Eyes focus on top of ball Keep the head still Front shoulder tucked into chin Keeps hands back Loose grip w/ fingers Balanced on feet Short Soft Stride Level swing, hands move thru the ball Back shoulder comes forward to meet the chin Squish the Bug Fielding Shoulders and toes squared to hitter Feet slightly wider than shoulders Weight slightly forward, on front balls of the feet Knees slightly bent Butt DOWN Head UP Still use the Alligator to field a ground ball Point Bill of the Cap at the ball all the way to the glove Throwing Make sure the person being thrown to is looking (NOSE) Step towards your target (TOE) Point at your target with your glove Arm comes over the 1:00 or 11:00 o clock. (THROW) Hand should end up near the opposite hip. Hitting Drills Using a Tee or Soft toss: Stick it in the fence using safety balls only (Power) Bat Behind Back / a.k.a. Squish the Bug (Power) Double T (Contact) Goal Keeper (Contact) Soft Toss (Contact) Walk the Line (Striding) Happy Gilmore (Striding) Fielding Drills Baseball Ready Position The Alligator Soccer Goalie Pizza Slices Pinkies to the sky if the ball is up high Pop-ups 3 Player Line Drill Passed Ball drill (catcher) Ball Blocker (catcher) Throwing Drills Nose-Toe-Throw Slap 5 Loose Grip Throw to the Bucket Throw to First Around the Horn 3 Player Line drill The QUAD Dish, Dart, Throw Balance Drill (pitchers) This is a quick reference guide you can take to the field with you
 you will not need to take the time to locate your target after catching")


34 Rookies & Minors: Cut Off A.) Line up between the person throwing the ball, and the target you will be throwing to. Why: SPEED. It is the shortest distance to your target, and if you line up prior to the throw (while the fielder is chasing the ball down) you will not need to take the time to locate your target after catching the ball. Note: As the play is developing, the coach should be instructing the cut-off person where to be positioning themselves, with instructions of Cut-2, Cut-3 or Cut-Home. There will never be a command to Cut-1, as this would place the incoming ball behind the runner, allowing them to advance. A When giving the cut instruction, always try to keep the ball in front of the lead runner to halt advancement. A.) Announce yourself as the cut-off person. Why: Under the pressure of the game, after a fielder picks up the ball and turns to looks towards the infield they will see all of their teammates staring at them all looking the same which creates confusion and loss of time. By raising the arms in a touchdown position, and yelling Cut-Off the fielder with the ball will know exactly who they are to throw to. B.) Turn to your power position as the person with the ball begins the wind up to throw. Why: Receiving the throw on the glove side allows a young player to instinctively take just one step and throw (with speed and power). Young players who receive a throw on the side of the body opposite the glove, instinctively continue to turn in that direction, spinning around so that the throwing arm must come to a complete stop at the end of the spin. This motion completely drains all energy the cut-off player should have been developing for the throw to the target. The player must now re-charge that energy (normally by taking several steps) which takes time and is never truly as strong as if they had taken the throw on the glove side. C.) Take one step and throw to your target. Why: SPEED. One step to throw will produce as much power as several steps and a throw and is much quicker. During warm-ups, have 3 players throwing in a line, working the cut-off process C B
 from 1st base, and allows for the baseman to see both the throw from the catcher as well as the runner.")

 will place the ball where the runner will be sliding, offering a quick tag. B.")
 Body and Glove positioning at 3 rd Base: Feet straddling the bag, glove just inside the bag ready to drop to the ground (ref Photo D).")
35 Rookies & Minors: Tag Plays A.) Body positioning at 2 nd Base, taking throw from catcher: Inside of 2 nd Base, between the bag and the mound. Why: This keeps the baseman out if the path of the runner coming (and sliding) from 1st base, and allows for the baseman to see both the throw from the catcher as well as the runner. The shortstop takes the throw, as they are moving towards both the bag and the runner, so eye contact can be maintained. As the 2nd baseman must turn their back to the runner to head towards 2nd base, they are used to take up a position about 15 feet behind the bag, backing up the throw. A.) Glove positioning at 2 nd Base, taking throw from catcher: In the path of the runner coming from 1 st base, just inside the bag (to the 1 st base side of the bag), and low to the ground. Why: Provides the catcher a target that (hopefully) will place the ball where the runner will be sliding, offering a quick tag. B.) The baseman should drop the glove on the ground Why: Prevents the runner from sliding under the tag. (nobody ever slides in mid-air ) C.) Body and Glove positioning at 3 rd Base: Feet straddling the bag, glove just inside the bag ready to drop to the ground (ref Photo D). Why: From this position, the baseman can see the runner coming at him while taking a throw from the field, and by turning his head slightly to the left can take a throw from left field, and turning the head slightly to the right, can take a throw from the catcher. If taking a throw at 3 rd from the catcher, the glove positioning would be lower than shown in Photo C, providing the catcher with a target that will place the ball where the runner will be sliding. A C B D Proper positioning protects the baseman from a sliding runner, while still getting the glove down
.")
 The player should begin dropping to the ground about a body s length away from the bag. Why: If the player drops too early and they do not reach the bag.")
 The player should tuck the bottom leg under the body (the leg of the hip the player intends to slide on) Why: If the player keeps the leg they intend to slide")
 For advanced players, have them try sliding to the side of the bag which is farthest from where the ball is arriving from.")
 If the ball is at the base the runner slid into, they should request a time out from the umpire before trying to get up.")
36 Rookies & Minors: Sliding into a Base A.) The runner should always be looking at the base they are running towards not looking where the ball is. Why: Runners slow down when they are not looking where they are going (self preservation). Players should be 100% committed to running as fast as they can not worrying what the ball is doing. B.) The player should begin dropping to the ground about a body s length away from the bag. Why: If the player drops too early and they do not reach the bag. Too late, and it could result in an injury to the ankle or knee should the bag not give way or if they jam their foot into the baseman. B.) The player should tuck the bottom leg under the body (the leg of the hip the player intends to slide on) Why: If the player keeps the leg they intend to slide on in a straight position, this results in more of a crash landing on the hip or the butt as opposed to a smooth slide. A B C C.) For advanced players, have them try sliding to the side of the bag which is farthest from where the ball is arriving from. Why: This makes it more difficult for the fielder, offering the opportunity for a missed tag. D D.) If the ball is at the base the runner slid into, they should request a time out from the umpire before trying to get up. Why: Should the player break contact with the base while the ball is still in play, a fielder could tag them out. D Conversely: Fielders should be coached to always hold the ball on a runner as they get up from a slide, unless time has been called. Practice sliding on grass with no shoes. Wearing just socks helps kids transition to the ground easier
 Relax (if the pitcher is not on the rubber, the batter should relax, watching the pitcher) Why: If Kids stand in the load position the entire time they are in the batters box, they are too tense")

 Ready (as the pitcher takes the rubber move the hands to eye level, bend the knees slightly, bring the head down slightly, and slight twist of the upper body, loose grip on the bat): Why: This")
37 Rookies and Minors: Hitting A.) Relax (if the pitcher is not on the rubber, the batter should relax, watching the pitcher) Why: If Kids stand in the load position the entire time they are in the batters box, they are too tense (both physically and mentally) which does not promote a fluid swing.and just burns a lot of energy. Long durations at the load position also does not promote a good weight shift as the pitch is delivered. Ideally, we like players to step out of the box between pitches to reset, but they do not always do this. B.) Ready (as the pitcher takes the rubber move the hands to eye level, bend the knees slightly, bring the head down slightly, and slight twist of the upper body, loose grip on the bat): Why: This begins the connection between the Hands and the Eyes the Eyes and the Ball which leading to a connection between the Hands and the Ball and ultimately when the bat follows the Hands contact. Knees slightly bent helps in two ways, with vertical adjustment to ball location and to see the ball better. Note the back elbow is up, but does not get above shoulder height, and appears to be relaxed (not forced to a high position) Young players often stand tall, and will drop the hands to about waist level during the swing which separates the hands and eyes. In photo D to the right, you can draw a straight line between the players eyes, hands and the bat during the swing. Head slightly down brings the eyes in closer to the strike zone to better see the ball. A loose grip promotes a quick swing. A slight twist of the upper body (show the pitcher our number) brings the stronger core muscles into play (torque) C.) Load (as the pitcher comes to the set position, hands move straight back, front shoulder tucks under the chin, weight shifts to back leg): Why: Just like throwing a ball to gather energy you must first move backwards before moving forward. D.) Explode (Short-Soft-Stride, Weight shifts to front leg, Back shoulder comes forward to the chin, Snap the hips open and show the pitcher the team name on the jersey and Squish the bug with your back foot) Why: The body and swing must go together, and the weight shift aides in this. Weight shift is the process of taking your weight from the balanced stance, gathering energy as you shift the weight to the back leg, and then bringing it forward at to meet the ball. A Short-Soft-Stride keeps the head on the same plane to help with ball tracking, and allows the hitter to sit on a pitch longer to help with hitting pitches of varying speeds. If the hitter uses the entire body in the swing, the natural motion of the back foot will be to Squish the bug A B C D There is no one perfect stance, and no two hitters are identical. The player should be comfortable.
 Keep the barrel of the bat above the hands, Bend the knees.")

38 Minors: Bunting C.) Move up in the box, Keep the bat out in front of the plate, Keep the barrel of the bat above the hands, Simply pivot (do not square around). Why: Moving up in the box gets the bat out in front of the plate, which provides much more fair territory to play with. C.) Keep the barrel of the bat above the hands, Bend the knees. Why: This helps promote getting the bat on top of the ball, placing it on the ground as opposed to producing a soft pop-up. Having the barrel above the hands also gets it closer to the eyes and if the eyes are tracking the ball properly this places the barrel of the bat on the ball. The player should adjust to the height of the pitch by bending the knees not by moving the hands and the barrel of the bat. Bending of the knees helps to get the eyes closer to the strike zone, to track the ball. Bending of the knees to adjust to the height of a pitch, as opposed to moving the hands, helps in identifying when the batter should pull the bat out of the bunt position when the pitch is not in the strike zone. If the player has to stand up straight to get to a pitch pull the bat away. If the player has to bend the knees so far that the back knee is almost on the ground, pull the bat away. Moving the hands only separates them from the eyes tracking the ball making contact more difficult. D.) Do not square to bunt, simply pivot on the feet Why: 1. SAFETY Squaring exposes the upper body to a wild pitch. Players in this position often freeze, not making a quick decision of which way to move. In this position, the player does not have the shoulder or arm in place to protect the upper body. 2. Squaring presents the opportunity to step on the plate during execution, which could be registered as an out. 3. Squaring takes time, so the fielders get an earlier indication that a bunt is being executed. 4. Squaring involves a lot of body movement which often moves the head. Just as during a swing, we want the head to have stability during the execution of a bunt. C D D.) Do not drop the barrel of the bat too far below the eyes Why: Separation of the eyes from the barrel of the bat make it difficult to make contact with the ball. If the player tracks the ball with the eyes (using the knees to range up and down), and the barrel is at the same height as the eyes, there is a higher probability of making contact. Start the bat at the highest point in the strike zone, and only move down for a pitch C


 The player should: Be balanced, with Butt UP (thighs parallel to ground), with weight up on the front balls of the feet.")
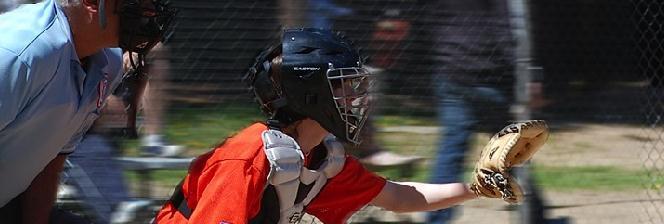
39 Rookies & Minors: Catching A.) The player should not: Be sitting Butt LOW on the heels of the feet. Why: Poor balance, Restricts vertical and lateral movement to block a wild pitch Expose their throwing hand. Why: Safety concern with regards to a pitch, foul ball, or bat connecting with the fingers, especially if the hand is resting on the shin pads so that there is no give when the hand/fingers are struck Keep the glove tucked up close to the face. Why: Restricts lateral and vertical movement of the arm to catch the ball, and because the glove is so clos to the face, often encourages the player to close their eyes as the ball approaches. B.) The player should: Be balanced, with Butt UP (thighs parallel to ground), with weight up on the front balls of the feet. Protect the throwing hand from foul balls and swinging bats, by placing it behind the leg or the bottom of the foot. Check that the catcher does not shift the hand too far behind, as a low pitch between the legs may hit the hand Keep the glove extended out in front. C.) Minors: When runners are on base with a threat to steal, the catcher should come up into a Secondary Position, with the Butt much higher and the Throwing hand behind the glove (making a fist). Why: This places the catcher in a position to get off a throw much faster. Making a fist keeps fingers from being exposed. Check for catchers pulling the hand out to early in anticipation of a steal. The hand is much closer to the bat in this position. A B C Balance is critical. Young players will tip over backwards while catching a ball when on the heels


 Retrieving a passed ball at the back-stop, players should take a direct route to the ball not a wide turn around the umpire. Why: SPEED.")
.")
 Place the foot on their throwing hand side to the back-stop, preparing to throw. Why: SPEED AND POWER.")
40 Minors: Catching Passed ball A.) Blocking a ball, the player should drop to the knees, placing the glove between the legs. Upper body should lean forward with head down and chin tucked into the chest protector. Elbows should be brought in close to the body, which will cup the shoulders forward. Why: We want to keep the ball in front of the catcher. Should the ball bounce up, players often lean back and turn their head, which allows the ball to either bounce off the catcher and get by or worse hit the catcher in an unprotected area around the neck. By leaning forward and cupping the shoulders, the ball should drop straight down or slightly forward. Tucking the chin into the chest pad protects the catchers neck area. B.) Retrieving a passed ball at the back-stop, players should take a direct route to the ball not a wide turn around the umpire. Why: SPEED. Players often take their first step towards the pitcher, placing momentum in the wrong direction, and often leads to a wide turn around the umpire (ref yellow arrow below). Players need to practice making their first move in an Upwards and Backwards motion rolling off of the umpire to gain balance. C.) Place the foot on their throwing hand side to the back-stop, preparing to throw. Why: SPEED AND POWER. Placing the glove side foot against the back-stop leads to the player picking up the ball with the glove first (wasting time), and makes them turn around to throw, placing the arm in a weak position. Placing the throwing hand foot against the stop leads to the bare hand picking up the ball, and places the arm and body in a power position to throw quickly. A B B C C C Playing a Passed Ball is all about SPEED, getting to it and being ready to throw it


 Force play at the plate: Glove hand and same side foot extended towards the ball, rear foot just making contact with the plate Why: Just like a 1st Baseman, we want the glove hand to be able to")
41 Minors: Catching A.) Positioning: Body and Glove Body far enough back so the bat will not hit any part of the catcher. Especially important for catchers who extend their glove hand and exposed wrist forward as the ball approaches. Body & Glove: Center plate, Inside, Outside. If your pitcher is consistently missing in or out, have the catcher help them out by shifting position out or in. Once the pitcher begins to hit the target, return to center plate Glove. If your pitcher is consistently missing high or low, have the catcher drop or raise the glove target positioning. Note the glove positioning in Photo A bringing the ball across the belt...and take a look at the form of the batter! B.) Force play at the plate: Glove hand and same side foot extended towards the ball, rear foot just making contact with the plate Why: Just like a 1st Baseman, we want the glove hand to be able to extend as far as it can towards the ball. Leaving most of the plate uncovered avoids injury from sliding runners. For SAFETY, one exception is if a throw is coming down the 3 rd base line, in which case a Right Handed player should maintain contact with the left foot to stay out of the base path. C.) Energy Management: Temperature, Arm, Legs Temperature: The catcher is covered with equipment, including a helmet and padding which is often black and absorbing heat on hot days. When there is a break in the action, have them step away from any batter and lift the mask to vent heat. Have a water bottle ready to hydrate (even in the middle of an inning). When on the bench, have a cool wet towel to wrap around their neck or place over the head. Arm: The catcher make almost as many throws as a pitcher. If working multiple innings in one of the positions, avoid using a player as both a catcher and a pitcher in the same game. Legs: If time is called, have the catcher stand up and shake the legs. Too many young players stay in the crouch when they do not need to be in that position. A A B B C C Catchers have the most physically demanding job, and we need to manage their condition
 Side step with glove side foot to begin hip rotation and repositioning the pivot foot. Why: Hip rotation provides power.")

, and pitch location will favor the left side of the plate (loss of control).")
42 Minors: Pitching A.) Wind Up Set Position: Shoulders squared to plate, Heels on rubber. Why: Squaring to the plate sets up body rotation which builds energy prior to the throw. Heels on the rubber allows for easier transition into the wind up. B.) Side step with glove side foot to begin hip rotation and repositioning the pivot foot. Why: Hip rotation provides power. Also assists the in transition of the pivot foot from being on the rubber, to being in front of the rubber. (Note the heel of the foot on the rubber beginning to slide out). To keep the head over the pivot foot, the side step should be small just enough to get the hip rotation going. C.) BALANCE: Drive foot in front of & parallel to the rubber, Landing leg knee up high with upper leg parallel to ground, Hands away from body, Front shoulder pointing to the target Why: Pivot foot should now be parallel to the rubber, or full hip rotation will not be achieved (loss of power), and pitch location will favor the left side of the plate (loss of control). The foot planted against the rubber aides power. The Landing Leg is high, influencing a strong drive to the plate which unloads the hips and creates power. Pitchers that do not get the knee of the Landing Leg up high, will often have the foot contact the ground early in the delivery, which often results in an early release and a high pitch crossing the plate. Hands are away from body aiding in balance. The pitcher should keep the head in line with the pivot foot, and bringing the hands in too close to the body can introduce a backwards lean in the upper body. The front shoulder should be pointing towards the target, which should be a natural result of the hip rotation if done correctly. If the shoulder remains open (pointing somewhere up the 1 st base line for a right handed pitcher), loss of power and accuracy will result, as the player uses most just the arm to make the delivery. The player should hold this position for a second, beginning the delivery with balance and stability. A B C During the entire pitch process the eyes never break lock with the catchers glove


43 Minors: Pitching D.) Arm Action: Down, Backwards and then Up and Big Leg Drive. Why: Moving from the balance position to power position, if the player removes the ball from the glove by simply pulling the arm straight back, both the shoulder and the elbow will lock before the arm can be fully extended, and loss of power will occur. The player should remove the ball from the glove in a downward angle and then swing backwards up, so that when the arm is fully extended backwards, the hand is on top of the ball. Arm action is created as the player moves to the power position as the hips unload, which creates a whipping motion in the arm as it begins to lag behind the body, and the hand moves from the top of the ball to behind the ball. The elbow of the throwing arm should not be below the shoulder, creating a L shape which helps to generate power and to keep the ball low. The glove arm should start out pointing at the target, and during the throw, should be pulled back into the body (reference Photo C on the page in the T-Ball section titled Drill: Nose-Toe-Throw ) which helps in squaring the upper body to the plate which generates power. The landing foot should drive out towards the plate, helping to begin unloading the hips (rotation/power towards the plate), making contact with the ground on a straight line from the rubber to the plate. Both feet should be on the ground when the pitcher releases the ball. As mentioned on the last slide, without a strong leg drive, the foot may contact the ground early in the delivery, which often results in an early release and a high pitch crossing the plate. E.) Follow through For power and to transition into a fielder. Why: SAFETY. The pitcher is the closest player to the hitter, and the only one who is not in a good fielding position as the pitch is on the way to the plate. A strong follow through helps the pitcher square up to the plate, and (as seen in this photo) the glove hand should begin to transition from being pulled back into the body to moving around an to in front of the pitcher. The pivot leg should transition from the rubber, to the side of the pitcher as they square up. If a good leg drive produces power from the lower body, the pivot leg should step over the bucket. This is a drill that can be offered to new pitchers to help with squaring up to the hitter. Have the player pitch a ball and then square them up to the plate to get a reference as to where their feet will be. Place a 5 gallon bucket about halfway between the leg (throwing hand side) and the rubber. As the pitcher throws the next ball, they should bring the leg up and over the bucket, landing their foot in front of it. Awkward at first, the player quickly forgets about the bucket and begins to step over it, squaring up to the plate. D E Balance, Hip Rotation, Arm Action and Leg Drive all contribute to Power and Accuracy
Juniors BB Curriculum. Baserunning Curriculum (Juniors Level)
") Juniors BB Curriculum 1. Baserunning 2. Catcher 3. Batting 4. Infield 5. Outfield 6. Pitcher Objectives: Baserunning Curriculum (Juniors Level) Learn to take extra bases on a batted ball or an error Focus
Juniors BB Curriculum 1. Baserunning 2. Catcher 3. Batting 4. Infield 5. Outfield 6. Pitcher Objectives: Baserunning Curriculum (Juniors Level) Learn to take extra bases on a batted ball or an error Focus
Granite Falls Little League Coaching Manual
 Page 1 of 12 Coaching Basic Skills Granite Falls Little League Coaching Manual GFLL approach to Teaching Basic Skills by level of Play Granite Falls Little League Page 2 of 12 Coaching Basic Skills Coaching
HAYAA Baseball Coaching Clinic. 3) Emphasize teamwork/cheering on teammates/giving a good effort
 Emphasize teamwork/cheering on teammates/giving a good effort") The Essentials of coaching youth baseball 1) Make the game FUN! 2) Learn the basics HAYAA Baseball Coaching Clinic 3) Emphasize teamwork/cheering on teammates/giving a good effort The more you can make
The Essentials of coaching youth baseball 1) Make the game FUN! 2) Learn the basics HAYAA Baseball Coaching Clinic 3) Emphasize teamwork/cheering on teammates/giving a good effort The more you can make
QUICK TIPS THROWING & FIELDING
 PRACTICE ACTIVITIES The number one reason children decided to stop playing baseball is they get bored. The best approach to planning and organizing practices is to make sure players are always active rather
PEE WEE AND LIONS RULES AND SKILLS HANDOUT (April 2005) THE RULES
 THE RULES") PEE WEE AND LIONS RULES AND SKILLS HANDOUT (April 2005) THE RULES 1. When the whistle is blown by the coach, stand still, be quiet, and look at the coach; 2. If you want to speak raise your hand and wait
PEE WEE AND LIONS RULES AND SKILLS HANDOUT (April 2005) THE RULES 1. When the whistle is blown by the coach, stand still, be quiet, and look at the coach; 2. If you want to speak raise your hand and wait
There are 9 positions on the softball field labeled as follows
 DEFENSE There are 9 positions on the softball field labeled as follows THROWING MECHANICS Dynamic throwing warmup o Wrist flicks, wrist snap is super important for a strong, fast accurate throw. Have arm
Batting Fundamentals
 Batting Fundamentals Hitting Program Elements 1. Teach proper Hitting mechanics Batting grip Bat and Plate position Training the batters eyes Proper swing Upper body Mechanics Lower body mechanics Finishing
Hitting and Bunting Drills
 Hitting and Bunting Drills Hitting from a Tee o Benefits - The Hitting from a Tee drill can be used to develop and reinforce the hitting fundamentals. This drill emphasizes that the player must keep her
WEEK 5: TEAMWORK T-Ball Practice Plan
 WEEK 5: TEAMWORK T-Ball Practice Plan INTRODUCTION, STRETCHES & WARM UP - 7 MINUTES 1. Have players share their favorite part about last week and talk about what they think teamwork means. 2. Refer to
Fielding Throwing and Catching Techniques, Practice and Drills
 Fielding Throwing and Catching Techniques, Practice and Drills Not to be reproduced without permission 1 1) Teach proper Fielding mechanics Ball grip Hand, glove and arm position Proper stance Throwing/Catching
The drills and practice plans listed below are to be used in conjunction with any other drills you may have in your own coaching arsenal.
 INTRODUCTION It s likely that this is the first youth baseball experience for most players and coaches and all are excited for the new season. These skills and practiced plans are designed to introduce
Minors BB & SB Curriculum. Baserunning Curriculum (Minors Level)
") Minors BB & SB Curriculum 1. Baserunning 2. Catcher 3. Batting 4. Infield 5. Outfield Baserunning Curriculum (Minors Level) Improve ability to run the bases efficiently Learn to steal bases and advance
Minors BB & SB Curriculum 1. Baserunning 2. Catcher 3. Batting 4. Infield 5. Outfield Baserunning Curriculum (Minors Level) Improve ability to run the bases efficiently Learn to steal bases and advance
Coaches Handbook. Coaches Handout Page 1
 Coaches Handout 2009 Page 1 General Session 1: How to Warm-up! Players are put through basic warm-ups and exercises that they should perform each week when they come to Tball. Stretching should be the
THROWING & FIELDING. Why Building Good Technique Is Important
 THROWING & FIELDING Nose, Toes, and Throws For beginning players, it is helpful to use a rhyme to help the players remember the proper throwing motion. Say "Nose, Toes and Throws" as they practice throwing.
NORTH READING GIRLS SOFTBALL Our Mission
 NORTH READING GIRLS SOFTBALL Our Mission North Reading Girls Softball is a non-profit youth sports organization dedicated to providing a safe, positive and fun environment in which our players can learn
Stance Starting point; need vision, balance, and plate coverage. Grip Loose grip in the fingers with the Door Knocking knuckles lined up to unlock
 Stance Starting point; need vision, balance, and plate coverage. Grip Loose grip in the fingers with the Door Knocking knuckles lined up to unlock the wrists and allow for greater bat speed. Weight Shift
2-HOUR PRACTICE PLAN EXAMPLE
 2-HOUR PRACTICE PLAN EXAMPLE Notes: In the following example, 5 minutes are allotted for flex-time. Have a written practice plan for every practice. Get good at time management. Wear a watch. 5 minutes:
LYAA BULLDOG Baseball
 LYAA BULLDOG Baseball OFFENSE Offense puts pressure on the defense. The more balls that are put into play regardless of hits or errors the more often runs will be scored and defenses will break down. QUALITY
to : entire team - warmup exercises (jumping jacks, leg stretches, arm circles, etc.) ( 10 minutes )
 ( 10 minutes )") Practice Plan - Minors: ( 2 hour practice) Practice #1 Date: Time: Team Roster: to : entire team - warmup exercises (jumping jacks, leg stretches, arm circles, etc.) ( 10 minutes ) to : entire team - throwing
Practice Plan - Minors: ( 2 hour practice) Practice #1 Date: Time: Team Roster: to : entire team - warmup exercises (jumping jacks, leg stretches, arm circles, etc.) ( 10 minutes ) to : entire team - throwing
T-Ball is a baseball game for young boys and girls. It is a way to have fun while learning how to play.
 Coaching youth baseball is an exciting and rewarding way to be involved with youth sports. It is not always easy though. A majority of the coaches at T-ball level are coaching for the first time and sometimes
WGAAA Baseball Skill/Coaching Manual
 WGAAA Baseball Skill/Coaching Manual All baseball players regardless of age should have a base knowledge and capability of proper baseball mechanics. If a team is mechanically sound, more often than not,
AYRA International League Minimum Skills
 AYRA International League Minimum Skills The International League should continue to work on all previous teachings and build upon these skills. This is a good age to start introducing more advanced skills,
PRACTICE 2 TIP : Filling Emotional Tanks (Winner s Circle)
") PRACTICE GOALS: What Your Team Should Learn 1. How to hold a ball with a four-seam grip 2. Successfully throw to a two-hand target using a four-seam grip 3. Attempt to catch the ball using two hands below
PRACTICE GOALS: What Your Team Should Learn 1. How to hold a ball with a four-seam grip 2. Successfully throw to a two-hand target using a four-seam grip 3. Attempt to catch the ball using two hands below
T-Ball and Pinto Coaching Guide (01/15/18)
") T-Ball and Pinto Coaching Guide (01/15/18) Introduction: Whether you are a parent whose child is about to start T-Ball for the first time or you are about to take on the responsibility of coaching a T-Ball
T-Ball and Pinto Coaching Guide (01/15/18) Introduction: Whether you are a parent whose child is about to start T-Ball for the first time or you are about to take on the responsibility of coaching a T-Ball
AAA/U9/U10 League. Stretching and Warmups
 AAA/U9/U10 League Stretching and Warmups Players should get to the field 30 mins before game Stretches and warmups required before doing any throwing or hitting Warmups can be led by one player (i.e.,
The Rochester Avon Recreation Authority appreciates your support and involvement and thank you for your time.
 COACHES HANDBOOK Table of Contents: Foreword... 1 T-Ball League Rules... 2 Coaches Introduction... 3 T-Ball Tips For Coaches... 4 Coaches Checklist... 6 T-Ball Skills Checklist... 8 Practice Tips... 12
PRACTICE 2 TIP : Rebounding From Mistakes (Mistake Ritual)
") PRACTICE GOALS: What Your Team Should Learn 1. Be able to hold a ball with a four seem grip 2. How to throw to a two-hand target using a four-seam grip 3. Run through first base 4. Attempt to catch the
PRACTICE GOALS: What Your Team Should Learn 1. Be able to hold a ball with a four seem grip 2. How to throw to a two-hand target using a four-seam grip 3. Run through first base 4. Attempt to catch the
Coaching Handbook: T-Ball
 Coaching Handbook: T-Ball Somerset Youth Baseball Asso. The following handbook outlines SYBA coaching tips and practice drills to be used in conjunction with the Player Development Plan for Somerset Youth
I. General Coaching Tips
 I. General Coaching Tips 1. Be Enthusiastic 2. Build Confidence n Help kids believe in themselves n Instead of being critical or creating pressure 3. Enthusiasm and confidence building more important than
Randolph College Softball 2008 Summer Program
 Randolph College Softball 2008 Summer Program Week 1 Week 2 Endurance: 1 mile run 4x per Endurance: 1.25 mile run 4x per Core workout: 4x per Core workout: 4x per Week 3 Week 4 Endurance: 1.5 mile run
Main Points Feet Balance Power Position (Power T Position)- Rotation Follow-through
- Rotation Follow-through") Pitching Main Points 1. Feet-take a small step back with non-throwing side foot, keeping the weight over the stationary foot, which is turned parallel and touching the rubber 2. Balance Position-non-throwing
Pitching Main Points 1. Feet-take a small step back with non-throwing side foot, keeping the weight over the stationary foot, which is turned parallel and touching the rubber 2. Balance Position-non-throwing
TEACHING TIPS REQUIREMENTS OBJECTIVES INJURIES THIS GUIDE
 2014 Coaching Guide REQUIREMENTS Submit a CORI/SORI Form Before you meet with your team, you must submit a Criminal Offender Record Information form or Sex Offender Record Information form to your league
Mt. Ararat High School. Softball. Skills and Drills. Table of Contents. Skills: Catchers Skills: Outfield...
 Mt. Ararat High School Softball www.mtasoftball.com Skills and Drills Table of Contents Skills: Catchers... 3 Skills: Outfield... 4 Skills: Infield... 6 Skills: Pitching... 8 Fundamentals of the Pitching
Throwing. How to Throw a Baseball. Grip
 Throwing Nose, Toes, and Throws For beginning players, it is helpful to use a rhyme to help the players remember the proper throwing motion. Say "Nose, Toes and Throws" as they practice throwing. "Nose"
Baseball Position By Position
 Baseball Position By Position A Y O U N G P L A Y E R M A N A G E R S G U I D E T O E A C H D E F E N S I V E P O S I T I O N O N T H E D I A M O N D A N D I N S I G H T O N B A S E R U N N I N G F O R
FUNDAMENTAL SOFTBALL SKILLS (DEVELOPING FUNDAMENTAL SKILLS)
") FUNDAMENTAL SOFTBALL SKILLS (DEVELOPING FUNDAMENTAL SKILLS) Learning outcomes: At the completion of this Module the candidate will be able to: Identify the fielding positions in softball and the responsibilities
FUNDAMENTAL SOFTBALL SKILLS (DEVELOPING FUNDAMENTAL SKILLS) Learning outcomes: At the completion of this Module the candidate will be able to: Identify the fielding positions in softball and the responsibilities
Drills A COACHES GUIDE TO YOUTH SOFTBALL. North Reading Girls Softball Coaches Clinic DRILLS
 Drills A COACHES GUIDE TO YOUTH SOFTBALL North Reading Girls Softball - 2018 Coaches Clinic DRILLS Drills Explain the Why's Before the How's Before teaching the skill, first tell players the name of the
to Successful & Effective Practices
 COACH S GUIDE to Successful & Effective Practices Thank you for volunteering your time to coach a Junior Giants team this summer! New to coaching? Great! We created step-by-step Practice Plans for volunteers
MATERIALS: PRACTICE GOALS: What Your Team Should Learn. PRACTICE 1 TIP: Honoring the Game (ROOTS) PRACTICE 2 TIP: Mistakes as Learning Opportunities
 PRACTICE 2 TIP: Mistakes as Learning Opportunities") PRACTICE GOALS: What Your Team Should Learn 1. How to hold a ball with a four-seam grip out of the glove 2. Successfully throw from a knee to a two-hand target using a four-seam grip 3. Round first base
PRACTICE GOALS: What Your Team Should Learn 1. How to hold a ball with a four-seam grip out of the glove 2. Successfully throw from a knee to a two-hand target using a four-seam grip 3. Round first base
FLLGS. AAA Practice Plan
 FLLGS AAA Practice Plan General Manager Guidelines When you get your roster be sure to contact all of your parents as soon as possible and introduce yourself. Parents are often just as excited as the girls
Plymouth New Hope Little League Coaching Manual
 Plymouth New Hope Little League Coaching Manual Presented by 2012 PNHLL - Baseball Development Committee Matt Deterding, Kevin Gray, Matt Haberle, Rob Lundquist, Jed Meyer, Jerry Persson, Rick Reed, John
BYS BASEBALL Coaches Handbook BYS Baseball PO BOX 551 Birdsboro, PA 19508
 BYS BASEBALL Coaches Handbook BYS Baseball PO BOX 551 Birdsboro, PA 19508 Revised 2/12 Coach Thanks for volunteering your time and talents to coach our youth. Coaching is a rewarding, tiring, exciting,
Glencoe Youth Baseball Player Coach Developmental Clinic Series
 Glencoe Youth Baseball Player Coach Developmental Clinic Series PCDC Infield/Outfield Session #1 Dynamic Warm-ups: (Tony Bastinelli) 10-15 minutes -Start with a light jog, maybe two / three gym laps, w/
MATERIALS: PRACTICE GOALS: What Your Team Should Learn. PRACTICE 1 TIP: Trying Hard (DIMITT) PRACTICE 2 TIP : Self-Control (Cool Head) DETERMINATION
 PRACTICE 2 TIP : Self-Control (Cool Head) DETERMINATION") PRACTICE GOALS: What Your Team Should Learn 1. Run the bases 2. Catching a ball using two hands above the waist 3. Consistently hit the ball off a tee 4. To see the ball from the coaches hand when hitting
PRACTICE GOALS: What Your Team Should Learn 1. Run the bases 2. Catching a ball using two hands above the waist 3. Consistently hit the ball off a tee 4. To see the ball from the coaches hand when hitting
T-BALL PRACTICE PLAN WEEK 2: HEALTH
 T-BALL PRACTICE PLAN WEEK 2: HEALTH INTRODUCTION, STRETCHES & WARM UP 7 MINUTES 1. Review names of coaches and team parents, and have players reintroduce themselves (name and their favorite fruit or vegetable).
1.Feet should line up (not to open or closed) 2. Toes pointed in slightly (no duck feet) knees slightly bent in an athletic position.
 2. Toes pointed in slightly (no duck feet) knees slightly bent in an athletic position.") Hitting Bottom to top Stance 1.Feet should line up (not to open or closed) 2. Toes pointed in slightly (no duck feet) knees slightly bent in an athletic position. 3. Hands should be held high with ear
Hitting Bottom to top Stance 1.Feet should line up (not to open or closed) 2. Toes pointed in slightly (no duck feet) knees slightly bent in an athletic position. 3. Hands should be held high with ear
CATCHING. Get in a big circle, and practice catching. (Can be used with the Throwing drill)
") CATCHING Use a basket to catch the ball. Round arms in front of you with elbows about four inches apart. Hands should be about shoulder high. Allow ball to land on inside of elbows, and wrap hands around
CATCHING Use a basket to catch the ball. Round arms in front of you with elbows about four inches apart. Hands should be about shoulder high. Allow ball to land on inside of elbows, and wrap hands around
Coaching Course READ FIRST
 Coaching Course READ FIRST 1. DOWNLOADABLE NOTES: SAVE THIS FILE some place on your computer where you ll be able to find it. Be sure to make note of the folder and location where you save it, so you can
SLP Little League: Coaching Certification
 SLP Little League: Coaching Certification Agenda o Preparation and Safety (10 min) Organization Equipment/Field o Teaching Skills, Drills and Games Throwing/Catch (45 mins) Grip Finish Drills/Games Fielding
1) SKILL DEVELOPMENT: Baseball fundamentals and a better understanding of the rules at a younger age
 SKILL DEVELOPMENT: Baseball fundamentals and a better understanding of the rules at a younger age") Orleans Little League Baseball Coach Pitch Program 7-8 years old players Practice Guide & Plans THIRD EDITION 2015 Introduction Coach Pitch level is a good place to start but it can be difficult for a
Orleans Little League Baseball Coach Pitch Program 7-8 years old players Practice Guide & Plans THIRD EDITION 2015 Introduction Coach Pitch level is a good place to start but it can be difficult for a
Little League Pitching Mechanics - Simple Instructions For Little League
 Little League Pitching Mechanics - Simple Instructions For Little League Pitchers By Steven Ellis, former Chicago Cubs pitching pro The goal for any Little League coach or parent is to keep the game simple
AUSTRALIAN BASEBALL UMPIRE S MANUAL
 AUSTRALIAN BASEBALL UMPIRE S MANUAL UMPIRE POSITIONS AND SIGNALS 2009 by Australian Baseball All rights reserved. No part of this publication may be reproduced or distributed in any form without prior
Rome wasn t built in a Day.
 Fundamental Focus of Week #4: Team Defense This week we are going to build the team defense portion of our practice plan. To cover the different situations players encounter during a game, we like to rotate
Baseball Hitting Principles Version 2
 Baseball Hitting Principles Version 2 Scott Kluemper 2/17/2013 Scott Kluemper 1 Table of Contents Page Swing Phases 3 Stance 4 Negative Move 10 Positive Move 12 Toe Touch 15 Heel Plant 17 Posture Lines
Purpose: This drill is designed to teach the players to catch with both hands and build confidence.
 Drills Fielding Drill Drill: Soft Hands Drill Age Group: 4 8+ year olds Purpose: This drill is designed to teach the kids the proper way to catch the ball with two hands and builds confidence. Equipment:
1) SKILL DEVELOPMENT: Baseball fundamentals and a better understanding of the rules at a younger age
 SKILL DEVELOPMENT: Baseball fundamentals and a better understanding of the rules at a younger age") Orleans Little League Baseball Coach Pitch Program 7-8 years old players Practice Guide & Plans 2016 Introduction Coach Pitch level is a good place to start but it can be difficult for a young player adjusting
Orleans Little League Baseball Coach Pitch Program 7-8 years old players Practice Guide & Plans 2016 Introduction Coach Pitch level is a good place to start but it can be difficult for a young player adjusting
OBA CATCHING PROGRAM
 Catcher s Individual Responsibilities 1. Strength training and conditioning 2. Fundamentals; fielding and throwing 3. Attitude and leadership skills 4. Knowledge of baseball OBA CATCHING PROGRAM Working
Coaching Clinic. Coach with Class. Rich Coletta & Bob McCreary
 Coaching Clinic Coach with Class Rich Coletta & Bob McCreary What to expect from your players every practice... What to expect from yourself every DAY... Things to remember when scheduling your practice...
Softball Pitching Mechanics
 Softball Pitching Mechanics When teaching softball pitching mechanics, the best way to avoid injury, develop consistency, and see results is through repetition and attention to detail. Even a slight change
Moorhead Baseball Routines/Hitting Drills
 Moorhead Baseball Routines/Hitting Drills Philosophy How we train: Teach everyday with the goal of our players becoming their own coach. Get them to feel what s going on. Consistent mix of instruction
Player Development. Pitching 1
 Pitching Player Development Pitching 1 Delivery Mechanics Checklist: 1. Feet slightly spread on throwing arm side of rubber 2. Body weight positioned over stride leg 3. Torso upright 4. Hips and shoulders
T-BALL LEAGUE CAPITOL LITTLE LEAGUE PLAYING RULES FOR T-BALL
 T-BALL LEAGUE 2015 2015 CAPITOL LITTLE LEAGUE PLAYING RULES FOR T-BALL The Capitol Little League Board of Directors appreciates your support and involvement and thanks you for your time. T-Ball is a baseball
DAY 1. Heavy Bat Rotations 4 sets x 15 seconds
 DAY 1 HITTING WORKOUT COMPLETE 1 CIRCUIT Heavy Bat Snaps 2 sets x 15 seconds Hold a heavy bat straight out in front of body. Slowly bring barrel to forehead, then snap back to starting position. Heavy
The BIG BOOK of Golf Drills
 The BIG BOOK of Golf Drills 1 How to Use This Guide Congratulations on purchasing the Big Book of Golf Drills! This book is designed to use as a reference guide. We do not recommend printing this out as
INTRO PROGRAM TIPS PROGRAM OUTLINE WEEK 1 WEEK 2 WEEK 3 WEEK 4 WEEK 5 WEEK 6 WEEK 7 WEEK 8 WEEK 9 WEEK 10 WEEK 11 WEEK 12 MATERIALS:
 PRACTICE GOALS: What Your Team Should Learn 1. Successfully throw to a two hand target using a four-seam grip while playing a game of 21 2. Run from first base to third base and from second base to home
HUDSON BOOSTER CLUB. Hudson Boosters JUNIOR LEAGUE SKILLS LIST
 HUDSON BOOSTER CLUB Hudson Boosters JUNIOR LEAGUE SKILLS LIST JUNIOR LEAGUE SKILLS AND CONCEPTS JUNIOR LEAGUE SKILLS 1 The skills and concepts listed are the minimum skills that a person coming out of
Spring Sports Program. Junior Kindergarten T-Ball Manual
 Spring Sports Program Junior Kindergarten T-Ball Manual Message from the Bridlewood Community Association (BCA): Thank you for taking part in the Spring Sports Program and making it a success year after
DOYLE BASEBALL TERMINOLOGY
 www.doylebaseball.com/siebert DOYLE BASEBALL TERMINOLOGY THROWING (Part One/Upper Half) Stance spread and flex lower half Show throwing arm extended straight out to the side of the body then bend elbow
T-BALL COACHES MANUAL 3-5 year olds YMCA OF METROPOLITAN DENVER
 T-BALL COACHES MANUAL 3-5 year olds YMCA OF METROPOLITAN DENVER PRACTICE OUTLINE YMCA YOUTH SPORTS PRACTICE SESSION PLANS 3-5 year olds Warm-up (5 minutes) Fitness component (5 Minutes) Skills Drills (15
Philosophy. That s a confused kid we ve created. A wise philosopher once said, This is not good. So I ve changed my approach.
 Philosophy Five years ago, when my daughter was in Kindergarten and playing for the first time, I remember trying to teach her and her teammates about the strike zone. When they would swing at a pitch
Umpire School Curriculum. Guide to Teaching the Basics of Umpiring
 Umpire School Curriculum Guide to Teaching the Basics of Umpiring 2007 1 Plate Mechanics: 1) Working the Slot Basic Fundamentals: 1) Head height is extremely important. Don t drop your chin lower than
Skill Development and Drills
 Skill Development and Drills Keith Van De Keere, NCCP Instructor vandekeere22@gmail.com Beginner Advanced Work with coach Work with player No Glove Glove Softer ball Baseball Short distance Full distance
SHERIDAN PARK COACHES HANDBOOK
 SHERIDAN PARK COACHES HANDBOOK UPDATED: SPRING 2010 Opening Day Skills Competition All team members must participate in at least 1 event No player may participate in more than 2 events 1. ROAD RUNNER Fastest
Beginning Softball Pitching Adapted from a guide created by Stan VanderSlik
 Beginning Softball Pitching Adapted from a guide created by Stan VanderSlik Pitching a softball is not like throwing a softball. Pitching is an underhand motion that, when done correctly, can result in
HUDSON BOOSTER CLUB. Hudson Boosters TRAVELING TEAM SKILLS LIST
 HUDSON BOOSTER CLUB Hudson Boosters TRAVELING TEAM SKILLS LIST COMPETITIVE TEAM SKILLS AND CONCEPTS COMPETITIVE TEAM SKILLS 1 The skills and concepts listed are the minimum skills that a person coming
Pitching Development
 Pitching Development Sections of this document: This document is structured around the core components of a good pitching delivery. Each section of the delivery will include 4 things: 1. Written description
Mosinee Baseball Hitting
 Mosinee Baseball Hitting Drills & Techniques Daily Team Warm-Up 1. Jog forward/backward (2 Times) 2. Butt Kicks (down & back) 3. High Knees (down & back) 4. Karaoke (Left & right) 5. Walking Lunges (down
MATERIALS: PRACTICE GOALS: What Your Team Should Learn. PRACTICE 1 TIP: Teachable Spirit (WAG) PRACTICE 2 TIP : 2 Roots (Rules) RULES WATCH
 PRACTICE 2 TIP : 2 Roots (Rules) RULES WATCH") PRACTICE GOALS: What Your Team Should Learn 1. Successfully throw to a two hand target using a four-seam grip 2. Attempt to catch a fly ball using two hands 3. To separate their hands when throwing 4.
PRACTICE GOALS: What Your Team Should Learn 1. Successfully throw to a two hand target using a four-seam grip 2. Attempt to catch a fly ball using two hands 3. To separate their hands when throwing 4.
COACH PITCH DIVISION
 COACH PITCH DIVISION These WLALL Coach Pitch rules are in addition to Little League Official Rules. To the extent the following rules are inconsistent with the Little League Official Rules, these rules
RFYBO Catching Guidelines
 RFYBO Catching Guidelines * Look for the vocal leader who s not afraid to direct traffic * STANCE When in the catching stance, you should be in a comfortable crouch, compact and relaxed. Move your entire
Glencoe Youth Baseball Player Coach Developmental Series
 Glencoe Youth Baseball Player Coach Developmental Series Dynamic Warm-ups: (Tony Bastinelli) 10-15 minutes -Start with a light jog, maybe two / three gym laps, w/ gloves on. Single file, no passing and
Mosquito Parent Guide
 Mosquito Parent Guide Rev: January 26, 2017 Introduction Welcome to Aylmer Minor Baseball s Mosquito program. This is a non-competitive, instructional program with an emphasis on teaching the fundamentals
Rookie Ball Parent Guide
 Rookie Ball Parent Guide Rev. January 26, 2017 Introduction Welcome to Aylmer Minor Baseball s Rookie Ball program. This is a non-competitive, instructional program with an emphasis on teaching the fundamentals
BEGINNING PITCHING TIPS BRYC Softball Updated February 4, 2008
 BEGINNING PITCHING TIPS BRYC Softball Updated February 4, 2008 General 1. Work on sound mechanics before anything else. The earlier a player learns the mechanics, the quicker she will progress in learning
SOFTBALL STANDARDS GRADE LEVEL STANDARD DESCRIPTION PE.2.C.2.5 PE.2.C.2.9 PE.2.L.3.3 PE.3.M.1.7 PE.2.C.2.8 PE.3.L.3.3 PE.3.L.3.4 PE.3.L.4.
 2018-2019 SOFTBALL SOFTBALL STANDARDS GRADE LEVEL STANDARD DESCRIPTION 2 ND PE.2.M.1.3 PE.2.C.2.2 PE.2.C.2.5 PE.2.C.2.6 PE.2.C.2.9 PE.2.L.3.3 PE.2.R.5.1 PE.2.R.5.2 PE.2.R.6.2 Strike an object continuously
Belton High School Marching Fundamentals 2016
 Belton High School Marching Fundamentals 2016 Fundamentals of Teaching Fundamentals: 1. Say the name of the maneuver (INSTRUCT) 2. State its purpose (INSTRUCT) 3. Demonstrate it slowly, several times,
Baseball and Softball Fundamentals and Drills
 Baseball and Softball Fundamentals and Drills Defensive Drills Throwing Mechanics 4 seam rotation Middle finger and thumb are directly opposite from each other on the seams Drill Basketball spin shoot
Abbott-O-Rabbit Coaches Orientation
 Abbott-O-Rabbit Coaches Orientation Thanks For Coaching at AOR! The reason for having this session is provide you with some tools to teach basic baseball/softball skills at AOR. It is also intended to
MINOR B DRILLS. 6:15 approx - Once the kids have completed all the stations, put the equipment away and prepare for the game
 MINOR B DRILLS 5:30 - Coaches arrive and prep field and set up pitching machine (please ensure you use the game machine and not the practice machine) - Coaches set up the 6 drill stations - Recruit 6-10
The Ranger Way The First 30 of Every Practice. Being Ready, Pressure on the Bases and Player Catch = SUCCESS
 The Ranger Way The First 30 of Every Practice Being Ready, Pressure on the Bases and Player Catch = SUCCESS DYNAMIC STRETCHING ROUTINE Each stretch should be 15-30 seconds. Most running can be done with
Why Parents Sign Kids Up for T-Ball 1. Have Fun 2. Get Exercise 3. Learn the Sport 4. Make friends
 1 Why Parents Sign Kids Up for T-Ball 1. Have Fun 2. Get Exercise 3. Learn the Sport 4. Make friends Basic Equipment Players: Tennis shoes (Cleats Preferred) T-shirt provided by program Glove No jewelry
COACHES RESPONSIBILITES. Coach all 12 players on your roster. Teach discipline and respect. Set team rules.
 RWLL COACHES CLINIC 2017 COACHES RESPONSIBILITES Coach all 12 players on your roster. Fun equates into success Build confidence in all players. Be positive in your coaching style. Teach discipline and
T-BALL PRACTICE PLAN WEEK 3: STRIKE OUT BULLYING
 T-BALL PRACTICE PLAN WEEK 3: STRIKE OUT BULLYING INTRODUCTION, STRETCHES & WARM UP 7 MINUTES 1. Have players talk about what was their favorite part of last week. 2. Refer to the WOW pack discussion guide
Baseball Coaching Clinic
 Baseball Coaching Clinic Summary: This clinic will be broken into sections, we will cover the following items: Preseason - The importance of a team meeting and what to review during that meeting. Fundamentals
CONEMAUGH VALLEY YOUTH LEAGUE
 CONEMAUGH VALLEY YOUTH LEAGUE TEE BALL DIVISION COACHES HANDBOOK CVYL Tee Ball Handbook Page 0 C V Y L Conemaugh Valley Youth League Tee Ball Division COACHES HANDBOOK Table of Contents: Introduction...2
Basic Baseball Fundamentals. Batting:
 Batting Place the players in a circle with plenty of room between each player with the Command Coach in the center. Other coaches should be outside the circle observing. If someone needs additional help
MULTI-PITCH BATTING TRAINER
 MULTI-PITCH BATTING TRAINER I N S T R U C T I O N S & P R A C T I C E D R I L L S www.sklz.com THROWS A PERFECT PITCH EVERY TIME! Zip-N-Hit Pro acts like a portable batting cage, allowing batters to improve
I've been ending practices with this drill for many years. It works with either baseball or softball.
 BASE RUNNING DRILLS 3-2-1: Place three balls equal distance apart about three fourths of the way from third to home. Have a runner (team 1) and have a fielder on third base and one one 2nd base (team 2).
Stance Recap Blocking Positions To the Right:
 Stance Recap We must create the ability to block out of both the primary (no runners on base) and the secondary (runners on base) stances. We have to put ourselves in a position to be able to get our feet
BASEBALL COACHES MANUAL 6-9 year olds YMCA OF METROPOLITAN DENVER
 BASEBALL COACHES MANUAL 6-9 year olds YMCA OF METROPOLITAN DENVER PRACTICE OUTLINE YMCA YOUTH SPORTS PRACTICE SESSION PLANS 6-9 year olds Warm-up (5 minutes) Fitness component (5 Minutes) Skills Drills