Bikes can be serviced only at MEC stores with bike shops. Find MEC stores that sell and service bikes at mec.ca/bikes
|
|
|
- Sherilyn Jacobs
- 6 years ago
- Views:
Transcription


1 TRAILER BIKE MANUAL
2 Thanks for choosing an MEC bike. And thanks for investing in an activity that s part of a more sustainable future. We hope your new bike provides years of fun and outdoor exploration. Enjoy the ride. Bikes can be serviced only at MEC stores with bike shops. Find MEC stores that sell and service bikes at mec.ca/bikes
3 MEC Bike Service Agreement During its first year your bike may require minor adjustments. You can bring your bike to an MEC store with a bike shop for free adjustments and minor maintenance for one year after purchase. (Please note that some MEC stores do not have bike shops.) Adjustments and maintenance include tightening of gear and brake cables, bearing adjustments, minor wheel truing, and general check ups. The Service Agreement covers the cost of service and labour and does not include the cost of replacement parts or advanced repairs. Any part found to be defective is covered by our Rock Solid Guarantee. Rock Solid Guarantee Like many retailers, we guarantee our products; if an item hasn t met your expectations, you can bring it back. Unlike most retailers, we also guarantee the product selection advice offered through our catalogue, website, and staff; if an item you ve purchased based on this advice turns out to be unsuitable, you can bring it back. In either case, simply return the item for exchange, refund, repair, or credit. Both the Rock Solid Guarantee and the Bike Service Agreement cover normal use and riding conditions. Damage caused by accidents, misuse, or abuse is not covered. Normal wear and tear on items such as tires, tubes, cables, and brake pads is not covered. The Service Agreement applies to the original owner only. Please provide your receipt when bringing your bike in for service. Bikes cannot be returned or serviced at MEC stores without bike shops.
4
5 OWNER S MANUAL AND ASSEMBLY INSTRUCTIONS for Novara Afterburner trailer cycles 1st Edition, 2007 WARNING: This Manual contains important safety, performance and service information. Read it before you take the first ride with your new trailer cycle, and keep it for reference. If you have any questions or do not understand any information in this Manual, take responsibility for your safety and consult with your local REI store or professional bike mechanic. GA5639.2
6 CONTENTS GENERAL CAUTION ABOUT CYCLING AND THE FORMAT OF WARNINGS IN THIS MANUAL 1 A SPECIAL NOTE TO THE LEAD CYCLIST 2 1. ASSEMBLY & OPERATION 4 A. Assembly instructions 4 B. Attaching the Afterburner to the lead bike 6 C. Riding techniques 9 D. Unfolding and folding the Afterburner 10 E. Storage SAFETY CHECKS BEFORE EACH USE GENERAL SAFETY GUIDELINES 12 A. The basics 12 B. Riding safety 13 C. Do not use the Afterburner for off-road riding 14 D. Do not use the Afterburner in inclement weather 14 E. Do not use the Afterburner for night riding 14 F. Changing components or adding accessories TECH 15 A. Wheel removal and installation 15 B. Tires and tubes SERVICE 17 A. Service intervals 17 B. If your trailer cycle sustains an impact 18
7 GENERAL CAUTION ABOUT CYCLING AND THE FORMAT OF WARNINGS IN THIS MANUAL Like any sport, cycling involves risk of injury and damage. By choosing to use a trailer cycle, you assume the responsibility for that risk, so you need to know and to practice the rules of safe and responsible riding and of proper use and maintenance. Proper use and maintenance of your trailer cycle reduces risk of injury. This Manual contains many Warnings and Cautions concerning the consequences of failure to maintain or inspect your trailer cycle and of failure to follow safe cycling practices. The combination of the safety alert symbol and the word WARNING indicates a potentially hazardous situation which, if not avoided, could result in serious injury or death. The combination of the safety alert symbol and the word CAUTION indicates a potentially hazardous situation which, if not avoided, may result in minor or moderate injury, or is an alert against unsafe practices. The word CAUTION used without the safety alert symbol indicates a situation which, if not avoided, could result in serious damage to the trailer cycle. Many of the Warnings and Cautions say you may lose control and fall. Because any fall can result in serious injury or even death, we do not always repeat the warning of possible injury or death. Because it is impossible to anticipate every situation or condition that can occur while riding, this Manual makes no representation about the safe use of the trailer cycle under all conditions. There are risks associated with the use of any trailer cycle which cannot be predicted or avoided, and which are the sole responsibility of the lead cyclist. 1
8 A SPECIAL NOTE TO THE LEAD CYCLIST You are responsible for the activities and safety of your passenger, and that includes making sure that: the trailer cycle is properly fitted to the lead bicycle; the trailer cycle is properly adjusted for the passenger s size; the trailer cycle is in good repair and safe operating condition; you and your passenger have learned and understand the safe operation of the trailer cycle; and you and your passenger have learned, understand and obey not only the applicable local motor vehicle, bicycle and traffic laws, but also the common sense rules of safe and responsible bicycling. As the adult operator, you should read this Manual, as well as review its warnings and the trailer cycle s functions and operating procedures with your passenger, before letting your passenger ride the trailer cycle. This Manual provides information on the trailer cycle only. You should refer to the user manual and instructions for the lead cycle for information on its correct and safe operation. This Manual should accompany the Afterburner if you ever loan or give your Afterburner to another person to use. The contents of this Manual are also available online, at WARNING: Make sure that you and your passenger always wear an approved bicycle helmet when riding; also make sure that your passenger understands that a bicycle helmet is for cycling only, and must be removed when not riding. Impacts to a bicycle helmet during play may damage its ability to provide its designed protection in a bicycle accident, which could result in serious injury or death. 2
9 WARNING: YOU MUST ENSURE THAT YOU, YOUR PASSENGER AND THE LEAD BIKE ARE COMPATIBLE WITH THE AFTERBURNER LEAD BIKE: The Afterburner is designed for upright bikes with 26" wheels (generally mountain bikes) or 27 /700c wheels (generally road bikes). The minimum height of area of the seatpost where the Afterburner hitch is mounted should be 30 (760mm). Clearance between the bottom of the hitch and the rear tire, panniers or rack of the lead bicycle should be at least 3.5". WARNING: Do not attach the Afterburner to bikes that cannot support these dimensions. They ensure proper clearance for the Afterburner s pedals when cornering as well as adequate clearance between the Afterburner frame and the lead bicycle. The lead bike s seatpost is critical to the safe operation of the Afterburner because it provides the structural integrity of the connection between the lead bike and the Afterburner. The lead bike s seatpost: must be round and straight over the entire section that the hitch will clamp to; must have a minimum diameter of 26.6mm and a maximum diameter of 31.6mm (most seatposts will have this dimension marked on them). must have at least 3" (75mm) of seatpost available for clamping; must be sound and free of dents, cracks, deep scratches or any other damage; and must be able to withstand the clamping forces of the Afterburner hitch. Aluminum seatposts with a wall thickness exceeding 1.75mm are best. Do not use the Afterburner with carbon fiber, titanium, steel or superlight aluminum posts. The high clamping forces of the Afterburner hinge can distort, crack, dent and otherwise damage these posts. WARNING: Attaching the Afterburner to a lead bike with an inappropriate or damaged seatpost can result in a connection failure causing the trailer to move out of position or separate from the lead bike. This can cause loss of control, which may result in severe personal injury or death to the lead bike rider and/or passenger. PASSENGER WEIGHT AND RIDING ABILITY: Do not tow passengers on the Afterburner who are not already able to ride a small bicycle with or without training wheels, as they lack the skills and understanding to be safe riders. Passengers must weigh less than 75 pounds, which is the maximum weight the Afterburner is able to support. Passengers must weigh less than 50% of the weight of the lead bike rider. If the passenger s weight is closer than that to the lead bicycle rider s weight, the bike can become hard to control. WARNING: Do not carry children who, due to age, size or disability, are unable to balance themselves on the Afterburner seat. 3

10 A. Assembly Instructions 1. ASSEMBLY & OPERATION The box contains: 1. Afterburner trailer cycle 2. Pedals 3. Handlebar Front Frame 4. Seat and post Hinge 5. Reflector Rear Frame 6. Safety flag 7. Deflector Before beginning, make sure that you have all of the parts. You will need these tools to assemble the Afterburner correctly: 1. Adjustable wrench deflector 2. Utility knife 3. 5mm Allen wrench 4. Screwdriver (flat head) 5. Tape measure (36"+) Do not try to assemble the Afterburner without these tools, and don t try to substitute others. Before assembly, remove all protective packaging. You will also need to unfold the Afterburner before assembly; please refer to Section 1.D on page 10 for unfolding instructions. 1. Install handlebar: Remove bolts from handlebar stem. Place handlebar in stem, replace bolts and tighten. Adjust the handlebar at the correct height/angle for your passenger. When correctly adjusted, the passenger should be able to hold the handlebars comfortably while sitting upright with arms bent at the elbows. 2. Install seat: Insert seatpost into Afterburner frame. Be sure that seatpost is inserted at least 2.5" into the Afterburner frame, past minimum insertion line marked on the seatpost. Hitch 30" (760mm) Min. Height minimum insertion Seatpost must be inserted far enough that no lines can be seen. 4
11 WARNING: The minimum insertion line must be completely inserted into the frame and should not be visible. Failure to insert the seatpost that far will make the seat assembly weak and unstable, and the seatpost could bend or break and cause serious injury to the passenger. Tighten seatpost binder bolt with a 5mm Allen wrench or with the quick-release lever. 3. Install pedals: Look for the letter R or L stamped on the pedal spindle. Thread the pedal marked R into the crank arm on the right (chain side) of the Afterburner. Start turning the pedal spindle in a clockwise direction by hand to avoid stripping the threads. Tighten pedal securely. Thread the pedal marked L into the crank on the left side of the Afterburner Start turning the pedal spindle in a counterclockwise direction by hand. Tighten pedal securely. 4. Install deflector: Open strap on deflector. Place deflector on bottom of downtube (see page 4) so the tube fits into the groove on the deflector. Wrap straps around the tube and fasten the straps. 5. Install reflector: Remove screw on reflector and slide reflector s clamp onto left seatstay. Tighten clamp. 6. Inflate tire to 35 psi. CAUTION: After 5 hours of riding, inspect all components for proper adjustment. See section 2, Safety Checks, on page 11 for details. 5


12 B. Attaching the Afterburner to the Lead Bike Attaching and separating the Afterburner is most easily done when both the lead bike and the Afterburner can be leaned against or supported by the same surface. You may also find it helpful to have someone holding one or the other while becoming familiar with the Afterburner s installation. From the front, the hitch has two visible bolts and a quick-release lever. a. The two 5mm bolts are used primarily for adjusting the size of the hitch to accommodate different diameters of seatposts. b. The quick-release lever provides the high clamping power that the Afterburner requires for safe and reliable operation. Once set up properly for a bike, it also allows the Afterburner to be installed and removed without tools. 1. Open the quick-release lever by pulling it away from the front cap, so that the word OPEN is visible. Spin the lever counterclockwise until it can clear the safety recess in the cap and move to the outside. It does not need to be removed all the way. 2. Remove all accessories attached to the lead cycle s seat and seatpost and install them elsewhere on the lead cycle or leave them off while the Afterburner is attached. 3. Insert the seatpost between the hitch s front cap and the post receiver. Replace the quick-release lever back in the safety recess and spin it clockwise until it contacts the front cap with the word CLOSED displayed. Post Receiver Front Cap Universal Joint open quick-release lever closed quick-release lever 5mm bolts Quick-Release Lever Bolts w/nylock Nut (not shown) 6
. If it can only be adjusted this way, the seatpost is not compatible with the hitch and should not be used. Afterburner Lead Bike Fig. 1 correct Fig. 2 incorrect Fig. 3 correct alignment b.")

13 4. Look down from above to make sure that the distances between the front cap and post receiver are roughly equal on both sides (Fig. 1). This allows the Afterburner hitch to function optimally. a. The front cap should NEVER contact the post receiver on either side when properly installed (Fig. 2). If it can only be adjusted this way, the seatpost is not compatible with the hitch and should not be used. Afterburner Lead Bike Fig. 1 correct Fig. 2 incorrect Fig. 3 correct alignment b. The hitch should always be installed and operated in line with the center of the lead bike (Fig. 3). Riding with the hitch off-center will force the passenger to ride with a tilt and can be dangerous if more than a couple degrees off. 5. Adjust the hitch by threading the quick-release lever and the two 5mm bolts as necessary to get the hitch in solid contact with the post with the front cap evenly spaced off of the post receiver. 6. Open the quick-release lever so that the word OPEN is visible. Using a 5mm wrench, give each of the bolts ½ turn in a clockwise direction. 7. Close the quick-release lever so that the word CLOSED is visible. It should require moderate effort to close. A person of average hand strength should need to wrap their fingers around part of the hitch or post for leverage. The lever should leave a clear imprint in the palm of your hand. 8. If the quick-release lever cannot be pushed all of the way to a position where the lever contacts either the seatpost or front cap, the hitch has not been installed correctly. You will need to re-open the lever and rotate the lever counter-clockwise until it can be closed into contact with either the front cap or post. WARNING: Securely clamping the hitch takes considerable force. If you can fully close the quick-release without wrapping your fingers around the hitch or post for leverage, and the quick-release lever does not leave a clear imprint in the palm of your hand, the tension is insufficient, and the Afterburner will be unsafe to operate. Open the lever and re-adjust the tension as described on the next page. 7
14 9. If this tension adjustment is insufficient, you may use the 5mm bolts to adjust by turning them in ¼ turn increments counterclockwise and trying to close again. If you need to adjust them more than twice, you may need assistance with installing the hitch. Re-read and re-perform steps 5 8 again and if you still have trouble you may need to consult your local REI store or a professional bike mechanic for assistance. 10. If the hitch is successfully installed, it will be impossible to rotate it about the seatpost by pushing on the tow bar. 11. Conduct a test ride without a passenger after installation is complete. 12. Adjust the Afterburner seat to the correct height for your passenger. Loosen the seatpost binder bolt or quick-release lever, adjust the seat height and retighten. To check for correct seat height: Have the passenger sit on the seat. Place the heel of one of the passenger s feet on a pedal in the down position. If the passenger s hips must rock for the heel to reach the pedal, lower the saddle. If the passenger s leg is bent more than 20º at the knee with the heel on the pedal, raise the saddle. When correctly adjusted, the passenger s feet should rest on the pedals at their lowest position with the passenger s knee bent slightly. Check to make sure that the minimum insertion line on the seatpost is not showing. WARNING: The minimum insertion line must be completely inserted into the frame and should not be visible. Failure to insert the seatpost that far will make the seat assembly weak and unstable, and the seatpost could bend or break and cause serious injury to the passenger. 13. Adjust the Afterburner seat to the correct angle by loosening the seat clamp bolt with a wrench. Adjust as necessary. Make sure seat and clamp are fully inserted over post and re-tighten while maintaining equal visible threading of clamp bolt on each side. Most riders prefer a horizontal seat. WARNING: After any adjustment to seat angle, be sure that the seat angle adjusting mechanism is properly tightened before riding. A loose clamp or seatpost binder can cause damage to the seatpost or can cause the passenger to lose control and fall. A correctly tightened seat angle adjusting mechanism will allow no seat movement in any direction. Periodically check to make sure that the seat adjusting mechanism is properly tightened. 14. Install the flag on the Afterburner chainstay. Always use the flag, which makes the trailer cycle more visible to other people and particularly to cars and trucks. 15. The hitch should be checked periodically for resistance to rotation. minimum insertion Seatpost must be inserted far enough that no lines can be seen. 8
15 Removal 1. Open the quick-release lever by pulling it away from the front cap, so that the word OPEN is displayed. Then spin the lever counterclockwise until it can clear the safety recess in the cap and move to the outside. The quick-release lever does not need to be removed. 2. The hitch is designed so that the seatpost can now be maneuvered out of the hitch past the quick-release lever and front cap. Re-installation 1. If the Afterburner is being re-installed on the same bicycle as before and the hitch has not been adjusted while in storage, re-install using steps 6 through 11 above. 2. If you are unsure of the previous installation or haven t used the Afterburner in a while, start from step 1 on page 6. C. Riding Techniques First Time Out: When you put on your helmet to take your first familiarization ride on your new Afterburner, be sure to pick an open, level environment that is free of cars, other cyclists, obstacles and other hazards. Ride to become familiar with the controls, features and performance of your new Afterburner. Different Riding Techniques: Riding with the Afterburner attached to your bicycle will feel quite different from regular cycling. Take it easy until you get used to the feel. Be careful to notice the following: 1. The Afterburner effectively makes you one long bicycle. You will not be able to turn as sharply as you can with just your bike. Watch for obstacles, and plan your turns so that you can make them wide and smooth. 2. Any motion that you make on your bike will be felt by your passenger on the Afterburner. Be careful to accelerate and climb hills slowly and smoothly. Swaying from side to side may cause your Afterburner passenger to let go and fall off the Afterburner and be seriously hurt. 3. The added weight of the Afterburner and passenger will increase the distance required for you to stop. Be especially careful when riding downhill towing an Afterburner. 4. Always keep your speed under 15 mph. At faster speeds, you are more likely to lose control. Gear Shift: The multispeed Afterburner gives your passenger a fun, safe way to learn how to shift gears. It has a derailleur drivetrain and a twist-grip shifter. 9
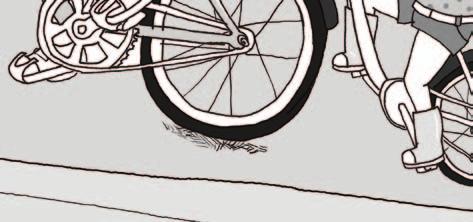
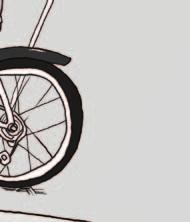
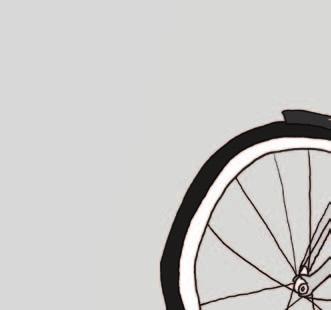
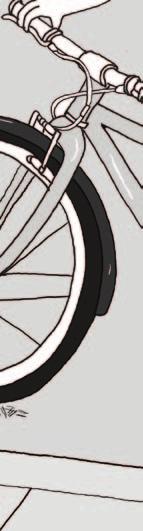
16 The vocabulary of shifting can be confusing. A downshift is a shift to a lower or slower gear, one which is easier to pedal. An upshift is a shift to a higher or faster, harder-to-pedal gear. So, at the rear gear cluster, what is called a downshift looks like an upshift. The way to keep things straight is to remember that shifting the chain in toward the centerline of the bike is for accelerating and climbing and is called a downshift. Moving the chain out or away from the centerline of the bike is for speed and is called an upshift. Whether upshifting or downshifting, the bicycle derailleur system design requires that the drive chain be moving forward and be under at least some tension. A derailleur will shift only if you are pedaling forward. CAUTION: Be sure to instruct your passenger to pedal forward when shifting and to refrain from moving the shifter while pedaling backward, and not to pedal backward immediately after having moved the shifter. This could jam the chain. D. Unfolding and Folding the Afterburner Unfolding: 1. Unfold the frame. You will need to remove the knob from the frame if it has been installed. 2. Once unfolded completely, re-insert knob into the frame and turn it clockwise to tighten. Frame must be supported or held in fully open position for bolt to insert properly. Failure to maintain fully open position while inserting bolt can damage the threads. 3. Tighten the knob securely and insert the safety flag if preparing for use. Folding: 1. Fold the Afterburner only when its rider has dismounted and the Afterburner has been disconnected from the lead bike. 2. Remove the safety flag from the flag holder by pulling up on the flagpole above the midpoint. 3. Unscrew the knob by turning it counterclockwise until it comes out of the frame. 4. Fold down the tow arm. A good place to store the knob is to screw it back into the lower part of the frame. E. Storage ready to ride partially folded Hanging the Afterburner from its wheel is an effective low-cost storage solution. It is also OK to store it folded. As with most equipment, dry areas, out of direct sunlight, are best for extended storage. 10

17 2. SAFETY CHECKS BEFORE EACH USE Check the condition of your Afterburner before every ride. Afterburner hitch and hinge condition: The hitch is the critical connection between the Afterburner and the lead bicycle. Before each ride: Carefully inspect hitch and hinge for cracks. Carefully inspect hardware on hitch and hinge to ensure that the bolts protrude through the nylock nut (see illustration). The nylock nut features a plastic insert that provides a high-friction fit for the bolt, to keep the nut from being loosened by road vibration. Check the bolts for tightness, as well, but do not over-tighten. Nuts, bolts and straps: Make sure nothing is loose. Lift the wheel off the ground two or three inches, then let it bounce on the ground. Anything sound, feel or look loose? Do a visual and tactile inspection of the whole trailer cycle. Any loose parts or accessories? If so, secure them. If you re not sure, ask someone with experience to check. bolt should protrude at least 1.5 threads beyond nut Tire pressure: The Afterburner tire is your passenger s primary suspension system. For your passenger s comfort and confidence, make sure the Afterburner tire is inflated to psi (see Section 4.B.1). Tire in good shape? Spin the wheel slowly and look for cuts in the tread and sidewall. Replace a damaged tire before riding the Afterburner. Wheels true? Spin the wheel and check for side-to-side wobble. If a wheel wobbles side to side, take the Afterburner to your local REI store or a professional bike mechanic to have the wheel trued. Chain taut? Press down on the chain midway between front and rear cogs. If the chain moves more than ½", tighten the chain by loosening bolts, moving the rear wheel back and re-tightening the bolts. Saddle alignment: Make sure the saddle points straight ahead and that the adjusting mechanisms for seat height and angle are tight and secure. Handlebar ends: Make sure the handlebar grips are secure and in good condition. If not, have your local REI store or a professional bike mechanic replace them. WARNING: Loose or damaged handlebar grips can cause the passenger to lose balance and fall. Afterburner hitch tightness: Push on the tow bar to confirm that the hitch cannot be rotated about the seatpost of the lead bicycle. Service Schedule: Follow the regular service and maintenance recommendations on pg.17 (Section 5). 11
18 A. The Basics 3. GENERAL SAFETY GUIDELINES WARNING: Many states require specific safety devices. It is your responsibility as the lead bike rider to familiarize yourself and your passenger with the laws of the city and/or state where you ride and to comply with all applicable laws, including properly equipping yourself and your bike as the law requires. 1. Always wear cycling helmets that meet the latest certification standards and are appropriate for the type of riding you do. Always follow the helmet manufacturer s instructions for fit, use and care. Most serious bicycle injuries involve head injuries that might have been avoided if the rider had worn an appropriate helmet. WARNING: Failure of either the lead bike rider or passenger to wear a helmet when riding may result in serious injury or death. 2. Always do the Safety Checks (Section 2) on pg.11 before you tow the trailer cycle. 3. Do not tow children on the Afterburner who are not already able to ride a small bicycle with or without training wheels. Do not carry children who because they are too young, too small or have a disability are unable to balance themselves on the seat. 4. Be thoroughly familiar with operation of the lead bicycle. 5. Be careful to keep body parts and other objects away from the sharp teeth and rings of the lead cycle s and trailer cycle s chains. 6. Both riders must always wear: Shoes that will stay on their feet and will grip the pedals. Never ride barefoot or in sandals. Bright, visible clothing that is not so loose that it can be tangled in the bicycle s moving parts or snagged by objects at the side of the road or trail. Protective eyewear, to protect against airborne dirt, dust and bugs tinted when the sun is bright, clear when it s not. 7. Ride at a speed no greater than 15 mph. Increased speed means higher risk. 12
19 B. Riding Safety 1. You are sharing the road or the path with others motorists, pedestrians and other cyclists. Respect their rights. 2. Ride defensively. Always assume that others do not see you. 3. Look ahead, and be ready to avoid: Vehicles slowing or turning, entering the road or your lane ahead of you, or coming up behind you. Parked car doors opening. Pedestrians stepping out. Children or pets playing near the road. Potholes, sewer grating, railroad tracks, expansion joints, road or sidewalk construction, debris and other obstructions that could cause you to swerve into traffic, catch your wheel or cause you to have an accident. The many other hazards and distractions that can occur on a bicycle ride. 4. Ride in designated bike lanes, on designated bike paths or as close to the edge of the road as possible, in the direction of traffic flow or as directed by local governing laws. 5. Stop at stop signs and traffic lights; slow down and look both ways at street intersections. Remember that a bicycle always loses in a collision with a motor vehicle, so be prepared to yield even if you have the right of way. 6. Use approved hand signals for turning and stopping. 7. Never ride with headphones. They mask traffic sounds and emergency vehicle sirens, distract you from concentrating on what s going on around you, and their wires can tangle in the moving parts of the bicycle, causing you to lose control. 8. Never carry anything that obstructs your vision or your complete control of the lead bicycle, or could become entangled in the moving parts of the bicycle. 9. Never hitch a ride by holding on to a vehicle. 10. Don t do stunts, wheelies or jumps with the Afterburner attached to a bicycle. 11. Don t weave through traffic or make any moves that may surprise people with whom you are sharing the road. 13
20 12. Observe and yield the right of way. 13. Never ride your bicycle while under the influence of alcohol or drugs. 14. If possible, avoid riding in bad weather, when visibility is obscured, at dawn, dusk or in the dark, or when extremely tired. Each of these conditions increases the risk of accident. 15. Install a full-coverage rear fender on the lead bicycle to avoid throwing road debris onto the trailer cycle rider. CAUTION: Check reflectors and their mounting brackets regularly to make sure that they are clean, straight, unbroken and securely mounted. Have your local REI store or a professional bike mechanic replace damaged reflectors and straighten or tighten any that are bent or loose. WARNING: Do not remove the reflectors or reflector brackets from your Afterburner. Removing the reflectors may reduce your visibility to others using the roadway. C. Do Not Use the Afterburner for Off-Road Riding Use the Afterburner only on level, well-maintained paved surfaces, and do not ride on rough terrain or uneven roads or surfaces with a trailer cycle. The bumping and jostling could knock the passenger off the trailer cycle and damage the hitch attachment. D. Do Not Use the Afterburner in Inclement Weather Do not use the Afterburner in reduced visibility or on reduced traction surfaces. This includes any surface affected by rain, snow, ice or loose roadway materials, etc. WARNING: Wet weather impairs traction, braking and visibility, both for the bicyclist and for other vehicles sharing the road. The risk of an accident is dramatically increased in wet conditions. E. Do Not Use the Afterburner for Night Riding Riding a bicycle at night is many times more dangerous than riding during the day because a cyclist can be very difficult for motorists and pedestrians to see. Do not use the Afterburner at dawn, at dusk or at night. WARNING: Riding at dawn, dusk or at night, or at other times of poor visibility, even with an adequate bicycle lighting system and even with reflectors can be dangerous because drivers may not see the trailer cycle or, if they do, recognize that it is part of the lead cycle and carrying a passenger. 14
21 F. Changing Components or Adding Accessories There are many components and accessories that you could install on your trailer cycle. However, if you change components or add accessories, you do so at your own risk. Before installing any component or accessory especially a different size tire make sure that it is compatible with your trailer cycle. Be sure to read, understand and follow the instructions that accompany any accessories that you purchase for your trailer cycle. WARNING: Do not install a longer seatpost on the trailer cycle. The need to add a longer seatpost is a sign that your passenger is too large for the trailer cycle. CAUTION: Changing the components on your trailer cycle may damage it or render it unusable. 4. TECH It s important to your safety, performance and enjoyment to understand how things work on your Afterburner. We urge you to ask your local REI staff or a professional bike mechanic how to do the things described in this section before you attempt them yourself and that you have your local REI staff or professional bike mechanic check your work before you use the trailer cycle. If you have even the slightest doubt as to whether you understand something in this section of the Manual, talk to an REI cycling staff member or a professional bike mechanic. A. Wheel Removal and Installation 1. Removing and installing the rear wheel of the single-speed Afterburner a. Removing the rear wheel of the single-speed Afterburner (1) Using the correct size wrench, loosen the two axle nuts. (2) Push the rear wheel forward. Use the slack in the chain and derail the chain from the front sprocket toward the inside. (3) Pull the rear wheel back until it clears the frame and slide it free of the chain. b. Installing the rear wheel of the single-speed Afterburner (1) Place the chain on the rear sprocket and slide it into the frame. (2) Replace the chain on the front sprocket and pull the wheel rearward until the chain is tight. (3) Snug the rear bolts and pedal the bike. If the chain has less than 1 /8", or more than ½", of vertical movement at any point in full rotation of the cranks, it needs to be adjusted. Pulling rearward makes it tighter and pushing forward slackens it. (4) Once it is properly tensioned, finish tightening the axle nuts. Remember to keep the wheel centered in the frame. 15
22 2. Removing and installing the rear wheel of the seven-speed Afterburner a. Removing the rear wheel of the seven-speed Afterburner (1) Using the correct size wrench, loosen the two axle nuts. (2) Shift the derailleur to the highest gear/smallest cog. (3) Push the rear wheel forward until it clears the frame and slide it free of the chain. It may help to rotate the derailleur rearward and up slightly for clearance. b. Installing the rear wheel of the seven-speed Afterburner B. Tires and Tubes (1) With the shifter in the highest gear setting, place the chain on the smallest sprocket and slide it up into the frame. It may help to rotate the derailleur rearward and up slightly for clearance. (2) Pull the wheel rearward and tighten the axle nuts. Remember to keep the wheel centered in the frame. 1. Tires The Afterburner tire is your passenger s primary suspension system. For your passenger s comfort and confidence, make sure the Afterburner tire is inflated to psi. The Afterburner s tire is made specifically for the Afterburner, for use on smooth surfaces. The size is marked on the sidewall of the tire. Use this information to purchase replacement tires. WARNING: Never inflate your Afterburner tire beyond 35 psi. The best and safest way to inflate a bicycle tire to the correct pressure is with a bicycle pump that has a built-in pressure gauge. WARNING: Do not use gas station air hoses or other air compressors to fill the Afterburner s tire. Air hoses and compressors are not made for bicycle tires. They move a large volume of air very rapidly, and will raise the pressure in your tire very rapidly, which could cause the tube to explode. 2. Tire Valves There are primarily two kinds of bicycle tube valves: the Schrader valve and the Presta valve. The Afterburner uses a Schrader valve similar to an automobile tire valve. The bicycle pump you use must have the fitting appropriate to the valve stem on your Afterburner tire. 16
23 5. SERVICE WARNING: Many Afterburner service and repair tasks require special knowledge and tools. Do not begin any adjustments or service on your trailer cycle until you have learned how to complete them properly. Improper adjustment or service may result in an accident. If you want to learn to do major service and repair work on your trailer cycle, we recommend that you: - Ask your local REI staff or professional bike mechanic to recommend a book on bicycle repair. - Ask your local REI staff or professional bike mechanic about the availability of bicycle repair courses in your area. Regardless of which option you select, we recommend that you ask your local REI staff or a professional bike mechanic to check your work, especially if you are at all unsure of your work s quality or scope. A. Service Intervals Some service and maintenance can and should be performed by the owner, and requires no special tools or knowledge beyond what is presented in this Manual. The following are examples of the type of service you could perform yourself. All other service, maintenance and repair should be performed in your local REI store or by a professional bike mechanic. 1. Break-in period: Your Afterburner will last longer and work better if you break it in. Control cables and wheel spokes may stretch or seat when a new trailer cycle is first used and may require readjustment by your local REI store or a professional bike mechanic. Your Safety Check (Section 2) will help you identify some things that may need readjustment. But even if everything seems fine to you, we suggest that you bring the Afterburner in for a 30-day checkup, or after about 10 to 15 hours of on-road use. But if you think something is wrong with the trailer cycle, take it to your local REI store or a professional bike mechanic before using it again. 2. Before every ride: Safety Checks (pg.11) 3. After 3 hours of use: Clean the trailer cycle and lightly oil the chain. Wipe off excess oil. 4. After every 10 to 20 hours of use: Grab one pedal and rock it toward and away from the centerline of the trailer cycle; then do the same with the other pedal. Anything feel loose? If so, continue to investigate until you can identify the problem and repair it. Carefully check the shift cable and housing. Any rust? Kinks? Fraying? If so, it should be replaced. 17
24 Squeeze each adjoining pair of spokes on either side of each wheel between your thumb and index finger. Do they all feel about the same? If any feel loose, the wheel needs to be serviced. Check to make sure that all parts and accessories are still secure, and tighten any that are not. Check the frame, particularly in the area around all tube joints; the handlebars; the stem; and the seatpost for any deep scratches, cracks or discoloration. These are signs that can indicate that a part needs to be replaced. Please discontinue riding until you can have it inspected by your local REI store or a professional bike mechanic. Keeping your Afterburner clean facilitates visual inspection. Rinse it with clean water and store it in a dry area to prevent corrosion. 5. Every 50 (on-road) hours of riding: Take your Afterburner to your local REI store or a professional bike mechanic for a complete checkup. WARNING: Like any mechanical device, a trailer cycle and its components are subject to wear and stress. Different materials and mechanisms wear or fatigue from stress at different rates and have different life cycles. If a component s life cycle is exceeded, the component can suddenly and catastrophically fail, causing serious injury or death to the rider. Scratches, cracks, fraying and discoloration are signs of stress-caused fatigue and indicate that a part is at the end of its useful life and needs to be replaced. Product life is often related to the kind of riding you do and to the treatment that you submit the trailer cycle to. REI s satisfaction guarantee does not mean that the trailer cycle cannot be broken or will last forever. B. If Your Trailer Cycle Sustains an Impact First, check yourself and Afterburner rider for injuries, and take care of them as best you can. Seek medical help if necessary. Next, check your trailer cycle for damage. If you see any damage, don t ride the trailer cycle until it has been repaired. After any crash, take your trailer cycle to your REI store or a professional bike mechanic for a thorough check. WARNING: A crash or other impact can put extraordinary stress on cycle components, causing them to fatigue or wear out prematurely. Components suffering from stress fatigue can fail suddenly and catastrophically, causing loss of control, serious injury or death. 18
25
26
27

28 For more information on warranty and other bike services visit mec.ca/bikes
Final Assembly Instructions Bikes with Quill Stems
 Final Assembly Instructions Bikes with Quill Stems Thank you for buying your new bicycle from L.L.Bean. Read these instructions carefully before beginning the final assembly. Prior to shipping, our expert
Bicycle Owner's Manual Easy Access Bike
 Bicycle Owner's Manual Easy Access Bike AGE: FROM 9 YEARS OLD AND UP IMPORTANT Check bike after assembly or any adjustments. Consult bicycle retailer with questions. Always wear a helmet. Children should
Final Assembly Instructions Bikes with Threaded Headsets
 Final Assembly Instructions Bikes with Threaded Headsets Thank you for buying your new bicycle from L.L.Bean. Read these instructions carefully before beginning the final assembly. Prior to shipping, our
Final Assembly Instructions Bikes with Threaded Headsets
 Final Assembly Instructions Bikes with Threaded Headsets Thank you for buying your new bicycle from L.L.Bean. Read these instructions carefully before beginning the final assembly. Prior to shipping, our
BICYCLE ASSEMBLY INSTRUCTIONS. dutchcycles.com.au. Distribution Centre
 BICYCLE ASSEMBLY INSTRUCTIONS dutchcycles.com.au Distribution Centre Shed 68, 400-422 Somerville Road, Tottenham, VIC 3012 email: service@dutchcycles.com.au BICYCLE COMPONENTS KEY INTRODUCTION CONGRATULATIONS
Congratulations on your purchase of a JC Series Performer trike! The Performer JC Series is designed for everything from touring to commuting and
 Congratulations on your purchase of a JC Series Performer trike! The Performer JC Series is designed for everything from touring to commuting and shopping in the city. The JC Series frames are made of
Inspecting before riding
 Inspecting before riding ) Squeeze both brake levers firmly. Do they move smoothly, yet their movement stops before they touch the handlebar grip? Do both wheels spin without wobbling or binding? Gently
Welcome, and congratulations on the purchase of your new Northrock Bicycle. Before you take your bicycle for a ride we encourage you to complete the
 Welcome, and congratulations on the purchase of your new Northrock Bicycle. Before you take your bicycle for a ride we encourage you to complete the following information for future reference, and we suggest
Parts List. 7. Handlebars 8. Grips 9. Handlebar Stem 10. Front Brake 11. Front Wheel 12. Crank 13. Chain
 Woodworm Cruise Parts List 1. Free Wheel with Rear Hub 2. Fenders 3. Fender Stay 4. Quick Release 5. Saddle 6. Seat Post 7. Handlebars 8. Grips 9. Handlebar Stem 10. Front Brake 11. Front Wheel 12. Crank
model - CYPRESS DX W
 Contents model - CYPRESS DX W Maintenenace manual Read and Save these instructions Welcome Contents 1 Preparing Nothing makes us happier than seeing people out riding bikes. For over thirty years Giant
BIKE TO GO - USER MANUAL - MODEL#: JBTG24
 BIKE TO GO 24 - USER MANUAL - MODEL#: JBTG24 GET ACQUAINTED WITH YOUR 24 BIKE TO GO Congratulations on your new Jetson 24 folding bicycle! The Jetson 24 Bike to Go is an innovative and fun personal transportation
Have questions? Chat with us live at raleighusa.com or call us at , 8am 5pm PST
 1 2 Have questions? Chat with us live at raleighusa.com or call us at 1-800-251-8435, 8am 5pm PST The bicycle you have purchased is a complex piece of equipment that must be properly assembled and maintained
Have questions? Chat with us live at raleighusa.com or call us at , 8am 5pm PST
 1 2 Have questions? Chat with us live at raleighusa.com or call us at 1-800-251-8435, 8am 5pm PST The bicycle you have purchased is a complex piece of equipment that must be properly assembled and maintained
Have questions? Chat with us live at raleighusa.com or call us at , 8am 5pm PST
 1 2 Have questions? Chat with us live at raleighusa.com or call us at 1-800-251-8435, 8am 5pm PST The bicycle you have purchased is a complex piece of equipment that must be properly assembled and maintained
EZee Glider Manual. Tools needed for Assembly: Wrench (included) Philips Screwdriver (not included) Assembly Instructions
 Philips Screwdriver (not included) Assembly Instructions") EZee Glider Manual Congratulations on your purchase of the EZee Glider! Your glider is designed for years of nearly carefree use by your child. These instructions include how to set up your glider and
EZee Glider Manual Congratulations on your purchase of the EZee Glider! Your glider is designed for years of nearly carefree use by your child. These instructions include how to set up your glider and
T R A F F I C S K IL L S 101
 page 1/5 GENERAL INSTRUCTIONS Mark your answers on the answer sheet provided. DO NOT make any marks on the test. Please read the following definitions and assumptions carefully before answering the test
Folding Dual Suspension MTB. Instruction Manual
 Folding Dual Suspension MTB Instruction Manual Introduction The Stowabike Folding MTB has been made to last and with proper maintenance, it will give you years of enjoyable rides and journeys. The following
BikeEd Need to Know: Teenager / Adult
 BikeEd Need to Know: Teenager / Adult Always Practice bike handling skills to better control your bike Wear a helmet, fitted correctly Perform ABC Quick Check on your bike before each ride Ride on the
comfort without compromising on performance and to fit your various needs on touring,
 Congratulations on your purchase of Goal-26X. Goal-26X is made to enhance comfort without compromising on performance and to fit your various needs on touring, shopping and communicating. Let s have fun
Mini Glider Manual. Your Glider comes partially assembled. The front wheel and the handlebars require assembly.
 Mini Glider Manual Congratulations on your purchase of the Mini Glider! Your glider is designed for years of nearly carefree use by your child. These instructions include how to set up your glider and
Santa Fe Cycles Assembly Guide Introduction
 Santa Fe Cycles Assembly Guide Introduction Congratulations on your purchase of your new Santa Fe bicycle. You have purchased a bicycle that has many features and qualities. Please take a few minutes and
Bicycle Owner s Manual
 Bicycle Owner s Manual simcoebicycles.com 10th Edition, 2014 This manual meets 16 CFR 1512 and EN 14764, 14766 and 14781 Standards IMPORTANT: This manual contains important safety, performance and service
Owner s Manual. The most comfortable upright bicycles ever made.
 Owner s Manual The most comfortable upright bicycles ever made. At Day 6, we hope you will enjoy riding our bicycles as much as we enjoy designing them. We have truly combined the best features of a recumbent
Owner s Manual. for multi-speed bicycles. 7th Edition, 2004
 Owner s Manual for multi-speed bicycles 7th Edition, 2004 IMPORTANT: This manual contains important safety, performance, and service information. Read it before you take the first ride on your new bicycle,
UNPACKING AND ASSEMBLING YOUR DIAMONDBACK ROAD BIKE
 EMAIL SIGNUP BIKE REG SEARCH BIKES THE RIDE HEALTH FITNESS SKILLS SHOP MAINTENANCE CYCLING 101 RIDERS LIKE YOU TEAMS SUPPORT UNPACKING AND ASSEMBLING YOUR DIAMONDBACK ROAD BIKE 1. Begin by carefully cutting
HELMETS SAVE LIVES!!! ALWAYS WEAR A PROPERLY FITTED HELMET WHEN YOU RIDE YOUR SCOOTER. DO NOT RIDE AT NIGHT. AVOID RIDING IN WET CONDITIONS.
 HELMETS SAVE CORRECT FITTING - MAKE SURE YOUR HELMET COVERS YOUR FOREHEAD. LIVES!!! ALWAYS WEAR A PROPERLY FITTED HELMET WHEN YOU RIDE YOUR SCOOTER. DO NOT RIDE AT NIGHT. AVOID RIDING IN WET CONDITIONS.
MODEL: COMMUTER / ROAD BIKE
 STEP BY STEP BUILD GUIDE MODEL: COMMUTER / ROAD BIKE TABLE OF CONTENTS TOOLS 1 LET S GET STARTED 2 INSTALLING THE QUILL STEM 3 INSTALLING THE FRONT FENDER 4 INSTALLING THE QUICK RELEASE 5 INSTALLING THE
MANUAL LEKKER BIKES 2016
 MANUAL LEKKER BIKES 2016 CONTACT For your own safety, never do work on your bicycle unless you feel absolutely sure about it. If you are in doubt or if you have any questions please contact our helpdesk:
Bicycle Safety Presented by: Name
 e l c y c Bi Safety Presented by: Name Questions? Who should wear a helmet? Little kids Where and when should a helmet be worn? Answers! Everyone. Every time. Everywhere. Moms & Dads On the bike path
WELCOME, AND CONGRATULATIONS
 VERSION 8.0 WELCOME, AND CONGRATULATIONS on your purchase of a new Giant bicycle; the fun of pedaling your new Giant bicycle is only moments away. Safety First. We strongly encourage you to read through
Rothan Owner s manual
 Rothan Owner s manual www.islabikes.co.uk 1. Brake levers 2. Brake pads 3. Saddle 4. Seatpost 5. Seatpost clamp 6. Stem 7. Stem bolts 8. Headset 9. Headset spacers 10. Headset adjuster bolt 11. Handlebars
Final Assembly Instructions Bikes with 16 Wheel Size
 Final Assembly Instructions Bikes with 16 Wheel Size Thank you for buying your new bicycle from L.L.Bean. Read these instructions carefully before beginning the final assembly. Prior to shipping, our expert
Ladies Shopper Bike Assembly Manual 28C03
 Ladies Shopper Bike Assembly Manual 28C03 Ecosmo Ltd 1 Know your bike 1. Wheel 2. Rear Derailleur 3. Chain 4. Crank Set 5. Pedal 6. Seat Quick Lock 7. Saddle and Post 8. Frame 9. Front Light 10. Front
Instructions for Assembly and Operation
 Instructions for Assembly and Operation Congratulations on the purchase of your new bike! With proper assembly and maintenance it will offer you years of enjoyable riding! IMPORTANT: Carefully read and
Owner s Manual Revision
 Owner s Manual Revision 5-25-2016 Owner s Manual Alter Cycles Bicycle Owner s Manual Congratulations on the purchase of your new Alter Cycles bicycle. You have chosen one of the smoothest riding bikes
Recumbent Bicycle/Tricycle Owner s Manual
 Recumbent Bicycle/Tricycle Owner s Manual 9th Edition, 2007 This manual meets EN Standards 14764, 14766 and 14781. IMPORTANT: This manual contains important safety, performance and service information.
OWNER S MANUAL ENGLISH
 OWNER S MANUAL ENGLISH 1 2 CONTENTS WELCOME 5 ALPHA ZERO ASSEMBLY 6 ALPHA ONE AND ALPHA TWO ASSEMBLY 8 ALPHA THREE AND ALPHA FOUR ASSEMBLY 12 ZULU THREE AND ZULU FOUR ASSEMBLY 18 BIKE FIT 23 PRE-RIDE CHECK
Rothan Owner s manual.
 Owner s manual www.islabikes.com www.islabikes.com 1. Brake levers 2. Brake pads 3. Saddle 4. Seatpost 5. Seatpost clamp 6. Stem 7. Stem bolts 8. Headset 9. Headset spacers 10. Headset adjuster bolt 11.
CERVÉLO BICYCLE USER MANUAL For Multi-Speed Racing Bicycles
 BICYCLE USER MANUAL CERVÉLO BICYCLE USER MANUAL For Multi-Speed Racing Bicycles 12th Edition, 2018 This manual meets EN Standards 14764, 14766 and 14781. All Cervélo bicycles are tested to ISO 4210 and
KMX Kompact Sports Trike
 KMX Kompact Sports Trike Assembly Instructions 1.0 Introduction Thank you for choosing KMX! When properly assembled and set up your KMX will provide many years of enjoyment. KMX Karts Ltd does its utmost
Owner s Manual 700c Fixed Gear Bicycles
 Owner s Manual 700c Fixed Gear Bicycles This manual contains important safety, assembly, operation and maintenance information. Please read and fully understand this manual before operation. Save this
MODEL: FIXIE / TRACK
 STEP BY STEP BUILD GUIDE MODEL: FIXIE / TRACK TABLE O F CON TENTS TOOLS 1 LET S GET STARTED 2 INSTALLING THE HANDLEBAR 3 INSTALLING THE FRONT WHEEL 4 ALIGNING THE STEM 5 INSTALLING THE SEATPOST 6 OPTIMIZING
ASSEMBLY GUIDE AROUND THE BLOCK - 1, 3, 7, & 21 SPEED SIXTHREEZERO
 ASSEMBLY GUIDE AROUND THE BLOCK - 1, 3, 7, & 21 SPEED SIXTHREEZERO OUR COMMITMENT We want you to love your bike as much as we do. If you run into any issues, no matter how small, let us know and we ll
The type of terrain: flat and rough-terrain
 1 2 The type of terrain: flat and rough-terrain ASSEMBLING YOUR BICYCLE 1. Gears 2. Rear Brake 3. Rear Reflector 4. Seat Post 5. Saddle 6. Front Brake Lever 7. Gear Selector 8. Handle Bars 9. Bell 10.
Safety manual Beinn 20/24/26
 Safety manual Beinn 20/24/26 Thank you for buying an Islabike! Your bike has been thoroughly checked and adjusted prior to delivery but there are a few tasks to perform before the bike is ready to ride:
E-trike Li Assembly Guide
 PREPARATION 1. Read this assembly manual BEFORE commencing assembly. 2. Carefully remove all the components and packaged hardware from the shipping boxes. 3. Unpack the contents of the large double box
BIKEMANUAL. For more information on warranty and other bike services visit mec.ca/bikes MEC.CA/BIKE
 BIKEMANUAL For more information on warranty and other bike services visit mec.ca/bikes MEC.CA/BIKE 2 Thanks for choosing an MEC bike. And thanks for investing in an activity that s part of a more sustainable
Owner s Manual IMPORTANT:
 Owner s Manual 11th Edition, 2015 This manual meets ISO-4210, 16 CFR 1512 and EN 14764, 14766 and 14781 Standards IMPORTANT: This manual contains important safety, performance and service information.
Bicycle Owner s Manual
 OWNERS MANUAL Bicycle Owner s Manual 11th Edition This manual meets ISO-4210, 16 CFR 1512 and EN 14764, 14766 and 14781 Standards IMPORTANT: This manual contains important safety, performance and service
Bicycle Owner s Manual This manual meets EN Standards 14764, and
 owner s manual Bicycle Owner s Manual This manual meets EN Standards 14764, 14766 and 14781. IMPORTANT: This manual contains important safety, performance and service information. Read it before you take
BICYCLE OWNER S MANUAL
 BICYCLE OWNER S MANUAL CERVÉLO BICYCLE OWNER S MANUAL 9th Edition, 2007 This manual meets EN Standards 14764, 14766 and 14781. All Cervélo bicycles are tested to ISO 4210 and CPSC 16 CFR Part 1512 Bicycle
Beinn 29 Owner s manual
 Owner s manual Setting up your 4 13 8 12 1 14 15 19 16 7 5 6 5 22 20 9 10 11 21 2 3 1. Brake levers 2. Brake calipers 3. Rotors 4. Saddle 5. Seatpost 6. Seatpost clamp 7. Saddle clamp 8. Stem 9. Stem bolts
READY, SET, RIDE YOUR FRIEND IN CYCLING GET TO KNOW YOUR NEW BIKE
 READY, SET, RIDE Congratulations on your new Liv bicycle! Whether it s for competition, commuting, fitness or fun, every Liv bike is made to enhance your cycling life. We aim to be a trusted companion
Carve Owner s Manual
 Carve Owner s Manual 2 Ski Bike Owner s Manual 1st Edition, 2016 IMPORTANT: This manual contains important safety, performance and service information. Read it before you take the first ride on your new
For riders age 8 years and older OWNERS MANUAL AND RIDING INSTRUCTIONS
 For riders age 8 years and older OWNERS MANUAL AND RIDING INSTRUCTIONS CONTENTS MASTER ASSEMBLY HOW TO RIDE SAFETY TIPS MAINTENANCE page 3 page 4 & 5 page 6 page 7 AN IMPORTANT MESSAGE TO PARENTS: This
NEVADA BICYCLING GUIDE
 NEVADA BICYCLING GUIDE BE BICYCLE SAFE EVERY TIME YOU RIDE LET S ALL BE SAFE TOGETHER. In Case of Emergency Contact: Name: Phone: Relationship: REMEMBER TO ALWAYS, BE SAFE AND BE SEEN! Before you head
RADROVER REAR RACK INSTALLATION MANUAL
 RADROVER REAR RACK INSTALLATION MANUAL WWW.RADPOWERBIKES.COM We are here to help! Please contact us at SUPPORT@RADPOWERBIKES.COM or 1-800-939-0310 if you have questions. REV022216 Welcome Thanks you for
ASSEMBLY GUIDE: Izip & Ezip Electric Bicycles with Rack-Top Mounted Batteries ( RTMB Bicycles )
") ASSEMBLY GUIDE: Izip & Ezip Electric Bicycles with Rack-Top Mounted Batteries ( RTMB Bicycles ) Please Refer to your Owner s Manual for Detailed Setup Instructions Technical & Customer Service: 1-800-377-4532
ASSEMBLY GUIDE: Izip & Ezip Electric Bicycles with Rack-Top Mounted Batteries ( RTMB Bicycles ) Please Refer to your Owner s Manual for Detailed Setup Instructions Technical & Customer Service: 1-800-377-4532
Beinn Owner s manual
 Beinn Owner s manual www.islabikes.co.uk Setting up your Islabike You can view our how to set up your Beinn video guides on our website: http://www.islabikes.co.uk/info-hub/islabike-setup-video-guides
CRUZBIKE Quest 2.0 Assembly
 CRUZBIKE Quest 2.0 Assembly CRUZBIKE Quest 2.0 Assembly... 1 General notes on assembly... 2 Un box and evaluate the frame and major parts... 2 Unfold the rear swing arm and arrange the frame... 3 Rear
Luath Owner s manual.
 Luath Owner s manual www.islabikes.com www.islabikes.com Setting up your Luath 3 11 7 12 1 16 14 6 4 5 8 9 10 13 15 2 21 19 20 22 23 17 18 Serial number Please make a record of your serial number. This
3. Fit. 1 Owner s manual
 3. Fit NOTE: Correct fit is an essential element of bicycling safety, performance and comfort. Making the adjustments to your bicycle which result in correct fit for your body and riding conditions requires
Troubleshooting Guide
 Troubleshooting Guide This troubleshooting guide outlines quick fixes to the most common technical questions about the ElliptiGO. If the problem persists or you feel uncomfortable performing these actions,
Thank you for purchasing a WIKE BOX BIKE!
 Thank you for purchasing a WIKE BOX BIKE! Contents Safety.....3 Front wheel.4 Kickstand..5 Handle Bar & Box 6 Seat post and Saddle 7 Final pre-ride check 8 Tools needed to assemble Bike: -High table or
DM-MBRD (English) Dealer's Manual. ROAD MTB Trekking. City Touring/ Comfort Bike. Rear Derailleur SLX RD-M7000 DEORE RD-M6000
 Dealer's Manual. ROAD MTB Trekking. City Touring/ Comfort Bike. Rear Derailleur SLX RD-M7000 DEORE RD-M6000") (English) DM-MBRD001-04 Dealer's Manual ROAD MTB Trekking City Touring/ Comfort Bike URBAN SPORT E-BIKE Rear Derailleur SLX RD-M7000 DEORE RD-M6000 CONTENTS IMPORTANT NOTICE... 3 TO ENSURE SAFETY... 4
(English) DM-MBRD001-04 Dealer's Manual ROAD MTB Trekking City Touring/ Comfort Bike URBAN SPORT E-BIKE Rear Derailleur SLX RD-M7000 DEORE RD-M6000 CONTENTS IMPORTANT NOTICE... 3 TO ENSURE SAFETY... 4
This owner s manual is applicable to the Mean Machine
 TM TM TM This owner s manual is applicable to the Mean Machine O w n e r s M a n u a l Razor Owner s Manual + Safety Handbook Table of Contents 1. Parts of the Mean Machine...........................3
K O N A O W N E R S M A N U A L
 THANK YOU for buying a Kona. A bicycle is a wonderful tool for transportation and recreation. We hope that you will ride it often and have a great deal of use and enjoyment from your purchase. This manual
SCOTT GENERAL INFO USA USER MANUAL 2016
 SCOTT GENERAL INFO USA USER MANUAL 2016 All rights reserved 2016 SCOTT Sports SA Distribution: SCOTT USA, Inc., 2733 E. Parleys Way, Suite #204, Salt Lake City, UT 84109 v6.1/30082016 WWW.SCOTT-SPORTS.COM
Assembly Instructions And User Guide
 EZ-1/EZ-CLASSIC QUADRIBENT By Blackbird Designs Inc. Mark 5.2 June 2011 Assembly Instructions And User Guide 1 The Quadribent is 2-seat, side-by-side, human powered vehicle that enables almost anyone to
THIS INSTRUCTION BOOKLET CONTAINS IMPORTANT SAFETY INFORMATION. PLEASE READ AND KEEP FOR FUTURE REFERENCE.
 THIS INSTRUCTION BOOKLET CONTAINS IMPORTANT SAFETY INFORMATION. PLEASE READ AND KEEP FOR FUTURE REFERENCE. FOR SERVICE ASSISTANCE CALL KENT TOLL FREE 1.800.451.5368 Monday - Friday 9:00 a.m. to 4:00 p.m.
IMPORTANT: Read this manual before taking your first ride on your new bicycle, and keep this manual handy for future reference.
 THANK YOU for buying a Kona. A bicycle is a wonderful tool for transportation and recreation. We hope that you will ride it often and have a great deal of use and enjoyment from your purchase. This manual
Co-Motion Co-Pilot Bicycles for travel
 Revised October 2014 Co-Motion Co-Pilot Bicycles for travel Packing and travel instructions Eugene Oregon USA Toll free 1-866-282-6336 www.co-motion.com Congratulations! A Co-Motion Co-Pilot is a great
Special instruction of installation for SAINT FH-M800/RD-M800 and FH-M805/RD-M805
 Technical Service Instructions SI-5VB0E t RD-M805 / RD-M800 Rear derailleur Special instruction of installation for SAINT FH-M800/RD-M800 and FH-M805/RD-M805 A hub axle is an essential component for the
MAGNETIC INDOOR CYCLING BIKE
 MAGNETIC INDOOR CYCLING BIKE SF-B1805 USER MANUAL IMPORTANT! Please retain owner s manual for maintenance and adjustment instructions. Your satisfaction is very important to us, PLEASE DO NOT RETURN UNTIL
SCOTT GENERAL INFO USA
 www.scott-sports.com SCOTT GENERAL INFO All rights reserved 2014 SCOTT Sports SA SCOTT Sports SA 17 Route du Crochet 1762 Givisiez Switzerland BIKE OWNER S MANUAL 2015 Distribution: SSG (Europe) Distribution
Verso Cologne Folding Bike
 Printed on 100% recycled paper Picture Similar Verso Cologne Folding Bike Model KC720-220 (Gloss Black) Model KC720-550 (Gloss White) Adjustment Tools! WARNING: CHOKING HAZARD- - Small Parts Not for children
Safety. Xootr Swift Bicycles USER S MANUAL Revision of September Terminology
 Safety Terminology Xootr Swift Bicycles USER S MANUAL Revision of September 2008 WARNING: Bicycling can be a hazardous activity even under the best of circumstances. Proper maintenance of your bicycle
Bicycle Owner s Manual Children s Bicycles
 Bicycle Owner s Manual Children s Bicycles The following manual provides assembly and maintenance instructions, as well as a guide to safe usage of your new bicycle. WARNING - Read the complete Owner s
CLASS CYCLE P8000 OWNER'S MANUAL JOHNSON HEALTH TECH. CO., LTD.
 CLASS CYCLE P8000 JOHNSON HEALTH TECH. CO., LTD. No.26, Ching Chuan Rd., Taya Hsiang, Taichung Hsien 428, Taiwan, R.O.C. TEL: +886-4-2566700 FAX: +886-4-2560087 E-mail: sales@johnsonfitness.com http://www.johnsonfitness.com
THIS INSTRUCTION BOOKLET CONTAINS IMPORTANT SAFETY INFORMATION. PLEASE READ AND KEEP FOR FUTURE REFERENCE.
 THIS INSTRUCTION BOOKLET CONTAINS IMPORTANT SAFETY INFORMATION. PLEASE READ AND KEEP FOR FUTURE REFERENCE. FOR SERVICE ASSISTANCE CALL KENT TOLL FREE 1.800.451.5368 Monday - Friday 9:00 a.m. to 4:00 p.m.
I Cycle Safely. A Little Book with a Big Message
 I Cycle Safely A Little Book with a Big Message Cycle Safely Program Why Cycle? It s fun! It s healthy! It s good for the environment! Here is your own I Cycle Safely pocket book. It s a little book with
Bicycle District & State 4-H O-Rama s Junior & Senior 4-H ers Ag Systems Technology Management
 Bicycle District & State 4-H O-Rama s Junior & Senior 4-H ers Ag Systems Technology Management OBJECTIVES Target Life Skills: Personal Safety, Decision Making, Self-discipline Opportunity will be provided
THIS INSTRUCTION BOOKLET CONTAINS IMPORTANT SAFETY INFORMATION. PLEASE READ AND KEEP FOR FUTURE REFERENCE.
 THIS INSTRUCTION BOOKLET CONTAINS IMPORTANT SAFETY INFORMATION. PLEASE READ AND KEEP FOR FUTURE REFERENCE. FOR SERVICE ASSISTANCE CALL KENT TOLL FREE 1.800.451.5368 Monday - Friday 9:00 a.m. to 4:00 p.m.
Bicycle Owner s Manual
 2 GAZELLE MANUAL Bicycle Owner s Manual 11th Edition, 2015 This manual meets ISO-4210, 16 CFR 1512 and EN 14764, 14766 and 14781 Standards IMPORTANT: This manual contains important safety, performance
USER GUIDE TO POWER ASSISTED BIKES
 USER GUIDE TO POWER ASSISTED BIKES 1 PAGE CONTENTS Page. 3 Unpacking Page. 3-4 Easy steps to get started Page. 5 General Assembly Instructions Page. 6 Aligning H/Bars, Page. 7 Tightening pedals onto Crank
LITERIDER 2&3 IMPORTANT WARNING. 2Bike (1x) Bolt (1x) Nut (1x) Small Hex Wrench (1x)
 Bolt (1x) Nut (1x) Small Hex Wrench (1x)") LITERIDER 2&3 3 Bike (1x) Bolt (1x) Flat Washer (2x) Nut (1x) Large Hex Wrench (1x) 2Bike (1x) wrench (1x) Small Hex Wrench (1x) keys (2x) Long Strap (1x) 2-Zip Strips (6x) 3-Zip Strips (9x) Wheel strap
LITERIDER 2&3 3 Bike (1x) Bolt (1x) Flat Washer (2x) Nut (1x) Large Hex Wrench (1x) 2Bike (1x) wrench (1x) Small Hex Wrench (1x) keys (2x) Long Strap (1x) 2-Zip Strips (6x) 3-Zip Strips (9x) Wheel strap
OWNER S MANUAL LIT
 OWNER S MANUAL LIT-15626-00-03 * Product and specifications are subject to change without notice. X1M-F8199-12 Introduction Thank you for choosing a Yamaha Power Assist Bicycle. This model is the result
BackCountry ebikes 2019 MULE Assembly
 BackCountry ebikes 2019 MULE Assembly Required Tools: Cutting Pliers (to cut box poly strapping and heavy bike banding) Scissors (to remove bubble wrap) Allen wrenches (3mm, 4mm, 5mm, 6mm) Wrenches (10mm,
Item N o.: Item N am e:southern Star 40cm Girls Cherry Bike
 Item N o.:42174868 Item N am e:southern Star 40cm Girls Cherry Bike Tighten them so they do not move and are horizontal. Check the handlebar is in good condition and the ends of the handlebar are
Serial number. Cnoc Owner s manual.
 Serial number Please make a record of your serial number. This is a combination of letters and numbers unique to your bike stamped to the underside of the frame. This is required by police and insurance
TABLE OF CONTENTS INTRODUCTION
 R3 DISC MANUAL TABLE OF CONTENTS Introduction... 1 Frame Features... 2 Fork Preparation... 3 Small Parts... 5 Frame Preparation... 6 Brake Housing Installation... 7 Mechanical Cable Routing... 9 Electric
Item N o.: Item N am e:40cm Boys Rival Bike
 Item N o.:42272892 Item N am e:40cm Boys Rival Bike 9 bell 8 grip 30 crash pad 10 brake lever 26 wheel reflector 22 saddle 23 seat post 25 rear reflector 24 quick release 6 handle bar 7 stem 2 top tube
Bicycle. District & State 4-H O-Rama Junior & Senior 4-H ers
 Bicycle District & State 4-H O-Rama Junior & Senior 4-H ers OBJECTIVES Target Life Skills: Personal Safety, Decision Making, Self-discipline Opportunity will be provided for faculty to share information
Warning: Please read this entire manual before riding your Simbi. Failure to do so could result in serious injury or even death.
 Warning: Please read this entire manual before riding your Simbi. Failure to do so could result in serious injury or even death. Contents 1. OVERVIEW... 3 A. Thank You... 3 B. General Warning... 3 C. Important
THIS INSTRUCTION BOOKLET CONTAINS IMPORTANT SAFETY INFORMATION. PLEASE READ AND KEEP FOR FUTURE REFERENCE.
 THIS INSTRUCTION BOOKLET CONTAINS IMPORTANT SAFETY INFORMATION. PLEASE READ AND KEEP FOR FUTURE REFERENCE. FOR SERVICE ASSISTANCE CALL TOLL FREE 1.800.451.5368 Monday - Friday 8:00 a.m. to 4:00 p.m. Eastern
BICYCLE OWNER S MANUAL
 BICYCLE OWNER S MANUAL Bicycle Owner s Manual This manual meets EN Standards 14764, 14766 and 14781. IMPORTANT: This manual contains important safety, performance and service information. Read it before
Bicycle Owner s Manual
 Bicycle Owner s Manual This manual meets ISO-4210, 16 CFR 1512 and EN 14764, 14766 and 14781 Standards supplemented with text pertaining to electric bicycles IMPORTANT: This manual contains important safety,
OWNER S MANUAL MINI-E-BIKE
 OWNER S MANUAL MINI-E-BIKE For future reference, please fill in the important information below. Serial Number (Your serial number can be found inside the main hinge. Unfold the Mini-E-Bike to see it.)
INDOOR CYCLING BIKE SF-B1110 USER MANUAL
 INDOOR CYCLING BIKE SF-B1110 USER MANUAL IMPORTANT! Read all instructions carefully before using this product. Retain owner s manual for future reference. For customer service, please contact: support@sunnyhealthfitness.com
BELT DRIVE INDOOR CYCLING BIKE SF-B1712
 BELT DRIVE INDOOR CYCLING BIKE SF-B1712 USER MANUAL IMPORTANT! Read all instructions carefully before using this product. Retain owner s manual for future reference. For customer service, please contact: