EST COPENHAGEN
|
|
|
- Claud Rudolf Byrd
- 6 years ago
- Views:
Transcription
1 EST COPENHAGEN


2 hello new user let's ride Congratulations on your new bicycle! Proper assembling and operation of your bicycle is important for your safety and enjoyment. Our customer service department is dedicated to your satisfaction with Triobike and its products. If you have questions or need advice regarding assembly, parts, performance, or returns, please contact the experts at Triobike. Enjoy the ride!


3 the trio way TRIOBIKE is a way of looking at the world where you choose to be free and out-going. You choose to be open to life. Triobike lets you go where cars can not through green parks and down charming side-streets, breathing healthy air with happy kids. Journeys become adventures, loads become lighter and days become brighter. You go where you want and you do it with a smile. We want to inspire everyone to greet each day with optimism and move through life with ease. This is what we call the trio way.


4 index ABOUT THIS MANUAL 8 REMINDER 9 WARNINGS 10 WARRANTY 13 GENERAL SAFETY 12 GENERAL BIKE SAFETY PRACTICE 12 WET WEATHER 14 ROAD CONDITIONS 15 NIGHT RIDING 15 HILL TECHNIQUE 16 CORNERING TECHNIQUE 16 FRONT BOX 17 ASSEMBLING THE BIKE 18 INSTRUCTIONS 26 QUICK RELEASE SEAT CLAMP 26 HANDLEBAR 28 ELECTRIC SYSTEM 29 GEARS 30 PARKING LOCK 31 REMOVABLE BOTTOM PLATE 32 SEAT BELT 33 BLANKET 35 HOOD 36 GENERAL SPECIFICATIONS 38 WARRANTY 39 MAINTENANCE 40 SAFETY CHECKLIST 42
5 about this manual reminder It is important that you understand your new bicycle. By reading this manual before you go out on your first ride, you ll know how to get better performance, comfort, and enjoyment from your new bicycle. It is also important that your first ride on your new bicycle is in a controlled environment, away from cars, obstacles and other cyclists. All persons assembling, using, and maintaining the bicycle must read and understand the safety warnings and operating instructions in this manual before using the bicycle. It is the responsibility of the user to ensure the bicycle is properly maintained and in proper operating condition. Doing so will reduce the risk of injury. This manual contains important information regarding safety, assembly, use, and maintenance of the bicycle but is NOT intended to be a complete or comprehensive manual covering all aspects concerning bicycle ownership. Always conduct regular maintenance and inspection of your bicycle. Complete the Safety Checklist at the end of this manual before each use. We recommend consulting a bicycle specialist if you have any doubts or concerns regarding your experience or ability to properly assemble and maintain the bicycle. 8 9


6 warnings DO NOT INSTALL ANY KIND OF ADDITIONAL ELECTRIC MOTOR OR INTERNAL COMBUSTION ENGINE TO THE BICYCLE. ADAPTING A BICYCLE IN THIS MANNER POSES AN EXTREME SAFETY RISK TO RIDER AND COULD RESULT IN LOSS OF CONTROL. INABILITY TO SAFELY REACH THE HANDLEBARS AND DISMOUNT THE BICYCLE MAY RESULT IN LOSS OF CONTROL OF THE BICYCLE. IMPROPER SETUP OR MAINTENANCE OF THE BICYCLE MAY RESULT IN AN UNEXPECTED MOVEMENT, LOSS OF CONTROL, AND SERIOUS INJURY. RIDING THE BICYCLE IN UNSAFE CONDITIONS, IN AN UNSAFE MANNER, OR DISREGARDING TRAFFIC LAWS MAY RESULT IN AN UNEXPECTED MOVEMENT, LOSS OF CONTROL, AND SERIOUS INJURY. 10
7 general safety Inspect the entire bicycle before riding - ensure that there are no loose parts, bolts or screws. Test the brakes and check if the pressure in the front tires is equal. Check rear tire pressure too. If you have any doubts or questions, contact your local bike dealer. By not following these safety precautions, you may risk injuring yourself or others. GENERAL BIKE SAFETY PRACTICES -Always follow the traffic laws in your country. -Never ride while under the influence of alcohol, medication or drugs. -If you suffer from any health conditions, please consult your doctor before riding. -Never endanger yourself or others by reckless riding. -The usage of bicycles or any accessories such as lamps, bells etc. is the user s own responsibility, and TRIOBIKE cannot be held responsible for any damage, accidents, personal injury or fines caused by the usage of these products. -Familiarize yourself with all the bicycle s features before riding. -Practice gear shifts, braking, and the use of the electric system. -Always ride defensively in a predictable, straight line. -Never ride against traffic. -Expect the unexpected (e.g., opening car doors or cars backing out of concealed driveways). -Take extra care at intersections and when preparing to pass other vehicles. -Maintain a comfortable stopping distance from all other riders, vehicles and objects. Safe braking distances and forces are subject to the prevailing weather conditions. Do not lock up the brakes. -When braking, always apply the rear brake first, then the front. The front brake is more powerful and if it is not correctly applied, you may lose control and rise the rear wheel. Always use the correct hand signals to indicate turning or stopping
8 -Obey the traffic laws (e.g., stopping at a red light or stop sign, giving way to pedestrians). -Wear proper riding attire, reflective if possible, and avoid open toeshoes. -Do not use items that may restrict your hearing and vision. -To maximize visibility, we suggest to ride the bike with folded hood. ROAD CONDITIONS -This bike is for on-road use only. Do not use the bike off-road or on rough terrain. -Be aware of road conditions. Concentrate on the path ahead. -Avoid pot holes, gravel, wet road markings, oil, curbs, speed bumps, drain grates and other obstacles. -Cross train tracks at a 90 degrees angle or walk your bicycle across. WET WEATHER NIGHT RIDING -When riding in wet weather always use safety lights to enhance visibility. -Do not ride the bike at night without lights on, both front and rear. -Exercise extreme caution when riding in wet conditions. -If using battery powered lights, make sure batteries are well charged. -Ride at a slower speed. Turn corners gradually and avoid sudden braking. -Wear reflective and light colored clothing. -Brake earlier, it will take a longer distance to stop. -Pot holes and slippery surfaces such as line markings and train tracks all become more hazardous when wet. -Ride at night only if necessary. Slow down and use familiar roads with street lighting
9 HILL TECHNIQUE FRONT BOX -Gear down before a climb and continue gearing down as required to maintain pedaling speed. -When loading and unloading passengers on the front box, be sure that the parking lock is activated. -If you reach the lowest gear and are struggling, don't stand up on your pedals, since you may loose control of the bike. -You will then obtain more power from each pedal revolution. -On the descent, use the high gears to avoid rapid pedaling. -Do not exceed a comfortable speed; maintain control and take additional care. -Braking will require additional distance. Initiate braking slowly and earlier than usual. Please consider that a fully loaded taxi bike can reach 250 Kg and this will heavily effect the braking distance. CORNERING TECHNIQUE -Brake slightly before cornering and prepare to lean your body into the corner. -Load and unload only 1 passenger at a time. -Don't step or stand on the front footerst since this will make the bike tip. The footrest is meant only to hold the feet of the passengers when they re already sitting on the seat. -Always follow the specific instruction when loading and unloading passengers on the front box. -Don t jump on the footrest. -Don t load heavy things in the front trunk. -When mounting the blanket, be sure that all the fixing points are secured. -When the hood is unfolded, be sure that the screw handles are firmly secured, and the Velcro bands v are firmly connected to the front rail supports. -Decrease your riding speed, avoid sudden braking and sharp turns


10 assembling the bike 1- Unscrew the 6 M8 bolts from the front of the bike frame. 2- Place the box on the front metal frame, open the front lid and place 4 M8 bolts. Close the lid and place 2 M8 bolt in the footrest holes. Place the nuts under the base WITHOUT TIGHTING


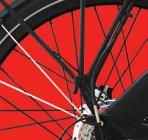
11 3- Mount the front light brackets using the front bolts and the nuts. 4- Tight all the 6 bolts inserted before, starting from the front


.")
12 5- Unscrew the 4 M6 bolts-nuts you find on the backrest. 6- Mount the handlebar using the 4 M6 bolts (the ones with washers on the top, the ones without on the bottom) + 4 M6 nuts (bolt outside, nuts inside). Seatbelts brackets have to be placed between the nuts and the metal plate
13 7- Firmly tight the 4 M6 bolts. The handlebar has to be stable. 8- Install the Velcro stripes for the cushions and place them in the right position


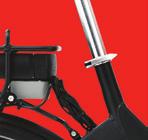
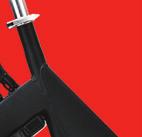
14 instructions QUICK RELEASE SEAT CLAMP -Unlock the quick-release lever and adjust the seat height up or down until -Try to close the quick-release lever. If it closes easily, open it up and the rider feels that he/she has control of the bicycle and are comfortable. tighten the adjustment nut further. If it s too difficult to close, open the quick release lever up and loosen the adjustment nut a little and try again. IMPORTANT: be sure the minimum insertion marks do not go past the top of the seat clamp and are not visible. DO NOT ATTEMPT TO TIGHTEN BY TURNING THE QUICK-RELEASE LEVER. THE QUICK-RELEASE LEVER IS FOR CLOSING, THE ADJUSTMENT NUT IS FOR ADJUSTING THE PRESSURE. IMPORTANT: you should feel resistance when you close the quick-release lever and should leave a temporary impression on your fingers. Open and close the handle to ensure the seat is securely locked in place 26 27


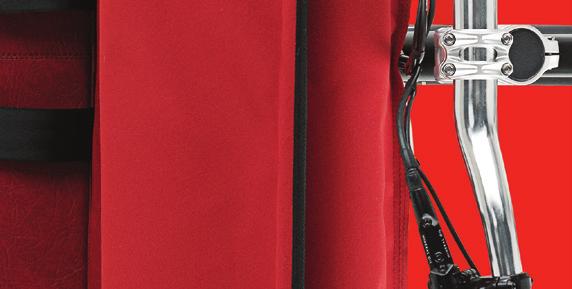
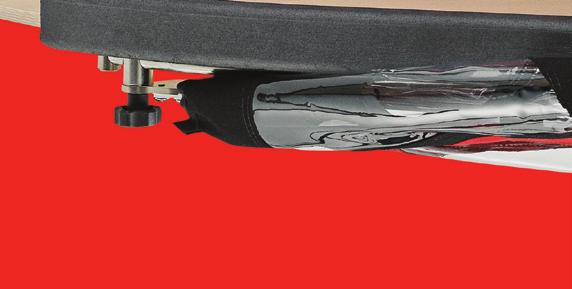
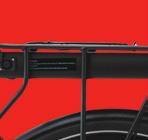
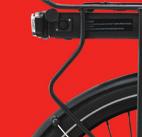
15 HANDLEBAR -Using a 6 mm Allen wrench loosen the bolt at the front of the stem. IMPORTANT: Do not loosen the bolts on the side of the stem. -Grasp the stem of the handlebar and rotate to the desired angle. ELECTRIC SYSTEM -Triobike taxi features a pedal-assist electric drive system manufactured by Promovec: please read carefully its manual. -Rotate the key on the battery case to the right: the rear light should switch on when the system is active. -Re-tighten the handlebar bolt at the front of the stem and check the handlebar is securely attached and cannot move. -Once you have adjusted the angle of the handlebar check the angle of the cables to be sure they are facing forward. -Press ON/OFF button on the handlebar control. -To make the bike move with electric assistance rotate the electric system handle on the left side of handlebar, WHILE PUSHING THE PEDALS


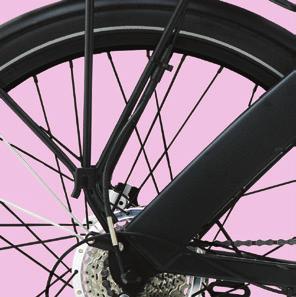
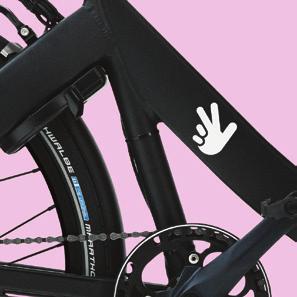
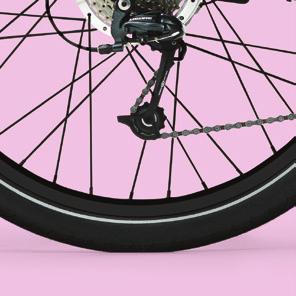
16 GEARS PARKING LOCK The rear shifter is placed on the right handlebar and has an indicator that reads either low or high or a series of number from 1 and up. First gears are used for slower riding, hill climbing, or to allow for easier peddling. It is recommended to start off in this gear and move through the gears as speed increases as needed, or comfortable. Use your index finger to shift up to a higher gear, and your thumb to shift down to lower gear. LOCK -Press the LEFT brake lever IN. -Rotate the small lever to the left. UNLOCK -Press the LEFT brake lever IN. -Rotate the small lever to the right


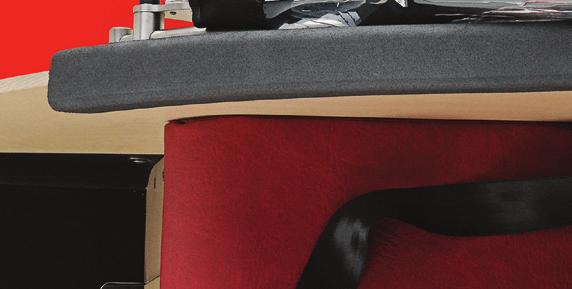
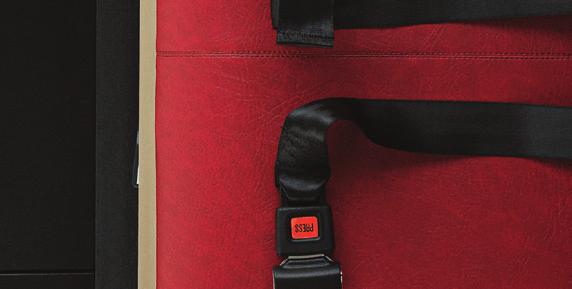
17 REMOVABLE BOTTOM PLATE SEAT BELT -Remove the footrest middle part FASTEN THE SEATBELT -Drive the bike all the way to the passenger, who easily can sit down on the seat. This gives and easy entry and exit. The idea is the same as in a wheelchair. -Sit on the bench like on a normal chair. When the passengers are properly seated they should raise their feet and place them on the footrest sides. re-place the footrest middle part in its position. -The passengers can place their feet on the complete footrest surface. IMPORTANT: Stepping or standing on the front footrest will make the bike tip. -Hold the latch and pull the seat belt across the body without twisting the webbing. -Insert the latch into the buckle. Listen for a click. -Tug on the seat belt latch to make sure the belt is securely fastened. RELEASE THE SEATBELT -Press the orange button on the buckle to release the latch. Latch will eject from buckle


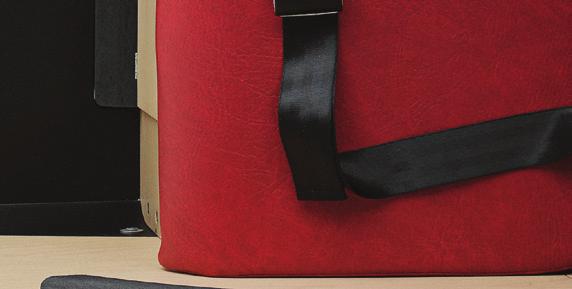
18 BLANKET SHORTEN/LENGTHEN THE SEAT BELT -Turn the adjustable latch at a right angle to the webbing and pull away from the latch, using the lower webbing strap. -To shorten, pull the top webbing strap directly away from the adjustable latch. -Attach the two lower corner elastic straps on the blanket to the nut below each mudguard. Make sure the blanket covers the edge of the bottom plate. -Attach the two upper corner straps on the blanket to the nut, next to the front rail supports. -If needed for only one passenger of larger size, insert the latch from the left seat belt into the buckle of the right seat belt


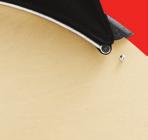
19 HOOD UNFOLDING THE HOOD FOLDING THE HOOD -Loosen the black screw handles on each rail. -Detach the Velcro strip from the front rail support. -Slide the screw handles on each rail towards the handlebar, while unfolding the hood. The sliders connected to the handles should touch the rear rail supports. -Unzip the zippers on each back corner of the hood. -Loosen the black screw handles on each rail. -Fasten the screw handles again at the end of the rail, closest to the handlebar. -Zip the two zippers on each back corner of the hood. -Fasten the Velcro strip around the front rail supports. 36 -Slide the screw handles on each rail towards the opposite end of handlebar, while folding the hood. The sliders should touch the front rail supports. -Fasten the screw handles again at the end of the rail, farthest from the handlebar. 37


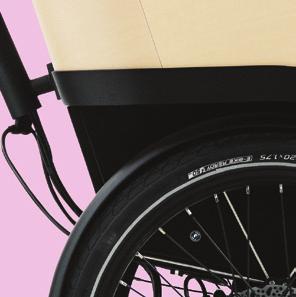
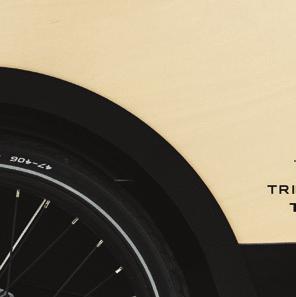
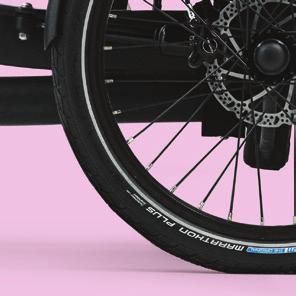
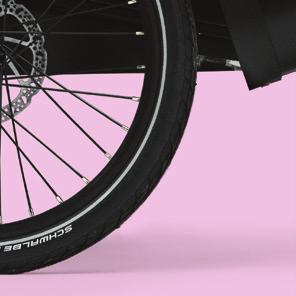
20 FRAME: aluminium 7005 general specifications RAIN PROTECTION: waterproof blanket and hood warranty BOX: beech plywood + aluminium REAR WHEEL: 26 FRONT WHEELS: 20 BRAKES: Tektro hydraulic disc brakes on front, Shimano hydraulic disc brake on rear GEARS: Shimano Deore 9 speeds HARNESS: two 2-point seat belts E-SYSTEM: Promovec 250W - geared BATTERY: Li-Ion cells, 36V Wh E-SYSTEM WARRANTY: 3 years OVERALL DIMENSIONS: LENGTH: 225 cm WIDTH: 106 cm TOTAL WEIGHT: 53 Kg MAX PAYLOAD ON THE FRONT BOX: 160 Kg OVERALL MAX PAYLOAD: 250 Kg Limited warranty of manufacture fail of 24 months. This warranty does not apply to gear hubs, brakes and shifters which are covered directly with these manufacturers. Failure due to accidents, abuse, neglect, normal wear & tear, improper assembly, wrong assembling operation, changes of the original product, improper use and maintenance by any other than authorized bicycle mechanics or use of parts inconsistent with the use originally intended for the bicycle as sold are not covered by this warranty. The bicycles are intended to be used for city biking. TRIOBIKE shall not be held responsible for any accidents, injury, losses or damage caused by use of the bicycle, being that of responsibility of the owner. The above limited warranty is conditional upon the bicycle being properly maintained and operated under normal conditions and use. In case of warranty claim contact the original place of purchase, accompanied by an original bill of sale or proof of purchase that identifies the bike or the frame by the serial number. Outside Denmark, the original owner is responsible for any and all labour and transportation charges associated with the warranty repair or replacement of all parts
21 maintenance year/km 3 months check operation checklist brakes grears bearings dealer stamp GENERAL ADVISE Please remember to have your first check & fine tune after 3 months. Hereafter we recommend a complete service and fine tuning of your bike every year/2000 km. Please consultant your local dealer or local shop. For specific control point for each service contact your local bike shop - this bike must be serviced only by trained and quilified bike mechanic. 1 year 2000 km 2 years 4000 km brakes grears bearings battery status tires check chain brakes grears bearings battery status tires check chain Specific control points for each service: brakes, gears, battery status, bearings. TIRES It s important to have correct air pressure on tires. It improves control and handling, and it doesn t stress tires. Correct pressure is 4.5 Bar (65 PSI). 3 years 6000 km 4 years 8000 km brakes grears bearings battery status tires check chain brakes grears bearings battery status tires check chain BATTERIES Batteries have to be charged every 4 weeks, also when the bike is parked and not in use. For complete instructions please check Promovec manual. 5 years km brakes grears bearings battery status tires check chain REPEAT ONCE A YEAR OR 2000 KM (1240 MILES) 40 41
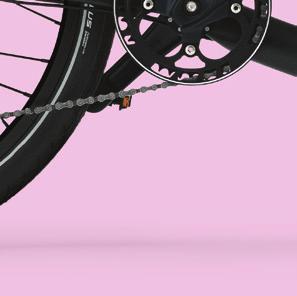
22 safety checklist CHAIN - The chain is oiled, clean and runs smoothly. Before every ride, it is important to carry out the following safety checks. Do not ride a bicycle that is not in proper working condition! CRANKS AND PEDALS ACCESSORIES -The reflectors are properly placed and not obscured. -All other fittings on the bike are properly and securely fastened, and functioning (e.g.: lights). -Rider s and passenger s clothing and items are properly constrained and not loose. - The pedals are securely tightened to the crank arms. - The crank arms are secured to the axle and are not bent. FRAME - The frame is not bent or broken. - The quick-release clamps are locked in place. BEARINGS STEERING -All bearings are lubricated, run freely and display no excess movement, grinding or rattling. BRAKES - The front and rear brakes work properly. - The brake control cables are lubricated, correctly adjusted and display no obvious wear. - The brake control levers are lubricated and tightly secured to the handlebar. - The handlebar and post are correctly adjusted and tightened, and allow proper steering. - The handlebar binder bolt is tightened. WHEELS AND TIRES - The wheels are properly attached to the bicycle and axle. - The tires are properly inflated within the recommended pressures displayed on the tires sidewall. - The tires have the proper amount of tread, no bulges or excessive wear


23 TRIOBIKE A/S NYROPSGADE 6, 1602 COPENHAGEN V - DENMARK INFO@TRIOBIKE.COM
TAXI ORIGINAL INSTRUCTIONS ENGLISH V 1.4
 TAXI ORIGINAL INSTRUCTIONS ENGLISH V 1.4 hello new user let's ride Congratulations on your new bicycle! Proper assembling and operation of your bicycle is important for your safety and enjoyment. Our
Ladies Shopper Bike Assembly Manual 28C03
 Ladies Shopper Bike Assembly Manual 28C03 Ecosmo Ltd 1 Know your bike 1. Wheel 2. Rear Derailleur 3. Chain 4. Crank Set 5. Pedal 6. Seat Quick Lock 7. Saddle and Post 8. Frame 9. Front Light 10. Front
Thank you for purchasing a WIKE BOX BIKE!
 Thank you for purchasing a WIKE BOX BIKE! Contents Safety.....3 Front wheel.4 Kickstand..5 Handle Bar & Box 6 Seat post and Saddle 7 Final pre-ride check 8 Tools needed to assemble Bike: -High table or
EZee Glider Manual. Tools needed for Assembly: Wrench (included) Philips Screwdriver (not included) Assembly Instructions
 Philips Screwdriver (not included) Assembly Instructions") EZee Glider Manual Congratulations on your purchase of the EZee Glider! Your glider is designed for years of nearly carefree use by your child. These instructions include how to set up your glider and
EZee Glider Manual Congratulations on your purchase of the EZee Glider! Your glider is designed for years of nearly carefree use by your child. These instructions include how to set up your glider and
Instruction Manual: VelectriX Foldaway
 Instruction Manual: VelectriX Foldaway CONTENTS Safe Riding Recommendations Page 2 Pre-Ride Checklist Page 3 Display and Controls Page 4 Quick Guide to Folding Page 6 Battery Instructions Page 7 Maintenance
Bicycle Owner's Manual Easy Access Bike
 Bicycle Owner's Manual Easy Access Bike AGE: FROM 9 YEARS OLD AND UP IMPORTANT Check bike after assembly or any adjustments. Consult bicycle retailer with questions. Always wear a helmet. Children should
HELMETS SAVE LIVES!!! ALWAYS WEAR A PROPERLY FITTED HELMET WHEN YOU RIDE YOUR SCOOTER. DO NOT RIDE AT NIGHT. AVOID RIDING IN WET CONDITIONS.
 HELMETS SAVE CORRECT FITTING - MAKE SURE YOUR HELMET COVERS YOUR FOREHEAD. LIVES!!! ALWAYS WEAR A PROPERLY FITTED HELMET WHEN YOU RIDE YOUR SCOOTER. DO NOT RIDE AT NIGHT. AVOID RIDING IN WET CONDITIONS.
Mini Glider Manual. Your Glider comes partially assembled. The front wheel and the handlebars require assembly.
 Mini Glider Manual Congratulations on your purchase of the Mini Glider! Your glider is designed for years of nearly carefree use by your child. These instructions include how to set up your glider and
Folding Dual Suspension MTB. Instruction Manual
 Folding Dual Suspension MTB Instruction Manual Introduction The Stowabike Folding MTB has been made to last and with proper maintenance, it will give you years of enjoyable rides and journeys. The following
comfort without compromising on performance and to fit your various needs on touring,
 Congratulations on your purchase of Goal-26X. Goal-26X is made to enhance comfort without compromising on performance and to fit your various needs on touring, shopping and communicating. Let s have fun
Instruction Manual: VelectriX Urban 2.0
 Instruction Manual: VelectriX Urban 2.0 CONTENTS Safe Riding Recommendations Page 2 Pre-Ride Checklist Page 3 Display and Controls Page 4 Maintenance Page 8 Warranty Page 9 Contact Details Page 10 Service
Santa Fe Cycles Assembly Guide Introduction
 Santa Fe Cycles Assembly Guide Introduction Congratulations on your purchase of your new Santa Fe bicycle. You have purchased a bicycle that has many features and qualities. Please take a few minutes and
Quattrocycle BV. Quattrocycle. User Manual. Last update February Quattrocycle BV Bremkant EJ Middelbeers. User Manual Quattrocycle 1
 Quattrocycle User Manual Last update February 2010 Quattrocycle BV Bremkant 6 5091 EJ Middelbeers User Manual Quattrocycle 1 Table of Contents Page Chapter 1: Introduction 3 Chapter 2: Instructions for
BIKE TO GO - USER MANUAL - MODEL#: JBTG24
 BIKE TO GO 24 - USER MANUAL - MODEL#: JBTG24 GET ACQUAINTED WITH YOUR 24 BIKE TO GO Congratulations on your new Jetson 24 folding bicycle! The Jetson 24 Bike to Go is an innovative and fun personal transportation
Instruction Manual: VelectriX Urban 2.0+
 Instruction Manual: VelectriX Urban 2.0+ CONTENTS Safe Riding Recommendations Page 2 Pre-Ride Checklist Page 3 Display and Controls Page 4 Maintenance Page 8 Warranty Page 9 Contact Details Page 10 Service
LITERIDER 2&3 IMPORTANT WARNING. 2Bike (1x) Bolt (1x) Nut (1x) Small Hex Wrench (1x)
 Bolt (1x) Nut (1x) Small Hex Wrench (1x)") LITERIDER 2&3 3 Bike (1x) Bolt (1x) Flat Washer (2x) Nut (1x) Large Hex Wrench (1x) 2Bike (1x) wrench (1x) Small Hex Wrench (1x) keys (2x) Long Strap (1x) 2-Zip Strips (6x) 3-Zip Strips (9x) Wheel strap
LITERIDER 2&3 3 Bike (1x) Bolt (1x) Flat Washer (2x) Nut (1x) Large Hex Wrench (1x) 2Bike (1x) wrench (1x) Small Hex Wrench (1x) keys (2x) Long Strap (1x) 2-Zip Strips (6x) 3-Zip Strips (9x) Wheel strap
Parts List. 7. Handlebars 8. Grips 9. Handlebar Stem 10. Front Brake 11. Front Wheel 12. Crank 13. Chain
 Woodworm Cruise Parts List 1. Free Wheel with Rear Hub 2. Fenders 3. Fender Stay 4. Quick Release 5. Saddle 6. Seat Post 7. Handlebars 8. Grips 9. Handlebar Stem 10. Front Brake 11. Front Wheel 12. Crank
Instructions for Assembly and Operation
 Instructions for Assembly and Operation Congratulations on the purchase of your new bike! With proper assembly and maintenance it will offer you years of enjoyable riding! IMPORTANT: Carefully read and
Thule RideAlong Mini Front Child Bike Seat
 Congratulations on your purchase of the Thule RideAlong Mini front child bike seat. This is a premium product with every detail carefully designed for high safety and easy use. We wish you and your child
BICYCLE ASSEMBLY INSTRUCTIONS. dutchcycles.com.au. Distribution Centre
 BICYCLE ASSEMBLY INSTRUCTIONS dutchcycles.com.au Distribution Centre Shed 68, 400-422 Somerville Road, Tottenham, VIC 3012 email: service@dutchcycles.com.au BICYCLE COMPONENTS KEY INTRODUCTION CONGRATULATIONS
model - CYPRESS DX W
 Contents model - CYPRESS DX W Maintenenace manual Read and Save these instructions Welcome Contents 1 Preparing Nothing makes us happier than seeing people out riding bikes. For over thirty years Giant
Instruction Manual: VelectriX Ascent+ 29 MTB
 Instruction Manual: VelectriX Ascent+ 29 MTB CONTENTS Safe Riding Recommendations Page 2 Pre-Ride Checklist Page 3 Display and Controls Page 4 Maintenance Page 8 Warranty Page 9 Contact Details Page 10
Final Assembly Instructions Bikes with Threaded Headsets
 Final Assembly Instructions Bikes with Threaded Headsets Thank you for buying your new bicycle from L.L.Bean. Read these instructions carefully before beginning the final assembly. Prior to shipping, our
KMX Kompact Sports Trike
 KMX Kompact Sports Trike Assembly Instructions 1.0 Introduction Thank you for choosing KMX! When properly assembled and set up your KMX will provide many years of enjoyment. KMX Karts Ltd does its utmost
Instruction Manual: VelectriX Ascent 29 MTB
 Instruction Manual: VelectriX Ascent 29 MTB CONTENTS Safe Riding Recommendations Page 2 Pre-Ride Checklist Page 3 Display and Controls Page 4 Maintenance Page 8 Warranty Page 9 Contact Details Page 10
Operator s Manual. All-Terrain Wheelchair
 Operator s Manual All-Terrain Wheelchair By Brandon Calavan Ana Groff Steve Benn Dylan Rinker Sebastian Pineo Team 1 Faculty Advisor: John Enderle Teaching Assistant: Sarah Brittain Client: Melody Kettle
Inspecting before riding
 Inspecting before riding ) Squeeze both brake levers firmly. Do they move smoothly, yet their movement stops before they touch the handlebar grip? Do both wheels spin without wobbling or binding? Gently
Have questions? Chat with us live at raleighusa.com or call us at , 8am 5pm PST
 1 2 Have questions? Chat with us live at raleighusa.com or call us at 1-800-251-8435, 8am 5pm PST The bicycle you have purchased is a complex piece of equipment that must be properly assembled and maintained
BICYCLE TO MOTORCYCLE BICYCLE RACK
 BICYCLE TO MOTORCYCLE BICYCLE RACK Install Manual Warning: You are responsible for securing the rack to your motorcycle., checking the attachments prior to use and periodically inspecting the products
Congratulations on your purchase of a JC Series Performer trike! The Performer JC Series is designed for everything from touring to commuting and
 Congratulations on your purchase of a JC Series Performer trike! The Performer JC Series is designed for everything from touring to commuting and shopping in the city. The JC Series frames are made of
Final Assembly Instructions Bikes with Quill Stems
 Final Assembly Instructions Bikes with Quill Stems Thank you for buying your new bicycle from L.L.Bean. Read these instructions carefully before beginning the final assembly. Prior to shipping, our expert
CRUZBIKE Quest 2.0 Assembly
 CRUZBIKE Quest 2.0 Assembly CRUZBIKE Quest 2.0 Assembly... 1 General notes on assembly... 2 Un box and evaluate the frame and major parts... 2 Unfold the rear swing arm and arrange the frame... 3 Rear
This is the Quick Start Guide for the Optibike Pioneer Allroad electric bicycle. The Guide provides for basic information required to ride the
 This is the Quick Start Guide for the Optibike Pioneer Allroad electric bicycle. The Guide provides for basic information required to ride the Allroad. It is not intended to be an extensive manual. It
Item N o.: Item N am e:40cm Boys Rival Bike
 Item N o.:42272892 Item N am e:40cm Boys Rival Bike 9 bell 8 grip 30 crash pad 10 brake lever 26 wheel reflector 22 saddle 23 seat post 25 rear reflector 24 quick release 6 handle bar 7 stem 2 top tube
IMPORTANT SAFETY NOTICE
 OWNER S MANUAL NOTE: Any photos of the YBIKE or decals in the owner s manual are intended to be used as a reference only, and there may be some differences to the unit you purchased. IMPORTANT SAFETY NOTICE
E-trike Li Assembly Guide
 PREPARATION 1. Read this assembly manual BEFORE commencing assembly. 2. Carefully remove all the components and packaged hardware from the shipping boxes. 3. Unpack the contents of the large double box
RADROVER REAR RACK INSTALLATION MANUAL
 RADROVER REAR RACK INSTALLATION MANUAL WWW.RADPOWERBIKES.COM We are here to help! Please contact us at SUPPORT@RADPOWERBIKES.COM or 1-800-939-0310 if you have questions. REV022216 Welcome Thanks you for
MANUAL LEKKER BIKES 2016
 MANUAL LEKKER BIKES 2016 CONTACT For your own safety, never do work on your bicycle unless you feel absolutely sure about it. If you are in doubt or if you have any questions please contact our helpdesk:
T R A F F I C S K IL L S 101
 page 1/5 GENERAL INSTRUCTIONS Mark your answers on the answer sheet provided. DO NOT make any marks on the test. Please read the following definitions and assumptions carefully before answering the test
Owner s Manual. The most comfortable upright bicycles ever made.
 Owner s Manual The most comfortable upright bicycles ever made. At Day 6, we hope you will enjoy riding our bicycles as much as we enjoy designing them. We have truly combined the best features of a recumbent
Final Assembly Instructions Bikes with Threaded Headsets
 Final Assembly Instructions Bikes with Threaded Headsets Thank you for buying your new bicycle from L.L.Bean. Read these instructions carefully before beginning the final assembly. Prior to shipping, our
USER GUIDE TO POWER ASSISTED BIKES
 USER GUIDE TO POWER ASSISTED BIKES 1 PAGE CONTENTS Page. 3 Unpacking Page. 3-4 Easy steps to get started Page. 5 General Assembly Instructions Page. 6 Aligning H/Bars, Page. 7 Tightening pedals onto Crank
POWER ASSISTED BICYCLES OWNERS MANUAL
 POWER ASSISTED BICYCLES OWNERS MANUAL WE HAVE INCLUDED A BICYCLE OWNER S MANUAL WHICH YOU SHOULD REFER TO FOR ALL GENERAL CYCLE MAINTENANCE. CONTENTS Page. 3 Unpacking. Page. 3-4 Easy steps to get started.
HOME ASSEMBLY INSTRUCTIONS
 HOME ASSEMBLY INSTRUCTIONS This Papillionaire Bicycle now belongs to you. It will take you to work, wait patiently outside your local cafe, and carry your groceries home. This is the start of your long-term
Have questions? Chat with us live at raleighusa.com or call us at , 8am 5pm PST
 1 2 Have questions? Chat with us live at raleighusa.com or call us at 1-800-251-8435, 8am 5pm PST The bicycle you have purchased is a complex piece of equipment that must be properly assembled and maintained
3. Fit. 1 Owner s manual
 3. Fit NOTE: Correct fit is an essential element of bicycling safety, performance and comfort. Making the adjustments to your bicycle which result in correct fit for your body and riding conditions requires
Assembly Instructions And User Guide
 EZ-1/EZ-CLASSIC QUADRIBENT By Blackbird Designs Inc. Mark 5.2 June 2011 Assembly Instructions And User Guide 1 The Quadribent is 2-seat, side-by-side, human powered vehicle that enables almost anyone to
Owner s Manual 700c Fixed Gear Bicycles
 Owner s Manual 700c Fixed Gear Bicycles This manual contains important safety, assembly, operation and maintenance information. Please read and fully understand this manual before operation. Save this
Item N o.: Item N am e:50cm GIRLS BELLA CRUISER BIKE
 Item N o.:42272847 Item N am e:50cm GIRLS BELLA CRUISER BIKE grip brake lever mudguard mudguard braket free wheel rear hub saddle seat post rear reflector seat clamp chain guard chain wheel crank stem
INSTALLATION INSTRUCTIONS
 INSTALLATION INSTRUCTIONS Accessory (ROOF) P/N 08L07-E09-100 Application 6 PILOT Publications No. Issue Date JUN 5 PARTS LIST 6 Washers Bicycle attachment 2 Brackets Hex wrench 4 Knobs 2 Keys 1 Rear Bracket
Item N o.: Item N am e:southern Star 40cm Girls Cherry Bike
 Item N o.:42174868 Item N am e:southern Star 40cm Girls Cherry Bike Tighten them so they do not move and are horizontal. Check the handlebar is in good condition and the ends of the handlebar are
BABYSEAT II. Suspension Child Carrier
 BABYSAT II Suspension Child Carrier User's Guide D FR S IT JP KR CHS User needs check whether there are any laws specific to the carrying of children in seats attached to cycles that apply in the country
7130 Lancer Rear Drive Magnetic Commercial Indoor Cycling Bike
 7130 Lancer Rear Drive Magnetic Commercial Indoor Cycling Bike Owner s Manual Made in Taiwan INDEX IMPORTANT SAFETY INFORMATION... 1 EXPLODED DRAWING... 2 PARTS LIST... 3 ASSEMBLY INSTRUCTION... 4-9 USER
Have questions? Chat with us live at raleighusa.com or call us at , 8am 5pm PST
 1 2 Have questions? Chat with us live at raleighusa.com or call us at 1-800-251-8435, 8am 5pm PST The bicycle you have purchased is a complex piece of equipment that must be properly assembled and maintained
BackCountry ebikes 2019 MULE Assembly
 BackCountry ebikes 2019 MULE Assembly Required Tools: Cutting Pliers (to cut box poly strapping and heavy bike banding) Scissors (to remove bubble wrap) Allen wrenches (3mm, 4mm, 5mm, 6mm) Wrenches (10mm,
2018 ACCESSORY ATTACHMENTS OWNER S MANUAL
 2018 ACCESSORY ATTACHMENTS OWNER S MANUAL WWW.RADPOWERBIKES.COM We are here to help! Please contact us at SUPPORT@RADPOWERBIKES.COM or 1-800-939-0310 if you have questions. REV031418 Welcome Thanks you
Parental Responsibilities
 Bicycle riding is a fun way to exercise and enjoy the outdoors. To remain safe on Illinois roads, bicyclists must obey the same traffic safety laws that govern vehicle drivers. No amount of bicycle safety
Thank you for purchasing the Hollander II Bike from Made.com
 Thank you for purchasing the Hollander II Bike from Made.com Please take time to identify the hardware as well as the individual components of this product. As you unpack and prepare for assembly, place
Assembly Tools. Assembly will take about an hour
 Assembly Guide Assembly Tools Included in your parts box: Pedals Toolkit (4+5mm combo Allen wrench, 13+15mm combo open-end wrench) Touch-up paint Spare fuses (for battery) Assembly will take about an hour
I Cycle Safely. A Little Book with a Big Message
 I Cycle Safely A Little Book with a Big Message Cycle Safely Program Why Cycle? It s fun! It s healthy! It s good for the environment! Here is your own I Cycle Safely pocket book. It s a little book with
CLASS CYCLE P8000 OWNER'S MANUAL JOHNSON HEALTH TECH. CO., LTD.
 CLASS CYCLE P8000 JOHNSON HEALTH TECH. CO., LTD. No.26, Ching Chuan Rd., Taya Hsiang, Taichung Hsien 428, Taiwan, R.O.C. TEL: +886-4-2566700 FAX: +886-4-2560087 E-mail: sales@johnsonfitness.com http://www.johnsonfitness.com
Read Instructions carefully before use. Rollator is designed for indoor & outdoor use. Do NOT use as a wheelchair or as a transport chair.
 Charcoal Red Seat Height 500-10191 500-10195 19 500-10211 500-10215 21 500-10241 500-10245 24 User Manual Read Instructions carefully before use. Rollator is designed for indoor & outdoor use. Do NOT use
TRAILMATE METEOR ASSEMBLY MANUAL
 TRAILMATE METEOR ASSEMBLY MANUAL (DISC BRAKE VERSION) The Trailmate Meteor recumbent has been designed for easy assembly. This means more time to enjoy the smooth ride with single speed, 3 speed coaster
User manual. Fun-2-Go. Van Raam BV Aaltenseweg CM Varsseveld Netherlands 06.13
 Fun-2-Go Van Raam BV Aaltenseweg 56 7051 CM Varsseveld Netherlands 06.13 Contents Contents... Contact details manufacturer... Conformity... Introduction... Delivery... Intended usage... Safety measures...
Item N o.: Item N am e:40cm GIRLS VIOLET BIKE
 Item N o.:42547242 Item N am e:40cm GIRLS VIOLET BIKE 1 2 SAFETY PRECAUTIONS If there is front brake,apply the rear brake first, and then apply the front brake. The front brake is strong and if not used
INSTALLATION INSTRUCTIONS
 INSTALLATION INSTRUCTIONS Accessory P/N 08L07-E09-100 Application 2013 ODYSSEY Publications No. AII 13265 Issue Date AUG 2012 Put this information in the glove box with the vehicle owner s manual. PARTS
INSTALLATION INSTRUCTIONS
 INSTALLATION INSTRUCTIONS Accessory (ROOF) P/N 08L07-E09-100 Application 2013 CROSSTOUR Publications No. AII 13168 Issue Date NOV 2012 PARTS LIST 6 Washers Bicycle attachment 2 Brackets Hex wrench 4 Thumbwheel
USER GUIDE ROLLING WALKERS INSTRUCTIONS FOR USE JANUARY, Maximum User Weight: 170kg (Do not exceed this weight)
") USER GUIDE ROLLING WALKERS INSTRUCTIONS FOR USE JANUARY, 2013 Model Nos: BE07889T Maximum User Weight: 170kg (Do not exceed this weight) Model Nos: BE07890TB Maximum User Weight: 227kg (Do not exceed this
USER GUIDE ROLLING WALKERS INSTRUCTIONS FOR USE JANUARY, 2013 Model Nos: BE07889T Maximum User Weight: 170kg (Do not exceed this weight) Model Nos: BE07890TB Maximum User Weight: 227kg (Do not exceed this
222 Schwinn Recumbent Exercise Bike Parts List Full Size Hardware Chart Product Illustration Assembly Instructions
 222 Schwinn Recumbent Exercise Bike Parts List Full Size Hardware Chart Product Illustration Assembly Instructions FITNESS SAFEGUARDS AND WARNINGS Before starting any exercise program, consult with your
INSTALLATION INSTRUCTIONS. Parts List. Tools Required. Before You Begin. Installation. Customer Information BICYCLE ATTACHMENT JUL.
 INSTALLATION INSTRUCTIONS JUL. 2006 Parts List Bicycle attachment Key plates (2) Tools Required Phillips screwdriver Flat-tip screwdriver Before You Begin Customer Information This Bicycle Attachment is
Performance & Sports Trike
 Performance & Sports Trike THE KMX KOLT THE KMX KOBRA THE KMX KOYOTE Assembly Instructions 1.0 Introduction Thank you for choosing KMX! When properly assembled and set up your KMX will provide many years
MODEL: FIXIE / TRACK
 STEP BY STEP BUILD GUIDE MODEL: FIXIE / TRACK TABLE O F CON TENTS TOOLS 1 LET S GET STARTED 2 INSTALLING THE HANDLEBAR 3 INSTALLING THE FRONT WHEEL 4 ALIGNING THE STEM 5 INSTALLING THE SEATPOST 6 OPTIMIZING
UNPACKING AND ASSEMBLING YOUR DIAMONDBACK ROAD BIKE
 EMAIL SIGNUP BIKE REG SEARCH BIKES THE RIDE HEALTH FITNESS SKILLS SHOP MAINTENANCE CYCLING 101 RIDERS LIKE YOU TEAMS SUPPORT UNPACKING AND ASSEMBLING YOUR DIAMONDBACK ROAD BIKE 1. Begin by carefully cutting
Item Name: 30CM GIRLS STAR THE UNICORN BIKE
 Item No.: 42333753 Item Name: 30CM GIRLS STAR THE UNICORN BIKE Contents 1. Parts identification 1 2. Safety precautions 2 3. Check list 6 4. Assembly 7 5. Adjustment 14 6. Repair and Service 15 7. Warranty
Using Your Bike Friday : Folding Rear Rack
 Using Your Bike Friday : Folding Rear Rack Green Gear Cycling, Inc. 3364 W. 11th Ave. Eugene, OR 97402 800-777-0258 USA & Canada +1-541-687-0487 Int l +1-541-687-0403 Fax www.bikefriday.com info@bikefriday.com
FAILURE TO COMPLY WITH THE MANUFACTURER S INSTRUCTIONS CAN LEAD TO SERIOUS INJURY OR DEATH OF THE PASSENGER/RIDER!
 FAILURE TO COMPLY WITH THE MANUFACTURER S INSTRUCTIONS CAN LEAD TO SERIOUS INJURY OR DEATH OF THE PASSGER/RIDER! Installation instructions for the Yepp Mini The Yepp Mini is suitable for carrying children
Final Assembly Instructions Bikes with 16 Wheel Size
 Final Assembly Instructions Bikes with 16 Wheel Size Thank you for buying your new bicycle from L.L.Bean. Read these instructions carefully before beginning the final assembly. Prior to shipping, our expert
Assembly Tools. Assembly will take 1-2 hours
 Assembly Tools Included in your parts box: Pedals Quick release skewer Reflectors (if not already installed) Toolkit (4+5mm combo Allen wrench, 13+15mm combo open-end wrench) Helpful Tools: Scissors (for
MAGNETIC CYCLING TRAINER SF-B0419 USER MANUAL
 MAGNETIC CYCLING TRAINER SF-B049 USER MANUAL IMPORTANT: Read all instructions carefully before using this product. Retain owner s manual for future reference. For customer service, please contact: support@sunnyhealthfitness.com
BELT DRIVE INDOOR CYCLING BIKE SF-B1712
 BELT DRIVE INDOOR CYCLING BIKE SF-B1712 USER MANUAL IMPORTANT! Read all instructions carefully before using this product. Retain owner s manual for future reference. For customer service, please contact:
MODEL: COMMUTER / ROAD BIKE
 STEP BY STEP BUILD GUIDE MODEL: COMMUTER / ROAD BIKE TABLE OF CONTENTS TOOLS 1 LET S GET STARTED 2 INSTALLING THE QUILL STEM 3 INSTALLING THE FRONT FENDER 4 INSTALLING THE QUICK RELEASE 5 INSTALLING THE
BELT DRIVE INDOOR CYCLING BIKE SF-B1712 USER MANUAL
 BELT DRIVE INDOOR CYCLING BIKE SF-B1712 USER MANUAL IMPORTANT! Please retain owner s manual for maintenance and adjustment instructions. Your satisfaction is very important to us, PLEASE DO NOT RETURN
TABLE OF CONTENTS INTRODUCTION
 R3 DISC MANUAL TABLE OF CONTENTS Introduction... 1 Frame Features... 2 Fork Preparation... 3 Small Parts... 5 Frame Preparation... 6 Brake Housing Installation... 7 Mechanical Cable Routing... 9 Electric
BikeEd Need to Know: Teenager / Adult
 BikeEd Need to Know: Teenager / Adult Always Practice bike handling skills to better control your bike Wear a helmet, fitted correctly Perform ABC Quick Check on your bike before each ride Ride on the
RS Important Notes. Contact. Bicycle Maintenance Stand instructions manual. Warranty Period : 1 year (from the date of your purchase)
") Warranty Period : 1 year (from the date of your purchase) RS-1700 Bicycle Maintenance Stand instructions manual (ver.1.2 2016/12) For more details, read the attached "Minoura Limited Warranty Policy" card.
Warranty Period : 1 year (from the date of your purchase) RS-1700 Bicycle Maintenance Stand instructions manual (ver.1.2 2016/12) For more details, read the attached "Minoura Limited Warranty Policy" card.
SG-7R46 SG-7R45 BR-IM41-R CJ-7S40 WARNING CAUTION SERVICE INSTRUCTIONS. Inter-7 Hub. Inter-M Brake Cassette joint NOTE:
 t WARNING It is important to completely understand the operation of your bicycle's brake system. Improper use of your bicycle's brake system may result in a loss of control or an accident, which could
Bike Safety It Starts With You!
 The law defines the bicycle as a vehicle that belongs on the road. Riding on the road means that you are mixing with other traffic, and it is only safe when all vehicles in traffic use the same rules of
Installation instructions for the Yepp Maxi Easyfit
 Installation instructions for the Yepp Maxi Easyfit The Yepp Maxi Easyfit is suitable for: - fitting to an Easyfit luggage carrier* (fig 1A) or - fitting in combination with the Yepp Maxi Easyfit carrier
TRICYCLE ADU LT. To register your bike visit
 ADU LT TRICYCLE THIS MANUAL CONTAINS IMPORTANT SAFETY, PERFORMANCE AND MAINTENANCE INFORMATION. READ THE MANUAL BEFORE TAKING YOUR FIRST RIDE ON YOUR NEW TRICYCLE, AND KEEP THE MANUAL HANDY FOR FUTURE
User manual. Velo-Plus². Van Raam BV Aaltenseweg CM Varsseveld The Netherlands 06.13
 Velo-Plus² Van Raam BV Aaltenseweg 56 7051 CM Varsseveld The Netherlands 06.13 Contents Contents... Contact details manufacturer... Conformity... Introduction... Delivery... Intended usage... Safety measures...
DISASSEMBLING & REASSEMBLING CARTRIDGE INSTALLING SEATPOST ON BIKE
 INTRODUCTION BILL OF MATERIALS SPECIFICATIONS & TOOLS PROCEDURES DISASSEMBLING & REASSEMBLING CARTRIDGE INSTALLING SEATPOST ON BIKE OPERATION OF SEATPOST GIANT LIMITED WARRANTY 1 INTRODUCTION Congratulations
Co-Motion Co-Pilot Bicycles for travel
 Revised October 2014 Co-Motion Co-Pilot Bicycles for travel Packing and travel instructions Eugene Oregon USA Toll free 1-866-282-6336 www.co-motion.com Congratulations! A Co-Motion Co-Pilot is a great
BASIC BIKE COMMUTING. A guide for getting started
 BASIC BIKE COMMUTING A guide for getting started Why Bike? The average American spends 55 minutes a day behind the wheel of an automobile and over $7,500 a year on transportation costs. Bicycles, however,
VERSA BIKE RACK INSTRUCTIONS
 VERSA BIKE RACK INSTRUCTIONS Models #8, 8 Important This rack is designed for use with a or. receiver hitch. The rack is designed to hold a maximum of two bicycles. Do not use it for anything other than
All rights reserved 2010 Les Fabrications TJD inc.
 Les Fabrications TJD inc. All rights reserved Les Fabrications TJD inc., Rivière-du-Loup, G5R 5X9. No copy or reproduction of this manual shall be made, in whole or in part, without the prior wrote permission
TABLE OF CONTENTS FRAME FEATURES INTRODUCTION
 S3 DISC MANUAL TABLE OF CONTENTS Introduction...1 Frame Features...2 Fork Preparation...3 Small Parts...5 Frame Preparation...6 Brake Housing Installation...7 Mechanical Cable Routing...9 Electric Cable
Congratulations, once again, on buying an E RIDER Model 18!!!!
 Congratulations, once again, on buying an E RIDER Model 18!!!! USER MANUAL We are sure you will be excited by the delivery of your brand new bike and you will be eager to start using your E RIDER as soon
FRAMESET ASSEMBLY GUIDE TRUE GRIT. LaufCycling.com
 FRAMESET ASSEMBLY GUIDE TRUE GRIT LaufCycling.com Congratulations on your True Grit Frameset! We understand you are in a hurry to go riding a.s.a.p. - but please take a deep breath and read this installation
Welcome, and congratulations on the purchase of your new Northrock Bicycle. Before you take your bicycle for a ride we encourage you to complete the
 Welcome, and congratulations on the purchase of your new Northrock Bicycle. Before you take your bicycle for a ride we encourage you to complete the following information for future reference, and we suggest
2012 K9100 COMPACT Worldwide Cycling Solutions Through Creative Innovations.
 Home Instruction Sheet Step-1Please check for any missing parts. Model K9100 COMPACT (Basic AirCaddy) aircaddy web page 20 04/03/12 98% (1) T3230-00 METAL WHEEL TRUCK Model K8350 (Aircraft Kit) (Optional)