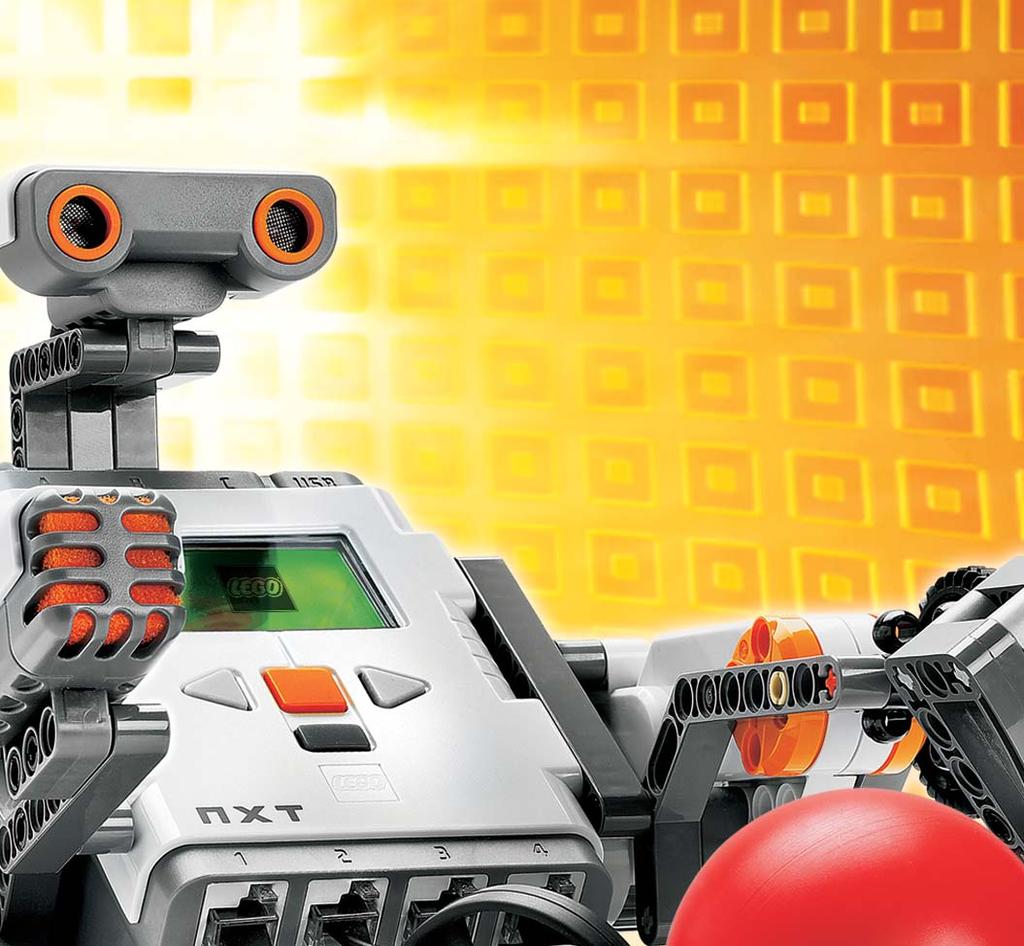
Introduction WELCOME TO LEGO MINDSTORMS EDUCATION
|
|
|
- Katherine Wells
- 5 years ago
- Views:
Transcription


1 NXT User Guide

2 Introduction WELCOME TO LEGO MINDSTORMS EDUCATION LEGO MINDSTORMS Education is the next generation in educational robotics, enabling students to discover Science, Technology, Engineering and Mathematics in a fun, engaging, hands-on way. By combining the power of the LEGO building system with the LEGO MINDSTORMS Education technology, teams of students can design, build, program, and test robots. Working together on guided and open-ended engineering projects, the team members develop creativity and problem-solving skills along with other important mathematics and science knowledge. Students also become more skilled in communication, organization and research, which helps prepare them for future success in higher levels of schooling and in the workplace. The next technology - now. LEGO MINDSTORMS Education features an advanced 32-bit computercontrolled NXT brick, Interactive Servo Motors, Sound, Ultrasonic and other sensors, Bluetooth communication and multiple downloading capabilities. The icon-based LEGO MINDSTORMS Education NXT Software is built on the LabVIEW software from National Instruments, an industry standard with applications in many engineering and research fields. Curriculum. Inspiration. Support. The LEGO MINDSTORMS Education website is your main resource for curriculum, training, product information and support. Our partners provide a strong network of information, technical advice, and teacher support as well. Carnegie Mellon Robotics Academy is our partner for developing curriculum materials and activities. Tufts University Center for Engineering Education Outreach (CEEO) is our partner for product development, workshops and conferences. In addition, local support is provided by our trade partners. If you are interested in a competitive challenge, check our website to find out more about the FIRST LEGO LEAGUE. Start here. This User Guide provides an overview of the components and features in the LEGO MINDSTORMS Education NXT materials. Enjoy! 2


3 Introduction Table of Contents Introduction Build. Program. Test Technology Overview... 5 Installing Batteries In The NXT... 7 Connecting The NXT Technology... 9 About The NXT Brick NXT Main Menu Touch Sensor Sound Sensor Light Sensor Ultrasonic Sensor Software Installing The Software Your First Program Software User Interface The Robot Educator Programming Palette The Configuration Panel The Controller Parts List For Base Set # Useful Information Download To Multiple NXTs Troubleshooting Interactive Servo Motor Lamps Using Bluetooth


4 Introduction Build. Program. Test. Build Build your robot. Specific building instructions for a robot are provided with this User Guide. There are also building instructions for the same robot in the NXT Building Guide found in the Base Set #9797 and in the Robot Educator, which is part of the LEGO MINDSTORMS Education NXT Software. Program Program your robot using the LEGO MINDSTORMS Education NXT Software. Many examples are included in the Robot Educator part of the software. Download your program to the NXT brick with the wireless Bluetooth connection or the USB cable. Test Run your program. What happens? Did your robot perform as you expect? If not, adjust your robot or your program and try again! Start Here If you prefer to start by building and programming using the NXT brick display without a computer, go to the NXT Building Guide. 4


5 Overview NXT Brick An intelligent, computer-controlled LEGO brick, the NXT is the brain of the LEGO MINDSTORMS Education robot. Touch Sensors Enable the robot to respond to obstacles in the environment. Sound Sensor Enables the robot to respond to sound levels. Attaching the sensors Sensors can be plugged into any input port numbered 1-4. Any wires except the converter wire can be used to connect the sensors. The default settings used for the test programs on the NXT and for many sample programs in the Robot Educator are as follows: Port 1: Touch Sensor Port 2: Sound Sensor Port 3: Light Sensor Port 4: Ultrasonic Sensor Light Sensor Enables the robot to respond to variations in light level and color. Ultrasonic Sensor Enables the robot to measure distance to an object and to respond to movement. 5


6 Overview Lamps & Converter Cables Add lamps and then program flashing lights, or use them to activate the Light Sensor, or just for fun! Three Lamps and three Converter cables are included in the Base Set. Interactive Servo Motors Ensure that robots move smoothly and precisely. Rechargeable battery Provides power to the NXT so the robot can move and respond. Attaching the Motors and Lamps Motors or Lamps can be plugged into any output port A, B, or C. The default settings used for the test programs on the NXT and for many sample programs in the Robot Educator are as follows: Port A: Motor or a Lamp for an extra function Port B: Motor for movement; for a two-motor chassis, often this is the left side. Port C: Motor for movement; for a two-motor robot, often this is the right side. 6

7 Installing Batteries In The NXT 1 2 Rechargeable battery The rechargeable battery fits into the bottom of the NXT. To install the rechargeable battery, move the plastic tab on the side with your thumb to open the back. The NXT comes with an extra cover that is used when 6 AA batteries are used. (See details on the next page.) Holding the rechargeable battery, press in the plastic tab and snap the battery into place. To recharge the battery, attach one end of the power adapter cord (sold separately) into the charge plug just below the NXT input ports. Attach the other end of the power adapter cord into the wall socket. The battery may also be charged when not inserted into the NXT. The green indicator light turns on when the power adapter is connected to the NXT. The red light turns on when the battery is recharging. The red light turns off when the battery is fully recharged. Fully recharging the battery requires approximately four hours. The NXT can be used when the battery is recharging; however, recharging then requires more time. This Li-Ion Polymer battery can be recharged up to 500 times. When you first use the rechargeable battery in the NXT itself, attach the transformer and let the battery and NXT charge together for approximately 20 minutes before starting. You may also need to do this if the rechargeable battery was completely depleted before recharging. Note: You will need to charge the battery first before using it. 7


8 Installing Batteries In The NXT Other battery types The NXT also operates using six AA/LR6 batteries. Alkaline batteries are recommended. Rechargeable AA/LR6-type batteries can be used; however, the power performance of the NXT may be reduced. Batteries low When the battery power is low, this icon flashes on and off in the NXT display. Important! Never mix different types of batteries in the NXT. Always remove batteries prior to long-term storage. Promptly remove depleted batteries from the NXT. Only recharge batteries under adult supervision. Never attempt to recharge non-rechargeable batteries. The NXT will Sleep to conserve power. To change the time or set Sleep to Never, go to Settings/Sleep/Never [Settings/ Sleep/Never]. You can also change the Settings to wait before going to Sleep from 2, 5, 10, 30, or 60 minutes. 8
. 1 2 3 4 Connecting sensors To connect a Sensor to the NXT, plug one end of a black wire into the Sensor.")


9 Connecting the NXT Technology C B A Connecting Motors To connect a Motor to the NXT, plug one end of a black wire to the Motor. Plug the other end into one of the output ports (A, B, C) Connecting sensors To connect a Sensor to the NXT, plug one end of a black wire into the Sensor. Plug the other end into one of the input ports (1, 2, 3, 4). Downloading and uploading The USB port and wireless Bluetooth connection are used for downloading and uploading data between your computer and the NXT. If your computer has Bluetooth, you can download programs to the NXT without using the USB cable. If your computer does not have Bluetooth, you must use the USB cable or buy a Bluetooth dongle for your computer. (Read more about the wireless Bluetooth connection on pages 34-43). Note that ALL of the black 6-wire cables can be used in both input and output ports, sensors and motors. Work sensors MUST be attached to the input ports (1-4) and motors MUST be attached to the output ports (A-C). 9


10 Connecting the NXT Technology 1 Turn on the NXT. Make sure the LEGO MINDSTORMS Education NXT Software is installed on your computer before connecting the NXT to the computer. See page 44 for installation instructions. 2 Connect the PC and the NXT with the USB cable. 3 When the PC identifies the NXT it will automatically finalize the installation of the LEGO MINDSTORMS Education NXT Software. Connecting the NXT to a Macintosh with a USB cable Make sure the LEGO MINDSTORMS Education NXT Software is installed before connecting your NXT to your Macintosh. (See the installation instructions on page 45.) Turn on your NXT. Connect the USB cable to the NXT. Connect the USB cable to the Macintosh and you re ready to go. 10


11 About The NXT Brick NXT Interface The NXT brick is the brain of the LEGO MINDSTORMS Education robot. It is a computer-controlled LEGO brick that provides programmable, intelligent, decision-making behavior. USB port Connect a USB cable to the USB port and download programs from your computer to the NXT (or upload data from the robot to your computer). You can also use the wireless Bluetooth connection for uploading and downloading. Output ports The NXT has three output ports labeled A, B, and C for Motors or Lamps. Bluetooth icon The Bluetooth icon shows the current status of any wireless Bluetooth connections. If there is no Bluetooth icon shown, Bluetooth is Off. Bluetooth is On but your NXT is not visible to other Bluetooth devices. Bluetooth is On and your NXT is visible to other Bluetooth devices. Bluetooth is On and your NXT is connected to a Bluetooth device. USB icon When you connect your NXT to a computer with a USB cable, a USB icon will be displayed. If you disconnect the USB cable, the icon will disappear. USB connected and working fine. USB connected but not working properly. Power Plug If you are using the rechargeable battery and need to recharge it, or if you are not using 6AA batteries, you can connect a power adapter to the NXT using the power plug. (Power adapters are sold separately.) 11
. Battery level The battery icon displays the NXT power level. When the battery power is low (below about 10% capacity), the battery icon flashes on and off.")

12 About The NXT Brick Running icon When the NXT is turned on, the running icon spins. If the running icon stops spinning, the NXT has frozen and you must reset it. (See page 63 for Troubleshooting steps). Battery level The battery icon displays the NXT power level. When the battery power is low (below about 10% capacity), the battery icon flashes on and off. Loudspeaker When sounds are included in a program, you can hear them through the Loudspeaker. NXT buttons Orange: On/Enter. Light grey arrows: Navigation, left and right Dark Grey: Clear/Go back. Turning off your NXT 1. Press the Dark Grey button until you see this screen. 2. Press the Orange button to turn off the NXT. Press the Dark Grey button to go back to the NXT main menu. Input ports The NXT has four input ports for attaching sensors. The sensors must be attached to port 1, 2, 3, or 4. 12


13 About The NXT Brick Naming the NXT You can change the name of your NXT by going to the NXT window in the software. This window is accessible from the Controller. NXT names can be at most eight characters long. NXT display options Your NXT has many other features. Read more about them on the following pages. Technical specifications 32-bit ARM7 microprocessor 256 Kbytes FLASH, 64 Kbytes RAM 8-bit microprocessor 4 Kbytes FLASH, 512 Byte RAM Bluetooth wireless communication, Bluetooth class II V2.0 compliant USB 2.0 port Four input ports, six-wire digital platform Three output ports, six-wire digital platform Dot matrix display, 60 x 100 pixels Loudspeaker, 8 KHz sound quality Power source: Rechargeable lithium battery or six AA Batteries Plug for power adapter: US: 120VAC 60Hz UK, EU, AUS: 230~ 50Hz 13


14 NXT Main Menu My Files In the My Files submenu you can store all the programs that you have made on the NXT or downloaded from your computer. There are three different subfolders: Software files programs you have downloaded from your computer. NXT files programs you have made on the NXT. Sound files sounds that are part of a program that you download. Files are automatically placed into the appropriate folders. When you download a program using a Sound file to the NXT, the program will be placed under Software files while the sound data will be placed under Sound files. When you Select a file, you can send it to other NXT units. Read more about this in the section Connecting Your NXT to Another NXT on page
15 NXT Main Menu NXT Program You don t need a computer to program a robot. Using the NXT Program submenu, you can make many programs without your computer. Try this program to see how easy it is. Make the robot go back and forth when the Touch Sensor is pressed. First, the robot will move forward until the Touch Sensor is pressed, and then it will move backwards. When its Touch Sensor is pressed again, the robot will move forward once again. This will continue indefinitely until you stop the program. Make sure the sensor and motors are connected to the right ports. The Touch Sensor is connected to port 1. The Motors are connected to ports B and C Select Forward. Use the Light Grey Arrow buttons to move through the choices and then press the Orange button Enter to make your selection. Select Touch. Select Backward. 15
16 NXT Main Menu Select Touch again. Now select Loop to make the program run again and again until you turn off the NXT. Now you can run the program. Simply select Run. Try these programs as well

17 NXT Main Menu Try Me Important Use the default port settings for the Motors, Lamps and Sensors as explained on pages 5-6. See pages for specific examples using each of the Sensors and the Motor. The Try Me feature allows you to experiment with the Sensors and Motors using programs that are ready to run. To start, press the Light Grey Arrow on the left to go to Try Me. Then press the Orange button to select Try Me Press the Orange button to select Try-Touch. Press the Orange button again to Run the Try-Touch program. Make sure the Touch Sensor is in port 1. Press the Touch Sensor button. The program Loops continuously so press the Dark Grey button to stop the program. Select some other Try Me programs to experiment with other Sensors and the Motors. Try Me files can be deleted in the Settings submenu (see page 19). However, to get them back onto the NXT, you would need to download the firmware again (see page 63). 17
18 NXT Main Menu View In the View submenu, you can do a quick test of your Sensors and Motors and see the current data for each. Connect Sensors or Motors to the NXT port(s). View will help you select the right port or check the default settings. Select View in the NXT display Select the icon of the Sensor or Motor that you want to test. You can only get readings from one sensor or motor at a time. Select the port to which the Sensor or Motor is attached. The data from the Sensor or Motor appears on the display. 18


 to")
19 NXT Main Menu Settings In the Settings submenu, you can adjust the different settings of the NXT, such as Loudspeaker volume or Sleep mode. In this submenu, you can also delete the programs that you have stored in the NXT memory. Sleep mode: You can set your NXT to be turned off after 2, 5, 10, 30 or 60 minutes when it is not being used. You can also select the Never setting so that the NXT remains on until you turn it off. Please be aware that this drains the batteries more quickly. Change Volume: Here you can adjust the volume of the NXT speakers in a range of 0 (Off) to 4 (Loud). Delete all programs: You are able to delete the programs from four subfolders: Software files, NXT files, Sound files, and Try Me files. 19
20 NXT Main Menu Bluetooth - NXT main menu In the Bluetooth submenu, you can set a wireless connection between your NXT and other Bluetooth devices, such as other NXT units, mobile phones, and computers. You can use a wireless connection to download programs without using a USB cable. You can even program a mobile telephone to control the NXT! Read more about wireless Bluetooth communications on pages
21 NXT Main Menu My Files NXT Program Sound files Software files NXT files Port 1: Touch Sensor Port 2: Sound Sensor Port 3: Light Sensor Port 4: Ultrasonic Sensor Port B/C: L/R motors Back left Turn left Turn left 2 Empty Backward Backward 5 Forward 5 Back left 2 Tone 2 Tone 1 Back right Back right 2 Turn right Forward Turn right 2 Sound Light Dark Touch Empty Object Wait 10 Wait 5 Wait 2 General Icons: Loop Stop Run Save File exists. Overwrite? File name: Untitled Send Sending files Delete Main menu File saved 21
22 NXT Main Menu View Bluetooth Settings Try Me Volume Sleep Delete files Sound db Sound dba Reflected light Ambient light Temperature F* Temperature C* Light Sensor* Deleting all files! Are you sure? Rotation* Motor rotations Motor degrees Ultrasonic cm Ultrasonic inch Touch Port 1 2, 3, 4, A, B, C Visibility On/Off Search My contacts Connections Visible On Searching Connecting Invisible Off Turning on Connection? Failed! Line is busy 22


23 Touch Sensor The Touch Sensor is a switch: it can be pressed or released. Pressed Released Bumped Suggestions for use You can add the Touch Sensor to an NXT model and then program the model behavior to change when the Touch Sensor is pressed or released. Programming ideas using the Touch Sensor are included in the Robot Educator. View See the current Touch Sensor response on the display using View. A zero [0] means the Touch Sensor button is not pressed. A one [1] on the display means the Touch Sensor button is pressed. Connect the Touch Sensor to NXT port 1. Select View in the NXT display. Select the Touch icon. Select port 1. Press and hold the Touch Sensor button while watching the NXT display. You should see a one (1) on the display. Now release the Touch Sensor button. You should see a zero (0) on the display. 23

24 Touch Sensor Try Me Use the appropriate program in the Try Me submenu (see page 17) to quickly see how it works. Program You can also use the Program [Program] feature to create programs right on the NXT without using a computer. See the Program section on page 15 to create a program using the Touch Sensor to turn on and turn off a sound. 24

![Sound sensor readings on the LEGO MINDSTORMS NXT are displayed in the percentage [%] of sound the sensor is capable of reading.](/docs-images/80/81994723/images/25-3.jpg "For comparison, 4-5% is like a silent living room and 5-10% is about the level of someone talking some distance away.")
25 Sound Sensor The Sound Sensor detects the decibel level: the softness or loudness of a sound. The Sound Sensor detects both db and dba. dba: the sounds human ears are able to hear. db: all actual sound, including sounds too high or low for the human ear to hear. The Sound Sensor can measure sound pressure levels up to 90 db about the level of a lawnmower. Sound sensor readings on the LEGO MINDSTORMS NXT are displayed in the percentage [%] of sound the sensor is capable of reading. For comparison, 4-5% is like a silent living room and 5-10% is about the level of someone talking some distance away. From 10-30% is normal conversation close to the sensor or music played at a normal level and % represents a range from people shouting to music playing at high volumes. These ranges are assuming a distance of about 1 meter between the sound source and the Sound Sensor. Suggestions for use You can add the Sound Sensor to an NXT model and then program the model behavior to change when the Sound Sensor is activated. Programming ideas using the Sound Sensor are included in the Robot Educator. View Test the Sound Sensor s ability to measure sound volume using View. Connect the Sound Sensor to NXT port Select View in the NXT display. Select the Sound db icon. Select port 2. Make sounds into the microphone (Sound Sensor) and see the readings on the NXT. Try also to read the sounds around you: How loud are the nearest voices? 25
26 Sound Sensor Try Me Use the appropriate program in the Try Me submenu (see page 17) to quickly see how it works. Program You can also use the Program feature to create programs right on the NXT without using a computer. See the Program section on page 15 to create a program using the Sound Sensor to control a sound. 26


27 Light Sensor The Light Sensor enables the robot to distinguish between light and darkness, to read the light intensity in a room, and to measure the light intensity on colored surfaces. This is what your eyes see. This is what your robot sees using the light sensor. Suggestions for use You can add the Light Sensor to an NXT model and then program the model behavior to change when the Light Sensor is activated. Programming ideas using the Light Sensor are included in the Robot Educator. View You can test the Light Sensor in different ways using View. Viewing reflected light turns on the flood light in the sensor. Viewing Reflected Light to see Colors Connect the Light Sensor to the NXT. Select View in the NXT display Select the Reflected light icon. Select the port in which you have placed the sensor. Hold the Light Sensor close to the different colors in your surrounding and see the different readings. You can use the color chart on page 66 of this guide or page 69 of the NXT Building Guide. 27

28 Light Sensor Viewing Ambient light Viewing Ambient light turns off the flood light so that the sensor reads only the light around it.connect the Light Sensor to the NXT. Select View in the NXT display Select the ambient light icon. Select the port in which you have placed the sensor. Test the Light Sensor s ability to read the surrounding light by measuring the light level in different parts of the room. For example, first hold the sensor against the window, then hold it under the table. Notice the difference in the readings. Higher numbers indicate more light (as a percentage of the light the sensor can read). Lower numbers indicate a lower amount of light. Try Me Use the appropriate program in the Try Me submenu (see page 17) to quickly see how it works. Program You can also use the Program [Program] feature to create programs right on the NXT without using a computer. See the Program section on page 15 to create a program using the Light Sensor to control a Motor. 28

, or from very thin and small objects can be difficult for the sensor to read.")
29 Ultrasonic Sensor The Ultrasonic Sensor enables the robot to see and recognize objects, avoid obstacles, measure distances, and detect movement. The Ultrasonic Sensor uses the same scientific principle as bats: it measures distance by calculating the time it takes for a sound wave to hit an object and come back just like an echo. The Ultrasonic Sensor measures distance in centimeters and inches. It is able to measure distances from 0 to 2.5 meters with a precision of +/-3 cm. Large-sized objects with hard surfaces provide the best readings. Objects made from soft fabrics, from curved objects (e.g. a ball), or from very thin and small objects can be difficult for the sensor to read. Suggestions for use You can add the Ultrasonic Sensor to an NXT model and then program the model behavior to change when the Light Sensor is activated. Note: Two Ultrasonic Sensors in the same room may interfere with each other s readings. Programming ideas using the Ultrasonic Sensor are included in the Robot Educator. View Test the Ultrasonic Sensor s ability to measure distance using View. Connect the Ultrasonic Sensor to the NXT. Select View in the NXT display Select the Ultrasonic Sensor icon. Select the port in which you have placed the sensor. Try to measure the distance to an object. Move the object closer and see the different readings. 29

30 Ultrasonic Sensor Try Me Use the appropriate program in the Try Me submenu (see page 17) to quickly see how it works. Program You can also use the Program feature to create programs right on the NXT without using a computer. See the Program section on page 15 to create a program using the Ultrasonic Sensor to control a Motor. 30


 allow you to program different speeds for your Motors and move the robot accurately.")
31 Interactive Servo Motor The three Interactive Servo Motors provide the robot with the ability to move. Using the Move [Move] block automatically aligns their speed so that the robot moves smoothly. Built-in Rotation Sensor The Interactive Servo Motors all have a built-in Rotation Sensor. The rotational feedback allows the NXT to control movements very precisely. The built-in Rotation Sensor measures the Motor rotations in degrees (accuracy of +/- one degree) or full rotations. One rotation is 360 degrees, so if you set the Motor to turn 180 degrees, the hub will make half a turn. Suggestions for use The built-in Rotation Sensor in each motor along with the Power configuration in the Move or Motor blocks in the Software (see page 53-55) allow you to program different speeds for your Motors and move the robot accurately. View Test the Rotation Sensor s ability to measure distance. Connect the Motor to the NXT. Select View in the NXT display Select the Motor rotations icon. Select the port in which you have placed the Motor. Now try to attach a wheel to the Motor and measure the rotations by pushing the wheel over the floor. 31
 to quickly see how it works. Program You can also use the Program [Program] feature to create programs right on the NXT without using a computer.")
32 Interactive Servo Motor Tachometer for Built-in Rotation Sensor Motor core Built-in gearing Hub with an axle hole for attaching a wheel Try Me Use the appropriate program in the Try Me submenu (see page 17) to quickly see how it works. Program You can also use the Program [Program] feature to create programs right on the NXT without using a computer. See the Program section on page 15 to create a program using the Motors. 32


33 Lamps The Lamps can be turned on and off, creating flashing patterns of light. They can also be used to activate the Light Sensor or to show that a motor is on or to indicate the state of a sensor. You can also use them to liven up your robot eyes or other features. Use the converter cables to attach Lamps to output ports A, B, or C. There are three Lamps and three converter cables included. View Use the Lamps to activate the Light Sensor. Select Ambient Light Use the Lamps to activate the Light Sensor. Select Ambient Light. Shine the Lamp near the Light Sensor. Notice that the reading changes. 33


34 Using Bluetooth Bluetooth is a communication technology that makes it possible to send and receive data without using wires. Using the Bluetooth features, you can set up a wireless connection between your NXT and other Bluetooth devices, such as other NXT units, mobile phones, and computers. Once the Bluetooth connection is set up, you can use it for these features: Downloading programs from your computer without using a USB cable. Sending programs from devices other than your computer, including your own NXT. Sending programs to various NXT units either individually or in groups. A group can contain up to three NXT devices. If you have a mobile phone with Bluetooth capability, you can use it to control robots. You may even be able to use it as an advanced sensor, such as a camera sensor. Visit for more information on mobile phone requirements. 34

35 Using Bluetooth Before you set up a wireless Bluetooth connection, make sure that your computer has Bluetooth capability. If your computer does not have Bluetooth built-in, you must use a Bluetooth USB dongle. Make sure that you use the right type of Bluetooth USB dongle. Read more about the different types of Bluetooth dongles at Making The Connection To A PC 1 2 Make sure that the NXT is turned on. Also make sure that Bluetooth is set to On and that the NXT is set to Visible. (Read how in the Bluetooth Submenu on page 40). Also make sure that Bluetooth is installed and enabled on your computer. Find the Controller at the lower right work area in the software. Click on the NXT window button (the one on the upper left) and the NXT window opens. 35

36 Using Bluetooth 3 Click Scan. Your computer automatically searches for Bluetooth devices. 4 After a short interval, a list of devices appears in the window on the computer screen. Select the device to which you want to establish the connection and click the Connect button. Note: You can increase the number of devices found by clicking Scan multiple times. 5 When you connect to a device for the first time, a Passkey window pops up. Enter the passkey to use with this device (the default passkey is 1234) and click OK. 36
37 Using Bluetooth 6 Enter the passkey on your NXT and confirm the connection by pressing the Orange [Enter] button. If you have chosen the default passkey, just click the Orange [Enter] button. 7 In the NXT window, the status of your NXT has now changed from Available to Connected. Your NXT and computer are now connected and can share data. Making The Connection To A Macintosh Make sure that the NXT is turned on. Also make sure that Bluetooth is set to On [On] and that the NXT is set to Visible. (Read how in the Bluetooth Submenu on page 40). Also make sure that Bluetooth is installed and enabled on your computer. Find the Controller at the lower right work area in the software. Click on the NXT window button (the one on the upper left) and the NXT window opens. 37

38 Using Bluetooth 3 Click Scan. The Bluetooth device window pops onto the screen. 4 A list of devices appears in the Select Bluetooth Device window on the screen. Select the device to which you want to establish the connection and click the Select button. 5 The NXT that you want to connect to appears in the NXT window as available. Click the Connect button. 38


39 Using Bluetooth 6 The Pair with a Bluetooth Device window pops up. Select the NXT. Click Pair. 7 When you connect to a device for the first time, a Passkey window pops up. Enter the passkey to use with this device (the default passkey is 1234) and click OK. 9 8 Enter the passkey on your NXT and confirm the connection by pressing the Orange [Enter] button. If you have chosen the default passkey, just click the Orange [Enter] button. Your Macintosh and NXT are now connected and can share data. 39
40 Using Bluetooth Bluetooth Submenu On NXT Bluetooth Select the Bluetooth submenu on the NXT display. Search Search for other Bluetooth devices. After you have chosen the Search icon, the NXT will automatically start to search for other Bluetooth devices to which it can connect. My Contacts This list includes the devices to which your NXT has previously been connected. Devices in this contact list can automatically connect to your NXT and send it data without using a passkey. To add devices to My Contacts [My Contacts], use the Search function. Connections This list includes all the devices to which your NXT is currently connected. You can connect to three items at one time (Lines 1, 2, and 3) and one can connect to you (Line 0). You can only communicate with one at a time. 40
41 Using Bluetooth Bluetooth and the NXT Window You can also view the connection status in the NXT window in the software. There you can change the name of your NXT, check the battery and memory levels, and delete programs on your NXT. Check the connection status in the icon bar at the top of the NXT display. If there is no Bluetooth icon shown, Bluetooth is Off. Bluetooth is On but your NXT is not visible to other Bluetooth devices. Bluetooth is On and your NXT is visible to other Bluetooth devices. Bluetooth is On and your NXT is connected to a Bluetooth device. Visibility Use the Visible option to make your NXT visible or invisible to other Bluetooth devices when they do a Bluetooth search. Passkey The Passkey ensures that only Bluetooth devices approved by you can connect to your NXT. Whenever you connect to a Bluetooth device for the first time using your NXT, you will be asked for a passkey. Select the preset passkey 1234 or make up your own code. Other Bluetooth devices must know your passkey in order to confirm a connection with your NXT. On/Off You can turn your Bluetooth function on or off. If you turn off Bluetooth, your NXT cannot send or receive data and you will have to use the USB cable for downloading programs. To save battery power, turn off the Bluetooth function when it is not in use. Note: Bluetooth is turned off by default. 41
42 Using Bluetooth Connecting Your NXT to Another NXT Select the Bluetooth submenu on the NXT display. Select the Search icon to search for other Bluetooth devices. Your NXT automatically searches for Bluetooth devices in a range of 0-30 meters (roughly 0 to 33 yards). Depending on how many are detected in the area, the Bluetooth devices will appear in a list on the NXT display after a few seconds Select the device to which you want to connect. Remember that you can give each NXT a unique name see Naming the NXT on page 13. Select the line on which you want the connection to be listed (1, 2 or 3). You can connect your NXT to three different devices at the same time. 7 If you connect to a device for the first time, your NXT asks for a Passkey. Just press Enter to use the default passkey 1234 or make up your own code. The other Bluetooth device must know your passkey in order to confirm the connection. This means the two NXT bricks need to enter the same passkey in order to connect. If you want to connect your NXT to more than one Bluetooth device, you can start a new Search or go to My Contacts submenu to select a trusted contact. 42

43 Using Bluetooth Connecting to more than one NXT You can connect three NXT bricks or other Bluetooth devices to your NXT at the same time. However, you can only communicate with one device at a time. Sending files from NXT to NXT It s easy to send programs from your NXT to another NXT: 1 2 Make sure that your NXT is connected to the NXT to which you want to send the program (see page 42, Connecting your NXT to another NXT). Select the My Files submenu in the NXT display and Select the program you want to send. Select Send. Select the connected devices to which you want the program sent (Lines 1, 2 or 3). Your NXT then sends the file. Connecting your NXT to a mobile phone If you have a mobile phone with Bluetooth capability, you can use it with LEGO MINDSTORMS Education NXT. Go to to download the MINDSTORMS Bluetooth connection program for your mobile phone. On the website, you can also find more information on how to connect the NXT to your mobile phone. 43
44 Software Installing the Software About the Software LEGO Education and National Instruments jointly developed the LEGO MINDSTORMS Education NXT software. The software has an intuitive drag and drop interface and graphical programming environment that makes it easy enough for a beginner yet equally powerful for an expert. LEGO MINDSTORMS Education NXT software is an optimized version of the professional NI LabVIEW graphical programming software used by scientists and engineers worldwide to design, control and test products and systems such as MP3 and DVD players, cell phones, and vehicle air bag safety devices. System Requirements Before installing the LEGO MINDSTORMS Education NXT Software, make sure that your computer meets the system requirements. Windows Intel Pentium processor or compatible, 800 MHz minimum Windows XP Professional or Home Edition with Service Pack 2 256MB of RAM minimum Up to 300 MB of available hard disk space XGA display (1024x768) 1 available USB port CD-ROM drive Compatible Bluetooth adapter (optional)* Macintosh PowerPC G3, G4, G5 processor, 600 MHz minimum Apple Mac OS X or MB of RAM minimum Up to 300 MB of available hard disk space XGA display (1024 x 768) 1 available USB port CD-ROM drive Compatible Bluetooth adapter (optional)* *Supported Bluetooth software includes Widcomm Bluetooth for Windows (newer than v SP5), and the Bluetooth stacks included in Microsoft Windows XP (with Service Pack 2) and Apple Mac OS X ( and 10.4). For more details on compatible Bluetooth adapters, see 44


![[Start] button (at](/docs-images/80/81994723/images/45-6.jpg "the bottom left-hand")
 -")
![click Run [Run] -](/docs-images/80/81994723/images/45-8.jpg "type d:\autorun.")
 - Follow")


45 Software Installing the Software 1 Microsoft Windows Exit all open programs. Insert the CD-ROM. If the CD-ROM does not run automatically: - click the Start [Start] button (at the bottom left-hand corner of the computer screen) - click Run [Run] - type d:\autorun.exe (where d: is your CD drive) - Follow the on-screen instructions 1 Apple Macintosh Exit all open programs. Insert the CD-ROM. Open the LEGO MINDSTORMS NXT CD-ROM and doubleclick Install. Select your preferred language. Follow the on-screen instructions. When the installation procedure is complete, click Finish. You are now ready to use the LEGO MINDSTORMS Education NXT Software and create programs to control robots! 45


46 Software Your First Program This simple program will make the NXT play a sound file. It will help you understand how to connect your computer to the NXT. 1 Start the software on your PC or Macintosh by double-clicking the program icon. 2 Type in the name of your first program, or just click Go! 3 First, click on the Sound block icon in the programming palette. 46


.")


47 Software Your First Program 4 Drag a Sound block and drop it to the right of the Starting point in the work area. Your program is now ready to download and run. Make sure you turn on your NXT and connect the USB cable to both your computer and the NXT (see page 9, Connecting the NXT Technology). 5 6 Locate the Controller in the lower right corner of the work area. Click Download and run (the center button) and listen to what happens. Congratulations, you have completed your first program! 47


48 Software Software User Interface A quick overview 1. Robot Educator 2. My Portal 3. Tool bar 4. Work area 5. Little Help window 6. Work area map 7. Programming palette 8. Configuration panel 9. Controller 10. The NXT window
49 Software Software User Interface Robot Educator Here you can find building and programming instructions using the Robot Educator model. My Portal Here you can access for tools, downloads, and information. The tool bar The tool bar includes the most frequently used commands from the menu bar in an easy-to-reach location. The work area This is the space on the screen where programming takes place. Drag programming blocks from the programming palette to the work area and attach the blocks to the sequence beam. Little Help window Here you can always get help if needed. The work area map Use the pan tool on the tool bar to move around the work area and use the work area map [tab in the lower right corner] to get an overview. The programming palette The programming palette contains all of the programming blocks you will need to create your programs. The tabs at the bottom of the palette let you switch between the common palette [containing the most frequently used blocks], the complete palette [containing all of the blocks], and the custom palette [containing blocks that you can download or create on your own]. The configuration panel Each programming block has a configuration panel that lets you customize the block for the specific input and output that you want. The Controller The five buttons on the Controller let you download programs (or parts of programs) from your computer to the NXT. With the Controller you can also change the settings of the NXT. The NXT window This pop-up window provides information about the NXT memory and communication settings. 49


50 Software Robot Educator 1 The Robot Educator is a series of tutorials that shows how to program a two-motor robot using the main features of the LEGO MINDSTORMS Education NXT Software. 2 Click to see a list of challenge examples for the palette. Click again to open the example. 3 The challenge presents a situation to solve using the building and programming examples or on your own. 50


51 Software Robot Educator 4 Follow the building instructions to build the Robot Educator model. 5 Over in the workspace, drag and drop the blocks to match the program shown in the Programming Guide. Download the sample program to your robot and see how the robot responds! 6 In the Common palette are many program examples using the seven Common blocks. 51


52 Software The Robot Educator 7 A series of examples show how the Complete palette icons can be used to program a model. 8 To see a list of examples for specific NXT Technology, click an item under Select. 9 Go to My Portal to find useful information and updates related to the LEGO MINDSTORMS Education NXT Software. 52


53 Software Programming Palette The programming palettes contain all of the programming blocks that you need to create programs. Each programming block includes instructions the NXT can interpret. You can combine the blocks to create a program. When you are done creating a program, you download it to the NXT. Remember to turn on and connect your NXT before downloading a program. 53
. The Common palette is recommended as a starting point.")
54 Software Programming Palette Common Palette To simplify its use, the programming palette has been divided into three different palette groupings: the Common palette, the Complete palette and the Custom palette (containing blocks that you create or download from the web). The Common palette is recommended as a starting point. Move block The Move block makes your robot Motors move or Lamps turn on. Record/Play block The Record/Play block enables you to program the robot with physical movement - and later play back the movement elsewhere in the program. Wait block The Wait block makes your robot wait for sensor input, such as a sound or a time interval. Sound block The Sound block enables your robot to make sounds, including pre-recorded words. Loop block Use the Loop block if you want your robot to continue to do the same things again and again, such as moving forward and backward until a Touch Sensor is pressed. Display block The Display block enables you to control the display on the NXT. You can type, show icons or even draw through your program. Switch block The Switch block enables the robot to make its own decisions, such as going left when it hears a loud sound and turning right when it hears a soft sound. 54
, Motors* and")
55 Software Programming Palette Complete Palette Common blocks The Common blocks are the same blocks available in the Common palette. Action blocks The Action blocks allow you to control specific types of behavior related to various output devices: the Interactive Servo Motor, NXT Sounds, NXT Display, Bluetooth (Send), Motors* and Lamps*. Sensor blocks Use these blocks in combination with the sensors on your robot to control behavior. The blocks correspond to Touch, Sound, Light and Ultrasonic Sensors; NXT buttons; Rotation of the Interactive Servo Motors, Timers, Bluetooth (Receive), and Touch*, Rotation*, Light*, and Temperature* Sensors. Flow blocks These blocks allow you to create more complex behaviors. Blocks include control for Repeat, Wait For and Variable conditions; blocks to Stop behavior or logical flow in a program; and Decision blocks to program responses to specific sensor conditions. 55
56 Software Programming Palette Complete Palette Data blocks Set up Boolean logic, random conditions, ranges and threshold for sensors and logical comparisons using these blocks. Advanced Use these blocks to add text, convert data to text, control the sleep function of the NXT, save files on the NXT, calibrate sensors, and reset motors. Custom Palette My Blocks Using the My Blocks, you can save a program as one block that you can then reuse in other programs. Web Downloads Using the Web Downloads block, you can save programs that you download from your friends or from the Portal or from a website such as 56


57 Software The Configuration Panel Each programming block has a configuration panel in which you can adjust the settings of the selected block. When a block is selected in the work area, its configuration panel becomes visible and active at the bottom of the screen. By changing the parameters on each configuration panel, you can change how a particular block will behave. For example, to make your robot move faster, you can change the Power [Power] property on the Move block configuration panel. The Controller The five buttons on the Controller communicate from your computer to the NXT brick: The NXT window button gives you access to the NXT memory and communication settings. The Download and run selected button downloads and runs just a pieces of your program code (e.g. a single block or just a few blocks). You will then be able to see how the small sequence of your program performs on the NXT without having to download the whole program. The Download button downloads the program to the NXT. You can then run the program from the NXT. The Stop button stops a running program. The Download and run button downloads a program to the NXT and then starts running the program. 57
58 LEGO Bricks Parts List For Base Set #9797 The LEGO MINDSTORMS Education NXT set #9797 is the main set for building NXT robots. Here is a list of the building elements included in the set. 1x Minifigure, cap, red 2x Connector peg, 2-module double, black 4x Plate, 1X2, grey 1x Minifigure, ponytail wig, black 2x Connector peg, handle, grey 8x Brick, 1X2, grey 1x Minifigure, head, yellow 2x Connector peg, 3-module double, grey 4x Brick, 2X2, grey 1x Minifigure, body, white with surfer 4x ½ beam, 3X5 curve, dark grey 8x Connector peg with axle, beige 1x Minifigure, legs, orange 20x Cross block, 2-module, grey 10x Connector peg with friction / axle, blue 1x Brick, 1X2, green translucent 4x Cross block, 3-module, dark grey 8x Connector peg with bushing, black 1x Brick, 1X2, red translucent 8x Cross block, double, black 10x Bushing, ½-module, yellow 1x Brick, 1X2, yellow translucent 4x Bushing, axle extender, black 10x Bushing, grey 2x Hub, 18X14, grey 4x Gear, 8-tooth, grey 4x Gear, 16-tooth, grey 2x Tile, 1X2, dark grey 4x Gear, 12-tooth double bevel, black 2x Tire, 24X14, black 2x Gear, 24-tooth crown, grey 2x Gear, worm, black 4x Hub, 24X4, grey 2x Gear, 20-tooth double bevel, grey 4x Gear, 4-tooth, black 4x Tire, 30.4X4, black 4x Gear, 24-tooth, grey 58


59 LEGO Bricks Parts List For Base Set #9797 4x Plate, 1X4, grey 2x Gear, 40-tooth, grey 10x Beam, 3-module, dark grey 2x Plate with holes, 2X4, grey 4x Studded Beam, 1X2, grey 4x Beam, 5-module, dark grey 2x Plate with holes, 2X6, grey 4x Studded Beam, 1X4, grey 4x Beam, 7-module, dark grey 2x Plate with holes, 2X8, grey 4x Studded Beam, 1X6, grey 6x Beam, 9-module, dark grey 2x Gear, 36-tooth, black 4x Studded Beam, 1X8, grey 2x Beam, 11-module, dark grey 2x Cross block, 2X1-module, dark grey 2x Angular block, 2 (180º), black 4x Studded Beam, 1X16, grey 2x Beam, 13-module, dark grey 2x Belt, 24mm, red 4x Angular beam, 4X2-module, dark grey 4x Beam, 15-module, dark grey 2x Belt, 33mm, yellow 8x Angular beam, 3X5-module, dark grey 60x Connector peg with friction, black 4x Angular beam, 4X6-module, dark grey 36x Connector peg with friction, 3-module, black 2x Studded beam, 1X2 with cross hole, dark grey 4x Angular beam, 3X7-module, dark grey 59


60 LEGO Bricks Parts List For Base Set #9797 2x Axle, 5½-module, dark grey 3x Lamp, 1X2, white 8x Axle, 2-module, red 14x Axle, 3-module, grey 8x Axle, 5-module, grey 3x Interactive Servo Motor, NXT 1x NXT 6x Axle, 4-module, black 1x Sound Sensor, NXT 1x Light Sensor, NXT 2x Touch Sensor, NXT 1x Ultrasonic Sensor, NXT 4x Axle, 6-module, black 2x Axle, 8-module, black 1x Ball, 52mm, red 1x Ball, 52 mm, blue 4x Tire, 56X26, black 4x Hub, 30X20, grey 2x Axle, 10-module, black 2x Axle, 12-module, black 3x Converter cable, NXT 1x USB cable 1x Rechargeable battery, NXT 1x Gear/turntable, 24-tooth inner/56-tooth outer, black 20 CM/8 INCH 1x Cable, 20 cm 35 CM/14 INCH 4x Cable, 35 cm 50 CM/20 INCH 2x Cable, 50 cm 60
 for a competition or classroom assignment.")


61 Useful Information Download to Multiple NXTs 1 This function allows you to download one or more programs to multiple NXTs. This is especially useful if you need to load a number of NXTs with the same program(s) for a competition or classroom assignment. Before using this function, make sure that all of the programs you would like to download are open in the software. When you open more than one program at the same time, the program names appear as tabs along the top of the work area. Also, make sure your NXT bricks are Available by clicking Scan in the NXT window. Otherwise, they will not appear in the Download to Multiple NXTs window. 2 When the programs that you would like to download are open, launch the function by choosing Download to Multiple NXTs in the Tools menu. This will launch the Download to Multiple NXTs dialog box Choose NXTs lists all of the NXT bricks that are currently available. 2. Choose Programs lists all of the programs that are currently open. By default, all NXTs and all programs are selected when the Download Multiple NXTs window opens. You can click the check boxes to deselect NXTs or programs. 61


62 Useful Information Download to Multiple NXTs Note: If you do not see an NXT on the list, close the Download to Multiple NXTs window and open the NXT window. Make sure that all the NXTs have been configured in this window before opening the Download to Multiple NXTs window. 4 When you are ready, click the Download button below the program list. This begins the download process. The Progress column displays the download progress. There are several possible Status and Progress options displayed in the Choose NXT area of the Download to Multiple NXTs window. Status: Available if the NXT can be selected but is not for this download. Unavailable if the NXT is not seen by the computer. Connected if the NXT is selected and ready for downloading. Progress: Skipped if you did not select that program file. Downloading if it is in progress. OK when downloading that program is complete. Error if a problem is encountered during the downloading process. Click the Close button when you are finished downloading programs to multiple NXTs. 62


63 Useful Information Troubleshooting Resetting the NXT If the running icon stops spinning, the NXT has frozen and you must reset it. Follow these steps to reset the NXT: 1. Make sure that the NXT is turned on. 2. Press the reset button that is located on the back of your NXT in the LEGO Technic hole in the upper left corner. Use, for example, an unfolded paperclip to press the button. 3. If you press the reset button for more than 4 seconds, you will need to update the firmware. 1 Updating the firmware in the NXT from your computer 1. Make sure that the NXT is turned on. Note: If you have just reset your NXT (see above) the display will not show anything. A ticking sound will tell whether it is turned on or not. 2. Make sure the NXT and computer are connected with the USB cable. 3. Go to the Tools pull-down menu in the software menu bar and select Update NXT Firmware. 2 Select the firmware you want to update. Click download. Note: The Windows Found new hardware wizard will pop-up the first time you update your firmware. Complete the wizard by following the on-screen instruction before you continue. 63


64 Useful Information Troubleshooting Managing NXT Memory You can download other files to the NXT until the memory is full. When the memory is full, you can select programs to delete in order to make space. Clicking Delete All removes only your programs, not your system files. For more Troubleshooting help, go to 64
Technology. In the My Files [My Files] submenu you can store all the programs that you have made on the NXT or downloaded from your computer.
![Technology. In the My Files [My Files] submenu you can store all the programs that you have made on the NXT or downloaded from your computer.](/thumbs/74/70002303.jpg "Technology. In the My Files [My Files] submenu you can store all the programs that you have made on the NXT or downloaded from your computer.") NXT Main Menu My Files Files are automatically placed into the appropriate folders. When you download a program using a Sound file to the NXT, the program will be placed under Software files while the
NXT Main Menu My Files Files are automatically placed into the appropriate folders. When you download a program using a Sound file to the NXT, the program will be placed under Software files while the
Technology. Using Bluetooth
 Bluetooth is a communication technology that makes it possible to send and receive data without using wires. Using the Bluetooth features, you can set up a wireless connection between your NXT and other
Technology. In the My Files [My Files] submenu you can store all the programs that you have made on the NXT or downloaded from your computer.
![Technology. In the My Files [My Files] submenu you can store all the programs that you have made on the NXT or downloaded from your computer.](/thumbs/88/117445322.jpg "Technology. In the My Files [My Files] submenu you can store all the programs that you have made on the NXT or downloaded from your computer.") My Files Files are automatically placed into the appropriate folders. When you download a program using a Sound file to the NXT, the program will be placed under Software files while the sound data will
My Files Files are automatically placed into the appropriate folders. When you download a program using a Sound file to the NXT, the program will be placed under Software files while the sound data will
Technology. Using Bluetooth
 Bluetooth is a communication technology that makes it possible to send and receive data without using wires. Using the Bluetooth features, you can set up a wireless connection between your NXT and other
The NXT Generation. A complete learning solution
 The NXT Generation A complete learning solution 2008 The NXT Generation LEGO MINDSTORMS Education is the latest in educational robotics, enabling students to discover ICT, science, D&T and maths concepts
Robot Activity: Programming the NXT 2.0
 Robot Activity: Programming the NXT 2.0 About this Activity In this activity, you will learn about some features of the NXT 2.0 programming software. You will write and save a program for the Lego NXT
LEGO Engineering Conferences ROBOLAB and MINDSTORMS Education Version 4.5 March 2008
 LEGO Engineering Conferences ROBOLAB and MINDSTORMS Education Version 4.5 March 2008 NXT-G Program Book II: Intermediate Robotics Activities for use with the NXT 2008 Tufts Center for Engineering Education
Rescue Rover. Robotics Unit Lesson 1. Overview
 Robotics Unit Lesson 1 Overview In this challenge students will be presented with a real world rescue scenario. The students will need to design and build a prototype of an autonomous vehicle to drive
1001ICT Introduction To Programming Lecture Notes
 1001ICT Introduction To Programming Lecture Notes School of Information and Communication Technology Griffith University Semester 2, 2015 1 4 Lego Mindstorms 4.1 Robotics? Any programming course will set
Using the Lego NXT with Labview.
 Using the Lego NXT with Labview http://www.legoengineering.com/component/content/article/105 The Lego NXT 32-bit ARM microcontroller - an Atmel AT91SAM7S256. Flash memory/file system (256 kb), RAM (64
FireHawk M7 Interface Module Software Instructions OPERATION AND INSTRUCTIONS
 FireHawk M7 Interface Module Software Instructions OPERATION AND INSTRUCTIONS WARNING THE WARRANTIES MADE BY MSA WITH RESPECT TO THE PRODUCT ARE VOIDED IF THE PRODUCT IS NOT USED AND MAINTAINED IN ACCORDANCE
Mapping a Magnetic Field. Evaluation copy. Figure 1: Detecting the magnetic field around a bar magnet
 Mapping a Magnetic Field Experiment 16 The region around a magnet where magnetic forces can be detected is called a magnetic field. All magnets, no matter what their shape, have two poles labeled north
Robot Soccer Challenge
 Robot Soccer Challenge Pre-Activity Quiz 1. What kind of wireless electrical connection can NXT robots use to communicate with other electrical devices (including other NXTs)? 2. Can you think of a way
NXT Robotics Techniques Workshop 2008
 ORTOP NXT Robotics Techniques Workshop 2008 Opening doors to the worlds of science and technology for Oregon s youth 9/29/2008 NXT Robotics Techniques - 2008 1 Goals Audience: Rookie coaches/mentors, experienced
Standard League WRO Football Simple Simon EV3 Training Curriculum
 Standard League WRO Football Simple Simon EV3 Training Curriculum Brian Thomas **LEGO, EV3 Mindstorms and Robolab are Registered Trademarks of the LEGO Corporation RoboCup Junior Australia Inc Copyright
Microsoft Windows Software Manual for FITstep Stream Version 4
 Thank you for purchasing this product from Gopher. If you are not satisfied with any Gopher purchase for any reason at any time, contact us and we will replace the product, credit your account, or refund
CONSUMER MODEL INSTALLATION GUIDE
 CONSUMER MODEL INSTALLATION GUIDE System requirements Windows System Requirements To use your TOMI and its software, your system should have: A Microsoft Windows compatible PC with a Pentium IV processor
Getting Started with the LabVIEW Toolkit for LEGO MINDSTORMS NXT
 Getting Started with the LabVIEW Toolkit for LEGO MINDSTORMS NXT Contents Overview...2 Mass Compiling...2 Building a LabVIEW VI that Runs on the NXT...3 Running a LabVIEW VI on the NXT...4 Building a LabVIEW
RM-80 respiration monitor
 RM-80 respiration monitor User Manual September 18, 2015 0025-003M 950 North Hague Avenue Columbus, Ohio 43204-2121 USA Sales: sales@colinst.com Service: service@colinst.com Phone: (614) 276-0861 Fax:
Mac Software Manual for FITstep Pro Version 2
 Thank you for purchasing this product from Gopher. If you are not satisfied with any Gopher purchase for any reason at any time, contact us and we will replace the product, credit your account, or refund
Callaway upro Golf GPS. User Guide (v1.3) 2009 Callaway Golf Company
 2009 Callaway Golf Company") Callaway upro Golf GPS User Guide (v1.3) 2009 Callaway Golf Company Table of Contents 1 GETTING STARTED WITH THE CALLAWAY UPRO...3 1.1 UPRO OVERVIEW...3 1.2 SYSTEM REQUIREMENTS...5 1.3 CHARGING THE UPRO...6
Callaway upro Golf GPS User Guide (v1.3) 2009 Callaway Golf Company Table of Contents 1 GETTING STARTED WITH THE CALLAWAY UPRO...3 1.1 UPRO OVERVIEW...3 1.2 SYSTEM REQUIREMENTS...5 1.3 CHARGING THE UPRO...6
WELCOME TO THE REVOLUTION
 USER GUIDE WELCOME TO THE REVOLUTION THANK YOU FOR CHOOSING THE GCQUAD We listened to what you wanted - and created the most accurate, versatile and game-enhancing ball and club analysis solution available
SDM-2012 Docking Station Standalone Configuration Operator s Manual
 SDM-2012 Docking Station Standalone Configuration Operator s Manual Part Number: 71-0254RK Revision: P5 Released: 10/5/12 www.rkiinstruments.com Warranty RKI Instruments, Inc. warrants gas alarm equipment
GEN II Robot Soccer EV3 Compass Training Curriculum Brian Thomas
 GEN II Robot Soccer EV3 Compass Training Curriculum Brian Thomas RoboCup Junior Australia Inc Copyright 2015 1 GEN II EV3 Robot Soccer Training Overview Welcome! The aim of this curriculum is to guide
HyperSecureLink V6.0x User Guide
 HyperSecureLink V6.0x User Guide Note: This software works with the LS-30 Version (06.0x or later) 1, Hardware Installation: 1-1, Connection Diagram for USB or RS-232 Computer Interface To LS-30 CM1 To
CONSOLE-320 ENGLISH. 230A: CONSOLE-320 with cable data output Item 230B: CONSOLE-320 with cable + wireless radio data output
 CONSOLE-320 Item 230A: CONSOLE-320 with cable data output Item 230B: CONSOLE-320 with cable + wireless radio data output Table of contents 1. INTRODUCTION...2 1.1 Power supply...2 1.2 Connections...2 1.3
Software Manual for FITstep Pro Version 2
 Thank you for purchasing this product from Gopher. If you are not satisfied with any Gopher purchase for any reason at any time, contact us and we will replace the product, credit your account, or refund
Standard League Robot Soccer EV3 Compass Training Curriculum Brian Thomas
 Standard League Robot Soccer EV3 Compass Training Curriculum Brian Thomas RoboCup Junior Australia Inc Copyright 2018 1 Standard League Robot Soccer EV3 Compass Training Welcome! The aim of this curriculum
Oxygen Meter User Manual
 Oxygen Meter User Manual Monday, July 23, 2007 1. Outline...2 2. Program...3 2.1. Environment for program execution...3 2.2. Installation...3 2.3. Un installation...3 2.4. USB driver installation...3 2.5.
Simple Simon GEN II Robot Soccer EV3 -Tris 10 Training Curriculum
 Simple Simon GEN II Robot Soccer EV3 -Tris 10 Training Curriculum Brian Thomas **LEGO, Mindstorms and Robolab are Registered Trademarks of the LEGO Corporation RoboCup Junior Australia Inc Copyright 2015
USER GUIDE USER GUIDE
 1 TABLE OF CONTENTS GETTING STARTED 2 Included in the box 2 Compatible smartphones 2 Accessories: 2 Download Mobitee and PIQ application 2 GET STARTED WITH MOBITEE AND PIQ 3 Create your Account and Login
Boyle s Law: Pressure-Volume Relationship in Gases
 Boyle s Law: Pressure-Volume Relationship in Gases The primary objective of this experiment is to determine the relationship between the pressure and volume of a confined gas. The gas we will use is air,
Chapter 13. ANTY: the robotic ant
 Chapter 13. ANTY: the robotic ant By now, you ve gotten the hang of building models that move on wheels. Another fun, but slightly more challenging, kind of model you can build is an animal robot that
ARCCOS 360 NEW USER GUIDE
 ARCCOS 360 NEW USER GUIDE Table of Contents 1. Getting Started a. Download & Install.2 b. Create Account....3 c. Pair Clubs..4 2. Play a. Starting a Round..5 b. Shot Editing.6 c. Shot List.7 d. Flag &
Quick Guide. SGX-CA500 Cycle Computer SGY-PM Series Power Meters
 Quick Guide SGX-CA500 Cycle Computer SGY-PM Series Power Meters Easy Installation and Advanced Functionality Fast Facts: Pioneer Power Meter Cranksets and arms ship pre-set in the ANT+ Format Simply install
Beginner Category Tug of War 2v2
 1 Beginner Category Tug of War 2v2 Game Description, Rules, and Scoring 2 1. General Rules 1.1. Team 1. A team consists of two (2) members and/or one (1) coach. 2. Participants are categorized into two
Race Screen: Figure 2: Race Screen. Figure 3: Race Screen with Top Bulb Lock
 Eliminator Competition Stand Alone Mode - Instruction Manual Main Menu: After startup, the Eliminator Competition will enter the Main Menu. Press the right/left arrow buttons to move through the menu.
ALGE DIVE! ALGE. ALGE-TIMING GmbH & Co
 ALGE ALGE DIVE! ALGE-TIMING GmbH & Co Rotkreuzstrasse 39 A-6890 Lustenau Telephone: +43 5577-85969 Fax: +43 5577-85969 e-mail: office@alge-timing.com Internet: www.alge-timing.com Table of contents 1.
Kestrel HVK Gun Loader Sofware
 www.kestrelmeters.com.au Kestrel HVK Gun Loader Sofware The Most Relied-Upon Pocket Weather Instruments in the World Making Work & Play Easier & Safer 1 Kestrel Pocket Weather Meters Kestrel Ballistics
ClubHub. User s Guide
 ClubHub User s Guide Table of Contents Setup... Initial Club Setup...7 Changing Clubs...5 Settings...8 My Clubs... Turn On/Off Sounds...9 Play Round Mode...0 List View...8 Social Sharing...0 Viewing D
TABLE OF CONTENTS Thank You for Choosing Swami GT Warranty/Video 1. General Getting Started On the Golf Course 3.
 User Manual TABLE OF CONTENTS Thank You for Choosing Swami GT...2 Warranty/Video...2-3 1. General...4 1.1 Screen Display/Button Description...4 1.2 Basic Specifications...5 1.3 Accessories List...6 1.4
Pegas 4000 MF Gas Mixer InstructionManual Columbus Instruments
 Pegas 4000 MF Gas Mixer InstructionManual Contents I Table of Contents Foreword Part I Introduction 1 2 1 System overview... 2 2 Specifications... 3 Part II Installation 4 1 Rear panel connections...
Wickets Administrator
 Wickets Administrator Software For Managing Stored Value Wickets 01/08/2008 Product Details And Operating Instructions Overview This page describes each major function of Wickets Administrator in detail.
The ICC Duckworth-Lewis-Stern calculator. DLS Edition 2016
 The ICC Duckworth-Lewis-Stern calculator DLS Edition 2016 (DLS2-2016) Installation and operating instructions Queries about program operation should be sent to: Steven.Stern@qut.edu.au 2016 International
User s Guide Sonostar Inc.
 Sonocaddie V300 Golf GPS User s Guide Sonostar Inc. V.3.A.0.2_E_UK This document is the property of Sonostar Inc. Any unauthorized reproduction is prohibited. Page 1 Contents Welcome...4 Warnings...4 Cautions...4
Instruction Manual. BZ7002 Calibration Software BE
 Instruction Manual BZ7002 Calibration Software BE6034-12 Index _ Index Index... 2 Chapter 1 BZ7002 Calibration Software... 4 1. Introduction... 5 Chapter 2 Installation of the BZ7002... 6 2. Installation
Getting to know your Sureshotgps micro V3
 Getting to know your Sureshotgps micro V3 Battery State Symbol Satellite Signal Shows distance to front, centre and rear of each green Hole Number Real Time Power on and Enter Key Down (backward) Key 1
Quick Start Guide. A. Hardware installation B. Software installation C. Start the software for the first time D. Do your first measurement
 Quick Start Guide This Quick Start Guide describes the hardware and software installation process and the Measurement feature in a simple way. Please follow the sequence of the steps to avoid problems
PC Configuration software for Discovery MkVI v 1.03 User guide
 PC Configuration software for Discovery MkVI v 1.03 User guide This user guide describes the different features included in PC Config software, version 1.03, and how they are used. When referring to this
SOFTWARE FOR CONTROL OF ROBOTIC MANIPULATOR
 SOFTWARE FOR CONTROL OF ROBOTIC MANIPULATOR INTRODUCTION Robotics is a very common and discussed problem recently. Robotic arms and manipulators are used in industry, transport or medicine. They often
XC2 Client/Server Installation & Configuration
 XC2 Client/Server Installation & Configuration File downloads Server Installation Backup Configuration Services Client Installation Backup Recovery Troubleshooting Aug 12 2014 XC2 Software, LLC Page 1
TOMI PRO MODEL PERSONAL MODEL
 TOMI PRO MODEL PERSONAL MODEL System requirements Windows System Requirements To use your TOMI and its software, your system should have: A Microsoft Windows compatible PC with a Pentium IV processor (1.5
OxyScan Graphic. Operating Instructions. UMS Micro-oxygen sensor 501. Microprocessor instrument
 OxyScan Graphic Operating Instructions UMS Micro-oxygen sensor 501 Microprocessor instrument Introduction Thank you for choosing the UMS Micro Oxygen Sensor 501 - a highly advanced product! Please read
ELIMINATOR COMPETITION DRAG RACE Program Manual Firm Ver 4.11
 ELIMINATOR COMPETITION DRAG RACE Program Manual Firm Ver 4.11 The Portatree Eliminator Super 2000 Competition Track Timer can be used with an IBM Compatible Personal Computer connected through Com Port
Wire Buddy Manual IOpath Software
 Wire Buddy Manual IOpath Software Wire Buddy is a calculation reference tool for Electricians and Maintenance personnel. Wire Buddy was created for the Maintenance Electrician. There are many occasions
Troubleshooting Guide: 640 Pediatric Exam Table with Midmark Scale
 Troubleshooting Guide: 640 Pediatric Exam Table with Midmark Scale Contents Description Refer To: Scale Troubleshooting Chart Troubleshooting Error Codes Error Messages Adjustments / Repair Procedures
Wiimote in Physical Etoys
 Wiimote in Physical Etoys Due to the popularity and the different features that the Nintendo Wiimote has, in this tutorial we will see how to access to some of them from Physical Etoys in order to make
HPICAL Operation & Data Logging Procedures. Click spacebar to advance through slides 1
 HPICAL-15000 Operation & Data Logging Procedures Click spacebar to advance through slides 1 WARNING Always wear proper safety equipment when using high pressure equipment. Do not exceed 125 psi air pressure.
OPERATION MANUAL DIVE CALIPER NOT SCALE / IF IN DOUBT ASK* *ALL UNITS IN MM/DEGREES UNLESS SPECIF. Dive Caliper General DC-051
 NOT SCALE / IF IN DOUBT ASK* DIVE CALIPER OPERATION MANUAL *THIS INFORMATION IS THE PROPERTY OF ZEBRA-TECH LTD. ALL RIGHTS RESERVED.* *ALL UNITS IN MM/DEGREES UNLESS SPECIF SURFACE F 3.2 Ra UNLESS S Part
Remote Control Bait Boat
 CARPIO 2.0 User Manual All pictures shown are for illustration purpose only. Actual product may vary due to product enhancement Remote Control Bait Boat (Smart Remote Control at 868 MHz) 1 Table of Contents
e d u c a t i o n NXT Solar Station
 e d u c a t i o n NXT Solar Station de LEGO Group. 2010 The LEGO Group. e d u c a t i o n NXT Solar Station Description Investigating the NXT Solar Station s ability to generate power by data logging wattage
Operating Manual. SUPREMA Calibration. Software for Fire and Gas Warning Units. Order No.: /01. MSAsafety.com
 Operating Manual Software for Fire and Gas Warning Units Order No.: 10154656/01 MSAsafety.com MSA Europe GmbH Schlüsselstrasse 12 8645 Rapperswil-Jona Switzerland info.ch@msasafety.com www.msasafety.com
nvisti Kestrel Companion Pro For Android
 nvisti Kestrel Companion Pro For Android The nvisti Kestrel Companion App is the most versatile, accurate and user friendly dual purpose app available. This app allows for both remote viewing for firing
User s Guide 2010 Sonostar Inc. V _E
 User s Guide C 2010 Sonostar Inc. V.350.03_E Welcome Congratulations on purchasing the Sonocaddie V350 Series. It is the easiest and most advanced golf GPS device available today with its intuitive and
uemis CONNECT: Synchronisation of the SDA with myuemis
 uemis CONNECT: Synchronisation of the SDA with myuemis 1 What is myuemis? In myuemis, your private area on the Internet portal www.uemis.com, you can visualise your dives, manage your database and transfer
DIVE MEET SCORING INSTRUCTIONS. Day before meet
 DIVE MEET SCORING INSTRUCTIONS Day before meet Physical set up Set up registration/scoring table #1 on 1 meter side and scoring table #2 on 3 meter side of diving well, judges chairs, and award stand as
BIT User Manual. 1. About this manual. 2. Know your BIT 1.1. WARNING System Components
 BIT User Manual About this manual WARNING Know your BIT System Components Operation Methods Maintenance, charging 3.3.1. Cleaning General handling Software Setup Calibrating the BIT Inclinometer calibration
This document contains recommendations that may help teams be more successful in preparing for and participating in the FTC World Championship Event.
 HOT SHOT! TIPS AND TRICKS SHEET This document contains recommendations that may help teams be more successful in preparing for and participating in the FTC World Championship Event. BEFORE YOU LEAVE FOR
GPS OWNERS MANUAL. All PowaKaddy electric trolleys have been awarded the Quiet Mark by the Noise Abatement Society
 OWNERS MANUAL GPS All PowaKaddy electric trolleys have been awarded the Quiet Mark by the Noise Abatement Society The PowaKaddy Update App Available to download from the Apple App store and Google Play
ADVANCED PORTABLE LAUNCH MONITOR. ES14 User Manual
 ADVANCED PORTABLE LAUNCH MONITOR ES14 User Manual Table of Contents BASICS OF THE ES14....4-6 POSITIONING THE ES14..... 7-9 KICK STAND RULER SELECTING A CLUB...........10 PROGRAMMING......... 11-24 ALTITUDE
all i imck >Э1 1 I Vf I \ Ш i ш ,M; цриазд IF 4 ifipm>v*' %тл sioaoy DNicning HUM
 p all i imck >Э1 N! w Ш i ш 1 I Vf I \ w,m; цриазд i IF 4 ifipm>v*' HUM V* %тл mk sioaoy DNicning Contents Foreword Preface xxiii xxv Chapter 1 Understanding LEGO Geometry 1 Introduction 2 Expressing Sizes
USER MANUAL April 2016
 USER MANUAL April 2016 Introduction TIEBREAK is a program for real time volleyball game data entry and statistical analysis. Extremely easy to use, TIEBREAK makes it possible to reliably and quickly enter
MASK INTEGRITY TEST ACCESSORY (MITA) MODEL 8120
 MODEL 8120") MASK INTEGRITY TEST ACCESSORY (MITA) MODEL 8120 QUICK START GUIDE P/N 6006154, REVISION C MAY 2013 Model 8120 Mask Integrity Tester is patented under U.S. Patent No. 8,312,761. Additional patents are pending.
MASK INTEGRITY TEST ACCESSORY (MITA) MODEL 8120 QUICK START GUIDE P/N 6006154, REVISION C MAY 2013 Model 8120 Mask Integrity Tester is patented under U.S. Patent No. 8,312,761. Additional patents are pending.
Heating of Land and Water
 Heating of Land and Water Experiment 8 How fast land and water heat and cool influences our weather. In Part I of this experiment, you will heat sand and water. You will use two Temperature Probes to see
BUDDY Gorgeous and easy to use GPS Navigation Kit USER GUIDE. Love from Intempo Digital xx
 BUDDY Gorgeous and easy to use GPS Navigation Kit USER GUIDE Love from Intempo Digital xx Contents - What s in the box 1. Buddy with Styli touch screen pen 2. Buddy holder 3. USB cable 4. Car charger 5.
Software for electronic scorekeeping of volleyball matches, developed and distributed by:
 Software for electronic scorekeeping of volleyball matches, developed and distributed by: Developed for the rules of USports 2017-18 As adopted by Ontario University Athletics for Men s & Women s Volleyball
BUYER S GUIDE AQUAlogger 530WTD
 OCEAN & ENVIRONMENTAL BUYER S GUIDE AQUAlogger 530WTD Wireless Temperature and Depth Logger AQUAlogger 530WTD The AQUAlogger 530WTD has an innovative design that includes the ability to transfer stored
Section 1: Overview... 6 Features... 6 Supported Software Part 1: Getting Started 7
 Table of Contents About this Manual... 3 Intended Audience... 3 How this Manual is Organized... 4 Conventions Used in this Manual... 5 Related Information... 5 Where To Get Help... 5 Section 1: Overview...
World Robot Olympiad 2019
 World Robot Olympiad 2019 REGULAR CATEGORY GENERAL RULES Age groups Elementary, Junior, Senior (for WeDo Rules, please see the WeDo documents) Version: January 15 th WRO International Premium Partners
Description. Measuring Device 3760XBI USP. Balancing
 Measuring Device 3760XBI Description 3760XBI comprises from a differential pressure unit with an integrated true differential pressure sensor for the exact measuring of both differential and static pressures
Figure SM1: Front panel of the multipatcher software graphic user interface (GUI) at the beginning of multipatcher operation.
 at the beginning of multipatcher operation.") APPENDIX 2. Multipatcher Software Setup and Operation. The multipatcher program is organized into four panels. There are controls that allow the user to specify various parameters into the system. The
APPENDIX 2. Multipatcher Software Setup and Operation. The multipatcher program is organized into four panels. There are controls that allow the user to specify various parameters into the system. The
Approach. S3 Owner s Manual. May _0B Printed in Taiwan
 Approach S3 Owner s Manual May 2012 190-01467-00_0B Printed in Taiwan All rights reserved. Under the copyright laws, this manual may not be copied, in whole or in part, without the written consent of Garmin.
INCREDIBLY EASY. EASILY INCREDIBLE.
 NEW INCREDIBLY EASY. EASILY INCREDIBLE. NEW The moment you put your head below the surface, you fell in love with diving. Shouldn t you feel the same way about your dive computer? SCUBAPRO s ground-breaking
QRAE II Quick Reference Covers Diffusion & Pump Models with Firmware Version 3.12 and higher
 QRAE II Quick Reference Covers Diffusion & Pump Models with Firmware Version 3.12 and higher WARNINGS Use only RAE Systems rechargeable battery pack part number 020-3402-000, or alkaline battery pack part
OWNER S MANUAL. All PowaKaddy electric trolleys have been awarded the Quiet Mark by the Noise Abatement Society
 OWNER S MANUAL All PowaKaddy electric trolleys have been awarded the Quiet Mark by the Noise Abatement Society Thank you for purchasing the new PowaKaddy. We hope you enjoy your new FW7s GPS trolley and
TrackMan Operator Training
 TrackMan Operator Training The following setup and use information is the same for using TrackMan in the Indoor setting or Outdoor setting unless noted Extend the two bottom legs and single back leg before
Soft Systems. Log Flume - 1. Enter Specification. Activity One ACTIVITIES. Help. for Logicator
 Log Flume - 1 ACTIVITIES These sheets present a series of activities for building your own programs to control the Log Flume Soft System. Together, they build into a complete control system for the log
D-OptoLogger Dissolved Oxygen Logger Operation Manual
 D-OptoLogger Dissolved Oxygen Logger Operation Manual Software version 3.4 Contents 1. Introduction..... 1 Optical Sensor Technology.....1 Features...... 1 2. D-OptoLogger Specifications.2 Specifications...
Sonocaddie AUTO PLAY
 Sonocaddie AUTO PLAY Golf GPS User s Guide V.3.0.0.1_E Sonostar Inc. This document is the property of Sonostar Inc. Any unauthorized reproduction is prohibited. Page 1 Contents Welcome...4 Warnings...4
Bante821 Portable Dissolved Oxygen Meter Instruction Manual
 Bante821 Portable Dissolved Oxygen Meter Instruction Manual BANTE INSTRUMENTS CO., LTD Bante821 Portable Dissolved Oxygen Meter 1 Introduction Thank you for selecting the Bante821 portable dissolved oxygen
World Robot Olympiad 2018
 World Robot Olympiad 2018 REGULAR CATEGORY RULES Version: Final Version January 15 th Table of Contents Introduction... 3 Important changes for WRO 2018... 3 Regular Category Rules... 4 1. Surprise Rule...
MULTITUBE BUBBLE TUBE BY ROMPA (U)
") Page 1 of 16 MULTITUBE BUBBLE TUBE BY ROMPA 19781 (U) CONTENTS 1 x Base Unit (chassis) 1 x Base Cover (white plastic cover) 1 x Multitube Bubble Tube Column 1 x Bubble Tube Cap 1 x Power Supply (black
Page 1 of 16 MULTITUBE BUBBLE TUBE BY ROMPA 19781 (U) CONTENTS 1 x Base Unit (chassis) 1 x Base Cover (white plastic cover) 1 x Multitube Bubble Tube Column 1 x Bubble Tube Cap 1 x Power Supply (black
BUILT TO WIN PAINTBALL LOADER SPIRE III MANUAL
 BUILT TO WIN PAINTBALL LOADER SPIRE III MANUAL SPIRE III SETUP Thank you for purchasing the Virtue Spire III paintball loader. This manual covers all aspects of your Spire III loader. It is recommended
955730_1 4/17/18. FlowSense Operator s Guide For Gen2 20/20 SeedSense Displays
 955730_1 4/17/18 FlowSense Operator s Guide For Gen2 20/20 SeedSense Displays Contents System Setup and Operation...3 Configuring Monitor for FlowSense...3 FlowSense Setup...4 Liquid Alerts...8 Monitoring
BASIC Z-STACK AND TIME SERIES SCAN ON THE ZEISS LIGHTSHEET Z. 1
 BASIC Z-STACK AND TIME SERIES SCAN ON THE ZEISS LIGHTSHEET Z. 1 The front door of the main body of the instrument may be open when you arrive. Take the sample chamber and slide it into position with the
PRODUCT MANUAL. Diver-Mobile for Android
 PRODUCT MANUAL Diver-Mobile for Android Contact details: Van Essen Instruments B.V. Van Essen Instruments - Canada Delftechpark 20 630 Riverbend Drive, Suite 100 2628 XH Delft Kitchener, ON, The Netherlands
DDR Dive Data Recorder Manual - Rel /12
 DDR Dive Data Recorder Manual - Rel. 1.1 2/12 TABLE OF CONTENTS 1. WHAT IS THE DDR? 4 2. TECHNICAL CHARACTERISTICS 5 3. DOWNLOADING DATA TO A PC 6 4. DDR MANAGER 7 5. CONFIGURE DEVICE BUTTON 9 6. READ
The ICC Duckworth-Lewis Calculator. Professional Edition 2008
 The ICC Duckworth-Lewis Calculator Professional Edition 2008 (Version 1.1) Installation and operating instructions Any queries about operating the program should be sent to steven.stern@anu.edu.au 2008
Steltronic StelPad User Guide
 StelPad User Guide Steltronic StelPad User Guide Contents Contents... 1 About StelPad and its Features... 3 StelPad System Elements... 3 StelPad Computer Integration with Focus... 4 Enable Custom Graphic
UNITY 2 TM. Air Server Series 2 Operators Manual. Version 1.0. February 2008
 UNITY 2 TM Air Server Series 2 Operators Manual Version 1.0 February 2008 1. Introduction to the Air Server Accessory for UNITY 2...2 1.1. Summary of Operation...2 2. Developing a UNITY 2-Air Server method