Welcome to this new 21 yards in 21 days program. I put this program together for a couple of important reasons, which were...
|
|
|
- Chastity Logan
- 5 years ago
- Views:
Transcription

1 1 P age
2 Contents Introduction...3 Day 1 Swing Faster Not Harder...5 Day 2 The Take-Away...8 Day 3 Wide Arc Day 4 Fast Backswing Day 5 Lag (Part 1) Day 6 Right Shoulder Under Day 7 Active Flexibility (Part 1) Day 8 Faster Swing (Part 1) Day 9 Release (Part 1) Day 10 Release (Part 2) Day 11 Shoulder Plane Day 12 - Active Flexibility (Part 2) Day 13 Faster Swing (Part 2) Day 14 Lag (Part 2) Day 15 - Active Flexibility (Part 3) Day 16 Faster Swing (Part 3) Day 17 Swing Sequencing (Part 1) Day 18 - Active Flexibility (Part 4) Day 19 Swing Sequencing (Part 2) Day 20 - Active Flexibility (Part 5) Day 21 - Faster Swing (Part 4) Conclusion P age
3 Introduction Welcome to this new 21 yards in 21 days program. I put this program together for a couple of important reasons, which were So often I see golfers trying to hit the ball further, and failing big time because they re doing things that will never help them to add yards to their drives. 2. I want to give golfers simple things they can do at home, so when they go to the golf course they will experience longer drives. Everything in this program can be done at home, as long as you have a place to swing. You don t need to hit balls doing any of the exercises. Some of them you can do when hitting balls, but it s not necessary. Via I will be sending you some extra drills and exercises that you can take with you to the driving range to help you there to gain even more distance. Now, the following drills and exercises have been carefully chosen to help you add 21 yards to your drives in just 21 days. Even if you ve done some of these drills and/or exercises before, you need to follow this plan in the exact order, to get the results you want. Because when you do this you ll be using the synergistic effect. Here is a definition of the synergistic effect... An effect arising between two or more agents, entities, factors, or substances that produces an effect greater than the sum of their individual effects. The drills and/or exercises that follow are in a specific order and sequence, so that by the end of this program you would have added at least 21 yards to your drives. So how is this going to happen by doing something new every day, for 15 minutes? Well, the following program is going to help you in 3 key areas to add yards to your drives. And those 3 areas are: 1. Technique 2. Flexibility 3. Swing Speed 3 P age
4 In this new program you re going to get drills that will help improve your technique, so you deliver more power to the ball at impact. You re going to get exercises that will help you to become more flexible, so you swing longer. And finally, you re going to get drills that will train you to swing faster. That s an explosive combination! But for you to get the results you want, you need to take action. Every day for 21 days, just block out 15 minutes to do what I say. Remember, you can do all the exercises at home...so there s no excuses! After you ve finished this program, it would be great if you could shoot me an and let me know your results. It always gives me a kick to hear how I ve been able to help someone. The reward for all my hard work is really in hearing how it has helped golfers like yourself. So I look forward to hearing from you and I wish you all the best. For Consistent Golf, Jeff Richmond Director of Instruction Consistent Golf Exercise Disclaimer The exercises provided by Emet Marketing are for informational and educational purposes only and any use thereof is solely at your own risk. Emet Marketing bears no responsibility thereof. Always consult a qualified medical professional before beginning any new exercise program. Exercise is not without its risks, and this or any other exercise program may result in injury. They include but are not limited to: risk of injury, aggravation of a pre-existing condition, or adverse effect of over-exertion such as muscle strain, abnormal blood pressure, fainting, disorders of heartbeat, and very rare instances of heart attack. To reduce the risk of injury, before beginning this or any exercise program, please consult a healthcare provider for appropriate exercise prescription and safety precautions. The exercise instruction and advice presented are in no way intended as a substitute for medical consultation. Emet Marketing disclaims any liability from and in connection with this program. As with any exercise program, if at any point during your workout you begin to feel faint, dizzy, or have physical discomfort, you should stop immediately and consult a physician. 4 P age

5 Day 1 Swing Faster Not Harder During the next 21 days I m going to be getting you to do things that will help you swing faster. BUT...I want to make sure you re not mixing up the message about swinging faster because it s... Swing Faster NOT Harder It s a fact that the faster you swing the further the ball goes. Because for every 1 mph you increase your swing speed you add about 2.5 yards to your shots. The problem is that golfers often make the mistake of trying to swing harder. And that creates extra tension. Please understand this about tension...it s is a killer to swing speed. When you re swinging you should only be using the necessary amount of muscle tension in your body and no more. If you have more tension in your muscles than is necessary you will be swinging slower than you should and that will cause shots to be shorter than you want. If you swing hard it may feel faster but in reality it will be slower. Always remember this... A Tense Muscle Is A Slow Muscle So because my goal with this program is to help you hit the ball further today I have a couple of great techniques you can do to reduce unnecessary tension (you do need some tension in your golf swing) so you will hit the golf ball further today. Here s the first one 1st. Setup to swing with your driver (and you don t need to hit a ball when doing this), but before you start to swing tense up your entire body, particularly your arms and shoulders, and then hold this tension and swing as fast as you can. Then immediately after doing 5 P age
6 this take another swing but this time relax your muscles completely and swing. When you do that exercise you will find a HUGE difference in speed from the first golf swing to the second golf swing. Now you can actually use this tension and hold technique before you hit any golf shot or just for swinging the club. To do this before you swing the golf club tense up your entire body and hold this for 5 seconds and then release and relax your body and then swing. For most golfers they have way too much tension in their shoulders, arms and hands. If you look at a lot of golfers when they setup to the golf ball they look like they re squeezing the club to death. You want your arms and shoulders to be very relaxed before swinging the golf club and during the swing so you swing with maximum speed. After doing this tense and relaxation when you go to swing you ll be a lot less likely to have tension in your body so you ll have a faster, quicker golf swing. So before you swing a golf club tense your arms as hard as you can and hold for 5 seconds and then release and relax and then swing the golf club. You ll notice you swing much faster when you are relaxed. OK, that s the first thing you can do to swing faster, here s the second 2nd. To help you reduce unnecessary tension in your golf swing simply hum as you re swinging. Start humming before you swing and then swing and notice your humming. This is basically a way of getting bio feedback about your golf swing. Because if you swing and your humming changes dramatically or it stops, that means you re tightening a lot as you re swinging. Now when you re swinging you simply have to notice the changes to the humming. But don t try to swing with less tension. Just swing while humming and your golf swing will change and the tension will reduce. This happens because you re made aware of something and for reasons you don t need to understand, you ll swing with less tension and more power. So there you go, that s two things you can do right now in your golf swing to swing quicker and hit the ball further. And now here is your 15 minute practice plan for today... 6 P age
7 Day 1 15 Minute Practice Plan Swing your driver with maximum tension for one swing and then relax for the next. Don t rush this. Have a small break after each swing. Do this for 7 ½ minutes. Swing your driver while humming when swinging and be aware of your humming. If your humming is cut off at any point it s because of excessive tension. Don t try to stop that however, just keep swinging and it will sort itself out. Do this for 7 ½ minutes. Ok, so that s your first daily 15 minute tasks. But don t do this and forget about it. In fact, I highly recommend that you incorporate the tense, hold and release element (particularly your shoulders, arms and hands) into your routine for the next 21 days and beyond. Because a tense muscle is a slow muscle! 7 P age

 and causes your arms to become separated from the body.")
8 Day 2 The Take-Away The way you start the club away from the ball has a HUGE influence over how efficient your golf swing is. And if you move the club inefficiently you ll be wasting potential power in your golf swing. So for today I m going to teach you how to take the club away with more efficiency. Now when you take the club away it should move on an arc just inside the target line NOT straight back along the target line. Why? Because a straight back takeaway gets the club travelling too much outside (off plane) and causes your arms to become separated from the body. All of this will require compensations later in the swing which will result in inconsistent ball striking and this will lose you distance. Obviously we don't want that, so here is a great drill that will help you to start taking the club on the correct path and with repetition this will fast become a habit. But to do this drill you will need a couple of things. The first is a small torch (or you can use a laser light if you have one). The second thing you'll need is a golf shaft (you can also do this with a driver) with a grip on it. This is a driver golf shaft. Once you have these two things then simply tape the torch to the bottom of the shaft, as shown on the next page 8 P age

9 Tape the torch to the bottom of the shaft like this. Then find a straight line to do this drill. And where the wall and floor meets is perfect. For this drill find a straight line and where the wall and floor meets is perfect. Now, it's a good idea to do this drill at night time because you'll be able to see the torch light easier. 9 P age

10 So to do this drill turn the torch on and then setup as normal and make sure the torch is about 2-3 inches away from the line you're going to use as a plane reference line. And make sure the torch's main light is pointing directly at the line. Turn the torch on, setup as normal and point the torch at the line, so it's about 2-3 inches away like this. From this position simply take the club away with a one piece takeaway (concentrating on turning your left shoulder to the right and keeping your arms, wrists and hands passive) and make sure the light remains pointing at the line as you're taking the club away. 10 P age

11 Important Note: As you're taking the club away the torch will move further away from the plane reference line. And so it should as you need to take the club to the inside. But the light should also point at the plane reference line at all times in the take-away. Keep moving the club away until you get to the place where your left hand is over your right leg and then stop. Then repeat this takeaway, and I suggest you do this drill for at least 15 minutes today. But feel free to do this drill as much as you want after today as it's a real good one and quite interesting. Take the club away with a one piece take away and make sure the light of the torch remains pointing at the line until your left hand reaches opposite your right leg. Then stop and repeat the drill. 11 P age
12 Things You Need To Complete This Drill 1. One small torch. 2. One golf shaft with a grip on it. A driver shaft is the best for this. 3. Some tape. To view a video of this drill simply click here. Day 2 15 Minute Practice Plan Practice taking the club away on plane for 15 minutes today just as I ve shown you. But it s important when you do this that you take the club away at the speed you normally do after getting used to this exercise. After doing this drill your golf swing will become more efficient and therefore more powerful. However if after doing this drill you felt like it was something completely foreign to you then make sure you do this drill regularly over the length of this program and beyond to ingrain it as a new habit. 12 P age

13 Day 3 Wide Arc To hit longer drives you need to have a wide arc back and through. And that s why today I have a very important drill to help you learn this. This drill will help you to create a bigger arc in your golf swing and if you can do that you WILL hit the ball further. To do this drill you will need a broom like this one pictured... Once you have a broom simply grip it like you would a golf club and setup as though you re about to swing a golf club. See the picture on the next page P age


14 Make sure the bristles are pointing straight up in the air. Then swing the broom but as you re doing this you want to swing with as much extension as you can, both back and through. 14 P age

15 Also, here is a very important point about this drill. When you get to the top of your backswing focus on starting the downswing by moving your left knee towards your target. This will help you to start the downswing with your lower body and help you to have good sequencing in your golf swing so you generate the most power possible down where the ball would be. When you look at all the long drivers they all have very wide arcs to their golf swings and this broom drill will help you to do this as well. Click here for a video of a student golfer demonstrating this broom drill. This drill is great for increasing active flexibility, BUT it can be quite hard on your body depending on how heavy the broom you re using is. So do this exercise slowly at first. Then after you can do about 10 swings with the broom then you need to work on speed. Because to hit the golf ball further you ve got to swing fast. So keep doing this broom drill, but here is a plan that you should follow with your 10 swings at one session. On your first swing do so at about 50% of your potential speed. On your second swing do so at about 60% speed. Your 3rd swing do so at about 70% maximum. On your 4th swing do so about 80% maximum. On your 5th swing do so about 90% maximum. Then from then on swing at about 95% of your maximum. Do not swing at 100% of your maximum however because you want to hold a little back to help prevent injuries. 15 P age
16 Important Note: Between each swing take about a second break to give yourself time to recover. Day 3 15 Minute Practice Plan Swing your broom about 10 times to warm up, focusing on having a very wide arc back and through. After your 10 swings to warm-up then swing about 50% of your potential speed with one swing. Then 60% speed with the next and increase 10% each swing until you re swinging about 95% of your maximum speed. Once you re swinging at 95% of your potential speed keep doing this until your 15 minutes of practice time is up. Remember to have a break between swings however. You need to be fresh when doing this. Today s exercise will help you to create great width in your swing. And the wider your swing the more energy you can impart to the golf ball. Plus, you ll be training yourself to swing faster as well. 16 P age
17 Day 4 Fast Backswing Most golfer swing back too slowly compared with Tour pro s. That s a fact that has been proven by scientific research and I ll get into that later in this program. But for now I simply want to help you learn to swing back faster. Remember, not harder, it s speed we re after. So today I have a simple exercise for you to do. To do this drill you ll need to get out your Sand Wedge. Then I want to you setup as though you re about to hit a ball. Then I want you to take your left hand off the grip so only your right hand is on the club. 17 P age
18 Once you re set then I want you to swing as fast as you can to the top of your swing and stop. Then bring the club down and repeat. Do this for 5 minutes. 18 P age


19 After this then I want you to repeat this but just with your left hand on the club. Do this for 5 minutes. Then after this I want you place both hands on the club as you normally would and swing as fast as you can for 5 minutes to the top of your golf swing. 19 P age
20 Click here for a video of a golfer demonstrating this drill. Day 4 15 Minute Practice Plan With your Sand Wedge swing back as quickly as you can to the top of your swing with just your right hand. Do this for 5 minutes. With your Sand Wedge swing back as quickly as you can to the top of your swing with just your left hand. Do this for 5 minutes. With your Sand Wedge swing back as quickly as you can to the top of your swing with both hands. Do this for 5 minutes. When you re doing this drill don t be concerned about technique. Rather you should be concerned about speed. Get out of your comfort zone and swing back fast. This should feel uncomfortably fast. Most golfers are in the mindset of swinging back slowly and for 99% of amateur golfers it s too slowly. So do this drill and train yourself to swing back faster and reap the benefits of longer drives. 20 P age


21 Day 5 Lag (Part 1) No doubt you ve heard about lag in the golf swing, and the place where you can see how much lag a golfer has in the golf swing is when their left arm is parallel with the ground on the downswing. Here is a picture of Sergio Garcia at this point in his downswing: Notice that the club shaft is almost touching Sergio s right shoulder! Another golfer that was well known for great lag in his downswing was Ben Hogan. Here is a picture of Ben Hogan at the half way point in his downswing: 21 P age

22 Again, like Sergio, the shaft is almost touching Ben s right shoulder! OK, so you know you need to retain the angle of your wrists in the downswing to hit the golf ball further.but how can you do it? Well, today I m going to give you a great drill to help you learn lag in your golf swing. To do this drill setup with a driver as normal. Then swing to the top of your backswing and stop. 22 P age
23 Once at the top of your backswing then slide your right hand down the club and loop your right index finger around the shaft so it s about a third of the way down the shaft. From this position swing down with your left hand while trying to increase the lag with your right hand. 23 P age


24 When you move the club down you can move it back and forwards a little bit to get the feeling of retaining the lag in your downswing. Also, when you get down near the hitting area it is important that you feel as though your hands are a long way in front of a position where a ball would be while you are still holding the club back with your right finger. When your left hand is about a foot in front of where a ball would be then release the club with your right finger and swing through with your left hand to a full finish. 24 P age
25 Click here to view a video of one of my students demonstrating this drill. Day 5 15 Minute Practice Plan Practice for 15 minutes doing this lag drill to get the feeling of retaining the lag in your golf swing and then releasing it to get the most power at impact. With the drill I have given you today you will learn to increase the lag in your golf swing for longer drives. Ben and Sergio have proven you don t need to be big to hit the ball a long way. Improve your lag and you ll increase the distance you hit the ball. 25 P age

26 Day 6 Right Shoulder Under Yesterday I gave you a great drill to help you retain lag in the downswing. But the problem is that most golfers often move the shoulders incorrectly in the downswing which will cause a golfer to come over the top and slice the ball which naturally will negate any benefits of retaining lag in the downswing. So to help you today I have a great drill to help you get the feeling of your right shoulder coming under as you re swinging down and through the ball. To do this drill here is what you need to do Setup to a shot as normal and then place your club in front of your ball. Then put your left hand on top of the shaft (see picture below). Once you're in this position simply swing your right hand back as if you were hitting a shot. 2. Place your clubhead level with your ball. Then place your left hand on top of the shaft to keep it from falling. 26 P age
. Keep swinging your right arm under and up so it finishes under your left under arm.")
27 Now swing your right hand back as if hitting a shot and then From this top of the swing position simply swing your right arm down and under, but keep the arm on top of the shaft in pretty much the same position as it was to start with (see picture above). Keep swinging your right arm under and up so it finishes under your left under arm. Also make sure your thumb on your right hand is pointing straight up at the end of your follow-through 27 P age

28 Swing your right arm down and under, keeping the left arm in pretty much the same position that it was at address. To watch a video of this drill being performed click here Do this drill for 15 minutes today then after you ve done that I want you to have some swings and feel as though the right shoulder is moving down and under in your golf swing. This is very important. Day 6 15 Minute Practice Plan Complete the right shoulder under drill for 15 minutes. Have a few swings and feel the right shoulder moving down and under in your downswing and follow-through so that at the end of your swing your right shoulder is lower than your left. 28 P age
29 Day 7 Active Flexibility (Part 1) Today I m going to get you doing some exercises that will help you to increase your swing radius. Because the longer you swing the further the ball will go. Before you do these exercises however you need to warm-up. So click here to watch a video that shows you a series of warm-up exercises that you should do for 3 5 minutes. After doing your warm-up you then need to do the following three exercises. Windmills Description: Swing arms around head in a vertical direction. To see a video of this exercise go here (it's under the Day 7 heading). Bye-Bye s Description: While standing raise both arms out to the side so they are parallel with the ground and at shoulder height. Then bend at the elbows of both arms so your fingers are pointing straight up to the sky and your arms will be forming a 90 degree angle. Your palms will be facing out in front of you. From this starting position simply rotate your hands 180 degrees while keeping your arms and elbows in a similar position as when they started, and continue until your palms are facing behind you. Then return your hands to the starting position and repeat. To see a video of this exercise go here (it's under the Day 7 heading). Wrist Rolls Description: Hold your arms out straight and rotate your wrists around in a clockwise direction and after 15 seconds or so switch to rotating your wrists around in a anti-clockwise direction. To see a video of this exercise go here (it's under the Day 7 heading). Here is exactly the sequence and length of time you should do these exercises for P age
30 Day 7 15 Minute Practice Plan Warm-up for 3 5 minutes Windmills for 30 seconds Bye-Bye s for 30 seconds Wrist Rolls for 30 seconds Then repeat the 3 exercises again another 4-5 times To finish off the 15 minutes swing your broom to increase your swing arc and to speed up your swing. 30 P age

31 Day 8 Faster Swing (Part 1) Today you re going to be training yourself to swing faster. Remember, you re not trying to swing harder. You re swinging faster so relax and only use the necessary tension to move the club fast. Now when swinging you have two hands on the club and you re probably not aware that either one of these hands can actually slow down your swing. So today we re going to start training your hands and arms (individually) to move fast. So to do this I want you to get out your driver and turn it upside down so you grip the club near the head BUT only with your left hand. Then I want you to swing back and through as fast as possible for 10 seconds. To see a video of this drill being performed by one of my students click here. After this I want you to have a break for a minute or two and then repeat it. Do this for a total of five, 10 second blocks. Before you do this however I want you to warm up for a few minutes. So to do this you can swing your broom focusing on having a wide arc. Or you can do some of the exercises I gave you yesterday. The choice is yours. 31 P age
32 So here s what you should be doing today... Day 8 15 Minute Practice Plan Warmup for about 5 minutes by doing the broom drill or exercises I gave you yesterday. Swing a turned upside down driver swing as fast as possible for 10 seconds back and through with just your left hand. There s no stopping for 10 seconds and don t worry about your technique. Rest about 1 2 minutes and repeat again. Complete five, 10 second swings. Today s drill is teaching your fast twitch fibers to fire so you swing faster. And you re doing this with isolation to help you get both sides of your body working together for the most speed possible. 32 P age


33 Day 9 Release (Part 1) I ve talked previously about you being relaxed and tension free when swinging to help you hit the ball further. And one critical place where that has to happen is when you re swinging through the ball. Sadly a lot of golfers swing through the ball without utilizing their wrists and consequently are only swinging at impact as fast as their arms are travelling which isn t very fast. So to help you learn to release the club through the ball I have a simple drill for you today. To do this drill sit down somewhere where you can swing a club safely on a horizontal plane and then do exactly that. Hold a club out in front of you and then swing like a baseball/softball player back and forth and of course you won't be able to use your legs which is the object of this exercise, because if you can't use your legs then of course you've got to use your arms. To watch a video of this drill being performed click here 33 P age
34 Do this drill for 15 minutes today. Day 9 15 Minute Practice Plan Sit down and swing a golf club on a horizontal plane back and through. Swing back and through for about 30 seconds and then stop and have a break. When swinging feel as though you re really using a lot of wrists and rolling your hands over through impact. Do about 5 sets of 30 second swings so this will take you less than 10 minutes. Do one of the other drills I ve given you to make up the other 5 minutes for today e.g. the broom drill. 34 P age
35 Day 10 Release (Part 2) Yesterday I gave you a drill to help you get your hands more involved in the golf swing. And today I m going to give you an extension of that drill so you can time the release of your swing more with your lower body. So instead of doing yesterday s drill while sitting down I want you to do this one standing up. To do this drill simply follow these steps... Step 1: Setup to an imaginary golf ball with your driver. Step 2: Now raise the club up so it s parallel with the ground. Step 3: From this position swing back (keeping the club parallel to the ground) by rotating your upper body and transferring your weight to your right side. While you re doing this gradually cock your wrists so that at the end of your backswing your wrists are fully loaded. When doing this your head should move slightly to the right so it s behind the ball. Step 4: To start the forward swing simply move your weight to your left foot and rotate your body while uncocking your wrists. Step 5: Keep rotating your body so you finish your swing with almost all of your weight on your left side, your belt buckle facing the target and your right foot up on the toe. On the next page are some pictures that show you this drill and if you click here you can see a golfer doing this drill (under Day 10 heading). 35 P age


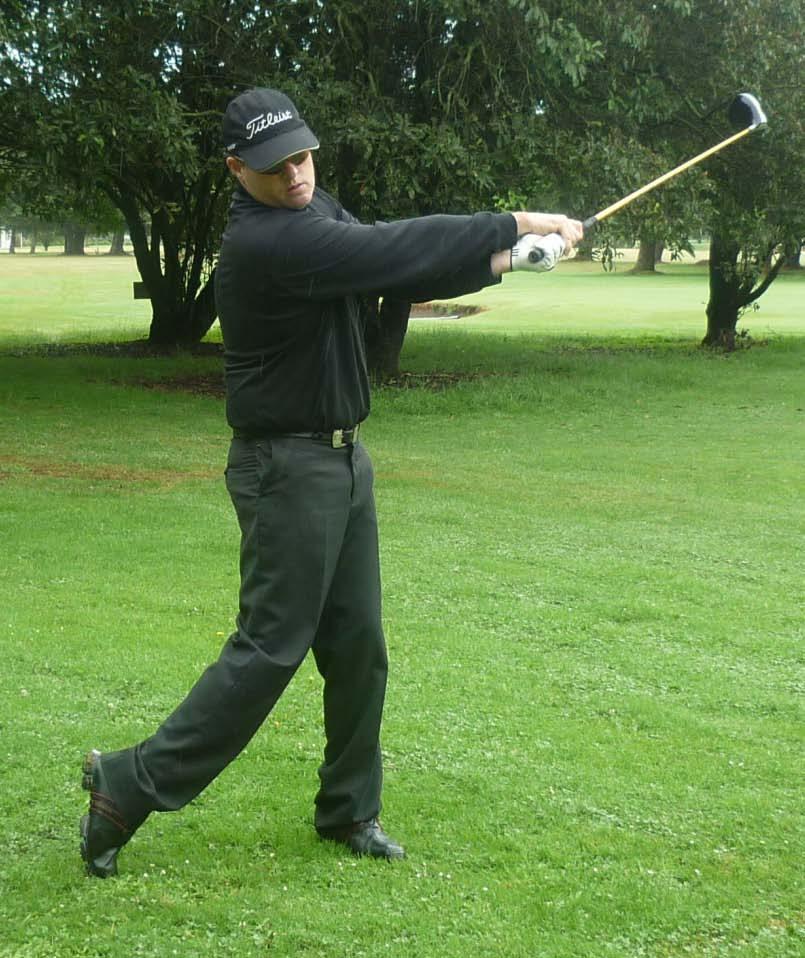

36 36 P age
37 That s a powerful golf swing, just on a different plane! When you do this drill you ll feel a very powerful release through the hitting area. If you can transfer that powerful, free release to your normal golf swing you will hit the ball a lot further. And that s the aim of this program! Day Minute Practice Plan Stand up and swing a golf club on a horizontal plane back and through. Swing back and through for about 30 seconds and then stop and have a break. When swinging feel as though you re really using a lot of wrists and rolling your hands over through impact. Do about 5 sets of 30 second swings so this will take you less than 10 minutes. Do one of the other drills I ve given you to make up the other 5 minutes for today. 37 P age


38 Day 11 Shoulder Plane In the last two days I ve given you drills that get you to swing on a horizontal plan and they re great drills to help you to release the club powerfully through impact. But the problem with them is that most golfers move their shoulders on a too horizontal plane which causes swing plane issues and ultimately causes shots that go much shorter than golfers want. So today I m going to get you to work on a drill that will help you to feel what your shoulders should be doing on both the backswing and followthrough. Also, this is a great drill to help you increase your backswing turn. To do this drill grab a club and place it across your back, standing in a normal posture position that you would use to hit a shot (see picture below). Once setup simply move your shoulders in a similar fashion as you do when you swing, but exaggerate the steepness of your shoulder plane by trying to point the club to a place where the ball would be (see pictures below). You can also do this drill with a ball under the outside of your right foot as this will further help you to feel the weight moving to the inside of your right foot on your backswing, rather than the outside. 38 P age


39 From the top of your backswing position start your downswing with your left knee so that you have separation between your knees (see picture below in the middle). When turning your shoulders on the downswing make sure that your head at impact is behind the place where a ball would be. This is very important. Then as you carry on into your follow-through exaggerate the steepness of your shoulder plane by trying to point the club at the place where a ball would be. So practice this back and forth motion for at least 15 minutes today, and once again really exaggerate the steepness of your shoulder plane. Also remember to keep your head behind the impact position in your swing then let your head move forward after this point. This is very important. Here's a summary of what you should do today Day Minute Practice Plan Place a club across your back and stand in a posture position similar to what you d use to hit a golf shot. Now start your backswing and try to turn your shoulders on an upright plane by attempting to point the club at a place where a ball would be. Once you ve completed your backswing then start your downswing by separating your left knee from your right knee. When completing the followthrough exaggerate the steepness of your shoulder turn by trying to point the club at the place where a ball would be. Do this for 15 minutes today. Click here to view a golfer doing this drill. So that's it for today! I'll see you back here tomorrow for the next drill. 39 P age
40 Day 12 - Active Flexibility (Part 2) Like on Day 7, today I m going to get you doing some exercises that will help you to increase your swing radius. Because the longer you swing the further the ball will go. Before you do these exercises however you need to warm-up. So click here to watch a video that shows you a series of warm-up exercises that you should do for 3 5 minutes. (It's under Day 12 heading) After doing your warm-up you then need to do the following three exercises. Helicopters Description: Stand and hold both arms out straight away from you. Then simply twist your torso to the right and then left while keeping your arms straight. To see a video of this exercise go here (it's under Day 12 heading). Empty Bottles Description: While standing allow your arms to hang at your sides with your palms facing your body and your thumbs pointing in towards your legs. Then raise both hands up while keeping your arms straight and keep your thumbs pointing towards the ground as though you are emptying out bottles. Stop when your arms are as high as possible and return to the start position and repeat. To see a video of this exercise go here (it's under Day 12 heading). Wrist Rolls Description: Hold your arms out straight and rotate your wrists around in a clockwise direction and after 15 seconds or so switch to rotating your wrists around in a anti-clockwise direction. To see a video of this exercise go here (it's under Day 12 heading). Here is exactly the sequence and length of time you should do this P age
41 Day Minute Practice Plan Warm-up for 3 5 minutes Windmills for 30 seconds Bye-Bye s for 30 seconds Wrist Rolls for 30 seconds Then repeat the 3 exercises again another 4-5 times To finish off the 15 minutes swing your broom to increase your swing arc and to speed up your swing. 41 P age

42 Day 13 Faster Swing (Part 2) On Day 8 I got you to start to train one half of your body to swing as fast as possible. And today I m going to help you train the other half. So to do this I want you to get out your driver and turn it upside down so you grip the club near the head BUT only with your right hand. Then I want you to swing back and through as fast as possible for 10 seconds. To see a video of this drill being performed by one of my students click here. After this I want you to have a break for a minute or two and then repeat it. Do this for a total of five, 10 second blocks. Before you do this however I want you to warm up for a few minutes. So to do this you can swing your broom focusing on having a wide arc. Or you can do some of the exercises from yesterday. The choice is yours. So here s what you should be doing today P age
43 Day Minute Practice Plan Warm-up for about 5 minutes by doing the broom drill or exercises from yesterday. Swing a turned upside down driver as fast as possible for 10 seconds back and through with just your right hand. There s no stopping for 10 seconds and don t worry about your technique. Rest about 1 2 minutes and repeat again. Complete five, 10 second swings. 43 P age

44 Day 14 Lag (Part 2) Today I m going to give you a great drill that will help you increase lag in your downswing. Retaining the lag in your downswing is a critical skill to help you hit the ball further. To do today s drill is really simple. To do it you need an iron and a wall. Once you ve got those two components then I want you to setup next to the wall and get to a position where your left arm is parallel with the ground and the club is pointing straight up in the air and your hand should be about a foot away from the wall like this... Position yourself like this so your hands are about a foot away from a wall. From this position simply complete your backswing P age

45 ...and then swing down......and follow-through. 45 P age

46 Now if you DO NOT retain the lag in your downswing you will hit the wall with the butt of your club. This is great feedback for you if this happens. And it s why I got you to do this drill with the club turned up the other way. Because if you hit the wall with the grip of your club you wouldn t have done any damage to your club. After you can do this drill successfully I then suggest you experiment with moving closer to the wall. This will make it harder to not hit the wall and will help you to retain the lag in your swing even more. To watch a video of this drill being performed click here So here s what you need to practice today... Day Minute Practice Plan Practice the wall lag drill and keep doing this until you miss the wall every time you swing. And once you can do that then move closer to the wall at setup to make it harder. 46 P age
47 Day 15 - Active Flexibility (Part 3) Like on Day 13, today I m going to get you doing some more exercises that will help you to increase your swing radius. Because as I keep saying...the longer you swing the further the ball will go. Before you do these exercises however you need to warm-up. So click here to watch a video that shows you a series of warm-up exercises that you should do for 3 5 minutes (It's under Day 15 heading) After doing your warm-up you then need to do the following three exercises. Straight leg kicks Description: In a standing position, slowly kick your right leg upward and across to your left hand held out forward at shoulder height. Keep the leg as straight as possible. Repeat with left leg to right hand. To see a video of this exercise go here (it's under Day 15 heading). Hip And Groin Flex Description: Start in a position similar to that of doing a push-up. Then bring up one foot so it finishes just outside the same side hand then return your foot to the starting position. Then repeat with your other foot. To see a video of this exercise go here (it's under Day 15 heading). Wrist Rolls Description: Hold your arms out straight and rotate your wrists around in a clockwise direction and after 15 seconds or so switch to rotating your wrists around in a anti-clockwise direction. To see a video of this exercise go here (it's under Day 15 heading). Here is exactly the sequence and length of time you should do this P age
48 Day Minute Practice Plan Warm-up for 3 5 minutes Straight leg kicks for 30 seconds Hip and Groin Flex for 30 seconds Wrist Rolls for 30 seconds Then repeat the 3 exercises again another 4-5 times To finish off the 15 minutes swing your broom to increase your swing arc and to speed up your swing. 48 P age

49 Day 16 Faster Swing (Part 3) On Day 8 and Day 13 I got you to train one half of your body to swing as fast as possible. And today I m going to help you train your entire body. So to do this I want you to get out your driver and turn it upside down so you grip the club near the head BUT with both hands, like normal. Then I want you to swing back and through as fast as possible for 10 seconds. To see a video of this drill being performed by one of my students click here. After this I want you to have a break for a minute or two and then repeat it. Do this for a total of five, 10 second blocks. Before you do this however I want you to warm up for a few minutes. So to do this you can swing your broom focusing on having a wide arc. Or you can some of the exercises that I gave you yesterday. The choice is yours. So here s what you should be doing today P age
50 Day Minute Practice Plan Warm-up for about 5 minutes by doing the broom drill or exercises from yesterday. Swing a turned upside down driver swing as fast as possible for 10 seconds back and through with just your right hand. There s no stopping for 10 seconds and don t worry about your technique. Rest about 1 2 minutes and repeat again. Complete five, 10 second swings. 50 P age
51 Day 17 Swing Sequencing (Part 1) As far as golf swing power is concerned one of the big key s is getting the sequencing correct from the transition in your backswing to downswing. Because during that part of your golf swing, for a brief second your upper body should be completing the backswing while your lower body is starting to move towards the target. So to complete the transition successfully you should have two main segments of your body (upper and lower) going in different directions. I know that sounds hard.and that s because it is! But it s doable and I m going to get you doing a great drill today that will help you to learn this. Now if you ve ever taken part in any other sport that requires kicking (e.g. soccer), throwing (e.g. baseball), hitting (e.g. tennis) you would ve experienced the transition move that is needed in the golf swing. And one move that almost everyone can relate a transition to is the action of throwing a ball. So if you wanted to throw a golf ball as far as you possibly could down the fairway would you?: a) shift your weight to your back foot as you re taking the ball back and then shift the weight to your front foot to throw the ball, or b) keep your weight evenly distributed the entire time you re throwing the ball. I hope you picked A because that s what any athlete would do to throw a ball as far and fast as possible. Just take a look at a baseball pitcher for example. When they pitch they move their weight to the back foot and they do this so much so that when they re taking the ball back they lift their front foot up. Then to change directions they shift their weight aggressively to their front foot and keep moving all of their weight so that at the end of the pitch basically all of their weight is on their front foot. Here is a great slow motion video of a baseball pitch for example. Now that s a great example of a powerful transition! And if baseball pitchers didn t shift their weight back and forth so much they could not do the fast pitches that they do. That example of the baseball pitcher leads nicely into this drill, as you ll soon see. 51 P age

52 During the transition from backswing to downswing you must let the club follow the lead from the rest of the body because the club is the last thing to move in the transition. Here is the sequential order of things that should be moving back towards the target during the transition: 1. Feet 2. Legs 3. Hips 4. Shoulders 5. Arms 6. Club So when your club is just about at the top of your backswing you want to then start transferring the weight aggressively back to your left foot. By doing this it means that for a fraction of a second your backswing is being completed but your lower body is moving towards the target. Again, this transition happens from the ground up. OK, to learn how to do this here s what I want you to do. Get out your driver and setup as normal. 52 P age

53 Then swing to the top of your backswing and stop. While you re stopped bring your front foot back so it s together with your back foot. 53 P age

54 Then to start the downswing simply move your front foot back to the position where it was at address......and swing down and follow-through. 54 P age
55 By doing that you ll quickly learn how the transition into the downswing should start with your lower body. But once you have that drill down the next thing you should do is take out the stop in your backswing. So swing back and as you re swinging back move your front foot back to your back foot and as you re completing the backswing move your front foot back to where it was at address. Doing this will help you to feel your upper body going back while your lower body is moving forward. This is super powerful! So click here to watch this video now to get a good idea on exactly how to do this drill (it's under Heading 17). You ll see the easy version and then the more advanced version at the end. There s no two ways about it.learning to swing back with your upper body while your lower body is moving forward is tough. But if you practice this drill I ve given you today then watch out. Longer drives will be yours! Day Minute Practice Plan Practice the stepping drill to train a powerful transition. 55 P age
56 Day 18 - Active Flexibility (Part 4) Like on Day 15, today I m going to get you doing some exercises that will help you to increase your swing radius. Because the longer you swing the further the ball will go (heard me say that before ). Before you do these exercises however you need to warm-up. So click here to watch a video that shows you a series of warm-up exercises that you should do for 3 5 minutes (it's under Heading 18). After doing your warm-up you then need to do the following three exercises. Dynamic Hurdles Description: Important Note You can do this exercise with an imaginary hurdle or a real one. Stand side on to your hurdle and then lift your leg over the hurdle, followed by your other leg. Once over the hurdle repeat going back leading with the second leg this time. To see a video of this exercise go here (it's under Heading 18). Lateral leg swings Description: Hold onto a support while standing and swing one leg side to side in front of the body, keeping your leg straight. Repeat with other leg. To see a video of this exercise go here (it's under Heading 18). Wrist Rolls Description: Hold your arms out straight and rotate your wrists around in a clockwise direction and after 15 seconds or so switch to rotating your wrists around in a anti-clockwise direction. To see a video of this exercise go here (it's under Heading 18). Here is exactly the sequence and length of time you should do this P age
57 Day Minute Practice Plan Warm-up for 3 5 minutes Dynamic Hurdles for 30 seconds Lateral Leg Swings for 30 seconds Wrist Rolls for 30 seconds Then repeat the 3 exercises again another 4-5 times To finish off the 15 minutes swing your broom to increase your swing arc and to speed up your swing. 57 P age

58 Day 19 Swing Sequencing (Part 2) Where do you want the most power and speed in your golf swing? Not at the start of your swing, not at the top of your backswing, BUT at impact, right? Well, here is the best drill I ve discovered to help a golfer learn how to have the most power at impact. Interestingly this drill doesn t involve swinging a golf club but instead you will be swinging a rope. The beauty of this drill is you get instant feedback if the power in your golf swing is NOT at impact. Because if you have a lot of power at the end of your swing you ll get hurt. So because we human beings learn quickly to avoid pain, when you do this drill you ll quickly learn how to apply the most power to the golf ball. This will result in a lot longer golf shots. So, to do this drill you ll need to get a fairly thick piece of rope that is about 3 and half feet in length like the one pictured below. A good place to find a thick enough rope is a boat shop or a hardware store. Once you ve got your rope then also need some duct tape. This is to put around one end of the rope where you re going to be holding the rope like a golf club and then a smaller amount down the other end, as is pictured on the next page. 58 P age


59 After your rope is ready then setup to an imaginary ball with your rope. 59 P age

60 From your setup position make your normal backswing move with your body. But here s a tip you should start your backswing with the big muscles of your back and shoulders to get the rope moving away smoothly. Once you get into your final backswing position then STOP so the rope is resting on your back. Then from this top of the swing position you then need to start your downswing. To do this you must: Start your downswing by moving your weight from your right foot to your left foot. At the same time move your hips laterally to the left and turn them as fast as you can. This should all happen very quickly however so you won t be able to easily distinguish the difference between your weight being transferred and your hips moving and turning. 60 P age

61 If you don t start the downswing correctly with a weight shift and a lateral shift and turn of the hips you will get hurt doing this rope drill. The rope will come through very fast at the finish of your swing and hit you and that will hurt. But it s great feedback and you ll probably only do it once! To make sure this doesn t happen however make sure you don t do anything with your hands after they ve reached the top of the swing position. Your hands are simply pulled through the downswing by your powerful lower body. Also do nothing with your shoulders and arms. Because like the hands they are moved as a result of your lower body movements. There should be no conscious thoughts as to how to move them in the downswing, or follow-through for that matter. And when you do this drill correctly the rope will lightly tap you at the end of your swing. It won t hurt you at all. Why? Because with the correct transition from the backswing to your downswing the majority of the power in your swing is generated at the bottom of your swing which is just where it should be. At the end of your swing the rope should be moving very slowly as it should have very little power. 61 P age
62 That s why this is such a great drill because you learn to use your body to get the club moving the fastest just where it needs to.through the ball. Now even though we ve given you a thorough explanation of how to do this drill you can t beat actually seeing it performed to get a full understanding of what we re talking about. So to do that click here to see a video of this rope drill being performed by one of my students (it's under Heading 19). When you do this drill you ll quickly learn how to get the most speed and power at the bottom of your swing. This will help you to hit the ball a lot further, so get a rope and start doing this drill consistently to improve your ball striking. Day Minute Practice Plan Practice this rope drill to learn the correct sequence in the golf swing so you hit the golf ball as far as possible. 62 P age
63 Day 20 - Active Flexibility (Part 5) Like on Day 18, today I m going to get you doing some exercises that will help you to increase your swing radius. Because the longer you swing the further the ball will go (last time you hear me say that ) Before you do these exercises however you need to warm-up. So click here to watch a video that shows you a series of warm-up exercises that you should do for 3 5 minutes (it's under heading 20). After doing your warm-up you then need to do the following three exercises. Trunk Rotations Description: Lie face up on the floor with your arms straight out to either side. Then with one of your legs lift it up and move it as far over to the opposite side as you can and then return that leg to the starting position. Then repeat with your other leg. To see a video of this exercise go here (it's under Heading 20). Standing Twist Description: Stand and twist your torso to the left and right holding your arms at chest height. To see a video of this exercise go here (it's under Heading 20). Wrist Rolls Description: Hold your arms out straight and rotate your wrists around in a clockwise direction and after 15 seconds or so switch to rotating your wrists around in a anti-clockwise direction. To see a video of this exercise go here (it's under Heading 20). Here is exactly the sequence and length of time you should do this P age
64 Day Minute Practice Plan Warm-up for 3 5 minutes Trunk Rotations for 30 seconds Standing Twist for 30 seconds Then repeat the 3 exercises again another 4-5 times To finish off the 15 minutes swing your broom to increase your swing arc and to speed up your swing. 64 P age
65 Day 21 - Faster Swing (Part 4) So far in this program I ve been giving you things to help you train your body to swing faster. And today I m going to help you do that again but this time with your driver how you normally would grip it. So to do this I want you to get out your driver and grip it normally. Then I want you to swing back and through as fast as possible for 10 seconds. To see a video of this drill being performed by one of my students click here. After this I want you to have a break for a minute or two and then repeat it. Do this for a total of five, 10 second blocks. Before you do this however I want you to warm up for a few minutes. So to do this you can swing your broom focusing on having a wide arc. Or you can some of the exercises that I gave you yesterday. The choice is yours. So here s what you should be doing today P age
66 Day Minute Practice Plan Warm-up for about 5 minutes by doing the broom drill or exercises from yesterday. Swing a turned upside down driver swing as fast as possible for 10 seconds back and through with just your right hand. There s no stopping for 10 seconds and don t worry about your technique. Rest about 1 2 minutes and repeat again. Complete five, 10 second swings. After you ve completed this then go out and smack your drives at least 21 yards further. Enjoy! 66 P age
: 3 Easy Steps To A Professional Swing Plane Increase Your Swing Speed Build A Swing Like A Pro")
67 Conclusion Well, that s the end of this program. BUT it s only the beginning of me helping you to become the best golfer possible. Because, here are some more resources to help you (click the words to go to the appropriate website): 3 Easy Steps To A Professional Swing Plane Increase Your Swing Speed Build A Swing Like A Pro Discover One Short Game Secret To Success Become A Great, Confident Putter Train Your Mind For Golf Success I hope you ve enjoyed the last 21 days. Please me your results and give me feedback. I would love to hear from you. For Consistent Golf, Jeff Richmond Director of Instruction Consistent Golf 67 P age
Table of Contents. Page 2 of 36
 Table of Contents Introduction... 3 Setup Lessons... 4 The Grip... 4 Ball Positioning... 5 Posture... 7 Alignment... 9 Swing Lessons - Step 1... 11 Swing Lesson - Step 2... 21 The Loop Drill... 24 Standing
Table of Contents. Introduction Secret # Secret # Secret # Secret # Secret # Conclusion...
 5 Secrets To Maximum Distance Table of Contents Introduction... 3 Secret #1... 4 Secret #2... 5 Secret #3... 7 Secret #4... 7 Secret #5... 9 Conclusion... 11 Page 2 Introduction The 5 secrets I share in
11 Short Game Drills To Help You Up And Down It From Anywhere!
 Table of Contents Introduction... 3 Chipping... 4 Drill #1 - Wrist Firm (Part 1)... 4 Drill #2 - Wrist Firm (Part 2)... 4 Drill #3 - Chipping Accuracy... 6 Pitching... 8 Drill #1 - Distance Control (Part
The BIG BOOK of Golf Drills
 The BIG BOOK of Golf Drills 1 How to Use This Guide Congratulations on purchasing the Big Book of Golf Drills! This book is designed to use as a reference guide. We do not recommend printing this out as
Hitting The Driver Made Easy
 Table of Contents Introduction 3 Equipment 4 The Golf Shaft 4 The Golf Grip 5 The Club Head 6 Equipment Summary 7 The Setup And Swing 9 The Grip 10 Ball Position 12 Alignment 12 Posture 14 The Take-Away
Mark Wood s Full-Swing Basics. 7 Steps to Jump-Start Your Game for 2015
 Mark Wood s Full-Swing Basics 7 Steps to Jump-Start Your Game for 2015 On giving short 30-minute corporate clinics, I am normally speaking with a large group of golfers who are of varying abilities. As
A new, Australian move promises solid contact, a cure for your slice, instant results and less strain on your back. Is this your SWING OF THE FUTURE?
 A new, Australian move promises solid contact, a cure for your slice, instant results and less strain on your back. Is this your SWING OF THE FUTURE? BY PETER CROKER and JEFFREY JOHNSON with Roger Schiffman
Finally Out of the Sand
 Finally Out of the Sand A Guide to Success in the Bunker Written By: Master Teaching Professional Adam Kolloff www.scratchgolfschool.com Introduction I can't tell you how many people roll their eyes when
The Simple Swing
 The Simple 1-2-3 Swing The Amazing "1-2-3 Swing" Guarantees The Average Golfer Can Break 90 In Less Than a Week! The Amazing "1-2-3 Swing" Guarantees Average Golfers Can Learn To Consistently Hit The Ball
Welcome to the Homework Hitting Workout Plans!
 Homework Hitting Workouts Plans Welcome to the Homework Hitting Workout Plans! Each of the below workout plans can be completed in 15 minutes or less. All can be done at home, in the garage, the back yard,
The Golf Swing. The Fundamentals
 The Golf Swing The Fundamentals Fundamental #1 Grip & Set-Up The grip and set-up should be viewed as putting parts of a machine together. The right parts connected in the right way will allow the machine
GOLF SPECIFIC DYNAMIC WARM UP
 GOLF SPECIFIC DYNAMIC WARM UP Golf-related injury is common. The three most common areas injured include: 1. The back 2. The wrists, and 3. The elbows. A golf-specific dynamic warm-up is recommended by
The Takeaway. The waggle can be an excellent opportunity to rehearse your takeaway
 The Takeaway Your approach to the ball is the final step over which you have total control. Once you actually start the swing, you need to depend on rhythm, tempo and balance to see you through the swing.
Table of Contents. *Available In Full Version Only
 TE LI R VE N O SI Fix Your Swing Series Lite Version Table of Contents 1. Fix Your Slice 2. Fix Your Hook 3. Hit More Fairways 4. Fix Your Setup 5. Fix Your Impact Area 6. Fix Your Fat Shots 7. Fix Your
Fix Your Swing Series. Table of Contents
 Fix Your Swing Series Table of Contents 1. Hit More Fairways 2. Fix Your Setup 3. Fix Your Ball Position 4. Fix Your Takeaway 5. Fix Your Backswing 6. Fix the Top of Your Swing 7. Fix Your Downswing 8.
Swing Trainers. You Can Find At Home. By Kevin Sprecher
 Swing Trainers You Can Find At Home By Kevin Sprecher Golf is a game that requires both innate feel and learned technique. There are distinct drills and exercises to create a swing change and new, more
Homework Hitting (c) Softball-Spot.com PART 1
 Softball-Spot.com PART 1") PART 1 Caution. It is important that you consult a physician and a trainer or coach before you begin. You should have a medical check-up before starting any exercise program. Welcome to homework hitting.
PART 1 Caution. It is important that you consult a physician and a trainer or coach before you begin. You should have a medical check-up before starting any exercise program. Welcome to homework hitting.
Instructional Manual
 Instructional Manual TABLE OF CONTENTS MEDICUS Dual 2000 Instructional Manual The Proper Grip 1 Posture, Stance & Alignment 2 Breakpoint 1: Takeaway 3 Breakpoint 2: Toe-up Position 4 Breakpoint 3: Setting
The Secrets Of The Swing
 The Secrets Of The Swing brought to you by www.golfclubdistance.org and Amazing Golf Mind Table of Contents 1. The Address 2. The Take Away 3. The Top Of The Backswing 4. The First Move 5. The Downswing
Welcome Statement. 1. the Plan. 2. the History. 3. the Warm Up. 5. the Setup. 6. the Swing 7. the Glue 8. the Tour Draw Practice Station.
 table of contents.. Welcome Statement. 1 the Plan. 2 the History. 3 the Warm Up. 5 the Setup. 6 the Swing 7 the Glue 8 the Tour Draw Practice Station. 9 the Tour Draw Assessment. 10 Summary. 11 Key Phrases.
Softball Pitching Mechanics
 Softball Pitching Mechanics When teaching softball pitching mechanics, the best way to avoid injury, develop consistency, and see results is through repetition and attention to detail. Even a slight change
BEGINNING PITCHING TIPS BRYC Softball Updated February 4, 2008
 BEGINNING PITCHING TIPS BRYC Softball Updated February 4, 2008 General 1. Work on sound mechanics before anything else. The earlier a player learns the mechanics, the quicker she will progress in learning
Glencoe Youth Baseball Player Coach Developmental Series
 Glencoe Youth Baseball Player Coach Developmental Series Dynamic Warm-ups: (Tony Bastinelli) 10-15 minutes -Start with a light jog, maybe two / three gym laps, w/ gloves on. Single file, no passing and
PEE WEE AND LIONS RULES AND SKILLS HANDOUT (April 2005) THE RULES
 THE RULES") PEE WEE AND LIONS RULES AND SKILLS HANDOUT (April 2005) THE RULES 1. When the whistle is blown by the coach, stand still, be quiet, and look at the coach; 2. If you want to speak raise your hand and wait
PEE WEE AND LIONS RULES AND SKILLS HANDOUT (April 2005) THE RULES 1. When the whistle is blown by the coach, stand still, be quiet, and look at the coach; 2. If you want to speak raise your hand and wait
one-plane swing eliminates push shots & duck hooks On The Cover ou ve read endless advice about swing planes and ball trajectories.
 On The Cover INSTRUCTION ONE-PLANE SWING one-plane swing eliminates push shots & duck hooks ou ve read endless advice about swing planes and ball trajectories. You re mentally drained from trying to figure
Shot put learn by - doing Basic technique for the Shot Put By: Mark Harsha Portage High School Girls Head Coach
 Shot put learn by - doing Basic technique for the Shot Put By: Mark Harsha Portage High School Girls Head Coach Goal One: Shot grip and placement 1. Holding the shot The shot is held at the base of the
Moorhead Baseball Routines/Hitting Drills
 Moorhead Baseball Routines/Hitting Drills Philosophy How we train: Teach everyday with the goal of our players becoming their own coach. Get them to feel what s going on. Consistent mix of instruction
Stance Recap Blocking Positions To the Right:
 Stance Recap We must create the ability to block out of both the primary (no runners on base) and the secondary (runners on base) stances. We have to put ourselves in a position to be able to get our feet
Dr. D. Ryan York, PT, DPT, CGS Doctorate in Physical Therapy Certified Golf Performance Specialist, GOLO Golf University
 Dr. D. Ryan York, PT, DPT, CGS Doctorate in Physical Therapy Certified Golf Performance Specialist, GOLO Golf University Dr. Chad Edwards, PT, DPT, CGFI Doctorate in Physical Therapy Certified Golf Fitness
Fix The Flight..Be Your Own Human Trackman
 2017 PGA Player Development Fix The Flight..Be Your Own Human Trackman Application of Jim Hardy s Pluses and Minuses. Krista Dunton www.kristaduntongolf.com Golf Magazine Top 100 Instructor Plane Truth
Coaching Principles. 1. Introduce 2. Demonstrate 3. Explain 4. Organize 5. Execute 6. Correct 7. Practice
 5 Pin Bowling Drill Book Updated August 2008 Coaching Principles STEPS IN TEACHING A DRILL 1. Introduce 2. Demonstrate 3. Explain 4. Organize 5. Execute 6. Correct 7. Practice GENERAL PRINCIPLES Drills
IMPORTANT COPYRIGHT AND LEGAL INFORMATION
 IMPORTANT COPYRIGHT AND LEGAL INFORMATION This book is the intellectual property of Anthony Procopis of http://www.thetruthaboutputting.com and AAP Enterprises Pty Ltd. This e-book cannot be shared. This
Carolina Trace Country Club
 Carolina Trace Country Club Short Game School Michael Krick Head Golf Professional Trace Member Table Of Contents Putting 1, 2 Putting Evaluation Matrix 3 Putting Positions 4 Chipping 5, 6 Pitching 7,
DRILLS MANUAL & SELF CORRECTION SYSTEM
 DRILLS MANUAL & SELF CORRECTION SYSTEM Symple Swing "The Easy-To-Learn Golf Swing " From Simple Golf LLC Support@SimpleGolf.com Website: www.simplegolf.com Copyright 2005 Simple Golf LLC Symple Swing Drills
00 G O L F T I P S
 00 G O L F T I P S www.golftipsmag.com DROP IN 10 STROKES 10 MINUTES! BY TOM STICKNEY, PGA, WITH RYAN NOLL PHOTOS BY RYAN NOLL It s a new year. It s a new you. It s time to kick those bad swing habits
slice bye bye FIND YOUR FAULT... AND FIX IT! SLICE CURE
 { C O V E R F E A T U R E} bye bye slice It s weak, nasty and robs us of better scores. Send your slice packing for good, by Gareth Johnston words joel tadman PICtures HOWARD BOYLAN { game} SLICE CURE
Little League Pitching Mechanics - Simple Instructions For Little League
 Little League Pitching Mechanics - Simple Instructions For Little League Pitchers By Steven Ellis, former Chicago Cubs pitching pro The goal for any Little League coach or parent is to keep the game simple
By Mark Favell with Al Barkow
 Golfers get into trouble when they try to align their body first, especially their feet, which are the least important element. By Mark Favell with Al Barkow Because golfers stand at the side of the ball
How using Trackman can help coaches produce better results
 WWW.TRACKMANROADSHOW.COM How using Trackman can help coaches produce better results The purpose of this case study is to prove that using Trackman can help coaches produce better results with their students
Playing Catch - Throwing The Baseball
 Playing Catch - Throwing The Baseball Entire Body When kids are taught to throw, often the instruction is watered down into just a couple of steps. The act of throwing a baseball is not that simple. Throwing
Lesson 3. Golf. Lesson Objectives. Personal Conditioning. Prepare Students... 3 min Explain/Demonstrate/Practice
 Lesson 3 Lesson Objectives Time Page Equipment & Materials Personal Conditioning Lesson 25........................................... 5 min. Prepare Students.................................... 3 min........
Beginning Softball Pitching Adapted from a guide created by Stan VanderSlik
 Beginning Softball Pitching Adapted from a guide created by Stan VanderSlik Pitching a softball is not like throwing a softball. Pitching is an underhand motion that, when done correctly, can result in
Kent Canoe Services
 Kent Canoe Services www.thecanoeshop.co.uk Eskimo Rolling (Kayaks) Introduction: Welcome to our article on Eskimo rolling. Years ago eskimo rolling was considered to be an advanced skill only performed
Baseball Training Program
 Baseball Training Program Always consult your physician before beginning any exercise program. The information and advice published or made available through the Orthopaedic and Neurosurgery Specialists,
LEVEL 1 SKILL DEVELOPMENT MANUAL
 LEVEL 1 SKILL DEVELOPMENT MANUAL Lesson Manual C A Publication Of The USA Hockey Coaching Education Program The USA Hockey Coaching Education Program is Presented By LESSON C-1 SPECIFIC OBJECTIVES 1. Refine
Techniques To Treat Your Pain At Home (512)
") Techniques To Treat Your Pain At Home (512) 288-5322 7010 W. TX-71 Suite 360 Austin TX, 78735 Arm Only Bird Dog Start in the quadruped position (all fours) with arms and thighs perpendicular to the floor.
Techniques To Treat Your Pain At Home (512) 288-5322 7010 W. TX-71 Suite 360 Austin TX, 78735 Arm Only Bird Dog Start in the quadruped position (all fours) with arms and thighs perpendicular to the floor.
Belton High School Marching Fundamentals 2016
 Belton High School Marching Fundamentals 2016 Fundamentals of Teaching Fundamentals: 1. Say the name of the maneuver (INSTRUCT) 2. State its purpose (INSTRUCT) 3. Demonstrate it slowly, several times,
How to Hit a Draw Video Transcription
 How to Hit a Draw Video Transcription Hi, I'm Bobby Eldridge and we're excited about what you're going to learn in this DVD. I have always believed that the draw is essential to your best golf. In the
THE PERFECT CHIP CENTER PAGE STRAP HERE. Proven Ways to Shoot Your Best Scores Ever! Powered by the Top 100 Teachers in America
 Performance PAGE STRAP HERE EDITED BY DAVID DeNUNZIO Powered by the Top 100 Teachers in America CENTER THE PERFECT CHIP You want your on-course chips to be like the ones you munch from a bowl: nice and
Randolph College Softball 2008 Summer Program
 Randolph College Softball 2008 Summer Program Week 1 Week 2 Endurance: 1 mile run 4x per Endurance: 1.25 mile run 4x per Core workout: 4x per Core workout: 4x per Week 3 Week 4 Endurance: 1.5 mile run
by John Bertges PGA Professional / PGTA Master Professional
 by John Bertges PGA Professional / PGTA Master Professional His name may be overused in golf circles today, but Tiger Woods has taught us a lot in reference to the Modern Golf Swing. Many of his accomplishments
The Fundamentals of Putting
 The Fundamentals of Putting Episode 1 - Setup and Aiming A proper setup position is a prerequisite of a good putt. Setup includes body posture, gripping the putter, alignment of body relative to the ball
Putting Basics. If You Can Putt You Can Score. Written by: Randy Sparks Purestrike Golf Academy Destin, Florida
 Putting Basics If You Can Putt You Can Score Written by: Randy Sparks Purestrike Golf Academy Destin, Florida Putting Now that you've built your chipping, pitching, and full swing motions, it's time to
Coaches Handbook. Coaches Handout Page 1
 Coaches Handout 2009 Page 1 General Session 1: How to Warm-up! Players are put through basic warm-ups and exercises that they should perform each week when they come to Tball. Stretching should be the
Welcome to The Big Half Training Plans. Complete beginner half marathon training plan.
 Welcome to The Big Half Training Plans Complete beginner half marathon training plan. We ve pulled together this training programme to help you understand the basics of what, how much and when to run over
WGAAA Baseball Skill/Coaching Manual
 WGAAA Baseball Skill/Coaching Manual All baseball players regardless of age should have a base knowledge and capability of proper baseball mechanics. If a team is mechanically sound, more often than not,
There are 9 positions on the softball field labeled as follows
 DEFENSE There are 9 positions on the softball field labeled as follows THROWING MECHANICS Dynamic throwing warmup o Wrist flicks, wrist snap is super important for a strong, fast accurate throw. Have arm
COACH RIC EVERMAN THE BASICS FOR BECOMING A FAST-PITCH SOFTBALL PITCHER
 COACH RIC EVERMAN THE BASICS FOR BECOMING A FAST-PITCH SOFTBALL PITCHER IMPORTANT: There are a lot of steps to learn here. Don t try to do them all of them at once. Take things one at a time. Nobody learns
Baseball Hitting Drills for Batting Tee Work
 Baseball Hitting Drills for Batting Tee Work In my experience, the difference between those players who make it in baseball and those who don t is consistency repeating your swing with drills is an important
Golf 8 Week Training Plan
 Golf 8 Week Training Plan Week #1 1. Welcome and introductions; introduce the game of golf and go over safety procedures: 1 Provide necessary equipment; wear appropriate clothing; protect against sun and
PLAY BETTER GOLF and HAVE MORE FUN
 PLAY BETTER GOLF and HAVE MORE FUN Randy Meyer PGA Table of Contents Chapter Page Teaching Philosophy 1 Philosophy and Approach 3 Swing Fundamentals 2 Pre-swing 4 In-swing 5 Golf Tips 3 Ball position,
DRILLS EVER! Practice drills are simple but effective. WAVE BYE TO A FLYING ELBOW Keep the right elbow tucked in at the top of your backswing
 20 BEST DRILLS EVER! Fix golf s common faults in minutes with Adrian Fryer s simple tips WORDS kit alexander Pictures BOB ATKINS Practice drills are simple but effective ways for any golfer to develop
PA RT 1 TOTAL GAME IMPROVEMENT PLAN LONG GAME. Find more fairways, hit more greens and shoot lower scores this summer
 PA RT 1 TOTAL GAME IMPROVEMENT PLAN LONG GAME Find more fairways, hit more greens and shoot lower scores this summer A stronger long game starts here... Learn from TG top-50 coaches and tour pros Welcome
Legal Disclaimer You must get your physician s approval before beginning this exercise program.
 1 Legal Disclaimer You must get your physician s approval before beginning this exercise program. These recommendations are not medical guidelines but are for educational purposes only. You must consult
Ultimate Hitting Drills
 If You Enjoy This Report, Please Check Out Ultimate Hitting Drills Discover 56 Game-Te Tested Hitting Drills For A Faster, Smoother, And More Powerful Swing! Get Instant Access To The Complete Report Today,
Movement Assessment & Enhancement Session
 C H A P T E R F O L L O W - U P I M P A C T M O V E M E N T S R O U T I N E Movement Assessment & Enhancement Session E X P E R I E N C E Y O U R G R E A T N E S S C H A P T E R F O L L O W - U P I M P
Baseball Hitting Principles Version 2
 Baseball Hitting Principles Version 2 Scott Kluemper 2/17/2013 Scott Kluemper 1 Table of Contents Page Swing Phases 3 Stance 4 Negative Move 10 Positive Move 12 Toe Touch 15 Heel Plant 17 Posture Lines
Timing 1. The hips and shoulders rotate at the end of the catch to assist in the acceleration of the stroke.
 Freestyle Body Position 1. Head position should be comfortable at a 45º angle with the water line slightly above the goggles. 2. Hips and shoulders should remain high in the water with a straight line
Field Hockey BC Coach Education and Mentorship Technical Skills
 Field Hockey BC Coach Education and Mentorship Technical Skills Robin D Abreo Provincial Development Coach Field Hockey British Columbia Tel: 604-730-7220 robin@fieldhockeybc.com www.fieldhockeybc.com
KOSCIELISKO POL. Biathlon Shooting Lesson :00 16:30
 KOSCIELISKO POL Biathlon Shooting Lesson 29.09.2011 15:00 16:30 Basic Shooting Skills Positions Basic Shooting Skills Positions Basic Shooting Skills Positions Introduction Dominant Eye Rifle Fitting Prone
Full swing technique is a pillar of a solid overall game. The following 4 core competencies are strong predictors of success in ball striking.
 Full Swing Analysis What are we trying to accomplish? Core Competencies in the Full Swing Full swing technique is a pillar of a solid overall game. The following 4 core competencies are strong predictors
A PRACTICAL GUIDE TO YOUR TRAINING SESSIONS
 A PRACTICAL GUIDE TO YOUR TRAINING SESSIONS WHEN and WHY? Once you have followed the advice in the How to Get Everything Learnt by Opening Day handout you will need to go back and to improve on the basic
Basic Shooting Skills Positions. By: Shannon Carlton
 Basic Shooting Skills Positions By: Shannon Carlton Agenda Introduction Dominant Eye Rifle Fitting Prone Position Rifle Fitting Tips Standing Position Sequences Checklists Positions Stable Comfortable
T H E M O S T I M P O R T A N T L E S S O N O F A L L
 T H E M O S T I M P O R T A N T L E S S O N O F A L L #2 The Grip CHEAT SHEET 1. Minimal compensation for consistency 2. Grip rotation influences club face angle 3. Turn hand right for more hook, Turn
How to Swing a Driver
 How to Swing a Driver Instruction set for beginning golfers By Mike Buzzell Pictured: John Daly, also known as Long John, was the first PGA Tour player to average 300 yards per drive. He won two Major
Goalkeeper Warm Up. After the foot skill and pass/receive drills that the entire team does have the goal keepers warm up with drills like these:
 Goalkeeper Warm Up After the foot skill and pass/receive drills that the entire team does have the goal keepers warm up with drills like these: Bounce and Catch 1. Have them hold a ball in their hands
HOW TO HOLD THE SHOT
 HOW TO HOLD THE SHOT Balance the shot in his hand so it is resting at the point where the fingers are connected to the palm of the hand. Keep their fingers together and allow their thumb to gently rest
A Publication Of The USA Hockey Coaching Education Program The USA Hockey Coaching Education Program is Presented By
 LEVEL 1 SKILL DEVELOPMENT MANUAL Lesson Manual B A Publication Of The USA Hockey Coaching Education Program The USA Hockey Coaching Education Program is Presented By LESSON B-1 SPECIFIC OBJECTIVES 1.
Stretching & Marching Sequence Chart - General
 Stretching & Marching Sequence Chart - General Exercise Description Counts Segment Warmup # Breathe and Stretch (2x) Breathe in 16 Head Roll (2x) Right, back 32 Shoulder Rotation (x + x) Up, down, up,
The following lesson is excerpted from
 The following lesson is excerpted from A Fresh Approach to the Snare Drum is the most comprehensive method available that simultaneously provides instruction for rhythm reading, technique fundamentals,
You get the best out of others when you give the best of yourself. Harry Firestone
 PROGRAMS & COACHING ADVICE: WEEK #1 You get the best out of others when you give the best of yourself. Harry Firestone THE WORKOUT ON CLINIC DAY: SESSION 1 FOR ALL PROGRAMS *Refer to your InTraining Pocket
U.S. Shooting Team Balance, Strength and Stability Workout. Shooting Warm-Up
 U.S. Shooting Team Balance, Strength and Stability Workout Shooting Warm-Up Modified by Dan Durben and Sommer Wood from the program originally developed by Amber Darland for the USA Shooting National Rifle
Movement Assessment & Enhancement Session
 C H A P T E R 6 F O L L O W - U P T R A J E C T O R Y M O V E M E N T S R O U T I N E Movement Assessment & Enhancement Session E X P E R I E N C E Y O U R G R E A T N E S S C H A P T E R 6 F O L L O W
ShuttlE. Schools Badminton. Module 5: 10 starter lessons
 ShuttlE Time Schools Badminton Teachers MANUAL Module 5: 10 starter lessons ShuttlE Time Schools Badminton Teachers MANUAL 10 starter lessons Badminton World Federation 2011. First published November
For this drill, you need four to six hurdles and at least two cones or other markers (one for the start line, one for the finish line).
.") Hurdle Acceleration Drill For this drill, you need four to six hurdles and at least two cones or other markers (one for the start line, one for the finish line). Place the first mini-hurdle at a distance
Hurdle Acceleration Drill For this drill, you need four to six hurdles and at least two cones or other markers (one for the start line, one for the finish line). Place the first mini-hurdle at a distance
No one questions that the wider your swing
 HOW TO LENGTHEN & WIDEN YOUR SWING By Brett Taylor with Al Barkow Photos by BW Studios, Courtesy of Eli Ingram, Lit l Links Golf Club No one questions that the wider your swing radius and the longer the
8 Steps To A Modern Forehand Technique
 8 Steps To A Modern Forehand Technique By Tomaz Mencinger FeelTennis.net 2 Thanks for downloading this free report / checklist that contains the short version of the 8 Steps To A Modern Forehand Technique.
A Women s Walking Training Program
 A Women s Walking Training Program Our objective is to get women to the starting line of fitness. Regardless of your age or ability we aim to create opportunities in walking and running around the world.
EFFORTLESS SWIMMING. Mastering Freestyle Technique: How to swim faster, longer and easier (and look good doing it)
") Mastering Freestyle Technique: How to swim faster, longer and easier (and look good doing it) Dear Fellow Swimmer, Thank you very much for investing your money, confidence and time into this course. We've
Mastering Freestyle Technique: How to swim faster, longer and easier (and look good doing it) Dear Fellow Swimmer, Thank you very much for investing your money, confidence and time into this course. We've
U.S. Shooting Team Balance, Strength and Stability Workout. Training Work-Out
 U.S. Shooting Team Balance, Strength and Stability Workout Training Work-Out Modified by Dan Durben and Sommer Wood November 2006 from the program originally developed by Amber Darland for the USA Shooting
 Hi Coach! Thanks for checking out this free report. Inside, you're going to discover 20 "plug and play" tips that will dramatically improve any hitter's swing. For better quality at-bats, improved contact,
DYNAMIC MOTION IN BALANCE.
 CONGRATULATIONS! With the purchase of your new SPEED STIK you are now just 15 days away from launching long drives, shooting better scores and deriving more enjoyment from your golf game. YOUR SPEED STIK
QUICK TIPS THROWING & FIELDING
 PRACTICE ACTIVITIES The number one reason children decided to stop playing baseball is they get bored. The best approach to planning and organizing practices is to make sure players are always active rather
Warm Ups. Standing Stretches
 Warm Ups Mild warm-ups are a necessity for everyone. The need for warm-ups increases with age as the body becomes less elastic over time. It is recommended that you execute the warm-up routine in this
The Pure Point Golf Driver DVD Special Outline Instruction to Focus on
 The Pure Point Golf Driver DVD Special Outline Instruction to Focus on Purpose: This instructional resource was included for your reference. The points outlined in the following sections are what we have
The Better Golfer s Guide to Strength Training
 The Better Golfer s Guide to Strength Training Your golf swing requires 21 different muscles to work together You need to train every one. Michael Wood, CSCS Chief Fitness Officer, Koko FitClub Let s Tee
The Grip: Place the shot comfortably on the base of the hand with the thumb down and the four fingers balancing the shot.
 The Javelin By Mark Mirabelli, Throwing Specialist - www.mmtrackandfield.com If I could use one word to express success in all three styles of throwing the shot put I would have to say the word drill.
Structure (Down plane)
") By Lauren Russell Structure (Down plane) The body (toes, knees, hips, wrists and shoulders) is aligned parallel to the intended target line. The torso is tilted over the ball from the hips whilst maintaining
By Lauren Russell Structure (Down plane) The body (toes, knees, hips, wrists and shoulders) is aligned parallel to the intended target line. The torso is tilted over the ball from the hips whilst maintaining
Glencoe Youth Baseball Player Coach Developmental Series
 Glencoe Youth Baseball Player Coach Developmental Series Dynamic Warm-ups: (Tony Bastinelli) 10-15 minutes -Start with a light jog, maybe two / three gym laps, w/ gloves on. Single file, no passing and
RJT. Pupil Task Cards: Throwing JUMP THROW RUN
 RJT s: Throwing RUN JUMP THROW s: Introduction Introduction to the s An important part of every child s cognitive development is to encourage them to explore new things and use self-guided learning to