To End All Wars. WW1 Miniature Game V1.2
|
|
|
- Toby Anthony
- 5 years ago
- Views:
Transcription


1 To End All Wars WW1 Miniature Game V1.2


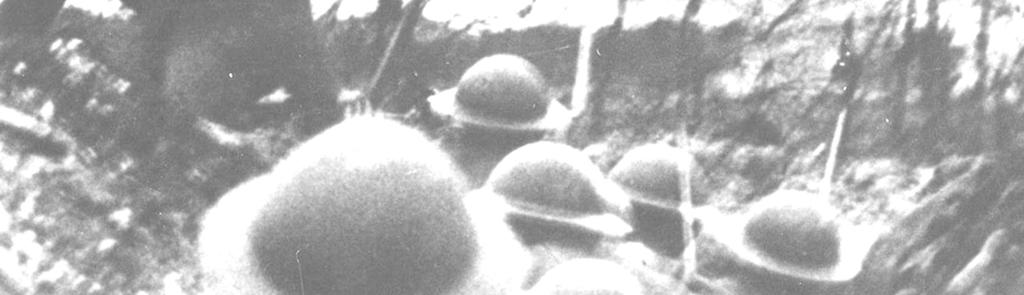
2 Introduction: The Western Front in World War I was dominated by a series of trenches cutting its way through the French countryside. Commanders on both sides would send their troops over the top and into No Man s Land, the battlefield between the trenches. These attacks would be immensely costly to the attackers, as the machine guns and rifle fire would rip through the attacking infantry. Both sides dreamt of an offensive that would break through the stalemate of trench warfare, and both sides tried to achieve this many times, but until the German Spring Offensives of 1918 and the subsequent Allied 100 Days Offensive, all efforts would end in catastrophic losses for little to no gain. To End All Wars is meant to be a simple and fast, but accurate, representation of combat on the Western Front. Overview: Unlike most World War I miniature games, TEAW uses a 1:1 scale, so each unit represents one soldier. This allows for a close up view of combat, as opposed the macro view that divisional levels games offer. Each team has a number of actions it can perform. While some of these actions are the same, each team has unique actions. For example, and Anti-Tank team can fire an anti-tank shot at a tank while an assault team could not. There is an expansion to TEAW which adds artillery and gas. This can allow for many different strategies for attacking the enemy s trenches. Version 1.2 (August 2017) Modified for Freewargamesrules.wikia.com
3 The Turn: There is no order of events for the turn; instead you choose what actions each team will take, in any order. There are general actions that most teams can take and specific actions for each team. Each team can take a different amount of actions per turn. When you have taken all the actions that you can, or choose to, it becomes your opponent s turn. Name # of Actions # of Figures Assault Team 3 6 Defensive Team 2 5 LMG Team 2 2 HMG Team 1 3 Engineer Team 3 4 Flamethrower Team 2 2 Raider Team 3 4 Sniper Team 2 1 Anti-Tank Team 2 3 In addition, defensive, LMG, HMG, sniper, and raider teams may use one action during their opponent s turn, but the action must be listed as: during opponent s turn. General Actions: Move: (All) NOTE: No team may use this action more than twice per turn. Move your team Xcm in any direction. While any team can move, they all move at different speeds. Name Speed (cm) Assault Team 12 Defensive Team 8 LMG Team 8 HMG Team 8 Engineer Team 8 Flamethrower Team 8 Raider Team 15 Barbed Wire: If, during movement, at team runs into barbed wire, its movement action ends and you must roll a die. Depending on the result, the following things happen: Die Roll Result 1 No effect. Can still take actions besides moving. May move past wire next turn. 2 No effect. Can still take actions besides moving. May move past wire next turn. 3 Slowed. Can take no more actions this turn. May move past wire next turn. 4 Slowed. Can take no more actions this turn. May move past wire next turn. 5 Snared! Can take no more actions this turn. Must roll to get out of wire next turn. 6 Snared! Can take no more actions this turn. Must roll to get out of wire next turn.
4 If you are snared in the wire, on the next turn you roll a die. On a 1-3 you get out of the wire and may take one move action forward (but no other action that turn). On a 4-6 you are still stuck in the wire and must roll again next turn. Shoot: (All except LMG, HMG, and Flamethrower Teams) If a team has LoS (line of sight: can draw an uninterrupted line from one team to the other) on an enemy team and is in range of that team, they may fire at them. You do not fire for each unit in the team, but the number alive impacts the attack. When attacking, check to see how many units are alive in the team; this determines how many dice will be rolled. When you have rolled your dice, see how many of the dice are equal to or above the hits on number, the defender removes that many units from his/her team. Range 25cm Units Alive Dice Hits On Example: A British assault team is attacking a German defensive team. The British team is 20 cm away from the Germans, so they are in range and have a clear line of sight to them. The British have 3 units alive in the team, and they roll two dice. One is a 4 and the other is a 2, so one of the Germans (defender chooses) is removed from the game. Cover: When you are attacking an enemy team and you cannot see at least one-half of the whole team (includes if you can see all of the units, but only parts of them), they are in cover. When a unit is in cover, it is harder to be successfully hit. Units Alive Dice Hits On Hand to Hand Combat: (All except HMG teams) NOTE: No team may use this action more that once per turn. If a team comes within 2cm of another team, they may engage in hand to hand combat. Both teams roll a die, the higher number has the initiative and attacks first. Once teams have started
5 hand to hand combat, they must continue to fight each turn until a team successfully withdraws or a team is completely wiped out. Roll a die for each unit alive. Compare to the below results. After the first team attacks, the second follows suit. Sum of Die Result 1-4 Attack blocked. 5-6 Attack successful, remove one opposing unit. If a team wants to withdraw from hand to hand combat, it must roll a die. On a 5-6 the attempt is successful, on a 3-4 the attempt is successful but one unit is killed, on a 1-2 the attempt is unsuccessful and a unit is killed. After a successful withdrawal, the unit may take on move action. Throw Back Grenade: (All) If a grenade lands within 4cm of your team, you may attempt to throw it back. Roll a die; on a 1-3 you are successful. Place a marker where you want the grenade to land within 15cm. It explodes at the beginning of your opponents turn, killing everything in a radius of 5cm. On a 4-6 you are not successful and that team s turn ends immediately. Specific Actions: Some teams may have the same action, but there may a difference in number of dice to roll, distances, etc. So read carefully. Assault Teams: Cut Wire: When moving, if you come to barbed wire, instead of rolling a barbed wire check, you may roll a die. On a 1-3 the wire is destroyed. If the roll is 4-6, the attempt is unsuccessful, continue the unit's turn as if it had just run into the wire. Even if you cut the wire, you may not finish your move action. Throw a Grenade: Place a marker where you want the grenade to land. Roll a die, on a 1-3 it lands where the marker is. On a 4-5 it lands 5cm in front of the target, and on a 6 it lands 5cm behind the target. At the beginning of your next turn it will explode, killing everything in a radius of 5cm. If the grenade lands in a trench or shell hole and explodes, it does not affect any unit not in the trench or shell hole but still in the radius of the blast. If it lands above a trench or shell hole, it also does not affect any unit in the trench or shell hole that is still in the radius of the blast.
6 Bayonet Charge: Works exactly like hand to hand combat, but more effective. Sum of Die Result 1-3 Attack blocked. 4-6 Attack successful, remove one opposing unit. Defensive Team: Defensive teams, like HMG teams, may use one action during their opponent s turn, but the action must be listed as: during opponent s turn. Throw a Grenade: Place a marker where you want the grenade to land. Roll a die, on a 1-3 it lands where the marker is. On a 4-5 it lands 5cm in front of the target, and on a 6 it lands 5cm behind the target. At the beginning of your next turn it will explode, killing everything in a radius of 5cm. If the grenade lands in a trench or shell hole and explodes, it does not affect any unit not in the trench or shell hole but still in the radius of the blast. If it lands above a trench or shell hole, it also does not affect any unit in the trench or shell hole that is still in the radius of the blast. Defensive Fire: (During Opponent s Turn) If your support team did not move on your turn and an enemy team moves within range of your support team, and is not in cover, you may open fire on them. Combat works the same way, except your shots will not be as accurate. Units Alive Dice Hits On NOTE: You may only use this action the turn that an enemy team comes into range of you. If the enemy team is already in range of you when it starts its turn, you may not use this action. LMG Team: Set Up MG: You must do this prior to using any attacks. Once you have used this action, you cannot move until you use the pack up MG action.
7 Pack Up MG: You must do this prior to moving after you have used the set up MG action. Machine Gun Attack: If a team has LoS on an enemy team and is in range of that team, they may fire at them. When attacking, check and see how far the target team is and then see how many dice you roll. When you have rolled your dice, see how many of the dice are above or equal to the hits on number, remove that many units from the enemy team Cover: When you are attacking an enemy team and you cannot see at least one-half of the whole team (includes if you can see all of the units, but only parts of them), they are in cover. When a unit is in cover, it is harder to be successfully hit Defensive Fire: (During Opponent s Turn) If your LMG team did not move on your turn and an enemy team moves within range of your team, and is not in cover, you may open fire on them. Combat works the same way, except your shots will not be as accurate and you can only achieve one kill NOTE: You may only use this action the turn that an enemy team comes into range of you. If the enemy team is already in range of you when it starts its turn, you may not use this action. HMG Teams: Set Up MG: You must do this prior to using any attacks. Once you have used this action, you cannot move until you use the pack up MG action. Pack Up MG: You must do this prior to moving after you have used the set up MG action.
8 Machine Gun Attack: If a team has LoS on an enemy team and is in range of that team, they may fire at them. When attacking, check and see how far the target team is and then see how many dice you roll. When you have rolled your dice, see how many of the dice are above the hits on number, remove that many units from the enemy team Cover: When you are attacking an enemy team and you cannot see at least one-half of the whole team (includes if you can see all of the units, but only parts of them), they are in cover. When a unit is in cover, it is harder to be successfully hit Defensive Fire: (During Opponent s Turn) If your HMG team did not move on your turn and an enemy team moves within range of your team, you may open fire on them. Combat works the same way, except your shots will not be as accurate and you can only achieve one kill no matter how many hit NOTE: You may only use this action the turn that an enemy team comes into range of you. If the enemy team is already in range of you when it starts its turn, you may not use this action. Engineer Team: Cut Wire: When moving, if you come to barbed wire, instead of rolling a barbed wire check, you may roll a die. On a 1-3 the wire is destroyed. If the roll is 4-6, the attempt is unsuccessful, continue the unit's turn as if it had just run into the wire. Even if you cut the wire, you may not finish your move action.
9 Place Wire: NOTE: Takes up all three actions. Your engineer team may place a section of barbed wire (around 5cm) anywhere touching one of the team s units. Place Mine: NOTE: Takes up all three actions. Your engineer team may place a mine anywhere within 3cm of one of the team s units. If any team, besides an engineer team, comes within 4cm of the mine, it explodes and kills anyone in a 5cm radius. Damaging Tanks: If a tank comes within 4cm of a mine, roll a die. On a 5 or 6, nothing happens; on a 1-4 the tank is damaged. If it is damaged, roll another die, on a 1-3 the driver is killed and the tank can no longer move, on a 4-6 the gunner is killed and the tank can no longer shoot. Diffuse Mine: NOTE: Takes up all three actions. If your engineer team comes within 5cm of a mine, they can attempt to diffuse it. Roll a die, on a 1-4 it is successful, on a 5-6 it goes off, killing everyone in a 5cm radius. Throw a Grenade: Place a marker where you want the grenade to land. Roll a die, on a 1-3 it lands where the marker is. On a 4-5 it lands 5cm in front of the target, and on a 6 it lands 5cm behind the target. At the beginning of your next turn it will explode, killing everything in a radius of 5cm. If the grenade lands in a trench or shell hole and explodes, it does not affect any unit not in the trench or shell hole but still in the radius of the blast. If it lands above a trench or shell hole, it also does not affect any unit in the trench or shell hole that is still in the radius of the blast. Place Charge on Tank: If your engineer team is within 5cm of an enemy tank, they may attempt to place an explosive charge on the tank. Roll a die, on a 2-5, the attempt was successful, on a 5 the attempt failed and the engineer s turn ends, and on a 1 the charge goes off, killing the entire team. If the attempt is successful, at the end of your next turn the charge goes off. Unlike other forms of damaging tanks, charges will render it completely useless, and the tank is destroyed.
10 Flamethrower Team: Flamethrower: When attacking with the flamethrower, put the flame marker at the end of the unit. The marker is cut into sections, each with the die rolls that count as a hit. Roll a die for any unit touched by the marker. If the roll is higher that the number on the section of the marker the unit is touching, they are killed. Damaging Tanks: If a tank is touched by the marker, you must get a 6 to damage it. If you damage a tank, roll another die. On a 1-3 the driver is killed and the tank can no longer move, on a 4-6 the gunner is killed and the tank can no longer shoot. Throw a Grenade: Place a marker where you want the grenade to land. Roll a die, on a 1-3 it lands where the marker is. On a 4-5 it lands 5cm in front of the target, and on a 6 it lands 5cm behind the target. At the beginning of your next turn it will explode, killing everything in a radius of 5cm. If the grenade lands in a trench or shell hole and explodes, it does not affect any unit not in the trench or shell hole but still in the radius of the blast. If it lands above a trench or shell hole, it also does not affect any unit in the trench or shell hole that is still in the radius of the blast. Raider Team: NOTE: Raider teams may throw as many grenades as they have actions. Cut Wire: When moving, if you come to barbed wire, instead of rolling a barbed wire check, you may roll a die. On a 1-3 the wire is destroyed. If the roll is 4-6, the attempt is unsuccessful, continue the unit's turn as if it had just run into the wire. Even if you cut the wire, you may not finish your move action. Throw a Grenade: Place a marker where you want the grenade to land. Roll a die, on a 1-3 it lands where the marker is. On a 4-5 it lands 5cm in front of the target, and on a 6 it lands 5cm behind the target. At the beginning of your next turn it will explode, killing everything in a radius of 5cm. If the grenade lands in a trench or shell hole and explodes, it does not affect any unit not in the trench or shell hole but still in the radius of the blast. If it lands above a trench or shell hole, it also does not affect any unit in the trench or shell hole that is still in the radius of the blast. Take Cover: (During Opponent s Turn) For every unit hit, you may roll a die. Each 6 negates a hit.
11 Elite Bayonet Charge: Works exactly like hand to hand combat, but it is much more effective. Sum of Die Result 1-2 Attack blocked. 3-6 Attack successful, remove one opposing unit. Sniper Team: Line Up Shot: Prior to attacking on a turn, you must use this action. Take Cover: (During Opponent s Turn) For every unit hit, you may roll a die. Each 6 negates a hit. Precision Shot: After lining up a shot, you may attack. Roll one die. Cover is negated. Distance (cm) Hits On Anti-Tank Team: Line Up Shot: Prior to attacking on a turn, you must use this action. Anti-Tank Shot: This is for specifically targeting tanks. After lining up a shot, you may attack. Roll one die. On a hit, roll a die, on a 1-3 the driver is killed and the tank cannot move, on a 4-6 the gunner was killed and the tank can not attack. Distance (cm) Hits On Tanks: The tank is a very powerful weapon on the battlefield and can single-handedly change the course of the battle. Most small arms cannot damage the tank, but flamethrower, engineer, and anti-tank teams have ways of damaging them. Tanks work mostly the same as infantry. Their turn consists of them using actions, but they have completely unique ones. # of Actions 2
12 Actions: Move: NOTE: Tanks may not move more than once per turn. Move your tank 15cm in one direction. If you wish to change the direction of the tank, you may not change it more than 90 degrees at the beginning of the action. Machine Gun Attack: If the tank has LoS (line of sight: can clearly see) on an enemy team and is in range of that team, they may fire at them. When attacking, check and see how far the target team is and then see how many dice you roll. When you have rolled your dice, see how many of the dice are above the hits on number, remove that many units from the enemy team Cover: When you are attacking an enemy team and you cannot see at least one-half of the whole team (includes if you can see all of the units, but only parts of them), they are in cover. When a unit is in cover it makes it harder to hit
13 Cannon Attack: Place a marker where you want the shot to land. The shot must be within the range of the tank and in a 45 degree triangle in front of the tank. Range (cm) 30 When attacking the team, roll a die and refer to the chart. Sum of Dice Result 1 Shot lands 15cm in front of the target. 2 Shot lands 15cm behind the target. 3-4 Shot lands on target. 5 Shot lands 15cm to the right of the target. 6 Shot lands 15cm to the left of the target. Wherever the shot lands, anything within a 5cm radius is killed. Gametypes: TEAW can be played in many different ways: Skirmish: Two small forces fight until one side is completely wiped out. Battle: Medium to large sized forces fight until one side is destroyed. Objective-based Battle: Similar to battle, but there is an objective, like control the enemies trench for X turns. Simulation: Reenactment of a historical battle. Campaign: Series of simulations that represent a full campaign like Verdun or the Somme. Objective Glossary: Eliminate Entire Force: All opposing units must be killed. Eliminate X Teams: Keep track of the number of opposing teams you destroy. If you destroy X teams, you win. Capture and Hold for X Turns: The area that you are trying to capture and hold, i.e. a trench, must be completely clear of opposing units and you must have units in that area. If that is true for X turns, you win.
To End All Wars WW1 Miniature Game V1
 To End All Wars WW1 Miniature Game V1 Introduction: The Western Front in World War I was dominated by a series of trenches cutting its way through the French countryside. Commanders on both sides would
TRENCH RAIDER: World War I Wargaming in Ten Minutes by David Raybin 2014
 TRENCH RAIDER: World War I Wargaming in Ten Minutes by David Raybin 2014 INTRODUCTION Instead of a generic set of WW1 rules I determined to make the rules fit the game scenario rather than the other way
House Rules for Nuts! Final Version Version 1.3 by Jeff Glasco
 1. The basic game uses a 3' x 3' table. This is fine for very dense combat, like in a major urban campaign, but is too small for a larger attack, like a platoon attack. A platoon attack would be on an
FIRETEAM Wargame Rules for Modern Combat Operations
 FIRETEAM Wargame Rules for Modern Combat Operations By Rory Crabb Written By Rory Crabb Version 1.0 July 2016 Miniatures from the collection of the author and terrain by Paul Davies 1 FIRETEAM Wargame
French infantry Platoon
 French Special Rules 1940 Gas Guzzler: The Char B1 Bis had huge problems with fuel consumption, to keep the vehicle in the field for a whole day would require it to be refueled at least twice. Any vehicle
Tactical Combat Rules By David Newport
 Tactical Combat Rules By David Newport Tactical Combat is a game covering company and battalion level actions using 20 th century weapons. The game was designed for World War II action, but it handles
Skirmish Action AAR: Ruhr 1945 By Russ Lockwood
 Skirmish Action AAR: Ruhr 1945 By Russ Lockwood This tidy little 1945 scenario for Skirmish Action (SA) comes courtesy of Dennis Shorthouse, whose figures and terrain make for a good-looking WWII table.
The Horror of Trench Warfare. World War I
 The Horror of Trench Warfare World War I War in Europe (1) The Western Front The war became a stalemate- trench warfare Trenches were long ditches surrounded by barbed wire to protect the troops. A WWI
FORCES OF VALOR BATTLE TACTICS 2005, Unimax Toys Limited, All Rights Reserved
 FORCES OF VALOR BATTLE TACTICS 2005, Unimax Toys Limited, All Rights Reserved Forces Of Valor, The Game allows you to fight exciting and realistic war games. All you need to play are Forces Of Valor soldiers
WORLD WAR 1 WORLD WAR 1 BATTLES
 WORLD WAR 1 WORLD WAR 1 BATTLES BELL WORK QUESTION WHAT DO YOU THINK WAS THE MOST SIGNIFICANT CONTRIBUTION CANADIANS AT HOME MADE TO THE WAR EFFORT? REVIEW LIBERAL LEADER WILFRID LAURIER CREATED A 'PARTY
Corinth Canal Scenario Pack Historicon
 Corinth Canal Scenario Pack 2016 Historicon July 16, 2016 Race For The Corinth Canal Commonwealth Platoons 1 and 2 represent elements of 2/6 Australian Infantry and start the game in foholes. Commonwealth
BATTLE FOR 2MM EARTH 1418: The Great War (Version 0.8)
") BATTLE FOR 2MM EARTH 1418: The Great War (Version 0.8) INTRODUCTION The Battle for 2mm Earth rules are suitable for any large combat up until around the end of the 19 th Century. I designed 1418 semi-independently
BATTLE FOR 2MM EARTH 1418: The Great War (Version 0.8) INTRODUCTION The Battle for 2mm Earth rules are suitable for any large combat up until around the end of the 19 th Century. I designed 1418 semi-independently
Modern Infantry Tactics in WWII Online
 Modern Infantry Tactics in WWII Online By Cameron (dryk) Version 0.1 A 75 th Guards Guide www.75thguards.com 1.1 Why Modern? In a game like WWII Online, it's hard to be lucky enough to find 10 people to
SkirmishCampaigns: France 40 Battles for the Meuse Across the Meuse - Sedan
 AFTERMATH Despite spirited resistance at several points, the infantry crossed the Meuse and penetrated the French positions in several areas, aided by heavy air and artillery support and combat engineer
Things that need changing in your rule book. (Errata for PBI)
") Things that need changing in your rule book. (Errata for PBI) This information applies to PBI as published by RFCM/Peter Pig March 2006. Firstly an apology for having to make updates and changes to the
Things that need changing in your rule book. (Errata for PBI) This information applies to PBI as published by RFCM/Peter Pig March 2006. Firstly an apology for having to make updates and changes to the
Global Command Series. Fortifications v1.0. A Global War 2 nd Edition 3d Printed Expansion Historical Board Gaming
 Overview Global Command Series Fortifications v1.0 A Global War 2 nd Edition 3d Printed Expansion Historical Board Gaming This set features rules for many different types of fortifications, sold separately
RULES. A: A targeted squad receives corner cover when the imaginary line of the attacking unit s line of sight passes through
 R e a d t h i s FAQ t h o r o u g h ly a n d k e e p i t s e c u r e i t m ay s av e l i v e s RULES Q: In what situations will a squad benefit from corner cover? A: A targeted squad receives corner cover
Operation Spark The Battle for Marino January 1943 Scenario written by Iain Craven With contributions and play testing by Richard Lawrence
 Operation Spark The Battle for Marino January 1943 Scenario written by Iain Craven With contributions and play testing by Richard Lawrence After a series of costly, and occasionally catastrophic, failed
ERES TO YOU FUZZY WUZZY by Bob Cordery
 1. Introduction ERES TO YOU FUZZY WUZZY by Bob Cordery ETYFW relies upon the use of both average dice (AvDs produce more predictable results) and normal dice (D6s produce less predictable results) to reflect
To begin OMOG requires a few things.
 Omog (One Man One Gun) is a game for toy soldiers and any available space. It can be played on a desktop, a coffee table, a countertop or other surface. The game itself is simple, easy to learn and easy
ONE IF BY LAND" - AMERICAN 1:10 SCALE WAR OF INDEPENDENCE RULES by Bob Bergman. Infantry/Cavalry figure 10 men Artillery crew figure 5 men
 ONE IF BY LAND" - AMERICAN 1:10 SCALE WAR OF INDEPENDENCE RULES by Bob Bergman Ground Scale 1 inch = 15 yards One Turn About five minutes Infantry/Cavalry figure 10 men Artillery crew figure 5 men Artillery
Stepping Up to Version 3 by Phil Yates
 Stepping Up to Version 3 by Phil Yates With the arrival of Version 3, lots of existing players are asking the obvious question: What s changed?. To answer this question, I ve written this document as a
WORLD WAR I- WEAPONRY. Our knowledge of life is limited to death
 WORLD WAR I- WEAPONRY Our knowledge of life is limited to death New Technology- Guns The Machine Gun It was used by both sides, hundreds of rounds a minute could be shot by one person. Combined with barbed
The Pre War Artillery Revolution
 Slide 1 Slide 2 The Pre War Artillery Revolution The war of 1914-18 was an artillery war. Artillery was the battle winner, artillery was what caused the greatest loss of life, the most dreadful wounds
BATTLE OF CHERBOURG THREE CAMPAIGNS FOR MEMOIR '44
 BATTLE OF CHERBOURG THREE CAMPAIGNS FOR MEMOIR '44 On June 6, 1944, thousands of Allied soldiers landed on the beaches of Normandy as part of Operation Overlord. The night before, hundreds of paratroopers
X Corps: The Somme 1916
 X Corps: The Somme 1916 A Card Wargame of World War I Neal Reid 2016 Published by Vexillia Limited www.vexillia.com Contents 1. Introduction 3 2. Historical Background 3 3. Game Overview 6 4. Setting Up
Initial Set-Up. Officer s Handbook Game Walk-Through
 Officer s Handbook Game Walk-Through O H W - D : 29 M 2018 The game was fought in a North African Desert environment in late 1940 between British and Italian Forces, depicting a hasty engagement where
September 3 rd 1939 Battle on the Czech/Polish border (BK28) between 3 rd German Infantry Army and 3 rd Polish Infantry Army.
 between 3 rd German Infantry Army and 3 rd Polish Infantry Army.") September 3 rd 1939 Battle on the Czech/Polish border (BK28) between 3 rd German Infantry Army and 3 rd Polish Infantry Army. Forces involved: dice: 1 infantry = 1 rifle unit of 4 bases 3 grenades = 3
September 3 rd 1939 Battle on the Czech/Polish border (BK28) between 3 rd German Infantry Army and 3 rd Polish Infantry Army. Forces involved: dice: 1 infantry = 1 rifle unit of 4 bases 3 grenades = 3
KR 16 Kometenmelodie Rules version 1.6 2nd Edition
 KR 16 Kometenmelodie Rules version 1.6 2nd Edition THE IDEA BEHIND THE RULES These are a free set of scenario driven sci-fi skirmish rules. They are intended to be used with 6mm figures with no more than
Attack at Luneville by Roger Burley
 Attack at Luneville by Roger Burley The objective for both the United States and the Germans is the control of Luneville defined for US as 3 buildings for 10 phases and the Germans to prevent this. 1 2
ARMORED FIGHTING VEHICLE COMBAT:
 ARMORED FIGHTING VEHICLE COMBAT: Due to the recent appearance of armored vehicles on the market, vehicles play an increasingly important role in the 12" action figure world. With slight modification, these
Fields of Blue & Grey
 Fields of Blue & Grey A very different kind of American Civil War rules, that allow the grand sweep of corp level actions to be recreated while still using the regiment as the basic combat element. A simple
King George Commands and We Obey
 King George Commands and We Obey Basing Army Commanders 80mm dia base with a vignette on it, min 3 figures. Divisional Commanders 80mm dia base with a vignette on it, max 2 figures. Brigade Commanders
Richard Borg. Rules & Scenarios
 Richard Borg Rules & Scenarios INTRODUCTION The Command and Colours WWI THE GREAT WAR game rules allow players to portray important engagements throughout WWI history. The battles, in the scenario section,
Canadian History 1201 Unit 2. Canada in the First World War
 Canadian History 1201 Unit 2 Canada in the First World War Student Workbook 2.2 Student Name: SCO 2.0: The student will be expected to demonstrate an understanding of Canada s involvement in the First
YANKS UP THE YANGTZE. A GAME OF WARFARE AND MAYHEM ALONG THE YANGTZE RIVER DURING THE 1920s. Written by Greg Blake
 YANKS UP THE YANGTZE A GAME OF WARFARE AND MAYHEM ALONG THE YANGTZE RIVER DURING THE 1920s Written by Greg Blake Welcome to YANKS UP THE YANGTZE [YUTY], Cannon Fodder Miniatures rules for gaming warfare
Bundok and Bayonet Colonial Wargames Rules by Bob Cordery
 Introduction Bundok and Bayonet Colonial Wargames Rules by Bob Cordery Part 1 - The Basic Rules The following Colonial Wargames rules were written for my own personal use and reflect my philosophy that
+HGJHURZ+HOO. PLAYTEST VERSION (02 June 2000) In the future, an updated version may be found at:
 In the future, an updated version may be found at:") AFTERMATH The US 1 st Infantry Division pushed on to expand the beachhead supported by the tanks of the 2 nd Armored. Within days the German 352 nd Division was reduced to a few brave and ragged survivors.
AFTERMATH The US 1 st Infantry Division pushed on to expand the beachhead supported by the tanks of the 2 nd Armored. Within days the German 352 nd Division was reduced to a few brave and ragged survivors.
LESSONS FROM THE FRONT QUESTIONS AND ANSWERS ON FLAMES OF WAR MARCH 2018
 i LESSONS FROM THE FRONT QUESTIONS AND ANSWERS ON FLAMES OF WAR MARCH 2018 During the time that the fourth edition of Flames Of War has been out, players have asked questions about the game. The questions
COMMANDS AND COLORS NAPOLEONICS PLUS
 COMMANDS AND COLORS NAPOLEONICS PLUS CAMPAIGN RULES Version 3.00 2018-09-20 Contents LEADERS... 3 Leader Casualty Fate... 3 Leader Replacement... 4 Leadership Quality... 4 CAPTURING A THOPHY... 4 GLORY...
PaintBall. Mini
 Game Setup Each paintball team consists of 6 paintballers and 1 Marshal. You will need some six sided dice (d6's) to play the game. The game is designed to use the hexon II board system by Kallistra. The
Introduction:... 4 Character Classes;... 4 Weapons:... 4 Organisation:... 4 Actions:... 5 Movement:... 5 Shooting:... 5 To Hit:...
 State of war A.C.W. Skirmish Wargame Rules Tyneside Wargames club Version 1a 1 2 Table of contents Introduction:... 4 Character Classes;... 4 Weapons:... 4 Organisation:... 4 Actions:... 5 Movement:...
Matt Walsh BATTLE OF POLYGON WOOD
 Matt Walsh BATTLE OF POLYGON WOOD Table of Content Topic Introduction Setting the Scene The Year 1917 The Australians Quote by Sir Douglas Haig- re the Australians The Flammenwerfer (German Flamethrower)
The Setting. Counter Attack at Ste Mere Eglise
 The Setting The Dulles War-gaming Club, sponsored by Britton Publishers, met to play-test Counter Attack on Ste Mere Eglise. This is a 25mm WWII skirmish scenario written by Steve Fliss using the Final
SNAPHANCE SCENARIO Franco-Dutch War - Battle of Seneffe 11 August 1674
 Franco-Dutch War - Battle of Seneffe 11 August 1674 Note: the woods on the hilltop are orchards. Page 1 of 5 Franco-Dutch War - Battle of Seneffe 11 August 1674 William of Orange invaded Northern France
Modified D20 System for Wild Pig Comics. Congratulations soldier! You have been given control of a 40 ton fighting machine, known as
 Modified D20 System for Wild Pig Comics WELCOME TO THE FUTURE OF COMBAT Congratulations soldier! You have been given control of a 40 ton fighting machine, known as a Mech. It is a complex machine when
OPERATIONAL OBJECTIVE ZONES
 OPERATIONAL OBJECTIVE ZONES The nature of combat on the Operational level varied between Open field battles and those fought over built-up and fortified areas. The cohesion of both the defender and attacker
Battalion Commander's Summary
 Command Decision is a platoon-based game using a ground scale and time scale which allows the full play of 20th Century mechanized maneuver combat on a game table. Its emphasis on command, troop quality,
FRENCH AND INDIAN WARS SKIRMISH
 FRENCH AND INDIAN WARS SKIRMISH 25/28 MM FIGURES 1 Figure equal to 1 Figure otherwise 1 to 5,10 15 20 Foot/Artilleryman 15mm frontage Depth 15mm,18mm,20mm depending on figure Cavalryman 25mm frontage Depth
Written by Ian Johnson.
 Written by Ian Johnson. This article covers medals given out for bravery and leadership. It doesn t cover awards given upon reaching a certain criteria, such as wound badges, tank destruction badges or
OVER THE TOP! Using Normal Flames Of War Missions in the Great War. by Mike Haught. Adding Trenches. Great War Table Size
 OVER THE TOP! Using Normal Flames Of War Missions in the Great War by Mike Haught The Great War booklet covers three distinct, almost cinematic, missions. The story of starts with the Big Push, the attacker
Order of Battle for your Company
 Fields Of Fire MISSION BOOKLET Campaign 2: Korea Naktong River, South Korea, August 8 through September 28, 1950 Order of Battle for your Company Formation Unit Steps Experience Company Headquarters CO
War Ain t Fair. By Stephen Luscombe. Fast play ww2 rules incorporating the full vagaries of war. 1.2
 War Ain t Fair Fast play ww2 rules incorporating the full vagaries of war By Stephen Luscombe Stephen@BRITISHEMPIRE.CO.UK 1.2 Introduction Welcome to War Ain t Fair. These are a set of rules designed to
Stories and Background by Stacy L. Colonna, without whom this book would not have been possible.
 Trilaterum Stories and Background by Stacy L. Colonna, without whom this book would not have been possible. Art by Bob Stearns. Photographs by Timothy W. Colonna. Images by NASA/STSci. Miniatures produced
LESSONS FROM THE FRONT QUESTIONS AND ANSWERS ON FLAMES OF WAR SEPTEMBER 2018
 i LESSONS FROM THE FRONT QUESTIONS AND ANSWERS ON FLAMES OF WAR SEPTEMBER 2018 During the time that the fourth edition of Flames Of War has been out, players have asked questions about the game. The questions
29. FORTIFICATIONS AND BUILDINGS
 Briefing 1. Fortifications and buildings provide concealment for pieces and protection from hostile fire. 2. Enemy troops in fortifications and buildings may be attacked either by directing the fire against
Green Jackets Rules for Napoleonic Skirmishes
 web.archive.org https://web.archive.org/web/20121011231318/http://www.btinternet.com/~r.denning/wargames/greenj.htm Contents Green Jackets Rules for Napoleonic Skirmishes R.J. Denning 1.Introduction 2.Scale
tdoherty Page 1 02/18/05
 La Bataille Revised Infantry Assault and Charge Sequence The reasons for changing the mêlée sequence have been discussed on CSW. It is my view that historically assaults would often degenerate into inconclusive
3rd Edition RULES OF PLAY
 Command & Colors Napoleonics 1 Game Design by Richard Borg 3rd Edition RULES OF PLAY 2 Command & Colors Napoleonics The battlefield is a scene of constant chaos. The winner will be the one who controls
Konflikt 47. errata & FAQ ERRATA PAGE 81: FANATICS PAGE 66: TESLA PAGE 101: WALKERS ASSAULTING INFANTRY AND ARTILLERY PAGE 68: MEASURE RANGE AND MOVE
 Konflikt 47 errata & FAQ 3 Nov 2016 PAGE 66: TESLA ERRATA Add the following sentence at the end of the second paragraph: Tesla weapons do not suffer a reduction in Pen values at long range. PAGE 68: MEASURE
BATTLEFIELDS OF THE GREAT WAR
 BATTLEFIELDS OF THE GREAT WAR Paris The Western Front 1914-1918 Battle of Ypres Battle of Ypres 1915: April 22 to 24, 1915 Location: Near Ypres, Belgium Canadian Troops: 1st Canadian Division Results:
DEFENSE ROLL Roll defending pilot s Skill (2 dice) plus these modifiers: Maneuver The current Maneuver rating of the vehicle
 plus these modifiers: Maneuver The current Maneuver rating of the vehicle") DREAM POD 9 D E M O G A M E TERRAIN COSTS REERENCE CHART Terrain Type Walker MP Ground MP Obscurement Clear 1 1 0 DEENSE ROLL Roll defending pilot s Skill (2 dice) plus these modifiers: Maneuver The current
DREAM POD 9 D E M O G A M E TERRAIN COSTS REERENCE CHART Terrain Type Walker MP Ground MP Obscurement Clear 1 1 0 DEENSE ROLL Roll defending pilot s Skill (2 dice) plus these modifiers: Maneuver The current
Zombie Supplement for OMOG. 2017, T. Sheil and A. Sheil All Rights Reserved
 Zombie Supplement for OMOG. 2017, T. Sheil and A. Sheil All Rights Reserved The Zombie Rules so Far These are a set of tenatative rules for a Zombie game supplement to OMOG Advanced (obtainable for free
III Corps: The Somme 1916
 III Corps: The Somme 1916 A Card Wargame of World War I Neal Reid 2016 Published by Vexillia Limited www.vexillia.com Contents 1. Introduction 3 2. Historical Background 3 3. Setting Up The Game 6 Acknowledgements
QUICK REFERENCE SHEETS
 QUICK REFERENCE SHEETS 1 QUICK REFERENCE SHEETS Survivor Action Point Table Actions AP Cost Walking (3 ) 1 Turning more than 180 degrees 1 Spotting 1 Running (6 ) 1 Diving (1 ) 2 Crawling (1 ) 1 Going
14. HIT / MISS DETERMINATION
 Briefing 1. Hit/miss determination is the procedure used to determine if a target is hit when a weapon fires. This rule is the core of the game in many ways, since hits determine which units can be damaged
SWEEP & CLEAR PANZERGRENADIERS IN AFGHANISTAN
 SKIRMISH SANGIN PRESENTS FREE SCENARIO SWEEP & CLEAR PANZERGRENADIERS IN AFGHANISTAN COLIN PHILLIPS AND CHRIS POOCH SCENARIO & RULES FOR SKIRMISH SANGIN PAGE 1 Overview: With the attention of the ISAF
Musket and Pike Users Manual
 1 Musket and Pike Introduction Musket and Pike is a series of games that cover the battles and campaigns associated with the era where muskets and pikes dominated the fighting. Each game can be played
We hope you enjoy this added dimension to Rivet Wars and thank you for Getting in the Fight!
 Rivet Wars: Armies version 2.0 Release Version Rivet Wars: Armies is a rule set that allows Rivet Wars players to take their game to the tabletop. During the kickstarter for Rivet Wars there was a growing
Napoleonic Battles. Introduction
 Napoleonic Battles Introduction Napoleonic Battles is a series of games that cover the battles and campaigns associated with Napoleon. Each game can be played alone versus the computer, or against a human
Blood, Sweat, and Tears
 Blood, Sweat, and Tears Rules for Wargaming World War Two at Company Level And its Tommy This and Tommy That, And Chuck 'im out, the brute. But it's Saviour of 'is country When the guns begin to shoot.
THE BACKGROUND GENERAL NOTES ACTIONS MORALE CLASS
 or: The Phantom Crown. Maximilian Rules! - Rules for wargaming the Maximilian Adventure by Mark W. Shearwood These rules originally appeared in Wargames Illustrated 160, (December 000). Many thanks to
ddddddddddddd Friday, 24 October, 14
 Te ddddddddddddd xt World War One - The War of Attrition The failure of the Schlieffen Plan and new technologies (machine guns, tanks & air planes) led to the trench system and thus a war of attrition
The Thin Red Line
 The Thin Red Line 1795-1815. Created by Ben Seib Developed by Scott Laird and the Cheltenham Warchiefs and with the help of the Newcastle Occasional Wargamers. 1 Introduction to The Thin Red Line Page
ARMIES OF THE 18 TH CENTURY
 ARMIES OF THE 18 TH CENTURY I. THE INFANTRY "Napoleon's got a bunch of the toughest, hammered down, ironed out roughnecks you ever saw, from generals down to buck privates. And he just said, "Sic 'em,
In this document you will find the work-in-progress army lists for the Corporation, Enforcers, Forge Fathers and Plague armies.
 Warpath Force Lists In this document you will find the work-in-progress army lists for the Corporation, Enforcers, Forge Fathers and Plague armies. They are incomplete the Corporation list just has the
Wissembourg 4 th August 1870
 Wissembourg 4 th August 1870 Last Updated: 17th February 2018 This scenario was prepared by Martin Soilleux-Cardwell. It has been updated for Volley & Bayonet: Road to Glory by Keith McNelly. Historical
THE BIG PUSH Big Push Demonstration and Scenario, revised 7/1/2016
 THE BIG PUSH Big Push Demonstration and Scenario, revised 7/1/2016 THE FIGHT FOR THIEPVAL RIDGE By Paul Rohrbaugh Play Area: Rows 7 through 16 inclusive, columns C through I (also inclusive). Scenario
Brigade Level Combat - Western Front 1916 Version
 Brigade Level Combat - Western Front 1916 Version 9-9-2006 This is the combat resolution system for a command post game about commanding brigades and divisions in WW1 particularly focussed on 1916. The
Historical Overview ".. probably dummy positions." Unknown air liaison officer with Panzer Division Grossdeutschland.
 Historical Overview ".. probably dummy positions." Unknown air liaison officer with Panzer Division Grossdeutschland. On the afternoon of July 4th 1943, as preparation for the great offensive, the German
Introduction. Playing a Campaign Game
 Introduction Tigers on the Hunt: Kursk is a DLC containing three Campaign Game Scenarios for the Tigers on the Hunt Game (TotH). The Campaign Game Scenarios in this DLC portray three different historical
LESSONS FROM THE FRONT QUESTIONS AND ANSWERS ON FLAMES OF WAR JUNE 2018
 i LESSONS FROM THE FRONT QUESTIONS AND ANSWERS ON FLAMES OF WAR JUNE 2018 During the time that the fourth edition of Flames Of War has been out, players have asked questions about the game. The questions
Command Combat: Civil War The Battle of Bull Run / Manassas July 21, 1861
 Command Combat: Civil War The Battle of Bull Run / Manassas July 21, 1861 Game Design by Jeff McArthur (c) Bandwagon Books, 2011 This scenario is from the Command Combat: Civil War series. To learn more
A Difficult Affair II (Kursk, July 1943)
") A Difficult Affair II (Kursk, July 1943) ".. probably dummy positions." Unknown air liaison officer with Panzer Division Grossdeutschland. On the afternoon of July 4th 1943, as preparation for the great
A Difficult Affair II (Kursk, July 1943) ".. probably dummy positions." Unknown air liaison officer with Panzer Division Grossdeutschland. On the afternoon of July 4th 1943, as preparation for the great
QRS QUICK REFERENCE QUICK REFERENCE SHEETS. Shooting Modifiers table. Survivor Action Point Table. Hand-to-Hand Modifiers Table
 QRS QUICK REFERENCE SHEETS Shooting Modifiers table Survivor Action Point Table Actions AP Cost Target Modifier Walking (3 ) Per AP to aim (max APs / +4 modifier) + Turning more than 80 degrees Target
Glory Days! Introduction. Troop Types and Figures. freewargamesrules.co.uk presents. by Craig Cartmell
 Introduction. freewargamesrules.co.uk presents Glory Days! by Craig Cartmell These are a set of rules for fighting the American Civil War at regimental and brigade level. The smallest unit sizes are infantry
2. Methodology for Calculating a Weapon System s or Database Unit s Overall Combat Power Coefficient (OCPC)
") Methodology for Calculating a Weapon System s or Database Unit s OCPC 2. Methodology for Calculating a Weapon System s or Database Unit s Overall Combat Power Coefficient (OCPC) The methodology for calculating
Methodology for Calculating a Weapon System s or Database Unit s OCPC 2. Methodology for Calculating a Weapon System s or Database Unit s Overall Combat Power Coefficient (OCPC) The methodology for calculating
Chosen Men Fat. 1. Sequence of play. Base Morale;
 Chosen Men Fat 1. Sequence of play v2.1 CCWG Assign cards to each unit in play then shuffle the deck and turnover the top 2 cards. These units then; 1) Test morale. 2) Perform an action. (Move, Load, Fire,
Weapons D6 / M247 General Purpose M
 Weapons D6 / M247 General Purpose M M247 GENERAL PURPOSE MACHINE GUN The M247 General Purpose Machine Gun, formally known as the Machine Gun, Caliber 7.62 mm, M247, is a machine gun used extensively by
2011 New Zealand Flames of war Mid-war Doubles tournament
 2011 New Zealand Flames of war Mid-war Doubles tournament Welcome to the 2011 New Zealand Flames Of War Mid-War Doubles Grand Tournament! We look forward to offering you a unique experience that includes
napoleon's battles at divisional and onehalf
 napoleon's battles at divisional and onehalf scales I am trying to find a Napoleonic rule-set to play minor, i.e divisional, engagements occurring at the Campaign of Leipzig or in any other Napoleonic
The Battle of Cowpens 1781
 The Battle of Cowpens 1781 Battle: COWPENS War: American Revolutionary War Date: 17th January 1781 Place: South Carolina on the border with North Carolina, United States of America Combatants: Americans
Overview. Components. Robotics Team Card
 Overview Aerial Assault is based on a real-life robotics competition where robots compete at a game of what looks a little bit like robot basketball. The robotics competition takes place on a flat gymnasium-sized
OPERATION TOENAILS. 30th June 05th August 1943 New Georgia Campaign
 OPERATION TOENAILS 30th June 05th August 1943 New Georgia Campaign February 1943, the battle of Guadalcanal ended by a US victory. USA had at this time a good base for the reconquest of of the Pacific.
FREE SCENARIO FOR SKIRMISH OUTBREAK
 FREE SCENARIO FOR SKIRMISH OUTBREAK COLIN PHILLIPS & CHRIS POOCH 1 Us and every other reservist got called up when the panic hit. There were four of us from farms near Hanksville, Sean, Hank, Ian and me,
Mini-Nap. RULES FOR CORPS SCALE WARGAMES IN THE NAPOLEONIC ERA USING THE 6mm SCALE
 Mini-Nap RULES FOR CORPS SCALE WARGAMES IN THE NAPOLEONIC ERA USING THE 6mm SCALE Copyright. Trevor Raymond. Version 8: August, 2009 (Exodus 20:15 - Thou shall not steal.") www.runtus.org Page 1 of 25
THE WAR OF THE SPANISH SUCCESSION PAPERBOYS RULES
 THE WAR OF THE SPANISH SUCCESSION PAPERBOYS RULES This is a little set of rules written to continue the tradition of each Paperboys book having an associated set. Andy Callan s ideas abound here, but Peter
Scouts Visits to Belgium & France 2012
 Scouts Visits to Belgium & France 2012 Ypres, Belgium We stayed at a place called Ypres in Belgium. This is a photo of the main square showing the Flanders museum which some of us visited. World War Two.
Crimson Dusk Wargames rules For skirmish to platoon level games In Near Future, Sci-Fi and Post Apocalyptic settings. Written by Duncan Thompson
 Crimson Dusk Wargames rules For skiirmiish to platoon level games IIn Near Future,, Scii- -Fii and Post Apocalyptiic settiings.. Wriitten by Duncan Thompson 2 Crimson Dusk Index Page Page Introduction
Call of Duty 4: Modern Warfare Sniper Guide
 Call of Duty 4: Modern Warfare Sniper Guide Hi, my name is Quadfather and I am a new member to the Gamewinners website. I play Call of Duty 4 on the PC under the name Anarchy Club. I really like to cheat.