A BETTER LIFE IMPORTANT INFORMATION PLEASE READ THIS INFORMATION BEFORE INSTALLATION. ALWAYS READ THE OWNER S MANUAL BEFORE USING THIS PRODUCT.
|
|
|
- Poppy Kelly
- 6 years ago
- Views:
Transcription


1 1
2 A BETTER LIFE For over 100 years we have been motivated by innovation... and innovation has inspired our greatest successes. Every day we strive to supply the highest quality products... and constantly seek to develop INNOVATIVE products. Innovation, is what we create every day... for everyone... for a better life: Because the pool is a source of PLEASURE and JOY... a place to REUNITE FAMILIES... which CREATES RELATIONSHIPS and memories... a place where time stands still. That s the magic of a pool! At Zodiac, we manufacture more than just pool equipment... we create A BETTER LIFE. Zodiac South Africa strives to offer world-class excellence in both products and service. Complemented by a team of dedicated staff throughout the country, we guarantee premium after sales services. Should you require assistance on your Zodiac product, need to locate a dealer near you or just wish to find out more information, call our Customer Care Helpline on 0860 Zodiac ( ) or go to IMPORTANT INFORMATION PLEASE READ THIS INFORMATION BEFORE INSTALLATION. ALWAYS READ THE OWNER S MANUAL BEFORE USING THIS PRODUCT. PLEASE SEND US YOUR WARRANTY CARD TO ENSURE YOUR WARRANTY IS REGISTERED AND RETAIN YOUR PROOF OF PURCHASE IN THE UNLIKELY EVENT OF FUTURE WARRANTY CLAIMS. 2
3 INDEX INTRODUCTION 5 SECTION 1 INSTALLATION 6 Preparing your pool and filtration system 6 Assembling your PACER 6 Assembling the Hoses 7 SECTION 2 CORRECT SETTINGS 8 Adjustment Suggestions: Auto Weir Valve 8 Correct balancing 9 Pool coverage 10 SECTION 3 REMOVAL and REFITTING OF THE DIAPHRAGM 10 AIB (Adjustable Inner Body) Explanation 10 Procedure to remove Diaphragm 10 Procedure to refit/reset Diaphragm 11 SECTION 4 HOW TO KEEP YOUR PACER OPERATING EFFICIENTLY 12 SECTION 5 PROBLEM SOLVING 13 SECTION 6 PARTS IDENTIFICATION 15 Exploded diagram PACER 15 SECTION 7 OPTIONAL ACCESSORIES 16 SECTION 8 - THE PERFECT PARTNER FOR YOUR PACER 17 SECTION 9 GETTING TO KNOW YOU BETTER 18 SECTION 10 AT YOUR SERVICE 19 3
4 Important Information WARNING RISK OF SUCTION HAZARD, WHICH IF NOT AVOIDED, CAN RESULT IN SERIOUS INJURY OR DEATH. READ THIS MANUAL IN ITS ENTIRETY BEFORE INSTALLING AND OPERATING THE CLEANER. Do not block the suction fittings in the pool, the suction opening on the cleaner or the cleaner hoses with any part of your body. Do not expose your hair, loose clothing, jewellery, etc. to any suction outlet fittings in the pool/spa or on the cleaner. Clean the weir basket, pump basket and pool filter before installing the cleaner and on a regular basis thereafter. Always disconnect the cleaner from the weir before cleaning or backwashing the pool filter. After cleaning or backwashing, let the filtration system run for at least five (5) minutes before re-connecting the cleaner. Remove the cleaner from the pool before chemical or shock treatments. Wait a minimum of four (4) hours after super chlorination before re-installing the cleaner. Read owner s manual completely before operating the cleaner. Do not operate outside of the pool. Do not let children play with cleaner. 4
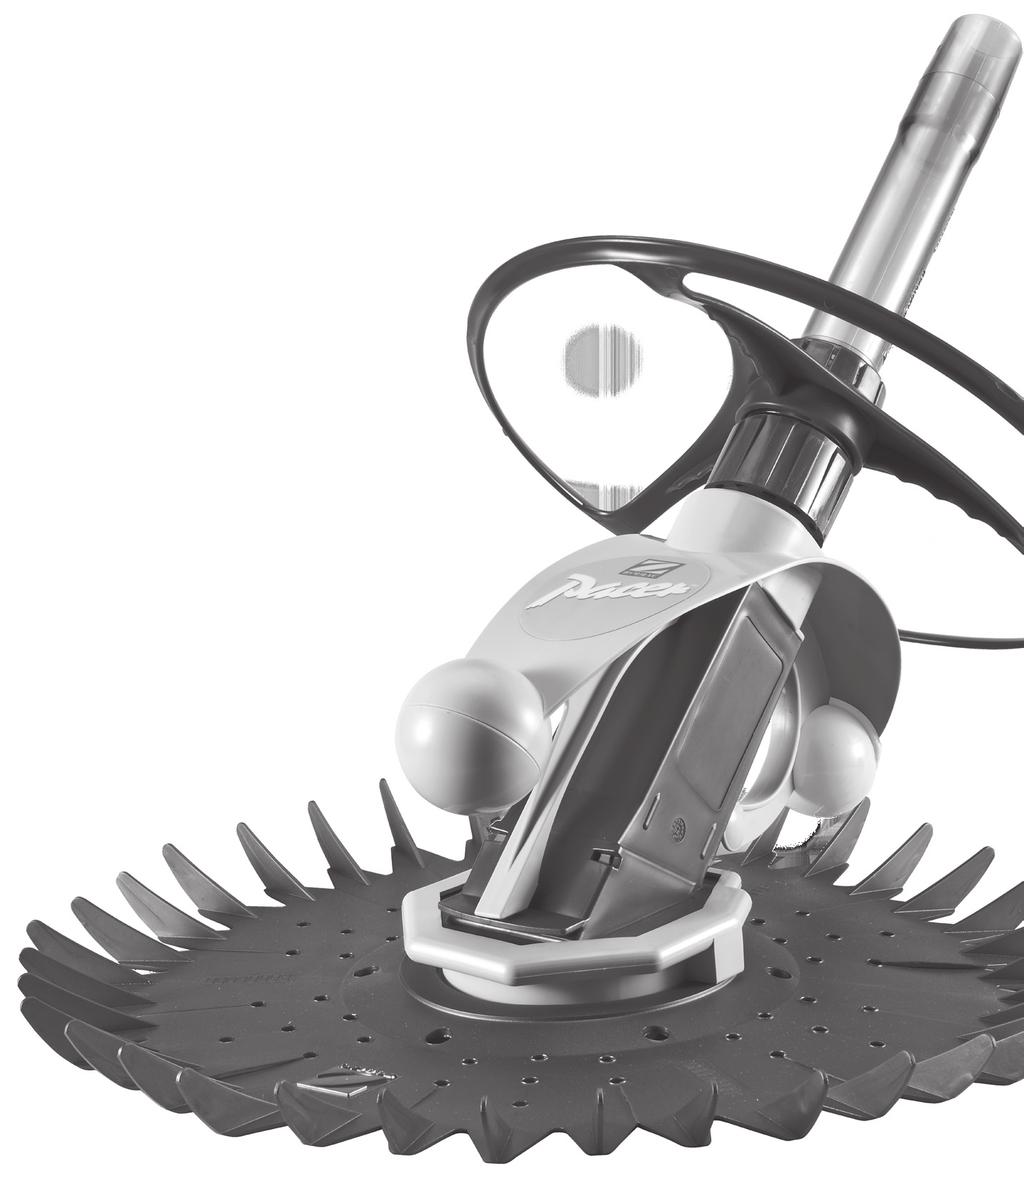
5 Introduction Dear Customer, Thank you for purchasing a PACER. It is through customers such as you that our position as worldwide market leader in poolcare remains unchallenged. Your PACER features a lightweight, streamlined counterweight assembly which improves speed and manoeuvrability. Your PACER has no moving parts to jam, wear, or come adrift. No nuts, bolts,screws, gears or wheels to corrode. Its Innovative Long Life Diaphragm System sucks up dirt, debris, bugs, leaves, and even pebbles. The Adjustable Inner Body (AIB), increases efficiency and makes Diaphragm maintenance quick and easy. The ingenious Deflector Wheel virtually eliminates cleaning problems caused by severe angles and pool steps. Your PACER will quickly and quietly clean any average pool. In the event of requiring under-warranty repairs, please take your PACER to your closest pool shop or alternatively please phone our Customer Care Helpline 0860 Zodiac ( ) and we will direct you to the Zodiac warranty agent nearest to you. IT S EASY TO INSTALL. JUST READ THE INSTRUCTIONS IN THE MANUAL CAREFULLY. HEAD ONLY PACER Pool Cleaner 36 Fin Disc Twist Lock Hose Adaptor Deflector Wheel Warranty Card Quick Start guide COMBI PACK ONLY PACER Pool Cleaner Auto Weir Valve with 90 Elbow 6 x1.2m Twist Lock Hose Lengths 36 Fin Disc Deflector Wheel C-Clip Warranty Card Quick Start Guide PACER is a Trade Mark of Zodiac Pool Care South Africa (Pty) Ltd. Specifications and equipment subject to change without prior notice. 5
6 SECTION 1 INSTALLATION Preparing your pool and filtration system IMPORTANT The filtration system must be operating at its maximum water flow before you install your PACER, otherwise you will have to re-adjust it after cleaning the pool filter. Installation is easy if you follow these simple preliminary steps: 1. Empty the weir basket. 2. Clean the pump basket. 3. Backwash the filter until the sight glass is clear. 4. Adjust all return jets (whether your pool has one, two, or more) to point downwards and towards each other so that you DO NOT see a circular water flow or ripples on the surface of your pool. Assembling your PACER 1. Fit the disc over the Flexi-foot (base) of your machine, with the top of the disc (marked TOP) facing towards the machine. (see Diagram 1) 2. Position disc underneath the Stop Block (A) then position under the disc Retaining Lug (B). (see Diagram 2) 3. Ensure that the disc rotates freely around the Flexi-foot once it has been fitted. Diagram 1 : Fitting the disc. Diagram 2: Fitting the disc. Position underneath Retaining lug. 4. Every PACER Pool Cleaner is supplied with a Medium Deflector Wheel. The purpose of this wheel is to protect the Outer Extension Pipe and Main Body and also to guide the PACER away from swimming pool steps or stairs. Position the Deflector Wheel on the Outer Extension Pipe as in Diagram 3. Then push down firmly on the Deflector Wheel, the Deflector Wheel will click into place. Make sure the top clips are seated in the groove. Ensure that the Deflector Wheel rotates freely. Diagram 3 6
7 section 1 installation Assembling the Hoses (COMBI) 1. Always insert the male hose cuff into the female cuff and twist until they lock together. Hoses must connect fairly tightly. The best setting on the ratchet system is setting 1 or 2. The ideal length of hose is from the weir to the farthest point of the pool plus one extra section of hose. If the weir is opposite the steps, use lowest step as farthest point (see Diagram 4). To ensure the best performance from your PACER, please ensure that only genuine Zodiac Twist Lock Hoses are used. 2. Fit the Hose Weight to the first section of the hose ±1 metre from the PACER Head. (Refer to Section 2, on page 9 for correct settings) 3. Bleed all the air from the hose by placing one end over the return jet thus filling the hose length with water. 4. Keeping the hose-ends underwater, move the hose from the return line to the weir and connect the female cuff directly to the Auto Weir Valve 90 Elbow. 5. Ensure that the Auto Weir Valve is firmly attached to the weir vacuum lid. Weir Weir (PACER HEAD ONLY) Your Pacer head is compatible with both Standard and Twist Lock hoses. Use the Twist Lock hose adaptor (See section 6) when using Twist Lock hoses. 7
8 section 2 Correct settings AUto weir valve The Zodiac Auto Weir Valve is preset at the factory to obtain maximum pool cleaning efficiency. Your PACER is preset on setting 2. However, if you do experience difficulties, it can be manually adjusted to one of the three settings (high, medium or low See Adjustment Suggestions below). Auto Weir Valve with 90 Elbow NOTE: To obtain maximum Diaphragm efficiency, please ensure a genuine Zodiac Adjustment Settings You will only need to adjust the Auto Weir Valve if the following occurs: Your PACER Pool Cleaner is performing too fast and/or climbing above the level of the water. Reduce Auto Weir Valve to medium(2) or low(1) setting TURNING YOUR PACER OFF IS MADE EASY WITH THE AUTO WEIR VALVE Your PACER Pool Cleaner is performing slowly and/or not climbing the pool walls. Increase Auto Weir Valve to medium(2) or high(3) setting 1. Low Setting 2. Medium Setting 3. High Setting Water Flow 1 2 You no longer need to remove the ZODIAC Auto Weir Valve from the weir. Simply depress the red pivoted arm (A), until it locks open the flow door. This end plugs into the weir Hose or 90 Elbow attaches to this end 8 To recommence pool cleaner operation, release the pivoted arm (A) by pressing down on the flow door (B). It s that simple!
9 section 2 Correct settings Adjustment suggestions Correct balancing Proper balancing must be accomplished in the deepest area of the pool (Diagram 6). The buoyancy of the hose tends to lift the PACER, especially in deeper water. The Hose Weight is provided to help neutralise the buoyant effect of the hose. Incorrect Correct Incorrect Diagram 6 POOL COVERAGE Normally it is undesirable for the return line water flow to affect the natural movement of your Zodiac Hose. However, the return line pressure can be used to balance cleaning coverage or to guide the cleaner away from steps and corners. A return line located anywhere along the shaded area can be utilised to gently push the hose, allowing your PACER to free itself from in-pool obstacles (Diagram 7). Diagram 7 9
10 SECTION 3 REMOVAL AND REFITTING OF THE DIAPHRAGM ADJUSTABLE INNER BODY (AIB) The technologically Advanced AIB incorporated into your new PACER makes it quick and simple for you to: Remove debris from the Diaphragm and Inner Extension Pipe. 8a Reset the Diaphragm. Replace the Diaphragm. Inspect the Outer Extension Pipe Swivel, to ensure that it is turning freely. PLEASE READ AND FOLLOW THE INSTRUCTIONS CAREFULLY 1. Procedure to remove Diaphragm. Separate pool cleaner from hose. 8b Loosen Hand-nut one and a half turns anti-clockwise (Diagram 8a). Grasp Diaphragm lip at edge of suction hole and pull. The Inner Extension Pipe and Diaphragm will be released in one piece (Diagram 8b). Pull Diaphragm off the Inner Extension Pipe. If there is a blockage, carefully remove it. Do not use any sharp objects as this may damage the Diaphragm. Inspect Diaphragm closely for perforations or cracks. Even small holes will compromise its operation. If the Diaphragm is damaged in any way, replace before refitting. Diagram 8 10
11 SECTION 3 REMOVAL AND REFITTING OF THE DIAPHRAGM 2. Procedure to refit Diaphragm. Slide the Inner Extension Pipe with the Diaphragm into the suction hole until the Diaphragm fits snugly into the groove provided (Diagram 9a). Make sure the Diaphragm is vertical and that the gap of the throat is not excessive. Tighten Hand-nut securely. 9a Reset Diaphragm If the gap of the throat is excessive (more than 5mm), yet the Diaphragm is not torn or damaged, push down lightly on the Inner Extension Pipe so as to close the gap slightly and hold in place before tightening the Hand-nut (Diagram 9b). Re-install pool cleaner and switch on pump. 9b NOTE: The procedure of removing and refitting the Diaphragm could, in itself, rectify a performance problem, eg. working erratically, as it resets the Diaphragm to its correct length. Diagram 9 11
12 SECTION 4 HOW TO KEEP YOUR PACER OPERATING EFFICIENTLY As a pool accessory connected to the suction line, your PACER relies on the filtration system in order to operate efficiently and effectively. Follow these simple maintenance tips: 1. The weir basket, pump basket, cartridge filter, sand filter (whichever is applicable) should be thoroughly cleaned on a regular basis to ensure optimum pool cleaner efficiency. N.B. Always disconnect the hose from the weir or vacuum line before backwashing your filter. 2. Always store your Zodiac Hoses in a straight line never coil or leave hose coiled in the sun. 3. Periodically inspect parts for wear. The Flexi-foot, Disc and Deflector Wheel are the most critical. As the Disc wears, it begins to curl at the outer edges. When the depth of the channels between the treads on the Flexi-foot are 3mm or less, replace the Flexi-foot. 4. In the event of an object becoming stuck in the Diaphragm, clear it quickly and easily by following the simple instructions laid out for Diaphragm maintenance under Section 3 Removal and refitting the Diaphragm (Page 10). IMPORTANT Sunlight (UV rays), pool chemicals and other harsh conditions can take their toll on your PACER and other pool accessories. ph is Very Important ph is a simple numerical scale which indicates the acid / alkaline balance of water. A ph value of 7.0 denotes neutrality, i.e. neither acid nor alkaline. High ph values (above 7.0) denote alkaline conditions and low ph values (below 7.0) denote acidic conditions. To extend the lifespan of your APC: 1. Ensure that your ph is between 7,0 and 7,6* at all times as recommended. ph levels higher or lower than the recommended levels are detrimental to most types of plastics and rubbers and will seriously damage your PACER. 2. Remove your PACER from the pool before chemical shock treatment and only reinstall it after a minimum of four hours. 3. Follow these recommended water balance levels:* Chlorine: 1,0 2.0ppm ph Levels: 7,0 7,6 Total Alkalinity: ppm * Values may vary within their ranges, depending on pool surface i.e. concrete, fibreglass or vinyl NOTE: Due to the harsh environment in which your pool cleaner operates, your PACER may discolour during normal use over a period of time. This will not affect the cleaning performance of your unit. 12
13 section 5 TROUBLESHOOTING PROBLEM CHecks Solutions Your PACER works slowly, runs then stops, or not at all. Is the filter clean? Are the baskets clean? Backwash and rinse the filter thoroughly. Remove baskets, clean thoroughly (Baskets must be in good condition). Is the vacuum lid sitting flush in the weir? Are the Auto Weir Valve and the hose secure? Remove and re-install. Make sure that the connections are sealed. Your PACER is working slowly and air bubbles are noticeable at the return jet. Is the Diaphragm operational? Is there a leak in the system? Is the Auto Weir Valve below water level? Refer Section 3 (Removal and Refitting of Diaphragm, pages 10-11). Possible problem areas: Possible leak at pump lid Check the pump lid O-ring. Possible leak in the hose. Check level of water. Your PACER is sticking in corners or at the steps. Is the Deflector Wheel properly installed? (Refer Section 1,page 6). Return to your nearest pool store for checking. For additional assistance, contact our Customer Care Helpline on 0860 Zodiac ( ) 13
14 section 5 TROUBLESHOOTING PROBLEM CHecks Solutions Your PACER does not reach the shallow end of the pool or moves in a fixed pattern. Your PACER climbs above the water level. Your PACER does not climb the walls easily. Your PACER falls on its side. Is the hose long enough? Is the hose affected by the return flow? Are the hose lengths straight? Is there too much suction? Is there sufficient suction? Is the float damaged? Add more sections of hose. Adjust the return outlet towards the bottom of the pool to make sure that the jet of water does not influence the direction of the Zodiac Hose. Make sure that the hose lengths are in good condition. Never roll up/coil hoses. Check that the Auto Weir Valve is not blocked by leaves and preventing the water from flowing through the Auto Weir Valve. Make sure the filter is clean. Adjust Auto Weir Valve setting (Refer to correct settings page 8) Return to your nearest pool shop for checking. Is the counterweight firmly fixed to the main body? Lack of equilibrium inside the floating system. The PACER should be returned for checking. For additional assistance, contact our Customer Care Helpline on 0860 Zodiac ( ) 14
15 SECTION 6 PARTS IDENTIFICATION SECTION 6 PARTS IDENTIFICATION Exploded diagram PACER 11 Description 1. Compression Ring 2. Inner Body 3. Flexi-foot Fin Disc 5. Inner Extension Pipe 6. Diaphragm Retaining Ring 7. Long-Life Diaphragm 8. Outer Extension Pipe with Hand-nut 9. Deflector Wheel 10. Sprintsweep Float Assembly a. Float b. Weight 11. Twist Lock Hose Adaptor (for Pacer Head Only) 15
16 section 6 Optional Accessories 1. WEIR ADAPTOR Fits suction inlets from 40 to 60mm. 2. WEIR COMBINATIONS Auto Weir Valve and Weir Elbows illustrating some of the different combinations that can be used. 3. AIM FLOW DIVERTOR To allow pool cleaner to clean close to return flow. 4. LARGE DEFLECTOR WHEEL If unit sticks in difficult corners, eg. steps. 5. CYCLONIC LEAF CATCHER TM An in-line filter which collects all the leaves, seeds, twigs and grit before they reach the weir, using an innovative vortex technology. Connects in-line with the hoses (suitable for Twist Lock and standard pool hose). 16
17 section 7 The perfect partner for your PACER A Salt Chlorinator from Zodiac Installing a Zodiac Salt Chlorinator is the effortless way to having a crystal clear pool, all the time. Zodiac Salt Chlorinators offer both convenience and peace of mind. Innovative technology means that you are assured of quality and product excellence. Zodiac, is by, far the most widely chosen brand of Salt Chlorinator available in South Africa today. Your purchase will ensure that you get the best of both worlds. Firstly, you will enjoy the convenience of a fully automatic product, which allows you to spend time relaxing at the poolside perfect for a modern-day lifestyle. You will also experience the fantastic soft feeling that only a salt chlorinated pool can offer. No more red eyes or itchy skin, just smiles all the way! A PowerFirst Premium Heat Pump from Zodiac Extend your swimming season and get even more pleasure from your pool by installing a PowerFirst Premium Heat Pump. This market-leading range of heat pumps from Zodiac utilises only the best components and materials, ensuring you total peace of mind and enjoyment of your pool. PowerFirst Premium is not only the most energy efficient range of heat pumps available today, but also the most environmentally friendly. 17
18 section 8 Getting to know you better At Zodiac, we strive to give our consumers superior quality products, as well as service excellence. To help us improve, please spare a moment of your time and let us understand your needs a little better. Once you have filled in the following survey, please fax a copy to (011) Title... Name & Surname... Address... Are you male or female?... Date of birth... How long have you owned your current pool?... Do you own any other Zodiac products?... If so, which ones?... Which of our products would you like to own?... Describe how you feel about owning a pool (love it / hate it)?... Why did you choose to purchase a Zodiac product?... Why did you choose to purchase your PACER? Have you ever called our Call Centre?... If so, please rate it on a scale of Extremely poor 4. Good 2. Poor 5. Extremely good 3. Acceptable Would you like to register for Aquasense, our monthly communication filled with information, tips and trends on pool care? (If yes, state here and fill in your address above)... 18
19 section 9 At your service If you are having a problem you cannot solve, mail or fax us the following information, along with a sketch of your pool shape, indicating the location of all weirs, inlets, stairs, ladders, waterfalls or any other significant features, and briefly describe the problem in the space below. (Send a photocopy and retain this page for future use.) Mail to: Zodiac Pool Care SA, Private Bag X127, Halfway House, 1685 Fax to: (011) Name... Tel No.... Postal Address...Code... Serial Number... Purchased from... Date of Purchase.../.../... Pool Surface (Tick one): Plaster Vinyl Fibreglass Other If other, please stipulate... Pool Size (Litres)... Pump Size... Type of Filter (Tick one): Sand D.E. Cartridge Filter Size (or Model No.)... My pool looks like this: Briefly describe the problem Customer Care Helpline: 0860 Zodiac ( ) 19
20 Zodiac Pool care South Africa (pty) ltd Private Bag X127 Halfway House 1685 Customer Care Helpline 0860 Zodiac ( ) WARNING: In terms of Section 2 of the Import and Export Control Act of 1989 (Act 45 of 1983), it is illegal to export Automatic Pool Cleaners and parts thereof. Section 4 of the Act provides that anyone convicted of exporting Automatic Pool Cleaners and parts thereof may be sentenced to a 10 (ten) year term of imprisonment and a fine of R (forty thousand Rand). 20
INSTRUCTION MANUAL HA SSLE S
 INSTRUCTION MANUAL NO FRILLS ~ NO HA SSLE S Dear Customer, Thank you for buying a BARACUDA PACER. It is thanks to you that we have become a worldwide market leader. Your BARACUDA PACER features a lightweight,
A BETTER LIFE IMPORTANT INFORMATION PLEASE READ THIS INFORMATION BEFORE INSTALLATION. ALWAYS READ THE OWNER S MANUAL BEFORE USING THIS PRODUCT.
 A BETTER LIFE For over 100 years we have been motivated by innovation... and innovation has inspired our greatest successes. Every day we strive to supply the highest quality products... and constantly
Automatic Pool Cleaner
 Automatic Pool Cleaner ABN 87 002 641 965 PO Box 7238 Wetherill Park, NSW 2164 Australia Ph: 1800 688 552 Fax: 1300 781 688 www.zodiac.com.au 2004 Zodiac Group Australia Pty Ltd W90071 Instruction Manual
Assembling & Installing your Pool Cleaner
 Assembling & Installing your Pool Cleaner STEP 1: Check Contents of the Box Remove the Badu Clean Supreme body and all parts from the box and check that the following components are included. Refer to
VAC-U DRIVE Swinging float arm for Acrobat like agility 36 Fin disk with DEEP VEE Scoop
 ACROBAT Vac-U-Drive Automatic Pool Cleaner VAC-U DRIVE Swinging float arm for Acrobat like agility 36 Fin disk with DEEP VEE Scoop Proven technology:diaphragm driven strength & quietness Unique hose design
POOL ROVER ST POOL CLEANER Installation Instructions
 POOL ROVER ST POOL CLEANER Installation Instructions A. ASSEMBLY FIG 1 - Place the seal over the top of the pool cleaner body and slide it down to the mouth. FIG 2 - Secure the seal beneath the flange
OWNER S MANUAL. The following parts are included with your Zodiac Pacer (Model# W83215): (1) Universal Valve Cuff. (2) 45 Degree Elbows
: (1) Universal Valve Cuff. (2) 45 Degree Elbows") OWNER S MANUAL The following parts are included with your Zodiac Pacer (Model# W83215): (1) Wheel Deflector (1) Finned Disc (1) FlowKeeper Valve (1) Universal Valve Cuff (2) 45 Degree Elbows (1) Cleaner
OWNER S MANUAL The following parts are included with your Zodiac Pacer (Model# W83215): (1) Wheel Deflector (1) Finned Disc (1) FlowKeeper Valve (1) Universal Valve Cuff (2) 45 Degree Elbows (1) Cleaner
OWNER S MANUAL. The following parts are included with your Zodiac G4 (Model# W83251): (1) Universal Valve Cuff. (1) Pool Pulse. (2) 45 Degree Elbows
: (1) Universal Valve Cuff. (1) Pool Pulse. (2) 45 Degree Elbows") OWNER S MANUAL The following parts are included with your Zodiac G4 (Model# W83251): (1) FlowKeeper Valve (1) Dual Durometer Disc (1) Universal Valve Cuff (2) 45 Degree Elbows (1) Pool Pulse (1) Cleaner
OWNER S MANUAL The following parts are included with your Zodiac G4 (Model# W83251): (1) FlowKeeper Valve (1) Dual Durometer Disc (1) Universal Valve Cuff (2) 45 Degree Elbows (1) Pool Pulse (1) Cleaner
Owner s Manual W Automatic Aboveground Pool Cleaner
 Owner s Manual W83309 Automatic Aboveground Pool Cleaner THANK YOU FOR PURCHASING THE ZIPPY ABOVEGROUND AUTOMATIC POOL CLEANER. THE ZIPPY IS DESIGNED TO QUICKLY CLEAN YOUR ABOVEGROUND POOL, PROVIDING YEARS
D L Y AU S T L IAN D ESI VTX-3 OWNER S MANUAL. SOC34095 VTX-3 instructions_version 1_Art3.indd 1
 D L Y AU S T RA GN ED E D ESI L IAN P R OU AND MA D VTX-3 OWNER S MANUAL SOC34095 VTX-3 instructions_version 1_Art3.indd 1 Congratulations Your new Kreepy Krauly VTX-3 is designed to give you years of
Aqua Pilot Suction Pool Cleaner
 Aqua Pilot Suction Pool Cleaner PL1810 Installation and User Guide Welcome Congratulations on purchasing the PureLine Aqua Pilot Suction Cleaner. Your new Aqua Pilot is guaranteed to provide you with years
Dolphin Hybrid RS1 - Suction Pool Cleaner. Operating Instructions
 Dolphin Hybrid RS1 - Suction Pool Cleaner Operating Instructions by 8151171 Dolphin_Hybrid_cover.indd 1 5/8/1 9:18 AM Dolphin_Hybrid_cover.indd 5/8/1 9:18 AM Contents The Dolphin Hybrid RS1 Suction Cleaner...
AUTOMATIC INGROUND POOL CLEANER. Owner's Manual and Quick Installation Instructions
 AUTOMATIC INGROUND POOL CLEANER Owner's Manual and Quick Installation Instructions THANK YOU FOR PURCHASING THE BARACUDA G3. YOUR BARACUDA G3 HAS BEEN DESIGNED AND MANUFACTURED TO BE EASILY INSTALLED AND
UPGRADE KIT. Installs a new EAZY filter into Nexus 200 / 300 manufactured after 2006 and Nexus 210 / 310 manufactured after 2009
 EAZYUG220320161117MAN UK English UPGRADE KIT Installs a new EAZY filter into Nexus 200 / 300 manufactured after 2006 and Nexus 210 / 310 manufactured after 2009 IMPORTANT PLEASE READ: Your Nexus MUST be
Welcome. Kreepy Krauly Hose & Accessories. Contents
 Welcome Kreepy Krauly Hose & Accessories Congratulations on purchasing the best pool-cleaning system in the world! Your new Kreepy Krauly will provide you with years of carefree pool enjoyment, as it efficiently
POOL CARE GUIDE. The E-Z Clor System To Perfect Pool Water.
 POOL CARE GUIDE The E-Z Clor System To Perfect Pool Water www.ezclorchemicals.com CONTENTS E-Z Clor 3-Step System...................... 1 Circulation/Your Pump........................ 2 The Filtration
Installation of Your SprayMaster System
 Installation of Your SprayMaster System 1. At the installation site, remove all equipment from the corrugated box and the polyethylene drum and replace the drum lid. Check the picture to identify each
Installation, Operation Instructions & Warranty Booklet
 Installation, Operation Instructions & Warranty Booklet! WARNING SAFETY INSTRUCTIONS: - Read Prior to Using Swimkleen 2 Suction Pool Cleaner. SUCTION HAZARD: When the Swimkleen 2 pool cleaner is connected
KREEPY KRAULY WARRIOR SUCTION SIDE POOL CLEANER
 KREEPY KRAULY WARRIOR SUCTION SIDE POOL CLEANER ENGLISH 1 ESPAÑOL 13 FRANÇAIS 29 INSTALLATION AND USER S GUIDE IMPORTANT SAFETY INSTRUCTIONS READ AND FOLLOW ALL INSTRUCTIONS SAVE THESE INSTRUCTIONS i CUSTOMER
Pontoon Slide Owner s Manual
 Pontoon Slide Owner s Manual Introduction Water sports can be safe and fun for all levels of enthusiasts. The Owner s Manual is presented to enhance your enjoyment of the sport. It is intended to alert
Notice de montage et d'utilisation (à conserver précieusement) Français : page 2
 Français : page 2") Notice de montage et d'utilisation (à conserver précieusement) Français : page 2 Instructions for installation and use (to be kept in a safe place) English : page 14 Instrucciones de montaje y de uso (a
Notice de montage et d'utilisation (à conserver précieusement) Français : page 2 Instructions for installation and use (to be kept in a safe place) English : page 14 Instrucciones de montaje y de uso (a
Inflatable Dock Slide Owner s Manual
 Inflatable Dock Slide Owner s Manual Introduction Water sports can be safe and fun for all levels of enthusiasts. The Owner s Manual is presented to enhance your enjoyment of the sport. It is intended
LIL REBEL ABOVEGROUND SUCTION-SIDE POOL CLEANER
 LIL REBEL ABOVEGROUND SUCTION-SIDE POOL CLEANER INSTALLATION AND USER S GUIDE IMPORTANT SAFETY INSTRUCTIONS READ AND FOLLOW ALL INSTRUCTIONS SAVE THESE INSTRUCTIONS i CUSTOMER SERVICE / TECHNICAL SUPPORT
Pontoon Slide Owner s Manual
 Pontoon Slide Owner s Manual WWW.RAVESPORTS.COM Copyright 2018 All rights reserved. No part of this publication may be reproduced or transmitted in any form or by any means, electronic or mechanical, including
RB70 Automatic Diluent Valve Maintenance Manual. Version 1.1 November 2006 Written by Tino de Rijk. Page 1 of 23
 RB70 Automatic Diluent Valve Maintenance Manual Version 1.1 November 2006 Written by Tino de Rijk Page 1 of 23 Table of Contents 1. Introduction... 3 2. ADV diagram and parts list (Pre June 2006)... 4
Pontoon Slide Owner s Manual
 Pontoon Slide Owner s Manual www.ravesports.com Table of Contents Introduction... 2 Safety rules and information... 3 Boat compatibility guide.5 Assembling and using your Pontoon Slide... 6 Cleaning and
ROUND ASSEMBLY. Positioning
 ROUND ASSEMBLY Positioning To ensure maximum enjoyment and efficiency, consider the following steps when selecting the desired location of you pool. Select a location that receives maximum sunlight for
Installation and Maintenance Manual. ECO Filtration Unit with 6-way-Top-Mount-Valve. Art. Nr
 Installation and Maintenance Manual ECO Filtration Unit with 6-way-Top-Mount-Valve Art. Nr. 300100 300101 300102 Important Details: - Using of this filtration unit for swimming pools and its guard band
IMPORTANT SAFETY INSTRUCTIONS READ AND FOLLOW ALL INSTRUCTIONS SAVE THESE INSTRUCTIONS
 Warrior D.E. Filter Operating Procedures IMPORTANT SAFETY INSTRUCTIONS READ AND FOLLOW ALL INSTRUCTIONS SAVE THESE INSTRUCTIONS Table of Contents SECTION I. FILTER INSTALLATION... 1 SECTION II. FILTER
APVMA Approval No /3/0204. Instruction Manual & Warranty Card
 APVMA Approval No. 52048/3/0204 Instruction Manual & Warranty Card MASTERING THE ELEMENTS Renowned worldwide for the quality and reliability of its products in the aeronautical and marine sectors, Zodiac
Pool Information 2015
 Pool Information 2015 A regular maintenance program will help prevent problems with the pool and the pool water. There are many elements that can influence the clarity and purity of the water. To keep
Jacuzzi. J-CQ420 Cartridge Filter Installation and Operating Instructions
 Jacuzzi J-CQ420 Cartridge Filter Installation and Operating Instructions IMPORTANT SAFETY PRECAUTIONS ATTENTION INSTALLER: This guide contains important information about the installation, operation and
AR STYLE FIREARMS OWNER'S MANUAL: OPERATION, HANDLING, DISASSEMBLY / REASSEMBLY & SAFETY INSTRUCTIONS
 AR STYLE FIREARMS OWNER'S MANUAL: OPERATION, HANDLING, DISASSEMBLY / REASSEMBLY & SAFETY INSTRUCTIONS - DO NOT DISCARD THIS MANUAL - READ THIS MANUAL CAREFULLY, PAYING CLOSE ATTENTION TO THE INSTRUCTIONS
Training. Testor Training Manual
 Training Testor Training Manual Index Section 1 Introduction and Safety Warnings Section 2 Test Procedures Section 3 Test Hoses Section 4 Fault Location 1:1 1.1 Introduction The Dräger Testor test equipment
User Instruction Manual
 User Instruction Manual 4500 psi Air Compressor Ver 2, 1.18 Contents Parts Included...3 Assembly Instructions...3-5 Operation Instructions...6-7 Oil Change Intervals...8 Air Filter Replacement...9 Setting
Service and Repair Manual
 II stage R2 Ice/ Special, II stage R 1 Pro DOWNSTREAM 2 nd STAGE REGULATOR Service and Repair Manual Introduction Safety Precautions...4 General Procedures, Maintenance Schedules...5 Initial Inspection
MAINTENANCE PROCEDURE FOR X 650
 MAINTENANCE PROCEDURE FOR X 650 X 650 25. juli 2005-1/6 MAINTENANCE PROCEDURE FOR X 650 2 ND STAGE WARNING: This maintenance procedure is only for appointed Scubapro technicians that completed a course
NEWS: 20% discount on service agreements signed before 1st March 2010
 Swimming Pool Maintenance Routine and charges Regular maintenance and consistent pool care is the best way to ensure a safe and healthy swimming environment. Although every pool is unique and has its own
SPECIFICATIONS Type: Twin stack, single phase Tank: 4 gallon Air Output: PSI; PSI Max PSI: 125 PSI HP: 1.
 2 GALLON TWIN STACK AIR COMPRESSOR Model: 9526 DO NOT RETURN TO STORE. Please CALL 800-348-5004 for parts and service. CALIFORNIA PROPOSITION 65 WARNING: You can create dust when you cut, sand, drill or
IT S TIME TO PLAY! Owner s Guide A&A BUILT-IN POOL CLEANING AND CIRCULATION SYSTEMS
 IT S TIME TO PLAY! Owner s Guide A&A BUILT-IN POOL CLEANING AND CIRCULATION SYSTEMS 1 Table of Contents Part Description Page 1 Welcome.................................2 How A&A Built-In Systems Work.................2
book : t95575.fm Seite 1 Mittwoch, September 20, :10 AM. Avensys. Exposed Single Lever Mixer
 955751.book : t95575.fm Seite 1 Mittwoch, September 20, 2000 10:10 AM Avensys Exposed Single Lever Mixer 33 389 33 396 Installation Instructions and Operating Guide Please leave this document with the
accidents which arise due to non-observance of these instructions and the safety information herein. SPECIFICATIONS
 18 GAUGE 1-1/4 INCH BRAD NAILER Model: 7611 CALIFORNIA PROPOSITION 65 WARNING: You can create dust when you cut, sand, drill or grind materials such as wood, paint, metal, concrete, cement, or other masonry.
OXYGEN MINERALE ABSOLUTE RANGE OWNER S MANUAL OXY MINERALE 600/1000 SERIES
 PURAPOOL OXYGEN MINERALE ABSOLUTE RANGE OWNER S MANUAL OXY MINERALE 600/1000 SERIES 1. PARTS IDENTIFICATION LIST 1. 5. 2. 4. 3. 6. 6. Figure 1.1 1. OXYGEN Minerale Power pack with timer option (x1) 2.
Farm Chlor Chlorinator Instruction Manual
 Farm Chlor Chlorinator Instruction Manual 1 2 GEA FIL FARM CHLOR CHLORINATOR INSTRUCTION MANUAL Content Welcome to improved water quality 3 Key Features and Benefits Chlorine Use What s included? 4 Installation
UsER manual for Watersens ph -REDOX
 UsER manual for Watersens -REDOX Cl 8 1 2 6 3 3 7 7 4 4 4 4 Parts List 1 Redox Probe 1 x 2 PH Probe 1 x 5 Tube Weight 2 x 6 Connection Valve 1 x chlorine 3 Chlorine and Pumps 2 x 7 Dosing Valve 2 x 5 5
Pool Owners Guide. As Recommended by Barrier Reef Pools LLC.
 Pool Owners Guide As Recommended by Barrier Reef Pools LLC. Congratulations Congratulations on your choice of a new BARRIER REEF Composite Swimming Pool. BARRIER REEF Composite pools are built to exacting
Budget Range Operators Handbook
 Budget Range Operators Handbook BAMBI AIR COMPRESSORS LTD 152 Thimble Mill Lane Heartlands Birmingham B7 5HT United Kingdom Tel: 0121 322 2299 Fax: 0121 322 2297 Email: sales@bambi-air.co.uk www.bambi-air.co.uk
5 Gallon Pressure Pot with HVLP Spray Gun and Hose
 California Air Tools 5 Gallon Pressure Pot with HVLP Spray Gun and Hose Model No. 365 Technical Data Type of feed.pressure Maximum pressure in the tank... 0,413Mpa (60PSI) Working pressure in the tank.0,
Booster Pump PB4-60 Replacement Kits
 Booster Pump PB4-60 Replacement Kits FOR YOUR SAFETY - This product must be installed and serviced by a contractor who is licensed and qualified in pool equipment by the jurisdiction in which the product
SALT WATER CHLORINATORS INSTALLATION INSTRUCTIONS
 SALT WATER CHLORINATORS INSTALLATION INSTRUCTIONS An introduction to salt water chlorination. Salt water chlorination is the healthy alternative to chlorinating your swimming pool, the natural way. Very
Purifier for Vinyl Lined Pools
 Purifier for Vinyl Lined Pools Operating Manual READ THE LABEL AND OPERATOR S MANUAL BEFORE USING Pool owner, save this manual! Builders, leave this manual with the pool owner! We ask you to take the time
OWNER S MANUAL NMB SERIES
 OWNER S MANUAL NMB SERIES NMB Manual V2.0.doc 1. PARTS IDENTIFICATION LIST 1. 5. 2. 4. 3. 6(a). 6(b). Figure 1.1 1. Powerpack with timer option (x1) 2. Cell (x1) 3. Cell Housing (x1) 4. O-ring (x1) 5.
SEP 100 D.E. SEPARATION TANK
 SEP 100 D.E. SEPARATION TANK INSTALLATION AND USER S GUIDE IMPORTANT SAFETY INSTRUCTIONS READ AND FOLLOW ALL INSTRUCTIONS SAVE THESE INSTRUCTIONS ii CUSTOMER SERVICE / TECHNICAL SUPPORT If you have questions
Robotic Pool Cleaners
 Robotic Pool Cleaners Relax and Enjoy Your Pool Dolphin robotic pool cleaners by Maytronics deliver automated, high-performance pool cleaning - efficiently and effectively. Building on decades of expertise
accidents which arise due to non-observance of these instructions and the safety information herein. SPECIFICATIONS
 18 GAUGE 2 INCH BRAD NAILER Model: 7555 CALIFORNIA PROPOSITION 65 WARNING: You can create dust when you cut, sand, drill or grind materials such as wood, paint, metal, concrete, cement, or other masonry.
4 ANGLE GRINDER MODEL NO: CAT 52 PART
 4 ANGLE GRINDER 4 ANGLE GRINDER MODEL NO: CAT 52 PART No: 3110685 OPERATION & MAINTENANCE INSTRUCTIONS 0807 Fig.1 SPECIFICATIONS Model:...CAG52 Part Number:...3110685 Rated Wheel...Capacity: 4 x 1/4 (type
Hurlcon KX Siesta Above Ground Salt Water Chlorinator by AstralPool Australia
 Hurlcon KX Siesta Above Ground Salt Water Chlorinator by AstralPool Australia OPERATING INSTRUCTIONS AstralPool Australia Pty. Limited. A.B.N. 97 007 284 504 Melbourne: Ph: (03) 8796 8600 Fax: (03) 8796
Visit:
 CORAL CLASSIC SPA START UP INSTRUCTIONS Remove the filter from the spa, see page 8 in your user manual. Place a hose in the filter box to fill the spa with water, see page 7 in your user manual. Remove
Photo: Jonas Wall ANTARES OVAL DRY GLOVE SYSTEM BY SI TECH.
 Photo: Jonas Wall ANTARES OVAL DRY GLOVE SYSTEM BY SI TECH www.sitech.se The Oval revolution We want to congratulate you on your purchase of the ANTARES Modular Dry Glove System. The oval design and quick
Owner s Guide. ElevateSUP.com
 Owner s Guide ElevateSUP.com IMPORTANT READ THIS IMPORTANT INFORMATION BEFORE USING YOUR STAND UP PAD- DLEBOARD Disregarding any of the safety precautions and instructions contained in the owner s manual
NB/NBR NITROGEN BOOSTER FOR AVIATION SERVICE
 NB/NBR NITROGEN BOOSTER FOR AVIATION SERVICE INSTALLATION, OPERATION & MAINTENANCE MANUAL INTERFACE DEVICES, INC. 230 Depot Road, Milford, CT 06460 Ph: (203) 878-4648, Fx: (203) 882-0885, E-mail: info@interfacedevices.com
WW-720. Pressure Reducing Control Valve
 WW-720 Pressure Reducing Control Valve (Size Ranges: 2-4 and 6-14 ) Installation Operation & Maintenance Page 1 of 6 1. DESCRIPTION The Model 720 Pressure Reducing is an automatic control valve (powered
Lab Cock. Contents. User s Manual (1) Be sure to read the following warranty clauses of our product 1. (2) General operating instructions 2
 Be sure to read the following warranty clauses of our product 1. (2) General operating instructions 2") Serial No. H-V005-E-6 Lab Cock Contents User s Manual (1) Be sure to read the following warranty clauses of our product 1 (2) General operating instructions 2 (3) General instructions for transportation,
Serial No. H-V005-E-6 Lab Cock Contents User s Manual (1) Be sure to read the following warranty clauses of our product 1 (2) General operating instructions 2 (3) General instructions for transportation,
WW-730. Pressure Sustaining/Relief Control Valve
 WW-730 Pressure Sustaining/Relief Control Valve Installation Operation & Maintenance Page 1 of 6 1. DESCRIPTION The Model 730 Pressure Relief / Sustaining Valve is an automatic control valve designed to
Super-Clean SCT Series SuperClean Sand Filter. Installation Manual
 Installation Manual -1- What happens to the water in your pool? This should be a question of prime consideration for all pool owners. In the past some pools did not use filtering systems, the owner was
Swimming Pool Winterizing
 Swimming Pool Winterizing 1. Remove Solar Cover During the closed season, when the pool is not in use, a solar cover must be cleaned and hosed down with fresh tap water, folded or rolled, and stored in
BS Series Basket Strainer
 BS Series Basket Strainer Operating, Installation, & Maintenance Manual Corrosion Resistant Fluid and Air Handling Systems. Dated 04-26-12 PRESSURE DROP SIMTECH strainers are engineered to offer the lowest
User Instructions K-Bot RX2/RX3 Pool Cleaner
 Klever Kleena User Instructions K-Bot RX2/RX3 Pool Cleaner K-Bot RX2 K-Bot RX3 8151289 8151289 K-Bot_RX2-RX3_2012.indd 1 15/2/2012 9:59 AM 8151289 K-Bot_RX2-RX3_2012.indd 2 15/2/2012 9:59 AM K-Bot RX2/RX3
Vessel Installation and Operating Manual
 For In-ground and Aboveground Pools Vessel Installation and Operating Manual Important Safety Information Please read this manual prior to installation. Nature 2 Express is designed to sanitize in-ground
RARS5000 AIR BODY SAW OWNER S OPERATING MANUAL
 RARS5000 AIR BODY SAW OWNER S OPERATING MANUAL DESCRIPTION 1. No mar 2. No mar tip 3. Housing grip 4. Trigger 5. Air inlet 6. Air inlet plug 7. Plastic board Important! It is essential that you read the
OPERATION & MAINTENANCE INSTRUCTIONS
 1 /2 REVERSIBLE AIR DRILL MODEL NO: CAT123 PART NO: 3110879 OPERATION & MAINTENANCE INSTRUCTIONS GC1110 INTRODUCTION Thank you for purchasing this CLARKE product. Before attempting to use this product,
VX Series Salt Chlorinator S Model
 VX Series Salt Chlorinator S l OPERATING INSTRUCTIONS HURLCON Manufacturing & sales Pty. Limited. A.B.N. 97 007 284 504 www.hurlcon.com.au service@hurlcon.com.au Information and specifications subject
Aquor House Hydrant V2
 Aquor House Hydrant V2 IN-WALL OUTDOOR FAUCET SYSTEM FLUSH-MOUNT QUICK-CONNECT SELF-DRAINING ANTI-SIPHON NON-FREEZE VBH-SERIES AQUOR HOUSE HYDRANT V2: WALL HYDRANT / FREEZELESS SILLCOCK Freezeless sillcock
To purchase replacement parts and accessories, or to obtain technical assistance, visit:
 IMPORTANT Read this guide and follow all instructions carefully before assembling or using this product. To purchase replacement parts and accessories, or to obtain technical assistance, visit: www.splasharoundpools.com
OWNER S MANUAL SUCTION GUN SG-300
 OWNER S MANUAL SUCTION GUN SG-00 Clemco International GmbH Carl-Zeiss-Straße Tel.: +49 (0) 806 90080 805 Bruckmühl Mail: info@clemco.de Germany Web: www.clemco-international.com Revision: 0.05 SG-00 SUCTION
Assembly Drawing: W-311B-A01, or as applicable Parts List: W-311B-A01-1, or as applicable Special Tools: , , &
 REDQ Regulators Model 411B Barstock Design Powreactor Dome Regulator OPERATION AND MAINTENANCE Contents Scope..............................1 Installation..........................1 General Description....................1
WW-720. Pressure Reducing Control Valve
 WW-720 Pressure Reducing Control Valve (Size Ranges: 2-4 and 6-14 ) Installation Operation & Maintenance Page 1 of 6 1. DESCRIPTION The Model 720 Pressure Reducing is an automatic control valve (powered
Needle valve. Contents. User s Manual. (1) Be sure to read the following warranty clauses of our product 1. (2) General operating instructions 2
 Be sure to read the following warranty clauses of our product 1. (2) General operating instructions 2") Serial No. H-V024-E-7 Needle valve User s Manual Contents (1) Be sure to read the following warranty clauses of our product 1 (2) General operating instructions 2 (3) General instructions for transportation,
Serial No. H-V024-E-7 Needle valve User s Manual Contents (1) Be sure to read the following warranty clauses of our product 1 (2) General operating instructions 2 (3) General instructions for transportation,
AIR STAPLER. MODEL: CSG3KC Part No OPERATING & MAINTENANCE INSTRUCTIONS
 AIR STAPLER MODEL: CSG3KC Part No. 3110380 0506 OPERATING & MAINTENANCE INSTRUCTIONS SPECIFICATIONS Min. Hose Size (ID)... 6mm (1/4 ) Air Inlet Connector... 10mm Quick Fit Ave. Air Consumption... 0.4 cfm
MD R a n g e O p e r a t o r s H a n d b o o k
 MD R a n g e O p e r a t o r s H a n d b o o k Covering Models:- MD35/20 MD75/80 MD75/0 MD75/0V MD75/250 MD75/250V MD0/500 MD225/1000 BAMBI AIR COMPRESSORS LTD 2 Thimble Mill Lane Heartlands Birmingham
Training. tm PA90 Series - Lung Demand Valve
 D Training Dräger tm12842 PA90 Series - Lung Demand Valve Index Section 1 Instructions for Use Section 2 Introduction and Safety Warnings Section 3 Product Description Section 4 Operating Principle Section
FloWash. Industrial Filter Cart
 OPERATION AND MAINTENANCE MANUAL FloWash Industrial Filter Cart Read all instructions before installation or operation of equipment. Failure to comply with these instructions could result in bodily injury
After filling the pool with clean water in the summer, two basic factors can take place due to the exposure of water to the sun and the air.
 ENGLISH WHAT HAPPENS TO THE WATER IN YOUR POOL? This should be a question of prime consideration for all pool owners. In the past some pools did not use filtering systems, the owner was faced with the
Technical Operating Instructions for Magnum Cutting Systems. for online instructions
 Technical Operating Instructions for Magnum Cutting Systems http://www.magnumusa.com/operating-video.html for online instructions In Case of Emergency Immediately Call for Medical Aid. Familiarize yourself
CUT OFF TOOL MODEL: CAT113
 CUT OFF TOOL MODEL: CAT113 Part No: 3120135 ASSEMBLY & INSTRUCTION MANUAL LS0309 INTRODUCTION Thank you for purchasing this CLARKE product Before attempting to use the product, it is essential that you
SSFU SUPER SPRAYFAST UNIVERSAL ADHESIVE APPLICATOR
 S S F U SSFU SUPER SPRAYFAST UNIVERSAL ADHESIVE APPLICATOR MACHINERY DIVISION OWNER S MANUAL UNIT INSTRUCTIONS Please follow all SSFU Safety Instructions. Contact your Duro Dyne Tech Service if you have
k valve 2 (50)HF 2½ (65)SF installation guide aylesbury For valve sizes (DN): tel fax
HF 2½ (65)SF installation guide aylesbury For valve sizes (DN): tel fax") aylesbury k valve installation guide For valve sizes (DN): 2 (50)HF 2½ (65)SF 3 (80)RB IMPORTANT Please keep for future reference. PLEASE READ THESE INSTRUCTIONS CAREFULLY AND REFER TO ANY DIAGRAMS BEFORE
aylesbury k valve installation guide For valve sizes (DN): 2 (50)HF 2½ (65)SF 3 (80)RB IMPORTANT Please keep for future reference. PLEASE READ THESE INSTRUCTIONS CAREFULLY AND REFER TO ANY DIAGRAMS BEFORE
Latvin Luxury Shower Panel. Telephone Product Specification. ~ Minimum Working Pressure 1.0 bar ~ Maximum Working Pressure 3.
 Product Specification ~ Minimum Working Pressure 1.0 bar ~ Maximum Working Pressure 3.0 bar Latvin Luxury Shower Panel ~ Fixing Centres 150mm +/- 10mm ~ Outlet size 1/2" Bottom Outlet Always maintain a
MAGNA-CHEM AUTOMATIC CHLORINATOR - MODEL: CSA-2P MAGNA ORP Chlorine Pump
 A. PARTS MAGNA-CHEM AUTOMATIC CHLORINATOR - MODEL: CSA-2P MAGNA ORP Chlorine Pump Assembly & Operating Instructions Parts for liquid chlorine pump head 1pc. 1/4 poly delivery tubing, 4 meters 1pc. drum
LIBERTY and PATRIOT SAND FILTER SERIES INSTALLATION & OPERATION MANUAL. RX Clear Patriot Sand Filters
 LIBERTY and PATRIOT SAND FILTER SERIES INSTALLATION & OPERATION MANUAL RX Clear Patriot Sand Filters 8 Tank 12 Tank 16 Tank 22 Tank 24 Tank MLA-F91-PS08 MLA-F91-PS12 MLA- F91-PS16 MLA-F91-PS22 MLA-F91-P24
HIGH PERFORMANCE POOL & SPA PUMPS
 HIGH PERFORMANCE POOL & SPA PUMPS INSTALLATION AND OPERATION MANUAL AQUA BOOSTER AB SERIES AB50F, AB75F, AB100F, AB125F, AB150F, AB200F Reltech Australia Pty Ltd 43-45 Kylta Rd West Heidelberg Vic 3081
Appendix A. Imbrium Systems Jellyfish Filter Inspection and Maintenance Information
 Appendix A Imbrium Systems Jellyfish Filter Inspection and Maintenance Information Jellyfish Filter Inspection and Maintenance Regular inspection and maintenance are proven, cost-effective ways to maximize
80 Litre Suction Oil Drainer
 80 Litre Suction Oil Drainer Please dispose of packaging for the product in a responsible manner. It is suitable for recycling. Help to protect the environment, take the packaging to the local amenity
Today s Date: Home Phone# Name: Cell Phone # _. Address:
 301 South Hull St. Sinking Spring, PA 19608 610-777-9440 www.bluelagoon-pools.com 2016 SWIMMING POOL OPENING CONTRACT To schedule an opening, please fill out this form, front and back. On the back side,
Vortex Spas User Manual
 Vortex Spas User Manual Dear Spa Buyer, Congratulations on your purchase of a new Vortex Spa. You now possess the ultimate passport to tranquility a miniature vacation at home, ready and waiting for you
model - CYPRESS DX W
 Contents model - CYPRESS DX W Maintenenace manual Read and Save these instructions Welcome Contents 1 Preparing Nothing makes us happier than seeing people out riding bikes. For over thirty years Giant
Pressure Dump Valve Service Kit for Series 2300 Units
 Instruction Sheet Pressure Dump Valve Service Kit for Series 00 Units. Overview The Nordson pressure dump valve is used to relieve hydraulic pressure instantly in Series 00 applicator tanks when the unit
INSTALLATION and OPERATION INSTRUCTIONS
 INSTALLATION and OPERATION INSTRUCTIONS FLOJET Beer Pump Panels MODEL NO. 66134-1 66134-2 66134-3 66134-4 IMPORTANT INFORMATION This manual has been prepared to assist you in the operation of Perlick Beer
SETTING THE HANDLE HEIGHT ON THE ROLLATOR
 Model No: Maximum User Weight: 10910C (Lightweight) 10928C (Heavy duty) 125kg (20st) (Lightweight) 170kg (27st) (Heavy duty) Height of handles: 780-915mm (30.5-36 ) (Lightweight) 790-930mm (31-36.5 ) (Heavy
Installation and operating manual. Pneumatic control station LK product no: PCS 1-10
 LK product no: PCS 1-10 Article no: 74503 Revision:8 Article no: 74503 Revision: 8 2 (23) Contents 1. General information... 5 2. Safety precautions... 5 2.1 Significance of symbols... 5 2.2 Explanatory