DIVATOR RS4 USER MANUAL
|
|
|
- Lindsey Ellis
- 5 years ago
- Views:
Transcription


1 DIVATOR RS4 USER MANUAL
2 USER MANUAL HAZARD INDICATORS... 3 SAFETY NOTICE... 4 TECHNICAL DESCRIPTION... 5 PREPARING FOR USE... 9 PRE-DIVE PROCEDURES CHECKS DURING DIVING DIVING IN COLD WATER POST-DIVE PROCEDURES TRANSPORT AND STORAGE SPARE PARTS INTERSPIRO AB, SWEDEN. THIS PUBLICATION CONTAINS OR REFERS TO PROPRIETARY INFORMATION WHICH IS PROTECTED BY COPYRIGHT. ALL RIGHTS ARE RESERVED. INTERSPIRO AND DIVATOR ARE REGISTERED TRADEMARKS OF INTERSPIRO. THIS PUBLICATION MAY NOT BE COPIED, PHOTOCOPIED, REPRODUCED, TRANSLATED, OR CONVERTED TO ANY ELECTRONIC OR MACHINE READABLE FORM IN WHOLE OR IN PART WITHOUT PRIOR WRITTEN APPROVAL FROM INTERSPIRO. CHANGES OR UPDATES TO THIS PUBLICATION MAY BE MADE WITHOUT PRIOR NOTICE. 2
3 USER MANUAL HAZARD INDICATORS This manual contains hazard warnings, identified as DANGER!, WARNING! and CAUTION!, that indicate risks and dangers that you may face while using the DIVATOR System. These different types of hazard indicators correspond to the degree of hazard you may encounter: DANGER! INDICATES AN IMMINENTLY HAZARDOUS SITUATION WHICH, IF NOT AVOIDED, WILL RESULT IN DEATH OR SERIOUS INJURY. WARNING! INDICATES A POTENTIALLY HAZARDOUS SITUATION WHICH, IF NOT AVOIDED, COULD RESULT IN DEATH OR SERIOUS INJURY. CAUTION! INDICATES A POTENTIALLY HAZARDOUS SITUATION WHICH, IF NOT AVOIDED, COULD RESULT IN MINOR OR MODERATE INJURY. IT MAY ALSO BE USED AS A WARNING AGAINST UNSAFE PRACTICES. Failure to comply with the instructions highlighted by the hazard warnings may result in equipment malfunctioning, serious injury or death. 3
4 SAFETY NOTICE WARNING! BEFORE USING THE DIVATOR RS4 SCUBA, THE USER MUST HAVE RECEIVED FULL TRAINING IN ITS USE, HAVE READ AND UNDERSTOOD THESE OPERATING INSTRUCTIONS AND DEMONSTRATED PROFICIENCY TO A RESPONSIBLE TRAINER OR SUPERVISOR. FAILURE TO DO SO MAY RESULT IN INJURY OR DEATH FOR THE USER AND CAN HAVE SERIOUS CONSEQUENCES FOR PEOPLE TO BE RESCUED AND/OR ITEMS OF VALUE TO BE SAVED. OWNER'S AND USER'S RESPONSIBILITIES WARNING! INTERSPIRO IS NOT RESPONSIBLE FOR: COMBINATIONS OF PRODUCTS, UNLESS PUT TO MARKET BY INTERSPIRO CHANGES OR ADAPTATIONS MADE TO THE PRODUCT BY A THIRD PARTY. DANGER! ALL USERS OF THE DIVATOR SYSTEM MUST BE CERTIFIED BY A NATIONALLY OR INTERNATIONALLY RECOGNIZED SCUBA CERTIFICATION AGENCY. FURTHERMORE, ALL USERS OF THE DIVATOR SYSTEM MUST BE ADEQUATELY TRAINED IN ITS USE BY A CERTIFIED SCUBA INSTRUCTOR WITH KNOWLEDGE AND EXPERIENCE IN THE USE OF THE DIVATOR DIVING SYSTEM. WARNING! HIGH PRESSURE GAS SYSTEMS MUST BE HANDLED WITH CARE. DAMAGE TO HIGH PRESSURE GAS SYSTEM COMPONENTS MAY RESULT IN INJURY OR DEATH. INTERSPIRO IS NOT LIABLE FOR DAMAGES INCURRED AS A CONSEQUENCE OF FAILURE TO FOLLOW THE INSTRUCTIONS IN THIS MANUAL. WARNING! ALL USERS OF THE DIVATOR SYSTEM MUST PERIODICALLY UNDERGO TRAINING IN EMERGENCY PROCEDURES IN SHALLOW WATER TO MAINTAIN PREPAREDNESS IN THE EVENT OF AN ACTUAL EMERGENCY. WARNING! THE BREATHING AIR SHALL MEET THE REQUIREMENTS FOR BREATHABLE AIR ACCORDING TO EN 132 ANNEX A, OR SIMILAR PURITY REQUIREMENTS. 4
 4. High pressure hose 5.")
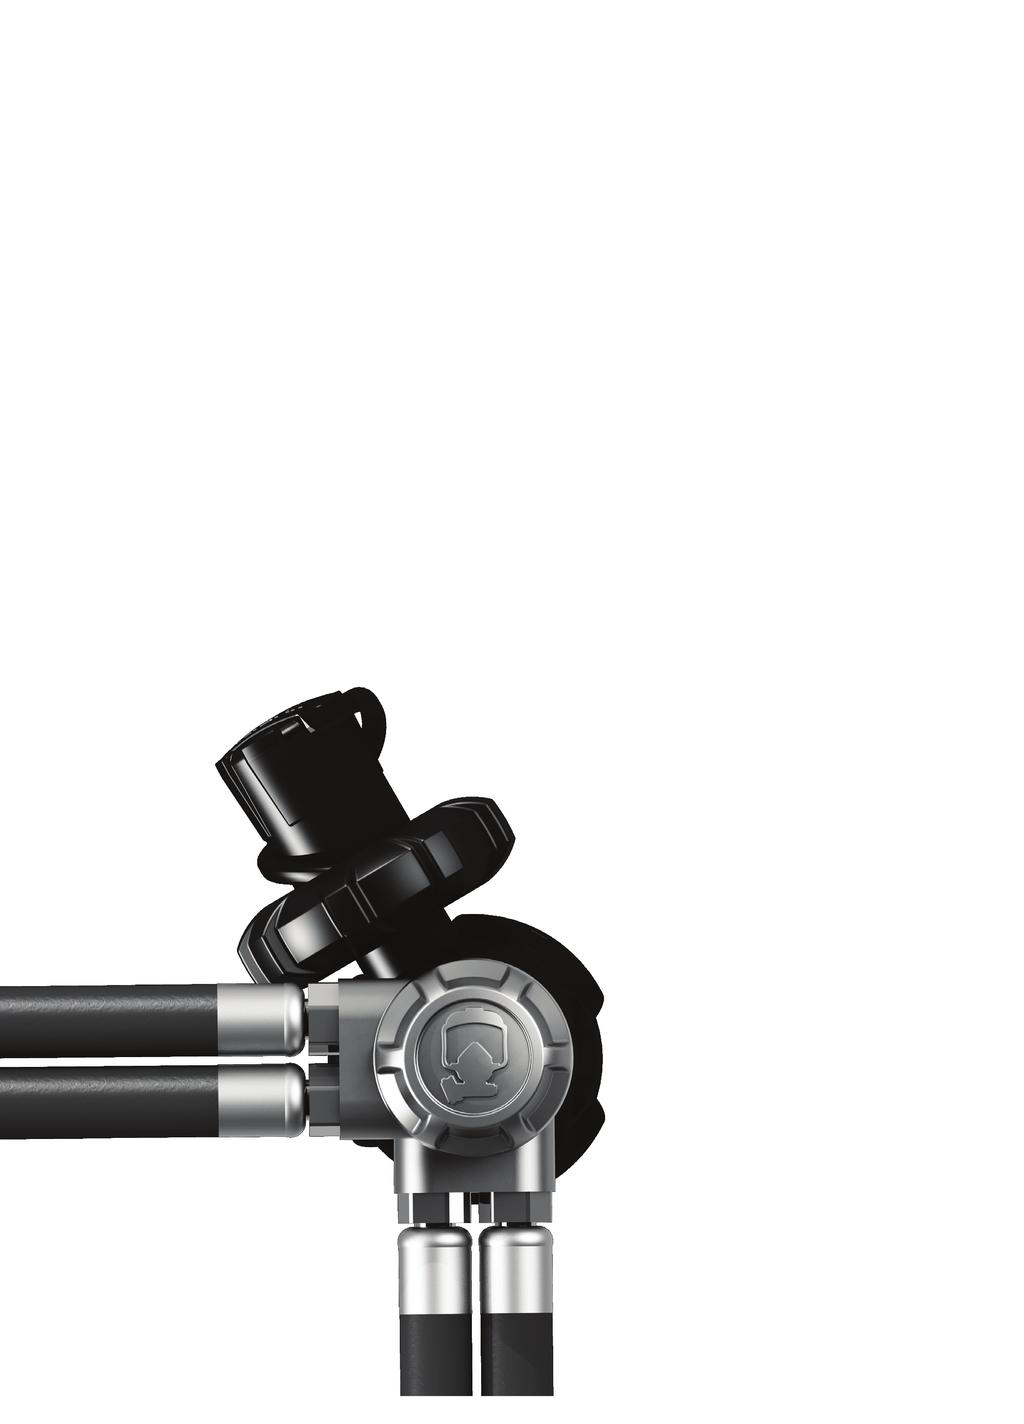
5 TECHNICAL DESCRIPTION DIVATOR RS4 REGULATOR ASSEMBLY 1. Regulator, first stage 2. Anti-freeze device (maintenance free) 3. Pressure gauge displaying pressures from 0 to 300 Bar, or 0 to 4350 Psi (photo shows pressure gauge with optional compass and depth gauge.) 4. High pressure hose 5. Quick connector for DP1 with protective rubber cap (optional) 6. Dry suit hose (optional) 7. Octopus hose (optional) 8. BC hose (optional) 9. Breathing hose for full face mask or breathing valve with mouth piece (optional) 5
6 DIVATOR RS4 ADVANTAGES The RS4 regulator is designed to make your dive efficient and safe. It has a high air flow capacity that ensures sufficient air supply to the primary and the secondary (octopus) breathing valve at the same time, regardless of the depth of the dive. This makes the RS4 an ideal regulator for professional diving and rescue missions. MODULAR The RS4 has a range of versions with different covers to choose from. Choosing the right regulator configuration for your specific diving needs will give you a safe and functional dive. ANTI-FREEZE The unique anti-freezing device on the RS4 is designed by Interspiro s engineers to be dry in all conditions, this will eliminate problems like freezing and free-flowing which other regulators on the market may encounter. This is possible because the regulator s reference chamber is kept dry by high pressure gas (high pressure gas can only contain negligible amounts of moist) and has a overpressure which ensure that no water may enter the reference chamber. ADJUSTABLE COVERS Loose hanging or protruding hoses are a huge safety risk. The RS4 has adjustable covers that makes it possible to adjust the hoses to lie secure, near the divers body, this will make the dive more ergonomic and safe. ROBUST SHOCKPROOF DESIGN The RS4 has an outer shell made of durable black rubber that protects the regulator from accidental impacts or chocks. This shockproof design will keep the regulator in a good condition and prolong its usage time. INCREASED USAGE POSSIBILITIES The RS4 can be used together with both a single cylinder and a cylinder pack. This ensures that you always have a regulator that suits your needs. A perfect match is to combine the RS4 with Divator LITE which is a perfectly balanced cylinder pack. Divator LITE has a low profile that allows for safer access to confined spaces and minimizes resistance in current waters together with being the lightest diving cylinders in the world. USING RS4 TOGETHER WITH INTERSPIRO DIVATOR DP1 The DP1 is a truly light weight and portable surface supply that provides full cylinder pressure to the diver at depth. Using DP1 together with RS4 will give the diver even more security when diving in tough conditions. The DP1 supply hose can be used as a lifeline and if using a communication, it can be attached to the hose. DIVATOR RS4 REGULATOR VERSIONS The RS4 Regulator is available with DIN or YOKE connection, both versions are available in four configurations. The DIN version are equipped with a parking spot plug for keeping the dust cover in place during the dive. 6
7 2-PORT SCUBA (DRY SUIT/BC) The RS4 regulator, 2-port SCUBA, is intended as a regulator to be used as an Inflation regulator for a dry suit and/or for a BC as a stand alone unit with a separate small cylinder. Delivered without pressure gauge and hoses. The RS4 regulator has two HP outlets (7/16 ) for a pressure gauge or a Divator HUD. There are two LP outlets (3/8 ) for a dry suit and/or a BC hose (or it can be used for any other LP hose). One outlet is equipped with an over pressure valve (tightened to 8 Nm) and the other is equipped with a blank plug. The two HP outlets are fitted with a blank plug and a parking plug. (YOKE outlet on image) 2-PORT SCUBA + DP1 The RS4 regulator, 2-port SCUBA + DP1, is intended as a regulator to be used as a commercial SCUBA regulator where the user would need a surface supply air connection for the DP1 system, a breathing hose for his full face mask and an inflation hose for a dry suit. Delivered with a pressure gauge showing Bar or Psi and a DP1 surface supply connection. The RS4 regulator has one free HP outlet (7/16 ) that for example can house the HUD or any other HP device. The two LP outlets (3/8 ) can be used for the breathing hose for the diver, a dry suit and/or a BC hose (or it can be used for any other LP hose). Both LP outlets are fitted with blank plugs. The second HP outlet is fitted with a parking plug. (YOKE outlet on image) 4-PORT SCUBA The RS4 regulator, 4-port SCUBA, is intended as a regulator to be used as an ordinary SCUBA regulator, where the user would need to connect a breathing hose for the full face mask or breathing valve, an octopus hose, an inflation hose for dry suit and a BC inflation hose at the same time. Delivered with a pressure gauge showing Bar or Psi. The RS4 regulator has one free HP outlet (7/16 ) that is fitted with a parking plug and for example can house the HUD or any other HP device. There are four (4) plugged LP outlets (3/8 ) that for example can house the breathing hose for the diver, a octopus, a dry suit and a BC hose (or it can be used for any other LP hose). (DIN outlet on image) 7
8 4-PORT SCUBA + DP1 The RS4 regulator, 4-port SCUBA + DP1, is intended as a regulator to be used as a Professional SCUBA regulator, where the user would need a surface supply air connection for the DP1 system, a breathing hose for the full face mask, an octopus hose for possible under water rescue operations, an inflation hose for the dry suit and a BC inflation hose at the same time. Delivered with a pressure gauge showing Bar or Psi and a DP1 Surface Supply connection. The RS4 regulator has one free HP outlet (7/16 ) that is fitted with a parking plug and for example can house the HUD or any other HP device. There are four (4) plugged LP outlets (3/8 ) that for example can house the breathing hose for the diver, a Octopus, a dry suit and a BC hose (or it can be used for any other LP hose) (DIN outlet on image). 8

 into desired position. Tighten the screws until the head(s) become locked in their position(s). Make sure that the screws are tightened evenly.")


9 PREPARING FOR USE The RS4 SCUBA can be used in different configurations. Follow this chapter in applicable parts. ADJUSTING THE DIVATOR RS4 BEFORE FIRST USE Adjust the RS4 into a mode that suits your SCUBA configuration before the first dive. Use the included 2 mm (5/64 inch) hexagonal (Allen) key. Turn the screws anti-clockwise maximum 1 turn until it is possible to turn the head(s). Turn the head(s) into desired position. Tighten the screws until the head(s) become locked in their position(s). Make sure that the screws are tightened evenly. Photo shows traditional regulator hose mounting. Photo shows parallel regulator hose mounting. ASSEMBLING THE DIVATOR RS4 ON THE CYLINDER Assemble the RS4 regulator onto the high pressure outlet on the cylinder, either in the parallel mode or in the traditional standard SCUBA mode (as seen on pictures). Photo shows traditional SCUBA mode. Photo shows parallel mode. ATTACHING A DEVICE TO THE SECOND HIGH PRESSURE OUTLET It is possible to attach a HUD or other HP device to the second high pressure outlet fitted with a parking plug. Interspiro recommends that this is done by an Interspiro certified service technician. 1. Remove the parking plug with a 6 mm hexagonal key. 2. Attach the HP device according to it s manual. When detaching the HP device: reassemble the parking plug with a 6 mm hexagonal socket fitted on a torque wrench to 15 Nm. 9
10 ATTACHING AND DIRECTING HOSES ON DIVATOR BC USE OF INTERSPIRO HOSES If using Interspiro hoses, tighten the hoses to 10 Nm. USE OF OTHER HOSES THAN INTERSPIROS Make sure that the hose has a working pressure of at least 34 Bar (490 Psi) and a burst pressure of at least 100 Bar (1450 (Psi). Tighten them according to the hoses user manual. CONNECTING THE BREATHING HOSE Connect the breathing hose to the full face mask (or mouthpiece) by screwing it on fingertight. If an over pressure mask is fitted, close the lever. CONNECTING THE INFLATION HOSE 1. Put the inflation hose for the BC through the upper elastic band on the corrugated inflation hose. 2. Pull the hose until you can connect it to the power inflators connector. 3. Adjust the hose length so that both hoses are parallel. Fasten the inflation hoses with the left velcro holder on the BC. CONNECTING THE OCTOPUS BREATHING HOSE AND VALVE 1. If a breathing hose for octopus is fitted, put the hose through the right inner side of the BC bladder and pull it out in its full length. 2. Connect the hose to the octopus breathing valve by screwing it on finger tight. Close the Lever on the octopus breathing valve. 3. Bend the hose one third of the length from the regulator. Insert the bent section of the hose through the elastic cord located on the upper back part of the BC harness. 4. Connect the octopus breathing valve to the octopus mouthpiece holder (optional) in a suitable position or store it in the BC s right outer pocket. ATTACHING THE DRY SUIT INFLATION HOSE If a dry suit inflation hose is fitted, put it through the right inner side of the BC harness. ATTACHING THE RS4 REGULATOR PRESSURE GAUGE Fasten the elastic cord with hook (attached on the pressure gauge) on a suitable D-ring on the BC. Make sure it is easily accessible during the dive. DIRECTING THE DIVATOR DP1 HOSE If the DP1 hose is fitted, make sure it is directed through the left inner side of the BC bladder. Store the DP1 hose in the BC left outer pocket. Close the zipper if you are not performing a DP1 surface supply dive. SURFACE SUPPLY DIVING USING THE DIVATOR DP1 1. Before using the DP1 Surface Supply diving system together with the RS4 SCUBA make sure that the attendant has: connected the air cylinders done the pre-dive checks on the DP1 equipment checked that air is fed to the DP1 regulator according to the DP1 manual. 2. Connect the RS4 quick connector for DP1 to the DP1 regulator. 3. Tighten the locking ring fully. Loosen it a quarter of a turn. 4. Put the DP1 Surface Supply assembly in the left BC pocket for security and protection. 5. Close the zipper on the BC pocket to avoid the regulator from falling out during diving. 6. Connect the carabiner on the DP1 surface supply hose to the lifebelt worn by the diver. For further instructions see the DP1 user manual. 10
11 PRE-DIVE PROCEDURES OVERALL CHECK 1. Make sure that the RS4 regulator is clean and free from sand and/or debris from previous use. 2. Inspect the regulator to detect if it has any signs of damage. A damaged or defective regulator must be replaced or repaired by an Interspiro certified service technician. 3. Check all hoses by pulling and bending them while inspecting for damage, cracks and discolouration. If the high pressure hose to the pressure gauge is found to be defective or damaged, it must be replaced by an Interspiro certified service technician. 4. Check that the protective band is attached to the reliefe valve otherwise replace it with a new protective band. Protective band order no (10 pack). WARNING! THE AIR LOSS CAUSED BY A BREAK IN THE DRY-SUIT HOSE IS JUST AS GREAT AS THAT CAUSED BY A BREAK IN THE BREATHING HOSE. THEREFORE, CHECK THOROUGHLY! The RS4 regulator has a restrictive orifice in the high pressure hose that limits the air flow to the pressure gauge. The restriction protects the user and the equipment if the hose burst. CHECKING O-RINGS O-rings that are exposed to sunlight, salt water, chemicals (including mild detergents), and ozone suffer ageing and may become defective. 1. Check all visible O-rings. 2. Replace all cracked or damaged O-rings. NOTE! IF IT IS A DIN CONNECTION, TIGHTEN THE CYLINDER VALVE COMPLETELY TO PREVENT THE O-RING ON THE REGULATOR CONNECTION NIPPLE TO COME OFF. If using a DIN connection and the O-ring on the regulator connection nipple comes off. Put a new O-ring on the nipple by pushing it in place. O-ring order no (10 pack). LEAKAGE AND FUNCTION TEST OF THE DIVATOR RS4 REGULATOR 1. Assemble the diving apparatus. 2. If using the primary breathing valve with safety pressure lever, make sure that the safety pressure lever is in closed position. 3. Open the cylinder valve slowly and observe the pressure gauge. Check that the pointer moves normally and smoothly. If the pointer moves irregularly or not at all, the pressure gauge is faulty. When the cylinder valve is fully open, then close it a quarter turn. 11
12 4. Check the pressure gauge to make sure that there is enough air pressure in the cylinder for the planned dive. Interspiro recommends that the cylinder should be full before every dive. 5. Press the inflate button on the BC inflator to make sure that it inflates the BC bladder. Push the dump button on the inflator to make sure that it drains the BC bladder from air. 6a. If using a primary breathing valve with safety pressure, turn the safety pressure lever to the open position. Check that a strong flow of air is heard. Reset the safety pressure lever to the closed position. 6b. If using a primary breathing valve without safety pressure, press the purge button on the breathing valve. Check that a strong flow of air is heard. Release the purge button. 7. If using a octopus breathing valve together with the primary breathing valve, press the purge button on the octopus breathing valve. Check that a strong flow of air is heard. Release the purge button. Close the locking lever against the valve housing. 8. Test the entire system for leaks with the following steps. Close the cylinder valve. Wait for one (1) minute. Listen for leaks. Open the cylinder valve while watching the pressure gauge. Check that the needle does not rise by more than 10 Bar (145 Psi). CAUTION! IF LEAKAGE IS GREATER THAN THE SPECIFIED VALUE, ANOTHER LEAKAGE HAS BEEN LOCATED OR IF THE EQUIPMENT IS FOUND TO BE DEFECTIVE OR DAMAGED, THE EQUIPMENT MUST BE REPAIRED BY AN INTERSPIRO CERTIFIED SERVICE TECHNICIAN. 9. Close the cylinder valve. 10. Check that the pressure gauge needle moves evenly while venting the system by pressing the purge button (or turning the safety pressure lever to open) on the breathing valve. CHECKS DURING DIVING 1. Check the pressure gauge repeatedly to monitor air consumption. Terminate the dive with ample air pressure to be able to return safely to the surface or to the entry point of the dive. 2. Check for leaks or abnormal behaviour of the RS4 regulator (small bubbles will occasionally leave the anti-freeze device and are expected when ascending, this is natural). 3. Check that optional equipment fitted to the RS4 regulator can be reached and managed. 4. If using a DP1 surface supply together with the RS4 regulator, check that air is not consumed from the worn cylinder. See the DP1 surface Supply user manual for additional details. WARNING: WHEN DIVING WITH THE RS4 REGULATOR THE DIVER S ONLY WARNING OF LOW AIR PRESSURE IS BY REPEATEDLY MONITORING THE PRESSURE DROP OF THE PRESSURE GAUGE. WARNING: IF USING THE DP1, THE ONLY INDICATION THAT THE DIVER HAS SWITCHED FROM SURFACE SUPPLY TO THE SCUBA CYLINDER (BAIL OUT) IS A DECREASE IN THE DIVER S PRESSURE GAUGE. 12
13 DIVING IN COLD WATER The RS4 regulator is equipped with a unique anti-freeze device that is specially constructed for extreme cold water diving. Cold water diving is dangerous and requires special planning, training and preparation. Make sure that the diver and surface support have appropriate training and experience in diving during cold water conditions before conducting a cold water dive. POST-DIVE PROCEDURES 1. If using the RS4 SCUBA together with the DP1 surface supply. Disconnect and vent the DP1 according to the DP1 surface supply user manual. 2. Pressurize the RS4 SCUBA (if not already done). 3. Rinse all parts of the RS4 SCUBA in clean water. If the equipment is very dirty, use a brush and a neutral cleaning agent for extended cleaning. For a detailed description of how to clean the face mask/breathing valve and BC see each product s user manual. 4. Close the cylinder valve. 5. Press the purge button on the breathing valve to vent the regulator. Venting may take as long as 30 seconds. The O-ring sealing between the regulator and the cylinder valve may be damaged if it is removed when there is pressure remaining. 6. Remove the RS4 regulator from the cylinder. 7. Allow all regulator parts to dry. 8. Disconnect and dry the rest of the RS4 SCUBA equipment according to each product s user manual. 9. Blow any moisture out of the cylinder valve by opening the valve and allowing air to escape for 1 to 2 seconds. 10. Close the cylinder valve and tighten the cylinder valve plug by hand (if fitted). The cylinder valve shall always contain a safety pressure of at least 2 Bar (29 Psi). 11. Put the dust cover on the regulator connection nipple for protection. 12. If the equipment is faulty or damaged, it must be repaired or replaced by an Interspiro certified service technician. 13. The equipment shall be thoroughly dried if it is to be stored in a bag/box for more than a few hours. WARNING! BLOW-OFF NOISE AND PRESSURE SURGES MAY CAUSE HEARING DAMAGE. ALWAYS USE EAR PROTECTORS WHEN FILLING AND EMPTYING AIR CYLINDER PACKS. 13
14 TRANSPORT AND STORAGE All rubber parts shall be stored in dry conditions, well protected from direct sunlight and extremes of temperature in a sealed plastic bag. During transport, the equipment shall be stored so that the equipment cannot be damaged and people cannot be injured. The cylinder (pack) must be transported with tightened plugs and, if possible, in boxes. The equipment shall not be stored where the temperature may be expected to go above 70ºC (158 F). The equipment must be completely dry before being put into storage. The DIN connection is equipped with a dust cover that protects the high pressure outlet during transport and storage. Dust cover order no (10 pack). SPARE PARTS Dust cover order no (10 pack) O-ring order no (10 pack) Protective band order no (10 pack) 14
15


16 PART NO A01
DIVATOR THE COMPLETE DIVING SYSTEM INTERSPIRO PRODUCT CATALOG
 DIVATOR THE COMPLETE DIVING SYSTEM INTERSPIRO PRODUCT CATALOG 2009 Interspiro AB, Sweden. This publication contains or refers to proprietary information which is protected by copyright. All rights are
X-Tech CLV User Manual. English
 X-Tech CLV User Manual English Sommary 03. Use 04. Maintenance 05. Caution 06. Technical specifications 08. Cold water use (
98695A01 - THE CONCEPT OF THE DIVATOR FAMILY
 98695A01 - THE CONCEPT OF THE DIVATOR FAMILY The History of Interspiro Respiratory Protection The History of Divator MK I The History of Divator MK II Scuba Diving Philosophy Government Customers Quality
Training. Testor Training Manual
 Training Testor Training Manual Index Section 1 Introduction and Safety Warnings Section 2 Test Procedures Section 3 Test Hoses Section 4 Fault Location 1:1 1.1 Introduction The Dräger Testor test equipment
RG3100 and RG3100Ice Regulator System
 RG3100 and RG3100Ice Regulator System User Guide www.diverite.com Date of purchase: www.diverite.com RG1208-5 & RG1208-5Ice www.diverite.com First Stage Regulator Product Description The RG1208-5 and RG1208-5Ice
R0001. Northern Diver. HYDRA Regulator Manual
 R0001 v Northern Diver HYDRA Regulator Manual Northern Diver Hydra Reg Manual East Quarry Appley Lane North, Appley Bridge, Wigan, WN6 9AE, UK Owner s manual Copyright Notice: This owners manual is copyrighted,
ZEOS 28 ZEOS 38 HYDROS 40 HYDROS 50 READ CAREFULLY. YOUR COMFORT AND SAFETY IS WORTH MORE THAN 15 MINUTES.
 ZEOS 28 ZEOS 38 HYDROS 40 HYDROS 50 USER MANUAL ENGLISH READ CAREFULLY. YOUR COMFORT AND SAFETY IS WORTH MORE THAN 15 MINUTES. CONGRATULATIONS! YOU HAVE PURCHASED A PERFECT PRODUCT IN WHICH, WITHOUT ANY
LTS BCD USER GUIDE. Hollis (2014) Doc r01 (8/29/14)
 Doc r01 (8/29/14)") LTS BCD USER GUIDE Contents NOTICES...3 DANGERS, WARNINGS, CAUTIONS, & NOTES...3 WARNINGS...4 INTRODUCTION...5 CARE AND MAINTENANCE...5 INFLATOR AND DUMP VALVE USE...6 ATTACHING A TANK...7 INTEGRATED WEIGHT
LTS BCD USER GUIDE Contents NOTICES...3 DANGERS, WARNINGS, CAUTIONS, & NOTES...3 WARNINGS...4 INTRODUCTION...5 CARE AND MAINTENANCE...5 INFLATOR AND DUMP VALVE USE...6 ATTACHING A TANK...7 INTEGRATED WEIGHT
ZEOS 28 ZEOS 38 HYDROS 40 HYDROS 50. User manual English
 ZEOS 28 ZEOS 38 HYDROS 40 HYDROS 50 User manual English 1 Introduction Congratulations! You have purchased a perfect product in which, without any compromise, we have connected the best existing materials
RG2200 BC Integrated Octopus
 175 NW Washington Street Lake City, Florida 32055, USA Web: www.diverite.com Phone: 386.752.1087 Fax: 386.755.0613 RG2200 BC Integrated Octopus Product description The Rite Source is both a BC inflation/deflation
In this manual; Warnings, Cautions and Notes calls your attention to information provided to help ensure your safety. Always dive safely.
 In this manual; Warnings, Cautions and Notes calls your attention to information provided to help ensure your safety. Always dive safely. A WARNING indicates a procedure or situation that, if not avoided,
REGULATOR OWNER S GUIDE
 REGULATOR OWNER S GUIDE CONTENTS TOC NOTICES...3 CE INFORMATION...3 INTRODUCTION...4 GENERAL WARNINGS...4 NITROX/O2...5 DIVING IN COLD WATER...5 SETUP & DIVE...6 REGULATOR FIRST STAGES...7 Preparation
PDY TON HYDRAULIC CRIMPING TOOL WARNING
 OPERATORS ORS GUIDE PDY-1220 12 TON HYDRAULIC CRIMPING TOOL All information found in this guide must be read and understood before use or testing of this tool. Failure to read and understand these warnings
J800 HOPE BUOYANCY COMPENSATOR OWNER S MANUAL
 J800 HOPE BUOYANCY COMPENSATOR OWNER S MANUAL EN1809 0 www.istsports.com 1 0120 I. INTRODUCTION I. INTRODUCTION CONTENTS II. GENERAL WARNING AND CAUTION Definition of WARNING, CAUTION and ATTENTION III.
RG1200 Service and Repair Manual
 Dive Rite RG 1200 Regulator Service and Repair Manual Page 1 Text and Photography by Pete Nawrocky Copyright ( ) 1999-2000, Lamartek, Inc., dba Dive Rite RG1200 Service and Repair Manual First Stage.........................................
Service and Repair Manual
 II stage R2 Ice/ Special, II stage R 1 Pro DOWNSTREAM 2 nd STAGE REGULATOR Service and Repair Manual Introduction Safety Precautions...4 General Procedures, Maintenance Schedules...5 Initial Inspection
WARNING: Indicates a potentially hazardous situation which, if not avoided, could result in death or serious injury.
 This owner s manual uses signal words recommended by the American National Standards Institute (see ANSI Z535.4) to designate levels of hazard seriousness. These signal words and their designations are
SECTION FIVE: OP-1B (XLDS) HIGH PRESSURE AIR STORAGE SYSTEM (HPASS) 02/17/2012
 HIGH PRESSURE AIR STORAGE SYSTEM (HPASS) 02/17/2012") HIGH PRESSURE AIR STORAGE SYSTEM (HPASS) 02/17/2012 CAUTION: BEFORE STARTING THIS PROCEDURE ENSURE THE SUPPLY REGULATORS ARE BACKED OFF COUNTER CLOCKWISE UNTIL THE KNOBS SPIN FREELY AND THE DIVERS PNEUMOFATHOMETER
HIGH PRESSURE AIR STORAGE SYSTEM (HPASS) 02/17/2012 CAUTION: BEFORE STARTING THIS PROCEDURE ENSURE THE SUPPLY REGULATORS ARE BACKED OFF COUNTER CLOCKWISE UNTIL THE KNOBS SPIN FREELY AND THE DIVERS PNEUMOFATHOMETER
Gemini Owner s Manual
 Gemini Owner s Manual WARNING - Improper use of the Gemini Breathable Inflator may result in serious injury or death. Do not attempt to use this product unless you have received certified scuba instruction
RG1200 Regulator System
 RG1200 Regulator System UserGuide Date of purchase: www.diverite.com DEVELOPED BY COPYRIGHT NOTICE WARRANTY INFORMATION Dive Rite 175 NW Washington Street Lake City, FL 32055 Phone: 386.752.1087 Fax:
Product Information News
 Product Information News MMR SECOND STAGE REGULATOR VALVE CORE MSA has changed its recommended rebuilding of the MMR Second Stage Regulator s bypass sleeve assembly during the annual inspection. Based
Flathead VI Owner s Manual
 Flathead VI Owner s Manual This owner s manual uses signal words recommended by the American National Standards Institute (see ANSI Z535.4) to designate levels of hazard seriousness. These signal words
Indicates an imminently hazardous situation which, if not avoided, will result in death or serious injury.
 REGULATORS OCTOPUS MV CAREFULLY READ THIS INSTRUCTION MANUAL BEFORE USE, AND KEEP IT FOR FUTURE REFERENCE. INTRODUCTION Congratulations on your purchase of a Mares regulator. This product is part of Mares
Operation Manual Guillotine Cutter RC-5
 Operation Manual Guillotine Cutter RC-5 Technical Specifications General Safety/Operating Instructions Using the Guillotine Cutter/Crimper Blade Change Instructions Maintenance Instructions This is a detailed
3/8" Dr. Air Butterfly Impact Wrench
 8192106 3/8" Dr. Air Butterfly Impact Wrench Owner s Manual Read and understand all instructions before use. Retain this manual for future reference. Specifications Construction: Polished aluminum and
RS(H)10,15 USER MANUAL. Read the complete manual before installing and using the regulator.
10,15 USER MANUAL. Read the complete manual before installing and using the regulator.") RS(H)10,15 USER MANUAL Read the complete manual before installing and using the regulator. WARNING INCORRECT OR IMPROPER USE OF THIS PRODUCT CAN CAUSE SERIOUS PERSONAL INJURY AND PROPERTY DAMAGE. Due to
RS(H)10,15 USER MANUAL Read the complete manual before installing and using the regulator. WARNING INCORRECT OR IMPROPER USE OF THIS PRODUCT CAN CAUSE SERIOUS PERSONAL INJURY AND PROPERTY DAMAGE. Due to
WARNING: Indicates a potentially hazardous situation which, if not avoided, could result in death or serious injury.
 This owner s manual uses signal words recommended by the American National Standards Institute (see ANSI Z535.4) to designate levels of hazard seriousness. These signal words and their designations are
COMBINATION AIR RELEASE DEGASSING (CARD) VALVES INSTALLATION AND MAINTENANCE MANUAL
 VALVES INSTALLATION AND MAINTENANCE MANUAL") COMBINATION AIR RELEASE DEGASSING (CARD) VALVES INSTALLATION AND MAINTENANCE MANUAL SPECIFICATIONS: The CARD series air valves are available in 3 pipe sizes, 1, 2 and 4 NPT or socket. Maximum inlet pressure
COMBINATION AIR RELEASE DEGASSING (CARD) VALVES INSTALLATION AND MAINTENANCE MANUAL SPECIFICATIONS: The CARD series air valves are available in 3 pipe sizes, 1, 2 and 4 NPT or socket. Maximum inlet pressure
O2 TECH REG O24/Alpha 7 Regulator owner's guide
 OCEANIC O2 TECH REG O24/Alpha 7 Regulator owner's guide O2 Tech Reg Pay special attention to items marked with this Warning Symbol. WARNINGS: This Regulator is intended for use by recreational specialty
AIR COMPRESSOR. Failure to follow all instructions as listed below may result in electrical shock, fire, and/or serious personal injury.
 2 GALLON AIR COMPRESSOR Model: 7517 DO NOT RETURN TO STORE. Please CALL 800-348-5004 for parts and service. CALIFORNIA PROPOSITION 65 WARNING: You can create dust when you cut, sand, drill or grind materials
170-CG Feed Unit SPONGE-JET USER MANUAL. Sponge-Jet, Inc. (USA) 14 Patterson Lane Newington, NH
 14 Patterson Lane Newington, NH") SPONGE-JET 170-CG Feed Unit USER MANUAL Sponge-Jet, Inc. (USA) 14 Patterson Lane +1-603-610-7950 Newington, NH 03801 www.spongejet.com AUGUST 2014, Sponge-Jet 170-CG User Manual - REV A / DOC: M-MKTG-002ENG
SPONGE-JET 170-CG Feed Unit USER MANUAL Sponge-Jet, Inc. (USA) 14 Patterson Lane +1-603-610-7950 Newington, NH 03801 www.spongejet.com AUGUST 2014, Sponge-Jet 170-CG User Manual - REV A / DOC: M-MKTG-002ENG
Chapter 9 Accessories
 SuperLite 17B Chapter 9 Accessories 9.1 Introduction This section provides the manufacturer s advice on how to install KMDSI accessories including the Hot Water Shroud, Low Pressure Inflator Hoses, and
Regulator Owner s Manual. Regulator Owner s Manual
 Regulator Owner s Manual Regulator Owner s Manual Manufactured by Apeks Marine Equipment Ltd. Neptune Way, Blackburn, Lancashire BB1 2BT England www.apeks.co.uk REGULATOR SERVICE RECORD Copyright Notice
fenzy x4 technical manual PN (orange) PN (black)
 PN (black)") fenzy x4 technical manual PN 854710 (orange) PN 854420 (black) Copyright Notice This owner s manual is copyrighted, all rights reserved. It may not, in whole or in part, be copied, photocopied, reproduced,
fenzy x4 technical manual PN 854710 (orange) PN 854420 (black) Copyright Notice This owner s manual is copyrighted, all rights reserved. It may not, in whole or in part, be copied, photocopied, reproduced,
KIRBY MORGAN DEEP SEA DIVING HELMETS ALL MODELS HELMET AND EMERGENCY GAS SYSTEM DAILY SET-UP AND FUNCTIONAL CHECKLIST APPENDIX A2.
 KIRBY MORGAN DEEP SEA DIVING HELMETS ALL MODELS HELMET AND EMERGENCY GAS SYSTEM DAILY SET-UP AND FUNCTIONAL CHECKLIST APPENDIX A2.3 01-25-17 THIS DAILY SET-UP AND FUNCTIONAL CHECKLIST SHOULD BE COMPLETED
12S 1st Stage. -Maintenance Procedure-
 12S 1st Stage -Maintenance Procedure- 1 Warning! All maintenance and repair procedures MUST be performed by a Mares authorized Service Center and/or Distributor. Therefore, the information provided below
SCUBATECH. User Instruction Manual. Buoyancy compensators. Range of models
 SCUBATECH User Instruction Manual Buoyancy compensators Range of models Tecline Donut 15, 17, 22 Tecline Donut (17, 22, 30) Special Edition Tecline Donut 22 Special Edition Rebreather Tecline Peanut 21
accidents which arise due to non-observance of these instructions and the safety information herein. SPECIFICATIONS
 18 GAUGE 1-1/4 INCH BRAD NAILER Model: 7611 CALIFORNIA PROPOSITION 65 WARNING: You can create dust when you cut, sand, drill or grind materials such as wood, paint, metal, concrete, cement, or other masonry.
PRS(TC)4,8 USER MANUAL. Read the complete manual before installing and using the regulator.
4,8 USER MANUAL. Read the complete manual before installing and using the regulator.") PRS(TC)4,8 USER MANUAL Read the complete manual before installing and using the regulator. WARNING INCORRECT OR IMPROPER USE OF THIS PRODUCT CAN CAUSE SERIOUS PERSONAL INJURY AND PROPERTY DAMAGE. Due to
PRS(TC)4,8 USER MANUAL Read the complete manual before installing and using the regulator. WARNING INCORRECT OR IMPROPER USE OF THIS PRODUCT CAN CAUSE SERIOUS PERSONAL INJURY AND PROPERTY DAMAGE. Due to
Instruction manual Divator MKII Face mask
 Instruction manual Divator MKII Face mask Contents Special points 5 Technical description 6 Face mask 6 Low volume diving visor 6 Breathing valve 7 Breathing valve with positive pressure 7 Usage 8 Preparation
BUOYANCY COMPENSATOR DEVICE MANUAL
 INTRIGUE WS SPORTPAK H2Odysey USER / OWNER BUOYANCY COMPENSATOR DEVICE MANUAL DESCRIPTION INDEX PAGE INTRODUCTION #1 CAUTION #1 / #2 / #15 BCD USE and FUNCTION #3 FEATURES #4 CONSTRUCTION and MATERIALS
LRS(H)4 USER MANUAL. Read the complete manual before installing and using the regulator.
4 USER MANUAL. Read the complete manual before installing and using the regulator.") LRS(H)4 USER MANUAL Read the complete manual before installing and using the regulator. WARNING INCORRECT OR IMPROPER USE OF THIS PRODUCT CAN CAUSE SERIOUS PERSONAL INJURY AND PROPERTY DAMAGE. Due to the
LRS(H)4 USER MANUAL Read the complete manual before installing and using the regulator. WARNING INCORRECT OR IMPROPER USE OF THIS PRODUCT CAN CAUSE SERIOUS PERSONAL INJURY AND PROPERTY DAMAGE. Due to the
Buoyancy Control Device
 Owner s manual for FLY 13, FLY 13 RESCUE, FLY 16H, FLY 17D, FLY 20D, FLY 21H, FLY 25D Buoyancy Control Device Distribution and service FINN SUB s.r.o. Rakovecka 35 63500 Brno Czech Republic www.finnsub.com
ACCESSORY KIT INSTALLATION MANUAL
 ACCESSORY KIT INSTALLATION MANUAL LP (PROPANE) CONVERSION KIT 1NP0366 FOR USE WITH MODELS: G8C & GF8 This conversion kit shall be installed by a qualified service agency in accordance with these instructions
Needle valve. Contents. User s Manual. (1) Be sure to read the following warranty clauses of our product 1. (2) General operating instructions 2
 Be sure to read the following warranty clauses of our product 1. (2) General operating instructions 2") Serial No. H-V024-E-7 Needle valve User s Manual Contents (1) Be sure to read the following warranty clauses of our product 1 (2) General operating instructions 2 (3) General instructions for transportation,
Serial No. H-V024-E-7 Needle valve User s Manual Contents (1) Be sure to read the following warranty clauses of our product 1 (2) General operating instructions 2 (3) General instructions for transportation,
DBML-60/80 Squeeze Tool
 DBML-60/80 Squeeze Tool OPERATORS MANUAL Description The Mustang Model DBML-60/80 Hydraulic squeeze tool has been manufactured since 1995. A Mustang 3 3/4 bore doubleacting cylinder producing 41,000 lbs
LEAK SEALING SYSTEMS
 OPERATION MANUAL FOR LEAK SEALING SYSTEMS 04 FEB 2016 PN 22-891709 Paratech Incorporated Headquarters Paratech Europe, Branch of Paratech Inc. P.O. Box 1000, Frankfort, IL 60423 USA P.O. Box 174, 5260
User Instruction Manual
 User Instruction Manual 4500 psi Air Compressor Ver 2, 1.18 Contents Parts Included...3 Assembly Instructions...3-5 Operation Instructions...6-7 Oil Change Intervals...8 Air Filter Replacement...9 Setting
Table of Contents. Operating Instructions. Resource v.2 Conserving Regulator
 Operating Instructions Table of Contents Resource v.2 Conserving Regulator Safety Information Device Precautions Introduction Product Features Product Specifications Feature Illustrations Set Up Usage
Purge Star & Ring Purge Systems
 March 2013 Operator s Manual Purge Star & Ring Purge Systems Additional instruction for Purge Star Single Hose, Purge Star Double (bypass) Hose and Ring Purge with bypass hose and gas dump valve feature.
INDEPENDENT TESTS SHOW THAT THE TX100 REGULATOR, EASILY EXCEEDS THE REQUIREMENTS OF THE EUROPEAN REGULATOR PERFORMANCE STANDARD EN250.
 BREATHING PERFORMANCE INDEPENDENT TESTS SHOW THAT THE TX100 REGULATOR, EASILY EXCEEDS THE REQUIREMENTS OF THE EUROPEAN REGULATOR PERFORMANCE STANDARD EN250. I.E. TOTAL WORK OF BREATHING NOT TO EXCEED 3.0
MMR Air Mask With. with Quick-Connect Hose
 MMR Air Mask With with Quick-Connect Hose Upgrade Kits P/N 10025120 Slide to Connect P/N 10050038 Slide to Connect w/ Solid Cover P/N 10038666 Push To Connect P/N 10050037 Push To Connect w/ Solid Cover
accidents which arise due to non-observance of these instructions and the safety information herein. SPECIFICATIONS
 18 GAUGE 2 INCH BRAD NAILER Model: 7555 CALIFORNIA PROPOSITION 65 WARNING: You can create dust when you cut, sand, drill or grind materials such as wood, paint, metal, concrete, cement, or other masonry.
KTM OM-2 SPLIT BODY FLOATING BALL VALVES INSTALLATION AND MAINTENANCE INSTRUCTIONS
 Before installation these instructions must be fully read and understood SECTION 1 - STORAGE 1.1 Preparation and preservation for storage All valves should be properly packed in order to protect the parts
OWNER S MANUAL. Dual Chamber Blast Machine. for 1 to 4 operators. with pneumatic. metering- and air valves
 OWNER S MANUAL Dual Chamber Blast Machine for 1 to 4 operators with pneumatic metering- and air valves Clemco International GmbH Carl-Zeiss-Straße 21 Tel.: +49 (0) 8062 90080 83052 Bruckmühl Mail: info@clemco.de
ST53SD. Self Contained Breathing Apparatus. User Manual
 Self Contained Breathing Apparatus User Manual User Manual for the (Short Duration) Self Contained Breathing Apparatus WARNING Disassembly of the components beyond the procedures described herein shall
Helicopter Aircrew Breathing Device (H.A.B.D.) User s Manual
 User s Manual") Helicopter Aircrew Breathing Device (H.A.B.D.) User s Manual Rev 02/16 2 H.A.B.D. User s Manual COPYRIGHT NOTICE This owner s manual is copyrighted, all rights reserved. It may not, in whole or in part,
Helicopter Aircrew Breathing Device (H.A.B.D.) User s Manual Rev 02/16 2 H.A.B.D. User s Manual COPYRIGHT NOTICE This owner s manual is copyrighted, all rights reserved. It may not, in whole or in part,
ACCESSORY KIT INSTALLATION INSTRUCTIONS
 ACCESSORY KIT INSTALLATION INSTRUCTIONS 1NP0680 - PROPANE CONVERSION FOR USE WITH MODELS: PM8, PC8, PM9, PC9, FL9M, FL9C, FC9M, FC9C This conversion kit is to be installed by a qualified service agency
SCUBATECH. Instructions for use. Demand regulators. Series models R1, R2, R3,R5, V2 (ICE, PRO, TEC, SPECIAL, OCTO, MONO)
") SCUBATECH Instructions for use Demand regulators Series models R1, R2, R3,R5, V2 (ICE, PRO, TEC, SPECIAL, OCTO, MONO) 1 Issue 2015/1 Table of contents: 1. Introduction 2. Important warnings 3. Design and
SCUBATECH Instructions for use Demand regulators Series models R1, R2, R3,R5, V2 (ICE, PRO, TEC, SPECIAL, OCTO, MONO) 1 Issue 2015/1 Table of contents: 1. Introduction 2. Important warnings 3. Design and
Dive Rescue International Terms & Conditions
 Dive Rescue International Terms & Conditions Contact Us: Phone: (800) 248-3483 Fax: (970) 482-0893 Website: www.diverescueintl.com E-mail: sales@diverescueintl.com Mail: 201 North Link Lane Fort Collins,
accidents which arise due to non-observance of these instructions and the safety information herein.
 3 GALLON PANCAKE COMPRESSOR Model: 50959 CALIFORNIA PROPOSITION 65 WARNING: You can create dust when you cut, sand, drill or grind materials such as wood, paint, metal, concrete, cement, or other masonry.
AIR INLINE METAL SHEAR
 AIR INLINE METAL SHEAR ASSEMBLY and OPERATING INSTRUCTIONS 3491 Mission Oaks Blvd. / Camarillo, CA 93011 Copyright 1997 by Harbor Freight Tools. All rights reserved. No portion of this manual or any artwork
Spiromatic Face Mask and breathing valve User manual
 Spiromatic Face Mask and breathing valve User manual Contents Safety notice... 4 Mask and breathing valve... 5 Checking before use Leakage test Putting on the mask... 7 Testing of the positive pressure
SPECIFICATIONS Type: Twin stack, single phase Tank: 4 gallon Air Output: PSI; PSI Max PSI: 125 PSI HP: 1.
 2 GALLON TWIN STACK AIR COMPRESSOR Model: 9526 DO NOT RETURN TO STORE. Please CALL 800-348-5004 for parts and service. CALIFORNIA PROPOSITION 65 WARNING: You can create dust when you cut, sand, drill or
Wafer Check Valve. Contents. User s Manual. (1) Be sure to read the following description of our product warranty 1
 Be sure to read the following description of our product warranty 1") Serial No. H-V066-E-3 Wafer Check Valve User s Manual Contents (1) Be sure to read the following description of our product warranty 1 (2) General operating instructions 2 (3) General instructions for
Serial No. H-V066-E-3 Wafer Check Valve User s Manual Contents (1) Be sure to read the following description of our product warranty 1 (2) General operating instructions 2 (3) General instructions for
Natural Gas to L.P. Gas Conversion Kit
 Natural Gas to L.P. Gas Conversion Kit For Bosch 96% AFUE Gas Furnace, BGH96 Model Installation Instructions 3124627 2 Natural Gas to L.P. Gas Conversion Kit Installation Instructions Data subject to change
OWNER S MANUAL. Page: 1 of 8
 Air Needle Scaler OWNER S MANUAL WARNING: Read carefully and understand all INSTRUCTIONS before operating. Failure to follow the safety rules and other basic safety precautions may result in serious personal
READ CAREFULLY. YOUR COMFORT AND SAFETY IS WORTH MORE THAN 15 MINUTES.
 PROJECT USER MANUAL ENGLISH READ CAREFULLY. YOUR COMFORT AND SAFETY IS WORTH MORE THAN 15 MINUTES. INDEX CONGRATULATIONS! YOU HAVE PURCHASED A PERFECT PRODUCT IN WHICH, WITHOUT ANY COMPROMISE, WE HAVE
WARNING. RELIABLE EQUIPMENT & SERVICE CO., INC. 301 Ivyland Road Warminster, PA USA Phone: Fax:
 OPERATOR'S GUIDE Pivot style control valves may be operated with one hand, leaving the second hand free to control the head. Lever locks in the forward position for tool advance, and in the rear position
REL-510H WARNING NOTICE 12 TON SINGLE ACTING REMOTE HYDRAULIC CRIMPING HEAD
 OPERATORS ORS GUIDE REL-510H 12 TON SINGLE ACTING REMOTE HYDRAULIC CRIMPING HEAD Compatible with U style and RELIABLE R12 shell type 12 ton compression dies. RELIABLE EQUIPMENT & SERVICE CO., INC. 92 Steamwhistle
Contents. Stainless Steel Side Block. 1.1 Separating the Side Block. Stainless Steel Side Block Reassembly of. Assembly from the Helmet Shell
 Separating the Side Block Assembly from the Helmet Shell Contents SSB-1 SSB-3 SSB-5 SSB-5 SSB-7 1.1 Separating the Side Block Assembly from the Helmet Shell 1.2 Side Block Assembly Replacement 1.3 Defogger
Installation Instructions
 LP and High Altitude LP Gas Conversion Kit For United States Installations Installation Instructions For Model Series *G6/PGF1 Furnaces, *L1/PGC1 Furnaces, and *R4/PPG1 Gas/Electric Appliances using Honeywell
1 DRIVE INDUSTRIAL IMPACT WRENCH
 1 DRIVE INDUSTRIAL IMPACT WRENCH 92622 ASSEMBLY AND OPERATING INSTRUCTIONS 3491 Mission Oaks Blvd., Camarillo, CA 93011 Visit our Web site at http://www.harborfreight.com Copyright 2004 by Harbor Freight
STATEMENTS OF FACT BENCH BG-4 CONTEST. 1. A positive pressure leak could be caused by a leakage in or at device components.
 STATEMENTS OF FACT BENCH BG-4 CONTEST 1. A positive pressure leak could be caused by a leakage in or at device components. 2. The battery in the Sentinel should be replaced every 6 months. 3. Dow Corning
ExtendAire TM II. Intermediate Pressure Accessory Kit USER INSTRUCTIONS
 ExtendAire TM II Intermediate Pressure Accessory Kit USER INSTRUCTIONS THIS MANUAL MUST BE CAREFULLY READ AND FOLLOWED BY ALL PERSONS WHO HAVE OR WILL HAVE THE RESPONSIBILITY FOR USING OR SERVICING THIS
Natural Gas to L.P. Gas Conversion Kit
 Natural Gas to L.P. Gas Conversion Kit For Bosch 80% AFUE Gas Furnace, BGS80 Model Installation Instructions 3124627 2 Natural Gas to L.P. Gas Conversion Kit Installation Instructions Data subject to change
STATEMENTS OF FACT BENCH BG-4 CONTEST. 1. A positive pressure leak could be caused by a leakage in or at device components.
 STATEMENTS OF FACT BENCH BG-4 CONTEST 1. A positive pressure leak could be caused by a leakage in or at device components. 2. The battery in the Sentinel should be replaced every 6 months. 3. Dow Corning
Types 749B and R130 Changeover Manifolds
 Instruction Manual MCK-1179 Types 749B and R130 June 2012 Types 749B and R130 Changeover Manifolds TYPE HSRL-749B TYPE 64SR/122 TYPE R130/21 TYPE 749B/21 Figure 1. Changeover Manifolds and Regulator Assemblies
Discharge Relief Valve Operation & Maint.
 Relief Valve Operation & Maint. CZ Series Centrifugal Fire Relief svalve Operation and Maintenance Instructions 1410 Operation and Maintenance Form No. F-1031 Section 2302.6 2111 Issue Date 04/90 11/95
SEA LW & 4500 (Survival Egress Air) User's Manual
 User's Manual") SEA - 3000LW & 4500 (Survival Egress Air) User's Manual Rev. 06/17 2 SEA-3000LW & 4500 User's Manual COPYRIGHT NOTICE This user's manual is copyrighted, all rights reserved. It may not, in whole or in
SEA - 3000LW & 4500 (Survival Egress Air) User's Manual Rev. 06/17 2 SEA-3000LW & 4500 User's Manual COPYRIGHT NOTICE This user's manual is copyrighted, all rights reserved. It may not, in whole or in
Service and Repair Operative Manual MC9 1 st STAGE. MC9 1 st Stage. 1 st STAGE MC9. Jannuary Rev. MC9 /B Ed. C/13
 MC9 1 st Stage 137 1 st STAGE MC9 Jannuary 2009 - Rev. MC9 /B Ed. C/13 138 WARNING! This manual is intended for use by expert technicians who should attend or have already received training in equipment
35 TON HYDRAULIC PUNCH WARNING
 OPERATORS GUIDE REL-35T-PNC 35 TON HYDRAULIC PUNCH NOTICE Sizes, weights and tool specifications listed in this manual are subject to change without notice. Please consult factory for information and updates.
OPERATING INSTRUCTIONS
 OPERATING INSTRUCTIONS Air Entrainment Meter ELE International Chartmoor Road, Chartwell Business Park Leighton Buzzard, Bedfordshire, LU7 4WG England phone: +44 (0) 1525 249200 fax: +44 (0) 1525 249249
Interspiro has over 60 years of experience in the design of Breathing Apparatus for demanding firefighting and diving conditions
 www.divatormask.com CORPORATE OVERVIEW Interspiro has over 60 years of experience in the design of Breathing Apparatus for demanding firefighting and diving conditions >> Industry firsts, include positive
RHPS Series RD(H)F40 User Manual. Read the complete manual before installing and using the regulator.
F40 User Manual. Read the complete manual before installing and using the regulator.") RHPS Series RD(H)F40 User Manual Read the complete manual before installing and using the regulator. 2 WARNING Before removing a regulator from the system for service, you must depressurize system purge
RHPS Series RD(H)F40 User Manual Read the complete manual before installing and using the regulator. 2 WARNING Before removing a regulator from the system for service, you must depressurize system purge
Gas Lines. Technical Manual. Sumitomo (SHI) Cryogenics of America, Inc Vultee Street Allentown, PA U.S.A.
 Cryogenics of America, Inc Vultee Street Allentown, PA U.S.A.") Gas Lines Technical Manual Sumitomo (SHI) Cryogenics of America, Inc. 1833 Vultee Street Allentown, PA 18103-4783 U.S.A. Revision F: April 2008 261320A TABLE OF CONTENTS Page DESCRIPTION...1 SPECIFICATIONS...2
Gas Lines Technical Manual Sumitomo (SHI) Cryogenics of America, Inc. 1833 Vultee Street Allentown, PA 18103-4783 U.S.A. Revision F: April 2008 261320A TABLE OF CONTENTS Page DESCRIPTION...1 SPECIFICATIONS...2
Regulator Owner's Manual
 Regulator Owner's Manual Copyright Notice This owner s manual is copyrighted, all rights reserved. It may not, in whole or in part, be copied, photocopied, reproduced, translated, or reduced to any electronic
PETERSEN 161-SERIES HIGH PRESSURE LIFTING AIR BAGS OPERATING INSTRUCTIONS WARNING!
 PETERSEN 161-SERIES HIGH PRESSURE LIFTING AIR BAGS OPERATING INSTRUCTIONS WARNING! Read and understand instructions before using Petersen Plugs. Failure to comply may result in property damage, serious
Code AWC20HP Air Compressor
 Code 951816 AWC20HP Air Compressor Index of Contents Index of Contents 02 Declaration of Conformity 02 What s Included 03 Safety Precautions 03 Specifications (AWC20HP Air Compressor) 04 Assembly Instructions
Apollo A-320 NITROX and A-320 CMF First Stage Regulators
 Apollo A-320 NITROX and A-320 CMF First Stage Regulators USER MANUAL Apollo Diving Equipment International Department Nippon Sensuiki Co., Ltd. 905 Shake Ebina-city Kanagawa Japan. The Apollo brand of
256 Pneumatic Pressure Indicator
 256 Pneumatic Pressure Indicator 51425699 Copyright 2002 Slope Indicator Company. All Rights Reserved. This equipment should be installed, maintained, and operated by technically qualified personnel. Any
Gas Welding Hoses and connections, the weak link
 Gas Welding Hoses and connections, the weak link By Leif Andersen, Technical Product Manager Welding, WSS Regulators with flashback arrestors and the shank with its welding or cutting attachment are made
MASK MANUAL Tested To BS EN ISO : 2005
 MASK MANUAL Tested To BS EN ISO 14225-2 : 2005 NORTHERN DIVER MASK MANUAL Thank you for purchasing this Northern Diver mask. To help ensure your future diving safety, do not use this product before reading
RB70 Automatic Diluent Valve Maintenance Manual. Version 1.1 November 2006 Written by Tino de Rijk. Page 1 of 23
 RB70 Automatic Diluent Valve Maintenance Manual Version 1.1 November 2006 Written by Tino de Rijk Page 1 of 23 Table of Contents 1. Introduction... 3 2. ADV diagram and parts list (Pre June 2006)... 4
Assembly Drawing: W-311B-A01, or as applicable Parts List: W-311B-A01-1, or as applicable Special Tools: , , &
 REDQ Regulators Model 411B Barstock Design Powreactor Dome Regulator OPERATION AND MAINTENANCE Contents Scope..............................1 Installation..........................1 General Description....................1
Assembly-, installation- and maintenance instruction manual for bladder accumulators IBV / EBV , top reparable
 Page 1 von 8 Assembly-, installation- and maintenance instruction manual for bladder accumulators IBV / EBV 100-575, top reparable Content Seite 0 Legend 2 1 Overview 2 2 Accumulator assembly and installation
Freedom8 ShoeBox Compressor Manual
 Freedom8 ShoeBox Compressor Manual Warning!! This product is not a toy! Use or misuse can cause severe injury or death! Use only with adult supervision. This unit is only to be used with tanks, hoses and
RASP RX3 Feed UnitTM SPONGE-JET USER MANUAL. Sponge-Jet, Inc. (USA) 14 Patterson Lane Newington, NH
 14 Patterson Lane Newington, NH") SPONGE-JET RASP RX3 Feed UnitTM USER MANUAL Sponge-Jet, Inc. (USA) 14 Patterson Lane +1-603-610-7950 Newington, NH 03801 www.spongejet.com Sponge-Jet RASP RX3 User Manual - REV A / DOC: MKT-014-ENG SPONGE-JET
SPONGE-JET RASP RX3 Feed UnitTM USER MANUAL Sponge-Jet, Inc. (USA) 14 Patterson Lane +1-603-610-7950 Newington, NH 03801 www.spongejet.com Sponge-Jet RASP RX3 User Manual - REV A / DOC: MKT-014-ENG SPONGE-JET
READ CAREFULLY. YOUR COMFORT AND SAFETY IS WORTH MORE THAN 15 MINUTES.
 ZEN USER MANUAL ENGLISH READ CAREFULLY. YOUR COMFORT AND SAFETY IS WORTH MORE THAN 15 MINUTES. INDEX CONGRATULATIONS! YOU HAVE PURCHASED A PERFECT PRODUCT IN WHICH, WITHOUT ANY COMPROMISE, WE HAVE CONNECTED
Yoke Block Instruction Manual
 Yoke Block Instruction Manual ! WARNING IMPORTANT: READ MANUAL COMPLETELY BEFORE OPERATING THIS DEVICE This manual contains instructions on periodically required checks to be performed by the user. These