REV A International ( ) 2013 MEDIVATORS Inc.
|
|
|
- Charlene Jackson
- 5 years ago
- Views:
Transcription


1 User Manual
2 FUJINON is a registered trademark of FUJIFILM Corporation MEDIVATORS is a registered trademark of MEDIVATORS Inc. OLYMPUS is a registered trademark of OLYMPUS Corporation. PENTAX is a registered trademark of Hoya Corporation. KARL STORZ is a registered trademark of KARL STORZ GmbH & Co. SCOPE BUDDY is a registered trademark of MEDIVATORS Inc REV A International ( ) 2013 MEDIVATORS Inc. All rights reserved. This publication is protected by copyright. Copying, disclosure to others or the use of this publication is prohibited without the express written consent of MEDIVATORS Inc. MEDIVATORS reserves the right to make changes in the specifications shown herein without notice or obligation. Contact your MEDIVATORS representative or MEDIVATORS customer service for more information.
3 TABLE OF CONTENTS Page 1 INTRODUCTION Using This Manual...1 Product Description...1 Product Specifications SAFETY Intended Use...3 Electrical Compliance...3 Operator Safety...4 Patient Safety...4 Endoscope Safety...4 Notes, Cautions and Warnings...5 Guidelines...6 Endoscope Pre-Cleaning...6 Cleaning and Disinfection SETUP AND FAMILIARIZATION Device Installation...9 System Components...10 Control Panel...11 Tubing Connections METHODS OF ENDOSCOPE CONNECTION Connection using DSD Hookups...13 Connection using All-Channel Irrigator...14 Connection for Forward Water Jet & Elevator Wire Channel...16 PENTAX and OLYMPUS Endoscopes...16 FUJINON Endoscopes DEVICE OPERATION Programming Times...19 Flush times for Manual Cleaning...19 Flush times for High-Level Disinfection...20 Use During Manual Cleaning...20 Circulating Detergent...21 Purging an Endoscope of Detergent...24 Rinsing an Endoscope with Water...24 Purging an Endoscope of Rinse Water...25 Use During Manual High-Level Disinfection...27 Circulating High-Level Disinfectant...27 Purging an Endoscope of High-Level Disinfectant...28 Rinsing an Endoscope with Water...29 Purging an Endoscope of Rinse Water...29 Daily Quality Assurance Test...30 Flow Validation Setup & Tubing Prime...30 Performing Validation Test...34 Daily Decontamination Procedure...34 Performing Decontamination Procedure...35
4 6 MAINTENANCE AND TROUBLESHOOTING Maintenance...37 Troubleshooting Guide GLOSSARY WARRANTY... 41
5 1 INTRODUCTION Using this Manual This manual describes the features of the MEDIVATORS SCOPE BUDDY Endoscope Flushing Aid, including setup, operation, safety, maintenance, and troubleshooting procedures. It is important to follow the provided instructions to keep the device in good operating condition, delivering proper fluid flows, and to ensure long product life. Given the unique design of the electrical and mechanical components used within this product, no userserviceable parts are contained within the unit and no internal calibration is required. Annual calibration and preventative maintenance schedules are also not required as the unit is designed to be maintenancefree. It is however; strongly recommended that daily quality assurance testing and the daily decontamination procedure be performed to ensure the system is functioning properly and ready for use. Refer to Chapter 5 for further information. Contact the manufacturer s representative if you have any questions regarding this product, its use, or operation. Product Description The MEDIVATORS SCOPE BUDDY Endoscope Flushing Aid is designed to facilitate the flushing of rinse water, cleaning solutions, and approved room temperature high-level disinfectants, through the channels of flexible, immersible endoscopes. This device is to be used during the manual precleaning, high-level disinfection, and rinsing phases of endoscope reprocessing. SCOPE BUDDY Endoscope Flushing Aid does not replace an automated endoscope reprocessor (AER). The SCOPE BUDDY Flushing Aid combines a diaphragm pump, digital timer, and electronic control circuitry to pump fluids through tubing connections to the channels of the endoscope. Three different tubing sets allow connection to most types of endoscopes. The Universal Cleaning Adapter Extension Line and multi-way adapters allow connection to the Universal Cleaning Adapter Hookup-up provided with the endoscope. The DSD Extension Line allows connection to the DSD hookup which attaches to the endoscope. The Elevator Wire Channel Hookup allows connection to the FUJINON endoscope s elevator wire channel or to the endoscope s Forward Water Jet. The SCOPE BUDDY Flushing Aid is designed to be used as a flushing aid only and assists in the circulation of cleaning or high-level disinfectant solutions through endoscope channels. All endoscopes must undergo cleaning and high-level disinfection prior to use on a patient. 1
6 Product Specifications Chassis Dimensions (height - width - depth) Weight (approx.) Power Cord and Connector 9 ½ H x 6 W x 8 D (Inches) 24.13H x 15.24W x 20.32D (CM s) 10 lb. (4.5kg) Medical Grade 6 feet (2.83m) 18AWG, #3 Connector Electrical Requirements VAC ±10% HZ 1 Current Draw < 1.0 Amperes Breaker and Protection Maximum Fluid Delivery Maximum Pump Pressure Cycle Time Range Setting Cycle Completion Indicators Electrical Safety Certifications Electromagnetic Interference Environmental Rating Designed for Use Installation/ Over Voltage Category Classification 1 Amp max. at 90 VAC input, Non-replaceable, internal primary current fuse, inrush limiting, thermal shutdown 1 Liter per minute 29 PSI w/safety Bypass 0 to 99 minutes/59 seconds Audible and Visual ETL and cetl Listed Conforms to UL Certified to CAN/CSA C22.2 No FCC Title 47, Part 15, Class A, EN and EN Standard Indoor Use Only II 1, Ordinary protection Pollution Degree 2 Operating Temperature Range Operating Humidity Range Storage Temperature Range Storage Humidity Range Warranty Period 15 C to 35 C 10-75% non-condensing -29 C to 57 C 5 90% non-condensing One Year 2
7 2 SAFETY Intended Use The MEDIVATORS SCOPE BUDDY Endoscope Flushing Aid is an electro-mechanical device intended to flush fluids through channels of flexible, immersible endoscopes. The device is designed to assist in the circulation of fluids by replacing manual syringing of endoscope channels. Endoscopes must be meticulously cleaned and high-level disinfected by an approved endoscope reprocessor or manual HLD soaking prior to use on a patient. This device is not an endoscope disinfector and does not take the place of an Automated Endoscope Reprocessor (AER). Throughout this manual are notes, cautions, and warnings, which are also represented by specific icons. These are designed to provide important information to the user regarding the proper use and operation of this device. It is important to read and understand all notes, cautions, and warnings, prior to using this product. Should you have any questions or require further clarification, please contact your manufacturer s representative. Examples of these icons are shown below. NOTE: A note refers to important information to which the user should pay special attention. Notes provide added insight and helpful information which can be useful to the operator. CAUTION: This information is an alert to the possibility of a problem with the device associated with its use or misuse. WARNING: This information is an alert to possible injury or other serious adverse reaction associated with the use or misuse of this device. WARNING: Do not use this device on NON-IMMERSIBLE endoscopes or on endoscopes with internal leaks. Electrical Compliance SCOPE BUDDY Flushing Aid has been rigorously tested to stringent electrical certifications and safety standards. This device meets the laboratory standard for Electromagnetic Interference Requirements for FCC Title 47, Part 15, Class A, EN and EN , and the Electrical Safety Requirements of UL , Pollution Degree 2, and Installation Category II Equipment. SCOPE BUDDY Flushing Aid carries and is certified to ETL and cetl, the Electrical CE Mark, UL , and CAN/CSA C22.2 No CAUTION: This device must always be plugged into an electrical wall outlet that includes an approved Ground Fault Interrupter (GFI) prior to operation of the pump. 3
8 Operator Safety 1. This device is only to be operated by properly trained and qualified personnel who are fully familiar with its intended use and operation. 2. Avoid biological contamination and chemical burns. Always wear appropriate personal protective equipment (PPE) including clothing, gloves, and safety glasses when handling used endoscopes. 3. Cleaning and detergent solutions for endoscope flushing must be used in accordance with the regulations governing their use, safety and shelf life. Decontamination and high-level disinfection solutions must be used in accordance to the regulations governing their directions for use. 4. In case of contact with cleaning or disinfectant solutions, follow manufacturers guidelines for appropriate care and response. Flush eyes of skin with copious amounts of water for a minimum of 15 minutes. Seek immediate medical attention in case of eye contact. 5. Decontamination solutions can be harmful if swallowed. In case of accidental ingestion, drink large quantities of water and call a physician immediately. Avoid contact with food. Do not store decontamination solutions near food. Patient Safety 1. Failure to adhere to the endoscope manufacturer s recommendations governing the proper cleaning of endoscopes after each patient examination may compromise the efficacy of the subsequent endoscope high level disinfection process. 2. All endoscopes must be high-level disinfected prior to patient use. SCOPE BUDDY Flushing Aid is designed to assist in manual high-level disinfection by circulating disinfection fluids through endoscope channels. Failure to adhere to the manufacturers instruction for manual high-level disinfection may compromise the efficacy of the HLD process. Endoscope Safety SCOPE BUDDY Flushing Aid has been designed and tested to meet endoscope manufacturer s guidelines including pressure and flow requirements. MEDIVATORS SCOPE BUDDY Flushing Aid is certified and validated safe for use with OLYMPUS, PENTAX, FUJINON and KARL STORZ flexible, immersible endoscopes. 4
9 Notes, Cautions, and Warnings General Cautions Use only a medical-grade detergent which has bacteriostatic properties, is low-foaming, freerinsing, and has a neutral ph. Detergent and rinse water cleaning solutions can be drawn from either a clean container for a single-pass through SCOPE BUDDY Flushing Aid, or recirculated from the sink through SCOPE BUDDY Flushing Aid. SCOPE BUDDY Flushing Aid can be used in either format depending on the facility s endoscope cleaning procedure. Only approved room temperature aldehyde based high-level disinfectants can be used with SCOPE BUDDY Flushing Aid. For the daily decontamination procedure, select a decontamination solution whose label indicates that it may be used at room temperature to achieve decontamination (see Section 6, Glossary, for definition) of medical instruments. Consult the manufacturer s label for the appropriate directions for use and decontamination solution contact time. Do not use alcohol-based products in or on the SCOPE BUDDY Flushing Aid. Alcohol is not compatible and should never be used to clean, flush, or rinse SCOPE BUDDY Flushing Aid. Use of alcohol or alcohol-based products with SCOPE BUDDY Flushing Aid will void the warranty. The tubing however can be reprocessed independently using 70% alcohol when not attached. Do not use bleach solutions or hydrogen peroxide in or on SCOPE BUDDY Flushing Aid. Do not exceed a detergent, water, High-level disinfection or decontamination solution temperature of 50 C in SCOPE BUDDY Flushing Aid. Follow the endoscope manufacturer s instructions and established professional guidelines for cleaning and high-level disinfecting endoscopes. The SCOPE BUDDY Endoscope Flushing Aid User Manual is intended to be used in conjunction with the instructions and labeling provided by the endoscope/accessory manufacturer. Endoscope/accessory manufacturers provide instructions and labeling necessary for users to understand the basic design, specifications, nomenclature, and components of specific flexible endoscopes/accessories. Users should be properly trained and instructed to inspect, prepare, use, clean, disinfect, rinse, dry, and store endoscopes. Follow recommended standards as referred by ASTM, ASGE, SGNA, and APIC. Read all precaution labels on the SCOPE BUDDY Flushing Aid before using. Never use SCOPE BUDDY Flushing Aid in a manner not specified by the manufacturer. Ensure that fluid exiting the open end of the endoscope or tubing is not facing a direction that would allow fluid to be sprayed on personnel, electrical fixtures, or the user. SCOPE BUDDY Flushing Aid, through its inherit use, becomes contaminated and requires cleaning and decontamination. Precautions must be taken to insure the device is properly decontaminated. Please refer to the Daily Decontamination Procedure for further information. Duodenoscopes with elevator wire channels (EWC) may require additional cleaning and disinfection steps. It is particularly important for the elevator wire channel to be manually cleaned and fully reprocessed correctly. Extra attention should also be given to the position of the EWC throughout the cleaning process. Refer to the endoscope manufacturer s instruction for the proper positioning of the elevator wire channel. If the SCOPE BUDDY Flushing Aid is to be unused for an extended period of time such as overnight, or over the weekend, it should be left full of decontamination fluid or clean rinse water. This maintains pump-head decontamination, lubrication and facilitates priming. SCOPE BUDDY Flushing Aid should not be air-purged and stored empty between uses. The tubing can be detached from the SCOPE BUDDY unit during this period. 5
10 Guidelines Endoscope Pre-cleaning Proper endoscope precleaning is essential to removing microbial burden and bio-debris from the inside and the outside of an endoscope. Precleaning guidelines should always be consulted and followed, and a pre-cleaning process should always be developed and strictly adhered to, to ensure an endoscope is effectively and properly cleaned. Always follow the endoscope manufacturer s instructions and established professional guidelines to properly preclean an endoscope. Meticulous manual cleaning of the endoscope or accessory must be performed using an appropriate detergent solution. Carefully brush all channels and valve ports using the detergent solution and cleaning tools designed for this purpose. Avoid the use of cotton swabs, gauze pads, and other lint-producing tools. Endoscopes should be leak tested before submersion as part of the overall reprocessing protocol as defined in the instrument manufacturer s instructions. Leak testing detects damage within the interior or exterior of the endoscope. Follow instructions for manual pre-cleaning contained in the endoscope manufacturer s manual. 6
11 Cleaning and Disinfection Always follow the endoscopes manufacturer s recommendations pertaining to the reprocessing of endoscopes and endoscope accessories to ensure that the endoscopes and accessories will be safe for patient use. A protocol should be developed and followed based on such guidelines. The following professional organizations have published guidelines pertaining to the reprocessing of endoscopes and associated accessories: Society of Gastroenterology Assoc. for Professionals in Infection Nurses and Associates, Inc. Control and Epidemiology, Inc. 401 North Michigan Ave K Street NW, Suite 1000 Chicago, IL Washington, DC USA USA Tel: Tel: Fax: Fax: American Society for American Society for Gastrointestinal Endoscopy Testing and Materials 1520 Kensington Rd., Suite Barr Harbor Dr. Oak Brook, IL West Conshohocken, PA USA USA Tel: Tel: Fax: Fax: Association of perioperative Canadian Society of Gastroenterology Registered Nurses, Inc. Nurses & Associates 2170 S. Parker Rd., Suite Nicholson Dr. Denver, CO Lakeside, NS B3T 1B3 USA CANADA Tel: Fax: Fax: British Society of Gastroenterological Nurses College of Gastroenterology Australia, Inc. (GENCA) 3 St. Andrews Place PO Box 483 Regents Park Boronia London NW1 4LB Vistoria 3155 ENGLAND Australia Tel: (+44) (0) Tel: Fax:
12 8
13 3 SETUP & FAMILIARIZATION Device Installation SCOPE BUDDY Flushing Aid can only be used with the power supply supplied with the device. Do not attempt to substitute or use a non-approved replacement power supply. The cycle run time can be adjusted by the operator. Always verify the rinse and flushing times are appropriate for the endoscope being flushed. Do not use alcohol or alcohol-based products, bleach solutions, or hydrogen peroxide in the SCOPE BUDDY Flushing Aid. The tubing hookups, hookup extensions, and fluid intake line are not autoclavable and must be reprocessed using low temperature decontamination methods only. SCOPE BUDDY Flushing Aid is designed to be placed on a counter top or mounted to the wall by using the supplied wall-mounting bracket. If mounting to a wall, ensure the bracket is properly secured using the correct mounting hardware, adequate to support at least ten pounds of weight. SCOPE BUDDY Flushing Aid must be located within a vertical height no greater than three feet above the incoming detergent, HLD, or rinse water solution. The distance between the top of the fluid solution and SCOPE BUDDY Flushing Aid must not exceed three feet. SCOPE BUDDY Flushing Aid is designed to operate in a damp environment, but should not be immersed in any fluids. Do not use the device if it becomes immersed in any type of fluid, or if fluid is observed leaking from the device. 9
![System Components SCOPE BUDDY Flushing Aid Base Unit [SB-1] Wall-mount bracket [WB-1] Power Supply [PS-1] Fluid Intake Line [L-1] DSD Extension Line [L-2] Universal Cleaning Adapter Extension Line](/docs-images/89/99629598/images/14-0.jpg "[L-3] Universal Cleaning Adapter 2-way adapter [HU-2] Universal Cleaning Adapter 3-way adapter [HU-3] Universal Cleaning 4-way adapter [HU-4] Flow Verification Tube [QA-1] Elevator Wire Channel (EWC)")
14 System Components SCOPE BUDDY Flushing Aid Base Unit [SB-1] Wall-mount bracket [WB-1] Power Supply [PS-1] Fluid Intake Line [L-1] DSD Extension Line [L-2] Universal Cleaning Adapter Extension Line [L-3] Universal Cleaning Adapter 2-way adapter [HU-2] Universal Cleaning Adapter 3-way adapter [HU-3] Universal Cleaning 4-way adapter [HU-4] Flow Verification Tube [QA-1] Elevator Wire Channel (EWC) Hookup [L-4] Graduated Cylinder [QA-2] In-Service Packet In-Service DVD Graduated Cylinder [QA-2] Base Unit [SB-1] Wall-Mount Bracket [WB-1] Fluid Intake Line [L-1] Power Supply [PS-1] DSD Extension Line [L-2] UCA 2-way Adapter [HU-2] Elevator Wire Channel Hook-up [L-4] Universal Cleaning Adapter Extension Line [L-3] Flow Verification Tube [QA-1] UCA 4-way Adapter [HU-4] UCA 3-way Adapter [HU-3] Figure 1 System Components 10

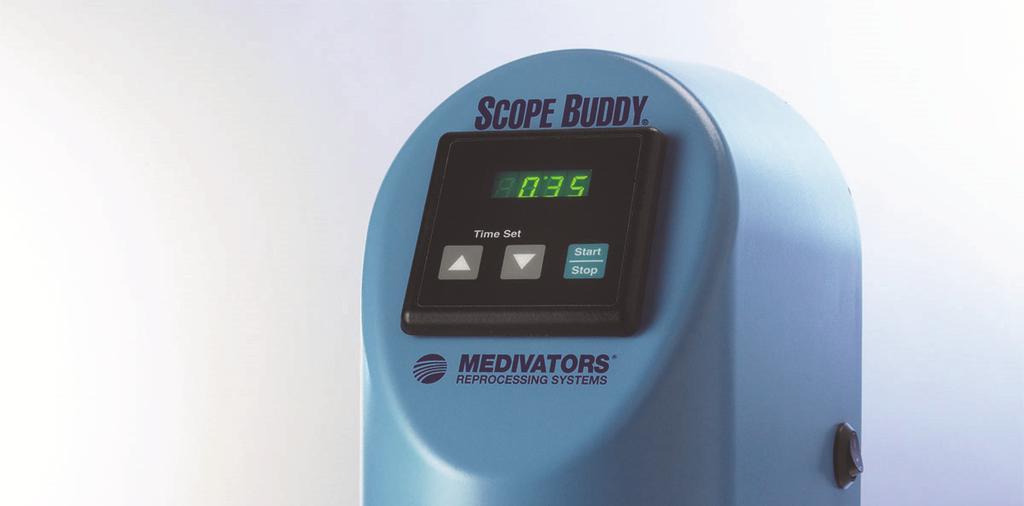
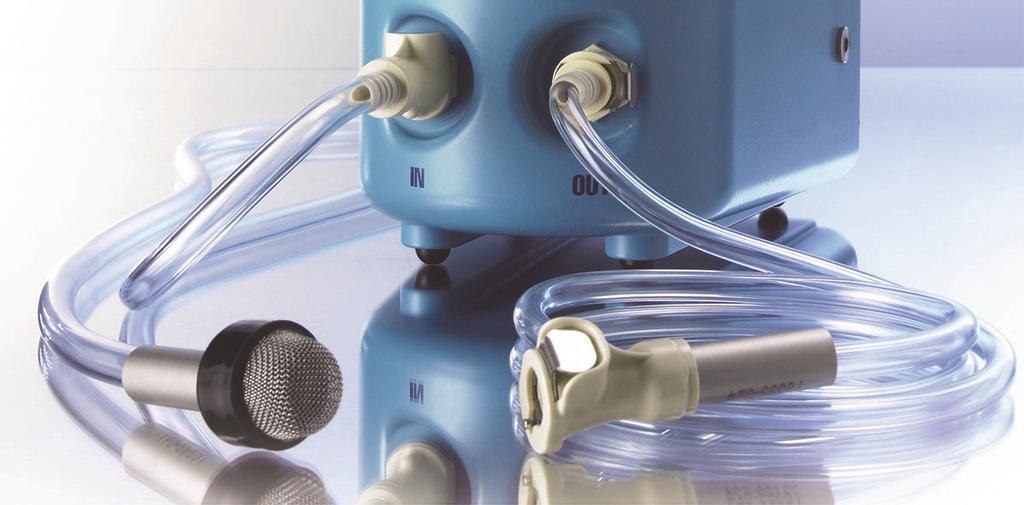
15 Control Panel Timer Display Displays the timer setting (when idle) or the time remaining when flushing. Time Set Used to increase or decrease the timer setting. Start/Stop Switch Press to start, stop, or pause the timer countdown and flushing action. Fluid Inlet IN port where fluid is drawn into the base unit. Fluid Outlet OUT port where fluid is discharged from the base unit. Power On/Off Switch Used to turn the device on or off. Power Connection Connection port for incoming power from the power supply to the base unit. Time Display Time Set Increase/Decrease Start/Stop Switch Power On/Off Switch Power Connection Fluid Inlet Fluid Outlet Figure 2 Control Panel 11
16 Tubing Connections The device is designed to function with a wide variety of manufacturer s endoscopes of various configurations. The device is supplied with different types of tubing connections which allow connection to most endoscopes. The DSD Extension Line allows connection to a MEDIVATORS DSD hookup which attaches to the endoscope. Refer to the DSD Hookup Application Guide to identify the correct hookup to use for the endoscope being flushed and the hookups Directions for Use Instructions for correct connection. The Universal Cleaning Adapter Extension Line and multi-way adapters allow connection to the Universal Cleaning Adapter provided with the endoscope. Refer to the endoscope manufacturer s Instructions for Use to ensure the correct Cleaning Adapter is being used and that it is correctly connected. The Elevator Wire Channel Hookup allows flushing of the elevator wire channel of a FUJINON Duodenoscope. The Elevator Wire Channel Hookup is also used to flush the forward water jet of a FUJINON endoscope. NOTE: The FUJINON forward water jet adapter is always used in conjunction with the Elevator Wire Channel Hookup. NOTE: When using a PENTAX or FUJINON water jet adapter, always verify it does NOT contain a check valve. Only non-check valve forward water jet adapters can be used with SCOPE BUDDY to achieve the correct flushing volume over the stated Rinse Matrix times. NOTE: The universal cleaning adapter may be referred to as an All-Channel Irrigator by some endoscope manufacturers. Reference the MEDIVATORS Hookup Application Guide which can be downloaded at to identify the appropriate DSD hookup for the manufacturer s endoscope being cleaned. The supplied tubing segments which facilitate endoscope connection are: Fluid Intake Line [L-1] Tubing set that allows fluid to be drawn up from the sink into the SCOPE BUDDY Flushing Aid. DSD Extension Line [L-2] Tubing set that allows fluid to be delivered from the machine to the DSD Hookup. Universal Cleaning Adapter Extension Line [L-3] Tubing set that allows fluid to be delivered from the machine to the Universal Cleaning Adapter supplied with the manufacturer s flexible endoscope. UCA 2-way Adapter [HU-2] Tubing adapter which connects to the Universal Cleaning Adapter Extension Line and allows connection to an endoscope s Universal Cleaning Adapter with 2 connection ports. UCA 3-way Adapter [HU-3] Tubing adapter which connects to the Universal Cleaning Adapter Extension Line and allows connection to an endoscope s Universal Cleaning Adapter with 3 connection ports. UCA 4-way Adapter [HU-4] Tubing adapter which connects to the Universal Cleaning Adapter Extension Line and allows connection to an endoscope s Universal Cleaning Adapter with 4 connection ports. Elevator Wire Channel Hookup [L-4] Tubing set that allows fluid to be delivered from the machine to the elevator wire channel, or to the forward water jet of a FUJINON endoscope. Flow Verification Tube [QA-1] Tubing segment used during the Daily Quality Assurance Test to ensure SCOPE BUDDY Flushing Aid is delivering the proper amount of fluid. NOTE: A complete set of tubing connections is available by contacting MEDIVATORS Customer Support. The reorder part number is , and the tubing is only available as a complete set. 12
17 4 METHODS OF ENDOSCOPE CONNECTION MEDIVATORS SCOPE BUDDY Endoscope Flushing Aid provides the user with two methods of connection to all endoscope models. SCOPE BUDDY Flushing Aid can be used with the appropriate MEDIVATORS DSD Hookups for a validated one-click method of connection. SCOPE BUDDY Flushing Aid can also be used with existing All-Channel Irrigation Tubing provided with the endoscope. Follow instruction below corresponding to the selected method of connection. Connection using MEDIVATORS DSD Hookup Tubing Adapters needed: MEDIVATORS DSD Hookup (sold separately) DSD Extension Line [T-2] Fluid Intake Tubing [T-1] Use this step-by-step procedure to properly attach the device to an endoscope using the Fluid Intake Tubing, the DSD Extension Line, and the appropriate MEDIVATORS DSD Hookup. The Fluid Intake Tubing and the DSD Extension Line are provided with the device. The MEDIVATORS DSD Hookup is provided separately. Reference the MEDIVATORS Hookup device, located at to identify the correct DSD Hookup for the endoscope being cleaned. Use of MEDIVATORS DSD Hookup provides an approved flow of detergent, rinse water, and High-Level Disinfection solution through all endoscope channels. Refer to the Directions for Use supplied with the hookup to ensure correct connection to all endoscope channels. Connection to the Endoscope: 1. Following the instructions provided, properly connect all endoscope channels to the MEDIVATORS DSD Hookup. 2. Align the male coupling on the MEDIVATORS DSD Hookup to the female adapter coupling on the DSD Extension Line [L-2] and push until it snaps into place. 3. Align the male adapter coupling on the DSD Extension Line [L-2] to the OUT port on the SCOPE BUDDY Flushing Aid [SB-1] and push on until it snaps into place. 4. Align the female adapter coupling on the Fluid Intake Line [L-1] to the IN port on the SCOPE BUDDY Flushing Aid [SB-1] and push on until it snaps into place. When properly connected, fluid will be drawn up from the sink or a clean container of detergent or rinse water solution. The fluid will flow through the Fluid Intake Tubing to SCOPE BUDDY Flushing Aid, and then out of SCOPE BUDDY Flushing Aid through the DSD Extension Tubing and the DSD Hookup to the endoscope. This provides fluid delivery for flushing the internal lumens of the endoscope. NOTE: If flushing the Forward Water Jet or the Elevator Wire Channel of a FUJINON endoscope, the Elevator Wire Channel Hookup [HU-5] must be used. Go to the section labeled Endoscope Flushing using the Elevator Wire Channel Hookup FUJINON Endoscopes for further instructions. 13

18 Figure 3 Connection for DSD Hookup Connection using All-Channel Irrigator Tubing Adapters needed: Endoscope All-Channel Irrigator (supplied by endoscope manufacturer) SCOPE BUDDY Flushing Aid Universal Cleaning Adapter Extension Line [L-3] Appropriate SCOPE BUDDY Flushing Aid multi-way adapters [HU-2, HU-3, HU-4] Fluid Intake Tubing [L-1] Use this step-by-step procedure to properly attach an endoscope to SCOPE BUDDY flushing aid using the Fluid Intake Tubing, the Universal Cleaning Extension Line with multi-way adapters, and the Universal Cleaning Adapter supplied by the endoscope manufacturer. NOTE: The endoscope s Universal Cleaning Adapter may be referred to as the All-Channel Irrigator by some endoscope manufacturers. NOTE: The Fluid Intake Tubing [L-1] and the Universal Cleaning Extension Line [L-3] with multiway adapters are provided with SCOPE BUDDY Flushing Aid. The Universal Cleaning Adapter is supplied by the endoscope manufacturer. Refer to the endoscope manufacturer s Instructions for Use to ensure the correct Cleaning Adapter is being used and that it is correctly connected. 14

19 Connection to the Endoscope 1. Following the instructions provided by the endoscope manufacturer, properly connect the appropriate All-Channel Irrigation tubing to the endoscope. 2. Select the appropriate SCOPE BUDDY Flushing Aid multi-way adapters based on the number of locations where a syringe would be needed. This will utilize the 2-way [HU-2], 3-way [HU-3] or 4-way adapters [HU-4]. 3. Align the male luer on the All-Channel Irrigation tubing with the female luer on the SCOPE BUDDY Flushing Aid multi-way cleaning adapters [HU-2, HU-3 OR HU-4]. Screw clockwise until fully engaged. 4. Align the male luer on the SCOPE BUDDY Flushing Aid multi-way cleaning adapters [HU-2, HU-3, or HU-4] with the female luer on the SCOPE BUDDY Universal Cleaning Adapter Extension Line [L-3]. Screw clockwise until fully engaged. 5. Align the male adapter coupling on the Universal Cleaning Adapter Extension Line [L-3] to the OUT port on the SCOPE BUDDY Flushing Aid [SB-1] and push on until it snaps into place. 6. Align the female adapter coupling on the Fluid Intake Line [L-1] to the IN port on the SCOPE BUDDY Flushing Aid [SB-1] and push on until it snaps into place. When properly connected, fluid will be drawn up from the sink or a clean container of detergent, rinse water, or HLD solution. The fluid will flow through the Fluid Intake Tubing to SCOPE BUDDY Flushing Aid, and then out of SCOPE BUDDY Flushing Aid through the Universal Cleaning Extension Line with multi-way adapters and the Universal Cleaning Adapter to the endoscope. This provides fluid delivery for flushing the internal lumens of the endoscope. Figure 4 Connection for Universal Cleaning Adapters 15
20 Connection for Forward Water Jet or Elevator Wire Channels PENTAX and OLYMPUS Endoscopes For PENTAX and OLYMPUS endoscopes, the Forward Water Jet and Elevator Wire Channel can be flushed simultaneously with the other endoscope channels and does not require the use of the Elevator Wire Channel Hookup [HU-5]. The forward water jet can be flushed using the appropriate MEDIVATORS DSD Hookup or the All-channel Irrigator Hookup provided with the endoscope. Note: When flushing the Forward Water Jet of a PENTAX Endoscopes, always ensure the forward water jet adapter does not contain a check valve. Only a forward water jet non check valve adapter can be used. FUJINON Endoscopes The FUJINON endoscope s forward water jet and elevator wire channels must be flushed independently using the provided SCOPE BUDDY Flushing Aid Elevator Wire Channel hookup (HU-5). The Forward Water Jet on these specific endoscopes has an internally contained check-valve which requires the use of the SCOPE BUDDY Flushing Aid Elevator Wire Channel hookup-up uniquely designed for this function. Never flush the FUJINON endoscopes forward water jet or Elevator Wire Channels simultaneously with other endoscope channels as the channels will not be properly flushed per the endoscope manufacturer s standards and guidelines. The independent flushing of these channels using SCOPE BUDDY Flushing Aids Elevator Wire Channel hookup ensures fluid is delivered directly to the channels. NOTE: Failure to flush the EWC or FWJ Channels independently will result in improper channel flushing per the endoscope manufacturer s standards and guidelines. Independently flushing of these channels is required by the manufacturer. Using SCOPE BUDDY Flushing Aid s Elevator Wire Channel Hookup [HU-5] ensures fluid is delivered directly to these channels. Tubing Adapters needed: FUJINON Elevator Wire Channel Irrigation Tubing (supplied by endoscope manufacturer) SCOPE BUDDY Flushing Aid Elevator Wire Channel Hookup [L-4] Fluid Intake Tubing [L-1] Use this step-by-step procedure to properly flush a FUJINON endoscope s Elevator Wire Channel or FUJINON Forward Water Jet. This procedure is used to attach the SCOPE BUDDY Flushing Aid to an endoscope using the Fluid Intake Tubing [L-1] and the Elevator Wire Channel Hookup [L-4]. NOTE: The Fluid Intake Tubing [L-1] and the Elevator Wire Channel Hookup [L-4] provided with SCOPE BUDDY Flushing Aid. The EWC Irrigation Tubing is supplied by the endoscope manufacturer. Refer to the endoscope manufacturer s Instructions for Use to ensure the correct Cleaning Adapter is being used and that it is correctly connected. Connection to the Endoscope 1. Following the instructions provided by the endoscope manufacturer, properly connect the appropriate Irrigation tubing to the endoscope Elevator Wire Channel. 2. Align the male luer on the Elevator Wire Channel Hookup [L-4] with the female luer on the Endoscope irrigation tubing. Screw clockwise until fully engaged. 16
21 3. Align the male adapter coupling on the Elevator Wire Channel Hookup [L-4] to the OUT port on the SCOPE BUDDY Flushing Aid [SB-1] and push on until it snaps into place. 4. Align the female adapter coupling on the Fluid Intake Line [L-1] to the IN port on the SCOPE BUDDY Flushing Aid [SB-1] and push on until it snaps into place. When properly connected, fluid will be drawn up from the sink or basin of detergent, HLD or rinse water solution. The fluid will flow through the Fluid Intake Tubing to SCOPE BUDDY Flushing Aid, and then out of SCOPE BUDDY Flushing Aid through the Elevator Wire Channel Hookup to the endoscope. This provides fluid delivery for flushing the internal lumens of the endoscope. NOTE: Verify fluid exiting the open end of the endoscope tubing is not facing a direction that would allow fluid to be sprayed on personnel or electrical fixtures. The endoscope should always be fully immersed in solution. 17
22 18
23 5 DEVICE OPERATION Programming Times Programming Times associated with MEDIVATORS SCOPE BUDDY Endoscope Flushing Aid are dependent on the associated endoscope and the applicable step in the reprocessing workflow. Always verify correct programming times comply with endoscope manufacturers guidelines prior to use. For manual precleaning, programming times should be determined based on endoscope manufacturer recommendations for flushing volumes. For manual High-Level Disinfection, programming times should be determined based on contact time needed for the HLD solution. Flushing Times for Manual Cleaning Published programming times are intended for use during the flushing of detergent and rinse water through endoscope channels as part of the manual precleaning process only. Programming times listed in the provided SCOPE BUDDY Flushing Aid Rinse Matrix are applicable for OLYMPUS, PENTAX, and FUJINON brand endoscopes used with SCOPE BUDDY Flushing Aid units having a serial number > The SCOPE BUDDY Flushing Aid Rinse Matrix for Manual Cleaning can be found by logging onto the MEDIVATORS website located at and navigating to the SCOPE BUDDY Endoscope Flushing Aid page located in subchapters Endoscope Reprocessing/Pre-cleaning. Always verify the correct SCOPE BUDDY Flushing Aid Rinse Matrix is being used for the serial number of the flushing aid in use. The SCOPE BUDDY Flushing Aid Rinse Matrix times for Manual Cleaning are based on in-house validation tests that were conducted using endoscopes with channels in good working condition, free from restrictions and absent of any defects. These rinse times represent the groupings of all like-model endoscopes in terms of channel configuration. Recommended programming times reflect the worst case flushing time in each endoscope grouping. Rinse times may be reduced by individual flow testing of a specific endoscope. Always ensure flushing volumes comply with endoscope manufacturers guidelines. Times stated in the SCOPE BUDDY Flushing Aid Rinse Matrix assume that the connection tubing and hookup kits from SCOPE BUDDY Flushing Aid to the endoscope are primed and full of fluid. Programming times should be extended by 10 seconds if the tubes are not pre-primed. Due to differences in individual endoscope channel performance, users should always verify that the solution volumes meet the manual cleaning requirements of the endoscope manufacturer and/or the facility. Users are encouraged to validate endoscope specific flushing times based on their individual models of endoscopes. The recommended method of checking the flushing times required for a specific endoscopes is to separate the flow of fluid exiting from each channel at the distal end while SCOPE BUDDY Flushing Aid is flushing. Using a small plastic card to help isolate the flow from each channel being checked, direct the individual channel flow into a measuring beaker and record the time it takes to flush the required amount of fluid through each channel. The flushing time required for SCOPE BUDDY Flushing Aid should reflect the time it took for the slowest channel to flow the required volume of fluid. This is usually the air/water channel SCOPE BUDDY Flushing Aid has been designed to be compatible with all flexible endoscopes irrespective of manufacturer. A default flushing time of 2 minutes 30 seconds can be used to ensure delivery of 100 mls of solution through each channel of the majority of endoscopes regardless of manufacturer or endoscope model. Users can validate shorter flushing times following the process above. 19
24 Flushing Times for Manual High-Level Disinfection During Manual High-Level Disinfection SCOPE BUDDY Flushing Aid Programming Times should be set to correspond with the contact time required for High-Level disinfectant being used. Programming times should be extended by 10 seconds if the tubes are not pre-primed with HLD solution. NOTE: Only approved room temperature aldehyde-based high-level disinfectants can be used with SCOPE BUDDY Flushing Aid. NOTE: Do not use chemistries that contain bleach, hydrogen peroxide or alcohol in SCOPE BUDDY Flushing Aid. NOTE: SCOPE BUDDY Endoscope Flushing Aid does not replace an Automated Endoscope Reprocessor (AER). Use During Manual Cleaning SCOPE BUDDY Endoscope Flushing Aid is approved for use in recirculating detergent, high-level disinfectant, and rinse water solutions through endoscope channels. The following instruction should be followed for successful manual cleaning and high-level disinfection of endoscopes NOTE: The endoscope leak test must be performed prior to immersing the endoscope in fluid according to manufacturer s guidelines. NOTE: Endoscope channels should be brushed in accordance with manufacturer s instructions prior to connection to SCOPE BUDDY Flushing Aid. NOTE: Detergent and Rinse Water cleaning solutions can be drawn from either a clean container for a single-pass through SCOPE BUDDY Flushing Aid, or recirculated from the sink through SCOPE BUDDY Flushing Aid. SCOPE BUDDY Flushing Aid can be used in either format depending on the facility s endoscope cleaning procedure. CAUTION: Always verify fluid exiting the distal tip of the endoscope is not facing a direction that would allow fluid to be sprayed on personnel or electrical fixtures. The endoscope should always be fully immersed under water. 20

25 Circulating Detergent: 1. Plug the unit in and then turn it on by pressing the power switch located on the side of the unit. The timer display will now illuminate. See Figure 5. Power Switch Figure 5 Base Unit Power Cord Connection 2. Locate the Fluid Intake Line [L-1] and attach to front panel tubing connection port labeled IN. Place the screened end into the sink or a clean container of detergent solution. Verify the screened end is deeply submerged into the detergent solution. See Figure 6. Figure 6 Plugging into IN labeled connection port on base unit. 21

26 3. Locate the appropriate OUT tubing assembly which connects directly to the endoscope channels. Align the male CPC connector of the DSD Extension Line [T-2] or Universal Cleaning Extension Line [T-3] to the female CPC connector labeled OUT located on the SCOPE BUDDY Flushing Aid. Push until the connectors snap into place. Refer to Chapter 4 for applicable method of connection to endoscope channels. Figure 7 Plugging into OUT labeled connection port on base unit. 4. Make applicable connection to endoscope channels using the DSD hookup or Manual Cleaning adapters. Refer to Chapter 4 Methods of Endoscope Connection for further details. 5. Using the SCOPE BUDDY Flushing Aid front panel arrow keys, set the timer until it displays the desired flushing time. Reference Chapter 5 Programming Times for further details. 6. Press the START/STOP button to begin the cycle, the timer display will now begin counting down. Detergent solution will now be drawn up, flushed through SCOPE BUDDY Flushing Aid, and will flow out the endoscope s distal tip. 7. Visually verify solution is exiting all channels of the endoscope. If fluid fails to come out all channels, then a channel may be blocked and the endoscope may need to be manually brushed and cleaned again. The flushing process will then need to be repeated until fluid flow through the endoscope is verified or the endoscope should be taken out of service. CAUTION: Failure to verify fluid flow through the endoscope can result in an endoscope which is not properly flushed or cleaned. Always verify fluid is exiting all endoscope ports including the distal end. CAUTION: The screened end of the Fluid Intake Line must remain fully submerged in solution to ensure proper fluid delivery and no interruption in fluid flow. 22
27 NOTE: A flushing cycle can be paused by pressing the START/STOP button. Pressing the START/STOP button again will resume the original cycle. If, however, an arrow key was pressed during the pause cycle, then pressing the START/STOP button will begin a cycle from the original pre-set time amount. 8. After the timer counts down to zero, fluid flow will stop and a five-second audible tone will be heard. During this time, the timer display will flash all zeros and then remain with a zero display providing an indication that the cycle is complete. Purging an Endoscope of Detergent: 1. Remove the Fluid Intake Line [L-1] from the detergent solution and place on the counter. 2. Press the START/STOP button once to reset the timer to the original pre-set time amount. 3. Press the START/STOP button again to begin pumping. The timer display will now begin counting down as some of the detergent solution is pumped out the endoscope. Verify fluid is exiting the tip of the endoscope. 4. Press START/STOP button to halt pumping when fluid no longer exits the endoscope. Note: Most fluid is now purged from the endoscope, but some residual fluid will remain in the endoscope. Rinsing an Endoscope with Water: 1. Dispose contaminated detergent solution down the drain and thoroughly rinse the sink. 2. Fill the sink or the fluid container with clean rinse water and place the Fluid Intake Line [L-1] into the clean water 3. Press the START/STOP button once to reset the timer to the original pre-set time amount. 4. Press the START/STOP button again to begin the cycle; the timer display will now begin counting down. Rinse water will now be drawn up, flushed through the device, and will flow out of the endoscope channels. 5. Verify rinse water is exiting all endoscope channels. If fluid fails to come out of the endoscope, then the endoscope may need to be manually brushed and cleaned again. The flushing process will then need to be repeated until flow through the endoscope is verified. CAUTION: Failure to verify fluid flow through the endoscope can result in an endoscope which is not properly rinsed. Always verify fluid is exiting all endoscope ports at the distal end. CAUTION: The screened end of the Fluid Intake Line must remain fully submerged in solution to ensure proper fluid delivery and no interruption in fluid flow. 23
28 NOTE: A flushing cycle can be paused by pressing the START/STOP button. Pressing the START/STOP button again will resume the original cycle. If; however, an arrow key was pressed during the pause cycle, then pressing the START/STOP button will begin a cycle from the original pre-set time amount. 6. Once the timer counts down to zero, fluid flow will stop and a five-second audible tone will be heard. During this time, the timer display will flash all zeros and then remain with a zero display providing an indication that the cycle is complete. Purging an Endoscope of Rinse Water: 1. Remove the Fluid Intake Line [L-1] from the rinse water and place on the counter. 2. Press the START/STOP button once to reset the timer to the original pre-set time amount. 3. Press the START/STOP button again to begin pumping. The timer display will now begin counting down as some of the rinse solution is pumped out the endoscope. Verify fluid is exiting the endoscope. 4. Press START/STOP button to halt pumping when fluid no longer exits the endoscope. NOTE: Residual fluid will remain in the endoscope. Do not use SCOPE BUDDY Flushing Aid to deliver alcohol to the endoscope. Alcohol should never be used in SCOPE BUDDY Flushing Aid. 5. Upon successful completion of these steps, the endoscope is now ready to be placed in an Automated Endoscope Reprocessor, or it can be manually reprocessed for high-level disinfection. NOTE: If using a FUJINON endoscope with a Forward Water Jet or Elevator Wire Channel, repeat detergent and rinse water process with the appropriate Elevator Wire Channel Hookups [HU-5]. See Chapter 4 Flushing a Forward Water Jet or Elevator Wire Channel for further instruction. 24

29 Figure 8 25

30 Use during Manual High-Level Disinfection Circulating High-Level Disinfectant: 1. Carefully move the endoscope from the manual cleaning sink to the high-level disinfection area. Plug the unit in and turn on by pressing the power switch located on the side of the unit. The timer display will now illuminate. 2. Locate the Fluid Intake Line [L-1] and attach to the front panel tubing connection port labeled IN. Place the screened end into the manual reprocessing basin. Verify the screened end is fully submerged into the HLD solution. Figure 9 SCOPE BUDDY Flushing Aid Set up for High-Level Disinfection 3. Locate the appropriate OUT tubing assembly which connects directly to the endoscope channels. Align the male CPC connector of the DSD Extension Line [L-2] or Universal Cleaning Extension Line [L-3] to the female CPC connector labeled OUT located on the SCOPE BUDDY Flushing Aid. Push until the connectors snap into place. Refer to Chapter 4 for applicable method of connection to endoscope channels. 4. Using the SCOPE BUDDY Flushing Aid front panel arrow keys, set the timer to correspond with the necessary contact time of the high-level disinfectant being used. Extend the time by 10 seconds if the tubing is not pre-primed with HLD solution. Refer to Chapter 5 Programming Times for instruction. CAUTION: Only approved reusable aldehyde based High-Level Disinfectants should be used with SCOPE BUDDY Flushing Aid. Do not use SCOPE BUDDY Flushing Aid with solutions at temperatures exceeding 20 C. Do not use solutions which contain alcohol, hydrogen peroxide, or bleach as these chemistries are not compatible with SCOPE BUDDY Flushing Aid. 26
31 5. Press the START/STOP button to begin the cycle. The timer display will now begin counting down. High-Level Disinfectant solution will now be drawn up, flushed through SCOPE BUDDY Flushing Aid, and will flow out the endoscope s distal tip as it is recirculated through the endoscope channels. 6. Visually verify solution is exiting all channels of the endoscope. If fluid fails to come out all channels, then a channel may be blocked and the endoscope may need to be manually brushed and cleaned again. The manual disinfection process will then need to be repeated until fluid flow through the endoscope is verified or the endoscope should be taken out of service. CAUTION: Failure to verify fluid flow through the endoscope can result in an endoscope which is not properly High-Level Disinfected. Always verify fluid is exiting all endoscope ports including the distal tip. CAUTION: Ensure that fluid exiting the distal tip of the endoscope is not facing a direction that would allow fluid to be sprayed on personnel, electrical fixtures, or the user. CAUTION: The screened end of the Fluid Intake Line must remain fully submerged in HLD solution to ensure proper fluid delivery and no interruptions in fluid flow. NOTE: A flushing cycle can be paused by pressing the START/STOP button. Pressing the START/STOP button again will resume the original cycle. If, however, an arrow key was pressed during the paused cycle, pressing the START/STOP button will begin a cycle from the original pre-set time amount. 7. After the timer counts down to zero, fluid flow will stop and a five second audible tone will be heard. During this time, the timer display will flash all zeros and then remain with a zero display providing an indication that the cycle is complete. NOTE: If using a FUJINON endoscope with a Forward Water Jet or Elevator Wire Channel, repeat High-Level Disinfection process with the appropriate Elevator Wire Channel Hookups [L- 4]. See Chapter 4 Connection for Forward Water Jet and Elevator Wire Channel for further instruction on flushing this channel independently. Purging an Endoscope High-Level Disinfectant: 1. Remove the Fluid Intake Line [L-1] from the high-level disinfection solution and place on the counter. 2. Press the START/STOP button once to reset the timer to the original pre-set time amount. 3. Press the START/STOP button again to begin pumping. The timer display will now begin counting down as some of the HLD solution is pumped out the endoscope. Verify fluid is exiting the tip of the endoscope. CAUTION: Ensure that endoscope or tubing is not facing a direction that would allow fluid to be sprayed on personnel, electrical fixtures or the user. The endoscope should remained submerged in the manual reprocessing basin during the purging steps. 4. Press START/STOP button to halt pumping when fluid no longer exits the endoscope. The user will notice air bubbles emerging from the distal tip. NOTE: Most High-Level Disinfection solution is now purged from the endoscope, but some residual fluid will remain in the endoscope channels. Users should take caution during the removal and transport of the endoscope to prevent HLD solution from dripping. 27
32 Rinsing an Endoscope with Water: 1. Fill a sink or fluid container with clean rinse water and place the Fluid Intake Line into the clean water. 2. Carefully move the endoscope from the HLD basin and submerge in prepared bath of rinse water. WARNING: To avoid biological contamination and chemical burns always wear appropriate personal protective clothing, gloves, and safety glasses when handling cleaning and disinfectant solutions 3. Properly store or dispose of High-Level Disinfection solution in accordance with facility guidelines 4. Set the timer to correspond to the appropriate flush time as designated by the High Level Disinfectant 5. Press the START/STOP button to begin the cycle; the timer display will now begin counting down. Rinse water will be drawn up, flushed through the device, and will flow out of the endoscope channels. 6. Verify rinse water is exiting all endoscope channels. If fluid fails to come out of the endoscope, verify all SCOPE BUDDY Flushing Aid tubing connectors are properly attached to the endoscope cleaning adapters in all areas where the user would previously use a syringe. The flushing process will then need to be repeated until flow through the endoscope is verified. CAUTION: Failure to verify fluid flow through the endoscope can result in an endoscope which is not properly rinsed. Always verify fluid is exiting all endoscope ports at the distal end. CAUTION: The screened end of the Fluid Intake Line must remain fully submerged in solution to ensure proper fluid delivery and no interruption to fluid flow NOTE: A flushing cycle can be paused by pressing the START/STOP button. Pressing the START/STOP button again will resume the original cycle. If, however, an arrow key was pressed during the pause cycle, the pressing the START/STOP button will begin a cycle from the original pre-set time amount. 7. Once the timer counts down to zero, fluid flow will stop and a five-second audible tone will be heard. During this time, the timer display will flash all zeros and then remain with a zero display providing an indication that the cycle is complete. 8. Drain rinse water from basin and refill with fresh rinse water solution. Repeat steps 4-7 to flush rinse water down all endoscope channels in accordance with the rinsing instructions provided with the High-Level Disinfectant. Steps 4-7 should continue to be repeated until the proper number of rinsing cycles has been achieved, as designated by the instructions for use of the selected High-Level Disinfectant. NOTE: If using a FUJINON endoscope with a Forward Water Jet or Elevator Wire Channel, repeat rinse water process with the appropriate Elevator Wire Channel Hookups [L-4]. See Chapter 4 Flushing a Forward Water Jet or Elevator Wire Channel for further instruction on flushing this channel independently. Purging an Endoscope of Rinse Water: 1. Remove the Fluid Intake Line [L-1] from the rinse water and place on the counter. 2. Press the START/STOP button once to reset the timer to the original pre-set time amount. 3. Press the START/STOP button again to begin pumping. The timer display will now begin counting down as some of the rinse solution is pumped out the endoscope. Verify fluid is exiting the endoscope. 4. Press START/STOP button to halt pumping when fluid no longer exits the endoscope 28
33 NOTE: Residual fluid will remain in the endoscope. Do not use SCOPE BUDDY Flushing Aid to deliver alcohol to the endoscope. Alcohol should never be used in the SCOPE BUDDY Flushing Aid. 5. Detach endoscope from SCOPE BUDDY Flushing Aid and follow endoscope manufacturers guidelines for drying endoscope channels. NOTE: Residual fluid will remain in the endoscope after SCOPE BUDDY Flushing Aid use. Endoscope channels should be purged with air and alcohol using a manual syringe. Do not use SCOPE BUDDY Flushing Aid to deliver alcohol to endoscope channels. Alcohol should never be used in SCOPE BUDDY Flushing Aid. Daily Quality Assurance Test Items needed: Fluid Intake Tubing (L-1) SCOPE BUDDY Flushing Aid Universal Cleaning Adapter Extension Line (L-3) Flow Verification Tube (QA-1) Graduated Cylinder (QA-2) To verify SCOPE BUDDY Flushing Aid is operating properly and delivering the correct amount of fluid, the Quality Assurance Flow Validation Test must be performed. This validation test should be performed prior to the first use of the day and quickly determines if the device is delivering the correct volume of fluid. The SCOPE BUDDY Flushing Aid validation test is performed using the Flow Verification Tube, Fluid Intake Line, the Universal Cleaning Adapter Extension Line, the SCOPE BUDDY Flushing Aid, and a graduated cylinder. To perform the test, SCOPE BUDDY Flushing Aid is preset to pump for a specific period of time and then after flushing, the dispensed fluid is measured to identify if it is within an acceptable volume range. Although the test can be performed at any time, it is recommended that it be run at the start of each work day. Use the following procedure to perform the test. WARNING: Failure to perform the daily quality test can result in the device not delivering the proper amount of fluid through the channels of an endoscope. NOTE: A 200cc graduated cylinder is required to perform this test. Flow Validation Setup and Tubing Prime: 1. Plug the unit in and turn it on by pressing the power switch located on the side of the unit. The timer display will now illuminate. See Figure
![Power Switch Figure 10 2. Locate the Fluid Intake Line [L-1] and attach it to the front panel tubing connection port labeled IN. Place the screened end into the sink or container of clean water.](/docs-images/89/99629598/images/34-0.jpg "Verify the screened end is fully submerged into the water. See Figure 11 Figure 11 3.")
34 Power Switch Figure Locate the Fluid Intake Line [L-1] and attach it to the front panel tubing connection port labeled IN. Place the screened end into the sink or container of clean water. Verify the screened end is fully submerged into the water. See Figure 11 Figure Locate the Universal Cleaning Adapter Extension Line [L-3] and attach it to the front panel tubing connection port labeled OUT. See Figure
35 Figure Locate the Flow Verification Tube [QA-1] and attach the plastic Luer connector to the remaining end of the Universal Cleaning Adapter Extension Line [L-3]. Place the open end of the Flow Verification Tube into the sink. See Figure 13 31
 minute. 6. To prime the device, select the START/STOP button to begin fluid delivery.")
36 Fluid Intake Line Universal Cleaning Adapter with Flow Verification Tube Figure 13 Universal Cleaning Adapter with Flow Verification Tube 5. Using the SCOPE BUDDY Flushing Aid front panel arrow keys, set the timer display to one (1) minute. 6. To prime the device, select the START/STOP button to begin fluid delivery. Watch until all air has been purged through the device and a steady column of water is exiting the flow verification tube. 7. Press START/STOP button to halt fluid flow. 32
Rev G Medivators Inc.
 User Manual MEDIVATORS and SCOPE BUDDY are registered trademark of Medivators Inc. OLYMPUS is a registered trademark of Olympus Corporation. PENTAX is a registered trademark of Hoya Corporation. FUJIFILM
SCOPE BUDDY USER MANUAL ENDOSCOPE FLUSHING AID Rev D
 SCOPE BUDDY ENDOSCOPE FLUSHING AID USER MANUAL 50096-381 Rev D SCOPE BUDDY USER/SERVICE MANUAL FUJINON is a registered trademark of Fujinon Corporation MEDIVATORS is a registered trademark of Minntech
Endo-Flush Order # ZUTR30004 OPERATION MANUAL. Zutron Medical, LLC W 98 th St #40-27 Lenexa, KS Phone Fax
 OPERATION MANUAL Zutron Medical, LLC 17501 W 98 th St #40-27 Lenexa, KS 66219 Phone 877-343-5873 Fax 913-967-5944 ZUT-Lab-004-30004 REV. 03312017 Table of Contents 2 Introduction 1. Intended Use 2. Labels,
SERVICE MANUAL MEDIVATORS SCOPE BUDDY ENDOSCOPE FLUSHING AID. (For Serial Numbers ) Endoscope reprocessing the way it should be
 Endoscope reprocessing the way it should be") SERVICE MANUAL SCOPE BUDDY ENDOSCOPE FLUSHING AID (For Serial Numbers 201345) Endoscope reprocessing the way it should be is a registered trademark of Minntech Corporation. SCOPE BUDDY is a registered
SERVICE MANUAL SCOPE BUDDY ENDOSCOPE FLUSHING AID (For Serial Numbers 201345) Endoscope reprocessing the way it should be is a registered trademark of Minntech Corporation. SCOPE BUDDY is a registered
TJF-Q180V Cleaning and Disinfection Checklist
 TJF-Q180V Cleaning and Disinfection Checklist TJF-Q180V Cleaning and Disinfection Checklist This checklist is used to evaluate and confirm if cleaning and disinfection of the TJF-Q180V has been performed
TJF-Q180V Cleaning and Disinfection Checklist
 TJF-Q180V Cleaning and Disinfection Checklist TJF-Q180V Cleaning and Disinfection Checklist This checklist is used to evaluate and confirm if cleaning and disinfection of the TJF-Q180V has been performed
Cavitron DualSelect. Introduction ENGLISH. Directions For Use. Cavitron DualSelect Dispensing System ENGLISH 1
 ENGLISH Cavitron DualSelect Dispensing System Directions For Use Please read carefully and completely before operating unit. Introduction Cavitron DualSelect Dispensing System Congratulations. Your purchase
Instruction Manual for Configura Cushionair Portable Pump
 Instruction Manual for Configura Cushionair Portable Pump Fitted with battery powered pump, suitable for Configura Portable chairs V E R S I O N O N E M A Y 2 0 1 6 Contents Introduction 3 Set up of Cushionair
RPS900W Redundant Power Supply. Installation Guide.
 RPS900W Redundant Power Supply Installation Guide www.edge-core.com Installation Guide RPS900W Redundant Power Supply Single DC Output Port with Dual Output Voltages RPS900W E10013-CS-R01 1500000081A
3 GALLON, OILLESS PANCAKE COMPRESSOR INSTRUCTIONS. Item #31289
 3 GALLON, OILLESS PANCAKE COMPRESSOR INSTRUCTIONS Item #31289 The EASTWOOD 3 GALLON, OILLESS PANCAKE COMPRESSOR, with an Integral Air Regulator, efficiently supplies all compressed air requirements for
Digital Melting Point Apparatus
 Digital Melting Point Apparatus Heating Plateau Ramping Start/Stop Plateau set Ramp stop Hold User Guide Version 1.1 Heating Viewing tube Sample Chamber IEC power inlet socket Power on/off Temperature
Operating Instructions Part No
 DIGITAL AUTOMATIC TYRE INFLATOR Operating Instructions Part No. 11.0545 Thank you for selecting this Jamec Pem Automatic Tyre Inflator. Please read this manual before carrying out any installation or service
INSTRUCTION MANUAL FOR MODEL 7360V VERTICAL CURING CHAMBER Revision E May
 INSTRUCTION MANUAL FOR MODEL 7360V VERTICAL CURING CHAMBER Revision E May 2015 98-0520 S/N 2001 N. Indianwood Ave. Tulsa, Oklahoma 74012 U.S.A. TEL: (918) 250-7200 FAX: (918) 459-0165 E-mail: chandler.sales@ametek.com
INSTALLATION GUIDE Gas Rangetops
 INSTALLATION GUIDE Gas Rangetops Contents Wolf Gas Rangetops........................... 3 Safety Instructions............................ 4 Gas Rangetop Specifications.................... 5 Gas Rangetop
Operating Instructions Part No
 DIGITAL AUTOMATIC TYRE INFLATOR Operating Instructions Part No. 11.0578 Thank you for selecting this Jamec Pem Automatic Tyre Inflator. Please read this manual before carrying out any installation or service
VERTICAL AIR COMPRESSORS
 VERTICAL AIR COMPRESSORS MODEL NO: VE11C150, VE15C150, VE18C150 PART NO: 2226005, 2226000, 2226015 OPERATION & MAINTENANCE INSTRUCTIONS LS0615 INTRODUCTION Thank you for purchasing this CLARKE Vertical
Budget Range Operators Handbook
 Budget Range Operators Handbook BAMBI AIR COMPRESSORS LTD 152 Thimble Mill Lane Heartlands Birmingham B7 5HT United Kingdom Tel: 0121 322 2299 Fax: 0121 322 2297 Email: sales@bambi-air.co.uk www.bambi-air.co.uk
GLIDERITE RIGID STYLET. Operations & Maintenance Manual
 GLIDERITE RIGID STYLET Operations & Maintenance Manual 0900 4686 00 60 GLIDERITE RIGID STYLET Operations & Maintenance Manual Effective: March 4, 2016 Caution: Federal (United States) law restricts this
Oxygen Dialflow Meter. Instructions for Use
 Oxygen Dialflow Meter Instructions for Use 702-0031.12 December 2017 1. Symbols Warning! Caution! Indicates a potentially hazardous situation which, if not avoided, could result in injury to the patient,
SOP: Buck Scientific BLC-20P HPLC Operation
 Page 1 of 11 Approvals Preparer: John Buford Reviewer: Tim Kull Reviewer: Dr. Margaret Bryans Date: 16OCT13 Date: 30OCT13 Date: 31OCT13 1. Purpose 1.1. Basic operation of the Buck Scientific BLC-20P isocratic
Med Aire Alternating Pressure Pump and Pad System
 User Manual Med Aire Alternating Pressure Pump and Pad System 14002E 14001E Symbols & Statements NOTE Indicates some tips or some information users should be aware of. CAUTION Indicates correct operating
SC505 Sof Care Inflator. Operating Instructions and Service Manual
 SC505 Sof Care Inflator Gaymar Industries, Inc. 10 Centre Drive Orchard Park, NY 14127 Toll Free +1 800.828.7341 + 1 716.662.2551 Fax +1 800.993.7890 Outside USA +1 716.662.8636 Outside USA Fax +1 716.662.0730
NovelBright LED Illuminator
 NovelBright LED Illuminator Instruction Manual version NS01_11 Instruction Manual This LED illuminator is suitable for research use only. It must be used by specialized personnel that know the health risks
AUTOMATIC TIRE INFLATOR # MW-60, MW-60-4WAY & MW-64HP
 USER MANUEL AUTOMATIC TIRE INFLATOR # MW-60, MW-60-4WAY & MW-64HP TIRE EQUIPMENT MANUFACTURER 1.866.409.RACK WWW.MARTINSINDUSTRIES.COM info@martinsindustries.com PARTS Verify that the following components
Customer Responsibilities. Important Customer Information. Cary 4000/5000/6000i UV-Vis spectrophotometer Site Preparation Checklist
 Thank you for purchasing an Agilent instrument. To get you started and to assure a successful and timely installation, please refer to this specification or set of requirements. Correct site preparation
Dual Solenoid Gas Valve Installation
 Installation IMPORTANT: These instructions are intended as a guide for qualified personnel installing or servicing FLYNN Gas Products. Carefully follow all instructions in this bulletin and all instructions
PRAHER PLC-MP AQUASTAR MANAUL 2009
 PRAHER PLC-MP AQUASTAR MANAUL 2009 1. Copyrights This Operating Manual contains copyright-protected information. All rights reserved to Praher Kunststofftechnik GmbH. This Operating Manual is designed
R2S Standard Sampling Assembly OPERATION PROCEDURE
 PURPOSE 1 of 10 To describe the procedure to monitor for viable airborne bacteria with the Remote-Slit- Sampler Assembly (R2S) from EMTEK, LLC. Principle A 100 mm agar based test plate is placed on the
BioAerosol Nebulizing Generator. Operation and Maintenance User Manual
 BioAerosol Nebulizing Generator Operation and Maintenance User Manual INTRODUCTION The BANG or BioAerosol Nebulizing Generator is a unique nebulizer for the generation of aqueous aerosols at a low air
Flexible Endoscope Cleaning System. Instruction Manual CM Rev.B
 Flexible Endoscope Cleaning System Instruction Manual 1 0901136-CM Rev.B TABLE OF CONTENTS Introduction...3 Indication for Use......3 Safety Precautions...3 Specifications...4 Accessory Kit Parts List...5
BOC: Living healthcare. Manual. LIV IQ BOC Integrated Valve with digital display portable delivery system for Medical Oxygen. BOC: Living healthcare
 BOC: Living healthcare Manual LIV IQ BOC Integrated Valve with digital display portable delivery system for Medical Oxygen. BOC: Living healthcare 02 Manual LIV IQ Oxygen Manual LIV IQ Oxygen 03 Contents.
MODEL 100 NITROGEN INFLATION CART
 MODEL 100 NITROGEN INFLATION CART Installation & Operation Information Branick Industries, Inc. 4245 Main Avenue P.O. Box 1937 Fargo, North Dakota 58103 REV120106 P/N: 81-0113 TABLE OF CONTENTS SAFETY
User s Guide. VetPro 1000 Mobile Dental Delivery System. For Models:
 VetPro 1000 Mobile Dental Delivery System For Models: 8000-001 8000-002 8000-003 8000-004 8000-005 8000-006 8000-007 8000-008 User s Guide 003-1879-00 Rev L Product Information (The information below is
1020 Industrial Drive, Orlinda, TN fax
 Operation Manual Tank Distribution System A-UPT Series 615-654-4441 sales@specialtyh2o.com 615-654-4449 fax TABLE OF CONTENTS Section 1 GENERAL 1.2 Warnings and Cautions... 1 1.2 Theory of Operation...
Hallowell EMC Anesthesia WorkStation Operating Manual
 Hallowell EMC Anesthesia WorkStation Operating Manual PN 000a2770 Anesthesia WorkStation A compact (9" W x 9" D x 15" H), convenient system for use on animals under 7 kg (15 lb.) Hallowell Engineering
SPECIFICATIONS ATTENTION
 VPS 504 S06 Installation Manual - P/N 80122 - Ed. 01/09 VPS 504 S06 and S05 Valve Proving System Installation Instructions VPS 1 6 Gases Natural gas, air and other inert gases. NOT suitable for butane
OC Panel High Limit Aquastat Kit, Manual Reset p/n
 OC Panel High Limit Aquastat Kit, Manual Reset p/n 233202 Instruction Sheet APPLICATION The OC (Option Control) Panel High Limit Aquastat Kit provides electronic temperature sensing in a UL limit-rated
OXY Integral. INTERCON ENTERPRISES INC Tel: Fax: Internet:
 OXY Integral INTERCON ENTERPRISES INC Tel: 800 665 6655 Fax: 604 946 5340 E-Mail: sales@intercononline.com Internet: www.intercononline.com Manual Integral 2006 1 INDEX 2-3 PREFACE 4 INTRODUCTION 5 Principle
USER MANUAL SAVE THESE INSTRUCTIONS. For the most current manual revision, please visit our Website:
 USER MANUAL Model: PM4300 Series SAVE THESE INSTRUCTIONS For the most current manual revision, please visit our Website: www.precisionmedical.com 300 Held Drive Tel: (+001) 610-262-6090 Northampton, PA
RAM 4021-PR. Operation Manual. Worldwide Manufacturer of Gas Detection Solutions
 RAM 4021-PR Operation Manual Worldwide Manufacturer of Gas Detection Solutions TABLE OF CONTENTS RAM 4021-PR For Your Safety... 2 Description.... 2 Setup Mode.... 2 Lights/Alarms.... 3 Operation.... 4
Medical Gas Control Panel
 Medical Gas Control Panel INSTALLATION & MAINTENANCE MANUAL 255105 (Rev. 6) 2018-04 2 255105 (Rev. 6) 2018-04 1.0 User Responsibilities The information contained in this installation and operation maintenance
VERTICAL AIR COMPRESSORS
 VERTICAL AIR COMPRESSORS MODEL NO: VE15C150, VE18C150, VE25C150 PART NO: 2226010, 2226020, 2226025 OPERATION & MAINTENANCE INSTRUCTIONS LS0715 INTRODUCTION Thank you for purchasing this CLARKE Vertical
ASE SOLVENT CONTROLLER INSTALLATION INSTRUCTIONS Dionex Corporation
 ASE SOLVENT CONTROLLER INSTALLATION INSTRUCTIONS 2000 Dionex Corporation Document No. 031277 Revision 03 April 2000 2000 Dionex Corporation All rights reserved worldwide. Printed in the United States of
User Guide. Pall Laboratory Manifold. For laboratory use. Not for use in a manner other than indicated. Introduction. Regulatory References
 User Guide Pall Laboratory Manifold For laboratory use. Not for use in a manner other than indicated. Introduction Application and Intended Use The membrane filtration (MF) technique is a method of analyzing
G92 Series BASOTROL Automatic Pilot Gas Valve
 Installation Instructions Issue Date September 17, 2008 G92 Series BASOTROL Automatic Pilot Gas Valve Installation IMPORTANT: Only qualified personnel should install or service BASO Gas Products. These
Installation of Your SprayMaster System
 Installation of Your SprayMaster System 1. At the installation site, remove all equipment from the corrugated box and the polyethylene drum and replace the drum lid. Check the picture to identify each
TANK MANAGER FOR TWO TANKS OPERATING MANUAL. 10/31/11 C-More T6C L color touch panel
 TANK MANAGER FOR TWO TANKS OPERATING MANUAL 10/31/11 C-More T6C L color touch panel 1 TABLE OF CONTENTS GENERAL...3 INSTALLATION...4 STONE TEST PROCEDURE...7 OPERATIONAL SUMMARY...7 AUTO CARBONATION...10
RAM Operation Manual. Worldwide Manufacturer of Gas Detection Solutions
 RAM 4021 Operation Manual Worldwide Manufacturer of Gas Detection Solutions TABLE OF CONTENTS RAM 4021 For Your Safety... 2 Description.... 2 Setup Mode.... 2 Lights/Alarms.... 3 Operation.... 4 Calibration....
Standard Operating Procedure #COE-SOP-0001 Chemical Fume Hood Operation
 Standard Operating Procedure # Chemical Fume Hood Operation Facility: NMSU College of Engineering Laboratories Written by: Juanita Miller, Safety Specialist, miljgh@nmsu.edu (575)-646-1292 Scope: This
AutoChanger Installation & User Guide Issue 2
 1 INDEX Page 1. Introduction... 3 2. AutoChanger Components Guide 4 3. Installation. 5-11 a) Installation Guidelines.. 5 b) Installation Retrofit... 6-11 c) Installation New... 11 4. AutoChanger User Guide
VECTA DELUXE SENSORY DISTRACTION STATION INSTRUCTION MANUAL
 VECTA DELUXE SENSORY DISTRACTION STATION INSTRUCTION MANUAL SET UP INSTRUCTIONS Read Instructions First The Vecta is a mobile cart that allows you to take the Multi-Sensory experience from room to room.
Siphon vessel / Priming aid
 Manufacturer: sera GmbH sera-straße 1 34376 Immenhausen Germany Tel.: +49 5673 999-00 Fax: +49 5673 999-01 info@sera-web.com Keep the operating manual for future use! Record the exact type and serial number
MyControl Bathing System Signature Series
 MyControl Bathing System Signature Series Touch Assist Touch Pad and CM Technologies Seal Pressure Regulation Instructions Acceptable seal inflation pressure setting must be varified, and adjusted if necessary,
AIR/OXYGEN BLENDER INSTRUCTION MANUAL
 BIO-MED DEVICES AIR/OXYGEN BLENDER INSTRUCTION MANUAL CATALOG #2120 REV 042203 BIO-MED DEVICES INC. 1445 BOSTON POST ROAD, GUILFORD, CT 06437 (203) 458-0202 FAX (203) 458-0440 www.biomeddevices.com TABLE
Operating Instructions for BAIR22-6 AIR-POWERED CRIMPING TOOL
 Operating Instructions for BAIR22-6 AIR-POWERED CRIMPING TOOL Read and understand all of the instructions and safety information in this manual before operating or servicing this tool. Table of Contents
U S E R M A N U A L. Model: PM4300 Series SAVE THESE INSTRUCTIONS
 U S E R M A N U A L Model: PM4300 Series (PM4351 Shown) SAVE THESE INSTRUCTIONS CAUTION Federal (USA) law restricts this device to sale by or on the order of a physician. 300 Held Drive Tel: (+001) 610-262-6090
RH800 & 2000 BASIC OPERATIONS
 RH800 & 2000 BASIC OPERATIONS 2 General information This manual contains technical information regarding Bayer SeedGrowth Equipment. Please read and understand these instructions completely before proceeding
Model ASSEMBLY and OPERATING INSTRUCTIONS
 QUICK CHANGE AIR BRUSH KIT Model 93506 ASSEMBLY and OPERATING INSTRUCTIONS Due to continuing improvements, actual product may differ slightly from the product described herein. 3491 Mission Oaks Blvd.,
200 PSI FAST-FILL AIR SOURCE KIT
 200 PSI FAST-FILL AIR SOURCE KIT 55% Duty Compressor on 2.0 Gallon Air Tank PART NO. 20007 IMPORTANT: It is essential that you and any other operator of this product read and understand the contents of
EC214 EC215 - EC215R Bench Conductivity Meters
 Instruction Manual EC214 EC215 - EC215R Bench Conductivity Meters http://www.hannainst.com These Instruments are in Compliance with the CE Directives Dear Customer, Thank you for choosing a Hanna Instruments
COMBAT SWIM BOARD. RJE International, Inc. RJE International Feb 1, TAC-300 Revision 6
 COMBAT SWIM BOARD RJE International, Inc. YOUR SOURCE FOR DIVER NAVIGATION AND UNDERWATER RELOCATION EQUIPMENT RJE International Feb 1, 2017 12 TAC-300 Revision 6 RJE International, Inc. 15375 Barranca
CJMJ.DPNQBDU. Instruction for use. Neonatal phototherapy device. BILI-COMPACT WY 1816/ Year of manufacture D2017_00
 Instruction for use Neonatal phototherapy device CJMJ.DPNQBDU D2017_00 GmbH > BILI-COMPACT WY 1816/ Year of manufacture Herrenhöhe 4 D-51515 Kürten/Germany 02207-9698-0 02207-4750 E-mail: info@weyermed.com
INFUSION SYSTEM (110V) (220V) USER S MANUAL
 (220V) USER S MANUAL") INFUSION SYSTEM 20-6000-00 (110V) 20-6005-00 (220V) USER S MANUAL 8000 South Kolb Road Tucson, AZ 85756 Phone 800.528.1597 Fax 520.885.1189 www.wellsgrp.com email: sales@wellsgrp.com GENERAL DESCRIPTION
INFUSION SYSTEM 20-6000-00 (110V) 20-6005-00 (220V) USER S MANUAL 8000 South Kolb Road Tucson, AZ 85756 Phone 800.528.1597 Fax 520.885.1189 www.wellsgrp.com email: sales@wellsgrp.com GENERAL DESCRIPTION
COMBAT SWIM BOARD. RJE International, Inc. RJE International January 16, TAC-300 Revision 4
 COMBAT SWIM BOARD RJE International, Inc. YOUR SOURCE FOR DIVER NAVIGATION AND UNDERWATER RELOCATION EQUIPMENT RJE International January 16, 2017 RJE International, Inc. 15375 Barranca Pkwy, Ste. I-112,
EMT EnvironmentalMonitoringTECHNOLOGIES
 1 of 11.PURPOSE To describe the procedure to monitor for viable airborne bacteria with the R2S Remote Start Sampling Assembly from EMT. Principle A 100 mm agar based test plate is placed on the turntable
Installation, Operation and Maintenance Manual
 Installation, Operation and Maintenance Manual Model H2F H2Flow Anti-Scale System Chemical-Free, Salt-Free Scale Prevention Introduction The H2Flow Anti-Scale System will condition the tap water providing
INDUSTRIAL - SOLVENT PARTS CLEANER
 INDUSTRIAL - SOLVENT PARTS CLEANER OPERATION & INSTRUCTION MANUAL I. Introduction A. Manufacturer s Statement CM400 This manual will provide you with important information about the Solvent Parts Cleaners
444C DUAL PERFORMANCE VALUE PACK
 (Chrome) PART NO. 44432 IMPORTANT: It is essential that you and any other operator of this product read and understand the contents of this manual before installing and using this product. SAVE THIS MANUAL
Welcome to the World of In-Home Gardening! Simple Steps to Get Your AeroGarden Up and Growing (No Tools Required)
") Quick Setup Guide Welcome to the World of In-Home Gardening! Simple Steps to Get Your AeroGarden Up and Growing (No Tools Required) Harvest Model number: 100690-BLK / GRY / WHT / RED Harvest 360 Model
Quick Setup Guide Welcome to the World of In-Home Gardening! Simple Steps to Get Your AeroGarden Up and Growing (No Tools Required) Harvest Model number: 100690-BLK / GRY / WHT / RED Harvest 360 Model
Welcome to the World of In-Home Gardening! Simple Steps to Get Your AeroGarden Up and Growing (No Tools Required)
") Quick Setup Guide Welcome to the World of In-Home Gardening! Simple Steps to Get Your AeroGarden Up and Growing (No Tools Required) Harvest Elite Model number: 100691-PPL / BSS / PCP / PSG Harvest Elite
Quick Setup Guide Welcome to the World of In-Home Gardening! Simple Steps to Get Your AeroGarden Up and Growing (No Tools Required) Harvest Elite Model number: 100691-PPL / BSS / PCP / PSG Harvest Elite
OPERATOR S MANUAL HOTLINE 3 Blood and Fluid Warmer
 l OPERATOR S MANUAL - HOTLINE 3 Blood and Fluid Warmer < HL-390-38 6 s l HOTLINE 3 Blood and Fluid Warmer < HL-390-38 OPERATOR S MANUAL PN 4534013EN Rev. 002 s G e n e r a l I n f o r m a t i o n HOTLINE
RAM Operation Manual. Worldwide Manufacturer of Gas Detection Solutions
 RAM 4021 Operation Manual Worldwide Manufacturer of Gas Detection Solutions TABLE OF CONTENTS RAM 4021 For Your Safety... 2 Description.... 2 Setup Mode.... 2 Lights/Alarms.... 3 Operation.... 4 Calibration....
Iron Filter Installation / Operation Manual
 Iron Filter Installation / Operation Manual BrassMaster and BrassMaster Plus Technical Video Library: http://watercontrolinc.com/residential-technical-support/residential-technical-videos BrassMaster technical
PERFORM Operating Document
 PERFORM Operating Document Use and Maintenance of CO 2 Incubator PC-POD-CA-007-v02 Revision History Version Reason for Revision Date 01 New POD 30-Sep-13 02 Minor revisions for section 2.3, 3.1, 4.3. 14-April-16
PumpAgents.com - Click here for Pricing/Ordering Nominal psi (bar) Cut-In Cut-Out
 Cut-In Cut-Out") PumpAgents.com - Click here for Pricing/Ordering Model 31670-Series Dual Max 7.5 GPM (28 LPM) AUTOMATIC TWO STAGE WATER SYSTEM WITH ACCUMULATOR TANK AND PUMPGARD STRAINER IDEAL FOR PLEASURE AND COMMERCIAL
PumpAgents.com - Click here for Pricing/Ordering Model 31670-Series Dual Max 7.5 GPM (28 LPM) AUTOMATIC TWO STAGE WATER SYSTEM WITH ACCUMULATOR TANK AND PUMPGARD STRAINER IDEAL FOR PLEASURE AND COMMERCIAL
G196 Series BASOTROL Redundant Combination Gas Valve with Manual Shutoff Valve
 Installation Instructions Issue Date August 19, 2008 G196 Series BASOTROL Redundant Combination Gas Valve with Manual Shutoff Valve Application The G196 valves are suitable for use with natural gas, Liquefied
TECHNICAL DATA. Trimpac 251a. Spetember 16, 2013
 Spetember 16, 2013 Trimpac 251a 1. DEsCrIpTION DESCRIPTION TRIMPAC Model B-6 and B-6B is a factory assembled trim package for a double interlocked preaction system with an electric/pneu-lectric release
A C Sipper. Installation and Operation Manual. Rev Part #
 A C Sipper Installation and Operation Manual Rev 1-15-09 Part # 16550181 TABLE OF CONTENTS Chapter 1: System Description. p. 05 Function and Theory..p. 05 Chapter 2: System Installation..p. 06 Chapter
User Manual for the Mars Calibration Bench
 User Manual for the Mars Calibration Bench Fall 2013 Table of Contents Table of Contents Table of Contents... iii Introduction... v Chapter 1: The Mars Calibration Bench... 1 What Is the Mars Calibration
RAM 4021-DPX Operation Manual
 RAM 4021-DPX Operation Manual Worldwide Manufacturer of Gas Detection Solutions TABLE OF CONTENTS ABL 4021-DPX / RAM 4021-DPX For Your Safety... 3 Description... 3 Setup Mode... 4 Lights/Alarms... 4 Operation...
Installation & Maintenance Instructions TEC-11N TIMER. Analogue electronic timer 02/09
 Installation & Maintenance Instructions TEC-11N TIMER Analogue electronic timer 02/09 GENERAL OPERATION The TEC-11N timer is produced using SMT (Surface Mounting Technology), ensuring improved performance
! Warning, refer to accompanying documents.
 About this Manual To the best of our knowledge and at the time written, the information contained in this document is technically correct and the procedures accurate and adequate to operate this instrument
24L OIL FREE AIR COMPRESSOR MODEL NO: TIGER 7/250 PART NO: OPERATION & MAINTENANCE INSTRUCTIONS LS10/13
 24L OIL FREE AIR COMPRESSOR MODEL NO: TIGER 7/250 PART NO: 2244030 OPERATION & MAINTENANCE INSTRUCTIONS LS10/13 INTRODUCTION Thank you for purchasing this product. Before attempting to use this product,
Ventam 85 Installation & Commissioning Instructions
 Ventam Systems Ltd Unit D4 Seedbed Business Centre Vanguard Way Shoeburyness Essex SS3 9QY Phone 01702 382 307 Fax 01702 382 340 Ventam 85 Installation & Commissioning Instructions 1 General The Ventam
Installing ASI Umbilical Delivery Systems
 Rev A 05 Nov 2015 Page 1 of 10 PURPOSE This guide provides an overview of tubing connections into an ASI wall-mounted Junction Box that has already been plumbed with a compressed air connection including
G196 Series BASOTROL Redundant Combination Gas Valve with Manual Shutoff Valve
 Installation Instructions Issue Date March 13, 2013 G196 Series BASOTROL Redundant Combination Gas Valve with Manual Shutoff Valve Application The G196 valves are suitable for use with natural gas, Liquefied
Operation and Maintenance Manual for GENTEC Model 881VR Continuous/Intermittent Digital Suction Regulators
 Operation and Maintenance Manual for GENTEC Model 881VR Continuous/Intermittent Digital Suction Regulators Genstar Technologies Co., Inc. 4525 Edison Avenue Chino, CA 91710 USA TEL 909-0-272 FAX 909-0-485
1020 Industrial Drive, Orlinda, TN fax
 Operation Manual Ultrafiltration for High Purity Distribution K-A-HPTUF Series 615-654-4441 sales@specialtyh2o.com 615-654-4449 fax TABLE OF CONTENTS Section 1 GENERAL 1.1 Warnings and Cautions... 1 1.2
GETZ EQUIPMENT INNOVATORS PART NO.: 9G59554 MODEL: MS 36 SC-R HYDROSTATIC TEST PUMP
 GETZ EQUIPMENT INNOVATORS PART NO.: 9G59554 MODEL: MS 36 SC-R HYDROSTATIC TEST PUMP LIMITED WARRANTY Getz Equipment Innovators warrants its products, and component parts of any product manufactured by
Operating Manual VSA100A. tina29e1 ( )
") Operating Manual Incl. EU Declaration of Conformity Vacuum Switch VSA100A tina29e1 (2017-05) 1 Product Identification In all communications with INFICON, please specify the information on the product nameplate.
Operating Manual Incl. EU Declaration of Conformity Vacuum Switch VSA100A tina29e1 (2017-05) 1 Product Identification In all communications with INFICON, please specify the information on the product nameplate.
RAM Operation Manual
 RAM 4021-1 Operation Manual Worldwide Manufacturer of Gas Detection Solutions TABLE OF CONTENTS RAM 4021-1 For Your Safety... 2 Description... 2 Setup Mode... 3 Lights/Alarms... 3 Operation... 4 Calibration...
MODEL NUMBER: PSI AIR SOURCE KIT 200 PSI Compressor on 2.0 Gallon 200 PSI Air Tank
 IMPORTANT SAFETY INSTRUCTIONS CAUTION - To reduce risk of electrical shock or Electrocution: MODEL NUMBER: 20008 200 PSI AIR SOURCE KIT 200 PSI Compressor on 2.0 Gallon 200 PSI Air Tank IMPORTANT: It is
100C Air Compressor Kit
 10010 100C Air Compressor (standard mounting bracket, CE Spec) 10014 100C Air Compressor (no leader hose or check valve, CE Spec) 10016 100C Air Compressor (with Omega Bracket, CE Spec) IMPORTANT: It is
MANUAL BE SERIES Test Benches
 The CustomCrimp Manual BE Series Test Benches are designed with features that make proof and burst testing of hydraulic hose assemblies a quick and easy procedure. CUSTOMIZED AND SPECIAL DESIGN BENCHES
Stand-Alone Bubble Detection System
 Instruction Sheet P/N Stand-Alone Bubble Detection System 1. Introduction The Bubble Detection system is designed to detect air-bubble induced gaps in a bead of material as it is being dispensed. When
Model 106 DPI "Micro-switch" Installation and Operating Instructions
 Mid-West Instrument Model 106 DPI "Micro-switch" Installation and Operating Instructions BULLETIN NO. IM116DPImicro/09A Replaces --- INSPECTION Before installation carefully check the Model Number on each
Nuclear Associates
 Nuclear Associates 36-751 XenoGard 133 Xe Monitor Operators Manual March 2005 Manual No. 128011 Rev. 3 2004, 2005 Fluke Corporation, All rights reserved. Printed in U.S.A. All product names are trademarks
36G22, 36G23, 36G24 & 36G52 36J22, 36J23, 36J24 & 36J52 DSI and HSI Single Stage Combination Gas Valve
 Operator: Save these instructions for future use! FAILURE TO READ AND FOLLOW ALL INSTRUCTIONS CAREFULLY BEFORE INSTALLING OR OPERATING THIS CONTROL COULD CAUSE PERSONAL INJURY AND/OR PROPERTY DAMAGE. DESCRIPTION
400C & 450C DUAL PERFORMANCE VALUE PACKS
 (Chrome) PART NO. 40013 (Silver) PART NO. 45012 (Chrome) PART NO. 45013 IMPORTANT: It is essential that you and any other operator of this product read and understand the contents of this manual before
RAM 4021 Operation Manual
 RAM 4021 Operation Manual Worldwide Manufacturer of Gas Detection Solutions TABLE OF CONTENTS RAM 4021 For your safety...3 Description...3 Set-up mode...4 Annunciator lights/alarms...4 Operation...5 Calibration...6