Vest: Steadicam Fawcett Exovest
|
|
|
- Jodie Joseph
- 5 years ago
- Views:
Transcription


1 Vest: Steadicam Fawcett Exovest p/n LIT


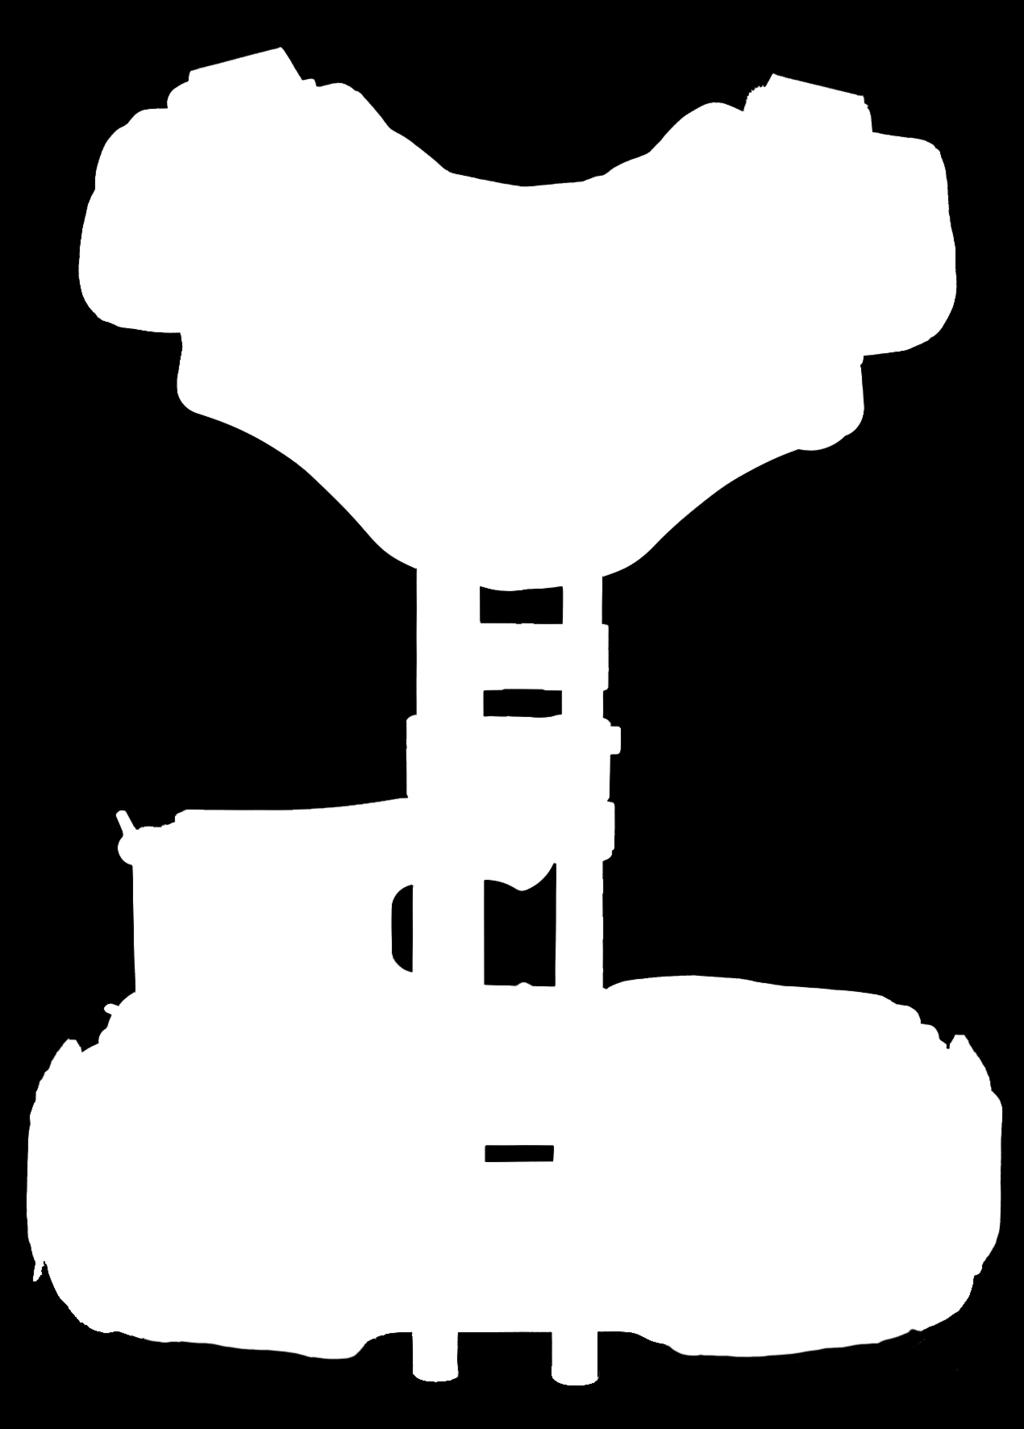
2 Introduction The Steadicam Fawcett Exovest is a semi-rigid exoskeletal vest that transfers the weight and torque of supporting a Steadicam into anatomically appropriate areas, without interfering with natural movement. Primary weight transfer is to the pelvis via four pads ergonomically placed around the waistband, and primary torque transfer is via a pad system at the upper back. Lower pads avoid compressing the abdomen in front, and the base of the spine in back. Upper pads avoid compressing the neck, shoulder joint, shoulder blades, and spine. Crucially, the absence of chest straps allows for unrestricted breathing and arm movement. Pad systems are connected by rigid sliding components, and tightened by double and triple-purchase straps for precise fit under load, so weight-bearing characteristics can be fine-tuned on the fly. The exemplary rigidity of the outer structure extends the torque-resisting lever-arm from mid-back (on existing vests) to high-shoulder level halving the force required to counterbalance a Steadicam rig. Symmetrical twin-rod spars, rising fore and aft from the waistband, increase vertical range of the socket block and uniquely, permit both front and rear arm mounting. Rear rod length clamp Socket block Four integral pivots allow the vest to conform to natural body movements. The rise and fall of the hips as weight is shifted from one leg to the other is accommodated by a lower pivot system, so the socket block remains level, and at the same height when walking resulting in less muscular strain, and better overall stability and balance. The upper pivot system allows free movement of the shoulders. The resultant feel is of increased lightness and control. Between takes, the entire vest may be relaxed by means of one over-center lever, as the upper pad system beds in only under load. The Exovest is lightweight and less constrictive than conventional vests allowing for better respiration, circulation, transpiration, and movement and is especially comfortable for female operators. 2 Waist velcro Rear view The designer, Chris Fawcett, operates and teaches Steadicam worldwide and has extensively studied the physiology of human weight-bearing appliances. He is the author of Steadicam Posture.


3 Front view Shoulder straps Shoulder latch Bridge plate Front rod length clamp Socket block Rear rods Waist velcro Waist latch Over-center lever 3
, how to place the pads (on your pelvic bones), how to lift the rear rods off your back (booster pads), and how to get the pivot")

4 Fitting the Vest Note: The Exovest is a a radical new concept in Steadicam support. As such, it needs to be fitted well. This manual will explain how to put the vest on (bottom latch first), how to place the pads (on your pelvic bones), how to lift the rear rods off your back (booster pads), and how to get the pivot system to work with your body. To get the most from your Exovest, follow the directions below, and experiment with different settings until it conforms to the size and shape of your body. Once these adjustments are finalized, you can enter and exit the vest quickly by means of two latches and one over-center lever. 1. Fitting the Exovest Loosen the velcro straps at the waist and shoulders, and retag them leaving plenty of room to enter the vest. Roughly set the front and rear rod lengths, by eye, to the length of your torso. Open the shoulder and the waist latch and put on the vest, draping it over your shoulders. Closing the waist latch Close the waist latch by pushing the waistband with your left hand, and with your right hand, either pushing on the bridge plate, as shown, or by reaching under the bridge plate to pull the crescent-shaped plastic guide with your fingers. If the waistband is too tight with the velcro loosened, see the section Customizing the Waistband. Push the guide with the heel of your right hand to seat the dovetail, and snap the over-center lever shut. If it doesn t close fully, open it again and push the guide farther. Fasten the shoulder latch. If it s difficult to close, reseat the latch by loosening and re-tightening the two dovetail screws while wearing the vest. See the section: Customizing the Shoulder Straps for more details. Place the centers of the waistband pads level with the top of your pelvic bones. 4 Pad placement


, and snug the shoulder straps down onto your shoulders.")
5 The four waist pads should rest on your pelvic bones. If you are broad across the pelvis, you may need to move the front pads further outboard so they do not sink into your abdomen. The pads should sit low, but you should be able to lift your legs sufficiently as to climb stairs without disturbing the vest. When you lift the Steadicam, the bulk of the weight should go into your pelvis, but allow a little stabilizing weight to rest on your shoulders don t leave a gap up there. When you push the Steadicam out in front of you, the rear rods should not touch your back. If they do, insert a booster pad between the back pad and the frame. Keep the rods off your back Centering the rods Tighten the waist velcro evenly on both sides, so the rods are centered both front and back. Open the rod clamps, front and back (if you can t reach them both yourself, ask for help), and snug the shoulder straps down onto your shoulders. Tighten the shoulder straps, leaving enough room to breathe deeply. You should examine your posture in a mirror at this point. If the rods are touching your back because you are slouched forward, you may wish to correct this by standing up straight rather than by using a booster pad. Note: If you re an experienced Steadicam operator, you ll notice you are using different back muscles. This is because most vests resist the torque at mid-back level, necessitating that work be done entirely in the lower region of the back. By doubling this lever arm, we halve the force necessary to counterbalance the rig, and engage back muscles to the height of the shoulders. Room to breathe 5


6 2. Relaxing into the Vest Trim With traditional Steadicam vests, when walking, you need to hold your pelvis level to prevent the rig from pulling from side to side. In the Exovest, you can walk normally, allowing your hip joints to rise and fall relative to one another. As you get used to relaxing your pelvis, you ll feel the Exovest working with your body. With the rig held comfortably in front of the centerline of your body, shift your weight sideways onto one leg, bringing the rig with you and remaining entirely upright. Now relax the stomach, back, and leg muscles that are holding your pelvis level so your unloaded knee bends and your unloaded hip joint drops. You will feel the pivot system shifting to accommodate this. Shift your weight, bringing the rig along, to the other leg, letting the pelvis rotate naturally as the other hip joint rises, again remaining entirely upright. Repeat this until you feel the pivot system working. Now bring this freedom of movement into a slow walk, and if you feel confident, even a slow jog. Get used to the feeling of the vest moving with you. You will soon find that, by freeing your pelvis, you will be able to move more smoothly and with less effort. Additionally, the socket block will remain at a more constant height relative to the ground. Operating in a good missionary or Don Juan position, with the rig held toward the centerline of your body, rather than off to the side, will increase the efficiency of the pivot system and reduce muscular strain while operating. If you have a short move that you d normally do with your arms only, try broadening your stance, and moving your body with the rig instead. Face into the rig to keep it as much on your centerline as possible. 6 Note: The small stopper block that restricts the rotation of the arm block to 180 aids with fitting and removing an arm to and from the vest, but many operators find that an arm functions better without it. Removing the stopper helps the arm to fold back out of the way as you cross the rig in front of your body. If you remove the stopper from a G70 arm, kick the aircraft-pin link forwards instead of backwards to increase reach.


, then slacken the shoulder velcro so you can slightly")


7 3. Operating Adjustments 4. Customizing the Shoulder Straps By virtue of the double and triplepurchase velcro straps, you can tweak the force-placement characteristics of the vest without having to remove it. For convenience, retag the inner end of the waistband velcro so the outer end closes close to the front of your body where you can grasp it easily. If the shoulder straps are too wide or too narrow, or the dovetail latch is difficult to fasten, you need to conform the shoulder straps to better match your anatomy. Remove the vest, and slightly loosen the four allen screws at front (shown below), then slacken the shoulder velcro so you can slightly loosen the four allen screws to the rear. Shoulder strap placement Adjusting under load In between takes, relax the entire vest by releasing the over-center lever at the waist. Adjusting shoulder strap clearance Over-center lever in relax position If you require a low lens height, or simply prefer to have the socket block mounted lower than usual, you can set the bridge plate to jump over the lower pivot. Be advised that the further the Steadicam arm attachment point is from your own shoulder, the more likely you are to limit your boom range. (Goofy operators, see Section 6.) Bridge plate jumping lower pivot Fasten the shoulder latch securely, then release the front rod clamp to allow the front rods to find their own level. Now adjust the shoulder width by sliding the straps to left or right. Holding both sets of rods horizontal in their pivots, tighten the screws while maintaining a symmetrical distance between each shoulder strap and the centerline of the vest. If you can get someone else to do this for you, while you are wearing the vest, all the better. Note: If the shoulder latch becomes sticky after this procedure, reseat the latch by loosening and re-tightening the two dovetail screws while wearing the vest. 7


8 5. Customizing the Waistband Customizing The standard waistband will fit pelvic girths of around in ( cm). To allow the waistband to reach its full extension, on each side, move the small retaining screws at the inside of the rear waistband from their inboard to their outboard positions. For narrower waists, the waistband will function best with the center waistband strap retracted to the rear, and with these screws in their inboard positions. For special sizing requirements, please contact Tiffen. Retaining screw moved to outboard position. 6. Reconfiguring for Goofy Operators You can simply flip the bridge plate for goofy operating (rig to the right side of the operator s body), but this puts the socket block on the same side as the over-center lever, and limits downward travel of the socket block as described in Section 8. To maximize utility, a goofy operator may reconfigure the vest to be the mirror image of a standard vest by moving both the shoulder and waist latches to the right-hand side of the vest. The screw-hole patterns in both the chest and abdominal plates are left right symmetrical, so moving the latch hardware from one side to the other is quite straightforward. You ll need a set of English Allen Keys to continue. Shoulder: 1. Remove the 2 screws that fasten the right-hand shoulder strap to the chest plate. Set the screws aside. 2. Remove the 2 screws that fasten the silver dovetail wedge to the left shoulder strap assembly. Remove the dovetail wedge, leaving the plastic handle and Velcro strap in place, and move the wedge, using its own screws, to the right shoulder strap assembly. Keep the dovetail wedge in its original orientation to the vest. 3. Remove the 4 screws that hold the silver dovetail grabber and its strike plate to the chest plate and move these to the left side of the plate using the same 4 screws. Keep the dovetail grabber in its original orientation relative to the vest. 4. Screw the left shoulder strap securely to the chest plate using the 2 remaining screws Reseat the latch following the note on page 7.


9 Waist: 1. Remove the front pads. Unthread the Velcro waistband straps from rear and the front rollers, on both left and right sides of the vest, but leave the Velcro tagged to the center slides. 2. Pull both front plastic waistband slides clear from the rest of the waistband. 3. On the right-hand side of the waistband, remove the four screws that attach the plastic waistband slide, and its front roller, to the abdominal plate. Keep the slide, the roller, and its screws together. 4. On the left-hand side of the waistband, peel off the Velcro backing strip behind the silver dovetail wedge, and remove the 2 screws that fasten the silver dovetail wedge and its strike plate to the abdominal plate. Move the wedge from the left to the right-hand side of the plate using the same 2 screws. Keep the dovetail in its original orientation to the vest, but mirror it left right. Stick the Velcro backing strip behind the dovetail wedge. 5. Screw the original right-hand plastic slide, and its roller, to the left side of the abdominal plate, using the 4 matching screws. 6. Fit the front slides into the rear slide assembly, and rethread the Velcro. If it isn t clear to you how to do this, please seek assistance. For someone with a little mechanical experience, it s 20 minutes work to make a full goofy vest that is still friendly to regular-side operators. 7. Posture The Exovest is designed to work in conjunction with good operating posture. Now s the time to check your form in a mirror. Whether walking or standing, angle yourself approximately 45 degrees to the rig. Tuck the rig in close to your center-line, and to your center of gravity. While standing in this position with the rig floating in balance in front of you, adjust your fore aft threads such that, when looking from the side, you are leaning neither forwards nor backwards, but are upright, with the center of your shoulder girdle directly over the center of your pelvic girdle. Adjust your side-to-side threads such that, when looking from the front, you are leaning neither left nor right. Do not allow your head to fall forward, but instead incline it downwards from the level of the top vertebra of your neck. This is the joint around which you nod, and is how you should tilt your head towards the monitor. Fore more posture information, please download Steadicam Posture from Above all, have fun, and fly safe. Stand up straight! 9
10 10 Notes
11 Notes 11
12 Patents pending. All trademarks are the property of their respective owners. Tiffen reserves the right to change specifications, accessories, etc. without prior notice. Designed and Manufactured in the United States of America 2013 The Tiffen Company. Written by Chris Fawcett and L.Hayball 12 The Tiffen Company, LLC 90 Oser Avenue, Hauppauge, NY Phone: Fax:
Stand-N-Fish FULL DETAIL INSTALLATION INSTRUCTIONS
 1 Stand-N-Fish FULL DETAIL INSTALLATION INSTRUCTIONS Thank you for purchasing the incredible new Stand-N-Fish Kayak Fishing System. Once installed on your kayak the Stand-N-Fish will take your kayak fishing
Ab Plank with Straight Leg Raise
 Ab Plank with Straight Leg Raise Position yourself face up with your knees bent at 90 degrees, feet flat on the floor. Your hands should be directly under your shoulders facing forward. While in this position
SAVE THESE INSTRUCTIONS. NOTE: Check all parts for shipping damage. In case of damage, DO NOT use. Contact Carrier/Invacare for further instructions.
 Walking Tutor, Installation and Operating Instructions Model No. WT 200 SAVE THESE INSTRUCTIONS NOTE: Check all parts for shipping damage. In case of damage, DO NOT use. Contact Carrier/Invacare for further
STAND AID 1600/ ECONOSTAND
 MAKERS OF STAND AID, POWER TOILET AID AND FREEDOM CHAIR STAND AID 600/ ECONOSTAND INSTRUCTIONS AND WARRANTY FOR STAND AID 600 STAND AID SERIAL # PO BOX 386 Sheldon, IA 50 (800) 83-8580 (7) 34-53 Fax: (7)
Sun Salutation Pose #1 Mountain Pose 1
 Sun Salutation Pose #1 Mountain Pose 1 Stand upright with feet together and look straight ahead, hands alongside body and palms forward. Lift abdomen inward and upward. Activate quadriceps and evenly distribute
FIRST TEAM SPORTS, INC Storm Portable Series Assembly Instructions
 FIRST TEAM SPORTS, INC Storm Portable Series Assembly Instructions WARNING! WARNING! WARNING! THIS BASKETBALL SYSTEM IS SPRING LOADED AND SHIPPED UNDER TENSION. ATTEMPTING TO ASSEMBLE OR DISASSEMBLE ANY
ORIENTATION SEQUENCE
 ORIENTATION SEQUENCE In-Trinity builds strength, deepens flexibility and improves balance, coordination and agility. For the first time, you will access movements never possible before, taking your training
Basic Movement Patterns Locomotor Skills 1.3
 Basic Movement Patterns Locomotor Skills 1.3 Jumping Forward & Sideways & Landing Extending Arms upward upon takeoff Arms Reach Full Extension about head height at lift off Extending the Hips, Knees, and
EXERCISE GUIDE STRENGTHEN YOUR CORE
 EXERCISE GUIDE STRENGTHEN YOUR CORE BACK EXTENSION WITH BALL Rest your belly on the ball, feet planted wide apart on the floor behind you and hands resting on your lower back. Peel your chest away from
U.S. Shooting Team Balance, Strength and Stability Workout. Training Work-Out
 U.S. Shooting Team Balance, Strength and Stability Workout Training Work-Out Modified by Dan Durben and Sommer Wood November 2006 from the program originally developed by Amber Darland for the USA Shooting
LEVEL 1 SKILL DEVELOPMENT MANUAL
 LEVEL 1 SKILL DEVELOPMENT MANUAL Lesson Manual C A Publication Of The USA Hockey Coaching Education Program The USA Hockey Coaching Education Program is Presented By LESSON C-1 SPECIFIC OBJECTIVES 1. Refine
VERSA BIKE RACK INSTRUCTIONS
 VERSA BIKE RACK INSTRUCTIONS Models #8, 8 Important This rack is designed for use with a or. receiver hitch. The rack is designed to hold a maximum of two bicycles. Do not use it for anything other than
Top 10 Yoga Exercises to relieve Sciatica
 Top 10 Yoga Exercises to relieve Sciatica This is due to compression and inflammation of the spinal nerves. A sharp pain radiates from the lower back to to the leg and foot in a pattern determined by the
KRIYA LOWER BACK AND HIPS
 KRIYA LOWER BACK AND HIPS 1. Pelvic Grind Left. Place your hands on your knees and begin grinding yourself in a big, smooth circle going to the left. Lift the chest up high as you tilt the pelvis back,
i NOTE: This installation manual contains important information related to system
 TRx Pivot Plus Manual Elevating Legrests (ELR) Installation and Set-Up Manual i NOTE: This installation manual contains important information related to system set-up and adjustments. Please forward to
U.S. Shooting Team Balance, Strength and Stability Workout. Shooting Warm-Up
 U.S. Shooting Team Balance, Strength and Stability Workout Shooting Warm-Up Modified by Dan Durben and Sommer Wood from the program originally developed by Amber Darland for the USA Shooting National Rifle
Final Assembly Instructions Bikes with Quill Stems
 Final Assembly Instructions Bikes with Quill Stems Thank you for buying your new bicycle from L.L.Bean. Read these instructions carefully before beginning the final assembly. Prior to shipping, our expert
Final Assembly Instructions Bikes with Threaded Headsets
 Final Assembly Instructions Bikes with Threaded Headsets Thank you for buying your new bicycle from L.L.Bean. Read these instructions carefully before beginning the final assembly. Prior to shipping, our
Techniques To Treat Your Pain At Home (512)
") Techniques To Treat Your Pain At Home (512) 288-5322 7010 W. TX-71 Suite 360 Austin TX, 78735 Arm Only Bird Dog Start in the quadruped position (all fours) with arms and thighs perpendicular to the floor.
Techniques To Treat Your Pain At Home (512) 288-5322 7010 W. TX-71 Suite 360 Austin TX, 78735 Arm Only Bird Dog Start in the quadruped position (all fours) with arms and thighs perpendicular to the floor.
Before you start! Is iwalk 2.0 right for you?
 Before you start! Is iwalk 2.0 right for you? Physical Abilities Requirements 1. Stair Test Before your injury, could you easily walk up and down stairs at normal speed, without using the hand rail? 2.
HoldUp Plus2. Safety Kit included: See additional instructions for installation. REAR WHEEL TRAY. BASE (1x) lock WASHER (1x) KEY (2x) SAFETY CLIP (1x)
 lock WASHER (1x) KEY (2x) SAFETY CLIP (1x)") HoldUp Plus2 InsTAll This product on 2" hitch version of the HoldUp Front WHEEL TRAY assembly (1x) REAR WHEEL TRAY assembly (1x) wrench (1x) BASE (1x) bolt (8X) Lock WASHER (8X) Washer (8x) KEY (2x) SAFETY
HoldUp Plus2 InsTAll This product on 2" hitch version of the HoldUp Front WHEEL TRAY assembly (1x) REAR WHEEL TRAY assembly (1x) wrench (1x) BASE (1x) bolt (8X) Lock WASHER (8X) Washer (8x) KEY (2x) SAFETY
PARTNER With all partner stretches: communicate with partner and use caution!!
 - warm up prior to stretching - isolate the muscle group to be stretched - move slowly and smoothly into stretch - use proper mechanics and correct alignment - breathe normal - slowly come out of stretch
Marine 6-Boat Free-Standing Racks SKU: Updated November 2011
 Marine 6-Boat Free-Standing Racks SKU: 30-061 Updated November 011 Contains: Marine -Boat Free-Standing Racks (SKU 1-003) Marine 3 rd Boat Expansion Racks (SKU 1-0303) Marine Back Legs (SKU -001) 3 Sets
Force Vectors SHOT PUT MECHANICS
 SHOT PUT MECHANICS The shot put is an individual event that is dominated by big, powerful male and female athletes. There are two techniques for throwing the shot put---the glide and rotation--. Neither
Shift phrase 3 Notes. Arm/ Head gesture Torso Guidance. Beat/ Bar Support Leg gesture and/or direction. Standing feet together facing DSR
 Shift phrase 3 Notes Beat/ Bar Support Leg gesture and/or direction Starting position Weight centred evenly between both legs; DSR Standing feet together facing DSR Arm/ Head gesture Torso Guidance Arms
Physical Activity. Good posture. Sitting guidelines. Rising from a chair
 Physical Activity Good posture + Chin tucked + Shoulders back with shoulder blades flat + Chest up and forward + Stomach drawn up and in + Lower back flattened + Knees straight, but not stiff + Feet parallel
ADAPTED SEATED MOUNTAIN
 ADAPTED SEATED MOUNTAIN SEATED MOUNTAIN SEATED MOUNTAIN (ADAPTED) SEATED MOUNTAIN. Sit comfortably on the mat or on a small pillow or yoga block with legs crossed at the ankles, hands in the lap.. Engage
SUNDAY MONDAY TUESDAY WEDNESDAY THURSDAY FRIDAY SATURDAY **REST**
 At minimum, walk 30 minutes, 5 days a week. Not sure if an exercise is right for you? Test your blood sugar before and after you work out. If your blood sugar is higher afterwards, the exercise is too
Om Fairy LLC Page 1 This personal yoga practice was created for One Stressed Out Yogi.
 A Restorative Practice for One Stressed Out Yogini. In any of the postures below, if your joints are floating in the air (elbows, knees, ankles, etc.), you can utilize extra props for support, be it a
FITTING and ADJUSTING The Free n Easy SADDLE
 FITTING and ADJUSTING The Free n Easy SADDLE By Les Spark Free n Easy Saddle Company www.free-and-easy-saddles.co.uk Updated by Marlene Moss Moss Rock Endurance www.mossrockendurance.com FITTING and ADJUSTING
 Invocation Prayers Index Age : 8-11 yrs 1) Standing: a) Tree pose (Vrukshasana) b) Utkatasana c) Eagle pose (Garudasana) 2) Sitting: a) Mountain pose (Parvatasana) b) Posterior Stretch pose (Paschimotasana)
Timing 1. The hips and shoulders rotate at the end of the catch to assist in the acceleration of the stroke.
 Freestyle Body Position 1. Head position should be comfortable at a 45º angle with the water line slightly above the goggles. 2. Hips and shoulders should remain high in the water with a straight line
Accessories. Adjustable Handles
 Accessories Adjustable Handles The Up n Free in all size models has convenient hand placement locations on the sides that suit most users. These locations provide a comfortable, sometimes re-assuring place
Tadasana Variation 7. Thighs back, buttocks in (with two helpers)
") Tadasana Variation 7 Pro ps 2 ropes or belts, Thighs back, buttocks in (with two helpers) 2 helpers This variation produces a similar effect to the previous one but with a different method. Stand in Tadasana
Tadasana Variation 7 Pro ps 2 ropes or belts, Thighs back, buttocks in (with two helpers) 2 helpers This variation produces a similar effect to the previous one but with a different method. Stand in Tadasana
Warm Ups. Standing Stretches
 Warm Ups Mild warm-ups are a necessity for everyone. The need for warm-ups increases with age as the body becomes less elastic over time. It is recommended that you execute the warm-up routine in this
Soft-Over-Ball. Exercise Chart.
 Lay on your stomach, your head on your hands. Contract your thighs. Press your pubic bone into the mat while lifting your belly-button as if an ice cube was underneath. Place the Mambo Max Soft- Over-Ball
The New Thrower s Ten Seven Exercises to Save the Thrower s Shoulder
 The New Thrower s Ten Seven Exercises to Save the Thrower s Shoulder tylterrell@gmail.com Lance Goyke lance@lancegoyke.com The following exercises are meant to be done in the order they are presented.
USER S MANUAL QUESTIONS? CAUTION. Model No. FMEX Serial No. Write the serial number in the space above for reference. Serial Number Decal
 Model No. FMEX81110.0 Serial No. Write the serial number in the space above for reference. USER S MANUAL Serial Number Decal QUESTIONS? If you have questions, or if parts are damaged or missing, please
Liko SupportVest, Mod. 91
 Liko SupportVest, Mod. 91 Instruction Guide English 7EN160145-03 Product description Liko SupportVest is a comfortable sit-to-stand vest that is easy to use and requires relatively little individual adjustment.
Assembly, Fitting, Care & Maintenance
 Assembly, Fitting, Care & Maintenance Assembly 1.1 Remove All Parts and Tools from Packaging 1.2 Part and Tools required for assembly 1.3 Check Foot & Leg Assembly 1.4 Adjust Upper-Leg-Support (ULS) Height
A Publication Of The USA Hockey Coaching Education Program The USA Hockey Coaching Education Program is Presented By
 LEVEL 1 SKILL DEVELOPMENT MANUAL Lesson Manual B A Publication Of The USA Hockey Coaching Education Program The USA Hockey Coaching Education Program is Presented By LESSON B-1 SPECIFIC OBJECTIVES 1.
Assembly Instructions And User Guide
 EZ-1/EZ-CLASSIC QUADRIBENT By Blackbird Designs Inc. Mark 5.2 June 2011 Assembly Instructions And User Guide 1 The Quadribent is 2-seat, side-by-side, human powered vehicle that enables almost anyone to
CHAPTER 4 ADVANCED GROUND-FIGHTING TECHNIQUES
 (FM 21-150) CHAPTER 4 ADVANCED GROUND-FIGHTING TECHNIQUES After achieving an understanding of the basics of ground fighting, other elements of fighting on the ground are added. These techniques, however,
TRUE TO FORM COMPANION BOOK FROM PAIN TO PERFORMANCE. Dr. Eric Goodman HOW TO USE FOUNDATION TRAINING FOR SUSTAINED PAIN RELIEF AND EVERYDAY FITNESS
 TRUE TO FORM HOW TO USE FOUNDATION TRAINING FOR SUSTAINED PAIN RELIEF AND EVERYDAY FITNESS COMPANION BOOK Dr. Eric Goodman FROM PAIN TO PERFORMANCE. PARt one: Foundation Training Exercises Anchoring...
GROUND COMBATIVES TRAINING STEP-BY-STEP INSTRUCTION MANUAL PICTORAL ANNEX FOR EXISTING TSP S
 GROUND COMBATIVES TRAINING STEP-BY-STEP INSTRUCTION MANUAL PICTORAL ANNEX FOR EXISTING TSP S Stand Up In Base - This is the most basic technique. It allows the Student to stand up in the presence of an
Belton High School Marching Fundamentals 2016
 Belton High School Marching Fundamentals 2016 Fundamentals of Teaching Fundamentals: 1. Say the name of the maneuver (INSTRUCT) 2. State its purpose (INSTRUCT) 3. Demonstrate it slowly, several times,
1. Downward Facing Dog
 1. Downward Facing Dog Come onto the hands and knees with your wrists underneath your shoulders and your knees underneath your hips. Inhale as you tuck your toes under your heels. Then exhale to lift your
 Index Age: 5 8 Yrs Invocation Prayers 1) Standing: A) Palm Tree Pose (Talasana) B) Ekpadasana C) Cone Pose (Konasana) 2) Sitting: A) Mountain Pose (Parvatasana) B) Cat Pose (Manjarasana) C) Butterfly Pose
SERIES 2 RAMP OWNER S MANUAL TOOLS REQUIRED: BEFORE YOU BEGIN... Read and understand these instructions before beginning a ramp setup.
 SERIES 2 RAMP OWNER S MANUAL BEFORE YOU BEGIN... Read and understand these instructions before beginning a ramp setup. Use caution and care for your back when lifting, pushing, pulling, folding or unfolding
Installation Manual. Version 12-10
 Installation Manual The products and parts shown herein are to be installed and used adjusted in accordance with these instructions. Any deviation by the buyer, installer, or user from these instructions
Yoga Home Practice Guidebook. Boston Medical Center Veterans Back to Health Trial
 Yoga Home Practice Guidebook Table of Contents Welcome... 1 Study Contact Information... 2 Making the Most Out of Your Yoga Experience... 3 Setting up Your Home Practice... 4 Completing Your Home Practice
AEROBIC GYMNASTICS Code of Points APPENDIX II Guide to Judging Execution and Difficulty
 FÉDÉRATION INTERNATIONALE DE GYMNASTIQUE FONDÉE EN 1881 AEROBIC GYMNASTICS Code of Points 2009 2012 DRAFT OCTOBER 2008 APPENDIX II Guide to Judging Execution and Difficulty Page 1 of 80 INTRODUCTION This
GRIP LOCK CHOCK (GLC)
") GRIP LOCK CHOCK (GLC) JANUARY 2012 NOMENCLATURE GENERAL CONCEPT An eight (8) Chock System comprised of four (4) Left Hand and four (4 ) Right Hand Chocks. The Main Body of the chock is black The Left Hand
GRIP LOCK CHOCK (GLC) JANUARY 2012 NOMENCLATURE GENERAL CONCEPT An eight (8) Chock System comprised of four (4) Left Hand and four (4 ) Right Hand Chocks. The Main Body of the chock is black The Left Hand
Straighten Up is an enjoyable very short spinal health program designed to help you feel and look your best. Basic Rules: 1. Think positively 2.
 Straighten Up is an enjoyable very short spinal health program designed to help you feel and look your best. Basic Rules: 1. Think positively 2. Stand tall in confident Inner Winner posture. 3. Breathe
Instructional Manual
 Instructional Manual TABLE OF CONTENTS MEDICUS Dual 2000 Instructional Manual The Proper Grip 1 Posture, Stance & Alignment 2 Breakpoint 1: Takeaway 3 Breakpoint 2: Toe-up Position 4 Breakpoint 3: Setting
Vaulting Compulsories
 Vaulting Compulsories The compulsories are seven exercises done in a series by all vaulters. They are the foundation of gymnastics done on the vaulting barrel and the horse. The compulsories are used to
Level 1 Vault STRETCH JUMP ONTO A RAISED MAT SURFACE (A MINIMUM OF 16 ) AND THEN HANDSTAND FALL TO STRAIGHT LYING POSITION ON THE BACK
 AND THEN HANDSTAND FALL TO STRAIGHT LYING POSITION ON THE BACK") Level 1 Vault The gymnast may perform the vault (both skills) two times. Each phase of the vault is worth 5.0 points with the score of each phase added together. The highest total score of the two vaults
Level 1 Vault The gymnast may perform the vault (both skills) two times. Each phase of the vault is worth 5.0 points with the score of each phase added together. The highest total score of the two vaults
Trampoline & Enclosure Assembly Instructions
 Trampoline & Enclosure Assembly Instructions Safe user weight 250 lbs (115 kg) Version 718602 The information in this document is subject to change without notice. Copyright Springfree Trampoline Inc.
STEP 1. STANCE. The stance must be a consistent, repeatable and comfortable.
 STEP 1. STANCE The body can be divided into 2 parts the upper body from the hips up and the lower body from the hips down. The upper part of the body must maintain consistent position from shot to shot
UK Yoga Sports Federation
 UK Yoga Sports Federation STANDING HEAD TO KNEE POSE 4 parts 1. Stand with feet together, shift body weight to standing leg (leg closest to the judges) and lock the knee (leg straight and thigh muscle
TACTICAL COMBATIVES COURSE STUDY GUIDE
 TACTICAL COMBATIVES COURSE STUDY GUIDE STANDING TECHNIQUES 1. ROUND KICK (All Minor Tasks) 1. Push off on the ball of your trail leg foot, and then step somewhat toward the target and laterally to the
U.S. Patent No. 7,922,246. Patents Pending
 U.S. Patent No. 7,922,246 Patents Pending 2 Table of Contents Page General Information... 3 Warnings and Cautions... 4 Tools... 6 SmartDock Parts... 6 Initial Set-Up and Adjustment... 7 Select Valve Retaining
LESSON 7: THE PRONE POSITION
 LESSON 7: THE PRONE POSITION PURPOSE This lesson introduces you to the correct technique for firing in the prone position. INTRODUCTION prone sling The prone position has the lowest center of gravity and
Liko SafetyVest, Mod. 93, 94
 Liko SafetyVest, Mod. 93, 94 Instruction Guide English 7EN160146-02 Mod. 93 Mod. 94 Product Description The Liko SafetyVest is a sit-to-stand vest that is unique in terms of safety, form and function.this
#59114 Rola 2-Bike Rack Carrier (Shown Assembled) (A) (C) (B)
 (A) (C) (B)") Use for Parts: #59114 Rola -Bike Rack System #59115 Rola 1-Bike Add-On TOOLS REQUIRED 10mm or 13/3 Socket & Wrench #59114 Rola -Bike Rack Carrier (Shown Assembled) Tray Attachment Hardware: (3) Plastic
Use for Parts: #59114 Rola -Bike Rack System #59115 Rola 1-Bike Add-On TOOLS REQUIRED 10mm or 13/3 Socket & Wrench #59114 Rola -Bike Rack Carrier (Shown Assembled) Tray Attachment Hardware: (3) Plastic
Simple Yoga Poses for the Gardener
 Simple Yoga Poses for the Gardener Lateral Stretch for back & shoulders Stand with feet together and knees slightly bent. Begin with left hand on hip and extend right arm overhead in line with your ear.
2012 K9100 COMPACT Worldwide Cycling Solutions Through Creative Innovations.
 Home Instruction Sheet Step-1Please check for any missing parts. Model K9100 COMPACT (Basic AirCaddy) aircaddy web page 20 04/03/12 98% (1) T3230-00 METAL WHEEL TRUCK Model K8350 (Aircraft Kit) (Optional)
Hatha. camel, hanuman. Meduim. Footnotes: Carolyn Weatherson, Teacher Training Manual, (Guelph: Maha Pura Publishing, 2010), 113.
, 113.") yoga BUILDER Name: Hatha camel, hanuman Difficulty: Meduim 1 Powerful Pose tall in Mountain Pose, inhale and lift your arms over your head keeping your palms to face each other. Your arms, fully extended,
yoga BUILDER Name: Hatha camel, hanuman Difficulty: Meduim 1 Powerful Pose tall in Mountain Pose, inhale and lift your arms over your head keeping your palms to face each other. Your arms, fully extended,
Sprinting. Relevant Knowledge** Overall Level. Assessment Criteria. Learning Outcomes
 Sprinting 1. coordinate their limbs. 2. be familiar with the starter s order.. swing their arms in rhythm. 1. coordinate their limbs. 2. swing their arms in rhythm.. react accurately to signals.. master
Instructional Task Cards for creating Yoga Stories
 Instructional Task Cards for creating Yoga Stories Directions: Allow for as many days as necessary for students to explore and practice the different yoga cards Place students in groups Allow students
Hyung Standards: Sam-Il through Moon-Moo
 General Comments: Always pivot on the ball of the foot. When you pivot on your heel you immobilize your hip. Sam-Il Double middle block starts with both fists at shoulder level. High double forearm block
1. Your anchor: Easy sitting, deep exhales (Sukhasana)
") Airplane yoga: 18 exercises for healthy flying Don't enjoy flying as much as you should? You're tired at your destination? These 18 exercises will set you straight By CNN/Charlotte Dodson 1. Your anchor:
Airplane yoga: 18 exercises for healthy flying Don't enjoy flying as much as you should? You're tired at your destination? These 18 exercises will set you straight By CNN/Charlotte Dodson 1. Your anchor:
2019 MADONE ASSEMBLY MANUAL
 2019 MADONE ASSEMBLY MANUAL 2019 MADONE Rim brakes and Di2 drivetrain Rim brakes and mechanical drivetrain Disc brakes and Di2 drivetrain Disc brakes and mechanical drivetrain TABLE OF CONTENTS Common
S t r e t c h i n g E x e r c i s e s
 Stretches for side of neck: 1. Sit or stand with arms hanging loosely at sides 2. Turn head to one side, then the other 3. Hold for 5 seconds, each side 4. Repeat 1 to 3 times Stretches For the side of
Stand-Up Wheelchair User s Manual. the H E L I U M
 Stand-Up Wheelchair User s Manual the H E L I U M TABLE OF CONTENTS PART 1 : OPERATION DIAGRAMS... 2 INTRODUCTION... 7 PART 2 : OPERATING INSTRUCTIONS... 9 2.1 Positioning - Seated...9 2.1.1 Footplate/lower
Dao Form from Lung Hu Shaun Master Weng 12 Moves
 Dao Form from Lung Hu Shaun Master Weng 12 Moves The Principles of Qigong 1) Adjust your psychology 2) Adjust your movements 3) Adjust your breath WARMUP 1. Opening and closing the chest arms out; Opening
Duet. Roller Assembly System PARTS LIST. Duet headrest (1) Duet strap (1) Rubber feet (4) (Foam rollers not included) Contact Us
 Duet strap (1) Rubber feet (4) (Foam rollers not included) Contact Us") Duet Roller Assembly System PARTS LIST»» Duet headrest (1)»» Duet strap (1)»» Rubber feet (4) (Foam rollers not included) Contact Us 1-800-PILATES +1-916-388-2838 pilates.com info@pilates.com 400-405 11.01.17
Duet Roller Assembly System PARTS LIST»» Duet headrest (1)»» Duet strap (1)»» Rubber feet (4) (Foam rollers not included) Contact Us 1-800-PILATES +1-916-388-2838 pilates.com info@pilates.com 400-405 11.01.17
Arm Range of Motion Exercises for
 Arm Range of Motion Exercises for People with Hemiplegia Hemiplegia is paralysis of muscles on one side of the body. Keeping your range of motion when you have hemiplegia is very important. It will help
A short description of the rowing stroke
 AN EXTRACT FROM MY FORTHCOMING BOOK A short description of the rowing stroke DRIVE 1 As the rower reaches this position at the end of the recovery the oar is placed in the water by lifting the hands, feel
RJT. Pupil Task Cards: Throwing JUMP THROW RUN
 RJT s: Throwing RUN JUMP THROW s: Introduction Introduction to the s An important part of every child s cognitive development is to encourage them to explore new things and use self-guided learning to
1. General Safety Information. Silvio V2.2 Assembly Instructions Assembly. Adjust to the rider.
 Silvio V. Assembly Instructions support@cruzbike.com. General Safety Information WARNING to avoid serious injuries:. If you are unsure about fitting, testing and adjusting brakes or gearing on a bicycle,
10 th Kup White Belt. The Basics
 10 th Kup White Belt Starting Tae Kwon Do as a white belt often feels rather daunting, especially when there are so many students around you that appear to make all the moves seem effortless. Just remember
40 Allied Drive Dedham, MA (office)
") Standing forward flexion Stand facing a mirror with the hands rotated so that the thumbs face forward. Raise the arm upward keeping the elbow straight. Try to raise the arm by hinging at the shoulder as
Standing forward flexion Stand facing a mirror with the hands rotated so that the thumbs face forward. Raise the arm upward keeping the elbow straight. Try to raise the arm by hinging at the shoulder as
OVERVIEW FOR STUNTS FLYER BODY POSITIONS
 TCI MODULE 6 Stunts Level 1 Page 1 of 11 OVERVIEW FOR STUNTS FLYER BODY POSITIONS *** NOTE *** For instruction purposes, we will assume regular flyer positions in this manual. That is, it is assumed that
Yoga for Kids. Sanford Health
 Yoga for Kids What is yoga? Yoga is an activity that involves body and mind awareness, with a focus on posture and breathing. Yoga is designed to bring mental, physical, and emotional health and balance.
Dragon Boats NSW Inc.
 Dragon Boats NSW Inc. (Incorporated under the Associations Incorporation Act, 2009) (Registered Number: Y2086230) (ABN 31 936 733 882) Boat Handling and Storage Policy Thanks to Mavericks and FFB Dragon
Baseball Training Program
 Baseball Training Program Always consult your physician before beginning any exercise program. The information and advice published or made available through the Orthopaedic and Neurosurgery Specialists,
HIPS Al\ID Gala5ynWrlght '94
 HIPS Al\ID GLUTEALS @K Gala5ynWrlght '94 n1 1111 Lie on your back on a table with both legs hanging over the edge at the knees. Inhale, flex one hip, and raise your knee toward your chest; interlock your
How to Make a Proper Fist
 How to Make a Proper Fist Bend your index finger so that the first knuckle touches the second knuckle of your thumb, tucking in the fold of skin that is between your thumb and index finger. Then fold your
TAILS Turnout Gear Sizing Instructions. Get the right fit for comfort and protection beyond measure
 TAILS Turnout Gear Sizing Instructions Get the right fit for comfort and protection beyond measure 2 The Importance of ACCURATE MEASUREMENTS To maximize first responder safety, proper fit of turnout gear
Try on this 10 minute yoga sequence for size to balance your body and focus your mind.
 Need a little more energy to start your workday right? From: https://www.workandmoney.com/s/10-minute-yoga-routine Try on this 10 minute yoga sequence for size to balance your body and focus your mind.
3. Fit. 1 Owner s manual
 3. Fit NOTE: Correct fit is an essential element of bicycling safety, performance and comfort. Making the adjustments to your bicycle which result in correct fit for your body and riding conditions requires
Specifications Testing & Adjusting Disassembly & Assembly
 SB4191E00 Jul. 2005 Specifications Testing & Adjusting Supplement for Quad Lift Mast D20/25/30/32/33S-3 G/GC20/25/30/32P-3 G/GC20/25/30/32E-3 Important Safety Information Most accidents involving product
THE FOUNDATION OF THE SHOT
 CHAPTER_2 THE FOUNDATION OF THE SHOT Success in archery depends on consistency and consistency starts with a solid foundation. Fully understanding and being able to apply the fundamentals is the key to
Warm-up 1. Al 4 Bel y Lift 2. Calf Stretch
 Warm-up 1. All 4 Belly Lift 1. Position yourself on your hands and knees. 2. Maximally round your spine upward. 3. Tuck your hips under, feel abs engage. 4. Raise knees off floor until they are straight.
 www.myrower.com support@myrower.com ASSEMBLY Congratulations on purchasing the MyRower! Please see the following pages for instructions on assembling your MyRower. Bits bag contents: Rail Cross Bolt (90mm)
Final Assembly Instructions Bikes with Threaded Headsets
 Final Assembly Instructions Bikes with Threaded Headsets Thank you for buying your new bicycle from L.L.Bean. Read these instructions carefully before beginning the final assembly. Prior to shipping, our
CLASS CYCLE P8000 OWNER'S MANUAL JOHNSON HEALTH TECH. CO., LTD.
 CLASS CYCLE P8000 JOHNSON HEALTH TECH. CO., LTD. No.26, Ching Chuan Rd., Taya Hsiang, Taichung Hsien 428, Taiwan, R.O.C. TEL: +886-4-2566700 FAX: +886-4-2560087 E-mail: sales@johnsonfitness.com http://www.johnsonfitness.com
Trampoline & Enclosure Assembly Instructions
 Trampoline & Enclosure Assembly Instructions Safe user weight 330 lbs (150 kg) Version 718702 The information in this document is subject to change without notice. Copyright Springfree Trampoline Inc.
6. Boarding Ladder Fender (MFC)
") 6. Boarding Ladder Fender (MFC) Table of Contents: Boarding Ladder/Fender (MFC)... 1 MFC Components... 1 Installing the MFC... 1 Climbing into Boat Using MFC/Boarding Ladder... 2 Climbing into the Boat
6. Boarding Ladder Fender (MFC) Table of Contents: Boarding Ladder/Fender (MFC)... 1 MFC Components... 1 Installing the MFC... 1 Climbing into Boat Using MFC/Boarding Ladder... 2 Climbing into the Boat