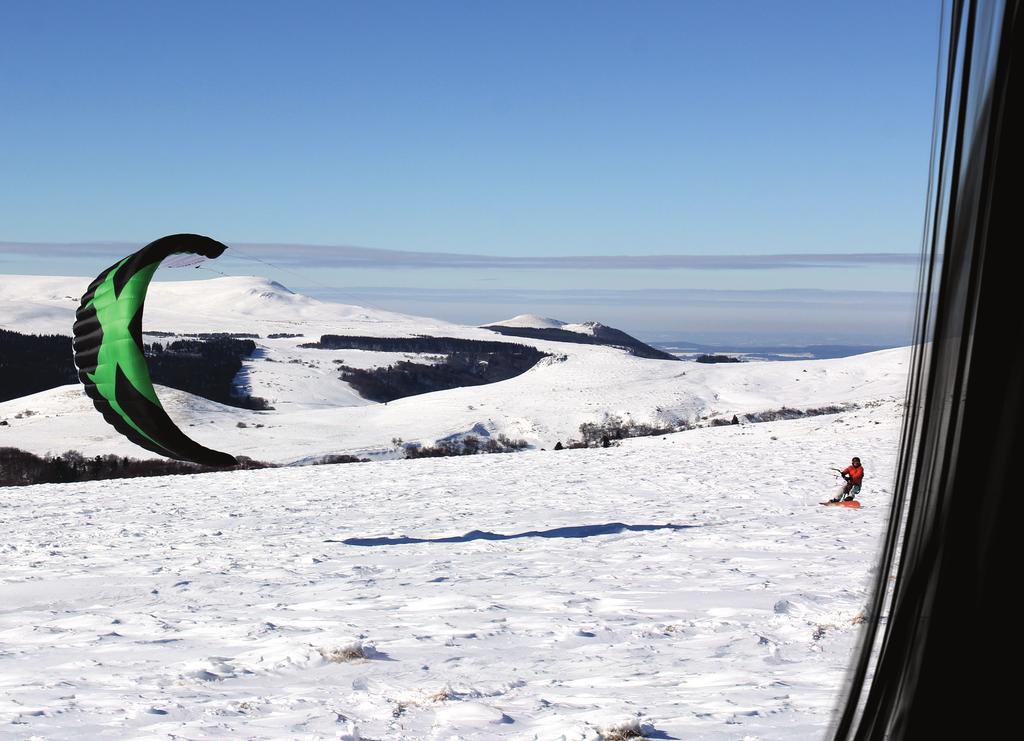
Before flying your kite it is very important to understand the wind window. The image shows where the kite will create the most power (straight
|
|
|
- Blaze Kelley
- 6 years ago
- Views:
Transcription

1
2

3 WELCOME Thank you for buying this Peter Lynn product and welcome to the world of Peter Lynn; a world of wind driven excitement, where people passionately pursue their dreams. Whether that s riding huge waves with your kiteboard on a beautiful island, freeriding at your local beach on a landboard or going for the buggy speed record on a deserted salt lake, Peter Lynn is here to help you pursue your dream. Are you ready to achieve your ultimate challenge? Peter Lynn has been taking challenges from the early days of the sport. Challenges to come with better products, invent new solutions, improve performance and build superior quality in every aspect of those products. We bring kites for all kite disciplines, for all terrains, for all conditions. All this comes forth from a passionate crew of kite sports enthusiasts and we invite you to join us. It s that passion that makes us fly. Before any attempt to use this product, please ensure you pay full and careful attention to the contents of this manual. While kiteboarding is an exciting and fun sport, it can be highly dangerous for yourself and others around you, especially if the necessary safety precautions are not or only partly taken. Aside from thoroughly reading this manual, we recommend proper instruction from a certified kiteboarding school. This manual has been designed to supplement kiteboarding lessons, not to replace them. So please make sure you learn to kiteboard in a safe way. Only then you will progress quickly and enjoy this beautiful sport to the max. Enjoy!
4 Safety instructions CAUTION: Kite powered sports can be very dangerous and physically demanding. The user of this product should understand that participating in kite powered sports may involve serious injury or death and agrees to observe the safety precautions listed below. Safe location and weather conditions: Stay away from power lines, roads, airfields, railway lines, trees and buildings. Never launch your kite in crowded areas. Do not fly your kite over bystanders. Make sure there is a clear downwind area at least three times the distance of your flying line length. Never fly kites or use this product in thunderstorms, lightning or gusty/stormy winds. Never fly a kite or use this product with wind forces so strong that you are unable to maintain full control of your kite and its power at all times. Do not fly a kite or use this product when wind conditions are likely to change dramatically. Stop kiting immediately when a storm or lightning is approaching. Make sure you are familiar with the location and local customs and laws before attempting any kind of kite sports. Safe traction kiting: A traction kite is not a toy and should not be flown by inexperienced persons and certainly not by children. Learn to fly kites by starting in light winds with a small sized kite. Never use any type of kite or this product for paragliding, parachuting or base jumping. Never use any type of kite or this product for jumping off high places like hills or cliffs Never use any type of kite or this product for any manlifting activity. Always use fully protective gear when kiteboarding, landboarding, snowkiting or buggy riding. Safe kiteboarding: Do not go kiteboarding in offshore winds. Be careful when kiting in onshore winds. We strongly recommend the use of helmet and life jacket/impact vest. A safety knife to cut flying lines in case of emergency is recommended. Do not kiteboard in spots already in use by swimmers or surfers. Beware of strong currents and sharks. Stay safely away from other watercrafts and shipping lanes. Never go further out to sea than you can safely swim back. Always make sure there is a capable person on shore that is keeping watch and is ready to provide (or call for) help in case of an emergency. We strongly recommend taking lessons from a certified kiteboarding school before using this kite on your own. Safety issues when using this product: This kite has been manufactured with high quality materials and has been manufactured using the latest and most advanced production methods. Prior to every use of this product, fully check your equipment for any signs of wear and tear. Replace parts immediately where needed. Prior to every use of this product, check if your safety releases are still working properly and you are aware how to use it. In case the safety release does not work as it should, do not use this product and replace parts where needed. Only use this product for kiteboarding, buggy riding, landboarding and snowkiting. Do not use this product when your body weight is over 130kg (285lbs). Only use this product when you are in a good state of health. Never use this product when under the influence of alcohol, drugs or medication. Do not alter, modify or change this product. Repairs should be done by a professional kite repair shop, sail repair shop, or by the Peter Lynn company.

 and where the kite will create the least power (edge of")
5 The wind window EDGE OF WIND WINDOW MINIMum Power POWER ZONE MaxiMum Power Before flying your kite it is very important to understand the wind window. The image shows where the kite will create the most power (straight downwind, also known as the power zone ) and where the kite will create the least power (edge of the window and zenith).


6 Terminology The following terms will give you a better understanding of the kite and the contents of this manual Top skin Air inlets Deflate zipper Lower skin Launch assistant Inflate zipper Pockets with sticks Trailing edge Leading edge Pocket Velcro seal Grab handle & VPC carrier Top/rear line adjustments Right top line attachment point Right rear line attachment point Tips Velcro outlets (for removing water/sand) VPC system VPC pulley VPC adjustment knots Left top line attachment point Left rear line attachment point Kite Left VPC system Right VPC system Left rear flying line attachment point Left top flying line attachment point Right top flying line attachment point Right rear flying line attachment point Upper segment of top flying line Point connecting top line segments Lower segment of top flying line Left rear flying line Right rear flying line Safety line Left leader line Right leader line Power adjuster Self-landing handle / Kite flag-out handle Free sliding stopper Control bar with colour coded EVA foam Centrix depower loop with primary quick release Safety leash with secondary quick release
7 Putting in the sticks Make sure all the inner connectors of the sticks are free of sand, snow or any other debris. Assemble the sticks. Slide the stick into the pocket. Make sure the stick slides in all the way, so the endcap sits in between the webbing at the top of the pocket. Close the Velcro flap at the bottom to secure the stick. Push the sticks out from the top, by grabbing the pocket in the middle and pushing the top down. Slide the stick out all the way and fold it down. Place the sticks in the pocket at the back of the backpack. Removing the sticks Open up the double Velcro seal at the bottom of the pocket. Tips REGARDING COMPACT STICKS Make sure the inner connectors of the sticks are free of sand, snow or any other debris before assembling the sticks. Regularly clean the compact sticks with tap water.
8 Starting off To start flying your kite you need to follow these six steps: Step 1. Finding the right location to launch your kite. Step 2. Placing the kite on the beach ready to pre-inflate. Step 3. Setting up your bar and lines. Step 4. Checking your safety systems. Step 5. Preparing for launch. Step 6. Launching the kite. Step 1. Finding the right location to launch your kite Find a spot to setup, away from airports, powerlines, trees and buildings. When launching, the area should be free of kiteflyers or other people. Also make sure there are no sharp objects on the ground, to prevent any damage to your kite. Step 2. Placing the kite on the beach ready to pre-inflate Roll the kite out and put in the sticks if not already done so. Place one tip on the ground with the lower skin upwards, and let the rest flap in the wind. Fold a small part of the tip over and place some sand on it. This part should be small, so as many cells as possible can inflate in the upwind tip. Open the inflate zipper on the upwind tip, and make sure it stands open so the air can flow in. Make sure both the deflate zipper and the other inflate zipper are closed. While the kite is being pre-inflated you can start to get your flying lines ready to be attached to the kite.


9 Step 3. Setting up your bar and lines Starting at the kite, unwind your flying lines while walking upwind backwards. Place your bar on the ground the correct way around. Make sure your leader lines and other parts of the bar are free of tangles or twists. Hold your lines between your fingers while walking back toward the kite, to sort out the flying lines. Make sure the lines are lying next to the kite, on the side of the trailing edge. To ensure that your lines are attached correctly, without twists or tangles, you can use the following method: First attach the rear line to the upwind tip. Now attach the top line to the upwind tip, taking it over the rear line you have just attached. Attaching the top lines to the kite VPC SYSTEM FLYING LINE Attach the rear line to the downwind tip. You are now ready to move on to the next step. Attaching the rear lines to the kite VPC SYSTEM FLYING LINE Take the other top line and attach it to the downwind tip, passing it over the kite. VPC SYSTEM FLYING LINE Make sure you attach your flying lines using a larkshead knot. Place a larkshead knot in the flying line connector, slide it over the knot on the end of the top line attachment and tighten the larkshead as shown. VPC SYSTEM FLYING LINE VPC SYSTEM FLYING LINE VPC SYSTEM FLYING LINE Connect the flying line connector to the rear line attachment and tighten the larkshead as shown.
10 Step 4. Checking your safety systems Before using this kite, please check the manual supplied with your bar on how to activate your safety systems and re-attach the release systems used. We recommend to test the safety system when using the kite for the first time so you are aware how the system works, how to activate it and how to re-attach it after activating. Never be afraid to use it because it can save your life! We recommend to check if your quick releases are in working order before every launch! The safety system works in two steps: Primary safety - If you need to lose the power of the kite without losing the kite itself the primary safety release can be used. The kite loses its power but is still connected to the rider by the safety leash. Secondary safety release - When the kite is still pulling after using your primary quick release, use the secondary release on the leash. Activating the primary quick release Re-connecting the primary quick release To activate your primary quick release, pull the red release cuff part down towards your spreader bar. Re-connect the primary safety release by placing the pin inside the Centrix center piece, flipping the pin over and sliding the release cuff over the pin.
11 Activating the secondary quick release Re-connecting the secondary quick release To activate your secondary quick release, move the red release cuff away from the large stainless steel ring. Re-connect the secondary safety release by placing the pin through the ring, folding the pin back up and sliding the red release cuff over the pin. Make sure the release cuff is sitting right against the ring after reconnecting. Warning! Tips regarding safety systems The secondary safety system does not function if the primary safety on the depower loop is not pulled first. The secondary safety should only be pulled in case the primary safety was somehow not sufficient to completely depower the kite. Pull this safety only if there is no other way, as it will completely disconnect you from your kite. A loose kite might result in dangerous situations for bystanders or other kite flyers and may also result in permanent loss of the kite. When your kite is on the water, always be very careful with flying lines which are not tensioned. Make sure they do not get tangled behind any part of your body, harness or board. After using your safety system, putting tension on any of the other lines can cause your kite to take off and start to pull. Check if your quick releases are in working order before every launch! Regularly rinse your bar and safety systems with tap water. When getting a bit overpowered, slowly bring back the kite straight above your head. Only try to use your safety system when things get out of hand. When your kite is on the water, always be very careful with flying lines which are not tensioned. Make sure they do not get tangled behind any part of your body, harness or board. After using your safety system, putting tension on any of the other lines can cause your kite to take off and start to pull.
12 Step 5. Preparing for launch Check that there are no sharp objects under or near the kite, as it may slide a little bit over the sand during launch. At the upwind tip, make sure the VPC lines as well as the flying lines are running freely from the tip. At the downwind tip, make sure the VPC lines as well as the flying lines are lying over the kite. Place both flying lines in the launch assistant, making sure the VPC lines and flying lines are as tight as possible between the stick and the Velcro tag. Check that your kite is ready for take off, your lines are free of tangles and not hooked behind anything and the area is clear of people or any other obstacles. Make sure the kite is fully pre-inflated. Failure to do so may result in the kite to collapse during take off. If the whole kite is full of air, close the inflate zipper on the upwind tip. Check again that the other inflate zipper and the deflate zipper are closed. Take your bar and make sure the safety leash is attached first. Always make sure to attach the safety leash before flying, so it can be used in case something goes wrong during the launch. Slightly pull in your power adjuster. 45 o Make sure you are standing at the correct position so your lines are at a 45 degree angle to the wind direction as shown. Be careful: as soon as there is tension on the flying line connected to the far tip the kite can take off any time! Always keep your lines slack if you are not yet ready to launch! Now you are ready to launch your kite.
13 Step 6. Launching the kite Self launch with Launch assistant When there is no help available, make sure the lines are held tight in the launch assistant. This ensures that the lines will not flip around the tip. Stand at 45 degrees to the wind direction and make sure your lines have very little tension. Grab your power adjuster and hold it up high while giving a series of short pulls. This will ensure the tip to flip up. Check again that the far top and rear line are not hooked behind the tip. If so, walk forward to prevent the launch. Self launch with little help If you have a helper around, this helper can hold up the downwind tip to ensure that the lines are running over the lower skin of the kite. As soon as there is tension on the lines, the helper can let go and the kite will launch. Ask the helper only to hold the tip up when you are completely ready to go, with your safety leash attached and your bar in your hands. If the helper holds the tip up at an earlier stage, the wind will blow against the tip pushing the air out of the tip area towards the center of the kite, making launching more difficult. 45 o Keep your rear lines tensioned and take a few steps back. The kite will slide back and slowly get into shape. Once the kite is off the ground keep the rear lines slightly tensioned until it has completely filled up with air.
14 Launching with a helper Launching with a helper is better than a self launch when the surface is rough (like rocks or dirty beaches) or when you want to launch from a different location than where the kite was pre-inflated, for example if you wish to stand in the water before launching. With the kite inflated as much as possible, the helper grabs both tips firmly, holding the sticks close together. 45 o Make sure your lines are at 45 degrees, fully tensioned. You can check that your lines are not twisted or tangled. When you are ready to launch, signal to your helper. The helper holds the tips parallel to the ground, with the leading edge towards the edge of the wind. After your signal, the helper now first has to release the tip on top. Keep your rear lines slightly tensioned. The kite will take its shape and the tip that was just released wants to fly off. At this moment the helper lets go of the other tip. Keep your rear lines slightly tensioned until the kite has completely filled up with air. Tips for launching your kite Make sure you are not launching in an area with obstacles like poles or cars, make sure the area is free of people or other kiteflyers. Do not fly your kite near powerlines, airports, highways, or in thunderstorms. Make sure your equipment is in good working order. Check for wear and tear and make sure your bar and safety system are in good working order before you launch. Make sure the ground is free of sharp objects to prevent the fabric from getting damaged. Pre-inflate the kite as much as possible. The more you pre-inflate the easier the launch. When launching, keep the rear lines tensioned until the kite is completely filled up with air. Do not launch while hooked into a harness. When in doubt of the wind strength, try a smaller kite first. Check your flying lines properly. Before attempting your launch, make sure they are free of twists and tangles. Also check if they are not hooked behind any part of your bar or spreader bar before you launch.
15 Landing Landing your kite is easiest with a helper, but also can be done without help from others. Landing with a helper Fly your kite all the way to the edge of the wind window, and slowly steer it down to the ground. A helper can then grab the pocket with stick closest to the ground. Run forward to release the tension on your lines and the kite will flap in the wind. The helper now lays the kite on the ground and secures the tip with some sand. Open the deflate zipper and fold the kite in half, placing both tips onto each other secured with some sand. Self-landing Make sure you are not landing your kite in an area with poles or other sharp objects on the ground. Fly your kite to the edge of the wind window. Unhook your depower loop when the leash is still attached to you or pull your safety release if necessary, and let go of the bar. The kite will lose its shape and fall on the ground. Wait until the kite has moved directly downwind of you. If possible, secure your leash to any heavy object around you, and walk towards your kite. Place some sand on the upwind tip, fold the kite in two and open the deflate zipper. Pull the flying line with the safety leash back through the rings on the power adjuster, so the leash gets back to its original position, before winding up your lines. Packing up your kite When leaving your kite on the beach, always make sure your kite lies folded in half. When leaving your kite lying out flat, the fabric will weaken in the downwind tip area due to the constant flapping and the VPC lines and/or flying lines might get tangled. When pausing for a longer period of time, we recommend you to roll up your kite, as UV rays damage the fabric. If you wish to store your kite without sticks, pull out the sticks. Roll up the complete kite from tips to the center. Place the kite and sticks in the bag. If you wish to store your kite with the sticks in, just roll up your kite from tips to center. Undo the zipper at the bottom of the bag and pull out the sleeve from the main pocket of the bag. Place your kite in the sleeve and reattach the clips on the front of the bag.
16 Steering and powering The power of your kite can easily be controlled with the bar. When the depower loop is hooked in, the bar can slide over the depower line, which changes the angle of attack causing the kite to produce more or less power. When pushing the bar away, the power of the kite will be reduced. When pulling in the bar, the kite will produce more power. When pulling in the bar while steering, the kite will make tighter turns. The power adjuster can be used to change the overall power of the kite. To reduce the overall power of the kite, pull in the line coming out of the cleat to the desired position. To increase the overall power of the kite, pull the line slightly towards you and move it away from the cleat. Now let the line out and let it lock back into the cleat at the desired position. For more information, more instructions and extra tips please refer to the manual supplied with your bar. We strongly recommend to use a Peter Lynn bar designed to be used with Twinskin kites.
17 Adjusting the VPC (Variable Power Control) system The VPC system gives you a better control of the kite and depower range while riding. The VPC system has four settings to set the kite s flying behaviour to your personal liking. Move the larkshead along the VPC lines and place it in between the knots, to make the VPC more or less active. Less active VPC - Moving the larkshead closer towards the trailing edge More active VPC - Moving the larkshead closer towards the leading edge More direct depower, faster power buildup when sheeting in or out More power More bar pressure Less direct depower, smoother power buildup when sheeting in or out More depower Less bar pressure Less stalling
18 Kite adjusters Inside the kite you will find adjusters which allow you to set the kite s flying behaviour to your personal liking. Flight adjuster Steering adjusters The flight adjuster can be found in the center of the kite, on the webbing running between the two rear line attachments. The flight adjuster changes the allround feel of the kite. Tightening the adjuster will give the kite slightly more power and less depower overall. Loosening the adjuster will make the kite less grunty. To adjust the kite s steering behaviour, use the steering adjusters, which can be reached by opening the inflate zipper. For a tighter turn, more bar pressure and overall more power, pull in the adjusters. For a better upwind performance and overall more depower, let out the adjusters. Flight adjuster loose Flight adjuster tight Steering adjusters loose Steering adjusters tight More depower Less stalling Less depower More power Better upwind performance More depower More power Tighter turn More bar pressure
19 Top/rear line adjustments You may find your lines not set right for your personal way of flying your kite. These are some guidelines that might help you set your lines correctly: Rear lines too loose Rear lines too tight Stalling On the rare occasion that your kite stalls, grab the power adjuster and jerk the top lines until the kite gets moving again. Inverting On a very rare occasion the kite may invert, so the back skin is facing the flyer. The kite will fly inverted. Land the kite nose down, allow it to roll over and then relaunch the kite. If the kite steers very slow, with very little response on your bar but flies fast, your top lines are too short / rear lines are too loose. If the kite steers very direct but does not accelerate in flight, leaving you with minimum pull, your top lines are too long / rear lines are too tight. To make your top lines longer use the adjustment knot furthest away from the kite. To shorten the top lines use the adjustment knot closest to the kite.
20 Tip on Tip relaunch When your kite lies on the water tip on tip, relaunch as follows: The kite lies on the water tip on tip. Pull the rear line of the bottom tip. The kite will open up......regaining its shape. Now just steer the kite off the water....so the kite rolls over onto its side. Now you can follow the tip on tip relaunch to finish off the procedure. Kite on its leading edge When your kite lies leading edge down, relaunch as follows: The kite lands with its leading edge on the water. Often the kite flies up with the two tips together. If this happens relaunch is simple: grab the power adjuster and jerk on both top lines. The tips will come loose and the kite will fly off. Pull in one rear line... After a water relaunch fly the kite up to the zenith. Shaking your bar a few times helps for the water to fall off the kite faster. On a rare occasion a little bit of water may have gotten into the kite. Keep the kite above your head till the water has dribbled out through the tips. Then continue surfing.
21 Removing sand and water from your kite By removing any sand from your kite, wear is reduced but also the kite s performance is increased. When flying a kite with a large amount of sand in it, the added weight will reduce overall flying speed and upwind performance. Removing sand & water from the tip area Removing sand & water from the center When there is sand or water stuck in the tip area, you can remove it by opening the small Velcro outlets on the tip. When there is sand or water in the center of the kite, you can get it out through the deflate zipper. Hold both tips and shake the kite up and down whilst the deflate zipper is open. The sand or water will come out of the kite via the deflate zipper.
22 Care and maintenance Peter Lynn products are designed to be strong and durable. The extreme nature of the kite sport puts a high strain on the equipment involved. By taking good care of your equipment, you can minimize the wear on your equipment. Kite care: Inspect your equipment before launch. Check for tears, abrasions, undone stitching, and all other forms of damage. Regularly remove sand or other dirt from your kite, to improve flight perfor-mance ad reduce wear. Regularly check if your zippers are still intact. Use silicon spray to clean them in case of salt residue on the zipper. Regularly check your VPC system for wear and tear. Make sure the pulleys are still in working order by spinning the wheels bij hand. Regularly check if the lines are still intact and that loops are free of wear. Also check if the VPC system is still connected to the webbing loops correctly as follows: Do not rig on rough terrain. Stay far away from sharp items that could damage your kite, such as seashells, trees, washed up wood or fences. Bar care: Make sure you regularly check your bar for wear and tear. Replace parts when needed. Make sure your flying lines are free of knots. Before launching, always check that your quick releases are in working order and free of sand or other debris. When reaching the water, before starting your kiteboarding session, splash some water on your bar to rinse off sand that has stuck to it. After every session, rinse your bar with tap water to remove the salt from the bar. If there are problems with your kite or your bar, please contact your Peter Lynn dealer. Secure your kite using soft items like sand or sand bags. Do not use items with sharp edges like rocks. Do not unnecessarily leave a kite unused for a longer period of time to prevent UV damage. Fold the kite in half and place some weight on both tips even when your kite is not used for a short period of time. Always make sure your kite is dry before packing and free of sand or sharp items. Regularly rinse your kite when used in salt water. When storing for a long time, it is advised to leave part of the bag open, to allow fresh air to get in the bag, and any remaining traces of moist to dry up.
23 Warranty Peter Lynn warrants this product, when it is purchased from an authorized Peter Lynn dealer by a retail customer, to be free of major defects in material or workmanship to the original purchaser, for a period of six (6) months from the date of purchase by the original retail customer. This warranty is subject to the following limitations: The warranty is solely for the benefit of the original retail purchaser and may not be assigned. For retail customer warranty claims, proof of purchase from an authorized Peter Lynn dealer is required. If the date of purchase can not be established, Peter Lynn will make a determination based on the last production year and/or the condition of the particular product claimed. The warranty on this product is valid only when it is solely used for designated purposes and does not apply to any product used for rental and/or teaching purposes. Peter Lynn will make the final warranty determination, which may require inspection and/or photos of the equipment. Photos must clearly show the defect(s). If necessary, this information must be sent to the Peter Lynn dealer where the product was originally purchased, postage prepaid. Alternatively you may contact the Peter Lynn distributor in (or nearest to) your country. If a product is deemed to be defective by Peter Lynn, the warranty covers the repair or replacement of the defective product only. Peter Lynn will not be responsible for any costs, losses, or damages incurred as a result of loss of use of this product. This warranty does not cover damage caused by misuse, abuse, neglect or normal wear and tear including, but not limited to, damage due to excessive sun exposure, use in combination with other than Peter Lynn control gear, damage caused by improper handling and storage, damage caused by use in waves or shore break, and damage caused by anything other than defects in material and workmanship. The warranty is voided if any unauthorized repair, change or modification has been made to any part of the equipment. The warranty for any repaired or replaced equipment takes effect from the date of the original purchase only. The original purchase receipt must accompany all warranty claims. The name of the Peter Lynn dealer and the date of purchase must be clear and legible. There are no warranties which extend beyond the warranty specified herein. Warranty Claims Warranty claims must be processed through an authorized Peter Lynn dealer and be issued a return authorization prior to shipping the product concerned. For claims processing please contact the Peter Lynn dealer the product was purchased from or call - or write to - the national Peter Lynn distributor. If there is no Peter Lynn distributor in your country, please find our contact details on our website DISCLAIMER RELEASE OF LIABILITY Peter Lynn / Vliegerop bv. - Release of Liability Caution Before making any attempt to set up or use this product, you agree to have read and fully understood the entire Peter Lynn Twinskin user manual; including, but not limited to, all instructions and warnings it contains. You also agree to make sure that any other user of this Peter Lynn product, prior to using it, will also read and fully understand this Peter Lynn Twinskin user manual; including, but not limited to, all instructions and warnings it contains. Assumption and acceptance of risk Kite powered sports can be very dangerous and physically demanding. While powerkiting in its many forms is an exciting and fun sport, it can be highly dangerous for yourself and others around you, especially if the necessary safety precautions are not or only partly taken. The user of this Peter Lynn product should understand that participating in kite powered sports can result in serious personal injury and even death to the user as well as to third parties. Before setting up and using this Peter Lynn product you agree to assume and accept any risk of injury, whether known or unknown, to both yourself and any third parties from using this Peter Lynn product. To reduce these risks, we strongly recommend you to stick to the safety precautions listed in this Peter Lynn user manual. Disclaimer and Release of Liability Concerning the purchase of this Peter Lynn product by you, you hereby agree, to the greatest extent allowed by law, to waive any claims you have or may have in the future against Peter Lynn and all related entities resulting from using this Peter Lynn product and/or any of its components. You will also release Peter Lynn and all related entities from any liability for special, indirect, incidental, consequential or exemplary damages, whether in contract, tort, negligence, strict liability or otherwise including, but not limited to, loss of property other than this Peter Lynn product, loss of use of this product, or other property or other economic losses. Peter Lynn shall not be liable for contribution or indemnification, whatever the cause. All terms and conditions contained herein shall, in the event of your death or incapacity, apply and be binding upon your heirs, next of kin and any other representatives including, but not limited to, administrators and executors. The foregoing provisions regarding liability and warranty are exclusive and in lieu of all other liability- and warranty statements, whether written, oral or implied.

24 scan QR code for more info Join us on Facebook Facebook.com/peterlynncom Realtime updates Twitter.com/peterlynncom The latest videos Youtube.com/peterlynncom
SAFETY INSTRUCTIONS CAUTION:
 WELCOME Thank you for buying this Peter Lynn product, and welcome to the World of Peter Lynn, a world of wind driven excitement, where people passionately pursue their dreams. Whether that s freeriding
Contents. introduction, contents. terminology, putting in and removing sticks. pre-inflation, attaching lines
 Congratulations on purchasing your Peter Lynn Kite! Using Twin Skin technology this kite sets new standards in jumping, upwind performance and depower. This manual contains information on how to set up
Before flying your kite it is very important to understand the wind window. The image shows where the kite will create the most power (straight
 WELCOME Thank you for buying this Peter Lynn product, and welcome to the World of Peter Lynn, a world of wind driven excitement, where people passionately pursue their dreams whether that s freeriding
WELCOME SAFETY INSTRUCTIONS
 WELCOME Peter Lynn; a world of wind driven excitement, where people passionately pursue their dreams whether that s freeriding at a local beach or going for the speed record in a deserted salt lake. Peter
WELCOME SAFETY INSTRUCTIONS
 WELCOME Lynn, a world of wind driven excitement, where people passionately pursue their dreams whether that s freeriding at a local beach or enjoying the virgin snow on a back country adventure. Peter
Before flying your kite it is very important to understand the wind window. The image shows where the kite will create the most power (straight
 WELCOME Thank you for buying this Peter Lynn product, and welcome to the World of Peter Lynn; a world of wind driven excitement, where people passionately pursue their dreams whether that s freeriding
Attaching the flying lines
 1 1 2 3 3 4 5 6 7 7 9 8 8 10 12 13 11 14 15 15 16 18 17 16 19 20 21 22 23 1. Rear line attachment loops 2. Top line attachment knots 3. Rear leader lines (top part) 4. djustment to set difference between
Congratulations on purchasing a Peter Lynn Arc, the new form of traction kite technology for kitesurfing and kitesailing, but also very useful for
 Congratulations on purchasing a Peter Lynn Arc, the new form of traction kite technology for kitesurfing and kitesailing, but also very useful for buggying and other power kiting activities. Their basic
MOOWII MANUAL. Using a kite is dangerous and can cause severe injuries. Before use, carefully read this manual.
 MOOWII MANUAL Using a kite is dangerous and can cause severe injuries. Before use, carefully read this manual. Release of liability By assembling or using this CrazyFly kiteboarding product (further named
Slash2011. CAUTION! Using a kite is dangerous and can cause severe injuries. Before use, carefully read this manual. USER MANUAL
 WE ADVICE YOU TO REGISTER YOUR KITE ON: www.crazyflykites.com/register Slash2011 USER MANUAL CAUTION! Using a kite is dangerous and can cause severe injuries. Before use, carefully read this manual. yflykites.com
2. Release of Liability, Claim Waiver and Assumption of Risk Agreement
 2004 Type Wave System Manual 1. Type Wave Concept 2. Release of Liability, Claim Waiver and Assumption of Risk Agreement 3. Wave Bar Features 4. Connecting the Bar to the Kite Fool Proof Connection System
USER GUIDE. approved ntents
 approved ntents 07 USER GUIDE .2 All content of this document, including text, images and graphics, is the exclusive property of STARKITES and is protected by international copyright and other intellectual
Semi Freddo Snow kite [Ram Air]
![Semi Freddo Snow kite [Ram Air]](/thumbs/89/97639710.jpg "Semi Freddo Snow kite [Ram Air]") User manual Semi Freddo Snow kite [Ram Air] This manual gives you detailed instructions on how to use your new Semi Freddo kite. We recommend you take your time to read the instructions. In case you have
User manual Semi Freddo Snow kite [Ram Air] This manual gives you detailed instructions on how to use your new Semi Freddo kite. We recommend you take your time to read the instructions. In case you have
Inflatable Stand Up Paddle Board Manual
 Inflatable Stand Up Paddle Board Manual V-Max AIR 12 6 Voyager AIR 11 6 Koa AIR 10 2 and 10 8 Heavy duty built in carrying handles Steel D Ring Built in Cargo Straps EVA Deck Pad High Pressure Air Valve
RELEASE OF LIABILITY AND ASSUMPTION OF RISK
 VERSION 3 User Manual Thank you for choosing STARKITES, please read this entire manual carefully before using your STAR KITE. Your ExA or SBow kite sets the standard in safety, performance and usability
ACE 2018 COMPLETE USER MANUAL
 ACE 2018 COMPLETE USER MANUAL TIPS & TRICKS WATCH OUT FOR USEFUL TIPS & TRICKS REGARDING OUR PRODUCTS UNDER WWW.NORTHKITEBOARDING.COM IN THE FOLLOWING CATEGORY: HELP. 1. RELEASE OF LIABILITY RELEASE OF
isup MANUAL THANK YOU FOR PURCHASING A KAHUNA isup, WE HOPE YOU HAVE MANY YEARS OF PADDLING ENJOYMENT.
 i isup MANUAL THANK YOU FOR PURCHASING A KAHUNA isup, WE HOPE YOU HAVE MANY YEARS OF PADDLING ENJOYMENT. THIS MANUAL IS A GENERAL GUIDELINE FOR SET-UP, CARE AND PROPER USE. PLEASE REFER TO OUR WEBSITE
User s Guide Inflatable Stand Up Paddle Board
 User s Guide Inflatable Stand Up Paddle Board Release of Liability, Claim Waiver and Assumption of Risk Agreement Release and Waiver of Claims Agreement In consideration of your use of this product, you
RECOMMENDED SUP PRACTICE:
 DO NOT USE THIS PRODUCT UNLESS YOU HAVE READ AND UNDERSTAND THESE WARNINGS AND INSTRUCTIONS WHICH ARE FOR YOUR SAFETY AND PROTECTION. THIS INFORMATION MAY BE SUBJECT TO CHANGE AT ANY TIME. PLEASE VISIT
I.!WARNING English Deutsch Français Italiano Español DO NOT USE THIS PRODUCT UNLESS YOU HAVE READ AND UNDERSTAND THESE WARNINGS AND INSTRUCTIONS WHICH
 USER MANUAL BEDIENUNGSANLEITUNGANLEITUNG GUIDE DE L UTILISATEUR GUIDA DELL UTENTE MANUAL DEL USUARIO I.!WARNING English Deutsch Français Italiano Español DO NOT USE THIS PRODUCT UNLESS YOU HAVE READ AND
1. Release of Liability 2 2. Safety and Precautions 3
 EVO 10 Content 1. Release of Liability 2 2. Safety and Precautions 3 2.1. Kiteboarding Safety 3 2.2. Dangers from the Kite 3 2.3. Dangers from Kite Lines 4 2.4. Dangers from the Kiteboard 4 2.5. Dangers
Using a kite involves risks and can cause severe injuries. Before use, carefully read this manual.
 Using a kite involves risks and can cause severe injuries. Before use, carefully read this manual. SUMMARY FOCUS P 2 SAFETY P 3 WIND RANGE P 6 SETTING UP YOUR KITE P 7 SETTING UP YOUR BAR P 8 LAUNCHING
Using a kite involves risks and can cause severe injuries. Before use, carefully read this manual.
 Using a kite involves risks and can cause severe injuries. Before use, carefully read this manual. FOCUS Here is a glossary of your equipment for you to get acquainted with most technical terms used in
Inflatable Stand-Up Paddle Boards SUPS OWNER S MANUAL
 Inflatable Stand-Up Paddle Boards SUPS OWNER S MANUAL WARNING: Read carefully and understand all ASSEMBLY AND OPERATION INSTRUCTIONS before operating. Failure to follow the safety rules and other basic
Watch out for useful tips & tricks regarding our products under in the following category:
 VEGAS 11 Tips & Tricks Watch out for useful tips & tricks regarding our products under www.northkites.com in the following category: TV, Pics & Goodies Movies. 1 Tips & Tricks Content 1. Release of Liability
SX Trainer Instruction Manual WARNING
 SX Trainer Instruction Manual WARNING DO NOT USE THIS PRODUCT UNLESS YOU HAVE READ AND UNDERSTAND THESE WARNINGS, CAUTIONS, AND INSTRUCTIONS WHICH ARE FOR YOUR SECURITY AND PROTECTION. THIS INFORMATION
thanks Chrono Manual pour télécharger Ce manuel Dans votre Langue, allez sur Le page Du produit et ChOisissez votre Kite >>
 Chrono Manual thanks Thank you for purchasing this Ozone kite. Our mission is to build kites with cutting edge performance, that are easy, fun and safe to use, no matter what your level. At Ozone we are
thanks WaterkiteManual
 C4 v6 Manual thanks Thank you for purchasing this Ozone kite. Our mission is to build kites with cutting edge performance that are easy, fun and safe to use, no matter what your level. 2 At Ozone we are
Navaro Buggy Instruction Manual INSTRUCTION BOOKLET
 INSTRUCTION BOOKLET Safety Thank you for purchasing your new Flexifoil buggy. If operated and looked after properly, your new buggy will serve you well. Before assembling and using this buggy, you must
We recommend as protective equipment: - helmet - life jacket - wet suit - gloves - sunglasses - sun lotion - safety knife, if not on the trapeze
 !WARNING! Please read the information of this booklet first and then only use the product if you agree on all the terms and conditions! We draw your attention to changes at any time without notice. If
airush Technical Advantage User s Manual
 airush Technical Advantage User s Manual Dear Pilot, We would like to express our gratitude to you for purchasing an Airush kite. We are sure you will have hours of action packed fun each time you fly.
1. Release of liability 2 2. safety and PRecautions Rigging the Kite attaching the lines 11
 content 1. Release of liability 2 2. safety and PRecautions 3 2.1. KITEBOARDINg SAFETY 3 2.2. DANgERS FROM ThE KITE 3 2.3. DANgERS FROM KITE LINES 4 2.4. DANgERS FROM ThE KITEBOARD 4 2.5. DANgERS TO UNINVOLVED
Content. 1. Release of liability 2 2. safety and PReCautions Rigging the Kite attaching the lines 11
 EVO 11 Content 1. Release of liability 2 2. safety and PReCautions 3 2.1. Kiteboarding Safety 3 2.2. dangers from the Kite 3 2.3. dangers from Kite LineS 4 2.4. dangers from the Kiteboard 4 2.5. dangers
CROSSOVER KING RALLY
 CROSSOVER KING. Reinvented for 2013, the new Rally is your go-to kite for premium surf and freeride performance. This 4-line crossover kite has been completely reengineered and features new Connect Forward
// EXTREMELY DURABLE // FUN IN THE LIGHTEST BREEZE // CLEAN 3-LINE SAFETY
 ... simply fun :) // EXTREMELY DURABLE // FUN IN THE LIGHTEST BREEZE // CLEAN 3-LINE SAFETY READY-TO-FLY PACKAGE CONSISTS OF: 1x PEAK Trainer Kite Ready to Fly 1x PEAK 3-line wrist safety 1x PEAK Trainer
born to be wild. designed by christoph fokken MONO BY SPIDERKITES MANUAL
 MONO BY SPIDERKITES MANUAL This single skin kite is a new type of land power kite. The Mono has been designed to generate traction power, so it can be used as a leisure foil, trainer kite or as sports
Watch out for useful tips & tricks regarding our products under in the following category: : help.
 REBEL 14 Tips & Tricks Watch out for useful tips & tricks regarding our products under www.northkites.com in the following category: : help. 1 Tips & Tricks Content 1. Release of Liability 3 2. Safety
Owner's Manual Product Line
 Owner's Manual 2017 Product Line Table of contents 1. Safety Information 2. Quick release procedure I. Installation II. Adjustment and operation III. Inspection of proper installation 3. Registering your
Tips & Tricks. Watch out for useful tips & tricks regarding our products under in the following category:
 FUSE 10 Tips & Tricks Watch out for useful tips & tricks regarding our products under www.northkites.com in the following category: TV, Pics & Goodies Movies. 1 Tips & Tricks Content 1. Release of Liability
EVO 2015 USER MANUAL
 EVO 2015 USER MANUAL Tips & Tricks Watch out for useful tips & tricks regarding our products under www.northkites.com in the following category: Help. 1 Tips & Tricks Content 1. Release of Liability 3
Further info about warranty please visit: USER MANUAL A Quickstart guide for your new Eleveight gear
 Further info about warranty please visit: www.eleveightkites.com/usermanual USER MANUAL A Quickstart guide for your new Eleveight gear CONTENT 04 / KITE STRUCTURE 05 / KITE INFLATION 06 / INFLATION AND
USER MANUAL 2013 BLADEKITEBOARDING
 BLADEKITEBOARDING USER MANUAL 2013 Table of Contents 03... Release of Liability 04... Safety First 07... Bar Overview 08... Kite Overview 09... Wind Range 10... Control System and Lines 16... Mad2 (Multi-valve
OWNERS MANUAL. Model Shown with optional Primary Mooring Cleats. Portable Mooring System SAFETY OPERATION MAINTENANCE PARTS
 OWNERS MANUAL Model 2400 Shown with optional Primary Mooring Cleats. Portable Mooring System SAFETY OPERATION MAINTENANCE PARTS CAUTION: Before using your new Pier Tender, read rules for Safety, Operation,
REBEL 2019 User Manual
 REBEL 2019 User Manual TIPS & TRICKS WATCH OUT FOR USEFUL TIPS & TRICKS REGARDING OUR PRODUCTS UNDER WWW.DUOTONESPORTS.COM IN THE FOLLOWING CATEGORY: HELP. 2 TIPS & TRICKS CONTENT 1. RELEASE OF LIABILITY
JUICE 2017 COMPLETE USER MANUAL
 JUICE 2017 COMPLETE USER MANUAL TIPS & TRICKS WATCH OUT FOR USEFUL TIPS & TRICKS REGARDING OUR PRODUCTS UNDER WWW.NORTHKITEBOARDING.COM IN THE FOLLOWING CATEGORY: HELP. 1 TIPS & TRICKS CONTENT 1. RELEASE
RADROVER REAR RACK INSTALLATION MANUAL
 RADROVER REAR RACK INSTALLATION MANUAL WWW.RADPOWERBIKES.COM We are here to help! Please contact us at SUPPORT@RADPOWERBIKES.COM or 1-800-939-0310 if you have questions. REV022216 Welcome Thanks you for
2018 ACCESSORY ATTACHMENTS OWNER S MANUAL
 2018 ACCESSORY ATTACHMENTS OWNER S MANUAL WWW.RADPOWERBIKES.COM We are here to help! Please contact us at SUPPORT@RADPOWERBIKES.COM or 1-800-939-0310 if you have questions. REV031418 Welcome Thanks you
Thank You! IMPORTANT INFORMATION. How to locate the HIN
 Owner s Manual Thank You! Thank you for purchasing a Pakayak kayak. We think you re going to love it. Although your boat was built so it does not need much attention, with a little care and proper maintenance
hannes burner team Rider:
 r e o v 4 - W a v e hannes burner R i d i n g team Rider: pa u l i n o p e r e i r a F r e e d o m Wave Riding Freedom The Reo is an iconic model in the kite surf world it s renowned for delivering outstanding
The only thing. is everything
 p u r e I NS P I RED B Y NAT U RE / / D RI V EN B Y T HE E LEMEN TS p e r f o r m a n c e The only thing that s changed is everything Race performance at it s best yet the all-new R1 V2. Taking a completely
Valve Cap. Button. Valve Base
 - Riber Inflatable Stand Up Paddle Board Users Guide Thank you for choosing a Riber Product Ltd. Stand Up Paddle board. This guide is to help you get the most out of your board and ensure you enjoy long
T3200 TransPlate Harness
 T3200 TransPlate Harness www.diverite.com Product Description The TransPlate Harness is designed specifically for use with hard back-plates, such as stainless steel or aluminum. The TransPlate Harness
REBEL 2016 USER MANUAL
 REBEL 2016 USER MANUAL Tips & Tricks Watch out for useful tips & tricks regarding our products under www.northkiteboarding.com in the following category: Help. 1 Tips & Tricks Content 1. Release of Liability
ULTIMATE PERFORMANCE.
 ULTIMATE PERFORMANCE. In its fourth generation, the 2014 Rally is the most versatile kite ever produced. The Rally delivers incredible wind range along with proven high-end performance for freeriding and
Owner s Manual & Safety Instructions
 Owner s Manual & Safety Instructions Save Save This This Manual Manual Keep manual for the safety warnings and precautions, assembly, Keep manual for the safety warnings and precautions, assembly, operating,
ultimate All-round Performance
 ultimate All-round Performance During the development of the R1 V2 we experienced the overall enhancement in performance achieved from a lighter weight kite. The Chrono V2 UltraLight combines our high
USER MANUAL ENGLISH 2018 CONTROL SYSTEM
 USER MANUAL ENGLISH 2018 CONTROL SYSTEM DO NOT USE THIS PRODUCT UNLESS YOU HAVE READ AND UNDERSTAND THESE WARNINGS, CAUTIONS, AND INSTRUCTIONS WHICH ARE FOR YOUR SECURITY AND PROTECTION. THIS INFORMATION
Accessible Performance is True Performance
 Accessible Performance is True Performance I N S P I R E D B Y N AT U RE / / D RI V EN B Y T HE EL EMENT S Our understanding of True Performance is not just raw power or speed - it s the combination of
airplaine kite Model assembly & Operating Instructions Important: If damage is caused due to a crash; your warranty is void.
 airplaine kite Model 95081 assembly & Operating Instructions Important: If damage is caused due to a crash; your warranty is void. Visit our website at: http://www.harborfreight.com Read this material
BEST KITEBOARDING USERS MANUAL WARNING
 BEST KITEBOARDING USERS MANUAL Thank you for purchasing a Best bar. Please read this manual carefully and in its entirety before using your new Best bar. WARNING Kiteboarding/kitesurfing is an extreme
BEST KITEBOARDING USER MANUAL
 BEST KITEBOARDING USER MANUAL Thank you for purchasing a Best kite. Please read this manual carefully and in its entirety before using your new Best kite. WARNING Kiteboarding/kitesurfing/snowkiting are
...continues to next page
 DO NOT USE THIS PRODUCT UNLESS YOU HAVE READ AND UNDERSTAND THESE WARNINGS, CAUTIONS, AND INSTRUCTIONS WHICH ARE FOR YOUR SECURITY AND PROTECTION. THIS INFORMATION MAY BE SUBJECT TO CHANGE AT ANY TIME.
CO2 BLACKTIP ACCESS KITE MANUAL
 2003 CO2 BLACKTIP ACCESS CO2 BLACKTIP ACCESS KITE MANUAL RELEASE OF LIABILITY AND ASSUMPTION OF RISK DO NOT USE THIS PRODUCT UNLESS YOU AGREE WITH THE FOLLOWING TERMS AND CONDITIONS IMPORTANT WARNING!
CONTRA NITRO CO2 ELEMENT
 2005 KITE MANUAL CONTRA NITRO CO2 ELEMENT RELEASE OF LIABILITY AND ASSUMPTION OF RISK DO NOT USE THIS PRODUCT UNLESS YOU AGREE WITH THE FOLLOWING TERMS AND CONDITIONS IMPORTANT WARNING! THIS WARNING IS
...continues to next page
 DO NOT USE THIS PRODUCT UNLESS YOU HAVE READ AND UNDERSTAND THESE WARNINGS, CAUTIONS, AND INSTRUCTIONS WHICH ARE FOR YOUR SECURITY AND PROTECTION. THIS INFORMATION MAY BE SUBJECT TO CHANGE AT ANY TIME.
VANDAL SUP OWNER S MANUAL
 IQ SURF IQ FREE IQ TOURING IQ RACE VANDAL SUP OWNER S MANUAL 1 Dear customer, Congratulations on your purchase of the board. We are proud to bring you a quality product at an affordable price with excellent
HELMETS SAVE LIVES!!! ALWAYS WEAR A PROPERLY FITTED HELMET WHEN YOU RIDE YOUR SCOOTER. DO NOT RIDE AT NIGHT. AVOID RIDING IN WET CONDITIONS.
 HELMETS SAVE CORRECT FITTING - MAKE SURE YOUR HELMET COVERS YOUR FOREHEAD. LIVES!!! ALWAYS WEAR A PROPERLY FITTED HELMET WHEN YOU RIDE YOUR SCOOTER. DO NOT RIDE AT NIGHT. AVOID RIDING IN WET CONDITIONS.
Model ASSEMBLY and OPERATING INSTRUCTIONS
 QUICK CHANGE AIR BRUSH KIT Model 93506 ASSEMBLY and OPERATING INSTRUCTIONS Due to continuing improvements, actual product may differ slightly from the product described herein. 3491 Mission Oaks Blvd.,
Leg Pouch Pilot Chute System
 Leg Pouch Pilot Chute System User Manual Version 1 Sep 2008 Page 1 Disclaimer: The following information must be read and understood before any use of this equipment. The user knows the risks of skydiving
4-in-1 Professional Inflator Kit
 4-in-1 Professional Inflator Kit Owner s Manual WARNING: Read carefully and understand all ASSEMBLY AND OPERATION INSTRUCTIONS before operating. Failure to follow the safety rules and other basic safety
UNIVERSAL HIGH LEVEL FOIL KITE
 UNIV ER SAL I NS P I RED NAT U RE / / D RI V EN H IGH T HE E LEMEN TS LEVEL FOIL KIT E UNIVERSAL HIGH LEVEL FOIL KITE The Chrono V3 is also available in an Ultra Light version. This is the same design
...continues to next page
 DO NOT USE THIS PRODUCT UNLESS YOU HAVE READ AND UNDERSTAND THESE WARNINGS, CAUTIONS, AND INSTRUCTIONS WHICH ARE FOR YOUR SECURITY AND PROTECTION. THIS INFORMATION MAY BE SUBJECT TO CHANGE AT ANY TIME.
DEDICATED SNOWKITE PERFORMANCE
 DEDICATED SNOWKITE PERFORMANCE Whether your passion is Freeride or Backcountry missions the new Subzero has you covered! The Subzero V1 is a completely new design dedicated purely for Snowkiting. Together
4-Line and 5-Line modes
 ozone // Håkon Mæland a n e w I NS P I RED NAT U RE / / e r a D RI V EN T HE ELEMEN TS The Hyperlink V1 is also available in an Ultra Light version. This is the same design produced with high quality lightweight
Island Hopper Gator Monster Head & Tail Water Trampoline Attachments
 Island Hopper Gator Monster Head & Tail Water Trampoline Attachments Aqua Sports Technology 11859 Lakeshore North, Auburn, CA 95602 530 268-7310 www.watertrampolines.com Table of Contents Introduction.....2
SPUD OWNER S MANUAL ALWAYS WEAR A COAST GUARD APPROVED FLOTATION DEVICE WHEN OPERATING THE SPUD KAYAK.
 SPUD OWNER S MANUAL ALWAYS WEAR A COAST GUARD APPROVED FLOTATION DEVICE WHEN OPERATING THE SPUD KAYAK. Know the limits of your abilities and the limits of your equipment. Changes in air temperature and
CONTENTS. 1. Me and my FLYSURFER kite Descriptions 5
 1 CONTENTS 1. Me and my FLYSURFER kite 5 2. Descriptions 5 3. FLYSURFER specific functions 7 3.1. Safety-System 7 3.1.1. Depowerloop Quick Release 7 3.1.2. Kite-leash Quick Release 9 3.2. Pull-Stop-System
Tips & Tricks. Watch out for useful tips & tricks regarding our products under in the following category:
 BAR 10 Tips & Tricks Watch out for useful tips & tricks regarding our products under www.northkites.com in the following category: TV, Pics & Goodies Movies. 1 Tips & Tricks Content 1. Release of Liability
DEDICATED SNOWKITE PERFORMANCE
 DEDICATED SNOWKITE PERFORMANCE This is the same design as the Subzero v1 produced with high quality lightweight materials and with out the blow-out valves to reduce weight and packing volume to a minimum
Kitesurfing Handbook
 Kitesurfing Handbook www.kiteclubnorthgoa.com Basic kitesurfing techniques are consisting of: 1. Kite piloting, launching and landing 2. Kite power controlling 3. Body dragging 4. Getting into the water
ignition v2 Manual ozonekites
 ignition v2 Manual INSPIRED BY NATURE // DRIVEN BY THE ELEMENTS thanks Thank you for purchasing this Ozone kite. Our mission is to build kites with cutting edge performance, that are easy, fun and safe
TRUST BAR 2016 USER MANUAL
 TRUST BAR 2016 USER MANUAL Tips & Tricks Watch out for useful tips & tricks regarding our products under www.northkites.com in the following category: Help. 1 Tips & Tricks Content 1. Release of Liability
SANTA CRUZ BICYCLES Cable Routing Procedure MY17
 SANTA CRUZ BICYCLES Cable Routing Procedure MY17 Copyright Santa Cruz Bicycles 2017 TABLE OF CONTENTS SAFETY INSTRUCTIONS... 3 CABLE ROUTING... 3 INTRODUCTION...3 TOOLS AND SUPPLIES...3 REAR DERAILLEUR
Bimini Top, Bimini Top Plus for Jeep Wrangler Vehicles Items # , # and #
 MT_BIMINI_TOPS_INST_LTRR.qxp_Layout 1 8/9/17 3:34 PM Page 1 Installation Instructions Bimini Top, Bimini Top Plus for 2007-2017 Jeep Wrangler Vehicles Items #14100335, #14300335 and #14300435 Bimini Top
RG2200 BC Integrated Octopus
 175 NW Washington Street Lake City, Florida 32055, USA Web: www.diverite.com Phone: 386.752.1087 Fax: 386.755.0613 RG2200 BC Integrated Octopus Product description The Rite Source is both a BC inflation/deflation
Page 1. Single Scull Car Rack Assembly and User s Manual " "
 Page 1 Single Scull Car Rack Assembly and User s Manual Page 2 Items in the box: (2) V cradles (2) 4 rails (1) 1 3/4 X 18 rail coupler (4) 1/4-20 X 4 1/2 bolts (2) 1/4-20 X 2 1/2 bolts (12) 1/4 flat washers
Machine USER MANUAL. Inflation...3. Profire Performance Bar...4. Lock-n-Load Reboot...5. Chicken Loop Length Customization...6. Machine setup...
 USER MANUAL 2006 Machine USER MANUAL TABLE OF CONTENTS Overview / Parts List...2 Inflation...3 Profire Performance Bar...4 Lock-n-Load Reboot...5 Chicken Loop Length Customization...6 Machine setup...7
ContEnts. 1. Impor tant Infor mation. 2. Safety First. 3. Bag Contents and Stor m II Overview. 4. Quick Guide
 ContEnts 1. Impor tant Infor mation 2. Safety First 3. Bag Contents and Stor m II Overview 4. Quick Guide 5. The Wind ter minology, window, conditions, table 6. Kite Size Infor mation REACTIVE TUBE TECHNOLOGY
TWO KAYAK VERTICAL FOLD-DOWN CARRIER
 S P X O TWO KAYAK VERTICAL FOLD-DOWN CARRIER TA R 2 50mm 40mm Stax Pro2 Kayak Carrier Red Load Straps Jawz Adapters Mounting Bolts Foam Blocks 9 Safety Strap 12 Tie-Downs Installation & Loading Instructions
MINISTRY OF TOURISM GUIDELINES FOR KITESURFING ACTIVITIES
 MINISTRY OF TOURISM GUIDELINES FOR KITESURFING ACTIVITIES 1. Purpose of the Guidelines The guidelines aim at ensuring that kitesurfing activities are conducted in compliance with acceptable standards and
Hot Tapping Machine. OPERATIONS MANUAL and OPERATING INSTRUCTIONS
 262-2040 Hot Tapping Machine For performing 1/4 6 Hot taps 285 psi or less. Municipal Water, Sewage, & Building Services Use OPERATIONS MANUAL and OPERATING INSTRUCTIONS WARNING: These instructions are
BEST KITEBOARDING USER MANUAL
 BEST KITEBOARDING USER MANUAL Thank you for purchasing a Best kite. Please read this manual carefully and in its entirety before using your new Best kite. WARNING Kiteboarding/kitesurfing/snowkiting are
SASK-A-POLE OWNERS AND USERS MANUAL
 SASK-A-POLE OWNERS AND USERS MANUAL GENERAL INFORMATION The Saskatchewan Abilities Council s Sask-a-Pole accessibility and transfer aid is designed to help provide safe and easy access to chairs, beds,
Innovation is often inspired by being in the right place, at the right time, with all the right connections coming together allowing the genesis of a
 a n e w Innovation is often inspired by being in the right place, at the right time, with all the right connections coming together allowing the genesis of a new vision or era. The Hyperlink is our vision
Install Manual October 2011
 Install Manual October 2011 INTRODUCTION This Manual contains safety information and instructions for installing the T-Line system and should be storedinanareawhereitisaccessibletooperatorsofthet-linesystem.
INFLATABLE STAND UP PADDLEBOARD 10 DRIFTER 10 8 ATR
 INFLATABLE STAND UP PADDLEBOARD 10 DRIFTER 10 8 ATR Thank you for choosing a Hobie Stand Up Paddleboard Start with an unmatched 60 years of revolutionary board building experience, Add the racing and surfing
STYLE. PERFORMANCE. SIMPLICITY. AENEEMA KITE MANUAL 2016
 STYLE. PERFORMANCE. SIMPLICITY. AENEEMA KITE MANUAL 2016 SURF-SPECIFIC SIMPLICITY All our products are designed for wave riding. That means they are constructed to withstand rough treatment and designed
USER GUIDE ROLLING WALKERS INSTRUCTIONS FOR USE JANUARY, Maximum User Weight: 170kg (Do not exceed this weight)
") USER GUIDE ROLLING WALKERS INSTRUCTIONS FOR USE JANUARY, 2013 Model Nos: BE07889T Maximum User Weight: 170kg (Do not exceed this weight) Model Nos: BE07890TB Maximum User Weight: 227kg (Do not exceed this
USER GUIDE ROLLING WALKERS INSTRUCTIONS FOR USE JANUARY, 2013 Model Nos: BE07889T Maximum User Weight: 170kg (Do not exceed this weight) Model Nos: BE07890TB Maximum User Weight: 227kg (Do not exceed this
accidents which arise due to non-observance of these instructions and the safety information herein. SPECIFICATIONS
 18 GAUGE 2 INCH BRAD NAILER Model: 7555 CALIFORNIA PROPOSITION 65 WARNING: You can create dust when you cut, sand, drill or grind materials such as wood, paint, metal, concrete, cement, or other masonry.
Contents. Technical Data. Permittable load. Suspension height. 45 cm, incl. carabiner. Speed System. Weight (without rescue system) 7 kg (size L)
 7 kg (size L)") Manual/Service 13 Contents Technical Data Fundamentals of the RANGE Technical Data Intended Use Permittable load Suspension height Glider Harness 120 kg 45 cm, incl. carabiner Speed System Rescue System
Manual/Service 13 Contents Technical Data Fundamentals of the RANGE Technical Data Intended Use Permittable load Suspension height Glider Harness 120 kg 45 cm, incl. carabiner Speed System Rescue System