Translations of this Gear Guide can be found online at the FLYSURFER website: flysurfer.com/downloads
|
|
|
- Ferdinand Rodger Nash
- 6 years ago
- Views:
Transcription

1 GEAR GUIDE
2 Translations of this Gear Guide can be found online at the FLYSURFER website: flysurfer.com/downloads SONIC RACE Manual #01 / Language: English / data subject to change FLYSURFER Kiteboarding 2017 //
3 GLISH


4 EDITORIAL Welcome to the world of FLYSURFER Kiteboarding! First off, we would like to thank you for purchasing the SONIC RACE and are happy to welcome you to the FLYSURFER family. We the whole FLYSURFER Team will do our best to make sure that you are, and remain, a satisfied customer and fan of our brand. We hope that the purchase of this product can make our philosophy everyday is a kiteday true for you. This Gear Guide contains important information for your SONIC RACE. This includes information on safety, handling and tips, and also our services. Novak Ernst Hesina Christoph Vitzthum Monika Kistler Manfred Schoenmaker Ramon Harich Armin SAFETY NOTES: For your own safety, read the safety notes in chapter 15 completely! Boelli Benni Kühnhauser Maximilian Regardless if whether you ride on land, snow or water, what age group you belong to or what kind of wind and weather conditions you prefer: when the fascination of this sport gets ahold of you, you will want to kite every day... Everyday is a kiteday with FLYSURFER Kiteboarding! The whole FLYSURFER Team wishes you a lot of fun with your new kite! Stoib Theresa Oettl Christine Kurz Katharina Sonderhauser Alexander Wehking Benedikt Gasser Bernhard
5 INHALT 01 SONIC RACE Sizes Bag & Accessory Kit Features CONTT 02 Handling Setting Up Sorting out the bridle Securing the kite Launching Power zone Edge of the wind window with an assistant Self launching at the edge of the wind window Kite Control How to jump Landing With an assistant Without an assistant by backstall Self-landing using the Frontline Safety Relaunch Reverse Launch Drainage Safety System Activating the QR Resetting the Kite Emergencies Self-Rescue Packing Up Care Repair Replacing the spare part lines Little Connection Lines Repairing the Cloth... 29
6 6 13 Trimming Mixer test Optimum trim of the flying lines Troubleshooting Safety Notes Do not fly with kites commandments for more safety when kiting Service No Free-Repair Repair & Spare Parts... 34


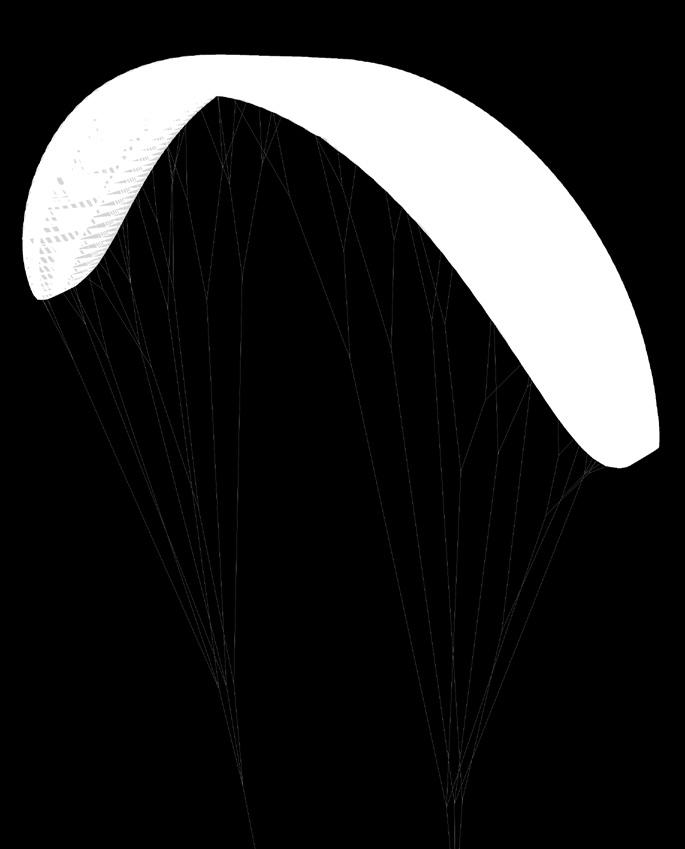
7 01 SONIC RACE Sizes 7 SONIC RACE SIZES: 7 / 9 / 11 / 13 / 15 / 18 / 21 m 2 COLOR: petrol blue / orange / white Bag & Accessory Kit The bag has been optimized to reduce weight and features many extras. Carrying straps on the outside provide a convenient way to carry your board. Additionally, the SONIC RACE comes with a compression sack. All FLYSURFER kites come with a Repair Kit and a Sandbag. More details can be found online on the FLYSURFER website!

8 Features
9 X-Light Fabric LIROS Dyneema Lines 9 The new X-Light fabric has the best qualities for maximum performance and impressive longevity. The incredibly lightweigt (32g/m2) double-ripstop material is highly tear-resistant as well as airtight, and provides an extemely smooth sail. 3-Level Bridle Design (A, B, Z) The 3-level bridle design drastically reduces the number of lines and the associated resistance by an incredible 30%. The fully-spliced, uncoated Dyneema SK99 lines are the perfect choice for this application. LIROS is a leading European company who specializes in high-quality technical rope solutions. Thanks to new Dyneema core fibers, line diameter is reduced while retaining equal breaking loads. Air Intakes The kite fills with air through the intakes in the leading edge. As soon as the kite has enough internal pressure, the intake valves seal automatically. Deflate Valve SONIC RACE Modern Competition Technology The new mixer features an adjustable splice system. The system transfers the power to the kite over three deflection pulleys, A1 with 8:1, B1 with 4:1 and B2 with 2:1, creating a steady pathway that provides uncompromised maximum performance. High-Performance Construction The soul of the kite shines through its lightweight design: The shape of the arc on the B-plane allows the entire span of the surface to be supported by fewer lines and the load to be evenly distributed. IKA-Registration Your FLYSURFER SONIC Race is approved for every IKA race and you do not need to apply for an additional plaque ID number. The kite deflates through the deflate valve, located in the middle of the trailing edge. Sharp Mini Ribs Doubling the number of cells at the trailing edge increases its profile stability substantially. The advantage: drag is reduced, while performance increases. Automatic Drainage System Should sand or water get into the kite, it will automatically be expelled by the dirt/water drainage system. Triple Depower Technology There are 3 ways the kite achieves maximum depower: Reducing the angle of attack, changing the profile and reducing the projected area. This leads to a huge wind range and ideal handling.
10 10 02 HANDLING Setting Up Unroll your kite upside down into the wind and secure it with something that has no sharp edges and is heavy enough to hold down the kite for the given wind. Unroll the lines from your bar whilst walking away from the kite. Place the bar far enough away from all bridle lines on the trailing edge side of the kite. Make sure that the bar cannot fall or be pulled into the bridles. Check your bridle for tangles. Make sure that none of the lines are caught around the back of the kite. Open the kite and if necessary, close the deflate valves. Start at the leading edge eventually holding up the front lines to visually check the bridle.
11 When the bridle is sorted out, lay the front lines to the inside and the steering lines to the outside. If not, follow the tips on the Sorting out the bridle chapter. If the lines are still twisted, untwist them by turning the bar. It may be possible (especially after not being careful when packing away or setting up the kite) that the bar has to be pushed through the lines again to untwist. 11 Handling Sort out your flying lines. Check for any damage or knots. Exception: There is a stopper knot that prevents the bar from sliding up too far when released. Tip: The bridle can also be checked before unrolling the flying lines. It can then be sorted out quickly Sorting out the bridle Even a badly tangled bridle can be quickly sorted out with the right technique. If the bridle is tangled, it was probably caused by mistakes made when packing or setting up the kite. Roll up your lines onto the bar until you get close to the mixer and secure the lines with a half hitch and/or the bungie cord.


12 12 Make sure that there are no lines caught or running behind the kite. Stick the bar along these lines through the bridle. Lightly tension up the bridle again to check it. If need be, repeat the last step till the left and right bridles are separated. Undo any loops, knots or bunches that may have formed. Unroll the lines from the bar and check as before. If the bridle is tangled, lines from one side of the bridle may be running through the lines on the other side.
13 02.03 Securing the kite A kite needs to be secured properly even if the wind is light. A runaway kite can be a serious danger to people downwind. To ensure a long lifespan of your kite, we recommend that you do not leave the kite flapping in the wind and sun for long periods. Make sure that the tips are not flapping too much. This can lead to the bridle tangling. The tips can be additionally secured with a bit of sand or other suitable object. 13 Handling Fold your kite in the middle and let the tips flow out downwind. The bottom skin and the bridle will be facing inwards. Weigh down the kite in the front third of the upper skin. This method prevents the tips from flapping in the wind. Open the deflate valves. A deflated kite will flap around on the ground less. Tip: The kite can also be secured using the same method as the launch. However, it has been proven that the above method keeps the kite more still in higher winds.
14 03 LAUNCHING 14 Please be aware of the Safety Notes (Chapter 15) and thoroughly check not only the wind and weather conditions, but also all your equipment, especially the safety system. Do not use any kite outside of its recommended upper wind range. When launching in strong winds, we recommend that you have an assistant holding you from the back of your harness. During launching, always pay attention that your brilde lines do not get caught on anything or become tangled. The adjuster of the SONIC RACE should not be fully pulled (depowered) during launch. A fully-pulled adjuster will result in a reduction of control as the steering lines will have no tension. Thanks to the efficient depower, the pulling of the adjuster is not really necessary when launching. If you think that the wind may be too strong, do not launch the kite. Tension the lines a bit so that the kite will fill through the air intakes. Wait until the kite has been prefilled enough before launching Power zone Caution: Caution only launch your kite in light winds through the power zone. Always keep enough distance to obstacles. Sit down while launching your kite, especially on slippery ground. Lay out your kite across the wind and weigh down the trailing edge with enough sand or other suitable objects. Tip: Pre-fill the kite properly! Sheet your bar in, keep the kite powered and low to the ground. Pull smoothly left and right to fully inflate the wing tips.
15 Tip: Or position your kite leeward in the soft zone. Make sure you pre inflate the SONIC RACE with enough air. Launch the kite and keep it close to the 3 or 9 o clock position. Sheet your bar in, keep the kite powered, pull smoothly left and right to fully inflate the wing tips. 15 Launching As soon as the kite is inflated and you are ready, give the assistant the thumbs up signal that he can let go. Make sure to once again check whether all lines run freely Edge of the wind window with an assistant It is important that your assistant is experienced with this technique and you have explained them how it s done. Position the kite and assistant exactly on the edge of the window. If the kite is threatening to collapse over the assistant, you can either walk downwind, or the assistant upwind. The helper begins from the center of the kite and holds multiple air intakes into the wind. As the kite fills, the assistant should walk their hands down the leading edge of the kite letting the inflated parts of the kite rise up. The bottom tip should not be touching the ground anymore. Tip: Pre-fill the kite properly!
16 16 If the kite does not want to fly on its own, then the assistant should walk downwind a bit, or you upwind. The Kite should be positioned downwind of you when you tension the lines for launch. Walk downwind a bit as the kite inflates Self launching at the edge of the wind window Lay the kite out 90 to the wind. Fold over the windward wingtip and secure it near the leading edge. Pay attention that the downwind wingtip does not fold over upwind. Pre-inflate the kite at least half way, for more control during the launch. The more you pre-inflate the kite the easier it will handle during the launch.
17 Release the kite from the sand or object securing it with a hard step away from the kite and steer it carefully up. Tip: You can prevent the lines getting caught around the bottom wingtip by folding over the tip once more and securing the second fold. 17 Kite Control 04 KITE CONTROL Steering a SONIC RACE is exactly the same as any other depower kite on the market. We recommend that everyone who does not know how to control a kite take a course at a qualified school or instructor. e.g one of our partner schools. You can find the link to our partner page using the QR code on the left. 05 HOW TO JUMP Do not jump in shallow water & only in suitable conditions. For an optimal high jump, ride at high SONIC RACE and fly the kite up a bit from its cruising posi-tion (60-70 skywards). Bear off the wind a little to pick up speed. When you have enough speed, edge hard and bend your legs as you steer the kite aggressively back toward the zenith. The bar should be sheeted out as much as possible until you are ready to take off. Pull on the bar as you push off the water and the kite flies past the zenith. As you reach the pinnacle of your jump, steer the kite forward and park it in the zenith. Keep the bar pulled in as much as possible to maximize hangtime. Just before you land, you will need to depower the kite a bit and steer it forward. This will give you the momentum for you to plane/glide away after landing. Bend your legs and point the nose of the board downwind on landing to absorb the speed and power. Tip: Be aware that the bar needs to be pulled in during your flying phase to get the maximum hangtime. Otherwise the very efficient depower of the SONIC RACE will cause you to fall faster. If you are not used to keeping the bar powered up, then the stopper-ball, a larger depowerloop or slightly lengthened front lines can help.
18 18 06 LANDING With an assistant The easiest and safest way to land your kite is with the help of an assistant. Signal an assistant who knows how to land your kite, that you want to land. The assistant should be standing well upwind of the kite. Warning: The assistant should never grab any lines. Walk towards the assistant and pull hard on the leeward side steering line as soon as they have the kite securely in their grasp. That way the kite will flag out downwind of the assistant. Lower the kite towards the assistant along the edge of the wind window. Secure the kite as described in Securing the Kite. The assistant can now approach the kite and grab hold of the leading edge of the kite Without an assistant by backstall Warning: Keep at least two line-lengths safety distance downwind. We generally recommend landing with the help of an assistant. Landing the kite by backstall should only be attempted in light winds.
19 Grab both leader lines above the floaters. Quickly run to the kite and secure it as described in Securing the Kite. Tip: When using this method it is also possible to walk your way up one of the steering lines to the kite, as long as the wind is light enough. 19 Landing Pull them back towards you until the kite stalls and flies backwards towards the ground. To a certain degree you can still control the kite as it flies backwards Self-landing using the Frontline Safety Make sure that you have a large enough landing area that is free of any obstacles that can damage the kite. Fly the kite down to the right side of the wind window (e.g. the side that your frontline-safety line is attached to). Secure the leader lines around a suitable object in a way that the backlines stay braked and flying up of the kite again is not possible. Activate your Quick Release. The kite will now flag out on the Frontline Safety and come to rest downwind of you.
20 20 Attach the Safety Leash to a suitable object (e.g. a post or a board tightly buried in the sand). 07 RELAUNCH Tip: If you do not drag the kite through the water, it will still be possible to relaunch it even after 30 minutes if there is enough wind. Walk to the kite and secure it as described in Securing the kite Reverse Launch This method works with strong and light winds and with all FLYSURFER kites. In light winds it is the superior relaunch method. Grab the leader lines above the floaters as high up as you can (do not grab the flying lines). Make sure that the bar is the right way up, e.g red side of the bar on the left. Do not cross over your hands. This way the bar will be the right way up after the kite relaunches. Pull the leader lines as far towards yourself as possible to reverse the kite off the water. Sharp tugs or pumping the lines may help in light winds. If the kite does not release from the water, grab the leader lines higher up.
21 When the kite is at least one wingspan above the water, let go of one of the leader lines. Make sure you keep hold of the other one. The kite will now spin around. As soon as the leading edge of the kite points up let go of the remaining leader line and put your hand back on the bar. Depower the kite till its back in the sky towards the zenith Drainage FLYSURFER kites feature a water/dirt drainage system. This ensures that water or dirt are automatically removed and do not stay trapped inside the kite. If the kite is lying ready for launch in the powerzone, you only have to depower the kite to let it launch. The air flowing into the kite will push out any water or dirt. If the kite is lying on its leading edge, it has to be turned upright onto its side. Try to achieve this by pulling on one Steering Line. Try to prevent the upper wingtip from collapsing. You can prevent this by pulling on the downwind side of the bar or the corresponding Leader Line. 21 Relaunch The excessive water/dirt should now flow out of the tip until it is ready to be launched again. This method must be done with feeling and requires some practice. Tip: The reverse launch is the recommended relaunch method when kitelandboarding, because this extends the durability and has the least effect on the kite s materials.


22 22 08 SAFETY SYSTEM Activating the QR The SONIC RACE is fitted with the Frontline Safety (FLS) system. After you activate your Quick Release, the Airstyle Bar will slide up the FLS Endline until it reaches the stopper-knot. The kite will flag out on this single line and will come to rest on the water in its normal windrange. Caution: The Race-Bar-Pro does not have a stopper-knot. If the kite has too much power, wrap the endline around your harness hook. The increased friction will make it easier to secure the endline. Now it is possible to pull the endline with both hands, and then to secure it again with one hand Resetting the Kite After leashing out the kite can easily be reset on the water and relaunched again. Work your way up the Safety-Endline until you get to the bar. Be careful not to get tangled in the loose endline. Never wrap the endline around your hand or fingers. When you reach the bar, secure the endline to your harness hook. This is done by wrapping the side of the endline which is under tension two times around the harness hook and then the loose side one time in the opposite direction.


23 When the endline is secured, the Quick Release can be reset with both hands. Let the Chicken Loop go and unwrap the endline from the harness hook. Make sure you have a good grip on the endline as you hook in the Chicken Loop and secure it with the Chickenstick. Slowly release the endline bit by bit. Make sure that it has not wrapped itself around any part of your body. Do not let the endline slip too quickly through your fingers as to avoid getting burns or cuts. Because of this, it is recommended that you let go of the entire endline when you get to the last two meters. Tip: It can happen that the kite can be tangled after flagging out. If this cannot be solved by pulling on the steering lines, you can try to solve the problem by flagging out the kite again. 09 EMERGCIES In an emergency situation it is important not to panic, and to react purposefully and goal orientated. Should you get lifted on the beach, do not steer the kite. Wait until you touch ground again and then immediately activate the Quick Release. The danger of getting lifted can be minimized by not flying the kite at the zenith when on land. However, in normal conditions, a FLYSURFER kite will be at its most stable in the zenith. Especially in very gusty conditions the kite can overfly its pilot. This can be corrected by powering up the kite by pulling the bar towards you or breaking with the leader lines (red and green). It is also possible to counter the kite s overflying, or get it back into the wind window by flying it back and forth. Should the center of the kite collapse towards the pilot (e.g frontstall) it is a good idea to activate the Quick Release before it opens again, as the kite can develop a lot of power when this happens. A backwards flying kite (backstall) can be recovered by depowering (pushing the bar towards the kite). In very light winds you can grab hold of the adjuster and give short effective pulls to accelerate the kite. 23 Emergencies
24 Self-Rescue If one is in danger of drifting away from the shore with an un-relaunchable kite, then it may be prudent to abandon the kite and swim back to shore if possible. Otherwise it is wise to stay with your kite, as it will make you easier to spot for rescuers. Packing down in deep water is only recommended for experienced kiters and should be practiced beforehand. Activate the Quick Release. Tip: The flagged out kite can be pulled behind you on the safety leash when swimming back. However, this needs a lot of strength and is only recommended for very short distances. Now roll the flying lines onto the bar and secure them with the bungies or even better using a half hitch. Grab the kite. Work your way up the endline to the bar. Once at the bar, wind the loose endline round the bottom of the bar in a figure of 8. Caution: It is very easy to get caught up in the bridle lines that are floating around. Avoid unnecessary swimming movements. A line knife in your harness can be a very useful tool in a worst case scenario.
25 Lay the tips on top of each other, and then the bar on top and roll up the kite. Be careful with the bridle lines and stow them as best you can within the two halves of the kite when rolling it up. You can open the deflate valves to make rolling it up easier. 10 PACKING UP A FLYSURFER kite can be packed into its bag very quickly. It is important that the bridle is securely packed inside the kite and the bar never gets into or goes through the bridle lines. Open the deflate valves. 25 Packing Up Secure the package with the harness. Wind the lines round the bar until you get to the mixer. Secure the lines with the elastics or a half hitch. Keep hold of the bar, or put it down somewhere out of the way of the bridle lines. Tip: In shallow areas where it is possible to walk, you can drag the kite back to shore. When doing this it is recommended to have the kite as described in Securing the kite and then drag it in by holding the middle air-intake valve. This way no water can get into the kite and greater distances can be covered. Fold the kite in half along the middle (tip on tip) and make sure that the bridle is inside both halves. Also make sure that there are no bridle lines over the outside skin.
26 26 Lay the bar on-top of the kite and a bit of the way in from the tips. Close the deflate valves carefully and fold the kite on both sides of the bar and put it in the kitebag. Throw the bridle lines in between the two halves of the folded kite. Roll up the kite around the bar. Make sure that no sharp objects on the beach damage the cloth. Tip: If you do not want to roll a wet bar into your kite, there is a method to attach the bar to the outside of the bag. Fold the kite in the middle (tip on tip) and then roll up the kite, including the bridle, and put it into the bag. Then roll up the bar and attach it to the outside of the bag. When setting up the kite it is recommended to then unroll the bar first and then take the kite out of the bag.
27 11 CARE FLYSURFER kites are very durable and very UV and saltwater resistant. With proper care, your kite may last even longer. Eventual color changes of the cloth can be caused by environmental causes, UV-exposure, mechanical strain, or it getting dirty. A color change has no influence on the flight characteristics whatsoever and is not covered by warranty. 1. Do not leave the kite exposed to the elements Be sure to pack your kite right after a session (or if you will be taking a longer break) in order to minimize the amount of time the material is exposed to the sun and flapping in the wind, and to help extend the active lifespan of your kite. 2. Drying If a kite is packed away wet and left for a long period of time it can develop ugly mildew spots, rust on the metal parts or color bleeding of the cloth. This does not effect how the kite performs, but will reduce the value of your kite. In extreme cases the kite may get moldy. To dry, simply continue to fly the kite until the canopy is dry. Tip: Drying of the kite can be accelerated by flying the kite with an open air drainage valve on land. Otherwise a fan or hair dryer can help, but please never use hot air! 3. Rinsing Rinse your kite from time to time with clean fresh water, after using it in salt water, and leave it to dry in the shade. Do not use any detergents. Using detergents on the cloth with void the warranty. 4. Check Check all parts of the kite before each use; especially parts that can wear out. Material failure on those parts can lead to further damages, or put the kiter at risk. 12 REPAIR The main parts that wear on the kites are the depower line, the safety endline, as well as the spare part lines and the pulleys. Depending on use, the flying lines and other parts will need to be replaced within the lifespan of your kite. If you do not service these parts, it can lead to damage to the kite and will void the warranty Replacing the spare part lines The spare part lines are the black lines that run through the pulley system known as the mixer. The spare part lines should be replaced before the sleeving can become torn or frayed (approx. 100 h). The pulleys should be changed after about 250 hours of use. Before replacing your spare part lines, perform a mixer test to write down your current mixertrim. When replacing spare part lines, the trim will change and you might want to keep your preferred trim. You can readjust the mixer trim to your previous setting after replacing the lines. Tip: Always exchange only one side at a time and use the other side as a template for how the mixer should look. Lay out the kite and sort out the bridle. Make sure that the lines do not get crossed or mixed up throughout the whole procedure. 27 Care


 put the pulley")

28 28 Disconnect the front and steering lines on one side. Undo the short line pieces at the mixer. Make sure to attach the new spare part line in the same way as the old one. Pull the old spare part lines out of the pulley. Always replace all three lines. Reattach the short line pieces and pull the knots tight. You can differentiate the spare part lines by their different lengths. Repeat the same procedure on the other side. Pull all knots tight and check the bridle carefully. When replacing a pulley (after 250h of use) put the pulley through the loop. Warning: After replacing the spare part lines, do a mixer test and adjust the mixer accordingly. Reconnect the spare part lines to the pulleys pull the end of each line through the loop and tighten the connection.

 allows you to quickly exchange a bridle line and also works as a predetermined overload weak-point that prevents the canopy from getting damaged.")

, we recommend using sewing to repair the damaged area.")
29 12.02 Little Connection Lines 13 TRIMMING As all lines change length over time, we have built in a way to correct the flying characteristics quickly and easily. It is very important that the front and steering lines are setup equally Mixer test Lay out the kite and sort out the bridle. Make sure that the lines do not get crossed or mixed up through the whole procedure. 29 Trimming The Little Connection Line (LCL) allows you to quickly exchange a bridle line and also works as a predetermined overload weak-point that prevents the canopy from getting damaged. Should an LCL break, replace it with a new LCL of the same colour (same breaking strength) Repairing the Cloth In case you get a small tear (e.g. through contact with a sharp object) we have included a repair kit with your kite. The area that needs to be repaired must be clean, dry and grease-free. Temporary repairs are possible with spinnaker repair tape, but the tear should be taped from the inside of the kite. It is recommended that you round off the edges of the repair tape. There is the possibility to have a professional repair done by us. We can exchange whole parts of the canopy, so that there will be no trace of the damage. Tip: When a tear is close to a seam (less than 5cm), we recommend using sewing to repair the damaged area. Bring the end loops of A1 and Z to one level by fixing them with a pen or stick Tension the mixer and secure the ends of the front and steering lines (e.g. an assistant can hold them). The position of the lines should not change during the test - you can hold the lines in position with a simple knot.
. All five knots should be at the same level at standard trim.")

 lines.")

30 30 Bring the A2 / B1 / B2 loops up to the A1 and Z loops and tension the mixer (min. 5 kg tensile load per line). All five knots should be at the same level at standard trim. If this is not the case, you just have to move the splice of the mixer (A2 / B1 / B2) to adjust the loop length until all five knots are at the same level Optimum trim of the flying lines Steering (back) lines shorten over time in relation to the flying (front) lines. Underneath the floaters, the back lines can be shortened or extended by using knots. Extension of the back lines is necessary when the trimmer needs to be pulled in too much to keep the kite flying normally in its intended wind range. Done. Be sure to pull everything properly tight again after adjusting, so that the trim stays under tension.
31 14 TROUBLESHOOTING Should you ever experience a problem with your kite, or if you have any questions about our products, we are available per or telephone. Competent help can also be found at our experienced dealers and kiteschools. PROBLEM CAUSE SOLUTION the kite pulls to one side when the bar is powered up kite pulls to one side when depowered the lines have stretched due to too much use on one side tangled bridle broken bridle line or LCL asymmetrically set mixer none of the above causes equalise the lines as discribed in Trimming sort out the bridle replace mixer test Open mixer on the side that the kite pulls to (extend C- & B-main). Shorten mixer on the other side of the kite by the same amount (shorten C- & B-main). C-main should always be double the amount of B-main. (shortened or lengthened) 31 Troubleshooting kite has a lot of backstall Steering Lines have shrunk check the trim of the flying lines (see bar manual) the middle of the kite collapses towards the rider or is unstable tips fold in a little mixer is adjusted incorrectly incorrect mixer setting deflate valve is still open a defect in the cloth or line, or even broken or stretched internal reinforcement beams. Rickety tips help for good turning and more depower Perform mixertest, if the kite still remains sensitive to backstall, extend the mixer, but only so far that the kite remains stable Perform mixertest, if the kite still remains unstable, shorten the mixer close the deflate valve repair the damage ignore it, or tune the mixer for more stability tips fold in a lot incorrect mixer setting Adjust the mixer to a max. of C- main -3 cm, B-main -1,5 cm undefined launch not enough internal pressure pre-inflate more kite does not relaunch bridle lines at the tip are very tangled Steering Lines are not pulled back far enough not enough wind water in the kite kite was flapping in the wind on the ground too much grab the leader lines higher up qait for a gust, or self-rescue drain the water (see chapter Drainage ) in future secure the kite as described in Securing the Kite
32 15 SAFETY NOTES 32 Kitesurfing is a potentially dangerous sport, that holds risks for the athlete or the people around them. Incorrect use of this product may result in serious injury or even death of the user or third parties. The user carries the sole responsibility for themselves and third parties when using this product. The user must check their equipment for wear, especially wearing parts, before each kite session. The product may only be used with original spare parts, and may not be modified. Every user should be qualified by a FLYSURFER kiteschool or a FLYSURFER dealer. Read the entire Gear Guide thouroughly before using the kite, and strictly adhere to the procedures. The following safety guidelines are only guidelines and do not claim to cover every instance. This product has been designed for riders weighing kg. We cannot guarantee the proper functioning of the product outside of this weight range. This manual can also be downloaded from Do not fly with kites A kite is not designed, tested or licensed as an aircraft or flying device. The use of a kite as an flying device is illegal and not covered by insurance. Flying with this product can lead to death!
33 commandments for more safety when kiting Never kite in unsuitable conditions such as storm fronts, lightning storms or off-shore winds. Check the weather and wind conditions carefully, choose the correct kite size. 2. Check the kite before every launch, including all parts. Never kite with weakened or damaged equipment or tangled lines. Safety Notes 3. Do not jump in too shallow water. 4. Never modify the kite or bar unless recommended by FLYSURFER. 5. Under load, lines are dangerous. Never wrap lines around any part of your body. 6. Only kite if you are sure you are physically fit to do so. Never kite under the influence of drugs or alcohol. 7. Check out the kiting spot beforehand. Make sure you are aware of any risks and dangers such as obstacles, shallows, currents and bans. Also be aware if rescue craft can get to you in case of an emergency. It is best to ask people (locals) who know the area well. 8. Keep a safety margin of at least two line-lengths downwind of you, and never kite near people or obstacles. Kiting near powerlines, roads, airports, cliffs, etc. is extremely dangerous. 9. Make sure that someone is looking out for you and that help is there if you need it. Never go out alone. Never kite further away from shore than you can swim back. 10. Do a test activation of your Quick Release before every launch. This will ensure the system is working and reinforce the release instinct of the kiter.
34 34 16 SERVICE The customer is king at FLYSURFER! Not only do we believe that the customer should be guided to the right product before a purchase, but it is also our view that the customer should be guaranteed 100% fun and function of their product over the entire lifespan of the product. With a worldwide network of dealers, importers, team riders, opinion leaders, etc. and of course the head office team, we want to offer the best possible post-sales service to our customers. We will gladly inform you about the entire FLYSURFER product range, service and any other questions you may have. We regularly reach out to FLYSURFER fans and people interested in our products through our year-round national and international test events. The friendly atmosphere and the open, helpful spirit at the onsite test events has planted a happy smile on the face of many satisfied testers countless different spots arround the globe. All further steps will be explained by our very competent colleagues in the head office on an individual basis Repair & Spare Parts Repairs can be done at either our workshop in the head office, or by a FLYSURFER sales partner who offers a repair service. Please contact FLYSURFER directly first! High quality original spare parts for all our products can be ordered directly from our Online-Shop: We hope that one day, we may have a chance to meet you and in the meantime, we wish you many fun hours and experiences kiting with your FLYSURFER products No Free-Repair The SONIC RACE and Infinity 3.0 Race Control Bar PRO are excluded from 12 months free repair warranty! Materials and construction have been fully optimized within these products, in order to achieve the highest possible performance in competitions. Therefore, there is no Free-Repair Warrantee on the SONIC RACE kite as well as the Infinity 3.0 Race Control Bar Pro, as applicable to other Flysurfer products. Of course, the customer is entitled to statutory warranty claims. In case of a claim, please contact FLYSUR- FER directly, either by or phone: support@skywalk.org
35 35 Service
36 FAMA1SR00 FLYSURFER Kiteboarding Brand of Skywalk GmbH & Co. KG Windeckstr Marquartstein, GERMANY WEBSITE: info@flysurfer.com PHONE: +49 (0)
// EXTREMELY DURABLE // FUN IN THE LIGHTEST BREEZE // CLEAN 3-LINE SAFETY
 ... simply fun :) // EXTREMELY DURABLE // FUN IN THE LIGHTEST BREEZE // CLEAN 3-LINE SAFETY READY-TO-FLY PACKAGE CONSISTS OF: 1x PEAK Trainer Kite Ready to Fly 1x PEAK 3-line wrist safety 1x PEAK Trainer
Semi Freddo Snow kite [Ram Air]
![Semi Freddo Snow kite [Ram Air]](/thumbs/89/97639710.jpg "Semi Freddo Snow kite [Ram Air]") User manual Semi Freddo Snow kite [Ram Air] This manual gives you detailed instructions on how to use your new Semi Freddo kite. We recommend you take your time to read the instructions. In case you have
User manual Semi Freddo Snow kite [Ram Air] This manual gives you detailed instructions on how to use your new Semi Freddo kite. We recommend you take your time to read the instructions. In case you have
MOOWII MANUAL. Using a kite is dangerous and can cause severe injuries. Before use, carefully read this manual.
 MOOWII MANUAL Using a kite is dangerous and can cause severe injuries. Before use, carefully read this manual. Release of liability By assembling or using this CrazyFly kiteboarding product (further named
Slash2011. CAUTION! Using a kite is dangerous and can cause severe injuries. Before use, carefully read this manual. USER MANUAL
 WE ADVICE YOU TO REGISTER YOUR KITE ON: www.crazyflykites.com/register Slash2011 USER MANUAL CAUTION! Using a kite is dangerous and can cause severe injuries. Before use, carefully read this manual. yflykites.com
Congratulations on purchasing a Peter Lynn Arc, the new form of traction kite technology for kitesurfing and kitesailing, but also very useful for
 Congratulations on purchasing a Peter Lynn Arc, the new form of traction kite technology for kitesurfing and kitesailing, but also very useful for buggying and other power kiting activities. Their basic
Contents. introduction, contents. terminology, putting in and removing sticks. pre-inflation, attaching lines
 Congratulations on purchasing your Peter Lynn Kite! Using Twin Skin technology this kite sets new standards in jumping, upwind performance and depower. This manual contains information on how to set up
THE ULTIMATE FLYING MACHINE. FLYSURFER Knowledge Database
 THE ULTIMATE FLYING MACHINE FLYSURFER Knowledge Database CONTENT 1. INTRODUCTION S. 5 SAFETY GUIDELINES S. 6 DELIVERY S. 6 1. YOUR FLYSURFER KITE S. 7 2. THE SPEED3 S. 7 2.1. Description S. 7 2.2. Features
ultimate All-round Performance
 ultimate All-round Performance During the development of the R1 V2 we experienced the overall enhancement in performance achieved from a lighter weight kite. The Chrono V2 UltraLight combines our high
USER GUIDE. approved ntents
 approved ntents 07 USER GUIDE .2 All content of this document, including text, images and graphics, is the exclusive property of STARKITES and is protected by international copyright and other intellectual
Accessible Performance is True Performance
 Accessible Performance is True Performance I N S P I R E D B Y N AT U RE / / D RI V EN B Y T HE EL EMENT S Our understanding of True Performance is not just raw power or speed - it s the combination of
The only thing. is everything
 p u r e I NS P I RED B Y NAT U RE / / D RI V EN B Y T HE E LEMEN TS p e r f o r m a n c e The only thing that s changed is everything Race performance at it s best yet the all-new R1 V2. Taking a completely
UNIVERSAL HIGH LEVEL FOIL KITE
 UNIV ER SAL I NS P I RED NAT U RE / / D RI V EN H IGH T HE E LEMEN TS LEVEL FOIL KIT E UNIVERSAL HIGH LEVEL FOIL KITE The Chrono V3 is also available in an Ultra Light version. This is the same design
CONTENTS. 1. Me and my FLYSURFER kite Descriptions 5
 1 CONTENTS 1. Me and my FLYSURFER kite 5 2. Descriptions 5 3. FLYSURFER specific functions 7 3.1. Safety-System 7 3.1.1. Depowerloop Quick Release 7 3.1.2. Kite-leash Quick Release 9 3.2. Pull-Stop-System
catalyst The Art of Progress
 catalyst v2 The Art of Progress i n s p i r e d b y n a t u r e / / d r i v e n b y t h e e l e m e n t s The Art of Progress The Catalyst V1 has been a great success but the Ozone design team is never
RELEASE OF LIABILITY AND ASSUMPTION OF RISK
 VERSION 3 User Manual Thank you for choosing STARKITES, please read this entire manual carefully before using your STAR KITE. Your ExA or SBow kite sets the standard in safety, performance and usability
WARNING p. 5. Delivery p My FLYSURFER kite and I p YOUR FLYSURFER KITE p Description p Features p. 7
 USER MANUAL CONTENTS WARNING p. 5 Safety Guidelines p. 5 Delivery p. 6 1. My FLYSURFER kite and I p. 6 2. YOUR FLYSURFER KITE p. 7 2.1. Description p. 7 2.2 Features p. 7 3. FLYSURFER (FS) Special Functions
4-Line and 5-Line modes
 ozone // Håkon Mæland a n e w I NS P I RED NAT U RE / / e r a D RI V EN T HE ELEMEN TS The Hyperlink V1 is also available in an Ultra Light version. This is the same design produced with high quality lightweight
9. Kite control in extreme situations 9.1. Flying the kite in the zenith 9.2. Being lofted on the beach 9.3. Kite Luffing (danger of frontstall) 9.4.
 9.4.") Contents WARNING Safety Guidelines 1. My FLYSURFER kite and I 2. YOUR FLYSURFER KITE 2.1. Description 2.2 Features 3. FLYSURFER (FS) special functions 3.1. TOTAL DEPOWER SYSTEM (TDS) 3.1.1. FULL DEPOWER
Contents WARNING Safety Guidelines 1. My FLYSURFER kite and I 2. YOUR FLYSURFER KITE 2.1. Description 2.2 Features 3. FLYSURFER (FS) special functions 3.1. TOTAL DEPOWER SYSTEM (TDS) 3.1.1. FULL DEPOWER
SX Trainer Instruction Manual WARNING
 SX Trainer Instruction Manual WARNING DO NOT USE THIS PRODUCT UNLESS YOU HAVE READ AND UNDERSTAND THESE WARNINGS, CAUTIONS, AND INSTRUCTIONS WHICH ARE FOR YOUR SECURITY AND PROTECTION. THIS INFORMATION
Innovation is often inspired by being in the right place, at the right time, with all the right connections coming together allowing the genesis of a
 a n e w Innovation is often inspired by being in the right place, at the right time, with all the right connections coming together allowing the genesis of a new vision or era. The Hyperlink is our vision
born to be wild. designed by christoph fokken MONO BY SPIDERKITES MANUAL
 MONO BY SPIDERKITES MANUAL This single skin kite is a new type of land power kite. The Mono has been designed to generate traction power, so it can be used as a leisure foil, trainer kite or as sports
hannes burner team Rider:
 r e o v 4 - W a v e hannes burner R i d i n g team Rider: pa u l i n o p e r e i r a F r e e d o m Wave Riding Freedom The Reo is an iconic model in the kite surf world it s renowned for delivering outstanding
We recommend as protective equipment: - helmet - life jacket - wet suit - gloves - sunglasses - sun lotion - safety knife, if not on the trapeze
 !WARNING! Please read the information of this booklet first and then only use the product if you agree on all the terms and conditions! We draw your attention to changes at any time without notice. If
DEDICATED SNOWKITE PERFORMANCE
 DEDICATED SNOWKITE PERFORMANCE This is the same design as the Subzero v1 produced with high quality lightweight materials and with out the blow-out valves to reduce weight and packing volume to a minimum
DEDICATED SNOWKITE PERFORMANCE
 DEDICATED SNOWKITE PERFORMANCE Whether your passion is Freeride or Backcountry missions the new Subzero has you covered! The Subzero V1 is a completely new design dedicated purely for Snowkiting. Together
WELCOME SAFETY INSTRUCTIONS
 WELCOME Peter Lynn; a world of wind driven excitement, where people passionately pursue their dreams whether that s freeriding at a local beach or going for the speed record in a deserted salt lake. Peter
NOVA: Takoon offers you the R-evolution!
 NOVA: Takoon offers you the R-evolution! Several years of research on new types of Kites have led TAKOON to rewrite the whole sport of kitesurfing. A new generation of Kite is born. While others look for
Kitesurfing Handbook
 Kitesurfing Handbook www.kiteclubnorthgoa.com Basic kitesurfing techniques are consisting of: 1. Kite piloting, launching and landing 2. Kite power controlling 3. Body dragging 4. Getting into the water
U S E R MANUAL CROSSBOW SWITCHBLADE CONTRA REVOLVER CO2
 2006 K I T E U S E R MANUAL CROSSBOW SWITCHBLADE CONTRA REVOLVER CO2 DO NOT USE THIS PRODUCT UNLESS YOU HAVE READ AND UNDERSTAND THESE WARNINGS AND INSTRUCTIONS WHICH ARE FOR YOUR SECURITY AND PROTECTION.
Action packed free ride, boosting to the moon, air style,speed, hydrofoil or twin-tip racing - the Edge V9 delivers high performance that is
 Action packed free ride, boosting to the moon, air style,speed, hydrofoil or twin-tip racing - the Edge V9 delivers high performance that is incredibly addictive. I N S P I R E D N AT U RE / / D RI V EN
5200 Lawrence Place Hyattsville, Maryland 20781, USA Toll Free: Phone: Fax:
 5200 Lawrence Place Hyattsville, Maryland 20781, USA Toll Free: 1-888-416-0174 Phone: 301-277-3888 Fax: 301-277-3323 www.premierkites.com Congratulations on your purchase of the Wolf NG sport kite. The
5200 Lawrence Place Hyattsville, Maryland 20781, USA Toll Free: Phone: Fax:
 5200 Lawrence Place Hyattsville, Maryland 20781, USA Toll Free: 1-888-416-0174 Phone: 301-277-3888 Fax: 301-277-3323 www.premierkites.com Congratulations on your purchase of the Osprey sport kite. The
Using a kite involves risks and can cause severe injuries. Before use, carefully read this manual.
 Using a kite involves risks and can cause severe injuries. Before use, carefully read this manual. SUMMARY FOCUS P 2 SAFETY P 3 WIND RANGE P 6 SETTING UP YOUR KITE P 7 SETTING UP YOUR BAR P 8 LAUNCHING
TENSOR USER MANUAL Please ReaD CaReFUllY BeFORe FlIGHT
 TENSOR USER MANUAL Please READ CAREFULLY BEFORE FLIGHT Welcome Congratulations on your purchase of the Tensor, a sophisticated land-based power kite that converts easily from dual-line bar to quad-line
Using a kite involves risks and can cause severe injuries. Before use, carefully read this manual.
 Using a kite involves risks and can cause severe injuries. Before use, carefully read this manual. FOCUS Here is a glossary of your equipment for you to get acquainted with most technical terms used in
airush Technical Advantage User s Manual
 airush Technical Advantage User s Manual Dear Pilot, We would like to express our gratitude to you for purchasing an Airush kite. We are sure you will have hours of action packed fun each time you fly.
BestKiteboarding: Waroo Kite Manual.
 BestKiteboarding: Waroo Kite Manual. Best Kiteboarding thanks you for making the decision to purchase a new Waroo SLE supported leading edge inflatable kite, we are sure that this kite will repay your
wind range & bar size land
 UNIV ER SAL HIGH LEVEL FOIL KIT E H å kon M æ lan d I NS P I RED NAT U RE / / D RI V EN T HE E LEMEN TS Born from the Chrono legacy and packed full of the latest technology, this allnew design takes it
Before flying your kite it is very important to understand the wind window. The image shows where the kite will create the most power (straight
 WELCOME Thank you for buying this Peter Lynn product, and welcome to the World of Peter Lynn; a world of wind driven excitement, where people passionately pursue their dreams whether that s freeriding
Contents. Technical Data. Permittable load. Suspension height. 45 cm, incl. carabiner. Speed System. Weight (without rescue system) 7 kg (size L)
 7 kg (size L)") Manual/Service 13 Contents Technical Data Fundamentals of the RANGE Technical Data Intended Use Permittable load Suspension height Glider Harness 120 kg 45 cm, incl. carabiner Speed System Rescue System
Manual/Service 13 Contents Technical Data Fundamentals of the RANGE Technical Data Intended Use Permittable load Suspension height Glider Harness 120 kg 45 cm, incl. carabiner Speed System Rescue System
Attaching the flying lines
 1 1 2 3 3 4 5 6 7 7 9 8 8 10 12 13 11 14 15 15 16 18 17 16 19 20 21 22 23 1. Rear line attachment loops 2. Top line attachment knots 3. Rear leader lines (top part) 4. djustment to set difference between
Technical Data. Flying with the range2. Maintenance and Repair
 Manual/Service 1 Contents Technical Data Fundamentals of the range2 Speed System Rescue System Rescue System Installation adjustment Possibilities Cross Bracing Ballast Container Pockets Towing Operation
CONTRA NITRO CO2 ELEMENT
 2005 KITE MANUAL CONTRA NITRO CO2 ELEMENT RELEASE OF LIABILITY AND ASSUMPTION OF RISK DO NOT USE THIS PRODUCT UNLESS YOU AGREE WITH THE FOLLOWING TERMS AND CONDITIONS IMPORTANT WARNING! THIS WARNING IS
Before flying your kite it is very important to understand the wind window. The image shows where the kite will create the most power (straight
 WELCOME Thank you for buying this Peter Lynn product, and welcome to the World of Peter Lynn, a world of wind driven excitement, where people passionately pursue their dreams whether that s freeriding
Before flying your kite it is very important to understand the wind window. The image shows where the kite will create the most power (straight
 WELCOME Thank you for buying this Peter Lynn product and welcome to the world of Peter Lynn; a world of wind driven excitement, where people passionately pursue their dreams. Whether that s riding huge
The Definite Guide to Optimist Trim
 The Definite Guide to Optimist Trim by Martin Gahmberg & the WB-Sails team The purpose of this tuning guide is to help you trim your WB sail optimally by learning the effects of the controls: How to change
O O. notus. zeeko bar. notus lt KITE FREESTYLE KITE STYLES. by zeeko. by zeeko FREESTYLE FREERIDE
 O O O O notus + notus lt KITE FREESTYLE KITE FREESTYLE FREERIDE by zeeko by zeeko zeeko bar notus by zeeko After the success of the first generation of NOTUS, the ZEEKO R&D team lead by Nicolas Caillou,
Company info, Technical Support & Warranty information:
 Congratulations! You are now the owner of the most popular down-wind kayak and canoe sail available on the market. WindPaddle Sails are off-the-wind sails that will easily propel you faster than you can
Chapter 6: The Magician's Tools: High Performance Tuning
 Chapter 6: The Magician's Tools: High Performance Tuning How your kite is tuned determines how it flies. You can leave it set on the regular performance marks provided by the factory and probably have
Thanks. Ride safe Team Ozone
 Thanks Thank you for purchasing this Ozone kite. Our mission is to build kites with cutting edge performance that are easy, fun and safe to use, no matter what your level. At Ozone we are passionate about
We are proud to announce the release of the 10th edition of the NOTUS and 4th edition of the REV version. This year is focused on lightness and
 2018 Collection We are proud to announce the release of the 10th edition of the NOTUS and 4th edition of the REV version. This year is focused on lightness and responsiveness. Thanks to the long-term experience
The TRUST is a kite with a 100% design focus on FREERIDE. Aimed at riders of any level, the kite is intuitive with an optimum relaunch capability, a
 2014 ENGLISH PRO GRAM The TRUST is a kite with a 100% design focus on FREERIDE. Aimed at riders of any level, the kite is intuitive with an optimum relaunch capability, a great stability and perfect power
2. Release of Liability, Claim Waiver and Assumption of Risk Agreement
 2004 Type Wave System Manual 1. Type Wave Concept 2. Release of Liability, Claim Waiver and Assumption of Risk Agreement 3. Wave Bar Features 4. Connecting the Bar to the Kite Fool Proof Connection System
thanks WaterkiteManual
 C4 v6 Manual thanks Thank you for purchasing this Ozone kite. Our mission is to build kites with cutting edge performance that are easy, fun and safe to use, no matter what your level. 2 At Ozone we are
OVERVIEW Here is what the finished set-up will look like, with the kite flying in the air. Note: Red lines on the left. Grey lines on the right.
 OVERVIEW Here is what the finished set-up will look like, with the kite flying in the air. Note: Red lines on the left. Grey lines on the right. < Bridle line(attached to the LE of the kite). The black
C01 ISLAND. Performance everywhere : Freestyle, Wave, Freeride, Foil & Hang Time 4 / 5,5 / 7 / 9 / 10 / 12 C02 ALOHA C03 DEEP WATER
 2016 C01 ISLAND Performance everywhere : Freestyle, Wave, Freeride, Foil & Hang Time 4 / 5,5 / 7 / 9 / 10 / 12 C02 ALOHA C03 DEEP WATER NOTUS REV 2016 Notus Rev 2016 retains & confirms its ultra versatile
...continues to next page
 DO NOT USE THIS PRODUCT UNLESS YOU HAVE READ AND UNDERSTAND THESE WARNINGS, CAUTIONS, AND INSTRUCTIONS WHICH ARE FOR YOUR SECURITY AND PROTECTION. THIS INFORMATION MAY BE SUBJECT TO CHANGE AT ANY TIME.
Owner s Guide. ElevateSUP.com
 Owner s Guide ElevateSUP.com IMPORTANT READ THIS IMPORTANT INFORMATION BEFORE USING YOUR STAND UP PAD- DLEBOARD Disregarding any of the safety precautions and instructions contained in the owner s manual
...continues to next page
 DO NOT USE THIS PRODUCT UNLESS YOU HAVE READ AND UNDERSTAND THESE WARNINGS, CAUTIONS, AND INSTRUCTIONS WHICH ARE FOR YOUR SECURITY AND PROTECTION. THIS INFORMATION MAY BE SUBJECT TO CHANGE AT ANY TIME.
GENERAL SAFETY NOTICE
 GENERAL SAFETY NOTICE ActSafe wants to share the outcome of recent investigations in rope damaging incidents. We want to heighten the users awareness that poor operation can potentially lead to rope damages
BEST KITEBOARDING USER MANUAL
 BEST KITEBOARDING USER MANUAL Thank you for purchasing a Best kite. Please read this manual carefully and in its entirety before using your new Best kite. WARNING Kiteboarding/kitesurfing/snowkiting are
Zip-Line Kit Instructions
 1 Zip-Lines Ireland - Zip-Line Kit Instructions DC001A Zip-Line Kit Instructions Thank you for your purchase of the ZLI Zip-line kit! This product was engineered to provide safe fun for all ages when the
to manage the above situations self rescue skills are needed!
 info@kitesystems.net Waterfoil self rescue on water Self rescue on water... Reasons for packing the kite and self rescue on water Sudden offshore wind direction No more wind A technical problem with the
9-Cell MAIN CANOPIES
 4357 D PARK DRIVE NORCROSS, GA 30093 USA Phone (770)-279-7733 FAX (770)-279-7729 MAIN CANOPY OWNER'S MANUAL and PACKING INSTRUCTIONS for all 9-Cell MAIN CANOPIES March 2007 1. TRAINING AND/OR EXPERIENCE
USER MANUAL 2013 BLADEKITEBOARDING
 BLADEKITEBOARDING USER MANUAL 2013 Table of Contents 03... Release of Liability 04... Safety First 07... Bar Overview 08... Kite Overview 09... Wind Range 10... Control System and Lines 16... Mad2 (Multi-valve
Navaro Buggy Instruction Manual INSTRUCTION BOOKLET
 INSTRUCTION BOOKLET Safety Thank you for purchasing your new Flexifoil buggy. If operated and looked after properly, your new buggy will serve you well. Before assembling and using this buggy, you must
...continues to next page
 DO NOT USE THIS PRODUCT UNLESS YOU HAVE READ AND UNDERSTAND THESE WARNINGS, CAUTIONS, AND INSTRUCTIONS WHICH ARE FOR YOUR SECURITY AND PROTECTION. THIS INFORMATION MAY BE SUBJECT TO CHANGE AT ANY TIME.
Aerodyne Flight Recommendations
 Aerodyne Flight Recommendations In this essay we present you with some recommendations, in order to assist you in learning more about your canopy, and how to use it in a better way, so that you can become
TUNE YOUR SAILS SPEED. Optimist Tuning Guide. Photo Wavelength
 TUNE YOUR SAILS FOR OUTRIGHT SPEED Photo Wavelength PEAK / HEAD THROAT TACK CLEW THANK YOU for choosing North Sails for your Optimist. Whether you are just starting out in an Optimist you are an experienced
CO2 BLACKTIP ACCESS KITE MANUAL
 2003 CO2 BLACKTIP ACCESS CO2 BLACKTIP ACCESS KITE MANUAL RELEASE OF LIABILITY AND ASSUMPTION OF RISK DO NOT USE THIS PRODUCT UNLESS YOU AGREE WITH THE FOLLOWING TERMS AND CONDITIONS IMPORTANT WARNING!
Inflatable Stand Up Paddle Board Manual
 Inflatable Stand Up Paddle Board Manual V-Max AIR 12 6 Voyager AIR 11 6 Koa AIR 10 2 and 10 8 Heavy duty built in carrying handles Steel D Ring Built in Cargo Straps EVA Deck Pad High Pressure Air Valve
2002 KITE MANUAL SOLID KITEBOARDING EQUIPMENT
 2002 KITE MANUAL SOLID KITEBOARDING EQUIPMENT RELEASE OF LIABILITY AND ASSUMPTION OF RISK DO NOT USE THIS PRODUCT UNLESS YOU AGREE WITH THE FOLLOWING TERMS AND CONDITIONS IMPORTANT WARNING! THIS WARNING
Taming the Kite! Wineglasses. Wineglasses occur when the top half of the kite fills before the bottom with a twist in the middle.
 Taming the Kite! What goes wrong? Wineglass when launching can happen in light or heavy weather Broaching on a reach usually in heavy weather Death rolls usually in heavy weather Gybing disasters worse
Storm Owner s Manual
 Storm Owner s Manual www.ravesports.com Table of Contents Product instructions and warnings... 3 Water sports safety code... 8 Inflating instructions... 11 Troubleshooting... 12 Cleaning and storage...
FIX ROAD & FIX STRAP cargo securing systems Operating Instruction Manual
 FIX ROAD & FIX STRAP cargo securing systems Operating Instruction Manual NWE NETWORK ENGINEERING OY AB VAT: FI 09628099 1 Introduction Please ensure you read these instructions and understand them fully
THE AMERICAN BARN DOOR KITE
 THE AMERICAN BARN DOOR KITE Oregon Kitemaker s Retreat January 2007 Rod Beamguard 4104 NW 112 th Way Vancouver, WA 98685-3578 (360) 574-8050 home (360) 750-9833 office kytfevr@wa-net.com PLANFORM BARN
Assembly instructions nortik scubi 2 Recreational kayak
 Assembly instructions nortik scubi 2 Recreational kayak QR-Code assembly video: Assembly instructions nortik scubi 2 Dear Customer, You have purchased a nortik scubi 2, an innovative hybrid kayak for recreational
Kite Manual 2009 User s Tips FAQ Bar Manual 2009 KITE MANUAL 2009 TECHNICAL ADVANTAGE
 Kite Manual 2009 User s Tips FAQ Bar Manual 2009 KITE MANUAL 2009 TECHNICAL ADVANTAGE Dear Rider We would like to express our gratitude to you for purchasing an Airush kite. We are sure you will have hours
CII Rigging suggestions
 CII Rigging suggestions This mini-manual uses photographs of the final prototype sail and the final pre-production mast. Where changes occurred between these and the production units, they are described
North Sails Seattle Thunderbird Tuning Guide
 Page 1 of 6 North Sails Seattle Thunderbird Tuning Guide Introduction The following tuning guide is meant as a good starting point in setting up your boat. Since not all Thunderbirds are exactly alike
Rapid Survival System
 Rapid Survival System Model W User Manual Emergency Floatation for Moving Water Self Rescue Version 10.02 Contents User Manual... 1 Part 1: Description and Function... 3 Part 2: Package Contents... 3 Part
Wing assemblyfinal Master 4/29/04 11:20 PM Page 1. Issued January 1, Sabre Aircraft. Assembly Manual. Sabre 16ss Wing
 Wing assemblyfinal Master 4/29/04 11:20 PM Page 1 Issued January 1, 2002 Sabre Aircraft Assembly Manual Sabre 16ss Wing Wing assemblyfinal Master 4/29/04 11:20 PM Page 2 1. 2. 1. Unzip the cover and remove
Main characteristics
 it rocks Expanding the kite line up, JN presents the swept back kite shape. The one fits all kite is specially developed for kiters searching for a shape with a wide windrange which is suitable for all
BlueArrow. Venus DLG. Construction and Flight Manual. Note: Read this manual carefully before construction and flight!
 BlueArrow Venus DLG Construction and Flight Manual Note: Read this manual carefully before construction and flight! 1 1. Introduction Thank you for choosing this fantastic Venus DLG brought to you by BlueArrow
2,500/4,000 LB Easy Riser Vertical Cable Feighner Lift
 2,500/4,000 LB Easy Riser Vertical Cable Feighner Lift CAUTION - PUT SAFETY FIRST 1. Before attempting to install or operate this lift, study and fully understand the proper operating procedures and safety
Pro Climb Rigging Bollard USER MANUAL. Pro Climb Rigging Bollard
 Pro Climb Rigging Bollard USER MANUAL Pro Climb Rigging Bollard www.proclimb.co.nz Protection Rubber Wear Sleeve Picture 1 Rigging Loop Introduction The Pro Climb Rigging Bollard (PCRB) is a friction device
USER MANUAL ENGLISH 2018 CONTROL SYSTEM
 USER MANUAL ENGLISH 2018 CONTROL SYSTEM DO NOT USE THIS PRODUCT UNLESS YOU HAVE READ AND UNDERSTAND THESE WARNINGS, CAUTIONS, AND INSTRUCTIONS WHICH ARE FOR YOUR SECURITY AND PROTECTION. THIS INFORMATION
Kiteboarding Rescue Procedures
 Kiteboarding Rescue Procedures Kiteboarding is a growing sport that is becoming more popular than windsurfing. Rescue of injured or incapacitated kiteboarders comes with many challenges; however, with
Aircraft Recovery Lifting out of Limits
 Aircraft Recovery Lifting out of Limits Aircraft skids off the runway Headlines such as these frequently reached us. Recently in the media there has been an increasing number of aircraft skidding off of
WELCOME SAFETY INSTRUCTIONS
 WELCOME Lynn, a world of wind driven excitement, where people passionately pursue their dreams whether that s freeriding at a local beach or enjoying the virgin snow on a back country adventure. Peter
SAFETY INSTRUCTIONS CAUTION:
 WELCOME Thank you for buying this Peter Lynn product, and welcome to the World of Peter Lynn, a world of wind driven excitement, where people passionately pursue their dreams. Whether that s freeriding
Watch out for useful tips & tricks regarding our products under in the following category:
 VEGAS 11 Tips & Tricks Watch out for useful tips & tricks regarding our products under www.northkites.com in the following category: TV, Pics & Goodies Movies. 1 Tips & Tricks Content 1. Release of Liability
Installation instructions for the Yepp Maxi Easyfit
 Installation instructions for the Yepp Maxi Easyfit The Yepp Maxi Easyfit is suitable for: - fitting to an Easyfit luggage carrier* (fig 1A) or - fitting in combination with the Yepp Maxi Easyfit carrier
2002 KITE MANUAL SOLID KITEBOARDING EQUIPMENT
 2002 KITE MANUAL SOLID KITEBOARDING EQUIPMENT RELEASE OF LIABILITY AND ASSUMPTION OF RISK DO NOT USE THIS PRODUCT UNLESS YOU AGREE WITH THE FOLLOWING TERMS AND CONDITIONS IMPORTANT WARNING! THIS WARNING
Shoreline Cantilever Lift 2500lb Capacity Models: (108" inside width) - Part # (120" inside width) - Part #
 - Part # (120 inside width) - Part #") Shoreline Cantilever Lift 2500lb Capacity Models: 25108 (108" inside width) - Part # 1017402 25120 (120" inside width) - Part # 1017403 1. 2. 3. 4. 5. CAUTION - PUT SAFETY FIRST Before attempting to install
Shoreline Cantilever Lift 2500lb Capacity Models: 25108 (108" inside width) - Part # 1017402 25120 (120" inside width) - Part # 1017403 1. 2. 3. 4. 5. CAUTION - PUT SAFETY FIRST Before attempting to install
AIR HAMMERS MODEL NO: CAT138/CAT139 OPERATING & MAINTENANCE INSTRUCTIONS PART NO: / GC064
 AIR HAMMERS MODEL NO: CAT138/CAT139 PART NO: 3120152 /3120153 OPERATING & MAINTENANCE INSTRUCTIONS GC064 INTRODUCTION Thank you for purchasing this CLARKE Air Hammer. Before attempting to use this product,
Bottle Rocket Launcher P4-2000
 WWW.ARBORSCI.COM Bottle Rocket Launcher P4-2000 BACKGROUND: The Bottle Rocket Launcher allows for the exploration of launching rockets using commonly available materials such as plastic soda bottles and
MAN-032 Rev 0. Performance Designs Zero Packing Manual
 Performance Designs Zero Packing Manual Packing your PD ZERO Before you begin packing, please first review PD s Ram-Air Parachute Owner s Manual. Pay careful attention to the warning/ discussion on pages
FISH NET REPAIR. By Alfred Carlson
 FISH NET REPAIR By Alfred Carlson 2 Contents 1. Contents 2 2. 3-Spot Repair (One Broken mesh) 3 3. V-Shaped Repair (Two Broken meshes ) 23 4. N-Shaped Repair (Three Broken meshes) 33 5. M-Shaped Repair
SEAGO LIFERAFT GX MODEL
 SEAGO LIFERAFT GX MODEL OWNERS MANUAL & OPERATING HANDBOOK First steps 1. Register the liferaft to activate warranty at www.seagoyachting.co.uk/register or post the registration form provided. 2. Affix