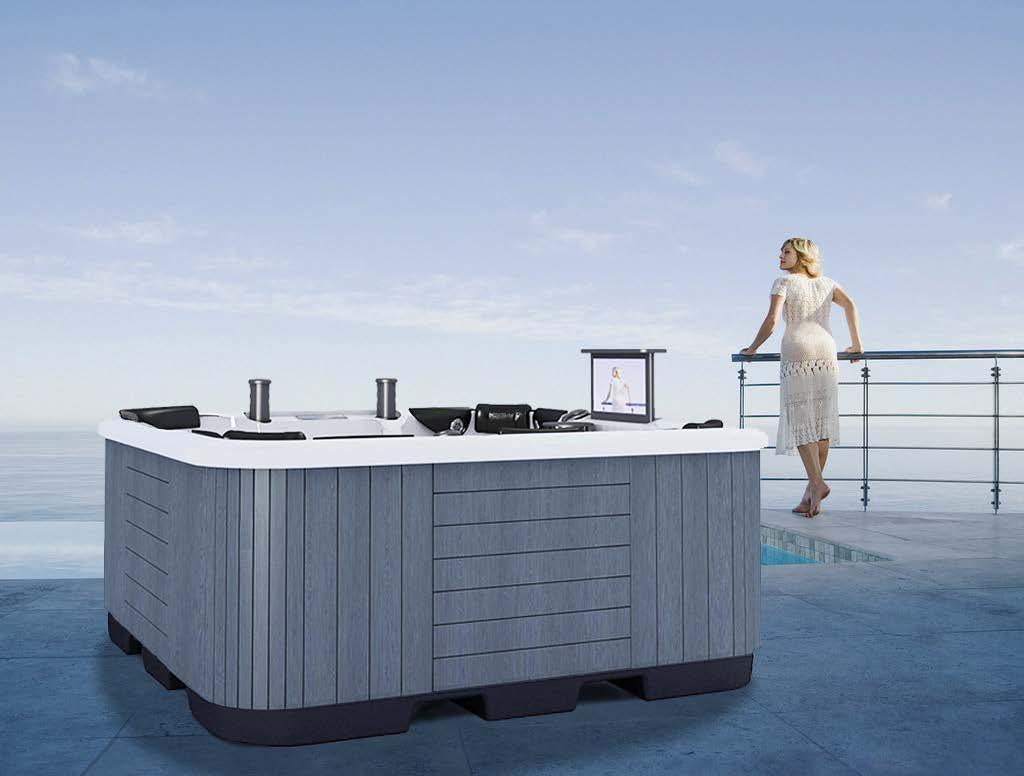
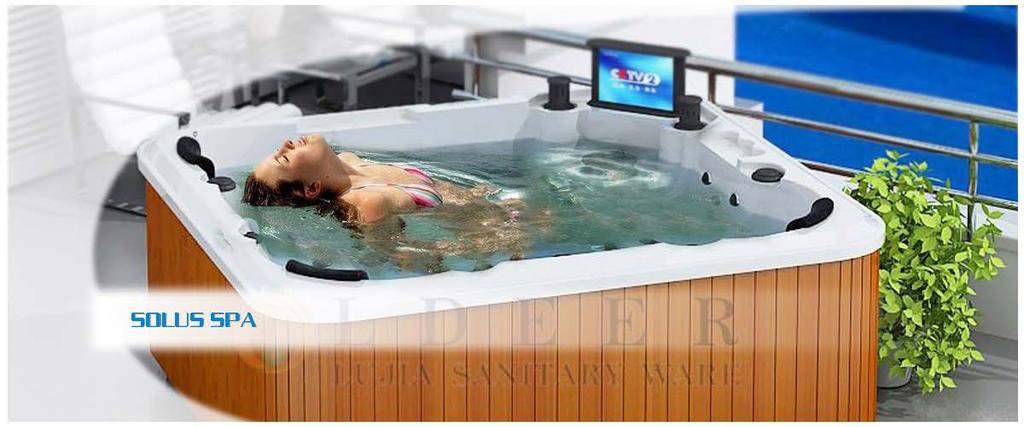
Solus Spa Solus Spa Solus Spa
|
|
|
- Chester McGee
- 6 years ago
- Views:
Transcription

1 Solus Spa Spa
2 Contents Page 3. Important Safety Instructions 4. Choosing the Right Location Outdoor Locations Special Considerations 5. Installation and Preparation Hot Tub Base Hot Water Supply Safety 14. Features Turning on the Jets, Pumps and Lighting Ozonator Low Temperature Protection Locking the Keypad 15. Radio 16. Troubleshooting 17. Warning Codes Taking Delivery 6. Electrics 7. Installation Accessing the Panel Connecting the Drainage Electrical Connections 8. Circuit Board Diagrams 9. Technical Specifications 10. Operating Your Spa Filling Up, Checking and Starting Your Spa Warnings Filters 11. Control Panel 12. Operating the Control Panel Menu Mode Sleep Mode Winter Mode Set Time Circulation Mode 13. Heating Your Spa Solus Spa 2
3 Important Safety Instructions Your physiological response to hot water is very subjective and depends on your age, health, and medical history. If you don t know your tolerance to hot water, or experience, dizziness, headaches or nausea you should exit the spa immediately and cool down. WARNING 1. Children should NOT use a spa without adult supervision. 2. Do not allow children to submerge their head under water. 3. Do not use a spa unless all suction guards are installed to prevent body and hair entrapment. Do not sit in front of, or on top of the suction fittings or skimmer, as this will obstruct proper circulation and may result in personal injury. 4. Never operate the spa pump at high speed without having all suction and return lines open. 5. Always keep the hardcover installed and locked when the spa is not in use. 6. People using medications and/or having any adverse medical history should consult a physician before using a spa. 7. People with infectious diseases should not use a spa. 8. Use caution when entering or exiting a spa. Where practical, install a safety grab bar or handrail. Turn off the jets before entering the spa to improve visibility of the steps or flat entry area. 9. Do not use drugs or alcohol before or during the use of a spa. 10. Pregnant women should consult a physician before using a spa. 11. As prolonged immersion in water temperatures in excess of 38 C (100 F) may be damage your health, we recommend measuring the water temperature with an accurate thermometer before entering the spa. We also recommend establishing lower temperatures and shorter periods of use for young children and/ or those users potentially affected by hot temperatures. 12. Do not use a spa immediately following strenuous exercise. 13. Do not permit or use electric appliances (such as light, telephone, radio or television) within 1.5 m (5 ft) of a spa, unless such appliances are rated at 12VDC or less. 14. Test the GFCI (Ground Fault Circuit Interrupter) monthly. 15. Post emergency phone numbers for Police, Fire Dept., and Ambulance at the nearest phone. HYPOTHERMIA Since your spa can be set to reach temperatures of 40 C (104 F), users should be aware that extended submersion in water that exceeds normal body temperature can lead to hypothermia. The causes, symptoms and effects of hypothermia may be described as follows: Hypothermia occurs when the internal temperature of the body reaches several degrees above the normal body temperature of 37 C (98.6 F). The symptoms of hypothermia include drowsiness, lethargy, and an increase in the internal temperature of the body. The effects of hypothermia include: Unawareness of impending hazard Failure to perceive heat Failure to recognize the need to exit the spa Physical inability to exit the spa Fetal damage in pregnant woman Unconsciousness resulting in the danger of drowning Solus Spa 3

4 WARNING THE USE OF ALCOHOL, DRUGS OR MEDICATION CAN SIGNIFICANTLY INCREASE THE RISK OF HYPOTHERMIA. Choosing the Right Location In this part, we describe outdoor spa installations. The following information will assist you in choosing the right location for your individual needs. When making your decision, always remember that spas can be enjoyed year-round, indoors or out, regardless of the climate. Many spa owners report that their favourite seasons are the cooler autumn and winter months, whilst others praise the enjoyment of using their spa in the warmer spring and summer months. OUTDOOR LOCATIONS For a variety of reasons, outdoor locations are a far more popular choice. Some of the reasons include: Limited indoor space Delivery complications due to door openings, stairwells, etc. Limited budget (indoor installations usually also involve interior home renovations) Desire for an outdoor entertainment centre The spa is being installed adjacent to an existing or planned swimming pool Concerns over splashing water inside the home For those who choose an outdoor location, spa operating temperatures can be adjusted to match the season. In colder months, many owners will operate their spa in the range of C ( F). During warmer months, an operating temperature of C (97-99 F) will provide a refreshing retreat. If you should choose an outdoor location, you will find further information as outlined in the section below. SPECIAL CONSIDERATIONS Contact your local building department to determine if a building permit is necessary and for information on applicable bylaws (distance from property lines, buildings, fencing requirements, etc.). If you are doing any excavating, contact your local gas, hydro, and cable-company to ensure that there are no underground lines Locate the spa, where practical, within close distance of a door to the house. This will maximize potential winter use. Ensure that your pump(s), controls, drain-valve and thermal probe are easily accessible and protected. If possible, locate the spa where you will enjoy some privacy. If this is not possible, a partial privacy or wind partition, or proper placement of the optional cover lifter should provide adequate privacy. Spa equipment is generally designed for indoor (out of the direct elements) use. When your Spa is equipped with a factory-installed cabinet, and installed as per the guidelines of this manual, the equipment is adequately protected. If the spa is shipped without a cabinet, your custom cabinet or other structure must be designed to supply protection for the spa equipment from rain, snow, splash water, etc., but still designed in a manner to ensure adequate ventilation.! Solus Spa 4

5 Preparation for Delivery HOT TUB BASE Your hot tub needs a good solid foundation. The foundation on which your hot tub sits must be able to support the weight of the tub, the water in it and the weight of its users. If the foundation is inadequate, the tub may shift every now and again. This will cause stress to the shell which may eventually lead to small cracks. Damage caused by an inadequate or improper foundation is not usually covered by hot tub warranties. It is the responsibility of the hot tub owner to provide a proper foundation for the hot tub. A hot tub containing both water and people is extremely heavy. If you are installing the tub onto wooden decking or an other elevated structure, it is advisable to consult a structural engineer to ensure that the structure will support the weight of the tub. Ideally, hot tubs should be installed onto a concrete base at least 4 thick. If you are installing your hot tub indoors, ensure that your choice of flooring is impermeable to water. Ensure that water drains away from the spa, protecting the cabinet and electrical components from water damage. WATER SUPPLY Hot Tubs do not require a permanent water supply however there must be a non-softened water supply and hosepipe within reach in order to fill the tub. A hosepipe is also used for emptying the hot tub via the bottom drain or by using a submersible pump. An accessible drain in which to direct the emptying water is useful. SAFETY Do not place your hot tub within 3 metres of overhead power lines. Make sure your hot tub is positioned so that access to the equipment compartment and side panels will not be blocked. On the E-003 and E-020, the access panel is on the longest side. TAKING DELIVERY Depending on the delivery service you have ordered, we will either drop the spa to curbside, or bring the spa into position (as long as there is clear access). Check the dimensions of your hot tub and compare them to the width of any gates and paths along the delivery route between the road and the installation site. It may be necessary for you to remove a gate or partially remove a fence in order to provide an unobstructed passageway. If the delivery route will require a 90 turn, don t forget to check the measurements to ensure the hot tub will fit through. Also, look for any protruding utility meters, low roof eaves, overhanging trees or gutters that might cause an obstruction. In some circumstances it might be necessary to hire a crane for the installation. This could be to avoid damage to the tub or to your property, or simply because there is no other way to get the tub into position. Solus Spa 5
 Regulations and fall into the same category as swimming pools.")


6 Electrics You don t need a permanent water supply for a hot tub or garden spa but you will need a suitable electrical supply to run the tub. Hot tubs have a specific section in the 17th Edition IEE (Institute of Electrical Engineers) Regulations and fall into the same category as swimming pools. When appointing an electrician to prepare your hot tub electrics check that they are suitably qualified electrician. Do not attempt to install hot tub electrics yourself if you are not a fully qualified electrician. The Government introduced a new law in January 2005, which demands that most electrical work in UK households is only carried out by a competent person. This law means that Electrical safety requirements have been included in a new Part P of the Building Regulations. The law states that anyone carrying out fixed electrical installations in households in England and Wales must ensure that electrical installations are: Designed and installed to afford appropriate protection against mechanical and thermal damage, and so that they do not present electric shock and fire hazards to people Suitably inspected and tested to verify that they meet the relevant equipment and installation standards. It is now against the law to have a new circuit installed in your home without having it inspected and tested to ensure it is Part P compliant. This can be achieved in 2 ways: 1. Appoint an electrical contractor who is registered with a competent person scheme. 2. Appoint someone who is not Part P registered but contact you local authority s Building Control Department first. The work will have to be inspected and tested by your local authority before it can be signed off. There will be a charge for this service. Either way you will receive a Part P certificate after the hot tub electrical supply work is completed. From 2007, these will need to be kept on file and presented if you ever sell your house as part of the new home information packs (HIPS). Solus Spas can liaise with your electrical contractor regarding the exact specification for your spa but it must meet the following specification: The hot tub must be hard wired on its own fused spur back to your household consumer unit. (i.e. the tub should not be sharing a supply with any other appliances) The hot tub should be protected by a sufficiently rated MCB (mains circuit breaker) and should cover the maximum amperage pull of the spa PLUS 25% to allow for brake torque (i.e. the extra rush of current when pumps are first started.) So a hot tub that has a maximum current draw of 20 amps should be fitted with a 25amp MCB. The hot tub should also be protected against earth faults by an RCD (Residual Current Device) This is a trip switch which prevents danger of electric shock from damaged or waterlogged cables and connections. A suitably rated 30mA RCD is recommended. Outdoor cabling should be protected from damage by either laying protective ducting (pvc pipe) below ground or by using Steel Wired Armoured (SWA) cable. Your electrician will calculate the size of cable required depending on the loading and the distance from the mains supply. A 6-10 mm2 3-core SWA cable should be suitable in most cases but always consult an electrician first. An IP65 45amp Rotary Isolation Switch is also recommended so that the hot tub can be isolated outdoors in an emergency or for service work. This is simply a rotary on/off switch but should be sited more than 2 metres away for the hot tub so that users cannot be in the spa whilst operating the switch. The hot tub supply can then be directly hard wired into the load box inside the spa. Waterproof gland packs should be used to prevent ingress of water on all outdoor electrical connections (2 at the isolation switch and 1 inside the hot tub) Ensure that all earth cables are clearly colour coded with green/yellow insulating tape or earth sleeve. Once the hot tub is filled with water and the electrical supply is installed, your hot tub installation team should commission the hot tub and check that everything is fully operational before handing over to you with a thorough training of how all of the hot tub features work. Solus Spa 6

 to the input of RCD 3.")
7 INSTALLING THE HOT TUB Accessing The Panel The diagrams below explains how to remove the panels for the Spas. Connecting The Drainage 1. Connect inlet pipe 2. Connect drainage 3. Shut of drainage 4. Once the spa has Electrical Connections been filled with water, turn of the water inlet valve as above. 1. Open electrical box 2. Connect a 3-Core, 6mm2 (or 10mm2 - Check with Engineer) to the input of RCD 3. Spas must be correctly earthed by an electrician. Solus Spa 7

8 CIRCUIT BOARD DIAGRAM Solus Spa 8
9 TECHNICAL SPECS Model Device Power Rated Amp Total Current Required E-020 Water Pump 2200W 9.17A Water Pump W 9.17A Circulation Pump 750W 3.13A Air blower 700W 2.92A Heater 3000K 12.5A TV 45W 3.75A DVD 30W 2.5A Other system.099w 0.45A 43.59A E-003 Water Pump W 9.17A Water Pump W 9.17A Circulation Pump 750W 3.13A Air blower 700W 2.92A Heater 3000K 12.5A Other system.099w 0.45A 37.34A E-012 water Pump W 9.17A Circulation Pump 750W 3.13A Air blower 700W 2.92A 28.17A Heater 3000K 12.5A Other system.099w 0.45A Solus Spa 9
10 Important Usage Warnings - Non Warranty Faults Paying full attention to the issues below will help to reduce the risk of damage to your spa. Please also read your warranty document in full. This can be found at the end of this document. Water Treatment One of the most crucial aspects of spa maintenance is water treatment. Poorly treated spas may result in high levels of ph or Water Hardness. Either of these problems may result in limescale build up which can damage your spa surface, pumps, jets or heaters. If we find a build up of limescale on your spa, this would not be covered under warranty. Different chemical packs have different methods of caring for the water. You will need to refer to the guide that came which your chosen chemical pack for exact details on how to treat your water. You can also download a general water treatment guide from our website. Filling Up Your Spa - Air Locks The correct way to fill up your spa is to place your hosepipe inside the filter compartment. Some customer place their hosepipe inside the spas main seating area however, doing this may cause a build up of air inside the heater (known as an air lock). Over time, air locks will cause the heater to fail. This would not be covered under warranty. To avoid this problem ensure you fill up the spa through the filter window. You can tell if you have an air lock by turning on the circulation pump. If no water appears to circulate through the system it is very possible that you have an air lock. To resolve this problem, loosen the unions at the side of the suction end of the circulation pump until water begins to flow through. Filters Poor filter conditions are one of the biggest causes of faults that are not covered under warranty. Poor filter conditions allow particles to roam in the spas water. These tiny particles can cause damage to the spas components. There are a number of ways of caring for your filter. Crucially, we recommend that you regularly soak your spa in filter cleaner every few weeks. Additionally, we recommend changing your filter every 6-9 months (depending on usage). Some customers purchase a spare filer at the time of ordering and alternate between the two. Use of Cover Your spa cover must be used when the spa is not in use. Leaving the cover expose allows leaves, dust etc to enter your spa. These may then be sucked in the spas pipework causing blockages or damaging the equipment. Caring for Wooden Skirting Wood skirting has a tendency to fade and lose its like-new appearance with time. You should re-stain your spa s skirting once every six months. Lightly sand the surfaces to remove any dirt and smoothen rough surfaces. Re-stain wood surfaces using a suitable stain. Do not use varnishes, shellacs or surface sealants. Frost Damage As water freezes in the winter, it expands. This expansion can cause damage to your spas components and pipework. If you intend to use the spa throughout winter then you must have the frost prevention system turned on. If you do not intend to use the spa throughout winter than the spa must be winterized. Problems arising from frost damage are not covered under warranty. Solus Spa 10


11 Cleaning the Filter Core The filter can be washed with a hose pipe, alternatively, the dirt on the filter can be brushed off after being left to dry in a cool place. CONTROL PANEL Solus Spa 11
12 1. MENU MODE Entering into the Menu allows you to adjust many of the spa s settings. These settings include the Time, Circulation Period, Sleep Times etc. To enter into Menu Mode press. Press either or until ON is displayed. Then press the button to enter Menu Mode. Then, scroll through the menu items by pressing. 1. SET UNIT OF TEMPERATURE You spa can display the temperature in either Celsius or Fahrenheit. Press to select you preferred unit and then press to confirm. 2. SETTING THE TIME Press to set the minute/hour. Press or to adjust to the time. Once the time has been correctly set, press the to confirm. 3. SETTING THE FILTRATION SETTINGS When the spa is maintaining a constant temperature, the circulation system will automatically turn on in order to filter the water in the tub and keep the water clean. The spa will circulate for a set period of time (FP1), and will circulate based on a frequency set by the user (FP2). To set FP1 (Filtration Time), use the +/- buttons and then press. The spa will now ask you to confirm the time in between each filtration (FP2). Use the +/- buttons to adjust the time and then press the button. 4. SLEEP MODE To save electricity, a sleep mode is included in the Hot Tub. Whilst the spa is in sleep mode it will consume less electricity and will turn off all but the spas vital features. You must select a start time (SIL), and an end time (SILD) for the sleep mode. Press the +/- buttons to select a starting hour (Range ) Then press OK to confirm. SILD should now be displayed on the screen. You are now ready to enter the end time. Again, press the +/- buttons to enter an end time. Press OK once you ve finished. Solus Spa 12
13 5. WINTER MODE Freezing water temperatures can cause damage to equipment in the spa. The spa heater will turn itself on to raise the temperature of the water to 8 C. Press OK to continue. 6. CORRECTING TEMPERATURE ERRORS 33 C when it is actually only 30 C, then it is possible to calibrate the thermometers that monitor temperatures in the spa. OK to confirm and continue. 7. RESTORING FACTORY SETTINGS To restore the spa to factory settings, use the +/- buttons until the panel displays ON. Press OK to confirm. 8. EXITING THE MENU To exit the menu, simply press the OK button. 2. Heating Your Spa To set the temperature of the spa, press the button. Use and to adjust the 'Set Temperature'. When the 'Set Temperature' is higher than the 'Actual Temperature', the spa will turn on the Circulation Pump. The heater will then turn itself on after 30 seconds. When the 'Set Temperature' is lower than the 'Actual Temperature', the spa will turn off the heater, the circulation pump and ozonator will automatically turn on. The spa will automatically enter 'Filter Mode'. Solus Spa 13

14 Turning on Jets, Pumps, and Lighting To turn on a feature in the Hot Tub, simply press the to move the arrow, then press OK to turn your selected feature on or off. Page 11 of this manual shows what all the icons above represent. Hold for 2/3 seconds and all of the spas features will turn on gradually. Please Note: - The Fan Pump will automatically turn itself off after 30 minutes. - The water pump will not initiate if the water level is too low. - Pump 3 is the circulation pump and will automatically operate when the heater is in operation or when the tub in in Filtration mode. You can not manually turn on Pump 3. Ozonator The Ozonator inside your spa produces a natural chemical found in water. Ozone reduces the need for chemicals and sanitisers. The ozonator turns itself on whenever the circulation pump is in action. Low Temperature Protection When the temperature of the spa drops below 5 C, the spa will turn on both the circulation pump and the heater until the temperature in the water rises above 8 C. Locking the Keypad To lock the control panel, simply hold the button for 3 seconds until the panel displays the symbol. To unlock the keypad, simply hold the button for an additional 3 seconds until 'UNLOCK' is displayed on the panel. Solus Spa 14
15 Radio Operation Turning the Radio On To turn on the radio simply press the button. When is pressed, the volume will automatically rise and the last used radio station will begin to play. Selecting Stations / Tuning To scan for a radio station, hold the button for 2 seconds. The screen will now display TUN. Press or and the radio will scan through all channels until it finds a radio station. If you re in an area of poor signal quality, it is recommended that you tune the radio manually. To tune manually, simply press and then use the and keys to select a frequency. Memory To save a radio station to memory, Immediately after selecting the radio station, press. Each time you press the spa will increase the Memory Channel. There are a total of 10 memory channels. To recall a channel of memory, simply press the button. Each time you press the button the Memory channel will increase. Adjusting the Volume Whilst the spa is in radio mode, press the and buttons to adjust the volume. LIstening to External Audio Devices (Inc DVD Player) To listen to an Auxiliary Audio Device, press the button until AUX is displayed on the panel. Ensure than an auxiliary device is connected up to the spas control panel. Solus Spa 15
16 GENERAL TROUBLESHOOTING Symptoms Possible Cause(s) Possible Resolutions No Power No Circulation (which in turn prevents heating) - Breaker tripped or switched off at Mains Box - Fuse blown in 12v Control - RCD Tripped - RCD connected Improperly - Touchpad connection loose - Filters dirty/need replacing - Water level is too low - Circulation pump too hot (CLDF Displayed on touch pad) - Check panel - Replace fuse - Reset - Consult electrician - Unplug and reconnect cable. - Clean/replace filters - Top up water - Leave spa for an hour RCD Tripping - Faulty RCD Consult electrician Jet Surge - Water level too low - Filter dirty/needs replacing - Top up water - Clean/replace filters No Heat - Heat not set high enough (must be 3 degrees above actual temperature) - Low water - Heating element damaged - Turn up the heating - Top up water - Replace heating element (contact Solus spa) Noisy Motor - Damaged or worn bearings - Low voltage - Low water level - Frozen pump - Clogged impeller - Filter dirty/needs replacing -Call Solus spa - Check electrical supply - Top up water - Thaw out - Access and clean - Clean/replace filters Spa hotter than displayed on touch page - Temperature needs calibrating - Refer to page 13. Control panel displays nothing - Electrical Burn Out - Reboot control system Pump does not turn on - No power to pump - Pumps too hot. - See No Power above - Leave to cool for an hour. Solus Spa 16
17 Warning / Protection Codes A number of warning codes could be displayed on the spa. Warning Code Possible Cause(s) Corrective Action(s) Lack of Water in the Spa. The spa will not heat, nor will water pumps operate when the water level is too low. HEAT Temperature of water is higher than 45 C and potentially harmful. Top up the level of water. The spa will automatically turn off the heater. ICE CLDF Water temperature is below 5 C and potentially harmful to equipment. Circulation pump too hot. Circulation pump faulty It is recommended that you turn on the Low Temperature Protection. If this is already turned on the then the spa will begin to heat up the water automatically. Leave pump to cool down for an hour. Contact Solus spa Solus Spa 17
Smart JVA Module WARNING. For use with AquaLink RS systems with rev R firmware or newer.
 INstallation and OPERATION Manual Smart JVA Module For use with AquaLink RS systems with rev R firmware or newer. H0370200 Rev C FOR YOUR SAFETY - This product must be installed and serviced by a contractor
WARNING FOR YOUR SAFETY
 ! OWNER S MANUAL Power Alert AquaLink TRI Controller H0389100 REV A WARNING FOR YOUR SAFETY - This product must be installed and serviced by a licensed electrician in accordance with AS/NZ 3000-2007 and
Blue Whale Spa :- Site Preparation and Delivery
 Pre-Delivery Instructions Please take the time to read this information carefully, as it will provide you with the information you will need to ensure the safe, secure, and timely installation of your
Step-by-Step Planning Guide
 B A C K Y A R D P L A N N I N G G U I D E Step-by-Step Planning Guide Whether you are considering purchasing a Michael Phelps Signature Swim Spa by Master Spas, or can t wait for yours to be delivered,
SPA WORLD. Pre- delivery Guide
 SPA WORLD Pre- delivery Guide HELLO! This document is designed to provide all the information you need to ensure the smooth delivery and installation of your spa or swim spa. Please read it carefully and
Spas that free your mind.
 Spas that free your mind. 110-120V 60Hz 1200W Read this manual before operating 1 IMPORTANT SAFETY INSTRUCTIONS When using this electrical equipment, basic safety precautions should always be followed,
PRE-PURCHASE DECISIONS...1 BEFORE DELIVERY...1
 Table of Contents PRE-PURCHASE DECISIONS...1 BEFORE DELIVERY...1 Typical Installation Site...1 SITE ACCESS...2 COVER...2 ELECTRICAL HOOK UP...3 LOAD SHARING...3 ELECTRICAL REQUIREMENTS...4 North American...4
Spas that free your mind.
 Spas that free your mind. SPECIAL CODE COLORS PMS 1235 PMS 274 PMS 300 PMS 306 110-120V 60Hz 1200W Read this manual before operating 1 IMPORTANT SAFETY INSTRUCTIONS When using this electrical equipment,
Swim Spa Pre-delivery Guide
 Swim Spa Pre-delivery Guide Hello! This document is designed to provide all the information you need to ensure the smooth delivery and installation of your spa or swim spa. Please read it carefully and
help make your spa installation a success Commissioned by Caldera Spas
 9tips to help make your spa installation a success Commissioned by Caldera Spas Simple planning makes a better spa As spa owners ourselves we know what needs to happen to ensure a hot tub is installed
Installation, Operation and Maintenance Instructions for Electronically Controlled Pressurisation Units
 Installation, Operation and Maintenance Instructions for Electronically Controlled Pressurisation Units Models: EPS Single Pump EPT Twin Pump EPS-HP EPT-HP Single Pump High Pressure Twin Pump High Pressure
Arcadia Spas User Manual
 Arcadia Spas User Manual Dear Spa Buyer, Congratulations on your purchase of a new Arcadia Spa. You now possess the ultimate passport to tranquility a miniature vacation at home, ready and waiting for
Hot Tub Pre-Delivery Guide
 Hot Tub Pre-Delivery Guide To prepare for the delivery of your hot tub, make sure the delivery path is clear and no obstructions are present. Obstacles such as overhanging tree limbs, awnings, protruding
OWNER S MANUAL ALL 110/120 VOLT PLUG & PLAY SPAS
 OWNER S MANUAL ALL 110/120 VOLT PLUG & PLAY SPAS TABLE OF CONTENTS INTRODUCTION TITLE Page 1. Table of Contents 2 2. Owners Record 3 3. Planning a Location 4 4. A Good Foundation 5 Placing the Hot Tub
LOGO INSTRUCTION MANUAL THE SYMBOL FOR QUALITY AND VALUE
 LOGO INSTRUCTION MANUAL THE SYMBOL FOR QUALITY AND VALUE CONGRATULATIONS!!! Your Nordic Hot Tub represents an innovative and unparalleled Hot Tub design, with unmatched quality, features and value. We
Vortex Spas User Manual
 Vortex Spas User Manual Dear Spa Buyer, Congratulations on your purchase of a new Vortex Spa. You now possess the ultimate passport to tranquility a miniature vacation at home, ready and waiting for you
Part No B (01-00)
") Part No. 3-85-1167B (01-00) INTRODUCTION The spa that you have purchased is one of the very best available, and incorporates features designed to assure long, enjoyable and healthful use if properly operated
Part No. 3-85-1167B (01-00) INTRODUCTION The spa that you have purchased is one of the very best available, and incorporates features designed to assure long, enjoyable and healthful use if properly operated
420C AIR COMPRESSOR KIT PART NO C AIR COMPRESSOR KIT PART NO
 420C AIR COMPRESSOR KIT PART NO. 42042 460C AIR COMPRESSOR KIT PART NO. 46043 420C 460C IMPORTANT: It is essential that you and any other operator of this product read and understand the contents of this
200 PSI COMPRESSORS - MODEL NUMBERS
 200 PSI COMPRESSORS - MODEL NUMBERS 380C AIR COMPRESSOR KIT PART NO. 38033 480C AIR COMPRESSOR KIT PART NO. 48043 380C 480C IMPORTANT: It is essential that you and any other operator of this product read
2005 Spa Pre-Delivery Guide
 $3.00 2005 Spa Pre-Delivery Guide The guide to making your new Cal Spa installation easy Due to continuous improvement programs, all models, operation, and/or specifications are subject to change without
IMPORTANT SAFETY INSTRUCTIONS
 IMPORTANT SAFETY INSTRUCTIONS CAUTION - To reduce risk of electrical shock: - Do not disassemble. Do not attempt repairs or modifications. Refer to qualified service agencies for all service and repairs.
Life Smart Spas Frequently Asked Questions LS600DX
 Customer Service (888) 961-7727, ahsservice@watkinsmfg.com Life Smart Spas Frequently Asked Questions LS600DX What makes Lifesmart Spas different from other spas? Lifesmart spas are rotationally molded.
400C & 450C DUAL PERFORMANCE VALUE PACKS
 (Chrome) PART NO. 40013 (Silver) PART NO. 45012 (Chrome) PART NO. 45013 IMPORTANT: It is essential that you and any other operator of this product read and understand the contents of this manual before
Jacuzzi. J-SS40 Salt System Installation and Operating Instructions
 Jacuzzi J-SS40 Salt System Installation and Operating Instructions IMPORTANT SAFETY INSTRUCTIONS WARNING: Before installing this product. Read and follow all warning notices and instructions accompanying
100C Air Compressor Kit
 10010 100C Air Compressor (standard mounting bracket, CE Spec) 10014 100C Air Compressor (no leader hose or check valve, CE Spec) 10016 100C Air Compressor (with Omega Bracket, CE Spec) IMPORTANT: It is
Bath with Airjets HOMEOWNERS GUIDE P50045-G5, P50047-G5, P50049-G5, P50052-G D
 P50045-G5, P50047-G5, P50049-G5, P50052-G5 2014 1 of 16 Kallista IMPORTANT SAFETY INSTRUCTIONS READ AND FOLLOW ALL INSTRUCTIONS SAVE THESE INSTRUCTIONS INSTRUCTIONS PERTAINING TO A RISK OF FIRE, ELECTRICAL
250C-IG COMPRESSOR KIT 12V PART NO C-IG COMPRESSOR KIT 24V PART NO
 250C-IG COMPRESSOR KIT 12V PART NO. 25050 250C-IG COMPRESSOR KIT 24V PART NO. 25058 IMPORTANT: It is essential that you and any other operator of this product read and understand the contents of this manual
TABLE OF CONTENTS. 3. Important Safety Instructions. 6. Surface and Pad Requirements. 7. Electrical Requirements. 8. Electrical Connections
 INTRODUCTION The spa that you have purchased is one of the very best available, and incorporates features designed to assure long, enjoyable and healthful use if properly operated and maintained. The following
You are now the proud new owner of an Alpine Swim Spa!
 Congratulations! You are now the proud new owner of an Alpine Swim Spa! Your Swim Spa will soon be ready and waiting for the whole family to enjoy. This Pre-Delivery guide is designed to ensure that the
Ventam 85 Installation & Commissioning Instructions
 Ventam Systems Ltd Unit D4 Seedbed Business Centre Vanguard Way Shoeburyness Essex SS3 9QY Phone 01702 382 307 Fax 01702 382 340 Ventam 85 Installation & Commissioning Instructions 1 General The Ventam
Life Smart Spas Frequently Asked Questions
 Customer Service (888) 961-7727, ahsservice@watkinsmfg.com Life Smart Spas Frequently Asked Questions What makes Lifesmart Spas different from other spas? Lifesmart spas are rotationally molded. This manufacturing
250C-IG COMPRESSOR KIT 12V PART NO C-IG COMPRESSOR KIT 24V PART NO
 250C-IG COMPRESSOR KIT 12V PART NO. 25050 250C-IG COMPRESSOR KIT 24V PART NO. 25058 IMPORTANT: It is essential that you and any other operator of this product read and understand the contents of this manual
WAKE COUNTY POOL PERMIT PRE-SEASON AUDIT 2014
 A DEPTH MARKINGS There are Depth Markings on and around a. On the vertical wall of the pool and on this pool that are at least 4 inches high; in contrasting color to the background; of a slip resistant
ARCHITECT GUIDELINES 1000 T
 ARCHITECT GUIDELINES 1000 T Architect Guidelines for SwimEx Installation Model 1000T General Layout Call SwimEx at 800-877-7946 to receive AutoCad Drawings of the SwimEx Model that you will be installing.
444C DUAL PERFORMANCE VALUE PACK
 (Chrome) PART NO. 44432 IMPORTANT: It is essential that you and any other operator of this product read and understand the contents of this manual before installing and using this product. SAVE THIS MANUAL
ARCHITECTURAL GUIDELINES ONE-PIECE COMMERCIAL
 ARCHITECTURAL GUIDELINES ONE-PIECE COMMERCIAL Architect Guidelines for SwimEx Installation of 500OT DW, 500OT, and 400OT General Layout Call SwimEx at 800-877-7946 to receive AutoCad Drawings of the SwimEx
Aquavar SOLO 2 Frequently Asked Questions
 Aquavar SOLO 2 Frequently Asked Questions How do I size the Aquavar SOLO 2 for the appropriate pump/motor combination? Can I use a 208 Volt motor? Can I run the Aquavar SOLO 2 up to 80HZ? What are the
UsER manual for Watersens ph -REDOX
 UsER manual for Watersens -REDOX Cl 8 1 2 6 3 3 7 7 4 4 4 4 Parts List 1 Redox Probe 1 x 2 PH Probe 1 x 5 Tube Weight 2 x 6 Connection Valve 1 x chlorine 3 Chlorine and Pumps 2 x 7 Dosing Valve 2 x 5 5
Installation, Operation & Maintenance Instructions
 Installation, Operation & Maintenance Instructions Please leave this instruction booklet with the home owner as it contains important guarantee, maintenance and safety information Read this manual carefully
HIGH PERFORMANCE POOL & SPA PUMPS
 HIGH PERFORMANCE POOL & SPA PUMPS INSTALLATION AND OPERATION MANUAL AQUA BOOSTER AB SERIES AB50F, AB75F, AB100F, AB125F, AB150F, AB200F Reltech Australia Pty Ltd 43-45 Kylta Rd West Heidelberg Vic 3081
ECONORESS ELECTRONIC EPS & EPT - ENHANCED PRESSURISATION SET INSTALLATION OPERATION & MAINTENANCE DOCUMENTATION
 ECONORESS ELECTRONIC EPS & EPT - ENHANCED PRESSURISATION SET INSTALLATION OPERATION & MAINTENANCE DOCUMENTATION OCT2010 STOKVIS ENERGY SYSTEMS 96R WALTON ROAD EAST MOLESEY SURREY KT8 0DL TEL: 020 87833050
Saskatchewan Health S A WHIRLPOOL DESIGN/OPERATIONAL T C H E W STANDARDS. Updated 02/00
 Saskatchewan Health S A S K A T C H E W A N WHIRLPOOL DESIGN/OPERATIONAL STANDARDS Updated 02/00 FOREWORD These standards should be read in conjunction with The Swimming Pool Regulations, 1999. Saskatchewan
Hot Tub Installation & Maintenance User Manual
 Hot Tub Installation & Maintenance User Manual HotPriceTubs 6 Guiseley Way Stockton On Tees TS160RF wwwhotpricetubs.com NOTE Because different control systems have various features and options, this manual
ARCHITECTURAL GUIDELINES FOUR-PIECE COMMERCIAL
 ARCHITECTURAL GUIDELINES FOUR-PIECE COMMERCIAL ARCHITECT GUIDELINES FOR SWIMEX FOUR-PIECE COMMERCIAL INSTALLATION GENERAL LAYOUT Call SwimEx at 800-877-7946 to receive AutoCad Drawings of the SwimEx Model
RESIDENTIAL SWIMMING POOLS AND SPAS A GUIDE FOR HOMEOWNERS
 RESIDENTIAL SWIMMING POOLS AND SPAS A GUIDE FOR HOMEOWNERS City of Redding 777 Cypress Avenue Redding CA 96001 Telephone: (530) 225-4013 FAX: (530) 225-4360 A Swimming Pool is any body of water 18 inches
97C COMPRESSOR KIT 12V PART NO C COMPRESSOR KIT 24V PART NO C COMPRESSOR KIT PART NO
 97C COMPRESSOR KIT 12V PART NO. 00097 97C COMPRESSOR KIT 24V PART NO. 02497 98C COMPRESSOR KIT PART NO. 00098 97C 98C IMPORTANT: It is essential that you and any other operator of this product read and
Swimming Pools, Hot Tubs and Spas
 OLATHE FIRE DEPARTMENT BUILDING CODES 1225 S. Hamilton Circle Olathe, KS 66061 / Main: (913) 971-7900 / Fax: (913) 971-9812 Swimming Pools, Hot Tubs and Spas Definitions: Swimming Pool- Any structure intended
OPERATING AND MAINTENANCE MANUAL GOLD LINE EXTRACTION CLEANERS M14-M26
 OPERATING AND MAINTENANCE MANUAL GOLD LINE EXTRACTION CLEANERS M14-M26 Made For: Spitwater Australia Pty Ltd 953 Metry St North Albury, NSW, Australia WARNING: FAILURE TO FOLLOW OPERATING, SAFETY AND MAINTENANCE
Installation, Operation and Maintenance Instructions for Electronically Controlled Pressurisation Units Digital Range
 Installation, Operation and Maintenance Instructions for Electronically Controlled Pressurisation Units Digital Range Models: DS 126 Single Pump / Single System DT 126 Twin Pump / Single System DS 160
42045 Heavy Duty ADA Base Model Kit: 85/105 PSI (ADA Compressor Only) Heavy Duty ADA Base Model Kit: 110/145 PSI (ADA Compressor Only)
 Heavy Duty ADA Base Model Kit: 110/145 PSI (ADA Compressor Only)") 42045 Heavy Duty ADA Base Model Kit: 85/105 PSI (ADA Compressor Only) 42047 Heavy Duty ADA Base Model Kit: 110/145 PSI (ADA Compressor Only) 45052 Constant Duty ADA Base Model Kit: 85/105 PSI (ADA Compressor
42045 Heavy Duty ADA Base Model Kit: 85/105 PSI (ADA Compressor Only) 42047 Heavy Duty ADA Base Model Kit: 110/145 PSI (ADA Compressor Only) 45052 Constant Duty ADA Base Model Kit: 85/105 PSI (ADA Compressor
USER S MANUAL BASIC HORIZONTAL OIL-LUBRICATED MICROCOMPRESSOR Reference: RCMPBH
 USER S MANUAL BASIC HORIZONTAL OIL-LUBRICATED MICROCOMPRESSOR Reference: RCMPBH THIS MANUAL IS INTENDED FOR TECHNICAL STAFF IN CHARGE OF THE INSTALLATION, THE OPERATION AND THE MAINTENANCE OF THIS PRODUCT
THE ULTIMATE HOT TUB BUYERS GUIDE WORK HARD, PLAY HARD, REJUVENATE HARD.
 HOT TUB BUYERS GUIDE One of the most important things to consider before you purchase your hot tub is whether a 110V spa or a 220V spa is the right fit for your lifestyle. The cost to install electricity
C.A.I. Customer Service Department 1462 East Ninth Street Pomona, CA Toll Free: CAL-SPAS Fax:
 12/16/2005 CONTACT INFORMATION For customer service, please contact your authorized dealer immediately. If you need additional information and/or assistance, please contact: C.A.I. Customer Service Department
LoneStar Fiberglass Pools. Do-It-Yourself. Installation Manual
 LoneStar Fiberglass Pools Do-It-Yourself Installation Manual Chris 1/3/2008 Do-It-Yourself The installation of a LoneStar Fiberglass pool is a much simpler task than most people think. What is important
Pool Inspection. Your Street San Diego, California Prepared for: Your Name Prepared by: Priority Inspection Service
 Pool Inspection Your Street San Diego, California 92106 Prepared for: Your Name Prepared by: Page 1 of 10 Table of Contents Standards of Practice 2 Definitions 3 General Information 3 General Pool Information
Aquatic Fitness System 2004 International Owner s Manual
 Spa Information It is very important that you gather the following information on your spa and enter it in the blanks provided below. This information can then be used to complete your Warranty Registration,
ARCHITECTURAL GUIDELINES 1000 S
 ARCHITECTURAL GUIDELINES 1000 S Architect Guidelines for SwimEx Installation Model 1000S GENERAL LAYOUT Call SwimEx at 800-877-7946 to receive AutoCad Drawings of the SwimEx Model that you will be installing.
400H HARDMOUNT AIR COMPRESSOR KIT PART NO H HARDMOUNT AIR COMPRESSOR KIT PART NO
 400H HARDMOUNT AIR COMPRESSOR KIT PART NO. 40042 450H HARDMOUNT AIR COMPRESSOR KIT PART NO. 45042 400H 450H IMPORTANT: It is essential that you and any other operator of this product read and understand
D E L U X E S E R I E S. Your Hot Tub Pre-Delivery Guide D E L U X E
 Your Hot Tub Pre-Delivery Guide live better feel better D E L U X E Service Center divinehottubsdeluxe.com Toll Free 1-877-483-1606 customerservice @ divinehottubsdeluxe.com divine hot tubs DLX pre-delivery,
Visit:
 CORAL CLASSIC SPA START UP INSTRUCTIONS Remove the filter from the spa, see page 8 in your user manual. Place a hose in the filter box to fill the spa with water, see page 7 in your user manual. Remove
SWIMMING POOLS/SPAS/HOT TUBS PLAN REVIEW GUIDE SHEET
 SWIMMING POOLS/SPAS/HOT TUBS PLAN REVIEW GUIDE SHEET Sect. 106-748, City Code of Ordinances: Regulations are applicable to both above and inground swimming pools, spas and hot tubs. POOL PLACEMENT Measurement
SP & SR series. owner s manual
 SP & SR series owner s manual Quick Reference Chart To assist you with the installation and maintenance service of your new spa, please fill out the following information and keep it on hand for future
DUAL SUCTION OUTLETS
 ISWG1061 Rev A DUAL SUCTION OUTLETS Contents Product Specific Warnings 2 Recommended system specifications... 5 Installation.... 6 Replacement Parts... 6 Owner s Manual Model No.: WG1061HF2PAK2 and WG1061LV2PAK2
Hot Tub Celebrations. Manual of Guidance and Instructions for Use
 Hot Tub Celebrations Manual of Guidance and Instructions for Use Welcome from Hot Tub Celebrations and thank you for hiring one of our Hot Tubs, we hope your expectations are exceeded and you fully enjoy
PLEASE READ CAREFULLY BEFORE INSTALLING OR USING MEGA POOL SAVER MPS 1100
 MPS-1100 User Manual Mega Pool Saver Ltd PLEASE READ CAREFULLY BEFORE INSTALLING OR USING MEGA POOL SAVER MPS 1100 For further up to date instructions on how to install Mega Pool Saver MPS 1100, please
AQUATIC TRAINING VESSELS OWNER S MANUAL
 AQUATIC TRAINING VESSELS OWNER S MANUAL WELCOME TO THE AQUATIC TRAINING LIFESTYLE! We sincerely hope your swim spa life is a pleasant experience. But, if by chance an issue should arise, contact your authorized
Your Hot Tub Pre-Delivery Guide
 Your Hot Tub Pre-Delivery Guide live better feel better D E L U X E Service Center divinehottubsdeluxe.com Toll Free 1-877-483-1606 customerservice @ divinehottubsdeluxe.com D E LU X E S E R I E S divine
The Simple Step-By-Step Procedure on How to Use Your New Spa Marvel All-In-One Natural Hot Tub Treatment
 6208 S. College Ave. Fort Collins, CO 80525 (970) 223 5197 info@coloradospas.com www.coloradospas.com Thank you for your recent purchase at Colorado Spas! We are so excited for you to start enjoying your
SWIMLIFE OWNER S MANUAL
 SWIMLIFE OWNER S MANUAL Contents subject to change without notice 2018 TABLE OF CONTENTS Letter of introduction 3 Important User Safety Instructions Warnings 4 Hyperthermia 5 Choosing the Right location
Installation, commissioning and servicing instructions
 www.reece.com.au Tempering valve 38550.08 5213 series Installation, commissioning and servicing instructions The tempering valve is used to regulate the set temperature of mixed hot and cold water even
USER S INFORMATION MANUAL
 USER S INFORMATION MANUAL UPFLOW, DOWNFLOW, UPFLOW/HORIZONTAL & HORIZONTAL ONLY INDUCED DRAFT GAS FURNACES Recognize this symbol as an indication of Important Safety Information If the information in this
VERTICAL AIR COMPRESSORS
 VERTICAL AIR COMPRESSORS MODEL NO: VE15C150, VE18C150, VE25C150 PART NO: 2226010, 2226020, 2226025 OPERATION & MAINTENANCE INSTRUCTIONS LS0715 INTRODUCTION Thank you for purchasing this CLARKE Vertical
New AQF Filter Polymer Filtration System
 New AQF Filter Polymer Filtration System Operator Manual Covering Serial Number 20002001 onwards February 2011 Index Disclaimer notice...3 Introduction...4 Important safety notices...5 Getting started...6
Delivery Step by Step Call now for expert advice: Lines open:
 Delivery Step by Step www.h2ohottubs.co.uk Call now for expert advice: 0333 990 0320 Lines open: Monday - Friday 9am - 5pm, Saturday 8am - 3pm step by step guide We ve created this simple step by step
Catalina Spa-kle Installation and User Guide
 Catalina Spa-kle Installation and User Guide Computer controlled automatic bromine generator for spas, hot tubs and swimspas. 1 TABLE OF CONTENTS 1. Safety Instructions and Installer Precautions 2. Installation
ARCHITECTURAL GUIDELINES FOUR-PIECE RESIDENTIAL
 ARCHITECTURAL GUIDELINES FOUR-PIECE RESIDENTIAL Architect Installation Guidelines for Four-Piece Residential Installations GENERAL LAYOUT Call SwimEx at 800-877-7946 to receive AutoCad Drawings of the
Bulletin Swimming pool, hot tub and spa installations Rules , , , , , and
 Bulletin 68-7-11 Swimming pool, hot tub and spa installations Rules 68-000, 68-056, 68-058, 68-064, 68-068, 68-302 and 68-404 Scope (1) Swimming pools - general (2) Grounding & bonding (a) Bonding for
450P- RV AUTOMATIC PORTABLE COMPRESSOR EXTREME SERIES
 450P- RV AUTOMATIC PORTABLE COMPRESSOR EXTREME SERIES PART NO. 45053 IMPORTANT: It is essential that you and any other operator of this product read and understand the contents of this manual before installing
The purpose of this brochure is to explain to owners and contractors the City of Burnaby s requirements for private swimming pools.
 Building Information BURNABY PLANNING & BUILDING DEPARTMENT Swimming Pools The purpose of this brochure is to explain to owners and contractors the City of Burnaby s requirements for private swimming pools.
450P AUTOMATIC PORTABLE COMPRESSOR EXTREME SERIES
 EXTREME SERIES PART NO. 45043 IMPORTANT: It is essential that you and any other operator of this product read and understand the contents of this manual before installing and using this product. SAVE THIS
Guide d installation et d utilisation À lire attentivement et à conserver pour consultation ultérieure
 Modèle ASPEN / MALIBU / MONTANA Guide d installation et d utilisation À lire attentivement et à conserver pour consultation ultérieure WARNING EN The disrespect of the instructions of use and maintenance
The Perfect Choice. OWNER S MANUAL DECEMBER 1, Fusion Series. Tropic Azure. Tristar. Opal CAUTION
 The Perfect Choice www.freeflowspas.com OWNER S MANUAL DECEMBER 1, 2009 Fusion Series Tropic Azure Tristar Opal CAUTION DO NOT OPERATE SPA BEFORE READING THIS MANUAL Failure to read this manual & follow
ARCHITECT INSTALLATION GUIDELINES FOR RESIDENTIAL TRITON INSTALLATIONS
 ARCHITECT INSTALLATION GUIDELINES FOR RESIDENTIAL TRITON INSTALLATIONS GENERAL LAYOUT Call SwimEx at 800-877-7946 to receive AutoCAD Drawings of the SwimEx Triton model that you will be installing. These
Swimming Pool Requirements
 Swimming Pool Requirements 1. Definitions: Approved Safety Pool Cover. Means a manually or power-operated safety pool cover that meets all of the performance standards of the American Society for Testing
OWNERS GUIDE. to Years of Enjoyment in your TubLicious Hot Tub. TubLicious Street, Langley, British Columbia, V2Y 1N1
 OWNERS GUIDE to Years of Enjoyment in your TubLicious Hot Tub TubLicious 6315 202 Street, Langley, British Columbia, V2Y 1N1 www.tublicious.com Contents 2 Important Safety Instructions Page 3 Read and
Installation Instructions / Operating & Maintenance Manual Midi-Fill Digital Pressurisation Unit Models MFD15 & MFD22
 Arrow Valves Ltd Installation Instructions / Operating & Maintenance Manual Midi-Fill Digital Pressurisation Unit Models MFD15 & MFD22 Tel 01442 823 123 Fax 01442 823 234 www.arrowvalves.co.uk Model shown
CUSTOMER ASSISTANCE GUIDE BUILDING PERMIT APPLICATION SUBMITTAL REQUIREMENTS
 CUSTOMER ASSISTANCE GUIDE BUILDING PERMIT APPLICATION SUBMITTAL REQUIREMENTS SWIMMING POOLS (IN-GROUND OR ABOVE-GROUND), SPAS AND HOT TUBS (CONTAINS WATER OVER 24 INCHES DEEP) Please read all of the following
PUBLIC SPA CHECKLIST. Planning and Building Department City of Mississauga 300 City Centre Drive, 3th Floor Mississauga ON L5B 3C1
 Planning and Building Department City of Mississauga 300 City Centre Drive, 3th Floor Mississauga ON L5B 3C1 PUBLIC SPA CHECKLIST This checklist is prepared for purposes of convenience only. For accurate
VERTICAL AIR COMPRESSORS
 VERTICAL AIR COMPRESSORS MODEL NO: VE11C150, VE15C150, VE18C150 PART NO: 2226005, 2226000, 2226015 OPERATION & MAINTENANCE INSTRUCTIONS LS0615 INTRODUCTION Thank you for purchasing this CLARKE Vertical
SWIMMING POOL, SPA, & HOT TUB GUIDELINES
 SWIMMING POOL, SPA, & HOT TUB GUIDELINES A. Adopted construction codes and installation requirements 1. 2015 edition of the International Residential Code and Appendix Q, 2. 2014 edition of the National
System Pressure Manager Standard & System Pressure Manager Plus
 System Pressure Manager Standard & System Pressure Manager Plus Installation, Commissioning & Servicing Instructions Note: THESE INSTRUCTIONS MUST BE READ AND UNDERSTOOD BEFORE INSTALLING, COMMISSIONING,
Installation and service should be performed by a qualified service professional.
 Damage to your lift or vessel can result from improper initial setup of the system. Consult a HydroHoist Certified Installer for initial setup and support Installation and service should be performed by
IntelliChlor Power Center (For use with IntelliChlor model IC60, IC40 and IC20)
") IntelliChlor Power Center (For use with IntelliChlor model IC60, IC40 and IC20) Patents pending Certified to NSF/ANSI 50 Installation and User s Guide IMPORTANT SAFETY INSTRUCTIONS READ AND FOLLOW ALL
IntelliChlor Power Center (For use with IntelliChlor model IC60, IC40 and IC20) Patents pending Certified to NSF/ANSI 50 Installation and User s Guide IMPORTANT SAFETY INSTRUCTIONS READ AND FOLLOW ALL
SWIMSPA OWNER S MANUAL
 SWIMSPA OWNER S MANUAL Hydropool Inc. 335 Superior Blvd. Mississauga, ON, Canada L5T 2L6 Tel: 905.565.6810 Toll Free: 1.800.465.2933 Fax: 905.565.6820 Email: info@hydropoolhottubs.com www.hydropoolhottubs.com
200 PSI HIGH-FLOW AIR SOURCE KIT
 200 PSI HIGH-FLOW AIR SOURCE KIT 50% Duty Compressor on 2.0 Gallon Air Tank PART NO. 20008 IMPORTANT: It is essential that you and any other operator of this product read and understand the contents of
1020 Industrial Drive, Orlinda, TN fax
 Operation Manual Tank Distribution System A-UPT Series 615-654-4441 sales@specialtyh2o.com 615-654-4449 fax TABLE OF CONTENTS Section 1 GENERAL 1.2 Warnings and Cautions... 1 1.2 Theory of Operation...
Swimming Pool Requirements
 Swimming Pool Requirements 8040 S. 6th Street Oak Creek, WI 53154 (414) 766-7000 www.oakcreekwi.org Revised: August 8. 2017 PERMITS A permit from the Inspection Department is required prior to putting
NEWS: 20% discount on service agreements signed before 1st March 2010
 Swimming Pool Maintenance Routine and charges Regular maintenance and consistent pool care is the best way to ensure a safe and healthy swimming environment. Although every pool is unique and has its own
Endo-Flush Order # ZUTR30004 OPERATION MANUAL. Zutron Medical, LLC W 98 th St #40-27 Lenexa, KS Phone Fax
 OPERATION MANUAL Zutron Medical, LLC 17501 W 98 th St #40-27 Lenexa, KS 66219 Phone 877-343-5873 Fax 913-967-5944 ZUT-Lab-004-30004 REV. 03312017 Table of Contents 2 Introduction 1. Intended Use 2. Labels,
2018 MODEL. SwimFit / SwimExpert INSTALLATION GUIDE
 2018 MODEL AQUASTREAM SERIES SwimFit / SwimExpert INSTALLATION GUIDE CAUTION: THIS GUIDE IS FOR REFERENCE ONLY! All installations must follow local electrical and building codes. Please consult your local