American Red Cross Lifeguarding
|
|
|
- Jessie Kennedy
- 5 years ago
- Views:
Transcription
1 Lifeguarding Manual

2 American Red Cross Lifeguarding MANUAL The following organizations provided review of the materials and/or support American Red Cross Lifeguarding:
3 This manual is part of the American Red Cross Lifeguarding program. By itself, it does not constitute complete and comprehensive training. Visit redcross.org to learn more about this program. The emergency care procedures outlined in the program materials reflect the standard of knowledge and accepted emergency practices in the United States at the time this manual was published. It is the reader s responsibility to stay informed of changes in emergency care procedures. The care steps outlined within this manual are consistent with the 2015 International Liaison Committee on Resuscitation (ILCOR) Consensus on Science and Treatment Recommendations (CoSTR). The treatment recommendations and related training guidelines have been developed by The American National Red Cross Scientific Advisory Council (SAC), a panel of nationally recognized experts in fields that include emergency medicine, emergency medical services (EMS), nursing, occupational health, sports medicine, school and public health, aquatics, emergency preparedness and disaster mobilization. This manual also reflects the United States Lifeguarding Standards: A Review and Report of the United States Lifeguard Standards Coalition, a collaborative effort of the American Red Cross, the United States Lifesaving Association and the YMCA of the USA. PLEASE READ THE FOLLOWING TERMS AND CONDITIONS (the or these Terms and Conditions ) BEFORE AGREEING TO ACCESS, USE OR DOWNLOAD THE FOLLOWING THE AMERICAN NATIONAL RED CROSS MATERIALS. BY PURCHASING, DOWNLOADING, OR OTHERWISE USING OR ACCESSING THE MATERIALS, YOU ACKNOWLEDGE AND HEREBY AGREE TO BE LEGALLY BOUND BY BOTH THESE TERMS AND CONDITIONS AND THE AMERICAN NATIONAL RED CROSS TERMS OF USE (AVAILABLE AT redcross.org/terms-of-use). YOU AGREE THAT THE INCLUDED COURSE MATERIALS ARE PROVIDED AS IS AND WITHOUT WARRANTIES OF ANY KIND, AND THAT ANY ACCESS TO OR USE OF THESE COURSE MATERIALS IS AT YOUR OWN RISK. The following materials (including downloadable electronic materials, as applicable) including all content, graphics, images and logos, are copyrighted by, and the exclusive property of, The American National Red Cross ( Red Cross ). Unless otherwise indicated in writing by the Red Cross, the Red Cross grants you ( Recipient ) the limited right to download, print, photocopy and use the electronic materials only for use in conjunction with teaching or preparing to teach a Red Cross course by individuals or entities expressly authorized by the Red Cross, subject to the following restrictions: The Recipient is prohibited from creating new electronic versions of the materials; The Recipient is prohibited from revising, altering, adapting or modifying the materials, which includes removing, altering or covering any copyright notices, Red Cross marks, logos, or other proprietary notices placed or embedded in the materials; The Recipient is prohibited from creating any derivative works incorporating, in part or in whole, the content of the materials; The Recipient is prohibited from downloading the materials, or any part of the materials, and putting them on Recipient s own website or any other third party website without advance written permission of the Red Cross; The Recipient is prohibited from removing these Terms and Conditions in otherwise-permitted copies, and is likewise prohibited from making any additional representations or warranties relating to the materials. Any rights not expressly granted herein are reserved by the Red Cross. The Red Cross does not permit its materials to be reproduced or published without advance written permission from the Red Cross. To request permission to reproduce or publish Red Cross materials, please submit your written request to The American National Red Cross. 2012, 2016 by The American National Red Cross. ALL RIGHTS RESERVED. The Red Cross emblem, American Red Cross and the American Red Cross name and logo are registered trademarks of The American National Red Cross and protected by various national statutes. The Boy Scouts of America corporate logo is a registered trademark of the Boy Scouts of America in the United States and/or other countries. All rights reserved. Used with permission. Printed in the United States of America ISBN:
4 ACKNOWLEDGMENTS This manual is dedicated to the thousands of employees and volunteers of the American Red Cross who contribute their time and talent to supporting and teaching lifesaving skills worldwide and to the thousands of course participants and other readers who have decided to be prepared to take action when an emergency strikes. Many individuals shared in the development and revision process in various supportive, technical and creative ways. The American Red Cross Lifeguarding Manual was developed through the dedication of both employees and volunteers. Their commitment to excellence made this manual possible. The following members of the American Red Cross Scientific Advisory Council provided guidance and review of the American Red Cross Lifeguarding Manual: David Markenson, MD, MBA, FCCM, FAAP, FACEP, EMT-P Chair, American Red Cross Scientific Advisory Council Chief Medical Officer, Sky Ridge Medical Center Denver, Colorado Peter G. Wernicki, MD, FAAOS Aquatics Chair, American Red Cross Scientific Advisory Council Sports Medicine Orthopedic Surgeon Assistant Clinical Professor, Florida State School of Medicine Chair, International Lifesaving Federation Medical Committee U.S. Lifesaving Association Medical Advisor Vero Beach, Florida Joshua M. Tobin, MD Member, American Red Cross Scientific Advisory Council Director, Trauma Anesthesiology Keck School of Medicine at USC Los Angeles, California The following members of the American Red Cross Scientific Advisory Council provide support and guidance on American Red Cross Swimming and Water Safety programs: Angela Beale, PhD Louise Kublick, BS Stephen Langendorfer, PhD William D. Ramos, PhD For more information on the Scientific Advisory Council, visit redcross.org/science. The American Red Cross thanks: Francesco (Frank) Pia, PhD, Emeritus Member of the Scientific Advisory Council, Alex Antoniou, PhD, Chief Marketing and Information Officer, National Swimming Pool Foundation and Jerome H. Modell, MD, Emeritus Professor of Anesthesiology, Colleges of Medicine and Veterinary Medicine, University of Florida, for their contributions to this manual. Roy Fielding, MS Member, American Red Cross Scientific Advisory Council Senior Lecturer, Department of Kinesiology University of North Carolina at Charlotte Charlotte, North Carolina Teresa (Terri) Lees, MS Member, American Red Cross Scientific Advisory Council Owner, Lees Therapeutic Solutions Talees LLC Wichita, Kansas Linda Quan, MD, FAAP Vice Chair, American Red Cross Scientific Advisory Council Pediatric Emergency Physician Seattle Children s Hospital Professor of Pediatrics at the University of Washington School of Medicine Seattle, Washington ACKNOWLEDGMENTS III
5 The panel of volunteer subject matter experts for this edition include: Joshua D. Aldama Operations Manager Aquatica San Antonio, SeaWorld Parks & Entertainment San Antonio, Texas Algreatus Batton, AFO Assistant Aquatics Operations Manager City of Charlottesville Parks and Recreation Charlottesville, Virginia David W. Bell, PhD National Aquatics Task Force Boy Scouts of America Ponca City, Oklahoma Branden Burns Aquatics Coordinator Twinsburg Parks and Recreation Twinsburg, Ohio Pete DeQuincy Aquatics Manager East Bay Regional Park District Oakland, California Mary Franklin Volunteer Instructor Trainer Educator American Red Cross Knoxville, Tennessee Cory Hilderbrand Aquatics Supervisor City of Irvine Irvine, California John Raby President Minnesota Safety Services, LLC Excelsior, Minnesota Billy Sassi Aquatics Manager Tucson Parks and Recreation Department Tucson, Arizona Sean E. Sepela Aquatic Operations Manager Freedom Aquatic & Fitness Center George Mason University Manassas, Virginia Ginny Templeton, MA Associate Director of Operations Associated Students Inc., California State Polytechnic University Pomona, California Jason D. Vitulli Aquatic Program Coordinator Town of Hempstead Hempstead, New York Brenda J. Ward Lecturer, Department of Kinesiology University of North Carolina at Charlotte Charlotte, North Carolina Christopher R. Whipple, AqP Manager of Lifeguards University of Maryland College Park, Maryland Karen M. Jenovese Owner, Swim New Hampshire LLC Concord, New Hampshire Dan Jones Division Head of Aquatics and Beaches City of Norfolk, Virginia William A.J. Kirkner, JD Senior Director, Aquatics Facilities and Programs JCC of Greater Baltimore Owings Mills, Maryland Daniel Llanas Director of Operations Aquatica San Antonio SeaWorld Parks & Entertainment San Antonio, Texas IV ACKNOWLEDGMENTS
6 LIFEGUARDING CONTENT DIRECTION Stephanie Shook, CPRP Senior Manager, Instructor Engagement and Quality Assurance Lifeguarding Content Director American Red Cross The American Red Cross team for this edition included: Catherine Barry National Director, Aquatics Jonathan Epstein Senior Director, Science and Content Development Connie Harvey National Director, Centennial Initiatives Matthew Haynes Product Manager, Aquatics Nichole Steffens Product Manager, Aquatics PREFACE This manual is for lifeguards, whom the American Red Cross profoundly thanks for their commitment to safeguarding the lives of children and adults who enjoy aquatic facilities. As the number of community pools and waterparks grows nationwide, participation in aquatic activities is also growing. With this growth comes the need for even more lifeguards. To protect this growing number of participants, lifeguards must receive proper and effective training. Lifeguards also need to maintain their skills to ensure their ability to work effectively with others as a part of a lifeguard team. Participation in frequent and ongoing training is essential. Lifeguards must be able to recognize hazardous situations to prevent injury. They must be able to supervise swimmers, minimize dangers, educate facility users about safety, enforce rules and regulations, provide assistance and perform rescues. Being a lifeguard carries a significant professional responsibility, but lifeguarding also offers opportunities for personal growth. Experience as a lifeguard can help one develop professional and leadership skills that will last a lifetime through college, career and family. There are a half million American Red Cross-trained lifeguards working at swimming pools, waterparks and waterfronts across our country. Every day on the job, these lifeguards are part of a critical force for good ensuring the safety of patrons and protecting lives. LIFEGUARDING CONTENT DIRECTION PREFACE V
7 CONTENTS CHAPTER 1 The Professional Lifeguard Introduction... 3 Responsibilities of a Professional Lifeguard... 3 Characteristics of a Professional Lifeguard... 4 Decision-Making... 8 Legal Considerations... 8 Continuing Your Training Being Part of the Team...13 Lifeguards as Water Safety Advocates...15 Wrap-Up...17 CHAPTER 2 Facility Safety Rescue Equipment...25 Facility Safety Checks...30 Weather Conditions...40 Rules and Regulations...43 Management and Safety...46 Wrap-Up...48 CHAPTER 3 Surveillance and Recognition An Overview of the Process of Drowning...57 Effective Surveillance...58 Wrap-Up...79 CHAPTER 4 Injury Prevention How Injuries Happen...91 Injury Prevention Strategies...91 Effective Guarding Injury Prevention Challenges...95 Special Considerations for Guarding Aquatic Attractions Wrap-Up CHAPTER 5 Emergency Action Plans Types of Emergency Action Plans Implementing an Emergency Action Plan Emergencies Outside of Your Zone Wrap-Up CHAPTER 6 Water Rescue Skills General Procedures for a Water Emergency Train to the Standard, Meet the Objective Rescue Skills Additional Rescue Skills for Waterfronts Special Situations at Waterfronts When Things Do Not Go As Practiced Wrap-Up VI
8 CHAPTER 7 Before Providing Care And Victim Assessment Bloodborne Pathogens How Pathogens Spread Preventing the Spread of Bloodborne Pathogens If You Are Exposed General Procedures for Injury or Sudden Illness on Land Wrap-Up CHAPTER 8 Breathing Emergencies Recognizing and Caring for Breathing Emergencies Giving Ventilations Airway Obstruction Emergency Oxygen Oxygen Delivery Devices Suctioning Wrap-Up CHAPTER 9 Cardiac Emergencies Cardiac Chain of Survival Heart Attack Cardiac Arrest CPR AEDs Multiple-Rescuer Response Wrap-Up CHAPTER 10 First Aid Responding to Injuries and Illnesses Secondary Assessment Sudden Illness Skin and Soft Tissue Injuries Bites and Stings Poisoning Heat-Related Illnesses and Cold-Related Emergencies Injuries to Muscles, Bones and Joints Emergency Childbirth Wrap-Up CHAPTER 11 Caring For Head, Neck And Spinal Injuries Causes of Head, Neck and Spinal Injuries Caring for Head, Neck and Spinal Injuries Wrap-Up Glossary References Special Thanks Index VII
9 SKILL SHEETS ROTATIONS...87 o Ground-Level Station...87 o Elevated Station...88 ENTRIES o Slide-In Entry o Stride Jump o Compact Jump o Run-and-Swim Entry ASSISTS o Simple Assist o Reaching Assist RESCUES AT OR NEAR THE SURFACE OF THE WATER o Active Victim Front Rescue o Active Victim Rear Rescue o Passive Victim Front Rescue o Passive Victim Rear Rescue o Passive Victim at or Near the Surface in Water 3, Face-Up o Passive Victim at or Near the Surface in Water 3, Face-Down o Multiple-Victim Rescue RESCUING A SUBMERGED VICTIM o Passive Submerged Victim Shallow Water 180 o Feet-First Surface Dive o Head-First Surface Dive o Rescuing a Submerged Victim in Deep Water REMOVAL FROM THE WATER o Extrication Using a Backboard at the Pool Edge o Extrication Using a Backboard at the Steps. 187 o Extrication Using a Backboard in Zero Depth o Extrication Using a Backboard Steep Steps and/or Moving Water o Walking Assist o Beach Drag o Quick Removal for a Small Victim USING A RESCUE BOARD o Approaching the Victim o Rescuing a Distressed Swimmer or Active Victim o Rescuing a Passive Victim USING WATERCRAFT FOR RESCUES o Rescue with a Non-Motorized Water Craft Square Stern Rowboat o Rescue with a Non-Motorized Water Craft Kayak o Rescue with a Motorized Water Craft WHEN THINGS DO NOT GO AS PRACTICED o Front Head-Hold Escape o Rear Head-Hold Escape o In-Water Ventilations REMOVING DISPOSABLE GLOVES USING A RESUSCITATION MASK o Head-Tilt/Chin-Lift o Jaw-Thrust (With Head Extension) Maneuver o Jaw-Thrust (Without Head Extension) Maneuver MOVING A VICTIM EMERGENCY MOVES o Pack-Strap Carry o Clothes Drag MOVING A VICTIM NON-EMERGENCY MOVES o Walking Assist o Two-Person Seat Carry PRIMARY ASSESSMENT ADULT, CHILD AND INFANT VIII


10 GIVING VENTILATIONS o Using a Bag-Valve-Mask Resuscitator CHOKING o Adult and Child o Infant EMERGENCY OXYGEN o Assembling the Oxygen System o Administering Emergency Oxygen USING A MANUAL SUCTIONING DEVICE CPR o One-Rescuer CPR o Two-Rescuer CPR Adult and Child o Two-Rescuer CPR Infant USING AN AED CPR WITH AIRWAY OBSTRUCTION CHECKING A RESPONSIVE PERSON CONTROLLING EXTERNAL BLEEDING SECONDARY ASSESSMENT USING SAMPLE TO TAKE A BRIEF HISTORY HEAD SPLINT o Face-Up Victim at or Near the Surface o Face-Down Victim at or Near the Surface o Submerged Victim o Face-Up Victim in Extremely Shallow Water o Face-Down Victim in Extremely Shallow Water SPINAL BACKBOARDING AND EXTRICATION o Spinal Backboarding Procedure o Spinal Backboarding Procedure High Edges o Spinal Backboarding Procedure Speed Slide IX

11

12 1The Professional Lifeguard Lifeguarding can be a rewarding job. Being a lifeguard is: Dynamic. Each day on the job presents you with new situations. Challenging. You need to make quick judgements to do the job well. Important. You may need to respond to an emergency at any moment. Inspiring. With the knowledge, skills and attitude you acquire through your lifeguard training, you can save a life. This chapter describes the characteristics, responsibilities and rewards of being a professional lifeguard. It also discusses the importance of maintaining lifeguarding knowledge and skills INTRODUCTION RESPONSIBILITIES OF A PROFESSIONAL LIFEGUARD CHARACTERISTICS OF A PROFESSIONAL LIFEGUARD DECISION-MAKING LEGAL CONSIDERATIONS CONTINUING YOUR TRAINING BEING PART OF THE TEAM LIFEGUARDS AS WATER SAFETY ADVOCATES WRAP-UP

13 1-1 INTRODUCTION You are training to become a professional lifeguard, taking responsibility for the lives of people who are participating in a variety of aquatic activities. As a professional rescuer with a legal responsibility to act in an emergency, you must be self-disciplined and confident in your knowledge and skills. You need to have solid public relations, customer service and conflict resolution skills. In addition, you must be willing to be a leader and a good team member. Being a lifeguard requires maturity, professionalism and competence in specialized rescue techniques. The purpose of the American Red Cross Lifeguarding course is to teach you the skills needed to help prevent and respond to aquatic emergencies. This includes land and water rescue skills, as well as first aid and CPR. 1-2 RESPONSIBILITIES OF A PROFESSIONAL LIFEGUARD As a lifeguard, your primary responsibility is to prevent drowning and other injuries from occurring at your aquatic facility (Figure 1-1). Lifeguards do this in many ways, such as: Monitoring activities in and near the water through patron surveillance. Preventing injuries by minimizing or eliminating hazardous situations or behaviors. Enforcing facility rules and regulations and educating patrons about them. Recognizing and responding quickly and effectively to all emergencies. Administering first aid and CPR, including using an automated external defibrillator (AED) and, if trained, administering emergency oxygen when needed. Working as a team with other lifeguards, facility staff and management. Figure 1-1 Patron surveillance is a critical part of a lifeguard's primary responsibility. FYI The American Red Cross Lifeguarding program includes benchmarks for lifeguard performance as well as lifeguarding facility operations. The benchmarks represent the core competencies of the Red Cross program and include expectations of Red Cross trained lifeguards. One of the benchmarks for lifeguard performance is to be professional at all times. To fulfill the responsibilities of a professional lifeguard, you must be mentally, physically and emotionally prepared at all times to do your job. 3 ChAPTER 1: ThE PROFESSIONAL LIFEGUARD


14 A lifeguard is also responsible for other tasks, which are secondary responsibilities. Secondary responsibilities must never interfere with patron surveillance. Secondary responsibilities can include: Testing the pool water chemistry. Assist patrons by performing safety orientations, administering swim tests, fitting life jackets and other duties (Figure 1-2). Cleaning or performing maintenance. Completing records and reports. Performing opening duties, closing duties, or facility safety checks and inspections. Figure 1-2 Swim testing is a secondary responsibility and must not interfere with patron surveillance. 1-3 CHARACTERISTICS OF A PROFESSIONAL LIFEGUARD To fulfill the responsibilities of a professional lifeguard, you must be mentally, physically and emotionally prepared at all times to do your job. As a professional lifeguard, you must be: Knowledgeable and skilled. Have the appropriate knowledge and skills to help prevent and respond to emergencies. Successful completion of this Lifeguarding course is your initial training. You must maintain your knowledge and skills through annual or preseason orientation and training, and through regular, frequent in-service training. Reliable. Arrive at work on time, accept assignments willingly, be committed to your work, and respond to all incidents quickly and effectively. Mature. Be a leader, but also be a good team member, act responsibly, take initiative and obey all facility rules, leading others by example. Courteous and consistent. Be polite and enforce the rules firmly and equally for everyone (Figure 1-3). Positive. Show a positive attitude in all job activities. Figure 1-3 Lifeguards must be courteous and consistent and maintain a positive attitude. ChAPTER 1: ThE PROFESSIONAL LIFEGUARD 4

15 Professional. Look professional and be prepared to respond appropriately to any situation by: o Wearing the lifeguard uniform only when on duty. o Sitting or standing upright at the lifeguarding station. o Being well groomed. o Keeping rescue equipment positioned for immediate use when on duty. o Keeping your eyes focused on your assigned zone of responsibility at all times. o Keeping interactions with others brief and not letting them interrupt patron surveillance. o Transferring and handling equipment carefully. o Observing all facility rules, regulations and policies. o Eating only when on break or off surveillance duty. Healthy and fit. To stay in good physical condition a professional lifeguard must: o Exercise. An exercise program should include swimming and water exercises that focus on building endurance and developing strength (Figure 1-4). Regular exercise helps you to stay alert, cope with stress and fatigue and perform strenuous rescues. o Eat and hydrate properly. Good nutrition and a balanced diet help to provide the energy needed to stay alert and active. Drink plenty of water to prevent dehydration. o Rest adequately. Proper rest and sleep during off-duty hours are essential for staying alert while on duty. o Protect yourself from sun exposure. Overexposure to the sun s ultraviolet (UV) rays can cause many problems, such as fatigue, sunburn, skin cancer, dehydration, heat exhaustion and heat stroke. To prevent these problems: Use a sunscreen with a sun protection factor (SPF) of at least 30, re-applying at regular intervals. Use an umbrella or shade structure for sun protection and to help keep cool. Wear a shirt and hat with a brim that shades your face, ears and the back of your neck and use polarized sunglasses with UVA/UVB protection. Drink plenty of water. Take breaks in cool or shaded areas. As a professional lifeguard, there are also some things you must not do. Keep the following in mind: Do not leave your lifeguard station while on surveillance duty. Do not use mobile phones or other devices for personal calls, texting or other types of communication when on duty. Do not slouch in a lifeguard stand. Always be attentive and sit or stand upright when on surveillance duty. Do not participate in conversations at the lifeguard station. Do not eat at the lifeguard station. Do not leave the facility while on duty. Do not use alcohol or drugs. Alcohol or drugs can negatively affect job performance and can jeopardize the safety of patrons, co-workers and yourself. Figure 1-4 Regular exercise helps lifeguards stay physically fit. 5 ChAPTER 1: ThE PROFESSIONAL LIFEGUARD


 behind not on the stand, not in your pocket, not in your hip pack.")
16 GUARDING WITH GADGETS When it comes to drowning prevention, seconds count. That means while you re on duty, your patrons require your undivided attention. As a lifeguard, patron surveillance is your primary responsibility this means there is no time to text, post, snap or chat. You should never be in a position to wonder If I wasn t talking on my phone, would I have heard my co-worker signaling an emergency or If I wasn t so focused on the photos that my friend just posted, maybe I would have seen that patron struggling. If you don t recognize an emergency, you can t respond to it. When you are on duty, leave the gadgets (Figure 1-5) behind not on the stand, not in your pocket, not in your hip pack. Your team and patrons depend on you to be completely engaged in patron surveillance. Stay focused and ready to respond without distraction; don t let tragedy be your teacher. Figure 1-5 ChAPTER 1: ThE PROFESSIONAL LIFEGUARD 6
17 SWIMMING FOR FITNESS Executing water-based rescues to get to a victim, moving the victim to safety and performing life-sustaining resuscitation require you to have adequate strength and endurance at a moment s notice. This means that you need to constantly maintain or improve your personal level of fitness. Luckily, most lifeguards have access to one of the most versatile pieces of fitness equipment available: the water. There are two main approaches to improving your level of fitness: building endurance and increasing intensity. You can improve your endurance by practicing more, whether by swimming longer distances or for longer periods of time. When exercising to increase endurance, you must commit to a regular, consistent workout schedule. Count the number of pool lengths that you can swim without having to stop to take a break. Your goal should be to increase this amount slightly each time you practice. At the beginning, you should be able to swim at least 300 yards without stopping. Try to build up to a competitive mile, which is about 1650 yards, or 66 lengths of a 25-yard pool. Once you build your endurance to this level, you will find it easy to practice even longer distances. If your practice time is limited, you may choose to focus on the intensity of your swim. Typically, when a person is doing an activity for a long period of time, they begin to slow down as muscles become fatigued. Strength is built by forcing muscles to work at or beyond their current peak level, which requires maintaining or increasing your level of effort over your period of exercise. In swimming, this can be done through interval training. Intervals are a series of swims of the same distance and time interval, each done at the same high level of effort. There is a rest period between the time spent swimming that depends on the speed of the swim. The entire swim series is a set. As an example, an interval set is "5 x 100 on 1:30." This means that the 500-yard swim is broken up in to five 100-yard swims, with 1:30 being the total amount of time for the swim and rest. In this example, a swimmer who swims the 100 in 1:15, has 15 seconds available for rest. This short rest period keeps the heart rate within the target range without dropping back to a resting heart rate. Interval training is the best all-around method to develop both speed and endurance. As your level of fitness improves, you should combine the endurance and intensity approaches to your workouts. Breaking down a larger endurance workout into smaller parts allows you to keep up your level of intensity, and it also helps to make the workout more interesting. 7 ChAPTER 1: ThE PROFESSIONAL LIFEGUARD

18 1-4 DECISION-MAKING Decision-making is an important and sometimes difficult component of lifeguarding. In an emergency, such as a situation requiring a possible rescue or CPR, you must make critical decisions and act quickly. Your facility should have established emergency action plans (EAPs), which are the written procedures that guide the actions of lifeguards and other staff members in emergencies. In a non-emergency situation, such as how to work with your facility s management or how to interact with patrons, you can take more time for deliberation. In these kinds of situations, when time is not a critical factor, a decision-making model can help guide you through the process. The FIND decision-making model can be applied to lifeguarding situations to help you clearly understand what is involved in a decision. FIND means: F - Figure out the problem. I - Identify possible solutions. N - Name the pros and cons for each solution. D - Decide which solution is best, then act on it. 1-5 LEGAL CONSIDERATIONS To avoid liability, it is important to understand the following legal principles that apply to your role as a professional lifeguard. Duty to act. While on the job, you have a legal responsibility to act in an emergency. Failure to adhere to this duty could result in legal action. Standard of care. You are expected to meet a minimum standard of care, which may be established in part by your training program and in part by state or local authorities. This standard requires you to: o Communicate proper information and warnings to help prevent injuries. o Recognize someone in need of care. o Attempt to rescue those needing assistance. o Provide emergency care according to your level of training. Negligence. When a person is injured or suffers additional harm because lifeguards failed to follow the standard of care or failed to act at all, the lifeguards may be considered negligent. Negligence includes: o Failing to control or stop any behaviors that could result in further harm or injury. o Failing to provide care. o Providing inappropriate care. o Providing care beyond the scope of practice or level of training. Figure 1-6 You must ask for a victim's consent before providing care. ChAPTER 1: ThE PROFESSIONAL LIFEGUARD 8
19 Abandonment. Once care is initiated, it must be continued until emergency medical services (EMS) personnel or someone with equal or greater training arrives and takes over. You can be held legally responsible for abandoning a person who requires ongoing care if you leave the scene or stop providing care. Confidentiality. While making a rescue or providing care, you may learn something about the injured or ill person, such as information about medical conditions, physical problems and medications taken. This person s right to privacy is protected by laws that require you to keep information learned about the person confidential. Reporters, insurance investigators or attorneys may ask questions following an incident. This information should not be shared with anyone except EMS personnel directly associated with the person s care, facility management or the facility s legal counsel. Sharing personal information with individuals not directly associated with an injured person s medical care may constitute a breach of the victim s privacy. Documentation. Properly documenting injuries and incidents is very important. If legal action occurs later, your records and reports can provide legal documentation of what was seen, heard and done at the scene. Complete the required forms as soon as possible after the incident; preferably immediately after the incident has wrapped up. As time passes, critical details may be forgotten. When completing a report, state the facts of the incident without including your opinion. Once the report is complete, sign and date it and have all responders read the report, then sign and date it as well. A copy of the report should be kept by the facility. Consent. An injured or ill person must give permission before responders can provide first aid and emergency care. To obtain consent: o State your name. o State your level of training. o Ask if you may help (Figure 1-6). o Explain that you would like to assess them to find out what you think may be wrong or what you can do to help. o Explain what you plan to do. With this information, an ill or injured person can grant their informed consent for care. Someone who is unresponsive, confused or seriously injured or ill (such as in a nonfatal drowning) may not be able to grant consent. In these cases, the law assumes the victim would give consent if they were able to do so. This is called implied consent. Implied consent also applies to a minor who needs emergency medical assistance and whose parent or guardian is not present. Refusal of care. Some injured or ill people may refuse care, even if they desperately need it. Parents also refuse care for their children. Even though someone may be seriously injured, their wishes must be honored. In these situations, you should explain why they need care. For significant injuries, you should call EMS personnel to evaluate the situation. For non-life-threatening emergencies, when care is refused and you are asked not to call EMS personnel, make it clear that you are neither denying nor withholding care and that you are not abandoning the victim. You must document any refusal of care. Someone else, such as another lifeguard, should witness the person s refusal of care and sign a report. Ask the person who refuses care to sign the report as well; if they refuses to sign, note that on the report. GOOD SAMARITAN LAWS Most states and the District of Columbia have Good Samaritan laws that protect people against claims of negligence after having provided emergency care in good faith without having accepted anything in return. These laws differ somewhat from state to state but generally help to protect people who act in good faith, within the scope of their training, and who are not negligent. Some Good Samaritan laws, however, do not provide coverage for individuals who have a legal duty to act, which includes professional lifeguards. Therefore, it is important that lifeguards consult a lawyer or the facility s legal counsel to determine the degree of protection provided by their state s Good Samaritan laws. 9 ChAPTER 1: ThE PROFESSIONAL LIFEGUARD

20 1-6 CONTINUING YOUR TRAINING Earning a lifeguarding certification means you have successfully completed a training course and passed written and skill evaluations on a given date. It does not mean that you have learned everything there is to know about lifeguarding. Once hired as a lifeguard, you should expect that you will be required to continue your training. It is the responsibility of facility management to help its lifeguards maintain abilities, develop skills and work effectively as a team. Expect facility management to provide a pre-service evaluation, annual or preseason orientation and training, a policies and procedures manual and regular in-service training. Pre-Service Evaluation Facilities often require lifeguard applicants to hold a current training certificate from a nationally recognized agency, such as the American Red Cross. State codes, insurance company rules and standards of organizations to which your facility belongs may require your employer to evaluate your current skill level. Your employer may have you participate in rescue scenarios to ensure that you understand your responsibilities within your team and are familiar with your facility s layout and equipment. Annual or Preseason Orientation and Training Lifeguards should have annual certification training. This is especially important for seasonal lifeguards, who can forget knowledge and skills between seasons. Annual training can include review courses or a review of first aid, CPR/AED and lifeguarding knowledge and skills (Figure 1-7). An orientation session about facility operations and lifeguards responsibilities helps both new and returning lifeguards understand the facility, their responsibilities and management s expectations. The orientation is critical for learning what is unique about your workplace and how it differs from the environment in which you were trained. Ask your employer questions about your facility and become completely familiar with your facility s operations. Figure 1-7 Annual training helps lifeguards maintain their knowledge and skills. ChAPTER 1: ThE PROFESSIONAL LIFEGUARD 10
21 Policies and Procedures Manual A policies and procedures manual should provide the information that you need to understand what is expected of you, to be able to work safely and to perform your duties effectively. This manual usually includes administrative policies and procedures, personnel policies and guidelines and standard operating procedures. Regular In-Service Training In-service training takes place while you are employed as a lifeguard and is designed to help you maintain your knowledge and skills at a professional level. It also gives you a chance to practice with other lifeguards at your facility. This will help you to efficiently respond as a team in an emergency. Maintaining Your Certification There is a validity period on for your certification. Additional training may be required to meet state and local regulations or facility-specific policies. Your facility management should be aware of any further training requirements. DID YOU KNOW? You may be evaluated periodically while on the job by your employer or through a contracted agency, such as the American Red Cross Aquatic Examiner Service, or a combination of both. These evaluations may be announced or unannounced, may be recorded, and may assess how you perform patron surveillance and lifeguarding skills. 11 ChAPTER 1: ThE PROFESSIONAL LIFEGUARD

22 IN-SERVICE TRAINING It is a best practice of many well-managed facilities that lifeguards participate in a minimum of 4 hours of in-service training each month (Figure 1-8). The facility manager, lifeguard supervisor, a head lifeguard or an individual who is an expert in a particular subject matter (such as a public health official, risk manager or human resources representative) may conduct in-service training. Training sessions will address issues, such as surveillance and recognition, water and land rescue skills, emergency response drills, decision-making protocols, facility rules and regulations, customer service, records and reports and physical conditioning. Figure 1-8 In-service training helps to maintain knowledge and skills. ChAPTER 1: ThE PROFESSIONAL LIFEGUARD 12
23 1-7 BEING PART OF THE TEAM There are two teams at most aquatic facilities: the lifeguard team and the safety team. The lifeguard team is formed whenever two or more lifeguards are on duty. The lifeguard team is part of a larger safety team, which is a network of people who prevent, prepare for, respond to and assist in an emergency at an aquatic facility. To be effective, members of both teams must know, understand and practice the roles that they are assigned in an emergency. Lifeguard Team If you work at a facility where two or more lifeguards are on duty at a time, you are part of a lifeguard team. To learn what you should expect from other team members, it is critical that you communicate and practice together. Your ability to respond to an emergency depends in large part on how much you have practiced the facility s emergency action plans (EAPs) together and how well you communicate. By practicing with your team, you will learn how staff members work together in a variety of circumstances (Figure 1-9). Team practice also gives teammates the chance to work on different responder roles together. This is particularly important because team rescues are an integral part of lifeguarding. Several of the rescues presented in this course require more than one rescuer to provide care. In addition to practicing rescues and response, it is important that the team works to maintain a climate of teamwork. Effective communication, trust, mutual respect, commitment and cooperation are crucial elements for working effectively as a team. Some ways that you can have a positive effect on your team include: Arriving to work on time. Rotating stations on time. Attending in-service trainings. Enforcing safety rules in a consistent manner. Communicating clearly while treating others with respect. Being prepared by maintaining your knowledge, skills and physical fitness. Completing secondary responsibilities in a timely and acceptable fashion. 13 ChAPTER 1: ThE PROFESSIONAL LIFEGUARD

24 The Emergency Action Plan The lifeguard team and other staff members must practice the facility s EAPs together until everyone knows their responsibilities and can perform them effectively. Because conditions can change throughout the day, you may need to adapt the EAP to a particular situation. Some facilities have created more than one EAP to cover specific situations or conditions. Factors that may affect the steps of an EAP include: The number of lifeguards on duty. The number and availability of other safety team members on duty. The types of patron activities occurring. Safety Team After your lifeguard team activates the facility s EAP, the safety team needs to back you up and provide assistance. The main objective of the safety team is to assist you in maintaining a safe environment and providing emergency care. In addition to the lifeguard team and other facility staff members, the safety team is composed of local emergency service personnel. Other members of the safety team may work off-site and often include upper-level management personnel. Chapter 5 discusses safety team members and their roles and responsibilities. Figure 1-9 The lifeguard team is formed whenever two or more lifeguards are on duty. ChAPTER 1: ThE PROFESSIONAL LIFEGUARD 14
25 1-8 LIFEGUARDS AS WATER SAFETY ADVOCATES Helping patrons be safe in, on and around the water is one of the primary responsibilities of a lifeguard. Lead by example for the patrons you serve as well as your fellow lifeguards by always demonstrating safe practices and behaviors, and promoting a safety-first mindset and attitude both on and off the stand. In your role as a lifeguard, you may be called upon by your facility management to help educate members of your community to prevent, prepare for and respond to emergencies in and around the water. The American Red Cross provides free water safety educational materials for adults and children that you can use to lead water safety presentations. Topics range from specific interests (such as home pool safety, rip current safety, boating safety and basic water rescue) to general water safety education (such as Longfellow s WHALE Tales for children between the ages of 5 and 12). At the core of these presentations are the following key concepts: The Circle of Drowning Prevention illustrates the layers of protection that are essential to prevent drowning (Figure 1-10). The Chain of Drowning Survival illustrates what action must be taken in the event of an aquatic emergency (Figure 1-11). Water competency is defined to help people of all ages understand the basic swimming skills needed to handle themselves safely in the water. This sequence of critical water-safety skills is: 1. Step or jump into the water over your head. 2. Return to the surface and float or tread water for 1 minute. 3. Turn around in a full circle and find an exit. 4. Swim 25 yards to the exit. 5. Exit from the water. If in a pool, be able to exit without using the ladder. Visit redcross.org for more information. 15 ChAPTER 1: ThE PROFESSIONAL LIFEGUARD


26 Figure 1-10 Circle of Drowning Prevention Figure 1-11 Chain of Drowning Survival ChAPTER 1: ThE PROFESSIONAL LIFEGUARD 16
27 Blog Post #1 Back to Work! May 20th 9:20 pm I ve been thinking about my lifeguarding class from last year, and how much I learned, and even how much I liked working at the pool. But that s not what did it for me. My first rescue at the beginning of the summer is how I knew I was meant to be a lifeguard. I m so excited to get back to work! When I arrived for pre-season orientation, I found out our facility signed up for a program called the Aquatic Examiner Service (AES). Basically, the American Red Cross sends an examiner into our facility unannounced with a hidden camera while we are lifeguarding to make sure we are doing our job. Pretty cool, right? They film us on the lifeguard stand performing patron surveillance and they also check on things like rescue equipment and training records. After filming, the examiner works with us to test our emergency response skills in situations like water rescues, caring for suspected spinal injuries and CPR/AED. The scenarios will change each time they visit and are designed to simulate real emergency situations. This is really going to keep us on our toes. At first, the other guards and I were nervous about having a Red Cross examiner film us on surveillance duty and test our skills. Thankfully, Emma (our supervisor) explained that the AES program is completely educational. She reassured us that failing a skill test doesn t mean we will be fired, but it will be an opportunity for us to train as a team to strengthen our skills and challenge us to improve for the next skill test. The examiner who conducted our testing would also run an in-service training session for us to practice and polish our skills! I m pretty excited to learn from the experts. 1-9 WRAP-UP Being a professional lifeguard means being fully prepared for this challenging and important work. Looking and acting professional indicates readiness to do the job. Maintaining professional conduct requires practice and commitment. No one is a natural-born lifeguard; it takes hard work. A lifeguard can meet the challenges and gain the rewards of being a professional through practice, hard work and dedication. BENCHMARK FOR LIFEGUARDS To fulfill the responsibilities of a professional lifeguard, you must be mentally, physically and emotionally prepared at all times to do your job. 17 ChAPTER 1: ThE PROFESSIONAL LIFEGUARD
28 Chapter 1 Review 1. What is the primary responsibility of a lifeguard? A To encourage patrons to participate in water safety educational programs C To schedule and participate in frequent in-service trainings B To prevent drowning and other injuries from occurring at their aquatic facility D To deliver patron safety orientations and administer swim tests 2. Provide three examples of how lifeguards fulfill their primary responsibility: 1) 2) 3) 3. List five examples of secondary responsibilities that should never interfere with patron surveillance: 1) 2) 3) 4) 5) ChAPTER 1 REvIEW 18
29 Chapter 1 Review 4. List five characteristics of a professional lifeguard: 1) 2) 3) 4) 5) 5. Lifeguards should: A Keep a cell phone in their hip packs at all times, in case of emergency. B Stay alert by eating at the lifeguard stand. C Always be attentive and sit or stand upright when on surveillance duty. D Assist patrons with swim testing when on surveillance duty. 6. A lifeguard is texting while on surveillance duty and fails to recognize a swimmer in distress. What legal principle could be a problem for this lifeguard? A Negligence C Refusal of care B Abandonment D Consent 19 ChAPTER 1 REvIEW
30 Chapter 1 Review 7. List the five steps that a lifeguard should take when obtaining consent from an injured or ill person before providing first aid or emergency care: 1) 2) 3) 4) 5) 8. What is the validity period of an American Red Cross Lifeguarding certification? How does an American Red Cross certified lifeguard get recertified? 9. Why is it important to attend a pre-season orientation and training? A To ensure that lifeguards understand their responsibilities and know how to perform their job B To ensure that lifeguards get practice with their facility s safety and rescue equipment and emergency action plans C To ensure lifeguards understand codes, rules and regulations of the facility D All of the above ChAPTER 1 REvIEW 20
31 Chapter 1 Review 10. What does EAP stand for? 11. Why is it important for lifeguards and other team members to understand and practice the EAP? 12. What is the best practice for the frequency of in-service training participation at well-managed aquatic facilities? A At least 1 hour of in-service training each month C At least 1 hour of in-service training each day B At least 4 hours of in-service training each year D At least 4 hours of in-service training each month 13. What are the benefits of regular, frequent in-service training? 21 ChAPTER 1 REvIEW
32 Chapter 1 Review 14. List four topics that could be a discussed during in-service training: 1) 2) 3) 4) QUESTION FOR FUTURE GUIDED DISCUSSION Being a professional lifeguard is about more than blowing a whistle and wearing a uniform. A lifeguard must be mentally, physically and emotionally prepared at all times to do their job. So, how should a lifeguard prepare for working at an aquatic facility? What personal lifestyle commitments should a lifeguard make? ChAPTER 1 REvIEW 22

33 23 ChAPTER 1 REvIEW

34 2 Facility Safety One of your most important responsibilities as a lifeguard is to help ensure that your facility is safe. You do this, in part, by having rescue equipment immediately available, conducting routine safety checks, taking appropriate action during severe weather and being familiar with facility rules. Management also has a role to play, which includes keeping the facility in compliance with the law and making sure that lifeguards are doing their jobs correctly RESCUE EQUIPMENT FACILITY SAFETY CHECKS WEATHER CONDITIONS RULES AND REGULATIONS MANAGEMENT AND SAFETY WRAP-UP


35 2-1RESCUE EQUIPMENT Aquatic facilities must have the appropriate rescue equipment available for emergency response and in proper working order at all times. Using rescue equipment makes a rescue safer for both you and the victim. You also must have immediate access to communication devices used at your facility to activate an emergency action plan (EAP), which may include a whistle, megaphone, radio, call box, intercom, telephone, flag or other signaling equipment. As a lifeguard, you must always wear or carry certain equipment so that it is instantly available in an emergency. The primary piece of rescue equipment used to perform a water rescue is the rescue tube. Another piece of equipment that must be immediately accessible is the backboard, which is used to remove victims from the water. Some facilities, like waterfronts, may use specific or specialty rescue equipment to meet the needs of their particular environments. Equipment That You Wear or Carry To respond quickly and appropriately to an emergency, a rescue tube, resuscitation mask and gloves must be instantly available. The best way to ensure this is to always keep the strap of the rescue tube over your shoulder and neck and wear a hip pack containing the gloves and resuscitation mask (Figures 2-1, 2-2, 2-3). You should wear the hip pack at all times, even when not on surveillance duty. Rescue Tubes The rescue tube is used at pools, waterparks and most non-surf waterfronts. It is a 45- to 54-inch vinyl, foam-filled tube with an attached tow line and shoulder strap. A rescue tube is capable of keeping multiple victims afloat. When performing patron surveillance, always keep the rescue tube ready to use immediately. Keep the strap of the rescue tube over the shoulder and neck. Figure 2-1 Resuscitation mask, gloves and whistle. Hold the rescue tube across your thighs when sitting in a lifeguard chair or across your stomach when standing. Hold or gather the excess line to keep it from getting caught in the chair or other equipment when you move or start a rescue. Figure 2-2 The rescue tube is used at pools, waterparks and most non-surf waterfronts. 25 ChAPTER 2: FACILITy SAFETy

36 Resuscitation Masks A resuscitation mask is a transparent, flexible device that creates a tight seal over the victim s mouth and nose to allow you to breathe air into a victim without making mouth-to-mouth contact. All masks should have a one-way valve for releasing exhaled air. Some masks also have an inlet for administering emergency oxygen. Masks come in different sizes to ensure a proper fit and tight seal on adults, children and infants. Gloves Disposable (single-use) gloves are used to protect employees that may be exposed to blood and other potentially infectious material (OPIM). Gloves should be made of non-latex materials, such as nitrile. Gloves also should be powder free. Whistle Whistles are important signaling devices for lifeguards. They are used to activate their facility s EAP, and get attention of other members of the safety team as well as patrons for policy enforcement. Whistles should be loud, made of a material that will not rust and have breakaway lanyards. Figure 2-3 It is important to wear your lifeguard gear properly. ChAPTER 2: FACILITy SAFETy 26
, other resuscitation equipment, an automated external defibrillator (AED),")
 is the standard piece of equipment used at aquatic facilities to remove victims from the water when they are unable to exit the water on their own")

, also known as a rescue can or torpedo buoy, often is the primary piece of rescue equipment used at waterfronts and surf beaches.")

37 Equipment You Can Easily Reach Other first aid and rescue equipment should be easily accessible for emergency use. This additional equipment may include backboards, rescue buoys, other personal protective equipment (PPE), other resuscitation equipment, an automated external defibrillator (AED), first aid supplies and rescue boards. Backboards A backboard (Figure 2-4) is the standard piece of equipment used at aquatic facilities to remove victims from the water when they are unable to exit the water on their own or when they have a possible injury to the head, neck or spine. Some backboards have runners on the bottom that allow the board to slide easily onto a deck or pier. A backboard must have straps to secure a victim in cases of head, neck or spinal injury, in addition to a device for immobilizing the head. Figure 2-4 A backboard is used to remove a victim from the water. Rescue Buoys A rescue buoy (Figure 2-5), also known as a rescue can or torpedo buoy, often is the primary piece of rescue equipment used at waterfronts and surf beaches. Most rescue buoys are made of lightweight, hard, buoyant plastic and vary in length from 25 to 34 inches. Molded handgrips along the sides and rear of the buoy allow the victim to keep a firm hold on the buoy. Rescue buoys are buoyant enough to support multiple victims. Personal Protective Equipment Personal protective equipment (PPE) is the specialized clothing, equipment and supplies used to prevent you from coming into direct contact with a victim s body fluids. In addition to gloves and resuscitation masks, other PPE may be available at your facility, including gowns, masks, shields and protective eyewear. A blood spill kit should also be available to safely clean up blood. Figure 2-5 Rescue buoys are often used at waterfronts. 27 ChAPTER 2: FACILITy SAFETy


 are used to remove fluids and foreign matter from the victim s upper airway.")

38 Bag-Valve-Mask Resuscitators A bag-valve-mask (BVM) resuscitator is a hand-held device (Figure 2-6) attached to a resuscitation mask that is used to ventilate a victim in respiratory arrest or when performing CPR. BVMs come in various sizes to fit adult, children and infants. The appropriately sized BVM should be used based on the size of the victim. Using a BVM requires two rescuers: one to maintain a tight seal for the mask and one to squeeze the bag. Other Resuscitation Equipment In addition to resuscitation masks, other resuscitation equipment is effective in responding to breathing and cardiac emergencies. Use of all of the following supplemental resuscitation equipment is not covered in the Lifeguarding course and requires additional training. This equipment may or may not be used at your facility: Oxygen cylinders and delivery devices. In a breathing or cardiac emergency, oxygen cylinders and delivery devices (Figure 2-8) are used to administer emergency oxygen to the victim. Suctioning devices. Suction devices (Figure 2-9) are used to remove fluids and foreign matter from the victim s upper airway. There are two types of suctioning devices: manual suctioning units are operated by hand while mechanical suctioining units are electrically powered Airways. Oropharyngeal and nasopharyngeal airways come in a variety of sizes and are used to help maintain an open airway in a nonbreathing victim. They do this by keeping the tongue away from the back of the throat during resuscitation. Figure 2-6 A BVM attaches to a rescusitation mask. Automated External Defibrillators An AED (Figure 2-7) is a portable electronic device that analyzes the heart s rhythm and can deliver an electrical shock, which helps the heart to re-establish an effective rhythm. This is known as defibrillation. It is used in conjunction with CPR on unconscious victims with no obvious signs of life (movement and breathing). An AED should be available at your facility. Figure 2-8 A lifeguard assists with breathing. Figure 2-7 An AED analyzes the victim's heart rhythm. Figure 2-9 Manual suction devices remove fluids from the upper airway. ChAPTER 2: FACILITy SAFETy 28


39 First Aid Kit and Supplies An adequate inventory of first aid supplies (Figure 2-10) must be available at all aquatic facilities. Common contents of a first aid kit include items used to treat bleeding and wounds and to help stabilize injuries to muscles, bones and joints. Ice packs and rescue blankets also may be included since they may help to treat heat- and cold-related emergencies. Your state or local health department may establish specific requirements for the contents of your first aid kit. Figure 2-10 A first aid kit must be at all aquatic facilities. Rescue Boards Some waterfronts use rescue boards (Figure 2-11) as standard equipment. Rescue boards are made of plastic or fiberglass and may include a soft rubber deck. They are shaped similarly to a surf board but usually are larger to accommodate a lifeguard plus one or more victims. Rescue boards are fast, stable and easy to use. They may be used during rescues to quickly paddle out long distances. They also may be used by lifeguards as a patrolling device, with the lifeguard paddling along the outer boundary of the swimming area. Figure 2-11 Rescue boards are standard at some waterfronts. Ring Buoys, Reaching Poles and Shepherd s Crooks A ring buoy, reaching pole and shepherd s crook (Figure 2-12) often are required by the health department for swimming pools and waterparks. This equipment is not typically used by lifeguards to perform the professional rescues taught in this course. This equipment usually is used by untrained bystanders. If your facility has any of these items, you should learn how to use them. Figure 2-12 Ring buoys and shepherd's crooks are typically used by untrained bystanders. 29 ChAPTER 2: FACILITy SAFETy

40 2-2 FACILITY SAFETY CHECKS Facility safety checks (Figure 2-13) are the primary tool used by aquatic facility staff to ensure overall safety for their facilities. These checks may be performed by lifeguards or by staff that are trained to handle facility operations and maintenance, or by a combination of both. A lifeguard supervisor or facility manager will instruct you about the specific procedures for your facility. You should never perform safety checks while also performing patron surveillance. If you identify an equipment problem during your surveillance or if a problem is reported to you, notify a lifeguard supervisor or another lifeguard who is not performing surveillance. If the condition is hazardous, follow your facility protocols and stop patrons from using the equipment or prohibit them from entering a potentially hazardous area. Safety checks are conducted before the facility is opened, during daily operations and at closing. Checks conducted before the facility is opened may include a physical inspection of all features, such as a test ride of all attractions. If you find an unsafe condition, you should correct the condition before the facility opens, if possible. If you cannot correct the problem, you should inform a supervisor immediately. If the condition is serious, the supervisor or facility manager may close or delay the opening of the facility, attraction or area until the condition is corrected. Signs, ropes or cones can keep patrons away from an area of the facility not open to the public. Inform other lifeguards about the hazard so that they can direct patrons away from the area. You also should record incidents in the daily log or on the appropriate form or report. Figure 2-13 Report any unsafe conditions when performing routine safety checks at your facility. ChAPTER 2: FACILITy SAFETy 30
41 TYPICAL ITEMS FOUND ON A FACILITY CHECKLIST The facility safety checklist should include the status of the following items and any action required. Equipment: Verify that all equipment is in good working order and a sufficient amount of it is available in the proper locations. RESCUE EQUIPMENT Rescue tubes and/or buoys Rescue board Non-motorized craft Motorized craft Masks and fins Reaching pole Ring buoy FIRST AID EQUIPMENT Hip packs Resuscitation masks Disposable gloves First aid supplies Backboard(s) with head immobilizer and straps First aid kit AED(s) Suctioning equipment Emergency oxygen delivery system SAFETY EQUIPMENT Lifeguard stands/stations Communication devices whistles, radios, emergency stop(s) Telephone directions for emergency calls posted PPE extra gloves, gowns, face shield, blood spill kit Life jackets Umbrellas or shade structures Sunscreen Operational Conditions: As applicable for the environment and facility type: Bottom free of hazards Water clarity (pools and waterparks should see the bottom) Water level Water temperature within specified range Air temperature within specified range Weather conditions safe Lighting underwater and above ground working properly Water chemical ranges within specified range Drain covers undamaged and secured Suction fittings undamaged and secured Circulation system within range and proper operational condition Flow rates Filter differential Hair/lint strainer Gutter/skimmer baskets Risk Management: In place, visible, secure, clean, ready for use: Depth markings clearly visible Swim area sections set up with ropes and/or buoys Signage in line of sight for patrons Fences and barriers, gates and doors secure Walkways/decks clear, accessible, nonslip and free of hazards Handrails or guardrails secure Ladder rungs or steps secure ADA accessibility equipment secure and ready for use Diving boards secure and nonslip Starting blocks secure and nonslip Floating features tethered and secure, undamaged Fire extinguishers charged and ready for use Emergency exits clear, accessible with working lights and alarms 31 ChAPTER 2: FACILITy SAFETy
42 TYPICAL ITEMS FOUND ON A FACILITY CHECKLIST Facility Sanitation: Clean, nonslip, free of debris and ready for use Pool shell free of algae, free of scum line Restrooms/locker rooms Warm, running water Soap Paper products adequately stocked First aid station adequately stocked Tables and seating Trash receptacles Administration: Posted or filed as applicable: Zones of surveillance diagrams posted Lifeguard rotation plans posted EAPs posted Safety Data Sheets available Staff certifications copies on file for all staff Training records on file In-service training records-on file Water quality test results Daily results posted Records on file Rescue and/or incident reports on file AED inspection checklist up to date Emergency oxygen system checklist up to date Aquatic Attractions: Rides and slides inspected and test run complete Rafts, tubes and/or sleds properly inflated and handles secure Landing areas free of rough surfaces and debris Water level and flow appropriate for attraction Electronic dispatching systems tested and operating properly Waterfronts: Shoreline is clean and free of sharp objects Bottom conditions are free from hazards Water conditions are safe for swimming Piers are anchored, stable, free from trip or injury hazards Lifeguard stands surrounding area clear of objects ChAPTER 2: FACILITy SAFETy 32

43 Specific Areas to Inspect for Safety The facility s safety checklist is a guide for performing a safety check. The purpose is to verify that equipment has been tested, is working properly, is ready for use and that the facility is clean and safe for patrons. Your facility should have a checklist specific to its needs. General areas and equipment to inspect include: Rescue equipment (hip pack contents, rescue tubes, backboards and first aid supplies) Communication equipment Pool decks or waterfront shorelines Pools, waterfront swimming areas or waterpark attractions Locker rooms (dressing areas, shower areas and restrooms) Equipment and structures (ladders, diving boards and starting blocks) Recreational equipment and play structures Inspecting Aquatic Attractions and Features Facilities should follow the manufacturer s guidelines for installation, safe inspection, maintenance and use of its various attractions and features (Figure 2-14). Your employer should provide you with a specific set of guidelines and training if you are responsible for these inspections. In some cases, maintenance personnel, rather than lifeguards, will be responsible for inspections. Even if the attraction or feature has been inspected already, stay alert for any problems that may develop, such as loose or rusted bolts; cracks; broken or missing pieces; frayed, loose or mildewed safety nets; unusual noises; and an area with increased frequency of injury to patrons. Mechanical malfunctions can result in raft slippage, conveyor malfunctions, power outages and water flow problems. If water flow stops, rider dispatch must stop immediately. Figure 2-14 Facilities should follow the manufacturer s guidelines for various attractions and features. 33 ChAPTER 2: FACILITy SAFETy


44 Inspecting Ride Vehicles Figure 2-15 Safety checks are a primary method of facility surveillance and help prevent injuries to patrons. Many attractions require the rider to ride an inflated tube, a foam mat, a plastic sled or a multiple-rider vehicle. Visually inspect mats and sleds to make sure that they have no signs of damage and that all handles are intact (Figure 2-15). Check vehicles that require inflation to ensure that they are inflated properly. Vehicles that are under- or overinflated should be taken out of service immediately. Hazards at Waterfront Facilities You should be aware of the specific potential hazards presented by some waterfront facilities. These include underwater hazards, pier formations and changing water conditions. Dangerous conditions may develop with changing winds, tides and weather. On some days, the water may be totally calm and flat. On other days, there may be large waves. Checking for potentially hazardous conditions specific to your facility should be covered during your orientation. If it is not, ask your facility management to discuss procedures for any situation for which you do not feel adequately prepared. Underwater Hazards Common underwater hazards may change throughout the day and include: Holes in the swimming area Sudden drop-offs Submerged objects, such as rocks, tree stumps and underwater plants (Figure 2-16) Bottom conditions (sand, rock, silt, weeds and mud) Slope of the bottom and water depth Shells and barnacles Broken glass or other sharp objects Marine life You should check for and, if possible, remove underwater hazards. If hazards cannot be removed, swimming areas should be re-positioned away from them. Alternatively, the shape and size of swimming areas may need to be changed to avoid underwater hazards. Floating buoys can be used to mark underwater hazards to warn patrons of their danger. Figure 2-16 Remove any underwater hazards at waterfront facilities. ChAPTER 2: FACILITy SAFETy 34


45 Pier Formations Piers in the water often are used for different activities (Figure 2-17, A D). The following precautions should be taken with piers: Ensure that floating piers and rafts are anchored securely. Adjust attachment points between floating sections to minimize hazards. Be aware of and take steps to eliminate blind spots (obstructed views) caused by piers or rafts. Ensure that patrons dive from piers only in designated areas. Check the water depth daily. Be aware of bottom and tidal changes before allowing head-first entries. Prohibit swimming in fishing areas around piers or adjacent to boat activity. Figure 2-17A Figure 2-17C Figure 2-17B Figure 2-17D Changing Water Conditions Many factors can influence water conditions, which in turn can affect patron safety. These factors include: Water depth and currents. Changes in the water level may lead to increased currents that make standing difficult and could sweep swimmers beyond area boundaries. Examples include: o A dam that releases water, causing the water depth above the dam to drop and the river depth below the dam to rise. o Heavy rainfall that makes a lake or river rise, or a long, dry period that makes it too shallow for diving. o Tidal changes. o Seiche, which is a standing wave of water that oscillates in large lakes usually created by strong winds and/or large barometric pressure gradients. o Sandbars that can move and shift from season to season or from heavy rain that produces strong currents. These changes in the waterfront floor can create unexpected drops or new shallow-water features. Water quality. Insufficient flow may lead to stagnant water and compromise water quality. Debris or cloudiness in the water. Water temperature, which usually is colder early in the summer and after rain. Although surface water may be warm and comfortable, water at a depth of several feet can be much colder. This condition, called a thermocline, can cause hypothermia (low body temperature). When dealing with changing water conditions: Warn patrons of hazards by using signs, buoys and safety announcements. Check for objects that may have washed into the area. Check for changes in bottom conditions and water depth. Alert patrons to cold water and watch for signs of hypothermia in patrons. Check and document scheduled high and low tides in the daily log each morning before opening and plan for changes in water depth. 35 ChAPTER 2: FACILITy SAFETy
.")
46 RIP CURRENTS This course is not intended to prepare lifeguards to work at surf waterfront environments; however, it is important for all lifeguards to understand the dangers of rip currents and to help educate others about these dangers. A rip current is a strong channel of water that flows offshore from a surf beach, and often extends well beyond the breaking waves (Figure 2-18). Rip currents are commonly associated with underwater features, such as sandbars. Gaps in the sandbars allow for the water brought in by wave action to be channeled back out to sea in these rip currents. This is not always the case. They also can occur near physical structures, such as piers, groins and natural outcroppings. Rip currents may exceed a speed of 8 feet per second, which even the strongest swimmer may not be able to overcome. According to the National Oceanic and Atmospheric Administration, common indicators of a rip current include: A channel of churning, choppy water. An area having a noticeable difference in water color from the adjacent water. A line of foam, seaweed or debris moving steadily away from shore. A break or flat area in the incoming wave formation. more than 80 percent of rescues performed by surf lifeguards. This makes rip currents one of nature's most deadly natural forces. Some beaches and waterfront areas use color-coded flags to indicate the presence of hazardous water conditions and rip currents. Any time a red or double red flag is visible, stay out of the water; use caution when there is a yellow flag. The best way to survive a rip current is not to fight it by swimming against it, but to swim across it, to one side or the other while parallel to the shore, then swim in to shore when you are out of the current. If caught in a rip current, do not panic. The current will eventually fade at some distance from shore allowing you to swim back in to the side of the rip current. If you need help, signal by calling and waving to those onshore. Always try to swim near a lifeguard at a surf beach. If you are lifeguarding at a waterfront area where there is the possibility of rip currents, it is critical to receive specialized training to learn how to identify rip currents and to help someone who is caught in them. For more information on rip currents, visit ripcurrents.noaa.gov and usla.org. Although these are good indicators, they are not always present. Rip currents can be very subtle in appearance and hard to spot. While rip currents may occur during strong winds, they can also occur on calm, clear days the primary cause is incoming waves. The United States Lifesaving Association (USLA) estimates that each year more than 100 people die by drowning in rip currents. Rip currents have been shown to account for Figure 2-18 ChAPTER 2: FACILITy SAFETy 36
47 WATER QUALITY The quality of water in spas and swimming pools constantly changes. It is affected by many factors, including the concentration of disinfectant in the water; the water s ph level, chemical balance and saturation; air temperature; sunlight; and contaminants from bathers and the environment. All of these factors are important not only for a safe swimming environment but also to ensure crystal-clear water clarity. Additional training is needed, and a certification in pool operations often is required, to learn how and when to make chemical adjustments to the pool water. If you work at a swimming pool or waterpark, your responsibilities probably will include monitoring the water to make sure that it is safe, clean and clear. You may be asked to assist by periodically testing the water s chlorine or bromine and ph levels. You should receive training on how to properly test the pool water chemistry if this is included in your job responsibilities. Disinfectant and ph Levels Chlorine is one of the most common chemicals used to disinfect pools and spas. When dissolved in pool or hot tub water, chlorine produces a chemical called hypochlorous acid, also known as free chlorine. Free chlorine disinfects and sanitizes the water by killing germs and contaminants. To work most effectively, the free chlorine-to-water ratio should be 2 to 4 parts per million. This concentration of free chlorine, called a residual, should be maintained at all times throughout the water. Free chlorine is colorless and odorless. However, it reacts with certain contaminants, such as human waste, to create combined chlorines, which are more commonly known as chloramines. Chloramines cause the chlorine-like smell found in indoor pools. Chloramines also can irritate the skin and mucous membranes. The ph of the pool and hot tub water must be maintained at the appropriate level for free chlorine to be effective and for bathers to be comfortable. As the ph level goes down, free chlorine works better as a disinfectant. However, when the ph drops below 7.2, the water may irritate eyes and skin and corrode pool surfaces and equipment. Human tears have a ph of about 7.5; therefore, the ideal ph in pool and hot tub water is 7.4 to 7.6. Bromine is another chemical commonly used to kill germs and contaminants in pool and hot tub water. It often is used in hot tubs instead of chlorine because it is more stable in hot temperatures and does not burn away as quickly. It also does not leave a chemical odor in the water. Testing and Adjusting A supervisor, or another staff member trained and certified in pool operations, typically monitors and adjusts chemical levels throughout the day. However, you may be trained to test the chlorine or bromine and ph levels of the water. The water quality will need to be tested and the results recorded at periodic intervals throughout the day. Your facility should have a test kit available that measures free chlorine or bromine and ph levels. Some measure other water-balance levels as well. N,N-diethyl-p-phenylenediamine (DPD) is the most common test chemical used to test for 37 ChAPTER 2: FACILITy SAFETy
48 WATER QUALITY, CONTINUED free chlorine or bromine. DPD reacts with chlorine and turns the water test sample shades of light to dark pink. Phenol red is a dye used to test the water s ph. Its color changes from yellow to orange to red based on the ph level. The water test result color is compared with the colors on the test kit. Your facility will have guidelines for the minimum, maximum and ideal ranges for chlorine or bromine and ph levels for safe swimming. Alert the appropriate staff member immediately if the water test results are not within the proper ranges for safe swimming at your facility. Adjustments may need to be made as soon as possible or the pool or hot tub may need to be temporarily closed until the chemical ranges are correct for safe swimming. Waterfront Considerations Water quality is also important at natural bodies of water. Swimming in unsafe water may result in minor illnesses, such as sore throats or diarrhea or more serious illnesses, such as meningitis, encephalitis or severe gastroenteritis. Children, the elderly and people with weakened immune systems have a greater chance of getting sick when they come in contact with contaminated water. The quality of natural bodies of water can be impacted by pollutants, such as runoff from animal waste, fertilizer, pesticides, trash and boating wastes and especially storm water runoff during and after heavy periods of rain. The Environmental Protection Agency recommends that state and local officials monitor water quality and issue an advisory or closure when beaches are unsafe for swimming. Source: Beaches, accessed September 6, epa.gov/beaches ChAPTER 2: FACILITy SAFETy 38
49 RECREATIONAL WATER ILLNESSES Illnesses that are spread by swallowing, breathing or contacting contaminated water are called recreational water illnesses (RWIs). Typical RWIs include ear aches, rashes and diarrhea. RWIs generally are not severe, but in rare cases they can result in serious outcomes, including pneumonia, neurological damage and even death. Gastroenteritis, a stomach ailment that causes diarrhea, nausea, vomiting and abdominal pain, is one of most commonly documented RWIs. It occurs when feces are released into the water and swallowed by other swimmers before having been killed by chlorine or another disinfectant. Cryptosporidium is the parasite that causes most gastroenteritis outbreaks. It can remain infectious, even when exposed to disinfectant levels for several days; therefore, people suffering from diarrhea should not enter the water. Those diagnosed with cryptosporidiosis should not enter recreational water for 2 weeks after symptoms have ceased. Fecal Incident Response Recommendations During orientation or in-service training, your facility should provide training on how to respond to accidental fecal releases (AFRs). If an AFR occurs, you should direct all patrons to leave all of the pools that use the same filtration system. Remove as much of the fecal material as possible with a scoop or net, trying not to break formed stool apart. Dispose of the feces using sanitary procedures. Do not vacuum the feces. Clean and disinfect the scoop and net and then place them in the pool during the following disinfection procedures. Formed stool Continue to operate the filtration system. Adjust the ph to below 7.5. Raise the free chlorine level to at least 2 ppm. Maintain those levels for 25 minutes before re-opening the pool. Diarrheal discharge Continue to operate the circulation system. Adjust the ph to below 7.5 Raise the free chlorine level to at least 20 ppm. Maintain those levels for 13 hours. Backwash the filter. Return the chlorine level to normal levels before re-opening the pool. Vomit in Pool Water Patrons are unlikely to contract RWIs by swallowing, breathing or contacting pool water contaminated by vomit or blood. The vomit that a person produces after swallowing too much water probably is not infectious; however, if a person vomits and it contains any solid matter or food particles, you should respond the same way as you would to a formed stool incident. To learn more about prevention practices, healthy swimming and recreational water topics, and to download free outbreak response toolkits and publications, visit the Centers for Disease Control and Prevention's (CDC) website at cdc.gov/healthywater/swimming/. You can learn even more by enrolling in a pool operator course. 39 ChAPTER 2: FACILITy SAFETy
50 2-3 WEATHER CONDITIONS Weather affects the safety of swimmers both outdoors and indoors. You should be aware of the weather conditions in your area and know how to act when severe weather occurs. The National Oceanic Atmospheric Association (NOAA) Weather Radio All Hazards is a good source of information about potentially hazardous weather. This nationwide radio network provides detailed weather information 24 hours a day to most areas. A special radio receiver is needed to receive the signal and can be set to sound an alarm when a warning is issued for a specific area. These radios have battery backup in case of power failure. Local up-to-date forecasts and weather warnings also are available from Internet sites, such as the National Weather Service at nws.noaa.gov. Local radio stations, mobile apps, television channels and cable services also provide forecasts and emergency weather warnings. Always follow your facility s EAP for severe weather conditions. Lightning and Thunderstorms In most parts of the United States, lightning and thunderstorms happen more often in the summer. Follow the facility s procedures for clearing patrons from the water before an impending storm. Patron or employee safety should never be put at risk. If a storm or other bad weather is predicted, stay alert for signs of the coming storm, such as thunder and lightning or high winds. If thunder or lightning occur: Clear everyone from the water at the first sound of thunder or first sight of lightning. If you are in an elevated station, get down immediately. Move everyone to a safe area free from contact with water, plumbing or electrical circuits. For outdoor facilities, move everyone inside, if possible. Large buildings are safer than smaller or open structures, such as picnic shelters or gazebos. Keep patrons and staff out of showers and locker rooms during a thunderstorm as water and metal can conduct electricity. Do not use a telephone connected to a landline except in an emergency. Keep everyone away from windows and metal objects (e.g., doorframes, lockers). Watch for more storms and monitor weather reports on a radio or TV broadcast, weather radio or website. If you are caught outside in a thunderstorm and there is not enough time to reach a safe building: Keep away from tall trees standing alone and any tall structures. Keep away from water and metal objects, such as metal fences, tanks, rails and pipes. Keep as low to the ground as possible: squat or crouch with the knees drawn up, both feet together and hands off the ground. Avoid lying flat on the ground; minimize ground contact. ChAPTER 2: FACILITy SAFETy 40

51 LIGHTNING Lightning is the result of the build-up and discharge of electrical energy, and this rapid heating of the air produces the shock wave that results in thunder. In the United states, 25 million cloudto-ground lightning strikes occur yearly. Lightning often strikes as far as 10 to 15 miles away from any rainfall, with each spark of lightning reaching over 5 miles in length and temperatures of approximately 50,000 F. Even if the sky looks blue and clear, be cautious. One ground lightning strike can contain 100 million volts of electricity. The National Lightning Safety Institute recommends waiting 30 minutes after the last lightning sighting or sound of thunder before resuming activities. Source: National Weather Service Web, Heavy Rain and Hail Heavy rain and hail can be dangerous. Rain can make it difficult to see the bottom of the pool or beneath the surface (Figure 2-19). If you cannot see the bottom of the pool, clear the pool of all patrons. In addition, hail can cause serious physical injury. If it is hailing, clear patrons from the water and direct them to shelter. Figure 2-19 Rain can obscure the bottom of the pool, and wind can cause leaves and debris to fall into outdoor pools. 41 ChAPTER 2: FACILITy SAFETy
52 Tornadoes If the aquatic facility s locale is prone to tornadoes, facility staff should monitor weather forecasts. A tornado watch means that tornadoes are possible. Some facilities may decide to close once a watch is issued and before the arrival of wind, rain and lightning, which also may occur when tornado formation is likely. A tornado warning means that a tornado has been sighted or indicated on radar and is occurring or imminent in the warning area. Some communities activate sirens during a tornado warning. Everyone should take shelter immediately. If a tornado warning is issued: Clear the water and surrounding area. Move everyone to the location specified in the facility s EAP, such as a basement or an inside area on the lowest level of a building. Keep everyone away from windows, doors and outside walls. Have everyone lie flat in a ditch or on a low section of ground if adequate shelter is unavailable at or near the facility. If a tornado siren warning is heard, keep patrons in the safe location. Continue listening to local radio or television stations or NOAA Weather Radio for updated instructions from the authorities. High Wind High wind may cause waves or turbulence that makes it hard to see patrons in the water. Wind also increases the risk of hypothermia, especially for small children and the elderly. Safety guidelines for high wind include: Clearing the pool or waterfront if visibility is impaired by waves or increased turbidity. Moving all patrons and staff indoors. Securing all facility equipment that could be blown around and become dangerous, but only if it is possible and safe to do so. Fog In some areas, fog can occur at any time of the day or night with changing weather conditions. If fog limits visibility, your facility may need to close. Weather Conditions and Indoor Facilities Indoor facilities are safe from most weather problems but still may be affected. Severe weather can cause a power failure; therefore, the facility should have some type of portable or emergency lighting. In the event of a power failure, you should clear the pool because circulation and filtration of pool water will not be possible. If weather conditions cause safety concerns, you also should clear the deck. Follow the facility s EAP for severe weather conditions. ChAPTER 2: FACILITy SAFETy 42

53 2-4 RULES AND REGULATIONS Every aquatic facility establishes its own set of rules and regulations. Some of these regulations are required by the state or local health department, whereas others are determined by the facility management. This course concentrates on common rules aimed at keeping patrons safer and preventing injuries; however, you should be familiar with and enforce all rules at your facility. Common Rules Every facility should post its rules and regulations for patron behavior in plain view of all patrons and staff. Rules do not keep patrons from having fun. Rules exist for everyone s health and safety. Posted rules help patrons to enjoy their experience without endangering themselves or others. Facilities that attract numerous international guests or those that are located in multi-cultural communities also may post rules in other languages or use international signs or symbols. Common rules posted at aquatic facilities may include: Swim only when a lifeguard is on duty. Swim diapers are required for small children or people with incontinence. No swimming with open or infected wounds. Obey lifeguard instructions at all times. No running, pushing or rough play. No hyperventilating before swimming underwater or breath-holding contests. No sitting or playing near or with drains or suction fittings. Dive only in designated areas (Figure 2-20). No glass containers in the pool area and locker rooms. No alcoholic beverages or drug use allowed. Figure 2-20 To help prevent injuries, post signs, markings and warnings to inform patrons about dangers. Waterfront Rules Waterfront facilities often adopt additional rules that are specific to the waterfront environment. These may include: No playing or swimming under piers, rafts, platforms or play structures. No boats, sailboards, surfboards or personal watercraft in swimming areas. No running or diving head first into shallow water. No fishing near swimming areas. No umbrellas at the waterline. (Umbrellas present a surveillance obstruction.) No swimming in unauthorized areas. 43 ChAPTER 2: FACILITy SAFETy

54 Waterpark Rules At waterparks, rules and regulations should be posted, but they also may be recorded and played over a public address system. Rules may vary based on the type of attractions available. For example, U.S. Coast Guard-approved life jackets may be required on certain attractions but not allowed on others. Waterparks should have signs posted at every attraction stating the depth of the water, height or age requirements and how to safely use the attraction. This is to prevent patrons from finding themselves in water that is deeper or shallower than they expected. For example, some pools at the end of a slide are shallow so that patrons can stand up, but others are very deep. Without signage to warn them, patrons may expect a shallow catch pool and be surprised to find themselves in deep water. Additional rules for each attraction typically cover: The minimum or maximum number of people allowed on an attraction or a tube at a time The maximum height or age requirements in areas designated for small children The minimum height or weight requirements for patrons using an attraction (Figure 2-21) Common rules for winding rivers, such as: o Enter and exit the winding river only at designated places. o No jumping or diving into the water. o No people on shoulders. o No climbing on any features. o Stay in tubes at all times if tubes are used. o No walking or swimming in the winding river if tubes are used. o Only one properly fitted life jacket per patron. o No stacking of tubes or life jackets. o No forming chains of tubes or life jackets. o Only one patron allowed per tube, except for an adult holding a small child. The child must be wearing a U.S. Coast Guard-approved life jacket in case the adult tips over. Common rules for waterslides, such as: o Enter, ride and exit the slide feet first. o No stopping in the slide, and no running, standing, kneeling, rotating or spinning on the slides. Keep hands inside the slide. o No metal objects, locker keys, jewelry, metal snaps/zippers, eyewear or watches, including metal rivets, buttons or fasteners on swimsuits or shorts. o No aqua socks or aqua shoes, eyeglasses, sunglasses or goggles. Figure 2-21 Use a measuring pole or line to ensure patrons are the proper height to use a ride. ChAPTER 2: FACILITy SAFETy 44
55 Rules for Facility Equipment and Structures Other rules for specific equipment and structures depend on the facility and may include: One person at a time on a ladder. Do not sit or hang on lifelines or lane lines. Do not climb on lifeguard stands or towers. Starting blocks may be used only by swim team members in scheduled practices, competitions and instruction when supervised by a certified coach or instructor. Diving Area Rules Rules for diving boards and dive towers should be posted in the diving area. The rules may include: Patrons must demonstrate their swimming ability before entering deep water. Only one person on the diving board at a time, and only one person on the ladder at a time. Look before diving or jumping to make sure the diving area is clear. Only one bounce allowed on the diving board. Dive or jump forward straight out from the diving board. Swim immediately to the closest ladder or wall. Rules for Spas, Hot Tubs and Therapy Pools Spas, hot tubs and therapy pools are popular, but their hazards include drowning, hyperthermia (high body temperature) and disease transmission. Rules common to these areas include: Use only when a lifeguard is present. Shower with soap and water before using. People with heart disease, diabetes, high or low blood pressure, seizures, epilepsy or other medical conditions are cautioned against using a spa or hot tub. Pregnant women and young children should seek their healthcare provider s approval before using a spa or hot tub. No unsupervised use by children. Do not use the spa or hot tub while under the influence of alcohol or other drugs. No diving, jumping or rough play in the spa or hot tub. Do not allow anyone to sit or play near or with the drain or suction fittings. Secure or remove any loose or dangling items, including hair, swimwear and jewelry. Limit time in the spa to 10 minutes. Patrons then may shower, cool down and return again briefly. Prolonged use may result in nausea, dizziness, fainting or hyperthermia. Remove swim caps before entering the spa or hot tub. 45 ChAPTER 2: FACILITy SAFETy
56 2-5 MANAGEMENT AND SAFETY As a lifeguard, your job is to follow and enforce your facility s rules and regulations. The job of your facility s management is to ensure that the facility is in compliance with local, state and federal regulations and to make sure that you are enforcing the rules correctly. Management is responsible for: Creating, reviewing and revising a facility s policies and procedures, rules and regulations, and EAPs as needed. Addressing unsafe conditions. Complying with federal, state and local regulations for facility operations and employment. Maintaining records on the facility and employees. Assisting after an emergency. Policies, Regulations and EAPs Facility management is responsible for ensuring that policies, rules and procedures, and EAPs are in place. Management also is responsible for reviewing and revising these plans as necessary to address any changes that may have occurred, such as new programming, new features or attractions, or emerging codes and industry standards. Addressing Unsafe Conditions Lifeguards work with management to address unsafe conditions at a facility. Management tells lifeguards what to check during safety checks and relies on them to find and report dangers. When an unsafe condition is found and reported, management is responsible for correcting the condition. You should always report unsafe conditions to your supervisor. In some instances, you may be asked to take action to limit use of an unsafe area or to help correct the unsafe condition, such as by sweeping up broken glass or by removing a piece of equipment from use. Complying with Regulations Government regulations protect patrons and employees. The facility and staff must comply with all regulations. Federal, state and local regulations affect the operation of aquatic facilities in many ways, such as lifeguard certification requirements, facility design and safety features, pool capacities, staff training requirements and lifeguard competencies, ratio of lifeguards to patrons, water sanitation procedures, first aid equipment and supplies, lifeguarding equipment and diving depths. Regulations are specific to individual areas. You should be familiar with those that affect your facility. Facility management should provide this information during orientation or in-service training. The following sections describe some federal regulations that may affect you. ChAPTER 2: FACILITy SAFETy 46

57 Age Limitations for Employment Federal and state departments of labor set conditions on the number of hours and the types of tasks that employees younger than 18 years are allowed to perform. The requirements typically are more stringent for 15 year olds than for those 16 and 17 years of age. A facility s policy and procedures manual should cover how these regulations affect your duties. Hazard Communication Standard Federal regulations protect people from chemical hazards in and around a facility. For example, the Hazard Communication Standard is designed to prevent injury and illness caused by exposure to hazardous chemicals. Employees must be trained about the chemicals stored and used in the workplace for jobs that involve handling such items. Each chemical has an information sheet called a Safety Data Sheet (SDS), and the information for each hazardous chemical must be easy to find and use. Each SDS includes procedures for handling each substance and provides information about the dangers of exposure as well as first aid and medical follow-up if exposure occurs. Be sure to learn about all hazardous materials at your workplace and know where to find and access your facility s SDSs (Figure 2-22). Employees have a right to know: Which hazardous chemicals are in the facility. Where those chemicals are stored in the facility. The specific dangers of those chemicals. How to identify chemical hazards in the facility. How to protect themselves and others from being exposed to hazardous chemicals. What to do if they or others are exposed to such hazards. Bloodborne Pathogens Standard The federal Occupational Safety and Health Administration developed the Bloodborne Pathogens Standard to reduce the risk of disease spreading from one person to another. This standard helps to protect employees from contact with body fluids or other potentially infectious materials that may contain disease-causing bacteria and viruses, called bloodborne pathogens. The facility s management should help to protect employees from being exposed to bloodborne pathogens and let employees know what to do if an exposure occurs. Additional information is provided in Chapter 7, Before Providing Care and Victim Assessment. Figure 2-22 Every chemical stored at a facility should have a Safety Data Sheet. Hazardous chemicals must be handled properly and with care, and stored properly, as specified in the Hazard Communication Standard. Unauthorized personnel should be kept away from chemical storage areas. 47 ChAPTER 2: FACILITy SAFETy
58 Blog Post #2 Preparing for Opening Day May 25th 8:45 pm I can t believe it s almost opening day at the pool. This year is flying by! Today I was pressure-washing the deck, doing some last-minute prep, when I saw Emma with someone from the Red Cross. They were walking around with a tablet, looking at EVERYTHING. They inspected and took notes on items throughout the facility including our pool signs, rescue equipment, in-service training paperwork and even the safety check lists that we fill out every day. I asked Emma about it later, and she said it was part of the Aquatic Examiner Service (AES), an operations assessment. Basically, they talk about ways to make our pool safer. After the assessment, Emma gets a report that outlines the things we do really well and some stuff we need to work on. For example, the examiner suggested that we move our AED from Emma s office to the lifeguard office connected to the pool so that it s more easily accessible. She also told me that when the examiner shows up unannounced later this summer, they will walk around again to see if we have made any changes based on their initial recommendations. I m still a little nervous knowing that an undercover examiner could show up any day, but it will certainly keep us rescue-ready. As long as we do what we practice at our in-services, we should get through this AES thing, no sweat! 2-6 WRAP-UP Your top priority as a lifeguard is helping keep patrons safe and free from injury so that they can safely enjoy aquatic activities. Lifeguards prevent injuries by enforcing the safety rules. They also prevent injuries by conducting safety inspections of the facility, the water, equipment and attractions. Lifeguards also need to recognize and respond to the changing water conditions and weather conditions that can occur. Together with management and your fellow lifeguards, your job is to set the stage for this safe experience by helping to create and maintain a safe aquatic facility. ChAPTER 2: FACILITy SAFETy 48
59 BENCHMARKS FOR LIFEGUARDS Lifeguards should: Dress in full uniform. Be equipped and ready for rescue. BENCHMARKS FOR LIFEGUARDING OPERATIONS Managers should ensure that: The facility is in compliance with the law and unsafe conditions are addressed. The facility has and maintains a facility-specific facility safety checklist. The appropriate employees on-site are trained in pool operations, water quality testing and water treatment. The facility has inclement weather and recreational water illness policies and procedures. 49 ChAPTER 2: FACILITy SAFETy
60 Chapter 2 Review 1. What items are considered to be personal protective equipment for a lifeguard? 2. What equipment should be worn or carried by a lifeguard at all times while on duty? List at least two and include the reason(s) why this equipment should be worn or carried. 1) 2) 3. What safety equipment/items should be easily accessible for a lifeguard while on duty? List at least two and describe how/when each item is used. 1) 2) ChAPTER 2 REvIEW 50
61 Chapter 2 Review 4. As a lifeguard, you are responsible for: A Ensuring that your facility is in compliance with local, state and federal regulations. B Creating and reviewing your facility s policies and procedures manual. C Consistently enforcing your facility s rules and regulations. D Creating rules, regulations and emergency action plans. 5. List five common rules and regulations often posted at an aquatic facility. 1) 2) 3) 4) 5) 6. Explain what it means to be equipped and rescue-ready. 51 ChAPTER 2 REvIEW


62 Chapter 2 Review 7. Identify at least two reasons why each lifeguard in the images below is not equipped and rescue-ready and indicate what can be done to improve each situation. QUESTION FOR FUTURE GUIDED DISCUSSION Effective surveillance includes several elements. What are these elements and why are they instrumental to keeping patrons safe? ChAPTER 2 REvIEW 52
63 Chapter 2 Review ADDITIONAL REVIEW QUESTIONS FOR WATERFRONT LIFEGUARDS: 1. Which list of typical safety checklist items, along with others, applies to a lakefront swimming area? A Water chemistry, circulation system, drain covers, starting blocks B Bottom conditions, pier attachments, buoys, safety lines C Emergency shut offs, tubes, communication between ride dispatch and landing D Wave height, tide charts, rip currents, beach flags 2. Which list of typical rules, along with others, applies to a lakefront swimming area? A No diving in shallow water, no running on pool deck, shower before entering the water B Ride slides feet-first, stay on tubes, observe minimum height or weight requirements C No swimming under piers, no fishing near swimming area D Shower before entering, limit time in high temperature water, remove swim caps 53 ChAPTER 2 REvIEW
64 Chapter 2 Review ADDITIONAL REVIEW QUESTIONS FOR WATERPARK & AQUATIC ATTRACTION LIFEGUARDS 1. In a waterpark setting, what additional items might be included in a safety checklist? 2. Why should waterparks have signs posted at every attraction stating the water depth? 3. What rules are typically covered for waterpark attractions? 4. What are some factors that make lifeguarding waterparks different than a typical pool? ChAPTER 2 REvIEW 54
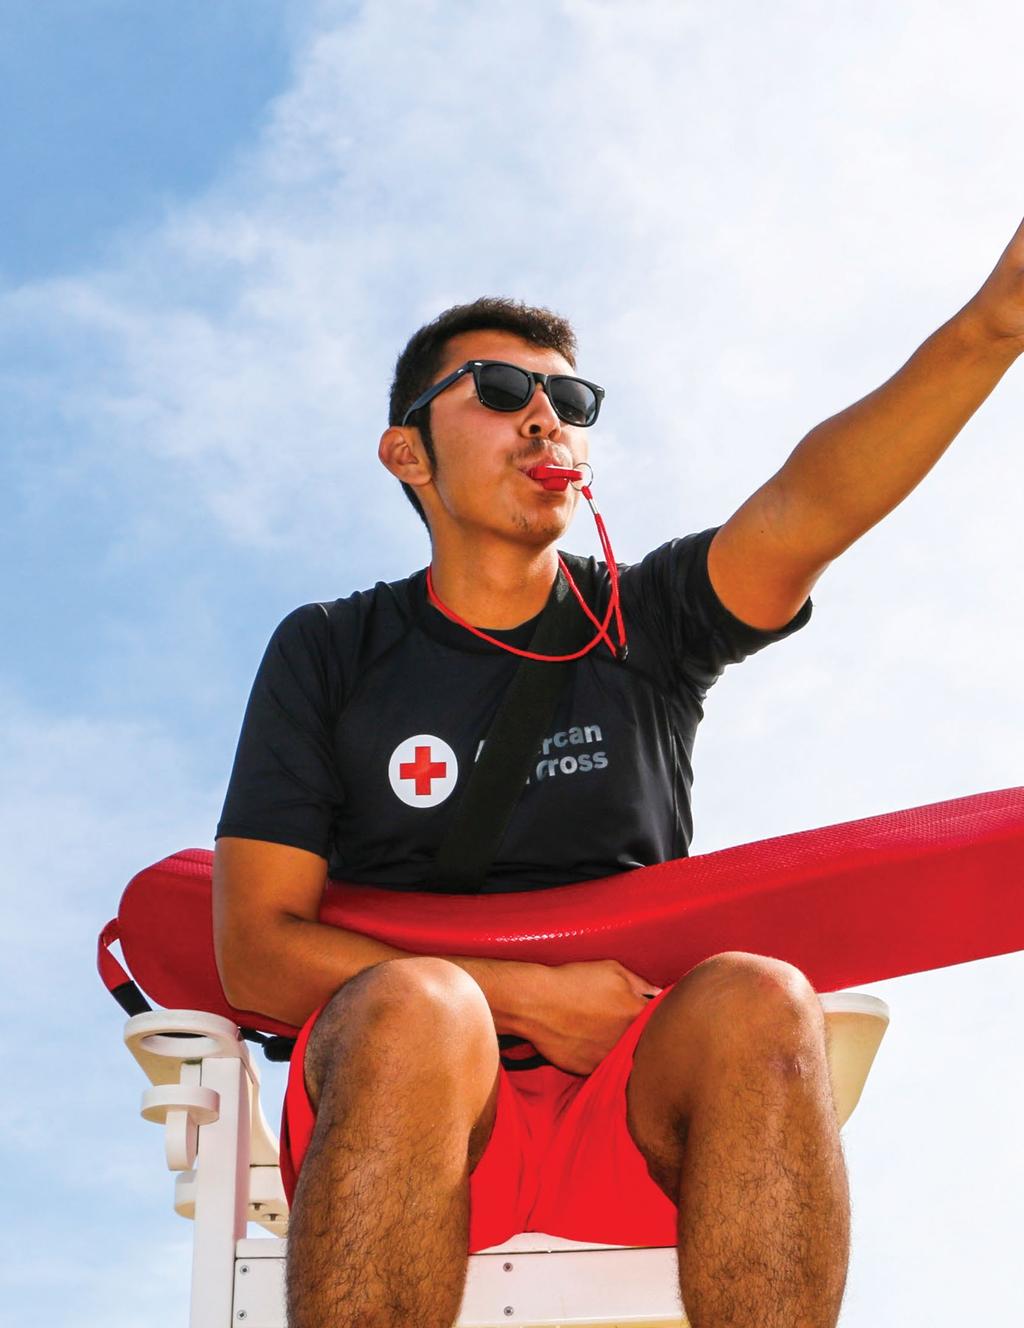
65
66 3 Surveillance and Recognition Your primary responsibility as a lifeguard is to help ensure patron safety and protect lives. The main tool used to accomplish this is patron surveillance keeping a close watch over the people in the facility and intervening when necessary. You will spend most of your time on patron surveillance. To do this effectively, you must be alert and attentive and ready to react at all times as you continuously supervise patrons AN OVERVIEW OF THE PROCESS OF DROWNING EFFECTIVE SURVEILLANCE WRAP-UP

67 3-1AN OVERVIEW OF THE PROCESS OF DROWNING Drowning is a continuum of events that begins when a victim's airway becomes submerged under the surface of the water (Figure 3-1). The process can be stopped, but if it is not, it will end in death. The process of drowning begins when water enters the victim's airway. This causes involuntary breath-holding and then laryngospasm (a sudden closure of the larynx or windpipe). When this occurs, air cannot reach the lungs. During this time, the victim is unable to breathe but may swallow large quantities of water into the stomach. As oxygen levels are reduced, the laryngospasm begins to subside, and the victim may gasp for air but instead inhales water into the lungs. Due to inadequate oxygen to body tissues, cardiac arrest may occur. This can happen in as little as 3 minutes after submerging. Brain damage or death can occur in as little as 4 to 6 minutes. The sooner the drowning process is stopped by getting the victim s airway out of the water, opening the airway and providing resuscitation (with ventilations or CPR), the better the chances are for survival without permanent brain damage. No two drowning situations are alike. There are many intervening variables that can affect the outcome, such as any underlying medical conditions of the victim or the time until advanced medical care intervenes. However, in general, if the victim is rescued within 1 1/2 to 2 minutes of submerging, giving ventilations may resuscitate the victim. Lifeguards must understand that only a few minutes can make the difference between life and death. To give a victim the greatest chance of survival and a normal outcome, you must recognize when a person needs help or is in danger of drowning, and you must act immediately. If there is any question whether a person in the water is beginning to drown or merely playing games, it is essential that you intervene and, if necessary, remove the person from the water immediately and provide care. Figure 3-1 Drowning begins when a victim s airway becomes submerged under the surface of the water. 57 ChAPTER 3: SURvEILLANCE AND RECOGNITION


.")
68 3-2 EFFECTIVE SURVEILLANCE With effective surveillance, you can recognize behaviors or situations that might lead to life-threatening emergencies, such as drownings or injuries to the head, neck or spine, and then act quickly to modify the behavior or control the situation. Effective surveillance has several elements: Recognition of dangerous behaviors Victim recognition Effective recognition Zone of surveillance responsibility Lifeguard stations Recognition of Dangerous Behaviors A focus of preventive lifeguarding is to intervene quickly to stop potentially dangerous behaviors that could result in an emergency. This may include redirecting a child to shallower water, stopping a group of teens from having breath-holding contests or stopping swimmers from hyperventilating (breathing rapidly and deeply) and swimming underwater for extended periods. Swimmers and nonswimmers, regardless of age, can become victims quickly because of dangerous behaviors (Figure 3-2, A C). Examples include: A weak swimmer or nonswimmer who is: o Bobbing in or near water over their head. o Crawling hand-over-hand along a pool wall. o Beyond arm s reach of a supervising adult, even if wearing a flotation aid. o Clinging to something or struggling to grab something to stay afloat. o Wearing a life jacket improperly. A person who is: o Breath-holding or swimming underwater for an extended period after hyperventilating. o Participating in a high-risk, high-impact activity, such as diving. o Experiencing a medical emergency. Figure 3-2A A small child crawling hand-over-hand toward deep water. Figure 3-2B A toddler beyond arm's reach of an adult. Figure 3-2C A victim experiencing a medical emergency. ChAPTER 3: SURvEILLANCE AND RECOGNITION 58


69 Victim Recognition Another element of effective surveillance is being able to recognize when someone is in trouble in the water. It is important to understand the behaviors that a victim shows when in distress or drowning. Someone in trouble may struggle at the surface for just a short time or may quickly disappear beneath the surface without any signs of distress. Others may be submerged already when the process of drowning begins, such as the person who has jumped or slipped into water over their head and is struggling to reach the surface. A swimmer may be in distress or actively struggling to survive. Others may be passive and therefore unable to help themselves, showing little or no movement. Understanding these behaviors enables lifeguards to recognize quickly when someone needs help. Lifeguards should be able to recognize and respond to a drowning victim within 30 seconds. Swimmers in Distress A swimmer can become distressed for several reasons, such as exhaustion, cramp or sudden illness. Quick recognition is key to preventing the distressed swimmer from becoming a drowning victim. A distressed swimmer makes little or no forward progress and may be unable to reach safety without assistance. Distressed swimmers may be: Able to keep their face out of the water. Able to call for help. Able to wave for help. Horizontal, vertical or diagonal, depending on what they use to support themselves. Floating, sculling or treading water. The distressed swimmer generally is able to reach for a rescue device, such as a rescue tube (Figure 3-3). If a safety line or other floating object is nearby, a distressed swimmer may grab and cling to it for support. As conditions continue to affect the distressed swimmer, such as fatigue, cold or sudden illness, they become less able to support themselves in the water (Figure 3-4). As this occurs, their mouth moves closer to the surface of the water, and anxiety increases. If a distressed swimmer is not rescued, they may become a drowning victim; therefore, you need to immediately initiate a rescue. Figure 3-3 A distressed swimmer may reach for a rescue device, such as a rescue tube or a rope line. Figure 3-4 A distressed swimmer may wave for help, float on the back, scull or tread water. 59 ChAPTER 3: SURvEILLANCE AND RECOGNITION
. This universal behavior is called the instinctive drowning response.")

70 Drowning Victim Active A drowning victim who is struggling to remain at the surface of the water has distinctive arm and body positions. These are efforts to try to keep the mouth above the water s surface in order to breathe (Figure 3-5). This universal behavior is called the instinctive drowning response. 1 Once it is recognized that a victim is drowning, the lifeguard must perform a swift and immediate rescue. Some victims cycle through these behaviors quickly and might submerge within seconds, whereas others are able to remain near the surface of the water for a short time. A drowning victim who is struggling: May not be able to call out for help because their efforts are focused on getting a breath. Works to keep the face above water in an effort to breathe. May be in a horizontal face-down position during the struggle because they are unable to lift their face out of the water. This may be particularly likely with a younger swimmer, such as a toddler. Has extended their arms to the side or front, pressing down for support. Is positioned vertically in the water with an ineffective kick. A young child may tip into a horizontal face-down position. Might continue to struggle underwater once submerged. Eventually will lose consciousness and stop moving. Figure 3-5 A drowning victim may become unable to support themselves and struggle at the surface of the water. Figure 3-6 A drowning victim may struggle to breathe and cannot call out for help. Drowning victims who are struggling to breathe may not always look the same. For some, the mouth sinks below the surface and reappears, sometimes repeatedly. While the mouth is below the surface, the drowning victim attempts to keep the mouth closed to avoid swallowing water. When above the surface, the drowning victim quickly exhales and then tries to inhale before the mouth goes below the surface again. While the victim is gasping for air, they also might take water into the mouth. For a victim who is in a horizontal face-down position but struggling, they are not able to keep the mouth above the surface of the water at all. 1 The Instinctive drowning response Pia, F. Observations on the Drowning of Nonswimmers Journal of Physical Education (July 1974): ChAPTER 3: SURvEILLANCE AND RECOGNITION 60
71 Often, a drowning victim at or near the surface is unable to call out for help (Figure 3-6). They can take in only enough air to breathe, so no air is left to call out. 2 For this and other reasons, a drowning in progress often is silent. A drowning victim does not make any forward progress in the water. A young child may appear to be doing a doggy paddle but has no forward progress; all efforts are devoted to getting air. The victim might be able to stay at the surface for only 20 to 60 seconds, if at all. They may continue to struggle underwater but eventually will lose consciousness and stop moving. A victim may slip into water over their head, incur an injury or experience a sudden illness and struggle underwater to reach the surface. If unable to swim or make progress, they will be unable to reach the surface. This drowning victim may appear to be a person who is playing or floating underwater. It may be easier to recognize a swimmer in distress or a victim struggling on the surface than to recognize a victim who has submerged already or is submerging. Never assume that anyone exhibiting these behaviors is playing or faking; it is essential that you intervene and, if necessary, remove the person from the water immediately and provide care. If in doubt, do not delay go right away. Drowning Victim Passive Some drowning victims do not struggle. They suddenly slip under water due to a medical condition or another cause, such as: A heart attack or stroke. A seizure. A head injury. A heat-related illness. Hypothermia (below-normal body temperature). Hyperventilation and prolonged underwater breath-holding activities. Use of alcohol and other drugs. 2 Active drowning victims and their inability to call out for help Pia, Frank, On Drowning. Water Safety Films, Inc. (1970) 61 ChAPTER 3: SURvEILLANCE AND RECOGNITION
. May be limp or have slight convulsive-like movements.")
.")
72 Figure 3-7 A drowning victim may float face-down at or near the surface of the water. Figure 3-8 A drowning victim may be face-down at the bottom of a pool. These drowning victims: Might float face-down at or near the surface or might sink to the bottom (Figure 3-7). May be limp or have slight convulsive-like movements. May have no defined arm or leg action, no locomotion and no breathing. May appear to be floating, if at the surface of the water. May be face-down, on one side or face-up, if at the bottom (Figure 3-8). Anyone who is exhibiting one or more of these presentations should be considered a drowning victim and responded to immediately. It can be difficult to clearly see a victim who is underwater or at the bottom of a pool because of glare, reflections or water movement from the wind or other swimmers. The victim may appear to look like a smudge, a shadow or an object like a towel. Do not expect to see a clear outline of a person on the bottom. At waterfronts, submerged victims may not be visible, depending on the water depth or water clarity. If you see something on the bottom that should not be there, do not delay, go right away. Specific Behaviors When conducting surveillance, actively search your assigned zone for behaviors that indicate a patron in need of immediate assistance. It is important to recognize the behaviors of a drowning victim (Table 3-1). Notice: Breathing Appearance or facial expression (if the face is visible to you) Arm and leg action Head and body position Body propulsion or locomotion (movement) through the water Understanding these behaviors helps you to quickly recognize when someone needs help. When you see some or all of these behaviors, react. Do not spend time second-guessing yourself; immediately initiate a rescue. Quick action can mean the difference between life and death for a distressed or drowning victim. ChAPTER 3: SURvEILLANCE AND RECOGNITION 62
73 Table 3-1: Behaviors of Distressed Swimmers and Drowning Victims Distressed Swimmer Drowning Victim-Active Drowning Victim-Passive Head position Above water Titled back with face looking up Face-up or facedown in the water Submerged Appearance and, if visible, facial expressions Trying to support self by holding or clinging to a lane line or safety line Expression of concern for personal safety Struggling to keep or get the head above the surface of the water Struggling to reach the surface, if underwater Expression of panic, wide-eyed Limp or convulsive-like movements Floating or submerged Eyes may be closed If submerged, may look like a shadow Breathing Is breathing Struggles to breathe Not breathing Arm and leg action Floating, sculling or treading water Might wave for help Arms to sides or in front, alternately moving up and pressing down None Body position Horizontal, vertical or diagonal, depending on means of support Vertical, leaning slightly back Horizontal or vertical Locomotion Little or no forward progress Less and less able to support self None None Sounds Able to call for help but may not do so May not be able to call out for help None Location At the surface At the surface, underwater or sinking Floating at the surface, sinking or submerged on the bottom 63 ChAPTER 3: SURvEILLANCE AND RECOGNITION
74 DANGEROUS BEHAVIORS Hyperventilation and Extended Breath-Holding The practices of hyperventilation preceding underwater swimming and extended breath-holding in the water are dangerous and potentially deadly activities. These actions can put the body in a state of hypoxia a condition in which the body is deprived of adequate oxygen supply which can result in hypoxic underwater blackout. Voluntary hyperventilation (rapid, deep breathing) is a dangerous technique used by some swimmers to try to swim long distances underwater or to hold their breath for an extended period while submerged in one place. These swimmers mistakenly think that by taking a series of deep breaths in rapid succession and forcefully exhaling that they can increase the amount of oxygen they breathe, allowing them to hold their breath longer underwater. This is not true. Hyperventilation does not increase the amount of oxygen or allow a swimmer to hold their breath longer; instead, it lowers the carbon dioxide level in the body. The practice is risky because the level of carbon dioxide in the blood is what signals a person to breathe. As the level of carbon dioxide increases, a person normally takes a breath. When a person hyperventilates and then swims underwater, the oxygen level in the blood can drop to a point where the swimmer passes out before the body knows it is time to breathe. Then, when the person finally does take a breath instinctively, water rushes in and the drowning process begins. Do not allow swimmers to participate in contests, games or repetitive activities to see who can swim underwater the farthest or hold their breath underwater the longest. Hyperventilation, prolonged underwater swimming for distance and breath-holding for time are extremely dangerous. If you see these dangerous activities, you must intervene. Explain to patrons that they should only take a single inhalation before submerging when swimming and playing underwater. In addition, instructors must prevent these activities during instructional periods, such as swim lessons, lifeguard classes, SCUBA classes and competitive swimming. Alcohol The following are some ways that alcohol can affect a person in the water and lead to drowning or head, neck or spine injuries: Alcohol affects balance. Some people with alcohol in their body have drowned in shallow water when they lost their balance and were unable to stand up. Ordinary actions on steps, ladders, diving boards or play structures become hazardous for an intoxicated person. Alcohol affects judgment. A person might take unusual, uncharacteristic risks, such as diving into shallow water. Alcohol slows body movements. It can greatly reduce swimming skills, even those of an excellent swimmer. Alcohol impairs one s ability to stay awake and respond appropriately to emergencies. One of the biggest myths about alcohol is that an intoxicated person can sober up by going swimming. Splashing water on a person s face or immersing a person in water will not reduce the amount of alcohol in the bloodstream or reduce the effects of alcohol. ChAPTER 3: SURvEILLANCE AND RECOGNITION 64
. When scanning, you should not just watch patrons in the water.")
75 Effective Scanning Knowing what to look for to determine if a victim is in trouble in the water is a first step, but you also need to know how to look. Scanning is a visual technique for guarding patrons in the water (Figure 3-9). When scanning, you should not just watch patrons in the water. Effective scanning requires you to deliberately and actively search your zone to continually observe swimmers behaviors and look for signals that someone in the water needs help. You must actively search all areas of your zone, seeing all patrons in and under the water, regardless of the type of activities taking place. Figure 3-9 Scanning is a surveillance technique for watching patrons. Search, don t watch. Guidelines for Effective Scanning Drowning and injuries can happen in an instant, often silently. Scanning your entire area of responsibility quickly and thoroughly is important. You cannot prevent or save what you cannot see. Table 3-2 provides guidelines for effective scanning. Table 3-2: Guidelines for Effective Scanning When scanning: Scan all patrons in your assigned area of responsibility. Stay focused. Maintain an active posture. Search the entire volume of water. Move your head and eyes and look directly at each area, rather than staring in a fixed direction. Ensuring that you: Actively search so that you see all the patrons in the water. Do no let your attention drift. Do not slouch, lean back, sit back with legs crossed or rest your head in your hand. These postures may cause you to become too relaxed and lose focus. Search the bottom, middle and surface of the water. Look directly at the patrons rather than relying on side vision to help you recognize someone in trouble. 65 ChAPTER 3: SURvEILLANCE AND RECOGNITION
76 Table 3-2: Guidelines for Effective Scanning, continued Scan from point to point thoroughly and repeatedly. Focus on effective patron surveillance instead of the scanning pattern itself. Search for signs of potential problems. Scan crowded and high-risk areas carefully. Pay close attention to nonswimmers or weak swimmers. Adjust your body position or stand up to eliminate blind spots. Change your body position regularly to help stay alert. Do not be distracted by people or activities outside of your area of responsibility. Do not interrupt scanning an area if a patron asks a question or has a suggestion or concern. Do not neglect any part of the assigned area, including any deck or beach areas as well as those areas under, around and directly in front of the lifeguard station. Keep your focus on searching your zone for potential dangerous behaviors and patrons in trouble. Look for arm and leg action. Body position and movement through the water may indicate that a patron is a weak swimmer and is in trouble in the water. Recognize that partially hidden arm movements might indicate that a victim is actively drowning. Consider that excitement or lack of knowledge can lead nonswimmers or weak swimmers to become unknowingly careless. For example, they may accidentally enter deep water. Remain aware of areas that are difficult to see. Areas might be blocked when patrons cluster together. Water movement, such as from fountains or bubbles, may also distort the view underwater. Switch positions, such as between seated and standing positions while in an elevated station, when necessary, to prevent fatigue. Keep focused on the assigned zone. Acknowledge the patron and quickly explain that although you cannot look at them while talking, you are listening. Politely but briefly answer the patron s question, suggestion or concern, or refer them to the head lifeguard, facility manager or another staff member. ChAPTER 3: SURvEILLANCE AND RECOGNITION 66


77 Scanning Challenges There are many challenges to scanning (Figure 3-10, A D). You must be aware of the challenges and actively employ tactics to combat them. The lives of patrons depend on it. Table 3-3 presents some scanning challenges that you may encounter along with tactics to overcome them. Figure 3-10A Glare on the water Figure 3-10B Murky water Table 3-3: Scanning Challenges Challege Monotony Fatigue Distractions Blind spots Glare (from sun or overhead lights) Tactics Stay fully engaged in what you are seeing do not let your attention drift Change body position and posture periodically Sit upright and slightly forward Rotate stations Search, don t watch Request additional lifeguard coverage Keep hydrated, cool off and get out of the sun when on break Exercise during one of your breaks Stay focused on patron surveillance Do not daydream, have conversations with coworkers or patrons or watch events outside of your area Keep patron activities safe and orderly. Signal for an additional lifeguard or supervisor if assistance is needed Adjust your location or body position, or stand up Search all potential blind spots, such as under the stand, at play features or any other part of the zone Use polarized sunglasses Change body position stand up to look around and through glare spots Reposition your lifeguard station (with permission from your supervisor) 67 ChAPTER 3: SURvEILLANCE AND RECOGNITION


78 Figure 3-10C Water movement obscuring the bottom of the pool Figure 3-10D Fatigue is a challenge for lifeguards. Table 3-3: Scanning Challenges, continued Challenge Water movement and surface distortion of the water Murky water Heavy patron loads Low patron loads High ambient temperature Tactics Adjust your body position Be aware of the normal appearance of the bottom of the pool; know the appearance of drains, colored tiles or painted depth markings Search the bottom carefully Adjust your location or body position Stay alert for high-risk activities Signal for additional assistance to get extra coverage for your area Stand up frequently Signal for additional assistance to get extra coverage for your area Change body position and posture frequently Change to a ground-level station, if appropriate Use fans to cool the surrounding air, if in an indoor setting Stay in the shade; use umbrellas if available Rotate more frequently Cool off by getting wet during your break Stay in cooler areas during breaks Stay hydrated by drinking plenty of water ChAPTER 3: SURvEILLANCE AND RECOGNITION 68
79 THE RID FACTOR If an active victim drowns while lifeguards are on duty, it is probably due to one or more of the following causes: 3 Lifeguards fail to recognize the victim s instinctive drowning response. Secondary duties intrude on lifeguards primary responsibility of patron surveillance. Lifeguards are distracted from surveillance. This set of causes often is referred to as the RID factor, where the acronym, RID, stands for recognition, intrusion and distraction. R - Recognition I - Intrusion D - Distraction Recognition Knowing how to recognize that a swimmer is in distress or a person is drowning is one of the most important lifeguarding skills. You must be able to distinguish such behavior from that of others who are swimming or playing safely in the water. You must recognize when someone needs to be rescued. You cannot expect the victim or others to call for help in an emergency. With good surveillance and scanning techniques, you can recognize even a passive victim who has slipped underwater without a struggle if the victim is in clear water. Intrusion Intrusion occurs when secondary duties, such as maintenance tasks, intrude on your primary responsibility of patron surveillance. Lifeguards often have to sweep the deck, empty trash cans, pick up towels, check locker rooms and perform other maintenance duties. While these duties might be part of the job, you should not perform them while conducting patron surveillance. Before you begin these duties, you must be sure that another lifeguard has taken over surveillance for your assigned area of responsibility. Similarly, you cannot perform adequate surveillance duties while also coaching a swim team or teaching a swimming lesson. These additional responsibilities should be performed by a different lifeguard, coach or instructor, even if there are no other patrons in the water. Distraction Distractions, such as talking with other lifeguards or friends, can also affect patron surveillance. A brief conversation might seem innocent, but during that time, you could miss the 20- to 60-second struggle of a young child at the water s surface. The child could die because you were distracted. You should not engage in social conversation while you are on duty. 3 T he RID Factor Pia, F The RID Factor as a Cause of Drowning Parks and Recreation (June 1984): ChAPTER 3: SURvEILLANCE AND RECOGNITION
.")
80 Zones of Surveillance Responsibility Your lifeguard supervisor or facility manager will establish and post each lifeguard s zone of surveillance responsibility referred to as zones. These are the specific areas of the water, deck, pier or shoreline that are your responsibility to scan from your lifeguard station (Figure 3-11). When establishing coverage, supervisors or managers must ensure that: All areas of the water from the bottom through to the surface are covered and can be seen by a lifeguard. There is overlapping coverage when more than one lifeguard is performing surveillance. Lifeguards have unobstructed views of their zones from each station. The size and shape of each zone allows lifeguards to respond quickly to victims in the water: o Lifeguards should be able to recognize and reach a victim in their zone within 30 seconds. o In each zone, lifeguards should be able to recognize an emergency, get to a victim, extricate and start giving ventilations within 1½ minutes to 2 minutes. Regular zone tests are conducted to ensure that recognition and response times are achievable in each zone. Supervisors or managers should post diagrams or charts showing the size, shape and boundaries of each zone. These can change throughout the day, depending on the following: Number of patrons Types of activities Variety of activities Time of day Environmental conditions, such as glare from the sun Management needs to notify lifeguards of any changes to zones. To ensure that all areas of the pool are covered, you might be assigned zone coverage, total coverage or emergency backup coverage. Figure 3-11 The zone of surveillance responsibility refers to the specific area a lifeguard is responsible for scanning. ChAPTER 3: SURvEILLANCE AND RECOGNITION 70


81 Zone Coverage In zone coverage, the swimming area is divided into separate zones, with one zone for each lifeguard station (Figure 3-12, A B). Zones can be designated by markers, such as ladders, lane lines, lifelines, buoys or the shape of the pool. Zone coverage is effective for high-risk areas or activities, avoiding blind spots and reducing the number of patrons watched by each lifeguard. When zone coverage is being provided, each lifeguard needs to know the zone for each guarding position. Figure 3-12A Zone coverage at a pool At a minimum, zones should overlap by several feet so that the boundaries between them have double coverage. This prevents any area from not being scanned. When zones overlap, it is important that each lifeguard react to an emergency; that is, you should not assume that the other lifeguard will notice a problem and react. Total Coverage When you are assigned total coverage, you will be the only lifeguard conducting patron surveillance while you are on duty. Some facilities, such as a small pool, assign their lifeguards total coverage. When only one lifeguard is conducting patron surveillance, that lifeguard has to scan the entire area, control the activities of patrons in and out of the water and recognize and respond to emergencies (Figure 3-13). If adequate coverage cannot be provided for all patrons, inform a supervisor that help is needed. Figure 3-12B Zone coverage at a waterfront Figure 3-13 Total coverage at a pool 71 ChAPTER 3: SURvEILLANCE AND RECOGNITION


82 Emergency Back-Up Coverage In emergency situations when two or more lifeguards are on duty and one lifeguard must enter the water for a rescue, lifeguards who remain out of the water must now supervise a larger area. They might need to move to better vantage points or close part of the swimming area, depending on the facility s design. Alternatively, the emergency plan may require lifeguards who are not on patron surveillance duty to take the rescuing lifeguard s place at the vacant lifeguard station. Figure 3-14A illustrates zone coverage when three lifeguards are on surveillance duty. Figure 3-14B shows an example of emergency back-up coverage for the same three-zone facility. This figure depicts Lifeguard Y as the primary rescuer. They signal and enter the water (indicated by a dotted line). The other two lifeguards (Lifeguards X and Z) stand in each of the lifeguard chairs and divide the responsibility for scanning the pool. Meanwhile, additional lifeguards or safety team members monitor the rescue, prepare to assist with additional equipment and call emergency medical services (EMS) personnel, if appropriate. Figure 3-14A Zone coverage with three lifeguards Figure 3-14B Back-up coverage during a rescue at a three-zone facility ChAPTER 3: SURvEILLANCE AND RECOGNITION 72
83 ZONE EVALUATIONS Lifeguard zones should be set up for success the lifeguard must be able to clearly see all parts of the zone as well as quickly respond in an emergency. Several factors influence the ability of the lifeguard to see: obstacles (backstroke flags or bulkheads), blind spots (glare or features), size and shape of the zone, type of station (elevated or ground-level), depth of the water, and shape of the pool or aquatic areas. These factors may also influence the amount of time it might take lifeguards to perform a water rescue, extricate and begin lifesaving care at each station. In addition, a lifeguard s ability to provide care can be affected by the availability and location of trained assisting responders and rescue equipment (backboards, masks and gloves). Managers should use various tools to help identify the effectiveness of their zones and make any modifications as necessary. As a lifeguard, you may expect to participate in a variety of drills to help train you and improve performance. Ask Drills It is important to know what lifeguards can and cannot see from each station. One method to help accomplish this is to simply ask them in what is referred to as an "ask" drill. To conduct an ask drill: 1. A supervisor places an object, such as a manikin or silhouette, or a live victim in various locations, including the surface and the bottom. 2. Ask the lifeguard if they can see the object. 3. Have the lifeguard determine if the object is something that would cause them to respond. Each zone should be tested at different times of day and for different activities or conditions. For example, conduct an ask drill during a kayak rental in a pool and again in that same zone during lap swim. These simple ask drills should be done regularly and at any time the zone or the characteristics of the zone change. Supervisors should always encourage lifeguards to inform them of any challenges or areas of a zone which they cannot see and which might prevent them from identifying a person in trouble in the water. Live Recognition Drills The size and shape of each zone should allow the lifeguard to see all areas of the zone, from the bottom through to the surface. The size and shape should also allow the lifeguard to be able to recognize a victim and reach the extremes of each zone furthest and deepest in 30 seconds. Facilities should conduct regular live action recognition drills during operations as a method to help identify the effectiveness of surveillance. It is as important to evaluate surveillance as it is to evaluate skills. This helps the lifeguard and the management to evaluate how they are doing with surveillance and to identify challenges, performance issues or areas that need further training. 73 ChAPTER 3: SURvEILLANCE AND RECOGNITION
84 ZONE EVALUATIONS To conduct a live recognition drill: Conduct a surprise victim drop. The lifeguard should not be aware of the introduction of a victim into their zone. Suitable victims include a mixture of real people and manikins or silhouettes. Observe and evaluate. The supervisor observes the drill and records the length of time for the lifeguard to recognize and reach the victim. The supervisor should consider factors that influenced the outcome and make modifications to the zone or provide in-service training to any staff member who was unable to meet the timeline of 30 seconds. Lifeguard Station Response Time Testing This drill tests the response time only (not the recognition of a victim) for a lifeguard station. The purpose of this drill is to help evaluate the ability of any lifeguard to be able to get to a victim in that zone and conduct a worst-case scenario rescue (submerged, passive victim), extricate the victim and start ventilations. This testing should be done with a variety of different lifeguards for the extremes of each zone. To ensure ideal conditions, the zone being tested should be closed so there is no interruption. It is important to know if the average lifeguard at the facility can accomplish this within a timeline of 1½ to 2 minutes at each station under ideal conditions. If they cannot, modifications may need to be made to the size, shape or coverage of the zone; location of the back-up rescue equipment; and where the responders that are assisting during an EAP are located. The results can also help identify where more training and practice is needed, such as in bringing equipment, putting on gloves, preparing equipment, reaching the victim and extricating the victim. To conduct lifeguard station response time testing: Place the lifeguard at the station and the support staff where they would normally be. Initiate the drill: o Place the victim in the pre-arranged location (for example, a submerged victim in the farthest corner of the zone). o Have the lifeguard activate the EAP. Time the response. Start timing at the whistle blast/eap signal and stop when the victim has been extricated from the water and 2 ventilations have been given. o Each station test should not exceed 1½ minutes from any location within that zone. (Factor in an average recognition time of no more than 30 seconds and add it to the response time for a total that should not exceed 2 minutes). o If the response time exceeds 2 minutes, adjustments should be made, and the test should be performed again. Repeat until the times are achieved. o Adjustments might include: Moving the lifeguard station. Adjusting the zone coverage, such as splitting the zone. Adjusting the placement of emergency equipment or emergency back-up personnel. ChAPTER 3: SURvEILLANCE AND RECOGNITION 74

85 Lifeguard Stations Lifeguards perform patron surveillance from a variety of positions including elevated, ground-level, roving and floating stations. Additional coverage at waterfront areas is sometimes provided by foot patrols, boat patrols and four-wheel-drive vehicles. The goal is to provide optimum coverage for the whole facility by placing lifeguards in positions to quickly recognize and respond to emergencies. To ensure that lifeguards stay alert, periodic rotations and breaks from surveillance are built into their surveillance schedules. The location of any lifeguard station must allow you to see your entire zone. The lifeguard stand may need to be moved or repositioned during the day to adapt to the changing sun, glare, wind or water conditions. It is critical for you to have a clear view of your entire zone. Elevated Stations Elevated lifeguard stations generally provide the most effective position for a broad view of the zone and patron activities (Figure 3-15). This is especially important at a facility where a single lifeguard at a time performs patron surveillance. When you are scanning from an elevated station, be sure to include the area under, around and directly in front of the stand. Movable stands should be positioned close to the edge of the water with enough room to climb up and down from the stand. The area surrounding an elevated stand must be kept clear of patrons or objects that might interfere with your ability to respond. You must know how to safely exit the stand, both in the course of a normal rotation and in an emergency. Be sure to practice with the rescue tube so that you are able to do so quickly and without getting injured. A safety zone should be established that allows access to the water in case of an emergency. At a waterfront, the safety zone should be thoroughly inspected with rakes and shovels before opening each day. This helps to prevent injuries to lifeguards during emergency exits from the lifeguard stand. Figure 3-15 An elevated lifeguard station 75 ChAPTER 3: SURvEILLANCE AND RECOGNITION


86 Ground-Level Stations Lifeguards sometimes are assigned to a fixed location on a deck or in shallow water (Figure 3-16). These stations allow for quick response and are common around winding rivers, in shallow water areas with play structures and at the ends of slides. The primary purpose of ground-level stations is to be close to patrons so you can easily make assists and enforce safety rules for patrons in the water and on the deck. While maintaining surveillance, you also can educate patrons about the reasons behind the rules; however, you should never become distracted from surveillance duties by talking socially with patrons or other staff. Figure 3-16 A ground-level lifeguard station Roving Stations When a facility becomes unusually crowded, such as during a special event or activity, supervisors or managers might assign a lifeguard to a roving station. The roving lifeguard is assigned a specific zone, which also is covered by another lifeguard in an elevated station. These roving, or walking, lifeguards are mobile and able to position themselves where needed within the zone. Combining the views from elevated stations with the mobility of the roving lifeguard provides extra coverage to help ensure effective patron surveillance. Floating Stations (Rescue Watercraft) In many waterfront facilities, lifeguards are stationed to watch swimmers from a watercraft, usually as extra coverage. Rescue watercraft typically are used to patrol the outer edge of a swimming area. Often, someone in trouble in the water can be reached more quickly from watercraft than from a lifeguard station on the shore. In a small, calm area, a rescue board, kayak or flat-bottom rowboat might be used (Figure 3-17). When patrolling on a rescue board, sit or kneel on the board for better visibility (Figure 3-18). Some protocols may require you to keep the rescue tube or buoy strapped across your chest or attached to the board. In rough water, rowboats might be used. Powerboats, inflatable boats and personal watercraft also can be used as rescue watercraft. Facility management normally provides on-the-job training in the use of watercraft at a facility. If stationed on watercraft in water with a current, you might have to row or paddle to stay in position. Some watercraft have a special anchor line with a quick release for lifeguards to make a rescue. In some larger watercraft, one lifeguard maintains the craft s position while a second watches the swimming area. Make sure that you are well trained in operating the facility s watercraft before using it for surveillance or to make a rescue. Use caution with motorized watercraft to avoid injuring swimmers or damaging lifelines when crossing into the swimming area to make a rescue. Figure 3-17 Rescue water crafts, such as kayaks, may be used at waterfront areas. Figure 3-18 A rescue board may be used to help with patron surveillance at waterfront areas. ChAPTER 3: SURvEILLANCE AND RECOGNITION 76


87 Dispatch Stations Lifeguards working at dispatch stations are responsible for assessing each potential rider to ensure that the rider meets all of the requirements for riding the attraction that have been established by the manufacturer and the facility. Riders must often meet physical requirements, such as a minimum height or a maximum weight, in order to ride an attraction. To facilitate screening, many attractions are equipped with height measurement stations, weight scales or both (Figure 3-19, A B). When an attraction allows groups of riders to ride together, the entire group must step on the scale together to ensure that maximum weight limits are not exceeded. In addition, lifeguards working at dispatch stations must verify that each rider wishing to ride the attraction is capable of holding themselves in the proper riding position. If the ride vehicle has handles, the rider must also be able to grasp them. Riders who appear unable to maintain a safe riding position should not be allowed to ride. The operational procedures for the attraction will provide guidelines for assessing riders who may not be able to ride the attraction safely due to physical, mental or behavioral disabilities. Figure 3-19A Many attractions are equipped with height measurement stations. Figure 3-19B A lifeguard checks a patron's height. Landing Zone Stations The lifeguard stationed in the landing zone also has several unique responsibilities in addition to surveillance. These responsibilities include helping riders to exit the ride, making sure that the landing zone is clear of people and equipment and signaling the dispatching lifeguard that it is safe to send the next rider. Riders may need help exiting the ride vehicle or slide runout or getting out of the catch pool (Figure 3-20). When you are stationed in the landing zone, you must recognize when a rider needs assistance and maintain surveillance of your assigned area while providing that assistance. Figure 3-20 Riders may need help exiting a ride vehicle or catch pool. 77 ChAPTER 3: SURvEILLANCE AND RECOGNITION
88 Other key roles of the lifeguard in the landing zone include making sure that the landing zone is completely clear of riders before signaling to the lifeguard at the top to dispatch the next rider and removing ride vehicles from the catch pool and placing them in a holding area or on a conveyor belt. After the landing zone has been cleared of people and equipment, and after verifying that the water level is appropriate, the lifeguard stationed in the landing zone signals the dispatching lifeguard that it is safe to send the next rider. Lifeguard Rotations All facilities should have a defined rotation procedure. Rotations include moving from one station to another as well as taking breaks from surveillance duty. Lifeguards should get regular breaks from surveillance duty to help stay alert and decrease fatigue. Typically, you might perform patron surveillance for 20 or 30 minutes at one station, rotate to another station for 20 or 30 minutes, and then rotate off of patron surveillance duty to perform other duties or take a break for 20 or 30 minutes, thereby getting a break from constant surveillance. Rest and meal breaks should be factored into the rotation. An emergency back-up coverage station often is included as a part of the rotation. The location may be in a staff room or on the pool deck, pier or shoreline within sight of the swimming area(s). The lifeguard at this station is not responsible for patron surveillance but is expected to be able to immediately respond to the EAP signal in an emergency. (Chapter 5 covers information about emergency action plans.) Your supervisor will establish a plan for lifeguard rotations, usually based on: Locations of stations Type of station (elevated, ground-level, roving or floating) The need to be in the water at some stations The number of patrons using an attraction The activity at the station, such as wave durations at a wave pool EAPs The rotation begins with the incoming lifeguard. While rotating, each lifeguard should carry their own rescue tube, and both lifeguards must ensure there is no lapse in patron surveillance, even for a brief moment. Each lifeguard must know who is responsible for scanning, or owning, the zone and at what time during the rotation. Lifeguards should transfer scanning responsibilities back and forth as the incoming lifeguard gets into position and the outgoing guard prepares to leave the station. Keep any necessary conversations brief, and make sure that eye contact remains on the water. As the incoming lifeguard, you should search the zone and be aware of the activity level in the zone you will be guarding. Begin searching your zone as you are walking toward your station, checking all areas of the water from the bottom to the surface. ChAPTER 3: SURvEILLANCE AND RECOGNITION 78
89 The outgoing lifeguard should inform you of any situations that need special attention. The exchange of information should be brief, and patron surveillance must be maintained throughout the entire rotation. Once in position, with the rescue tube strapped in place, make any adjustments needed, such as removing shoes or adjusting an umbrella before confirming to the outgoing lifeguard that you own the zone. Confirm and signal that the zone is clear and transfer responsibility for the zone. The outgoing lifeguard should continue scanning as they are walking toward the next station. The skill sheet at the end of this chapter outlines the steps for rotations for ground-level and elevated stations. Some attractions may have additional specific responsibilities with each rotation, such as dispatch zones. Be sure to know your facility-specific rotation requirements. 3-3 WRAP-UP A lapse in coverage even for just a few seconds could result in injury or death. A lifeguard must be alert for dangerous behaviors and able to recognize a distressed swimmer and a drowning victim who is active or passive. Effective scanning techniques and lifeguard stations are needed both to prevent incidents and locate people in trouble. BENCHMARKS FOR LIFEGUARDS Lifeguards should: Stay alert, attentive and focused. Maintain active posture and change body position regularly. Use tactics to deal with scanning challenges. Search, don t watch. Scan zones continuously, scanning from point to point thoroughly. Recognize and respond to victims in the water quickly, in 30 seconds or less. Follow posted rotation plans. 79 ChAPTER 3: SURvEILLANCE AND RECOGNITION
90 BENCHMARKS FOR LIFEGUARDING OPERATIONS Managers should ensure that: The shape and size of the lifeguard zones and lifeguard stations are appropriate to provide for adequate patron surveillance and response time to victims in the water. Zones are clearly identified and posted for different staffing levels, as well as for different activities and different times of day or for other considerations, such as to account for glare. Drills are conducted to test zones: o Conduct Ask Drills. o Conduct Live Action Recognition Drills. o Conduct Lifeguard Station Response Time Testing. Lifeguards get regular breaks from surveillance duty to help stay alert and decrease fatigue. Rest and meal breaks should be factored into the rotation. ChAPTER 3: SURvEILLANCE AND RECOGNITION 80
91 Chapter 3 Review 1. In general, there are three types of swimmers in distress or drowning victims. List each type with three observable characteristics for each. 1) 2) 3) 2. Match each station type with its general use: Roving Stations A. Puts you close to the patrons to easily make assists Elevated Stations Ground-Level Stations Floating Station B. Used in waterfront facilities to patrol the outer edge of a swimming area C. Ideal for a single guard facility D. Good to use with a crowded zone 81 ChAPTER 3 REvIEW
92 Chapter 3 Review 3. A lifeguard on duty should be able to recognize and reach a drowning victim within: 4. The size of a zone should allow for a lifeguard to recognize an emergency, reach the victim, extricate and provide ventilations within. Explain why. 5. What is the difference between total and zone coverage? Total coverage: Zone coverage: 6. Lifeguards should be actively their zones. A Changing C Creating B Watching D Searching Why? ChAPTER 3 REvIEW 82
93 Chapter 3 Review 7. You are guarding a lap swim with only two patrons. All of the following will help you deal with the monotony EXCEPT for which? A Stay fully engaged and do not let attention drift. B Change body position and posture periodically. C Swing your whistle lanyard. D Sit upright and slightly forward. 8. It is very hot in your facility and you are starting to doze on the stand. All of the following can help you stay alert EXECPT for which? A Stay in a cooler area during breaks. C Rotate more frequently. B Stay hydrated while drinking plenty of water. D Jump in the pool while on surveillance duty to cool off. 9. The glare of the lights on the water and the water movements are making it hard to see all areas of your zone. Circle all acceptable options. A Wear polarized sunglasses. B Adjust your body position; stand up to look around and through the glare spots. C Reposition the lifeguard station with the permission of your supervisor. D Be aware of the normal appearance of the bottom of the pool; know the appearance of drains, colored tiles or painted depth markings. E Do not change your position as the lifeguard stations are placed to be ascetically pleasing. 10. Why is it important for lifeguard managers to conduct drills to test zones? 83 ChAPTER 3 REvIEW
94 Chapter 3 Review 11. Fill in the blank:, which can be described as rapid, deep breathing, is a dangerous technique used by some swimmers to try to swim long distances underwater or to hold their breath for an extended period while submerged in one place. If you see these dangerous activities, you must intervene. 12. RID stands for R: I: D: 13. During rotation, both lifeguards must ensure there is no lapse in patron surveillance, even for a brief moment. To ensure this, what should each lifeguard do? The incoming lifeguard should: The outgoing lifeguard should: QUESTION FOR FUTURE GUIDED DISCUSSION What are some common injuries at at a pool? How can a lifeguard treat and prevent them? ChAPTER 3 REvIEW 84
95 Chapter 3 Review ADDITIONAL REVIEW QUESTIONS FOR WATERFRONT LIFEGUARDS: 1. Which scanning challenge often occurs at waterfronts but should not exist at pools? A Distractions C Murky water B Heavy patron loads D High air temperature 2. Who normally provides training for watercraft used at some waterfront facilities? A The lifeguard s training agency C Facility management B The lifeguard figures it out D The U.S. Coast Guard 85 ChAPTER 3 REvIEW
96 Chapter 3 Review ADDITIONAL REVIEW QUESTIONS FOR WATERPARK LIFEGUARDS: 1. In a waterpark setting, which type of lifeguard stations might you encounter in a rotation? 2. What are lifeguards guarding at dispatch stations responsible for? 3. What are some characteristics unique to waterpark features that may make it more difficult to see a drowning victim? 4. What are some scanning challenges that you may encounter when guarding a play structure? What tactics can you use to counteract them? ChAPTER 3 REvIEW 86


97 ROTATIONS Ground-Level Station Begin scanning your zone as you are walking toward your station. Note the swimmers, activities and the people on the deck. In a pool or waterpark setting where the water is clear, check the entire volume of water from the bottom of the pool to the surface of the water. Walk to the side of the outgoing lifeguard and continue scanning the zone. Exchange any important information needed without losing surveillance of the zone. Confirm and signal that the zone is clear and transfer responsibility of the zone. The outgoing lifeguard can now begin to rotate. You now "own the zone." The outgoing lifeguard continues searching the zone as they walk toward the next station. Note: Surveillance of the zone must not be lost at any time during the rotation. As the responsibility for searching the zone transfers, eye contact must remain on the water. 87 SKILL ShEET


98 ROTATIONS Elevated Station Begin scanning the zone as you are walking toward the lifeguard station. Search the entire zone and note the swimmers, activities and the people on the deck. In a pool or waterpark setting where the water is clear, check the entire volume of water from the bottom of the pool to the surface of the water. Take a position next to the stand and begin searching the zone. After a few moments of scanning, signal the lifeguard in the stand to climb down. Once on the deck, the outgoing lifeguard takes a position next to the stand and is responsible for surveillance of the zone. The incoming lifeguard climbs into the stand, makes any adjustments to equipment or personal items and begins scanning. Exchange any important information as needed without losing surveillance of the zone. Confirm and signal that the zone is clear and transfer responsibility for the zone. The outgoing lifeguard can now begin to rotate. You now own the zone. The outgoing lifeguard continues searching the zone as they walk toward the next station. Note: Surveillance of the zone must not be lost at any time during the rotation. As the responsibility for searching the zone transfers, eye contact must remain on the water. SKILL ShEET 88
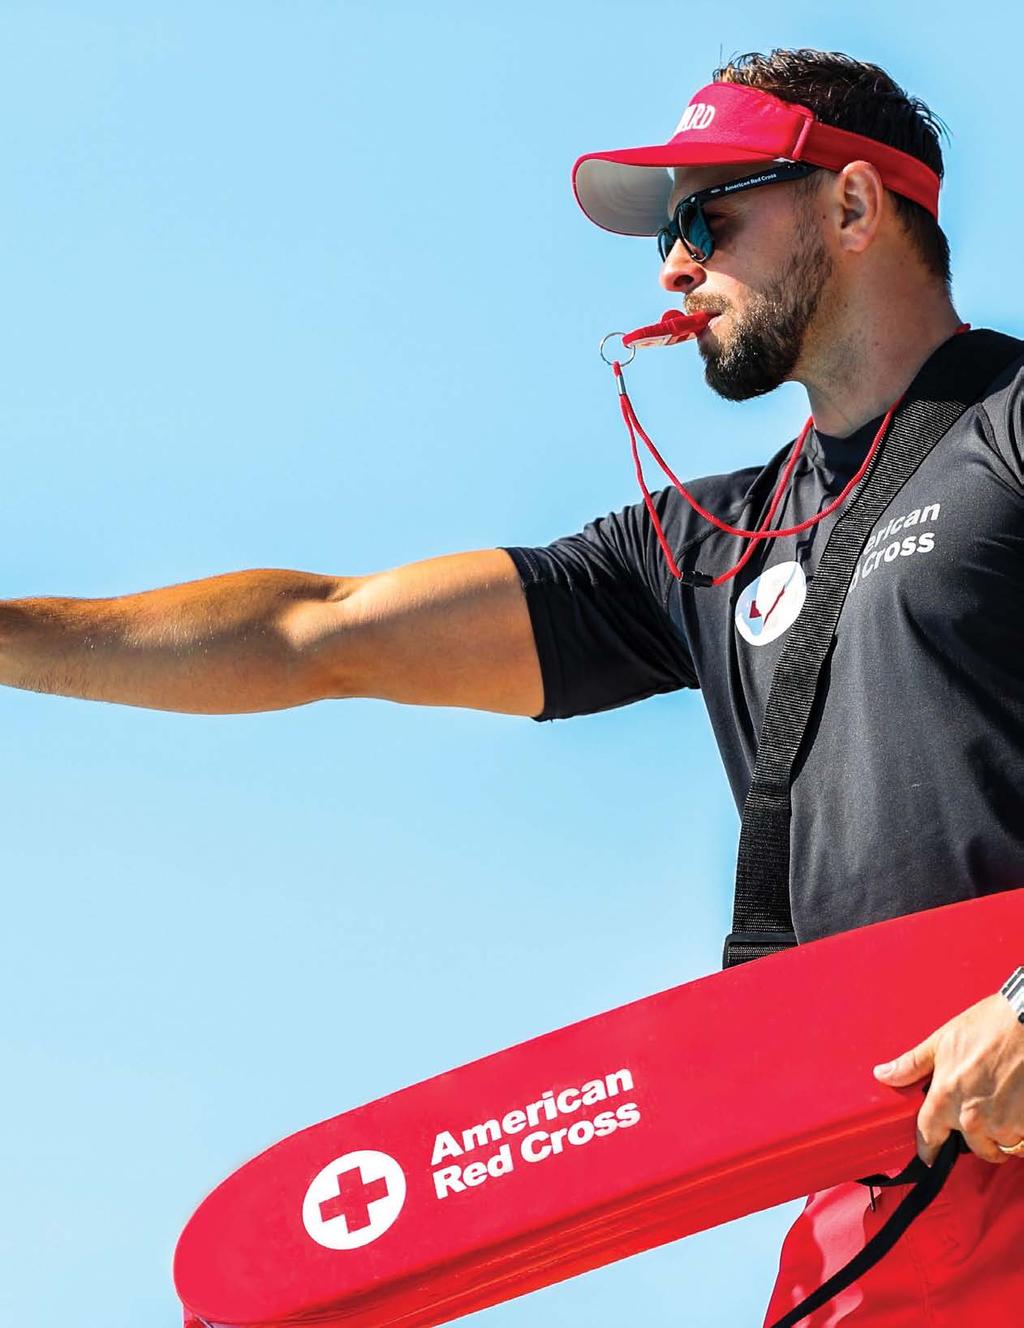
99

100 4 Injury Prevention Lifeguards are essential for keeping aquatic facilities safe. Unlike most other professional rescuers, lifeguards are present to help prevent emergencies from occurring. As a lifeguard, one of your goals is to prevent injuries, so you should know the best strategies for preventing them. You must also be prepared to meet the safety challenges presented by visiting groups, as well as the various activities and features at your facility HOW INJURIES HAPPEN INJURY PREVENTION STRATEGIES EFFECTIVE GUARDING INJURY PREVENTION CHALLENGES SPECIAL CONSIDERATIONS FOR GUARDING AQUATIC ATTRACTIONS WRAP-UP
101 4-1 HOW INJURIES HAPPEN Aquatic injury prevention is part of your facility s risk management program. Risk management involves identifying dangerous conditions or behaviors that can cause injuries and then taking steps to minimize or eliminate those conditions or behaviors. Even though lifeguarding requires performing emergency rescues, far more time is spent on preventive lifeguarding trying to make sure emergencies do not happen in the first place. Although not all emergencies can be prevented, knowing what causes life-threatening injuries can help you to prevent many of them. Injuries either are life threatening or non-life-threatening. Examples of life-threatening injuries include drowning and injuries to the head, neck or spine. Life-threatening conditions that can result from an injury include unconsciousness, breathing and cardiac emergencies, severe bleeding and drowning. Drowning begins when a person s mouth and nose are submerged and water enters the airway, regardless of the water depth. Drowning can occur in shallow or deep water. In shallow water, a toddler may fall over and be unable to stand or raise the head up. Drowning also may result when a nonswimmer enters or falls into water over their head, when a swimmer becomes exhausted and cannot stay afloat or when a patron is incapacitated in the water due to a medical emergency, such as a seizure or cardiac emergency. Most head, neck or spinal injuries at aquatic facilities result from a high-risk, high-impact activity, such as head-first entries into shallow water. If a victim s head strikes the bottom or the side of the pool, the spinal cord can be damaged, possibly causing paralysis or death. Non-life-threatening injuries also occur in aquatic facilities. Examples of non-life-threatening injuries include fractures or dislocations, abrasions (scrapes), superficial burns (sunburns), muscle cramps (caused by overexertion), heat exhaustion, dehydration, and sprains and strains. Non-life-threatening injuries can occur by slipping, tripping, falling when running or getting cut on sharp objects. They also can occur when patrons do not follow the rules. If you understand how most injuries occur, you can help prevent them by increasing your awareness of risks and hazards, helping patrons to avoid risky behavior and developing a safety-conscious attitude at your facility. 4-2 INJURY PREVENTION STRATEGIES As you learned earlier in this course, your injury prevention responsibilities include ensuring that the facility is safe and providing effective patron surveillance. Another important injury prevention responsibility is communicating with patrons, which involves educating and informing patrons as well as enforcing your facility s rules. 91 ChAPTER 4: INjURy PREvENTION

102 Communicating with Patrons Communicating with patrons is an important injury prevention strategy. It requires you to inform and educate patrons about inappropriate behaviors and the potential for injury. Communication also includes consistently enforcing rules and regulations in a positive, customer-friendly manner. Informing and Educating Patrons Patrons need to know about risks that could cause injury. Signs communicate warnings, provide instructions on how to use equipment, and list rules and regulations to prevent behaviors that can lead to injury (Figure 4-1). Informing patrons about the potential for injury is also part of your role. Therefore, you need to understand the rules and regulations of your facility and the rationale behind them. Patrons may be unfamiliar with a facility s features or get so excited that they do not read signs or pay attention to the rules. If patrons are not following the rules, it is your job to inform them of the possible consequences. Explaining rules in a positive way encourages patrons to behave safely. The following steps can prevent a patron from engaging in risky behavior: Get the patron s attention. For example, you might do this by blowing a whistle and saying, Excuse me (Figure 4-2). Explain the hazard or danger. For example, say, If you dive into shallow water, you might hit your head on the bottom and get injured. Or say, You may slip and hurt yourself if you run. Simply telling someone not to do something often does not work. People usually understand and cooperate when they know why something is dangerous. Explain a safe option. For example, say, If you want to dive, please go to the deep end of the pool where it is safe. Or say, Excuse me, diving into shallow water is dangerous and can cause a head injury. Please use the deep end. Or say, Walk, please. This type of explanation gets the patron s attention, clarifies the danger, emphasizes the consequences of the risky behavior and offers safe options, if available and appropriate. Figure 4-1 Signs provide instructions to patrons on how to use equipment and list rules and regulations of the facility. ChAPTER 4: INjURy PREvENTION 92

103 Enforcing Rules By enforcing the rules, you help to prevent injuries and encourage safe patron behavior. When conducting patron surveillance, keep rule enforcement brief by using only a few words or short phrases, such as, "Slow down," or by giving a hand signal. When enforcing rules, be consistent, fair and respectful. In some cases, the patron may not know the facility's rules or may not understand them. Always use age-appropriate enforcement methods that are approved by the facility's policies. If certain patrons repeatedly break the rules even after you have attempted to correct their behavior, you could direct them to leave the water for a set time. Signal for someone who is not engaged in patron surveillance, such as another lifeguard or a supervisor, to explain the rules and their rationale. If the patron is a child and a parent or guardian is available, the rules should be clearly explained to the adult as well. Since most people want to be treated with respect, simply explaining and enforcing the rules usually is sufficient. If a parent or guardian is uncooperative, do not argue, but instead ask a supervisor or facility manager to assist you. A patron may become uncooperative and defiant, compromising their safety and the safety of others. If this happens, you should summon a supervisor or facility manager, who may ask the patron to leave the facility. Use this approach only when other methods have failed. If a patron refuses to leave after being told to leave for repeatedly breaking the rules, the supervisor or manager may choose to call the police or security personnel. Every facility needs a procedure for removing someone from the facility. This procedure should have specific steps and guidelines to follow. Any such action should be recorded in the facility s daily log and on the appropriate form or report. Figure 4-2 You may need to use your whistle to get a patron's attention. 93 ChAPTER 4: INjURy PREvENTION
104 INTERACTING PROFESSIONALLY WITH THE PUBLIC When you are on duty, your actions should promote an atmosphere of professionalism, safety, trust and goodwill. The following general guidelines will help you display a professional image and maintain a positive relationship with patrons: When conducting patron surveillance, any verbal interaction should be brief, and your eyes should remain on the water. Politely refer the patron to a staff member who is not conducting surveillance, if necessary. When not conducting patron surveillance: o Treat people as you would like to be treated. Make every patron feel welcome, important and respected. o Be professional at all times. Be courteous, mature and responsible. Never insult or argue with a patron. o Speak clearly and calmly at a reasonable pace and volume. o Use appropriate language, but do not patronize or speak down to anyone, including children. o When interacting with patrons, make frequent and direct eye contact. Remove your sunglasses, if necessary. When speaking to small children, kneel down to be at eye level with them. o Take all suggestions and complaints seriously, and follow up as necessary. Avoid blaming anyone. If you cannot resolve a complaint, take it to your facility s management. Always follow the facility s procedures. o Repeat the concern expressed by the patron back to them to ensure that you understand the concern correctly. o Do not make promises that cannot be kept. o Enforce rules fairly and consistently. Be positive and nonjudgmental. Reinforce correct behavior. o Take a sincere interest in all patrons. Nonverbal Communication Spoken words make up a surprisingly small part of overall communication. A listener automatically tends to make judgments about a speaker s attitude based on the volume, pace, tone and pitch of the speaker s voice. A listener also reacts positively or negatively to visual cues or body language. You can gauge a person s attitude as cooperative or confrontational by evaluating these cues; know that the listener will be doing the same. Nonverbal communication also is expressed while you are on duty, whether you are conducting patron surveillance or performing secondary responsibilities. Patrons may make judgments about your professionalism by observing your appearance, demeanor, posture and behavior. Lifeguards are on stage and set the tone while on duty. ChAPTER 4: INjURy PREvENTION 94
105 DEALING WITH UNCOOPERATIVE PATRONS AND VIOLENCE No matter how fairly you enforce the rules, you may encounter an uncooperative patron. Before assuming that a patron is being uncooperative, you should make sure that they hear and understand you. If a patron breaks the rules and is uncooperative, you should take action right away, because breaking the rules can be a danger to the uncooperative patron and to others. Most facilities have procedures for handling uncooperative patrons; however, if your facility does not have a procedure, you should call the lifeguard supervisor or facility manager for help as soon as possible. A patron may threaten to or commit a violent act. You must be realistic about what can be done in a violent situation. If violence is likely to erupt, call the supervisor or facility manager immediately. If violence does erupt, do not try to stop it. Never confront a violent patron physically or verbally and do not approach a patron who has a weapon. In such a situation, the best approach is to retreat and follow the facility s EAP for violence. Safety for patrons and facility staff should be your main goal. 4-3 EFFECTIVE GUARDING INJURY PREVENTION CHALLENGES Lifeguards should be conducting patron surveillance anytime the facility is being used by patrons or staff. A major goal of patron surveillance is looking for behaviors that indicate someone may need assistance. As part of your patron surveillance, you also may have specific responsibilities based on the facility s activities or features, such as enforcing age or height requirements, helping patrons with equipment or ensuring that riders are in the proper position. These responsibilities will vary and may include guarding: A variety of activities occurring simultaneously. Kiddie areas, play structures, special attractions, water slides, winding rivers and wave pools. Organized recreational swim groups and youth camps. 95 ChAPTER 4: INjURy PREvENTION
106 Guarding Activities Facilities often have a variety of activities taking place simultaneously, all of which require your surveillance. Examples include: Open or recreational swim Water exercises, such as water walking and lap swimming Instructional classes, such as swim lessons, water therapy, water exercise and SCUBA lessons Swimming, water polo, synchronized swimming and other team practice Competitive events, such as swim meets and triathlons Special events, such as movie nights, pool parties and after-hours rentals To help you identify patrons who may need assistance, be aware of the age and ability levels of those participating in the activity. For example, you may notice a young child in beginner-level swim lessons moving toward water over their head or an elderly man stopping frequently as he swims laps. Each activity has its own unique characteristics and risks. Some activities, such as SCUBA classes, may require that you receive special training on what to look for specifically or be aware of while you are on surveillance duty. Considerations and questions that need to be answered for effective guarding include: What things could go wrong that are unique about this activity? What is the swimming ability or comfort level in the water of patrons involved in this activity? Are there any unique challenges or obstacles to recognizing an emergency, approaching a victim or performing a rescue? Do participants have any medical conditions that increase the chances for sudden illness or injury due to the nature of the activity? Instructional Classes Instructional classes are a type of general activity that have the benefit of supervision by trained personnel. Although the instructor is responsible for the safety of the class, that does not relieve you of your responsibilities. You must still scan every person in the water and enforce rules, perform rescues and provide first aid as appropriate. However, with proper preparation, instructors may become valuable members of your safety team. Facility management should share and practice emergency action plans (EAPs) with instructors, clarify their roles during an emergency and share those roles with you. Some instructors will have lifeguard training and specialized rescue skills; others will not. Having an instructor present may help you to ensure patron safety because they may be: Familiar with special equipment. Therapy classes may use wheelchairs, lifts and special flotation devices. Instructors for those classes should be able to recognize and deal with potential problems with such devices. Familiar with the behavior of specific types of patrons. Instructors may be able to recognize subtle signs of potential problems that may not be obvious to you. For example, a water exercise instructor may detect the early signs of overexertion of a patron in that class. Able to help in an emergency related to the specialized class. For example, a SCUBA instructor should know how to deal with and respond to a victim wearing a SCUBA tank and buoyancy control device. ChAPTER 4: INjURy PREvENTION 96

107 Guarding Areas for Young Children Many facilities have shallow pools for young children. It is common for these areas to have play equipment, including slides, fountains, inflatable play equipment and climbing structures. Effective patron surveillance at these areas is essential, even though the water may be shallow (Figure 4-3). Enforce rules, such as height and age requirements, fairly and consistently. Note that: Older children might be too large for some structures, or their play might be too rough for young children. Toddlers who are still learning to walk may fall easily. If they fall down in water, they usually cannot lift themselves to an upright position, even if the water is ankle or knee deep. Children often get lost. Remind adults to supervise their children at all times. You must watch out for young children using the pool as a toilet. The facility should have procedures for preventing and addressing the situation, including handling fecal incidents, which follow local health department guidelines. Children usually do not think about overexposure to the sun or hypothermia. If a child is becoming sunburned or overly cold, immediately inform the child s parent or guardian. Figure 4-3 Even though the water may be shallow, effective patron surveillance is essential. 97 ChAPTER 4: INjURy PREvENTION


108 Guarding Zones with Play Structures Facilities may have play structures that are either permanent or removable (Figure 4-4). Permanent structures include sprays and fountains, interactive water-play structures and dumping buckets. Removable structures include large floating toys, inflatable play structures and water basketball and volleyball nets. Some play structures require their own lifeguards, whereas others are watched by lifeguards surveying a larger area. While guarding at play structures: Do not let a play structure become overcrowded. Be prepared to restrict the number of patrons using it at one time. Do not allow patrons to swim underneath structures. Watch to ensure that patrons return to the surface after dropping into the water from a floating feature. Swimmers can be surprised by the fall or become disoriented, especially if they do not realize they will be dropping into deep water. Pay close attention to children playing in and around sprays, fountains and interactive water play structures. These attractions usually are in shallow water. Excited children may run and fall. A very young child who falls might not be able to get back up or may strike their head. Pay close attention to patrons in moving water. Moving water can surprise people. They might lose their balance and be unable to stand up again. Watch for overcrowding and horseplay on floating structures. These structures are tethered to the bottom of the pool; some allow patrons to walk from one floating structure to another while holding onto an overhead rope (Figure 4-5). Keep play safe and orderly. Watch for patrons who climb onto floating toys and jump back into the water. They may not notice what is around them and jump onto other swimmers or into water that is over their heads. Watch for patrons who throw balls and other toys and hit unsuspecting swimmers, resulting in injury. Figure 4-4 Many facilities have play equipment for young children. Figure 4-5 Watch for overcrowding and horseplay on floating structures. ChAPTER 4: INjURy PREvENTION 98

109 Guarding Organized Recreational Swim Groups Groups of all sizes visit aquatic facilities for recreation. This includes groups from day care centers, day camps and youth organizations as well as school groups, sports groups and groups visiting facilities for birthday parties. These groups may be based out of your facility and swim regularly or may visit one or more times as a field trip. Groups often are supervised by leaders, chaperones or camp counselors. These supervisors may assist with discipline but do not take the place of lifeguards. Group leaders may be in the water with the group, on the deck or shore or a combination of both. Group leaders should know how to alert lifeguards in an emergency. In some cases, most group members will have similar swimming abilities, such as a day care center group composed of preschool-age nonswimmers. The swimming ability of other groups may vary widely, such as in a youth camp group with a wider age range of children. Sometimes, a group will reserve all or part of a facility for its own instructor to teach a class, lead a practice or conduct skill checks. These activities may include kayaking, SCUBA diving or swim team tryouts (Figure 4-6). In general, when guarding groups, you should: Ensure that swimming areas are divided according to swimmers abilities and are clearly marked. Ensure that patrons stay in the sections appropriate for their swimming abilities. Be aware that weak swimmers or nonswimmers, excited to be together enjoying a recreational activity, may attempt to venture into areas that are beyond their swimming ability. Provide U.S. Coast Guard-approved life jackets for weak swimmers or nonswimmers. Know how to identify group leaders or chaperones. Ensure that chaperones are actively supervising the members of their group and that the appropriate swimmer-to-chaperone ratio is met. If it appears that they are not doing so, alert your facility s manager. Signal for additional lifeguard coverage, such as a roving lifeguard, if you feel you cannot effectively guard your zone. You may need to do this at the beginning of the swim time while the group gets adjusted to the facility s rules or if large groups are concentrated in one area. For groups using buddy checks (see Guarding at Youth Camps, page 103), you may need to signal the buddy check, confirm that everyone is accounted for and count the individuals or buddy pairs, depending on the system being followed. Regardless of a group s makeup or activities, as a lifeguard, you still are responsible for helping to ensure the safety of its members. To help groups remain safe and injury free, your facility s manager may develop activity-specific EAPs and strategies in advance. Figure 4-6 A group sometimes reserves all or part of a facility for its own use. 99 ChAPTER 4: INjURy PREvENTION

110 Strategies for Safe Group Visits Facilities often implement additional strategies for injury prevention and swimmer management during group visits. Group leaders should meet in advance with managers at the facility to discuss appropriate plans and procedures. A copy of the facility rules as well as written expectations of group leaders should be provided in advance of the group visit, when possible. Strategies for ensuring safe group visits typically involve one or more of the following: Booking procedure. Before the visit, group leaders should provide the aquatic facility with information about how many group members and supervisors will be visiting. This is especially important with large camp groups, which require additional time to process through safety orientation, swimmer classification and identification procedures. Confirming the supervisor-to-swimmer ratios helps facility managers plan appropriate staffing levels. Group leaders also should inform the facility about any special characteristics of the group, such as the percentage of swimmers and nonswimmers. Any staff who will be accompanying the group should be informed about how to help supervise group members around and in the water and how to help the lifeguards in an aquatic emergency. Safety orientation. Safety orientations are conducted when groups first arrive at the facility. The purpose is to educate all members of the visiting group on your facility s policies and rules and to point out key safety issues. You may be tasked with conducting these orientations. Classification of swimming abilities. Swim tests are administered to determine if a visitor has the minimum level of swimming ability required to participate safely in activities, such as swimming in water over their head or riding on certain slides. If your facility administers these tests, management may have developed a system for lifeguards to easily identify patrons swim levels. For example, levels can be identified by colorcoded wristbands or swim caps (Figure 4-7). A red armband might identify someone who is a beginner and needs to stay in the shallow end; a green armband might identify someone who can go in deep water. Designation of swimming areas. Swimming areas should be clearly marked and defined according to swimmers abilities and intended use. Buoyed ropes should divide shallow and deep water. Multi-use facilities often divide the water into sections for general recreation swim or lap swim or divide areas for floatable features or play structures. In waterfront areas, the swimming area should be restricted from the nonswimming areas, and there should be some type of continuous barrier, such as buoyed lifelines, piers or decks, around the perimeter of areas set aside for weak swimmers or nonswimmers to prevent them from straying into deep water. All swimming areas should be explained to the group and its leaders during the safety orientation. Identification of group leaders or adult chaperones. Your facility should use an identification system so that lifeguards and other facility staff can easily locate group leaders or adult chaperones. For example, group leaders could wear a laminated lanyard or a brightly colored baseball cap or T-shirt to identify them as being responsible for that group. Supplemental group strategies. Other strategies, such as the buddy system and buddy checks, sometimes are used to provide an additional layer of protection. These are particularly helpful with camp groups, which can be large. For more details on the buddy system, see page 103. Figure 4-7 Color-coded wristbands are used to classify patrons by swimming ability. ChAPTER 4: INjURy PREvENTION 100
. When conducting a safety orientation: Ensure that group leaders or adult chaperones are present and can be clearly identified by all members of the facility staff.")
111 How to Conduct a Safety Orientation If you are tasked with providing a safety orientation to a visiting group, you will need to cover general water safety as well as information specific to your facility (Figure 4-8). When conducting a safety orientation: Ensure that group leaders or adult chaperones are present and can be clearly identified by all members of the facility staff. Make it fun and build rapport with the group. Ask questions rather than reading a list of rules. This allows you to become more familiar with what group members already know as well as gauge their level of understanding. Explain the reasons for any rules that group members do not understand. Identify areas where they can and cannot swim, if applicable. Point out where the lifeguards are stationed and inform the group how to get additional help if needed. Confirm the swimmer-tosupervisor ratio expected for group leaders and divide the group so that group leaders have a designated set of people to oversee. Issue any identification and/or swim classification items to group members and leaders, such as colored wristbands. Safety topics typically covered during an orientation include general aquatic safety rules, swimming area sections, water depths, features or play structures, equipment, how to use approved floatation devices, rule signage locations and operational information, such as buddy checks or breaks. Figure 4-8 Welcome visiting groups to your facility by conducting a safety orientation. How to Administer a Swim Test Swim tests can be used to determine if a person has the minimum level of swimming ability required to participate safely in activities, such as swimming in deep water, riding a slide that empties into deep water or jumping off a diving board into deep water. There is no single set of swim test criteria that best meets the needs of all facilities or organizations, nor is the following information intended to set a standard. If administering swim tests, each facility or organization should establish its own requirements based on the facility s design and features, the activities offered and common practices. 101 ChAPTER 4: INjURy PREvENTION

112 During your facility-specific training, you should be provided with standard procedures and criteria for conducting swim tests. Never administer a swim test while performing patron surveillance duty. When administering a swim test: Have the swimmer take the test in a safe area, such as near a wall, safety line or lane line. Have the swimmer take the test in shallow water first. If successful, have the swimmer move to the deep water and take the test. Be prepared to assist a person who may struggle in the water while attempting the swim test. Swimmers may overestimate their abilities (Figure 4-9). Ensure that chaperone(s) are present during the test, if applicable. Ensure that the person has safely exited the water after the test is complete. When the test is completed, tell the swimmer where they are permitted to swim. To be eligible to swim in deep water, swimmers should have at least a minimum level of competency in the water. The Red Cross water competency sequence can be used as this swim test. Water competency is defined as being able to perform the following skills in a sequence: 1. Enter the water and completely submerge. 2. Recover to the surface and remain there for at least 1 minute (floating or treading). 3. Rotate 360 degrees and orient to the exit. 4. Level off and propel oneself on the front or the back through the water for at least 25 yards. 5. Exit from the water. After the initial test, additional swim tests should be conducted at intervals throughout a season to determine if swimming abilities have improved. Figure 4-9 Have a lifeguard stationed near a patron during a swim test in case they need assistance. ChAPTER 4: INjURy PREvENTION 102
113 Guarding at Youth Camps Some youth camps operate their own waterfront and pool facilities. If you are working at one of these camps, your area of responsibility and patron load may be smaller than those at a public facility because campers typically will be your only patrons. Some camps will supplement trained lifeguards with other staff who, after proper orientation, will serve as spotters or lookouts; however, these staff members should never take the place of lifeguards. At the beginning of a camp session, all participants and staff who will be involved in aquatic activities should be given a swim test. After the initial test, additional swim tests should be conducted at intervals throughout the camp session to determine if participants swimming abilities have improved. Participants who arrive after the initial test has been given also should be tested. Youth camps with their own aquatic facilities often implement additional prevention strategies, including the buddy system, buddy boards and buddy checks. Buddy Systems The buddy system is used by camps to enhance safety for swimming groups. Under the buddy system, one participant is paired with another participant of similar swimming skills. The pair is then assigned to a specific swimming area. If buddies do not have similar swimming skills, the pair should remain in the swimming area suitable to the weakest swimmer s abilities. Buddies must be instructed to stay together and be responsible for one another. They need to tell a lifeguard immediately if their buddy is in trouble or missing, at which time you should take immediate action. The buddy system provides useful safeguards to help account for swimmers by having each buddy look out for the other; however, it does not replace lifeguard surveillance. Buddy Boards A buddy board helps to keep track of everyone in the swimming area (Figure 4-10). Typically, a buddy board is a large, permanent structure mounted within the confines of the swimming area near the entrance and may also be divided into different activities or swimming areas. Generally, a buddy board works as follows: Based on the initial swim test, each person gets a colored tag with their full name and group designation, such as a cabin or campsite number. Tags should be color-coded or labeled by swimming ability, such as swimmer or nonswimmer. A lifeguard or other staff member is stationed at the buddy board to make sure tags are placed correctly and that everyone who enters or leaves the swimming area moves their tag appropriately. Before buddies enter the water, they hang their tags on hooks on the section of the board that indicates the swimming area in which they will be swimming. The buddies tags should be next to each other to indicate that they are a pair. Tags should be placed on separate hooks to facilitate a reliable count. If buddies decide to move from one section to another, such as from the deep to the shallow area, they must first notify the person at the board and move their tags. When buddies leave the water, they move their tags to the Out section. 103 ChAPTER 4: INjURy PREvENTION

.")
114 Figure 4-10 Buddy boards are used to track patrons who enter a swimming area. Buddy Checks The primary purpose of buddy checks is to account for all swimmers and to teach buddies to continuously monitor their partners. Buddy checks often are set for specifically timed intervals. To initiate a buddy check, a lifeguard, lookout or supervisor gives a prearranged signal, such as a whistle blast. The buddies grasp each other s hands, raise their arms over their heads and hold still while the staff accounts for everyone (Figure 4-11). Buddies do not have to leave the water; those in shallow water may stand in place, while those in deep water may move with their buddy to the side and those already on deck should remain there. Two methods commonly are used to confirm that the staff has accounted for everyone. Both use a buddy board or other tracking system: Method 1: Lifeguards count the swimmers in each area and relay those numbers to a monitor. The monitor checks the numbers against the total on the buddy board or other tracking device. Method 2: Each pair of buddies is given a number. The monitor calls off the numbers in order, and buddies respond when their number is called. If everything matches, the buddy check is over. If a buddy check reveals that a person is missing, you should immediately suspect that the buddy is submerged and activate your facility s EAP. Although the buddy system provides useful safeguards, buddy checks are not conducted frequently enough to substitute for normal surveillance. You should never depend on the buddy system as the only method of supervision. You must constantly scan your zone of responsibility, looking for the behaviors of swimmers in trouble. Figure 4-11 Buddy checks are used to account for each swimmer in a swim area. ChAPTER 4: INjURy PREvENTION 104
115 4-4 SPECIAL CONSIDERATIONS FOR GUARDING AQUATIC ATTRACTIONS Special attractions create a lot of excitement and can include rides, such as bowl slides, multi-person raft rides, uphill water coasters and high-speed water slides. Some attractions found at deep-water pools also include diving platforms, cable swings and hand-over-hand structures like ropes, nets and rings. In a waterpark setting, there are multiple attractions designed for a variety of age groups and abilities. Regardless of their swimming ability, patrons may become fearful, disoriented or off-balance while taking part in one of these attractions, thus requiring assistance. Follow these general principles when guarding attractions: Watch patrons as they enter and exit an attraction. Dispatch patrons safely on a ride at set intervals. Dispatching is the method of informing patrons when it is safe for them to proceed on a ride. Carefully watch both the water below and the activities overhead. Keep patrons in view as long as possible. However, keeping patrons in view can be a problem on some attractions: Structures, such as caves, enclosed tubes, bridges and buildings, might prevent you from seeing patrons at all times. When a patron goes out of sight, watch to make sure they emerge safely on the other side. Ensure that patrons who submerge return to the surface. The excitement may cause weak swimmers or nonswimmers to overestimate their abilities or underestimate the water s depth. Be aware of special risks. Structures designed to allow patrons to sit or climb on them, or to swim over or under them, pose hazards. Supervise patrons carefully. Someone who falls off of a mat, raft or tube might get injured or pose a hazard to another patron. Attraction-Specific Operational Procedures Your employer should provide attraction-specific training that will enable you to operate attractions you are assigned to within the manufacturer s guidelines and state or local codes. Typically, each attraction will have specific operational procedures that include information related to the following: How the ride operates The characteristics of the attraction, such as speed or attraction rating The number of riders that can be safely accommodated The type of ride vehicle Height and weight restrictions that are in effect Special considerations for riders with disabilities Proper riding position The location of rescue equipment Operating procedures for dispatch at the top of the attraction and for exiting at the bottom of the attraction Dispatch procedures, including dispatch time intervals, dispatch signaling devices, verbal pre-ride instructions for riders (including proper riding position, conduct and exiting procedures) and protocols for stopping dispatch Exiting procedures Communication systems Spiels (recorded or repeated safety messages) Water level of the landing zone Water flow Restricted areas Emergency procedures for situations including stuck riders, crowd control, attraction and facility evacuations, drowning, medical emergencies, power or other utility failures, fires, environmental conditions (e.g., lightning and wind), mechanical malfunctions and security incidents (e.g., fights, robbery and vandalism) 105 ChAPTER 4: INjURy PREvENTION
.")


116 Guarding Wave Pools Wave pools are popular attractions that produce waves of various heights, intervals and patterns (Figure 4-12). Wave pools vary in size, shape and depth. At one end is the head wall, where a mechanical system creates the waves. Lifeguards are stationed at various places around or in the pool (Figure 4-13). Wave pools operate on a cycle, such as 10 minutes with the waves on and 10 minutes with them off. Wave pools are popular attractions at waterpark facilities. When guarding a wave pool: Ensure that patrons enter only in the shallow end. When the waves are on, stand up to get a better view of patrons. Watch for swimmers who get knocked over by the waves or carried into deeper water by the undercurrent. Inexperienced swimmers may go to where the waves break because of the excitement. Do not let patrons dive into the waves or dive through inner tubes. Keep the areas around ladders and railings clear so that patrons can exit from the pool quickly. Keep other swimmers out of the pool during special activities, like surfing. Surfboards or boogie boards in the wave pool can present a hazard to others. Before performing an emergency rescue, turn the waves off using the emergency stop (E-stop) button at the lifeguard chair (Figure 4-14). Rotate positions only when the waves are off. Figure 4-12 Wave pools are popular attractions at waterpark facilities. Figure 4-13 Lifeguards are stationed at various places at a wave pool while performing surveillance. Figure 4-14 An emergency stop (E-stop) button can be pressed to turn off the waves in a wave pool when a rescue is required. ChAPTER 4: INjURy PREvENTION 106
.")

117 LIFE JACKETS The U.S. Coast Guard has categorized personal flotation devices (PFDs) into five categories. They are rated for their buoyancy and purpose. Types I, II, III and V are referred to as life jackets, whereas Type IV is a throwable device (Table 4-1). Swimming ability, activity and water conditions help determine which type of life jacket to use. For any type, it should be U.S. Coast Guard-approved and in good condition. The U.S. Coast Guard label is stamped directly on any approved device (Figure 4-15). Facilities may have policies addressing the use of life jackets in a pool, waterfront or attraction. Type II and III life jackets are most commonly used in these settings. In general, anyone who cannot swim well should wear a life jacket if they are going to be in or around the water at an aquatic facility; however, in some cases, such as on certain slides, life jackets are not permitted. In other cases, such as fast-moving winding rivers, life jackets are recommended or may be required. Life jackets may be available at a facility for rent or free of charge (Figure 4-16). Figure 4-15 As a lifeguard, you may be tasked with: Ensuring that life jackets are U.S. Coast Guard-approved. Inflatable toys and swim aids, such as water wings, swim rings and other flotation devices, are not designed to be used as substitutes for U.S. Coast Guard-approved life jackets or adult supervision. Ensuring that life jackets are in good condition. Buckles and straps should be in good working condition. There should be no rips, tears, holes or shrinkage of the buoyant materials. Helping patrons to select a properly sized life jacket. Life jackets are sized by weight. Check the U.S. Coast Guard label and be sure that it is matched to the weight range of the patron. Ensuring that life jackets are properly worn by patrons. A properly fitted life jacket should feel snug, keep the person s chin above the water and allow the person to breathe easily. The life jacket should not ride up on the patron s body in the water. Completely secure any straps, buckles or ties associated with the life jacket. Ensuring that patrons properly use life jackets. Correct any improper wearing or use of life jackets. Do not allow patrons to wear multiple life jackets or stack multiple life jackets on top of each other to be used as floats. You should remove any extra empty life jackets from the water. An empty life jacket in the water should be a signal that something is wrong. Consistent enforcement of rules related to life jacket use can lead to appropriate behavior by all patrons. Figure ChAPTER 4: INjURy PREvENTION


118 Table 4-1: Life Jacket Types Type Style Typical Use Features I Life jacket Boating on offshore waters or rough water where rescue may be delayed. May help to turn an unconscious person from a face-down position to a vertical, face-up position, or to a face-up, slightly tipped-back position. II Buoyant vest Recreational boating on inland waters where a rescue is likely to occur quickly. Good for calm or inland water. Suitable for supervised use in pools and waterparks. May help to turn an unconscious person from a face-down position to a vertical, face-up position, or to a face-up, slightly tipped-back position. Is less buoyant than a Type I life jacket. III Flotation vest Fishing or sailing on inland waters where a rescue is likely to occur quickly. Good for calm or inland water. Suitable for supervised use in pools and waterparks. May help to keep a responsive person in a vertical, faceup position, or in a face-up, slightly tipped-back position; wearer may have to tilt the head back to avoid going face-down. IV Throwable device, such as a buoyant cushion or ring buoy Boating on inland waters with heavy boat traffic where help always is present. May be thrown to a victim in an emergency; does not take the place of wearing a life jacket or vest. V Special use Intended for specific activities, such as whitewater rafting and special offshore work environments. Acceptable only when used according to directions on its label. ChAPTER 4: INjURy PREvENTION 108

119 Guarding Winding Rivers In a winding river, water flows in a long circular or twisting path through a facility. Depending on the winding river, patrons may be floating on tubes, walking or swimming. Some wear life jackets, and some do not. Water speeds may vary. Lifeguards may be positioned at the entrance and exit. They also may be positioned at several elevated or ground-level stations or at a combination of both with overlapping zones around the river (Figure 4-17). When guarding a winding river: Ensure that patrons enter and exit at designated locations. Watch for inexperienced swimmers falling off their inner tubes or inflatable rafts. It will be difficult for you to see all patrons or the bottom of the winding river if there are a lot of tubes and rafts in the water. Similarly, it can be difficult for someone who falls off a raft or tube to come up for air if the surface is blocked. In addition, someone who is hit by an inflatable raft might be knocked down, hit the bottom and get into trouble. Watch for patrons around features in winding rivers, such as fountains and waterfalls, which can catch patrons off-guard or cause patrons to gather. Watch carefully for, and correct, risky behavior. Figure 4-17 Lifeguards may be stationed in multiple stations around a winding river when performing patron surveillance. Guarding at Water Slides When you are working at an aquatic attraction, your assigned zone may be the dispatch area at the top of a water slide or the landing zone at the bottom of a slide. Guards working a dispatch area at the top of a slide have many unique tasks to perform, such as assessing riders, getting riders into sliding position, giving verbal instructions on safe riding procedures and launching riders at appropriate intervals. Guards assigned to work in the landing zone also have unique responsibilities, such as helping riders to exit a ride and ensuring the landing zone is safe before the next rider is dispatched. Carrying out these responsibilities properly is critical for lowering riders risk for injuries. On some water slides, patrons ride on an inner tube, raft, mat or sled. On others, riding equipment is not allowed. On some slides, only one person is allowed on an inner tube or a raft. On others, two or more people can go together on a special tube or raft. On an inner tube or raft, patrons ride in a sitting position. If no equipment is used, the proper riding position typically is 109 ChAPTER 4: INjURy PREvENTION
 moving, reducing wait times and helping to ease any tension caused by the lengthy wait. However, safety is paramount.")
. o Have the ability to sit upright and maintain the proper riding position throughout the ride.")
120 face-up and feet-first. Popular attractions often have lengthy wait times, and riders may have climbed many steps to access the ride (Figure 4-18). An efficient dispatching procedure helps to keep the queue (line) moving, reducing wait times and helping to ease any tension caused by the lengthy wait. However, safety is paramount. When assessing riders: Check that patrons meet all requirements for riding the attraction as established by the manufacturer and your facility, such as ensuring riders: o Meet a minimum height or a maximum weight by using height measurement stations, weight scales or both (Figure 4-19). o Have the ability to sit upright and maintain the proper riding position throughout the ride. o Have the ability to control the upper torso, head and neck. o Have the ability to hold on with, at minimum, one functioning hand. o Demonstrate conduct indicating awareness of, and willingness to follow, rider requirements. Make sure that riders are wearing appropriate attire in accordance with the facility s and the attraction s rules, including these examples: o Riders are required to have on swimwear. o Clothing with metal embellishments or fasteners (such as zippers, buckles, snaps, rivets or buttons) is not permitted. o Water shoes may or may not be permitted. o Riders may need to remove eyewear (such as glasses or sunglasses) before going on the ride. Observe the rider s demeanor. Riders who seem fearful or show any signs of hesitation or reluctance to ride should be prevented from riding. Figure 4-18 Popular attractions often have lengthy wait times, and riders may have climbed many steps to access the ride. Figure 4-19 Some aquatic attractions have minimum height and weight requirements. ChAPTER 4: INjURy PREvENTION 110
. Dispatch riders at the proper intervals.")

121 When dispatching riders at the top of a slide: Help riders into the ride vehicle or opening of the water slide, ensuring that they are properly positioned, providing verbal safety reminders and launching riders on their way (Figure 4-20). Dispatch riders at the proper intervals. Dispatch the next rider using information provided by the lifeguard station in the landing zone, an electronic dispatch system or both. Confirm that the water is at the appropriate level. If water is above or below the water level marker, rider dispatch should be stopped and not resumed until the water level is corrected. When the landing zone is clear of people and equipment, and other safety conditions are met, the lifeguard stationed in the landing zone will give the appropriate signal to allow dispatch of the next rider (Figure 4-21). Figure 4-20 Help riders into the ride vehicle or opening of the water slide. Figure 4-21 Watch for riders to exit the slide into the catch pool. An electronic dispatching system allows lifeguards to communicate at the top and bottom of a slide by pushing a button on a control panel or a remote. The electronic dispatching system may use lights, retractable barriers, motion sensors or a combination of these to let the dispatching lifeguard know that it is safe to send the next rider down the slide. Other equipment (such as a telephone, intercom system or megaphone) may also be available to allow the lifeguards stationed at the top and the bottom of the slide to communicate with each other and the facility switchboard. Riders travel at different rates of speed due to variations in body weight, body friction and position. Generally, the heavier the person, the faster the person will travel. The landing zone must be clear of the rider and the ride vehicle before the next ride is dispatched. 111 ChAPTER 4: INjURy PREvENTION

122 When stationed in the landing zone: As needed, help riders exit the ride vehicle, slide runout or catch pool (Figure 4-22). If a backup of ride vehicles occurs when assisting riders, immediately signal to the dispatching lifeguard to hold rider dispatch until the backup is cleared. Make sure the landing zone is completely clear of riders before signaling to the lifeguard at the top to dispatch the next rider. Ensure that riders are not permitted to wait in the landing zone for other riders. If required, remove ride vehicles from the catch pool and place them in a holding area or on a conveyor belt. Signal the dispatching lifeguard that it is safe to send the next rider after: o Clearing the landing zone of people and equipment. o Verifying that the water level is appropriate. Figure 4-22 As needed, help riders exit the ride vehicle, slide runout or catch pool. 4-5 WRAP-UP As a lifeguard, one of your goals includes helping to ensure that serious injuries never happen. The more you know about how injuries occur, the better you will be able to prevent them. Good communication with patrons is vital in preventing injuries. You should inform patrons about the potential for injury and educate them about the consequences of risky behavior. It also is important to develop strategies for dealing with injuryprevention challenges at your facility. BENCHMARKS FOR LIFEGUARDS Lifeguards should: Use all injury prevention strategies at the facility to help patrons stay safe. Enforce rules and communicate clearly and professionally with patrons. BENCHMARKS FOR LIFEGUARDING OPERATIONS Lifeguard managers should: Define policies and procedures for aquatic programs and groups. Maintain records, reports and safety checklists. ChAPTER 4: INjURy PREvENTION 112
123 Chapter 4 Review 1. List the three major strategies a lifeguard can use to help prevent injuries at an aquatic facility. 1) 2) 3) 2. List three things that can help determine if a life jacket is appropriate for use. 1) 2) 3) 3. Many facilities have unique challenges that demand different kinds of surveillance. For each situation listed below, list two guidelines you should keep in mind when providing surveillance for patrons. Guarding areas for young children: 1) 2) Play structures: 1) 2) 113 ChAPTER 4 REvIEW
124 Chapter 4 Review 4. Identify three strategies for ensuring safe group visits. 1) 2) 3) 5. Why is it important to educate your patrons about safety in, on and around the water? 6. You are in the lifeguard office taking a break from surveillance duty and a camp counselor requests a swim test for a new camper. You use the Red Cross water competency sequence to conduct a swim test. Describe these steps in order: 1) 2) 3) 4) 5) ChAPTER 4 REvIEW 114
125 Chapter 4 Review ADDITIONAL REVIEW QUESTIONS FOR WATERFRONT LIFEGUARDS: 1. At waterfront facilities using swim tests for group visits, areas for nonswimmers should: A Begin in shallow water and grade seamlessly into deep water appropriate for swimmers. B Be separated from the swimmer area with a continuous barrier, such as a pier or buoyed lifeline. C Extend slightly into deep water for practice. D Include designated deep water areas for diving. 115 ChAPTER 4 REvIEW
126 Chapter 4 Review ADDITIONAL REVIEW QUESTIONS FOR WATERPARK & AQUATIC ATTRACTION LI FEG UAR DS: 1. Many facilities have unique challenges that require different guarding strategies. For each situation listed below, list two guidelines you should keep in mind when guarding patrons at the following attractions. Aquatic attractions: 1) 2) Wave pools: 1) 2) 2. What additional challenges might you face when enforcing rules in a waterpark? 3. What are some responsibilities of a lifeguard assigned the landing zone of a slide? 4. What are some examples of rules or policies that might be found in a waterpark setting? ChAPTER 4 REvIEW 116
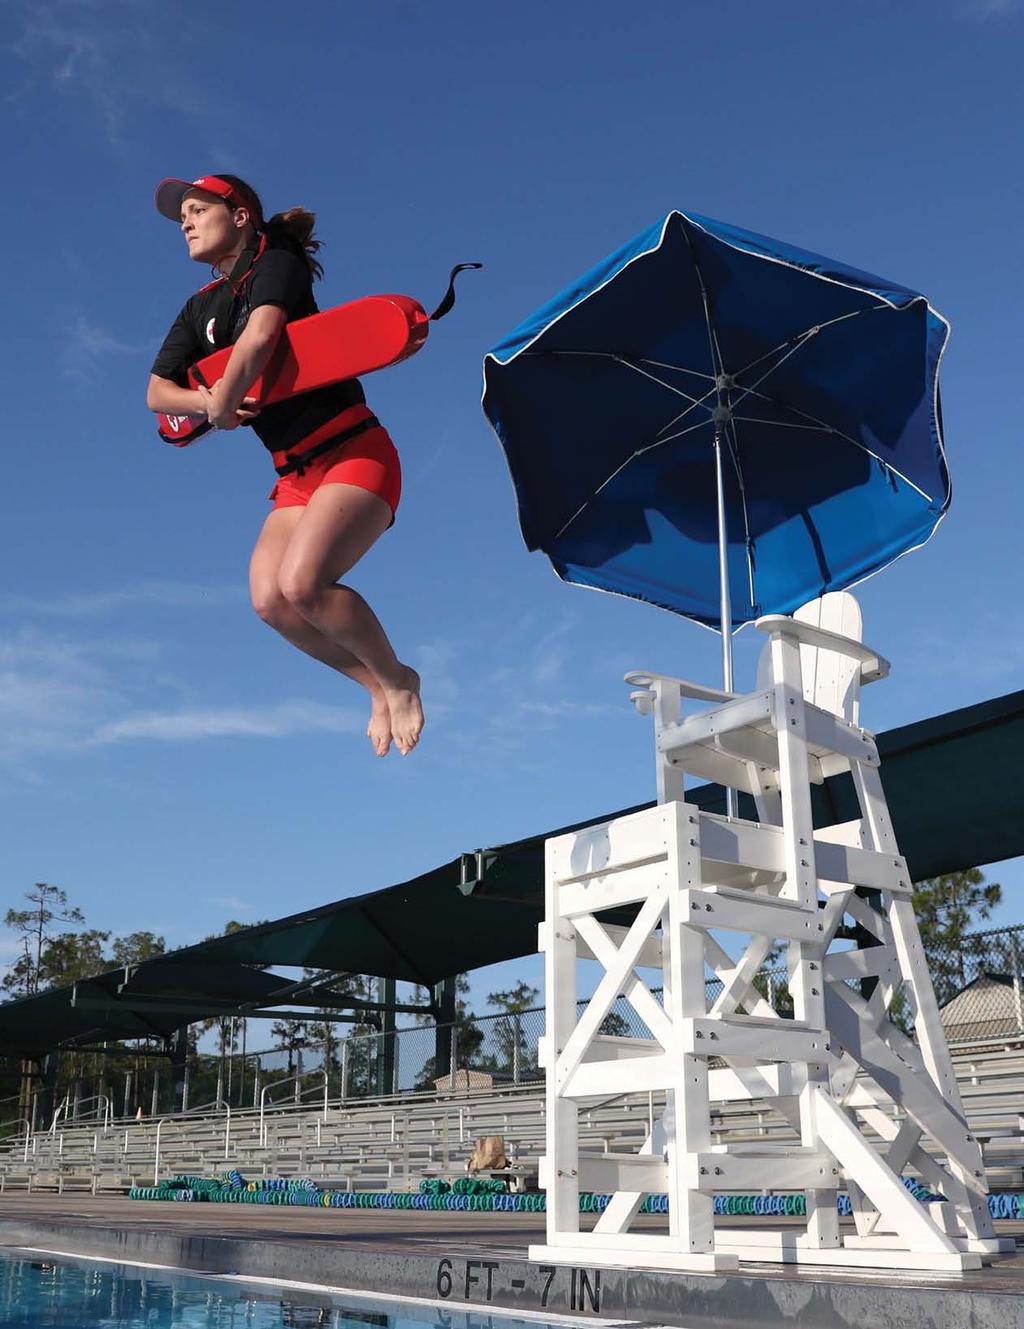
127
.")
128 5 Emergency Action Plans While on duty, you may need to respond to a variety of situations ranging from aquatic emergencies and facility problems to missing persons, sudden illness and severe weather. Your role will be spelled out in your facility s emergency action plans (EAPs). EAPs are detailed plans describing the safety team s responsibilities in an emergency and should be posted in an area frequented by lifeguards, such as the breakroom. During orientation, in-service training and simulation drills, you should learn and practice your assigned roles in EAPs. You should know the roles assigned to lifeguards based on where they are positioned or who is the primary rescuer, and also become familiar with the roles assigned to other members of the safety team all outlined in the EAP. To be effective, lifeguard and safety teams should practice the EAPs regularly, using a variety of simulated emergency situations. Remember that in some emergencies, only a few minutes can make the difference between life and death. To give a drowning victim the greatest chance for survival and a normal outcome, you must be able to efficiently implement the EAP and provide resuscitative care TYPES OF EMERGENCY ACTION PLANS IMPLEMENTING AN EMERGENCY ACTION PLAN EMERGENCIES OUTSIDE OF YOUR ZONE WRAP-UP


129 5-1TYPES OF EMERGENCY ACTION PLANS Every aquatic facility has its own specific set of EAPs based on the unique characteristics at each facility. Plans include factors such as the facility s layout, number of staff on duty at a time, location of backup lifeguards and other safety team members, equipment used and typical response times of the local emergency medical services (EMS) system. EAPs should be practiced regularly and included in your facility s policies and procedures manual. Aquatic facilities often have a general plan for water and land rescues, as well as additional plans designed to address specific situations. Examples of situation-based EAPs include: Water emergency Drowning victim active (Figure 5-1) Water emergency Drowning victim passive (Figure 5-2) Water emergency Spinal injury victim Water emergency Missing person Land emergency Injury or illness Figure 5-1 Water emergency drowning victim, active Other situations requiring an EAP include: Evacuations Sheltering in place Severe weather Chemical spills or leaks Power failures Violence Thefts in progress Along with detailing the role that you and your lifeguard team will play in an emergency, EAPs also identify the very important roles played by other members of the safety team. Figure 5-2 Water emergency drowning victim, passive The following two charts (page 120) illustrate how an EAP should be implemented. The first example depicts a situation where no additional resuscitative care is needed after the victim has been removed from the water; the second illustrates a situation where additional resuscitative care is required. Your facility s EAPs will include decision points based on conditions found at the scene along with assigned roles and detailed instructions about how to proceed, which are based on specific circumstances and needs of the facility, such as staffing positions and levels and emergency response times. 119 ChAPTER 5: EMERGENCy ACTION PLANS
130 Sample Emergency Action Plan Flow: Water Emergency Example 1: No Additional Resuscitative Care Is Needed Example 2: Additional Resuscitative Care Is Needed Rescuer Action Other Lifeguard(s) Assist With... Additional Staff Assist With... Rescuer Action Other Lifeguard(s) Assist With... Additional Staff Assist With... Signal Rescue Back-up surveillance coverage Clearing the zone or area if no additional certified lifeguards available for patron surveillance Signal Rescue Back-up surveillance coverage Clearing the zone or area if no additional certified lifeguards available for patron surveillance Victim OK No Additional Care Needed Victim Needs Emergency Care Report, advise, release Equipment check Corrective action Return to duty Provide emergency care Report, advise, release Equipment check Corrective action The water or land rescue and providing emergency care Back-up zone coverage or clearing the area Summoning EMS personnel Bringing additional equipment, if necessary Clearing the area or facility Controlling the crowd Meeting EMS personnel Return to duty If the victim was treated for serious injuries or illness, follow the facility EAP protocols for: Closing the facility. Contacting family members. Contacting the chain of command, such as supervisors or public relations personnel. Handling patrons and answering questions. Discussing the incident details. Operational debriefings. ChAPTER 5: EMERGENCy ACTION PLANS 120

131 Role of the Safety Team As discussed in Chapter 1, the lifeguard team is part of a larger safety team a network of people who prevent, prepare for, respond to and assist in an emergency at an aquatic facility. Safety team members working on-site may include aquatics instructors; admissions personnel; retail, concession and administrative staff; maintenance, custodial and security personnel; and supervisors and administrators (Figure 5-3). At parks, waterfronts and youth camps, other team members may include park rangers, game wardens, marine safety officers and EMS personnel stationed at on-site advanced first aid stations. Members of the safety team should be trained and certified in first aid and CPR/AED at the same level of the lifeguard team. This will help ensure that when called upon, they are able to provide the necessary support to the lifeguards when responding to an emergency. Additional members of the safety team may work off-site and often include upper-level management personnel. Members from a variety of departments within an organization, such as communications, public relations, risk management, legal counsel and executive leadership, may play a role. These team members often become involved as soon as possible after a serious injury or death. Even if only one lifeguard is performing patron surveillance, other safety team members on-site should be in a position to see and/or hear your emergency signal(s) and immediately respond to help in an emergency. Everyone needs to know their roles in an EAP. In a small facility, team members may be assigned several different roles, whereas in a large facility each person Figure 5-3 Safety teams consist of lifeguards; aquatics instructors; admissions personnel; retail, concession and administrative staff; maintenance, custodial and security personnel; and supervisors and administrators. 121 ChAPTER 5: EMERGENCy ACTION PLANS

132 may have only one role. Depending on the emergency, the number of staff available and procedures laid out in the EAP, other members of the safety team may support lifeguards by: Assisting with emergency rescues, if trained to do so. Summoning EMS personnel by calling or the designated emergency number. Bringing rescue equipment, such as a backboard or an automated external defibrillator (AED), to the scene. Clearing the swimming area. Alerting additional safety team members. Controlling bystanders. Securing and protecting the area or evacuating the facility. Notifying the chain of command, beginning with the lifeguard supervisor or facility manager, who then informs the appropriate individuals. Meeting and directing EMS responders to the scene. Collecting information for reports. Dealing with questions from patrons or the media. All safety team members working on-site must know where equipment is stored, including the first aid kit, AED, backboard, resuscitation equipment and disposable gloves. Certification in CPR/AED and first aid is beneficial and often is required for team members who may need to assist the lifeguard team. Safety team members also should practice with the lifeguard team by participating in emergency simulation drills (Figure 5-4). In some situations, it may be necessary to solicit the assistance of bystanders. Although bystanders may not have the training required to handle emergencies, with direct communication and guidance they can help by controlling a crowd, relaying a message to other team members, getting equipment or summoning EMS personnel. Figure 5-4 Safety team members participating in emergency simulation drills. ChAPTER 5: EMERGENCy ACTION PLANS 122
133 CHOOSING WHERE TO WORK It is very important that you choose your place of employment wisely. Before you accept a lifeguarding job, you should evaluate the potential working conditions. Are you going to be set up for success? Will you have the tools you need to perform your job? The best way to answer these questions is to interview potential employers. Just as they will ask you questions when they interview you, you should ask them questions about their facilities. These questions should include: How many lifeguards will be on duty at one time? What is the length of lifeguard rotations? How many lifeguard stands are there? Are there scheduled meal breaks? Does the facility provide rescue equipment, such as rescue tubes, first aid kits and backboards? Does the facility provide uniforms, or are you required to purchase your own? Does the facility provide whistles, or are you required to provide your own? Has the facility established an EAP? Does the facility conduct new employee orientations? Is there a staff manual outlining policies and procedures and if so, is it available to you? MISSING PERSON PROCEDURES Every aquatic facility should include missing-person procedures in its EAP. All staff should be trained in these procedures during orientation. Time is critical when a person is missing. For example, the missing person could be someone struggling in the water or a child who wandered off and cannot be found by their parent. Every missing-person report is serious. During all missing-person search procedures, one person should be in charge to avoid confusion and wasting time. This may be the lifeguard supervisor or facility manager. Lifeguards will begin the search, but if the missing person is not found immediately, they may ask other facility staff for help and call EMS personnel for backup. You and other staff should continue the search until EMS personnel arrive on the scene to assist with the search. You can cancel the EMS response if you find the missing person and they do not need medical assistance. The facility s EAP may include some or all of the following steps for a missing-person search: The lifeguard who takes the initial report should quickly alert other lifeguards about the situation. They should then find out the following from the patron who reported the person missing: o Where the person was last seen 123 ChAPTER 5: EMERGENCy ACTION PLANS
134 MISSING PERSON PROCEDURES, CONTINUED o How long the person has been missing o The person s age o The person s swimming ability The lifeguard should keep the reporting party with them until a positive identification of the missing person is made. A public address request for the missing person to report to a specific area may be made. All other lifeguards should clear the swimming areas and assist in the search, starting at the place where the missing person was last seen and expanding from there. If it is determined that the missing person is not in the water, lifeguards and other staff should meet in a designated location to begin an organized land search. The search should include lawns, bathrooms, locker rooms, picnic areas and other play structures within the facility. Swimming areas should remain closed until it is determined that the missing person is not in the aquatic facility. A designated lifeguard or staff member should make an announcement over the public address system describing the missing person, if appropriate. (Follow the facility s policy as to whether or not you should describe a missing child.) Use a megaphone, if necessary. Direct everyone to please stay calm and ask for volunteers, if they are needed. Ask the missing person to report to the main lifeguard area. In many cases, the person will not be aware that someone has reported them missing. If the missing person is not found in the aquatic facility, facility staff or EMS personnel should call the local police department, which will take over and expand the search. EAPs for waterfront facilities also may include the following steps: One lifeguard should act as the lookout above the water level on a pier, raft or watercraft with rescue equipment. Lifeguards should look under piers, rafts, floating play structures and in other dangerous locations. Adult volunteers can help search shallow areas, but only lifeguards should search beyond chest-deep water. See Chapter 6 for information on sightings, cross bearings and line searches. EAPs for camps also may include the following steps: Staff should quickly check the missing person s cabin or tent and other areas. All campers should be moved to a central location where a head count should be taken. Lifeguards should continue to search the entire waterfront until every person has been accounted for or until proper authorities take over. EAPs for parks also may include the followings steps: Staff should search playgrounds, campsites and wooded areas. Park rangers, maintenance staff and volunteers can search land areas while lifeguards search the water. ChAPTER 5: EMERGENCy ACTION PLANS 124
135 5-2 IMPLEMENTING AN EMERGENCY ACTION PLAN The following section describes a typical EAP designed for a general water or land emergency. In an actual emergency, the safety team member responsible for each task would be designated in the facility s specific EAP. At the Onset of an Emergency Recognize the Emergency The first step in any EAP is to recognize that an emergency is taking place in the water or on land and to determine that someone needs immediate help. Activate the EAP Next, before leaving your station, activate the EAP by giving the pre-arranged signal, such as a long whistle blast, to alert other lifeguards and staff. This step is critical. If your signal is not recognized, other lifeguards and safety team members will not realize that there is an emergency. Without their backup, your safety and the safety of patrons may be compromised. The signals used to activate an EAP must be simple and clear. They will be pre-determined based on the nature of the facility and the number of staff. Signals commonly use one or more of the following: Whistles Your hands (for hand signals) Public address systems Telephones or call boxes (Figure 5-5) Two-way radios Flags Horns Megaphones Electronic devices (buttons or switches) that must be triggered At a slide, the signal must alert the lifeguard stationed at the top to stop dispatching more riders. At a wave pool, pushing the emergency stop (E-stop) button is required to stop the waves before attempting a rescue (Figure 5-6). 125 ChAPTER 5: EMERGENCy ACTION PLANS


136 Figure 5-5 A manager calls while executing her facility's EAP. Figure 5-6 Pushing the emergency stop (E-stop) button stops waves at a wave pool. Perform a Water Rescue or Provide Emergency Care Once you have given the signal, choose the appropriate rescue for the situation and provide care to the victim as necessary. Some rescues may require additional lifeguards to enter the water and assist with the water rescue. During the Emergency Ensure Backup Zone Coverage The lifeguard rotation should include backup zone coverage plans that ensure backup coverage is immediately available upon activating the EAP. For water rescues, the EAP may direct all lifeguards to stand in their chairs and adjust their zone coverage to accommodate for that of the lifeguard making the rescue. Alternatively, the plan may require lifeguards who are not on patron surveillance duty to take the rescuing lifeguard s place at the vacant lifeguard station. Clear the Swimming Area Sometimes an incident is serious enough to require clearing the swimming area. The lifeguard who is providing back-up coverage or another member of the safety team identified in the EAP makes this judgment and signals to patrons to leave the water. With the area cleared, other staff members are able to either assist with the rescue or provide additional care. ChAPTER 5: EMERGENCy ACTION PLANS 126

137 Summon EMS Personnel If the incident involves a life-threatening emergency, someone must summon EMS personnel by immediately calling or the designated emergency number. A safety team member usually makes this call, but it might be made by a patron or other bystander; so, emergency numbers and other instructions, such as the facility s address, should be clearly displayed in the facility and at each phone (Table 5-1). In some facilities, a number, such as an 8 or 9, must be dialed first to place an outside call. This information also should be included in any instructions. Some facilities and remote youth camps have onsite medical staff on their safety teams, such as emergency medical technicians (EMTs) or nurses. If this is the case, the facility s EAP may direct you to contact one of these members before or instead of calling When EMS personnel arrive, a member of the safety team meets them and directs them to the scene (Figure 5-7). Figure 5-7 When EMS personnel arrive, a member of the safety team meets them and directs them to the scene. Table 5-1: Sample Emergency Call Procedure: Ambulance, Fire, Police Call or the designated emergency number. Identify yourself. Explain the situation briefly (e.g., unconscious child pulled from the water). Explain the purpose of the call (e.g., need an ambulance, need police). Give the location. Facility Name Physical Address Phone # Answer questions addressed to you. Do not hang up until the EMS call-taker tells you to do so. 127 ChAPTER 5: EMERGENCy ACTION PLANS
138 TRAINING WITH EMERGENCY PERSONNEL As a professional lifeguard, you may have the opportunity to train with local EMS personnel, including EMTs, paramedics, firefighters and law enforcement officers. These training sessions can be beneficial to both lifeguards and EMS personnel. In addition to fostering good relationships, training together gives lifeguards a better understanding of their role on the EMS team and familiarizes EMS personnel with the aquatic facility s emergency procedures. Your facility might offer a variety of joint in-service trainings, including but not limited to: Medical emergency action plans and procedures Emergency action plans for severe weather and chemical and natural disasters Threats to public safety and facility security Types of equipment to be used during an emergency Transitions from staff to EMS personnel for various emergencies Missing-person protocols for land and water Public-indecency awareness Demonstration of CPR/AED and lifeguarding skills Practice and coordination of medical EAPs Practice and coordination of missing-person procedures Practice and coordination of evacuation procedures for fire or other emergencies Proper radio communications Procedures for recognizing and handling suspicious behavior One of the benefits of these trainings is that you and your fellow lifeguards get a chance to see EMS responders in action and to practice interacting with them before an actual emergency occurs. For example, if your training session involves practicing how to transfer care to EMS personnel, you might discover that you may be expected to continue giving CPR, even after EMS personnel arrive. Likewise, EMS personnel may benefit from these training sessions by getting to see lifeguards carry out water rescues and provide emergency care. This gives EMS personnel the chance to become familiar with your skills and your facility s equipment. Both EMS personnel and lifeguards benefit from trainings that cover EAPs. By practicing EAPs in advance, both have an opportunity to address potential problems. For example, while practicing an evacuation plan, you may discover that the EMS stretcher does not fit in your facility s elevator. ChAPTER 5: EMERGENCy ACTION PLANS 128
139 Control Bystanders You may need to control bystanders to prevent them from interfering with a rescue or emergency care. This may involve: Using a firm but calm voice to ask bystanders to move back so that care can be provided. Do not yell at patrons. Roping off areas or positioning chairs around the emergency site. Using the public address system to communicate with patrons. Repeating commands and requests as often as is necessary. Ensuring that EMS personnel have a clear path. Keeping bystanders and any children away from the rescue scene. Any safety team member should be empowered to solicit aid from bystanders as appropriate, such as to summon EMS personnel or to help with crowd control. Always follow your facility s policies and procedures when seeking assistance from patrons. However, emergency plans should not rely on bystander aid in lieu of adequate staffing. Bystanders are not primary response personnel. Evacuate the Facility In certain circumstances, such as a fire or violent situation, you may need to evacuate the facility. To evacuate everyone safely: Give the pre-determined signal and instruct patrons to clear the pool or waterfront area. Follow the facility s evacuation procedures to clear all areas of the facility, including locker rooms, lobby areas and staff rooms. Direct patrons to a position of safety. Ensure that patrons do not re-enter the facility until the facility is declared safe for re-entry. In emergency situations, EMS, fire or law enforcement personnel will inform facility staff when it is safe to re-enter. 129 ChAPTER 5: EMERGENCy ACTION PLANS
140 After the Emergency Report, Advise, Release After the emergency has been resolved, you and other members of the safety team still have three important tasks to complete: report, advise and release. Report the Incident Staff members involved in the incident need to complete the appropriate incident report form as quickly as possible after providing care. Collect the required information about the victim, such as name, address and contact information, before you release the victim. After releasing the victim, you can continue filling out the information regarding the rescue. The person who made the rescue should fill out the form, recording only factual information of what was heard and seen and any action taken. Do not record personal opinions or information given to you by someone else. Depending on the circumstances, other lifeguards involved in the incident may sign your form as witnesses or fill out their own separate forms. Sometimes you will be responsible for requesting witness statements from bystanders, although this usually is done by a lifeguard supervisor or manager. Witnesses should write their names, addresses, phone numbers and statements on separate, dated forms, describing the incident in their own words. Do not tell witnesses what to put in their statements and separate witnesses when they are completing their statements; if they are allowed to be together, they may talk to each other, which may distort their perception of the emergency. Advise the Victim Depending on the nature of the incident, your next step may be to advise the victim. For example, you might give the victim safety instructions to prevent a similar incident from recurring or recommend that the person follow up with a healthcare provider. In certain cases, you might advise the person not to return to the water for a period of time. In a serious or life-threatening emergency, it may be more appropriate to have EMS or medical personnel provide the advice. Always be certain to document your actions and any advice given to the victim on the incident report. Release the Victim A victim may be released only when the rescue and emergency care provided by you and your safety team is complete. In some cases, you will release the person under their own care or to a parent, guardian, camp counselor, group leader, instructor or other staff member. In other situations, you will release the victim to the care of advanced emergency care providers, such as EMS personnel. Always be sure to document that the victim was released. Remember that documentation is important for legal reasons as well as for tracking when, where and how often incidents occur. Reports provide valuable information for facilities to use when they assess safety protocols, such as staffing levels or placement of lifeguard stations. ChAPTER 5: EMERGENCy ACTION PLANS 130
141 SAMPLE INCIDENT REPORT FORM Date: Time: AM PM Day: Mon Tue Wed Thur Fri Sat Sun FACILITY DATA: Facility: Phone Number: Address: City: State: ZIP: PATRON DATA: (complete a separate form for incidents involving more than one person) Name: Phone Number: (H): (Cell): Address: City: State: ZIP: Family Contact: Name: Phone: Date of birth: Age: Gender: Male Female INCIDENT DATA: Location of Incident: (describe the location below and mark an X on the facility diagram) Location: Water Depth, if a water rescue: Water Conditions: Facility Condition: Description of Incident: (Describe what happened and include any contributing factors, such as unaware of depth, medical reasons, etc.): Did an injury occur? Yes No If yes, describe the type of injury: CARE PROVIDED: Did facility staff provide care? Yes No Describe care provided in detail: 131 ChAPTER 5: EMERGENCy ACTION PLANS
142 PATRON ADVISED: Describe any instructions provided to the patron (cautioned to obey the rules, issued a life jacket, etc.): Patron returned to activity? Yes No PATRON RELEASED TO: Self Parent/Guardian EMS Transported off-site Medical Facility: STAFF INFORMATION: Name and position title of staff that provided care: Name(s) of assisting lifeguard(s) or staff involved in incident: REPORT PREPARED BY: Name: Position: Signature: Date: Witnesses (attach witness descriptions of incident) Name: Phone: Address: City: State: ZIP: Witnesses (attach witness descriptions of incident) Name: Phone: Address: City: State: ZIP: REFUSAL OF CARE: Did victim refuse medical attention by staff? Yes No If yes, victim (parent or guardian for a minor) signature: ATTACHMENTS: Note any attachments such as EMS personnel report or follow-up conversations with the victim and/or parents or guardian. ChAPTER 5: EMERGENCy ACTION PLANS 132
143 Notify the Chain of Command The facility s lifeguard supervisor or facility manager needs to be notified when emergencies occur. With a serious injury or death, the lifeguard supervisor or facility manager notifies the appropriate administrator(s) as soon as possible. The administrator works with responding agencies to determine who should contact the victim s family. Your chain of command also may offer advice and guidance on what needs to be done before reopening the facility. Check the Equipment and the Facility All equipment and supplies used in the rescue must be inspected. You or other safety team members must report and/or replace all damaged or missing items before returning to duty. Properly clean and disinfect any equipment or areas of the facility exposed to blood or other potentially infectious materials. Use biohazard bags to dispose of contaminated materials, such as used gloves and bandages. Place all soiled clothing in marked plastic bags for disposal or cleaning. If the facility was cleared or closed during the incident, put all required equipment back in place before reopening the facility. Remove any equipment involved in the emergency, such as a tube, sled or mat, from rotation until it is cleared by the lifeguard supervisor or facility manager. If an injured victim was put on a backboard, EMS personnel usually will use that same backboard to transport the victim to a hospital. If this occurs, ask EMS personnel to temporarily exchange backboards with the facility; otherwise, immediately replace the backboard or close the facility until a backboard is available on site. Report any missing or damaged items to the lifeguard supervisor or facility manager. Take Corrective Action Before reopening the facility, you or another member of the safety team should correct any problems that contributed to the incident, such as tightening a loose step on a ladder. If a problem cannot be resolved, you may need to restrict access to the unsafe area. Return to Duty After completing your responsibilities for the rescue, return to surveillance duty at the appropriate lifeguard station. Follow the procedures for lifeguard rotations. Inform your supervisor if you need time to regroup or are too shaken by the incident to effectively focus on surveillance. Reopen the Facility During or after a significant incident, the lifeguard supervisor, facility manager or another individual as identified in the EAP decides whether to close the facility temporarily, and when to reopen. The decision may depend on safety issues, such as whether enough lifeguards are ready to return to surveillance duty, all of the required equipment is in place or spills involving blood or other potentially infectious materials have been cleaned up. Deal with Questions Television or newspaper reporters, insurance company representatives and attorneys may ask questions about the emergency, as may people who are just curious. Do not give out any information about the incident or injured person. Only management or a designated spokesperson should talk to the media or others about an incident; your doing so may lead to legal action. The procedure for dealing with the media and others should be laid out in the policies and procedures manual and the EAP. If people ask questions, let them know that you are not the appropriate person to speak to regarding the incident and refer them to the manager or spokesperson. Do not discuss the emergency with anyone who is not on the facility staff, except for safety team members who are there to assist staff. If the area where the incident happened is visible from public property, you cannot prevent people from taking pictures or recording from a public area. However, facility policy may state that permission from management is necessary before anyone is allowed to take photos or record inside the facility. 133 ChAPTER 5: EMERGENCy ACTION PLANS
144 Attend the Operational Debriefing The entire safety team may attend a meeting to talk about what happened before, during and after the emergency. Avoid assigning blame or criticizing anyone s actions or reactions. The goals of the debriefing are to: Examine what happened. Assess the effectiveness of the EAP. Consider new ways to prevent similar incidents. Be alert for stress reactions after a critical incident. If the incident involved a serious injury or death and you need assistance in coping with the experience, a licensed mental health professional may help. CRITICAL INCIDENT STRESS In an emergency, a person may react both physically and mentally. Physical reactions include tense muscles and increased heart rate and breathing. Mental and emotional stress may manifest as sleeplessness, anxiety, depression, exhaustion, restlessness, nausea or nightmares. Some effects may occur immediately, but others may appear days, weeks or even months after the incident. People react to stress in different ways, even with the same incident. Someone may not even recognize that they are suffering from stress or know its cause. A critical incident may cause a strong emotional reaction and interfere with a lifeguard s ability to cope and function during and after the incident. For lifeguards, critical incidents include: A patron s death, especially the death of a child or a death following a prolonged rescue attempt An event that endangers the rescuer s life or threatens someone important to the rescuer The death of a co-worker on the job Any powerful emotional event, especially one that receives media coverage These catastrophic events are especially stressful if the lifeguard believes that they did something incorrectly or failed to do something even after doing exactly what they were trained to do. This stress is called critical incident stress. It is a normal reaction. Someone experiencing this usually needs help to recognize, understand and cope with the stress. If this type of stress is not identified and managed, it can disrupt a lifeguard s personal life and their effectiveness on the job. Facility management should help by contacting a licensed mental health professional. ChAPTER 5: EMERGENCy ACTION PLANS 134
145 5-3 EMERGENCIES OUTSIDE OF YOUR ZONE Emergencies sometimes occur away from the water in places, such as: Locker rooms Concession areas Entrance and lobby areas Mechanical rooms Playgrounds and play areas Parking lots You must be prepared to respond to these emergencies even though they are outside of the immediate aquatic environment and not part of your zone of responsibility. If you witness or are told about an emergency when you are not on surveillance duty, you should activate the pre-determined EAP signal. If the signal cannot be heard from your location, and you cannot or should not move the victim, you should send a patron to alert another staff member to initiate the facility s EAP. In the meantime, size up the scene, assess the victim s condition and give appropriate care. You also could be summoned by other safety team members to respond to or assist with emergencies in other parts of your facility, such as a gymnasium, childcare area, cardio or weight room, sauna or park area. Whereas some of these areas might be supervised by facility staff trained in basic first aid, lifeguards might be called upon to respond in an emergency because they are trained at the professional level. Follow your facility EAPs for leaving your zone of responsibility to assist in these types of emergency situations. THE NEED FOR RESCUE DATA Training agencies, such as the American Red Cross, can gain a great deal of useful information from reviewing aquatic facilities rescue reports. Knowing the details about the emergencies to which lifeguards respond and the rescue methods that they use while on the job can help these agencies to determine what lifeguards and management need to know to be prepared and effective in an emergency. For example, the Department of Kinesiology at the University of North Carolina at Charlotte has developed a rescue reporting system to gather information for this purpose. The ultimate goal is to help the Red Cross and others learn more about what actually takes place when lifeguards are called upon to respond to an emergency. This includes details, such as: Environmental conditions at the time of the rescue. How lifeguards identified the emergency. The type of equipment used. The information is gathered in a multiple-choice format and is completely anonymous. All emergencies, from a complex rescue to a simple reaching assist, can be reported. To access the survey, go to: kinesiology.uncc.edu/student-resources/water-rescue-usa 135 ChAPTER 5: EMERGENCy ACTION PLANS
146 5-4 WRAP - UP EAPs are blueprints for handling emergencies. You need to know your EAP responsibilities and the roles given to all members of the safety team. Working as a team and practicing EAPs helps everyone know how to respond in an emergency and how to manage the stress it may cause. BENCHMARKS FOR LIFEGUARDS Lifeguards should: Handle rescues with a sense of urgency. BENCHMARKS FOR LIFEGUARDING OPERATIONS Lifeguard managers should ensure that: EAPs are facility-specific, address multiple staffing levels and include back-up coverage. EAPs are reviewed and practiced at pre-season and regular in-service training. Water rescues and incidents are mapped and analyzed. Timely and complete documentation of incident and injuries are maintained. ChAPTER 5: EMERGENCy ACTION PLANS 136
147 Chapter 5 Review 1. Why should an EAP be facility specific? 2. Provide three examples of situation-based EAPs. 1) 2) 3) 3. Place the following EAP actions in order for a situation where the victim is responsive and does not require additional care: Rescue Equipment check/corrective action Signal Return to duty Report, advise, release 137 ChAPTER 5 REvIEW
148 Chapter 5 Review 4. Describe the actions of the additional safety team members listed below during a rescue where the victim is unresponsive and requires additional emergency care. Other lifeguards: 1) 2) Additional safety team members: (Front desk staff, maintenance staff or others as designated by the EAP) 1) 2) 3) 4) 5) 5. When completing a report, you should: A Include all details about the incident, including your opinion about how the incident happened. B Allow witnesses to discuss their thoughts about the incident before compiling their statement onto one report. C Collect all factual information about what was seen, heard and the actions taken. D Not allow the victim to leave until you have completed the report and your supervisor has signed it. ChAPTER 5 REvIEW 138
149 Chapter 5 Review 6. Who should deal with questions from the media after an incident? Select all that apply. A The lifeguard who performed the rescue D The company spokesperson B The front desk attendant who called E EMS personnel C The facility manager Why? 7. Why might a supervisor chose NOT to re-open a facility that was closed during an emergency? Provide one example. 8. Members of the safety team, including non-lifeguard personnel, should be: A Trained and certified in first aid and CPR/AED at the same level of the lifeguard team (for professionals). B Trained in first aid and CPR for non-professionals. C Trained in CPR if they interested in receiving training. D Trained to follow the other EAP duties that do not involve providing care. 139 ChAPTER 5 REvIEW
150 Chapter 5 Review 9. After an emergency has been resolved, there are still three important tasks to complete. Explain each task. Report: Advise: Release: 10. You must be prepared to respond to emergencies that are outside of the immediate aquatic environment and not part of your zone of responsibility. Describe three areas where these emergencies could occur. 1) 2) 3) ChAPTER 5 REvIEW 140
151 Chapter 5 Review ADDITIONAL REVIEW QUESTIONS FOR WATERFRONT LIFEGUARDS: 1. An EAP for a missing person includes quickly checking if the person is in the water. Checking for a submerged victim is most difficult for which area? A Spa with the bottom obscured by water jets C Underneath play structures in a swimming pool B Lap swimming area in a pool with lane lines D Underneath play structures at a waterfront with murky water 141 ChAPTER 5 REvIEW
152 Chapter 5 Review ADDITIONAL REVIEW QUESTIONS FOR WATERPARK & AQUATIC ATTRACTION LI FEG UAR DS: 1. What additional steps might be included in the EAP for a wave pool, a winding river and the landing zone of a speed slide? Wave pool: Winding river: Speed slide landing zone: 2. What additional actions must be taken after signaling an emergency in the following attractions? Wave pool: Slides: 3. What signals would you most likely use to activate the EAP in a waterpark setting? ChAPTER 5 REvIEW 142
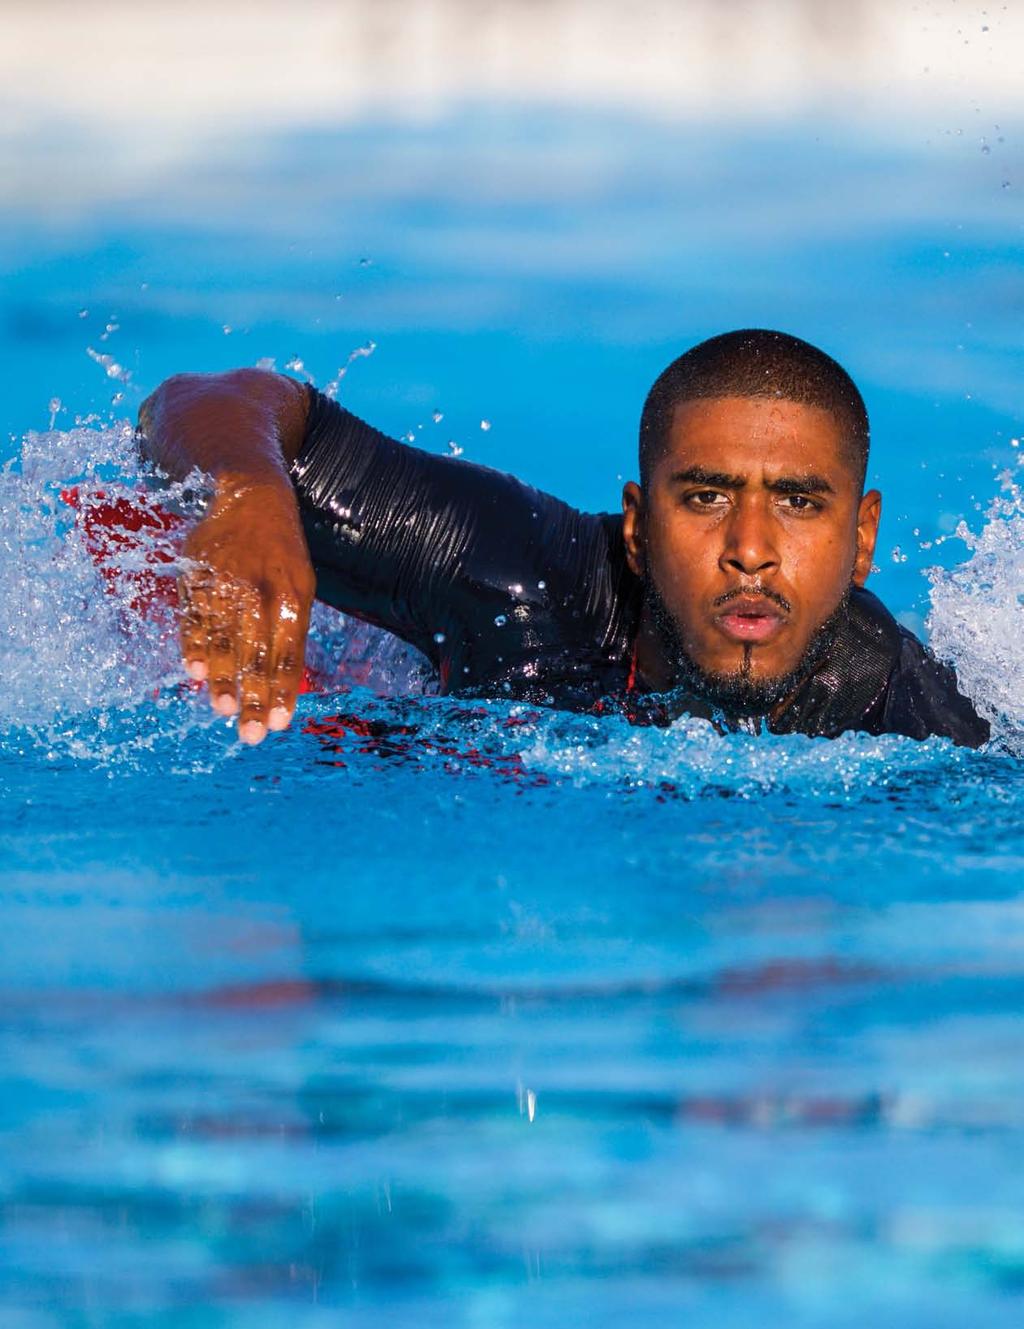
153

154 6 Water Rescue Skills You must always be prepared to enter the water to make rescues when on duty. This means that you have the proper equipment immediately available and are properly stationed to see your entire zone of responsibility. You should always be scanning your zone, searching for signs indicating that someone may need help. If someone does need help, you must assess the victim s condition, perform an appropriate rescue, move the victim to safety and provide additional care as needed. The skills discussed in this chapter will give you the tools needed to safely perform a rescue in most aquatic environments, although the steps may need to be modified, depending on the actual situation in the water. When performing a rescue, you should keep in mind the skill steps that you have learned, but focus on the ultimate objective to safely rescue the victim and provide appropriate care GENERAL PROCEDURES FOR A WATER EMERGENCY TRAIN TO THE STANDARD, MEET THE OBJECTIVE RESCUE SKILLS ADDITIONAL RESCUE SKILLS FOR WATERFRONTS SPECIAL SITUATIONS AT WATERFRONTS WHEN THINGS DO NOT GO AS PRACTICED WRAP-UP

155 6-1GENERAL PROCEDURES FOR A WATER EMERGENCY In all situations involving a water rescue, follow these general procedures: 1. Activate the emergency action plan (EAP). 2. Enter the water, if necessary. 3. Perform an appropriate rescue. 4. Move the victim to a safe exit point. 5. Remove the victim from the water. 6. Provide emergency care as needed. 7. Report, advise and release. Activate the Emergency Action Plan As soon as you recognize an emergency situation, always immediately activate the EAP (Figure 6-1). Figure 6-1 Immediately activate your facility s EAP when an emergency situation occurs. Enter the Water, if Necessary In some cases, you will be able to use a reaching assist to pull a victim to safety from a deck or pier, such as a distressed swimmer at the surface. However, in most situations you will need to enter the water to perform a successful rescue. You must quickly evaluate and consider many factors when choosing how to safely enter the water. Each time you rotate to a new station, keep in mind the following factors as you consider how to enter the water to perform a rescue: water depth, location and condition of the victim, location of other swimmers, design of the lifeguard station, your location, facility setup and type of equipment used (rescue board, rescue buoy or rescue tube). 145 ChAPTER 6: WATER RESCUE SKILLS
156 Perform an Appropriate Rescue The type of water rescue you use will depend on the victim s condition. This includes whether the victim is active or passive, at or near the surface, submerged or possibly has sustained an injury to the head, neck or spine. You should ensure that the victim s airway is above the surface of the water as you move them to a safe exit point. Begin your rescue by approaching the victim. Always keep the victim or the location where you last spotted the victim within your line of sight. When swimming, always travel with the rescue tube strapped on during your approach to the victim. An exception may be a waterfront setting where additional specialty rescue equipment may be used, such as a rescue board or watercraft. You may approach the victim by: Walking with a rescue tube to the victim in shallow water. Swimming with a rescue tube to the victim. Traveling on the deck or beach for a distance, then swimming with a rescue tube to the victim. Paddling on a rescue board. Navigating in a watercraft. As you near a victim, you need to maintain control and may need to reposition your rescue tube, rescue board or watercraft before making contact. For all assists and rescues when the victim is in distress or struggling, communicate directly with the person. Let the victim know that you are there to help, and give any necessary instructions, using short phrases. For example, say, I m here to help. Grab the tube. Be aware that the victim s condition and location can change between the time you notice the problem and when you complete your approach. For example, a victim who was struggling at the surface may begin to submerge as you approach, requiring you to use a different type of rescue than originally planned. Move the Victim to a Safe Exit Point After performing a water rescue, move the victim to a safe exit point. For some, this can be as simple as helping them to walk out of the water, such as in a simple assist. For others, it requires supporting the victim on the rescue tube while keeping their mouth and nose out of the water as you move to the safe exit point, such as in an active victim rear rescue. Do not automatically return to the point where you entered; you may be able to reach another point Remove the Victim from the Water Safely remove the victim from the water. For responsive victims, this may involve simply assisting them out of the water. For victims who are unresponsive or suspected of having a head, neck or spinal injury, you will need to extricate using a backboard or a rescue board. faster. However, realize that the closest place on land may not be feasible for extricating the victim. There may be limited deck space or lane ropes, equipment or other features that block the way. Move quickly to the nearest point with appropriate access. Be sure that the chosen exit site has enough room to safely extricate the victim from the water. You also will need enough space to provide any additional care needed, such as giving ventilations or CPR. ChAPTER 6: WATER RESCUE SKILLS 146
157 Provide Emergency Care as Needed The victim may need additional emergency care after the water rescue. This can range from helping the person regain composure to giving ventilations or performing CPR. Report, Advise and Release After an emergency, you and other members of the safety team must complete incident report forms, advise the victim on the next steps and release the victim to the appropriate parties. Every water rescue should have a written report. Documentation is important for legal reasons as well as for tracking when, where and how often incidents occur. After the victim is out of the water and care has been given, advise the person, as appropriate, by providing any safety instructions necessary to prevent the likelihood of the incident recurring. You then may release the victim to their own care or to a parent or guardian. 6-2 TRAIN TO THE STANDARD, MEET THE OBJECTIVE In this course and throughout your ongoing training, you will be taught how to perform water rescues based on American Red Cross standards. You will learn these techniques in a specific manner. However, in the real world, no two aquatic emergencies are exactly alike. Actual rescue situations often are fast-moving and rapidly changing. You may not be able to follow each step exactly as you have learned and practiced. So, in an actual rescue, keep in mind the skill steps you have learned, but your primary focus should be on the overall objective saving the victim s life. During this course, you will be evaluated on your ability to make decisions and handle situations as they occur. Keep in mind these four core objectives in any rescue situation: Ensure the safety of the victim, yourself and others in the vicinity. This includes the entry, approach, rescue, removal and care provided. Use a rescue technique that is appropriate and effective for the situation. Provide an appropriate assessment, always treating life-threatening conditions first. Handle the rescue with a sense of urgency. 6-3 RESCUE SKILLS This section contains summaries of water rescue skills that will be taught in this course, along with the objectives specific to each type of skill. Skill sheets describing the skill steps are located at the end of the chapter. 147 ChAPTER 6: WATER RESCUE SKILLS

158 Entries The objective of entries is to get in the water quickly and safely, with rescue equipment, and begin approaching the victim (Figure 6-2). It may not be safe to enter the water from an elevated lifeguard stand if your zone is crowded or due to the design or position of the stand. You may need to climb down and travel along the deck or shore before entering the water. The type of entry used depends on: The depth of the water The height and position of the lifeguard station (elevated or at ground level) Obstacles in the water, such as people, lane lines and safety lines The location and condition of the victim The type of rescue equipment The design of the facility There are several ways to enter the water for a rescue: Slide-In Entry. The slide-in entry is slower than other entries, but it is the safest in most conditions. This technique is useful in shallow water, crowded pools or when a victim with a head, neck or spinal injury is close to the side of the pool or pier. Stride Jump. Use the stride jump only if the water is at least 5 feet deep and you are no more than 3 feet above the water. Compact Jump. You can use the compact jump to enter water from the deck or from a height, depending on the depth of the water. If jumping from a height (when you are more than 3 feet above the water, such as on a lifeguard stand or pier), the water must be at least 5 feet deep. Run-and-Swim Entry. To enter the water from a gradual slope zero-depth area, such as a shoreline or wave pool use the run-and-swim entry. Figure 6-2 The compact jump can be used to enter water at least 5 feet deep from an elevated station. ChAPTER 6: WATER RESCUE SKILLS 148
.")
.")

159 Rescue Approaches The objective of a rescue approach is to safely, quickly and effectively move toward the victim in the water while maintaining control of the rescue tube and keeping the victim in your line of sight. The best way to swim to the victim using a rescue tube is with a modified front crawl or breaststroke (Figure 6-3, A B). With the rescue tube under your armpits or torso, swim toward the victim with your head up, keeping the rescue tube in control at all times. For long distances, or if the rescue tube slips out from under your arms or torso while you are swimming, let the tube trail behind (Figure 6-4). If necessary, reposition the rescue tube in front of you before contacting the victim. Figure 6-3A Modified front crawl approach In shallow water, it may be quicker or easier to walk to the victim. Hold the rescue tube at your side and walk quickly toward the victim. If necessary, position the tube in front of you before contacting the victim. Figure 6-4 Allow the rescue tube to trail behind you when swimming long distances. Figure 6-3B Modified breastroke approach Assists The objective of an assist is to safely and effectively help a victim who is struggling in the water and move them to safety. Assists are the most common way that lifeguards help patrons who are in trouble in shallow water. An assist may be required to help a patron: Stand up because they are small or have been thrown off balance, such as from landing at the bottom of a slide. Get to the surface when they are submerged in shallow water. Enter and exit an attraction. Get in or out of inner tubes or rafts. Reach an exit point when they are tired. 149 ChAPTER 6: WATER RESCUE SKILLS


160 You also may use an assist for a patron who is stuck on a slide or becomes frightened. In this instance, you should climb up the slide to reach the patron and talk to the patron to help calm them and provide direction. If you are stationed in the water, such as when standing in a catch pool, assists can be performed quickly without interrupting patron surveillance. However, if a rescue is needed instead of an assist, activate the EAP. The most common assists include the: Simple Assist. A simple assist can be used in shallow water and may be merely helping a person to stand. The simple assist also may be used to rescue a victim who is submerged in shallow water and is within reach (Figure 6-5). Reaching Assist. To assist a distressed swimmer who is close to the side of the pool or a pier, use a reaching assist from the deck by extending a rescue tube within the victim s grasp. A swimmer in distress usually is able to reach for a rescue device. However, a victim who is struggling to keep their mouth above the water s surface in order to breathe may not be able to grab a rescue tube. In this case, you may need to enter the water to rescue the victim using a front or rear victim rescue. Figure 6-5 Simple assist Rescuing a Victim at or Near the Surface The objective of rescuing a victim at or near the surface of the water is to safely and confidently support the victim using the rescue tube before the victim submerges. The victim s airway should remain above the water while you move to a safe removal point, assess the victim s condition and then provide the appropriate care. Use the following rescues for victims at or near the surface of the water: Active Victim Front Rescue: for a drowning victim who is struggling and facing toward you Active Victim Rear Rescue: for a drowning victim who is struggling and facing away from you (Figure 6-6) Passive Victim Front Rescue: for a drowning victim who is face-down at or near the surface in a vertical-to-horizontal position; seems unresponsive and is not suspected of having a head, neck or spinal injury; and is facing toward you (Figure 6-7, A B) Figure 6-6 Active victim rear rescue ChAPTER 6: WATER RESCUE SKILLS 150

; seems unresponsive; and is not suspected of having a head, neck or spinal injury Figure 6-7A Passive victim front rescue Figure 6-7B Support the victim on the")

161 Passive Victim Rear Rescue: for a drowning victim who is face-down at or near the surface in a vertical-to-horizontal position; seems unresponsive and is not suspected of having a head, neck or spinal injury; and is facing away from you Passive Victim at or Near the Surface in Water 3, Face-Up: for a drowning victim who is face up at or near the surface in water less than 3 feet; seems unresponsive; and is not suspected of having a head, neck or spinal injury Passive Victim at or Near the Surface in Water 3, Face-Down: for a drowning victim who is face-down at or near the surface in very shallow water (3 feet or less); seems unresponsive; and is not suspected of having a head, neck or spinal injury Figure 6-7A Passive victim front rescue Figure 6-7B Support the victim on the rescue tube and tow them to the extrication point. Rescuing a Submerged Victim Sometimes a drowning victim is below the surface. This could be in shallow water or in deep water beyond your reach. The objective in rescuing a submerged victim is to effectively and quickly go underwater, make contact with the victim, bring them to the surface and support the victim on the rescue tube while maintaining an open airway (Figure 6-8). Continue to maintain an open airway while moving the victim to a safe exit point, remove the victim, assess the victim s condition and provide appropriate care. In deep water, surface dives enable you to submerge to moderate depths to rescue or search for a submerged victim. When a victim is below the surface, you must be able to get under water or to the bottom. As a lifeguard, you must be able to perform both of the following methods of getting to the bottom: Feet-First Surface Dive Head-First Surface Dive Use the following rescues, based on the victim s position in the water: Passive Submerged Victim Shallow Water: for a victim who is passive, submerged in shallow water Submerged Victim in Deep Water: for a victim who is submerged in deep water An additional lifeguard may be necessary to provide assistance, especially for a deep-water rescue. For example, the additional lifeguard may need to retrieve and position the rescue tube if you had to remove the strap to reach the victim. Figure 6-8 Rescuing a submerged victim 151 ChAPTER 6: WATER RESCUE SKILLS
, or when a parent attempts to rescue a child but is overcome by the child s strength.")

162 Multiple-Victim Rescue Sometimes two or more victims need to be rescued simultaneously. This may happen, for example, when a victim grabs a nearby swimmer to try to stay above the water (Figure 6-9), or when a parent attempts to rescue a child but is overcome by the child s strength. The objective for this rescue is the same as those involving any other active victim. Several lifeguards should assist in a multiple-victim rescue, if possible. At least one lifeguard should check the bottom for possible submerged victims while other lifeguards rescue the victims at the surface. Figure 6-9 Multiple-victim rescue Removal from Water At this stage in the rescue, the objective is to safely and effectively remove the victim from the water, taking the victim s condition into account, and to provide the appropriate care. You must keep the victim s airway above the water throughout the process. Sometimes a victim is unresponsive or too exhausted to climb out of the water, even on a ladder. The decision when and how to remove the victim should be made based on the victim s condition and size, how soon help is expected to arrive and whether a bystander can help. If a victim needs immediate first aid, such as ventilations or CPR, extricate them from the water immediately and make sure that emergency medical services (EMS) personnel have been summoned. If you suspect that the victim has an injury to the head, neck or spine, and the victim is breathing, special extrication techniques are used to remove the victim (see Chapter 11). Quick Removal for a Small Victim. This technique can be used to remove a small, passive victim from shallow water if a backboard is not immediately available. Walking Assist. Use the walking assist to help a conscious victim walk out of shallow water. Beach Drag. On a gradual slope from a waterfront beach or zero-depth entry, the beach drag is a safe, easy way to remove someone who is unresponsive or who cannot walk from the water. Do not use this technique if you suspect an injury to the head, neck or spine, unless the victim is not breathing. Use one of the following techniques to remove a victim from the water: Extrication Using a Backboard. To perform the extrication technique, work with an assisting rescuer to use a backboard at the pool edge or pier, zero-depth entry or steps (Figure 6-10). Figure 6-10 Extrication using a backboard ChAPTER 6: WATER RESCUE SKILLS 152
.")

.")
163 6-4 ADDITIONAL RESCUE SKILLS FOR WATERFRONTS Using a Rescue Board At some waterfronts, a rescue board is used to patrol the outer boundaries of a swimming area. A rescue board also may be kept by the lifeguard stand, ready for emergency use (Figure 6-11). If the facility uses a rescue board, learn how to carry the board effectively, paddle quickly and maneuver the board in all conditions. Wind, water currents and waves affect how you will be able to handle the board. Practice using a rescue board often to maintain your skills. Keep the board clean of suntan lotion and body oils, which can make it slippery. The objective when using a rescue board is to reach the victim quickly, safely make contact, place the victim on the board and return to shore (Figure 6-12). If the victim is unresponsive, loading the victim on the rescue board can be challenging. When possible, multiple rescuers should assist in getting the victim to shore. Depending on variables, including distance from shore, the rescue board may not be the most efficient method of rescue. Follow facility protocols for the use of the rescue board. Several skills are involved when using a rescue board: Approaching the Victim Rescuing a Distressed Swimmer or Active Victim Rescuing a Passive Victim Figure 6-11 Have a rescue board ready for emergency use by the lifeguard stand. Figure 6-12 A rescue board can be used to rescue victims at a waterfront facility. Using Watercraft for Rescues If your facility uses watercraft for rescues, you should practice to become skilled in managing them in all rescue situations and all weather conditions. The facility must train lifeguards in the use of the watercraft (Figure 6-13). Refer to the skill sheets at the end of this chapter for general guidelines on the use of various watercraft. Figure 6-13 A rescue craft, such as a kayak, can be used to rescue victims at a waterfront facility. 153 ChAPTER 6: WATER RESCUE SKILLS


164 REACHING AND THROWING EQUIPMENT A ring buoy (Figure 6-14), reaching pole and shepherd s crook often are required by the health department for swimming pools and waterparks to be used by untrained bystanders. The throw bag, or rescue bag, is a throwing device often carried by paddlers, kayakers and swift-water rescue teams. It also may be used at swimming facilities, particularly in rescue water craft. While this equipment is not typically used by lifeguards to perform the professional rescues taught in this course, you should learn how to use them if your facility has any of these items. For a reaching assist with equipment, brace yourself on the pool deck, pier surface or shoreline. Extend the object to the person, sweeping it toward the person from the side until it makes contact with an arm or hand. When the person grasps the object, slowly and carefully pull them to safety. Keep your body low and lean back to avoid being pulled into the water. For a throwing assist, place your non-throwing hand through the wrist loop, if it has one. If there is no wrist loop, step on the non-throwing end of the line. Hold the coil of the line in the open palm of your non-throwing hand (Figure 6-15). Try to get the attention of the swimmer, and then throw the device so that the line lands across the victim s shoulder or slightly in front. When using a throw bag, the line plays out of the bag as it travels through the air. Tell the victim to grab onto the line and hold onto it. Pull the victim to safety. Always consider wind conditions and water current when performing a throwing assist. With all rescue equipment at a facility, you are expected to participate in the in-service training and practice to become proficient in the use of throw bags Ring buoy 6-15 Throw bag ChAPTER 6: WATER RESCUE SKILLS 154

. This will help you to maintain a consistent direction when swimming, especially if there is a current. 3.")
165 6-5 SPECIAL SITUATIONS AT WATERFRONTS Sightings and Cross Bearings When a drowning victim submerges at a waterfront, you must swim or paddle to their last seen position. Take a sighting or a cross bearing to keep track of where the victim went underwater. To take a sighting: 1. Note where the victim went under water. 2. Line up this place with an object on the far shore, such as a piling, marker buoy, tree, building or anything that is identifiable. Ideally, the first object should be lined up with a second object on the shore (Figure 6-16). This will help you to maintain a consistent direction when swimming, especially if there is a current. 3. Note the victim s distance from the shore along that line. With two lifeguards, a cross bearing can be used. To take a cross bearing: 1. Have each lifeguard take a sighting on the spot where the victim was last seen from a different angle (Figure 6-17). 2. Ask other people to help out as spotters from shore. 3. Have both lifeguards swim toward the victim along their sight lines. 4. Have both lifeguards check spotters onshore for directions. Spotters communicate with megaphones, whistles or hand signals. 5. Identify the point where the two sight lines cross. This is the approximate location where the victim went under water. Figure 6-16 Taking a sighting If a person is reported as missing in or near the water, or you have attempted and are unable to locate a victim after submersion, a search is necessary. Figure 6-17 Taking a cross bearing 155 ChAPTER 6: WATER RESCUE SKILLS


166 Searching Shallow-Water Areas To search shallow-water areas where the bottom cannot be seen: 1. Have a lifeguard or supervisor oversee the search. 2. Ask adult volunteers and staff to link their arms and hold hands to form a line in the water. The shortest person should be in the shallowest water, and the tallest person should be in water no more than chest deep (Figure 6-18). 3. Have the whole line slowly move together across the area, starting where the missing person was last seen. 4. As the line moves forward, have searchers sweep their feet across the bottom with each step. If there is a current, walk downstream with the current. (A typical search pattern is shown in Figure 6-19). 5. Have only trained lifeguards search deeper areas. Figure 6-18 Lifeguards performing a shallow-water line search. Figure 6-19 Search pattern ChAPTER 6: WATER RESCUE SKILLS 156

.")
167 Searching Deep-Water Areas Surface Dives Feet-first and head-first surface dives enable lifeguards to submerge to moderate depths to search for a submerged victim. Deep-Water Line Searches The deep-water line search is used in water greater than chest-deep when the bottom cannot be seen from the surface. The search should start at the point where the victim was last seen in the water. This point should be marked on the shoreline. When preparing to conduct a deep-water line search, adhere to the following guidelines: Wearing masks and fins, several lifeguards form a straight line an arm s length from each other (Figure 6-20). One lifeguard should serve as the safety lookout above the water level on a pier, raft or watercraft with rescue equipment in case a searcher gets in trouble or the missing person is found. On command from the lead lifeguard, all lifeguards perform the same type of surface dive (feet-first or head-first) to the bottom and swim forward a predetermined number of strokes usually three. If the water is murky, searchers check the bottom by sweeping their hands back and forth in front of them, making sure to cover the entire area. To keep the water from becoming cloudier, try to avoid disturbing silt and dirt on the bottom. Be sure not to miss any areas on the bottom when diving and resurfacing. Lifeguards should return to the surface as straight up as possible. The lead lifeguard accounts for all searchers, re-forms the line at the position of the person farthest back and backs up the line one body length. On command, the team dives again. Lifeguards repeat this procedure until the victim is found or the entire area has been searched. Figure 6-21 shows one example of a search pattern: Lifeguards move the line in one direction to the boundary of the search area, then turn at a 90-degree angle to the first line and repeat the sequence as necessary. If the missing person is not found, lifeguards expand the search to nearby areas. Consider whether currents may have moved the victim. Lifeguards continue to search until the person is found, emergency personnel take over or the search has been called off by officials. If a lifeguard finds the victim, the lifeguard should bring the victim up by grasping the victim under the armpit and returning to the surface. Swim the victim to safety, keeping the victim on their back, with their face out of the water. A lifeguard with equipment should take over to maintain an open airway while moving the victim to safety. Remove the victim from the water, assess the victim s condition and provide appropriate care. Figure 6-20 Lifeguards performing a deep-water line search. Figure 6-21 Deep-water search pattern 157 ChAPTER 6: WATER RESCUE SKILLS

168 Mask and Fins A mask and fins should be used in an underwater search for a missing person at a waterfront (Figure 6-22). Use well-maintained equipment that is sized properly and fits you well. Mask A mask is made of soft, flexible material with non-tinted, tempered safety glass and a head strap that is easily adjusted. Choose a mask that allows blocking or squeezing of the nose to equalize pressure. Some masks have additional features, such as molded nosepieces or purge valves. Regardless of the design, a proper fit is essential: A good fit prevents water from leaking into the mask. Each lifeguard at a waterfront facility should have a mask that fits their face. To check that a mask fits properly: Figure 6-22 Mask and fins 1. Place the mask against your face without using the strap. Keep hair out of the way. 2. Inhale slightly through your nose to create a slight suction inside the mask. This suction should keep the mask in place without being held. 3. Adjust the strap so that the mask is comfortable. The strap should be placed on the crown of the head for a proper fit. If it is too tight or too loose, the mask may not seal properly. 4. Try the mask in the water. If it leaks a little, adjust how the strap sits on the back of your head and tighten the strap if needed. If the mask continues to leak, check it again with suction. A different size may be needed if the leaking persists. To prevent the mask from fogging, rub saliva on the inside of the face plate and rinse the mask before putting it on. Commercial defoggers also can be used. If your mask starts to fill with water while you are submerged, you can remove the water by pressing the palm of one hand against the top of your mask, which loosens the bottom seal. At the same time, blow air out of your nose and tilt your head slightly to push the water out. Alternatively, you can pull the bottom of the mask away from your face to break the seal, ensuring that the top part still is firm against your face, and blow air out of your nose. If your mask has a purge valve, blow air out of your nose and excess water exits via the purge valve. ChAPTER 6: WATER RESCUE SKILLS 158
169 EQUALIZING PRESSURE UNDERWATER As you descend into deep water, water pressure increases and presses against the empty spaces in your skull, especially those inside your ears. This can cause pain or even injury. To relieve this pressure, you need to force more air into the empty spaces so that the air pressure matches the water pressure. This is called equalizing. Be sure that you equalize early and often by taking the following steps: 1. Place your thumb and finger on your nose or on the nosepiece of your mask, if you are wearing one. 2. Pinch your nose and keep your mouth shut. Try to exhale gently through your nose until the pressure is relieved. 3. Repeat this as needed to relieve ear pressure. If your ears hurt, do not attempt to go deeper until successfully equalizing the pressure. 4. If you are using a mask when descending, the increased water pressure will cause the mask to squeeze your face. To relieve the squeezing, exhale a small amount of air through your nose into the mask. If you are unable to equalize the pressure because of a head cold or sinus problem, you should return to the surface rather than risk an injury. Fins Fins provide more speed and allow users to cover greater distances with less effort. A good fit is important for efficient movement. Fins come in different sizes to fit the foot; the blades also differ in size. Fins with larger blades enable the person to swim faster but require more leg strength. Fins should match your strength and swimming ability. Each lifeguard at a waterfront facility should have fins that fit their feet. Wetting your feet and the fins first makes it easier to put them on. Do not pull the fins on by the heels or straps of the fins. This can cause a break or tear. Push your foot into the fin, and then slide the fin s back or strap up over your heel. Use a modified flutter kick when swimming with fins. The kicking action is deeper and slower, with a little more knee bend than the usual flutter kick. Swimming under water is easier if you use your legs only, not your arms; keep your arms relaxed at your side. In murky water, hold your arms out in front to protect your head and feel for the victim. 159 ChAPTER 6: WATER RESCUE SKILLS

170 Entering the Water with Mask and Fins It is important to learn how to enter the water safely while wearing equipment. You should enter using a slide-in entry or with a stride jump when entering from a height of less than 3 feet. Never enter head-first wearing a mask and fins. If entering the water from a sloping beach, carry the fins until you are thigh-deep in the water, and then put them on. To do a stride jump with mask and fins: 1. Put one hand over the mask to hold it in place, keeping your elbow close to your chest. Keep your other hand at your side. 2. Make sure no swimmers or other objects are below. 3. Step out with a long stride over the water, but do not lean forward (Figure 6-23). The fins will slow your downward motion as you enter the water. 4. Swim with your face in the water, keeping your arms at your side if the water is clear, or hold your arms out in front to protect your head if visibility underwater is poor. Figure 6-23 Step out with a long stride to enter the water when using a mask and fins. COLD WATER A serious concern at many waterfront facilities is someone suddenly entering into cold water water that is 70 F (21 C) or lower. This usually happens in one of two ways: Either a person falls in accidentally, or a person enters intentionally without proper protection. In some cases, a swimmer may be under water in warmer water and suddenly enter a thermocline, a sharp change in temperature from one layer of water to another. As a general rule, if the water feels cold, consider it to be cold. Cold water can have a serious effect on a victim and on the lifeguard making the rescue. Sudden entry into cold water may cause the following negative reactions: A gasp reflex, a sudden involuntary attempt to catch one s breath, may cause the victim to inhale water into the lungs if the face is under water. If the person s face is not under water, they may begin to hyperventilate. This can cause unconsciousness and lead to breathing water into the lungs. An increased heart rate and blood pressure can cause cardiac arrest. A victim who remains in the cold water may develop hypothermia (below-normal body temperature), which can cause unconsciousness. However, the body has several natural mechanisms that may help to increase the person s chances of survival. In cold water, body temperature begins to drop almost as soon as the person enters the water. If cold water is swallowed, the cooling is accelerated. When a person remains in cold water, the body s core temperature drops and body functions slow almost to a standstill, sharply decreasing the need for oxygen. Any oxygen in the blood is diverted to the brain and heart to maintain minimal functioning of these vital organs. Because of this response, some victims have been successfully resuscitated after being submerged in cold water for an extended period. ChAPTER 6: WATER RESCUE SKILLS 160


171 6-6 WHEN THINGS DO NOT GO AS PRACTICED Even with the best preparations and practice, circumstances sometimes may require you to deviate from your facility s EAP during an emergency. The skills in this section are designed to help you deal with some of the situations that may affect your safety or could significantly delay lifesaving care. Your facility must determine under what circumstances these additional emergency skills can be used. Skill sheets are located at the end of the chapter. Escapes A drowning victim may grab you if your technique is faulty or if the rescue tube slips out of position. You should always hold on to the rescue tube, because it helps both you and the victim stay afloat. However, if you lose control of the tube and a victim grabs you, use one of the following skills to escape: Front Head-Hold Escape. Use this technique when the victim grabs you from the front (Figure 6-24). Rear Head-Hold Escape. Use this technique when the victim grabs you from behind. Figure 6-24 Front Head-Hold Escape In-Water Ventilations Always remove a victim who is not breathing from the water as soon as possible in order to provide care. Ventilations and compressions are more effective on a firm, flat surface. However, if you cannot immediately remove the victim, or if doing so will delay care, then perform in-water ventilations (Figure 6-25). Once conditions allow you to extricate the victim from the water, stop ventilations, remove the victim and then resume care immediately. Figure 6-25 Perform in-water ventilations if the victim cannot be removed immediately or if doing so will delay care. 161 ChAPTER 6: WATER RESCUE SKILLS
172 Blog Post #3 First AES Visit June 3rd 7:30 pm It happened! We had our first AES visit today. I was on surveillance duty during recreational swim and I had just completed a rotation to an elevated station. After a few minutes of searching my new zone, I saw something sinking to the bottom of the pool in the deep end. I knew exactly what to do I blew my whistle to activate the EAP and pointed to the victim so that my teammates could see where I was going and could cover my zone. I entered the water using a compact jump and swam as fast as I could to get to the victim. As I got closer to the victim, I realized that it was a manikin and it clicked: This must be our first AES visit! While I was relieved that it wasn t a real victim sinking to the bottom of the pool, I knew that I still needed to demonstrate my skills. I stayed calm and completed the rescue as quickly as possible as if the manikin were a real person in a life-or-death situation. After submerging underwater and rescuing the manikin, I brought it to the side of the pool where I saw Emma standing with a patron, who introduced himself as a Red Cross aquatic examiner. He congratulated me on my first successful AES evaluation and told me that I met the Red Cross lifeguarding benchmark by recognizing and responding to the victim within 30 seconds. He also said that we would continue to practice water rescues, including extrication and resuscitation, during in-service training so that he could evaluate our performance as a team and help us improve our skills. After the pool closed and our guests left for the day, Emma introduced the rest of the lifeguard team to the examiner. He praised our team for our professionalism while on surveillance duty and acknowledged my excellent water rescue. We spent about an hour performing skill drills and water rescues, all while getting feedback and tips from our examiner. He and Emma identified some skills that we need to improve on as a team. He also challenged us to practice during in-service, so that we could demonstrate our improved skills at our next AES visit. I m so proud that I successfully completed my first evaluation I know that I ll be prepared to respond, and potentially save a life in a real emergency! ChAPTER 6: WATER RESCUE SKILLS 162
173 6-7 WRAP-UP You must learn and practice water rescue skills so you will be able to effectively respond to aquatic emergencies. However, it is just as important that you know how to adapt these skills to the actual circumstances encountered during a real-world situation. Emergencies can happen quickly, and conditions can change in an instant. In an emergency, you should perform the rescue, bring the victim to a safe exit point, remove the victim from the water and provide the appropriate care. Never jeopardize your own safety, always use rescue equipment (such as a rescue tube) and keep your eye on the ultimate objective saving the victim s life. BENCHMARKS FOR LIFEGUARDS Lifeguards should: Always be prepared to enter the water to make rescues when on duty. Have the proper equipment immediately available and be properly stationed to see the entire zone of responsibility. Assess the victim s condition, perform an appropriate rescue, move the victim to safety and provide additional care as needed, if someone needs help. Always train to the standard, but meet the objective when executing a rescue response: o The safety of the victim, yourself and others is paramount during all parts of the rescue response. o Use rescue techniques appropriate and effective for the situation. o Conduct an appropriate assessment, handling life-threatening situations first. o Handle all rescues with a sense of urgency. BENCHMARKS FOR LIFEGUARDING OPERATIONS Managers should ensure: Lifeguards are trained using the facility-specific equipment to perform the water rescues in the facility. 163 ChAPTER 6: WATER RESCUE SKILLS
174 Chapter 6 Review 1. List the general procedures, in order, for situations involving a water rescue. 1) 2) 3) 4) 5) 6) 7) 2. What are some factors that should be considered when deciding how to enter the water? (Select all that apply) A Location of the victim E Water temperature B Location of other swimmers C Size of the victim D Condition of the victim F Your location G Facility design/set-up H Type of equipment used 3. In addition to the correct answer(s) above, what additional factors should be considered when deciding how to enter the water and why? ChAPTER 6 REvIEW 164
175 Chapter 6 Review 4. Identify the appropriate entry for each scenario listed below: SCENARIO ENTRY You are seated on an elevated lifeguard stand in the deep end during recreational swim and spot a passive-drowning victim. The area surrounding your station is clear of patrons and objects. You are searching your zone from an elevated station when you spot a patron who appears to have a head injury as a result of diving in shallow water. You spot an active drowning victim while searching your zone from a ground-level station located in the middle of the pool where the water is 4 deep. You are searching your new zone as you walk toward the elevated lifeguard stand in the deep end before a rotation and you spot an active drowning victim. You have just rotated to a roving station during open swim at a crowded waterfront and spot a swimmer in distress. 5. What are the two most common assists and when should each be used? 1) 2) 165 ChAPTER 6 REvIEW
176 Chapter 6 Review Select the appropriate rescue or extrication method for the scenarios below: 6. You are approaching a victim who is vertical in the water, near the surface in 4 feet of water. The victim is facing you and appears to be unconscious. A Active victim front rescue C Passive victim in extreme shallow water face-up B Passive victim front rescue D Submerged victim in shallow water 7. You are approaching a child who is facing away from you and struggling to keep their head above water. A Active victim rear rescue C Passive victim rear rescue B Active victim front rescue D Passive victim front rescue 8. You are approaching a victim from behind who appears to be unconscious. A Passive victim front rescue followed by extrication using a backboard C Passive victim front rescue followed by a walking assist B Passive victim rear rescue followed by a two person removal D Passive victim rear rescue followed by extrication using a backboard 9. A victim in the water is not breathing. A Always remove a victim who is not breathing from the water as soon as possible to provide care. However, if doing so will delay care, then perform in-water ventilations until you can remove the victim. C Give ventilations and CPR in the water for 1 minute, 30 seconds and then remove them from the water. D Wait for additional assistance to remove the victim from the water. B Give ventilations in the water, then remove the victim from the water. ChAPTER 6 REvIEW 166
177 Chapter 6 Review 10. What are four core objectives in any rescue situation? 1) 2) 3) 4) 167 ChAPTER 6 REvIEW
178 Chapter 6 Review ADDITIONAL REVIEW QUESTIONS FOR WATERPARK & AQUATIC ATTRACTION LIFEGUARDS 1. What should you consider when deciding what entry to use at a wave pool? 1) 2) 3) 4) 5) 2. What attraction features might impact the removal of the victim from the water? 1) 2) 3) 4) ChAPTER 6 REvIEW 168


179 ENTRIES Slide-In Entry Sit down on the edge facing the water. Place the rescue tube next to you or in the water. Lower your body into the water feet-first. Retrieve the rescue tube. 4 Place the rescue tube across your chest with the tube under your armpits, focus on the victim and begin the approach. Stride Jump Squeeze the rescue tube high against your chest with the tube under your armpits. Hold the excess line to keep the line from getting caught on something when jumping into the water. Leap into the water with one leg forward and the other leg back. Lean slightly forward, with your chest ahead of your hips, and focus on the victim when you enter the water. Squeeze or scissor your legs together right after they make contact with the water for upward thrust. Focus on the victim and begin the approach. Note: Use the stride jump only if the water is more than 5 feet deep and you are no more than 3 feet above the water. You may need to climb down from an elevated lifeguard station and travel on land before entering the water. 169 SKILL ShEET


180 ENTRIES Compact Jump Squeeze the rescue tube high against your chest with the tube under your armpits. Hold the excess line to keep it from getting caught on the lifeguard chair or other equipment when jumping into the water. Jump out and away from the lifeguard chair, pool deck or pier. In a wave pool, time the jump to land on the crest (top) of a wave. Bend your knees and keep your feet together and flat to absorb the shock if you hit the bottom. Do not point your toes or keep your legs straight or stiff. Let the buoyancy of the rescue tube bring you back to the surface. Focus on the victim when surfacing and begin the approach. Note: Use the compact jump only if the water is at least 5 feet deep and you are more than 3 feet above the water. It may not be safe to enter the water from an elevated station if your zone is crowded or as a result of the design or position of the stand. You may need to climb down from an elevated lifeguard station and travel on land before entering the water. Run-and-Swim Entry 1 2 Hold the rescue tube and the excess line and run into the water, lifting your knees high to avoid falling. When you can no longer run, either put the rescue tube across your chest and lean forward or drop the tube to the side and start swimming, letting the rescue tube trail behind. Do not dive or plunge head-first into the water; this could cause a serious head, neck or spinal injury. SKILL ShEET 170


181 ASSISTS Simple Assist Approach the person who needs help. In 3 or more feet of water, use a rescue tube and keep it between you and the person who needs help. Reach across the tube, if you are using one, and grasp the person at the armpit to help them maintain their balance. If the person is underwater, grasp them by the armpits with both hands and help them stand up. Assist the person to the exit point, if necessary. 171 SKILL ShEET


182 ASSISTS Reaching Assist 1 Brace yourself on the deck. 2 3 Extend your arm or a rescue tube to the victim, keeping your body weight on your back foot and crouching to avoid being pulled into the water. If the victim is close enough to reach without using a rescue tube, extend your arm and grasp the victim. If you are using a rescue tube, extend the tube to the victim and tell them to grab it. To gain more extension, you may need to remove the rescue tube shoulder strap from your shoulder. Hold the strap in one hand and extend the rescue tube to the victim with the other hand and tell the victim to grab it. Slowly pull the victim to safety. Note: A swimmer in distress generally is able to reach for a rescue device. However, a victim who is struggling to keep their mouth above the water s surface to breathe may not be able to grab a rescue tube. In those cases, you may need to enter the water to rescue the victim using a front or rear victim rescue. SKILL ShEET 172


183 RESCUES AT OR NEAR THE SURFACE OF THE WATER Active Victim Front Rescue 1 Approach the victim from the front As you near the victim, grab the rescue tube from under your arms with both hands and begin to push the tube out in front of you. Continue kicking to maintain momentum. Thrust the rescue tube slightly under water and into the victim s chest, keeping the tube between you and the victim. Encourage the victim to grab the rescue tube and hold onto it. Keep kicking, fully extend your arms and move the victim to a safe exit point. Change direction, if needed. 173 SKILL ShEET


184 RESCUES AT OR NEAR THE SURFACE OF THE WATER Active Victim Rear Rescue Approach the victim from behind with the rescue tube across your chest. With both arms, reach under the victim s armpits and grasp the shoulders firmly. Tell the victim that you are there to help and continue to reassure the victim throughout the rescue. Using your chest, squeeze the rescue tube between your chest and the victim s back. Keep your head to one side to avoid being hit by the victim s head if it moves backwards. Lean back and pull the victim onto the rescue tub. Use the rescue tube to support the victim so that the victim s mouth and nose are out of the water. Tow the victim to a safe exit point. SKILL ShEET 174


185 RESCUES AT OR NEAR THE SURFACE OF THE WATER Passive Victim Front Rescue Approach a face-down victim from the front with the rescue tube across your chest. As you near the victim, reach one arm out toward the victim s opposite arm and grab the victim s wrist/forearm just above the wrist while grabbing the rescue tube with your other hand. Grasp the victim s opposite wrist/ forearm with your palm facing up on the underside of the victim s arm. Pull and twist the arm toward your opposite shoulder to turn the victim over on their back. As you pull and twist, thrust the rescue tube under the victim s back as they turn over. Place the tube under the victim below the shoulders so that the victim s head naturally falls back to an open airway position. Keep the victim s nose and mouth out of the water. Reach one arm over the victim s shoulder and grasp the rescue tube. Use the other hand to stroke toward an exit point. Remove the victim from the water, assess the victim s condition and provide appropriate care. 175 SKILL ShEET


186 RESCUES AT OR NEAR THE SURFACE OF THE WATER Passive Victim Rear Rescue Approach the face-down victim from behind with the rescue tube across your chest. With both arms, reach under the victim s armpits and grasp the shoulders firmly. You may be high on the victim s back when doing this. Using your chest, squeeze the rescue tube between your chest and the victim s back. Keep your head to one side to avoid being hit by the victim s head if it moves backwards. Roll the victim over by dipping your shoulder and rolling onto your back so that the victim is face-up on top of the rescue tube. Place the tube under the victim below the shoulders so that the victim s head naturally falls back to an open-airway position. Keep the victim s nose and mouth out of the water. Reach one arm over the victim s shoulder and grasp the rescue tube. Use your other hand to stroke toward an exit point. Remove the victim from the water, assess the victim s condition and provide appropriate care. SKILL ShEET 176


187 RESCUES AT OR NEAR THE SURFACE OF THE WATER Passive Victim at or Near the Surface in Water 3, Face-Up Swim or quickly walk to the victim s side. If you are using a rescue tube, let go of it, but keep the strap around your shoulder. Reach down to grasp the victim s arms midway between the elbows and shoulders. Move the victim s arms up alongside the victim s head. Grab the rescue tube, if you are using one, and position it under the victim s shoulders. The victim s head should naturally fall back into an open-airway position. Quickly look, listen and feel to check for breathing. If an assisting lifeguard is there to assist with removing the victim, remove the victim from the water without positioning the rescue tube under the victim s shoulders. Move the victim to a safe exit point, remove the victim from the water, assess the victim s condition and provide appropriate care. 177 SKILL ShEET


188 RESCUES AT OR NEAR THE SURFACE OF THE WATER Passive Victim at or Near the Surface in Water 3, Face-Down Swim or quickly walk to the victim s side. If you are using a rescue tube, let go of it but keep the strap around your shoulder. Reach down to grab the victim s arms midway between the elbows and shoulders. Move the victim s arms up alongside the victim s head. Glide the victim forward and roll the victim face-up by pushing the victim s arm that is closest to you under the water while pulling the victim s other arm across the surface toward you. If the water is too shallow to glide the victim forward without causing further injury, roll the victim to a face-up position by simultaneously lifting and rolling the victim over. Grab the rescue tube, if you are using one, and position it under the victim s shoulders. The victim s head should naturally fall back into an open-airway position. Quickly look, listen and feel to check for breathing. If an assisting lifeguard is there to assist with removing the victim, remove the victim from the water without positioning the rescue tube under the victim s shoulders. Move the victim to a safe exit point, remove the victim from the water, assess the victim s condition and provide appropriate care. SKILL ShEET 178


189 RESCUES AT OR NEAR THE SURFACE OF THE WATER Multiple-Victim Rescue 1 Approach one victim from behind With both arms, reach under the victim s armpits and grasp the shoulders. Squeeze the rescue tube between your chest and the victim s back, keeping your head to one side of the victim s head. Use the rescue tube to support both victims with their mouths and noses out of the water. Talk to the victims to help reassure them. Support both victims until other lifeguards arrive or the victims become calm enough to assist with moving to a safe exit point. Note: Whenever possible, more than one rescuer should assist with a multipxle-victim rescue. 179 SKILL ShEET


190 RESCUING A SUBMERGED VICTIM Passive Submerged Victim Shallow Water Swim or quickly walk to the victim s side. Let go of the rescue tube but keep the strap around your shoulders. Submerge and reach down to grab the victim under the armpits. Simultaneously pick up the victim, move forward and roll the victim face-up once surfaced. Grab the rescue tube and position it under the victim s shoulders. The victim s head should fall back naturally into an open-airway position. If an assisting lifeguard is there with the backboard, skip this step and proceed to remove the victim from the water. Move the victim to a safe exit point, remove the victim from the water, assess the victim s condition and provide appropriate care. Tip: If the water depth is shallow enough, you can use the simple assist to lift the victim to the surface, then position them on the rescue tube (if needed) to complete the rescue. SKILL ShEET 180


191 RESCUING A SUBMERGED VICTIM Feet-First Surface Dive Swim to a point near the victim. Release the rescue tube but keep the strap around your shoulders. Position your body vertically, then at the same time press both hands down to your sides and kick strongly to raise your body out of the water. Take a breath, then let your body sink underwater as you begin to extend your arms outward with palms upward, pushing against the water to help you move downward. Keep your legs straight and together with toes pointed. Tuck your chin and turn your face to look down toward the bottom. As downward momentum slows, repeat the motion of extending your arms outward and sweeping your hands and arms upward and overhead to go deeper. Repeat this arm movement until you are deep enough to reach the victim. Tip: Do not release all of the air in your lungs while you are submerging; instead, exhale gently. Save some air for your return to the surface. As you descend into deep water, be sure to equalize pressure early and often. If you must swim underwater, such as for a deep-water line search, also perform these steps: 1 2 When deep enough, tuck your body and roll to a horizontal position. Extend your arms and legs and swim underwater. 181 SKILL ShEET


192 RESCUING A SUBMERGED VICTIM Head-First Surface Dive Swim to a point near the victim and release the rescue tube. Gain momentum using a swimming stroke. Take a breath and sweep your arms backwards to your thighs and turn them palms-down. Tuck your chin to your chest and flex at the hip sharply while your arms reach downward toward the bottom. Lift your legs upward, straight and together so that their weight above the water helps the descent. Get in a fully extended, streamlined body position that is almost vertical. If you need to go deeper, such as in a diving well, do a simultaneous arm pull with both arms, then level out and swim forward underwater. Tip: If the depth of the water is unknown or the water is murky, hold one or both arms extended over the head toward the bottom or use a feet-first surface dive. As you descend into deep water, be sure to equalize pressure early and often. SKILL ShEET 182


193 RESCUING A SUBMERGED VICTIM Rescuing a Submerged Victim in Deep Water Release the rescue tube, perform a feetfirst surface dive and position yourself behind the victim. Reach one arm under the victim s arm and across the victim s chest. Hold firmly onto the victim s opposite side. Once you have hold of the victim, reach up with your free hand and grasp the towline. Pull it down and place it in the same hand that is holding the victim. Keep pulling the towline this way until nearing the surface. As you approach the surface, grasp and position the rescue tube so it is placed on the victim s back, below their shoulders. Upon reaching the surface, ensure that the victim is positioned on the rescue tube and the victim s head is back in an open-airway position. Reach your free arm over the tube and under the victim s armpit. Grasp their shoulder firmly. Tow the victim to a safe exit point. Remove the victim from the water, assess the victim s condition and provide appropriate care. 183 SKILL ShEET

194 RESCUING A SUBMERGED VICTIM Rescuing a Submerged Victim in Deep Water continued Tip: Depending on the depth of the water, use one of the following techniques: If you must remove the strap from your shoulder to descend and reach the victim, continue to hold onto the strap so that the rescue tube can be used to help bring the victim to the surface. If the victim is deeper than the length of the strap and towline, release the strap and towline, grasp the victim, push off the bottom (if possible) and kick to the surface. Once at the surface, place the rescue tube in position behind the victim and continue the rescue. If you have released the strap of the rescue tube, it might not be within reach when you return to the surface. An additional lifeguard responding to your EAP signal should assist by placing the rescue tube in position so that you can continue the rescue. If this is not possible, you may need to move to safety without the rescue tube. SKILL ShEET 184
 on deck brings the backboard to the edge of the water and removes the head immobilizer.")


195 REMOVAL FROM THE WATER Extrication Using a Backboard at the Pool Edge The rescuing lifeguard swims with the victim toward the side of the pool. The assisting responder(s) on deck brings the backboard to the edge of the water and removes the head immobilizer. The assisting responder(s) on deck places the board vertically in the water against the wall, submerging the head space of the board if possible. The rescuing lifeguard approaches the backboard and moves to the side of the victim. The rescuing lifeguard raises one of the victim s arms so that the assisting responder can grasp the arm. The rescuing lifeguard then slides the rescue tube out from under the victim and toward him before contact is made with the board. The assisting responder on deck firmly holds the backboard with one hand and the victim s forearm with the other hand and angles the board out slightly to help position the victim on the board as the rescuing lifeguard stabilizes the backboard from the side. If more than one on-deck responder is available, they should help hold and stabilize the backboard. 185 SKILL ShEET
 on deck pulls the backboard onto the deck.")
196 REMOVAL FROM THE WATER Extrication Using a Backboard at the Pool Edge continued 5 6 Once the victim is centered on the backboard, the assisting responder(s) signals that they are ready to remove the victim. While maintaining their hold on the victim s arm, the assisting responder(s) on deck pulls the backboard onto the deck. The rescuing lifeguard pushes the backboard as the assisting responder(s) pulls. If more than one on-deck responder is available, they should help hold the backboard and pull the backboard onto the deck. Assess the victim s condition and provide appropriate care. SKILL ShEET 186
.")
 on deck brings the backboard to the steps and removes the head immobilizer.")
197 REMOVAL FROM THE WATER Extrication Using a Backboard at the Steps Tip: Before removing a victim on a backboard using the steps, consider your own and your partner s size and strength, the number of steps, the size and weight of the victim and whether or not additional responders are available to assist with holding and lifting the board (if needed). If you do not think you can safely lift the backboard and exit the water using the steps, consider using the pool edge removal method instead The rescuing lifeguard swims with the victim toward the side of the pool. The assisting responder(s) on deck brings the backboard to the steps and removes the head immobilizer. The assisting responder(s) on deck places the board in the water at an angle against the steps. The rescuing lifeguard approaches the backboard and moves to the side of the victim. The rescuing lifeguard raises both of the victim s arms so that the assisting responder(s) can grasp the arm(s). The assisting responder on deck firmly holds the backboard with one hand and the victim s forearm with the other hand, as the rescuing lifeguard stabilizes the backboard from the side. If more than one on-deck responder is available, they should help hold and stabilize the backboard. Once the victim is centered on the backboard, the assisting responder(s) signals that they are ready to remove the victim. While maintaining their hold on the victim s arm, the assisting responder(s) on deck pulls the backboard at an angle up the steps and onto the deck. The rescuing lifeguard pushes the backboard as the assisting responder(s) pulls. If more than one on-deck responder is available, they should grasp the backboard and the victim s other forearm and help pull the backboard up the steps. 187 SKILL ShEET


198 REMOVAL FROM THE WATER Extrication Using a Backboard at the Steps continued 6 Assess the victim s condition and provide appropriate care. Extrication Using a Backboard in Zero Depth The rescuing lifeguard supports the victim in a face-up position with the victim s arms extended alongside the victim s head until another lifeguard arrives with the backboard. The assisting responder removes the head-immobilizer device, enters the water, submerges the backboard and positions the board under the victim so that it extends slightly beyond the victim s head. The assisting lifeguard raises the backboard into place. Each lifeguard moves behind the victim s head. Each lifeguard grasps one of the victim s wrists and one of the handholds of the backboard and begins to move toward the zero-depth entry. If the water is deep enough, a rescue tube can be placed under the foot-end of the backboard to aid flotation. After reaching the zero-depth entry, the lifeguards slightly lift the head-end of the backboard, carefully pulling the backboard out of the water. Assess the victim s condition and provide appropriate care. SKILL ShEET 188


199 REMOVAL FROM THE WATER Extrication Using a Backboard Steep Steps and/or Moving Water The rescuing lifeguard supports the victim in a face-up position with the victim s arms extended alongside the victim s head until another lifeguard arrives with the backboard. In moving water, the rescuing lifeguard should position the victim so that their head is pointed upstream. This position will help keep the victim s body in alignment for easier placement of the backboard and reduce splashing of water on to the victim s face. The assisting responder removes the head-immobilizer device, enters the water, submerges the backboard and positions the board under the victim so that it extends slightly beyond the victim s head. The assisting lifeguard raises the backboard into place. Each lifeguard moves behind the victim s head. Each lifeguard grasps one of the victim s wrists and one of the handholds of the backboard and begins to move toward the steps. Lifeguards carefully and gently drag the backboard, taking one step at a time until they reach the top of the steps. Gently lower the backboard to the ground. Assess the victim s condition and provide appropriate care. 189 SKILL ShEET


200 REMOVAL FROM THE WATER Walking Assist Place one of the victim s arms around your neck and across your shoulder. Grasp the wrist of the arm that is across your shoulder. Wrap your free arm around the victim s back or waist to provide support. Hold the victim firmly and assist them in walking out of the water. Have the victim sit or lie down while you monitor their condition. Beach Drag Stand behind the victim and grasp them under the armpits, supporting the victim s head as much as possible with your forearms. Let the rescue tube trail behind, being careful not to trip on the tube or line. If another lifeguard is available to assist, each of you should grasp the victim under an armpit and support the head. Walk backward and drag the victim to the shore. Use your legs, not your back. Remove the victim completely from the water, then assess the victim s condition and provide appropriate care. SKILL ShEET 190


201 REMOVAL FROM THE WATER Quick Removal for a Small Victim Note: Do not use this technique if you suspect a spinal injury, the victim is breathing and a backboard is on the way. 1 Bring the victim to the side of the pool Maintain contact with the victim by rotating the victim on their back into the crook of your arm. Be sure to support the victim s head above the surface of the water. Place your other arm under the victim s knees. Lift the victim carefully and place them on the pool deck. Exit the water, assess the victim s condition and provide the appropriate care. Note: If the victim must be moved to provide further care, place the victim on a backboard with the assistance of another lifeguard. 191 SKILL ShEET


202 USING A RESCUE BOARD Approaching the Victim Hold onto the sides of the board, about mid-board when entering the water. When the water is knee-deep, lay the rescue board on the water and push it forward. Climb on just behind the middle and lie down in the prone position. If needed, place your foot into the water to help steer. For better balance, place a foot on either side of the rescue board in the water. Paddle with the front of the board toward the victim using either a front-crawl or a butterfly arm stroke. If you need to change to a kneeling position to better see the victim, paddle a few strokes before moving on the board. Continue paddling with your head up and the victim in your sight until you reach them. SKILL ShEET 192


203 USING A RESCUE BOARD Rescuing a Distressed Swimmer or Active Victim 1 2 Approach the victim from the side so that the side of the rescue board is next to the victim. Grasp the victim s wrist and slide off of the rescue board on the opposite side Help the victim to reach their arms across the rescue board. Stabilize the rescue board and help the victim onto the board. Tell the victim to lie on their stomach, facing the front of the board. Carefully climb onto the board from the back with your chest between the victim s legs. Take care to avoid tipping the rescue board, and keep your legs in the water for stability. Encourage the victim to relax while you paddle the rescue board to shore. Slide off of the board and help the victim off of the board onto shore with a walking assist. 193 SKILL ShEET


204 USING A RESCUE BOARD Rescuing a Passive Victim To rescue someone who is unresponsive or cannot hold onto or climb onto the rescue board: 1 Approach the victim from the side. Position the rescue board so that the victim is slightly forward of the middle of the rescue board. 2 Grasp the victim s hand or wrist and slide off of the board on the opposite side, flipping the rescue board over toward you. Hold the victim s arm across the board with the victim s chest and armpits against the far edge of the board. 3 Grasp the far edge of the rescue board with the other hand. 4 Kneel on the edge of the rescue board using your own body weight to flip the board toward you again. Catch the victim s head as the rescue board comes down. SKILL ShEET 194


205 USING A RESCUE BOARD Rescuing a Passive Victim continued Position the victim lying down lengthwise in the middle of the rescue board with the victim s head toward the front of the rescue board. Kick to turn the board toward shore. Carefully climb onto the board from the back with your chest between the victim s legs. Be careful not to tip the rescue board, and keep your legs in the water for stability. Paddle the rescue board to shore. 8 Help the victim to safety with the beach drag or other removal technique. Tip: Make sure that the victim s armpits are along the edges of the board before flipping the board. Use caution when flipping the board to ensure that the victim s armpits, and not the upper arms, remain along the edge of the board during the flip. 195 SKILL ShEET
 of the craft.")


206 USING WATERCRAFT FOR RESCUES Rescue with a Non-Motorized Water Craft Square Stern Rowboat Extend an oar or rescue tube to the victim and pull them to the center of the stern (rear) of the craft. This is the most stable area on which to hold. If the victim cannot hold the oar or rescue tube, move the stern close to the victim and grasp the victim s wrist or hand and pull them to the stern. Have the victim hold onto the stern while you move the watercraft to safety. Be sure that their mouth and nose remain above water. If the victim needs to be brought onto the craft, help the victim over the stern and move the watercraft to safety. SKILL ShEET 196

207 USING WATERCRAFT FOR RESCUES Rescue with a Non-Motorized Water Craft Kayak Extend the rescue tube to a distressed swimmer or active victim. Instruct the victim to hold onto the rescue tube while you paddle to shore. Ensure that the victim continues to hold the tube and that their mouth and nose remain above water as you paddle. Rescue with a Motorized Water Craft 1 Always approach the victim from downwind and downstream. 2 3 Shut off the engine about three boat-lengths from the victim and coast or paddle to the victim. Bring the victim on board before restarting the engine. 197 SKILL ShEET


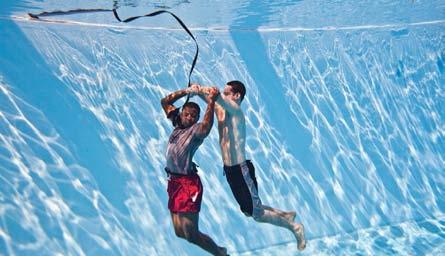
208 WHEN THINGS DO NOT GO AS PRACTICED Front Head-Hold Escape 1 As soon as the victim grabs hold, take a quick breath, tuck your chin down, turn your head to either side, raise your shoulders and submerge with the victim. 2 3 Once underwater, grasp the victim s elbows or the undersides of the victim s arms just above the elbows. Forcefully push up and away. Keep your chin tucked, your arms fully extended and your shoulders raised until you are free. Quickly swim underwater, out of the victim s reach. Surface and reposition the rescue tube and try the rescue again. Rear Head-Hold Escape 1 Take a quick breath, tuck your chin down, turn your head to either side, raise your shoulders and submerge with the victim. 2 3 Once underwater, grasp the victim s elbows or the undersides of the victim s arms just above the elbows. Forcefully push up and away while twisting your head and shoulders. Keep your chin tucked, your arms fully extended and your shoulders raised until you are free. Quickly swim underwater, out of the victim s reach. Surface and reposition the rescue tube and try the rescue again. SKILL ShEET 198

209 WHEN THINGS DO NOT GO AS PRACTICED In-Water Ventilations Note: Always remove a victim who is not breathing from the water as soon as possible to provide care. However, if you cannot immediately remove the victim or if doing so will delay care, then perform in-water ventilations Ensure that the rescue tube is placed under the victim so that their airway falls into an open position. From behind the victim s head, position the assembled resuscitation mask. If you are in deep water, perform the skill with support from the rescue tube. Give ventilations. 4 Remove the victim from the water as soon as conditions allow, then immediately resume providing care. 199 SKILL ShEET
210 200
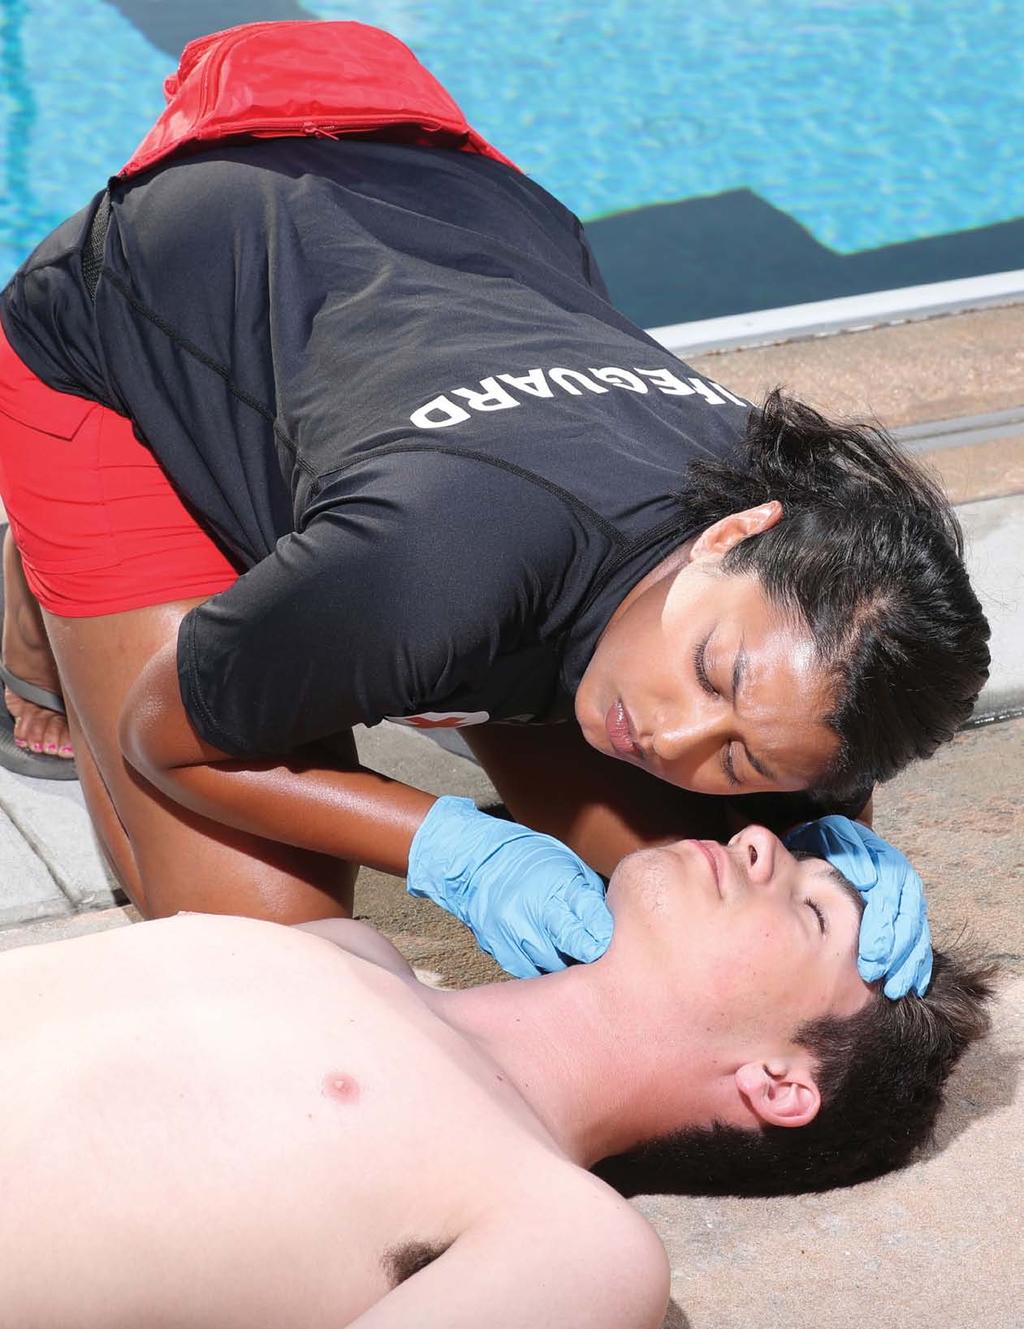
211

212 7 Before Providing Care and Victim Assessment After you rescue a victim from the water, your next steps are to identify any life-threatening conditions by performing a primary assessment and providing care. You also will need to perform a scene size-up and a primary assessment if a victim is injured or becomes ill on land. While caring for a victim, it is crucial that you protect yourself and others from the transmission of infectious disease. In this chapter, you will learn how infectious diseases occur and how you can prevent them from spreading. This chapter also covers the general procedures for responding to sudden illness and injury on land BLOODBORNE PATHOGENS HOW PATHOGENS SPREAD PREVENTING THE SPREAD OF BLOODBORNE PATHOGENS IF YOU ARE EXPOSED GENERAL PROCEDURES FOR INJURY OR SUDDEN ILLNESS ON LAND WRAP-UP
213 7-1BLOODBORNE PATHOGENS Bloodborne pathogens, such as bacteria and viruses, present in blood and other potentially infectious material (OPIM), such as other body fluids, can cause disease in humans. Pathogens are found almost everywhere in our environment. Bacteria can live outside of the body and commonly do not depend on other organisms for life. If a person is infected by bacteria, antibiotics and other medications often are used to treat the infection. Viruses depend on other organisms to live. Once viruses are in the body, they are difficult to kill. This is why prevention is critical. The bloodborne pathogens of primary concern to lifeguards are the hepatitis B virus, hepatitis C virus and human immunodeficiency virus (HIV) (Table 7-1). table 7-1: How Bloodborne Pathogens Are Transmitted Disease Signs and Symptoms Mode of Transmission Infectious Material Hepatitis B Fatigue, abdominal pain, loss of appetite, nausea, vomiting, joint pain Direct and indirect contact Blood, saliva, vomitus, semen Hepatitis C Fatigue, dark urine, abdominal pain, loss of appetite, nausea, jaundice Direct and indirect contact Blood, saliva, vomitus, semen HIV Symptoms may or may not appear in the early stage; late-contact-stage symptoms may include fever, fatigue, diarrhea, skin rashes, night sweats, loss of appetite, swollen lymph glands, significant weight loss, white spots in the mouth, vaginal discharge (signs of yeast infection) and memory or movement problems Direct and possibly indirect contact Blood, saliva, vomitus, semen, vaginal fluid, breast milk Hepatitis B Hepatitis B is a liver infection caused by the hepatitis B virus. Hepatitis B may be severe or even fatal. The virus can live in the body for up to six months before symptoms appear. These may include flu-like symptoms such as fatigue, abdominal pain, loss of appetite, nausea, vomiting and joint pain. Jaundice (yellowing of the skin and eyes) is a symptom that occurs in the later stage of the disease. Medications are available to treat chronic hepatitis B infection, but they do not work for everyone. The most effective means of prevention is the hepatitis B vaccine. This vaccine, which is given in a series of three doses, provides immunity to the disease. Scientific data show that hepatitis B vaccines are safe for adults, children and infants. Currently, no evidence exists indicating that hepatitis B vaccines cause chronic illnesses. Your employer must make the hepatitis B vaccination series available to you because you could be exposed to the virus at work. The vaccination must be made available within 10 working days of the initial assignment, after appropriate training has been completed. However, you can choose to decline the vaccination series. If you decide not to be vaccinated, you must sign a form affirming your decision. 203 ChAPter 7: Before ProViding CAre And ViCtim Assessment
214 Hepatitis C Hepatitis C is a liver disease caused by the hepatitis C virus. Hepatitis C is the most common chronic bloodborne infection in the United States. The symptoms are similar to those of the hepatitis B infection and include fatigue, abdominal pain, loss of appetite, nausea, vomiting and jaundice. Currently, no vaccine exists against hepatitis C, and no treatment is available to prevent infection after exposure. Hepatitis C is the leading cause of liver transplants. For these reasons, hepatitis C is considered to be more serious than hepatitis B. HIV HIV is the virus that causes AIDS. HIV attacks white blood cells and destroys the body s ability to fight infection. This weakens the body s immune system. The infections that strike people whose immune systems are weakened by HIV are called opportunistic infections. Some opportunistic infections include severe pneumonia, tuberculosis, Kaposi s sarcoma and other unusual cancers. People infected with HIV initially may not feel or look sick. A blood test, however, can detect the HIV antibody. When an infected person has a significant drop in a certain type of white blood cells or shows signs of having certain infections or cancers, they may be diagnosed as having AIDS. These infections can cause fever, fatigue, diarrhea, skin rashes, night sweats, loss of appetite, swollen lymph glands and significant weight loss. In the advanced stages, AIDS is a very serious condition. People with AIDS eventually develop life-threatening infections and can die from these infections. Currently, there is no vaccine against HIV. There are many other illnesses, viruses and infections to which you may be exposed. Keep immunizations current, have regular physical checkups and be knowledgeable about other pathogens. For more information on the illnesses listed above and other diseases and illnesses of concern, contact the Centers for Disease Control and Prevention (CDC) at or go to cdc.gov. 7-2 HOW PATHOGENS SPREAD Exposures to blood and other potentially infectious materials occur across a wide variety of occupations. Lifeguards, healthcare providers, emergency medical services (EMS) personnel, public safety personnel and other workers can be exposed to blood through injuries from needles and other sharp devices, as well as from direct and indirect contact with skin and mucous membranes. For any disease to be spread, including bloodborne diseases, all four of the following conditions must be met: A pathogen is present. A sufficient quantity of the pathogen is present to cause disease. A person is susceptible to the pathogen. The pathogen passes through a portal of entry (e.g., eyes, mouth and other mucous membranes; nonintact skin or skin pierced by needlesticks; animal and human bites, cuts, abrasions and other means). ChAPter 7: Before ProViding CAre And ViCtim Assessment 204


215 To understand how infections occur, think of these four conditions as pieces of a puzzle (Figure 7-1). All of the pieces must be in place for the picture to be complete. If any one of these conditions is missing, an infection cannot occur. Present Entry Site At the workplace, bloodborne pathogens, such as hepatitis B virus, hepatitis C virus and HIV, are spread primarily through direct or indirect contact with infected blood or other body fluids. These viruses are not spread by food or water, or by casual contact, such as hugging or shaking hands. The highest risk of transmission while at work is unprotected direct or indirect contact with infected blood. Quantity Figure 7-1 How pathogens spread Susceptible Direct Contact Direct contact transmission occurs when infected blood or other potentially infectious material from one person enters another person s body. For example, direct contact transmission can occur through infected blood splashing in the eye or from directly touching the potentially infectious material of an infected person with a hand that has an open sore (Figure 7-2). Figure 7-2 Direct contact Indirect Contact Some bloodborne pathogens also can be transmitted by indirect contact (Figure 7-3). Indirect contact transmission can occur when a person touches an object that contains the blood or other potentially infectious material of an infected person and that blood or potentially infectious material enters the body through a portal of entry. Such objects include soiled dressings, equipment and work surfaces that have been contaminated with an infected person s potentially infectious material. For example, indirect contact can occur when a person picks up blood-soaked bandages with a bare hand and the pathogens enter through a break in the skin on the hand. Figure 7-3 Indirect contact 205 ChAPter 7: Before ProViding CAre And ViCtim Assessment
.")

216 Droplet and Vector-Borne Transmission Other pathogens, such as the flu virus, can enter the body through droplet transmission. This occurs when a person inhales droplets from an infected person s cough or sneeze (Figure 7-4). Vector-borne transmission of diseases occurs when the body s skin is penetrated by an infectious source, such as an animal or insect bite or sting (Figure 7-5). Examples of diseases spread through vector-borne transmission include malaria and West Nile virus. Figure 7-4 Droplet transmission Figure 7-5 Vector-borne transmission Risk of Transmission Hepatitis B, hepatitis C and HIV share a common mode of transmission direct or indirect contact with infected blood or other potentially infectious material but they differ in the risk of transmission. Individuals who have received the hepatitis B vaccine and have developed immunity to the virus have virtually no risk for infection by the hepatitis B virus. For an unvaccinated person, the risk for infection from hepatitis B-infected blood from a needlestick or cut exposure can be as high as 30 percent, depending on several factors. In contrast, the risk for infection from hepatitis C-infected blood after a needlestick or cut exposure is about 2 percent, whereas the risk of infection from HIVinfected blood after a needlestick or cut exposure is far less than 1 percent. 7-3 PREVENTING THE SPREAD OF BLOODBORNE PATHOGENS OSHA Regulations The federal Occupational Safety and Health Administration (OSHA) issued regulations about on-the-job exposure to bloodborne pathogens. OSHA determined that employees are at risk when they are exposed to blood or other potentially infectious material. Employers should follow OSHA requirements regarding job-related exposure to bloodborne pathogens, which are designed to protect you from disease transmission. This includes reducing or removing hazards from the workplace that may place employees in contact with infectious materials, including how to safely dispose of needles. OSHA regulations and guidelines apply to employees who may come into contact with blood ChAPter 7: Before ProViding CAre And ViCtim Assessment 206
217 or other body substances that could cause an infection. These regulations apply to lifeguards because, as professional rescuers, lifeguards are expected to provide emergency care as part of their job. OSHA has revised the regulations to include the requirements of the federal Needlestick Safety and Prevention Act. These guidelines can help lifeguards and their employers meet the OSHA bloodborne pathogens standard to prevent transmission of serious diseases. For more information about the OSHA Bloodborne Pathogens Standard 29 CFR , go to osha.gov. EMPLOYERS RESPONSIBILITIES OSHA s regulations on bloodborne pathogens require employers to protect employees in specific ways, including: Identifying positions or tasks covered by the standard. Creating an exposure control plan to minimize the possibility of exposure and making the plan easily accessible to employees. Developing and putting into action a written schedule for cleaning and decontaminating the workplace. Creating a system for easy identification of soiled material and its proper disposal. Developing a system of annual training for all covered employees. Offering the opportunity for employees to get the hepatitis B vaccination at no cost to them. Establishing clear procedures to follow for reporting an exposure. Creating a system of recordkeeping. Soliciting input from nonmanagerial employees in workplaces where there is potential exposure to injuries from contaminated sharps regarding the identification, evaluation and selection of effective engineering and work practice controls. Recording the appropriate information about needlestick injuries in the sharps injury log, including: o Type and brand of device involved in the incident o Location of the incident o Description of the incident Maintaining a sharps injury log in a way that protects the privacy of employees. Ensuring confidentiality of employees medical records and exposure incidents. Exposure Control Plan OSHA regulations require employers to have an exposure control plan. This is a written program outlining the protective measures that employers will take to eliminate or minimize employee exposure incidents and how to respond should an exposure occur. The plan also should detail how the employer will meet other OSHA requirements, such as recordkeeping. The exposure control plan guidelines should be made available to lifeguards and other personnel who may come into contact with blood or other potentially infectious materials and should specifically explain what they need to do to prevent the spread of infectious diseases. 207 ChAPter 7: Before ProViding CAre And ViCtim Assessment
. Good hand hygiene. Engineering controls. Work practice controls.")
218 Standard Precautions Standard precautions are safety measures that combine universal precautions and body substance isolation (BSI) precautions and are based on the assumption that all body fluids may be infectious. Standard precautions can be applied through the use of: Personal protective equipment (PPE). Good hand hygiene. Engineering controls. Work practice controls. Proper equipment cleaning. Personal Protective Equipment PPE appropriate for your job duties should be available at your workplace and should be identified in the exposure control plan. PPE includes all specialized clothing, equipment and supplies that prevent direct contact with infected materials (Figure 7-6). These include, but are not limited to: breathing barriers, nitrile latex-free disposable (single-use) gloves, gowns, masks, shields and protective eyewear (Table 7-2). Figure 7-6 Personal protective equipment includes breathing barriers and gloves. table 7-2: Recommended Personal Protective Equipment Against Hepatitis B, Hepatitis C and HIV Transmission in Prehospital Settings Task or Activity Disposable Gloves Gown Mask Infectious Material Protective Eyewear Bleeding control with spurting blood Yes Yes Yes Yes Bleeding control with minimal bleeding Yes No No No Emergency childbirth Yes Yes Yes Yes Oral/nasal suctioning; manually clearing airway Yes Yes Yes Yes Handling and cleaning contaminated equipment and clothing Yes No, unless soiling is likely No No ChAPter 7: Before ProViding CAre And ViCtim Assessment 208
219 Guidelines for using PPE to prevent infection include the following: Avoid contact with blood and other potentially infectious material. Use CPR breathing barriers when giving ventilations to a victim. Wear nitrile latex-free disposable gloves when providing care: o Do not use gloves that are discolored, torn or punctured. Do not clean or reuse disposable gloves. o Cover any cuts, scrapes or sores, and remove jewelry, including rings, before wearing gloves, if possible. o Avoid handling items such as pens, combs or radios when wearing soiled gloves. o Change gloves before providing care to a different victim. In addition to gloves, wear protective coverings, such as a mask, eyewear and a gown, when there is a likelihood of coming into contact with blood or other body fluids that may splash. Remove gloves without contacting the soiled part of the gloves, and dispose of them in a proper container. See the skill sheet located at the end of the chapter for steps to remove gloves properly. Tip: To put gloves on with wet hands if near the pool, fill the gloves with water and place your hand inside the glove. Hand Hygiene Hand washing is the most effective measure to prevent the spread of infection. Wash your hands before and after providing care, if possible, so that they do not pass pathogens to or from the victim. Wash your hands frequently, such as before and after eating, after using the restroom and every time you have provided care. By washing hands often, you can wash away disease-causing germs that have been picked up from other people, animals or contaminated surfaces. To wash your hands correctly, follow these steps: 1. Wet your hands with warm water. 2. Apply soap to your hands. 3. Rub your hands vigorously for at least 15 seconds, covering all surfaces of your hands and fingers, giving added attention to fingernails and jewelry. 4. Rinse your hands with warm, running water. 5. Dry your hands thoroughly with a disposable towel. 6. Turn off the faucet using the disposable towel. Alcohol-based hand sanitizers and lotions allow you to cleanse your hands when soap and water are not readily available and your hands are not visibly soiled. If your hands contain visible matter, use soap and water instead. When using an alcohol-based hand sanitizer: Apply the product to the palm of one hand. Rub your hands together. Rub the product over all surfaces of your hands, including nail areas and between fingers, until the product dries. Wash your hands with anti-bacterial hand soap and water as soon as they are available. In addition to washing your hands frequently, it is a good idea to keep your fingernails shorter than one-fourth inch and avoid wearing artificial nails. Engineering Controls and Work Practice Controls Engineering controls are objects used in the workplace that isolate or remove a hazard, thereby reducing the risk of exposure. Examples of engineering controls include: Biohazard bags and labels PPE 209 ChAPter 7: Before ProViding CAre And ViCtim Assessment
 in puncture-resistant, leak-proof, labeled containers.")


220 Sharps disposal containers (Figure 7-7) Safer medical devices, such as sharps with engineered injury protections or needleless systems Work practice controls are methods of working that reduce the likelihood of an exposure incident by changing the way a task is carried out. Examples of work practice controls include: Dispose of sharp items (e.g., broken glass) in puncture-resistant, leak-proof, labeled containers. Avoid splashing, spraying and splattering droplets of blood or other potentially infectious materials when performing all procedures. Remove and dispose of soiled protective clothing as soon as possible. Clean and disinfect all equipment and work surfaces soiled by blood or other body fluids. Use good hand hygiene. Do not eat, drink, smoke, apply cosmetics or lip balm, handle contact lenses or touch the eyes, mouth or nose when in an area where exposure to infectious materials is possible. Isolate contaminated areas so other employees or people do not walk through and become exposed. Be aware of any areas, equipment or containers that may be contaminated. Biohazard warning labels are required on any container holding contaminated materials, such as used gloves, bandages or trauma dressings. Signs should be posted at entrances to work areas where infectious materials may be present. Equipment Cleaning and Spill Clean-Up After providing care, you should clean and disinfect the equipment and surfaces. In some cases, you will need to properly dispose of certain equipment. Handle all soiled equipment, supplies and other materials with care until they are properly cleaned and disinfected (Figure 7-8). Place all used disposable items in labeled containers. Place all soiled clothing in marked plastic bags for disposal or washing (Figure 7-9). Commercial blood spill kits are available. Take the following steps to clean up spills: Wear disposable gloves and other PPE, such as eye protection. Clean up spills immediately, or as soon as possible, after the spill occurs. Rope off or place cones around the area so others do not accidentally get exposed by walking through the spill. If the spill is mixed with sharp objects, such as broken glass and needles, do not pick these up with your hands. Use tongs, a broom and dustpan or two pieces of cardboard. Flood the area with a fresh disinfectant solution of approximately 1½ cups of liquid chlorine bleach to 1 gallon of water (1 part bleach per 9 parts water, or about a 10 percent solution), and allow it to stand for at least 10 minutes. Use appropriate material to absorb the solution, and dispose of it in a labeled biohazard container. Scrub soiled boots, leather shoes and other leather goods, such as belts, with soap, a brush and hot water. If you wear a uniform to work, wash and dry it according to the manufacturer s instructions. Figure 7-7 Sharps disposal container Figure 7-8 Clean and disinfect all equipment after use. Figure 7-9 Use a biozhazard bag to dispose of soiled materials. ChAPter 7: Before ProViding CAre And ViCtim Assessment 210
221 7-4 IF YOU ARE EXPOSED If you are exposed to a bloodborne pathogen, immediately take the following steps: Clean the contaminated area thoroughly with soap and water. Wash needlestick injuries, cuts and exposed skin. If you are splashed with blood or other potentially infectious material around your mouth or nose, flush the area with water. If your eyes are involved, irrigate them with clean water, saline or sterile irrigants for 20 minutes. Following any exposure incident: Report the exposure incident to the appropriate supervisor immediately and to the EMS personnel when they take over the care of the victim. This step can be critical to receive appropriate postexposure treatment. Document what happened. Include the time and date of the exposure, as well as the circumstances of the exposure, any actions taken after the exposure and any other information required by your employer. Seek immediate follow-up care as identified in your facility exposure control plan. 7-5 GENERAL PROCEDURES FOR INJURY OR SUDDEN ILLNESS ON LAND If someone is suddenly injured or becomes ill, activate the facility s emergency action plan (EAP). Use appropriate first aid equipment and supplies, and follow these general procedures: 1. Size up the scene. o Only move the victim if necessary for their safety. 2. Perform a primary assessment. o Obtain consent if the victim is responsive. 3. Summon EMS, if needed and not already done. 4. Perform a secondary assessment, if no life-threatening conditions are found. 5. Provide care for the conditions found. 6. Report, advise and release. 211 ChAPter 7: Before ProViding CAre And ViCtim Assessment
222 Size Up the Scene When you size up the scene, your goal is to determine if the scene is safe for you, other lifeguards, EMS personnel, the victim(s) and any bystanders. You should: Use your senses to check for hazards that could present a danger to you or the victim, such as unusual odors that would indicate a gas leak or fire, sights that would indicate anything out of the ordinary or sounds, such as an explosion. Use appropriate PPE. Determine the number of injured or ill victims. Determine the nature of the illness or what caused the injury. Look for clues as to what may have caused the emergency and how the victim became ill or injured. Form an initial impression that may indicate a life-threatening emergency, including unresponsiveness or severe bleeding. Determine what additional resources may be needed. If the scene appears to be unsafe, move to a safe distance, notify additional members of the safety team and wait for their arrival. To form an initial impression, look for signs that may indicate a life-threatening emergency: Does the victim look sick? Is the victim awake and moving? Signs that may indicate a life-threatening emergency might consist of: Unresponsiveness. Abnormal skin color. Severe life-threatening bleeding. If you see severe life-threatening bleeding, use any available resources to control the bleeding, including a tourniquet or hemostatic dressing, if one is available and you are trained. Moving a Victim When an emergency occurs in the water, you must remove the victim from the water so that you can provide care. However, for emergencies on land, you should care for the victim where they are found. Ideally, when a victim is on land, you should move them only after you have conducted an assessment and provided care. Needlessly moving a victim can lead to further pain and injury. Move an injured victim on land only if: You are faced with immediate danger. You need to get to other victims who have more serious injuries or illnesses. It is necessary to provide appropriate care (e.g., moving a victim to the top or bottom of steps to perform CPR). If you must leave a scene to ensure your personal safety, you must make all attempts to move the victim to safety as well. ChAPter 7: Before ProViding CAre And ViCtim Assessment 212
223 EMERGENCY MOVES Your safety is of utmost importance. Lifting and moving a victim requires physical strength and a high level of fitness. If you improperly lift a victim, you can permanently injure yourself or further injure the victim. When moving a victim, consider the victim s height and weight, your physical strength, obstacles such as steps and narrow passages, the distance the victim needs to be moved, the availability of others to assist, the victim s condition and the availability of transport aids. To improve your chances of successfully moving a victim without injuring yourself or the victim: Lift with your legs, not your back. Keep your legs shoulder-width apart, head up, back straight and shoulders square. Avoid twisting or bending anyone who has a possible head, neck or spinal injury. Do not move a victim who is too large for you to move comfortably. Walk forward, when possible, taking small steps, and look where you are going. Non-emergency moves include: Walking Assist. Either one or two responders can use the walking assist for a responsive person who simply needs assistance to walk to safety. Two-Person Seat Carry. The two-person seat carry requires a second responder. This carry can be used for any person who is responsive and not seriously injured. Emergency moves include: Clothes Drag. The clothes drag can be used to move a responsive or unresponsive person suspected of having a head, neck or spinal injury. This move helps to keep the person s head, neck and back stabilized. Pack-Strap Carry. The pack-strap carry can be used with responsive and unresponsive people. Using this carry with an unresponsive person requires a second responder to help position the injured or ill person on your back. There are several ways to move a victim. Perform a Primary Assessment Following the scene size-up, including forming an initial impression, conduct a primary assessment to determine if the victim has any life-threatening conditions and, if so, summon EMS personnel if a call has not already been made. The primary assessment includes checking the victim for responsiveness, breathing and a pulse. Check the Victim for Responsiveness A person who can speak is responsive, but may not be alert. Remember, if a person is responsive and alert, you must obtain consent before providing care. Document any refusal of care by the victim on an incident or rescue report. If a witness is available, have them listen, and document in writing, any refusal of care. If an adult or child appears to be unresponsive, shout, Are you okay? Use the person s name, if you know it. Then tap the victim on the shoulder and again shout, Are you okay? in a shouttap-shout sequence. If an infant appears to be unresponsive, follow the same shout-tap-shout sequence, but tap the infant s foot to see if 213 ChAPter 7: Before ProViding CAre And ViCtim Assessment

224 they respond. A response may be subtle, such as some slight movement or momentary eye opening that occurs when you speak to the victim or apply a stimulus, such as a tap to the shoulder. Use the mnemonic AVPU to help you determine the level of consciousness: A - Alert fully awake, but may still be confused V - Verbal responds to verbal stimuli P - Painful responds to painful stimuli U - Unresponsive does not respond If the victim is not awake, alert and oriented or does not respond, call EMS if you have not already done so. Summon EMS Personnel If you are unsure of the victim s condition or notice that the condition is worsening, summon EMS personnel. As a general rule, summon EMS personnel if victims experience any of the following conditions: Unresponsive or an altered level of consciousness (LOC), such as drowsiness or confusion Breathing problems (difficulty breathing or no breathing) Water inhalation after being recovered from under water Chest pain, discomfort or pressure lasting more than a few minutes, that goes away and comes back or that radiates to the shoulder, arm, neck, jaw, stomach or back Persistent abdominal pain or pressure No pulse Severe life-threatening bleeding Vomiting blood or passing blood Severe (critical) burns Suspected poisoning Seizures in the water Seizures on land, unless the person is known to have periodic seizures; if not, summon EMS personnel for a seizure on land if: o This is the person s first seizure. o The seizure lasts more than 5 minutes. o The person has repeated seizures with no sign of gaining lucidity. o The person appears to be injured. o The cause of the seizure is unknown. o The person is pregnant. o The person is known to have diabetes. o The person fails to regain responsiveness after the seizure. Suspected or obvious injuries to the head, neck or spine Stroke Painful, swollen, deformed areas (suspected broken bone) or an open fracture above the hands or feet Condition is unclear or worsening Open the Airway and Check for Breathing and Pulse If the victim does not respond, open the victim s airway and quickly check for breathing and a pulse for at least 5 seconds, but not more than 10 seconds (Figure 7-10). Perform these tasks simultaneously. If a victim is able to speak, the airway is functional, and they are breathing. However, even if a victim can speak, you must continue to assess breathing, because breathing status, rate and quality can change suddenly. Figure 7-10 When performing a primary assessment, open the victim's airway and check for breathing and a pulse simultaneously for at least 5 seconds, but no more than 10 seconds. ChAPter 7: Before ProViding CAre And ViCtim Assessment 214


 maneuver.")


225 Opening the Airway When a victim is unresponsive, the tongue relaxes and can block the flow of air through the airway, especially if the victim is lying on their back. To check for breathing and give ventilations, you must manually tilt the head or thrust the jaw to move the tongue away from the back of the throat. The method used to open the airway depends on the number of rescuers responding, the position of the rescuer to the victim and whether you suspect the victim has an injury to the head, neck or spine. You can open the airway from a position either to the side of the victim or above the victim's head, using the following techniques: From the victim's side: Use the head-tilt/chin-lift. From above the victim's head: Tilt the head back using the jaw-thrust maneuver. o When the victim is suspected of having an injury to the head, neck or spine, use the jaw-thrust (without head extension) maneuver. For a child, tilt the head slightly past the neutral position, but not as far as you would for an adult. For an infant, tilt the head to the neutral position (Table 7-3). table 7-3: Head Positions for Giving Ventilations to an Adult, a Child and an Infant Checking for Breathing To check for breathing, position your ear over the mouth and nose so that you can hear and feel air as it escapes while you look for the chest to rise and fall. Normal, effective breathing is regular, quiet and effortless. Isolated or infrequent gasping in the absence of other breathing in an unresponsive person may be agonal breaths, which can occur even after the heart has stopped beating. Be aware that this is not normal breathing. Agonal breaths are a sign of cardiac arrest. In this situation, care for the victim as though they are not breathing at all. Checking for a Pulse With every heartbeat, a wave of blood moves through the blood vessels. This creates a beat called the pulse. You can feel it with your fingertips in the arteries near the skin. Sometimes the pulse may be difficult to find, since it may be slow or weak. If you do not find a pulse within 10 seconds, do not waste any more time attempting to find one. Assume that there is no pulse, and begin care immediately. To check for a pulse: For an adult or child, feel for a carotid pulse by placing two fingers in the middle of the victim s throat and then sliding them into the groove at the side of the victim s neck closest to you. Press in lightly; pressing too hard can compress the artery. For an infant, feel for the brachial pulse on the inside of the upper arm between the infant s elbow and shoulder. Press in lightly; pressing too hard can compress the artery. 215 ChAPter 7: Before ProViding CAre And ViCtim Assessment

226 Give 2 Ventilations if Appropriate For an unresponsive person who is not breathing and does not have a pulse, it is necessary to immediately begin CPR with chest compressions. However, in certain situations, such as drowning, giving ventilations before beginning CPR is important. If you find a victim who is unresponsive and not breathing and has no pulse as a result of drowning, you should give the victim 2 ventilations before starting compressions. (See Chapter 8 for further information on breathing emergencies.) Each one should be a quality ventilation that makes the victim s chest clearly rise. If these ventilations do not make the victim s chest clearly rise, re-tilt and attempt another ventilation. However, if the victim is not breathing, does not have a pulse and was not in the water, you should assume that the problem is a cardiac emergency. In this case, begin CPR with chest compressions. (See Chapter 9 for more on cardiac emergencies.) Using a Resuscitation Mask to Give Ventilations You should use a resuscitation mask when giving ventilations, if one is available (Figure 7-11). To ensure that you are giving adequate ventilations, the mask must be properly placed and sealed over the victim s mouth and nose. Each ventilation should last about 1 second and make the victim s chest begin to rise. Be careful not to overventilate the victim by blowing too long or too forcefully. Once you see chest movement, you have given adequate ventilation. Overventilation can cause gastric distention air in the stomach which results in vomiting. It can also increase the pressure in the chest, making CPR ineffective. To use a resuscitation mask to give ventilations: Position yourself at the victim s head, either on the victim s side or above the head. Position the mask over the victim s mouth and nose, using both hands to hold the mask in place to create an airtight seal. If you are on the victim s side, tilt the victim s head back while lifting the chin. If you are behind the victim s head, tilt the head back and lift the jaw. For a victim with a suspected head, neck or spinal injury, use the jaw-thrust (without head extension) maneuver. Blow into the one-way valve, ensuring that you can see the chest rise. Each ventilation should last about 1 second, with a brief pause between breaths to let the exhaled breath escape. Figure 7-11 Use a resuscitation mask when giving ventilations. Recovery Positions If a victim is unresponsive but breathing and you do not suspect a head, neck or spinal injury, place the victim in a side-lying recovery position. If you suspect a head, neck or spinal injury, leave the victim in a face-up position unless you are unable to maintain an open airway because of fluids or vomit or if you are alone and have to leave the victim (e.g., to call for help); in these cases, a side-lying recovery position will help to keep the airway open and clear. ChAPter 7: Before ProViding CAre And ViCtim Assessment 216

227 Perform a Secondary Assessment If you are certain that the victim does not have any immediate life-threatening conditions, you should perform a secondary assessment to identify any additional problems. The secondary assessment provides additional information about injuries or conditions that may require care and could become life-threatening if not addressed. (See Chapter 10 for more information on injuries, illnesses and performing a secondary assessment.) CALL FIRST OR CARE FIRST? If you are alone when responding to someone who is ill, you must decide whether to Call First or Care First. If you are ALONE: Call First (call or the designated emergency number before providing care) for: o Any adult or child about 12 years of age or older who is unresponsive. o A child or an infant whom you witnessed suddenly collapse. o An unresponsive child or infant known to have heart problems. Care First (provide 2 minutes of care, and then call or the designated emergency number) for: o An unresponsive child (younger than about age 12) whom you did not see collapse. o Any victim suspected of drowning. Call First situations are likely to be cardiac emergencies in which time is a critical factor. In Care First situations, the conditions often are related to breathing emergencies. WHEN IS A CHILD A CHILD? In most instances, determining whether to treat a child as a child or as an adult has been based on age. Typically, an adult is defined as someone about the age of 12 (adolescent) or older; someone between the ages of 1 and 12 has been considered to be a child for CPR care; and an infant is someone younger than 1 year of age. However, for the purposes of this course, a child is defined as the age of 1 to the onset of puberty, as evidenced by breast development in girls and underarm hair development in boys. An infant is considered under the age of 1 year. 217 ChAPter 7: Before ProViding CAre And ViCtim Assessment
228 Provide Care for the Conditions Found Provide care for the conditions found during the primary and secondary assessments. Always treat life-threatening situations first. Other lifeguards and/or safety team members should assist as outlined in the EAP, either by getting equipment and summoning EMS personnel or in the actual delivery of care, such as giving two-rescuer CPR and using an AED. Care should be continued until EMS personnel take over, if needed. Report, Advise and Release Once appropriate care is given, be sure to complete incident report forms, advise the victim on next steps and release the victim to the appropriate parties. 7-6 WRAP-UP As a professional lifeguard, you are an important link in the EMS system and have a duty to act and to meet professional standards. One of these standards is taking appropriate precautions to protect yourself and others against the transmission of infectious diseases. You also should be familiar with and always follow the general procedures for responding to injury or sudden illness on land. These procedures include activating the EAP, sizing up the scene, performing an initial assessment, summoning EMS personnel by calling or the designated emergency number and, after caring for any life-threatening injuries, performing a secondary assessment. ChAPter 7: Before ProViding CAre And ViCtim Assessment 218
229 BENCHMARKS FOR LIFEGUARDS Lifeguards should: Have familiarity with and the ability to operate facility-specific rescue equipment, including resuscitation masks and BVMs. Expect to be equipped with and ready to use: o Personal protective equipment. o Lifeguarding rescue equipment. o Resuscitation equipment, including resuscitation masks, BVMs and oxygen equipment. Obtain consent, identifying themselves as trained responders. Conduct a primary assessment for timely determination of a victim s level of consciousness, breathing and pulse. BENCHMARKS FOR LIFEGUARDING OPERATIONS Managers should ensure that lifeguards are equipped with: Protective equipment. Lifeguarding rescue equipment. Resuscitation equipment, including resuscitation masks and BVMs. 219 ChAPter 7: Before ProViding CAre And ViCtim Assessment
230 Chapter 7 Review 1. Touching soiled dressings that are contaminated with potentially infectious material is an example of: A Indirect contact C Droplet contact B Direct contact D Vector-borne contact 2. Examples of work practice controls include: A Disposing of sharp items in a puncture resistant, leak-proof, labeled container B Removal and proper disposal of soiled protective clothing as soon as possible C Cleaning/disinfecting all equipment and work surfaces possibly soiled by blood or other potentially infectious material D All of the above 3. The OSHA recommended solution to use for disinfecting contaminated or soiled equipment and surfaces is: A 4 cups of bleach per gallon of water C 1/4 cup of antibacterial soap per gallon of water B 1 cup of ammonia per gallon of water D 1 part bleach per 9 parts of water 4. Place the following general procedures for injury or sudden illness on land in order: Perform a primary assessment. Provide care for the conditions found. Summon EMS, if needed and not already done. Size up the scene. Report, advise and release. Perform a secondary assessment. ChAPter 7 review 220
231 Chapter 7 Review 5. Describe six actions you should take or determinations that you should make while performing a scene size-up: 1) 2) 3) 4) 5) 6) 6. Provide a situation and specific example of when you should move a victim who is on land. 221 ChAPter 7 review
232 Chapter 7 Review 7. If you are alone when responding to someone who is ill, you must decide whether to Call First or Care First. When should you Call First? When should you Care First? 8. How do you tell the difference between an adult, a child, and an infant? Adult: Child: Infant: 9. During the primary assessment, you find the victim is not breathing and has no pulse. When would you give 2 ventilations before starting CPR? ChAPter 7 review 222


233 REMOVING DISPOSABLE GLOVES Removing Disposable Gloves Note: To remove gloves without spreading germs, never touch your bare skin with the outside of either glove Pinch the glove. Pinch the palm side of one glove on the outside near your wrist. Pull the glove toward your fingertips, turning it inside out as you pull it off your hand. Slip two fingers under the glove. Hold the removed glove in the palm of your gloved hand. Carefully slip two fingers under the glove at the wrist of the remaining gloved hand. Pull the glove off. Pull the glove toward your fingertips, turning it inside out as you pull it off your hand. The other glove is now contained inside the first glove. Dispose of gloves and wash hands. Dispose of gloves and any other PPE in a proper biohazard container. Wash your hands thoroughly with soap and running water, if available. Otherwise, rub hands thoroughly with an alcohol-based sanitizer if hands are not visibly soiled. 223 skill sheet
.")
 on the bottom of the mask and slide your first two fingers onto the bony part of the victim s chin.")
234 USING A RESUSCITATION MASK Head-Tilt/Chin-Lift Note: Always select the appropriately sized mask for the victim. 1 Kneel to the side of the victim s head Position the mask. Place the mask over the mouth and nose of the victim starting from the bridge of the nose. Place the bottom of the mask below the mouth to the chin (the mask should not extend past the chin). Seal the mask. Place the thumb and fingers of one hand around the top of the mask. Your remaining fingers can rest on the side of the victim s face. Place the thumb of your other hand (the hand closest to the victim s chest) on the bottom of the mask and slide your first two fingers onto the bony part of the victim s chin. Press downward on the mask with your top hand and the thumb of your lower hand to seal the top and bottom of the mask. Tilt the victim s head back and lift the chin to open the airway. Blow into the mask. Each ventilation should last about 1 second and make the chest clearly rise. The chest should fall before the next ventilation is given. skill sheet 224
.")
235 USING A RESUSCITATION MASK Jaw-Thrust (With Head Extension) Maneuver Note: Always select the appropriately sized mask for the victim. 1 Kneel above the victim s head Position the mask. Place the mask over the mouth and nose of the victim starting from the bridge of the nose. Place the bottom of the mask below the mouth to the chin (the mask should not extend past the chin). Seal the mask. Place your thumbs and index fingers along each side of the resuscitation mask to create a C. Slide your 3rd, 4th and 5th fingers into position to create an E on both sides of the victim s jawbone. Hold the mask in place while you tilt the head back and lift the jaw into the mask. Blow into the mask. Each ventilation should last about 1 second and make the chest clearly rise. The chest should fall before the next ventilation is given. 225 skill sheet
.")
236 USING A RESUSCITATION MASK Jaw-Thrust (Without Head Extension) Maneuver Note: Always select the appropriately sized mask for the victim. 1 Kneel above the victim s head Position the mask. Place the mask over the mouth and nose of the victim starting from the bridge of the nose. Place the bottom of the mask below the mouth to the chin (the mask should not extend past the chin). Seal the mask. Place your thumbs and index fingers along each side of the resuscitation mask to create a C. Slide your 3rd, 4th and 5th fingers into position to create an E on both sides of the victim s jawbone. Without moving or tilting the head back, lift the lower jaw up with your fingers along the jawbone to seal the mask to the face. Blow into the mask. Each ventilation should last about 1 second and make the chest clearly rise. The chest should fall before the next ventilation is given. skill sheet 226


237 MOVING A VICTIM EMERGENCY MOVES Pack-Strap Carry Note: Do not use this carry for a victim suspected of having a head, neck or spinal injury Have the victim stand or have a second rescuer support the victim in a standing position. Position yourself with your back to the victim. Keep your back straight and knees bent so that your shoulders fit into the victim s armpits. Cross the victim s arms in front of you and grasp the victim s wrists. Lean forward slightly and pull the victim up and onto your back. Stand up and walk to safety. Clothes Drag Note: The clothes drag is an appropriate emergency move for a responsive or unresponsive victim suspected of having a head, neck or spinal injury. 1 Position the victim on their back. 2 3 Kneel behind the victim s head and gather the victim s clothing behind his their neck. Pull the victim to safety, cradling the victim s head with their clothes and your hands. 227 skill sheet

238 MOVING A VICTIM NON-EMERGENCY MOVES Note: Do not use these non-emergency moves for a victim suspected of having a head, neck or spinal injury. Walking Assist Note: Either one or two lifeguards can use this method to move a victim who needs assistance walking Stand at one side of the victim, place the victim s arm across your shoulders and hold it in place with one hand. Support the victim with your other hand around the victim s waist. Walk the victim to safety. Two-Person Seat Carry Put one arm under the victim s thighs and the other across the victim s back and under the victim s arms. Have a second responder do the same. Interlock your arms with those of a second rescuer under the victim s legs and across the victim s back. Have the victim place their arms over both rescuers shoulders. Lift the victim in the seat formed by the rescuers arms and carry the victim to safety. skill sheet 228


239 PRIMARY ASSESSMENT ADULT, CHILD AND INFANT Primary Assessment Adult, Child and Infant Note: Activate the EAP and get an AED on the scene as soon as possible. 1 Size up the scene while forming an initial impression: Use your senses to check for hazards that could present a danger to you or the victim. Use appropriate PPE. Determine the number of injured or ill victims. Determine what caused the injury or the nature of the illness. Look for clues to what may have caused the emergency and how the victim became ill or injured. Form an initial impression that may indicate a life-threatening emergency, including responsiveness or severe bleeding. Does the victim look sick? Are they awake and moving? Determine what additional resources may be needed. Note: If you see severe life-threatening bleeding, use any available resources to control the bleeding including a tourniquet if one is available and you are trained Check for responsiveness. Shout, Are you okay? (use the person s name if you know it) then tap the victim on the shoulder and shout, Are you okay? again in a shout-tap-shout sequence. o For an infant, tap the foot. If no response, summon EMS personnel, if you have not already done so. If the victim is face-down, roll the victim onto their back while supporting the head, neck and back. Perform a primary assessment, open the airway and simultaneously check for breathing and a pulse for at least 5 seconds, but no more than 10 seconds. To open the airway: o From the side, use the head-tilt/ chin-lift technique. o From above the victim s head, use the jaw-thrust (with head extension) maneuver. o If a head, neck or spinal injury is suspected, use the jaw-thrust (without head extension) maneuver. 229 skill sheet


240 PRIMARY ASSESSMENT ADULT, CHILD AND INFANT Primary Assessment Adult, Child and Infant continued Look, listen and feel for breathing and pulse simultaneously. o For an adult or child, feel for a carotid pulse by placing two fingers in the middle of the victim s throat and then sliding them into the groove at the side of the neck closest to you. Press lightly. o For an infant, feel for the brachial pulse on the inside of the upper arm between the infant s elbow and shoulder. Press lightly. 5 Give two ventilations ONLY IF the victim is not breathing as the result of a drowning. If the chest does not clearly rise when attempting the first 2 ventilations, retilt the head and try to give another ventilation. If after the second attempt the chest clearly rises, give 1 more ventilation so there are two successful ventilations. If after the second attempt, the chest does not clearly rise, immediately begin CPR. 6 Provide appropriate care. If the victim is not breathing but has a pulse, give ventilations. o Adult: Give 1 ventilation about every 5-6 seconds. o Child and Infant: Give 1 ventilation about every 3 seconds. If the victim is not breathing and has no pulse, begin CPR starting with compressions. If unresponsive but breathing and you do not suspect a head, neck or spinal injury, place the victim in a side-lying recovery position. To place the victim in a recovery position: o Raise the victim's arm that is closest to you. o Roll the victim toward you so that their head rests on their extended arm. o Bend the victim s knees to stabilize their body. skill sheet 230

241 231 ChAPter 8

242 8 Breathing emergencies In a breathing emergency, a person s breathing becomes impaired, causing a potentially life-threatening situation. When air cannot travel freely and easily into the lungs, it greatly reduces the body s oxygen supply or may cut off the oxygen supply entirely. This lack of oxygen can eventually stop the heart (cardiac arrest) and, in the case of a drowning victim, prevent blood from reaching the brain and other vital organs in as little as 3 minutes after a victim submerges. Brain cell damage or death begins to occur within 4 to 6 minutes. As a lifeguard, you may be called upon at any time to respond to a breathing emergency; therefore, it is important for you to know how to recognize and care for these emergencies RECOGNIZING AND CARING FOR BREATHING EMERGENCIES GIVING VENTILATIONS AIRWAY OBSTRUCTION EMERGENCY OXYGEN OXYGEN DELIVERY DEVICES SUCTIONING WRAP-UP

243 8-1 RECOGNIZING AND CARING FOR BREATHING EMERGENCIES If a victim suffers a breathing emergency and is deprived of adequate oxygen, hypoxia will result. Hypoxia is a condition in which insufficient oxygen reaches the cells. Hypoxia may result from an obstructed airway, shock, inadequate breathing, drowning, strangulation, choking, suffocation, cardiac arrest, head trauma, carbon monoxide poisoning or anaphylactic shock. Signs and symptoms of hypoxia can include an increased heart rate, cyanosis (a condition that develops when tissues do not get enough oxygen and turn bluish, particularly in the lips and nail beds), changes in the level of consciousness (LOC), restlessness and chest pain. There are two types of breathing (also referred to as respiratory) emergencies: respiratory distress, a condition in which breathing becomes difficult, and respiratory arrest, a condition in which breathing stops. Respiratory distress can lead to respiratory failure, which occurs when the respiratory system is beginning to shut down, which in turn can lead to respiratory arrest. Breathing problems can be identified by watching and listening to a victim s breathing and by asking the victim how they feel (Figure 8-1) if they are awake and alert. Because oxygen is vital to life, always ensure that the victim has an open airway and is breathing. Without an open airway, a victim cannot breathe and will die. A victim who can speak, cry or cough forcefully is responsive, has an open airway, is breathing and has a pulse. Figure 8-1 Watch and listen for breathing problems in a responsive victim. Ask the victim how they feel. Respiratory Distress A victim who is having difficulty breathing is experiencing respiratory distress. Causes of Respiratory Distress Respiratory distress can be caused by: A partially obstructed airway Illness Chronic conditions, such as asthma, emphysema and congestive heart failure Electrocution, including lightning strikes Heart attack Injury to the head, chest, lungs or abdomen Allergic reactions Drug overdose Poisoning Emotional distress Anaphylactic shock 233 ChAPter 8: BreAthing emergencies
244 Signs and Symptoms of Respiratory Distress Signs and symptoms of respiratory distress include: Slow or rapid breathing Unusually deep or shallow breathing Shortness of breath or noisy breathing Dizziness, drowsiness or light-headedness Changes in LOC Increased heart rate Chest pain or discomfort Skin that is flushed, pale, ashen or bluish Unusually moist or cool skin Gasping for breath Wheezing, gurgling or high-pitched noises Inability to speak in full sentences Tingling in the hands, feet or lips Feelings of apprehension or fear Caring for Respiratory Distress You do not need to know the exact cause of respiratory distress to provide initial care. When you find a victim experiencing difficulty breathing, activate the emergency action plan (EAP) and: Maintain an open airway. Summon emergency medical services (EMS) personnel. Help the victim to rest in a comfortable position that makes breathing easier, such as sitting and leaning slightly forward. Reassure and comfort the victim. Assist the victim with any of their prescribed medication. Keep the victim from getting chilled or overheated. Administer emergency oxygen and monitor oxygen saturation, if available and you are trained and authorized by state law to do so. ASTHMA Asthma is an ongoing illness in which the airways swell. An asthma attack happens when an asthma trigger, such as dust or exercise, affects the airways, causing them to suddenly swell and narrow. This makes breathing difficult, which can be frightening. Recognizing an Asthma Attack You can often tell when a person is having an asthma attack by the hoarse whistling sound made when inhaling and/or exhaling. This sound, known as wheezing, occurs because the small airways have narrowed or become obstructed. Signs and symptoms of an asthma attack include: Coughing or wheezing Coughing that occurs after exercise, crying or laughing Difficulty breathing Shortness of breath Rapid, shallow breathing Sweating Tightness in the chest Inability to talk without stopping frequently for a breath or speaking in one- to threeword sentences Bent posture with shoulders elevated and lips pursed to make breathing easier Feelings of fear or confusion Caring for an Asthma Attack When someone is having trouble breathing, it is a life-threatening emergency. Assist the person with their prescribed quick-relief medication, usually an inhaler, if requested and if permitted by state or local regulations. To care for a victim of an asthma attack, follow these guidelines: Get the medication to them as soon as possible, and call or the designated emergency number if breathing does not improve after 5 to 15 minutes or if it worsens. ChAPter 8: BreAthing emergencies 234

245 ASTHMA, CONTINUED A metered-dose inhaler (MDI) is the most common way to deliver medication to a person having a sudden asthma attack. Different companies produce different styles of MDIs, but they all work in basically the same way. Use only the medication prescribed for the person and only if the person is having a severe (acute) asthma attack. Some inhalers contain long-acting preventive medication that should not be used in an emergency. Ensure that the prescription is in the person s name and is a quick-relief medication prescribed for acute attacks. Ensure that the expiration date of the medication has not passed. Read and follow any instructions printed on the inhaler before administering the medication to the victim. Figure 8-2 Assist a victim with using an asthma inhaler if locol protocols allow. Once delivered, the medication can work quickly but may take as long as 5 to 15 minutes to reach full effectiveness. To assist a person with asthma with a rescue or quick-relief inhaler, obtain consent and then follow these general guidelines, if local protocols allow (Figure 8-2): 1. Help the person sit up and rest in a position comfortable for breathing. 2. If the person has prescribed asthma medication, help them take it. 3. Shake the inhaler, and then remove the cover from the mouthpiece. Position the spacer, if the victim uses one. 4. Have the person breathe out fully through the mouth, and then place the lips tightly around the inhaler mouthpiece. 5. Have the person inhale deeply and slowly as the person (or you, if the person is unable) depresses the inhaler canister to release the medication, which they then inhale into the lungs. 6. Have the person hold their breath for a count of 10. If using a spacer, have the person take 5 to 6 deep breaths with the spacer still in the mouth, without holding the breath. 7. Monitor the person s condition. 8. If breathing does not improve after 5 to 15 minutes, or if it worsens, call Respiratory Arrest A victim who has stopped breathing but has a pulse is in respiratory arrest. Causes of Respiratory Arrest Respiratory arrest may develop from respiratory distress, respiratory failure or other causes, including: Drowning Obstructed airway (choking) Injury to the head, chest, lungs or abdomen 235 ChAPter 8: BreAthing emergencies

246 Illness, such as pneumonia Respiratory conditions, such as emphysema or asthma Congestive heart failure Heart attack Coronary heart disease (such as angina) Allergic reactions (food or insect stings) Electrocution, including lightning strikes Shock Poisoning Drug overdose Emotional distress Caring for Respiratory Arrest Although respiratory arrest may have many causes, you do not need to know the exact cause to provide care. Begin by following the general procedures for injury or sudden illness on land. To determine if someone is breathing, see if the victim s chest clearly rises and falls (Figure 8-3). Listen for escaping air, and feel for air against the side of your face when simultaneously checking for breathing and a pulse during the primary assessment. You usually can observe the chest rising and falling. Figure 8-3 Check breathing by watching if the victim's chest clearly rises and falls. Normal, effective breathing is regular, quiet and effortless. The normal breathing rate for an adult is between 12 and 20 breaths per minute; however, some people breathe slightly slower or faster. In an unresponsive person, you may detect isolated or infrequent gasping in the absence of normal breathing. These are called agonal breaths. Agonal breathing is isolated or infrequent gasping that occurs in the absence of normal breathing in an unresponsive victim. These breaths can occur after the heart has stopped beating and are considered a sign of cardiac arrest. Agonal breaths are not normal breathing. If the victim is demonstrating agonal breaths, you need to begin CPR. Drowning Victims Anyone who experiences respiratory impairment from submersion in water is a drowning victim. Drowning may or may not result in death. Victims who have been pulled from the water and are not breathing are in immediate need of ventilations. In general, if the victim is rescued quickly enough, giving ventilations may resuscitate the victim. Without oxygen, a victim s heart will stop and death will result. Your objective is to get the victim s mouth and nose out of the water, open the airway and give ventilations as quickly as possible. Always ensure that victims who have been involved in a drowning incident are taken to the hospital, even if you think the danger has passed. Complications can develop as long as 72 hours after the incident and may be fatal. ChAPter 8: BreAthing emergencies 236
, which can counteract the effects of an opioid overdose, including respiratory arrest.")
247 OPIOID OVERDOSE With a growing epidemic of opioid (commonly heroin, oxycodone, Fentanyl and Percoset TM ) overdoses in the United States, local and state departments of health have increased access to the medication naloxone (Figure 8-4), which can counteract the effects of an opioid overdose, including respiratory arrest. Naloxone (also referred to by its trade name Narcan TM ) has few side effects and can be administered intranasally through the nose. Trained responders should administer the drug when the victim is in respiratory arrest and an opioid overdose is suspected. Responders should follow local medical protocols and regulations to determine the dosing and timing of naloxone administration. Figure 8-4 Naloxone 8-2 GIVING VENTILATIONS If the victim is not breathing but has a definitive pulse, the victim is in respiratory arrest. To care for a victim experiencing respiratory arrest, you must give ventilations. Giving ventilations is a technique to supply oxygen to a victim who is in respiratory arrest. Give 1 ventilation every 5 to 6 seconds for an adult, with each ventilation lasting about 1 second and making the chest rise. Give 1 ventilation about every 3 seconds for a child or infant. When giving ventilations, it is critical to avoid over-ventilating a victim by giving ventilations at a rate and volume greater than recommended; that is, more than 1 ventilation every 5 to 6 seconds, or for longer than 1 second each. In addition to causing gastric distension (air in the stomach) and possible vomiting, over-ventilation can lead to increased pressure in the chest and a subsequent decrease in the effectiveness of CPR. When giving ventilations to a victim: Maintain an open airway by keeping the head tilted back in the proper position. Seal the mask over the victim s mouth and nose. Give ventilations (1 ventilation every 5 to 6 seconds for an adult and 1 ventilation every 3 seconds for a child or infant) for about 2 minutes, and then reassess for breathing and a pulse. If the victim has a pulse but is not breathing, continue giving ventilations. When giving ventilations, if the chest does not rise after the first breath, reopen the airway, make a seal and try a second breath. If the breath is not successful, move to compressions and check the airway for an obstruction before attempting subsequent ventilations. If an obstruction is found, remove it and attempt ventilations. However, never perform a blind finger sweep. Continue giving ventilations until: The victim begins to breathe on their own. Another trained rescuer takes over. More advanced medical personnel take over. You are too exhausted to continue. The victim has no pulse, in which case you should begin CPR and use an AED if one is available and ready to use. The scene becomes unsafe. For more details, see Table ChAPter 8: BreAthing emergencies

 into a victim without making mouth-to-mouth contact (Figure 8-5, A -C).")

248 CPR Breathing Barriers CPR breathing barriers create a barrier between your mouth and the victim s mouth and nose. This barrier can help prevent contact with a victim's blood, vomitus and saliva, and from breathing the air that the victim exhales when giving ventilations or performing CPR. CPR breathing barriers include resuscitation masks and bag-valve-mask (BVM) resuscitators. A resuscitation mask should be in your hip pack. Resuscitation Masks A resuscitation mask allows you to breathe air (with or without emergency oxygen) into a victim without making mouth-to-mouth contact (Figure 8-5, A -C). Resuscitation masks have several benefits. They help to get air quickly to the victim through both the mouth and nose; create a seal over the victim s mouth and nose; can be connected to emergency oxygen, if equipped with an oxygen inlet; and protect against potential disease transmission. A resuscitation mask should: Be easy to assemble and use. Be made of transparent, pliable material that allows you to make a tight seal over the victim s mouth and nose. Have a one-way valve for releasing exhaled air. Have a standard 15- or 22-mm coupling assembly (the size of the opening for the one-way valve). Have an inlet for delivering emergency oxygen, if facility protocols include administering emergency oxygen. Perform well under different environmental conditions, such as in water or under extreme temperatures. Figure 8-5A Resuscitation mask Figure 8-5B Pediatric resuscitation mask When using a resuscitation mask, make sure to use one that matches the size of the victim. For example, use an adult resuscitation mask for an adult victim and an infant resuscitation mask for an infant. Also, ensure that you position and seal the mask properly before blowing into the mask. Figure 8-5C Resuscitation mask ChAPter 8: BreAthing emergencies 238

249 Bag-Valve-Mask Resuscitators A BVM resuscitator is a handheld device used to administer a higher concentration of oxygen than a pocket mask. BVMs are operated by two responders in a multiple-responder situation. A BVM has three parts: a bag, a valve and a mask. By placing the mask over the victim s mouth and nose and squeezing the bag, you open the oneway valve, forcing air into the victim s lungs. When you release the bag, the valve closes and air from the surrounding environment refills the bag. Because it is necessary to maintain a tight seal on the mask, two rescuers should operate a BVM (one rescuer positions and seals the mask while Figure 8-6 BVMs come in a variety of sizes for use with adults, children and infants. the second rescuer squeezes the bag). BVMs have several advantages, in that they: Increase oxygen levels in the blood by using the air in the surrounding environment instead of the air exhaled by a rescuer. Can be connected to emergency oxygen. Are more effective for giving ventilations than a resuscitation mask when used correctly by two rescuers. Protect against disease transmission and inhalation hazards if the victim has been exposed to a hazardous gas. May be used with advanced airway adjuncts. BVMs come in various sizes to fit adults, children and infants (Figure 8-6); you should use the appropriately sized BVM for the size of the victim. Using an adult BVM on an infant has the potential to cause harm and should not be used unless a pediatric BVM is unavailable and more advanced medical personnel advise you to do so. ANAPHYLAXIS Anaphylactic shock, also known as anaphylaxis, is a severe allergic reaction that can cause difficulty breathing, as air passages swell and restrict airflow in and out of the victim s lungs and airways. Anaphylaxis can also cause other responses, such as a combination of shock, swelling and skin reactions. In susceptible people, triggers can include insect bites or stings, certain foods (like peanuts, tree nuts, shellfish, milk, eggs, soy and wheat), animal dander, plant pollen, certain medications (like penicillin and sulfa drugs), latex and chemicals. Anaphylactic shock is a life-threatening condition and requires immediate care. A person who is experiencing anaphylaxis may develop one or more of the signs and symptoms within seconds or minutes of coming into contact with the allergen. Anyone at risk should wear a medical identification tag, bracelet or necklace and have an epinephrine auto-injector readily available. Recognizing Anaphylaxis Some possible signs and symptoms of anaphylaxis include: Trouble breathing Swelling of the face, neck, tongue or lips A feeling of tightness in the chest or throat Skin reactions (such as hives, itchiness or flushing) Stomach cramps, nausea, vomiting or diarrhea Dizziness Loss of consciousness Signs and symptoms of shock (such as excessive thirst; skin that feels cool or moist and looks pale or bluish; an altered level of consciousness and a rapid, weak heartbeat) To determine if a person is experiencing anaphylaxis, look at the situation as well as the person s signs and symptoms (Table 8-1). 239 ChAPter 8: BreAthing emergencies
250 table 8-1: Recognizing Anaphylaxis Situation You do not know if the person has been exposed to an allergen. You think the person may have been exposed to an allergen. You know that the person has been exposed to an allergen. Look For: Any skin reaction (such as hives, itchiness or flushing), OR Swelling of the face, neck, tongue or lips PLUS Trouble breathing, OR Signs and symptoms of shock Any TWO of the following: Any skin reaction Swelling of the face, neck, tongue or lips Trouble breathing Signs and symptoms of shock Nausea, vomiting, cramping or diarrhea Trouble breathing, OR Signs and symptoms of shock ANAPHYLAXIS, CONTINUED Caring for Anaphylaxis If you suspect that someone is experiencing anaphylaxis, you should immediately: Have someone summon EMS personnel. Offer to help the person administer their medication, if the person carries any (e.g., epinephrine) and if local protocols allow. (Epinephrine is a form of adrenaline medication prescribed to treat the symptoms of severe allergic reactions.) Help the person administer the medication, and then summon EMS personnel, if you are alone. Make sure the person is sitting in a comfortable position while you wait for help to arrive, or have the person lie down if they are showing signs of shock. Assist with the administration of a second dose of epinephrine in 5 to 10 minutes if signs and symptoms persist and EMS has not arrived on scene. Epinephrine Epinephrine is a drug that slows or stops the effects of anaphylaxis. If a person is known to have an allergy that could lead to anaphylaxis, they may carry an epinephrine auto-injector (a syringe system, available by prescription only, that contains a single dose of epinephrine). Devices are available in different doses because the dose of epinephrine is based on weight (0.15 milligrams for children weighing between 33 and 66 pounds, and 0.3 milligrams for children and adults weighing more than 66 pounds). Many healthcare providers advise that people with a known history of anaphylaxis carry an anaphylaxis kit containing at least two doses of epinephrine (two auto-injectors) with them at all times. This is because more than one dose may be needed to stop the anaphylactic reaction. Have the person administer a second dose only if emergency responders are delayed and the person is still having signs and ChAPter 8: BreAthing emergencies 240
251 ANAPHYLAXIS, CONTINUED symptoms of anaphylaxis 5 to 10 minutes after administering the first dose. It is important to act fast when a person is having an anaphylactic reaction because difficulty breathing and shock are both lifethreatening conditions. If the person is unable to self-administer the medication, you may need to help. You may assist a person with using an epinephrine auto-injector when the person has a previous diagnosis of anaphylaxis and has been prescribed an epinephrine auto-injector, the person is having signs and symptoms of anaphylaxis, the person requests your help using an auto-injector and your state laws permit giving assistance. Where state and local laws allow, some organizations (such as schools) keep a stock epinephrine auto-injector for designated staff members who have received the proper training to use in an anaphylaxis emergency. If you are using a stock epinephrine auto-injector, follow your facility s EAP, which may include verifying that the person is showing signs and symptoms of anaphylaxis, ensuring that the person has been prescribed epinephrine in the past and making sure to use a device containing the correct dose based on the person s weight. Different brands of epinephrine auto-injectors are available, but all work in a similar fashion (and some have audio prompts to guide the user). The device is activated by pushing it against the mid-outer thigh. Once activated, the device injects the epinephrine into the thigh muscle. The device must be held in place for the recommended amount of time (5 to 10 seconds, depending on the device) to deliver the medication. Some medication may still remain in the auto-injector even after the injection is complete. After removing the autoinjector, massage the injection site for several seconds (or have the person massage the injection site). Handle the used device carefully to prevent accidental needlestick injuries. Place the device in a rigid container, and then give the container to EMS personnel for proper disposal. To assist with administering epinephrine via an Epi-Pen TM : 1. Check the label on the auto-injector. If the medication is visible, check to make sure the medication is clear, not cloudy. If the medication is expired or cloudy, do not use it. 2. Determine whether the person has already given themselves a dose of the medication. If the person has, help them administer a second dose only if EMS personnel are delayed and the person is still having signs and symptoms of anaphylaxis 5 to 10 minutes after administering the first dose. 3. Locate the outer-middle of one thigh to use as the injection site (Figure 8-7). Make sure there is nothing in the way, such as seams or items in a pocket. 4. Grasp the auto-injector firmly in one fist and pull off the safety cap with your other hand. 5. Hold the orange tip (needle end) against the person s outer thigh so that the autoinjector is at a 90-degree angle to the thigh. 6. Quickly and firmly push the tip straight into the outer thigh. You may hear and feel a click. 7. Hold the auto-injector firmly in place for 10 seconds, then remove it from the thigh and massage the injection site with a gloved hand for several seconds or have the victim massage the thigh if gloves are not immediately available (Figure 8-8). 8. Check the person s condition and watch to see how they respond to the medication. If the person is still having signs and symptoms 5 to 10 minutes after administering the first dose and EMS personnel have not arrived, help the person to administer a second dose. 241 ChAPter 8: BreAthing emergencies


252 ANAPHYLAXIS, CONTINUED 9. Place the used auto-injector in its plastic carrying case or another hard plastic container with the tip facing down. Give it to EMS personnel when they arrive. Check state and local regulations regarding use of prescription and over-the-counter medications. Antihistamines The person s healthcare provider may recommend that the person carry an antihistamine in their anaphylaxis kit, in addition to epinephrine. An antihistamine is a medication that counteracts the effects of histamine, a chemical released by the body during an allergic reaction. Antihistamines are supplied as pills, capsules or liquids and are taken by mouth. The person should take the antihistamine according to the medication label and their healthcare provider s instructions. Figure 8-7 Press the tip straight into the outer thigh. Figure 8-8 Massage the injection site with a gloved hand. Giving Ventilations Special Considerations Frothing A white or pinkish froth or foam may be coming out of the mouth and/or nose of victims of a drowning. This froth results from a mix of mucous, air and water during respiration. If you see froth, open the airway and begin giving ventilations. If an unresponsive victim s chest does not clearly rise after you give a ventilation, re-tilt the head and then reattempt another ventilation. If the ventilation still do not make the chest clearly rise, assume that the airway is blocked and begin CPR, beginning with chest compressions. Vomiting When you give ventilations, the victim may vomit. Many victims who have been submerged vomit because water has entered the stomach or air has been forced accidentally into the stomach during ventilations. If this occurs, quickly turn the victim onto their side to keep the vomit from blocking the airway and entering the lungs (Figure 8-9). Support the head and neck, and turn the body as a unit. After vomiting stops, clear the victim s airway by wiping out the victim s mouth using a finger sweep and suction device, if one is available and you are trained to use it, and then turn the victim onto their back and continue with ventilations. Figure 8-9 If victim vomits, turn them on their side to keep the vomit from entering the victim's airway. ChAPter 8: BreAthing emergencies 242

253 You can use a finger sweep to clear the airway of an unresponsive victim when the blockage is visible, but when available, you should use a manual suction device to suction the airway clear. Suctioning is the process of removing foreign matter from the upper airway by means of a suction device. When using a manual suction device: Remove the protective cap from the tip of the suction catheter. Measure the suction tip to prevent inserting the suction tip too deeply. Suction for no more than 15 seconds at a time for an adult, 10 seconds for a child and 5 seconds for an infant. Apply suction as you withdraw the catheter from the mouth. Gastric Distention When giving ventilations, give just enough air to make the victim s chest rise. The chest should fall before you give the next ventilation. If you overventilate the victim, air may enter the stomach, causing gastric distention. The victim then will likely vomit, which can obstruct the airway and complicate resuscitation efforts. Dentures If the victim is wearing dentures, leave them in place unless they become loose and block the airway. Dentures help to support the victim s mouth and cheeks, making it easier to seal the mask when giving ventilations. Mouth-to-Mouth Ventilations While on duty as a lifeguard, you are expected to have professional equipment either in your hip pack or readily available. However, if you are in a situation off the job in which you do not have a resuscitation mask or BVM available and you need to provide mouth-to-mouth ventilations: Open the airway past a neutral position, using the head-tilt/chin-lift technique. Pinch the nose shut, and make a complete seal over the victim s mouth with your mouth. Give ventilations by blowing into the victim s mouth. Ventilations should be given one at a time. Take a break between breaths by breaking the seal slightly between ventilations and then taking a breath before re-sealing over the mouth. Suspected Head, Neck or Spinal Injury If you suspect that an unresponsive victim has a head, neck or spinal injury, always take care of the airway and breathing first. Open the airway by using the jaw-thrust (without head extension) maneuver to check for breathing or to give ventilations (Figure 8-10). If the jaw-thrust (without head extension) maneuver does not open the airway, use the head-tilt/chin-lift technique. See Chapter 11 for more information. If the victim vomits, quickly roll the victim (the entire body, not just the head) onto their side to prevent aspiration or airway obstruction. After vomiting stops, remove vomit from the victim s mouth using a finger sweep or suction device, if necessary, and turn the victim onto their back and continue with ventilations. Figure 8-10 Jaw-thrust (without head extension) maneuver 243 ChAPter 8: BreAthing emergencies
254 With mouth-to-mouth ventilations, the victim receives a concentration of oxygen at approximately 16 percent compared to the oxygen concentration of ambient air at approximately 20 to 21 percent. Giving individual ventilations can help maintain this oxygen concentration level. However, if you do not break the seal and take a breath between ventilations, the second ventilation will contain a decreased oxygen concentration. Mask-to-Stoma Ventilations Some victims may breathe through a stoma an opening in the neck as a result of surgery. If so, keep the airway in a neutral position as you look, listen and feel for breathing with your ear over the stoma. To give ventilations, make an airtight seal with a round pediatric resuscitation mask around the stoma or tracheostomy tube and blow into the mask. table 8-2: Giving Ventilations Adult, Child and Infant Giving Ventilations Adult Child and Infant Give 1 ventilation every 5 to 6 seconds. Each ventilation should last about 1 second and make the chest clearly rise. The chest should fall before you give the next ventilation. Give 1 ventilation every 3 seconds. Each ventilation should last about 1 second and make the chest clearly rise. The chest should fall before you give the next ventilation. When giving ventilations to care for a victim in respiratory arrest, keep the following in mind: Maintain an open airway by keeping the head tilted back in the proper position. Seal the mask over the victim s mouth and nose. Give ventilations for about 2 minutes, then reassess for breathing and a pulse. If a ventilation does not make the chest clearly rise, re-tilt the head and attempt another ventilation. o If the chest still does not rise after an additional attempt, provide care for a potential airway obstruction by immediately beginning CPR, starting with compressions. If the victim vomits, roll the victim onto their side and clear the victim's mouth using a finger sweep and suction device, if available. Turn the victim onto their back and continue giving ventilations. If the victim has a pulse but is not breathing, continue giving ventilations. ChAPter 8: BreAthing emergencies 244

255 8-3 AIRWAY OBSTRUCTION Airway obstruction is a common emergency. You need to be able to recognize that a victim who cannot cough, speak, cry or breathe requires immediate care. Airway obstructions can lead to respiratory and even cardiac arrest if not addressed quickly and effectively. A responsive person clutching their throat is exhibiting what is commonly called the universal sign for choking. However, in many cases, a victim will just panic. Other behaviors that might be seen include running about, flailing arms or trying to get another s attention. There are two types of airway obstruction: mechanical and anatomical. Any foreign body lodged in the airway is a mechanical obstruction and requires immediate attention. An anatomical airway obstruction is caused by the body itself, most commonly the tongue. An unresponsive victim loses muscle control, which may cause the tongue to fall back and block the airway. Causes of Airway Obstructions Common causes of choking include: Swallowing poorly chewed food. Drinking alcohol before or during meals (Alcohol dulls the nerves that aid swallowing, making choking on food more likely.) Eating too fast, or talking or laughing while eating. Walking, playing or running with food or objects in the mouth. Wearing dentures (Dentures make it difficult to sense whether food is fully chewed before it is swallowed.) Caring for an Adult or Child Airway Obstruction You must get consent before helping a responsive choking person. If the person is a child, get consent from a parent or guardian, if present. If no parent or guardian is present, consent is implied (Figure 8-11). If you suspect a person is choking, ask the victim, Are you choking? Then, identify yourself and ask if you can help. If the victim is coughing, encourage continued coughing. If the victim cannot cough, speak or breathe or has a weak, ineffective cough, activate the EAP and have another person summon EMS personnel. For an adult or child, if the victim can cough forcefully, encourage them to continue coughing until they are able to breathe normally. If the victim cannot breathe or has a weak or ineffective cough, you will need to perform a combination of 5 back blows (blows between the shoulder blades) followed by 5 abdominal thrusts (inward and upward thrusts just above the navel). To perform back blows, position yourself to the side and slightly behind the victim. For a child, you may need to kneel. Place one arm diagonally across the person s chest (to provide support) and bend the person forward at the waist so that the victim's upper body is as close to parallel to the ground as possible. Firmly strike the victim between the shoulder blades with the heel of your other hand. Each back blow should be separate from the others. Figure 8-11 If a parent or guardian is present, obtain consent before providing care 245 ChAPter 8: BreAthing emergencies

256 To perform abdominal thrusts, stand behind the victim and, while maintaining your balance, make a fist with one hand and place it thumb-side against the victim's abdomen just above the navel. Cover the fist with your other hand, and give quick, upward thrusts. Perform a combination of 5 back blows followed by 5 abdominal thrusts. Each back blow and abdominal thrust should be a separate and distinct attempt to dislodge the object. Continue delivering a combination of back blows and abdominal thrusts until the object is forced out; the victim can cough, speak or breathe or the victim becomes unresponsive. If you cannot reach far enough around the victim to give effective abdominal thrusts, or if the victim is obviously pregnant or known to be pregnant, give chest thrusts (Figure 8-12). To perform chest thrusts, stand behind the victim and place the thumb-side of your fist against the lower half of the victim s sternum (breastbone) and your second hand over the fist. Then give quick, inward thrusts. If a responsive victim becomes unresponsive, carefully lower the victim to a firm, flat surface, send someone to get an AED and summon EMS if you have not already done so. Immediately begin CPR with chest compressions. Unlike the responsive victim suffering foreign body airway obstruction, consent is implied when a victim is unresponsive. However, you must get consent from a parent or guardian, if present, before caring for an unresponsive child with an airway obstruction. As you open the airway to give ventilations, look in the person s mouth for any visible object. If you can see it, use a finger sweep motion to remove it. If you do not see the object, do not perform a blind finger sweep, but continue CPR. Remember to never try more than 2 ventilations during one cycle of CPR, even if the chest does not rise. Continuing cycles of 30 compressions and 2 ventilations is the most effective way to provide care. Even if ventilations fail to make the chest rise, compressions may help clear the airway by moving the blockage to the upper airway, where it can be seen and removed. For more details, see Table 8-3. Figure 8-12 If a victim is obviously pregnant, use chest thrusts instead of abdominal thrusts to dislodge the object. Caring for an Infant Airway Obstruction If the victim is an infant, get consent from a parent or guardian, if present. If no parent or guardian is present, consent is implied. Identify yourself and ask if you can help. When an infant is choking and awake but unable to cough, cry or breathe, you will need to perform a series of 5 back blows and 5 chest thrusts from a kneeling position. Start with back blows. Hold the infant face-down on one arm using your thigh for support. Make sure the infant s head is lower than their body and that you are supporting the infant s head and neck. With your other arm, give firm back blows with the heel of your hand between the infant s scapulae. After 5 back blows, start chest thrusts. Turn the infant over onto your other arm, using your thigh for support. Make sure to support the head and neck as you move the infant. Place two fingers in the center of the infant s chest, just below the nipple line. Give 5 quick thrusts. Continue this cycle of 5 back blows and 5 chest thrusts until the object is forced out; the infant can cough, cry or breathe; or the infant becomes unresponsive. If an infant does become unresponsive while choking, carefully place the infant onto a firm, flat surface, send someone to get an AED and summon EMS if you have not already done so. Immediately begin CPR, starting with chest compressions. For more details, see Table 8-3. ChAPter 8: BreAthing emergencies 246
257 table 8-3: Providing Care for Obstructed Airway Adult, Child and Infant Adult and Child Infant Continue the cycle of care until: When providing care: Caring for a Responsive Choking Victim 5 back blows 5 abdominal thrusts o Use chest thrusts if you cannot reach around the victim or the victim is pregnant. 5 back blows 5 chest trusts The object is forced out. The victim begins to cough forcefully or breathe. The victim becomes unresponsive. Use less force on a child than you would on an adult when giving abdominal thrusts. Use two fingers on the center of the chest, just below the nipple line, when giving chest trusts to an infant. Keep one hand on the victim s forehead to maintain an open airway when giving chest thrusts to an infant. If a Choking Victim Becomes Unresponsive Carefully lower the victim to a firm, flat surface. Send someone to get an AED and summon EMS if you have not already done so. Immediately begin CPR, starting with chest compressions. After each set of chest compressions and before attempting ventilations, open the victim's mouth and look for the object. o If you see an object in the victim's mouth, carefully remove it using your finger. Never perform a blind finger sweep. Carefully lower the victim to a firm, flat surface. Send someone to get an AED and summon EMS if you have not already done so. Immediately begin CPR, starting with chest compressions. After each set of chest compressions and before attempting ventilations, open the victim's mouth and look for the object. o If you see an object in the victim's mouth, carefully remove it using your finger. Never perform a blind finger sweep. The victim begins to breathe on their own. Another trained rescuer takes over. More advanced medical personnel, such as EMS personnel, take over. You are too exhausted to continue. The scene becomes unsafe. Remember to never attempt more than 2 ventilations during one cycle of CPR, even if the chest does not rise. Continuing cycles of 30 compressions and 2 ventilations is the most effective way to provide care. If the victim vomits at any time, including during a compression cycle, immediately roll the victim to their side, clear the mouth, reposition the victim on their back and resume CPR. 247 ChAPter 8: BreAthing emergencies


258 8-4 EMERGENCY OXYGEN When someone has a breathing or cardiac emergency, the supply of oxygen to the brain and heart, as well as the rest of the body, is reduced, resulting in hypoxia. Hypoxia is when an insufficient amount of oxygen reaches the cells. If breathing stops (respiratory arrest), the brain and heart will soon be starved of oxygen, resulting in cardiac arrest and ultimately death if not managed quickly and appropriately. Oxygen cylinders come in different sizes and various pressure capacities. In the United States, oxygen cylinders typically have green markings. However, the color scheme is not regulated, so different manufacturers and countries other than the United States may use differently colored markings. Oxygen cylinders are under high pressure and should be handled carefully. The air a person normally breathes is about 20 to 21 percent oxygen. When giving ventilations or performing CPR mouth-to-mouth or with a resuscitation mask, the air exhaled into the victim is about 16 percent oxygen. By administering emergency oxygen, you can deliver a higher percentage of oxygen, thus improving or eliminating hypoxia (Figure 8-13). Emergency oxygen can be given for many breathing and cardiac emergencies, but should be administered as a secondary treatment after the priorities of airway management, ventilation, CPR, AED, bleeding control and other lifesaving care have been addressed. Consider administering emergency oxygen for victims who are hypoxic, as evidenced by an oxygen saturation below 94 percent. Figure 8-13 Administering emergency oxygen Oxygen should be delivered using equipment that is properly sized for the victim and flow rates that are appropriate for the delivery device. Emergency oxygen units are available in some jurisdictions, but they require a prescription in most, provided that they contain at least a 15-minute supply of oxygen and are designed to deliver a pre-set flow rate of at least 6 liters per minute (LPM). Medical-grade oxygen cylinders are labeled U.S.P. and marked with a yellow diamond containing the word Oxygen (Figure 8-14). Figure 8-14 Oxygen cylinders are marked with a yellow diamond that reads "Oxygen" and, in the United States, typically have green markings. ChAPter 8: BreAthing emergencies 248
.")

, nearly empty or in-between.")

259 Variable-Flow-Rate Oxygen Many EMS systems use variable-flow-rate oxygen, which allows the rescuer to vary the flow of oxygen. These systems are practical because they are able to deliver a specific amount of oxygen based on a victim s need. cylinder. An O-ring gasket makes the seal tight (Figure 8-16). The flowmeter controls how rapidly the oxygen flows from the cylinder to the victim. The flow can generally be set from 1 to 15 LPM. To administer emergency oxygen using a variableflow-rate system, assemble the following pieces of equipment: an oxygen cylinder, a regulator with pressure gauge and flowmeter, and a delivery device. The regulator lowers the pressure of the oxygen as it comes out of the cylinder so that the oxygen can be used safely (Figure 8-15). The regulator also has a pressure gauge that shows the pressure in the cylinder. The pressure gauge shows if the cylinder is full (2000 pounds per square inch psi ), nearly empty or in-between. The regulator must be carefully attached to the oxygen Figure 8-15 A pressure regulator is attached to an oxygen cylinder to reduce the pressure of oxygen to a safe level. Figure 8-16 An O-ring gasket Fixed-Flow-Rate Oxygen Some emergency oxygen systems have the regulator set at a fixed-flow rate. Most fixed-flowrate tanks are set at 15 LPM; however, you may come across tanks set at 6 LPM, 12 LPM or another rate. Some fixed-flow-rate systems have a dual (high/low) flow setting. Fixed-flow-rate oxygen systems typically come with the delivery device, regulator and cylinder already assembled (Figure 8-17), which makes it quick and simple to administer emergency oxygen. A drawback to fixed-flow-rate oxygen systems is that the flow rate cannot be adjusted, which limits how it can be used, including limiting the concentration of oxygen that can be delivered. For example, a fixed-flow-rate unit with a preset flow of 6 LPM can be used only with a nasal cannula or resuscitation mask, whereas a preset-flow rate of 12 LPM allows the use of only a resuscitation mask or non-rebreather mask. To operate this type of device, simply turn it on according to the manufacturer s instructions, check that oxygen is flowing and place the delivery device on the victim. Figure 8-17 A fixed-flow-rate oxygen system Oxygen Safety Precautions When preparing and administering emergency oxygen, safety is a concern. Use emergency oxygen equipment according to the manufacturer s instructions and in a manner consistent with federal and local regulations and protocols. 249 ChAPter 8: BreAthing emergencies
260 Also, follow these recommended guidelines: Be sure that oxygen is flowing before putting the delivery device over the victim s face. Do not use oxygen around flames or sparks, including smoking materials, such as cigarettes, cigars and pipes. Oxygen causes a fire to burn more rapidly and intensely. Do not use grease, oil or petroleum products to lubricate or clean the regulator. This could cause a fire or an explosion. Do not stand oxygen cylinders upright, unless they are well secured. If the cylinder falls, the regulator or valve could become damaged or cause injury due to the intense pressure in the tank. Do not drag or roll cylinders. Do not carry a cylinder by the valve or regulator. Do not hold onto protective valve caps or guards when moving or lifting cylinders. Do not deface, alter or remove any labeling or markings on the oxygen cylinder. Do not attempt to mix gases in an oxygen cylinder or transfer oxygen from one cylinder to another. Do not use a defibrillator when around flammable materials, such as free-flowing oxygen or gasoline. (If oxygen is being administered to a victim when an AED is ready to be used, make sure to close the tank before shocking.) Never attempt to refill an oxygen cylinder; only an appropriately licensed professional should do this. When high-pressure oxygen cylinders have been emptied, close the cylinder valve, replace the valve protection cap or outlet plug, if provided, and mark or tag the cylinder as empty. Promptly return the cylinder to be refilled according to state, local and facility regulations and policies. Pay specific attention to the following areas concerning oxygen cylinders: Check for cylinder leaks, abnormal bulging, defective or inoperative valves or safety devices. Check for the physical presence of rust or corrosion on a cylinder or cylinder neck, and any foreign substances or residues, such as adhesive tape, around the cylinder neck, oxygen valve or regulator assembly. These substances can hamper oxygen delivery and, in some cases, have the potential to cause a fire or explosion. 8-5OXYGEN DELIVERY DEVICES An oxygen delivery device is the equipment used to provide emergency oxygen to a victim. Tubing carries the oxygen from the regulator to the delivery device. When administering emergency oxygen, make sure that the tubing does not get tangled or kinked, which could stop the flow of oxygen to the mask or cannula. Oxygen delivery devices include nasal cannulas, resuscitation masks, non-rebreather masks and BVMs (Table 8-4). Various sizes of these devices are available for adults, children and infants. Appropriate sizing is important to ensure adequate management. If young children or infants are frightened by a mask being placed on their face, you can use the blow-by technique. To perform this technique, you, a parent or guardian holds the mask about 2 inches from the child s or infant s face, waving it slowly from side to side, allowing the oxygen to pass over the face and be inhaled. ChAPter 8: BreAthing emergencies 250
261 Nasal Cannulas Nasal cannulas are used only on victims who are able to breathe, most commonly on those with minor breathing difficulty or a history of respiratory medical conditions. They are useful for a victim who can breathe but cannot tolerate a mask over the face. Nasal cannulas are held in place over a victim s ears, and oxygen is delivered through two small prongs inserted into the nostrils. Nasal cannulas deliver between 24 percent and 44 percent oxygen to the victim. These devices are not used often in an emergency because they do not give as much oxygen as a resuscitation mask, non-rebreather mask or BVM. Victims experiencing a serious breathing emergency generally breathe through the mouth and need a device that can supply a greater concentration of oxygen. Nasal cannulas may not be effective for victims with a nasal airway obstruction, nasal injury or severe cold. With a nasal cannula, you should set the flow rate between 1 and 6 LPM, although a flow rate between 2 and 4 LPM is most common. Avoid using rates above 6 LPM with this device since they tend to quickly dry out mucous membranes, which causes nose bleeds and headaches. Resuscitation Masks A resuscitation mask with oxygen inlet can be used to deliver emergency oxygen to a nonbreathing victim. It also can be used to deliver oxygen to someone who is breathing but still requires emergency oxygen. Some resuscitation masks come with elastic straps to place over the victim s head to keep the mask in place. If the mask does not have straps, you or the victim can hold the mask in place. With a resuscitation mask, set the oxygen flow rate at 6 10 LPM for a responsive victim, or 6 15 LPM for an unresponsive victim. The resuscitation mask can deliver between 25 percent and 55 percent oxygen concentration. Non-Rebreather Masks A non-rebreather mask is used to deliver high concentrations of oxygen to a victim who is breathing. It consists of a face mask with an attached oxygen reservoir bag and a one-way valve between the mask and bag, which prevents the victim s exhaled air from mixing with the oxygen in the reservoir bag. The victim inhales oxygen from the bag, and exhaled air escapes through flutter valves on the side of the mask. The flow rate should be set at LPM. When using a non-rebreather mask with a high-flow rate of oxygen, you can deliver up to 90 percent oxygen concentration to the victim. Bag-Valve-Mask Resuscitators A BVM can be used on a breathing or nonbreathing victim. A responsive, breathing victim can hold the BVM to inhale the oxygen, or you can squeeze the bag as the victim inhales in order to deliver more oxygen. Set the oxygen flow rate at 15 LPM or higher when using a BVM. The BVM with an oxygen reservoir bag is capable of supplying 90 percent or more oxygen concentration when used at 15 LPM or higher. 251 ChAPter 8: BreAthing emergencies


262 Monitoring Oxygen Saturation A pulse oximeter is a device that can be used to measure the percentage of oxygen saturation in the blood. Pulse oximetry may be used as an added tool, but an assessment of the victim s signs and symptoms should be used to make decisions about care. It is possible for victims to show a normal reading but have trouble breathing, or to have a low reading but appear to be breathing normally. The pulse oximeter reading never should be used to withhold oxygen from a victim who appears to be hypoxic or when it is the standard of care to apply oxygen despite good pulse oximetry readings. Range Percent Value Delivery Device Normal 95 to 100 None Mild hypoxia 91 to 94 Nasal cannula or resuscitation mask Moderate hypoxia 86 to 90 Non-rebreather mask or BVM Severe hypoxia 85 Non-rebreather mask or BVM To use a pulse oximeter, apply the probe to the victim s finger or any other measuring site, such as the ear lobe or foot, according to the manufacturer s recommendation (Figure 8-18). Let the machine register the oxygen saturation level and verify the victim s pulse rate on the oximeter with the actual pulse of the victim. Monitor the victim s saturation levels while administering emergency oxygen. If the oxygen level reaches 100 percent and local protocols allow, you may decrease the flow rate of oxygen and change to a lower-flowing delivery device. Figure 8-18 Pulse oximeter devices are commonly used by EMS personnel. table 8-4: Oxygen Delivery Devices Delivery Device Common Flow Rate Oxygen Concentration Suitable Victims Nasal Cannula 1 6 LPM Victims with breathing difficulty Victims unable to tolerate mask Resuscitation Mask 6 15 LPM Victims with breathing difficulty Victims who are nonbreathing Non-Rebreather Mask LPM Up to 90 Breathing victims only BVM 15 LPM or higher 90 or higher Breathing and nonbreathing victims ChAPter 8: BreAthing emergencies 252


 are operated by hand. They are lightweight, compact and relatively inexpensive.")
263 8-6SUCTIONING Sometimes injury or sudden illness can cause mucus, fluids or blood to collect in a victim s airway. A finger sweep can be used to clear the airway on an unresponsive victim when the blockage is visible, but a more effective method is to suction the airway clear. Suctioning is the process of removing foreign matter from the upper airway using a manual or mechanical device. Suctioning is not necessary or beneficial in attempting to remove water from the lungs of a drowning victim. It is important to suction when fluids or foreign matter are present or suspected, because the airway must be open and clear in order for the victim to breathe. Manual suction units (Figure 8-19) are operated by hand. They are lightweight, compact and relatively inexpensive. Because they do not require an energy source, they avoid some of the problems associated with mechanical units and are more suited to the aquatic environment. If suctioning is part of facility protocols, there should be several sizes of sterile suction catheters on hand to use on victims of various sizes. Figure 8-19 Suctioning devices are used to clear a victim's airway. AIRWAY ADJUNCTS The tongue is the most common cause of airway obstruction in an unresponsive person. You can use a mechanical device, called an airway adjunct, to keep a victim s airway clear. An improperly placed airway device can compress the tongue into the back of the throat, further obstructing the airway. There are two types of basic airway adjuncts. One type, called an oropharyngeal airway (OPA) is inserted in the victim s mouth. The other type, called a nasopharyngeal airway (NPA) is inserted in the victim s nose. OPAs and NPAs come in a variety of sizes. The curved design fits the natural contour of the airways. Once you have positioned the airway adjunct, use a resuscitation mask or BVM to ventilate a non-breathing victim. If using an NPA on a victim who is breathing normally, you may utilize a non-rebreather mask to supply supplemental oxygen. Oropharyngeal Airways When properly positioned, an OPA keeps the tongue away from the back of the throat, helping to maintain an open airway (Figure 8-20). Figure 8-20 Insert an OPA with the curved tip along the roof of the mouth to clear a victim's airway. Rotate it to drop it into the back of the throat. Nasopharyngeal Airways When properly positioned, an NPA can help maintain an open airway. An NPA may be used on a conscious, responsive victim or an unresponsive victim. Unlike an OPA, the NPA does not cause the victim to gag. NPAs should not be used on victims with suspected facial trauma or skull fracture. Follow local protocols for when, how and who can use NPAs. 253 ChAPter 8: BreAthing emergencies
264 8-7WRAP-UP Breathing emergencies are extremely serious. As a lifeguard, you must know how to recognize the signs and symptoms of respiratory distress, hypoxia and respiratory arrest and react immediately to provide care for victims. This includes knowing how to give ventilations and care for choking victims. If facility protocols, local laws and regulations allow, it also includes knowing how to administer emergency oxygen and use airway adjuncts and suction devices. BENCHMARKS FOR LIFEGUARDS Lifeguards should provide appropriate care for victims experiencing respiratory emergencies, which includes: Caring for drowning as a respiratory event. Handling life-threatening situations with a sense of urgency. Using resuscitation equipment, including appropriately sized breathing barriers and BVMs. Recognizing signs and symptoms of respiratory distress and providing care. Recognizing and providing care for responsive and unresponsive victims with an obstructed airway. Administering emergency oxygen using a variety of oxygen delivery devices if permitted by local protocols and you are trained and certified. BENCHMARKS FOR LIFEGUARDING OPERATIONS As professional responders, lifeguards should reasonably expect the following facility-specific operational understanding and training: Familiarity with facility-specific resuscitation equipment, such as appropriately sized breathing barriers and BVMs, oxygen delivery equipment (if rescuers are trained and oxygen delivery is permitted by local protocols) Regular refresher training and practice of resuscitative care skills, as skills degrade quickly following a training session this in-service training includes practicing with other responders on team dynamics ChAPter 8: BreAthing emergencies 254
265 Chapter 8 Review 1. Fill in the blanks: Lack of oxygen can eventually stop the heart (cardiac arrest) and prevent blood from reaching the brain and other vital organs in as little as minutes after submerging. Brain cell damage or death begins to occur within to minutes. 2. Describe the two types of respiratory emergencies: Respiratory distress: Respiratory arrest: 3. List five possible causes of respiratory distress. 1) 2) 3) 4) 5) 4. When caring for a person in respiratory distress: A Ask the victim to stand and lean back to make breathing easier. C Do not allow the victim to take their prescribed medication. B Determine the exact cause of respiratory distress before providing initial care. D Maintain an open airway and summon EMS personnel. 255 ChAPter 8 review
266 Chapter 8 Review 5. List five possible causes of respiratory arrest. 1) 2) 3) 4) 5) 6. When checking to see if someone is breathing (circle all that apply): A Look to see if the victim s chest clearly rises and falls. B Check for breathing before checking for a pulse. C Check for breathing and a pulse simultaneously. D Look away from the victim s chest. E Keep the victim s mouth closed. F Listen and feel for air against the side of your face. 7. Fill in the blanks. The normal breathing rate for an adult is between and breaths per minute. 8. What is a lifeguard s objective when caring for a drowning victim who is not breathing? ChAPter 8 review 256
267 Chapter 8 Review 9. When giving ventilations to an adult who is not breathing but has a definitive pulse, you should give ventilations: A 2 every 5 to 6 seconds C 1 every 3 seconds B 2 every 3 seconds D 1 every 5 to 6 seconds 10. When giving ventilations to a child who is not breathing but has a definitive pulse, you should give ventilations: A 2 every 5 to 6 seconds C 1 every 3 seconds B 2 every 3 seconds D 1 every 5 to 6 seconds 11. What should you do if you are giving ventilations and the victim s chest does not rise after the first breath? 12. All of the following describe appropriate care for a conscious person with an airway obstruction (choking) EXCEPT: A Check the victim for breathing and a pulse for no more than 10 seconds. C Obtain consent; if the victim is a child, get consent from a parent or guardian. B Perform a combination of 5 back blows followed by 5 abdominal thrusts. D If the victim cannot cough, speak or breathe, activate the EAP and have someone summon EMS. 257 ChAPter 8 review
268 Chapter 8 Review 13. If a conscious choking victim becomes unresponsive, what should you do? ChAPter 8 review 258


269 GIVING VENTILATIONS Giving Ventilations Note: Activate the EAP, size up the scene while forming an initial impression, obtain consent, use PPE, perform an initial assessment, care for any severe, life-threatening bleeding and get an AED on the scene as soon as possible. If the victim is not breathing but has a pulse: 1 Position and seal the resuscitation mask. 2 Open the airway and blow into the mask. Adult: Give 1 ventilation about every 5 to 6 seconds. Child or infant: Give 1 ventilation about every 3 seconds. Each ventilation should last about 1 second and make the chest clearly rise. The chest should fall before the next ventilation is given. Give ventilations for about 2 minutes. Notes: For a child, tilt the head slightly past a neutral position. Do not tilt the head as far back as for an adult. For a victim with a suspected head, neck or spinal injury, use the jaw-thrust (without head extension) maneuver to open the airway to give ventilations. For an infant, maintain a neutral position. 3 4 Recheck for breathing and pulse about every 2 minutes. Remove the mask and look, listen and feel for breathing and a pulse for at least 5 seconds but no more than 10 seconds. Assess the victim's condition and provide appropriate care. If unresponsive and no breathing but there is a pulse: Continue giving ventilations. If unresponsive and no breathing or pulse: Begin CPR. 259 skill sheet
270 GIVING VENTILATIONS Giving Ventilations continued Do not stop giving care except in one of the following situations: You see an obvious sign of life, such as normal breathing or victim movement. An AED is ready to analyze the victim s heart rhythm. Another trained responder or responders take over, such as a member of your safety team or EMS personnel, and relieve you from giving compressions or ventilations. You are alone and too exhausted to continue. The scene becomes unsafe. skill sheet 260

271 GIVING VENTILATIONS Using a Bag-Valve-Mask Resuscitator Notes: Activate the EAP, size up the scene and form an initial impression, use PPE, perform a primary assessment and get an AED on the scene as soon as possible. Always select the appropriately sized mask for the victim. Prepare the BVM for use during the primary assessment. If the victim is not breathing but has a pulse: 1 2 Rescuer 1 kneels behind the victim s head and positions the mask over the victim s mouth and nose. To seal the mask and open the airway, use the jaw-thrust (with head extension) maneuver. Note: For a child, tilt the head back slightly past a neutral position. Do not tilt the head as far back as for an adult. For an infant, position the head in a neutral position. 3 4 Rescuer 2 gives ventilations. Squeeze the bag slowly with both hands. For an adult, give 1 ventilation about every 5 to 6 seconds. For a child or infant, give 1 ventilation about every 3 seconds. Each ventilation should last about 1 second and make the chest clearly rise. The chest should fall before the next breath is given. Rescuer 2 rechecks for breathing and a pulse about every 2 minutes. Remove the mask and look, listen and feel for breathing and a pulse for at least 5 seconds, but no more than 10 seconds. 261 skill sheet
272 GIVING VENTILATIONS Using a Bag-Valve-Mask Resuscitator continued 5 Assess the victim's condition and provide appropriate care. If unresponsive and no breathing but there is a pulse: Continue giving ventilations. If unresponsive and no breathing or pulse: Begin CPR. Do not stop giving care except in one of the following situations: You see an obvious sign of life, such as normal breathing or victim movement. An AED is ready to analyze the victim s heart rhythm. Another trained responder or responders take over, such as a member of your safety team or EMS personnel, and relieve you from giving compressions or ventilations. You are alone and too exhausted to continue. The scene becomes unsafe. skill sheet 262


273 CHOKING Adult and Child Notes: Activate the EAP, size up the scene while forming an initial impression, obtain consent, use PPE and care for any severe, life-threatening bleeding. For a child, obtain consent if a parent or guardian is present. Stand or kneel behind the child, depending on the child s size. Use less force on a child than you would on an adult. If the victim cannot breathe or has a weak or ineffective cough: Give 5 back blows. Position yourself slightly behind the victim. Place one arm diagonally across the victim s chest and bend the victim forward at the waist. The victim s upper airway should be at least parallel to the ground. Firmly strike the victim between the shoulder blades with the heel of your hand. Each thrust should be a distinct attempt to dislodge the object. Give 5 abdominal thrusts. Stand behind the victim while maintaining your balance. For a child, stand or kneel behind the child, depending on the child s size. Use less force on a child than you would on an adult. Make a fist with one hand and place it thumb-side down against the victim s abdomen, just above the navel. Cover the fist with your other hand and give quick, upward thrusts. Each thrust should be a distinct attempt to dislodge the object. Assess the victim's condition and provide appropriate care. 263 skill sheet
274 CHOKING Adult and Child continued Continue giving 5 back blows and 5 abdominal thrusts until: The object is forced out. The victim begins to cough, speak or breathe. The victim becomes unresponsive. If the victim becomes unresponsive at any time while choking: Carefully lower the victim onto a firm, flat surface, send someone to get an AED, and summon EMS if you have not already done so. Immediately begin CPR, starting with 30 chest compressions. Open the mouth to look for and do a finger sweep to remove a foreign object only if you see an object. Give 2 ventilations. As long as the chest does not clearly rise, continue cycles of giving 30 chest compressions, looking for a foreign object, doing a finger sweep only if you see the object and giving ventilations. Notes: During CPR on an unresponsive choking adult or child, when opening the airway to give ventilations, look into the mouth for any visible object. o f ou see an ob ect, use a finger sweep motion to remove it. o f ou do not see an ob ect, do not do a finger sweep. nstead, continue CPR cycles. Remember to never try more than 2 ventilations during one cycle of CPR, even if the chest does not rise. skill sheet 264

275 CHOKING Adult and Child continued Use chest thrusts instead of abdominal thrusts if: You cannot reach far enough around the victim to give abdominal thrusts. The victim is obviously pregnant or known to be pregnant. To perform chest thrusts: Stand behind the victim and place the thumb side of your fist against the lower half of the victim s sternum and the second hand over the fist. Give quick, inward thrusts. Look over the victim s shoulder so that their head does not hit your face when you perform the chest thrusts. Repeat until the object is forced out; the victim begins to cough, speak, or breathe; or until the victim becomes unresponsive. 265 skill sheet


276 CHOKING Infant Note: Activate the EAP, size up the scene while forming an initial impression, obtain consent if a parent or guardian is present, use PPE, and care for any severe, life-threatening bleeding. If the infant is awake and cannot cough, cry or breathe: Carefully position the infant face-down along your forearm. Support the infant s head and neck with your hand. Lower the infant onto your thigh, keeping the infant s head lower than their body. Give 5 back blows. Give back blows with the heel of your hand between the infant s shoulder blades. Each back blow should be a distinct attempt to dislodge the object. Position the infant face-up along your forearm. Position the infant between both of your forearms, supporting the infant s head and neck. Turn the infant face-up. Lower the infant onto your thigh with the infant s head lower than their chest. Give 5 chest thrusts. Put two or three fingers on the center of the chest, just below the nipple line and compress the chest about 1½ inches. Each chest thrust should be a distinct attempt to dislodge the object. their chest. skill sheet 266
277 CHOKING Infant continued 5 Provide appropriate care. Continue giving 5 back blows and 5 chest thrusts until: The object is forced out. The infant begins to cough forcefully or breathe. The infant becomes unresponsive. If the infant becomes unresponsive at any time while choking: Carefully lower the infant onto a firm, flat surface, send someone to get an AED, and summon EMS if you have not already done so. o Immediately begin CPR, starting with 30 chest compressions. o Open the mouth to look for and do a finger sweep to remove a foreign object only if you see an object. o Give 2 ventilations. o As long as the chest does not clearly rise, continue cycles of giving 30 chest compressions, looking for a foreign object, do a finger sweep only if you see the object and giving ventilations. Notes: During CPR on an unresponsive infant, when opening the airway to give ventilations, look into the mouth for any visible object. o f ou see an ob ect, use a finger sweep motion to remove it. o f ou do not see an ob ect, do not do a finger sweep. nstead, continue c cles. Remember to never try more than 2 ventilations during one cycle of CPR, even if the chest does not rise. 267 skill sheet
 and is marked with a yellow diamond containing the word Oxygen. Clear the valve. Remove the protective covering. Remove and save the O-ring gasket, if necessary.")

.")
278 EMERGENCY OXYGEN Assembling the Oxygen System Note: Always follow standard precautions when providing care Check the cylinder. Make sure that the oxygen cylinder is labeled U.S.P. (United States Pharmacopeia) and is marked with a yellow diamond containing the word Oxygen. Clear the valve. Remove the protective covering. Remove and save the O-ring gasket, if necessary. Turn the cylinder away from you and others before opening for 1 second to clear the valve of any debris. Attach the regulator. Put the O-ring gasket into the valve on top of the cylinder, if necessary. Make sure that it is marked Oxygen Regulator and that the O-ring gasket is in place. Check to see that the pin index corresponds to an oxygen cylinder. Secure the regulator on the cylinder by placing the two metal prongs into the valve. Hand-tighten the screw until the regulator is snug. Open the cylinder counterclockwise one full turn. Check the pressure gauge. Determine that the cylinder has enough pressure (more than 200 psi). If the pressure is lower than 200 psi, DO NOT use. Attach the delivery device. Attach the plastic tubing between the flowmeter and the delivery device. Note: When breaking down the oxygen equipment, be sure to bleed the pressure regulator b turning on the flowmeter after the cylinder has been turned off. skill sheet 268


279 EMERGENCY OXYGEN Administering Emergency Oxygen Notes: Activate the EAP, size up the scene and form an initial impression, use PPE, perform an initial assessment and get an AED on the scene as soon as possible. Follow local protocols for using emergency oxygen. Check the cylinder to make sure the oxygen cylinder is labeled U.S.P. and is marked with a yellow diamond containing the word Oxygen. Determine that the cylinder has enough pressure (more than 200 psi). If the pressure is lower than 200 psi, DO NOT use. Assemble the cylinder, regulator and delivery device prior to delivery. 1 Turn the unit on and adjust the flow as necessary. For a variable-flow-rate oxygen system, turn the flowmeter to the desired flow rate: o Nasal cannula: 1 6 LPM o Resuscitation mask: 6 15 LPM o Non-rebreather mask: LPM 2 3 Verify the oxygen flow. Listen for a hissing sound and feel for oxygen flow through the delivery device. Place the delivery device on the victim and continue care until EMS personnel take over. Note: When monitoring a responsive victim s oxygen saturation levels using a pulse oximeter, you ma reduce the flow of o gen and change to a lower flowing deliver device if the blood o gen level of the victim reaches 100 percent. 269 skill sheet


280 USING A MANUAL SUCTIONING DEVICE Using a Manual Suctioning Device Notes: Activate the EAP, size up the scene and form an initial impression, use PPE, perform an initial assessment and get an AED on the scene as soon as possible. If needed, assemble the device according to manufacturer s instructions. 1 Position the victim. Roll the body as a unit towards you so that the victim is on their side. Open the victim's mouth Remove any visible large debris from the mouth with a gloved finger. Measure and check the suction tip. Measure from the victim s earlobe to the corner of the mouth. Note the distance to prevent inserting the suction tip too deeply. Check that the suction is working by placing your finger over the end of the suction tip as you squeeze the handle of the device. Suction the mouth. Insert the suction tip into the back of the mouth. Squeeze the handle of the suction device repeatedly to provide suction. Apply suction as you withdraw the tip using a sweeping motion, if possible. Suction for no more than: o Adult: 15 seconds at a time o Child: 10 seconds at a time o Infant: 5 seconds at a time skill sheet 270
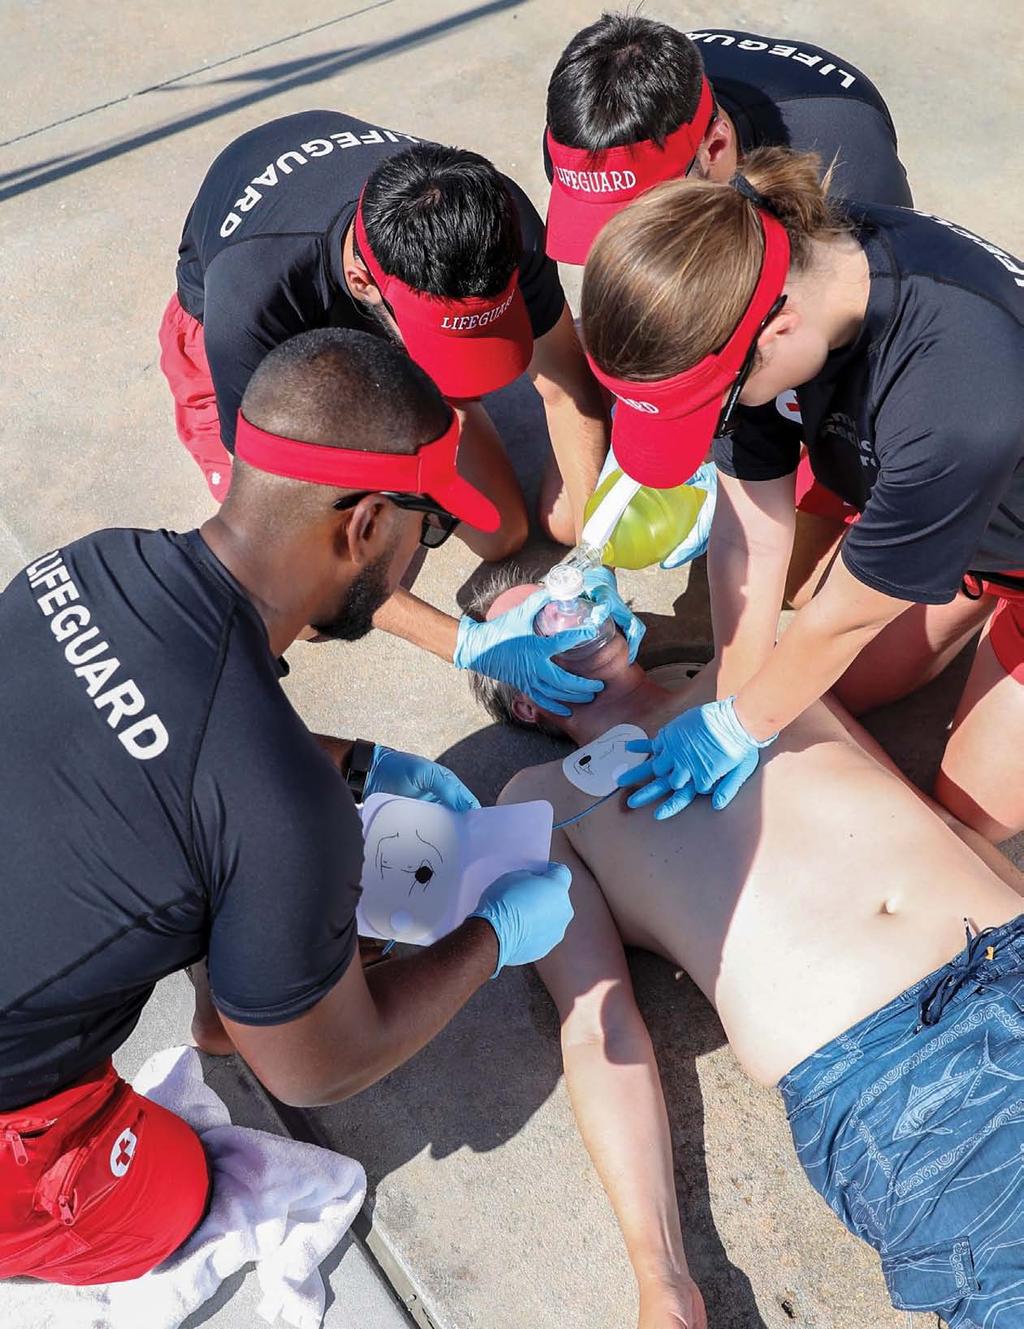
281

282 9 Cardiac emergencies A cardiac emergency is life-threatening. It can happen at any time to a victim of any age, on land or in the water. You may be called on to care for a victim of a cardiac emergency, including non-specific chest pain, a heart attack or cardiac arrest. Cardiac arrest care includes performing CPR and using an automated external defibrillator (AED) two of the links in the Cardiac Chain of Survival. By following the Cardiac Chain of Survival, you can greatly increase a victim s chance of survival from cardiac arrest. Chapter 7 describes how to identify and give initial care for life-threatening conditions by performing a primary assessment. Chapter 8 covers how to recognize and care for breathing emergencies. This chapter covers how to provide care for several cardiac emergencies CARDIAC CHAIN OF SURVIVAL HEART ATTACK CARDIAC ARREST CPR AEDS MULTIPLE-RESCUER RESPONSE WRAP-UP
283 9-1CARDIAC CHAIN OF SURVIVAL To effectively respond to cardiac arrest, it is important to understand the Cardiac Chain of Survival (Figure 9-1). The Cardiac Chain of Survival for adults consists of five links: Recognition of cardiac arrest and activation of the emergency response system Early CPR to keep oxygen-rich blood flowing and to help delay brain damage and death Early defibrillation to help restore an effective heart rhythm and significantly increase the victim s chance for survival Advanced life support using advanced medical personnel who can provide the proper tools and medication needed to continue the lifesaving care Integrated post-cardiac arrest care to optimize ventilation and oxygenation and treat hypotension immediately after the return of spontaneous circulation The pediatric Cardiac Chain of Survival is similar to the adult Cardiac Chain of Survival (Figure 9-2). The five links include the following: Injury prevention and safety Early, high-quality CPR Rapid activation of the emergency medical services (EMS) system or response team to get help on the way quickly no matter the victim s age Effective, advanced life support Integrated post-cardiac arrest care For each minute CPR and defibrillation are delayed, the victim s chance for survival is reduced by about 10 percent. Figure 9-1 The Cardiac Chain of Survival. Figure 9-2 The Pediatric Chain of Survival. 273 ChAPter 9: CArdiAC emergencies
284 9-2 HEART ATTACK When the muscle of the heart suffers a loss of oxygenated blood, the result is a myocardial infarction (MI), or heart attack. A heart attack is not the same as a cardiac arrest, but it can cause a cardiac arrest. Heart attacks usually result from cardiovascular disease, but can be caused by a myocardial contusion or bruising to the heart caused by a traumatic event. Recognizing a Heart Attack A heart attack refers to the necrosis (death) of heart tissue as a result of a loss of oxygenated blood. The sooner the signs and symptoms are recognized and treated, the better the victim's chance of survival. Even victims who have had a heart attack may not recognize the signs because each heart attack may have different signs and symptoms. Summon EMS personnel and provide prompt care if, during the SAMPLE history (discussed in Chapter 10), the victim shows or reports any of the signs and symptoms listed below or if you suspect that the victim may be suffering from a heart attack. Ask open-ended questions, such as, How are you feeling? to hear the symptoms described in the victim s own words. The signs and symptoms include: Chest discomfort or pain that is severe, lasts longer than 3 to 5 minutes, goes away and comes back or persists even during rest Discomfort, pressure or pain that is persistent and ranges from discomfort to an unbearable crushing sensation in the center of the chest, possibly spreading to the shoulder, arm, neck, jaw, stomach or back, and is usually not relieved by resting, changing position or taking medication Chest pain that comes and goes Difficulty breathing, such as at a faster rate than normal, or noisy breathing Pale or ashen skin, especially around the face Sweating, especially on the face Dizziness or light headedness Nausea or vomiting Fatigue, lightheadedness or loss of consciousness These warning signs may occur with or without chest pain. When women experience chest pain, it may be atypical sudden, sharp but short-lived pain outside the breastbone. Like women, other individuals such as older adults or those with diabetes are somewhat more likely to experience some of the other warning signs, such as: Shortness of breath Nausea or vomiting Back or jaw pain Unexplained fatigue or malaise Caring for a Heart Attack If you think someone is having a heart attack: Take immediate action and summon EMS personnel. Have the victim stop any activity and rest in a comfortable position. Loosen tight or uncomfortable clothing. Closely monitor the victim until EMS personnel take over. Note any changes in the victim s appearance or behavior. Comfort the victim. Be prepared to perform CPR and use an AED. ChAPter 9: CArdiAC emergencies 274

285 Administering Aspirin for a Heart Attack You may be able to help a victim who is awake and alert and is showing signs of a heart attack by offering an appropriate dose of aspirin, if local protocols allow or medical direction permits. Aspirin never should replace advanced medical care, and you should never delay calling EMS to find or offer aspirin. If the victim is awake and alert and able to take medicine by mouth, ask: Are you allergic to aspirin? Do you have a stomach ulcer or stomach disease? Are you taking any blood thinners, such as Coumadin (warfarin)? Have you been told by a healthcare provider not to take aspirin? If the victim answers no to all of these questions, and if local protocols allow, consider administering two 81-mg, low-dose aspirins (162 mg total), or up to one 5-grain, 325-mg aspirin tablet, based on what is available. (It is not necessary to give more than two low-dose aspirins.) The aspirin must be chewed before swallowing. Be sure that you only give aspirin and not acetaminophen (e.g., Tylenol ) or nonsteroidal anti-inflammatory drugs (NSAIDs), such as ibuprofen (e.g., Motrin or Advil ) or naproxen (e.g., Aleve ). These medications do not work the same way aspirin does and are not beneficial for a person who is experiencing a heart attack. Enteric-coated aspirin is fine to administer as long as it is chewed. 9-3 CARDIAC ARREST Cardiac arrest is a life-threatening emergency that may be caused by a heart attack, drowning, electrocution, respiratory arrest or other conditions. Cardiac arrest occurs when the heart stops beating or beats too irregularly or weakly to circulate blood effectively. Cardiac arrest can occur suddenly and without warning. In many cases, the victim has already been experiencing the signs and symptoms of a heart attack. However, sudden cardiac arrest is often the first sign of sudden death. The signs of a cardiac arrest include: Sudden collapse Unresponsiveness Abnormal breathing No pulse 9-4 CPR A victim who is unresponsive, not breathing normally and has no pulse is in cardiac arrest and needs CPR (Figure 9-3). The objective of CPR is to perform a combination of effective chest compressions and ventilations to circulate blood that contains oxygen to the victim's brain and other vital organs. In most cases, CPR is performed in cycles of 30 chest compressions followed by 2 ventilations. Figure 9-3 CPR is delivered in cycles of chest compressions and ventilations. 275 ChAPter 9: CArdiAC emergencies
286 Summoning EMS personnel immediately is critical for the victim s survival. If an AED is available, it should be used in combination with CPR and according to local protocols until EMS personnel take over. One component of CPR is chest compressions. To ensure optimal victim outcomes, high-quality CPR must be performed. You can ensure high-quality CPR by providing high-quality chest compressions, making sure that the: Victim is on a firm, flat surface to allow for adequate compression, such as the floor or ground. Chest is exposed to ensure proper hand placement and the ability to visualize chest recoil. Hands are correctly positioned with the heel of one hand in the center of the chest on the lower half of the victim s sternum, with the other hand on top. Most responders find that interlacing their fingers makes it easier to provide compressions while keeping the fingers off the chest. Arms are as straight as possible, with the shoulders directly over the hands to promote effective compressions. Locking elbows will help maintain straight arms. Compressions are given at the correct rate at least 100 per minute to a maximum of 120 per minute and at the proper depth to ensure adequate circulation: o For an adult, compress the chest at least 2 inches, but no more than 2.4 inches. o For a child, compress the chest about 2 inches. o For an infant, compress the chest about 1½ inches. Chest must be allowed to fully recoil between each compression to allow blood to flow back into the heart following the compression. Interruptions to chest compressions are minimized. For more details, see Table 9-1. Chest Compression Fraction Chest compression fraction, or CCF, is the term used to denote the proportion of time that chest compressions are performed. It represents the fraction of time spent performing compressions; that is, the time that the responders are in contact with the victim s chest, divided by the total time of the resuscitation, beginning with the start of CPR until CPR is stopped, for whatever reason. Expert consensus identifies a CCF of at least 60 percent to promote optimal outcomes, with a goal of 80 percent. To achieve the best CCF percentage, a coordinated team approach is needed, with each member assuming specific roles, anticipating the next action steps for yourself and other team members. This coordinated team approach also includes integrating and assimilating additional safety members and EMS personnel who arrive on the scene. Keep in mind that there are no national protocols in place for high-performance CPR. How you function within a team setting, including how additional personnel assimilate into the team, may vary depending on your local protocols or practice. Remember that when giving ventilations to a victim during CPR, you should: Maintain an open airway by keeping the head tilted back in the proper position. Seal the mask over the victim s mouth and nose. Blow into the one-way valve, ensuring that you can see the chest begin to rise and fall. Each ventilation should last about 1 second, with a brief pause between breaths to let the chest fall. After ventilations, quickly reposition your hands on the center of the chest and start another cycle of 30 compressions and 2 ventilations. ChAPter 9: CArdiAC emergencies 276
 at least every 2 minutes (5 cycles of 30 compressions and 2 ventilations) to reduce rescuer fatigue, or during the")
287 Two-Rescuer CPR When an additional rescuer is available, you should provide two-rescuer CPR. One rescuer gives chest compressions and the other gives ventilations (Figure 9-4). Rescuers should change positions (alternate giving compressions and ventilations) at least every 2 minutes (5 cycles of 30 compressions and 2 ventilations) to reduce rescuer fatigue, or during the analysis of the AED. Changing positions should take less than 5 seconds. When performing CPR, the victim may vomit, there may be frothing at the nose and mouth, and the scene may be chaotic. The victim also may produce agonal breaths. Remember that agonal breaths are not normal breathing this victim needs CPR. Understand that, despite your best efforts, not all victims of cardiac arrest survive. When CPR is in progress by one rescuer and a second rescuer arrives, the second rescuer should confirm whether EMS personnel have been summoned. If EMS personnel have not been summoned, the second rescuer should do so before getting the AED or assisting with care. If EMS personnel have been summoned, the second rescuer should get the AED, or if an AED is not available, help perform two-rescuer CPR. When performing two-rescuer CPR on a child or infant, rescuers should change the compression-to-ventilation ratio from 30 compressions for every 2 ventilations (30:2) to 15 compressions for every 2 ventilations (15:2). This provides more frequent ventilations for children and infants. When providing two-rescuer CPR to an infant, rescuers should also perform a different technique, called the encircling thumbs technique. Once you begin CPR, do not stop. Continue CPR until: You see an obvious sign of life, such as normal breathing or victim movement. An AED is ready to analyze the victim's heart rhythm. Other trained responders, such as a member of your safety team or EMS personnel, take over and relieve you from compression and ventilation responsibilities. You are alone and too exhausted to continue. The scene becomes unsafe. Figure 9-4 During two-rescuer CPR, one rescuer gives ventilations and the other gives chest compressions. 277 ChAPter 9: CArdiAC emergencies
 with the other hand on top Two")

 30 chest compressions and 2 ventilations Cycles (two rescuers) 30 chest")


288 table 9-1: Summary of Techniques for CPR Adult, Child and Infant Adult Child Infant Hand position Heel of one hand in center of chest (on lower half of sternum) with the other hand on top Two fingers on the center of the chest (just below the nipple line) Compression depth At least 2 inches (Try to avoid greater than 2.4 inches if using a feedback device.) About 2 inches About 1½ inches Ventilations Cycles (one rescuer) Until chest begins to rise (1 second per ventilation) 30 chest compressions and 2 ventilations Cycles (two rescuers) 30 chest compressions and 2 ventilations 15 chest compressions and 2 ventilations Rate Between 100 and 120 compressions per minute 9-5 AEDS AEDs are portable electronic devices that analyze the heart s rhythm and provide an electrical shock (Figure 9-5). Defibrillation is the delivery of an electrical shock that may help re-establish an effective rhythm. CPR can help by supplying blood that contains oxygen to the brain and other vital organs. However, the sooner an AED is used, the greater the likelihood of survival. You must assess victims quickly and be prepared to use an AED in cases of cardiac arrest. Figure 9-5 An AED ChAPter 9: CArdiAC emergencies 278
289 Did You Know? For each minute CPR and defibrillation are delayed, the victim s chance for survival is reduced by about 10 percent. When the Heart Stops Any damage to the heart from disease or injury can disrupt the heart s electrical system, which normally triggers the contraction or pumping action of the heart muscle. This disruption can result in an abnormal heart rhythm, possibly stopping circulation. Two common treatable abnormal rhythms that cause sudden cardiac arrest are ventricular fibrillation (VF) and pulseless ventricular tachycardia (VT). In VF, the ventricles quiver, or fibrillate, without any organized rhythm, and the electrical impulses fire at random, creating chaos and preventing the heart from pumping and circulating blood. There is no normal breathing and no pulse. In pulseless VT, an abnormal electrical impulse controls the heart. This abnormal impulse fires so fast that the heart s chambers do not have time to fill, and the heart is unable to pump blood effectively. As with V-fib, there is no normal breathing or pulse with pulseless VT. In many cases, VF and VT can be corrected by early defibrillation. If VF or VT is not corrected, all electrical activity will eventually cease, a condition called asystole. Asystole cannot be corrected by defibrillation. You cannot tell what, if any, rhythm the heart has by feeling for a pulse. An AED will analyze the heart's rhythm and determine if there is a shockable rhythm. Using an AED on Adults When cardiac arrest occurs, use an AED as soon as it is available and ready. First, turn on the AED and follow the audible and visual prompts. Apply the AED pads as instructed and allow the AED to analyze the heart rhythm. Ensure that no one is touching the victim during the analysis. Continue to follow the prompts of the AED. If CPR is in progress when the AED arrives, do not interrupt chest compressions and ventilations until the AED is turned on, the AED pads are applied and the AED is ready to analyze the heart rhythm, unless you are the only rescuer able to operate the AED and perform CPR. After a shock is delivered, or if no shock is advised, immediately resume chest compressions and continue performing about 2 minutes of CPR before the AED re-analyzes the heart rhythm. If there are 2 or more rescuers, you should change positions (alternate performing compressions and operating the AED) about every 2 minutes, or as the AED is analyzing the heart rhythm, in order to reduce rescuer fatigue. If at any time you notice an obvious sign of life, such as normal breathing or movement, stop CPR and monitor the victim s condition. Administer emergency oxygen, if available and you are trained and authorized to do so. Using an AED on Children and Infants While the incidence of cardiac arrest in children and infants is relatively low compared with that of adults, cardiac arrest does happen to young children. Causes of cardiac arrests in children include: 279 ChAPter 9: CArdiAC emergencies
290 Airway and breathing problems Traumatic injuries or accidents (e.g., drowning, motor-vehicle collision, electrocution or poisoning) A hard blow to the chest Congenital heart disease Sudden infant death syndrome (SIDS) AEDs equipped with pediatric AED pads are capable of delivering the lower levels of energy considered appropriate for infants and children up to 8 years old or weighing less than 55 pounds. Use pediatric AED pads and/or equipment for a pediatric victim, if available. If pediatric-specific equipment is not available, an AED designed for adults can be used on children and infants. Pediatric pads should not be used on adults. Always follow local protocols, medical direction and the manufacturer s instructions. For a child or infant in cardiac arrest, follow the same general steps and precautions as when using an AED on an adult. If the pads risk touching each other because of the victim s smaller chest size, place one pad on the child's chest and the other on the back. For an infant, always place one pad on the chest and the other on the back. DO'S AND DON'TS FOR AED USE Follow these general precautions when using an AED. Do's Do make sure that no one is touching or is in contact with the victim or the resuscitation equipment before shocking a victim with an AED. Do use an AED if a victim is experiencing cardiac arrest as a result of traumatic injuries. Follow local protocols or practice. Do use an AED for a victim who is pregnant. The mother's survival is paramount to the infant's survival. Follow local protocols and medical direction. Do use an AED on a victim who has a pacemaker, other implantable cardioverter defibrillators or metal body piercings. To maintain safety, avoid placing the AED pads directly over these items. Position the pads so they are at least an inch away. Don'ts Do not use alcohol to wipe the victim s chest dry. Alcohol is flammable. Do not touch the victim while the AED is analyzing. Touching or moving the victim could affect the analysis. Do not touch the victim while the device is defibrillating. You or someone else could be shocked. Do not defibrillate a victim when around flammable or combustible materials, such as gasoline or free-flowing oxygen. (If oxygen is begin administered to a victim when an AED is ready to be used, make sure to close the tank before shocking.) Do not use an AED on a victim wearing a medication patch on the chest until the patch and medication are removed. With a gloved hand, remove any patches from the chest and wipe away any residual medication before applying the pads. Special AED Situations Some situations require special precautions when using an AED. These include using AEDs around water, on victims of trauma or hypothermia, or when confronted with AED protocols that differ than those discussed here. Be familiar with these situations, and know how to respond appropriately. Always follow manufacturer s recommendations. ChAPter 9: CArdiAC emergencies 280

. If it is raining, take steps to make sure that the victim is as dry as possible and sheltered from the rain.")

291 AEDs Around Water A shock delivered in water could harm rescuers or bystanders; however, AEDs are safe to use on victims who have been removed from the water. If the victim is in water: Remove the victim from the water before defibrillation. A shock delivered in water could harm rescuers or bystanders. Be sure that there are no deep puddles of water around you, the victim or the AED. Remove any wet clothing from the victim's chest to place the AED pads properly, if necessary. Dry the victim s chest and attach the AED pads (Figure 9-6). If it is raining, take steps to make sure that the victim is as dry as possible and sheltered from the rain. Ensure that the victim's chest is wiped dry. Do not delay defibrillation when taking steps to create a dry environment. AEDs are safe, even in rain and snow, when all precautions and manufacturer s operating instructions are followed. Avoid getting the AED or AED pads wet, and keep them out of any deep puddles of water, if possible. Pacemakers and Implantable Cardioverter-Defibrillators Pacemakers are small, implantable devices sometimes located in the area below the left collarbone. There may be a small lump that can be felt under the skin (Figure 9-7). An implantable cardioverter-defibrillator (ICD) is a miniature version of an AED that automatically prevents or corrects irregular heart rhythms. Sometimes, a victim s heart beats irregularly, even if the victim has a pacemaker or an ICD. If the implanted device is visible, or you know that the victim has one, do not place the AED pad directly over the device. This may interfere with the delivery of the shock. Adjust AED pad placement, if necessary, and continue to follow the AED instructions. If you are not sure whether the victim has an implanted device, use the AED as needed. It will not harm the victim or rescuer. Follow any special precautions associated with ICDs, but do not delay CPR or defibrillation. It is possible to receive a mild shock if an implantable ICD delivers a shock to the victim while CPR is performed. This risk of injury to rescuers is minimal, and the amount of electrical energy involved is much lower than an AED. Transdermal Medication Patches A transdermal medication patch administers medication through the skin. The most common of these patches is the nitroglycerin patch, used by those with a history of cardiac disease. Since you might absorb nitroglycerin or other medications, remove the patch from the victim s chest with a gloved hand before defibrillation (Figure 9-8). Never place AED electrode pads directly on top of medication patches. Figure 9-6 Before using an AED, be sure the victim is not lying in any puddles of water. Dry the victim's chest, then attach the AED pads. Figure 9-7 Scars or a small lump may indicate that the patient has had some sort of device implanted. Figure 9-8 Remove any type of transdermal medication patch from the victim's chest with a gloved hand before defibrillation. 281 ChAPter 9: CArdiAC emergencies
292 Hypothermia Hypothermia is a life-threatening condition in which the entire body cools because of its inability to keep itself warm. Some people who have experienced hypothermia have been resuscitated successfully, even after prolonged exposure to the cold. If the victim is not breathing and does not have a pulse, begin CPR until an AED becomes available. Follow local protocols regarding whether you should use an AED in this situation. If the victim is wet, follow these steps: Remove wet clothing, dry the victim's chest and protect the victim from further heat loss. Attach the AED pads. If a shock is indicated, deliver it, following the instructions of the AED. Follow local protocols regarding whether additional shocks should be delivered. Do not withhold CPR or defibrillation to re-warm the victim. Be careful not to unnecessarily shake a victim who has experienced hypothermia, as this could result in an irregular heart rhythm. Chest Hair Some victims may have excessive chest hair that may cause difficulty with pad-to-skin contact. Since the time it takes to deliver the first shock is critical, and chest hair rarely interferes with pad adhesion, attach the pads and analyze the heart s rhythm as soon as possible. Press firmly on the pads to attach them to the victim s chest. If you get a Check pads or similar message from the AED, remove the pads and replace them with new ones if available. The pad adhesive may pull out some of the chest hair, which may solve the problem, but most AED cases contain a safety razor to assist in hair removal. If you continue to get the Check pads message, remove the pads, quickly shave the victim s chest and attach new pads to the victim s chest. o When in doubt, or in a situation when only one set of pads is available, shave the chest first. Trauma If a victim is in cardiac arrest resulting from traumatic injuries, you should still use an AED. Administer defibrillation according to local protocols. Metal Surfaces It is safe to deliver a shock to a victim in cardiac arrest on a metal surface, such as bleachers, as long as appropriate safety precautions are taken. Care should be taken that defibrillation electrode pads do not contact the conductive (metal) surface and that no one is touching the victim when the shock button is pressed. Jewelry and Body Piercings You do not need to remove jewelry and body piercings when using an AED. Leaving them on the victim will do no harm. However, do not place the AED pad directly over metallic jewelry or body piercings. Adjust pad placement at least an inch away, if necessary, and continue to follow established protocols. Pregnancy The best way to care for a pregnant woman in cardiac arrest is the same for all victims, including CPR and use of an AED. The fetus has the best chance of survival if the mother survives the event, and care should not be altered for fear that the electrical shock from an AED may harm the fetus. Follow local protocols and medical direction. ChAPter 9: CArdiAC emergencies 282

293 AED Maintenance For defibrillators to perform optimally, they must be maintained. AEDs require minimal maintenance. These devices have various self-testing features. Familiarize yourself with any visual or audible prompts the AED may have that warn of malfunction or a low battery. Read the operator s manual thoroughly, and check with the manufacturer to obtain all necessary information regarding maintenance. If the machine detects any malfunction, you should inform management, who will contact the manufacturer. The device may need to be returned to the manufacturer for service. While AEDs require minimal maintenance, it is important to remember the following: Follow the manufacturer s specific recommendations for periodic equipment checks. Make sure that the batteries have enough energy for one complete rescue. (A fully charged backup battery should be readily available.) Make sure that the correct defibrillator pads are in the package and are properly sealed. Check any expiration dates on AED pads and batteries, and replace as necessary. After use, make sure that all accessories are replaced and that the machine is in proper working order before placing the unit back in service. If at any time the machine fails to work properly, or you recognize any warning indicators, discontinue use, place the unit out of service and contact the manufacturer immediately. 9-6 MULTIPLE-RESCUER RESPONSE In the aquatic environment, more than two rescuers often respond to an emergency. In many cases, three or more rescuers provide care for an unresponsive victim. When an unresponsive victim has been removed from the water and needs CPR, care might begin with one rescuer until other rescuers arrive on the scene with additional equipment and begin assisting in providing care. Roles for multiple-rescuer response for an unresponsive victim may include (Figure 9-9): Figure 9-9 In a multiple-rescuer response, lifeguards work together to provide care. Circulation. The rescuer provides compressions and also may operate the AED if giving care alone. If an additional rescuer is available, they should place the pads and operate the AED. Airway. The rescuer is positioned behind the victim s head to maintain an open airway and ensure the mask is positioned and sealed to provide effective ventilations. Breathing. Two rescuers provide ventilations using a bag-valve-mask (BVM) resuscitator. Emergency oxygen may be attached to the BVM if rescuers are trained to administer emergency oxygen. If the victim vomits during CPR, the rescuer pauses CPR, rolls the victim on their side and clears the vomit from the victim's mouth by using a finger sweep or a suction device. After clearing the vomit, resume CPR starting with compressions. Practice-multiple rescuer response drills regularly with your team. Each member of the team should be able to arrive on the scene and perform any of the roles necessary in providing the appropriate care. See the flow chart at the end of the chapter for an example of how multiple rescuer response operates. 283 ChAPter 9: CArdiAC emergencies
294 Blog Post #4 Second AES Visit July 10th 7:45 pm We ve had an incredibly busy summer! Since my last post, we had two visits with different Red Cross examiners, including another unannounced visit that happened last night. About an hour before closing, I was in the breakroom when I heard the whistle blast. I ran out to the pool deck as the guard covering the deep-end was entering the water. I didn t see an active victim, and while I couldn t see the bottom of the pool from where I was standing, I knew that this could be a passive drowning victim who needed life-saving resuscitative care. I grabbed the crash bag containing the AED and BVMs and ran toward the deep-end. I arrived on the scene as the rescuing lifeguard surfaced with a manikin in her arms that's when I realized this was another AES visit. After the pool closed for the day, we stayed for an hour of in-service training with the Red Cross examiner to practice our multiple-rescuer response skills. We worked in teams and had to extricate passive victims from the water using a backboard. Then, we provided care while our examiner timed us. We had to perform a primary assessment with two ventilations in under a minute, but because we ve been practicing all summer, my team had no problem beating the 1-minute challenge. I hope we ll never have to use these skills, but if we do, we ll be prepared. 9-7 WRAP-UP As a professional lifeguard, you should be able to recognize and respond to cardiac emergencies, including heart attacks and cardiac arrest. To do this, you must understand the importance of the five links of the Cardiac Chain of Survival: early recognition of the emergency and early access to EMS, early CPR, early defibrillation, early advanced medical care and integrated post-cardiac arrest care. When using an AED, always follow local protocols. AEDs are relatively easy to operate and generally require minimal training and retraining. Remember that AEDs are safe to use on victims who have been removed from the water, but you must first make sure you, the victim and the AED are not in deep puddles. ChAPter 9: CArdiAC emergencies 284
295 BENCHMARKS FOR LIFEGUARDS Lifeguard's should: Minimize interruptions of high-quality chest compressions. Use the appropriate compression depth based on the victim's age. Maintain a chest compression fraction (CCF) of at least 60 percent, with a goal of 80 percent. Use the appropriate compression rate. Allow for a full chest recoil to allow blood to flow into the heart. Avoid rescuer fatigue by changing positions at least every 2 minutes. BENCHMARKS FOR LIFEGUARDING OPERATIONS As professional responders, lifeguards should have: Familiarity with facility-specific AED equipment. Practice multiple-rescuer response techniques, including tworesponder CPR and how to operate effectively within a multiple-rescuer resuscitation situation. Effective communication and collaboration with other responders and bystanders. An understanding of care practice and protocols as determined by a local medical director. Regular refresher training and practice of rescue and care skills, as skills degrade quickly following a training session this in-service training includes practicing with other responders on team, dynamics skills during resuscitation and multiple-rescuer response techniques. 285 ChAPter 9: CArdiAC emergencies
296 Chapter 9 Review 1. Describe the five links in the Cardiac Chain of Survival for adults: 1) 2) 3) 4) 5) 2. Fill in the blank: For each minute CPR and defibrillation are delayed, the victim s chance for survival is reduced by about percent. 3. What should you do if you think someone is having a heart attack? 4. Signs of cardiac arrest include (circle all that apply): A Sudden collapse D Unresponsiveness B Vomiting E Rapid pulse C No pulse ChAPter 9 review 286
297 Chapter 9 Review 5. What is the objective of CPR? 6. Fill in the blank: Compressions given at the correct rate are at least per minute to a maximum of per minute. 7. What is the appropriate compression depth when providing CPR on an adult? A At least 2 inches but no more than 2.4 inches B At least 2.4 inches but no more than 3 inches C 2 inches D 1½ inches 8. When providing two-rescuer CPR, when should rescuers change positions? A At least every 2 minutes C During the analysis of the AED B After 5 cycles of 30 compressions and 2 ventilations D All of the above 9. You arrive on the scene when another lifeguard is performing CPR, what should you do first? 287 ChAPter 9 review
298 Chapter 9 Review 10. When performing two-rescuer CPR on an infant, describe how lifeguards should modify the following: Compression-to-ventilation ratio: The compression technique: 11. Provide three examples why a lifeguard could or should stop CPR: 1) 2) 3) 12. True or False: It is not appropriate to use an AED on a victim who is pregnant? Why? ChAPter 9 review 288
299 Flow Chart: Example of Multiple-Rescuer Response CPR in Progress This flow chart is an example of how multiple rescuers come on to the scene and help care for the victim. Follow the protocols for the EAP for your facility. A victim may not exhibit all of the symptoms or exhibit the symptoms in this order (e.g., obstructed airway). Always provide the appropriate care for the conditions found. You should use an AED as soon as it is available and ready to use. Using an AED has priority over using a BVM or administering emergency oxygen. If a rescuer is needed to get or prepare the AED, stop using the BVM and perform two-person CPR until the AED is ready to analyze. This example assumes that the EAP has been activated, EMS personnel have been called and a primary assessment has been done. The victim is not breathing and has no pulse. Additional rescuers are coming in to support the efforts of the initial rescuers and are bringing equipment. 1. The initial rescuers begin two-rescuer CPR. Rescuers 1 and 2 perform two-rescuer CPR. Rescuer 1 gives ventilations while Rescuer 2 gives chest compressions. 2. An additional rescuer arrives with the AED. CPR continues until the AED pads are placed on the victim and it is ready to begin analyzing. Rescuer 3: o Turns on the AED and follows the prompts. o Attaches the pads to the victim s bare chest. o Plugs in the connector, if necessary. o Says, Clear. o Pushes the Analyze button, if necessary. o If a shock is advised, says, Clear, and delivers the shock by pressing the Shock button, if necessary. The compressor changes place with another responder. The new compressor hovers hands a few inches above the chest during analysis to prepare for CPR. 289 ChAPter 9 review
300 3. After the shock, or if no shock is advised, Rescuers 1, 2 and 3 perform about 2 minutes of CPR until the AED begins to analyze or signs of life return. 4. An additional rescuer arrives with the BVM and assists with care. One rescuer assembles the BVM, if necessary. Administer emergency oxygen, if trained and authorized to do so. One rescuer places and seals the mask of the BVM and maintains an open airway. One rescuer provides ventilations by squeezing the bag. One rescuer performs compressions. o If the victim vomits: Rescuers quickly roll the victim onto the side. A rescuer on the side of the victim clears the victim s mouth out after vomiting stops, using a finger sweep and suction, if necessary. Turn the victim onto the back and continue providing care. o If ventilations do not make the chest clearly rise: One rescuer re-tilts the head. One rescuer attempts 1 ventilation. o If the ventilation attempt still does not make the chest clearly rise: One rescuer gives 30 chest compressions. One rescuer looks inside the mouth and removes any visible, large debris from the mouth using a finger sweep and suction, if necessary. One rescuer replaces the mask. One rescuer opens the airway and seals the mask. One rescuer provides ventilations. One rescuer performs compressions. Notes: If at any time you notice normal breathing or any other signs of life, stop CPR and monitor the victim s condition. Rescuers should change positions (alternate performing compressions and giving ventilations) about every 2 minutes, or when the AED analyzes, to reduce rescuer fatigue. Changing positions should take less than 5 seconds. ChAPter 9 review 290


301 CPR One-Rescuer CPR Notes: Activate the EAP, size up the scene while forming an initial impression, use PPE, perform primary assessment and get an AED on the scene as soon as possible. nsure the victim is on a firm, flat surface, such as the floor or a table. Expose the victim s chest to ensure proper hand placement and the ability to visualize chest recoil. If the victim is not breathing and has no pulse: 1 Give 30 chest compressions. Adult or child: Place the heel of one hand in the center of the chest on the lower half of sternum with the other hand on top. o Keep your arms as straight as possible and shoulders directly over your hands. Infant: Place one hand on the infant s forehead. Place two or three fingers from your hand closest to the infant s feet on the center of the chest just below the nipple line. The fingers should be oriented so they are parallel not perpendicular to the sternum. Push hard, push fast. o Compress the chest at a depth of: Adult: At least 2 inches but not more than 2.4 inches. Child: About 2 inches. Infant: 1½ inches. o Compress the chest at a rate of at least 100 per minute but no more than 120 per minute. Let the chest fully recoil between each compression. 291 skill sheet

302 CPR One-Rescuer CPR continued 2 Give 2 ventilations. 3 Perform cycles of 30 compressions and 2 ventilations. Do not stop CPR except in one of the following situations: You see an obvious sign of life, such as normal breathing or victim movement. An AED is ready to analyze the victim s heart rhythm. Another trained responder or responders take over, such as a member of your safety team or EMS personnel, and relieve you from giving compressions or ventilations. You are alone and too exhausted to continue. The scene becomes unsafe. Notes: eep our fingers off the chest when performing compressions on an adult or child b interlacing our fingers. Use your body weight, not your arms, to compress the chest. Count out loud or to yourself to help keep an even pace. skill sheet 292

303 CPR Two-Rescuer CPR Adult and Child Notes: Activate the EAP, size up the scene while forming an initial impression, use PPE, perform a primary assessment and get an AED on the scene as soon as possible. nsure the victim is on a firm, flat surface, such as the floor or a table. Expose the victim s chest to ensure proper hand placement and the ability to visualize chest recoil. If the victim is not breathing and has no pulse: Rescuer 2 finds the correct hand position to give chest compressions. Place two hands on the center of the chest. Rescuer 2 gives chest compressions. Push hard, push fast. o Compress the chest at a depth of: Adult: At least 2 inches but not more than 2.4 inches. Child: About 2 inches. o Compress the chest at a rate of at least 100 per minute but no more than 120 per minute. Rescuer 1 gives 2 ventilations. 4 Perform about 2 minutes of compressions and ventilations. Adult: Perform cycles of 30 compressions and 2 ventilations. Child: Perform cycles of 15 compressions and 2 ventilations. 293 skill sheet

304 CPR Two-Rescuer CPR Adult and Child continued 5 6 Rescuers change positions at least every 2 minutes (5 cycles of 30 compressions and 2 ventilations) and/or while the AED is analyzing the heart rythym. Rescuer 2 calls for a position change by using the word change at the end of the last compression cycle: o Adult: Use the word change in place of the word thirty. o Child: Use the word change in place of the word fifteen. Rescuer 1 gives 2 ventilations. Rescuer 2 quickly moves to the victim s head with their own mask. Rescuer 1 quickly moves into position at the victim s chest and locates correct hand position on the chest. Changing positions should take less than 5 seconds. Rescuer 1 begins chest compressions. Continue cycles of compressions and ventilations. Continue CPR until: You see an obvious sign of life, such as normal breathing or victim movement. An AED is ready to analyze the victim s heart rhythm. Another trained responder or responders take over, such as a member of your safety team or EMS personnel, and relieve you from giving compressions or ventilations. You are alone and too exhausted to continue. The scene becomes unsafe. Notes: eep our fingers off the chest when performing compressions on an adult or child b interlacing our fingers. Use your body weight, not your arms, to compress the chest. Count out loud to help keep an even pace. skill sheet 294


305 CPR Two-Rescuer CPR Infant Notes: Activate the EAP, size up the scene while forming an initial impression, use PPE, perform a primary assessment and get an AED on the scene as soon as possible. nsure the victim is on a firm, flat surface, such as the floor or a table. Expose the victim s chest to ensure proper hand placement and the ability to visualize chest recoil. If the victim is not breathing and has no pulse: Rescuer 2 finds the correct hand position to give chest compressions. Use the encircling thumbs technique to give chest compressions. o Place thumbs next to each other on the center of the chest just below the nipple line. o Place both hands underneath the infant s back and support the infant s back with your fingers. o Ensure that your hands do not compress or squeeze the side of the ribs. If available, a towel or padding can be placed underneath the infant s shoulders to help maintain the head in the neutral position. Rescuer 2 gives chest compressions. Push hard, push fast. o Compress the chest about 1½ inches at a rate of at least 100 compressions per minute but no more than 120 per minute. Rescuer 1 gives 2 ventilations. 295 skill sheet

306 CPR Two-Rescuer CPR Infant continued Perform cycles of 15 compressions and 2 ventilations for about 2 minutes. Rescuers change positions at least every 2 minutes and/or during the analysis of the AED. Rescuer 2 calls for a position change by using the word change in place of saying fifteen at the end of the last compression cycle. Rescuer 1 gives 2 ventilations. Rescuer 2 quickly moves to the victim s head with their own mask. Rescuer 1 quickly moves into position at the victim s chest and locates correct hand position on the chest. Changing positions should take less than 5 seconds. Rescuer 1 begins chest compressions. Continue cycles of compressions and ventilations. Continue CPR until: You see an obvious sign of life, such as normal breathing or victim movement. An AED is ready to analyze the victim s heart rhythm. Another trained responder or responders take over, such as a member of your safety team or EMS personnel, and relieve you from giving compressions and ventilations. You are alone and too exhausted to continue. The scene becomes unsafe. Note: Count out loud to help keep an even pace. skill sheet 296


307 USING AN AED Using an AED Notes: Activate the EAP, size up the scene while forming an initial impression, use PPE, perform a primary assessment and get an AED on the scene as soon as possible. nsure the victim is on a firm, flat surface, such as the floor or a table. If the victim is not breathing and has no pulse: 1 Turn on the AED and follow the audible and/or visual prompts. 2 Expose the victim s chest and wipe it dry if necessary. Tip: Remove any medication patches with a gloved hand and wipe away any remaining medication residue. 3 Attach the AED pads to the victim s bare, dry chest. Place one pad on the victim s upper right chest and the other pad on the left side of the chest. o Child: Use pediatric AED pads, if available. If the pads risk touching each other, place one pad in the middle of the child s chest and the other pad on the child s back, between the shoulder blades. o Infant: Always place one pad on the chest and the other on the back. 4 Plug in the connector, if necessary. 297 skill sheet


308 USING AN AED Using an AED continued 5 6 Stand clear. Make sure that no one, including you, is touching the victim. Say, Everyone, stand clear! Analyze the heart rhythm. Push the Analyze button, if necessary. Let the AED analyze the heart rhythm. Deliver a shock or perform CPR based 7 on the AED recommendation. If a shock is advised: o Make sure no one, including you, is touching the victim. o Say, Everyone clear in a loud commanding voice. o Deliver the shock by pushing the Shock button, if necessary. o After delivering the shock, perform about 2 minutes of CPR, starting with chest compressions. If no shock is advised: o Perform about 2 minutes of CPR, starting with chest compressions. o Continue to follow the prompts of the AED. Notes: If at any time you notice an obvious sign of life, such as normal breathing or victim movement, stop CPR and monitor the victim s condition. The AED will not advise a shock for normal or absent heart rhythms. If two trained rescuers are present, one should perform CPR while the second rescuer operates the AED. Do not interrupt CPR (chest compressions and ventilations) until the AED pads are applied and the AED is turned on and ready to analyze unless you are the only rescuer able to operate the AED and perform CPR. If there are multiple responders, they should: o Hover with their hands a few inches above the chest during the AED analysis and the shock (if indicated) to minimize interruptions to resuming CPR. o Resume compressions immediately following the delivery of a shock or after the AED determines that no shock is advised. o Switch responsibility for compressions each time the AED performs an analysis to limit their fatigue. o Do not wait for the AED to deliver a "resume CPR" prompt before resuming compressions. skill sheet 298


309 CPR WITH AIRWAY OBSTRUCTION CPR with Airway Obstruction If a person who is choking becomes unresponsive, summon EMS if you have not already done so, then lower them to a firm, flat surface and immediately begin CPR, starting with chest compressions Begin CPR starting with 30 chest compressions. Compress the chest to a depth of: Adult: At least 2 inches but no more than 2.4 inches Child: About 2 inches Infant: About 1½ inches Before attempting ventilations, open the victim s mouth and look for the object. If you see an object in the victim s mouth, carefully remove it using a finger sweep. To perform a finger sweep, slide your finger along the inside of the victim s cheek, using a hooking motion to sweep out the object. Never perform a blind finger sweep. Replace the resuscitation mask and give 2 ventilations. 299 skill sheet


310 CPR WITH AIRWAY OBSTRUCTION CPR with Airway Obstruction continued 4 Continue to provide care by repeating this cycle until: The victim begins to breathe on their own. Another trained rescuer takes over. More advanced medical personnel, such as EMS personnel, take over. You are too exhausted to continue. The scene becomes unsafe. Your ventilations are successful; continue CPR. Note: Continuing cycles of 30 compressions and 2 ventilations is the most effective way to provide care. Even if ventilations fail to make the chest rise, compressions may help clear the airway by moving the blockage to the upper airway where it can be seen and removed. Continue to check the victim's mouth for an object after each set of compressions until ventilations make the chest clearly rise. skill sheet 300

311
, sizing up the scene, performing a primary assessment and summoning emergency medical services (EMS) personnel for any")
312 10 first Aid As covered in Chapter 7, when you encounter an ill or injured victim, you must follow a series of general procedures designed to ensure a proper assessment and response. These procedures include activating the emergency action plan (EAP), sizing up the scene, performing a primary assessment and summoning emergency medical services (EMS) personnel for any life-threatening emergencies. If you do not find a life-threatening situation, you should complete a secondary assessment and provide first aid as needed. This chapter covers how to perform a secondary assessment, including how to check a conscious victim and how to take a brief history using the SAMPLE technique. It also describes how to recognize and provide first aid for some of the injuries, illnesses and medical conditions that you might encounter while on the job RESPONDING TO INJURIES AND ILLNESSES SECONDARY ASSESSMENT SUDDEN ILLNESS SKIN AND SOFT TISSUE INJURIES BITES AND STINGS POISONING HEAT-RELATED ILLNESSES AND COLD-RELATED EMERGENCIES INJURIES TO MUSCLES, BONES AND JOINTS EMERGENCY CHILDBIRTH WRAP-UP


313 10-1 RESPONDING TO INJURIES AND ILLNESSES Even when everyone works to prevent emergencies, injuries and illnesses do occur at aquatic facilities. With some injuries, such as a nosebleed, the problem will be obvious and easy to treat by following the first aid care steps described in this chapter. In other situations, such as a sudden illness, it may be harder to determine what is wrong. In all cases, remember to follow the general procedures for injury or sudden illness on land, and to use appropriate personal protective equipment, such as nitrile, latex-free disposable gloves and CPR breathing barriers. It is a common practice to carry a few first aid supplies in your hip pack (Figure 10-1). Also, be aware that every facility should have a first aid area where an injured or ill person can receive first aid and rest, and where additional first aid supplies are available (Figure 10-2). Some facilities staff the first aid area with highly trained personnel, such as emergency medical technicians (EMTs). You should know where your facility s first aid area is located, the type of equipment and supplies available, how to provide first aid correctly, the communications systems used to summon additional emergency personnel and whether staff with more advanced training are present. Figure 10-1 A few first aid supplies can be carried in your hip pack. Figure 10-2 Every facility should have first aid supplies that are available from a first aid area. Considerations for Responding to Injuries and Illnesses Your job as a lifeguard requires you to juggle many responsibilities. Injuries happen suddenly, and in a first aid emergency you must decide how best to respond to the situation, including when to activate the EAP. The ability to recognize that an emergency has occurred is the first step toward taking appropriate action. Once you recognize that an emergency has occurred, you must decide to act. To help make decisions in an emergency situation, ask yourself the following questions: Should I provide care where the victim was found, or move them to the first aid room? Is the safety of the victim or others compromised? Is there a risk of further injury to the victim? Is there a risk of exposing the victim or others to pathogens (e.g., by leaving a trail of blood or other potentially infectious materials)? Should I summon EMS personnel? When should I recommend that the victim see a healthcare provider to seek further medical treatment? 303 ChAPter 10: first Aid

314 10-2 SECONDARY ASSESSMENT During the secondary assessment, you should perform a quick examination and then take a brief history (Figure 10-3). If any life-threatening conditions develop or are found during your secondary assessment, stop the assessment and provide appropriate care immediately. If additional lifeguards are available, delegate care. Figure 10-3 When caring for a responsive victim, perform a quick examination and take a brief history. Using SAMPLE to Take a Brief History Use the SAMPLE mnemonic as an easy way to remember what you should ask about when you are taking the brief history: S = Signs and symptoms o These include bleeding, skin that is cool and moist, pain, nausea, headache and difficulty breathing. A = Allergies o Determine if the victim is allergic to any medications, food or environmental elements, such as pollen or bees. M = Medications o Find out if the victim is taking any prescription or nonprescription medications and whether they took them today as prescribed. P = Pertinent past medical history o Determine if the victim has any medical conditions, has had medical problems in the past or recently has been hospitalized. L Last oral intake o Find out what the victim most recently took in by mouth, as well as the volume or dose consumed. This includes, food, drinks and medication. E = Events leading up to the incident o Determine what the victim was doing just before and at the time of the incident. When talking to a child, get down at eye level with the child, speak slowly and in a friendly manner, use simple words and ask questions that the child can easily understand. For children and infants, you will need to involve the parent or legal guardians and obtain consent, when possible. If the person is responsive but not fully awake and alert, you may need to ask bystanders several of the SAMPLE questions in order to gather a history. ChAPter 10: first Aid 304
315 Checking a Responsive Person After taking the SAMPLE history, check an alert and awake victim by performing a head-to-toe examination. Before beginning the examination, tell the person what you are going to do. Visually inspect the person s body, looking carefully for any bleeding, cuts, bruises and obvious deformities. Do not ask the person to move any areas in which they have discomfort or pain, or if a head, neck or spinal injury is suspected. When checking a child or infant for non-lifethreatening conditions, observe the child or infant before touching them. Look for signs that indicate changes in the level of consciousness (LOC), trouble breathing and any apparent injuries or conditions. For a non-life-threatening situation involving a child or an infant, conduct the check from toe to head. This will allow the child or infant to become familiar with the process and see what is happening. Check for the same things on a child or infant that you would look for on an adult. However, if there is a life-threatening condition or the child or infant's condition is unknown, conduct the check starting with the head. See the Checking a Responsive Person skill sheet at the end of this chapter for steps to follow when performing a head-to-toe examination. If the person is unable to move a body part or has pain on movement: Help the person rest in a comfortable position. Keep the person from getting chilled or overheated. Reassure the person. Determine whether to summon EMS personnel. Continue to watch for changes in LOC and breathing. Did you know: When inspecting a victim, look for a medical identification (ID) tag, necklace or bracelet on the person s wrist, neck or ankle (Figure 10-4). A digital medical identification tag may also be available on the person's mobile phone; this tag can be accessed without unlocking the phone. These ID tags will provide medical information about the person if they are unable to communicate with you, explain how to care for the conditions identified and list whom to call for help. Figure 10-4 Medical ID tags, necklaces and bracelets can provide important information about an injured or ill person SUDDEN ILLNESS Sudden illness can happen to anyone, anywhere. You may not be able to identify the illness, but you still can provide care. Victims of sudden illness usually look and feel ill. If you suspect something is wrong, check the victim and look for a medical ID tag, necklace or bracelet on the person s wrist, neck or ankle. The victim may try to say nothing is seriously wrong, but the victim s condition can worsen rapidly. Do not be afraid to ask the victim questions. There are many types of sudden illness, including diabetic emergencies, fainting, seizures and stroke. 305 ChAPter 10: first Aid

316 Signs and Symptoms of Sudden Illness Many sudden illnesses have similar signs and symptoms. These include: Changes in LOC Nausea or vomiting Difficulty speaking or slurred speech Numbness or weakness Loss of vision or blurred vision Changes in breathing; the person may have trouble breathing or may not be breathing normally Changes in skin color (pale, ashen or flushed skin) Sweating Persistent pressure or pain Diarrhea Paralysis or an inability to move Severe headache General Care Steps for Sudden Illness When providing care for sudden illness, follow the general procedures for an injury or sudden illness on land: Care for any life-threatening conditions first. Monitor the victim s condition and watch for changes in LOC. Keep the victim comfortable and reassure them. Keep the victim from getting chilled or overheated. Do not give the victim anything to eat or drink, unless the victim is awake, able to swallow and follow simple commands and intake is indicated based on the treatment recommendations. Care for any other problems that develop, such as vomiting. Diabetic Emergencies People who are diabetic sometimes become ill because there is too much or too little sugar in their blood. Many people who are diabetic use diet, exercise and/or medication to control their diabetes. The person may disclose that they are diabetic, or you may learn this from the information on a medical ID tag or from a bystander. Often, people who have diabetes know what is wrong and will ask for something with sugar if they are experiencing symptoms of low blood sugar (hypoglycemia). They may carry some form of sugar with them, such as glucose tablets. If the person is awake and can safely swallow and follow simple commands, give them sugar (Figure 10-5). If it is available, give 15 to 20 grams of sugar in the form of glucose tablets to the victim. If not available, 15 to 20 grams of sugar from several sources can be given, including glucose- and sucrose-containing candies, jelly beans, orange juice or whole milk. If the person has hypoglycemia, sugar will help quickly. If the problem is high blood sugar (hyperglycemia), giving the sugar will not cause any immediate harm. Give something by mouth only if the victim is awake and able to safely swallow. Always summon EMS personnel for any of the following circumstances: The person is unresponsive. The person is responsive but not fully awake and is unable to swallow. The person does not feel better within about 10 to 15 minutes after taking sugar, or gets worse. A form of sugar cannot be found immediately (In that event, do not spend time looking for it.) Figure 10-5 Give a victim experiencing a diabetic emergency glucose tablets. ChAPter 10: first Aid 306
317 Fainting When a person suddenly loses consciousness and then reawakens, they may simply have fainted. Fainting is not usually harmful, and the person will usually quickly recover once horizontal. Position the person on their back. Loosen any tight clothing, such as a tie or collar. Make sure the victim is breathing normally. Do not give the victim anything to eat or drink. If the victim vomits, position the victim on their side. Once the victim is sign-andsymptom-free, you may have them slowly sit up, and then you should reassess their condition. If they remain sign-and-symptom-free for several minutes, have the victim try to stand, and then reassess once again. If the victim is unable to sit up or stand without any signs or symptoms, call EMS for further evaluation. Seizures There are many different types of seizures. Generalized seizures usually last 1 to 3 minutes and can produce a wide range of signs and symptoms. When this type of seizure occurs, the person loses consciousness and can fall, causing injury. The person may become rigid and then experience sudden, uncontrollable muscular convulsions lasting several minutes. Breathing may become irregular and even stop temporarily. A seizure is also considered a possible sign of cardiac arrest, so the victim should be assessed and monitored closely. Seeing someone have a seizure may be intimidating, but you can provide care for the person. The person cannot control any muscular convulsions that may occur, and it is important to allow the seizure to run its course because attempting to restrain the person can cause further injury. To provide care to a person having a seizure: Protect the person from injury by moving nearby objects away from the person. Protect the person s head by placing a thin cushion under the head and shoulders to keep the airway open. Folded clothing makes an adequate cushion. When the seizure is over, the person usually begins to breathe normally. They may be drowsy and disoriented or unresponsive for a period of time. Check to see if the person was injured during the seizure. Be reassuring and comforting. If the seizure occurred in public, the person may be embarrassed and self-conscious. Ask bystanders not to crowd around the person. They will be tired and want to rest. Stay with the person until they are fully awake and alert. If the person is known to have periodic seizures, there may be no need to summon EMS personnel. They usually will recover from a seizure in a few minutes. However, summon EMS personnel if: The seizure occurs in the water. This is the person s first seizure. The seizure lasts more than 5 minutes. The person has repeated seizures with no lucid period. The person appears to be injured. The cause of the seizure is unknown. The person is pregnant. The person is known to have diabetes. The person fails to regain consciousness after the seizure. The person is elderly and may have suffered a stroke. 307 ChAPter 10: first Aid
, or if directed by EMS personnel for a prolonged seizure. 4.")
318 Seizures in the Water If a person has a seizure in the water, follow these steps: 1. Summon EMS personnel. 2. Support the person with their head above water until the seizure ends (Figures 10-6). 3. Remove the person from the water as soon as possible after the seizure (since they may have inhaled or swallowed water), or if directed by EMS personnel for a prolonged seizure. 4. Once on land, position the person on their back and perform a primary assessment. Give ventilations or CPR, if needed. If the person vomits, turn the victim on their side to drain fluids from the mouth. Sweep out the mouth (or suction out the mouth if you are trained to do so). 5. If the victim is breathing normally, position the victim on their side and continue to monitor their airway and breathing until the victim is fully awake and alert. Figure 10-6 If someone experiences a seizure while in the water, support the victim's head above the water until the seizure ends. Stroke As with other sudden illnesses, the signs and symptoms of a stroke are a sudden change in how the body is working or feeling. This may include sudden weakness or numbness of the face, an arm or a leg. Usually, weakness or numbness occurs only on one side of the body. Other signs and symptoms include: Difficulty with speech (trouble speaking and being understood, and difficulty understanding others) Blurred or dimmed vision Sudden, severe headache, dizziness or confusion Loss of balance or coordination Trouble walking Ringing in the ears If the person shows any signs or symptoms of stroke, time is critical. The objective is to recognize a possible stroke and summon EMS personnel immediately. There are several treatments that can be administered in the hospital setting that can limit the long-term effects of a stroke, but they are time-limited. Every minute matters. ChAPter 10: first Aid 308
. o Ask the person to smile.")

319 To identify and care for a victim of a stroke, use a stroke screening scale: Think FAST. Use the FAST mnemonic to help you remember how to care for a victim of stroke: F = Face Weakness on one side of the face (Figure 10-7). o Ask the person to smile. This will show if there is drooping or weakness in the muscles on one side of the face. Does one side of the face droop? A = Arm Weakness or numbness in one arm (Figure 10-8). o Ask the person to raise both arms in front of them self to find out if there is weakness in the limbs. Does one arm drift downward? S = Speech Slurred speech or trouble speaking. o Ask the person to speak a simple sentence, and then listen for slurred or distorted speech. Example: The sky is blue. Can the victim repeat the sentence correctly and clearly? T = Time Time to summon EMS personnel if any one of these signs or symptoms are seen. o Note the time of onset of signs and symptoms, and summon EMS personnel immediately. If the possible stroke is unwitnessed, try to find out the time the victim was last known to be well and free of signs and symptoms of a stroke. Figure 10-7 Signals of a stroke include facial drooping. Figure 10-8 Weakness on one side of the body is another signal of a stroke SKIN AND SOFT TISSUE INJURIES Soft tissues are the layers of skin and the fat and muscle beneath the skin s outer layer. A physical injury to the body s soft tissue is called a wound. Any time the soft tissues are damaged or torn, the body is threatened. Injuries may damage the soft tissues at or near the skin s surface, or deep in the body. Germs can enter the body through a scrape, cut, puncture or burn and cause infection. Bleeding can occur at or under the skin s surface, where it is harder to detect. Burns are a special kind of soft tissue injury. Like other types of soft tissue injury, burns can damage the top layer of skin, or the skin and the layers of other tissues beneath. Soft tissue injuries typically are classified as either closed or open wounds. 309 ChAPter 10: first Aid
320 Closed Wounds Closed wounds occur beneath the surface of the skin. The simplest closed wound is a bruise or contusion. Bruises result when the body is subjected to blunt force, such as when you bump your leg on a table or chair. Such a blow usually results in damage to soft tissue layers and blood vessels beneath the skin, causing internal bleeding. Caring for Internal Bleeding Summon EMS personnel immediately if the victim shows any sign or symptom of shock, or: The victim complains of severe pain or cannot move a body part without pain. The force that caused the injury was great enough to cause serious damage. An injured arm or leg is blue or extremely pale. The victim becomes confused, faint, drowsy or unresponsive. The victim is vomiting blood or coughing up blood. The victim has skin that feels cool or moist, or looks pale or bluish. The victim has tender, swollen, bruised or hard areas of the body, such as the abdomen. While waiting for EMS personnel to arrive, the objectives are to: Care for any life-threatening conditions first. Help the victim rest in a comfortable position and reassure them. o If there are signs and symptoms of shock, lay the person flat. Most closed wounds do not require special medical care. However, a significant violent force can cause injuries involving larger blood vessels and the deeper layers of muscle tissue. These rare injuries can result in severe bleeding beneath the skin. In these cases, medical care is needed quickly. Monitor the victim s condition, and watch for any changes in LOC. Keep the victim from getting chilled. (Care for shock.) Care for other problems that develop, such as vomiting. If the closed wound is not serious: 1. Apply a cold pack on the area to help control the bleeding under the skin and provide comfort. To make a cold pack, fill a sealable plastic bag with a mixture of ice and water. Place a gauze pad, towel or other cloth between the source of the cold and the victim's skin. Never put ice directly on the skin. If a cold pack is not available, use a chemical cold pack. 2. Apply the cold pack for no more than 20 minutes. If continued cooling is needed, remove the pack for 20 minutes and re-chill it, and then replace it. 3. Monitor the victim for the potential for hypothermia, especially in children when applying cold therapy. Open Wounds In an open wound, the break in the skin can be as minor as a scrape of the top layer of skin (abrasion) or as severe as a deep, penetrating injury beneath all layers of skin. The amount of external bleeding depends on the location and severity of the injury. Most external bleeding injuries that you encounter will be minor, such as a small cut that can be cared for by applying direct pressure over the wound until the bleeding stops, cleaning the wound and applying an adhesive bandage. However, some cuts are too large, or the blood is under too much pressure, for effective clotting to occur. In these cases, you need to recognize the situation and provide care quickly. Remember to always wear nitrile, latex-free disposable gloves and follow all other standard precautions when giving care. ChAPter 10: first Aid 310


.")
. o Puncture wounds often do not bleed profusely, but can easily become infected.")
321 The following are the four main types of open wounds: Abrasion (Figure 10-9). o The skin has been rubbed or scraped away (e.g., scrape, road rash or rug burn). The area usually is painful. o Dirt and other matter may have entered the wound. Cleaning the wound with soap and water is important to prevent infection. Figure 10-9 Abrasion Laceration (Figure 10-10). o Cuts bleed freely, and deep cuts can bleed severely. o Deep cuts can damage nerves, large blood vessels and other soft tissues. Avulsion (Figure 10-11). o An avulsion is a cut in which a piece of soft tissue or even part of the body, such as a finger, is torn loose or torn off entirely (e.g., amputation). An avulsion often leaves a flap of skin still attached to the wound. o Often, deeper tissues are damaged, causing significant bleeding. Figure Laceration Puncture (Figure 10-12). o Puncture wounds often do not bleed profusely, but can easily become infected. o Bleeding can be severe internally, with damage to major blood vessels or internal organs. o Any impaled object embedded in the wound should not be removed, unless it makes CPR impossible to perform. Figure Avulsion Figure Puncture 311 ChAPter 10: first Aid
. Clean the wound thoroughly with soap (if available) and water.")

322 Caring for External Bleeding To care for a minor wound, such as an abrasion, follow these general guidelines: Control any bleeding. o Place a sterile dressing over the wound. o Apply direct pressure until bleeding stops (Figure 10-13A). Clean the wound thoroughly with soap (if available) and water. If possible, irrigate an abrasion with clean, warm, running tap water for about 5 minutes to remove any dirt and debris. If bleeding continues, use a new sterile dressing and apply more pressure. After bleeding stops, remove the dressing and apply wound gel or an antibiotic ointment to the wound, if one is available, the victim has no known allergies or sensitivities to the medication and local protocols allow you to do so. Cover the wound with a sterile dressing and bandage (or with an adhesive bandage). (Figure 10-13B). Wash your hands immediately after providing care. Figure 10-13A Apply direct pressure firmly against a wound for a few minutes to control any bleeding. Figure 10-13B Use a sterile dressing and bandage to cover the wound. To care for a major wound: Activate the EAP, summon EMS personnel and follow the general procedures for injury or sudden illness on land. Cover the wound with a sterile gauze dressing, if available, and apply direct pressure over the wound using the flat part of your fingers. A large wound may require more pressure; use pressure from your full hand with gauze dressings to try to stop the bleeding. For an open fracture, do not apply direct pressure over the broken bones, but instead pack sterile gauze around the area to control bleeding and prevent infection. Do not remove the dressing if it becomes saturated with blood while you are applying pressure. Instead, place additional dressings over the soaked bandage and reapply direct pressure. Then cover the dressings with a bandage to hold them in place. Keep the victim warm and position the victim on their back. Care for other conditions, including shock. Wash your hands immediately after providing care. If conscious and able, the victim may use their hand to apply pressure while you put your gloves on and prepare the necessary supplies. ChAPter 10: first Aid 312
323 Severe, Life-Threatening Bleeding Although a rare event, there may be times when you encounter a victim with severe, life-threatening bleeding when direct pressure is not effective or not possible due to the circumstances of the injury. When direct pressure fails or is not possible, there are two bleeding control adjuncts that can be used to control severe, life-threatening bleeding: tourniquets and hemostatic dressings. TOURNIQUETS A tourniquet is a device placed around an arm or leg to constrict blood vessels and stop blood flow to a wound. In some life-threatening circumstances, you may need to use a tourniquet to control bleeding as the first step, instead of maintaining direct pressure over several minutes. Examples of situations where it may be necessary to use a tourniquet include: Severe, life-threatening bleeding that cannot be controlled using direct pressure A physical location that makes it impossible to apply direct pressure to control the bleeding (e.g., the injured person or the person s limb is trapped in a confined space) Multiple people with life-threatening injuries who need care A scene that is or becomes unsafe If you find yourself in a situation where you need to apply a tourniquet, a commercially manufactured tourniquet is preferred over a makeshift device. Follow the manufacturer s instructions for applying the tourniquet. Although tourniquets may have slightly different designs, all are applied in generally the same way. To apply a manufactured tourniquet: 1. Position the tourniquet around the wounded extremity approximately 2 inches above the wound, avoiding the joint. 2. Secure the tourniquet tightly in place according to the manufacturer s instructions. 3. Tighten the tourniquet by twisting the rod (windlass) until the flow of bright red blood stops, and then secure the rod in place. 4. Note and record the time that you applied the tourniquet, and give this information to EMS personnel. Once the tourniquet is applied, it should not be removed until the person reaches a healthcare facility. If it is necessary to use a tourniquet and a commercially manufactured tourniquet is not available, make a tourniquet using a strip of soft material that is 2 to 4 inches wide (such as a triangular bandage that has been folded into a tie) and a short, sturdy stick or other rigid object. Tie the stick or other rigid object into the material and twist it to tighten the makeshift tourniquet. Note: Do not cover the tourniquet with clothing. 313 ChAPter 10: first Aid

324 HEMOSTATIC DRESSINGS A hemostatic dressing (Figure 10-14) is a dressing treated with a substance that speeds clot formation. As is the case with tourniquets, hemostatic dressings are used when severe, life-threatening bleeding exists and standard first aid procedures fail or are not practical. Typically, hemostatic dressings are used on parts of the body where a tourniquet cannot be applied, such as the neck or torso. A hemostatic dressing can also be used to control bleeding from an open wound on an arm or a leg, if a tourniquet is ineffective or not available. The hemostatic dressing is applied at the site of the bleeding (possibly inside of the wound) and is used along with direct pressure. You should always follow local protocols, as well as your facility s specific procedures. Your facility s management should train you in the use of hemostatic agents if you are expected to use them in an emergency. Figure Hemostatic dressings Shock Any serious injury or illness can result in a condition known as shock. Shock is a natural reaction by the body when tissues do not receive adequate perfusion. Shock usually means the victim s condition is serious. Signs and symptoms of shock include: Restlessness or irritability Altered LOC Pale, ashen, cool or moist skin Nausea or vomiting Rapid breathing and pulse Excessive thirst To minimize the effects of shock: Make sure that EMS personnel have been summoned. Have the victim lie down flat on their back. Cover the victim with a blanket to prevent loss of body heat. Comfort and reassure the victim until EMS personnel arrive and take over. Administer emergency oxygen, and if you are trained to do so. Monitor the victim s condition and watch for changes in LOC. Control any external bleeding. Keep the victim from getting chilled or overheated. Note: Do not give food or drink to a victim of shock, even if the victim asks for them. ChAPter 10: first Aid 314

.")
325 Care for ounds Specific Situations Patrons at aquatic facilities can suffer a variety of wounds, from a minor nosebleed to a severed body part. No matter how seriously the victim is wounded, you must remain calm and follow the general procedures for injury or sudden illness on land. This section covers how to care for some of the specific wounds that you might encounter on the job. Nosebleeds To care for a nosebleed: Have the victim sit leaning slightly forward to prevent swallowing or choking on the blood (Figure 10-15). Pinch the nostrils together for about 5 to 10 minutes, or until the bleeding stops. o Do not pack the victim s nose to stop the bleeding. After the bleeding stops, have the victim avoid rubbing or blowing the nose, which could restart the bleeding. Medical attention is needed if the bleeding persists or recurs, or if the victim says the nosebleed was a result of high blood pressure. If the victim becomes unresponsive, perform a primary assessment. If the victim is breathing, place them on their side to allow blood to drain from the nose. Monitor the victim s airway, and have suction ready, if available. Summon EMS personnel immediately. Figure Control a nosebleed by having the victim sit with the head slightly forward, pinching the nostrils together. Figure To care for an impaled object in the eye, stabilize the object with a shield, such as a paper cup, and bandage the cup in place. Eye Injuries Care for open or closed wounds around the eye as you would for any soft tissue injury. Never put pressure directly on the eye. For impaled objects, significant blunt trauma or penetrating injuries to the eye: Summon EMS personnel. Keep the victim as still as possible. Do not try to remove the object from the eye. Bandage loosely and do not put pressure on the injured eye. Stabilize the object as best as possible. Cover both eyes loosely with a cup or shield. Depending on the size of the object, you may be able to stabilize it by encircling the eye with a gauze dressing or soft sterile cloth, but be careful not to apply any pressure to the area. Position bulky dressings, such as roller gauze, around the impaled object, and then cover it with a shield, such as a paper cup (Figure 10-16) or sunglasses. The shield should not touch the object. To cover both eyes, bandage any shields and dressings in place with a self-adhering bandage or roller bandage to keep any impaled objects stable and minimize movement of both eyes. For small foreign bodies in the eye, such as sand, lint or pollen: Tell the victim to blink several times to try to remove the object. Gently flush the affected eye with water. Seek medical attention if the object remains. For chemicals in the eye: Flush the eye continuously with tap water for at least 15 minutes, or until EMS personnel take over. If tap water is not available, use normal saline or another commercially available eye irrigation solution. Always flush away from the uninjured eye. 315 ChAPter 10: first Aid


326 Injuries to the Mouth and Teeth If a head, neck or spinal injury is not suspected: Rinse out the victim s mouth with cold tap water, if available. Have the victim lean slightly forward, or place the victim on their side. Try to prevent the victim from swallowing the blood, which could cause nausea or vomiting. Apply a dressing. o For injuries inside the cheek, place folded sterile dressings inside the mouth against the wound. o For injuries outside the cheek, apply direct pressure using a sterile dressing. o For injuries to the tongue or lips, apply direct pressure using a sterile dressing. Apply cold to reduce swelling and ease pain. If a tooth is knocked out: 1. Control any bleeding. 2. Have the victim gently bite down on a rolled sterile dressing in the space left by the tooth (or teeth). 3. Save any displaced teeth. Carefully pick up the tooth by the crown (white part), not the root. Do not scrub or attempt to clean the tooth, or remove any attached tissue fragments. Place the tooth in a Hank s Balanced Salt Solution. If not available, place the tooth (in order of preference) in egg white, coconut water or whole milk. If none of these solutions are available, place the tooth in the victim s saliva (not in the mouth). 4. Advise the victim to get to an emergency department or dentist with the tooth as soon as possible. For the greatest chance to save the tooth, it needs to be re-implanted within minutes. Scalp Injuries Scalp injuries often appear to bleed heavily. Putting pressure on the area around the wound can control the bleeding. Apply gentle pressure if there is suspicion of a skull fracture (Figure 10-17). If you feel a depression, spongy areas or bone fragments, do not put direct pressure on the wound. Summon EMS personnel if you cannot determine the seriousness of the scalp injury. For an open wound with no sign of a fracture, control the bleeding with direct pressure using several dressings. Once bleeding is controlled, secure the dressings with a bandage. If you suspect a head, neck or spinal injury, minimize movement of the head, neck and spine. See Chapter 11 on how to care for a head, neck or spinal injury. Impaled Objects An object that remains in an open wound is called an impaled object. Take the following steps to care for an impaled object: Summon EMS personnel. Place several dressings around the object to stabilize it and keep it from moving. Avoid placing pressure on or moving the object. Bandage the dressings in place around the object (Figure 10-18). Do not remove the object. Figure Control bleeding from a scalp injury by applying pressure around the wound. Avoid direct pressure. Figure Place several dressings around an impaled object to keep it from moving. Bandage the dressings in place around the object. ChAPter 10: first Aid 316

327 Injuries to the Abdomen Be aware that open wounds to the abdomen can cause internal organs to push outside of the body. To care for an open abdominal injury, follow these guidelines: Summon EMS personnel. Carefully remove clothing from around the wound. If organs are protruding: o Do not attempt to put them back into the abdomen. o Cover the organs with a moist, sterile dressing and cover the dressing with plastic wrap. o Place a folded towel or cloth over the dressing to keep the organs warm. Care for shock. Animal and Human Bites An animal or human bite may be serious because of the nature of the wound and risk of infection. A person who is bitten by an animal should be removed from the situation, if possible, but only without endangering yourself or others. Do not try to restrain or capture the animal. Tetanus and rabies immunizations may be necessary, so it is vital to report bites from any wild or unknown domestic animal to the local health department or other agency, according to local protocols. For animal or human bites, follow these guidelines: Summon EMS personnel if the wound bleeds severely, or if the animal is suspected to have rabies. For severe bleeding, control the bleeding first. Do not clean the wound; it will be properly cleaned at the hospital. If the bleeding is minimal: o Wash the wound with soap and water and then rinse with clean, running water. Saline may be used, if water is not available. o Apply a small amount of antibiotic wound ointment, cream or gel to the wound if the person has no known allergies or sensitivities to the ingredients. o Control the bleeding. o Cover with a sterile bandage. Severed Body Parts Caring for a victim with a severed body part can be disturbing. Remain calm, and take the following steps: Summon EMS personnel. Control the bleeding. Most bleeding can be controlled with direct pressure. Consider using a tourniquet if there is severe, life-threatening bleeding that is not controlled with hard pressure. Cover the wound with a sterile dressing, and bandage the wound to prevent infection. Wrap the severed body part(s) in sterile gauze (or other clean material) (Figure 10-19). Place the severed body part(s) in a plastic bag, and seal the bag. Put the plastic bag in another plastic bag containing an ice and water slurry (not on ice alone). Care for shock. Be sure that the body part is taken to the hospital with the victim immediately. Figure Wrap a severed body part in sterile gauze, put in a plastic bag and put the bag on ice. 317 ChAPter 10: first Aid
328 Burns Burns are a special kind of soft tissue injury. Like other types of soft tissue injury, burns can damage the top layer of skin, or the skin and the soft tissue beneath. There are four sources of burns: heat, radiation, chemicals and electricity. Burns are classified by their depth. The deeper the burn, the more severe. The severity of the burn depends on the: Temperature or strength of the heat or other energy source. Length of exposure to the burn source. Location of the burn. Area and size of the burn. Victim s age and general medical condition. Critical burns can lead to shock and other life-threatening situations and need immediate medical attention. These include burns: That cause a victim to have difficulty breathing. That cover more than one body part or a large body surface area. To the head, neck, hands, feet, abdomen or genitals. To the airway. (Burns to the mouth and nose may be a signal of this.) To a child or elderly person (other than very minor burns.) From chemicals, explosions or electricity. Caring for Burns To care for burns, follow the general procedures for a land emergency. If the scene is safe, check the victim for life-threatening conditions. Summon EMS personnel if the condition is life-threatening. The following general guidelines apply for all types of burns: Stop the burning by removing the victim from the source of the burn. Cool the burned area with large amounts of cool or cold tap water for at least 10 minutes. If cool or cold water is not available, use a cool or cold compress that is clean. Monitor the victim for hypothermia when cooling large burns. Cover the burned area loosely with a dry, sterile dressing. Comfort and reassure the victim. On the next page, Table 10-1 outlines specific considerations and care steps for the different sources of burns. ChAPter 10: first Aid 318
329 table 10-1: Care Steps Based on Source of Burn Electrical Chemical Radiation (Sun) Summon EMS personnel. Check the scene for safety, and check for life-threatening injuries. If a power line is down, wait for the fire department or the power company to disconnect the power source. Cool the burn with cold tap water for at least 10 minutes. Cover the burn loosely with a dry, sterile dressing. Be aware that electrocutions can cause cardiac and breathing emergencies. Be prepared to perform CPR or defibrillation. Take steps to minimize shock. Summon EMS personnel. Brush off dry chemicals with a gloved hand, being careful not to get the chemical on yourself or to brush it into the victim s eyes. Flush the affected area continuously with large amounts of cool water. Keep flushing the area for at least 20 minutes, or until EMS personnel arrive. If a chemical gets into an eye, flush the eye with tap water for at least 15 minutes, or until EMS personnel arrive and begin care. Always flush the affected eye from the nose outward and downward to prevent washing the chemical into the other eye. If possible, have the victim remove contaminated clothes to prevent further contamination while continuing to flush the area. Cool the burned area, and protect it from further damage by keeping it out of the sun BITES AND STINGS Spider Bites and Scorpion Stings Only two spiders in the United States are poisonous: the black widow and the brown recluse. A bite from one of these spiders can cause serious illness or death. Some scorpion stings also can be fatal. When patrons are bitten by spiders at aquatic facilities, it is usually when they are reaching or rummaging in dark places, such as lockers or storage areas. They are typically bitten on their hands or arms. 319 ChAPter 10: first Aid

330 If someone has been bitten by a black widow or brown recluse spider, or stung by a scorpion: Summon EMS personnel. Wash the wound thoroughly. Bandage the wound. Apply a topical antibiotic ointment to the bite to prevent infection if the person has no known allergies or sensitivities to the medication. Apply a cold pack to the site to reduce swelling and pain. Give the victim anti-venom a medication that blocks the effects of the spider s poisonous venom if it is available and local protocols allow. Care for life-threatening conditions. Monitor the victim s condition and watch for changes in LOC. Keep the victim comfortable. Snakebites Snakebites kill few people in the United States. Whereas 7,000 to 8,000 venomous snakebites are reported each year in the United States, fewer than five victims die from the snakebite. To provide care for a bite from a venomous snake: Summon EMS personnel. Keep the injured area still and lower than the heart. The victim should walk only if absolutely necessary. Wash the wound. Apply an elastic roller bandage. Use a narrow bandage to wrap a hand or wrist, a mediumwidth bandage to wrap an arm or ankle and a wide bandage to wrap a leg. o Check for feeling, warmth and color of the limb beyond where the bandage will be placed, and note changes in skin color and temperature. o Place the end of the bandage against the skin and use overlapping turns (Figure 10-20). o Gently stretch the bandage while wrapping. The wrap should cover a long body section, such as an arm or a calf, beginning at the point farthest from the heart. For a joint, like a knee or ankle, use figure-eight turns to support the joint. o Always check the area above and below the injury site for warmth and color, especially fingers and toes, after applying an elastic roller bandage. By checking before and after bandaging, you will be able to determine if any tingling or numbness is a result of the bandaging or of the injury itself. o Check the snugness of the bandage a finger should easily, but not loosely, pass under the bandage. For any snakebite, do not apply ice or electricity, suction or a tourniquet, and do not cut the wound. Figure Apply an elastic roller bandage using overlapping turns to slow the spread of venom. ChAPter 10: first Aid 320
 is in the skin.")
.")


331 Insect Stings Insect stings can be painful. They also can be fatal for people who have severe allergic reactions (anaphylaxis). Allergic reactions can result in a breathing emergency. If someone is having a breathing emergency, summon EMS personnel. To care for an insect sting: Examine the sting site to see if the stinger (if there is one) is in the skin. Remove the stinger if it is still present. Scrape it away with the edge of a plastic card, such as a credit card. Wash the wound with soap and water. Marine Life The stings of some forms of marine life not only are painful, but they can make the victim feel sick, and in some parts of the world, they can be fatal (Figure 10-21). The side effects of a sting from an aquatic creature can include allergic reactions that can cause breathing and heart problems, as well as paralysis and death. If the sting occurs in water, the victim should be moved to dry land as soon as possible. Emergency care is necessary if the victim has been stung by a lethal jellyfish, does not know what caused the sting, has a history of allergic reactions to stings from aquatic life, has been stung on the face or neck, or starts to have difficulty breathing. Cover the site with a dressing and keep the wound clean. Apply a cold pack to the site to reduce pain and swelling. Watch the victim for signals of a severe allergic reaction shortness of breath; swelling of the face, neck or tongue; rash or hives or a tight feeling in the chest and throat. Care for life-threatening conditions. Monitor the victim s condition, and look for changes in LOC. Keep the victim comfortable. a towel or the pads of your fingers. Flush the injured part in salt water as soon as possible for at least 30 seconds to offset the toxin. Do not rub the wound or apply fresh water, ammonia, rubbing alcohol, vinegar or baking soda, because these substances may increase pain. Then use hot-water immersion (as hot as can be tolerated) for at least 20 minutes, or until pain is relieved. If hot water is not available, dry hot packs or, as a second choice, dry cold packs also may be helpful in decreasing pain. Do not apply a pressure immobilization bandage. The basic care steps for jellyfish stings are to remove the victim from the water, prevent further injection of poisonous material by deactivating or removing nematocysts (stingers), and controlling pain. There are some differences in specific care based on the region and the species of jellyfish. The supervisor of the aquatic facility should inform you of specific treatment recommendations and provide you with photographs of the jellyfish to aid in identification. To deactivate the stingers/tentacles for most types of jellyfish in most waters in the United States, remove any remaining tentacles with gloved hands, Figure Stingray, istockphoto.com/dia Karanouh Bluebottle jellyfish/portuguese man-of-war, istockphoto/mark Kostich Sea anemone, istockphoto/omers Jellyfish, Shutterstock/Johan ChAPter 10: first Aid
332 10-6 POISONING A poison is any substance that can cause injury, illness or death when introduced into the body. Poisons can be in the form of solids, liquids, sprays or fumes (gases and vapors). If a person is showing signs and symptoms of poisoning, call the Poison Control Center at If the person is unresponsive or experiences a change in LOC, or if another life-threatening condition is present, summon EMS personnel. In an aquatic facility, the Safety Data Sheet (SDS) is required onsite for every product/chemical in use. In the case of a known poisoning by a product or chemical, the SDS should accompany the victim to the doctor or hospital. Ingested Poison Ingested poisons are poisons that are swallowed and include: Certain foods, such as specific types of mushrooms and shellfish Drugs, such as excessive amounts of alcohol Overdosing on medications, such as aspirin or opioids Household items, such as cleaning products, pesticides and certain household plants A person who has ingested poison generally looks ill and displays symptoms common to other sudden illnesses. If you have even a slight suspicion that a person has been poisoned, call the Poison Control Center. Inhaled Poison Poisoning by inhalation occurs when a person breathes in poisonous gases or fumes. Poisonous fumes can come from a variety of sources. They may or may not have an odor. Common inhaled poisons include: Carbon monoxide, which can come from car exhaust, fires or charcoal grills Chlorine gas, which is highly toxic; you will need special training to recognize and treat this type of poisoning Fire extinguisher gases If someone has inhaled poisonous fumes: Size up the scene to be sure that it is safe to help the victim. Summon EMS personnel. Move the victim to fresh air. Care for life-threatening conditions. Monitor the victim s condition, and watch for changes in the LOC. If conscious, keep the victim comfortable. Absorbed Poison An absorbed poison enters through the skin or mucous membranes in the eyes, nose and mouth. Absorbed poisons come from plants, as well as from chemicals and medications. Poison ivy, poison oak and poison sumac are the most common poisonous plants in the United States. Some people are allergic to these poisons and have life-threatening reactions after contact, whereas others may not even get a rash. ChAPter 10: first Aid 322
333 If someone has come in contact with a poisonous substance: Remove exposed clothing and jewelry, and immediately rinse the exposed area thoroughly with water for 20 minutes, using a shower or garden hose if possible. If a rash or wet blisters develop, advise the victim to see their healthcare professional. If the condition spreads to large areas of the body or face, have the victim seek medical attention HEAT-RELATED ILLNESSES AND COLD-RELATED EMERGENCIES Exposure to extreme heat or cold can make a person ill. A person can develop a heat-related illness or a cold-related emergency, even when temperatures are not extreme. Factors that may contribute to these emergencies include environmental conditions, such as wind speed, humidity level and general working or living conditions, as well as the victim s personal physical attributes, such as age, state of health and recent physical exertion. Once the signs and symptoms of a cold-related emergency or heat-related illness appear, the victim s condition can quickly get worse and lead to death. Heat-Related Illnesses Heat-related illnesses are progressive conditions caused by overexposure to heat. If recognized in the early stages, heat-related emergencies usually can be reversed. If not recognized early, they may progress to heat stroke, a life-threatening condition. There are three types of heat-related illnesses, which form a continuum progressing from one to the next: Heat cramps are painful muscle spasms that usually occur in the legs and abdomen. Heat cramps are the least severe of the heat-related emergencies. Heat exhaustion is an early indicator that the body s cooling system is becoming overwhelmed. Signs and symptoms of heat exhaustion include: o Cool, moist, pale, ashen or flushed skin o Headache, nausea and dizziness o Weakness and exhaustion o Heavy sweating Heat stroke occurs when the body s systems are overwhelmed by heat, causing them to stop functioning. Heat stroke is a life-threatening condition. Signs and symptoms of heat stroke include: o Changes in LOC o Skin that is hot to the touch o Skin that is wet or dry or appears red or pale o Vision disturbances o Seizures o Vomiting o Rapid and shallow breathing o Rapid and weak pulse o Lack of sweating 323 ChAPter 10: first Aid
334 Caring for Heat-Related Illnesses Take the following steps to care for someone suffering from a heat-related illness: Move the victim to a cool place. Loosen tight clothing. Remove perspiration-soaked clothing. Cool the victim by spraying them with cool water or applying cool, wet towels to the skin. Fan the victim. Encourage the victim to drink small amounts of a commercial sports drink, coconut water or milk, if the victim is conscious and able to swallow. Give water if none of these drinks are available. If the victim refuses water or vomits, or has a mental status change, vision disturbance or a seizure: Send someone to summon EMS personnel immediately. Take steps to rapidly cool the victim as soon as possible by any means available. o Preferably immerse the victim up to their neck in cold water, if safe to do so. o Alternatively, place ice-water-soaked towels over the person s entire body, rotating towels frequently. o If bags of ice are available, place them on the victim s body, over the towels. If you are not able to measure and monitor the victim s temperature, apply rapid cooling methods for 20 minutes, or until the victim s condition improves or EMS personnel arrive. Give care as needed for other conditions that you find. Cold-Related Emergencies Temperatures do not have to be extremely cold for someone to suffer a cold-related emergency, especially if the victim is wet or it is windy. Hypothermia Hypothermia occurs when a victim s entire body cools because its ability to keep warm fails. A victim with severe hypothermia will die if care is not provided. A victim who has hypothermia may seem indifferent, disoriented or confused. You may notice that the victim has a glassy stare. Initially, the victim may shiver, but as the hypothermia progresses, the shivering may stop. This is a sign that the victim s condition is worsening and they need immediate medical care. In advanced cases of hypothermia, the victim may become unresponsive, and their breathing may slow or stop. The body may feel stiff because the muscles have become rigid. To care for hypothermia: Perform a primary assessment. Summon EMS personnel. Gently move the victim to a warm place. Sudden movements may cause cardiac arrest. Remove any wet clothing. Warm the victim by wrapping all exposed body surfaces in blankets or by putting dry clothing on the victim. Be sure to cover the head, since a significant amount of body heat is lost through the head. o Do not warm the victim too quickly, such as by immersing them in warm water. Have the victim drink liquids that are warm, but not hot, and that do not contain alcohol or caffeine, if the victim is alert. Wrap water bottles or chemical hot packs, if you are using one, in a towel or blanket before applying. Monitor the victim s condition, and watch for changes in LOC. ChAPter 10: first Aid 324
335 10-8 INJURIES TO MUSCLES, BONES AND JOINTS Accidents, such as falls, are a common cause of injuries to muscles, bones and joints. There are four types of muscle, bone and joint injuries: Fracture A complete break, a chip or a crack in a bone. Fractures can be open or closed. o Closed fractures: The skin over the broken bone is intact. o Open fractures: There is an open wound in the skin over the fracture. Dislocation Displacement of a bone away from its normal position at a joint. These usually are more obvious than fractures. Sprain Tearing ligaments at a joint. Strain Stretching and tearing muscles or tendons. It is difficult to know whether a muscle, bone or joint injury is a closed fracture, dislocation, sprain or strain. However, you do not need to be able to identify the type of injury because the type of care provided is universal. The objective is to keep the injured area stable in the position found until EMS personnel take over. Caring for Muscle, Bone and Joint Injuries When caring for muscle, bone and joint injuries, except for an open fracture, use the general procedures for a land emergency and: Summon EMS personnel if the victim cannot move or use the injured area. Support the injured area above and below the site of the injury. Check for circulation and sensation below the injured area. Immobilize and secure the injured area only if the victim must be moved and doing so does not cause further pain or injury. In many cases, it may be best to allow EMS personnel to immobilize the injury prior to transport. Recheck for circulation and sensation below the injured area. Immobilizing Muscle, Bone and Joint Injuries Immobilizing a muscle, bone or joint injury helps keep the injured body part from moving. This also may help to reduce any pain. Splinting is a method of immobilizing an injured extremity and should be used only if you must move or transport a person prior to EMS arrival to seek medical attention, and if splinting does not cause more pain. A tool or device used to immobilize an injury is called a splint. Commercially manufactured splints are widely available, but if necessary, you can improvise one from items available at the scene. The following can be used to immobilize common muscle, bone and joint injuries: Anatomic splints: The person s body is the splint. For example, an arm can be splinted to the chest, or an injured leg to the uninjured leg. Soft splints: Soft materials such as a folded blanket, towel, pillow or folded triangular bandage can be used to form a splint. A sling is a specific kind of soft splint that uses a triangular bandage tied to support an injured arm, wrist or hand. Rigid splints: Boards, folded magazines or newspapers, or metal strips that do not have sharp edges, can serve as splints. The ground: An injured leg may be immobilized by being stretched out on the ground. 325 ChAPter 10: first Aid
336 If splinting is necessary, splint the injury in the position in which the injured area was found. Splint the injured area and the joints or bones above and below the injury site. Check for circulation and sensation before and after splinting. RICE The general care for all musculoskeletal injuries is similar: rest, immobilize, cold and elevate, or RICE. Rest Avoid any movements or activities that cause pain. Help the victim to find the most comfortable position. If you suspect head, neck or spinal injuries, leave the victim lying flat. Immobilize Stabilize the injured area in the position in which it was found. In most cases, applying a splint will not be necessary prior to EMS arrival. For example, the ground can provide support to an injured leg, ankle or foot, or the victim may cradle an injured elbow or arm in a position of comfort. Cold Apply a cold pack for periods of 20 minutes. If 20 minutes cannot be tolerated, apply cold for periods of 10 minutes. If continued cooling is needed, remove the pack for 20 minutes, and then replace it. Cold helps to reduce swelling and eases pain and discomfort. Make a cold pack by placing ice (crushed or cubed) with water in a plastic bag and wrapping it with a towel or cloth. If a cold pack is not available, use a commercial cold pack, which can be stored in a kit until ready to use. Place a thin layer of gauze or cloth between the source of cold and the skin to prevent injury to the skin. Do not apply a cold pack directly over an open fracture, because doing so would require you to put pressure on the open fracture site and could cause discomfort to the victim. Instead, place cold packs around the site. Do not apply heat, as there is no evidence that applying heat helps. Elevate Elevating the injured area above the level of the heart helps slow the flow of blood and reduce swelling. Elevation is particularly effective in controlling swelling in extremity injuries. However, never attempt to elevate an injured area if it causes pain. ChAPter 10: first Aid 326
337 Caring for Open Fractures An open fracture occurs when a broken bone tears through the skin and surrounding soft tissue. To care for a victim with an open fracture: Summon EMS personnel. Place sterile dressings around the open fracture. Control any bleeding, as necessary. Bandage the dressings in place around the fracture. Do not move the exposed bone and limb, or attempt to align or place the bones back into the body EMERGENCY CHILDBIRTH If a pregnant woman is about to give birth, summon EMS personnel. Important information to give to the dispatcher includes the pregnant woman s age and expected due date, the length of time she has been having labor pains and the number of previous pregnancies she has had. You also should speak with the woman to help her remain calm; place layers of clean sheets, towels or blankets under her and over her abdomen; control the scene so that she will have privacy; and position her on her back with her knees bent, feet flat and legs spread apart. Continue to meet the needs of the newborn while caring for the mother. Help the mother to begin nursing the newborn, if possible. This will stimulate the uterus to contract and help to slow the bleeding. The placenta still will be in the uterus, attached to the newborn by the umbilical cord. Contractions of the uterus usually will expel the placenta within 30 minutes. Do not pull on the umbilical cord. Catch the placenta in a clean towel or container. It is not necessary to separate the placenta from the newborn. Follow local protocols and medical direction for guidance on cutting the cord. Remember, the woman delivers the baby, so be patient and let it happen naturally. The baby will be slippery, so take care to avoid dropping the newborn. After delivery, wrap the newborn in a clean, warm blanket or towel and place them on the mother s chest. Do not let the woman get up or leave to find a restroom. (Most women at this point feel a desire to use the restroom.) Be sure to allow the woman s knees to be spread apart to avoid causing complications or harm to the baby. Do not place your fingers in the woman s vagina for any reason. Do not pull on the baby. 327 ChAPter 10: first Aid
338 10-10 WRAP-UP As a professional lifeguard, you may need to care for patrons with a variety of injuries and illnesses. An important part of your job is to provide these victims with effective care. Remember to follow the general procedures for injury or sudden illness on land until EMS personnel arrive and take over. This includes performing a primary assessment and, if you do not find a life-threatening emergency, performing a secondary assessment. You must know how to check a responsive person from head to toe, take a brief SAMPLE history and provide the victim with whatever first aid is needed based on your training and local protocols. BENCHMARKS FOR LIFEGUARDS Lifeguards should: Obtain consent, identifying themselves as trained responders. Be equipped and ready to use personal protective equipment and other first aid supplies. Conduct a secondary assessment to take a brief history and identify any non-life-threatening conditions. Provide appropriate care for victims in need of first aid. Recognize and respond to injures and illnesses. Identify life-threatening conditions and provide appropriate care. BENCHMARKS FOR LIFEGUARDING OPERATIONS Lifeguard managers should: Maintain and implement a facility-specific exposure control plan. Manage and monitor frequent refreshers and in-service training of lifeguarding staff. ChAPter 10: first Aid 328
339 Chapter 10 Review 1. When completing a secondary assessment, lifeguards use SAMPLE to gather a brief history of the responsive victim. What does the mnemonic SAMPLE stand for? S A M P L E 2. List five symptoms of sudden illnesses: 1) 2) 3) 4) 5) 329 ChAPter 10 review
340 Chapter 10 Review 3. List the general precautions for injury or sudden illness on land: 1) 2) 3) 4) 5) 6) 4. How should you provide care for a victim experiencing a diabetic emergency? 5. When would you summon EMS personnel for a victim of a diabetic emergency? Provide two examples. 1) 2) ChAPter 10 review 330
341 Chapter 10 Review 6. List three reasons why you should summon EMS personnel for a victim who is having, or had a seizure. 1) 2) 3) 7. You are lifeguarding at a crowded facility and recognize a patron in the water who appears to be having a seizure. Place the following response and care steps in order. Remove the person from the water. Perform a primary assessment. Support the person with their head above water until the seizure ends. Summon EMS personnel. If breathing normally, position the victim on their side and monitor airway and breathing. 8. You are conducting a secondary assessment on an adult patron who lost their balance on the pool deck. The patron is slurring his speech while explaining that his arm is feeling numb. What sudden illness could this patron be experiencing? A Cardiac arrest C Seizure B Diabetic emergency D Stroke 331 ChAPter 10 review
342 Chapter 10 Review 9. What does FAST stand for? F A S T When would you use it? 10. What are a lifeguard s objectives while waiting for EMS personnel to arrive? 1) 2) 3) 4) 5) ChAPter 10 review 332
343 Chapter 10 Review 11. The following are signs and symptoms of shock, EXCLUDING: A Altered level of consciousness C Restlessness or irritability B Warm or dry skin D Nausea or vomiting 12. Fill in the blank. is a life-threatening condition that occurs when the body s systems are overwhelmed by heat and stop functioning. 1) List three signs and symptoms of the condition described above: 2) 3) 333 ChAPter 10 review
344 334

345 CHECKING A RESPONSIVE PERSON Checking a Responsive Person Notes: When checking an adult or child, explain what you are about to do. If a child or an infant becomes extremely upset, conduct the check from toe to head. Look for a medical ID tag, necklace or bracelet on the victim s wrist, neck or ankle. Do not ask the victim to move any area of the body that causes discomfort or pain, or if you suspect a head, neck or spinal injury Check the head. Look at the scalp, face, ears, eyes, nose and mouth for cuts, bumps, bruises and depressions. Note if the victim has any changes in LOC, such as dizziness, or feels light-headed. Check skin appearance and temperature. Feel the victim s forehead with the back of your hand and note if the skin is cold or hot. Look at the color of the victim s face and lips. Look at the victim s skin and note if it is moist or dry; or if it is red, pale, flushed or ashen. Check the neck. Ask the victim to move their head from side to side if there is no discomfort and if an injury to the neck is not suspected. Note pain, discomfort or inability to move. Check the shoulders. Ask the victim to shrug their shoulders. 5 Check the chest and abdomen. Ask the victim to take a deep breath and blow air out. Listen for difficulty or changes in breathing. Ask the victim if they are experiencing pain during breathing. 335 skill sheet

346 CHECKING A RESPONSIVE PERSON Checking a Responsive Person continued Check the arms. Check one arm at a time. Ask the victim to move their hand and fingers and to bend the arm. Check the legs. Check one leg at a time. Ask the victim to move their foot and toes and to bend the leg. Provide care for any conditions found. 9 Have the victim rest in a comfortable position if they can move all body parts without pain or discomfort and has no other apparent signs or symptoms of injury or illness. Continue to watch for changes in consciousness and breathing. skill sheet 336

.")
347 CONTROLLING EXTERNAL BLEEDING Controlling External Bleeding Note: Always follow standard precautions when providing care. Activate the EAP and summon EMS personnel, if necessary. You can ask the victim to apply direct pressure with the dressing while you put on your gloves, if necessary. To control external bleeding: 1 Cover the wound with a sterile gauze pad and apply direct pressure until the bleeding stops. If blood soaks through the first gauze pad, put another one on top and apply additional direct pressure (press harder than you did before, if possible). It may take several minutes for the bleeding to stop When the bleeding stops, check for circulation (feeling, warmth and color) beyond the injury. Apply a roller bandage. Wrap the bandage around the wound several times to hold the gauze pad(s) in place. Tie or tape the bandage to secure it. Check for circulation (feeling, warmth and color) beyond the injury. If there is a change in feeling, warmth or color (indicating that the bandage is too tight), gently loosen it. Remove your gloves and wash your hands. Notes: If the bleeding does not stop with the application of direct pressure, call or the designated emergency number if you have not already, and give care for shock if necessary. If the bleeding does not stop: Apply additional dressings and bandages on top of the first ones and continue to apply direct pressure. Take steps to minimize shock. Summon EMS personnel. Follow local protocols when considering other methods of bleeding control, such as applying a tourniquet or hemostatic dressings. 337 skill sheet
348 SECONDARY ASSESSMENT USING SAMPLE TO TAKE A BRIEF HISTORY Secondary Assessment Using SAMPLE to Take a Brief History Notes: When talking to children, get to eye level with the child, talk slowly and in a friendly manner, use simple words and ask questions a child can easily answer. If the child s parents are nearby, ask for consent. If a parent or guardian is not available, consent is implied. Take a brief history using SAMPLE: Signs and symptoms: What happened? Where do you feel any pain or discomfort? If so, can you describe it? Do you have any numbness or loss of sensation? If so, where? Allergies: Do you have any allergies to medications or food? If so, what type of reactions have you experienced when you were exposed? Medications: Do you have any medical conditions or are you taking any medications? If so, what conditions do you have or what medications are you taking? Have you taken any medications in the past 12 hours? Pertinent past medical history: Have you recently been ill? Do you have any medical conditions? Have you experienced any recent falls, accidents or blows to the head? Have you had surgery, been in a traumatic accident or had a medical emergency? Last oral intake: When did you last eat or drink? What did you last eat or drink and how much? Events leading up to the incident: What were you doing before the incident occurred? What were you doing when the incident occurred? skill sheet 338

349 ChAPter 11

350 11 Caring for head, neck and spinal injuries Every year, approximately 12,000 spinal cord injuries are reported in the United States. Nearly 8 percent of these injuries occur during sports and recreation, some from head-first entries into shallow water. Although most head, neck and spinal injuries occur during unsupervised activities, they do sometimes happen while a lifeguard is on duty. These injuries are rare, but when they do occur, they can result in lifelong disability or even death. Prompt and effective care is required. As a professional lifeguard, you must be aware of the causes of head, neck and spinal injuries. You also must know how to recognize them and provide appropriate care CAUSES OF HEAD, NECK AND SPINAL INJURIES CARING FOR HEAD, NECK AND SPINAL INJURIES WRAP-UP
351 11-1CAUSES OF HEAD, NECK AND SPINAL INJURIES Head, neck and spinal injuries rarely happen during supervised diving into deep water. In pools, head, neck and spinal injuries most often occur at the shallow end, in a corner or where the bottom slopes from shallow to deep water. They also occur when someone strikes a floating object, like an inner tube or person, while diving. Head, neck or spinal injuries also happen out of the water, such as when a person trips or falls on a pool deck or in a locker room. At lakes, rivers and oceans, head, neck and spinal injuries usually occur in areas where depths change with the tide or current. At beaches, these injuries happen mainly when someone plunges head-first into shallow water or a breaking wave. These injuries also result from collisions with an underwater hazard, such as a rock, tree stump or sandbar. Head, neck or spinal injuries often are caused by high-impact/high-risk activities. In aquatic environments, examples of these activities include: Entering head-first into shallow water. Falling from greater than a standing height. Entering the water from a height, such as a diving board, water slide, embankment, cliff or tower. Striking a submerged or floating object. Receiving a blow to the head. Colliding with another swimmer. Striking the water with high impact, such as falling while water skiing or surfing. Signs and Symptoms You should suspect a possible head, neck or spinal injury only if the activity was high-impact or high-risk and the signs or symptoms of injury are present. The signs and symptoms of possible head, neck or spinal injury include: Unusual bumps, bruises or depressions on the head, neck or back Heavy external bleeding of the head, neck or back Bruising of the head, especially around the eyes and behind the ears Blood or other fluids in the ears or nose Confusion or disorientation Changes in level of consciousness Seizures Impaired breathing Impaired vision Nausea or vomiting Partial or complete loss of movement of any body part Loss of balance Behavior similar to that of a person under the influence of alcohol or drugs (e.g., confusion, stumbling, repeatedly asking the same questions, memory loss, nausea or vomiting, speech problems) Severe pain or pressure in the head, neck or back (reported by the person, or indicated by the person holding their head, neck or back) Back pain, weakness, tingling or loss of sensation in the hands, fingers, feet or toes Persistent headache 341 ChAPter 11: CAring for head, neck And spinal injuries
352 11-2 CARING FOR HEAD, NECK AND SPINAL INJURIES For a victim of a suspected head, neck or spinal injury, your objective is to minimize movement of the head, neck and spine. If the victim is in the water, you must use specific rescue techniques to stabilize and restrict motion of the victim s head, neck and spine. You must also be familiar with and train using your facility's equipment. Skill sheets that describe the steps to care for head, neck and spinal injuries are located at the end of the chapter. If the victim is in the water and is breathing, you and at least one assisting lifeguard will try to minimize movement of the head, neck and spine during extrication, using a spinal backboarding procedure to extricate the victim from the water. However, if the victim is in the water and is not breathing, extricate the victim from the water as quickly as possible, and then begin resuscitative care. Whether on land or in the water, higher priority is given to airway management, giving ventilations, performing CPR or controlling severe bleeding, than to spinal care. The care that you provide to a victim with an injury to the head, neck or spine depends on: The victim s condition, including whether they are responsive and breathing. The location of the victim (shallow or deep water, at the surface of the water, submerged or not in the water.) The availability of additional help, such as other lifeguards, bystanders, firefighters, police or emergency medical services (EMS) personnel. The facility s specific procedures. The air and water temperature. Caring for Head, Neck and Spinal Injuries in the Water If you suspect a head, neck or spinal injury and the victim is in the water, follow these general rescue procedures: 1. Activate the facility s emergency action plan (EAP). Facilities may have a distinct signal to begin a suspected head, neck or spine injury rescue. 2. Safely enter the water. If the victim is near a pool wall or pier, minimize water movement by using a slide-in entry rather than a compact or stride jump. If you use a running entry, slow down before reaching the victim. 3. Perform a rescue providing manual in-line stabilization Move the victim to safety. If in deep water, move to shallow water if possible. 4. Check for responsiveness and breathing. If the victim is breathing, proceed with the spinal backboarding procedure to remove the victim from the water (See page 366). If the victim is not breathing, immediately remove the victim from the water using the passive victim extrication technique and provide resuscitative care. Do not delay extrication from the water by strapping the victim onto the board or using the head immobilizer device. 5. Re-assess the victim s condition and provide appropriate care. Additionally: Minimize shock by keeping the victim from getting chilled or overheated. If the victim vomits, tilt the backboard or place the person on their side in a recovery position to help clear the vomit from the victim s mouth. ChAPter 11: CAring for head, neck And spinal injuries 342

353 Manual In-Line Stabilization The head splint technique is used for performing manual in-line stabilization for victims in the water (Figure 11-1). You can use this technique when the victim is face-up or face-down. The technique is performed in subtly different ways, depending on the victim's location and position in the water and can be used when the victim is in shallow or deep water and at, near or below the surface. However, regardless of the variation used, your objective should remain the same to get the victim into a face-up position while minimizing movement of the head, neck and spine. Vary the technique in the following ways, based on the victim s position in the water: If the victim is face-up, approach from the victim's side and use the over-arm head splint technique. If the victim is face-down, approach from the victim s side and use the head splint technique to rotate them to a face-up position. Once rotated, change to an over-arm head splint position. This position makes it easier to load a victim on the backboard for extrication from the water. If the victim is in shallow water, you do not need to use the rescue tube to support yourself. If the victim is at the surface in deep water, you may need the rescue tube to support yourself and the victim. If the victim is submerged, do not use the rescue tube when you are submerging and bringing the victim to the surface. Once at the surface, another lifeguard can place a rescue tube under your armpits to help support you and the victim. Figure 11-1 Use the head splint technique for performing manual in-line stabilization for victims in the water. The head splint technique uses the victim s arms to help hold the victim s head in line with the body. Avoid lifting or twisting the victim when performing this skill. Do not move the victim any more than necessary. Minimize water movement by moving the victim away from crowded areas and toward the calmest water possible. Keep the victim s mouth and nose out of the water and minimize water splashing onto the victim s face. As soon as the victim is stabilized in the head splint and is face-up in the water, immediately check the victim for responsiveness and breathing. Fortunately, injuries to the head, neck or spine rarely occur in deep water. Should this occur, the victim often can be moved to shallow water. Lane lines or safety lines may need to be moved to clear a path to shallow water. If you cannot move the victim to shallow water, use the rescue tube under both armpits to help support yourself and the victim until the backboard arrives. 343 ChAPter 11: CAring for head, neck And spinal injuries

354 ALTERNATE METHOD FOR MANUAL IN-LINE STABILIZATION TECHNIQUE HEAD AND CHIN SUPPORT When caring for victims with head, neck or spinal injuries in the water, special situations may require a modification to the in-line stabilization technique used, such as when a victim has one arm. The head and chin support can be used for face-down or face-up victims who are at or near the surface in shallow water at least 3 feet deep or for a face-up victim. Be aware of the following situations: Do not use the head and chin support for a face-down victim in water that is less than 3 feet deep. This technique requires you to submerge and roll under the victim while maintaining in-line stabilization. It is difficult to do this in water less than 3 feet deep without risking injury to yourself or the victim. Do not use the rescue tube for support when performing the head and chin support on a face-down victim in deep water. This impedes your ability to turn the victim over. However, once the victim is turned face-up, another lifeguard can place a rescue tube under your armpits to help support you and the victim. To perform the head and chin support for a face-up or face-down victim at or near the surface: 1. Approach the victim from the side. 2. With your body about shoulder depth in the water, place one forearm along the length of the victim s breastbone and the other forearm along the victim s spine. 3. Use your hands to gently hold the victim s head and neck in line with the body. Place one hand on the victim s lower jaw (Figure 11-2) and the other hand on the back of the lower head. Be careful not to place pressure on the neck or touch the front or back of the neck. Figure 11-2 Place one hand on the victim's lower jaw 4. Squeeze your forearms together, and the other hand on the back of the lower head. clamping the victim s chest and back. Continue to support the victim s head and neck. If the victim is face-down, you must turn them face-up. Slowly move the victim forward to help lift the victim s legs. Turn the victim toward you while submerging. Roll under the victim while turning the victim over. Avoid twisting the victim s body. The victim should be face-up as you surface on the other side. 5. Check for responsiveness and breathing. If the victim is not breathing, immediately remove the victim from the water using an appropriate extrication method for a passive victim. Do not delay removal from the water by strapping the victim onto the backboard or using the head immobilizer device. If the victim is breathing, hold the victim face-up in the water and move toward safety until the backboard arrives. In deep water, move the victim to shallow water if possible. ChAPter 11: CAring for head, neck And spinal injuries 344
 that involves a temporary loss of brain function after a blow to the head and alters the way the brain functions.")

355 HEAD INJURIES Any significant force to the head can cause an injury, ranging from bleeding to a concussion. A concussion is a Traumatic Brain Injury (TBI) that involves a temporary loss of brain function after a blow to the head and alters the way the brain functions. It is a very common type of head injury in many sports, including swimming. It is not always easy to tell if someone is suffering from a concussion, especially since they may or may not lose consciousness. In fact, while the effects of a concussion may occur immediately or very soon after a blow to the head, in some cases, it may be hours or even days before any changes are seen. These effects can then last for several days or even longer. Suspect a concussion if a patron shows any of the following signs and symptoms: Confusion, which can last from moments to several minutes Headache Repeated questions asking about what happened Temporary memory loss Brief loss of consciousness Nausea and vomiting Speech problems Blurred vision and/or sensitivity to light Balance problems Be aware that a person in the water who receives a severe blow to the head could lose consciousness temporarily and submerge. Anyone suspected of having any head injury in or out of the water should be examined immediately by a healthcare provider. IMMOBILIZATION EQUIPMENT FOR VICTIMS OF HEAD, NECK OR SPINAL INJURIES The backboard (Figure 11-3) is the standard piece of rescue equipment used at aquatic facilities for immobilizing and removing a victim from the water. Backboards work best when they are equipped with: A chest strap to secure the victim to the board. A head immobilizer device that can be attached to the top, or head-end, of the board. Backboards vary in shape, size, buoyancy, number or style of body straps and style of head immobilizer device. Every aquatic facility develops its own backboarding procedures based on the facility type, equipment, number of rescuers available and local EMS protocols. Your facility should train you on using a backboard extrication according to the facility s procedures. Figure 11-3 Backboard with head immobilzer 345 ChAPter 11: CAring for head, neck And spinal injuries


356 Spinal Backboarding Procedure After stabilizing the victim s head, neck and spine, you and at least one other lifeguard should place and secure the victim on a backboard. Using a backboard helps to restrict the victim's motion during the process of removing them from the water. A minimum of two lifeguards is needed to place and secure a victim on a backboard, but additional lifeguards or bystanders should also help, if available. An assisting lifeguard remains on the deck and slides the backboard into the water, resting it on the pool edge. Then, the rescuing lifeguard guides the victim onto the backboard. The lifeguard secures the victim to the backboard with a single chest strap and a head immobilizer device. Throughout the spinal backboarding process (Figure 11-4), lifeguards must maintain manual in-line stabilization of the victim s head and neck. To aid in floatation of the backboard, a rescue tube can be placed under the board if needed (Figure 11-5). Additional lifeguards also can assist in keeping the board afloat. Figure 11-4 Maintain manual in-line stabilization of the victim s head and neck throughout the spinal backboarding process. Spinal Backboarding Procedure Alternative Procedure for Facilities with High Edges Some facilities have pools with high edges that require an alternate method for spinal backboarding. When using this method, two rescuers must enter the water to load the victim onto the backboard. While in the water, lifeguards secure the victim to the backboard with a single chest strap and a head immobilizer device (Figure 11-5). Communication between lifeguards is critical during the spinal backboarding procedure. Communication with the victim also is important. Let the victim know what you are doing and reassure them along the way. Tell the victim not to nod or shake their head but instead to say yes or no in answer to your questions. Figure 11-5 Some facilities have pools with high edges. ChAPter 11: CAring for head, neck And spinal injuries 346
357 Team Spinal Backboarding Spinal backboarding and extrication from the water can be a challenge in deep or shallow water. Having other assisting rescuers work with you is helpful and may be necessary to ensure your safety as well as that of the victim. Working together as a team, other lifeguards can help by: Helping to submerge, position and stabilize the backboard from the deck. Supporting the in-water rescuer in deep water. Supporting the backboard while the chest strap and head immobilizer are secured. Securing the chest strap or the head immobilizer device. Communicating with and reassuring the victim. Guiding the backboard as it is being removed from the water. Removing the backboard from the water. Providing care after the victim has been removed from the water. Additional lifeguards should be able to arrive at the scene, identify what assistance is needed and begin helping. Spinal Backboarding Procedure Using the Head and Chin Support When using the head and chin support as the stabilization technique, modify the backboarding procedure in the following ways: While the rescuing lifeguard guides the victim onto the backboard, they carefully remove their arm from beneath the victim and place it under the backboard while the other hand and arm remain on the victim s chin and chest. The assisting responder moves to the victim s head and places the rescue tube under the head of the backboard to aid in floatation of the board. The additional rescuer then supports the backboard with their forearms and stabilizes the victim s head by placing their hands along side of the victim s head. The primary rescuer can now release. Extrication from the Water Once the victim is secured onto the backboard, you should remove the victim from the water. Your technique will vary depending on the characteristics of your exit point (e.g., shallow or deep water, speed slide or sloping waterfront entry). After the victim is out of the water, assess their condition using the primary assessment and provide the appropriate care. Place a towel or blanket on the victim to keep them warm if needed. Use the following skills to secure a victim suspected of having a spinal injury to a backboard and extricate them from the water: Spinal Backboarding Procedures Spinal Backboarding Procedure High Edges Spinal Backboarding Procedure Speed Slide 347 ChAPter 11: CAring for head, neck And spinal injuries
358 Special Situations In-line stabilization and backboarding can be more difficult to perform in some waterpark attractions and waterfront facilities that have extremely shallow water, moving water or confined spaces. Caring for a victim of a head, neck or spinal injury in these situations requires modification of the techniques for in-line stabilization and extrication from the water. During orientation and inservice trainings, your facility s management should provide information and skills practice for in-line stabilization and backboarding procedures used at the facility for its specific attractions and environments. These trainings should include emergency shut-off procedures to stop water flow and movement. Extrication from Extremely Shallow Water Many facilities have extremely shallow water, such as zero-depth pools, wave pools and sloping beaches. To remove a victim from a zero-depth or sloping entry, have sufficient lifeguards on each side of the backboard to support the victim s weight. After the victim is secured to the backboard: After reaching the zero-depth entry, the lifeguards slightly lift the head end of the backboard, carefully pulling the backboard and victim out of the water. Gently lower the backboard and the victim to the ground once out of the water, using proper lifting techniques to prevent injuring yourself. Moving Water You may need to modify the way you care for a person with a head, neck or spinal injury if waves or currents are moving the water. In water with waves, move the victim to calmer water, if possible. At a waterfront, a pier or raft may break or block the waves. If there is no barrier from the waves, have other rescuers form a wall with their bodies to block the waves. At a wave pool, stop the waves by pushing the emergency stop (E-stop) button. Remember, even though the button has been pushed, residual wave action will continue for a short time. Rivers, Streams and Winding River Attractions A special problem in rivers, streams and winding rivers at waterparks is that the current can pull or move the victim. At waterparks, the facility s EAP may include signaling another lifeguard to stop the flow of water in a winding river by pushing the E-stop button. In all cases: Ask other lifeguards or patrons for help in keeping objects and people from floating into the rescuer while they are supporting the victim. Do not let the current press sideways on the victim or force the victim into a wall. This would twist the victim s body. Keep the victim s head pointed upstream into the current. This position also reduces the splashing of water on the victim s face. Once the in-line stabilization technique is performed and the victim is turned face-up, slowly turn the victim so that the current pulls their legs around to point downstream. Place the victim on a backboard by following the facility s spinal backboarding procedures. ChAPter 11: CAring for head, neck And spinal injuries 348

.")
.")
359 Catch Pools The water in a catch pool moves with more force than in a winding river and can make it difficult to hold a victim still. If a person is suspected of having a head, neck or spinal injury in a catch pool, immediately signal other lifeguards to stop sending riders. If possible, someone should stop the flow of water by pushing the emergency stop button. Once in-line stabilization is achieved and the victim is turned face-up, move the victim to the calmest water in the catch pool if water is still flowing (Figure 11-6). If there is only one slide, the calmest water is usually at the center of the catch pool. If several slides empty into the same catch pool, calmer water usually is between two slides (Figure 11-7, A B). Place the victim on a backboard, following the facility s spinal backboarding procedures. Figure 11-6 Move the victim to the calmest water in the catch pool once manual in-line stabilization is achieved. Speed Slides A head, neck or spinal injury may happen on a speed slide if the patron twists or turns their body the wrong way, strikes their head on the side of the slide, or sits up and tumbles down off the slide. The narrow space of a speed slide is problematic for rescuing a victim with a head, neck or spinal injury. Backboarding can be a challenge because the water in the slide is only 2 or 3 inches deep and does not help to support the victim. Figure 11-7A Catch pool with only one slide Figure 11-7B Catch pool with two slides 349 ChAPter 11: CAring for head, neck And spinal injuries

360 Caring for Head, Neck and Spinal Injuries on Land If you suspect that a victim on land has a head, neck or spinal injury, activate the facility s EAP and follow the general procedures for injury or sudden illness on land: Size up the scene. Perform a primary assessment. Summon EMS personnel. Perform a secondary assessment. Provide the appropriate care. Caring for a Non-Standing Victim If you suspect that a victim on land has a head, neck or spinal injury, have the victim remain in the position in which they were found and protect them from further injury from others until EMS personnel assume control (Figure 11-8). Do not attempt to align the head and neck, unless the victim is not breathing and you cannot maintain an open airway. Gently position the victim s head in line with the body only if you cannot maintain an open airway. Use appropriate personal protective equipment, such as disposable gloves and breathing barriers. Approach the victim from the front so that they can see you without turning the head. Tell the victim not to nod or shake their head but instead by responding verbally to your questions, such as by saying yes or no. Caring for a Standing Victim If you encounter a patron who is standing but has a suspected head, neck or spinal injury, activate your facility EAP, have someone bring a chair and have the victim sit so they don t fall. Protect them from further injury and comfort them until more advanced help arrives. Minimize movement of the victim s head by telling the victim to remain still and avoid turning or twisting their head, neck or back. Most victims will self-splint by limiting their own motion if pain exists. If the victim s condition becomes unstable (e.g., the victim complains of dizziness, has a potential life-threatening condition or begins to lose consciousness), and a chair is not available, slowly lower the victim to the ground with the assistance of other lifeguards. Try to limit excessive movement of the head, neck or spine while the victim is being lowered. Figure 11-8 If a non-standing victim has a suspected head, neck or spinal injury, keep them positioned as they were found until EMS personnel assume control. ChAPter 11: CAring for head, neck And spinal injuries 350
361 Blog Post #5 End of Summer August 27th 9:00 pm I can t believe our season is coming to an end! I spoke with Emma earlier this month about how I can gain more management experience and she suggested I apply for the head lifeguard position. I submitted my application, interviewed and guess what I got the job! To prepare for my new position, I registered for the American Red Cross Lifeguard Management online course. I m really excited to learn more about management and emergency action planning. As head lifeguard, I will be responsible for planning in-service training and evaluations, which means I ll get to work with Emma and our Red Cross examiner to help keep our safety team trained and prepared. I can t wait until next summer! 11-3 WRAP-UP Although they are rare, head, neck and spinal injuries do occur at aquatic facilities. They can cause lifelong disability or even death. Prompt, effective care is needed. As a professional lifeguard, you must be able to recognize and care for victims with head, neck or spinal injuries. To decide whether an injury could be serious, consider both its cause and the signs and symptoms. If you suspect that a victim in the water has a head, neck or spinal injury, make sure to summon EMS personnel immediately. Minimize movement by using in-line stabilization. Secure the victim to a backboard to restrict motion of the head, neck and spine. When the victim is out of the water, provide the appropriate care until EMS personnel arrive and assume control of the victim s care. 351 ChAPter 11: CAring for head, neck And spinal injuries
362 BENCHMARKS FOR LIFEGUARDS Lifeguards must provide appropriate care and effective spinal management for victim's of a suspected head, neck or spinal injury. Lifeguards should: Tend to life-threatening situations via an appropriate assessment. Use rescue techniques that are appropriate and effective for the situation (high risk, high impact). Prioritize the safety of victim, yourself and others during all parts of the rescue. Handle rescues with a sense of urgency. BENCHMARKS FOR LIFEGUARDING OPERATIONS: Lifeguard managers should ensure that: Lifeguards practice the appropriate spinal backboarding technique(s) at a variety of locations within your facility where spinal injuries are most likely to occur. ChAPter 11: CAring for head, neck And spinal injuries 352
363 Chapter 11 Review 1. Head, neck or spinal injuries often are caused by high-impact/high-risk activities. List three examples of high-impact/high-risk activities in an aquatic environment. 1) 2) 3) 2. Place the general rescue procedures for caring for a head, neck or spinal injury in the water in order: Check for responsiveness and breathing. Activate the EAP. Perform a rescue providing manual in-line stabilization. Re-assess the victim s condition and provide appropriate care. Safely enter the water. Remove the victim from the water using the appropriate spinal backboarding procedure. 353 ChAPter 11 review
364 Chapter 11 Review 3. Fill in the blank. The technique is used for performing manual in-line stabilization for victims in the water. 4. Backboards are a standard piece of rescue equipment used at aquatic facilities for immobilizing and removing the victim from the water. Backboards work best when they are equipped with: 1) 2) 5. You enter the water to rescue a victim with a suspected spinal injury. You determine that the victim is not breathing. What should you do next? A Remove the victim from the water using the passive victim extrication technique. C Remove the victim water using a modified spinal backboarding procedure. B Remove the victim from the water using the spinal backboarding procedure. D Delay removal from the water and provide 2 minutes of in-water ventilations. 6. The following statements describe appropriate rescue techniques for a victim with a suspected spinal injury, EXCEPT: A If the victim is in shallow water, you do not need to use a rescue tube to support yourself. C If the victim is small and is in shallow water, you do not need to use a backboard to extricate the victim. B If the victim is submerged, you should not use the rescue tube when submerging and bringing the victim to the surface. D If the victim is at the surface in deep water, you may need a rescue tube to support yourself and the victim. ChAPter 11 review 354
365 Chapter 11 Review 7. When rescuing a victim of a suspected head, neck or spinal injury using the spinal backboarding procedure, communication with the victim is important. What should lifeguards tell the victim? 8. Describe four ways that additional lifeguards can help during spinal backboarding and extrication from the water. 1) 2) 3) 4) 355 ChAPter 11 review
366 Chapter 11 Review ADDITIONAL REVIEW QUESTIONS FOR WATERFRONT LIFEGUARDS: 1. Special considerations for spinal injuries at a facility with a beach or other zero-depth entry may include: A Injury from board diving and extrication from deep water onto a pier high above the water. C Injury from plunging during a running entry, in-line stabilization and extrication from extremely shallow water. B Injury from exiting a slide and dealing with current in a catch pool. D Injury from fall from play structure, dealing with victim s life jacket during stabilization and extrication. 2. How should lifeguards extricate a suspected spinal injury victim who is secured to a backboard from a zero-depth or sloping entry waterfront? ChAPter 11 review 356
367 Chapter 11 Review ADDITIONAL REVIEW QUESTIONS FOR WATERPARK & AQUATIC ATTRACTION LI FEG UAR DS: 1. How should lifeguards extricate a suspected spinal injury victim who is secured to a backboard from a zero-depth entry wave pool? 2. When rescuing a suspected head, neck or spinal injury victim from a winding river or other moving water attraction, moving water and objects in the water can pull or move the victim. What should be done to help minimize movement and protect the victim? 357 ChAPter 11 review
368 Chapter 11 Review ADDITIONAL REVIEW QUESTIONS FOR WATERPARK & AQUATIC ATTRACTION LI FEG UAR DS: 3. What actions should lifeguards take when responding to a victim with a suspected head, neck or spinal injury in a catch pool? 4. What challenges might you encounter when responding to a head, neck or spinal injury in a waterpark? Consider different attractions such as a wave pool, winding river, speed slide, etc. ChAPter 11 review 358


369 HEAD SPLINT Face-Up Victim at or Near the Surface Approach the victim from the side. In deep water, use the rescue tube under both of your arms for support. Grasp the victim s arms midway between their shoulder and elbow. Grasp the victim s right arm with your left hand and the victim s left arm with your right hand. Gently move the victim s arms up alongside the head. Slowly and carefully squeeze the victim s arms against their head to help hold the head in line with the body. Do not move the victim any more than necessary. If the victim is unresponsive, quickly look, listen and feel to check for breathing. If the victim is not breathing, immediately remove the victim from the water using the passive victim extrication method and provide resuscitative care. Do not delay removing the victim from the water by using the spinal backboarding procedure. If the victim is breathing, hold the victim s head in line with the body and move toward safety until the backboard arrives. In deep water, move the victim to shallow water, if possible. Continue to check for breathing. If at any time the victim stops breathing, immediately remove the victim from the water then provide appropriate care. 359 skill sheet


370 HEAD SPLINT Face-Down Victim at or Near the Surface Approach the victim from the side. In deep water, use the rescue tube under both of your arms for support. Grasp the victim s arms midway between the shoulder and elbow. Grasp the victim s right arm with your right hand and the victim s left arm with your left hand. Squeeze the victim s arms against their head to help hold the head in line with the body. Glide the victim slowly forward. Continue moving slowly and turn the victim until they are face-up. To do this, push the victim s arm that is closest to you under the water while pulling the victim s other arm across the surface toward you. If the victim is unresponsive, quickly look, listen and feel to check for breathing. If the victim is not breathing, immediately remove the victim from the water using the passive victim extrication method and provide resuscitative care. Do not delay removal from the water by using the spinal backboarding procedure. If the victim is breathing, hold the victim s head in line with the body and move toward safety until the backboard arrives. In deep water, move the victim to shallow water, if possible. skill sheet 360
.")

371 HEAD SPLINT Face-Down Victim at or Near the Surface continued 6 7 Switch to an overarm head splint position. Position the victim s head in the crook of your arm, with the head in line with the body. To switch to an overarm head splint: o Apply firm pressure with your outside hand to pull the victim toward your chest (hug them against your chest). o Release your hand that is holding the arm against your chest and reach over the victim and grab the victim's outside arm, placing it next to your other hand. o Release your hand that is under the victim and move it to the victim's arm that is against yout chest and continue to apply pressure. Continue to check for breathing. If at any time the victim stops breathing, immediately remove the victim from the water then provide appropriate care. 361 skill sheet


372 HEAD SPLINT Submerged Victim Approach the victim from the side. In deep water, release the rescue tube if the victim is more than an arm s reach beneath the surface. Grasp the victim s arms midway between the shoulder and elbow.grasp the victim s right arm with your right hand and the victim s left arm with your left hand. Gently move the victim s arms up alongside the head. Squeeze the victim s arms against their head to help hold the head in line with the body. Turn the victim face-up while bringing the victim to the surface at an angle. To turn the victim face-up, push the victim s arm that is closest to you down and away from you while pulling the victim s other arm across the surface toward you. The victim should be face-up just before reaching the surface or at the surface. If the victim is unresponsive, quickly look, listen and feel to check for breathing. If the victim is not breathing, immediately remove the victim from the water using a technique, such as the passive victim extrication method, and provide resuscitative care. Do not delay removal from the water by strapping the victim in or using the head immobilizer device. If the victim is breathing, hold the victim with the head in line with the body and move toward safety until the backboard arrives. In deep water, move the victim to shallow water, if possible. skill sheet 362
373 HEAD SPLINT Submerged Victim continued 6 7 Switch to an over-arm head splint position Position the victim s head close to the crook of your arm with the head in line with the body. Another lifeguard can place a rescue tube under your armpits to help support you and the victim. To switch to an overarm head splint: o Apply firm pressure with your outside hand to pull the victim toward your chest (hug them against your chest). o Release your hand that is holding the arm against your chest and reach over the victim and grab the victim's outside arm, placing it next to your other hand. o Release your hand that is under the victim and move it to the victim's arm that is against your chest and continue to apply pressure. Continue to check for breathing. If at any time the victim stops breathing, immediately remove the victim from the water, then provide appropriate care. 363 skill sheet


374 HEAD SPLINT Face-Up in Extremely Shallow Water Approach the victim s head from behind. Grasp their right arm with your right hand and their left arm with your left hand, trapping the victim s head between their arms. Gently move the victim s arms up alongside their head. Squeeze the victim s arms against their head to help hold the head in line with the body. Remain positioned above and behind the victim s head. If the victim is unresponsive, quickly look, listen and feel to check for breathing. If the victim is not breathing, immediately remove the victim from the water and give the appropriate care. If the victim is breathing, hold the victim in this position. Place a towel or blanket on the victim to keep them from getting chilled. Note: If you are unable to keep the victim from getting chilled and there are enough assisting lifeguards, follow the care steps for skill sheet, Spinal Backboarding Procedure Speed Slide. skill sheet 364


375 HEAD SPLINT Face-Down in Extremely Shallow Water Approach the victim s head from the side. Grasp the victim s right arm with your right hand and the victim s left arm with your left hand, trapping the victim s head between their arms. After the victim s head is trapped between their arms, begin to roll the victim toward you. While rolling the victim, step from the victim s side toward the victim s head and begin to turn the victim face-up. Lower your arm on the victim s side that is closest to you so that the victim s arms go over the top of your arm as you step toward the victim s head. Maintain arm pressure against the victim s head, since your hand rotates during this maneuver. You are now positioned above and behind the victim s head. If the victim is unresponsive, quickly look, listen and feel to check for breathing. If the victim is not breathing, immediately remove the victim from the water and give the appropriate care. If the victim is breathing, hold the victim in this position. Place a towel or blanket on the victim to keep them from getting chilled. Continue to check for breathing. If at any time the victim stops breathing, immediately remove the victim from the water then provide appropriate care. Note: If you are unable to keep the victim from getting chilled and there are enough assisting lifeguards, follow the care steps for skill sheet, Spinal Backboarding Procedure Speed Slide. 365 skill sheet

 on deck brings the backboard to the edge of the water and removes the head immobilizer, placing it within reaching distance.")


376 SPINAL BACKBOARDING AND EXTRICATION Spinal Backboarding Procedure The rescuing lifeguard provides in-line stabilization using the head splint technique and swims with the victim toward the side of the pool. Rotate the victim to a face-up position if necessary. Use the overarm head splint technique to maintain in-line stabilization before reaching the side of the pool. The assisting responder(s) on deck brings the backboard to the edge of the water and removes the head immobilizer, placing it within reaching distance. The assisting responder(s) on deck places the board at an angle in the water, submerging the head space of the board if possible. The rescuing lifeguard now approaches the board and moves to the side of it. The rescuing lifeguard then places one foot (steps on) the end of the backboard to hold it down. The rescuing lifeguard places the victim on the center of the backboard with the head on the designated head space. With the head of the backboard resting on the pool edge, the assisting responder stabilizes the board by pressing down on it with both elbows and stabilizes the victim by placing both hands on the victims arms and applying pressure, using the head splint. The rescuing lifeguard can release the arms. A rescue tube may be quickly placed under the foot end of the board, if needed for support. skill sheet 366


377 SPINAL BACKBOARDING AND EXTRICATION Spinal Backboarding Procedure continued The rescuing lifeguard secures one strap across the victim s chest, under the armpits, and then stabilizes the victim by placing one hand and arm on the victim s chin and chest and the other hand and arm under the backboard. The assisting responder then releases the victim s arms and lowers the victim s arms down and secures the victim s head to the backboard using a head immobilizer and strap across the forehead. The rescuers should place the victim s arms on the victim s torso to prevent discomfort or injury during extrication. The rescuing lifeguard moves to the foot end of the board while the assisting responder holds the backboard at the head of the board from the pool deck. The assisting responder lifts the head of the backboard so the runners are on the deck. Working together, the lifeguards pull and push the backboard onto the deck, then begin to assess the victim s condition and provide the appropriate care. 367 skill sheet


378 SPINAL BACKBOARDING AND EXTRICATION Spinal Backboarding Procedure High Edges The rescuing lifeguard provides in-line stabilization using the head splint technique and swims with the victim toward the side of the pool. Rotate the victim to a face-up position if necessary. Use the overarm head splint technique to maintain in-line stabilization before reaching the side of the pool. The assisting responder(s) on deck brings the backboard to the edge of the water and removes the head immobilizer, placing it within reaching distance. The assisting responder enters the water, submerges the backboard and positions the board under the victim so that it extends slightly beyond the victim s head. The victim s head should be centered on the backboard s head space. Once the backboard is in place, the assisting rescuer places a rescue tube under the head end of the backboard for support and then the assisting responder maintains stabilization of the victim s head by placing both hands on the victims arms and applying pressure, using the head splint technique. The rescuing lifeguard can release the arms. The rescuing lifeguard secures the victim to the backboard by securing the chest strap high across the victim s chest and under the victim s armpits. The rescuing lifeguard then stabilizes the victim by placing one hand and arm on the victim s chin and chest and the other hand and arm under the backboard. skill sheet 368


379 SPINAL BACKBOARDING AND EXTRICATION Spinal Backboarding Procedure High Edges continued The assisting responder then releases the victim s arms and lowers the victim s arms down and secures the victim s head to the backboard using a head immobilizer and strap across the forehead. The rescuing lifeguard gets out of the water and grasps the handholds of the backboard while the assisting responder maintains control of the backboard from in the water. Once the rescuing lifeguard has control of the board from the pool deck, the assisting responder moves to the foot of the board. Working together, the lifeguards pull and push the backboard onto the deck, then begin to assess the victim s condition and provide the appropriate care. 369 skill sheet


380 SPINAL BACKBOARDING AND EXTRICATION Spinal Backboarding Procedure Speed Slide The rescuing lifeguard (Lifeguard 1) approaches the victim s head from behind to stabilize the victim by performing a head splint: Grasp the victim s right arm with your right hand and their left arm with your left hand. Gently move the victim s arms up to trap their head between their arms. Squeeze the victim s arms against their head to help hold the head in line with the body. Remain positioned above and behind the victim s head. If the victim is unresponsive, quickly look, listen and feel to check for breathing. If the victim is not breathing, immediately remove the victim from the water and give the appropriate care. If the victim is breathing, hold the victim in this position. Place a towel or blanket on the victim to keep them from getting chilled. Lifeguard 2 positions themselves at the side of the victim, even with the victim s waist, and grasps the victim at the hip and knee while Lifeguard 3 takes the backboard to the opposite side of the victim. Lifeguard 1 signals to Lifeguard 2 (by counting 1-2-3) to roll the victim to their side; when the victim is on their side, Lifeguard 3 places the backboard in line with the victim. skill sheet 370
 and the victim is rolled on to the backboard.")


381 SPINAL BACKBOARDING AND EXTRICATION Spinal Backboarding Procedure Speed Slide continued Lifeguard 1 counts to signal to the other lifeguards (by counting 1-2-3) and the victim is rolled on to the backboard. Lifeguard 2 secures the victim to the backboard by securing the chest strap high across the victim s chest and under the victim s armpits. Lifeguard 2 then stabilizes the victim by placing one hand and arm on the victim s chin and chest and the other hand on the side of the backboard. Lifeguard 1 releases the victim s arms, lowers the victim s arms down and secures the victim s head to the backboard using a head immobilizer and strap across the forehead. Lifeguard 3 can assist by handing the head immobilizer to Lifeguard 1 and/or placing the forehead strap on the head immobilizer. Lifeguards lift the backboard and victim out of the slide. When available additional rescuers can assist with lifting and moving the victim. 371 skill sheet
Characteristics of a Professional Lifeguard
 Today you begin training for an exciting and rewarding job. Being a lifeguard is Dynamic Each day on the job ay present ew situations. Challenging Doing your job well requires quick judgments. Exciting
K.M. Enterprises. American Red Cross Blended Learning Lifeguarding Course Outline 2 day course Day 1, Morning Classroom Sessions
 Day 1, Morning Classroom Sessions I. Registration, paperwork and age verification II. Swim test A. 300 yd (mixed freestyle & breaststroke) B. 10lb brick test (start in water, swim 20 yards, surface dive
K.M. Enterprises. American Red Cross Lifeguarding Course Outline 4 day course Day 1, Morning Classroom Sessions
 Day 1, Morning Classroom Sessions I. Registration, paperwork and age verification II. Swim test A. 300 yd (mixed freestyle & breaststroke) B. 10lb brick test (start in water, swim 20 yards, surface dive
The Professional Lifeguard
 Chapter 1 The Professional Lifeguard LIFEGUARDING CAN BE A REWARDING JOB. BEING A LIFEGUARD IS Dynamic. Each day on the job may present This chapter describes the characteristics and new situations. responsibilities
K.M. Enterprises. American Red Cross Lifeguarding Review Course Outline 2 day course Day 1, Morning Classroom Sessions
 Day 1, Morning Classroom Sessions I. Registration, paperwork and certificate verification II. Swim test A. 300 yd (mixed freestyle & breaststroke) B. 10lb brick test (start in water, swim 20 yards, surface
Aquatic Curriculum reviewed Basic Aquatic Skills Curriculum
 Basic Aquatic Skills Curriculum 0 Basic Aquatic Skills I. Students will examine various aquatic environments and their potential hazards. (SM 2.1, 3.2, 4.7) A. Content and Skills (SMHPE 4, 7) 1. Recreation
Guarding for Organized Swim Groups
 Day 2 Inspection Guarding for Organized Swim Groups Organized groups may visit your facility. Day care groups Camps Youth organizations Groups can be part of your facility or an outside group They should
TAMALPAIS UNION HIGH SCHOOL DISTRICT Larkspur, California. Lifeguarding Certification and Swimming Instructor Training
 TAMALPAIS UNION HIGH SCHOOL DISTRICT Larkspur, California Course of Study Lifeguarding Certification and Swimming Instructor Training I. INTRODUCTION Lifeguarding Certification and Swimming Instructor
Swim as a Pair Near a Lifeguard s Chair
 Swim as a Pair Near a Lifeguard s Chair KEY TERMS Aquatic facility: A place where recreational water activities happen. Buddy: A person who helps another person follow the rules and can get help in an
Lifeguard Candidate s Information (for course purposes only) Date of Course: Name: Cell phone: address: Home address: 1 P a g e
 Date of Course: Name: Cell phone: address: Home address: 1 P a g e") Please fill out this page upon registration and return it back to the front desk staff. This page must be submitted for you to complete the online trainings. Thank you Lifeguard Candidate s Information
Please fill out this page upon registration and return it back to the front desk staff. This page must be submitted for you to complete the online trainings. Thank you Lifeguard Candidate s Information
Aquatic Leadership Catalogue September 2017 Labour Day 2018
 Aquatic Leadership Catalogue September 2017 Labour Day 2018 Aquatic Leadership 2017-2018 Page 1 Bronze Star & Basic First Aid CPR A Bronze Star Bronze Star is the pre-bronze Medallion training standard
Candidate Welcome Letter
 Candidate Welcome Letter Dear Lifeguard Candidate, Thank you for enrolling in the YMCA Lifeguard course. The Y believes that preventing an accident and saving a life is worth the hours of training and
American Red Cross Lifeguarding Instructor (r.17)
") Name: Date: American Red Cross Lifeguarding Instructor (r.17) Course Description: The LGI course prepares you to teach American Red Cross Lifeguarding, First Aid, CPR/AED, and Water Safety courses. Prerequisites:
Name: Date: American Red Cross Lifeguarding Instructor (r.17) Course Description: The LGI course prepares you to teach American Red Cross Lifeguarding, First Aid, CPR/AED, and Water Safety courses. Prerequisites:
POOL TEST ITEM WORKSHEETS
 Item 1 Lifeguarding theory and practice POOL TEST ITEM WORKSHEETS Explain the role and responsibilities of the NLS Lifeguard in terms of role-modeling, prevention and rescue. Describe how critical incident
Aquatic Advanced Leadership Brochure Course. Dates. Fees
 Aquatic Advanced Leadership Brochure 2016 Course Dates 2016 Course Fees Why a job in Aquatics? Make a difference and potentially save a life by teaching swimming. The best people skills are acquired when
FIRST AID, CERTIFICATION & LEADERSHIP
 FIRST AID AIRWAY MANAGEMENT Lifesaving Society Airway Management certification provides lifeguards with specific knowledge and training in the use of oxygen, suction devices, oral airways and masks/ bag-valve-masks.
Gallagher Hospitality Practice. Pool Procedures
 Gallagher Hospitality Practice Pool Procedures JUNE 2017 Introduction It s that time of the year again. Temperatures are rising and families are making their summer vacation plans. Since most households
South Walton Fire District Junior Lifeguard Learning Objectives
 South Walton Fire District Junior Lifeguard Learning Objectives INTRODUCTION The South Walton Fire District Beach Safety Division s Junior Lifeguard Program Mission, Goals and Vision are as follows: Mission:
TYPE F. Home Pools GUIDELINES FOR SAFE POOL OPERATION DOMESTIC POOLS SLSQ ANNUAL REPORT 14 15
 0 TYPE F Home Pools GUIDELINES FOR SAFE POOL OPERATION DOMESTIC POOLS SLSQ ANNUAL REPORT 14 15 Royal Life Saving Bahrain Royal Life Saving Bahrain (RLSB) is a charity registered under the Ministry of Social
The Recreation Professional s guide to Aquatics Management
 The Recreation Professional s guide to Aquatics Management Learning Objectives: Identify the similarities and differences between Recreation and Aquatic Facility/Operation management Outline the necessary
AQUATIC ADVANCED LEADERSHIP. 2018/2019 Course Information.
 AQUATIC ADVANCED LEADERSHIP 2018/2019 Course Information www.tillsonburg.ca Why a Job in Aquatics? Make a difference and potentially save a life by teaching swimming. The best people skills are acquired
THEPOWER OFWATER. February THE SCARED STRAIGHT OF AQUATICS Thursday, February 7, 2013, 4:30 p.m. - 6:00 p.m. Session 1307 Gerald Dworkin
 THE SCARED STRAIGHT OF AQUATICS Thursday, February 7, 2013, 4:30 p.m. - 6:00 p.m. Session 1307 Gerald Dworkin 1 Gerald M. Dworkin Consultant, Aquatics Safety & Water Rescue Lifesaving Resources, LLC www.lifesaving.com
YMCA of Honolulu Lifeguard & Swim Instructor
 YMCA of Honolulu Lifeguard & Swim Instructor Looking for a rewarding job? Become certified as a YMCA Lifeguard and/or Swim Instructor. The benefit to take our course to get a job with the YMCA: Guaranteed
YMCA OF DELAWARE STAFF - LIFEGUARD RECERTIFICATION GUIDELINES & STANDARDS
 YMCA OF DELAWARE STAFF - LIFEGUARD RECERTIFICATION GUIDELINES & STANDARDS All YMCA of Delaware lifeguards are trained with the Ellis & Associates ILTP Curriculum. Licensed Instructors with the YMCA of
Unit Assessment Sheet Award: SLSGB Surf Lifeguard
 Unit Assessment Sheet Award: SLSGB Surf Lifeguard Course Number 03738 Lead Trainer Name Course Type SLSGB Surf Lifeguard Date Assessor 1 Assessor 2 Signature Signature Unit FA01 - Adult Basic Life Support
RLSS UK NPLQ Guidance & Syllabus for Pool Lifeguard Trainer Assessors part four
 RLSS UK National Pool Lifeguard Qualification 8th Edition (First Revision) Assessor Name: RLSS UK TA No: Assessment date: Approved Training Centre: Time assessment started: Time assessment finished: Question
YMCA OF DELAWARE COMMUNITY LIFEGUARD COURSE GUIDELINES & STANDARDS
 YMCA OF DELAWARE COMMUNITY LIFEGUARD COURSE GUIDELINES & STANDARDS All YMCA of Delaware lifeguards are trained with the Ellis & Associates ILTP Curriculum. Licensed Instructors with the YMCA of Delaware
PROGRAM CATALOG 3160 S.
 PROGRAM CATALOG 3160 S. Valley View Blvd, Suite 108 Las Vegas, NV 89102 (888) 860-3031 Lifeguard Society.com KipnisEducationGroup.com Classes.Vegas Effective January 01, 2018 Licensed to operate by the
U.S. Lifeguard Standards: A Lifeguarding Practice Research Synopsis Mike Espino
 U.S. Lifeguard Standards: A Lifeguarding Practice Research Synopsis Mike Espino Mike is the Aquatics Safety and Risk Specialist for the YMCA of the USA. Previous to joining the YMCA of the USA, he was
Wave, Tide or Ride, Follow the Guide
 Wave, Tide or Ride, Follow the Guide KEY TERMS Catch pool: A landing pool located at the bottom of a water slide. Current: The continuous movement of water. Dispatcher: The lifeguard at the top of a water
live outside the body and can often be treaded by antibiotics. need other organisms to live and prevention of is critical.
 Name: Chapter 7: Before Providing Care and Victim Assessment After you rescue a victim from the water, your next steps are to any - conditions by performing a assessment. What is a bloodborne pathogen?
Elements of an Effective Aquatic Risk Management Plan Linda Griffith, JD, ARM
 Elements of an Effective Aquatic Risk Management Plan Linda Griffith, JD, ARM Linda Griffith is a former litigation attorney who discovered risk management along the way. For the last ten years, she has
HOSA 105 EMERGENCY PREPAREDNESS
 HOSA 05 EMERGENCY PREPAREDNESS MODULE 5: EMERGENCY RESPONSE SKILL DEVELOPMENT PURPOSE HOSA and Health Science Education offer a variety of opportunities for students to develop emergency preparedness skills
Emergency Action Plan
 1 Emergency Action Plan Huntington Swimming Using Lake Clair 1005 N Broadway Huntington, Indiana 46750 1-260-359-9622 Huntington Swimming and Parkview Huntington YMCA are committed to employee and park
{aquatics education }
 {aquatics education } 2010 11 certification} Red Cross Training Courses Get trained! Charger Aquatics at Albuquerque Academy is partnering with the American Red Cross to present aquaticssafety certification
Adult, Child and Infant Exam
 CPR Pro for the Professional Rescuer Adult, Child and Infant Exam Instructions: Read each of the following questions carefully and then place an X over the correct answer on the separate answer sheet provided.
Summer Program Guide K7L 4T9 K7M 6S4. YMCA of Kingston
 2018 Summer Program Guide 100 745 Progress Avenue Kingston, ON Kingston, ON K7L 4T9 K7M 6S4 YMCA of Kingston First Aid, CPR, and Lifeguard Training National Lifeguard Service (NLS) Bronze Medallion and
Checklist Swimming Pool Safety
 Checklist Swimming Pool Safety Costly claims can arise from unsafe swimming pool operations at educational institutions. United Educators (UE) and its members have spent more than $8 million since 2010
LIFEGUARD IN-SERVICE AGENDA: JANUARY
 JANUARY Swim Endurance Skill 250m swim Scanning & Alertness SilhouetteDrop Rescue Skill Passive Rescues w/ Board Lifts CPR Skills Unresponsive & Not Breathing First Aid Skills Bleeding in the Pool Branch
Frequently Asked Questions About AEDs updated 11/2/2015
 Frequently Asked Questions About AEDs updated 11/2/2015 What does AED stand for? AED stands for automated external defibrillator. What s an AED? An AED is a device used to administer an electric shock
Al Palladini Community Centre 9201 Islington Ave., Woodbridge. Fri Sep 29 6:30-10:00pm Fri Jan 12 5:30-9:00pm
 Becoming a Lifeguard & Swim Instructor leadership Becoming a Lifeguard & Swim Instructor Bronze Medallion & Emergency First Aid Learn lifesaving principles embodied in the (4) components of water-rescue
CITY OF PEMBROKE RECREATION & TOURISM DEPARTMENT KINSMEN SWIMMING POOL INFORMATION x 1506
 CITY OF PEMBROKE RECREATION & TOURISM DEPARTMENT KINSMEN SWIMMING POOL INFORMATION 613-735-6821 x 1506 2015 Swim Lesson Registration Dates January 05-09 8 week program Registration will be accepted during
Informational Guide for:
 Informational Guide for: 2007 Three Rivers District Swim Program Includes information on all swim classes, CPR classes, and registration forms. Table of Contents for The Three Rivers District Swim Program
D) "A" is for open the airway; "B" is for stop the bleeding; "C" is for assess circulation
 A is for open the airway; B is for stop the bleeding; C is for assess circulation") Lesson U4C2L1 FIT Questions 1. (U4C2L1:F1) To what degree is learning about first aid important to you? A) I am extremely interested in learning how to administer first aid. B) I think first aid is important
Lesson U4C2L1 FIT Questions 1. (U4C2L1:F1) To what degree is learning about first aid important to you? A) I am extremely interested in learning how to administer first aid. B) I think first aid is important
PROGRAM CATALOG S. Valley View Blvd, Suite 108 Las Vegas, NV (888) KipnisEducationGroup.com Classes.Vegas
 KipnisEducationGroup.com Classes.Vegas") PROGRAM CATALOG 3160 S. Valley View Blvd, Suite 108 Las Vegas, NV 89102 (888) 860-3031 KipnisEducationGroup.com Classes.Vegas Effective August 01, 2017 Licensed to operate by the Commission on Postsecondary
PROGRAM CATALOG 3160 S. Valley View Blvd, Suite 108 Las Vegas, NV 89102 (888) 860-3031 KipnisEducationGroup.com Classes.Vegas Effective August 01, 2017 Licensed to operate by the Commission on Postsecondary
SWIMMING INSTRUCTION/WATER SAFETY POLICY
 SWIMMING INSTRUCTION/WATER SAFETY POLICY Rationale This policy applies to programs which have the purpose of teaching swimming and water safety. It does not apply to water activities such as recreational
Waterfront Staff. Lifeguards. Waterfront Directors
 Waterfront Staff Lifeguards Lifeguards supervise free swim periods, boating and special events held at the waterfront areas. They also instruct swim lessons. Lifeguards are responsible for maintaining
EAP Do You Know What to DO?
 EAP Do You Know What to DO? Sean Ries Director of Campus Recreation Centers LLC @ UAB Mike Weaver Facility Coordinator Centers LLC @ Cleveland State University Emergency Action Plan Overview Levels of
2005 Top Ten Major Changes in Treatment Recommendations *
 2005 Top Ten Major Changes in Treatment Recommendations * This document reviews the top ten new treatment recommendations and guidelines for ASHI s basic life support training programs for professional
QQI and IWS Joint Consultation on:
 QQI and IWS Joint Consultation on: NFQ Level 5 and 6 Lifeguard qualifications Irish Water Safety (IWS) is the statutory body established to promote water safety in Ireland. Quality and Qualifications Ireland
Assessment Requirements for HLTAID003 Provide first aid
 Assessment Requirements for HLTAID003 Provide first aid Release: 4 Assessment Requirements for HLTAID003 Provide first aid Modification History Release Release 1.1 Comments Minor corrections to formatting
CITY AND COUNTY OF DENVER CR&CF RISK UNIT Automated External Defibrillator (AED) Standard
 Standard") CITY AND COUNTY OF DENVER CR&CF RISK UNIT 65.7.2 Automated External Defibrillator (AED) Standard 1.0 Introduction An Automated External Defibrillator (AED) is a medical device used to treat a victim who
CITY AND COUNTY OF DENVER CR&CF RISK UNIT 65.7.2 Automated External Defibrillator (AED) Standard 1.0 Introduction An Automated External Defibrillator (AED) is a medical device used to treat a victim who
American Red Cross Lifeguard Exam Study Guide
 AMERICAN RED CROSS LIFEGUARD EXAM STUDY GUIDE PDF - Are you looking for american red cross lifeguard exam study guide Books? Now, you will be happy that at this time american red cross lifeguard exam study
First Aid Course Catalogue September 2018 Labour Day 2019
 First Aid Course Catalogue September 2018 Labour Day 2019 Aquatic Leadership 2017-2018 Page 1 My Safe Life An SOS 4 Kids Program My Safe Life is a personal safety program designed for children 7 9 years.
Administrative Procedures Automated External Defibrillator (AED)
") Administrative Procedures Automated External Defibrillator (AED) PURPOSE: The purpose of these procedures is to give guidance to those employees of the Lynden School District who are trained and willing
Administrative Procedures Automated External Defibrillator (AED) PURPOSE: The purpose of these procedures is to give guidance to those employees of the Lynden School District who are trained and willing
Chicago Public Schools Policy Manual
 Chicago Public Schools Policy Manual Title: AQUATIC ACTIVITY SAFETY Section: 604.6 Board Report: 18-0627-PO2 Date Adopted: June 27, 2018 Policy: THE CHIEF EXECUTIVE OFFICER RECOMMENDS: That the Board rescind
County of Henrico Verification Originator Revised Issued Human Resources Initials Risk
 Human Resources Initials Area of Application: Document Location: County of Henrico General Government & Schools http://employees.henrico.us/info/safety-manual/ Revisions Rev. No. Date Description 001 03/31/17
AED Program 2017 January 2017
 AED Program 2017 January 2017 Contents Purpose...1 Definitions...1 Scope and Applicability...1 Duties and Responsibilities...1 AED Coordinator...1 Alternate AED Coordinator...2 AED Owner...2 AED Director...2
Outlined below is the criteria and process a candidate must go through to become an Ocean Rescue Lifeguard.
 Ocean Rescue Lifeguard Candidate, Thank you for your interest in becoming a member of Charleston County Park and Recreation Commission s Ocean Rescue Lifeguard Team. This position requires that you possess
Lifesaving. Enhancing our youths competitive edge through merit badges
 lifesaving BOY SCOUTS OF AMERICA MERIT BADGE SERIES Lifesaving The Boy Scouts of America is indebted to the American Red Cross for its subject matter expertise, review, and other assistance with this edition
Non-Agency Disclosure and Acknowledgment Agreement
 Non-Agency Disclosure and Acknowledgment Agreement In European Union and European Free Trade Association countries use alternative form. Please read carefully and fill in all blanks before signing. I understand
Swimming Pools only* b) rescue procedures
 rescue procedures") E7. Aquatic Emergencies for the Site and ANY body of water campers are transported to (Pool, Stream, River, Lake, Ocean). Provide a brief overview of your aquatic emergency response plan for: a) each body
E7. Aquatic Emergencies for the Site and ANY body of water campers are transported to (Pool, Stream, River, Lake, Ocean). Provide a brief overview of your aquatic emergency response plan for: a) each body
Written Exam. Basic Life Support
 Written Exam Basic Life Support Instructions: Read each of the following questions carefully and then place an X over the correct answer on the separate answer sheet provided. Please do not write on the
Canadian Lifeguard Emergency Response Championships May 5 & 6, 2018 Town of Milton. Emergency Response Plan
 Canadian Lifeguard Emergency Response Championships May 5 & 6, 2018 Town of Milton Emergency Response Plan Purpose To outline roles, responsibilities and action plan in the event of a medical emergency
Pomona College Automated External Defibrillator (AED) Program
 Program") Pomona College Automated External Defibrillator (AED) Program Introduction To help ensure the safety and well-being of the Pomona College community and visitors to campus, Pomona College is increasing
Pomona College Automated External Defibrillator (AED) Program Introduction To help ensure the safety and well-being of the Pomona College community and visitors to campus, Pomona College is increasing
PUA21012 CERTIFICATE II IN PUBLIC SAFETY (AQUATIC RESCUE) BRONZE MEDALLION
 BRONZE MEDALLION") AWARD SUMMARY The aim of this course is to provide participants with the skills and knowledge of basic patrolling and surf awareness in order to be able to participate in lifesaving operations. This is
AWARD SUMMARY The aim of this course is to provide participants with the skills and knowledge of basic patrolling and surf awareness in order to be able to participate in lifesaving operations. This is
Life Support Programme
 Life Support Programme Summary of Changes to RLSS UK Life Support Programme Qualified deliverers The Life Support awards can be taught and assessed by: Lifesaving Instructor (and higher) Pool or Beach
Qualification Specification HABC Level 2 International Award in Pool Lifeguarding Version 1.1: September 2016
 www.highfieldabc.ae Qualification Specification HABC Level 2 International Award in Pool Lifeguarding Office 306 3 rd Floor Building 49 Healthcare City Dubai United Arab Emirates Tel 009714 449 4042 Fax
Monthly Lifeguard Training & Competency Assessment Register
 Incidents Session 1 January July Role of the Lifeguard. Principles of scanning. 10:20 system. Zoning. Primary assessment. Management of Heart attacks. Management and causes of unconsciousness. Turning
YWCA Aquatic Center LIFEGUARD MANUAL
 YWCA Aquatic Center LIFEGUARD MANUAL Table of Contents Manual objectives, introduction... 2 Chain of command...2 General responsibilities.3 Office responsibilities...4 Timecard procedure...4 Absence policy...4
CHAPTER 3: TAKING ACTION AND CARING FOR BREATHING EMERGENCIES Multiple Choice
 CHAPTER 3: TAKING ACTION AND CARING FOR BREATHING EMERGENCIES Multiple Choice Circle the correct answer. 1. One of the first steps to follow in an emergency is a. Transporting the victim to the hospital.
Under 17 and Under 15 Competition Theory Paper
 Surf Life Saving Australia Champion Lifesaver 2009 Under 17 and Under 15 Competition Theory Paper Mark the best answer to each question on the answer sheet. The best answer is the one that can be found
A Guide to Implementing an AED. Program
 1 A Guide to Implementing an AED Program INTRODUCTION Implementing an AED program not only reduces risk exposure but can mean the difference between life and death. It requires a fully managed plan that
STATE UNIVERSITY COLLEGE AT ONEONTA SWIMMING POOL PROCEDURES March 2012
 STATE UNIVERSITY COLLEGE AT ONEONTA SWIMMING POOL PROCEDURES March 2012 I. BACKGROUND Although the State Sanitary Code does not apply directly to state-owned facilities, SUNY Onoenta facilities are inspected
Aquatics Program Guide
 Colorado Springs 5904 Prairie Schooner Drive Colorado Springs, CO 80923 villasport.com/cs 719-522-1221 The Woodlands 4141 Technology Forest Boulevard The Woodlands, TX 77381 villasport.com/tw 832-585-0822
Brevard County (Florida) Administrative Procedures
 Administrative Procedures") Page 1 of 8 Brevard County (Florida) Administrative Procedures 8452 - AUTOMATED EXTERNAL DEFIBRILLATOR Mission Statement The mission of the District is to plan and implement a sustainable Automated External
Page 1 of 8 Brevard County (Florida) Administrative Procedures 8452 - AUTOMATED EXTERNAL DEFIBRILLATOR Mission Statement The mission of the District is to plan and implement a sustainable Automated External
QUALIFICATION SPECIFICATION
 QUALIFICATION SPECIFICATION FAA LEVEL 3 AWARD IN ACTIVITY FIRST AID (RQF) AWARD IN ACTIVITY FIRST AID AT SCQF LEVEL 6 The qualification is designed to provide the knowledge and competence required for
COALINGA STATE HOSPITAL. Effective Date: August 31, 2006
 COALINGA STATE HOSPITAL NURSING POLICY AND PROCEDURE MANUAL SECTION Emergency Procedures POLICY NUMBER: 702 Effective Date: August 31, 2006 SUBJECT: CARDIOPULMONARY RESUSCITATION (CPR) 1. PURPOSE: To provide
THE AMERICAN SAFETY & HEALTH INSTITUTE ADULT CPR EXAM
 THE AMERICAN SAFETY & HEALTH INSTITUTE ADULT CPR EXAM 1. During an adult victim s assessment, responder should check victim for responsiveness. If no response, responder should first: A. Check for signals
: Purpose : Scope
 105 CMR 432.000: MINIMUM REQUIREMENTS FOR PERSONAL FLOTATION DEVICES FOR MINOR CHILDREN AT MUNICIPAL AND RECREATIONAL PROGRAMS AND CAMPS Section 432.001: Purpose 432.002: Scope 432.010: Definitions 432.020:
Outdoor Education - Paddle Rafting
 Outdoor Education - Paddle Rafting Secondary - Curricular 2017 Update coming soon to reflect amendments to Ontario Public Pools Regulation 565 that come into effect on July 1, 2018. Lakes, Rivers Flatwater,
YWCA Aquatic Center LIFEGUARD MANUAL
 YWCA Aquatic Center LIFEGUARD MANUAL Table of Contents Manual Objectives... 2 Introduction to the YWCA... 2 General Responsibilities... 3 Office Responsibilities... 4 Timecard Procedure... 4 Absence Policy...
Rookie Lifeguard Programme Candidate Workbook
 Rookie Lifeguard Programme Candidate Workbook Name Club Updated October 2015 The Rookie Lifeguard Programme The Rookie Lifeguard Program is an introductory program developed for 13 year olds wishing to
Red Cross Swim Preschool
 The Love of Swimming Starts Here When you choose the program, you re getting: A program based on research Proven excellence in teaching Age-appropriate learning through games and songs A focus on your
Steel City Dragon-Boat Program & Steel City Dragons Dragon-Boat Racing Team Revised March 2013 SAFETY PROTOCOL. Dragon Boat Operating Safety
 Steel City Dragon-Boat Program & Steel City Dragons Dragon-Boat Racing Team Revised March 2013 Dragon Boat Operating Safety Minimum safety protocol for the safe operation of Dragon Boat during all on-water
AG Specialty Services Inc.
 8 Pages, Page down to the You Want Approved s Florida Date: Name Days Cost Monday February 6 USCG NMC STCW Approved First Aid/CPR/AED 1 $ 100.00 The course teaches lifesaving skills that will prepare you
3. PURPOSE: To establish the minimum safety content of swimming pool Operations Manuals.
 GO.. TITLE: OPERATIONS MANUALS 2. DATE ISSUED: July 996 ISSUE: 2 3. PURPOSE: To establish the minimum safety content of swimming pool Operations Manuals. 4. (a) An Operations Manual should be prepared
For additional information on this matrix, please contact the following:
 National headquarters staff of the American Heart Association, American Safety and Health Institute, American Red Cross, and the National Safety Council produced the following training matrix. Each organization
Unit Assessment Sheet SLSGB Aquatic First Aid
 Unit Assessment Sheet 03683 - SLSGB Aquatic First Aid Course Number 03683 Lead Trainer Name Course Type SLSGB Aquatic First Aid Date Assessor 1 Assessor 2 Signature Signature Unit FA01 - Adult Basic Life
Mine Rescue Certification Training Standard
 Mine Rescue Certification Training Standard Mine Rescue Certification Training Standard Employers who have workers working in an underground workplace shall take the necessary precautions to ensure worker
Primary assessment: hazards & ABCs Item 11
 Rookie Patrol Primary assessment: hazards & ABCs Item 11 Demonstrate a primary assessment including hazards and ABCs on an unconscious, breathing victim. To assess an unconscious breathing victim with
After-Action Review Report
 After-Action Review Report Incident Date and Name August 11, 2014 - Sikome Lake Drowning Fatality Fish Creek Provincial Park - Kananaskis Region 1. Scope This Report will consist of a review of the: applicable
Basic Life Support (BLS)
") Basic Life Support (BLS) Basic Life Support (BLS) is the foundation for saving lives after cardiac arrest. Participant will learn the skills of high-quality cardiopulmonary resuscitation (CPR) for victims
Basic Life Support (BLS) Basic Life Support (BLS) is the foundation for saving lives after cardiac arrest. Participant will learn the skills of high-quality cardiopulmonary resuscitation (CPR) for victims
Comprehensive Course Syllabus
 Comprehensive Course Syllabus WEL 221: Lifeguarding Fall 2009 Course Description: The lifeguarding class is a certification program through the American Red Cross for those students at least 15 years of
SWIMMING POOL SAFETY GUIDE
 SWIMMING POOL SAFETY GUIDE HOW TO MAKE YOUR SWIMMING POOL SAFER FOR KIDS Swimsprout Of Texas (832) 366-3007 www.swimsproutoftexas.com 1 Pools help bring people together. They help create life long memories
CPR & ECC COURSE MATRIX
 CPR & ECC COURSE MATRIX Course Content Audience Student Materials Instructor Materials Course Completion Card Type Estimated Time (Based on 6:1 Student to Instructor Ratio) Courses for Healthcare Professionals
Lesson Guide B.1 B / WATER EXPLORATION. Lesson Guide
 B.1 CAUTION: Limit participants to a single inhalation whenever you ask them to hold their breath and submerge. Set safety limits when setting up activities that involve submerging or swimming underwater.
Emergency Medical Services Agency Public Safety AED Service Provider Guide
 Emergency Medical Services Agency Public Safety AED Service Provider Guide 2180 Johnson Ave., 2 nd Floor San Luis Obispo, CA 93401 805-788-2511 Phone 805-788-2517 Fax www.sloemsa.org PUBLIC SAFETY AED