Installation guide. GT 1100 Model - RECTANGLE
|
|
|
- Bernadette Walters
- 5 years ago
- Views:
Transcription

1 Installation guide GT 1100 Model - RECTANGLE
2 WARNING WARNING THIS POOL IS NOT DESIGNED FOR DIVING OR JUMPING. DANGEROUS INJURY CAN RESULT - SHALLOW WATER!!! Follow All Safety and Maintenance Instructions Your pool is designed for years of pleasurable, safe family fun. But, when used incorrectly, a swimming pool can be dangerous. To insure your pool is used safely you must observe the following safety precautions: Do not dive! - Do not jump! - No rough play! - No running or pushing! Do not walk on the top ledge. It can be slippery and is not a walkway. Be sure to install all safety labels provided with your pool according to the instructions. Keep a safety rope 1/4 by 50 with a flotation buoy with an outside diameter of 15. Have accessible in a prominent area by your pool. Post near all entrances to pool area a list of telephone numbers of the: Nearest available police Nearest ambulance service Nearest available hospital Nearest available fire department Nearest available physician Nearest available rescue unit 911 emergency number if available Provide fencing or enclosure which is independent of the house as a closure around the entire pool area. The fencing must be made of durable material, a minimum of 4 in height from ground level and with closures with self-latching locks, to make pool inaccessible to toddlers and uninvited guests. Make sure gate is always closed. Be sure to follow local building code requirements for load capacity and fencing if using an aftermarket or homebuilt deck. You must make sure all fencing and barriers are in working order so that pool is always protected. Check with your local municipality for any special laws in your area. Never drink alcoholic beverages or use any intoxicants which could hinder your judgment and reflexes. Never use pool alone. All children must be supervised continuously. Do not use pool if bottom is not clearly visible: At night, sufficient lighting must be available. It is solely the pool owner s responsibility to provide adequate lighting for pool bottom, safety signs and walkways, which exceeds minimum standards of the IES of North America. Do not climb, stand or sit on any pool structure or the filter system. Components such as the filtration system, pumps and heater must be positioned so as to prevent their being used as a means of access to the pool by young children. Be sure that all toys, chairs and tables or similar objects that a young child could climb on be at least 4 from pool. Do not use pool during electrical or rain storms. See available Association of Pool & Spa Professional (APSP) publications for more tips on pool safety. IMPORTANT NOTICE! READ BEFORE INSTALLATION. WA R N I N G DO NOT AFFIX ANY OTHER PRODUCTS MADE BY OTHERS TO YOUR POOL SUCH AS, BUT NOT LIMITED TO, DECKS AND SLIDES! ENCLOSED IN THE FRAME CARTON IS AN ENVELOPE CONTAINING SAFETY STICKERS, WHICH MUST BE INSTALLED AS PER THE FOLLOWING INSTRUCTIONS. FAILURE TO PROP- ERLY INSTALL WARNING LABELS WILL VOID WARRANTY. FAILURE TO MOUNT THESE SAFETY LABELS MAY SUBJECT YOU TO SUBSTANTIAL LI- ABILITY IN CASE OF INJURY. NO DIVING - NO JUMPING SHALLOW WATER DIVING OR JUMPING MAY CAUSE DEATH OR PERMANENT INJURY SIGN MUST BE PLACED ON THE WALL, NEXT TO THE POOL ENTRY. THESE WARNINGS ARE NOT TO BE REMOVED UNDER ANY CIRCUMSTANCES! IF THEY BECOME DISCOLORED OR FALL OFF, PLEASE REQUEST REPLACEMENTS, WHICH WILL BE SENT AT NO CHARGE. NO DIVING - NO JUMPING SHALLOW WATER SIGN TO BE PLACED ON THE INSIDE LIP OF THE TOP LEDGE Rev. 0 2
3 INTRODUCTION Congratulations on BECOMING THE OWNER of a NEW SWIMMING POOL. THESE ARE INSTRUCTIONS FOR INSTALLING YOUR SWIMMING POOL. The FOLLOWING ARE SOME HELPFUL HINTS THAT YOU SHOULD TAKE INTO consideration BEFORE INSTALLING YOUR POOL. 1. Read through the entire instruction booklet before you begin. This will enable you to find out exactly what is involved with installing your swimming pool before you begin. 2. DO NOT ATTEMPT INSTALLATION IN WINDY OR GUSTY WEATHER. This will not only make installation more difficult, it may result in damage to your pool before it is completely installed. 3. Although we have broken down the installation into many simple steps, you will probably find that steps 1 to 4 will be the most labor-intensive and time-consuming. Once you have completed those four steps you should find that the rest of the installation moves along much more quickly. 4. Please be sure to review all safety material and local codes before beginning your installation. There is a yellow safety envelope packed with your pool. This envelope contains safety material and warning stickers to be placed on your pool. If you are missing any of these items please contact your dealer or the factory to obtain it. The warranty is void if all safety precautions are not followed. 5. In the event that you need to make a warranty claim, it is important to know the size and model of your swimming pool in order to expedite the handling of your claim. Please fill in the information below and keep for your records. All of this information can be found on the labels attached to the cartons your pool is packed in. POOL MODEL: SIZE OF POOL: DATE OF PURCHASE: LINER MODEL: 6. Make sure you have the necessary tools and materials before beginning your installation. Below is a list of the tools and materials needed. Shovel Carpenter s level and/or transit (Optional) Tape measure Patio Blocks (2 x 8 x 16 ) Phillips head screwdriver Box cutter (Razor blade) Duct tape Tamp Sand Wrench Filter Skimmer/Return fitting 3
4 POOL Your rectangle EZpanel pool comes in various configurations and sizes. Make sure you follow the right installation steps. Your pool can be: - above ground - semi-inground - in ground The oval structural system can be with: - straps (with or without concrete collar) - brace (with concrete collar) The exterior finish could be: - dressed - decorative panels / top ledges - raw - no decorative panels / top ledegs EZ Panel Pool Chart of Installation Options and Restrictions Above Ground The pool can be installed above the ground in round, oval, and rectangle. Part way in the GROund with StRAPS 33 or less in the ground: Round, Oval with straps, Rectangle with straps, No concrete collar. All the way in GROund with StRAPS 33 or more in the ground: Round, Oval with straps, Rectangle with straps, must have concrete collar Part way in the GROund with no StRAPS 33 or less in the ground: Oval with no straps, Rectangle with no straps, not allowed. All the way in GROund with no StRAPS 36 or more in the ground: Oval with no straps, Rectangle with no straps, must have concrete collar. WARNING: Don t use concrete containing calcium chloride. Panel Type The EZ Panel pool is offered with 2 panel options. The 1 sided aluminum panel option can be used up to a depth of 33. Below 33 the pool must be built with the 2 sided aluminum panel option. Backfilling RestRICtions When adding water or backfilling a pool there cannot be more than a 3 difference between the height of the water and the height of the back-fill. Soil Conditions All of the Pool Installation instructions referred to herein, and elsewhere, are based upon calculations with respect to the insitu soil mechanics, of the installed swimming pool, viz all placed subsoils and backfill, must be clean, dry, drained, granular soils free of any debris or deliterious matter moderately compacted in place. 4
5 LEVELS 52'' 52'' 33'' Max. in soil Single Sided Above Ground Panel Round or Curved end of Oval Single Sided Semi Inground Panel Round or Curved end of Oval Greater than 33 in soil 52'' 9'' Concrete 28'' Double Sided Inground Panel Round or Curved end of Oval 52'' 52'' 33'' Max. in soil Single Sided Above Ground Panel with Straps Rectangle or Straight side of the Oval Single Sided Semi Inground Panel with Straps Rectangle or Straight side of the Oval 52'' Greater than 33'' in soil 52'' Greater than 36'' in soil 9'' 9'' Concrete Concrete 28" 28" Double Sided Inground Panel with Straps Rectangle or Straight side of the Oval Double Sided Inground Panel with Braces Rectangle or Straight side of the Oval 5
6 PART LIST - RECTANGLE REF. PART NAME POOL SIZES (IN FEET) 9 x 13 9 x x x x x x x 35 1 Panel Skimmer Panel Rod Straight Diameter Lock Cosmetic Panel Retainer (4 per panel) 6 Small Cosmetic Panel Retainer (skimmer panel) 7 Cosmetic Panel Bottom Cosmetic Panel Ledge Union (left) Ledge Union (right)
7 PART LIST - RECTANGLE REF. PART NAME POOL SIZES (IN FEET) 9 x 13 9 x x x x x x x Top Ledge Small Top Ledge Ledge Cover (round section) Ledge Cover (straight section) Post Union Straight Union Post Cosmetic Panel Hardware Bag Cosmetic Radius Lock Rectangle Pool (small corner) 19 Cosmetic Radius Lock Rectangle Pool (long corner) 7
8 PART LIST - RECTANGLE SPECIFIC TO STRAPS SYSTEM T REF. PART NAME POOL SIZES (IN FEET) 9 x 13 9 x x x x x x x Steel T Support Plastic Sleeve Universal Steel Strap Pressure Plate
9 PART LIST - RECTANGLE SPECIFIC TO BRACE SYSTEM L REF. PART NAME POOL SIZES (IN FEET) 9 x 13 9 x x x x x x x Plastic Sleeve Turnbuckle 5/ Angle Turnbuckle L Vertical Post Rebar * not included 29 Base Rectangular Tube End Fitting Turnbuckle
10 EXPLODED VIEW - RECTANGLE 9/
11 EXPLODED VIEW - RECTANGLE BRACE SYSTEM L * STRAPS SYSTEM T
12 POOL AREA DIMENSIONS IMPORTANT INFORMATION PRIOR TO INSTALLATION ALL DIAGONAL DIMENSIONS ARE TAKEN AT THE PIVOT POINT WHERE THE PANELS START GOING INTO THE ROUND SECTION - SEE VISUAL. 12
13 POOL DIMENSIONS "T" SYSTEM 9 x 13 13'10-1/8" 9'7" 1'4-3/8" 15'3-5/8" 4'3-1/8" 9 x 18 18'1-1/8" 9'7" 1'4-3/8" 18'10-7/8" 8'6-1/8" 13
14 POOL DIMENSIONS "T" SYSTEM 13 x 18 18'1-1/4" 1' 4-3/8" 13'10-1/8" 21'3" 4'3-1/8" typ. 8'6-1/8" 13 x 22 22'4-1/4" 13'10-1/8" 24'8-7/8" 4'3-1/8" typ. 1' 4-3/8" 12'9-1/4" 14
15 POOL DIMENSIONS "T" SYSTEM 13 x 26 26'7-3/8" 1' 4-1/2" 13'10" 28'5-1/8" 4'3-1/8" typ. 17'0-3/8" 18 x 26 26'7-3/8" 18'1-1/4" 1' 4-3/8" 30'8" 8'6-1/8" 17'0-3/8" 15
16 POOL DIMENSIONS "T" SYSTEM 18 x 30 30'10-3/8" 1' 4-1/2" 18'1-1/4" 34'2-3/4" 8'6-1/8" 21'3-3/8" 18 x 35 35'1-1/2" 18'1-1/4" 1' 4-3/8" 37'11-3/8" 8'6-1/8" 25'6-1/2" 16
17 POOL DIMENSIONS "L" SYSTEM 9 x 13 13'10-1/8" 9'7" 1' 6-3/4" 15'3-5/8" 4'3-1/8" 9 x 18 18'1-1/8" 9'7" 1' 6-7/8" 18'11-3/8" 8'6-1/8" 17
18 POOL DIMENSIONS "L" SYSTEM 13 x 18 18'1-1/4" 13'10-1/8" 21'3-1/8" 4'3-1/8" typ. 1' 6-7/8" 8'6-1/8" 13 x 22 22'4-1/4" 13'10-1/8" 24'8-7/8" 4'3-1/8" typ. 1' 6-3/4" 12'9-1/4" 18
19 POOL DIMENSIONS "L" SYSTEM 13 x 26 26'7-3/8" 1' 6-3/4" 13'10" 28'5-1/8" 4'3-1/8" typ. 17'0-3/8" 18 x 26 26'7-3/8" 18'1-1/4" 1' 6-7/8" 30'7-5/8" 8'6-1/8" 17'0-3/8" 19
20 POOL DIMENSIONS "L" SYSTEM 18 x 30 30'10-3/8" 18'1-1/4" 1' 6-7/8" 34'2-5/8" 8'6-1/8" 21'3-3/8" 18 x 35 35'1-1/2" 18'1-1/4" 37'11-1/4" 8'6-1/8" 1' 6-7/8" 25'6-1/2"
21 I N S TA L L AT I O N STEP 1 When you choose the appropriate site for your pool, make sure you allow for the distance between the pool and property line as required by law in your municipality. Do not locate pool over underground lines, septic tanks, under electrical lines, near hazardous structures, or out of local code restrictions. It is essential that the area selected for your pool has a level and firm base. Do not assemble your pool on asphalt, tar or oil base surfaces. Avoid areas with sharp objects, or ground treated with weed killer or other chemicals. Also avoid areas where nut grass, Bermuda grass or bamboo grass grows, as they can grow through your liner. Do not place components such as filters, pumps, and heaters in a way that they can be used as a means of access to pool by young children. Be sure to follow all local building codes and obtain all building permits required for your area. It is essential to plan the location of the skimmer and return plumbing, at this point. Also plan the location of pool views, pool entrance, decks, fences, privacy shields, sun path, breeze direction, shrubs, filters, pumps, and in-ground drainage. BE SURE TO AVOID - All electrical wires - All gas lines - Septic tanks - Cesspools - Dry wells - Tree roots/stumps - Buried debris (trees, building material, etc.) - Sudden slopes within 6 of pool area 21
22 INSTALLATION STEP 2 A F B E D H C G Strap Oval System ( T ) DIMENSIONS A B C D E F G 9 x / /8 NA / / /8 9 x / /8 NA / / /8 13 x / / / / / x / / / / / / x / / / / / /8 18 x / /4 17 3/ / / /8 18 x / / / / / / /8 18 x / / / / / / /4 Brace Oval System ( L ) DIMENSIONS A B C D E F G 9 x / /8 NA / / /8 9 x / /8 NA / / /8 13 x / / / / / x / / / / / / /4 13 x / / / / / /8 18 x / /4 17 3/ / / / /8 18 x / / / / / /8 34 1/8 18 x / / / / / / /4 H / / / / / H / / / / / Once you have selected your site, trace the outside perimeter of your pool on the ground using spray paint. The length of the lines you trace will vary according the overall dimensions of your pool. Find your pool dimensions on the above chart and use the letters from the diagrams to determine the correct lengths of the lines you will trace. 22
23 I N S TA L L AT I O N STEP aboveground semi-inground & inground Remove the sod from the area you have just outlined. When installing the pool aboveground, add 8 to the dimensions listed at step 2 to leave space for the panels. When installing the pool semi-inground or inground, add 18 to the dimensions listed at step 2 to leave space for assembly. Dig to the desired depth. Remove all debris (rocks, roots, etc.) using a rake. 23
24 INSTALLATION STEP 4 Aboveground installation Dig the areas where the steel T or L supports are to be installed. Dig to a depth of 3 inches. Refer to the drawings on pages 13 to 20 to find out the exact T or L support position for your pool dimension. Take material such as stone dust or fine mortar that can form a solid, permanent base and deposit this material around the rim of the basin. The material used should be spread around the perimeter of the pool to a width of 24 and a thickness of 2. Level the material with a straight wooden plank and a level. Wet and pack down the stone dust into a smooth, level mass. 24
25 FOR T ASSEmblY, go to PAGE 26. for L ASSEmblY, go to PAGE 44.
26 T ASSEMBLY - RECTANGLE STEP 1 Start with the straight section of the pool by installing the universal steel strap onto the steel T support using 2 screw pins 1/4-20 1/2 long, with serrated nuts 1/4-20. Use the two holes side by side. Insert and level a concrete slab of approximately 8 x 16 x 2 under each steel T support. 26
27 T ASSEMBLY - RECTANGLE STEP 2 Attach all of the universal steel straps together at each joint using 4 screw pins 1/4-20 1/2 long, with serrated nuts 1/4-20. Use the 4 holes that are in line. 27
28 T ASSEMBLY - RECTANGLE STEP 3 Assemble the universal straps in a criss-cross pattern using the 1/4-20 x 0,75 screws and bolts. Refer to the pool dimension pages for the correct layout according to your pool size. IMPORTANT Wait until the panels are installed before fastening the universal steel straps. 28
29 T ASSEMBLY - RECTANGLE STEP 4 Place a pressure plate on the T support, but do not screw in. This will enable you to align them correctly. Make sure the bases of the horizontal sleeves are level with the surrounding ground. IMPORTANT Wait until the panels are installed before fastening the pressure plates. Measure the two intersecting axes to ensure that the two straight sections are parallel. Screw the pressure plate to the T base using screw AB Pins # 12 x 0.75 (3 on each side). 29
30 T ASSEMBLY - RECTANGLE STEP 5 Install the pressure plate using the tapping screw # 12 x 0,75". Refer to the pool dimension pages for the correct layout according to your pool size. Make sure you rectangle pool is square IMPORTANT Screws holding pressure plates and universal steel straps should be in place but not tight yet. 30
31 T ASSEMBLY - RECTANGLE STEP 6 Slide over the T the plastic sleeve. The cut-out (opening) should be toward the outside of the pool. 31
32 T ASSEMBLY - RECTANGLE STEP 7 OUTSIDE POOL INSIDE POOL TOP VIEW Slide the post union over the T (now with the plastic sleeve). The hinge detail should be toward the inside of the pool. 32
33 T ASSEMBLY - RECTANGLE STEP 8 ILLUSTRATION A Starting in the straight section of the oval pool, insert a panel between the union posts and lock them in place using a rod on each side. Insert the rod using a mallet. Be careful not to crush the top part of the panel (see illustration A). 33
34 T ASSEMBLY - RECTANGLE STEP 9 TOP VIEW SINGLE AND DOUBLE SIDED PANEL Slide the straight diameter lock where the panels are lined-up with the union post. Repeat step 8 and 9 for all panels in straight section. See next step for corner installation. Using pliers, crimp the end of the radius lock to prevent the part to drop through when installed 34
35 T ASSEMBLY - RECTANGLE STEP 10 Single sided panel Install the cosmetic radius lock rectangular pool long corner on both side of each corner. If you have a double sided panel go to step
36 T ASSEMBLY - RECTANGLE STEP 11 SINGLE SIDED PANEL Install the cosmetic radius lock rectangular pool short corner at each corner. 36
37 T ASSEMBLY - RECTANGLE STEP 12 Corner lock DOUBLE SIDED PANEL Slide the corner lock into place between the union post. 37
38 T ASSEMBLY - RECTANGLE STEP 13 receptical DOUBLE SIDED PANEL Use self taping screws to attach the receptical to the panel as shown. Screw must be in center of receptical Edge of receptical must line up with edge of panel 38
39 T ASSEMBLY - RECTANGLE STEP 14 DOUBLE SIDED PANEL Position parts as shown so the corner is square. 39
40 T ASSEMBLY - RECTANGLE STEP 15 Corner Cover DOUBLE SIDED PANEL Slide the corner covers into place. They will slide into the corner lock on one edge and the receptical on the other edge. 40
41 T ASSEMBLY - RECTANGLE STEP 16 Make sure your pool is perpendicular at this point by measuring the diagonal. Both dimensions should be the same. 41
42 T ASSEMBLY - RECTANGLE STEP 17 TOP VIEW At this point you can tight up the screws holding the pressure plate to T support, and the screws on all universal steel straps. Move to step 35 to continue your installation. 42
43 THE FOLLOWING SECTION DESCRIBES HOW TO INSTALL YOUR EZPANEL POOL WITH A BRACE SYSTEM ( L ). GO TO PAGE 26 IF YOU HAVE A T ASSEmbly POOL.
44 L ASSEMBLY - RECTANGLE STEP 18 Assemble the L vertical post with the base rectangular tube using a screw hex 5/8-11 x 3,5" long and nut. The 2 parts should be perpendicular to each other. 44
45 L ASSEMBLY - RECTANGLE STEP 19 Slide the plastic sleeve over the L assembly. The cut-out (opening) should be toward the outside of the pool. 45
46 L ASSEMBLY - RECTANGLE STEP 20 Slide the post union over the L assembly (now with the plastic sleeve). The hinge detail should be toward the inside of the pool. 46
47 L ASSEMBLY - RECTANGLE STEP 21 Install the end fitting turnbuckle using a screw hex 5/8-11 x 1.5" long and nut on the base rectangular tube. 47
48 L ASSEMBLY - RECTANGLE STEP 22 Assemble the angle turnbuckle, the turnbuckle and angle bracket to the end fitting turnbuckle using 4 screws hex 3/8-16 x 1" long and nuts. 48
49 L ASSEMBLY - RECTANGLE STEP 23 Secure the angle turnbuckle, to the L assembly using 2 screw hex drilling 1/4 x 1.5" long. 49
50 L ASSEMBLY - RECTANGLE STEP 24 carpenter level turnbuckle Using a carpenter level, adjust the turnbuckle in order to have the union post vertical. 50
51 L ASSEMBLY - RECTANGLE STEP 25 Starting in the straight section of the oval pool, insert a panel between the union posts and lock them in place using a rod on each side. Insert the rod using a mallet. Be careful not to crush the top part of the panel. NOTE There is no turnbuckle assembly at the corner. 51
52 L ASSEMBLY - RECTANGLE STEP 26 TOP VIEW SINGLE AND DOUBLE SIDED PANEL Slide the straight diameter lock where the panels are lined-up with the union post. Repeat step 25 and 26 for all panels in straight section. See next step for corner installation. Using pliers, crimp the end of the radius lock to prevent the part to drop through when installed 52
53 L ASSEMBLY - RECTANGLE STEP 27 SINGLE SIDED PANEL Install the cosmetic radius lock rectangular pool short corner at each corner. 53
54 L ASSEMBLY - RECTANGLE STEP 28 Leave this space free for now If you have a double sided panel, go to step 29. Single sided PANEL Install the cosmetic radius lock rectangular pool long corner on both side of each corner. 54
55 L ASSEMBLY - RECTANGLE STEP 29 Corner lock DOUBLE SIDED PANEL Slide the corner lock into place between the union post. 55
56 L ASSEMBLY - RECTANGLE STEP 30 receptical DOUBLE SIDED PANEL Use self taping screws to attach the receptical to the panel as shown. Screw must be in center of receptical Edge of receptical must line up with edge of panel 56
57 L ASSEMBLY - RECTANGLE STEP 31 DOUBLE SIDED PANEL Position parts as shown so the corner is square. 57
58 L ASSEMBLY - RECTANGLE STEP 32 Corner Cover DOUBLE SIDED PANEL Slide the corner covers into place. They will slide into the corner lock on one edge and the receptical on the other edge. 58
59 L ASSEMBLY - RECTANGLE STEP 33 Make sure your pool is perpendicular at this point by measuring the diagonal. Both dimensions should be the same. 59
60 L ASSEMBLY - RECTANGLE STEP 34 Secure the L assembly to the ground by inserting a rebar 1/2 (#4) x 12" long through the base rectangular tube. 60
61 Once all panels ARE installed, with T OR L ASSEmbly, CONTINUE INSTALLING YOUR POOL WITH THE NEXT STEPS. REMEMBER THE EZ- PANEL POOL COMES IN VARIOUS CON- FIGURations, make sure you follow the RIGht installation steps.
62 ASSEMBLY STEP 35 OPtIOnAl Required for aboveground or semi-inground installation. From the top, slide the cosmetic panel retainers into the vertical grooves on the panel. There are 4 grooves per panel. Install the two small cosmetic panel retainers in the middle of the skimmer panel. 62
63 I N S TA L L AT I O N STEP 36 OPtIOnAl Required for aboveground or semi-inground installation. From the top, slide the cosmetic panel into the retainer. There are three cosmetic panels per panel section. Each cosmetic panel should sit on the base of the panel. The skimmer panels are different see next page. In case of a semi-inground pool, cut the length of this part in order to have it in line with the top of the panel. 63
64 I N S TA L L AT I O N STEP 37 Cosmetic retainer panel Small cosmetic retainer Bottom cosmetic skimmer panel The cosmetic panels on the skimmer panel are shorter than the other panels. From the top, slide the small bottom decorative panels into the retainer. Install the skimmer and return accordng to the manufacturer installation. You don t need to connect them yet. In case of a semi-inground pool, cut the length of the cosmetic panel and small cosmetic retainer in order to have it in line with the top panel - see next step. 64
65 T ASSEMBLY STEP 38 concrete 9 28 Pour a collar of concrete all around the pool at the base of the panel. Make sure the panel is level. WARNING: Do not use concrete with calcium chloride. 65
66 L ASSEMBLY STEP concrete Pour concrete all around the pool at the base of the panel. Re-adjust the turnbuckle if needed in order to have the union post vertical. WARNING: Do not use concrete with calcium chloride. 66
67 I N S TA L L AT I O N STEP 40 Final ground level Self-drilling screws According to your installation configuration (semiinground installation), you might have to custom cut the cosmetic panels. First backfill the trench left behind the panels. Slide the cosmetic panels into the retainer until they cover the aluminum panels. Cut the panels aligned with the top of the aluminum panels. Install a self-drilling screw below the panel to prevent the cosmetic panel to slide down over the years. 67
68 I N S TA L L AT I O N STEP 41 Put three layers of duck tape over all joints. If you are using foam coves, clip them at the base of the panel. There should be no gaps between them. If you don t have foam coves, use sand instead. If you are using sand, bank the sand against the wall to form a cove cm high (6 ) and cm wide (6 ) at ground level. Water the sand to compact it and use a trowel to spread it evenly. 68
69 I N S TA L L AT I O N STEP 42 EXTERIOR INTERIOR Remove your shoes to avoid damaging the base or tearing the liner. Open the liner box carefully so as not to damage the liner. Unfold the liner from the center outwards. Note: The liner is generally smaller than the support structure of the pool. It stretches more easily when warm. For this reason, it is important that the liner be installed on a warm sunny day. EXTERIOR You can now start installing the liner onto the pool wall. Use the liner s vertical seam as a guide and make sure the seam is vertical and perpendicular to the seam between wall and bottom. Make sure the seam between wall and bottom sits onto the cove. Hang the liner into the molded slot of the panel. 69
70 I N S TA L L AT I O N STEP 43 OPTIONAL Required for aboveground or semi-inground installation. Insert the ledge union at the ends of the large and small top ledge. Use a mallet to push the ledge union up to the groove in the top ledge. There is a right and a left version of this part (refer to parts list). 70
71 INSTALLATION STEP 44 A B EXTERIOR EXTERIOR INTERIOR INTERIOR EXTERIOR INTERIOR OPTIONAL Required for aboveground or semi-inground installation. To install the top ledge, center the top ledge over the panel, with the bulging portion of the top ledge outside the pool (see illustration A). Position the top ledge on an angle in order for the hook inside the top ledge to catch the edge on the top of the panel. In the straight section, you will also have to install the small top ledge (refer to step 24). Once the hook is in position, rotate back the ledge on top of the panel. Again, make sure the top ledge is centered on top of the panel. Using a self-drilling screw Pan Phillips Drilling SST # 10-16x5/8, lock the top ledge in place on the panel on each side. 71
72 I N S TA L L AT I O N STEP 45 Install the small top ledges similar to the way you install them in the straight section of the pool. 72
73 I N S TA L L AT I O N STEP 46 INTERIOR EXTERIOR Hook the ledge cover over the ledge union, starting from outside the pool and finish inside the pool. Do the same with the straight ledge cover in the straight sections. 73
74 INSTALLATION STEP 47 Small Top Ledge Small Top Ledge Round section Straight to round section Straight section Tuck the ledge cover sides into the groove in the ledge union. 74
75 I N S TA L L AT I O N STEP 48 Hook the ledge cover at the corners over the ledge union, starting from outside the pool and finish inside the pool. 75
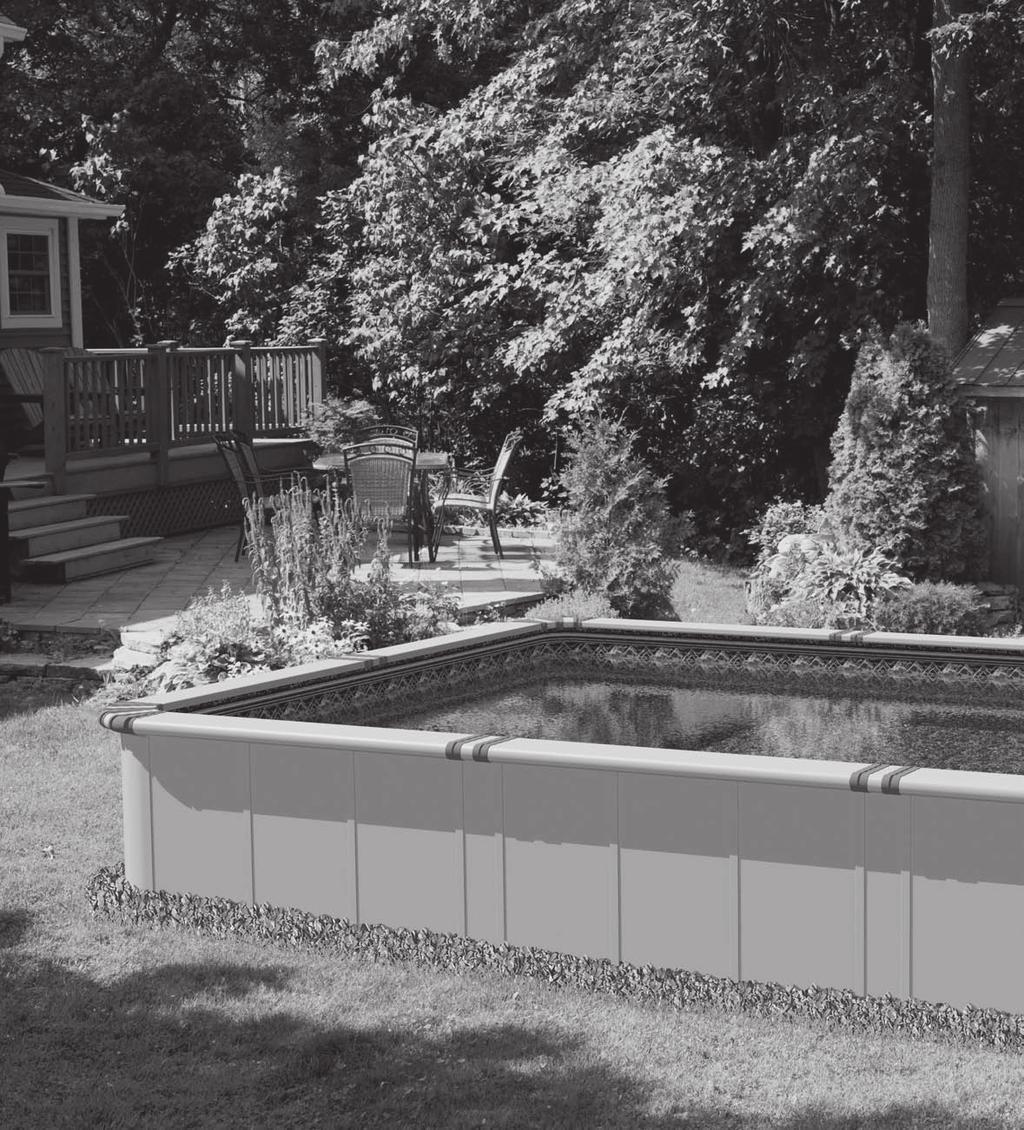
76 INSTALLATION STEP 49 This is how your brand new EZ Panel pool should look like once completed. There are different installation options: Aboveground Semi-Inground Inground Depending on the installation type selected, same parts are optional (i.e. cosmetic panels). 76
77 POOL SAFETY & MAINTENANCE Important Pool Safety & Maintenance Keep your pool wall and frame clean. Always wash away any deposits of pool chemicals that land on the frame of your pool. Wash periodically with a mild soap solution (no abrasives). At least once a year use a clear non-yellowing household wax on all metal components. Your pool and liner must be inspected regularly for leaks, corrosion, scratches, and punctures. If any problem is found IMMEDIATE CORRECTIVE ACTION MUST BE TAKEN. Small repairs and punctures in your liner may be easily repaired using repair kits available at your local dealer. Scratches on your pool wall and frame must be touched up with anti-rust enamel. Wire brush all rust and add a coat of enamel primer followed by a coat of color matching paint. Pool water is full of various caustic chemicals, which will corrode metal parts. If any corrosion is allowed to continue, failure of the pool structure may occur which could result in excessive property damage as well as bodily harm. The area around and below the skimmer must be carefully and regularly inspected. If these areas are wet, and remain wet for any length of time, it usually means there is a small leak. Skimmer/skimmer return gaskets must be replaced when they become defective. Water must not be permitted to continually run down the wall, if neglected, the pool will break. If proper skimmer/skimmer return gasket care is not maintained, your warranty will be void! Be sure to follow all local and state safety regulations when installing any accessory to your pool. Any decks and all entries must be carefully monitored for safety. Installing any other manufacturer s deck or slide is strictly forbidden! Winterizing Your Pool During the winter your pool is subject to more stress than in the summer, and any breakage that is caused by incorrect winter procedures is not covered by any warranty with this company. All of our pools and liners are designed to be left up all winter, but nonetheless are subject to the warranty of the liner being purchased. Continue to chlorinate and filter until the pool is closed down. Before closing down your pool for the winter you must make a complete inspection of the pool: Check all the connections to make sure everything is tight and in good condition Check to see that the liner is snugly held in place over the wall. Check for any indication of rust or deterioration in any part. IF ANY OF THE ABOVE IS FAULTY YOU MUST CORRECT THE SITUATION IMMEDIATELY Lower the level of water to about one foot below the skimmer intake and return holes. Throughout the winter you must continually check this level, as it must not reach the skimmer holes at any time during the winter. During the winter the pool requires the use of an equalizer to allow for the expansion and contraction that occurs when ice is formed and to hold the cover up. This can be a product manufactured for this express purpose and is available at your swimming pool dealer. The use of a winterizing agent will simplify the start-up of your pool next season. A cover designed for winter use is also recommended to keep pressure on the equalizer so it is forces into the water, keep dirt out and at the same time, serve as a safety cover. If your skimmer is supplied with a winter plate and cap you must still follow the same steps as above. It is essential that no water be allowed to run down the wall for any period of time. If your skimmer did not come with a winter plate, it is available at a nominal charge from your dealer and it is recommended. 77
78 WINTER RULES Important Winter Rules After your pool has been winterized and all steps carefully followed, the following checks and procedures must be strictly adhered to during fall, winter and spring seasons. Your pool warranty will be invalid if the pool has been improperly winterized and the following procedures have not been strictly followed. Pools that have been incorrectly winterized have been known to collapse under the tremendous pressures exerted by ice and snow. A pool that is left up during the freezing temperatures must not be allowed to leak. It is not uncommon for a leak to develop during rigorous summer usage and go undetected. What is thought to be water loss due to evaporation or spillage may be caused by a small leak. Persistent wet areas around the pool should be inspected. To determine if your pool is leaking, mark the liner at the water level and closely observe the water level in the pool for a period of days after the pool is closed for the season. Any rain during this period may compensate for any undetected water leakage. Therefore, if rain occurs, the observation period must be extended to find any leaks. Maintain a strict leak inspection schedule throughout fall, winter, and spring months. Spring thawing, which frequently leads to ground heaving, can be especially dangerous if care is not taken. Maintain a strict inspection of the inner skimmer housing to see that water is not leaking at the gasket. If the skimmer was not removed, water should not be allowed to collect in the skimmer housing as the water will freeze and crack the housing, causing possible damage to the wall. Should ice, or anything else, cut your pool liner allowing the pool to empty, be sure to release the cover thereby removing the weight from the top of your pool. Failing to do so can cause your pool to collapse. Consult your pool dealer for the proper winter chemicals for quick spring start-up. As the ground freezes and thaws over the course of the winter, the ground sometimes sinks. The liner, with the weight of the ice and snow on it, may also sink. When this happens, the liner may be pulled out of its coping. Be sure to pull off all excess snow and ice from the winter cover. Do not permit ice skating or horseplay during the winter as this can cause pool and liner damage, as well as, serious injuries. 78
Installation guide. GT 1100 Model - ROUND
 Installation guide GT 1100 Model ROUND WARNING WARNING THIS POOL IS NOT DESIGNED FOR DIVING OR JUMPING. DANGEROUS INJURY CAN RESULT SHALLOW WATER!!! Follow All Safety and Maintenance Instructions Your
Above Ground Pool Assembly & Installation
 P/N 95-0734 Above Ground Pool Assembly & Installation ROUND SLAT WALL WA R N I N G : THIS IS NOT DESIGNED FOR DIVING OR JUMPING. DANGEROUS INJURY CAN RESULT - SHALLOW WATER!!! Your pool is designed for
DANGER!! IMPORTANT NOTICE! READ BEFORE INSTALLATION
 Safety Information Your pool is designed for years of pleasurable, safe family fun. But when used incorrectly, a swimming pool can be dangerous. To insure your pool is used safely, you MUST observe the
MATRIX OVAL YARDMORE POOL INSTRUCTIONS
 V P/N 95-0432 03/08 MATRIX OVAL YARDMORE POOL INSTRUCTIONS Your pool is designed for years of pleasurable, safe, family fun. But, when used incorrectly, a swimming pool can be dangerous. To insure your
Round pool 52 (1,32m)
") Round pool 52 (1,32m) www.aquabois.com above ground or semi-inground Instructions for the assembly and installation of a wood pool Dear client, Congratulations, you have purchased a pool of superior quality
Round pool 52 (1,32m) www.aquabois.com above ground or semi-inground Instructions for the assembly and installation of a wood pool Dear client, Congratulations, you have purchased a pool of superior quality
Above Ground Pool Assembly & Installation
 P/N 95-0735 Above Ground Pool Assembly & Installation OVAL SLAT WALL POOL WA R N I N G : THIS POOL IS NOT DESIGNED FOR DIVING OR JUMPING. DANGEROUS INJURY CAN RESULT-SHALLOW WATER!!! Your pool is designed
ABOVE GROUND POOL SAFETY
 P/N 95-0734 EXCURSION ABOVE GROUND ROUND SLAT INSTRUCTIONS ABOVE GROUND SAFETY WARNING FAILURE TO HEED THESE WARNINGS CAN RESULT IN PERMANENT INJURY, PARALYSIS FROM A BROKEN NECK, ELECTROCUTION OR DROWNING.
Pool Component Installation Manual. A. Introduction to Installing your Pool
 SECTION 1 Pool Component Installation Manual General Instructions A All Round Pools Part No. 1920283 rev. 4 A. Introduction to Installing your Pool Read all instructions completely before you begin. These
WARNING! Safety Information
 LIBERTY WARNING! Safety Information Your pool is designed for years of pleasurable, safe family fun. But when used incorrectly, a swimming pool can be dangerous. To insure your pool is used safely, you
INSTALLER: Once the installation of the pool is complete, it is important to give this document to the customer in person.
 A ECHO Dear Customer Congratulations! You have purchased a pool of superior quality and durability. To achieve the best possible results, follow the instructions carefully. Failure to follow the installation
C Capri/Zephyr. INSTALLER: Once the installation of the pool is complete, it is important to give this document to the customer in person.
 C Capri/Zephyr Bora/Brisa Dear Customer Congratulations! You have purchased a pool of superior quality and durability. To achieve the best possible results, follow the instructions carefully. Failure to
Relaxing Meadow ABOVE GROUND POOL ROUND INSTALLATION MANUAL
 Relaxing Meadow ABOVE GROUND POOL ROUND INSTALLATION MANUAL 95-0443 02.16 ABOVE GROUND POOL SAFETY PLEASE READ BEFORE INSTALLATION warning FAILURE TO HEED THESE WARNINGS CAN RESULT IN PERMANENT INJURY,
REPRIEVE INSTALLATION MANUAL ROUND POOL 09.15
 95-0443 REPRIEVE INSTALLATION MANUAL ROUND POOL 09.15 48 PREP-48SSPSSN1 Product Description: Product Code: Reprieve Round PREP-48SSPSSN1 Quantity Required for Installation (by Pool Size) Index# Description
Aboveground Pool Installation Manual
 97-0753 Aboveground Pool Installation Manual Thismanual must be left with the pool owner www.wilbargroup.com Section 1 GENERAL INSTRUCTIONS ROUND POOL GROUND PREPARATION Safety Rules for Pool Owners Your
Relaxing Meadow ABOVE GROUND POOL OVAL INSTALLATION MANUAL
 Relaxing Meadow ABOVE GROUND POOL OVAL INSTALLATION MANUAL 95-0444 02.16 ABOVE GROUND POOL SAFETY PLEASE READ BEFORE INSTALLATION warning FAILURE TO HEED THESE WARNINGS CAN RESULT IN PERMANENT INJURY,
To purchase replacement parts and accessories, or to obtain technical assistance, visit:
 IMPORTANT Read this guide and follow all instructions carefully before assembling or using this product. To purchase replacement parts and accessories, or to obtain technical assistance, visit: www.splasharoundpools.com
Saltwater Series SALTWATER 8000 INSTALLATION MANUAL ROUND POOL 01.16
 Saltwater Series SALTWATER 8000 INSTALLATION MANUAL ROUND POOL 0.6 Above Ground Pool SAfety PleASe read before installation warning Failure to heed these warnings can result in permanent injury, paralysis
Sharkline Deluxe ABOVE GROUND POOL ROUND INSTALLATION MANUAL
 Sharkline Deluxe ABOVE GROUND POOL ROUND INSTALLATION MANUAL 95-0443 02.16 ABOVE GROUND POOL SAFETY PLEASE READ BEFORE INSTALLATION warning FAILURE TO HEED THESE WARNINGS CAN RESULT IN PERMANENT INJURY,
ROUND ASSEMBLY. Positioning
 ROUND ASSEMBLY Positioning To ensure maximum enjoyment and efficiency, consider the following steps when selecting the desired location of you pool. Select a location that receives maximum sunlight for
Pool Component Installation Manual. A. Introduction to Installing your Pool
 SECTION 1 Pool Component Installation Manual General Instructions A All Round Pools Part No. 1920283 rev. 4 A. Introduction to Installing your Pool Read all instructions completely before you begin. These
This manual must be left with the pool owner. Pool Component Installation. Safety Rules For Pool Owners
 This manual must be left with the pool owner Pool Component Installation SECTION 1 Manual General Instructions A All Round Pools Part No. 1920283 rev. 4 Safety Rules For Pool Owners Your pool contains
DELUXE ABOVE GROUND POOL. Installation Guide
 DELUXE ABOVE GROUND POOL Installation Guide : : For your safety, your pool is not designed for diving and/or jumping in head first. Please do not dive. Diving may result in permanent injury or death. INSTALLER:
SALTWATER 8000 INSTALLATION MANUAL YARDMORE OVAL POOL
 Saltwater Series SALTWATER 8000 INSTALLATION MANUAL YARDMORE OVAL POOL 0.6 Above Ground Pool SAfety PleASe read before installation warning Failure to heed these warnings can result in permanent injury,
V Montego POOL MODEL INSTALLATION MANUAL - OVAL POOLS 11.13
 V35042 Montego POOL MODEL INSTALLATION MANUAL - OVAL POOLS.3 Above Ground Pool Safety Please read before installation warning Failure to heed these warnings can result in permanent injury, paralysis from
T A POOL ASSEMBLY AND INSTALLATION MANUAL. Above Ground Aluminum Delta Sheetwall Oval Pools
 T3667-60A POOL ASSEMBLY AND INSTALLATION MANUAL Above Ground Aluminum Delta Sheetwall Oval Pools Note: Deck and fence accessories shown are optional. THIS MANUAL EXPLAINS THE CORRECT METHOD TO ASSEMBLE
GT 1100 model. Semi in-ground. Versatility Redefined
 GT 1100 model Semi in-ground Versatility Redefined no pool looks like it no pool performs like it There s simply no pool like the GT 1100 EZ Panel Pool TM. No in-ground pool so affordable. No semi in-ground
ABOVE GROUND POOL SAFETY
 ABOVE GROUND ROUND POOL INSTRUCTIONS ABOVE GROUND POOL SAFETY WARNING FAILURE TO HEED THESE WARNINGS CAN RESULT IN PERMANENT INJURY, PARALYSIS FROM A BROKEN NECK, ELECTROCUTION OR DROWNING. THIS POOL IS
Installing the Top Rails & Verticals
 Additional Installation Information Important Read Me First For Esprit Round Pools SECTION 4 Esprit Round Pools Part No. 1920717 rev. 0 Installing the Top Rails & Verticals When you come to Section 4,
SAVE THESE INSTRUCTIONS DEALER/INSTALLER: GIVE TO HOMEOWNER OCEAN BLUE ABOVE GROUND POOL LADDERS
 SAVE THESE INSTRUCTIONS DEALER/INSTALLER: GIVE TO HOMEOWNER OCEAN BLUE ABOVE GROUND POOL LADDERS ASSEMBLY AND INSTALLATION MANUAL FOR A-FRAME AND INPOOL LADDERS A-FRAME Part No. 400100 PROUDLY MADE IN
V35047 INSTALLATION MANUAL - CHANNEL LOK II OVAL POOLS POOL MODEL - Caribbean 11.13
 V35047 INSTALLATION MANUAL - CHANNEL LOK II OVAL POOLS POOL MODEL - Caribbean 11.13 Above Ground Pool Safety Please read before installation warning Failure to heed these warnings can result in permanent
EZ Set Ice Rink- 200 & 400 Owner s Manual
 EZ Set Ice Rink- 200 & 400 Owner s Manual WWW.RAVESPORTS.COM Copyright 2017 All rights reserved. No part of this publication may be reproduced or transmitted in any form or by any means, electronic or
V35034 INSTALLATION MANUAL
 V35034 INSTALLATION MANUAL BRACELESS OVAL POOLS INSPIRATION REGENCY (STR/RTR/LX) 0.7 ABOVE GROUND POOL SAFETY PLEASE READ BEFORE INSTALLATION warning FAILURE TO HEED THESE WARNINGS CAN RESULT IN PERMANENT
Universal Elevator Mount Owners Manual Customer Service Center N53 W24700 South Corporate Circle Sussex, WI U.S.A.
 REQUIRED TOOLS AND MATERIALS: 2 Capable Adults Carpenter s Level 15 Tape Measure Pencil Universal Elevator Mount Owners Manual Customer Service Center N53 W2400 South Corporate Circle Sussex, WI 530 U.S.A.
LoneStar Fiberglass Pools. Do-It-Yourself. Installation Manual
 LoneStar Fiberglass Pools Do-It-Yourself Installation Manual Chris 1/3/2008 Do-It-Yourself The installation of a LoneStar Fiberglass pool is a much simpler task than most people think. What is important
V35032 IMPRESS POOL MODEL INSTALLATION MANUAL - OVAL POOLS
 V35032 IMPRESS POOL MODEL INSTALLATION MANUAL - OVAL POOLS 5.3 Above Ground Pool Safety Please read before installation warning Failure to heed these warnings can result in permanent injury, paralysis
V35038 REVELATION-IMPULSE-PANACHE POOL MODEL INSTALLATION MANUAL - OVAL POOLS G:\RnD\01-Projets\Révélation\Revelation 15x22light 2D.
 G:\RnD\0-Projets\Révélation\Revelation 5x22light 2D.3dm V35038 REVELATION-IMPULSE-PANACHE POOL MODEL INSTALLATION MANUAL - OVAL POOLS.3 Above Ground Pool Safety Please read before installation warning
St. Kitts 54" Round Pools
 St. Kitts 54" Round Pools Installation Instructions 573-3774/0317 Installation Instructions HOW TO USE THESE INSTRUCTIONS Be sure to read these instructions completely before beginning assembly or installation.
THE VORTEX SLIDE OWNER S MANUAL
 THE VORTEX SLIDE OWNER S MANUAL CORPORATE HEADQUARTERS WESTERN SALES AND MANUFACTURING PLANT P.O. Box 400 1017 SW Berg Parkway Canby, Oregon 97013 Phone: (503) 266-2231 Fax: (503) 266-4334 www.srsmith.com
CamRT Sun Top Bimini Installation Instructions
 CamRT Sun Top Bimini Installation Instructions C910-07 & C910-08 Rev. 16-Jun-15 Information: info@roswellglobal.com Warranty: warranty@roswellglobal.com Questions? Please call us at (31) 638-1331 Setup:
Troyer s Gourd Rack 8 unit F R H O P
 B E A D I M-N L Vertical Parts F R H O P Horizontal Parts C G J Updated 11/16 Parts List A: Top of Pole B: Bottom of Pole C: 48 Ground Stake D: Top Perch rods 48 long E: Hub F: Rope Winder w/ attached
Evora ROUND ABOVE GROUND POOL INSTALLATION MANUAL V
 Evora ABOVE GROUND POOL ROUND INSTALLATION MANUAL V35076 03.17 ABOVE GROUND POOL SAFETY PLEASE READ BEFORE INSTALLATION warning FAILURE TO HEED THESE WARNINGS CAN RESULT IN PERMANENT INJURY, PARALYSIS
Cool Springs and Clarksville store call Cookeville store call Bowling Green store call
 Welcome to the Pool & Spa Depot family! The following guide is to help you understand what's involved in building your new above ground pool. Your above ground pool installation will require the following
Why Choose A Polymer Wall Swimming Pool?
 WHY CHOOSE A WHY CHOOSE A Why Choose A Polymer Wall Swimming Pool? 3 4 CHAPTER 6 10 13 15 INTRODUCTION 1 What exactly is a Package Pool and More Specifically a Polymer Wall Swimming Pool? CHAPTER 2 The
V35013 REFLEXION INSTALLATION MANUAL ROUND POOL
 V35013 REFLEXION INSTALLATION MANUAL ROUND POOL 10.14 Above Ground Pool Safety Please read before installation warning Failure to heed these warnings can result in permanent injury, paralysis from a broken
OUTDOOR BACKSTOP WITH 5'-0" EXTENSION
 INSTALLATION INSTRUCTIONS OUTDOOR BACKSTOP WITH 5'-0" EXTENSION NoUU. 00175- _ READ ALL INSTRUCTIONS THOROUGHLY BEFORE ATTEMPTING TO INSTALL THIS EQUIPMENT. INSTALLATION / ASSEMBLY OF THIS EQUIPMENT MUST
KERSPLASH POOL CLIMBING WALL INSTALLATION INSTRUCTIONS
 TOLL FREE: 1-800-476-7366 VOICE 651-665-9131 FAX 651-665-9130 EMAIL: INFO@POOLCLIMBINGWALLS.COM EVERLAST CLIMBING 1335 MENDOTA HEIGHTS ROAD MENDOTA HEIGHTS, MN 55120 2012 EVERACTIVE BRANDS Congratulations!
V35042 INSTALLATION MANUAL
 V35042 INSTALLATION MANUAL BRACELESS OVAL POOLS ZENITH CAMILIA ENIGMA SIMBIO VECTRA MAGNUS OHANA 0.7 ABOVE GROUND POOL SAFETY PLEASE READ BEFORE INSTALLATION warning FAILURE TO HEED THESE WARNINGS CAN
P/N S OVAL POOL INSTALLATION MANUAL
 P/N 39184 S OVAL POOL INSTALLATION MANUAL ABOVE GROUND POOL SAFETY PLEASE READ BEFORE INSTALLATION warning FAILURE TO HEED THESE WARNINGS CAN RESULT IN PERMANENT INJURY, PARALYSIS FROM A BROKEN NECK, ELECTROCUTION
General Instructions
 This manual must be left with the pool owner Pool Component Installation SECTION 1 Manual General Instructions Safety Rules or Pool Owners Channel Lok-I Oval Pools Part No. 1920586 rev. 1 Your pool contains
V35046 INSTALLATION MANUAL - ROUND POOLS POOL MODEL - Caribbean 11.13
 V35046 INSTALLATION MANUAL - ROUND POOLS POOL MODEL - Caribbean 11.13 Above Ground Pool Safety Please read before installation warning Failure to heed these warnings can result in permanent injury, paralysis
THE VORTEX SLIDE OWNER S MANUAL
 THE VORTEX SLIDE OWNER S MANUAL CORPORATE HEADQUARTERS WESTERN SALES AND MANUFACTURING PLANT P.O. Box 400 1017 SW Berg Parkway Canby, Oregon 97013 Phone: (503) 266-2231 Fax: (503) 266-4334 www.srsmith.com
Saltwater Series SALTWATER LX INSTALLATION MANUAL ROUND POOL 01.16
 Saltwater Series SALTWATER LX INSTALLATION MANUAL ROUND POOL 01.16 ABOVE GROUND POOL SAFETY PLEASE READ BEFORE INSTALLATION warning FAILURE TO HEED THESE WARNINGS CAN RESULT IN PERMANENT INJURY, PARALYSIS
Big Ride ASSEMBLY AND INSTALLATION INSTRUCTIONS * * C A U T I O N * *
 Big Ride ASSEMBLY AND INSTALLATION INSTRUCTIONS * * C A U T I O N * * S.R. SMITH BIG RIDE SLIDES ARE MANUFACTURED FOR INSTALLATION AND USE ON INGROUND SWIMMING POOLS ONLY. THE BIG RIDE IS NEVER TO BE INSTALLED
V35009 INSTALLATION MANUAL - ROUND POOLS POOL MODEL - LIBERTY-ELIXIR-LEGEND
 V35009 INSTALLATION MANUAL - ROUND POOLS POOL MODEL - LIBERTY-ELIXIR-LEGEND 11.13 Above Ground Pool Safety Please read before installation warning Failure to heed these warnings can result in permanent
General Instructions
 This manual must be left with the pool owner Pool Component Installation SECTION 1 Manual General Instructions Safety Rules For Pool Owners Gibraltar Oval Pools Part No. 1920585 rev. 0 Your pool contains
Private Swimming Pool Permit Application
 Private Swimming Pool Permit Application Pool Address: Legal: Lot: Block: Plan: Subdivision: Applicant Information: Are you also the primary contact? Yes No Name: Address: Postal Code: Phone: Email Address:
Lomart TRIMLINE OVAL POOLS POOL ASSEMBLY AND INSTALLATION INSTRUCTIONS
 Lomart TRIMLINE OVAL POOLS POOL ASSEMBLY AND INSTALLATION INSTRUCTIONS THINK SAFETY FIRST Safe and correct use of your new Lomart pool means swimming and wading only. DO NOT DIVE OR JUMP! The above-ground
Step 1. PLANNING FOR THE INSTALLATION TOOLS REQUIRED
 Installation Guide Fiji Step 1. PLANNING FOR THE INSTALLATION TOOLS REQUIRED In planning for the installation of a new Viking pool, there are many important considerations that must be evaluated in order
Excursion ABOVE GROUND POOL OVAL SLAT INSTALLATION MANUAL
 Excursion ABOVE GROUND POOL OVAL SLAT INSTALLATION MANUAL 95-0735 02.16 ABOVE GROUND POOL SAFETY PLEASE READ BEFORE INSTALLATION warning FAILURE TO HEED THESE WARNINGS CAN RESULT IN PERMANENT INJURY, PARALYSIS
BP48-1 AND SSP48-1 IN-GROUND POST INSTALLATION INSTRUCTIONS
 BP48-1 AND SSP48-1 IN-GROUND POST INSTALLATION INSTRUCTIONS WARNING: THIS IN-GROUND POST IS NOT DESIGNED FOR USE WITH AN LP GAS CYLINDER. WARNING: SEE YOUR GRILL OWNER S MANUAL FOR PROPER LOCATION, MINIMUM
275 RID Assembly Instructions
 75 RID Assembly Instructions Part No. 0003003 v. Lscsep0 PARTS LIST (Specifications and contents subject to change without notice) Description Part # A. RID Track...0000050 B. Capacity Plate...0053 C.
Edge ROUND ABOVE GROUND POOL INSTALLATION MANUAL V
 Edge ABOVE GROUND POOL ROUND INSTALLATION MANUAL V35037 03.17 ABOVE GROUND POOL SAFETY PLEASE READ BEFORE INSTALLATION warning FAILURE TO HEED THESE WARNINGS CAN RESULT IN PERMANENT INJURY, PARALYSIS FROM
Instruction Manual for ZY-021 Height adjustable Acrylic Backboard with Chain net
 Instruction Manual for ZY-021 Height adjustable Acrylic Backboard with Chain net WARNING: IMPROPER INSTALLATION OR SWINGING ON THE RING MAY CAUSE SERIOUS INJURY OR DEATH Notice to assemblers: All basketball
Splash Guard Technology ATTENTION CUSTOMER: STATEMENT OF LIMITED WARRANTY
 DISTRIBUTED BY: POLYGROUP LIMITED (MCO) Avenida Xian Xing Hai, Edificio Zhu Kuan, 11 Andar M, Macau Customer Service Representative: General Foam Plastics Corporation (800) 813-0206 www.polygroup.com PRO-SERIES
7 & 9 Top Rail Pool Series 52 and 54 Oval Pools
 1989 560-1041 WARNING NO DIVING! Shallow water. You can be permanently injured. Copyright 7 & 9 Top Rail Pool Series 52 and 54 Oval Pools Installation Instructions 573-4036 Installation Instructions HOW
SASK-A-POLE OWNERS AND USERS MANUAL
 SASK-A-POLE OWNERS AND USERS MANUAL GENERAL INFORMATION The Saskatchewan Abilities Council s Sask-a-Pole accessibility and transfer aid is designed to help provide safe and easy access to chairs, beds,
InstallatIon and owner s InstrUCtIons
 InstallatIon and owner s InstrUCtIons Wall Mount Series Adjustable and Fixed Height Goal Systems table of Contents Safety Instructions... 2 Goal Specifications... 3 Frame Attachment... 4 Frame Assembly
VOLLEYBALL SPIKE TRAINER. Assembly Instructions. Owner s Manual. Model # VST-100. Club Volleyball Gear WARNING
 VOLLEYBALL SPIKE TRAINER Model # VST-100 Assembly Instructions Owner s Manual WARNING To ensure safety, do not attempt to assemble this system without following all instructions carefully. Check entire
AMITY TWP POOL REQUIREMENTS
 AMITY TWP POOL REQUIREMENTS Construction In-ground, Above-ground and Storable pools and Spas shall be designed and constructed in conformance with International Swimming Pool & Spa Code (ISPSC) Location
NEXT GENERATION FLEX FENCE
 NEXT GENERATION FLEX FENCE Area To Be Fenced.. With Next Generation Flex Fence any post that is not in a straight line with another post must be braced. Layout your fence installation. Determine all end
POOL FENCE STARTER KIT INSTALLATION MANUAL WARNING! ADULT ASSEMBLY ONLY DESIGNED FOR ASSEMBLY ON GRASS
 POOL FENCE STARTER KIT Complies with Australian Standard, AS1926.1-2012: Safety barriers for swimming pools INSTALLATION MANUAL Pool not included DESIGNED FOR ASSEMBLY ON GRASS WARNING! ADULT ASSEMBLY
GENERAL INSTRUCTIONS Oval Pool. for regular installation
 V Text / Full Color Version GENERAL INSTRUCTIONS Oval Pool for regular installation ABOVE POOL SAFETY PLEASE READ BEFORE INSTALLATION FAILURE TO HEED THESE WARNINGS CAN RESULT IN PERMANENT INJURY, PARALYSIS
THE TURBOTWISTER TM SLIDE OWNER S MANUAL
 THE TURBOTWISTER TM SLIDE OWNER S MANUAL CORPORATE HEADQUARTERS WESTERN SALES AND MANUFACTURING PLANT P.O. Box 400 1017 SW Berg Parkway Canby, Oregon 97013 Phone: (503) 266-2231 Fax: (503) 266-4334 www.srsmith.com
Installation of Nylon Putting NP50
 Installation of Nylon Putting NP50 1. Layout of Green and Existing Ground Preparation Step 1: Determine the size and shape of your green as well as any chipping stations and/or sand traps. Step 2: Measure
Model: LG IP CL ADULT SUPERVISION REQUIRED
 420969 Model: LG IP CL 313 Regina Avenue Rahway, NJ 07065-4891 732-574-1500 GENERAL Before you start, check to see that you have the correct number of parts. Use the packing list on the next page. Carefully
CORPORATE HEADQUARTERS WESTERN SALES AND MANUFACTURING PLANT P.O.
 SLIDE OWNERS MANUAL CORPORATE HEADQUARTERS WESTERN SALES AND MANUFACTURING PLANT P.O. Box 400 1017 SW Berg Parkway Canby, Oregon 97013 Phone: (503) 266-2231 Fax: (503) 266-4334 www.srsmith.com 06-821 S.R.
V35041 MAGNUS RTR POOL MODEL INSTALLATION MANUAL - ROUND POOLS
 V35041 MAGNUS RTR POOL MODEL INSTALLATION MANUAL - ROUND POOLS 11.13 Above Ground Pool Safety Please read before installation warning Failure to heed these warnings can result in permanent injury, paralysis
Trilogy Theory of Operation
 INSTALLATION & OVERVIEW... 2 Load Height... 2 Approach Angle... 2 Footprint... 3 Protrusion... 3 Mounting the... 4 General Torque Specs... 4 OPERATION OF BIKE RACK... 5 Loading Bikes... 5 Unloading Bikes...
MODEL #7100X A-FRAME LADDER
 SAVE THESE INSTRUCTIONS DEALER/INSTALLER: GIVE TO HOMEOWNER MODEL #7100X A-FRAME LADDER LADDER MUST BE ATTACHED TO POOL FRAME... DO NOT USE WITH INFLATABLE POOLS ASSEMBLY AND INSTALLATION MANUAL The Anti-Entrapment
UNIVERSAL INSTRUCTIONS BRACED OVAL POOLS
 UNIVERSAL INSTRUCTIONS BRACED OVAL POOLS PLEASE READ THESE INSTRUCTIONS CAREFULLY AND THOROUGHLY BEFORE STARTING GROUND PREPARATION AND POOL ASSEMBLY. DOING SO WILL PREVENT PROBLEMS. Oval Pool: General
SERIES 2 RAMP OWNER S MANUAL TOOLS REQUIRED: BEFORE YOU BEGIN... Read and understand these instructions before beginning a ramp setup.
 SERIES 2 RAMP OWNER S MANUAL BEFORE YOU BEGIN... Read and understand these instructions before beginning a ramp setup. Use caution and care for your back when lifting, pushing, pulling, folding or unfolding
WARNING! ADULT ASSEMBLY ONLY
 POOL FENCE EXPANSION KIT Complies with Australian Standard, AS1926.1-2012: Safety barriers for swimming pools WARNING! ADULT ASSEMBLY ONLY PACKAGE CONTENTS: Part A - 1 x 30cm LONG POST SECTION Part B 1
Safe Installation Procedures and Care Manual Meyco Safety Pool Covers
 Safe Installation Procedures and Care Manual Meyco Safety Pool Covers Meyco Products relies on the experience and knowledge of pool professionals to properly install our products. Damage that occurs to
Tripod Series OPERATOR S MANUAL
 Tripod Series OPERATOR S MANUAL #1630 - Solo 75 2-Stage Tripod (Alloy) #1501 - Solo 75 2-Stage Tripod #2001 - Solo 75 3-Stage Tripod #1505 - Solo 100 3-Stage Tripod Features and Controls 75mm Bowl or 100mm
GRAVITY BIKE RACK ASSEMBLY & OPERATING INSTRUCTIONS
 GRAVITY BIKE RACK 94479 ASSEMBLY & OPERATING INSTRUCTIONS Due to continuing improvement, actual product may differ slightly from the product described herein. 3491 Mission Oaks Blvd., Camarillo, CA 93011
Owner s Manual. for. Manual Reel Mower. (Model MM-1)
") Owner s Manual for Manual Reel Mower (Model MM-1) Sunlawn, Inc. 325 Garfield Street Fort Collins, CO 80524 Tel: 970-493-5284 FAX: 970-493-5202 For service inquiries, parts replacement, and maintenance
Owner s Manual for Manual Reel Mower (Model MM-1) Sunlawn, Inc. 325 Garfield Street Fort Collins, CO 80524 Tel: 970-493-5284 FAX: 970-493-5202 For service inquiries, parts replacement, and maintenance
BALL STOP INSTALLTION GUIDE
 BALL STOP INSTALLTION GUIDE GROUND SLEEVE INSTALLATION: 1. Locate the exact location of the ground sleeve. NOTE: Maximum recommended pole spacing is 20 feet on center. 2. Excavate the pole footing; refer
Halsey Taylor Owners Manual STOP!
 Halsey Taylor Owners Manual 4710 Freeze Resistant Floor Mounted Steel Fountain STOP! PLEASE READ THE FOLLOWING INFORMATION. ITALLATION ITRUCTIO FOR THE 4710FR FTN. WITH 97243C SINGLE VALVE CONTROL ASSEMBLY
IMPORTANT: RECEIVING INSTRUCTIONS:
 Instruction Sheet Sidewinder Mechanical Bender IMPORTANT: RECEIVING INSTRUCTIONS: Visually inspect all components for shipping damage. If any shipping damage is found, notify carrier at once.shipping damage
1/2 METER FLYTE-DECK II FIBERGLASS STAND (6' BOARD) (8' BOARD) (10' BOARD)
 (8' BOARD) (10' BOARD)") 1/2 METER FLYTE-DECK II FIBERGLASS STAND 70-209-736 (6' BOARD) 70-209-738 (8' BOARD) 70-209-740 (10' BOARD) CAUTION ALL MINIMUM WATER ENVELOPE DIMENSIONS FOR RESIDENTIAL INGROUND SWIMMING POOLS MUST MEET
1/2 METER FLYTE-DECK II FIBERGLASS STAND 70-209-736 (6' BOARD) 70-209-738 (8' BOARD) 70-209-740 (10' BOARD) CAUTION ALL MINIMUM WATER ENVELOPE DIMENSIONS FOR RESIDENTIAL INGROUND SWIMMING POOLS MUST MEET
STATIONARY TRUCK INTERNAL HALYARD V-CLEAT FLAGPOLES FOR QUICK AND PROFESSIONAL INSTALLATION READ ALL INSTRUCTIONS BEFORE PROCEEDING
 9390 South 300 West, Sandy, Utah 84070 801-562-0123 800-782-0500 ColonialFlag.com STATIONARY TRUCK INTERNAL HALYARD V-CLEAT FLAGPOLES FOR QUICK AND PROFESSIONAL INSTALLATION READ ALL INSTRUCTIONS BEFORE
-- SGP (NOVA TEAM SQUARE)
") -- SGP-100 -- (NOVA TEAM SQUARE) Installation Instructions Call Jaypro Sports Equipment at 1-800-243-0533 during regular business hours for technical support. www.jaypro.com Rev-B Page 1 of 9 JAYPRO SPORTS
-- SGP-100 -- (NOVA TEAM SQUARE) Installation Instructions Call Jaypro Sports Equipment at 1-800-243-0533 during regular business hours for technical support. www.jaypro.com Rev-B Page 1 of 9 JAYPRO SPORTS
ATTENTION CUSTOMER: STATEMENT OF LIMITED WARRANTY
 DISTRIBUTED BY: GP LIMITED 8/F, Enterprise Square 3, 39 Wang Chiu Road, Kowloon Bay, Hong Kong Customer Service Representative: General Foam Plastics Corporation (800) 813-0206 www.genfoam.com ABOVE GROUND
accidents which arise due to non-observance of these instructions and the safety information herein. SPECIFICATIONS
 18 GAUGE 1-1/4 INCH BRAD NAILER Model: 7611 CALIFORNIA PROPOSITION 65 WARNING: You can create dust when you cut, sand, drill or grind materials such as wood, paint, metal, concrete, cement, or other masonry.
Owner s Manual. for. NaturCut. Model CLASSIC HD
 Owner s Manual for NaturCut Model CLASSIC HD Table of Contents Welcome... 1 Warranty... 1 Use of This Product... 1 Assembly... 2 Assembly Parts... 2 Assemble Handle Section... 2 Adjust Cutting Height...
SPECIFICATIONS. 1. Cover Locks measure approximately 7.5 (measured down from the top of the swim spa shell).
.") Axis Cover System (UNBOX AND VERIFY ALL COMPONENTS ARE PRESENT) 1qty - Axis Cover 2qty - X900198 Lever Channels c. 2qty - X900193 Top Handle of Rotating Lever Latch d. 2qty - X900194 Base of Rotating Lever
Axis Cover System (UNBOX AND VERIFY ALL COMPONENTS ARE PRESENT) 1qty - Axis Cover 2qty - X900198 Lever Channels c. 2qty - X900193 Top Handle of Rotating Lever Latch d. 2qty - X900194 Base of Rotating Lever
GENERAL INSTRUCTIONS Round Pool. for regular installation
 GENERAL INSTRUCTIONS Round Pool for regular installation ABOVE GROUND POOL SAFETY PLEASE READ BEFORE INSTALLATION FAILURE TO HEED THESE WARNINGS CAN RESULT IN PERMANENT INJURY, PARALYSIS FROM A BROKEN
Made in U.S.A. Narrow-U Bike Rack Heavy Duty Submittal Sheet. Materials: Finishes: Mount Options: Setbacks:
 Submittal Sheet Materials: 2 Schedule 40 Steel Pipe (2.375 OD) Finishes: Galvanized An after fabrication hot dipped galvanized finish is available Powder Coat Our powder coat finish assures a high level
Installation Instructions
 116-3027, 116-3017 X-Pando Adjustable Steel Protector Installation Instructions 1404 N. Marshall Ave. El Cajon CA. 92020 For technical support call us at (800) 368-3075 NB 6/28/10 607-0112 Step 1. Mounting
BPB26-1 AND SSPB26-1 PATIO BASE INSTALLATION INSTRUCTIONS
 BPB26-1 AND SSPB26-1 PATIO BASE INSTALLATION INSTRUCTIONS WARNING: THIS PATIO BASE IS NOT DESIGNED FOR USE WITH AN LP GAS CYLINDER. WARNING: SEE YOUR GRILL OWNER'S MANUAL FOR PROPER LOCATION, MINIMUM CLEARANCES,