TACTICS BOOK. Tactical tips for playing Strato-Football
|
|
|
- Abner Walsh
- 5 years ago
- Views:
Transcription
1 1
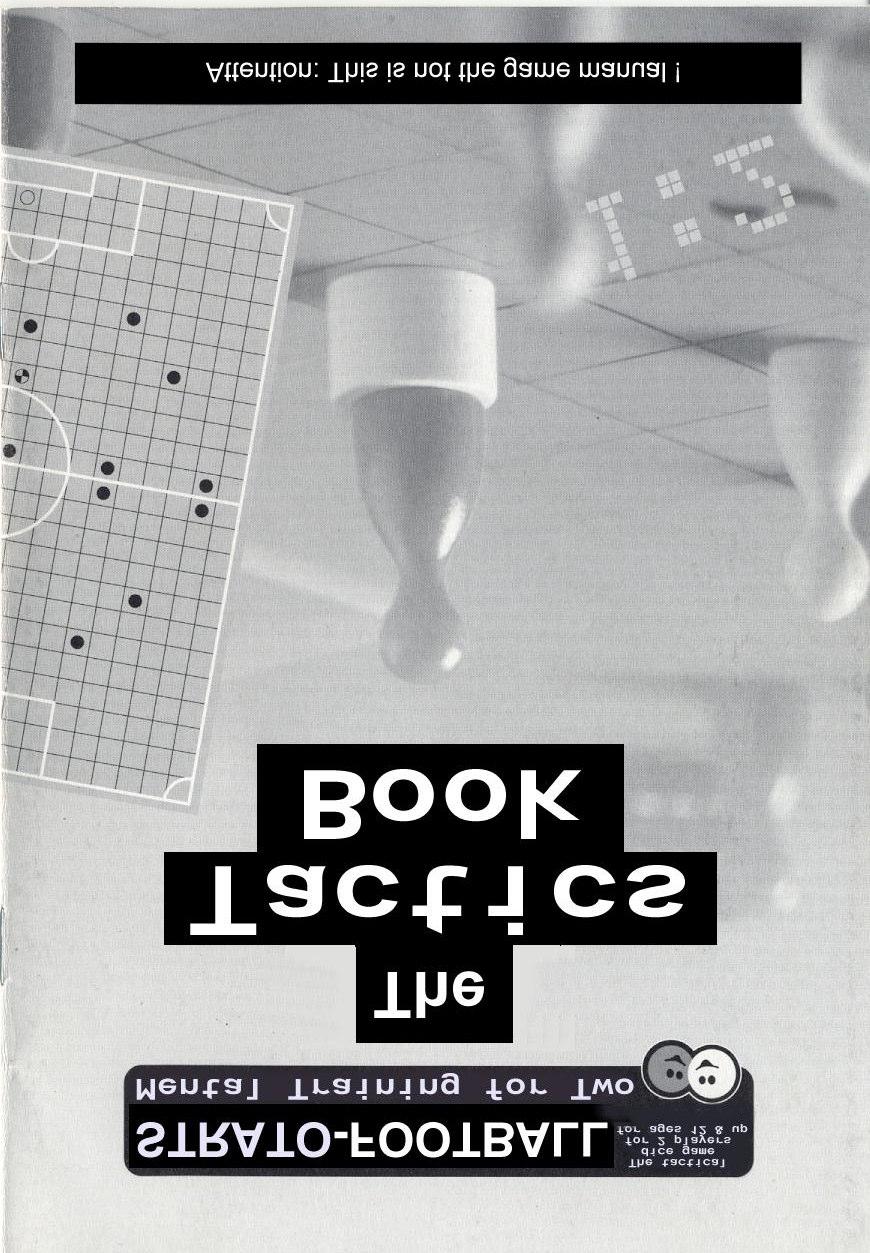
2 TACTICS BOOK Tactical tips for playing Strato-Football Preface Games of dice are games of luck. This is the opinion of many people and they are mostly right. But there are games of dice where players can take advantage with logical moves. Such a game is Strato-Football. A player gains experience and improves his game play each time he plays the game. With this book at hand I try to share the experiences I made during almost 29 years. Thus a game newcomer will become a good Strato-Football player even faster. Also players who played the game more often will hopefully find some tips and hints to become an even better player. There is no doubt that a game gets more interesting if the players are more experienced. Thus I wish all readers to gain experience and raise the fun that they will have with Strato-Football. If you never played Strato-Football before I recommend putting away this book temporarily. You should play some games to learn the basic aspects. After that you could even more take advantage of this tactics book. To get more understanding of the described examples in the game, I recommend to arrange the figures like described in the book and to replay the described moves and positions. And now have fun Walter Müller (2003) 2
3 Table of contents Preface...2 Signs and Symbols...5 Game Field...5 Terms and Definitions...6 Chapter 1 How to move to a field on the game board : What are target fields? : Tactical Basics for playing Strato-Football : Mistakes of Beginners : One or more figures are standing in the target field row : Utilising the corner : Bringing new figures to the target point row : Obstructing the opponent : The figure, which later can t run : Different target points in context...12 Chapter 2 Rows of Figures : Composition of figure rows : Composition of vertical rows in the own half : Vertical rows in the opposing half : Vertical rows at the side line : Removing old rows : Vertical rows with the opposing goal keeper : Parallel vertical rows : Horizontal rows : Parallel horizontal rows : Row crossings : Defense rows...18 Chapter 3 Attack : The ball possessing opposing figure will not always be attacked : Which figure is attacking? : Choosing the right field for your figure after an attack : In which direction your opponent wants to shoot the ball? : In which row your opponent wants to hold the ball? : Where should your opponent shoot the ball? : Influence of the side line for placing figures : A figure between the opponent and the own goal : Is there a parallel row beside the ball row? : Attacks at the side line : In which row you don t have enough figures? : Evade an opponent s attack : Make opposing attacks unlikely...23 Chapter 4 The Goal Keeper : The goal keeper is the most important figure in defense : Best positions for the goalkeeper : Defensive figures support the goalkeeper in front of the goal : Defensive figures support the goalkeeper beside the goal : Defensive figures should not obstruct their own goalkeeper : The goalkeeper outsde the penalty box : The goalkeeper could compensate a whole horizontal row...27 Chapter 5 Tactical Overview
4 5.1: To keep the entire playing field in your view : Uncovered opposing figures : To play with eleven figures : Leave defending figures in the back : Forwards have to watch : Game speed : Is it wise to shoot the ball to an unoccupied field? : Slowing down the game : Speeding up the game : Bad pass : Forced bad pass : Bad pass at own will : Shooting the ball out the game field...31 Chapter 6 The Psychology of the Game : Who will win a game of Strato-Football? : Oblivion : Think positive : Fear is a bad game partner : The one who rails will loose : The right environment : Game figures, fans, stadium : Tournaments...33 Summary History The Genesis of Strato-Football

5 Signs and Symbols In this book we have pictures of in game situations, which are using special symbols. The meaning of these symbols is as follows: red figure w/o ball red figure with ball red goal keeper ball on a field w/o figure yellow figure w/o ball yellow figure with ball yellow goal keeper target field Italics. In the following examples several moves are shown. Some moves are NOT recommendable. These moves are shown in italics. Game Field 5
6 Terms and Definitions Area Of Interest The Area of Interest is the area of the game board around the field with the ball. Attack Back An Attack is a move to the field with the ball. Back means the area around the own goal. Ball possession The figure, which stands on top of the ball, has the ball possession. Ball Line Field Figure Forward Horizontal lines Own half Row The Ball Line is the line where the ball is. There are always two ball lines: the horizontal and the vertical one. The game board has 20 times 24 fields. For referencing the fields are marked with letters and numbers. The figure G7 means the figure, which stands at the postion G7 on the example game board. For example: The figure at G7 has a dice roll result of. means The player has a dice roll result of and moves with his figure, which stands on the field G7. More often a much shorter text is used: G7 moves to B7. Forward means: at the opposing goal. Horizontal lines start at one sideline and are limited by the other sideline. There are 24 horizontal lines on the game board. In the examples they are marked with numbers (1-24). The own half of the game field is the half, where the own figures are placed at the beginning of the game. The Center Line is the border between the opposing and the own half. The own goal is the goal in the own half. The game board consists of several fields which are organized as rows. The game board has 20 vertical and 24 horizontal lines. Scoring chance A scoring chance is the possibility to shoot the ball into the opposing goal within the next move. Shot distance Target field / target point Vertical lines The shot distance is the maximum distance the ball can be shot. This distance is six fields long. The target field is the field where a figure wants to move to. A target field can be the field with the ball, a field where an opponent can be attacked at, a field where the opponent can be obstructed, or to take a better attacking position. Vertical lines start at one goal line and are limited by the other goal line. On the game board are 20 goal lines. In the examples they are marked with letters (A - T). 6
7 Chapter 1 How to move to a field on the game board 1.1: What are target fields? A game of Strato-Football means movement. The figures are moved around the game board, the ball moves between figures. The basic question of the game (which sometimes can t be answered easily) is: Where should I move my figures? Where is the right target field to move to? We have different types of target fields: θ The Ball. Each player is trying to get the ball. Only the player who has the ball can make goals and finally win the game. θ An opposing figure with the ball. A ball in possession can normally only be taken with an attack. For an attack a player has to reach the field of the opposing figure with the ball. So this field is an important target point. θ A good position. In Strato-Football you have to think ahead. The figures should be placed at strategical good positions. This is important for both: offense and defense (for example for obstructing an opposing figure). In the game the players are trying to reach several target points at the same time. So the players have to decide which target points are very important, important or less important. This evaluation will be described later. In Chapter 1 we only explain how to reach a specific target point in the fastest way. 1.2: Tactical Basics for playing Strato-Football In Strato-Football we use a standard dice with six faces with the digits to. The six faces are all the same size. This means that the probability to get a specific digit is the same for all digits. The longer a game takes, the more the count of each single digit will be the same. But there is no way to predict the next dice roll. So these statements direct us to the following consequence: To reach a target field fast, you should place your figures with different distances to the target point. Ideally you have six figures with different distances to the target field. In this case you can reach the target field for sure (independet of dice roll). Tactical Reminder: Place your figures in different distances to the target point. 1.3: Mistakes of Beginners If a figure is able to reach a target field, it is nonsense to move the figure to a field with a different distance to the target field. With this action you would not raise your chance, but only change it. It s better to move another figure nearby to raise your chance to get to the target field. (For this rule several exceptions exist. We discuss them later.) 7
. Now we can move from H6 to L6 or F6 to J6.")


8 1.4: One or more figures are standing in the target field row Figure 1: If two figures have the same distance to a target field, you have to move one of them to get a second possibility reaching the target field in the next move: We have a dice roll of. The target field would have only been reachable with a (only from field F6 or H6). Now we can move from H6 to L6 or F6 to J6. In both cases we have got a second possibility. The figures have now the distances, and, respectively. Figure 2: The same principle is working for two figures with the same distance but different directions to a target field. In Figure 2 we have a dice roll of. The player s figure moves from H6 to L6 or from G7 to G11. Moving from H6 to D6 or G7 to G3 is also possible. Figure 3: To get a second possibility you have to think about the highest possible dice roll of. So your figure should not be farther away as 6 fields of the target point. In Figure 3 we have a dice roll of. Now we move from F6 to L6. The target field is reachable now with a dice roll of or. It wouldn t have been a good move to go from H6 to N6, because N6 is seven fields away from the target field and therefore not reachable within the next move. 8
.")
.")
 possibility.")
9 Figure 4: It s a little more difficult if already three figures are in the area around the target field. In Figure 4 we have a dice roll of. The right moves would be L6 to M6 or F6 to E6. With these moves we have the distances, and to the target field. It would be wrong to move from L6 to K6 because we already have a figure with a distance of to the target field (G6). Figure 5: In some situations the tactical position of your figure can t be improved. The target field is reachable with a (from G7) or with a (from J6 or G9). We have a dice roll of. The possible moves from J6 to F6 and from G9 to G5 don t improve our situation, because we can t increase our number of possibilities (2). In this case we should improve a position of another figure in another area, which is more effective that a misspend move near the target point. Further Thinking Figure 6: We have a dice roll of. The right move for this is: P4 to J4. Only with a dice roll of, we can place the figure P4 near enough to the target field. With a next move of,, or we have a new (third) possibility. With or we reach the target field directly. It would have been wrong to move from C4 to I4 (with the ). We would have created two possibilities to reach the target field (with or ), but only with another we could increase our sum of possibilities (3). In the following move we couldn t have used dice rolls of, or effectively. 9
. : No improvement possible.")
10 Further Thinking Figure 7: Figure 7 shows that sometimes more distant figures should be fetched to the ball line, before we should give figures, which currently have equal distance to the target field, an unequal distance. We have a dice roll of : Like described above we could move from E6 to I6. The following moves would be: : Target field reached (from G6). : No improvement possible. : Target field reached (from I6). : No improvement possible, because the figure at I10 can t be moved to row 6 because it s obstructed with our own figure. : No improvement possible. : No improvement possible. We have four numbers (,, and ), where we can t improve our situation. Also the move from G6 to K6 would be possible (with a in figure 7). The following moves would be: : Target field reached (from E6). : No improvement possible. : Move from I10 to F10. With this move we get a third possibility to reach the target field. : Move from I10 to I6. With this move we get a third possibility too. : Target field reached (from K6). : No improvement possible. In this situation we only have two numbers, where no improvement is possible. The right move for the situation above would be I10 to I6. The following moves are: : Target field reached (from E6 or G6). : No improvement possible. : Target field reached (from I6). : Move from G6 to K6. With this move we get a third possibility. : Move from G6 to L6. With this move we get a third possibility. : Move from E6 to K6. With this move we get a third possibility. Only with a after the move from I10 to I6 no improvement is possible. So this move is definitely better than the move E6 to I6 or G6 to K6. So we come to the conclusion in Figure 7: First we should move a figure, which is not standing in the ball line, to the line with the ball. With this action we could improve our chances in the following moves. 10
. θ Directly from C3 to A3 with a.")
.")

11 1.5: Utilising the corner Figure 8: The figure at G3 is able to reach the target field with a. We have a dice roll of. Now we move from G3 to C3. With this move we now have to choices to get to the target field: θ Across the corner field with a (from C3 across C2, C1, B1, A1 and A2 to A3). θ Directly from C3 to A3 with a. definitely have a better situation. 1.6: Bringing new figures to the target point row Figure 9: To reach a target field, a minimum of one figure of your own has to be in that row of the target point (=target row). If this is not the case, you have to move a figure to that row, even if it is currently more than six fields away. We have a dice roll of. Now we move the figure at I6 to row 8. In the next move we will move our figure near the target field. With this move we will It would have been wrong to move with the figure at J6, because it the next move we could have had a dice roll of. Then the figure from J6 would have been to far away from the target field. So we wouldn t have created a new possibility. 1.7: Obstructing the opponent Figure 10: Often the opponent will also try reaching the same target point as you (e.g. to reach the ball). So in your thoughts you have not only to think about putting your figures at a better position, you have also to think about obstructing your opponent. In figure 10 the red player has the next move (round figures). We have a dice roll of. The right move is: F5 to F10. With this we have created a third possibility to reach the target field. At the same time your opponent is not able to move from F7 to the target point row. It would have been wrong moving from F5 to K5. With this we have a third possibility too, but the opponent is able to move from F7 to F10 and would improve his position. 11

12 1.8: The figure, which later can t run Move your figures only to such fields, where you can leave too. There are fields, where your figures are captured. You can t move them away from there. If you block your figures in this way, you are playing short. An example: created a new possibility to get the ball. Figure 11: In this example we have an ticklish situation. The ball is free in front of the goal (at J6). If an attacker (diamond shapes) moves to the field with the ball, we have a goal chance immediately. For the defending team (circle shapes) exist three important target fields: field J6, to to take possession of the ball, field J3 and J2 for the goalkeeper to prevent goal shots temporarily. We have a dice roll of. The right move would be: A10 to E10. From E10 with another (to E6) or with a (to J10) we have a It would have been wrong to move from B8 to F8. F8 would have been a field with no return. Let s prove it: With a the goalkeeper moves from K3 to J3. With a the goalkeeper moves from K3 to J2 (across K2). With a the figure M6 fetches the ball. With a the figure at F8 could have moved to J8, where it would have had a distance of two fields to the ball. But this would t have created another possibility, because the goalkeeper would have needed a to repel the ball. With a or a we can t improve our situation. In the example of figure 11 we should not move any figure to the rows G, H, I, K, L, M or 3, 4, 5, 7, 8 and 9, because a figure in one of these rows can t be moved from there in a way which makes sense. 1.9: Different target points in context If you want to reach two or more target points at the same time, you have to view this situation in context. Move your figures to different fields with different distances. If you get a dice roll, which does not fit your needings for the first target, you could eventually reach the second target with it. 12
 θ Vertical rows at the side line θ Vertical rows with the ball θ Vertical rows without the ball θ Vertical rows with many opponents θ Vertical rows with the")
13 Chapter 2 Rows of Figures A multitude of different figure rows exist: θ Vertical rows in the own half θ Vertical rows in the opposing half θ Vertical rows at the goal (row I - L) θ Vertical rows left and right of the goal (A - H and M - T) θ Vertical rows at the side line θ Vertical rows with the ball θ Vertical rows without the ball θ Vertical rows with many opponents θ Vertical rows with the own goalkeeper θ Vertical rows with the opposing goalkeeper θ Parallel rows θ Horizontal rows at the opposing goal θ Horizontal rows at the Halfway Line θ Horizontal rows at the own goal θ Row crossings θ Defense rows θ Old rows θ Opposing rows Each of the rows above (exception: old rows) has its own sense, its role in the game. Each of the rows above has its optimal condition for us in the game, which has to be aimed at. In Chapter 2 we explain this optimal conditions and compositions. 2.1: Composition of figure rows A figure row is a row with target points. In Chapter 1 of this booklet we ve described in detail, how we can reach a target point at the game field. So in this second chapter we only discuss the attributes of a row and its composition. 2.2: Composition of vertical rows in the own half An attack in the direction of the opposing goal starts at the moment as soon as a figure of our own is getting the ball in our own half. So the ball has to be moved in the direction from our own goal to the opposing goal. The easiest way to do this is to compose a vertical row in the ball line. In this row we will move the ball forward. The composition of the vertical row and the ball movement have to be made at the same time, so the opponent doesn t get much time to defend this attack. In Figure 12 we have a dice roll of : Now the figure at H8 moves to E8. In the next move the ball can be played forwards (in direction of the arrow to E8) with a and with a from H9 to E9. It would have been wrong to move immediately with the first in figure 12 from H9 to E9. In this case we could have played the ball forwards (from E6 to E9) with 13

14 another or the figure at H8 could have moved to H9. So we needed the twice, but in the following move we could do nothing meaningful with the. If you build up a vertical row, take note of the order in which you move the figures into it. Bild 14: To move the ball forward as fast as possible, you have to build up the vertical row from front to rear. This increases the speed of the ball, which let your opponent less time to reorganize his defense. If then you have enough own figures in the vertical row, figures, which are standing behind the ball, are useless, because you want to play the ball forwards and not back. So you should move such figures forwards or out of the row. To show this we use the following dice rolls:,,,. With the first we move from F8 to D8. Also F4, F6 or F10 could have been moved to the ball row. But a pass to F10 is not possible (7 fields is to far away). F4 and F6 have a shorter distance to the figure with the ball, but a pass forward could have only been done with short (means slow) steps. With the second we move F6 to D6. With the we shoot the ball forwards (to D8). Now we have two figures behind the figure with ball. With the following we move D6 to D12. We could have moved D3 to D9 too. But then D8 could only play the ball one field forwards (to D9) instead of four fields (to D12). So with this example we come to the conclusion: It s better to play the ball with fewer long steps as with more short steps. 2.3: Vertical rows in the opposing half Figure 15: The way to compose vertical rows in the opposing half is similar as in the own half. Additionally we have to think here that an attack in this vertical row should lead to a goal. For this we have to move our own figures in good shooting positions. An additional advantage is, if we can obstruct opposing figures, especially the goalkeeper. 14


15 Figure 15: Here are the best moves in the attacking situation shown in figure 15: With : L7 to K7 With : I3 to K3. We could not pass the ball directly from K11 to K3, but K3 is a strong obstruction for the opposing goalkeeper. This increases our goal chance. With : Here we have two very good possible moves: First we could move H6 to K6. Also good would be the move I3 to K2 (across I2 and J2). This move is also a big obstruction for the opposing goalkeeper. With we have two good moves too: First K12 to K8, or we can shoot the ball to K7. Here the ball can t be reached from an opposing figure. If we can reach the ball again, and this is possible with three dice roll possibilities, we have an immediate goal chance (with a ). The same happens with a : Either we move K12 to K7 (but this move obstructs the figure at L7, which can t move to row K anymore) or we shoot the ball to K6. I think the last option is better, because we have a better goal chance now (goal chance with or ) and because figure is not blocked. It would be perfect, if both fields (K2 and K3) could be occupied with offensive figures. In this case the opposing goalkeeper has virtually no chance for a defensive action. If this can be managed, you have to bring all available figures to the vertical row K. Figure 16: If a vertical row ends in the opposing half beside the goal, it is important that an attacking figure stands at the front of this row. If the figure there gets the ball, it is easy to make a goal from the side. At the same time the defending goalkeeper will be obstructed. Here are the best moves: With : F6 moves to F5. With a pass from F11 to F5, perhaps the ball could be passed to J5 later. This would be a goal chance. It is not recommendable to move from E3 to F3 with a. F3 is a bad position for the attacker, because from there the ball can t be played across to the goal (the opposing goalkeeper prevents this). With : is an ideal number for obstructing the opponsing goalkeeper. We have two possibilities: One is to move from H3 to J3. This obstructs the goalkeeper, if the ball comes to the player at J5 (see further notice at ). Also the move from H3 to H1 could obstruct the opposing goalkeeper, if the ball goes to the field F3, which is aspired with the vertical row F. With : Now E3 is moving to F1. So we only have to play the ball to F1 and we have a very good goal chance. If at F1 is already a figure, you should move many figures in row F, that the ball can reach F1. 15
16 With H3 is moving to the important field F1. After that, if you get another, you could either move from E3 to G1 to obstruct the goalkeeper of the opponent, or you move F12 to F8. With : We shoot the ball from F11 to F6. With we get no possibility that makes sense. In figure 16 we also come to the conclusion, that our own figures, which are standing in the same vertical row as the opposing goalkeeper, are not very useful during an attack. You should this figures to another vertical row. 2.4: Vertical rows at the side line If possible, you should not create any vertical rows at the sideline (but this can t always be avoided). If the ball is in such a vertical row, you can be attacked easily. The risk of a ball loss is high. It s also more difficult to get the ball from the border row back to the game field center. A vertical row at the sideline is absolutely senseless without the ball. So its best not to build a vertical row at the sideline (see also 3.3.7). 2.5: Removing old rows Rows, which have lost their sense, should be dissolved as quickly as possible, to free up figures, which can be used at other places on the game field. Figures which are fixed in a row, are absent at other game field places. So as a precaution you have to scatter as many figures as possible In different vertical and horizontal rows. In some previous examples we had the expression we can t improve our situation several times. With dice rolls, which aren t useful near the ball, you have to remove old rows, which have lost or fulfilled their sense already. But don t create new rows, which you don t need. Expressed differently: Only create rows, which you will need. All figures, which are not standing in such needed rows, should be scattered in as many different horizontal and vertical rows as possible. 2.6: Vertical rows with the opposing goal keeper If the movement of the ball in a vertical row needs a long time, the opposing goalkeeper will move to this row in all likelihood (ofcourse this is only possible for the rows I, J, K and L). At the latest if the goalkeeper moves to the ball row, you have to look for alternatives, to get the ball into the opposing goal nevertheless. There are several possibilities: First you can build up a parallel vertical row, second you can build up a row crossing. Ideally you would combine both alternatives. 2.7: Parallel vertical rows Figure 17: Basically the attacker creates parallel vertical rows if the ball is still far away from the opposing goal. If the defending goalkeeper moves to the ball row, the attacker will move it the parallel row to continue the attck there. The first row stays in use. If now the opposing goalkeeper moves to the new ball row, the ball can be passed back to the first row. You need much time to create parallel rows, so you should only move three (maximum of four) figures to each row. If you move more figures to these rows, 16

. With a dice roll of you should move from L8 to L7.")
17 then to many figures are bound there. These could give the opponent an advantage in another area of the game field. The opponent also has enough time, to prepare the defense for the parallel rows, because you need much time to build it up. Another important thing is to create several points in these parallel rows, where you can pass the ball between the rows. In figure 17 the ball can be passed to the other row in two horizontal rows (rows 11 and 5). With a dice roll of you should move from L8 to L7. With this move you ll get two advantages: First the ball can be passed with three different dice rolls (with to I11, with to L7 or with to L5) and you will get a new way to change the horizontal row (in row 7). 2.8: Horizontal rows Horizontal rows are often a result of luck or of a defensive emergency situation. Horizontal rows are only useful for safeguarding the own ball possession. Only in front of the opposing goal you should create horizontal rows knowingly, because it makes it easier to score a goal. Horizontal rows, which are out of the shot distance to the opposing goal, should normally be decomposed soon. At the start of the game each player has already a horizontal row consisting of four or five figures respectively. At kickoff the starting player may try to hold the ball in this horizontal row for some time, to move some figures into the opposing half or to build up a vertical row. But as soon as the ball leaves the horizintal row, this row should be decomposed as fast as possible. 2.9: Parallel horizontal rows For the opponent it is not easy to compose an effective defense against a horizontal row (see also 3.3.1). Sometimes the ball could be hold in a horizontal row as long as it needs to compose a parallel horizontal row within shot distance to the goal. Figure 18: If the red player succeeds getting the ball to row 5, it could be a good scoring chance. At this moment we only have two positions (K10 and D10), where we can pass the ball to one of our figures in row 5 directly. The possibilities to get the ball from row 10 to row 5 have to be optimised. For this there are several possibilities: With : J5 to I5 or I10 to J10. With this you have two figures in the same vertical row. If you pass from K10 to I10 or J10 you will create a new direct transition point between rows 10 and 5. With : G5 to I5. 17
. So the figure at F10 is needless.")
18 With : D10 to G10. This creates a new pass option from K10 to G10 and from there to G5. With : F10 to J10. The figure at F10 is exactly five fields away from K10. It would never get the ball, because with a dice roll of 5 the figure at K10 would pass the ball to K5 (our desired row). So the figure at F10 is needless. But a pass from J10 to J5 would be a dangerous option. With : K10 to K5. With : D10 to J10. The distance between D10 and K10 was seven fields. So the figure at D10 wouldn t have got the ball. So the current position at J10 is optimal. 2.10: Row crossings Vertical rows are especially necessary to bring the ball from the own defense to the opposing goal. But often it will not be possible to shot from the row, which brought the ball forward. Reasons for that could be that the oppsing goalkeeper ist standing in the same line or the row ends beside the goal. So we need a direction change. Figure 19: Especially at kickoff at the start of the game, the ball lies in a horizontal row. Here we also need a change of direction so that we can play the ball near the opposing goal and not only in the horizontal row. The best way to make a change of direction is a row crossing (with crosswise arrangement). The most important point at a row crossing is the crossover point. In figure 19 we have a crossing with the vertical row L and the horizontal row 5. But it is not as easy as it could be to pass the ball from row L to row 5, because the crossing point is not occupied by any of our figures. If the attacker is able to occupy the crossing point L5, the ball should stay in the horizontal row 5 until a scoring chance is possible. The vertical row L can be decomposed after the ball has reached row 5. The dangerousness of the attack is increased with figure G1, because a possible goal shot is from the side is available. For this reason you should not use the figure G5 to occupy the crossing point L5. G5 is the crossing point of horizontal row 5 and vertical row G. Notice: With two rows, which are intersecting, you should occupy the crossing point first. 2.11: Defense rows If your opponent composes a row (with or w/o the ball), you should place some of your own figures in this row by all means. It depends on the composition and the dangerousness of the opposing row, how many figures of your own you should place there. In a horizontal row in front of your goal, which is a dangerous situation, you have to place as many of your own figures as possible in such a row. If the opponent creates a vertical row in his own half, it is enough to place about three figures in that row in your own half. With this action, such a row will be needless for your opponent. Is it 18
19 possible for you to place your goalkeeper in an opposing vertical row, two additional own defensive players are enough. In such situation it is more important to obstruct the opponent to create a row crossing (see also 2.10). If the opponent has a figure in a vertical row at the base line beside our goal, you should place as many figures as possible in that row, because it is essential that you prevent that the opponent is able to bring the ball to his foremost figure. Also, if your goalkeeper is obstructed in a opposing row, you have to bring many defensive figures to that row. 19


20 Chapter 3 Attack 3.1: The ball possessing opposing figure will not always be attacked Normally you would always attack an opposing figure possessing the ball. There are only few situations where you would avoid such an attack: Figure 20: If your opponent has protected the ball cleverly, you could be confronted with a tactical positional disadvantage if you want to attack. You have the yellow (edged) figures and with have a dice roll of. Now you could attack the ball possessing figure at E8, but you have to move your figure to D8 or F8. With that move, you would the whole row E to your opponent. In such a case, it is not advisable to attack. It would be better to move from G11 to G8, to attack from there. -If your goalkeeper can avoid a direct or dangerous shot with the current dice roll, than it is more important than an attack. -If you can occupy a strategical important field, it could be more important as an attack. 3.2: Which figure is attacking? Figure 21: If you could attack the opponent with several own figures, you should choose the one with the worst position. In figure 21 the ball possessing figure (M4) can be attacked by three defending figures with a dice roll of. In this example the attack has to be done from P4. J4 has an important position, because it inhibits that a futher opposing figure could move into the horizontal row 4 (from J5 to J4). M1 inhibts a goal shot from the side and has to stay where it is. From the defending teams view (round figures), the figure at P4 has the worst position of the three figures, which could attack. After the attack, the figure moves to L4, to ensure a better tactical situation of the dangerous horizontal row : Choosing the right field for your figure after an attack After the attack you have four fields to choose from, where you can move the attacking figure (if the fields are not occupied). It is very important, that you move the figure to the right field. The following chapters will help you choosing the right field for your figure after the attack. 20
, you could expect goal shots.")

21 3.3.1: In which direction your opponent wants to shoot the ball? Normally your opponent prefers to shoot the ball in the direction of your goal. Especially in the four central vertical rows (the vertical rows which are leading to the goal directly), you could expect goal shots. During an attack you should place your figure always behind the figure, which is attacked. Only if your opponent possesses the ball in a horizontal row with many figures, where you have no figures, and the ball possessing figure is in the row, which is covered by your goalkeeper, you could place your attacking figure in the horizontal row. Because is not very often possible to place your figure in the horizontal row (as stated above), your opponent could possibly hold the ball in the horizontal row for a long time without any problems. But its more important to secure the back than a quick ball conquest. You have to be patient : In which row your opponent wants to hold the ball? Depending on the number of own and opposing figures in a row (and the whole game situation) you could realize in which row your opponent presumably wants to hold the ball. After an attack place your figure in that row : Where should your opponent shoot the ball? Figure 22: The figure that has attacked before could influence in which row the opponent will shoot the ball. We have a dice roll of and we are attacking from the field E7. Your opponent has two passing possibilities in row E (from E5 and E6) and two more options in row 8 (from F8 and H8). If you place your figure in row E after the attack, your opponent will rather shoot the ball to row 8; if you place your figure in row 8, he will rather pass the ball to row E. So think about the danger in each row and place your figure in the less dangerous one after the attack : Influence of the side line for placing figures If an attacking point in a horizontal row has a distance of five fields or less from the sideline, place your figure near the center after the attack. In figure 23 it seems that the yellow player (edged figures) wants to hold the ball in row 8. The red player has a dice roll of and attacks F8. Now the attacking figure has to be placed at G8. If the yellow player shoots the ball from F8 to L8 with a, he could be reached by the red player with a. If the red player would have moved his figure to E8 after the attack, 21
, because the ball would leave the game field.")

22 the ball wouldn t have been reachable with a dice roll of (distance seven fields). The yellow player can t play the ball in another direction after an attack (with a dice roll of ), because the ball would leave the game field. But if the yellow player would have a dice roll between and after the attack, the red player could always reach the ball with his figure at G8 in the horizontal row, independent of the direction where the yellow player shoots the ball : A figure between the opponent and the own goal Normally it s always a good idea to place the own figure, which is currently being attacked, between the ball possessing figure and the own goal : Is there a parallel row beside the ball row? If your opponent has build up a parallel vertical row beside the ball row, place your figure after the attack in the parallel row, to prevent the change of the ball in the parallel row (see also 2.7) : Attacks at the side line Figure 24: If you attack an opposing figure at the side line, you should place your figure always to the center. In figure 24 your figure is at B6 after the attack. In the following move if your opponent shoots the ball to row 6, you could reach the ball for sure there. But if the opponent shoots the ball in direction of row A, you also can get the ball, because your figure is allowed to make a turn at the side line in row A (see game rules). Only if your opponent shoots the ball with a, the ball is not directly reachable for you (distance seven fields). In this case you should move your figure afterwards and make a turn at the sideline in row A. This example also illustrates, why a placement of figures at the sideline is not adviseable (see also 2.4) : In which row you don t have enough figures? If none of the previous advises improved your situation, think about the following: The attack was at G6. How many figures do you have in the rows F, H, 5 and 7? Place your figures after the attack in one of the rows above, where you have the fewest of your own figures. 22


23 3.4: Evade an opponent s attack It is not always adviseable, to shoot the ball to a figure, which is the nearest to the opposing goal. It is also important, that the ball possessing figure is not exposed to big danger from the opposing figures. Figure 26: In figure 26 the yellow player (edged figures) has a dice roll of and he could pass the ball from I7 to I5. But I5 is dangerous, because there is a high risk to be attacked by a red figure. After a pass from I7 to I5 a further pass is only possible with another. So the danger of ball loss is high. That s the reason why it is not adviseable to pass the ball from I7 to I5 in figure 26. It s much better to pass the ball from P7 to N7. The defense team cannot attack I7 (except the goal keeper, but this would not be adviseable, because a direct goal chance would be created) and we ve created a better goal chance for the yellow player with the pass from I7 to N7 continuing to N1. 3.5: Make opposing attacks unlikely Figure 27: If you want the ball to be played forward in a vertical row, it is an advantage for the ball possessing player, if the field in front and behind the ball possessing figure is occupied. This makes it harder for the opponent to attack. If he still wants to attack, it is an advantage for you, because he has to leave the row with his attacking figure. In figure 27 this is obvious. If the yellow player attacks with a, you have to place the figure at A3 or C3 after the attack. With this move no yellow figure is in row B and the red player can continue game play without any danger (see also 3.1 figure 20). 23


24 Chapter 4 The Goal Keeper 4.1: The goal keeper is the most important figure in defense Often I ve seen that especially beginners don t use their goalkeeper often enough. The goalkeeper is absolutely the most important defensive figure. He has to be noticed first, almost any other move is less important than the right placement of the goalkeeper. The goalkeeper has to get a well position on time, not when the opponent is already in front of the goal. Like in real football the goalkeeper is often helpless without the support of his defensive teammates. How to best place the goalkeeper in position will be explained here in chapter : Best positions for the goalkeeper Best positions for the goalkeeper are I3, J3, K3 or L3. The reason why is obvious in figures 28 to 30. Figure 28: The goalkeeper is on field N3. The opposing attack comes in row K. The goalkeeper has to get a dice roll of the opponent s goal chance. to prevent Figure 29: The goalkeeper is standing at L2. The opposing attack is taking place in row K. The goalkeeper needs a dice roll of to prevent the goal chance. Figure 30: The goalkeeper is standing at J3. The opposing attack is taking place in row K. The goalkeeper can successfully defend with a dice roll of (at K3) or with a (at K2). In figures 28 and 29 only one dice number is a positive result; in figure 30 we have two. Only in cases of emergency the goalkeeper should be placed in one of the two semi circle fields at J4 or K4 (figure 30). If the opponent is attacking in rows I or L, the goalkeeper could easily leave the penalty box with a horizontal move. With such a move he would loose his influence, because (according to the rules) he is only allowed to parry the ball inside the penalty box. 24

25 4.3: Defensive figures support the goalkeeper in front of the goal The goalkeeper can only cover one vertical row at a time. Therefore the remaining three fields in front of the goal have to be blocked by defensive figures, so that the opponnent has no chance to move his figures at good shooting positions. In figure 31 the red player wants to intiate an attack. In this moment the red player can shoot the ball from N5 to J5 with a. With this he gets a goal chance. The yellow player will move his goalkeeper to row J with or. With this action he covers the red player at field J5. But now the yellow player has to occupy the fields I5, K5 and L5 with his defensive figures too. If the yellow goalkeeper is standing in row J and if the three previous named fields are occupied by yellow figures, the goal chance for the red player has gone at first. Figure 31: The yellow player has a dice roll of ; with this he has several possibilities to block the attacking red figures: I8 to I5. This move is not important yet, as long as the yellow goalkeeper is not standing in row J. Because if the red player has a dice roll of, he will not move his figure from I9 to I5, but pass the ball from N5 to J5. O5 to L5. With this move the yellow player blocks the entrance of a red figure from L7 to L5. The defensive figure at O5 could also reach the fields K5 or I5 in one of the next moves. Therefore with a dice roll of the figure at O5 will stay where it is. The right move of the yellow player with a would be L8 to L5. After that I5 could be blocked and then, if possible, as the last field K5. 4.4: Defensive figures support the goalkeeper beside the goal In figure 31 we have another defensive figure at a very important field: N1.This figure prevents a side attack by the red team. The goalkeeper could stay in front of the goal. It s always bad if the goalkeeper is placed beside the goal. 25


26 Figure 32: This figure shows the same situation as figure 31 except the field N1 is occupied by a red attacking figure instead of a defending figure. Yellow has a dice roll of and may decide: Either the goalkeeper moves to J2 and covers the figure J5 or the goalkeeper moves to M3. From there the goalkeeper is able to react in case of a pass from N5 to N1 (with from M3 to M1 or with from M3 to N2, do an attack and then stay on M1). But if the goalkeeper stays at M1, there is a high risk, that the yellow player passes back from N1 to N5. From there the ball can be passed to row 5 in front of the goal of the yellow player. The newly created goal chance is hard to prevent. So in a vertical row, where an opponent has the ball, you have to place a defending figure in row 1 beside the goal early. This defensive action makes it possible for the goalkeeper to stay in front of his goal, where he has a much better position. 4.5: Defensive figures should not obstruct their own goalkeeper Eight fields in front of the goal (I2, I3, J2, J3, K2, K3, L2 and L3) and four fields beside the goal (G1, H1, M1 and N1) are the most important fields for the goalkeeper because there he is able to parry the ball in case of an opposing goal shot. Normally the 12 previous listed fields should not be occupied by defensive figures as long as the opponent possesses the ball or the ball lies free in the danger zone in front of the goal. Figure 33: The ball is free at K5. The attacking player (yellow, edged figures) has four possibilities to get the ball. You are leading the red figures and you have a dice roll of. Now you could move from I4 to K2. From there you get another possibility to get the ball with a. But it s likely that the attacker is able to get the ball within the next move. But then our own figure would obstruct your own goalkeeper at K2. He would only be able to parry the ball at K3 with a. In figure 33 the move from G9 to G5 would be better. With this move you get a new possibility to get the ball and the goalkeeper has still two defending moves (K3 and K2), if the opponent is able to get the ball. 26

27 4.6: The goalkeeper outsde the penalty box If the ball lies free near the penalty box and the goalkeeper could reach it directly, the goalkeeper must move onto the ball by all means. This move is always better than to leave the ball to the opponent. Once the goalkeeper has passed the ball away, he should move to a good position in front of his goal as soon as possible again. 4.7: The goalkeeper could compensate a whole horizontal row Figure 34: Once you have got the ball in the defense you have to intiate a counterattack. For this you have to set up a well vertical row first. With such a row you are able to move the ball out of your own half. In figure 34 you are standing at J3 with the ball. In row K you have build up a well horizontal row without any annoying opposing figures. Now if you are attacked at J3, you could pass the ball to your goalkeeper with any dice roll. From there the ball can be played forward fast. After the attack the attacking figure stands no more in row K, so it could not obstruct you very much. 27
28 Chapter 5 Tactical Overview 5.1: To keep the entire playing field in your view The gameboard of Strato-Football has 472 fields, where the game figures are placed. Some players are limiting their soughts on the area with the ball only. It happens, that certain dice roll results are not useful near the ball. In such a case you should check the placement of all your figures one the whole gameboard and try to improve it : Uncovered opposing figures Is there an area on the gameboard, where only opposing figures are standing? How dangerous it will be, if the ball will come to such an area? Will your opponent get an advantage from this? Did your opponent place this figures with intent, or are they remains of an earlier situation? If you recognize danger there, you should place some of your own figures there, to obstruct your opponent : To play with eleven figures In Strato-Football your moves have to be realized per long-term-planing. Sometimes it is not the most important task to get the ball with al efforts or to attack your opponent at all costs. Often a good space management is more important. Do you have old figure rows which you don t need anymore? Are there any of your figures placed in less important areas of the gamefield? If you already have three or four possibilities near the ball to get it, it s better to move your other figures to some other important regions of the gamefield, than to create another possibility near the ball. With this in mind you will play with all eleven figures. If you are concentrating to much on the area near the ball you will have some figures on the gameboard which are not used properly : Leave defending figures in the back If an attacks needs much time (e.g. the opponent has a strong defense or the dice rolls do not fit) many players are moving more figures forward from their back. This could be an opponent s tactic to make a fast counterattack. Don t get trapped. Some of your figures (three to four) should always stay back to cover this area. That does not mean, that this figures should not take part of the game flow. They have to be in the dangerous horizontal rows. But the defensive figures should stay in your back half. They could also move in the horizontal rows, but they should never leave the back uncovered : Forwards have to watch If you loose the ball during an attack in front of the opposing goal, it is not always necessary to move your all of your own figures back to your goal immediately. You could leave one or two figures near the opposing goal. If you re getting the ball again you have good pass targets with the previously placed figures. The best way is to 28

29 leave the figures near the opposing goal to obstruct the opposing goalkeeper or at the fields in the front row beside the goal. 5.2: Game speed The way how fast you pass the ball to another figure means game speed. If you build up safe figure rows with many figures before you move the ball means slow game speed. Many passes back or to the side are slowing down the game too. Passing the ball after few moves, figure rows consisting of few figures only and the ball is often shot to unoccupied fields with high risk is the fast way of playing the game : Is it wise to shoot the ball to an unoccupied field? Normally the ball should always be well protected. Once a ball is lost it s not easy to get it back. But an overacted way to play the game needs more time and your opponent could use this for a better-organized defense. He may also be able to build up well-placed figure rows to prepare a counterattack. For this reasons its better to play a faster game most of the time. Especially if you have a higher dice roll you should think about shooting the ball to an unoccupied field. How many of your figures could reach the ball there? How easy is it for your opponent to get it? If the situation is advantageous for you, you should consider shooting the ball forwards, especially if a good goal shot is possible from the new location. Even if you can t get the ball back there, you have got some more space. First your opponent has to get the ball out of the danger zone. The time he needs for this task, is a time bonus for you to rearrange your own figures. Perhaps you are able to hold the opponent back in his half and you can also increase the pressure for his goal : Horizontal shot in front of the opposing goal Figure 35: Player Red (round figures) is attacking and has a dice roll of be shot to field K5 immediately.. Now the ball has to This move has two advantages: Firstly player Red can t be attacked from a defensive figure there; secondly we ve created a clear goal chance if player Red is able to reach the ball (with dice results with, or ). Also with a in the example in figure 35 you have to shoot the ball in front of the opposing goal (to L5). There you only have two possible digits to get the ball back ( or ). But this is even better as to wait for the opponent to attack and after that perhaps you will not get a good dice roll for that. 29
.")
30 : Clearance Also after an attack of the opponent to your goal a shot to an unoccupied field could clear the situation. Bild 36: After a dangerous attack you have got the ball and shot it to O3. The opponent can attack this area easily. You have a dice roll of. Now it is essential that you play the ball to O9. There you can reach it with three dice faces (, or ). The opponent has currently no chance to reach it. This situation could be a good chance for a counterattack, because the opponent has not enough figures in his back : Slowing down the game With a fast gameplay it could happen easily, that the figures of both teams are spread over the game field too far from each other without any connection. In this case there is a bigger influence of luck to the game. Now first of all you should reorder your figures. This will slow-down the game. A good way to get the time needed for this action could be a pass out of the hot zone of the game field. This could be a short back pass to a figure with a better tactical position, or a horizontal pass to a row, where no opposing figures are standing. After three or four moves you have more active figures to use for a new powerful attack. If your opponent has the ball in his own half or at the sideline and your figures are not placed well on the game board, you should not attack your opponent at all costs. First rearrange your figures, set up a well-positioned defense which makes it difficult for your opponent to get through. After this step you can try to get the ball again : Speeding up the game If your opponent has placed his figures disadvantageous (e.g. many figures are staing in old rows [see 2.5] or to many figures are placed in front of your goal [see 5.1.3] or his figures are not well placed in any other way), you should take advantage of this circumstances and speed up the game. A few quick passes forward (with high dice results if possible) could lead to a promising goal chance. 5.3: Bad pass A bad pass is shooting the ball to an opposing figure. A bad pass is only happening, if the opponent was attacking in his previous move. 30

31 5.3.1: Forced bad pass If you have a dice roll result, which lets you pass the ball to an opposing figure only after an attack, then pass the ball to a figure, which is placed worst from the opponent s view or to a figure, which you are able to attack quickly again : Bad pass at own will Sometimes a bad pass after an attack is better as a shot to the back or sidewards. Figure 37: The red player was attacked at K8 and he has a dice roll of. Now the ball is passed to the opposing goalkeeper at K2. The goalkeeper could bring the ball out of the danger zone with a only (K7). The red player has three possibilities (, or ) to be able to attack the goalkeeper again. After this attack if the goalkeeper has only a lower dice roll number, the ball lies short in front of the goal and a good goal chance could arise. In the example of figure 37 it would have been wrong to shoot the ball sidewards, because there it could have been reached easily by an oppossing figure (I8, L8). In this situation a counterattack could arise and the red player hasn t finished a good situation with success. Also a shot back to field K14 would be questionable. There the ball is so far away from the opposing goal that the opponent has enough time to rearrange his defense. 5.4: Shooting the ball out the game field Normally nobody will shoot the ball out of the game field unsolicited. But sometimes after an attack you have to choose: a bad pass at own will or shooting the ball out of the game field. With such a choice you should prefer shooting the ball out of the game field, because the opponent has to shoot the ball immediately within the next move (according to the game rules; see game rules Throw-In, Goal-Kick and Corner Kick). In such a situation the ball could land on an unoccupied field after the opponent s move. There you could easily get it again. 31
32 Chapter 6 The Psychology of the Game 6.1: Who will win a game of Strato-Football? After all the previously mentioned tactical tips for the game there is another possibly crucial topic: the psychology of the game. The discussion about the influence of tactics and luck to the game result is as old as the game itself. If a professional is playing against a beginner, the beginner would loose normally, but if two almost equal experienced players are playing a game, luck will get more influence. Here I affirm that luck could be influenced. I will try to prove this with some examples : Oblivion Forget yesterday, don t think about tomorrow. Don t think about the championship. Don t plan ahead for the next game. Think about the current game of Strato-Football and nothing else. Only the game board, the 22 game figures and the ball exist. The ball has to be put into the opposing goal. All other things are unimportant. Think about them after the game. Now they will only distract you from your goal : Think positive One player says: I need a Two, Four or Five. He will get it soon on his dice throw. The other player will conjure the dice: Please any result except a Three. I affirm the Three will arise often. A soon as you think about a number which you don t need. It will influence the dice negatively and exactly this number will appear : Fear is a bad game partner If someone is afraid of his opponent, like a rabbit is afraid of the snake, will be like paralysed. He will not dare anything and will loose the game. Also an experienced player can loose a game. He only has 11 figures, a dice and no miraculous abilities : The one who rails will loose In each game there are phases in which a player doesn t get the wanted dice results. That s normal and has to be sitten out. The one who will grumble about that doesn t pay enough attention to the game; in subconsciousness he awaits that the streak of bad luck will continue. Often the player loses sight in such situation that the dice result could be used still reasonable. The patient player waits for the negative series to end, continues the game the easy way and will get his next series of luck. 32
33 6.1.5: The right environment Create a relaxing environment for the game. Loud music, an interesting conversation at the table beside, noisy kids, ringing phones, lack of time these things will distract your concentration and will create negative influence to your game flow. In the right playing environment your game play and with it your winning chance will improve : Game figures, fans, stadium One player does play the game on the standard game board with the standard game figures, which are put careless in the standard game box. Another player creates his own game figures; he has a relationship with them. Around the game board fans are positioned which are standing on a especially created tribune. The game board is well designed. Within such an atmosphere the players will have even more fun, perhaps the positive atmosphere may increase the gaming performance. 6.2: Tournaments The suspense of Strato-Football could be increased with tournaments. It has been proved of value that a tournament over a longer period where each player plays about a game per month will be best. With such configuration the players will not have any schedule difficulties, because not all players have to meet at one location. The players of one game could decide the game location and time individually. The result of the game will be reported to the tournament management. They will announce the results at a common location (gamers club, gamers shop, internet or others). At you will find suggestions and tournaments of the past in retrospect. 33
34 Summary History The Genesis of Strato-Football It was a rainy Sunday in June Germany and I were excited about the Football world cup in Germany. In the german team were players like Sepp Maier, Franz Beckenbauer, Berti Vogts, Uli Hoeneß, Günther Netzer and others. At one Sunday there were no match in TV it was a day without any match. What does a teenager do in such situation? Right! He will play football himself. So I took the phone and called all of my friends. But none of them wanted to play (because of the weather perhaps). I didn t let discourage me. I wanted to play football. If it isn t possible outdoors, we will play indoors. We took a box. We painted a grid pattern on it which results in many small squares as the game field. Each player (my younger brother was the victim) got eleven game figures of the same color. We reused the figures from a chess game. A coin was used as the ball, which was put under a game figure. We were throwing the dice alternately. The one who got the ball could shoot the ball (with the number from the dice) or he could move one of his figures (same for a figure without the ball). The goal was to put the ball into the opposing goal. The development of the game including drawing of the game field needed about half an hour. We had a rule in the first game of Strato-Football, which we disposed as counterproductive: The player who doesn t possess the ball was allowed to attack any figure of the ball-possessing opponent. This player got a penalty at the location of the so called foul. This means: If a player had a promising shooting position already, the opposing player did make a foul on any opposing player at any position of the game field. The ball had to be placed at this position and the promising goal chance was gone. After we corrected the game rules for this reason they were not changed till today significantly. Ten years later, in the year 1984, few copies of Strato-Football were produced manually myself and were sold at several flea markets and Christmas markets. Even four to five years later I invented further games, which I presented at the game developer meeting in Göttingen and at the game days in Essen to a broad public. At this time I offered the game to some smaller shops for selling near Kempten. One of this shops, the Holzstüble was willing to take the game in their program. So with Strato-Footballspiel the contact to the shop owner was intiated. The contact got closer; finally so close that I became copartner of the shop. The shop has been growing, we moved the shop and changed the name to "Villa Kunterbunt". The founder of the shop has already leaved as a partner. Today (2003) I m the owner of the game shop "Villa Kunterbunt" since 15 years. This shop would not exist today, if it wouldn t had been raining at this memorable Sunday in June 1974 and if Strato-Football wouldn t had been invented this day. Thank St. Peter! Walter Müller PS: Even today I play all my Strato-Football games with chess figures, which I used for my first test game. 34

35 Created by: Translation Executive Producer: Nello Cozzolino (London / UK) Translation: Otto Loibl (Vienna / Austria, loo@nusurf.at) December 2005 Version
U9-U10 Teaching Formation
 U9-U10 Teaching Formation OVERVIEW All of the efforts put towards individual skills and team skills are of little use if your team isn t in a position to take advantage of those skills. Proper formation
FUBA RULEBOOK VERSION
 FUBA RULEBOOK 15.07.2018 2.1 VERSION Introduction FUBA is a board game, which simulates football matches from a tactical view. The game includes its most important details. The players take roles of the
Don t look back think forward!
 Don t look back think forward! Force your opponents to give up the ball and then make your move! by Ralf Peter, DFB coach When you win the ball, you should start moving decisively forward right away while
Soccer. Construct and execute defensive plays and strategies.(11- 12)
") Soccer State Goal: 19A, 19B, 19C, 21A, 21B Outcome: The students will demonstrate, explain and identify basic strategies of offense and defense in soccer. Components: Construct and execute offensive plays
Soccer State Goal: 19A, 19B, 19C, 21A, 21B Outcome: The students will demonstrate, explain and identify basic strategies of offense and defense in soccer. Components: Construct and execute offensive plays
GLOBAL PREMIER SOCCER
 GLOBAL PREMIER SOCCER GPS 204 CURRICULUM FUTSAL VACATION PROGRAM u - u4 GPS CURRICULUM METHODOLOGY U4 - U8 JUNIORS U9-U2 JUNIOR PREMIER U3-U8 PREMIER 8+ PREMIER Player Evaluation & Assessment FUN-Damental
Introduction Definition of decision-making: the capacity of the player to execute an action following some conscious tactical or strategical choice.
 Decision Making in Rugby Here is a paper by Pierre Villepreux. He presented it at the 1993 Asian Pacific Congress in Calgary. Eleven years have passed, but this remains one of the benchmark papers on this
Thinking beyond the press
 Thinking beyond the press Part 2: Complex exercises: Fast attack after pressing and attack-building by Stefan Lottermann, German sports scientist In Part of this series (SIS 3/2006), Stefan Lottermann
Games for better team play Roger Keenan
 1 1. 30 Metre Foot pass Games For Better Team Play - Roger Keenan End Line 14m 21m 45m Variation: Gaelic/Rugby Ball a) 10 v 10 b) ½ pitch c) 1 ball d) Full rules e) Score awarded for 30 metre pass. f)
Basics: KEYS TO COACHING LACROSSE. 1. Players at every level must play every day with both hands.
 KEYS TO COACHING LACROSSE Basics: 1. Players at every level must play every day with both hands. Both hands. No one can advance in lacrosse without playing with both hands. There are too many youth players
Northern SC U6 Playing Format 3v3
 Northern SC U6 Playing Format 3v3 This document outlines guidelines for increasing the consistency of playing formations and terminology we use with U6 players. As players of this age may have different
Northern SC U12 Playing Formats 8v8 (7 field players + 1 GK)
") Northern SC U12 Playing Formats 8v8 (7 field players + 1 ) This document outlines guidelines for increasing the consistency of playing formations and terminology we use with U12 players. As players of
Northern SC U12 Playing Formats 8v8 (7 field players + 1 ) This document outlines guidelines for increasing the consistency of playing formations and terminology we use with U12 players. As players of
Building the Playing Style Concepts
 Building the Playing Style Concepts Style Of Play - Specific Players 1, 2 or 3 touch maximum - minimizing the number of touches improves the speed of play. Keep the game simple - do not force situations,
Game Time. Players. Game Field. Game Field. Game Field. Game Rules 4 year olds-kindergarten. All games are held on field 6.
 Game Field Game Rules 4 year olds-kindergarten All games are held on field 6. Players & coaches only inside the field area. The playing surface is artificial grass. Cleats or tennis shoes are okay. Water
F.I.S.T.F. Sports Rules of Table Football (version 5.0) Explanatory notes on Changes
 Explanatory notes on Changes") F.I.S.T.F. Sports Rules of Table Football (version 5.0) Explanatory notes on Changes FISTF Sports Department - September 2014 2014 FEDERATION INTERNATIONAL SPORTS TABLE FOOTBALL. All Rights Reserved 1.
F.I.S.T.F. Sports Rules of Table Football (version 5.0) Explanatory notes on Changes FISTF Sports Department - September 2014 2014 FEDERATION INTERNATIONAL SPORTS TABLE FOOTBALL. All Rights Reserved 1.
A Parents Guideline to Referee s Signals, and The Laws Of The Game
 A Parents Guideline to Referee s Signals, and The Laws Of The Game Foreword: This guideline was designed to help young soccer players and the spectators who sit and watch soccer games every weekend understand
Possession games, Youth Training Sessions. Accents U13s
 Youth Training Sessions Possession games, The U13s are an age group that go through lots of changes and development, which is a wonderful challenge for a coach. Not only do the U13s switch from a small
NORTHERN SUBURBS NETBALL ASSOCIATION. Strategy Session. Authors: Megan Anderson Jenny Gage Traill
 NORTHERN SUBURBS NETBALL ASSOCIATION Strategy Session 2018 Authors: Megan Anderson Jenny Gage Traill STRATEGY SESSION Aim: Team strategies are important in terms of players understanding their role within
NC - LHS A Model Soccer Program
 A Model Soccer Program Program Philosophy As High School coaches, our role is to develop our players both on and off the field. How do we ensure that is achieved? Help them be students first, athletes
Soccer Manual. Rules, Regulations, & Training Information.
 www.soky.org Soccer Manual Rules, Regulations, & Training Information All Special Olympics Kentucky Soccer games and tournaments should be run according to FIFA rules. Any modifications to those rules
FIBA Guidelines for Referee Education Volume 2. Three-Person Officiating. Script
 FIBA Guidelines for Referee Education Volume 2 Three-Person Officiating Script DVD Volume 2, Three-Person Officiating Page 1 of 54 CONTENT INTRODUCTION 1. START OF THE GAME 1.1. Observation and Duties
1. 4 Corners Passing:
 1. 4 Corners Passing: - s must use controlled passing, communication, and speed to make supportive angles and keep control of the ball within the cones (10 x 10 yds) - Defender ( ) tries to intercept passes
Offside. Judging Involvement in Play Ohio South Module A On-Line Intermediate Referee Recertification Training
 Offside Judging Involvement in Play 2014 Ohio South Module A On-Line Intermediate Referee Recertification Training CJK 1999 World Cup Offside Scenario 2014 Mod A.ppt OFFSIDE VIDEO The following video is
Natural Soccer User Guide
 [Hier eingeben] Welcome to Natural Soccer! Natural Soccer User Guide Natural Soccer is an arcade soccer game rather than an accurate simulation of the sport. That is, fastpaced action and fun gameplay
BASIC FUTSAL COACHING PREPARATION
 BASIC FUTSAL COACHING PREPARATION I. Basics Futsal The priority in Futsal is to motivate players in an environment that is conducive to learning. The more pleasure kids derive from their participation,
Developing Game Intelligence for 11- years- old football players. 1 st Simplified Game. Maintaining Ball Possession 3 on 1
 Simplified Games 3 on 3 The simplified game is still an ideal framework for discovering, understanding, and resolving specific game-related problems for 7-a-side football. 1 st Simplified Game Maintaining
Where to Sit? Rules: Kickoffs. Rules: Goal Kicks. General Soccer Rules. Coaches and players from both teams sit on the same sideline.
 Where to Sit? General Soccer Rules Coaches and players from both teams sit on the same sideline. Spectators sit on opposite sideline. No one sits behind the goalies or on the goal line. Rules: Kickoffs
CYSA Coach s Training Guide
 CYSA Coach s Training Guide Team Ideas 2 training players of the week based on hustle, listening, attitude, trying hard, etc at training Start the next game, Team Captains for the next game, lead team
TACTICAL FOOTBALL GAME RULEBOOK fubatacticalfootballgame. Game design by Hannu Uusitalo
 TACTICAL FOOTBALL GAME RULEBOOK 2.0 Game design by Hannu Uusitalo www.fubaboardgame.com fubatacticalfootballgame 1 2 3 WHAT YOU NEED TO PLAY Game board The game board (rubber mat) is divided into 13 areas,
In this session we look at developing teams ability to defend as a unit.
 Defending as a unit In this session we look at developing teams ability to defend as a unit. What you tell your players the session is about: Working hard together to win possession. Pressing, supporting
COACHING CONTENT: TACTICAL Aspects to improve game understanding TACTICAL
 COACHING CONTENT: TACTICAL Aspects to improve game understanding TACTICAL 1. Attacking Principles Creating Space Support Width Depth Overlaps Diagonal Runs Forward Play Speed of Play Switiching Positions
Simplified Rules of Soccer
 Simplified Rules of Soccer For those families new to soccer, and those who still feel new regarding the rules, the following "Simplified Rules of Soccer" should be a handy guide through the many years
AGE BALL SIZE GAME LENGTH # OF PLAYERS
 Note: Revised 3/16 B A S A R U L E S O F S O C C E R AGE BALL SIZE GAME LENGTH # OF PLAYERS 4 - no goalies U-6... #3. 16 min. halves... U7... #3... 20 min. halves... 5-1 must be a goalie U-9 #4... 25 min.
U8 PRACTICE PLANS. Finishing & Shooting. Focus on Passing. Pressuring Defender. 2 vs 2 Play. Goal to Goal. 1 vs. 1 Turn & Shoot.
 U8 S Finishing & Shooting 2 vs 2 Play Goal to Goal 1 vs. 1 Turn & Shoot 4 Corner Shooting 4 vs 4 Scrimmage Focus on Passing 2 vs 2 Play Soccer Marbles Team Tag Colored Gates in Pairs 4 vs 4 Scrimmage Pressuring
Long Version Basketball Pre-Game
 Court Coverage Long Version Basketball Pre-Game Trail s Primary Responsibilities (2 person): Sideline And Division Line Last Second Shot Drives Starting In Primary Bring Subs In Weak Side Rebound Coverage
Basic organization of the training field
 Burke Athletic Club u4 & 5 Training Scheme Phase I Introduction to Soccer 1v1 Legend The purpose of this training program is to allow the u4 and 5 s the opportunity to learn some basic ideas and experience
A Developmental Approach. To The Soccer Learning Process
 A Developmental Approach To The Soccer Learning Process Soccer by definition Soccer is a game played between 2 teams and each team is trying to score more goals than the other team. Soccer games are decided
Basic requirements for a foul
 LAW 12 FOULS AND MISCONDUCT 119 Basic requirements for a foul The following conditions must be met for an offence to be considered a foul: it must be committed by a player it must occur on the field of
Old Bridge Girls Soccer: Coaches Handbook - A Guide to a Successful Season
 Old Bridge Girls Soccer: Coaches Handbook - A Guide to a Successful Season Coaches let us first start by saying Thank You from the board of the Old Bridge Girls Soccer League. This is a big commitment
AYSO Region 13 s Guidance, Interpretations & Modifications for U10 Referees on the Laws of the Game
 AYSO Region 13 s Guidance, Interpretations & Modifications for U10 Referees on the Laws of the Game AYSO Region 13 strives to make soccer fun, fair, and safe for players of all ages. The U10 modifications
COACHING FUTSAL: NSCAA LEVEL 1 FUTSAL DIPLOMA
 COACHING FUTSAL: NSCAA LEVEL 1 FUTSAL DIPLOMA Excerpts from the NSCAA Level 1 Futsal Diploma Manual STAGE 3: 9-11 YEAR OLD PLAYERS CLICK HERE TO ORDER THE FULL Coaching Futsal: NSCAA Level 1 Futsal Diploma
Goal Defence GD The Goal Defence works really closely with the goal keeper, they must support each other. GD players must be good at marking.
 DEFENDING POSITIONS Goalkeeper GK A goal keeper s job is to protect their goal post! You have to stay alert so that you can collect rebounds off the post and intercept passes, you need fast reactions.
Weeks 1-3 Dribbling/Ball Control and Throw In Focus
 U14 DIVISION (Ages 12-14) This practice manual is setup for teams to work on specific skill areas for 2-3 weeks in a row to allow coaches adequate practice time to teach the skill fundamentals. With each
The art of disciplined play
 Argentina U20 tactically the strongest at the World Youth Championship: The art of disciplined play The World Youth Championship is, after the World Cup, the second largest tournament organized by the
Rotations, Specialization, Positions, Switching and Stacking
 Rotations, pecialization, Positions, witching and tacking Endline ideline Introduction In this section, we will cover some of the basic principles that are useful for new players to understand how to position
5. Performance Phase Model Sessions
 . Performance Phase Model Sessions FFA National Football Curriculum - The roadmap to international success Chapter Page 68 Return to Model Sessions contents Page . Performance Phase Model Sessions Model
Copyright Notice - IT IS ILLEGAL TO POST THIS DOCUMENT ONLINE
 1 Copyright Notice - IT IS ILLEGAL TO POST THIS DOCUMENT ONLINE 2 The material enclosed is copyrighted. You do not have resell rights or giveaway rights to the material provided herein. Only customers
U9 REC COACHES MEETING
 FALL 2017 U9 REC COACHES MEETING U9 REC COACHES MEETING THE ROLE OF THE COACH 1. WHY AM I COACHING? 2. WHAT DO I BELIEVE THE PLAYERS SHOULD GET FROM THEIR EXPERIENCE PLAYING SOCCER? 3. HOW CAN I HELP THEM
WINTER FUTSAL EDUCATION SERIES
 2016-17 WINTER FUTSAL EDUCATION SERIES Positions & Defensive Principles #4 Ala #1 GK #5 Fixo #5 Pivo #3 Ala Positions - Roles & Responsibilities #1 Goal Keeper 1. Organize your defense in front of you
Develop Quick Attack from Defence
 Topic: Develop Quick Attack from Defence GAME 1: FAST BREAK Why play this Game: Scenario: In your match, you want your defence to break out quickly and counter attack. What activity could you use in training
HANDBALL. A bit of history
 HANDBALL A bit of history Games similar to modern team handball have historically been played in many different cultures around the world. We know that the ancient Greeks and Romans played a type of handball,
FROM THE ARTICLE: MOMENT OF ORGANIZATION FROM VALENCIA CF (Edition 62, Tactical-Football)
") SYSTEMIC DRILL FROM THE ARTICLE: MOMENT OF ORGANIZATION FROM VALENCIA CF (Edition 62, al-football) Name: Manuel Torres Pericás Physical Education Teacher Bachelor CAFE (Specialty Football) Football manager
SYSTEMIC DRILL FROM THE ARTICLE: MOMENT OF ORGANIZATION FROM VALENCIA CF (Edition 62, al-football) Name: Manuel Torres Pericás Physical Education Teacher Bachelor CAFE (Specialty Football) Football manager
TACTICAL. Basic Concepts of Play. The USA Hockey Coaching Education Program is presented by REVISED 6/15
 TACTICAL Basic Concepts of Play The USA Hockey Coaching Education Program is presented by REVISED 6/15 OBJECTIVES To introduce the conceptual aspect of ice hockey To point out that the game can teach the
LAW 11 Offside Review
 LAW 11 Offside Review 1 An attacker got the ball several yards past the second-to-last defender, but the referee didn t call offside. Why? Offside position is not judged when a player got the ball, but
Sony Four Legged Robot Football League Rule Book
 Sony Four Legged Robot Football League Rule Book RoboCup Technical Committee (As of June 9, 2003) 1 Rules are classified into several categories 1. Setup of the environment 2. Robot players 3. Game process
Introduction to Handball for Physical Education. Joanna V. Franquelli
 Introduction to Handball for Physical Education Joanna V. Franquelli Outline I. Introduction Background Handball Court Handball Sizes Rules of the Game Basic Skills Player Positions II. Handball at Schools
Umpire Manager s Briefing for Umpires Version 1 27 October 2016
 Umpire Manager s Briefing for Umpires 2017 Version 1 27 October 2016 Preparation Be thorough in your match preparation Make sure that you understand the Briefing this is our match plan You are expected
The importance of t. Gordon Craig, Coerver Coaching Director
 Gordon Craig, Coerver Coaching Director The importance of t Inspired by the ideas of the Dutch coach, Wiel Coerver in the 60 s, that all the great skills from the top players at the time could be taught
HIGHER PE (National 6) TACTICS Pupil Workbook
 TACTICS Pupil Workbook") STRATHAVEN ACADEMY HIGHER PE (National 6) TACTICS Pupil Workbook PHYSICAL FACTORS (Tactics) and MENTAL FACTORS Impacting on Performance Name: Class: Teacher s Name: 1 What is a Tactic? SECTION 1 A tactic
STRATHAVEN ACADEMY HIGHER PE (National 6) TACTICS Pupil Workbook PHYSICAL FACTORS (Tactics) and MENTAL FACTORS Impacting on Performance Name: Class: Teacher s Name: 1 What is a Tactic? SECTION 1 A tactic
GOALKEEPER ACTIVITES U10 through U16
 GOALKEEPER ACTIVITES U10 through U16 **Keep in mind that we do want our goalkeepers to have quick reactions, being able to respond to multiple shots. But, throughout all goalkeeper activities, allow the
Copyright Notice - IT IS ILLEGAL TO POST THIS DOCUMENT ONLINE
 1 Copyright Notice - IT IS ILLEGAL TO POST THIS DOCUMENT ONLINE 2 The material enclosed is copyrighted. You do not have resell rights or giveaway rights to the material provided herein. Only customers
BRIEFING for Swiss Hockey Umpires Season
 BRIEFING for Swiss Hockey Umpires Season 2017-2018 It is important that umpires know and are able to apply the latest version of the FIH rules of hockey. This briefing complements these rules and emphasizes
UMPIRES RULE: Understanding the rules and umpiring considerations of indoor hockey
 UMPIRES RULE: Understanding the rules and umpiring considerations of indoor hockey Oct 19, 2016 In the southern hemisphere Indoor Hockey is beginning or has begun its season. From all reports there is
Coaching Development Guide for U10 LTPD Alignment for Learn To Train
 Coaching Development Guide for U10 LTPD Alignment for Learn To Train CHARACTERISTICS OF U-10 PLAYERS: Gross and small motor skills becoming more refined and reliable. Boys and girls begin to develop separately.
U8 / U9 Coaching Guide
 U8 / U9 Coaching Guide Created for LNYSA Boys & Girls Coaches Questions? Contact Heather Biondolillo heather.biondolillo@lnysa.org Printing generously donated by Structures, Inc. http://www.structureseng.com
Impact Soccer Curriculum. Micros 6 to 9 years
 Impact Soccer Curriculum Micros 6 to 9 years Week: 1 Topic: Dribbling bjectives: Maintain close control of ball Change direction and speed Ball each dribbling around the area; coach shouts commands to
Goal Umpiring. Visual Signaling
 Goal Umpiring Visual Signaling Visual signaling is one area in which goal umpires are legendary and there are quite a number of signals needed to be learnt. Signals are not only for the benefit of the
Boyne Area 4H Youth Soccer. Grades 1 & 2. Practice Lesson Plan Manual
 Boyne Area 4H Youth Soccer Grades 1 & 2 Practice Lesson Plan Manual TABLE OF CONTENTS Table of Contents Under 8 Lesson Plans... 3 Under 8 --- Practice Session One... 4 Under 8 --- Practice Session Two...
Opleiding Informatica
 Opleiding Informatica Determining Good Tactics for a Football Game using Raw Positional Data Davey Verhoef Supervisors: Arno Knobbe Rens Meerhoff BACHELOR THESIS Leiden Institute of Advanced Computer Science
Contact with your suggestions for this chapter. Chapter1 Standard 4 v 4
 Chapter1 Standard 4 v 4 All the following games will use the following standard 4 v 4 pitch in the diagram below unless a new diagram is shown. Win by 1 Normal game of 4 v 4 but you can never lead the
Unit 10- Indoor Football
 Unit 10- Indoor Football Indoor football was born as a spectator sport with the increase in indoor sport centres and with the public support of companies. It has many things in common with football, but
Soccer Manual. Rules, Regulations, & Training Information.
 www.soky.org Soccer Manual Rules, Regulations, & Training Information All Special Olympics Kentucky Soccer games and tournaments should be run according to FIFA rules. Any modifications to those rules
Joseph Luxbacher, PhD Director of Coaching USC Travel Soccer Week #4 Curriculum. Small - Sided Games to Reinforce All Fundamental Skills
 Joseph Luxbacher, PhD Director of Coaching USC Travel Soccer Week #4 Curriculum Topics: Small - Sided Games to Reinforce All Fundamental Skills The focus this week will be on reviewing the fundamental
BASIC INDIACA RULES (BIR)
") INTERNATIONAL INDIACA ASSOCIATION (IIA) BASIC INDIACA S (BIR) More information about IIA can be found on www.indiaca-iia.com CONTENTS GAME CHARACTERISTICS CHAPTER ONE FACILITIES AND EQUIPMENT 1 PLAYING
INTERNATIONAL INDIACA ASSOCIATION (IIA) BASIC INDIACA S (BIR) More information about IIA can be found on www.indiaca-iia.com CONTENTS GAME CHARACTERISTICS CHAPTER ONE FACILITIES AND EQUIPMENT 1 PLAYING
U14 10 Week Curriculum
 U14 Week Curriculum U14 Curriculum Week 1 - Passing and Control Week 2 Positive Dribbling Week 3 Turning with the Ball Week 4 - Technical Development Session Week 5 Shooting and Finishing Week 6 Transition
The Coaching Hierarchy Part II: Spacing and Roles Tom Turner, OYSAN Director of Coaching August 1999 (Revised: December 2000)
") The Coaching Hierarchy Part II: Spacing and Roles Tom Turner, OYSAN Director of Coaching August 1999 (Revised: December 2000) In the June issue of Ohio Soccer, a 7-step hierarchical approach to coaching
The Coaching Hierarchy Part II: Spacing and Roles Tom Turner, OYSAN Director of Coaching August 1999 (Revised: December 2000) In the June issue of Ohio Soccer, a 7-step hierarchical approach to coaching
United Soccer: Game Rules
 United Soccer: Game Rules Game Rules: 4 year olds - Kindergarten Coach Role On the field directing traffic and keeping time Facilitate game and referee Coach players to: Actively pursue ball NOT sit back
Rule 5. Series of Downs, Number of Down and Team Possession After Penalty
 Series of Downs, Number of Down and Team Possession After Penalty Section 1 Series of Downs Section 1 Art. 1 The team which next puts the ball in play by scrimmage following a free kick, touchback or fair
Copyright Notice - IT IS ILLEGAL TO POST THIS DOCUMENT ONLINE
 Copyright Notice - IT IS ILLEGAL TO POST THIS DOCUMENT ONLINE The material enclosed is copyrighted. You do not have resell rights or giveaway rights to the material provided herein. Only customers that
RecSports Futsal Rules
 Any rule not specifically covered will be governed in accordance with the National Federation of State High School Association Soccer Rules. Rule 1: Players Each team shall consist of five players on the
NCAA Women s Lacrosse Test Questions. Study Guide
 NCAA Women s Lacrosse Test Questions Study Guide PLEASE NOTE THAT THE ORDER OF THE POSSIBLE ANSWERS BELOW EACH QUESTION MAY BE DIFFERENT THAN THE ORDER THAT APPEARS ON THE ELECTRONIC VERSION OF THE TEST.
steps to designing effective practice
 22 23 steps to designing effective practice How do you decide what coaching practices to deliver? And what process do you follow when designing the practice? Here, FA Youth Coach Educator, Ben Bartlett,
Tournament Playing Rules
 Tournament Playing Rules Grade 1 st Grade 2 nd Grade 3 rd Grade 4 th Grade 5 th and 6 th Grade 6 th /7 th and Up Number of Players on Field Minimum players to start game Game time Game time: Semi & Finals
PHISICAL EDUCATION IES Puerta de La Serena 3ºESO Bilingual. Tie: empate Goalie/goalkeeper: portero to endanger: poner en peligro feint: finta
 Tie: empate Goalie/goalkeeper: portero to endanger: poner en peligro feint: finta Overcome: superar to gain: obtener patrol: ronda, merodea leap: salto UNIT 8: HANDBALL 1. INTRODUCCTION Handball is a fast-paced
contents QuickStart Tennis Practice Sessions Introduction ages 9 10 practice sessions
 contents QuickStart Tennis Practice Sessions Introduction I II practice 1 Forehands and Backhands with Control 1 10 practice 2 Serving 11 18 practice 3 Returning the Serve 19 24 practice 4 Net Play 25
Learning to Play, Playing to Learn. Team Practice Games Samples Handout. Hans van der Mars
 February 26 & 27, 2016 Conestoga Middle School Beaverton Oregon Learning to Play, Playing to Learn Team Practice Games Samples Handout Hans van der Mars 35th Annual Northwest Conference for Children's
Soccer Study Guide. The Game
 Soccer Study Guide lgrotthuss football-focus.com.webloc www.outdoorfunstore.com/ sports/images/soccer.jpg The Game Soccer is played with 11 players per team High School varsity soccer with 2 equal halves
Manual for Youth. Manual for Youth Referees
 Manual for Youth Referees Manual for Youth Referees 2014 1 The AYSO National Office TEL: (800) 872-2976 FAX: (310) 525-1155 www.ayso.org All rights reserved. 2014 American Youth Soccer Organization Reproduction
TREMONTON RECREATION
 AT E R C E TON R N O M TRE ION SOCCE OK O B Y A L P R COACH SPORTSMANSHIP PLEDGE - MORE THAN More Than... As a Tremonton Youth Soccer Coach, you are a part of changing the landscape of youth sports for
The Progression from 4v4 to 11v11
 The Progression from 4v4 to 11v11 The 4v4 game is the smallest model of soccer that still includes all the qualities found in the bigger game. The shape of the team is a smaller version of what is found
Soccer Summary of Rules Divisions: U10, U12, U14, U15
 MISSION The mission of the league is to promote, develop, supervise and voluntarily assist the interest of youths participating in recreational soccer. The primary goal of the league is to provide a safe
NORTHEASTERN UNIVERSITY INTRAMURAL SPORTS Volleyball Training Manual
 NORTHEASTERN UNIVERSITY INTRAMURAL SPORTS Volleyball Training Manual VOLLEYBALL TRAINING MANUAL SUMMER 2006 THE GAME OF VOLLEYBALL Volleyball is a sport played by two teams on a playing court divided by
MEMORANDUM. Stefanie Sparks Smith, Secretary-Rules Editor NCAA Women s Lacrosse Rules Committee.
 VIA ELECTRONIC MAIL MEMORANDUM September 25, 2015 TO: Head Women s Lacrosse Coaches and Officials. FROM: Julie Myers, Chair NCAA Women s Lacrosse Rules Committee Stefanie Sparks Smith, Secretary-Rules
SOCCER ESSENTIALS. Bente Skogvang Professional Soccer Referee Associate Professor of Sport at Elverum University in Norway
 SOCCER ESSENTIALS Bente Skogvang Professional Soccer Referee Associate Professor of Sport at Elverum University in Norway Birger Peitersen Institute of Exercise and Sport University of Copenhagen Karen
5. Game Training Phase Model Sessions
 . Game Training Phase Model Sessions FFA National Football Curriculum - The roadmap to international success Chapter Page 0 Return to Model Sessions contents Page . Game Training Phase Model Sessions Similar
TACTICAL. Offensive Positional Play. The USA Hockey Coaching Education Program is presented by REVISED 6/15
 TATIAL Offensive Positional Play The USA Hockey oaching Education Program is presented by REVISED 6/15 OBJETIVES To describe the potential responsiblities of players To describe both offensive side of
Center Circle. Halfway Line
 Build-Out Line Goal Line Halfway Line Goal Area Penalty Area Build-Out Area Build-Out Area Penalty Area Goal Area Goal Line Build-Out Line LAW 1 SMALL-SIDED THE FIELD OF FIELDS PLAY (7 v 7) Touchline Center
Cradling Games CRADLING GAME (1)
") To work on cradling skills Cradling Games CRADLING GAME (1) Play 1 v 1 in a 15-by-15-yard square. Several squares can be set up within the penalty box to enable four groups to work at the same time. Start
To work on cradling skills Cradling Games CRADLING GAME (1) Play 1 v 1 in a 15-by-15-yard square. Several squares can be set up within the penalty box to enable four groups to work at the same time. Start
5. Skill Acquisition Phase Model Sessions
 5. Skill Acquisition Phase Model Sessions FFA National Football Curriculum - The roadmap to international success Chapter 5 Page 28 Return to Model Sessions contents Page 3. Skill Acquisition Phase Model
Warm Up. Technical Practice / Development 1
 Week: 1 Topic: Dribbling bjectives: Maintain close control of ball Change direction and speed, different surfaces, head up, attacking space. Ball each dribbling around the area; coach shouts commands to