Be g i n n i n g s. Ar c h e r y B E S T. A Step-by-Step Instructional Guide for Teaching Olympic Style Archery to New Archers
|
|
|
- Jeffry Skinner
- 6 years ago
- Views:
Transcription
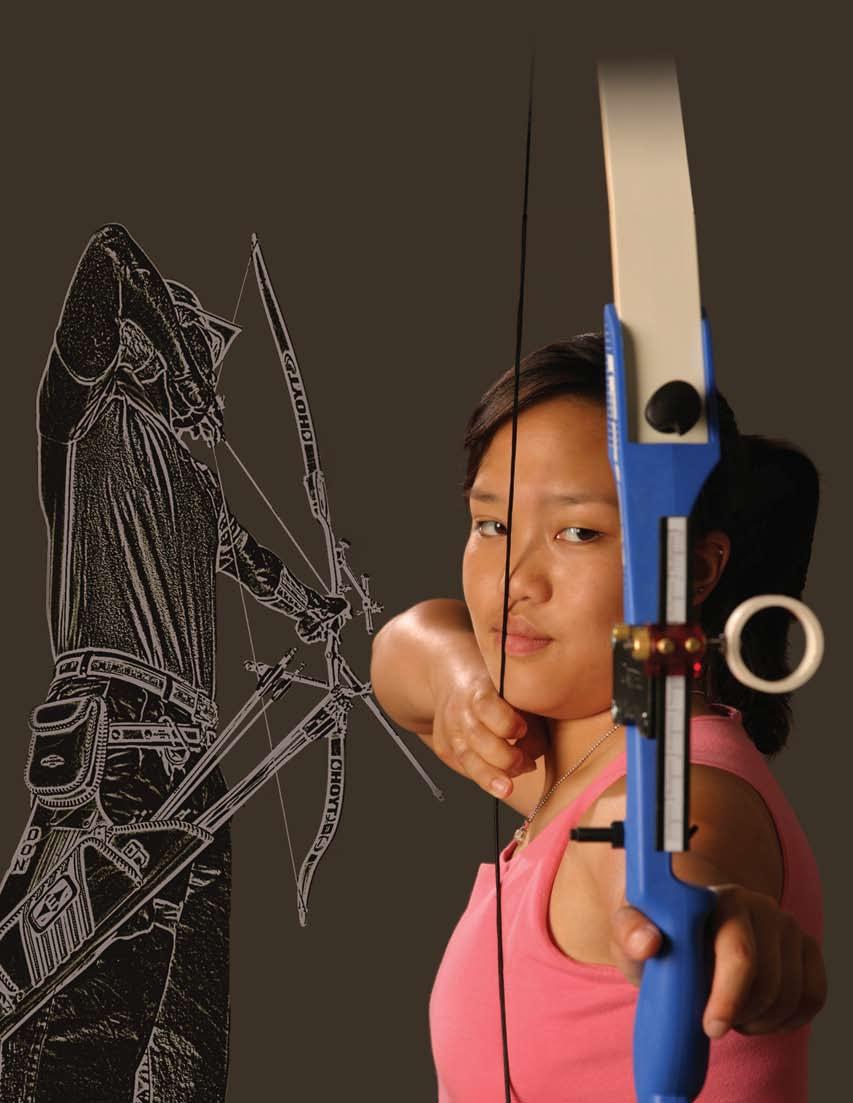


1 B E S T (Biomechanically Efficient Shooting Technique) Be g i n n i n g s in Ar c h e r y A Step-by-Step Instructional Guide for Teaching Olympic Style Archery to New Archers
2

3 B E S T (Biomechanically Efficient Shooting Technique) BEGINNINGS IN ARCHERY By: Don Rabska Learning archery is easy and fun, offering a great challenge for all ages and a sport that can lead to local, national, and international competition. Learning sports through a systematic process is the fastest route to success, encouraging good habits from the start. There are many ways to shoot a bow and arrow with many different shooting styles to choose from. The information covered in this book and the BEST DVD represents the method of shooting that applies to Olympic style archery. The BEST (Biomechanically Efficient Shooting Technique) method is founded on the scientific study of biomechanics and other sports sciences. Biomechanics is the branch of science that examines the internal and external forces acting on the human body and the effect produced by those forces. The most accomplished archers in the world have utilized these same techniques for many years. This instructional guide is designed to support new archers, new archery coaches, and coaches who have already been certified as instructors through various archery organizations. Here you will find the tools you will need to introduce the BEST method, a systematic, success driven process that is taught through a series of exercises, first by mimicking, then with training aids, and finally withthe bow. The book will also provide a brief introduction to some of the intermediate level components of this shooting technique. Later publications on the BEST method will provide advanced level training and answer questions about archery technique at the highest competitive level. The lessons in this guide are designed to help the student archer and coach to become completely familiar with the solid fundamentals of championship shooting form. One of the keys to quickly learning this system of shooting is to start new archers with the lightest possible muscle load. The use of light-weight training aids allows the archer to easily master each step before moving on to the next skill. As a coach, you can monitor and quickly adjust each student s shooting form through the use of these aids before introducing the full draw weight of the bow. In other words, students will have the opportunity to learn how to properly shoot before they ever shoot that first important arrow.
4 BEST Beginnings in Archery by Don Rabska Published 2008 by Easton Sports Development Foundation 7855 Haskell Avenue, Suite 360, Van Nuys, CA Copyright 2009 by Easton Sports Development Foundation All rights reserved. This book, or parts thereof, may not be reproduce in any form without permission.
5 Table of Contents


6 Shooting Technique Correct Shooting Posture The four positions shown here represent what good archery technique should look like. By using the information presented in this guide, archers and coaches alike will quickly learn the physical properties that constitute correct shooting form. Chapter by chapter, the book will take the reader through a systematic progression of instruction clearly demonstrating how each form component is taught and applied to create the championship shooting form. By applying this teaching system, anyone can learn biomechanical excellence in the sport of archery and learn to shoot the BEST technique. 6


7 shooting technique Archery technique developed through the BEST method will produce top level shooting form as demonstrated in the two photos shown here. When properly applied the techniques in this book offer a simple-to-follow scientific approach to teaching the sport of archery. Here we see two angles showing proper body position for Olympic style archery. In the full draw position, the arm and shoulder positions of a recurve archer should look virtually the same as the archer shown in these photos. By correctly using the shoulder blades (scapulae) and shoulder positions, archers will quickly learn how to use their back to create the archers triangle (photo A). This shooting triangle as shown in the overhead photo is vital to archery success and must be learned early in the process for fast progression toward becoming an accomplished archer. In photo A note the position of the shoulder blades and how the tops of the two shoulders are in a straight line with the bow arm (arm holding the bow). In photo B, you can see that both shoulders are down in the proper shooting position, which is evident by the V created at the top of each shoulder. The shoulder and shoulder blade positions are the most important part of the shooting form and are what the archer should focus on during the shot process. A B 7
. Leg position. Hip and upper body positions.")


8 Getting Started Building a strong foundation is the key to early success. This chapter teaches the fundamentals of building the shooting foundation from the ground up, starting with: Stance (foot positions). Leg position. Hip and upper body positions. Bow arm (arm that holds the bow) and bow arm shoulder positions. Rotation of the bow arm elbow (rotating the bow arm elbow out of the path of the bowstring). Bow arm rotation and the bow arm shoulder position are key points in developing proper shooting technique. First steps in preparing students for BEST method training Eye dominance test - Virtually everyone knows if they are right or left handed, but far less know if they are right or left eye dominant. To test for eye dominance, here are two procedures. Typically, a student is either right handed and right eye dominant or left handed, left eye dominant. There is a small percentage of the population however, that are cross dominant. These individuals are either left handed but right eye dominant or the reverse. Right hand, right eye dominant archers should shoot right handed, holding the bow in their left hand and drawing the bow with their right. Left hand, left eye dominant archers should shoot left handed with the bow held in the right hand. In the case of the cross-dominant archers who are right handed and left eyed dominant or left hand right Self Test - Organize the archers in a line. Have the students place their index finger and thumb webs together, and then spread the hands slightly to create a golf ball sized hole between the two hands. With both eyes open, raise the hole up in front of their face with arms fully extended and look through the hole at an object in the distance. While keeping both eyes open, have them bring the hole back to their face. The eye the hole goes to is the dominant eye. eye dominant, it is best to go with the dominant hand to draw the bow. However, some of these students may have a very difficult time aiming with the weaker eye and are often found turning their head to the stronger eye. This issue can create technique problems that the coach needs to be aware of. They may turn their head and compromise the anchor position, or simply use the wrong eye to aim with causing arrows to miss well left or right of the target. If an archer continues to have one of these problems and seems unable to adapt, it is best to change them over to shooting with the other hand at a relatively early stage of their development. Instructor Test - Line up the students facing you. Have them bring their two hands together to form the same golf ball sized hole between their thumbs and the web of the hand as in the self test. Instruct the students to keep both eyes open and raise their hands, arms fully extended to eye level, then look through the hole in the hands at your nose. The eye you see through the hole is the dominant eye. 8 Form a hole about the size of a golf ball between your thumb and forefinger. With both eyes open, raise the hole in front of the face with the arms fully extended. Bring the hole back to the face.


9 1 Stance - The basic square stance is used for all beginning archers. To start, provide a shooting line where students will line up with one foot placed on each side of the line as if they were shooting. The feet should be about shoulder width apart, with the back foot approximately 1 ahead of the front foot. The toes are turned very slightly away from shooting line. Have the students pretend their feet are thick syrup poured on a flat surface, feeling them spreading longer and wider. Next have them lean slightly forward placing about 65% of their weight on the balls of the feet. This is the first step in building a stable shooting posture. stance & body position 2 Knees - The knees should be relaxed and the legs straight. Do not allow the knees to bend. Bone to bone alignment of the upper and lower leg bones are important for stability. Process: Lock the legs back and then relax without allowing the knees to bend. A B Hip Position - Teach 3 the pelvic tilt so the hips fall into the correct position to align the lower part of the spine. Process: Demonstrate by sticking out your hips (photo A), then showing how the hips fall into place by tilting the hips forward, tucking the rear under (photo B). Incorrect. Correct. 9
.")
 held down and let the shoulder and ribs fall straight down.")


10 stance & body position 4 Rib position - Dropping the ribs down is the final step in developing a straight back and prevent arching, or a hollow back (photo B). Teach the students to let their ribs fall straight down toward the stomach by relaxing the muscles of the chest and back (photo A). Process: Stand up straight and tall, then let the ribs fall straight down toward the stomach by relaxing the back, shoulders and muscles of the chest. Be aware not to allow the shoulders to roll forward, but keep the shoulder blades (scapula) held down and let the shoulder and ribs fall straight down. This procedure increases bow shoulder stability, improves bowstring clearance at the chest and aids in lowering the bodies center of gravity. Do this exercise several times to get the feeling well ingrained. Throughout each step of the process, learning to keep the shoulders down and the back straight are two very important steps toward rapid archery success. Maintaining a flat back will prevent students from sitting back on their hips. 5 A correct B incorrect Ribs down, good string clearance - good posture. Ribs up, arched back string contacting chest - no clearance. Review - Go back over Stance, Knees, Hip position and dropping the Ribs down. At this point, make sure the shoulders are square and not hunched forward. Also make sure that the students are not sitting back on their hips. The body must be straight (vertical) with approximately 65% of the weight forward on the balls of the feet. 6 Raising the bow arm -.Instruct the students to place their bow hand palm flat against the side of leg with the thumb pointed straight at the ground parallel to the leg. See insert photo. Process: Turn the head straight toward the target. Next, keep reaching toward the ground with thumb and continue reaching while raising the bow arm up (left arm for a right hand archers and right arm for left hand archers) toward the target. Raise only the arm, making sure to keep the shoulder down and without moving the body toward the target. The feeling is to keep reaching or scooping the arm up toward the target from the moment they start raising the arm. Spend time here to develop the feeling of reaching from under the arm, not from the shoulder. Have the students tell you when they can feel some discomfort from about the armpit to the elbow. If they can feel a little stretching pain when the arm is extended, they are doing it correctly. Raise only the bow arm while keeping the shoulders down. 10

. Have them raise the bow arm up to shoulder height and turn their head straight toward the target.")
11 Another check is to have the students place their drawing hand directly under the bow arm and see if they can feel the big muscle (Latisimus Dorsi muscle or Lats ) activate when reaching. They are doing it right if they can feel the muscle move. Also, make sure that the bow arm elbow crease is vertical, which should happened automatically when maintaining the feeling of reaching with the thumb pointing toward the target as a arm is raised (more detail on this in the following section). Have them raise the bow arm up to shoulder height and turn their head straight toward the target. Now reach to the target for 5 seconds, then bring the arm down and rest for 5 seconds. Do this exercise 5 to 10 times to start, rest for a minute and repeat 5 to 10 more times. This method of raising the bow arm will teach students how to place the bow shoulder in the proper (down) position with little effort. By correctly reaching from the beginning, it is impossible to raise the shoulder at the same time. Remember to have the students turn their head straight toward the target while performing this exercise. 7 Bow arm rotation - Rotating the bow arm elbow can be one of the more challenging parts of the shooting technique for beginners to master. If elbow rotation is not automatically accomplished by pointing the thumb down and continuing to reach while raising the arm, the following exercise will help create that all important mind body connection. This rotation exercise will also help the student feel how the muscles at the back of the arm (triceps) tighten when the bow arm elbow is rotated. To help the elbow rotate more easily, tighten the triceps of the bow arm while working to rotate the elbow. Process: Place the bow hand against the edge of a door jamb or corner edge of a wall, i.e. something to lean against to create force against the bow shoulder. Position the bow hand so the pressure is on the thumb pad of the palm, allowing students to practice the correct bow hand position at the same time. Placing pressure on the thumb pad of the palm and not the heel side of the palm will help facilitate elbow joint rotation into the correct vertical position. With your bow arm in the shooting position, (shoulder height) and the bow hand against the door jamb, turn the elbow out (clockwise for right hand archers and counterclockwise for left hand archers). Do this exercise several times and continue to practice daily. Be sure to keep the bow shoulder down while doing the exercise. Over time, gradually lighten the pressure on the palm until the elbow can be turned without holding anything. stance & body position The correct bow shoulder position will produce a V shaped notch at the top of the shoulder. Note the correct vertical elbow joint in this photo. Turn the bow arm elbow down (clockwise for right hand shooters) until the elbow joint is vertical. 11

12 stance & body position This simple exercise will quickly demonstrate if the bow arm elbow is correctly positioned. With the bow arm extended, palm facing the ground and thumb extended, the bow arm elbow should be in the correct vertical position. Test the students by having them bend the bow arm at the elbow to see what direction the hand moves. Make sure the upper arm does not rotate while bending the arm at the elbow. If the hand comes to the chest it is correct. If the hand ends up by the face, the elbow is not correctly rotated. Always rotate the elbow out or down to create a vertical crease at the elbow joint. There are several important reasons for rotating the elbow. First, and of significant importance, to keep the elbow out of the path of the string. Rotating the elbow also activates the bow arm triceps to improve bow arm stability and properly aligns the bones of the upper arm and shoulder joint. Continue the bow arm reaching exercise and have the students work on learning to rotate the bow arm elbow while reaching toward the target. You want them to develop the feeling of reaching, but without moving any part of the body toward the target. A quick check for correct bow arm rotation correct incorrect Here the elbow is correctly rotated into a vertical position.. Here the elbow joint is not rotated. With the elbow correctly rotated, the arm will bend toward the chest. When the elbow joint is not correctly rotated, the arm will bend toward the face. Students should continue the exercise of turning their head straight toward the target to develop good training habits and create a mental connection with what they want to hit. Learning to correctly position the bow shoulder and elbow are critical steps in the learning process and must be well accomplished before moving on to the next step. If the bow shoulder and bow arm elbow are not correctly positioned, it is not possible to develop sound shooting technique. 12
. Shoulder positions. Back tension or how to use the drawing arm shoulder blade (scapula) to development alignment.")

.")
. The strap will be at a slight angel across the fingers.")
13 Form Strap Training Students are now taught to raise the drawing arm simultaneously with the bow arm in preparation for drawing the bow. This section will cover: Drawing arm position (arm that draws the bowstring). Shoulder positions. Back tension or how to use the drawing arm shoulder blade (scapula) to development alignment. Beginning shot process. Shoulder alignment. Training device used to develop correct shoulder positions, release and follow-through 8 Using the Form Strap - The Form Strap is an excellent training tool for students to raise both arms in unison. Once the students are well accomplished at raising the bow arm, they are ready to raise both arms simultaneously. To simplify the process, use the Form Strap. Set the strap to the distance show in photo A. This length will approximately closely match that of the initial draw position or set position. (Approximately thumb pad to shoulder joint). Process: Place the strap on the thumb pad of the bow hand, just inside the lifeline. On the draw hand, place the strap in the middle joint of the first and middle fingers and in the first joint of the ring finger (photo B). The strap will be at a slight angel across the fingers. Fingers will be at a slight angle. After setting the hand positions, place the drawing arm forearm on the stomach. Keep the bow arm straight and raise it about 12 from the front leg into the "starting position". (photo C). Keep the strap positioned across the thumb pad of the bow hand with thumb pointed forward and the draw fingers hooked correctly on the strap (photo D). Next, pull the back of the draw shoulder toward the spine while the draw arm is resting on the stomach, then raise both hands toward the target to about cheek level. Remember to keep both chandlers down Another way to achieve initial shoulder alignment is to raise the hands to cheek level first, then pull the back of the draw shoulder back toward the spine to align the bow arm and shoulders. Both methods will produce some tension on the strap and help to bring the two shoulders into the correct drawing position. A B C Set position Starting position. D 13


14 form strap By using the Form Strap, the hands are held in the correct set position (photo E). Both hands should be at the same height, while the draw elbow is level with or slightly below the draw hand. Remember to keep both shoulders down at all times. The most important point here is to concentrate on pulling from the back of the draw shoulder and not the arm or draw elbow. Repeat raising the hands up and down and pulling from the back of the draw shoulder to bring the shoulders in line. Do this exercise several times until the students can do the process in a single smooth motion. The instructor must make sure that the draw shoulders stay completely down. Teach them to raise only the arms and not raise the shoulders or ribs. When lowering the arms, the students bow arm should come to rest about one foot from the front leg and the draw arm forearm coming to rest on the stomach. Once the students have had adequate practice in this exercise, have them do the same exercise without the Form Strap and make sure the hand movements are exactly the same as with the strap. E 9 Drawing (without the Form Strap) - Students will soon develop the ability to raise both arms in unison while keeping the shoulders down. The next step after raising the arms is the draw. In this exercise, the focus is on learning to move the drawing elbow back by rotating the draw shoulder (scapula) back toward the spine. It is the entire shoulder and scapula unit that is used to draw the bow from the set position, and not the draw arm. Working from the set position, the proper hinge point is now at the scapula, which is used exclusively to draw the bow from the set position to anchor. The idea is to create a straight line between the tops of the shoulders and bow arm through the rotation of the draw shoulder. (see photo) Process: From the start position, raise the arms to the set position, then move the draw elbow and shoulder unit back until the index finger of the drawing hand is located 1 to 2 inches below the chin. From there, move the hand up until the top of the draw hand and index finger are firmly pressing against the bottom of the jaw bone. The drawing process should take about 4 to 5 seconds to move the hands and arms from the start position to where the draw hand is firmly pressed against the jaw. During the draw, remember to keep the bow hand moving straight toward the target center, without allowing any drift of the bow arm to the left or right. A With the arms raised, note that the shoulder is down creating a V shape at the top of the shoulder "correct position". Curved arrow shows direction of draw scapula/shoulder movement toward the spine. 14
.")


15 10 F Anchor - Anchoring is really two things. First it is placing the draw hand under the chin with the top of the index finger and hand in full contact with the bottom of the jaw (photo F). Second it is also the use of the skeleton structure. In the first description, the draw hand is under the jaw, with bowstring touching the corner of the chin and thee center of the nose. The term Anchor is the most common description of this part of the shooting form. It can also be considered as the "rear sight" position. In the BEST shooting system you will learn that the skeletal structure and especially the bow shoulder and draw side scapula position are what actually control the draw length. form strap The skeleton structure constitutes what we consider the true anchor. By using bone alignment to develop the correct shoulder positions at full draw (photo G) the anchor in both cases becomes far more precise. 11 Follow Through - Once the students are able to make the correct drawing and anchoring motions, they may now be taught the follow-through. Have the archer come to anchor for 3 seconds and then move the drawing hand directly back along the neck until the top of the index finger rests just past the ear lobe. The skill here is to teach them to follow- through only for the amount the draw scapula travels toward the spine, and not allow the draw arm to hinge at the shoulder joint. As the draw hand moves back, it should be in contact with the neck for the entire follow- through. During the draw, remind the students to continue reaching the bow arm toward the target to set up the proper skeletal alignments. At anchor, place the draw hand under the chin with the top of the index finger and hand in full contact with the bottom of the jaw. G The bow shoulders and draw shoulder positions are the primary controlling points of an accurate and consistent draw length. 15

16 form strap Miming the Shot Putting all of the shot components together is the goal of the following lesson. Students have now learned the stance and body positions, as well as the draw, anchor and follow through. For this exercise, establish the stance, hip and rib positions in preparation for the following drill. Step 1, is the starting position, beginning with the bow arm about 12 from the leg and the draw hand forearm resting on the stomach. 1 Starting position. 2 Step 2, raise both hands up to the set position, with the draw hand at about the shoulder joint and the bow arm fully extended. Step 3, move the draw hand back by moving the entire shoulder and elbow around toward the spine until the draw hand is about 1-2 below the chin. Raise hands together to set position. 3 Step 4, bring the draw hand up under the chin Step 5, stay in the position of step 4 for 3 seconds and then move the draw hand back, directly along the neck until the hand ends up behind the neck. Practice each step until the entire process becomes a fluid movement, beginning from the starting position through each major step of the shot process until follow through. Move draw shoulder down toward spine. 4 Move draw hand up to anchor Follow-through and keep bow arm up.
 to develop optimum accuracy and consistency through proper bone alignment of the skeletal structure.")


 between the tops of the two shoulders and the bow arm (photo AB line).")
17 12 Alignment - Alignment means the position of the arms and shoulders when the archer is at full draw. Achieving proper alignment produces the correct lines of force (force vectors) to develop optimum accuracy and consistency through proper bone alignment of the skeletal structure. Good alignment is absolutely necessary for developing top shooting form. Consistency and accuracy are two different things. Any archer can be accurate on one shot, but the real goal is to be consistently accurate from shot to shot. If the tops of the shoulders and bow arm, as well as the hands and draw elbow are not correctly positioned, any errors, even very small errors in technique will be greatly magnified. In developing proper alignment, there are two body alignment positions that need to be checked to verify good shooting posture in relation to the bow arm and shoulder positions. A B form strap In this view, the straight line between points A and B clearly shows the most critical part of the archers alignment. If the AB line is developed, the rest of the form will basically fall in place. corret alignment poor alignment C D It is easy to see from these overhead views how good alignment produces the archers triangle. The CD line produces the long edge from the end of the elbow to the bow hand. Create a straight line between the two shoulders and bow arm, moving the draw shoulder toward the spine. (archers triangle). Note draw elbow slightly behind arrow line. Poor alignment. Top of shoulder not in line while the draw arm elbow is well outside the arrow line. D A C First, there should be a straight line (alignment) between the tops of the two shoulders and the bow arm (photo AB line). Secondly, the bow hand, drawing hand and tip of the drawing elbow must also create a nearly straight line (CD line). The tip of the draw elbow should be slightly behind the hand more toward the spine along the CD line. Both AB and CD positions need to be checked to make sure alignment is correct. It is possible to do one without the other and the reason both positions need to be verified to ensure that proper alignment is achieved. Correct alignment will produce a straight line between the bow arm and the tops of the two shoulders (AB line). Along the CD line, the bow hand and draw hand align while the tip of the draw elbow is positioned slightly past the line. Also, notice how much further the draw scapula protrudes past the bow arm scapula along the AB line and how it points well right of the target (right hand archer). B 17


18 18 Form Strap Training This chapter offers more detail on specific components of technique to ready the archer for the final shooting steps presented later in the book. Here we learn: The correct bow hand position. Drawing hand position and position of the draw fingers. To refine the draw scapula motion and the steps to train students in this unique body movement. The use of the Form Strap to mimic the shooting process. The first experience in resistance training to ready the student for shooting. 13 Use the Form Strap to simulate shooting - The Form Strap is used to learn the final steps of the basic shot process. At this stage, adjust the Form Strap to the correct draw length for each student (photo below). Place the Form Strap along the inside of the life line on the thumb pad of the bow hand. In the staring position, have the students point their thumb toward. As they rise the hands to draw, the thumb will be pointed toward the target. Pointing the thumb forward will align the thumb with the inside of the forearm creating a stable bow hand position. On the drawing hand, place the strap between the first and middle joint of the index and middle finger and in the fist joint of the third finger. Adjust the strap from the "Y" of the thumb (thumb pad) to the front of the chin with the bow arm extended in the shooting position and the archer in correct alignment (See previous page on alignment). Adjust the Form Strap to full draw, palm to front of chin. Simulating shooting 14 Draw hand position - Start with the Form Strap placed correctly on the drawing fingers. Next, create a deep relaxed hook with the three fingers, curling the fingers slightly past a right angle to the back of the hand. From that position, relax the draw fingers, but without opening or changing the finger position. Relaxing the draw fingers will also allow the tension to flow to the back (draw scapula) and not held in the forearm or draw fingers. Relaxing the draw fingers and forearm will help prevent the student from pinching the arrow off the arrow rest when learning to shoot for the first time. Initial strap position on the draw fingers. Create the finger hook by curling the ends of the fingers keeping the back of the hand straight. Note how the wrist is bent slightly out in correct natural position. Learning to relax the draw hand is a critical part of the drawing and follow-through process.

19 incorrect form strap Rotating the bow arm elbow - 15 The Form Strap is a great teaching tool, making it easy to mold students into the correct shooting posture while the archer is held in a static, full draw position by the Form Strap. While the archers are at full draw, make sure that both shoulders are down and the bow arm is properly rotated into position. Once the skill of rotating the bow arm has been learned, have the students add some additional tension to the back of the arm (triceps) to increase bow arm stability. Tightening the triceps of the bow arm will help prevent the elbow from rotating back into the wrong position during the shot. The bow arm elbow joint should remain nearly vertical when the shot is executed. Some of the most important steps in the shooting process are keeping both shoulders down and rotating the bow arm elbow joint into a vertical position. correct The elbow joint is incorrectly positioned, putting the elbow in the path of the bowstring. The elbow joint is correctly rotated in the vertical position, providing bowstring clearance. 19
 is used to draw the bowstring as the archer reaches full draw, not the draw arm.")
.")

, move the draw hand up into the anchor point, firmly pressing the top edge of the draw hand and index finger under the")


.")
20 form strap 16 Scapula exercise - This exercise makes it easy to teach how the scapula works. The draw-arm scapula (shoulder blade) is used to draw the bowstring as the archer reaches full draw, not the draw arm. Have the students place their draw hand on the center of their chest with the draw elbow parallel to the ground (photo A). Next, have them move their draw elbow back toward their spine without allowing the hand position to move on the chest (photo B). If the hand moves along the chest, they are using the arm and not the scapula. This exercise will teach students to correctly move the scapula rather than the draw arm. A B A B 17 Refining Anchor and Full Draw Position - When drawing to the anchor point, position the draw hand about 1 to 2 below the chin, pulling the draw scapula down and around toward the spine. From the position of 1 to 2 below the chin (photo 1), move the draw hand up into the anchor point, firmly pressing the top edge of the draw hand and index finger under the jaw bone (photo 2).The thumb is held down and lies against the neck, while the top edge of the hand makes full contact under the jaw. The tip of the index finger is positioned directly under the corner of the chin. 18 Place the draw hand on the center of the chest. Move the draw elbow back without moving the hand position. 1 Drop the draw hand to a position about 1 to 2 below the chin. Move the draw hand up to the anchor point while keeping the scapula down and towards the spine. Maintain an equal reaching and drawing force throughout the follow-through. Relax the draw fingers while maintaining the draw forces. Keep the bow arm up. Releasing - Teach the concept of no release, emphasizing the point that the release is simply an instantaneous relaxation of the draw fingers and not a deliberate opening of the hand. Go through the entire draw process to the anchor point using the Form Strap. Continue to remind students to reach toward the target while drawing, creating the feeling of equal power in both halves of the body (photo 3). The important point is to develop a sensation of equal force going toward and away from the target. While anchored at full draw and building energy in both directions, instantly relax the draw fingers while maintaining those forces. The draw hand should automatically move back along the neck creating the followthrough (photo 4). After the follow-through, observe that the draw fingers end in a slightly curled, naturally relaxed position. If the fingers are straight, it means the student physically opened the fingers rather than relaxing them. Make sure students have accomplished the skill of the release/follow through before moving to to the next phase of the shot cycle, the three point draw
.")

")

. 3.")
21 The three-point draw Three-point draw - This 19 is the last step of the beginning shot process. The stance, knees, pelvic tilt and ribs down positions are already set in preparation for shooting. Further preparation includes adjusting the Form Strap to the correct draw length for each student. (See page 18). To begin the shot sequence, hook the draw fingers on the Form Strap as shown on page 18 and place the strap across the thumb pad of the bow hand and point the thumb forward. 1 2 form strap Starting Position, pull back of draw shoulder toward spine and point bow hand thumb forward. 1.While in the Starting Position (photo 1) (bow arm 12 from the front leg and the draw hand on stomach), turn the head toward the target and pull the back of the draw shoulder toward the spine to initiate shoulders alignment. Next, raise both hands to approximately cheek level. At this Set-Up position, the draw hand should be located just in front of the bow arm shoulder joint (photo 2). 2. Move the drawing hand back until the draw hand is about 1 to 2 directly below the anchor point (corner of the chin, photo 3). While drawing, focus on building equal power in both sides of the body, toward and away from the target. Retain the feeling of power in the draw scapula while bringing the draw hand up to anchor and fitting the draw hand firmly under the jaw. Maintain the feeling of building energy in the draw scapula while reaching toward the target with the bow arm (using muscles under the arm). 3. Continue building draw forces at anchor for the entire release/follow-through phase, which will last about 2 to 3 seconds after anchoring. Within the 2 to 3 second time period, create the followthrough by simply relaxing the draw hand fingers while sustaining the feeling of power toward and away from the target. This action will automatically create the release/follow-through, which produces a single action motion. Remember, the release/follow through is one event, not two separate steps Raise both hands to set position, cheek level. Load draw scapula while drawing, with draw hand 1 to 2 below chin. Continue to maintain load on scapula and move hand up to anchor. Follow-Through keeping bow arm up. 21

22 Stretch Band As students continue to progress in learning the steps of shooting, they can now be introduced to second level resistance training. Here we introduce the stretch band. Students will learn to: Use of the stretch band as a training aid Use the stretch band to develop follow through Feel how the stretch band closely resembles drawing and shooting a bow due to its elasticity. Use the stretch band in practicing the three step shooting process of the drawing, anchoring and follow-through. 20 Training device used to replicate the feeling of drawing the bow and teaching proper follow-through Introduce the Stretch Band - Use a light drawweight stretch band, the red or green colors are good for beginners. Tie a knot in the stretch band to make a loop about 10 in diameter. The stretch band must be very light in its pull weight to keep from compromising the archer s technique. Too much drawing force can push the shoulders out of position at this early stage. Exercise for developing the release - Here 21 is an easy exercise to help students practice the correct release/follow through process. To help teach this skill, direct the students to hook the draw fingers on the stretch band and place the knotted part of the stretch band on the thumb pad of the bow hand. Next, have the students slowly draw the stretch band. When they have stretched the band approximately 6 to 12 have them instantly relax the drawing fingers while still in motion. Demonstrate this drill several times to help students understand the procedure. Watch the students to make sure the fingers are not straight or extended on release, but flip back into a slightly curled, naturally relaxed position. Also, observe that they continue moving and do not stop the motion to release while drawing. The draw/ release/follow through must be done in a single fluid motion. Practice this drill until the students understand how to instantly relax the fingers and have the draw hand continue to fly back rather than stopping the motion by physically opening fingers. 22 Use the stretch band to simulate shooting Hook the fingers on the stretch band in the same way as the Form Strap. The stretch band will more closely simulate shooting and duplicate the feeling of drawing and releasing a bowstring due to its elasticity. Make sure the students come to the proper anchor with the top of the index finger firmly under the jaw and the stretch band at the front corner of the chin. Carefully observe the students when introducing the stretch band. With new archers, there is a tendency to draw the stretch band well past the anchor point position when first using this training tool. The reason is, there is no definite stop when using the stretch band as there is with the Form Strap. When drawing the band, the draw hand is turned out slightly (counterclockwise for right hand archers, opposite for left hand) from where the fingers would be vertical. Turning the draw hand out just a little provides for a more biomechanically natural position and helps to relax the biceps of the draw arm. For the draw hand finger placement, check to see that the stretch band is placed just behind the first joints of the index and middle fingers and in the first joint of the third finger. 22


.")
, making sure that the top of the index finger has full contact directly under the chin (jaw).")
.")
23 23 Drawing - In the Starting Position (photo 1), pull the back of the draw shoulder around slightly toward the spine to align the shoulders while keeping the draw shoulder down. Remember to point the bow hand thumb forward. Next (photo 2), raise both hands to about cheek level and in a smooth fluid motion, move the draw elbow and draw shoulder scapula around toward the spine. As the students approach full draw, have them continue moving the draw scapula further down and around toward the spine. At this point, there should only be the drawing scapula engaged to pull the stretch band. That is, move the draw shoulder and scapula as a single unit keeping the draw hand relaxed. 24 Anchoring - During the drawing phase, the act of pulling the draw scapula down will aid in the draw hand being positioned about 1 to 2 below the chin ( photo 3). The draw hand should naturally come down below the chin as part of the draw process when correctly engaging the draw scapula. While holding the draw-scapula in this position, move the draw hand up into the anchor point (photo 4), making sure that the top of the index finger has full contact directly under the chin (jaw). 25 Releasing - Remember to emphasize that the release and follow-through is a single action. It is a unique experience to instantly relax the draw fingers while keeping the feeling of building continuous power toward and away from the target (photo 5). Instantly relaxing the draw hand is not an intuitive skill and requires ample practice to master the technique. However, this is the most efficient way of shooting stretch band Starting position, pull back of draw shoulder toward spine. Raise both hands to cheek level and point bow hand thumb toward the target. Load draw scapula while drawing placing draw hand 1 to 2 below chin. Continue to maintain load on scapula and move hand up to anchor. Follow-through keeping bow arm up. Note how the bow hand wrist falls toward the target. 23


24 stretch band and must be taught and closely monitored in order to develop championship-shooting form. By instantly relaxing the draw fingers to create the release and subsequent follow-through, the archer produces the least amount of lateral disturbance on the bowstring, providing for a consistent arrow launch and ensuring greater accuracy. Once students learn how to correctly perform the release, they are ready to use the stretch band for the three-point draw shot sequence. 26 Three-Point Draw Using the Stretch Band - The shooting steps involving the stance, knees, pelvic tilt and ribs down positions are already set in preparation for the shot as preformed in the Form Strap exercise. Set the correct bow hand and draw finger positions on the stretch band and turn the head toward the target to finalize shooting posture for the Starting Position. 1. While in the Starting Position, pull the back of the draw shoulder around to line up the shoulders. Next, raise both hands to approximately cheek level. While raising the hands to the Set-Up position, remember to point the bow hand thumb toward the target. 2. From the set-up position, move the drawing hand back until the hand is about 1 to 2 directly below the anchor point (corner of the chin). While drawing, focus on building equal power in both sides of the body, toward and away from the target and continue moving the draw scapula down and toward the spine. Retain the feeling of building power in the draw scapula while bringing the draw hand up to anchor and fitting the top of the hand directly under the jaw. Maintain energy in the draw scapula while reaching toward the target with the bow arm. 3. At anchor, continue building energy in the draw scapula and bow arm reaching to the target for the entire release/follow-through phase, which will last about 2 to 3 seconds after anchoring. Within the 2 to 3 second time period, create the followthrough by simply relaxing the draw hand fingers while sustaining the feeling of power toward and away from the target. This action will automatically create the release/follow-through, producing a single action event. The Follow-Through is completed with the draw scapula moving toward the spine to create followthrough. The arm and draw hand simply go along for the run. 24 Remember, the release and follow-through must not be two separate events of stopping to release and a secondary action to follow-through. Joint flexibility Some archers, especially females, have overly flexible joints. Have the archers fully extend their bow arms and check to see if any of the students have elbows that bend beyond straight when extended. This condition is known as hyperextension and you will need to work carefully with these students to protect their bow arms. It is critically important that they learn to properly rotate the elbow out of the path of the bowstring. For these archers, teach them to rotate the elbow slightly beyond where the elbow crease is vertical. Always use full length arm guards as seen in the photo right.
25 ranch safety procedures Before moving to the next stage in the shooting process, the instructor needs to be fully familiar with the whistle system in preparation for running safe practice sessions before actual shooting begins. The following information demonstrates range procedures and order of shooting using the whistle system. In the following chapter, students will be using an elastic cord on the bows, offering the closest step to actually shooting a bow and the last step before shooting their first arrows. 2 Whistles - From the waiting line, all archers go forward and place one foot on each side of the shooting line. Bow in hand, no arrows at this time. This same procedure will also be used once actual shooting begins. 1 Whistle - In the shooting position, have the students pretend to place an arrow on the bowstring and go through the three step shot process using the elastic cord. Teach the students to always keep the bow in a vertical position when walking and learning to load the arrow in the bow. Have the students perform the shot routine 3 times. Once an archer completes the third repetition, they then walk from the shooting line to the bow racks which are placed behind the waiting line. Archers will place the bows in the rack and wait behind the waiting line until all archers have finished. Continue to wait for the next whistle signal. 3 Whistles - Once all of the students have completed the shooting routine and are all back behind the waiting line, blow three whistles for all of the archers to go forward to the target line. When actual shooting begins, all archers will stand at the target line and allow one archer at a time to go forward to score and remove their own arrows from the target. 5 or more Whistles - Emergency, immediately stop shooting, all arrows back in quivers and direct your attention to the instructor. After the following chapter has been completely reviewed, it is time to familiarize students with shooting control and range safety using the whistle system. Hand out bows to students and have them wait with their toes behind the waiting line (see range diagram below). Procedure (using elastic cord) as follows: All students start behind the waiting line. 2yd 2yd Targets Target Shooting Waiting line line line How to handle dropped arrows on the shooting line Important: Should a student drop an arrow while on the shooting line, do not have them pick it up. Only teachers/instructors are to pick up dropped arrows. Procedure: Instruct all students to leave dropped arrows on the ground and finish shooting any remaining arrows in their quiver. Have them remain on the shooting line while all other archers complete shooting and retreat behind the waiting line. The instructor will pick up the dropped arrow and hand it to the archer. The student will then shoot the remaining arrow to complete that end of arrows. 25


26 26 Elastic Cord The following chapter will offer the first introduction to the bow. Here is where students must fully concentrate on the feeling Students will now be able to experience: Bow hand position on the bow grip. Finger position on a string that will closely resemble the bowstring. String contact at the corner of the chin and touching tip of the nose Releasing the elastic cord in the final and last step before actual shooting begins. The final preparations before that first important arrow. Training device that most closely duplicates actual shooting 27 First introduction of the bow - At this stage, the bows are handed out, but the student is not yet ready to shoot the first arrow. The bow will appear to have two bowstrings. One will be the bows normal bowstring and the other is an elastic cord. The elastic cord can The stretch cord can be drawn back and released without hurting the bow. With the bow in the students hands, it is now possible to ensure that both the bow hand and draw hand are correctly positioned. The position of the bow hand on the grip is basically the same as when they first learned to raise the bow arm using the Form Strap. The grip touches only the thumb pad portion of the palm, with the knuckles of the bow hand at about a 45 degree angle (photo right). Have them hold the bow lightly with the bow hand index finger, just enough to keep the bow from flying out of the bow hand during follow through. be drawn back and released without hurting the bow, and is the closest feeling to actually shooting. The goal here is to make sure the students technique is to an acceptable level of proficiency before shooting that first important arrow. Knuckles at approximately 45 degree angle. Thumb pointed forward.


27 The elastic cord is an excellent teaching tool as it produces only 5 to 6 pounds of draw (pull) force at full draw. When moving to the full draw weight of the bow, it is vitally important that the bows used are very light in draw weight. Bows that are about 10 lb. at 28 of draw are best for beginners. The importance of using an easily controlled, light draw bow can not be overstressed. elastic cord A very light draw weight bow will greatly aid students in maintaining good shooting technique they are learning. Once the shooting technique is sound draw weight can be gradually increased over time. Bows that are too heavy in draw weight for a student to control will always compromise technique. Finger pressure is approximately 40% top, 50% middle and 10% on the bottom finger. Fitting arrows Now that your students are getting close to shooting their first arrow, it is necessary to measure each students draw length to make certain the arrows you hand out are long enough to safely shoot. Procedure: without using a bow have the student show you a full draw position. When the archer is in the full draw position with their head turned toward the target and bow arm fully extended, place one end of a tape measure or yardstick against the front of their chin. Next, measure the Curl the fingers into a deep hook. Keep the back of the hand and fingers straight. distance from their chin to one inch (1 minimum) beyond the end of their thumb with the thumb extended toward the target. The arrows need to be at least as long, or longer than the distance measured from the chin to one inch past the end of the thumb. Arrows are measured from the inside portion of the arrow nock (where the string sits), to the end of the arrow shaft (not including point). Use a tape measure or yardstick to measure the correct arrow length. Measure the distance from the chin to one inch beyond the end of their thumb. 27


 directly below the anchor point to about 1 to 2 below the chin (photo 3).")
.")

28 elastic cord Final Stage before Shooting - This is the best opportunity to fine tune each student and confirm that they have learned to correctly hook the string with the draw fingers. 1. Place the bow hand on the bow gip with knuckles correctly positioned at 45 degrees and the thumb pointing forward. Hold the bow with index finger just enough to keep the it from falling out of the hand upon follow through. 2. Turn the head toward the target (photo 1). 3. Pull the back of the draw shoulder toward the spine to create shoulder alignment. Raise both hands simultaneously to cheek level, keeping both shoulders down. 4. Rotate the bow arm elbow into a vertical position if not already accomplished. 5. Draw the bow keeping the head turned toward the target. Draw the elastic cord (later bowstring) directly below the anchor point to about 1 to 2 below the chin (photo 3). Be sure to contact the chin first with the stretch cord before moving the hand up under the jaw to anchor (photo 3). 6. Slide the string upward along the corner of the chin (just right of center for right hand archers, opposite for left hand archers). Always keep the stretch cord or bowstring in contact with the chin while moving the draw hand into the anchor position. The draw hand contact under the chin should be firm (photo 4). 7. In most cases, if the head position is correct, the string will contact the center of the nose after anchor without the need to adjust the head. Archers with a shorter nose may need to tilt the head slightly forward to touch their nose to the string. Continue to feel the draw scapula position when anchoring. 8. Align the tops of the two shoulders and bow arm. 9. Keep the draw fingers very relaxed, just enough to maintain the same finger position. 10. Build equal force toward and away from the target. Relax only the draw fingers to create the follow-through (photo 5).The draw scapula movs toward the spine and carries the draw hand back along the neck, past the ear lobe. 11. Keep the bow arm up for approximately 2 seconds after follow through. 12. Reflect on the feeling of the shot Starting position. Raise both hands to cheek level. Draw 1 to 2 below chin. Move draw hand up to anchor. Maintain draw forces. Follow- Through, keeping the bow arm up.
 so the draw weight of the bow is not uncomfortable on the draw fingers.")
. Do this procedure at least 15 times before shooting the first arrow.")

29 Drawing Practice: Drawing the bow for the first time - (Remove 29 elastic). Pass out finger protection to each student (finger tabs) so the draw weight of the bow is not uncomfortable on the draw fingers. Keep the draw finger hook relaxed, placing about 40% of the draw weight on the index finger, 50% on the middle finger and about 10% on the bottom finger. Follow the previous system of drawing. Have the students draw the bow, anchor, hold for 3 seconds and then let down (holding the string the entire time). Do this procedure at least 15 times before shooting the first arrow. The students need to feel what the bows true draw weight feels like and verify that they can control the draw weight with good shooting posture. getting ready for shooting Caution: read before drawing practice and shooting begins Dry Firing the bow can break and possibly injure the archer. Remember to emphasize that the students must hold on to the bowstring during this process so not to Dry Fire the bow. (A Dry Fire is to let the bowstring go without an arrow). Correct anchor position. Draw hand in full contact with bottom of chin. String in contact with corner of chin and tip of nose. 29


30 First Arrow Shooting the first arrow Final preparations for shooting the first arrow can be found in this chapter. Here the archers will be introduced to: The finger tab, to protect the draw fingers. The arm guard, to protect the bow arm forearm. The archers will continue working on all of the steps and skills developed through the processes previously covered using good biomechanical shooting form. Here the students will shoot that first important arrow. Prepare for the shooting lesson by passing out arm guards and finger tabs to each student and matching the equipment to each archer s physical size. For beginners, full length arm guards are best for fully protecting the bow arm against the possibility of painful bowstring contact. The long arm guard is an important precaution in case some students have not yet learned to rotate the bow arm correctly. Each student should also have a well fitting finger tab. Remember to use extra long arrows for good safety practices and match the draw weight of the bow to each archer s physical strength. Lay out the bows in groups of left hand and right hand bows as well as by length and draw weight. 30 Introducing the arrow - The students are now ready to shoot their very first arrow using the three-point drawing system. They should start at no more than 2 to 3 yards away from a blank target mat. No target face or bow sight is introduced at this time. The students are simply learning to feel what it is like to shoot. Focusing on the actual sensation of shooting the bow is the fastest route to shooting success and must be continually emphasized. Later, when introducing the target face and bow sight, there will be a tendency to over aim. For the instructor, it is important to remind students to work on their shooting form and not concentrate on aiming or trying to hit the center. Overaiming or trying too hard will cause them to quickly forget shooting form. Shooting procedures Nocking the arrow Place the arrow on the bow string directly under the nocking point with the odd colored feather/fletch facing away from the bow (index fletch). Be sure the arrow nock snaps firmly onto the bow string. Always keep the bow in a vertical position on the shooting line and when walking to and from the shooting line. Finger hook and bow hand Place the index finger above the arrow nock and the middle and ring finger below the nock. Take a deep hook with the draw fingers as in the previous exercises and point the bow hand thumb forward. Remind the students to relax both the draw hand and bow hand when drawing the bow. 30


31 Quickly review the process: Stance Legs straight, knees relaxed Pelvic tilt Ribs down (chest down) first arrow Follow the three - point draw system. 1- Both hands raise to approximately cheek level. Pull the draw shoulder and elbow back, using the back of the draw shoulder to create shoulder alignment. 2- Draw to anchor, first making contact with the bowstring on the corner of the chin. The drawing hand located 1 to 2 below the chin. Slide the bowstring up along the chin to locate the top of the draw hand firmly under the jaw. While drawing, the draw scapula moves toward the spine allowing the draw elbow to be located directly behind the archers neck and bow shoulder. During the draw, the bow arm continues to reach toward the target to create equal forces in both halves of the body. At full draw, make sure the bow arm elbow joint is rotated vertically Remember to keep the head up and straight forward toward the target, not tilted. The bowstring should be firmly contacting the right front corner of the chin (right hand archers, opposite corner for left hand archers), but not to the side of the chin. If the bowstring does not automatically make contact with the tip of the nose, tilt the head slightly forward until the center of the nose touches the bowstring. 3- Maintain the anchor position (bringing the shoulders into alignment) for 3 seconds and follow-through with the draw scapula moving toward the spine. The draw hand fingers are relaxed to create the release/follow through while the draw hand follows a straight path along the neck. Keep the bow arm up and maintain the exact same bow arm position during the follow-through. Always maintain dynamic forces toward and away from the target. Monitor the archer s progress for the remainder of the session. 31


32 Bow Sight Introducing the bow sight After the feeling of shooting has been well established, the bow sight can be introduced. The new archer must continue to concentrate on the shooting form, not on aiming. Remind the students to: Focus on shooting technique Look at the target through the ring, but keep the mind on the feeling of the shot Take no more than 3 to 4 seconds from the time they anchor to release and follow through. When students are introduced to using a bow sight, they will often change their main focus to aiming, forgetting their shooting form. Instructors need to continually remind new students to work on technique and avoid the tendency to over aim. Mount the sights to the bows in advance of the training session and set the sight elevation for the approximate distance they will be shooting, which should be no more than 3-5 meters. Start with ring about 4 above the arrow rest. The training sight is used to introduce the concept of aiming by simply looking through a large circle. Precise aiming should never be a conscious effort. Teach the students to look through the ring (keeping both eyes open) at where they want to hit, but keep full concentration on the process of shooting. The focus must only be on the shooting technique and not on aiming. Process: At this stage of development student archers should be shooting at very close distances without a target face. A shooting distance of 3-5 meters/yards is more than enough. Students should feel the success of hitting the middle of the target mat to build confidence in their shooting form and to become accustomed to hitting center. After the archers have become familiar with the use of the bow sight, teach them how to adjust the sight to increase accuracy by moving the sight up, down, left or right. The sight always follows the arrow impact. For example, if the arrows hit high, raise the sight up. If arrows impact low, lower the sight The same is true for left and right impact. If arrows hit right, move the sight to the right and if they hit left, move the sight to the left. Once students start shooting at different distances have them record their sight settings for each shooting distance into a notebook for future reference. distance shooting of 3-5 meters/yards. 4 Training sight 1½ diameter PVC pipe. 32 Keeping both eyes open.


33 In this lesson, introduce a 122 cm (48 ) target and move the shooting distance to 9 to 10 meters. Emphasize again that the concentration must continue to stay on the process of shooting the arrow, and not on aiming. The students need only look through the ring at the targets center, while keeping conscious focus on the feeling what the body is doing throughout the shooting process. Once the archers are at full draw, consistently remind them to shoot within 3 seconds after firmly anchoring. While anchored, narrow the focus to feeling the draw scapula building energy and the bow arm reaching to the target. During this final stage of the shot, create the follow-through, moving the draw scapula toward the spine while keeping the head and bow arm still. If they can keep the mind totally focused on the feeling of the shot, they will experience rapid improvement and success. bow sight Review process from previous classes Review the complete shooting process from the beginning to make sure steps are remembered and followed. Stance Knee position Ribs down position Bow hand position - thumb pointed forward Draw finger position Shoulder position Head turned to the target both eyes open Bow arm rotation through reaching with thumb pointed forward Drawing and Anchoring Draw scapula motion Power toward and away from target Release and follow-through as single action Reflect on how shot felt Remember to teach the students to simply look through the large sight ring at what they want to hit, while concentrating only on the steps of the shooting technique. Students must be taught to avoid focusing to much attention on the sight or target. 33


 of the bow and attaches to the index finger.")
34 intermediate level shooting technique Finger sling - As the archers continue to improve their form, more advanced steps may be introduced. The finger sling is an important part of the equipment and something that is used by top archers worldwide. When used correctly, the finger sling can significantly improve accuracy and consistency. In the more advanced stages of shooting, the archer does not actually hold the bow, but rather wants the bow to leave or jump forward from the hand. Learning to relax the bow hand and allowing the bow hand to follow through toward the target is a critical step in developing top-level technique. The bow shoots more accurately because the archer does not grip the handle, which often causes bow torque. The finger sling is simply a small strap that attaches to the thumb of the bow hand, goes around the outside (back) of the bow and attaches to the index finger. The archer continues to point the thumb toward the target, but instead of keeping the index finger against the bow to hold it in the hand, relax the bow hand keeping only enough hand tension to point the thumb forward. On release, the bow hand wrist falls forward (photos 1 and 2) and the finger sling catches the bow, preventing it from falling out of the hand. Coaches/instructors must watch that students do not grab the bow on the release and follow-through phase of the shot. Grabbing the bow is a common error and the reason for not introducing the finger sling too early. Make sure the students allow the bow to jump from the hand, with the bow hand wrist falling forward toward the target. 1 2 String Position - Once the archers have reached a good level of proficiency and are well skilled in each step of the shooting process, a few more steps can be added to ready the students for more advanced training. As students become familiar with using the training sight they will need to learn to control the position of the string in their sight picture. As the archers bring the string to their face at anchor, the string will appear in their line of sight and appear blurry. Teach them to place the string image along the inside edge of the sight window (see picture right). Watch each archer to ensure that they bring the string to a consistent point on their face at anchor. 34


35 Transfer: The transfer stage is not difficult to learn once the archer has become proficient in the basic shooting skills. However, it is absolutely necessary that the students are completely competent in the basic shooting process before learning the more advanced stages of higherlevel archery technique. The transfer stage is simply learning to move the draw shoulder and scapula more toward the spine to correctly position the draw scapula. The additional transfer step is used to create maximum bone and shoulder alignment. To accomplish the transfer, go through the normal drawing process, dropping the draw scapula down low deep in the back and moving it toward the spine on the initial draw. Because the initial draw is partially a linear movement, achieving the maximum range of motion in the draw scapula takes a secondary movement in an angular direction. This last movement is accomplished after coming to full draw and anchoring. Once the archer is at full draw and firmly anchored, move the draw scapula slightly more toward the spine. The transfer is created by pulling the back of the draw shoulder in toward the spine and not by trying to pull the shoulder and elbow further back. The transfer process will achieve approximately ¾ to one additional inch of travel in the scapula to further enhance alignment. In this position, controlling the draw weight of the bow is also much easier due to the optimum bone alignment achieved through the transfer step. It is also important to note that the transfer movement does not increase draw length. The scapula moves further toward the spine, but the draw hand remains in the same initial anchor position. Transfer relaxation - By maintaining the transfer position, it is possible to significantly relax the draw hand and draw arm, allowing that tension to be moved into the draw scapula rather than the arm. These steps create the control phase of the shot and help ready the archer for a steady and accurate shot execution. The transfer phase is one of the more advanced stages in elite level shooting technique. Note: Elite level shooting technique will be discussed in much greater detail in the next video and accompanying book. Future lessons will include more detailed focus on back tension, the correct breathing process during shooting and other more technical aspects of the sport. transfer stage 35


36 stringing the bow There are several ways to string a recurve bow. Two of the recommend methods are demonstrated below. Some bow stringing methods are unsafe, such as the push pull and step through methods. Using a bow stringer is the safest way to string a recurve bow, both for the archers safety and to prevent bow damage. The cord bow stringer and Form Strap methods are two safe and easy ways to string a recurve bow. Using a Cord-Type Bow Stringer - The cord stringer is the most popular method for stringing a recurve bow, with several varieties to choose from. All work well and function in a similar manner. The type shown here is the double cup model, having a small and large cup to fit over the limb tips. Other types have a single cup for the bottom limb tip and a friction pad that slips partway down the top limb and stays in place when the bow is being strung. To start, make sure each bow limb is securely fastened to the bows riser. Use a bowstring in good condition and slide the top bowstring loop down the top limb about 6 and fit the bottom bowstring loop into the string notch on the bottom limb. Now place the large cup of the bow stringer over the bottom limb tip and the small cup over the top limb tip. For the other models of cord type bow stringers, follow the manufacturer s instructions. Next, with the proper cup placed over each limb tip, stand on the cord and pull up on the bow at the pivot point of the bow grip. As the bow limbs start to flex, slide the top bow string loop up the limb until it can be sliped into the limbs string notch. Make sure the bottom bowstring loop stays in place during the stringing procedure. Once the top string loop is in place, let off the pressure on the bow to relax the limbs and the bow is strung. To unstring the bow, reverse the process. Using the Form Strap - First, position something under the bottom limb tip to protect it from damage and or dirt. The use of an old towel or piece of carpet will work fine (photo 1). Make a large loop with the Form Strap and place it over the pivot point of the bow grip, between the bowstring and grip. Position one foot on each side of the grip and slip one foot through each end loop of the Form Strap, centering the strap in the middle of each foot. Be sure the bottom bowstring loop is properly positioned on the limb tip and the bowstring is in the center of the bottom limb (photo 2). Place one hand under the recurve part of the top limb and pull up to bend the bow. Slide the bowstring loop up the top limb into the string notch (photo 3), (or place the bowstring loop over the tip and into the string notch when the top limb is flexed). 2 1 Slide the string loop up the limb and into the string notch. 1 3 To unstring the bow, reverse the procedure by pulling up on the top limb to relax the bowstring. Remove the bowstring loop from the string notch and slide it down the limb while slowly relaxing the pressure on the top limb. 36


37 Form Strap - The Form Strap is the first of the training tools to be used in the learning process. It is made of ¾ nylon webbing fitted with a plastic strap adjuster buckle to form an adjustable loop. The loop should be able to accommodate a draw length up to about 34. The strap including attached buckle should be at least 6 long. Nylon webbing and accessories can be purchased at many sporting goods stores, army surplus or search the internet for pre made straps. Some styles of luggage straps will also function in the same way. The Form Strap can also be used as an isometric exerciser and bowstringing device. training tools Teaching the BEST method to beginners requires some simple training tools. Most of these can be made by the instructor and are low cost. Take the time to acquire or build all of the training aids before starting your class. Stretch Band - Stretch bands are elastic rubber straps, used primarily for exercise and physical therapy. They are marketed under the brand name Theraband and can be purchased at a medical supply store, on-line or at some archery specialty shops. Therabands come in a wide range of resistance and are color coded to indicate their strength. Light brown offers the lightest resistance and gray the heaviest. For most archery applications the red or green colors are the best. Therabands come in 6 yard and 50 yard rolls and are also available in a latex free version for archers who may be allergic to latex products. To use the Theraband, cut the 6 wide ribbon into an un-stretched 42 to 44 length. Tie the band into a loop approximately 10 in diameter with a simple square knot. The stretch band can then be used as a shooting form training tool or a warm up and exercise device. The stretch band can be especially handy for travelers who want to keep up their form and muscle tone while on the road. The Form Strap can be adjusted to fit any draw length using the sliding buckle. The Form Strap can be used for different types of specialized training. Because it holds the archer in a statistic position, it is easy to develop the correct biomechanical positioning. Bone aliment and body positions can be quickly taught and felt by the archer. Isometric workouts for building archery strength as well as shooting form practice can also be accomplished with this tool. Additional benefits such as developing alignment and the ability to easily learn to move the draw scapula toward the spine are just some of the uses of the Form Strap. For example, because the Form Strap does not stretch while held the full draw and anchor position, correct scapula motion can be quickly learned. This movement is not easily accomplish with a stretch band or even the bow because both can be draw further than the full draw position. Practicing with the Form Strap will greatly help any archer learn technique and make rapid improvements in shooting skill. Therabands do wear out. Expect to get 6-9 months use before it will need to be replaced. 37

 material from a home improvement, upholstery or sporting goods store (often used inside tent poles for easy")


38 training tools Elastic Cord String - Sometimes, even a bow that is 10 pounds in draw weight may be too heavy when first introducing the bow. An elastic string added to a recurve bow will enable the beginner to get the feel of the bow s mass weight and grip before moving to the bow s full draw weight. It is much easier for a coach to re-position the archer into the correct form when the archer is using a very light draw weight bow. To make an elastic string, purchase 1 8 diameter bungee type stretch cord (shock cord) material from a home improvement, upholstery or sporting goods store (often used inside tent poles for easy assembly). Cut the elastic cord to about 40 to 42 long for a 66 bow and tie a simple slip knot in each end, or use serving thread to tightly form a small loop at each end of the cord. Secure the loops at the top and bottom of a strung recurve bow to form a second string for training purposes. Training Sight - Training Sight Very little emphasis is placed on aiming when first learning the BEST method. It is important, however, to have archers become accustomed to looking through a sighting device while shooting. The simple replacement of the small sighting ring on an inexpensive target sight with a large plastic ring made from a 1½ diameter PVC pipe will serve as a training sight. Later, the large ring can be replaced with a smaller target aperture. To make a training sight, cut 1½ diameter PVC pipe into sections about ½ to 9 16 long. Drill a small hole in the side of the ring using a 3 16 drill bit and insert an 8-32 x 2 long button head machine screw through the hole with the threads to the outside (screw-head on inside of ring). Secure the machine screw to the PVC ring with an 8-32 locking nut and thread the remaining screw into the sight block. This large sight ring is easy for the beginning archer to use, while not distracting them from focusing on the process of shooting. 38


 and two types of finger tabs (with and without finger separator). Tabs with finger separators are recommended for use after the beginner stage.")
39 shooting equipment Finger Tabs and Arm Guards - All archers should shoot with a finger tab and arm guard. Finger tabs are made of flexible material and protect the draw fingers while shooting. For new archers, a simple single layer tab is adequate. Later, as technique improves and bow weights increase, the archer may choose a multi-layer tab with a finger spacer. The arm guard should protect the inner elbow joint and forearm. Long or full length arm guards are highly recommended for all beginners, especially for archers with hyperextended elbows. Teach each archer to properly position and adjust their equipment for adequate protection of the draw fingers and bow arm elbow. Quivers - Arrow quivers can be of a simple ground type or hip mounted. Ground quivers can be easily made using a 9 square of plywood and a 3 to 4 diameter x 12 long piece of PVC or plastic drainage pipe secured to the center of the plywood. Ground quivers are often easier for young archers to use, as they are located next to the archer on the shooting line and less cumbersome when walking. Typical 18 high orange safety cones also provide an adequate ground quiver for arrows. Two styles of full length arm guards (junior and adult) and two types of finger tabs (with and without finger separator). Tabs with finger separators are recommended for use after the beginner stage. Finger Slings - The finger sling should be added only after the archer has established consistent shooting form and is closer to an intermediate level of shooting competence. In the more advanced stages of shooting technique, the archer does not grip the bow, but rather relaxes the bow hand letting the bow jump forward toward the target. The finger sling is used to catch the bow to prevent it from falling from the archers hand Hip quivers should be clipped to the belt or pocket on the draw hand side of the body. 39


40 shooting equipment Arrows - For beginners, arrow length is a very important consideration. Pick arrows that are long enough to extend at least 1 to 2 beyond the far side of the bow when the archer is at full draw. Following this procedure will ensure that there is no chance for an archer to overdraw an arrow past the arrow rest where it could fall and injure the bow hand. Arrows should be organized in sets of three and each set should be clearly marked to identify the set. Markings can include unique shaft and fletching color combinations, colored cresting bands or a number system. Have the archer learn which arrows are theirs and use the same arrows for each session. Having a spare arrow or two for each set will allow damaged arrows to be replaced immediately without disrupting the shooting session. Bows - Bows should be individually numbered or lettered for identification. Be sure each archer knows their bow number and uses the same bow each time they step to the shooting line. Organize the bows by right and left handed risers as well as by bow length and draw weight. Fit each archer with a bow that most closely matches their size and strength. Remember that beginning bows should have a draw weight of pounds maximum. The bows used for introducing the BEST method to new archers should be very light in draw weight. Bows pounds in draw weight are ideal. Under no circumstances should the bows have a draw weight of 20 pounds or more for beginning archers. The BEST method is designed for recurve archers. While many of the shooting form techniques are adaptable to compound archery, all beginning bows in this method should be of a recurve design. Lightweight, youth compound and compound like bows are not used for this program. 40
41 archery equipment RECURVE BOW Tip Recurve String Notch BOW GRIP DETAIL UPPER LIMB String Pivot Point Arrow Shelf Grip Index Fletching (facing out) Serving Nock Locator Limb Back Sight Window Arrow Rest Limb Face RISER (handle) Serving Brace Height Limb Pocket LOWER LIMB ARROW Nock Point Shaft Cresting Fletching (Vanes or Feathers) 41
42
43

44 Tell us why do you like archery? (USA Olympic hopes) Guy Krueger I like Archery because I think it s probably the most technically difficult sport in the world. It has given me a lot of opportunities and an opportunity to be the best in the world, something I really want to be. Brady Ellison I love to compete! Archery is an individual sport that is technically based, and you have to be on top of your game to be good. There are a bunch of great people in archery and it s a lot fun to meet people and to travel all over the place, I really enjoy that. Tyler Martin I started shooting in camp when I was a little kid and got hooked, I love it! Josh Anderson I just love to shoot! Ever since I was little I loved being outside, spending time with friends and in archery there s awesome people, they re like my family now. Lindsey Carmichael I like archery because anybody can shoot, the opportunities are amazing. You can shoot if you re 4, 40 or 80. You can shoot standing or from a wheelchair. I think it s a great sport for opportunity and anyone can succeed.
STEP 1. STANCE. The stance must be a consistent, repeatable and comfortable.
 STEP 1. STANCE The body can be divided into 2 parts the upper body from the hips up and the lower body from the hips down. The upper part of the body must maintain consistent position from shot to shot
THE FOUNDATION OF THE SHOT
 CHAPTER_2 THE FOUNDATION OF THE SHOT Success in archery depends on consistency and consistency starts with a solid foundation. Fully understanding and being able to apply the fundamentals is the key to
Woodruff Archery Merit Badge Requirements Packet
 Scout Name: Troop #: MB Period: Requirement 1: Woodruff Archery Merit Badge Requirements Packet a. State and explain the Range Safety Rules: (1). Three safety rules when on the shooting line. (2). Three
*The steps described are for the right-handed person; adjustments will need to be made for a lefthander.
 archery study guide history The origin of archery is unknown; however, archery has been an activity with varied objectives for human beings since the beginning of recorded history. The successful use of
The Golf Swing. The Fundamentals
 The Golf Swing The Fundamentals Fundamental #1 Grip & Set-Up The grip and set-up should be viewed as putting parts of a machine together. The right parts connected in the right way will allow the machine
Woodruff Archery Merit Badge Requirements Packet
 Scout Name: Troop #: MB Period: Requirement 1: Woodruff Archery Merit Badge Requirements Packet a. State and explain the Range Safety Rules: (1). Three safety rules when on the shooting line. (2). Three
St George s Archery Club BEGINNERS COURSE SESSION RUNNING ORDER PLANNER
 St George s Archery Club BEGINNERS COURSE SESSION RUNNING ORDER PLANNER SESSION ONE Lead SESSION THREE Lead Bow Selection Freestyle Shot Refresher Arrow Selection Warm-up Bracers & safety check Adjusting
The BIG BOOK of Golf Drills
 The BIG BOOK of Golf Drills 1 How to Use This Guide Congratulations on purchasing the Big Book of Golf Drills! This book is designed to use as a reference guide. We do not recommend printing this out as
Techniques To Treat Your Pain At Home (512)
") Techniques To Treat Your Pain At Home (512) 288-5322 7010 W. TX-71 Suite 360 Austin TX, 78735 Arm Only Bird Dog Start in the quadruped position (all fours) with arms and thighs perpendicular to the floor.
Techniques To Treat Your Pain At Home (512) 288-5322 7010 W. TX-71 Suite 360 Austin TX, 78735 Arm Only Bird Dog Start in the quadruped position (all fours) with arms and thighs perpendicular to the floor.
GETTING STARTED with AAAR
 GETTING STARTED with AAAR Instinctive shooting employs the use of your anchor (rear sight), your dominant eye, and the point of the arrow (front sight) to develop a point-of-aim view. Without bow and arrow,
Ab Plank with Straight Leg Raise
 Ab Plank with Straight Leg Raise Position yourself face up with your knees bent at 90 degrees, feet flat on the floor. Your hands should be directly under your shoulders facing forward. While in this position
KOSCIELISKO POL. Biathlon Shooting Lesson :00 16:30
 KOSCIELISKO POL Biathlon Shooting Lesson 29.09.2011 15:00 16:30 Basic Shooting Skills Positions Basic Shooting Skills Positions Basic Shooting Skills Positions Introduction Dominant Eye Rifle Fitting Prone
Basic Shooting Skills Positions. By: Shannon Carlton
 Basic Shooting Skills Positions By: Shannon Carlton Agenda Introduction Dominant Eye Rifle Fitting Prone Position Rifle Fitting Tips Standing Position Sequences Checklists Positions Stable Comfortable
U.S. Shooting Team Balance, Strength and Stability Workout. Training Work-Out
 U.S. Shooting Team Balance, Strength and Stability Workout Training Work-Out Modified by Dan Durben and Sommer Wood November 2006 from the program originally developed by Amber Darland for the USA Shooting
PRO BANDS TRAINING GUIDE
 PRO BANDS TRAINING GUIDE Thank you for choosing SKLZ Pro Bands. We are dedicated to providing you with the best tools and instruction possible to help you unleash your athletic potential. If there is anything
ARCHERY & SCOUTING. PRESENTATION POINTS: Equipment & Safety Personal Safety Facility Safety 10 steps to good shooting
 ARCHERY & SCOUTING PRESENTATION POINTS: Equipment & Safety Personal Safety Facility Safety 10 steps to good shooting Kathleen Millar, CAE, OCT NCCP Level 4 Coach EQUIPMENT SAFETY Stringing & Unstringing
U.S. Shooting Team Balance, Strength and Stability Workout. Shooting Warm-Up
 U.S. Shooting Team Balance, Strength and Stability Workout Shooting Warm-Up Modified by Dan Durben and Sommer Wood from the program originally developed by Amber Darland for the USA Shooting National Rifle
LESSON 4: THE FIRST TARGET POSITION - STANDING
 LESSON 4: THE FIRST TARGET POSITION - STANDING PURPOSE This lesson introduces you to the first target position, which is the standing position. the type of clothes that are used in school-age sporter class
Movement: Using the chest muscles and a slight bend in the elbow, bring your arms together in front of your chest.
 Chest Fly Anchor: Chest height Start: Stand with a split stance arms open out to the side, palms facing forward. Movement: Using the chest muscles and a slight bend in the elbow, bring your arms together
Archery Fundamentals
 Archery Fundamentals Objectives Common bow types and their basic parts Basic parts of an arrow and its usage Safe practices for archers Responsible shooter Good shooting form Know Your Bow and Arrows Modern
Cervical and Shoulder Girdle Stretches
 Cervical and Shoulder Girdle Stretches Exercise 1: Scalene Stretch Sit straight up in a chair with your shoulders relaxed. Keep your gaze straight ahead at eye level and your chin pointed down slightly.
PARTNER With all partner stretches: communicate with partner and use caution!!
 - warm up prior to stretching - isolate the muscle group to be stretched - move slowly and smoothly into stretch - use proper mechanics and correct alignment - breathe normal - slowly come out of stretch
GROUND COMBATIVES TRAINING STEP-BY-STEP INSTRUCTION MANUAL PICTORAL ANNEX FOR EXISTING TSP S
 GROUND COMBATIVES TRAINING STEP-BY-STEP INSTRUCTION MANUAL PICTORAL ANNEX FOR EXISTING TSP S Stand Up In Base - This is the most basic technique. It allows the Student to stand up in the presence of an
Coaches Handbook. Coaches Handout Page 1
 Coaches Handout 2009 Page 1 General Session 1: How to Warm-up! Players are put through basic warm-ups and exercises that they should perform each week when they come to Tball. Stretching should be the
Instructional Manual
 Instructional Manual TABLE OF CONTENTS MEDICUS Dual 2000 Instructional Manual The Proper Grip 1 Posture, Stance & Alignment 2 Breakpoint 1: Takeaway 3 Breakpoint 2: Toe-up Position 4 Breakpoint 3: Setting
Shoulder Exercises for Combined Labrum Repair Rehabilitation Protocol
 Shoulder Exercises for Combined Labrum Repair Rehabilitation Protocol The exercises illustrated and described in this document should be performed only after instruction by your physical therapist or Dr.
SUN GOD ARCHERY at UCSD: NTS Shot Cycle
 3 PILLARS OF THE SHOT CYCLE SUN GOD ARCHERY at UCSD: NTS Shot Cycle 1) Barrel of the gun Bow hand pressure point, front shoulder, and back shoulder alignment 2) Holding Being braced "inside the bow" Analogy:
CHAPTER 4 ADVANCED GROUND-FIGHTING TECHNIQUES
 (FM 21-150) CHAPTER 4 ADVANCED GROUND-FIGHTING TECHNIQUES After achieving an understanding of the basics of ground fighting, other elements of fighting on the ground are added. These techniques, however,
40 Allied Drive Dedham, MA (office)
") Standing forward flexion Stand facing a mirror with the hands rotated so that the thumbs face forward. Raise the arm upward keeping the elbow straight. Try to raise the arm by hinging at the shoulder as
Standing forward flexion Stand facing a mirror with the hands rotated so that the thumbs face forward. Raise the arm upward keeping the elbow straight. Try to raise the arm by hinging at the shoulder as
RULES POSTURE GUIDELINES: ADULT DIVISION COMPULSORY POSTURES
 RULES 2018-2019 POSTURE GUIDELINES: ADULT DIVISION COMPULSORY POSTURES Copyright 2014 International Yoga Sports Federation (IYSF) Second Edition, 2016. All rights reserved. Except for brief quotations
The Grip: Place the shot comfortably on the base of the hand with the thumb down and the four fingers balancing the shot.
 The Javelin By Mark Mirabelli, Throwing Specialist - www.mmtrackandfield.com If I could use one word to express success in all three styles of throwing the shot put I would have to say the word drill.
Coaching Principles. 1. Introduce 2. Demonstrate 3. Explain 4. Organize 5. Execute 6. Correct 7. Practice
 5 Pin Bowling Drill Book Updated August 2008 Coaching Principles STEPS IN TEACHING A DRILL 1. Introduce 2. Demonstrate 3. Explain 4. Organize 5. Execute 6. Correct 7. Practice GENERAL PRINCIPLES Drills
Belton High School Marching Fundamentals 2016
 Belton High School Marching Fundamentals 2016 Fundamentals of Teaching Fundamentals: 1. Say the name of the maneuver (INSTRUCT) 2. State its purpose (INSTRUCT) 3. Demonstrate it slowly, several times,
Little League Pitching Mechanics - Simple Instructions For Little League
 Little League Pitching Mechanics - Simple Instructions For Little League Pitchers By Steven Ellis, former Chicago Cubs pitching pro The goal for any Little League coach or parent is to keep the game simple
Chapter 8 - POSTURE. The following guidelines can be used to develop good postural habits. ! 2010 High Performance Golf
 Chapter 8 - POSTURE Posture is the habitual position that people hold themselves in, whether they are sitting, standing, active or sedentary. The aim of good posture is to maintain the natural curves of
Yellow Belt Grading Requirements - Details
 Yellow Belt Grading Requirements - Details Stance and movement: Horse Stance Looking for: Feet shoulder width apart or wider. Knees above feet. Feet face forwards. Thighs ideally parallel with ground.
Beginner shooting tips
 Beginner shooting tips The new shooter is in a great position to learn the fundamentals of shooting. Being new you are a clean slate where as a person who has been shooting for some time may bring some
OzBow Archery Instruction Program (the pathway to Olympic participation)
") OzBow Archery Instruction Program (the pathway to Olympic participation) The OzBow Archery Instruction Program is the second step in the Archery Australia Pathway Program. This program provides the participants
OzBow Archery Instruction Program (the pathway to Olympic participation) The OzBow Archery Instruction Program is the second step in the Archery Australia Pathway Program. This program provides the participants
TRUE TO FORM COMPANION BOOK FROM PAIN TO PERFORMANCE. Dr. Eric Goodman HOW TO USE FOUNDATION TRAINING FOR SUSTAINED PAIN RELIEF AND EVERYDAY FITNESS
 TRUE TO FORM HOW TO USE FOUNDATION TRAINING FOR SUSTAINED PAIN RELIEF AND EVERYDAY FITNESS COMPANION BOOK Dr. Eric Goodman FROM PAIN TO PERFORMANCE. PARt one: Foundation Training Exercises Anchoring...
1. POST: Options FRAME: Options 1-3
 Name: Date: Class Number: Score: /10 GO / NO-GO UNITED STATES ARMY COMBATIVES COURSE Basic Combatives Course Technical Evaluation 1. POST: Options 1-3 Performance Steps (Must pass 5 of 7) GO NO-GO Student
EXERCISE GUIDE STRENGTHEN YOUR CORE
 EXERCISE GUIDE STRENGTHEN YOUR CORE BACK EXTENSION WITH BALL Rest your belly on the ball, feet planted wide apart on the floor behind you and hands resting on your lower back. Peel your chest away from
Instructions for How to Teach the Level 2 Course - Day 2
 Instructions for How to Teach the Level 2 Course - Day 2 WWW.USARCHERY.ORG a program of in partnership with F O U N D A T I O N S Instructions for How to Teach the Level 2 Course - Day 2 INTRODUCTION
10 th Kup White Belt. The Basics
 10 th Kup White Belt Starting Tae Kwon Do as a white belt often feels rather daunting, especially when there are so many students around you that appear to make all the moves seem effortless. Just remember
Lesson 3. Golf. Lesson Objectives. Personal Conditioning. Prepare Students... 3 min Explain/Demonstrate/Practice
 Lesson 3 Lesson Objectives Time Page Equipment & Materials Personal Conditioning Lesson 25........................................... 5 min. Prepare Students.................................... 3 min........
LEVEL 1 SKILL DEVELOPMENT MANUAL
 LEVEL 1 SKILL DEVELOPMENT MANUAL Lesson Manual C A Publication Of The USA Hockey Coaching Education Program The USA Hockey Coaching Education Program is Presented By LESSON C-1 SPECIFIC OBJECTIVES 1. Refine
THROWING SKILLS RUN JUMP THROW
 RUN JUMP THROW CHAPTER 7: KEY IDEAS Throwing activities can be divided into the following sub-groups: pushing activities which lead to shot put pulling activities which lead to javelin throw slinging activities
Arm Range of Motion Exercises for
 Arm Range of Motion Exercises for People with Hemiplegia Hemiplegia is paralysis of muscles on one side of the body. Keeping your range of motion when you have hemiplegia is very important. It will help
FITA Coach s Manual. RECURVE BOW SHOOTING FORM Module. Intermediate Level
 FITA Coach s Manual RECURVE BOW SHOOTING FORM Module Intermediate Level FITA Coaching Manual Intermediate Level Module RECURVE BOW SHOOTING FORM The centre line of the body when assuming the stance The
Ice Hockey. Equipment Fitting Guide - Fit to Play the Right Way. Brought to you by: follow
 Ice Hockey Equipment Fitting Guide - Fit to Play the Right Way Brought to you by: coachsafely.org www.helmetfitting.com follow us @coachsafely and @Helmetfitting YOUTH AGE GROUPS: 8-and-Under (mite), 10-and-Under
SHOT PUT - GLIDE TECHNIQUE
 SHOT PUT - GLIDE TECHNIQUE The Shot Put can be broken down to four different phases. Preparation/Glide/Delivery & Recovery. Preparation - The thrower sets up correctly to commence the glide. Glide - The
ORIENTATION SEQUENCE
 ORIENTATION SEQUENCE In-Trinity builds strength, deepens flexibility and improves balance, coordination and agility. For the first time, you will access movements never possible before, taking your training
UK Yoga Sports Federation
 UK Yoga Sports Federation STANDING HEAD TO KNEE POSE 4 parts 1. Stand with feet together, shift body weight to standing leg (leg closest to the judges) and lock the knee (leg straight and thigh muscle
Full swing technique is a pillar of a solid overall game. The following 4 core competencies are strong predictors of success in ball striking.
 Full Swing Analysis What are we trying to accomplish? Core Competencies in the Full Swing Full swing technique is a pillar of a solid overall game. The following 4 core competencies are strong predictors
Yoga Home Practice Guidebook. Boston Medical Center Veterans Back to Health Trial
 Yoga Home Practice Guidebook Table of Contents Welcome... 1 Study Contact Information... 2 Making the Most Out of Your Yoga Experience... 3 Setting up Your Home Practice... 4 Completing Your Home Practice
Teaching Rifle Positions to New Junior Shooters. NLU # 748 Free 04/13
 Teaching Rifle Positions to New Junior Shooters NLU # 748 Free 04/13 TM Teaching Rifle Positions to New Junior Shooters This booklet offers a reprint of three articles that originally appeared in the CMP
AMATEUR HOCKEY ASSOCIATION ILLINOIS, INC. MITE 8 & UNDER AMERICAN DEVELOPMENT MODEL
 Mite 8 & Under American Development Model Week 1 This coach s manual is intended to provide the instructions and tools to conduct the Mite and 8 & Under Illinois Hockey - Skills Challenge. Mite
Introduction to Basic Archery
 Introduction to Basic Archery Archery includes a complex set of activities, from backyard target shooting to formal or field competitions, from family fun to bow hunting and bow fishing, or even the Olympic
Page 1 of 6. Important Safety Rules for Parents Supervising Family Archery
 WARNING DANGEROUS PROJECTILE: A mishandled arrow or bowstring may result in serious injury or even death. Parental Supervision Required. Bows and arrows are not toys. Page 1 of 6 Failure to follow Instructions
KAYAK TECHNICAL TEMPLATE. Scott Oldershaw National Team Coach
 KAYAK TECHNICAL TEMPLATE Scott Oldershaw National Team Coach Revised 09/2009 Introduction This Kayak Technical Template is for coaches involved with athletes preparing for competition at the Canada Games,
AUSTRALIAN BASEBALL UMPIRE S MANUAL
 AUSTRALIAN BASEBALL UMPIRE S MANUAL UMPIRE POSITIONS AND SIGNALS 2009 by Australian Baseball All rights reserved. No part of this publication may be reproduced or distributed in any form without prior
Goaltending Development
 AGES 8 AND UNDER Goaltending Development LESSON WORKBOOK JOE EXTER 2 Goaltending is a combination of sound structural technique and athleticism. It is important for coaches and goaltenders to consistently
KRIYA LOWER BACK AND HIPS
 KRIYA LOWER BACK AND HIPS 1. Pelvic Grind Left. Place your hands on your knees and begin grinding yourself in a big, smooth circle going to the left. Lift the chest up high as you tilt the pelvis back,
Basic Steps to Remember
 Lift those buns off the chairs. with these exercises. 1. Work your upper and lower body at the same time, beginning with legs, adding arms. 2. Alternate more vs. less strenuous movements. 3. If you get
Movement Assessment & Enhancement Session
 C H A P T E R F O L L O W - U P I M P A C T M O V E M E N T S R O U T I N E Movement Assessment & Enhancement Session E X P E R I E N C E Y O U R G R E A T N E S S C H A P T E R F O L L O W - U P I M P
Skills and Drills The Center's Skills
 Introduction to Offensive Fundamental Skills Skills and Drills This section reviews the fundamental skills of flag football, explains why each is important and emphasizes the skill s basic teaching points.
The Best Eight Static Stretches for Golfers
 The Best Eight Static Stretches for Golfers This is a simple stretching programme for improve your flexibility and mobility for golf. It requires no equipment and designed to be completed in the comfort
PEE WEE AND LIONS RULES AND SKILLS HANDOUT (April 2005) THE RULES
 THE RULES") PEE WEE AND LIONS RULES AND SKILLS HANDOUT (April 2005) THE RULES 1. When the whistle is blown by the coach, stand still, be quiet, and look at the coach; 2. If you want to speak raise your hand and wait
PEE WEE AND LIONS RULES AND SKILLS HANDOUT (April 2005) THE RULES 1. When the whistle is blown by the coach, stand still, be quiet, and look at the coach; 2. If you want to speak raise your hand and wait
defenders get specific coaching for their respective positions, goalies require the same attention and guided skill development.
 POWER POINT SLIDES ACTIVITIES NOTES Mini-lecture: Over view- 10 RM- p. 1 1. Provide the following overview of the clinic: Rationale: Goaltending is a critical aspect of team play and requires direct &
Shot put learn by - doing Basic technique for the Shot Put By: Mark Harsha Portage High School Girls Head Coach
 Shot put learn by - doing Basic technique for the Shot Put By: Mark Harsha Portage High School Girls Head Coach Goal One: Shot grip and placement 1. Holding the shot The shot is held at the base of the
Teaching Progression and the Fine Points For Contact In The Underhand Pass (Service Reception and Defense) Step 1: Catch & Throw
 Step 1: Catch & Throw") Teaching Progression and the Fine Points For Contact In The Underhand Pass (Service Reception and Defense) Step 1: Catch & Throw - Players can be in pairs or if working individually then the coach can
Teaching Progression and the Fine Points For Contact In The Underhand Pass (Service Reception and Defense) Step 1: Catch & Throw - Players can be in pairs or if working individually then the coach can
Basic Shooting Skills Principles of Marksmanship. By: Shannon Carlton
 Basic Shooting Skills Principles of Marksmanship By: Shannon Carlton Agenda Introduction Principles of Coaching 5 Principles of Marksmanship Developing a Routine Making Sight Adjustments Sequences Principles
Yoga Teacher Training. Partner Yoga and Assisting/Adjusting Yoga Students
 Yoga Teacher Training Partner Yoga and Assisting/Adjusting Yoga Students By: Nancy Wile Yoga Education Institute Yoga Education Institute, 2012 All rights reserved. Any unauthorized use, sharing, reproduction,
PLAY BETTER GOLF and HAVE MORE FUN
 PLAY BETTER GOLF and HAVE MORE FUN Randy Meyer PGA Table of Contents Chapter Page Teaching Philosophy 1 Philosophy and Approach 3 Swing Fundamentals 2 Pre-swing 4 In-swing 5 Golf Tips 3 Ball position,
Baseball Training Program
 Baseball Training Program Always consult your physician before beginning any exercise program. The information and advice published or made available through the Orthopaedic and Neurosurgery Specialists,
Force Vectors SHOT PUT MECHANICS
 SHOT PUT MECHANICS The shot put is an individual event that is dominated by big, powerful male and female athletes. There are two techniques for throwing the shot put---the glide and rotation--. Neither
SUNDAY MONDAY TUESDAY WEDNESDAY THURSDAY FRIDAY SATURDAY **REST**
 At minimum, walk 30 minutes, 5 days a week. Not sure if an exercise is right for you? Test your blood sugar before and after you work out. If your blood sugar is higher afterwards, the exercise is too
Shooting Clinic, Alaska Biathlon Anchorage 4 April 2009 Instructor: Richard Barlow Session 3: Fundamentals, Position Details A.
 Shooting Clinic, Alaska Biathlon Anchorage 4 April 2009 Instructor: Richard Barlow Session 3: Fundamentals, Position Details A. Fundamental Steps 1. The sequence of six steps for a well-aimed shot needs
Chair exercises Sally Ann Belward, Falls Clinical Lead Physiotherapist
 Chair exercises Sally Ann Belward, Falls Clinical Lead Physiotherapist Exercise safety Exercise should be comfortable and fun Ensure participants are sat on a sturdy chair, have comfortable clothing and
TECHNICAL MODELS & PROGRESSIONS FOR THE GLIDE SHOT PUT. Ben Bishop, Lake Park HS
 TECHNICAL MODELS & PROGRESSIONS FOR THE GLIDE SHOT PUT Ben Bishop, Lake Park HS 1 WHEN IS THE GLIDE A VIABLE OPTION? Athletes that rely heavily on strength levels as opposed to other athletic domains,
1. Your anchor: Easy sitting, deep exhales (Sukhasana)
") Airplane yoga: 18 exercises for healthy flying Don't enjoy flying as much as you should? You're tired at your destination? These 18 exercises will set you straight By CNN/Charlotte Dodson 1. Your anchor:
Airplane yoga: 18 exercises for healthy flying Don't enjoy flying as much as you should? You're tired at your destination? These 18 exercises will set you straight By CNN/Charlotte Dodson 1. Your anchor:
HOW TO HOLD THE SHOT
 HOW TO HOLD THE SHOT Balance the shot in his hand so it is resting at the point where the fingers are connected to the palm of the hand. Keep their fingers together and allow their thumb to gently rest
Try on this 10 minute yoga sequence for size to balance your body and focus your mind.
 Need a little more energy to start your workday right? From: https://www.workandmoney.com/s/10-minute-yoga-routine Try on this 10 minute yoga sequence for size to balance your body and focus your mind.
Trauma-Informed Yoga Lesson Plan
 Trauma-Informed Yoga Lesson Plan Triggers MEDICAL DISCLAIMER Not all exercises are suitable for everyone and it is recommended that you consult your doctor before beginning this or any exercise program.
The Three Swings of Wright Balance: Which One Are You?
 The Three Swings of Wright Balance: Which One Are You? Our 25 years of research has yielded the following. In summary we are able to do simple body measurements, provide a student with Stance Widths that
Punch Instructors Course Handout. One Day Instructor Training Workshop
 Punch Instructors Course Handout One Day Instructor Training Workshop 1 10:00 Welcome and introductions 10:15 Master Class 11:15 Break 11:30 Technique Overview Part one General Boxing Safety Straights
OVERVIEW FOR STUNTS FLYER BODY POSITIONS
 TCI MODULE 6 Stunts Level 1 Page 1 of 11 OVERVIEW FOR STUNTS FLYER BODY POSITIONS *** NOTE *** For instruction purposes, we will assume regular flyer positions in this manual. That is, it is assumed that
CHAPTER 4 U10 U13 2 PERSON RESCUE AND RESUSCITATION COMPETITION RULES AND PROCEDURES A GENERAL COMPETITION CONDITIONS C ERROR SCHEDULE
 CHAPTER 4 U0 U3 2 PERSON RESCUE AND RESUSCITATION COMPETITION RULES AND PROCEDURES A GENERAL. The 2 person R&R is conducted in the same arena as other R&R events and provides the opportunities to introduce
RJT. Pupil Task Cards: Throwing JUMP THROW RUN
 RJT s: Throwing RUN JUMP THROW s: Introduction Introduction to the s An important part of every child s cognitive development is to encourage them to explore new things and use self-guided learning to
The Ancient Art of Chi Gong. for. Strength & Flexibility
 The Ancient Art of Chi Gong for Strength & Flexibility The Student/Athlete Educational Foundation, Inc. 12 Manison Street, Suite E Stoneham, MA 02180 781-850-4520 doc@chap.com Abdominal Butterfly (Stretches
Structure (Down plane)
") By Lauren Russell Structure (Down plane) The body (toes, knees, hips, wrists and shoulders) is aligned parallel to the intended target line. The torso is tilted over the ball from the hips whilst maintaining
By Lauren Russell Structure (Down plane) The body (toes, knees, hips, wrists and shoulders) is aligned parallel to the intended target line. The torso is tilted over the ball from the hips whilst maintaining
The Secrets Of The Swing
 The Secrets Of The Swing brought to you by www.golfclubdistance.org and Amazing Golf Mind Table of Contents 1. The Address 2. The Take Away 3. The Top Of The Backswing 4. The First Move 5. The Downswing
Upper Body: Range of Motion Exercises - Self-Directed for the Neck and Arms
 Upper Body: Range of Motion Exercises - Self-Directed for the Neck and Arms Author: Sarah Housman, MS, OTR/L; Mary Pearson OTR/L These exercises for joints of the arm and neck can help: maintain the range
THROW. Skill Progressions at a Glance. General Criteria (for right-handed throws) Safety for the Throws
 Safety for the Throws") THROW Skill Progressions at a Glance General Criteria (for right-handed throws) Movement sequence: a. preparation; b. momentum building; c. delivery; and d. recovery. During the delivery, right heel and
THROW Skill Progressions at a Glance General Criteria (for right-handed throws) Movement sequence: a. preparation; b. momentum building; c. delivery; and d. recovery. During the delivery, right heel and
ROWING CANADA AVIRON ROWING TECHNIQUE MOVEMENT PATTERNS IN SWEEP AND SCULLING TECHNIQUE IN CANADA FEBRUARY 28, 2017
 ROWING CANADA AVIRON ROWING TECHNIQUE MOVEMENT PATTERNS IN SWEEP AND SCULLING TECHNIQUE IN CANADA FEBRUARY 28, 2017 INTRODUCTION TECHNIQUE CAN BE DEFINED AS A SPECIFIC SEQUENCE OF MOVEMENTS OR PARTS OF
Warm Ups. Standing Stretches
 Warm Ups Mild warm-ups are a necessity for everyone. The need for warm-ups increases with age as the body becomes less elastic over time. It is recommended that you execute the warm-up routine in this
DOYLE BASEBALL TERMINOLOGY
 www.doylebaseball.com/siebert DOYLE BASEBALL TERMINOLOGY THROWING (Part One/Upper Half) Stance spread and flex lower half Show throwing arm extended straight out to the side of the body then bend elbow
Dr. D. Ryan York, PT, DPT, CGS Doctorate in Physical Therapy Certified Golf Performance Specialist, GOLO Golf University
 Dr. D. Ryan York, PT, DPT, CGS Doctorate in Physical Therapy Certified Golf Performance Specialist, GOLO Golf University Dr. Chad Edwards, PT, DPT, CGFI Doctorate in Physical Therapy Certified Golf Fitness
A Publication Of The USA Hockey Coaching Education Program The USA Hockey Coaching Education Program is Presented By
 LEVEL 1 SKILL DEVELOPMENT MANUAL Lesson Manual B A Publication Of The USA Hockey Coaching Education Program The USA Hockey Coaching Education Program is Presented By LESSON B-1 SPECIFIC OBJECTIVES 1.
RED DEER RINGETTE GOALIE HANDBOOK
 RED DEER RINGETTE GOALIE HANDBOOK The Red Deer Ringette Association provides goalie equipment up to the U14 Division. Divisions above U14 will be supplied with goal equipment if it is available. At the
Basic Quarterback Training
 Basic Quarterback Training This tip provided by Todd Kreuger, Football Tools For Active.com Repetition is the key to becoming a good quarterback. Below are some of the most important techniques a high