Contents. introduction, contents. terminology, putting in and removing sticks. pre-inflation, attaching lines
|
|
|
- Charlotte Tyler
- 5 years ago
- Views:
Transcription

1

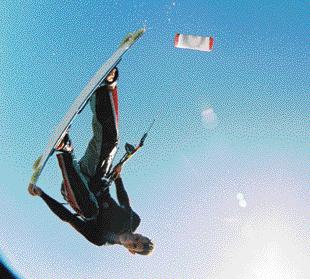
2 Congratulations on purchasing your Peter Lynn Kite! Using Twin Skin technology this kite sets new standards in jumping, upwind performance and depower. This manual contains information on how to set up your kite and use it on the water. Its enormous amount of power and lift are potentially dangerous. Therefore it is important that you go through this whole manual carefully in order to understand the kite and use the kite safely. We also advice you to watch the instructional video which will give you a yet clearer understanding of some of the issues covered in this manual. Contents page 2 page 3 page 4 page 5 page 6 page 7 page 8 page 9 page 10 page 11 page 12 2 Introduction introduction, contents Introduction terminology, putting in and removing sticks Setting up pre-inflation, attaching lines Setting up attaching lines cont., setting more/less bar pressure, using larkshead knots Getting ready to launch closing the zippers, standing at the correct position Launching and Landing launching the kite, landing the kite Flying techniques using the bar for power and depower, using the power adjuster, inverting Flying techniques top/rear line adjustments, packing up your kite Water Relaunch kite lying tip on tip, kite on its leading edge, removing sand and water Safety systems and maintenance safety systems, using your safety release, using your safety leash quick release, maintenance tips More information Safety precautions, More info about Peter Lynn


3 Leading edge Top skin Pockets with carbon rods Velcro outlets Lower skin Trailing edge Air intake vents Top line attachment points Tips Rear line attachment points Putting in and removing sticks The sticks can be taken in and out at the bottom of the pocket. To place them into the pockets: 1. Undo the double velcro seal and slide in the stick all the way to the other end. 2. Fold back the first velcro flap making sure the stick is in tight. 3. Close up the last velcro flap and you are ready to go! To take out the sticks, slowly pull them out after opening the double velcro seal. Do not pull the stick out very quickly as parts might get caught. 3


4 4 Starting off To start flying your kite you need to follow the following procedure: 1. Place the kite on the beach ready to pre-inflate 2. Set up your bar and lines 3. Launch the kite Step 1. Place the kite on the beach ready to pre-inflate 1. Take the kite out of the bag and roll the kite out. Place one tip on the ground and let the rest flap in the wind. Fold a small part of the tip over and place some sand on it. This part should not be too big, so as many cells as possible can inflate. 2. Open the zipper and make sure the air can flow in. While the kite is being preinflated you can start to get your flying lines ready to be attached to the kite. Step 2. Set up your bar and lines 1. Roll the leader lines off the bar and place everything flat on the ground. Roll out the flying lines in a straight line and attach them to the bar as shown in the bar manual.


5 5 2. Make sure the lines are free of twist and tangles. Now attach them to the kite as shown on the diagram. One set of lines should be attached to the depower set and to the top attachments on the kite. The other set of lines should be attached to the ends of the bar and to the bottom attachment points on the kite. top line rear line top line rear line More bar pressure Attach the rear line to the higher attachment point for more bar pressure A simple method to ensure that your flying lines are attached properly is doing it in the following order, as shown on the right: 1. Place your flying lines all untangled in a straight line so the sleeves are lying past the downwind tip. First attach the rear line to the upwind tip. 2. Now attach the top line to the upwind tip, taking it over the rear line you have just attached. 3. Take the other top line and attach it to the downwind tip, passing it over the kite. 4. Attach the rear line to the downwind tip and you are ready to launch your kite with the assurance of untangled lines! Less bar pressure Attach the rear line to the lower attachment point for less bar pressure Use a larkshead knot to attach the lines: Place a larkshead knot in the sleeve, slide it over the attachment knots and tighten the larkshead as shown below 1 2 3


6 6 Step 3. Launch the kite Check that there are no sharp objects near the kite, as it may slide a little bit over the sand during launch. 1. Make sure the kite is sufficiently pre-inflated. Failure to do so will result in the kite to collapse during take off. Close BOTH zippers, the inflate zipper and the delflate zipper! At the tip that is folded over, make sure the lines are running freely as shown on the photo on the right. 2. Check that your kite is ready for take off: lines are free of tangles, area is clear of people and other kite flyers. Take your bar and attach the safety leash to your harness. Always make sure to attach the safety leash before flying, so it can be used in case something goes wrong during the launch. Pull in your power adjuster. 3. Make sure you stand at the correct position so your lines are at a 45 degree angle to the wind direction. (as shown on the right). Be careful: when there is tension on the flying line connected to the far tip the kite can take off at any time. Now you are ready to launch your kite.


7 7 The launch Make sure the far top and rear line lie over the lowerskin of the kite and slowly pull the tip up. Keep your rear lines tensioned. Take a few steps back. The kite will slide back and slowly get into shape. The tip will come up further. Once the kite is off the ground keep the rear lines slightly tensioned until it has filled up with air. Let the kite slowly fly up to the zenith.! Make sure you are not launching in an area with obstacles like poles or cars, make sure the area is free of people or other kiteflyers. Do not fly your kite near powerlines, airports, highways, or in thunderstorms. Make sure the ground is free of sharp objects to prevent the fabric from getting damaged. The kite can collapse during the launch when it is not completely filled up with air. Keep the rear lines tensioned until the kite is completely filled up. Pre-inflate the kite properly. The more you pre-inflate the easier the launch. Do not launch while hooked into a harness. When in doubt of the wind strength, try a smaller kite first. Check your lines properly, make sure they are free of twists and tangles. Landing Landing your kite can be done in two ways: 1. Fly your kite all the way to the edge of the wind window, and slowly steer it down to the ground. An assistant can then grab the spar closest to the ground and after releasing the tension on your lines the kite flaps in the wind. 2. Fly your kite to the edge of the wind window and slowly bring it down close to the ground. Make sure you are not landing your kite in an area with poles or other sharp objects on the ground. Activate your safety system. The kite will lose its shape and fall on the ground.


8 Using the bar The power of your kite can easily be controlled with the bar. When the depower loop is hooked in, the bar can slide over the depower line which changes the angle of attack causing the kite to produce more or less power. When sheeting out the bar the power of the kite decreases. When pulling in the bar the power of the kite increases. Using the power adjuster To change the overall power of the kite the power adjuster can be used. Sheeting out Causes the kite to produce more power overall. Pull the black end of the loop (the end with the Peter Lynn logo) towards you and release forward. The clip slides away in small steps. Repeat the process until you find the right setting. Pulling in Causes the kite to produce less power overall. Pull the grey end of the loop towards you. The clip is pulled towards you and locks in. Pulling in Sheeting out! To make tighter turns, pull the bar a bit more towards the body when steering. Slowly bring back the kite straight above your head when things get out of hand. This is a secure area where the pull is the smallest. Do not fly your kite straight through the center of the wind window. Inverting Very occasionally when the kite overflies completely and then drifts back, it may invert, so the back skin is facing the flyer. The kite will fly inverted. Land the kite nose down, allow it to roll over and then relaunch the kite. 8


 region 1: your kite should now be fully depowered, with the rear lines hanging slack.")


9 Top/Rear line adjustments Adjusting your lines is very important. These are some guidlines that might help you adjust your kite: If the kite stalls frequently, your rear lines are too tight. Shorten the lines on the top attachments of the kite. If the kite steers very slow, your rear lines are too loose. Shorten the leader lines on your bar. When your kite stalls, reach forward and jerk the top lines until the kite gets moving. When setting your kite you can also divide the depower line into 3 regions. (see image) region 1: your kite should now be fully depowered, with the rear lines hanging slack. region 2: this is the standard position where you are holding your bar when surfing. region 3: now the kite should stall slightly Packing up your kite Even when taking a short break, we would not recommend you to leave your kite flat on the beach. The constant flapping of the downwind tip will weaken the fabric in this area. Fold the kite in half, with a good portion of sand on both tips. This will prolong the life of your kite. When pausing for a longer period of time, we would recommend you to roll up your kite, as UV rays damage the fabric. At the end of your kiting session, open the deflation zipper and fold the kite in half. You can place some sand on the two tips, and the kite will deflate itself whilst you are winding up your lines. If you wish to store your kite without sticks the easiest method is to pull open the double velcro seal, pulling out the sticks partially and now rolling up the complete kite from tips to the center, pushing the air out. When you are ready pull out the sticks and fold them up, and place them in the bag together with the kite When storing the kite with the sticks in, just roll up your kite from tips to center. Now undo the zipper at the bottom of the bag and pull out the gauze. Place your kite in the gauze. 9


10 10 Tip on tip The kite lies on the water tip on tip. 2. Pull the rear line of the bottom tip. The kite will open up regaining its shape. Now just steer the kite off the water. Kite on its leading edge The kite lands with its leading edge on the water. 2. Pull in one backline so the kite rolls over onto one tip. 3. Now you can follow the tip on tip relaunch to finish off the procedure. After a water relaunch fly the kite up the zenith. If water has seeped into the kite, keep the kite above your head till the water has dribbled out through the tips. Then continue surfing. Removing sand & water When there is some sand or water in the kite, you can remove it by opening the small velcro outlets on the tip. Another method is holding both tips and shaking the kite whilst the deflation zipper is open. The sand will come out of the kite via the deflation zipper.


11 Safety systems If you wish to loose the power of the kite without losing the kite itself the safety system can be used. Never be afraid to use it because it might save your life! When activating the safety system, the kite loses its shape and falls down on to the water. Using your safety release To activate your safety system, you need to disconnect yourself from the bar. This can be done by using the safety release by pulling the red loop on your depower loop and/or your harness line. The bar will slide forward on the line that is connected to the safety leash. This creates a difference in line length, one side of the tip will be held on while the other is not. The kite loses its shape and falls down on the water. Using the safety leash quick release When the kite is still pulling, even after using the safety system, there is a safety release on the leash. This is very useful when two kites are tangled up into each other. To disconnect the leash from your harness, pull on the webbing on the snap shakle.! When getting a bit overpowered, slowly bring back the kite straight above your head. Only try to use your safety system when things gets out of hand. When your kite is on the water, always be very carefull with flying lines which are not tensioned. Make sure they do not get tangled behind any part of your body, harness or board. After using your safety system, putting tension on any of the other lines means your kite can take off and start to pull. Maintenance Tips Always remove sand and water of your kite. Always store your kite dry. Regularly rinse off your kite with tap water. Regularly check your equipment for wear and tear. Some parts that need regular checking: Fabric: Check the fabric for holes or tears. Zippers: regularly check if they are still intact. Use silicon spray to clean them in case of salt residue on the zipper. Line attachment loops: Regularly check that the line is still intact and that loops are free of wear. Also check that the loops are still tied on correctly. (see image on the right) Pockets: Regularly check both ends of the pocket for wear. If there are problems please contact Peter Lynn Kiteboarding for the best solution. 11

12 12 Safety precautions Safe location and weather conditions: stay away from power lines, roads, airfields, railway lines never launch your kite on crowded beaches do not fly over bystanders make sure there is a clear downwind area at least three times the distance of your flying line length never fly kites in thunderstorms, lightning or gusty/stormy winds do not go kiteboarding in offshore winds Safe Kiteflying: powerkites are no toys, they should not be flown by inexperienced persons and certainly not by children learn to fly kites with smaller models and start in light winds never use kites for paragliding or parachuting never use any type of kite or kite accessory for jumping off high places or any other manlifting activity Safe kiteboarding: we strongly recommend the use of helmet and life jacket/impact vest. Also a safety knife to cut flying lines in case of emergency is recommendable do not kiteboard in spots already in use by swimmers, surfers or windsurfers stay safely away from other watercraft and shipping lanes never go further out to sea than you can safely swim back always make sure there is a capable person on shore that is keeping watch and is ready to provide (or call for) help in case of an emergency Safe traction kiting: always use fully protective gear when landboarding, snowkiting and buggy riding do not jump off hills and cliffs More about Peter Lynn products There is a whole range of products available from Peter Lynn. For more info on these products, extra tips and tricks, or any other questions, please visit: or
Congratulations on purchasing a Peter Lynn Arc, the new form of traction kite technology for kitesurfing and kitesailing, but also very useful for
 Congratulations on purchasing a Peter Lynn Arc, the new form of traction kite technology for kitesurfing and kitesailing, but also very useful for buggying and other power kiting activities. Their basic
Attaching the flying lines
 1 1 2 3 3 4 5 6 7 7 9 8 8 10 12 13 11 14 15 15 16 18 17 16 19 20 21 22 23 1. Rear line attachment loops 2. Top line attachment knots 3. Rear leader lines (top part) 4. djustment to set difference between
Before flying your kite it is very important to understand the wind window. The image shows where the kite will create the most power (straight
 WELCOME Thank you for buying this Peter Lynn product and welcome to the world of Peter Lynn; a world of wind driven excitement, where people passionately pursue their dreams. Whether that s riding huge
Before flying your kite it is very important to understand the wind window. The image shows where the kite will create the most power (straight
 WELCOME Thank you for buying this Peter Lynn product, and welcome to the World of Peter Lynn, a world of wind driven excitement, where people passionately pursue their dreams whether that s freeriding
WELCOME SAFETY INSTRUCTIONS
 WELCOME Peter Lynn; a world of wind driven excitement, where people passionately pursue their dreams whether that s freeriding at a local beach or going for the speed record in a deserted salt lake. Peter
Before flying your kite it is very important to understand the wind window. The image shows where the kite will create the most power (straight
 WELCOME Thank you for buying this Peter Lynn product, and welcome to the World of Peter Lynn; a world of wind driven excitement, where people passionately pursue their dreams whether that s freeriding
SAFETY INSTRUCTIONS CAUTION:
 WELCOME Thank you for buying this Peter Lynn product, and welcome to the World of Peter Lynn, a world of wind driven excitement, where people passionately pursue their dreams. Whether that s freeriding
MOOWII MANUAL. Using a kite is dangerous and can cause severe injuries. Before use, carefully read this manual.
 MOOWII MANUAL Using a kite is dangerous and can cause severe injuries. Before use, carefully read this manual. Release of liability By assembling or using this CrazyFly kiteboarding product (further named
Semi Freddo Snow kite [Ram Air]
![Semi Freddo Snow kite [Ram Air]](/thumbs/89/97639710.jpg "Semi Freddo Snow kite [Ram Air]") User manual Semi Freddo Snow kite [Ram Air] This manual gives you detailed instructions on how to use your new Semi Freddo kite. We recommend you take your time to read the instructions. In case you have
User manual Semi Freddo Snow kite [Ram Air] This manual gives you detailed instructions on how to use your new Semi Freddo kite. We recommend you take your time to read the instructions. In case you have
WELCOME SAFETY INSTRUCTIONS
 WELCOME Lynn, a world of wind driven excitement, where people passionately pursue their dreams whether that s freeriding at a local beach or enjoying the virgin snow on a back country adventure. Peter
Slash2011. CAUTION! Using a kite is dangerous and can cause severe injuries. Before use, carefully read this manual. USER MANUAL
 WE ADVICE YOU TO REGISTER YOUR KITE ON: www.crazyflykites.com/register Slash2011 USER MANUAL CAUTION! Using a kite is dangerous and can cause severe injuries. Before use, carefully read this manual. yflykites.com
Using a kite involves risks and can cause severe injuries. Before use, carefully read this manual.
 Using a kite involves risks and can cause severe injuries. Before use, carefully read this manual. SUMMARY FOCUS P 2 SAFETY P 3 WIND RANGE P 6 SETTING UP YOUR KITE P 7 SETTING UP YOUR BAR P 8 LAUNCHING
Using a kite involves risks and can cause severe injuries. Before use, carefully read this manual.
 Using a kite involves risks and can cause severe injuries. Before use, carefully read this manual. FOCUS Here is a glossary of your equipment for you to get acquainted with most technical terms used in
born to be wild. designed by christoph fokken MONO BY SPIDERKITES MANUAL
 MONO BY SPIDERKITES MANUAL This single skin kite is a new type of land power kite. The Mono has been designed to generate traction power, so it can be used as a leisure foil, trainer kite or as sports
Kitesurfing Handbook
 Kitesurfing Handbook www.kiteclubnorthgoa.com Basic kitesurfing techniques are consisting of: 1. Kite piloting, launching and landing 2. Kite power controlling 3. Body dragging 4. Getting into the water
RELEASE OF LIABILITY AND ASSUMPTION OF RISK
 VERSION 3 User Manual Thank you for choosing STARKITES, please read this entire manual carefully before using your STAR KITE. Your ExA or SBow kite sets the standard in safety, performance and usability
USER GUIDE. approved ntents
 approved ntents 07 USER GUIDE .2 All content of this document, including text, images and graphics, is the exclusive property of STARKITES and is protected by international copyright and other intellectual
SX Trainer Instruction Manual WARNING
 SX Trainer Instruction Manual WARNING DO NOT USE THIS PRODUCT UNLESS YOU HAVE READ AND UNDERSTAND THESE WARNINGS, CAUTIONS, AND INSTRUCTIONS WHICH ARE FOR YOUR SECURITY AND PROTECTION. THIS INFORMATION
Navaro Buggy Instruction Manual INSTRUCTION BOOKLET
 INSTRUCTION BOOKLET Safety Thank you for purchasing your new Flexifoil buggy. If operated and looked after properly, your new buggy will serve you well. Before assembling and using this buggy, you must
2002 KITE MANUAL SOLID KITEBOARDING EQUIPMENT
 2002 KITE MANUAL SOLID KITEBOARDING EQUIPMENT RELEASE OF LIABILITY AND ASSUMPTION OF RISK DO NOT USE THIS PRODUCT UNLESS YOU AGREE WITH THE FOLLOWING TERMS AND CONDITIONS IMPORTANT WARNING! THIS WARNING
Thanks. Ride safe Team Ozone
 Thanks Thank you for purchasing this Ozone kite. Our mission is to build kites with cutting edge performance that are easy, fun and safe to use, no matter what your level. At Ozone we are passionate about
CONTRA NITRO CO2 ELEMENT
 2005 KITE MANUAL CONTRA NITRO CO2 ELEMENT RELEASE OF LIABILITY AND ASSUMPTION OF RISK DO NOT USE THIS PRODUCT UNLESS YOU AGREE WITH THE FOLLOWING TERMS AND CONDITIONS IMPORTANT WARNING! THIS WARNING IS
2002 KITE MANUAL SOLID KITEBOARDING EQUIPMENT
 2002 KITE MANUAL SOLID KITEBOARDING EQUIPMENT RELEASE OF LIABILITY AND ASSUMPTION OF RISK DO NOT USE THIS PRODUCT UNLESS YOU AGREE WITH THE FOLLOWING TERMS AND CONDITIONS IMPORTANT WARNING! THIS WARNING
OVERVIEW Here is what the finished set-up will look like, with the kite flying in the air. Note: Red lines on the left. Grey lines on the right.
 OVERVIEW Here is what the finished set-up will look like, with the kite flying in the air. Note: Red lines on the left. Grey lines on the right. < Bridle line(attached to the LE of the kite). The black
2. Release of Liability, Claim Waiver and Assumption of Risk Agreement
 2004 Type Wave System Manual 1. Type Wave Concept 2. Release of Liability, Claim Waiver and Assumption of Risk Agreement 3. Wave Bar Features 4. Connecting the Bar to the Kite Fool Proof Connection System
CO2 BLACKTIP ACCESS KITE MANUAL
 2003 CO2 BLACKTIP ACCESS CO2 BLACKTIP ACCESS KITE MANUAL RELEASE OF LIABILITY AND ASSUMPTION OF RISK DO NOT USE THIS PRODUCT UNLESS YOU AGREE WITH THE FOLLOWING TERMS AND CONDITIONS IMPORTANT WARNING!
68 MEGA OBSTACLE COURSE
 68 MEGA OBSTACLE COURSE General info 68 x13 x16 1-2 operator(s) required 4 passengers max at one time 2 at the start line and 2 going over big slide Max weight per person 225lbs Minimum height 36 2 x 1.0
CONTENTS. 1. Me and my FLYSURFER kite Descriptions 5
 1 CONTENTS 1. Me and my FLYSURFER kite 5 2. Descriptions 5 3. FLYSURFER specific functions 7 3.1. Safety-System 7 3.1.1. Depowerloop Quick Release 7 3.1.2. Kite-leash Quick Release 9 3.2. Pull-Stop-System
WARNING p. 5. Delivery p My FLYSURFER kite and I p YOUR FLYSURFER KITE p Description p Features p. 7
 USER MANUAL CONTENTS WARNING p. 5 Safety Guidelines p. 5 Delivery p. 6 1. My FLYSURFER kite and I p. 6 2. YOUR FLYSURFER KITE p. 7 2.1. Description p. 7 2.2 Features p. 7 3. FLYSURFER (FS) Special Functions
BestKiteboarding: Waroo Kite Manual.
 BestKiteboarding: Waroo Kite Manual. Best Kiteboarding thanks you for making the decision to purchase a new Waroo SLE supported leading edge inflatable kite, we are sure that this kite will repay your
Owner s Instruction Manual
 Owner s Instruction Manual IMPORTANT! PLEASE READ THIS MANUAL CAREFULLY BEFORE PROCEEDING. AFTER READING THIS MANUAL, SAVE THESE INSTRUCTIONS FOR FUTURE REFERENCE. Congratulations on your purchase of the
U S E R MANUAL CROSSBOW SWITCHBLADE CONTRA REVOLVER CO2
 2006 K I T E U S E R MANUAL CROSSBOW SWITCHBLADE CONTRA REVOLVER CO2 DO NOT USE THIS PRODUCT UNLESS YOU HAVE READ AND UNDERSTAND THESE WARNINGS AND INSTRUCTIONS WHICH ARE FOR YOUR SECURITY AND PROTECTION.
to manage the above situations self rescue skills are needed!
 info@kitesystems.net Waterfoil self rescue on water Self rescue on water... Reasons for packing the kite and self rescue on water Sudden offshore wind direction No more wind A technical problem with the
Owner s Instruction Manual
 Owner s Instruction Manual IMPORTANT! PLEASE READ THIS MANUAL CAREFULLY BEFORE PROCEEDING. AFTER READING THIS MANUAL, SAVE THESE INSTRUCTIONS FOR FUTURE REFERENCE. Congratulations on your purchase of the
NOVA: Takoon offers you the R-evolution!
 NOVA: Takoon offers you the R-evolution! Several years of research on new types of Kites have led TAKOON to rewrite the whole sport of kitesurfing. A new generation of Kite is born. While others look for
We recommend as protective equipment: - helmet - life jacket - wet suit - gloves - sunglasses - sun lotion - safety knife, if not on the trapeze
 !WARNING! Please read the information of this booklet first and then only use the product if you agree on all the terms and conditions! We draw your attention to changes at any time without notice. If
ContEnts. 1. Impor tant Infor mation. 2. Safety First. 3. Bag Contents and Stor m II Overview. 4. Quick Guide
 ContEnts 1. Impor tant Infor mation 2. Safety First 3. Bag Contents and Stor m II Overview 4. Quick Guide 5. The Wind ter minology, window, conditions, table 6. Kite Size Infor mation REACTIVE TUBE TECHNOLOGY
ESOCCI RIGGING MANUAL
 ESOCCI RIGGING MANUAL 1 Spray Covers Hull Rear Iako Forward Iako Ama ESOCCI RIGGING MANUAL 2 When training & racing in outrigger canoes, the canoe is your protector on the water and therefore it is imperative
airush Technical Advantage User s Manual
 airush Technical Advantage User s Manual Dear Pilot, We would like to express our gratitude to you for purchasing an Airush kite. We are sure you will have hours of action packed fun each time you fly.
Chapter 6: The Magician's Tools: High Performance Tuning
 Chapter 6: The Magician's Tools: High Performance Tuning How your kite is tuned determines how it flies. You can leave it set on the regular performance marks provided by the factory and probably have
...continues to next page
 DO NOT USE THIS PRODUCT UNLESS YOU HAVE READ AND UNDERSTAND THESE WARNINGS, CAUTIONS, AND INSTRUCTIONS WHICH ARE FOR YOUR SECURITY AND PROTECTION. THIS INFORMATION MAY BE SUBJECT TO CHANGE AT ANY TIME.
...continues to next page
 DO NOT USE THIS PRODUCT UNLESS YOU HAVE READ AND UNDERSTAND THESE WARNINGS, CAUTIONS, AND INSTRUCTIONS WHICH ARE FOR YOUR SECURITY AND PROTECTION. THIS INFORMATION MAY BE SUBJECT TO CHANGE AT ANY TIME.
USER MANUAL ENGLISH 2018 CONTROL SYSTEM
 USER MANUAL ENGLISH 2018 CONTROL SYSTEM DO NOT USE THIS PRODUCT UNLESS YOU HAVE READ AND UNDERSTAND THESE WARNINGS, CAUTIONS, AND INSTRUCTIONS WHICH ARE FOR YOUR SECURITY AND PROTECTION. THIS INFORMATION
Owner s Instruction Manual
 Owner s Instruction Manual IMPORTANT! PLEASE READ THIS MANUAL CAREFULLY BEFORE PROCEEDING. AFTER READING THIS MANUAL, SAVE THESE INSTRUCTIONS FOR FUTURE REFERENCE. Congratulations on your purchase of the
THE ULTIMATE FLYING MACHINE. FLYSURFER Knowledge Database
 THE ULTIMATE FLYING MACHINE FLYSURFER Knowledge Database CONTENT 1. INTRODUCTION S. 5 SAFETY GUIDELINES S. 6 DELIVERY S. 6 1. YOUR FLYSURFER KITE S. 7 2. THE SPEED3 S. 7 2.1. Description S. 7 2.2. Features
5200 Lawrence Place Hyattsville, Maryland 20781, USA Toll Free: Phone: Fax:
 5200 Lawrence Place Hyattsville, Maryland 20781, USA Toll Free: 1-888-416-0174 Phone: 301-277-3888 Fax: 301-277-3323 www.premierkites.com Congratulations on your purchase of the Osprey sport kite. The
5200 Lawrence Place Hyattsville, Maryland 20781, USA Toll Free: Phone: Fax:
 5200 Lawrence Place Hyattsville, Maryland 20781, USA Toll Free: 1-888-416-0174 Phone: 301-277-3888 Fax: 301-277-3323 www.premierkites.com Congratulations on your purchase of the Wolf NG sport kite. The
Flat Fold Highchair INSTRUCTION MANUAL. Designed and manufactured to BS EN 14988: 2012 IMPORTANT:
 Flat Fold Highchair INSTRUCTION MANUAL Designed and manufactured to BS EN 14988: 2012 IMPORTANT: Thank you for choosing our product. Please read and understand these instructions before using this flat
...continues to next page
 DO NOT USE THIS PRODUCT UNLESS YOU HAVE READ AND UNDERSTAND THESE WARNINGS, CAUTIONS, AND INSTRUCTIONS WHICH ARE FOR YOUR SECURITY AND PROTECTION. THIS INFORMATION MAY BE SUBJECT TO CHANGE AT ANY TIME.
Trampoline & Enclosure Assembly Instructions
 Trampoline & Enclosure Assembly Instructions Safe user weight 250 lbs (115 kg) Version 718602 The information in this document is subject to change without notice. Copyright Springfree Trampoline Inc.
NO FLIPPING NO HEAD FIRST 4 TO 7 PASSENGERS AT A TIME
 CASTLE BOUNCE HOUSE General info 15 x15 x13 1 operator required 4-7 passengers max at one time (depending on age and passengers size) Max weight per person 150lbs Minimum height 36 maximum height 60 1
EZee Glider Manual. Tools needed for Assembly: Wrench (included) Philips Screwdriver (not included) Assembly Instructions
 Philips Screwdriver (not included) Assembly Instructions") EZee Glider Manual Congratulations on your purchase of the EZee Glider! Your glider is designed for years of nearly carefree use by your child. These instructions include how to set up your glider and
EZee Glider Manual Congratulations on your purchase of the EZee Glider! Your glider is designed for years of nearly carefree use by your child. These instructions include how to set up your glider and
TENSOR USER MANUAL Please ReaD CaReFUllY BeFORe FlIGHT
 TENSOR USER MANUAL Please READ CAREFULLY BEFORE FLIGHT Welcome Congratulations on your purchase of the Tensor, a sophisticated land-based power kite that converts easily from dual-line bar to quad-line
Attaching the ball Attach the rope to the underside of the middle of the inflatable. The rope will then attach to the ball using a D-ring.
 General info 29 x29 x13 1 operator required 4 players max at one time Max weight per person 225lbs Minimum height 44 maximum height 80 2 x 1.5 hp blower WRECKING BALL Setup Unroll the inflatable onto a
...continues to next page
 DO NOT USE THIS PRODUCT UNLESS YOU HAVE READ AND UNDERSTAND THESE WARNINGS, CAUTIONS, AND INSTRUCTIONS WHICH ARE FOR YOUR SECURITY AND PROTECTION. THIS INFORMATION MAY BE SUBJECT TO CHANGE AT ANY TIME.
Wingsuit Owners Manual
 Tony Uragallo flying the Apache, photo Jeff Nebelkopf Wingsuit Owners Manual Version 1 - April 2012 Dear Tony Suit Customer Thank you for your recent wingsuit purchase. Please take a few minutes to read
// EXTREMELY DURABLE // FUN IN THE LIGHTEST BREEZE // CLEAN 3-LINE SAFETY
 ... simply fun :) // EXTREMELY DURABLE // FUN IN THE LIGHTEST BREEZE // CLEAN 3-LINE SAFETY READY-TO-FLY PACKAGE CONSISTS OF: 1x PEAK Trainer Kite Ready to Fly 1x PEAK 3-line wrist safety 1x PEAK Trainer
Kite Manual 2009 User s Tips FAQ Bar Manual 2009 KITE MANUAL 2009 TECHNICAL ADVANTAGE
 Kite Manual 2009 User s Tips FAQ Bar Manual 2009 KITE MANUAL 2009 TECHNICAL ADVANTAGE Dear Rider We would like to express our gratitude to you for purchasing an Airush kite. We are sure you will have hours
2011 CONVERT / CONVERT SE IDS KITE USER MANUAL
 2011 CONVERT / CONVERT SE IDS KITE USER MANUAL MANUEL D'UTILISATION DE L'AILE BENUTZERHANDBUCH FÜR DEN KITE MANUAL DEL USUARIO DEL KITE MANUALE D USO DEI KITE РУКОВОДСТВО ПОЛЬЗОВАТЕЛЯ DO NOT USE THIS
Wing assemblyfinal Master 4/29/04 11:20 PM Page 1. Issued January 1, Sabre Aircraft. Assembly Manual. Sabre 16ss Wing
 Wing assemblyfinal Master 4/29/04 11:20 PM Page 1 Issued January 1, 2002 Sabre Aircraft Assembly Manual Sabre 16ss Wing Wing assemblyfinal Master 4/29/04 11:20 PM Page 2 1. 2. 1. Unzip the cover and remove
Mini Glider Manual. Your Glider comes partially assembled. The front wheel and the handlebars require assembly.
 Mini Glider Manual Congratulations on your purchase of the Mini Glider! Your glider is designed for years of nearly carefree use by your child. These instructions include how to set up your glider and
Further info about warranty please visit: USER MANUAL A Quickstart guide for your new Eleveight gear
 Further info about warranty please visit: www.eleveightkites.com/usermanual USER MANUAL A Quickstart guide for your new Eleveight gear CONTENT 04 / KITE STRUCTURE 05 / KITE INFLATION 06 / INFLATION AND
Kiteboarding Rescue Procedures
 Kiteboarding Rescue Procedures Kiteboarding is a growing sport that is becoming more popular than windsurfing. Rescue of injured or incapacitated kiteboarders comes with many challenges; however, with
4-Line and 5-Line modes
 ozone // Håkon Mæland a n e w I NS P I RED NAT U RE / / e r a D RI V EN T HE ELEMEN TS The Hyperlink V1 is also available in an Ultra Light version. This is the same design produced with high quality lightweight
BEST KITEBOARDING USER MANUAL
 BEST KITEBOARDING USER MANUAL Thank you for purchasing a Best kite. Please read this manual carefully and in its entirety before using your new Best kite. WARNING Kiteboarding/kitesurfing/snowkiting are
Optimist Tuning Guide
 Optimist Tuning Guide Sail Care: To help you re new racing sail stay in top condition as long as possible here is some tips - Try not to crease your sail, some creases can cause MIT tears in your sail
Owner s Instruction Manual
 Owner s Instruction Manual IMPORTANT! PLEASE READ THIS MANUAL CAREFULLY BEFORE PROCEEDING. AFTER READING THIS MANUAL, SAVE THESE INSTRUCTIONS FOR FUTURE REFERENCE. Congratulations on your purchase of the
RAVE SUP STAND UP PADDLE BOARD User Guide/Owner s Manual
 RAVE SUP STAND UP PADDLE BOARD User Guide/Owner s Manual ! W A R N I N G This product is not a lifesaving device. Always wear a nationally approved personal floatation device when using this product. Not
It isn t hard to imagine where some of these hot tricks and techniques came from.
 Chapter 8: Magical Illusions and Hot Tricks It isn t hard to imagine where some of these hot tricks and techniques came from. A flier jerks on the line to try and relaunch a downed kite. The kite rolls
Watch out for useful tips & tricks regarding our products under in the following category:
 VEGAS 11 Tips & Tricks Watch out for useful tips & tricks regarding our products under www.northkites.com in the following category: TV, Pics & Goodies Movies. 1 Tips & Tricks Content 1. Release of Liability
9. Kite control in extreme situations 9.1. Flying the kite in the zenith 9.2. Being lofted on the beach 9.3. Kite Luffing (danger of frontstall) 9.4.
 9.4.") Contents WARNING Safety Guidelines 1. My FLYSURFER kite and I 2. YOUR FLYSURFER KITE 2.1. Description 2.2 Features 3. FLYSURFER (FS) special functions 3.1. TOTAL DEPOWER SYSTEM (TDS) 3.1.1. FULL DEPOWER
Contents WARNING Safety Guidelines 1. My FLYSURFER kite and I 2. YOUR FLYSURFER KITE 2.1. Description 2.2 Features 3. FLYSURFER (FS) special functions 3.1. TOTAL DEPOWER SYSTEM (TDS) 3.1.1. FULL DEPOWER
airplaine kite Model assembly & Operating Instructions Important: If damage is caused due to a crash; your warranty is void.
 airplaine kite Model 95081 assembly & Operating Instructions Important: If damage is caused due to a crash; your warranty is void. Visit our website at: http://www.harborfreight.com Read this material
MINISTRY OF TOURISM GUIDELINES FOR KITESURFING ACTIVITIES
 MINISTRY OF TOURISM GUIDELINES FOR KITESURFING ACTIVITIES 1. Purpose of the Guidelines The guidelines aim at ensuring that kitesurfing activities are conducted in compliance with acceptable standards and
ANTARES. User Manual ANTARES OVAL DRY GLOVE SYSTEM BY SI TECH. Photo: Jonas Andersson, Lysekil
 ANTARES User Manual Photo: Jonas Andersson, Lysekil ANTARES OVAL DRY GLOVE SYSTEM BY SI TECH ANTARES - User manual We want to congratulate you on your purchase of the ANTARES, a Dry Glove System developed
ACE 2018 COMPLETE USER MANUAL
 ACE 2018 COMPLETE USER MANUAL TIPS & TRICKS WATCH OUT FOR USEFUL TIPS & TRICKS REGARDING OUR PRODUCTS UNDER WWW.NORTHKITEBOARDING.COM IN THE FOLLOWING CATEGORY: HELP. 1. RELEASE OF LIABILITY RELEASE OF
USER MANUAL 2013 BLADEKITEBOARDING
 BLADEKITEBOARDING USER MANUAL 2013 Table of Contents 03... Release of Liability 04... Safety First 07... Bar Overview 08... Kite Overview 09... Wind Range 10... Control System and Lines 16... Mad2 (Multi-valve
2,500/4,000 LB Easy Riser Vertical Cable Feighner Lift
 2,500/4,000 LB Easy Riser Vertical Cable Feighner Lift CAUTION - PUT SAFETY FIRST 1. Before attempting to install or operate this lift, study and fully understand the proper operating procedures and safety
User Manual GRI- 1500Li
 User Manual GRI- 1500Li Your Cart Tek caddy cart was thoroughly quality control checked and road tested before being shipped to your address. We do everything possible to assure that your caddy is in perfect
2012 SWITCHBLADE IDS KITE USER MANUAL
 2012 SWITCHBLADE IDS KITE USER MANUAL MANUEL D'UTILISATION DE L'AILE BENUTZERHANDBUCH FÜR DEN KITE MANUAL DEL USUARIO DEL KITE MANUALE D USO DEI KITE РУКОВОДСТВО ПОЛЬЗОВАТЕЛЯ DO NOT USE THIS PRODUCT UNLESS
Shiel e d Kite t By B y Sam & Ca C rir King Ore r g e o g n o Kite t m e aker e rs s Retr t e r a e t t2013
 Shield Kite By Sam & Cari King Oregon Kitemaker s Retreat 2013 SAIL ASSEMBLY Your pre-cut sail pieces include half-inch seam allowances. This provides enough material to complete a 1/4 inch double rolled
THE AMERICAN BARN DOOR KITE
 THE AMERICAN BARN DOOR KITE Oregon Kitemaker s Retreat January 2007 Rod Beamguard 4104 NW 112 th Way Vancouver, WA 98685-3578 (360) 574-8050 home (360) 750-9833 office kytfevr@wa-net.com PLANFORM BARN
1997 Transformer Bump & Jump
 1997 Transformer Bump & Jump Rigging & Fine Tuning Guide 1) Roll out the sail, insert the foot batten and tension it. 2) Slide the mast through the luff sleeve (see diagram 1). Note: When rigging with
Best Kiteboarding User Manual
 . Best Kiteboarding User Manual Thank you for purchasing a Best kite. Please read this manual carefully and in its entirety before using your new Best kite. WARNING Kiteboarding/kitesurfing/snowkiting
Teachings From An American Style Fighter Kite
 Teachings From An American Style Fighter Kite When flying a fighter kite, one of my goals is to adjust the kite so its flight characteristics match, as close as possible, the way I want the kite to fly.
BEST KITEBOARDING USER MANUAL
 BEST KITEBOARDING USER MANUAL Thank you for purchasing a Best kite. Please read this manual carefully and in its entirety before using your new Best kite. WARNING Kiteboarding/kitesurfing/snowkiting are
Trampoline Installation Instructions
 Congratulations on purchasing an Oz Trampolines Product. Following are detailed setup instructions for your trampoline. Please ensure all boxes and parts are present before continuing. Setting Up Your
Accessible Performance is True Performance
 Accessible Performance is True Performance I N S P I R E D B Y N AT U RE / / D RI V EN B Y T HE EL EMENT S Our understanding of True Performance is not just raw power or speed - it s the combination of
Watch out for useful tips & tricks regarding our products under in the following category: : help.
 REBEL 14 Tips & Tricks Watch out for useful tips & tricks regarding our products under www.northkites.com in the following category: : help. 1 Tips & Tricks Content 1. Release of Liability 3 2. Safety
Butler Tactical Parachute Systems, LLC
 Butler Tactical Parachute Systems, LLC A division of Butler Parachute Systems Group, Inc. TT-600 TETHERED TANDEM BUNDLE DELIVERY SYSTEM PACKING MANUAL (REVISION A ) Page 1 of 62 INTRODUCTION This manual
Assembly instructions nortik scubi 2 Recreational kayak
 Assembly instructions nortik scubi 2 Recreational kayak QR-Code assembly video: Assembly instructions nortik scubi 2 Dear Customer, You have purchased a nortik scubi 2, an innovative hybrid kayak for recreational
MAN-032 Rev 0. Performance Designs Zero Packing Manual
 Performance Designs Zero Packing Manual Packing your PD ZERO Before you begin packing, please first review PD s Ram-Air Parachute Owner s Manual. Pay careful attention to the warning/ discussion on pages
Technical Data. Flying with the range2. Maintenance and Repair
 Manual/Service 1 Contents Technical Data Fundamentals of the range2 Speed System Rescue System Rescue System Installation adjustment Possibilities Cross Bracing Ballast Container Pockets Towing Operation
Sheffield Kite Fliers Risk Assessment
 Sheffield Kite Fliers Risk Assessment 1.0 Definition We all make risk assessments throughout every day of our lives, but we don t write them down. When you decide that an activity is too dangerous for
Owner s Instruction Manual
 Owner s Instruction Manual For Models: AE1060, AE1010, AE1064, and AE1062 IMPORTANT! PLEASE READ THIS MANUAL CAREFULLY BEFORE PROCEEDING. AFTER READING THIS MANUAL, SAVE THESE INSTRUCTIONS FOR FUTURE REFERENCE.
Photo: Jonas Wall ANTARES OVAL DRY GLOVE SYSTEM BY SI TECH.
 Photo: Jonas Wall ANTARES OVAL DRY GLOVE SYSTEM BY SI TECH www.sitech.se The Oval revolution We want to congratulate you on your purchase of the ANTARES Modular Dry Glove System. The oval design and quick
Risk Assessment. Compiled by: Lawrence Smith Date Compiled: 1 February 2009
 Risk Assessment Compiled by: Lawrence Smith Date Compiled: 1 February 2009 Location: Gwithian Date of Activity: Ongoing Activity: Kitesurfing on the sea and launching and landing of LEI kites on land.
1. Release of liability 2 2. safety and PRecautions Rigging the Kite attaching the lines 11
 content 1. Release of liability 2 2. safety and PRecautions 3 2.1. KITEBOARDINg SAFETY 3 2.2. DANgERS FROM ThE KITE 3 2.3. DANgERS FROM KITE LINES 4 2.4. DANgERS FROM ThE KITEBOARD 4 2.5. DANgERS TO UNINVOLVED
Contents. Technical Data. Permittable load. Suspension height. 45 cm, incl. carabiner. Speed System. Weight (without rescue system) 7 kg (size L)
 7 kg (size L)") Manual/Service 13 Contents Technical Data Fundamentals of the RANGE Technical Data Intended Use Permittable load Suspension height Glider Harness 120 kg 45 cm, incl. carabiner Speed System Rescue System
Manual/Service 13 Contents Technical Data Fundamentals of the RANGE Technical Data Intended Use Permittable load Suspension height Glider Harness 120 kg 45 cm, incl. carabiner Speed System Rescue System
ASSEMBLY MANUAL HOBIE CATSY
 ASSEMBLY MANUAL HOBIE CATSY HOBIE CAT EUROPE ZI Toulon Est, BP 50 8078 Toulon cedex 9, France Tel : + (0)9 08 78 78 - Fax : + (0)9 08 99 Email : hobiecat@hobie-cat.net - http://www.hobie-cat.net ASSEMBLY
Trampoline & Enclosure Assembly Instructions
 Trampoline & Enclosure Assembly Instructions Safe user weight 330 lbs (150 kg) Version 718702 The information in this document is subject to change without notice. Copyright Springfree Trampoline Inc.