MECHANIC SKILLS: Practice
|
|
|
- Harold Jackson
- 5 years ago
- Views:
Transcription

1 MECHANIC SKILLS: Practice
2

3 MECHANIC SKILLS: PRACTICE QUICK NOTES These lessons are not meant to be used alone. Always pair with mechanic skills explanations. We broke the lessons into two parts so that teachers could make classes as long or as short as they needed. While we never do this, some schedules may call for doing an Explanation one day and a Practice another day. Other classes may be able to combine two Explanation units and two Practice units into one session. The important thing is that youth are receiving some explanation and safety information before being handed tools and bikes. As with our Explanation units, when teaching Practice units we follow these guidelines at Bike Works: Ask twice as many questions as you answer. Emphasize a hands-on approach to learning. Focus on problem solving and troubleshooting. Safety is part of every lesson. It is particularly important to stress safety during Practice units. There are countless ways youth can bump, bang, hit, chip, scrape or otherwise dent themselves, each other, and/ or the bikes. For this reason it is important to point out general safety guidelines such as, Use tools for their intended use only, as well as lesson-specific hints and tricks such as, Be extremely careful of hitting your knuckles on the chain ring when you are removing crank arms. We have done our best to include these reminders in NOTES boxes throughout the lessons. Finally, be aware that some students may have never held a tool before. Start from the beginning and help students find a grip that is comfortable for them. Although it may seem like smaller people will have more trouble with loosening bolts or tightening a cable, most seasoned mechanics will tell you it s all about leverage. Help students learn how to position themselves in order to put gravity on their side, and how to use the best tools (the longer combination wrench for example) to get the best leverage. 113


4 WHAT YOU WILL FIND IN THIS SECTION Bike Break Down 115 Bike Part Bingo 116 Fix a Flat Practice 118 Front Hub Practice 120 Threaded Headset Practice Piece Bottom Bracket Practice 124 Brakes: BMX and MTB Practice 126 Rear Derailleur Practice 128 Front Derailleur Practice 130 Threadless Headset Practice Piece Bottom Bracket Practice 134 Advanced Brakes Practice 136 Advanced Drivetrain Practice 138 Rear Hub Practice 140 Wheel Truing Practice
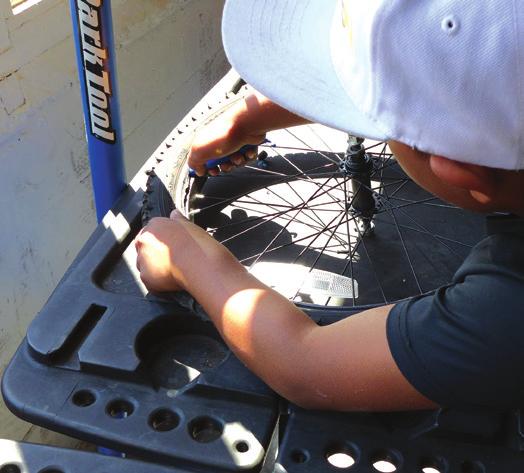
5 BIKE BREAK DOWN Get those hands on those bikes! This is a chance for youth to work with tools and get a feel for the bikes without previous experience. TIME AGE STAFF 15 min all beg 1 GOOD FOR GROUP yes T O O L KIT a Preparation: 1. Prep your work area with bikes in stands that are ready to be stripped. Make sure the stands are secure. We suggest one bike per two students, if possible. 2. Lay out tools for youth to use. Make sure tools you want youth to use are accessible and those you don t want them to use are out of sight/ reach. MATERIALS Whatever tools and bikes you have! Review Worksheet (p. 212) Activity: 1. Break up into pairs at each work station (use strategies on p ). 2. Discuss the importance of safety and using the right tool for the right job. 3. Go over how to use the repair stand, some of the basic tools you have laid out, the name of the tool, where on the bike it is used, and where it is stored. 5. Have the youth strip bikes in pairs starting with taking off the wheels. This an engaging way to get kids working with tools without really knowing anything yet. A good way to organize strip projects is to list an order on the board. 1. Wheels: Remove wheels from bike. Remove tires and tubes from wheels. 2. Pedals: When most people are done with wheels, have everyone put down their tools and regroup. Spend a minute explaining drive side and non drive side and how non drive side pedals are reverse threaded. 3. Cables: Cut all cables 4. Brake Levers: Remove brake levers from bars. Do not take apart further! 5. Handlebars and Stem: Remove bars and stem from bike. Follow-up: 1. Fill out the Review Worksheet (p. 212). This will help you plan the next class, and the next year. 2. Take a head count of the tools and make sure they are all in the correct places. 115
. 3. Print out labeled image of the bicycle (p.")
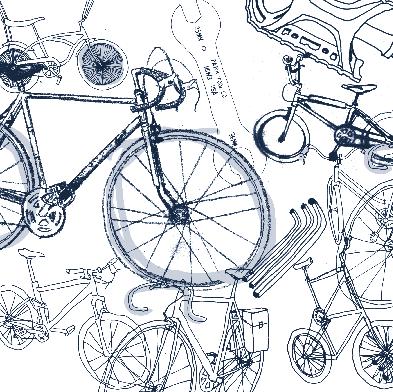
6 BIKE PART BINGO 1 OF 2 Help students learn the parts of the bike in a fun and easy way! TIME AGE STAFF 30 min all beg 1 GOOD FOR GROUP yes T O O L KIT none Preparation: 1. Review your notes and Review Worksheet from the previous class. 2. Print out blank BINGO cards and BINGO images one set for each student (p. 216 and 217). 3. Print out labeled image of the bicycle (p. 239). 4. Put a variety of bikes in the stands one for each pair if possible. 5. Make a space for cutting, gluing and playing BINGO! Activity: 1. Pass out the labeled image of a bicycle. 2. Go over the parts of the bike using one of the bikes in the stand. 3. Explain the rules of BINGO and hint at some silly prizes. 4. Using the templates provided in the appendix, give everyone time to make their own BINGO card. There are several ways to do this: Allow people to cut and chose the parts they want to put on their card. If you have enough bikes, assign pairs or groups to partially assembled bikes. Tell them they can ONLY include parts on their card that are on their assigned bike. Have participants make a card and then trade with another participant before playing. Don t forget to leave the FREE space open. MATERIALS Labeled image of the parts of the bicycle BINGO cards you can prepare these ahead of time or have students make them BINGO markers Glue Bikes in stands in various states of completion Scissors Silly prizes like bike pins, candy, tattoos, etc. Parts of the Bike English/ Spanish (p. 239) Blank BINGO Cards (p. 216) BINGO Card Images (p. 217) Review Worksheet (p. 212) SOURCE WE Bike NYC CONTINUED ON P
7 BIKE PART BINGO 2 OF 2 (CONTINUED FROM P. 116) 5. Play BINGO! You can do four rounds of BINGO depending on time: Round 1: Say the name of a part and point to it on the bicycle. Also point to the image that will be on the cards. Round 2: Say the name of a part and point to it on the display bicycle. Round 3: Say the name of a part and have a volunteer point to the part on the bicycle. Round 4: Only point to a part on the bicycle and have the group come up with the name of the part. 6. When someone wins, you can have them come up and identify all 5 parts they covered on the display bicycle before claiming their prize. MATERIALS & See p. 116 Follow-up: 1. Fill out the Review Worksheet (p. 212). This will help you plan the next class, and the next year. 2. Take a head count of the tools and make sure they are all in the correct places. 117
8 FIX A FLAT PRACTICE 1 OF 2 Learn how to fix a flat tire! Gain a sense of accomplishment in a mechanic setting. TIME AGE STAFF 30 min all beg 1 GOOD FOR GROUP yes T O O L KIT a Preparation: 1. Review your notes and Review Worksheet from the previous class. 2. Just before class take a tack and pop at least one tube on each bike. 3. Write the steps to fixing a flat on the board: Remove the Wheel Remove the Tire Patch the Tube 1. Find and mark the hole with an X 2. Sand area 3. Apply vulcanizing fluid and let DRY 4. Apply the patch Test for leaks Reinstall tire and tube NO TOOLS! Reinstall wheel and inflate to proper pressure MATERIALS Repair stands 13, 14, 15mm wrenches Ballpoint pens Sandpaper Vulcanizing fluid Bulk patches Rags Floor pumps Holey tubes BMX bikes with flats & worn out tires and/or wheels Replacement tires and wheels as necessary Review Worksheet (p. 212) CONTINUED ON P

9 FIX A FLAT PRACTICE 2 OF 2 (CONTINUED FROM P. 118) Activity: 1. After you have done the demonstration you can divide kids into pairs (use strategies on p ). 2. Let pairs get to work fixing those flats! Make sure youth do the whole process from taking the wheel off, to tightening it back onto the bike and inflating the tire to proper pressure! 3. When they are done, have them bring it to an instructor for a final check. 4. After they have completed the entire process as a duo, give them each a popped inner tube for them to repair on their own. 5. Be sure to leave 15 minutes at the end of class for clean up and Final Checks of each bike. MATERIALS & See p. 118 Follow-up: 1. Fill out the Review Worksheet (p. 212). This will help you plan the next class, and the next year. 2. Take a head count of the tools and make sure they are all in the correct places. 119
10 FRONT HUB PRACTICE 1 OF 2 Practice overhauling front hubs. TIME AGE STAFF 30 min all beg 2 GOOD FOR GROUP no T O O L KIT b Preparation: 1. Review your notes and Review Worksheet from the previous class. 2. Make sure you have enough front wheels for one per pair of students. 3. Write the 51/2 steps of an overhaul on the board or wall. Activity: 1/2. Get a rag 1. Disassemble 2. Clean 3. Inspect 4. Grease and Reassemble 5. Adjust 1. Review the 51/2 steps of an overhaul with the students, having them explain each step to each other. MATERIALS Repair stands Cone wrenches Combination wrenches 12 adj. wrench Simple green Rags Grease Bearings Drop gauge tool BMX bikes and/or wheels Review Worksheet (p. 212) NOTE Remind students to use particular care with the dust caps (if they have them) and that this is the make or break portion of the repair if they approach it without caution. Front Hub Exploded (p. 246) 2. Pair up students, two to a bike (use strategies on p ). 3. Have students work together to overhaul the front hub. CONTINUED ON P
11 FRONT HUB PRACTICE 2 OF 2 (CONTINUED FROM P. 120) 4. When students are done, have them bring their wheel to an instructor for a Final Check. 5. Be sure to leave 15 minutes at the end of class for clean up! MATERIALS & See p. 120 NOTE Make sure to monitor that a stronger student in the pair isn t doing all the work. Follow-up: 1. Fill out the Review Worksheet (p. 212). This will help you plan the next class, and the next year. 2. Take a head count of the tools and make sure they are all in the correct places. 121
12 THREADED HEADSET PRACTICE 1 OF 2 Practice overhauling threaded headsets. TIME AGE STAFF 30 min all beg 2 GOOD FOR GROUP no T O O L KIT b Preparation: 1. Review your notes and Review Worksheet from the previous class. 2. Prepare enough bikes in stands for students to work in groups of two 3. Write the agenda and the 51/2 steps of an overhaul on the board or wall. 1/2. Get a rag 1. Disassemble 2. Clean 3. Inspect 4. Grease and Reassemble 5. Adjust MATERIALS Repair stands Allen keys Combination wrenches 30, 32, 36, 40mm headset wrenches Channel locks Large adjustable wrench Simple green Rags Grease Activity: 1. Have students explain the 51/2 steps of an overhaul. You can have it already written on the board, or have the students fill in the steps. 2. Pair up students, two to a bike (use strategies on p ). 3. Work slowly showing everyone how to remove the handlebars from the bike. Make sure everyone has removed their handlebars before continuing with the overhaul. 4. Overhaul that headset! Follow the 51/2 steps and be sure to keep the pieces in order on your rag. Bearings Drop gauges BMX bikes Threadless stem for demo Review Worksheet (p. 212) 5. When students are done, have them bring their headset to an instructor for a Final Check. 6. Be sure to leave 15 minutes at the end of class for clean up! CONTINUED ON P

13 THREADED HEADSET PRACTICE 2 OF 2 (CONTINUED FROM P. 122) Follow-up: 1. Fill out the Review Worksheet (p. 212). This will help you plan the next class, and the next year. 2. Take a head count of the tools and make sure they are all in the correct places. MATERIALS & See p
14 1-PIECE BOTTOM BRACKET PRACTICE 1 OF 2 Practice overhauling 1-piece bottom brackets. TIME AGE STAFF 30 min all beg 2 GOOD FOR GROUP no T O O L KIT b Preparation: 1. Review your notes and Review Worksheet from the previous class. 2. Prepare enough bikes in stands for students to work in groups of two. Try to choose bikes without chain guards. 3. Write the agenda and the 51/2 steps of an overhaul on the board or wall. Activity: 1/2. Get a rag 1. Disassemble 2. Clean 3. Inspect 4. Grease and Reassemble 5. Adjust 1. Have students explain the 51/2 steps of an overhaul in a creative way. 2. Pair up students, two to a bike (use strategies on p ). 3. Have students put their bikes in the stand non drive side facing the class. MATERIALS Repair stands Bottom bracket wrenches Large and small adjustable wrench Simple green Rags Grease Spanner wrenches Pedal wrench Screwdriver BMX bikes Review Worksheet (p. 212) 4. Overhaul! Make sure to lay all the pieces out on the rag in order. Remind students about parts of the bottom bracket that are reverse threaded! The non drive side of the bike is Backward Land where everything is reverse threaded. 5. When students are done, have them bring their bottom bracket to an instructor for a Final Check. CONTINUED ON P
15 1-PIECE BOTTOM BRACKET PRACTICE 2 OF 2 (CONTINUED FROM P. 124) 6. If students finish early, have them check all the other things on the bike that you have learned so far headset, flat tires, front hubs. They can also lubricate the chain and clean the bike. 7. Be sure to leave 15 minutes at the end of class for clean-up and Final Checks of each bike. MATERIALS & See p. 124 Follow-up: 1. Fill out the Review Worksheet (p. 212). This will help you plan the next class, and the next year. 2. Take a head count of the tools and make sure they are all in the correct places. 125
16 BRAKES: BMX AND MTB PRACTICE 1 OF 2 Understand the parts and adjustments associated with BMX and MTB brakes.understand the concept of troubleshooting and problem solving. TIME AGE STAFF 30 min all beg 2 GOOD FOR GROUP no T O O L KIT b MATERIALS NOTE Depending on what skill level you are teaching, youth can work on BMX (Beginner) or MTB (Intermediate) bikes. Repair stands Examples of housing and cables Cable and housing cutters Preparation: 1. Review your notes and Review Worksheet from the previous class. 2. Prepare enough bikes in stands for students to work in groups of two on each bike. If supplies are limited, two groups can work on each bike given it has both a front and rear brake. 3. If possible, have an extra volunteer for this lesson. Brakes are tricky and can get frustrating fast! 4. Write the agenda and the steps to a brake adjustment on the board. 1. Wheels centered 2. Troubleshooting Look at every part of the system and replace parts as necessary. 3. Pad alignments 4. Cable tension Remember your barrel adjuster! Tri-flow or other chain lube Spares for project Cables Offset brake tools 3rd & 4th hand tools (optional) Housing Cable ends Ferrules Brake pads Y socket (8,9,10) Needle nose pliers BMX bikes Review Worksheet (p. 212) Brake Types (p. 248) CONTINUED ON P
17 BRAKES: BMX AND MTB PRACTICE 2 OF 2 (CONTINUED FROM P. 126) Activity: 1. Begin by talking about the difference between troubleshooting and an overhaul. For this lesson we don t need to take apart every part of the brake, like we would in an overhaul, we only need to look at each part of the system and fix the parts that aren t working well. This is called troubleshooting. 2. Pair up students and assign bikes (use strategies on p ). 3. Give students enough time for everyone to replace, lube and adjust a cable. Remind students to follow this order: 1. Center wheel. 2. Troubleshooting: Inspect entire system replace parts if necessary. 3. Adjust pad alignment. 4. Adjust cable tension. 4. When students are done, have them bring their bike to an instructor for a Final Check. 5. If students finish early, have them check all the other things on the bike that you have learned so far headset, flat tires, front hubs, bottom bracket. They can also lubricate the chain and clean the bike. 6. Be sure to leave 15 minutes at the end of class for clean up and Final Checks of each bike. MATERIALS & See p. 126 Follow-up: 1. Fill out the Review Worksheet (p. 212). This will help you plan the next class, and the next year. 2. Take a head count of the tools and make sure they are all in the correct places. 127
18 REAR DERAILLEUR PRACTICE 1 OF 2 Understand components and adjustment of the rear derailleur. Understand the concept of troubleshooting and problem solving. TIME AGE STAFF 30 min all beg 2 GOOD FOR GROUP no T O O L KIT a MATERIALS NOTE This lesson can be combined with Front Derailleurs. Repair stands Examples of housing and cables for all systems Cable and housing cutters Preparation: 1. Review your notes and Review Worksheet from the previous class. 2. Prepare enough bikes in stands for students to work in groups of two. 3. You may want to go around and re-set some of the limit screws or change the cable tension on the bikes so that they are ready for repair. 4. Beware of grip shifts! Try not to replace the cable if you can! 5. This is another good lesson for an extra volunteer in the classroom! 6. Write the agenda and the steps to adjustment on the board. 1. Troubleshoot; Inspect entire system replace parts if necessary. 2. Adjust alignment. 3. Adjust limit screws. 4. Adjust cable tension Remember your barrel adjuster! Tri flow or other chain lube Screwdrivers Spares for project Cables Housing Cable ends Ferrules Y-socket (8, 9, 10) Allen wrenches (4, 5, 6) Mountain bikes Review Worksheet (p. 212) CONTINUED ON P
19 REAR DERAILLEUR PRACTICE 2 OF 2 (CONTINUED FROM P. 128) NOTE This lesson has the most potential for the glazed over student factor. Make sure you keep them engaged and talking. Be wary of overwhelming them with unnecessary information by keeping your lesson short and to the point. MATERIALS & See p. 128 Activity: 1. Have students tell stories or imagine what might happen if the gears weren t working properly. 2. Pair up students, two to a bike (use strategies on p ). 3. Give students enough time for everyone to replace, lube and adjust a cable. Remind students to follow the adjustment steps on the board. Be sure to stress TROUBLESHOOTING FIRST! Many times youth will struggle with adjusting a rear derailleur for an hour only to realize they need to replace a rusty cable or their housing is frayed. Those are the things troubleshooting should find first! 4. When students are done, have them bring their bike to an instructor for a Final Check. 5. If students finish early, have them check all the other things on the bike that you have learned so far headset, flat tires, front hubs, bottom bracket. They can also lubricate the chain and clean the bike. 6. Be sure to leave 15 minutes at the end of class for clean up and Final Checks of each bike. Follow-up: 1. Fill out the Review Worksheet (p. 212). This will help you plan the next class, and the next year. 2. Take a head count of the tools and make sure they are all in the correct places. 129
20 FRONT DERAILLEUR PRACTICE 1 OF 2 Understand components and adjustment of the front derailleur. Understand the concept of troubleshooting and problem solving. TIME AGE STAFF 30 min all beg 2 GOOD FOR GROUP no T O O L KIT a MATERIALS NOTE This lesson can be combined with Rear Derailleurs. Repair stands Examples of housing and cables for all systems Cable and housing cutters Preparation: 1. Review your notes and Review Worksheet from the previous class. 2. Prepare enough bikes in stands for students to work in groups of two. 3. You may want to go around and re-set some of the limit screws or change the cable tension on the bikes so that they are ready for repair. 4. This is another good lesson for an extra volunteer in the classroom! 5. Beware of grip shifts! Try not to replace the cable if you can! 6. Write the agenda and the steps to adjustment on the board. 1. Troubleshoot; Inspect entire system replace parts if necessary. 2. Adjust height. 3. Adjust alignment. 4. Adjust limit screws. 5. Adjust cable tension remember your barrel adjuster! Tri-flow or other chain lube Screwdrivers Spares for project Cables Housing Cable ends Ferrules Y-socket (8, 9, 10) Allen wrenches (4, 5, 6) Mountain bikes Review Worksheet (p. 212) CONTINUED ON P
21 FRONT DERAILLEUR PRACTICE 2 OF 2 (CONTINUED FROM P. 130) Activity: 1. Have students tell stories or imagine what might happen if the gears weren t working properly. 2. Pair up students, two to a bike (use strategies on p ). 3. Give students enough time for everyone to replace, lube and adjust a cable. Follow the steps on the board. Remind students to TROUBLESHOOT FIRST! Cable tension won t fix a problem if the housing is blown. 4. When students are done, have them bring their bike to an instructor for a Final Check. 5. If students finish early, have them walk around the shop and tour different kinds of shifting systems. Can they find a grip shift, downtube shifter, trigger shifter, bar end shifter, and an STI shifter? 6. If students still have time, have them check all the other things on the bike that you have learned so far headset, flat tires, front hubs, bottom bracket, front derailleur and brakes. They can also lubricate the chain and clean the bike. 7. Be sure to leave 15 minutes at the end of class for clean up and Final Checks of each bike. MATERIALS & See p. 130 Follow-up: 1. Fill out the Review Worksheet (p. 212). This will help you plan the next class, and the next year. 2. Take a head count of the tools and make sure they are all in the correct places. 131
22 THREADLESS HEADSET PRACTICE 1 OF 2 Review the 51/2 steps to an overhaul. Practice overhauling a threadless headset. TIME AGE STAFF GOOD FOR GROUP 30 min int 2 no T O O L KIT a Preparation: 1. Review your notes and Review Worksheet from the previous class. 2. Prepare enough bikes in stands for students to work in groups of two. If you don t have enough threadless headset bikes, have students work on what you have. 3. This is the portion of the class where students may be falling behind on their bike projects if they had harder bikes to work on or any unforeseen problems make sure that they get ample time to do their work and catch up if they can. 4. Write the agenda and the 51/2 steps of an overhaul on the board or wall. 1/2. Get a rag 1. Disassemble 2. Clean 3. Inspect 4. Grease and Reassemble 5. Adjust MATERIALS Repair stands Allen keys Combination wrenches Simple green Rags Grease Bearings Drop gauges Mountain bikes w threadless headsets Review Worksheet (p. 212) Threadless Headset Exploded (p. 247) CONTINUED ON P
23 THREADLESS HEADSET PRACTICE 2 OF 2 (CONTINUED FROM P. 132) Activity: 1. Review the 51/2 steps of an overhaul. Be creative! Have students do the majority of the talking during the review. 2. Remind students that the cable routing of bikes with gears will be much more complex than the bikes they have worked on in the earlier classes, have them take a mental picture of the front of the bike before starting their work. 3. Pair up students, two to a bike (use strategies on p ). 4. Overhaul! Remind students to share the work. 5. When students are done, have them bring their headset to an instructor for a Final Check. 6. If students finish early, have them check all the other things on the bike that you have learned so far headset, flat tires, front hubs. They can also lubricate the chain and clean the bike. 7. Make sure to leave 15 minutes for clean up! If a student pair is really struggling with an adjustment feel free to fix it for them at this point so that it gets back together. MATERIALS & See p. 132 Follow-up: 1. Fill out the Review Worksheet (p. 212). This will help you plan the next class, and the next year. 2. Take a head count of the tools and make sure they are all in the correct places. 133
24 3-PIECE BOTTOM BRACKET PRACTICE 1 OF 2 Practice overhauling a 3 piece bottom bracket. STAFF GOOD FOR TIME AGE GROUP 30 min int 2 no T O O L KIT c Preparation: 1. Review your notes and Review Worksheet from the previous class. If possible, remove crank arms and re assemble before class to avoid a seized crank arm situation. 2. Prepare enough bikes in stands for students to work in groups of two. 3. Challenge the students sense of vocabulary by using bicycle language yourself and encouraging them to use precision in their speech. 4. This is a great lesson for extra volunteers! 5. Write the agenda and the 51/2 steps of an overhaul on the board or wall. NOTE 1/2. Get a rag 1. Disassemble 2. Clean 3. Inspect 4. Grease and Reassemble 5. Adjust It is very important during disassembly that you have all instructor hands on-deck to ensure that there is no cross-threading happening when removing crank arms. MATERIALS Repair stands Bottom bracket sockets Large and small adjustable wrench Allen keys Simple green Lockring wrench Spanner wrenches Rags Grease Crank pullers Screwdriver Pedal wrench Mountain bikes Bottom Bracket chart Review Worksheet (p. 212) Bottom Brackets (p. 250) CONTINUED ON P
25 3-PIECE BOTTOM BRACKET PRACTICE 2 OF 2 (CONTINUED FROM P. 134) Activity: 1. Have students explain the 51/2 steps of an overhaul. Get creative! Assign each person one step in the overhaul process. Have them act out their step without making any words. Have the rest of the students put the 6 actors in order without talking or making any noise! 2. There may be several different types of bottom brackets on the class bikes. Take some time to tour the classroom and look at the different systems. Display the Bottom Bracket chart (p. 250) to show students the various ways to take on and off a 3 piece bottom bracket based on the country of origin for the part/bike. 3. Remind students to look for washers when they remove the cranks/crank bolts! 4. Pair up students, two to a bike (use strategies on p ). 5. Overhaul! Make sure to remind students to tighten the crank puller in the crank with the adjustable wrench before extracting the cranks. 6. When students are done, have them bring their bike to an instructor for a Final Check. 7. If students finish early, have them check all the other things on the bike that you have learned so far, lubricate the chain and clean the bike. 8. Be sure to leave 15 minutes at the end of class for clean-up and Final Checks of additional work on each bike. MATERIALS & See p. 134 Follow-up: 1. Fill out the Review Worksheet (p. 212). This will help you plan the next class, and the next year. 2. Take a head count of the tools and make sure they are all in the correct places. 135
26 ADVANCED BRAKES PRACTICE 1 OF 2 Understand the parts and adjustments associated with BMX and MTB brakes.understand the concepts of troubleshooting and problem solving. TIME AGE STAFF GOOD FOR GROUP 30 min int 2 no T O O L KIT c Preparation: 1. Review your notes and Review Worksheet from the previous class. 2. Prepare enough bikes in stands for students to work in groups of two. Try to get as many different kinds of brake systems in the stands as possible. Try to group similar types of systems together in the classroom so that students can help each other, and you don t have to move around as much. 3. Prep the bikes by making subtle or not so subtle changes in the brakes that need to be fixed. 4. Write the agenda and the steps to brake adjustments on the board. NOTE 1. Troubleshoot 2. Cables and Housing 3. Canti Hangers and Straddle Cables 4. Ferrules and End Caps 5. Cable Tension 6. Centering and Springs 7. Brake Pads In the advanced classes, try to challenge the students sense of vocabulary by using bicycle language yourself and encouraging them to use precision in their speech. MATERIALS Repair stands Bikes Rags Simple green Sandpaper Tri flow or other lube Cable cutters Offset brake tools 3rd & 4th hand tools Housing Cable ends Ferrules Brake pads Y-socket (8/9/10) wrench Hex wrenches 9/11 & 8/10 brake wrenches Screwdrivers Examples of cables Examples of brakes and pads Review Worksheet (p. 212) Brake Types (p. 248) CONTINUED ON P. 137 Brake Type Flow Chart (p. 249) 136

27 ADVANCED BRAKES PRACTICE 2 OF 2 (CONTINUED FROM P. 136) Activity: 1. Pair up students, two to a bike (use strategies on p ). 2. Review the steps on the board having youth explain each part. 3. Have at it! Remind students to TROUBLESHOOT FIRST! 4. Have all adjustment brought to an instructor for a Final Check before moving on. 5. If students finish early, have them check all the other things on the bike that they have learned so far, lubricate the chain and clean the bike. 6. Give students a chance to work on more than one type of brake. After they have adjusted their bike, have them prep it for the next group by making changes that need to be adjusted by the next mechanics. 7. Have a more in-depth discussion about disk brakes, hydraulic brakes and specific tips for squealy brakes if you have time. 8. Be sure to leave 15 minutes at the end of class for clean up and Final Checks of each bike. MATERIALS & See p. 136 Follow-up: 1. Fill out the Review Worksheet (p. 212). This will help you plan the next class, and the next year. 2. Take a head count of the tools and make sure they are all in the correct places. 137
28 ADVANCED DRIVETRAIN PRACTICE 1 OF 2 Practice looking at the drive train as a unit and adjusting all the parts together. TIME AGE STAFF GOOD FOR GROUP 30 min adv 2 no T O O L KIT c Preparation: 1. Review your notes and Review Worksheet from the previous class. 2. Prepare enough bikes in stands for students to work in groups of two. 3. Make sure to have a bike manual (or several) to use for reference if students start getting frustrated. 4. Prep the bikes by making subtle or not-so-subtle changes in the gears that need to be fixed. 5. Have some extra chain available for trying out the chain tool. 6. Write the agenda and steps to adjustment on the board. Rear: 1) TROUBLESHOOT 2) Alignment 3) Limit screws 4) Cable Tension Front: 1) TROUBLESHOOT 2) Height 3) Alignment 4) Limit screws 5) Cable tension MATERIALS Repair stands Bikes Examples of housing and cables for all systems Cable and housing cutters Tri-flow Screwdrivers Cables Cable ends Ferrules Rags Simple green Chain checker Chain removal tool Allen keys Y-socket wrench 9/11 & 8/10 wrenches Freewheel example (off a bike) Cassette example (off a bike) CONTINUED ON P. 139 Review Worksheet (p. 212) 138
] and remind why they are doing it in the first place. MATERIALS & See p. 138 Activity: 1.")
29 ADVANCED DRIVETRAIN PRACTICE 2 OF 2 (CONTINUED FROM P. 138) NOTE This class has the potential to get very frustrating for some as derailleurs can be particularly challenging. Help the students with techniques on how to work through their feelings [like Scenic Turnout (p. 175)] and remind why they are doing it in the first place. MATERIALS & See p. 138 Activity: 1. Pair up students, two to a bike (use strategies on p ). 2. Have at it! Remind students to start by troubleshooting the whole system. 3. If students finish early, have them check all the other things on the bike that they have learned so far, lubricate the chain and clean the bike. They can also practice breaking and re connecting a chain with the chain tool. 4. When students are done, have them bring their bike to an instructor for a Final Check. 5. Be sure to leave 15 minutes at the end of the lesson to clean up! Follow-up: 1. Fill out the Review Worksheet (p. 212). This will help you plan the next class, and the next year. 2. Take a head count of the tools and make sure they are all in the correct places. 139
30 REAR HUB PRACTICE 1 OF 2 Practice overhauling a rear hub. TIME AGE STAFF GOOD FOR GROUP 30 min adv 2 no T O O L KIT c Preparation: 1. Review your notes and Review Worksheet from the previous class. 2. Prepare enough bikes in stands for students to work in groups of two. 3. Make sure to have a bike manual (or several) to use for reference if students start getting frustrated. 4. Challenge the students sense of vocabulary by using bicycle language yourself and encouraging them to use precision in their speech. 5. Write the agenda and the 51/2 steps of an overhaul on the board or wall. 1/2. Get a rag 1. Disassemble 2. Clean 3. Inspect 4. Grease and Reassemble 5. Adjust MATERIALS Repair stands Bikes Cone wrenches Combination wrenches Bench vice Axle vice Freewheel remover Chain whip Giant adjustable wrench Cassette lockring tools Grease Rags Simple green Cleaning brushes Torque wrench (optional) Review Worksheet (p. 212) Rear Freewheel Hub Exploded (p. 246) CONTINUED ON P
31 REAR HUB PRACTICE 2 OF 2 (CONTINUED FROM P. 140) Activity: 1. Review the 51/2 steps of an overhaul. Get creative! If students are mature enough to stay positive and not get mean, have them explain the steps while imitating the teaching style of one of their teachers. Have students (and staff) guess which teacher it is! 2. Get to it! Remind students to take extra care when working with freewheels and cassettes. 3. Make sure the students know that they need to get their adjustment checked by an instructor EVERY TIME before fully reassembling their bike. They also need to sign off on each job as they finish this is an important habit for working in a shop. MATERIALS & See p. 140 NOTE Make sure students use caution when threading freewheels back onto the wheel as they could turn disastrous if improperly threaded. 4. If students finish early, have them check all the other things on the bike that they have learned so far, lubricate the chain and clean the bike. 5. When students are done, have them bring their wheel to an instructor for a Final Check before putting it back in the bike. 6. Be sure to leave 15 minutes at the end of class for clean-up! Follow-up: 1. Fill out the Review Worksheet (p. 212). This will help you plan the next class, and the next year. 2. Take a head count of the tools and make sure they are all in the correct places. 141
32 WHEEL TRUING PRACTICE 1 OF 2 Practice concepts of wheel building and truing. TIME AGE STAFF GOOD FOR GROUP 30 min adv 3 no T O O L KIT c Preparation: 1. Review your notes and Review Worksheet from the previous class. 2. Prepare one bike for each student. They will true both the front and rear wheels. 3. This class requires special preparation to round up enough truing stands. Plan in advance! 4. Have additional practice wheels on hand for students who move fast or whose wheels don t need much truing. 5. Have an example of a bent (versus out of true) rim. 6. Write the steps to truing a wheel on the board along with the agenda. 1. Remove the wheel 2. Put the wheel in the stand 3. True laterally with the tire on 4. True radially with the tire off 5. Check spoke tension with a tensiometer 6. Check wheel dish with a dishing tool 7. Clean the wheel MATERIALS Truing stands Spoke wrenches Dishing tool Tensiometer Tri-Flow Rags Demo wheels, rims, hubs, spokes Review Worksheet (p. 212) Parts of the Wheel (p. 245) CONTINUED ON P
] and remind why they are doing it in the first place. MATERIALS & See p. 142 Activity: 1.")

33 WHEEL TRUING PRACTICE 2 OF 2 (CONTINUED FROM P. 142) NOTE This class has the potential to get very frustrating. Help the students with techniques on how to work through their feelings [like Scenic Turnout (p. 175)] and remind why they are doing it in the first place. MATERIALS & See p. 142 Activity: 1. Remind students to work in SMALL increments. A quarter turn at a time is enough. In addition, they ll have to go back and forth between radial and lateral truing a few times. 2. If students finish early, have other wheels they can work on. Throw a bent rim in the mix and talk about why it can t be trued. What can you do in this instance? 3. When students are done, have them bring their wheels to an instructor for a Final Check. 4. Be sure to leave at least 15 minutes at the end of class for clean up and any additional adjustments. Follow-up: 1. Fill out the Review Worksheet (p. 212). This will help you plan the next class, and the next year. 2. Take a head count of the tools and make sure they are all in the correct places. 143
Santa Fe Cycles Assembly Guide Introduction
 Santa Fe Cycles Assembly Guide Introduction Congratulations on your purchase of your new Santa Fe bicycle. You have purchased a bicycle that has many features and qualities. Please take a few minutes and
Just as you d bring along a map if you were heading off for a trip on
 In This Chapter Chapter 1 Channeling Your Inner Grease Monkey Entering the world of bike repair and maintenance Caring for your bike before, during, and after you ride Making emergency, basic, and advanced
Have questions? Chat with us live at raleighusa.com or call us at , 8am 5pm PST
 1 2 Have questions? Chat with us live at raleighusa.com or call us at 1-800-251-8435, 8am 5pm PST The bicycle you have purchased is a complex piece of equipment that must be properly assembled and maintained
Have questions? Chat with us live at raleighusa.com or call us at , 8am 5pm PST
 1 2 Have questions? Chat with us live at raleighusa.com or call us at 1-800-251-8435, 8am 5pm PST The bicycle you have purchased is a complex piece of equipment that must be properly assembled and maintained
Have questions? Chat with us live at raleighusa.com or call us at , 8am 5pm PST
 1 2 Have questions? Chat with us live at raleighusa.com or call us at 1-800-251-8435, 8am 5pm PST The bicycle you have purchased is a complex piece of equipment that must be properly assembled and maintained
Assembly Tools. Assembly will take about an hour
 Assembly Guide Assembly Tools Included in your parts box: Pedals Toolkit (4+5mm combo Allen wrench, 13+15mm combo open-end wrench) Touch-up paint Spare fuses (for battery) Assembly will take about an hour
Course outlineimportant: As personnel i
 Bike SA Inc Advanced Bike Maintenence Course Course outlineimportant: As personnel i nvolved in this program it is your responsibility to familiarise yourself with this document Please familiarise yourself
Parts List. 7. Handlebars 8. Grips 9. Handlebar Stem 10. Front Brake 11. Front Wheel 12. Crank 13. Chain
 Woodworm Cruise Parts List 1. Free Wheel with Rear Hub 2. Fenders 3. Fender Stay 4. Quick Release 5. Saddle 6. Seat Post 7. Handlebars 8. Grips 9. Handlebar Stem 10. Front Brake 11. Front Wheel 12. Crank
SANTA CRUZ BICYCLES Cable Routing Procedure MY17
 SANTA CRUZ BICYCLES Cable Routing Procedure MY17 Copyright Santa Cruz Bicycles 2017 TABLE OF CONTENTS SAFETY INSTRUCTIONS... 3 CABLE ROUTING... 3 INTRODUCTION...3 TOOLS AND SUPPLIES...3 REAR DERAILLEUR
Folding Dual Suspension MTB. Instruction Manual
 Folding Dual Suspension MTB Instruction Manual Introduction The Stowabike Folding MTB has been made to last and with proper maintenance, it will give you years of enjoyable rides and journeys. The following
BICYCLE ASSEMBLY INSTRUCTIONS. dutchcycles.com.au. Distribution Centre
 BICYCLE ASSEMBLY INSTRUCTIONS dutchcycles.com.au Distribution Centre Shed 68, 400-422 Somerville Road, Tottenham, VIC 3012 email: service@dutchcycles.com.au BICYCLE COMPONENTS KEY INTRODUCTION CONGRATULATIONS
Assembly Tools. Assembly will take 1-2 hours
 Assembly Tools Included in your parts box: Pedals Quick release skewer Reflectors (if not already installed) Toolkit (4+5mm combo Allen wrench, 13+15mm combo open-end wrench) Helpful Tools: Scissors (for
ASSEMBLY GUIDE AROUND THE BLOCK - 1, 3, 7, & 21 SPEED SIXTHREEZERO
 ASSEMBLY GUIDE AROUND THE BLOCK - 1, 3, 7, & 21 SPEED SIXTHREEZERO OUR COMMITMENT We want you to love your bike as much as we do. If you run into any issues, no matter how small, let us know and we ll
Shifting Lever. Dealer's Manual. RAPIDFIRE Plus SL-M2000 SL-M3010 SL-M4010. Thumb Shifter SL-TZ500. ROAD MTB Trekking. City Touring/ Comfort Bike
 (English) DM-MDSL001-01 Dealer's Manual ROAD MTB Trekking City Touring/ Comfort Bike URBAN SPORT E-BIKE Shifting Lever RAPIDFIRE Plus SL-M2000 SL-M3010 SL-M4010 Thumb Shifter SL-TZ500 CONTENTS IMPORTANT
model - CYPRESS DX W
 Contents model - CYPRESS DX W Maintenenace manual Read and Save these instructions Welcome Contents 1 Preparing Nothing makes us happier than seeing people out riding bikes. For over thirty years Giant
Rear Drive System SERVICE INSTRUCTION. Specifications SI-R670B
 - SERVICE INSTRUCTION SI-R670B t Rear Drive System Before use, read these instructions carefully, and follow them for correct use. In order to realize the best performance, we recommend that the following
Lectric Cycles Mid-Drive Electric Motor Installation
 Lectric Cycles Mid-Drive Electric Motor Installation This write-up describes the installation of a Lectric Cycles electric motor. The model is the e-rad Mid-Drive 750 Watt conversion kit, installed on
Ladies Shopper Bike Assembly Manual 28C03
 Ladies Shopper Bike Assembly Manual 28C03 Ecosmo Ltd 1 Know your bike 1. Wheel 2. Rear Derailleur 3. Chain 4. Crank Set 5. Pedal 6. Seat Quick Lock 7. Saddle and Post 8. Frame 9. Front Light 10. Front
Bicycle Noise Diagnosis
 Bicycle Noise Diagnosis Bottom bracket noise is a common complaint but most times the noise could be coming from another area on the bicycle. Noises that are telegraphing through the frame often sound
TRAILMATE METEOR ASSEMBLY MANUAL
 TRAILMATE METEOR ASSEMBLY MANUAL (DISC BRAKE VERSION) The Trailmate Meteor recumbent has been designed for easy assembly. This means more time to enjoy the smooth ride with single speed, 3 speed coaster
Service & Repair Labor Rates *
 (Stage 1 Service) all procedures included in a regular Tune up * only free with purchase of new bike Clean & Lube (Stage 2 Service) Tune up (Stage 3 Service) Recommended monthly check condition of cables
COLLEGE OF HEALTH SCIENCES Department of Kinesiology Sport and Recreation Office Fall 2015
 COLLEGE OF HEALTH SCIENCES Department of Kinesiology Sport and Recreation Office Fall 2015 Course Title: Sport and Recreation 289 Bicycle Maintenance, 1 credit Course Time: Lec 342, Saturdays 12:00pm-3:50pm,
TB Title: Mountain Bike Maintenance Part 1 of 2
 Technical Brief No.: TB-09-0528 Title: Mountain Bike Maintenance Part 1 of 2 For many New England mountain bikers and other cyclist, spring is that time of the year to make sure your bike is safe and ready
ASSEMBLY GUIDE: Izip & Ezip Electric Bicycles with Rack-Top Mounted Batteries ( RTMB Bicycles )
") ASSEMBLY GUIDE: Izip & Ezip Electric Bicycles with Rack-Top Mounted Batteries ( RTMB Bicycles ) Please Refer to your Owner s Manual for Detailed Setup Instructions Technical & Customer Service: 1-800-377-4532
ASSEMBLY GUIDE: Izip & Ezip Electric Bicycles with Rack-Top Mounted Batteries ( RTMB Bicycles ) Please Refer to your Owner s Manual for Detailed Setup Instructions Technical & Customer Service: 1-800-377-4532
2019 MADONE ASSEMBLY MANUAL
 2019 MADONE ASSEMBLY MANUAL 2019 MADONE Rim brakes and Di2 drivetrain Rim brakes and mechanical drivetrain Disc brakes and Di2 drivetrain Disc brakes and mechanical drivetrain TABLE OF CONTENTS Common
MANUAL LEKKER BIKES 2016
 MANUAL LEKKER BIKES 2016 CONTACT For your own safety, never do work on your bicycle unless you feel absolutely sure about it. If you are in doubt or if you have any questions please contact our helpdesk:
Thank you for purchasing a WIKE BOX BIKE!
 Thank you for purchasing a WIKE BOX BIKE! Contents Safety.....3 Front wheel.4 Kickstand..5 Handle Bar & Box 6 Seat post and Saddle 7 Final pre-ride check 8 Tools needed to assemble Bike: -High table or
UNPACKING AND ASSEMBLING YOUR DIAMONDBACK ROAD BIKE
 EMAIL SIGNUP BIKE REG SEARCH BIKES THE RIDE HEALTH FITNESS SKILLS SHOP MAINTENANCE CYCLING 101 RIDERS LIKE YOU TEAMS SUPPORT UNPACKING AND ASSEMBLING YOUR DIAMONDBACK ROAD BIKE 1. Begin by carefully cutting
DM-RCWH (English) Dealer's Manual. ROAD MTB Trekking. City Touring/ Comfort Bike. Wheel Set. WH-RX31 SM-AX x12 SM-AX x12
 Dealer's Manual. ROAD MTB Trekking. City Touring/ Comfort Bike. Wheel Set. WH-RX31 SM-AX x12 SM-AX x12") (English) DM-RCWH001-00 Dealer's Manual ROAD MTB Trekking City Touring/ Comfort Bike URBAN SPORT E-BIKE Wheel Set WH-RX31 SM-AX720-100x12 SM-AX720-142x12 CONTENTS IMPORTANT NOTICE... 3 TO ENSURE SAFETY...
(English) DM-RCWH001-00 Dealer's Manual ROAD MTB Trekking City Touring/ Comfort Bike URBAN SPORT E-BIKE Wheel Set WH-RX31 SM-AX720-100x12 SM-AX720-142x12 CONTENTS IMPORTANT NOTICE... 3 TO ENSURE SAFETY...
SANTA CRUZ BICYCLES Geometry Adjust Flip Chip
 SANTA CRUZ BICYCLES Geometry Adjust Flip Chip Copyright Santa Cruz Bicycles 2017 TABLE OF CONTENTS SAFETY INSTRUCTIONS... 3 GEOMETRY ADJUST FLIP CHIP... 3 INTRODUCTION...3 TOOLS AND SUPPLIES...3 MY18 NOMAD
DM-MARD (English) Dealer's Manual. ROAD MTB Trekking. City Touring/ Comfort Bike REAR DERAILLEUR XTR RD-M9100 RD-M9120
 Dealer's Manual. ROAD MTB Trekking. City Touring/ Comfort Bike REAR DERAILLEUR XTR RD-M9100 RD-M9120") (English) DM-MARD001-00 Dealer's Manual ROAD MTB Trekking City Touring/ Comfort Bike URBAN SPORT E-BIKE REAR DERAILLEUR XTR RD-M9100 RD-M9120 CONTENTS CONTENTS...2 IMPORTANT NOTICE...3 TO ENSURE SAFETY...4
(English) DM-MARD001-00 Dealer's Manual ROAD MTB Trekking City Touring/ Comfort Bike URBAN SPORT E-BIKE REAR DERAILLEUR XTR RD-M9100 RD-M9120 CONTENTS CONTENTS...2 IMPORTANT NOTICE...3 TO ENSURE SAFETY...4
2019 MADONE ASSEMBLY MANUAL
 2019 MADONE ASSEMBLY MANUAL 2019 MADONE Rim brakes and Di2 drivetrain Disc brakes and Di2 drivetrain Rim brakes and mechanical drivetrain Disc brakes and mechanical drivetrain TABLE OF CONTENTS Common
Ride for New Beginnings June 23-25, 2017
 Ride for New Beginnings June 23-25, 2017 Please Print and Complete All Information on the Application Please Circle the Appropriate Item: Participation Type: Ride Option: SAG Option: T-Shirt Type: T-Shirt
Thumb Shifter Plus Thumb Shifter
 (English) DM-SL0004-01 Dealer's Manual Thumb Shifter Plus Thumb Shifter Thumb Shifter Plus SL-FT55 SL-TX50 SL-TX30 Thumb Shifter SL-TZ20 IMPORTANT NOTICE This dealer's manual is intended primarily for
FRAMESET ASSEMBLY GUIDE TRUE GRIT. LaufCycling.com
 FRAMESET ASSEMBLY GUIDE TRUE GRIT LaufCycling.com Congratulations on your True Grit Frameset! We understand you are in a hurry to go riding a.s.a.p. - but please take a deep breath and read this installation
ROAD Wheel Set. Dealer's Manual WH-9000-C24-CL WH-9000-C24-TL WH-9000-C35-CL WH-9000-C35-TU WH-9000-C50-CL WH-9000-C50-TU WH-9000-C75-TU
 (English) DM-WH0002-00 Dealer's Manual ROAD Wheel Set WH-9000-C24-CL WH-9000-C24-TL WH-9000-C35-CL WH-9000-C35-TU WH-9000-C50-CL WH-9000-C50-TU WH-9000-C75-TU WH-RS21 WH-RS61 CONTENTS IMPORTANT NOTICE...
It's Not Rocket Science, It's Bicycle Maintenance
 TECM 2700.011 It's Not Rocket Science, It's Bicycle Maintenance A Comprehensive Bicycle Maintenance Manual for All Riders Patrick Doran, Bryan Hayes, Ashley Huffman, Corbin Sheridan 4/18/2012 It's Not
Special instruction of installation for SAINT FH-M800/RD-M800 and FH-M805/RD-M805
 Technical Service Instructions SI-5VB0E t RD-M805 / RD-M800 Rear derailleur Special instruction of installation for SAINT FH-M800/RD-M800 and FH-M805/RD-M805 A hub axle is an essential component for the
CRUZBIKE Quest 2.0 Assembly
 CRUZBIKE Quest 2.0 Assembly CRUZBIKE Quest 2.0 Assembly... 1 General notes on assembly... 2 Un box and evaluate the frame and major parts... 2 Unfold the rear swing arm and arrange the frame... 3 Rear
TABLE OF CONTENTS INTRODUCTION
 R3 DISC MANUAL TABLE OF CONTENTS Introduction... 1 Frame Features... 2 Fork Preparation... 3 Small Parts... 5 Frame Preparation... 6 Brake Housing Installation... 7 Mechanical Cable Routing... 9 Electric
comfort without compromising on performance and to fit your various needs on touring,
 Congratulations on your purchase of Goal-26X. Goal-26X is made to enhance comfort without compromising on performance and to fit your various needs on touring, shopping and communicating. Let s have fun
Co-Motion Co-Pilot Bicycles for travel
 Revised October 2014 Co-Motion Co-Pilot Bicycles for travel Packing and travel instructions Eugene Oregon USA Toll free 1-866-282-6336 www.co-motion.com Congratulations! A Co-Motion Co-Pilot is a great
Shifting Lever. RAPIDFIRE Plus 11-speed
 (English) DM-SL0005-04 Shifting Lever Dealer's Manual RAPIDFIRE Plus 11-speed MTB XTR SL-M9000 DEORE XT SL-M8000 CONTENTS IMPORTANT NOTICE... 3 TO ENSURE SAFETY... 4 LIST OF TOOLS TO BE USED... 7 INSTALLATION...
9-speed super narrow. chain such as. CN-7701 / CN-HG93 8- / 7- / 6-speed narrow. chain such as CN-HG50 / CN-IG51
 - Technical Service Instructions SI-5VH0B t RD-M600 Rear derailleur General Safety Information WARNING The ST-M600 DUAL CONTROL lever is used for both gear shifting and braking operations. Make sure that
BackCountry ebikes 2019 MULE Assembly
 BackCountry ebikes 2019 MULE Assembly Required Tools: Cutting Pliers (to cut box poly strapping and heavy bike banding) Scissors (to remove bubble wrap) Allen wrenches (3mm, 4mm, 5mm, 6mm) Wrenches (10mm,
The type of terrain: flat and rough-terrain
 1 2 The type of terrain: flat and rough-terrain ASSEMBLING YOUR BICYCLE 1. Gears 2. Rear Brake 3. Rear Reflector 4. Seat Post 5. Saddle 6. Front Brake Lever 7. Gear Selector 8. Handle Bars 9. Bell 10.
Entry Level 3, Level 1 Award and Level 2 Certificate in Cycle Mechanics ( ,-18,-28) August 2017 Version 1.2
 August 2017 Version 1.2") QUALIFICATION HANDBOOK Entry Level 3, Level 1 Award and Level 2 Certificate in Cycle Mechanics (3902-08,-18,-28) August 2017 Version 1.2 Qualification at a glance Subject area City & Guilds number 3902
QUALIFICATION HANDBOOK Entry Level 3, Level 1 Award and Level 2 Certificate in Cycle Mechanics (3902-08,-18,-28) August 2017 Version 1.2 Qualification at a glance Subject area City & Guilds number 3902
E-trike Li Assembly Guide
 PREPARATION 1. Read this assembly manual BEFORE commencing assembly. 2. Carefully remove all the components and packaged hardware from the shipping boxes. 3. Unpack the contents of the large double box
ASSEMBLY GUIDE TRUE GRIT. LaufCycling.com
 ASSEMBLY GUIDE TRUE GRIT LaufCycling.com Congratulations on your True Grit! We understand you are in a hurry to go riding a.s.a.p. - but please take a deep breath and read this installation guide first.
To save this document, scroll up and select the download icon
 Thank you for purchasing a RustySpokes Softcruise. We know you are going to enjoy the bike, but if you had it shipped to you, there are a few things you need to do to assemble the bike. The seat, pedals
FRAME FEATURES TABLE OF CONTENTS INTRODUCTION
 R3 MANUAL TABLE OF CONTENTS Introduction...1 Frame Features...2 Fork Preparation...3 Small Parts...5 Frame Preparation...6 Mechanical Cable Routing...7 Electric Cable Routing...9 Seatpost Assembly & Installation...11
Rear Drive System SERVICE INSTRUCTIONS SI-R920A WARNING. Note Always be sure to use the sprocket set bearing the same group
 - SERVICE INSTRUCTIONS SI-R90A t Rear Drive System Before use, read these instructions carefully, and follow them for correct use. WARNING Use neutral detergent to clean the chain. Do not use alkali-based
DM-MBRD (English) Dealer's Manual. ROAD MTB Trekking. City Touring/ Comfort Bike. Rear Derailleur SLX RD-M7000 DEORE RD-M6000
 Dealer's Manual. ROAD MTB Trekking. City Touring/ Comfort Bike. Rear Derailleur SLX RD-M7000 DEORE RD-M6000") (English) DM-MBRD001-04 Dealer's Manual ROAD MTB Trekking City Touring/ Comfort Bike URBAN SPORT E-BIKE Rear Derailleur SLX RD-M7000 DEORE RD-M6000 CONTENTS IMPORTANT NOTICE... 3 TO ENSURE SAFETY... 4
(English) DM-MBRD001-04 Dealer's Manual ROAD MTB Trekking City Touring/ Comfort Bike URBAN SPORT E-BIKE Rear Derailleur SLX RD-M7000 DEORE RD-M6000 CONTENTS IMPORTANT NOTICE... 3 TO ENSURE SAFETY... 4
TABLE OF CONTENTS FRAME FEATURES INTRODUCTION
 S3 DISC MANUAL TABLE OF CONTENTS Introduction...1 Frame Features...2 Fork Preparation...3 Small Parts...5 Frame Preparation...6 Brake Housing Installation...7 Mechanical Cable Routing...9 Electric Cable
MODEL: FIXIE / TRACK
 STEP BY STEP BUILD GUIDE MODEL: FIXIE / TRACK TABLE O F CON TENTS TOOLS 1 LET S GET STARTED 2 INSTALLING THE HANDLEBAR 3 INSTALLING THE FRONT WHEEL 4 ALIGNING THE STEM 5 INSTALLING THE SEATPOST 6 OPTIMIZING
MASTER TRUING STAND TS-3. Optional Dial indicator set with brackets Dial indicator bracket set only
 MASTER TRUING STAND TS-3 3 2 1 3 8 9 4 10 7 6 5 12 13 Optional 1555-1 Dial indicator set with brackets 1556-1 Dial indicator bracket set only 49 11 16 14 15 48 32 31 37 38 20 19 17 18 34 39 21 36 22 33
Reinforced connecting pin. Silver. 6.5mm. Black. 7.1mm
 - SERVICE INSTRUCTIONS SI-R70C t Rear Drive System Before use, read these instructions carefully, and follow them for correct use. WARNING Use neutral detergent to clean the chain. Do not use alkali-based
HOME ASSEMBLY INSTRUCTIONS
 HOME ASSEMBLY INSTRUCTIONS This Papillionaire Bicycle now belongs to you. It will take you to work, wait patiently outside your local cafe, and carry your groceries home. This is the start of your long-term
Nexus. Dealer's Manual. ROAD MTB Trekking. City Touring/ Comfort Bike SG-3R40 SG-3R45 SG-3R75 SG-3R75-A SG-3R75-B SG-3D55 SG-3C41
 (English) DM-SG0005-01 Dealer's Manual ROAD MTB Trekking City Touring/ Comfort Bike URBAN SPORT E-BIKE Nexus SG-3R40 SG-3R45 SG-3R75 SG-3R75-A SG-3R75-B SG-3D55 SG-3C41 SL-3S35-E SL-3S41-E SL-3S42-E SM-BC03
SANTANA STOWAWAY TANDEM WITH AIRLINER SAFECASE AND FTS FOAM TRAY SYSTEM ASSEMBLY AND DISASSEMBLY
 SANTANA STOWAWAY TANDEM WITH AIRLINER SAFECASE AND FTS FOAM TRAY SYSTEM ASSEMBLY AND DISASSEMBLY Congratulations! You are now the proud owner of the world s most travel-ready, performance tandem. The following
Final Assembly Instructions Bikes with 16 Wheel Size
 Final Assembly Instructions Bikes with 16 Wheel Size Thank you for buying your new bicycle from L.L.Bean. Read these instructions carefully before beginning the final assembly. Prior to shipping, our expert
DM-RARD (English) Dealer's Manual. ROAD MTB Trekking. City Touring/ Comfort Bike. Rear Derailleur DURA-ACE RD-R9100 ULTEGRA RD-R8000
 Dealer's Manual. ROAD MTB Trekking. City Touring/ Comfort Bike. Rear Derailleur DURA-ACE RD-R9100 ULTEGRA RD-R8000") (English) DM-RARD001-03 Dealer's Manual ROAD MTB Trekking City Touring/ Comfort Bike URBAN SPORT E-BIKE Rear Derailleur DURA-ACE RD-R9100 ULTEGRA RD-R8000 CONTENTS IMPORTANT NOTICE... 3 TO ENSURE SAFETY...
(English) DM-RARD001-03 Dealer's Manual ROAD MTB Trekking City Touring/ Comfort Bike URBAN SPORT E-BIKE Rear Derailleur DURA-ACE RD-R9100 ULTEGRA RD-R8000 CONTENTS IMPORTANT NOTICE... 3 TO ENSURE SAFETY...
R.e.a.d Zinn & the Art of Road Bike Maintenance: The World's Best- Selling Bicycle Repair and Maintenance Guide PDF
 R.e.a.d Zinn & the Art of Road Bike Maintenance: The World's Best- Selling Bicycle Repair and Maintenance Guide PDF R.e.a.d Zinn & the Art of Road Bike Maintenance: The World's Best-Selling PDF File: R.e.a.d
Troubleshooting Guide
 Troubleshooting Guide This troubleshooting guide outlines quick fixes to the most common technical questions about the ElliptiGO. If the problem persists or you feel uncomfortable performing these actions,
DM-RD (English) Dealer s Manual. ROAD Rear Derailleur RD-9000 RD-6800 RD-5800 RD-4700
 Dealer s Manual. ROAD Rear Derailleur RD-9000 RD-6800 RD-5800 RD-4700") (English) DM-RD0003-09 ROAD Rear Derailleur Dealer s Manual RD-9000 RD-6800 RD-5800 RD-4700 CONTENTS IMPORTANT NOTICE...3 TO ENSURE SAFETY...4 LIST OF TOOLS TO BE USED...6 INSTALLATION...8 Chain length...
(English) DM-RD0003-09 ROAD Rear Derailleur Dealer s Manual RD-9000 RD-6800 RD-5800 RD-4700 CONTENTS IMPORTANT NOTICE...3 TO ENSURE SAFETY...4 LIST OF TOOLS TO BE USED...6 INSTALLATION...8 Chain length...
SG-7R46 SG-7R45 BR-IM41-R CJ-7S40 WARNING CAUTION SERVICE INSTRUCTIONS. Inter-7 Hub. Inter-M Brake Cassette joint NOTE:
 t WARNING It is important to completely understand the operation of your bicycle's brake system. Improper use of your bicycle's brake system may result in a loss of control or an accident, which could
Front derailleur. Dealer's Manual DURA-ACE FD-R9100 ULTEGRA FD-R FD ROAD MTB Trekking. City Touring/ Comfort Bike DM-RAFD001-03
 (English) DM-RAFD001-03 Dealer's Manual ROAD MTB Trekking City Touring/ Comfort Bike URBAN SPORT E-BIKE Front derailleur DURA-ACE FD-R9100 ULTEGRA FD-R8000 105 FD-5801 Procedures for cable tension adjustment
Final Assembly Instructions Bikes with Threaded Headsets
 Final Assembly Instructions Bikes with Threaded Headsets Thank you for buying your new bicycle from L.L.Bean. Read these instructions carefully before beginning the final assembly. Prior to shipping, our
Rocky Mountain Element Technical Manual. Rev B
 Rocky Mountain Element Technical Manual Rev B 1 Table of Contents Materials Required... 3 Suspension Pivot Torque Guide... 4 Small Parts Torque Guide... 5 Assembly Instructions... 6 1) Bearing Installation...
Item N o.: Item N am e:40cm Boys Rival Bike
 Item N o.:42272892 Item N am e:40cm Boys Rival Bike 9 bell 8 grip 30 crash pad 10 brake lever 26 wheel reflector 22 saddle 23 seat post 25 rear reflector 24 quick release 6 handle bar 7 stem 2 top tube
RADON 237A: ASSEMBLY GUIDE. Revision Valid for MY2017 Radon
 RADON 237A: ASSEMBLY GUIDE Revision 3.0-05-29-2017 - Valid for MY2017 Radon RADON 237A: Table of Contents 1. Tools Needed and First Aid Kit... 3 2. Sizing Chart... 4 3. Seat Post Collar Assembly... 5 4.
1. General Safety Information. Silvio V2.2 Assembly Instructions Assembly. Adjust to the rider.
 Silvio V. Assembly Instructions support@cruzbike.com. General Safety Information WARNING to avoid serious injuries:. If you are unsure about fitting, testing and adjusting brakes or gearing on a bicycle,
Bicycle District & State 4-H O-Rama s Junior & Senior 4-H ers Ag Systems Technology Management
 Bicycle District & State 4-H O-Rama s Junior & Senior 4-H ers Ag Systems Technology Management OBJECTIVES Target Life Skills: Personal Safety, Decision Making, Self-discipline Opportunity will be provided
R3 RIM MANUAL EN. Version 1 I
 R3 RIM MANUAL EN Version 1 I 07.02.2017 TABLE OF CONTENTS Introduction...1 Frame Features...2 Fork Preparation...3 Small Parts...5 Frame Preparation...6 Mechanical Cable Routing...7 Electric Cable Routing...9
Final Assembly Instructions Bikes with Threaded Headsets
 Final Assembly Instructions Bikes with Threaded Headsets Thank you for buying your new bicycle from L.L.Bean. Read these instructions carefully before beginning the final assembly. Prior to shipping, our
DM-TRRD (English) Dealer's Manual. ROAD MTB Trekking. City Touring/ Comfort Bike. Rear Derailleur DEORE XT RD-T8000 DEORE RD-T6000
 Dealer's Manual. ROAD MTB Trekking. City Touring/ Comfort Bike. Rear Derailleur DEORE XT RD-T8000 DEORE RD-T6000") (English) DM-TRRD001-01 Dealer's Manual ROAD MTB Trekking City Touring/ Comfort Bike URBAN SPORT E-BIKE Rear Derailleur DEORE XT RD-T8000 DEORE RD-T6000 CONTENTS IMPORTANT NOTICE... 3 TO ENSURE SAFETY...
(English) DM-TRRD001-01 Dealer's Manual ROAD MTB Trekking City Touring/ Comfort Bike URBAN SPORT E-BIKE Rear Derailleur DEORE XT RD-T8000 DEORE RD-T6000 CONTENTS IMPORTANT NOTICE... 3 TO ENSURE SAFETY...
Bicycle. District & State 4-H O-Rama Junior & Senior 4-H ers
 Bicycle District & State 4-H O-Rama Junior & Senior 4-H ers OBJECTIVES Target Life Skills: Personal Safety, Decision Making, Self-discipline Opportunity will be provided for faculty to share information
Cantilever Brake. Dealer's Manual. ROAD MTB Trekking. City Touring/ Comfort Bike
 (English) DM-RCBR001-00 Dealer's Manual ROAD MTB Trekking City Touring/ Comfort Bike URBAN SPORT E-BIKE Cantilever Brake BR-CX70 BR-CX50 BL-4700 BL-4600 BL-R780 BL-R3000 ST-7900 ST-6700 ST-5700 ST-4600
BOTTOM BRACKET BEARINGS
 BOTTOM BRACKET BEARINGS This basic tutorial will demonstrate the workings of a typical 3 piece bottom bracket, showing the removal and installation of the various components that make up the bearing system.
Item N o.: Item N am e:50cm GIRLS BELLA CRUISER BIKE
 Item N o.:42272847 Item N am e:50cm GIRLS BELLA CRUISER BIKE grip brake lever mudguard mudguard braket free wheel rear hub saddle seat post rear reflector seat clamp chain guard chain wheel crank stem
Final Assembly Instructions Bikes with Quill Stems
 Final Assembly Instructions Bikes with Quill Stems Thank you for buying your new bicycle from L.L.Bean. Read these instructions carefully before beginning the final assembly. Prior to shipping, our expert
Cycling. Scout s Name: Unit: Counselor s Name: Counselor s Ph. hypothermia, heat reactions, frostbite, dehydration, insect stings, tick.
 Cycling Merit Badge Workbookk This workbook can help you but you still need to read the merit badge pamphlet (book). No one can add or subtract from the Boy Scout Requirements #33216. Each Scout must do
E-117 TRI: ASSEMBLY GUIDE
 E-117 TRI: ASSEMBLY GUIDE Valid for MY2016 E-117 Tri Revision 8.0-07-08-2016 E-117 TRI: Table of Contents 1. Tools Needed & First Ait Kit..........................2 2. Fitting / Stack & Reach.....................3
THIS INSTRUCTION BOOKLET CONTAINS IMPORTANT SAFETY INFORMATION. PLEASE READ AND KEEP FOR FUTURE REFERENCE.
 THIS INSTRUCTION BOOKLET CONTAINS IMPORTANT SAFETY INFORMATION. PLEASE READ AND KEEP FOR FUTURE REFERENCE. FOR SERVICE ASSISTANCE CALL TOLL FREE 1.800.451.5368 Monday - Friday 8:00 a.m. to 4:00 p.m. Eastern
DISASSEMBLING & REASSEMBLING CARTRIDGE INSTALLING SEATPOST ON BIKE
 INTRODUCTION BILL OF MATERIALS SPECIFICATIONS & TOOLS PROCEDURES DISASSEMBLING & REASSEMBLING CARTRIDGE INSTALLING SEATPOST ON BIKE OPERATION OF SEATPOST GIANT LIMITED WARRANTY 1 INTRODUCTION Congratulations
MANTEL BIKE BOX: PACKING YOUR ROAD BIKE FOR TRANSPORT
 MANTEL BIKE BOX: PACKING YOUR ROAD BIKE FOR TRANSPORT ROAD BIKE COMPONENTS 1 Frame: a b c d e Top tube Down tube Seat tube Chain stay Seat stay 2 Saddle 3 Seat post 4 Seat post clamp 5 Rear brake 6 Front
Item N o.: Item N am e:southern Star 40cm Girls Cherry Bike
 Item N o.:42174868 Item N am e:southern Star 40cm Girls Cherry Bike Tighten them so they do not move and are horizontal. Check the handlebar is in good condition and the ends of the handlebar are
Preparation/Maintenance Manual
 Preparation/Maintenance Manual It is essential that you read this manual in its entirety before riding your bike for the first time to ensure that your bike is properly assembled and safe to ride. It is
DM-SL (English) Dealer's Manual. REVOSHIFT Shifter SL-RS47 SL-RS45 SL-RS36 SL-RS35 SL-RS34 SL-RS25
 Dealer's Manual. REVOSHIFT Shifter SL-RS47 SL-RS45 SL-RS36 SL-RS35 SL-RS34 SL-RS25") (English) DM-SL0002-03 Dealer's Manual REVOSHIFT Shifter SL-RS47 SL-RS45 SL-RS36 SL-RS35 SL-RS34 SL-RS25 IMPORTNT NOTICE This dealer's manual is intended primarily for use by professional bicycle mechanics.
(English) DM-SL0002-03 Dealer's Manual REVOSHIFT Shifter SL-RS47 SL-RS45 SL-RS36 SL-RS35 SL-RS34 SL-RS25 IMPORTNT NOTICE This dealer's manual is intended primarily for use by professional bicycle mechanics.
DM-MBST (English) Dealer's Manual. ROAD MTB Trekking. City Touring/ Comfort Bike. Shifting lever. EZ-FIRE Plus ST-EF500 ST-EF510
 Dealer's Manual. ROAD MTB Trekking. City Touring/ Comfort Bike. Shifting lever. EZ-FIRE Plus ST-EF500 ST-EF510") (English) DM-MBST001-00 Dealer's Manual ROAD MTB Trekking City Touring/ Comfort Bike URBAN SPORT E-BIKE Shifting lever EZ-FIRE Plus ST-EF500 ST-EF510 CONTENTS IMPORTANT NOTICE... 3 TO ENSURE SAFETY...
(English) DM-MBST001-00 Dealer's Manual ROAD MTB Trekking City Touring/ Comfort Bike URBAN SPORT E-BIKE Shifting lever EZ-FIRE Plus ST-EF500 ST-EF510 CONTENTS IMPORTANT NOTICE... 3 TO ENSURE SAFETY...
ROAD wheel set. Dealer's Manual DURA-ACE WH-R9100-C24-CL WH-9000 ULTEGRA WH-6800
 (English) DM-WH0002-11 Dealer's Manual ROAD MTB Trekking City Touring/ Comfort Bike URBAN SPORT E-BIKE ROAD wheel set DURA-ACE WH-R9100-C24-CL WH-9000 ULTEGRA WH-6800 Non-Series WH-RS81 WH-RS61 WH-RS31
HUB SET (DISC BRAKE)
") (English) DM-MAHB001-00 Dealer's Manual ROAD MTB Trekking City Touring/ Comfort Bike URBAN SPORT E-BIKE HUB SET (DISC BRAKE) XTR HB-M9110 FH-M9110 FH-M9125 HB-MT900 FH-MT900 E-THRU Axle 12 mm SM-AX75 SM-AX76
(English) DM-MAHB001-00 Dealer's Manual ROAD MTB Trekking City Touring/ Comfort Bike URBAN SPORT E-BIKE HUB SET (DISC BRAKE) XTR HB-M9110 FH-M9110 FH-M9125 HB-MT900 FH-MT900 E-THRU Axle 12 mm SM-AX75 SM-AX76
FRAME FEATURES TABLE OF CONTENTS INTRODUCTION. A guide to your Cervélo C Series frame.
 C SERIES MANUAL TABLE OF CONTENTS Introduction...1 Frame Features...2 Fork Preparation...3 Small Parts...5 Frame Preparation...6 Brake Housing Installation...7 Mechanical Cable Routing...9 Electric Cable
GALLIUM PRO 259A & 259B: ASSEMBLY GUIDE
 GALLIUM PRO 259A & 259B: ASSEMBLY GUIDE GALLIUM PRO 259A & 259B: Table of Contents 1. Tools Needed and First Aid Kit... 3 2. Sizing Chart... 4 3. Trouble-shooting / Tips... 5 4. Seat Post Collar Assembly...
Front derailleur. Dealer's Manual SORA FD-R3000 FD-R3030 CLARIS FD-R2000 FD-R2030. ROAD MTB Trekking. City Touring/ Comfort Bike DM-RBFD001-01
 (English) DM-RBFD001-01 Dealer's Manual ROAD MTB Trekking City Touring/ Comfort Bike URBAN SPORT E-BIKE Front derailleur SORA FD-R3000 FD-R3030 CLARIS FD-R2000 FD-R2030 CONTENTS IMPORTANT NOTICE... 3 TO
Bicycle Owner's Manual Easy Access Bike
 Bicycle Owner's Manual Easy Access Bike AGE: FROM 9 YEARS OLD AND UP IMPORTANT Check bike after assembly or any adjustments. Consult bicycle retailer with questions. Always wear a helmet. Children should
MODEL: COMMUTER / ROAD BIKE
 STEP BY STEP BUILD GUIDE MODEL: COMMUTER / ROAD BIKE TABLE OF CONTENTS TOOLS 1 LET S GET STARTED 2 INSTALLING THE QUILL STEM 3 INSTALLING THE FRONT FENDER 4 INSTALLING THE QUICK RELEASE 5 INSTALLING THE
EZ-3 USX HD Supplemental Owner s Manual
 EZ-3 USX HD Supplemental Owner s Manual Find us online at SunSeeker.Bike Revised 2/2016 CONGRATULATIONS! Congratulations and welcome to the Sun Seeker family! You have selected one of the most comfortable
Good tread, no splits, cracks or holes, properly inflated. True, no missing or broken spokes, good rim. Secure, facing in right direction
 APPENDIX 1 Bike Check This is an M check. Start at the front of the bike and systematically work towards the back. Put a cross beside anything that is faulty. Note any faults you find. X FAULT Front tyre
Bicycle maintenance made ridiculously easy From zero to hero all the things an absolute beginner needs to know to look after their own bike
 Bicycle maintenance made ridiculously easy From zero to hero all the things an absolute beginner needs to know to look after their own bike Checklists Every ride Monthly Repairs Clean Lubricate Fix a flat