Introduction. This is part one of the two-part Teaching & Coaching Manual.
|
|
|
- Scott Cornelius Potter
- 6 years ago
- Views:
Transcription
1
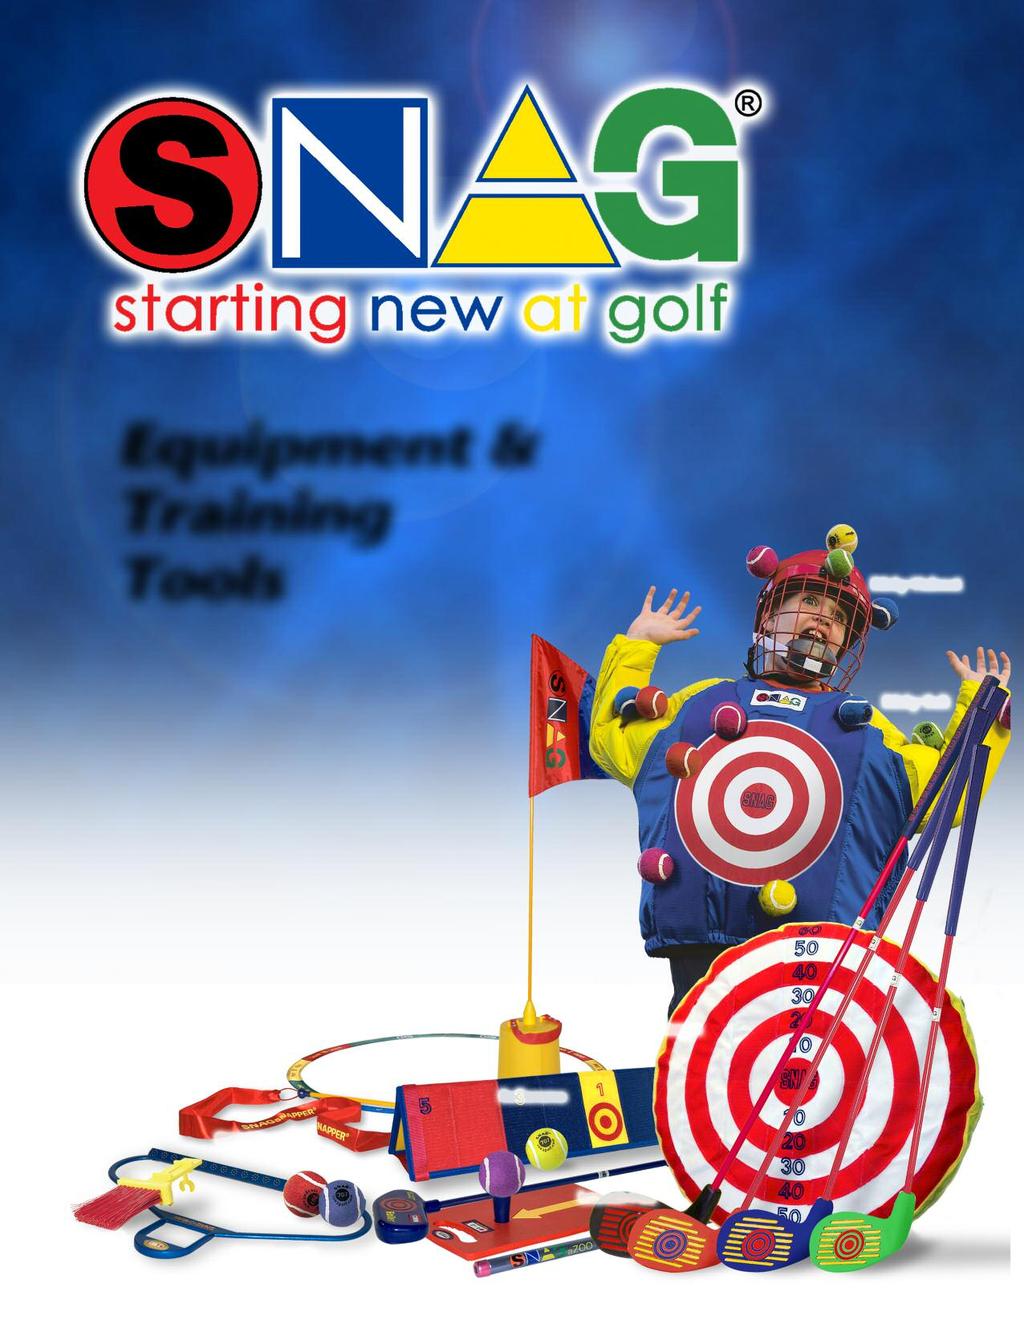
2 This is part one of the two-part Teaching & Coaching Manual Introduction What Is SNAG? SNAGology Setting Up Your Course Rules & Scoring Sample Scorecard SNAG Safety Equipment & Training Tools Equipment Descriptions Training Tools Descriptions SNAG Swing Basics/Instruction Terminology Clock & Alphabet Hoop Clocks Power Source Images Hold Stance Roll Preparation The Roll The Chip The Pitch Launch Preparation The Launch The SNAGGLE Practice Drills Rolling Drills Chipping Drills Pitching Drills Launching Drills Equipment Care 2

3 What Is SNAG? SNAG contains all the basic elements of golf but in a modified form. The game has its own simplified rules and terminology, which adds fun to the learning and playing experience. Falling somewhere between miniature golf and regulation golf, SNAG allows for full shots, pitching, chipping and putting. The SNAGball has a limited distance with the average player hitting it a maximum of 50 yards. SNAG has only two clubs: the Launcher is used to hit, pitch and chip the ball; like a putter, the Roller is used to roll the ball on the SNAG green. All shots other than putting are played off a small rubber mat and tee called the Launch Pad. This ensures that the player will have an optimal lie every time. The target, called the Flagsticky, also differs from anything in golf as it is not a hole with a cup inside but rather an above-ground weighted cylinder covered with a hook material. The SNAG ball is slightly smaller than a tennis ball and covered with a loop material. Unlike golf where you finish by putting the ball into the hole, in SNAG, you finish by sticking your ball to the Flagsticky. Because of the Flagsticky and the Launch Pad, SNAG is portable and playable anywhere. Because of SNAG, The World is Your Course. SNAG has a training program and tools that make learning fun, fast and easy. Visit our Web site at for more information. It s fun. It s easy to learn. It s easy to teach. SNAG is a comprehensive system that has been developed by years of experience. The key is in simplifying the manners of instruction so that it can be a transition into the game of golf. 3
4 A description of the various terms used in playing the game of SNAG. Ace A SNAGout in one launch (in golf this is called a hole-in-one). Aim How a SNAGster positions the body, Launch Pad, Launcher and SNAG ball in preparation to make a swing. Chip The shot made from just off the Short Stuff that flies a short distance and rolls a longer distance. Duck The warning given to SNAGsters who may be hit by a SNAG ball (in golf we yell fore! ). Flagsticky The end target consisting of the flag, pole and sticky base. This is placed on the SNAG green and filled with water or sand for stability. Hold The proper way a Snagster puts his hands on the club, right on red and left on yellow (in golf this is called the grip ). Launch When the club makes contact with the SNAG ball and it flies into the air or rolls toward the target. Launcher The club that is used (red shaft) to launch the SNAG ball from the Launch Pad (in golf, we use a wood or iron). Launch Pad The mat and tee used to launch the SNAG ball. OB When the SNAG ball goes outside the designated playing area of the Sticky. Requires a 1-point penalty. Pitch A less-than-full launch towards the Short Stuff and Flagsticky having more air time and little roll time. Ready How a SNAGster positions the body to launch or roll the SNAG ball. Roll The forward movement of the SNAG ball towards the Flagsticky (in golf this is called a putt ). Roller The club used (blue shaft) only on the Short Stuff to roll the SNAG ball towards the Flagsticky (in golf this is called the putter ). Rollerama A triangular target used to practice chipping and rolling SNAGballs. SNAG azoo A circle-building tool designed to help SNAGsters develop their power L. It makes a cool sound if done correctly. SNAG Bag A bag used to carry all the SNAG equipment. SNAG Ball A fuzzy ball with a large dot and directional arrow used to play the game of SNAG. SNAG Coach A SNAG instructor. A person who helps you improve your SNAG game. SNAG Course An area consisting of any number of SNAG holes - usually in threes. SNAGgle The pre-launch routine of up high, down low, dot your eye and go! 4
, a playing lane (the SNAG way which includes obstacles) and the SNAG green.")
5 SNAG Green The circular-shaped area around the Flagsticky where a Roller is used to reach the Flagsticky (in golf this area is called the green ). SNAG Hole A defined playing area consisting of a tee (the first launch area of the sticky), a playing lane (the SNAG way which includes obstacles) and the SNAG green. Each SNAG hole will vary in length and design. SNAG -O-Matic A training tool designed to help SNAGsters remember to maintain a firm wrist when chipping SNAG -Out When a SNAGster makes a launch or roll of any kind and it sticks to the Flagsticky. This means the Sticky is completed. SNAG Point What is counted everytime contact is made with the SNAG ball. They are added up along with penalty points to determine the score for each SNAG hole. SNAG Way The area on a Sticky between the first launch position and SNAG green inside of which the SNAG ball must remain. SNAG Snapper A circle-building training tool which utilizes a long ribbon to teach the proper hand, arm and lower body movement throughout the swing. Swing The complete synchronized movement of the body, with all parts working together to move the club in a circular direction to propel the SNAG ball forward. Flagsticky The end target consisting of the flag, pole and sticky base. This is placed on the SNAG green and filled with water or sand for stability. 5

6 Some suggestions on how to set up your own individual SNAG Course TM A SNAG hole is like a golf hole and can be any distance that you desire. Here are some guidelines: A par 3 can be up to a maximum of 35 yards or bigsteps. A good SNAGster should get the SNAG Ball inside the SNAG Green in one launch, and to the Flagsticky in two rolls, for a total score of three on the SNAG Hole. A par 4 is about yards or big steps. A good SNAGstershould get the SNAG Ball inside the SNAG Green in two launches,and to the Flagsticky in two rolls, for a total score of four on the SNAG Hole. A par 5 (three launches and two rolls) should be yardslong. Sixpointers (four launches and two rolls) should be about yards long. On the next page are some illustrations that may help you set up your own SNAG course. 6
7 Some suggestions on setting up your own individual SNAG course. Before setting up a course, follow these easy steps: Fill the yellow Flagsticky base with water or sand Yards Insert the flagpole and flag into the top of the Flagsticky base. Yell Geronimo? Think of how you can use obstacles located in the area of your intended play. Par 3 Consider how many people will be playing and limit each group to no more than five. You can set up a SNAG Hole practically anywhere. You must first find a flat area to outline your SNAG Green, which is like the green in golf, and place your Flagsticky somewhere inside of it. Use 50' or 100' clothesline, chalk or powder to outline your SNAG Green Use cones, sticks or rope to outline the boundaries of your SNAGway. From there you can step off the distance back to your teeing area. It is best if you design several Stickys in advance of your play and mark the teeing area Yards Par 4 Be Creative Use your imagination to design different obstacles that you have to play around to avoid. These may include things like trees, creeks, dirt piles, play areas, etc. You can use the infield of a softball field as your SNAG green and play to it from different directions. You can set up your course around a football or soccer field. You may even design a course in your own neighborhood if you are careful to avoid traffic and your neighbor s property Yards Always be smart and set up your course safely. Par Yards Par 6 7

8 The fun of the game lies in its dependence on honesty & integrity. SNAG Rules! The SNAG ball must be launched off the Launch Pad everywhere except on the SNAG Green, where only the Roller must be used. After the first launch, the SNAGster is allowed to pick up his ball and tee it up within one Launcher club length of the ball s position, no closer to the SNAG Green and the Flagsticky. The SNAGster may not improve his ball s position on the SNAG Green. If a SNAGster cannot tee up and launch his ball within one Launcher length, then he must take a penalty point and go to the closest spot (no closer to the Flagsticky) and proceed from there under SNAG Rule No. 1. If a SNAG Ball goes out-of-bounds, then the SNAGster must go to the closest spot where it went out-of-bounds, take a penalty point and proceed from there under SNAG Rule No. 1. If a SNAG Ball is lost, the SNAGster must take a penalty point and go to the closest spot where the ball was lost (no closer to the Flagsticky) and proceed under SNAG Rule No. 1. On the SNAG Green, if one SNAGster s ball is in the way of another SNAGster s ball, the ball closest to the Flagsticky may be marked with a coin or other small flat object and picked up so that the other SNAGster may proceed. The marked ball must be placed back in its original position. The SNAG Ball must stick to the Flagsticky to be considered a SNAG Out (sometimes the rubber binding on the ball hits the hook material and bounces off too bad!). Scoring To start a SNAG Hole, the SNAGster places his Launch Pad down and launches his SNAG Ball towards the Flagsticky. Each strike of the ball counts one point. Misses as well as accidental tipping of the ball off the Launch Pad tee do not count. When your ball sticks to the Flagsticky, you SNAG Out and your points are added up. The player with the lowest number of points wins the SNAG Hole. It is recom-mended that you play SNAG Holes in multiples of three and set a tar-get score (in golf this is called par) for each SNAG Hole before you play. 8
9 SCORECARD Date: / / Player Total COURSE NAME: TOTAL SCORE Scorecard Instruction 1. Fill in the name of the course you design. 4. Fill in the date that you played. 2. The names of the SNAGsters. 5. Fill in the total points made by each SNAGster for all of the SNAG Holes played. 3. The points made by each SNAGster for every SNAG Hole played. Follow these instructions to fill out your scorecard when you are playing SNAG. You can make lots of copies on any color or black & white copier. Scoring Games One on One Two SNAGsters play against each other on every Sticky. The SNAGster with the lowest points on each SNAG Hole wins (in golf this is called match play ). Add em Up The total number of points are added up for each SNAGster for all of the SNAG Holes played. The SNAGster with the lowest number of points wins (in golf this is called stroke play ). Scatter All members of a SNAG Team make their first launch. The team plays their next launch from the SNAG Ball with the best position. The team will continue this process until they SNAG Out (in golf this is called a scramble ). Launch n Switch Two or three SNAGsters make a team. They take turns launching or rolling until they SNAG Out. The team with the fewest points wins the SNAG Hole (in golf, this is called alternate shot ). Best Buds Three or four team members play a SNAG Hole a nd SNAG OUt. Each team then adds the points of the best two scores on that SNAG Hole. The team with the lowest combined points wins (in golf this is called best ball ). 9
.")
10 The following are some basic guidelines to keep in mind when playing SNAG or using any of the components. Always leave your Launcher and Roller in the SNAGbag when not in use. Some thoughts on how to play SNAG without harming yourself or others. Always make sure that there are at least 8 feet between you and all the other SNAGsters (Figure 1). Use the Launcher and Roller to launch SNAG balls only never hit golf balls, rocks or other hard objects. Use the Launcher only off the Launch Pad. (Figure 1) No swings of any kind are to be made with the Roller off the Launch Pad. Never stand behind a SNAGster when he is either preparing to swing or actually swinging. There is a blind spot behind the SNAGster when he is swinging (Figure 2). Use extreme caution when playing near roads, streets or houses. Take extra time to make sure the playing area is clear. (Figure 2) 10
.")
11 Never try to snag a passing dinosaur with a SNAG ball. They tend to get very annoyed walking around with SNAG balls stuck to their skin. Hey, just checking to see if you were paying attention. Be careful never to launch a SNAG ball at another SNAGster at close range. Always make sure that the SNAGster in front of you is at least 50 yards away (Figure 3). Always give the verbal warning Duck if there is a chance that your SNAG balls may come close to hitting another SNAGster. This signal will give other SNAGsters time to protect themselves. (Figure 3) Always be respectful of other SNAGsters be quiet during play, no yelling. (Figure 4) Never take a practice swing without knowing if other SNAGsters are around you, as you may hit someone accidentally (Figure 4). Cease all play if lightning is in the area. Cease all play if other SNAGsters are using their equipment in a dangerous manner. Use the training tools only for the purpose for which they were intended. Every precaution has been taken in the design and manufacture of your SNAG equipment to eliminate any hazards. Care should be exercised by you when using this equipment. 11
12


13 Flagstickys come in two sizes: the beginner size and the Super Snag size. The beginner s size is six inches round at the base and cones up to five inches at the top. The sec-ond size is the super Snag size and is five inches at the bottom to four inches at the top. They are 10 and 9 inches high respectively and are covered with a yellow sticky hook material. The screw on cap enables it to be filled with sand or water to provide stability when laid on top of any flat playing surface. Covered in hook material for easy adhesion by the loop covered SNAG ball. Very forgiving for shots launched too hard or shots that graze the outside edges. Brightly colored for better visual targeting. SNAG Balls SNAG balls come in two sizes that fit the need of the instructional program. The basic SNAG ball is slightly smaller than a tennis ball and made of loop material that enables it to stick to the hook material on the Flagsticky and other instructional targets. The smaller size or Super SNAG ball is slightly larger than a golf ball and contains the same covered material. Both SNAG balls are uniquely designed with a large, black, numbered dot. A directional arrow just above the dot, helps establish proper alignment of the Launcher and Roller clubfaces with the target. SNAG balls are safe and will float if launched into water. SNAG Clubs Flagsticky SNAG clubs have fiberglass shafts with just the right amount of flex for maximum feel and fun. The heads are made of high impact plastic for safety and durability. The enlarged heads provide plenty of surface area to strike the SNAG balls. On each face is a bullseye, which is centered perfectly to establish perfect alignment with the target SNAG clubs come equipped with a special SNAG grip, constructed in three different hand sizes for the men, women and children. The pentagonal grips feature yellow and red dots on the top two panels to provide Snagsters with a consistently perfect hold. SNAG club heads come in four basic colors. white and bright blue. Green designates the shortest clubs. At 26 they are generally designed for kids ages 4-7. Blue designates the 30 clubs, designed for kids ages Red is for kids 12 and above or anyone size 4 10 and up. Our newest club design is the black clubs. At 35, they are designed for adults and the tallest kids, 5 6 and up. Launch Pad The Launch Pad is used for every shot where the Launcher is used. The Launch Pad has a yellow directional arrow that aids the snagster in lining up his shot. The launch pad also has a rubber tee for an optimal lie every time. The tees come in two sizes, one to accommodate the SNAG ball and a shorter one to be used for Super SNAG and the first use with regular golf balls. The proper placement of the launch pad is critical in helping the SNAGster to be properly aligned for each shot. 13


14 Hoop Clock The Hoop Clock has the same numbering as a clock face. When placed on the ground, the ball is be placed at the 6 o clock position. 7 and 5 are colored blue for rolling. 8 and 4 are green for chipping. 9 and 3 are yellow for pitching and 10 and 2 are red for launching. The colors match up to SNAG s instructional word cues. Comes in 2 sizes, small (5-10 years old) and adult. This is a must have for every new learner. BENEFITS Provides a safety zone for the new learner. Helps new learners understand the swing lengths and rhythms associated with various sots. A three-foot long triangular target. Each of two sides is covered with different colored hook material. Has coloredsections and a bullseye used for scoring. BENEFITS The first used target in rolling and chipping that provides positive feedback. Shots that would have missed a golf hole and gone unrewarded are rewarded with point values. Alignment patterns are identified when clusters of balls stick to the same area. Bullseye Target Inflatable target covered with hook material used for Pitch and Launch purposes. BENEFITS Helps develop the student s visual targeting. Helps develop feel for short pitch shots Sticky Helmet & Sticky Jacket Rollerama These SNAG training tools are overlaid with a hooked and padded material designed to allow the wearer to catch SNAG balls comfortably and in a safe way. They are colorful and come in three sizes small, medium and large. BENEFITS Fun for all! Designed to improve targeting and focus on full launches. Designed to be an activity for SNAG outings. 14


15 Roller Brush A tool designed like a paint brush which is easily clipped onto the shaft of the roller. BENEFITS Demonstrates the brushing motion necessary to make an effective putting stroke. This is made possible by brushing the bristles and playing surface. Will help visual learners paint a circle when it is attached to the launcher. The swing s speed is generated when there is a powerful wrist set of L on the away swing, and then as the club is swung around through the SNAGball, there will be another power L or wrist seton the target side. The SNAGazoo helps the student to feel the correct positions by sounding its whistle when set correctly. The SNAGazoo must be swung in slow motion, never in a hard, full-force manner. It comes in three sizes for men, women and children. BENEFITS Teaches how to set the wrists correctly when they are away to the rear and how to reset them after impact and prior to the follow through. Proper use creates the correct angle in the away to the rear position to execute the pitch shot correctly. Gives immediate positive feedback during all phases of use. SNAG -O-Matic SNAGazoo Placed on the inner forearm of the target arm as the learner strokes his or her chip, the SNAG-O-Matic is designed to develop the proper chipping stroke. The tool attaches to the top of the Launcher grip with the majority of it extending beyond the end of the club. BENEFITS Helps new learners develop the firm wrist needed for executing proper chips. Also has valuable applications for rolling, pitching and launching. SNAG Snapper The Snapper is a unique training tool. It has aunique swivel at the top and a long ribbon which enables the SNAGster to develop a feeling for the circular motion of the swing as well as when to apply the power into the swing at the bottom of its arc through the SNAGball. The special SNAG colored grip enables the SNAGster to place their hands correctly as they develop their proper swing motion. It comes in both children s and adult s sizes. BENEFITS Teaches the proper hand action and hold pressure required to obtain a correct swing. Teaches the correct timing and rhythm when the grip, shaft and ribbon are synchronized during the swing. Develops motor skills through a series of tasks rather than mechanical commands. Gives immediate positive feedback during all phases of use. Helps SNAGsters visually see and feel the correct circular movement of the club head. 15

16 Target Zones The Hoop Clock has the same numbering as a clock face. When placed on the ground, the ball is be placed at the 6 o clock position. 7 and 5 are colored blue for rolling. 8 and 4 are green for chipping. 9 and 3 are yellow for pitching and 10 and 2 are red for launching. The colors match up to SNAG s instructional word cues. Comes in 2 sizes, small (5-10 years old) and adult. This is a must have for every new learner. BENEFITS Provides a safety zone for the new learner. Helps new learners understand the swing lengths and rhythms associated with various sots. 16

17

18 Terminology Through years of teaching experience we have discovered that words play a very vital role in communicating the swing to the student. In the videos and this instructional manual we will try at all times to use the same terms to designate the parts of the body as well as the various directions. Examine the diagram below: As the player stands and faces the launch pad, straight out from his body is the front and behind his back is the back. The direction towards the target is referred to as the target side. Away from the target is the rear side. Front Target Rear Back There are other words that we will try and stay away from in our instruction. The word backswing, which confuses the student by creating the image of swinging behind ones self. In place of this term we will use away, circle around, and circle away. We also want to stay away from the term down swing, which infers a chopping motion, and the phrase hit the ball for because of its violent undertones. For the target swing we will use the term swing through, or make a target L. We would like to encourage you to use the terms a big launch, a swish or a sweep for full shots and for rolls and chips we encourage the use of the term brushing to the Flagsticky. We also refer to the placement of the hands on the grip as the Hold rather than the grip. When you refer to gripping the club the reference many times will infer that we are to hold on very tightly which is not what we want for a successful hold on the club. Tic-Toc is the sound we use to accompany the chipping and rolling motions. Encourage the student to learn these words and use them out loud with Tic being the away-swing sound and Toc being the swing through sound. 18


 are designed to enable the student to have a picture as well as a feeling of")


19 The Clock & The Alphabet To simplify the instruction we ll be using four letters of the alphabet along with a clock illustration to teach the correct movements of the snag swing. These are simply guidelines and should not be rigid but are approximations that can be demonstrated by the coach as well as performed by the students. Clock When teaching using the clock illustrations have the student imagine that they are human clocks, with their hands being the hands of the clock and the club head following along behind their hands. You will see from the four diagrams that each one will demonstrate where the approximate hand positions go to perform the clock motions for each shot. This will be very valuable in teaching your students the correct positions for their swing performance Roll Chip Alphabet The letters used in SNAG (A,Y, and L) are designed to enable the student to have a picture as well as a feeling of the correct position to be achieved prior to executing their shot. We encourage the instructor to utilize these letter cues to help students more easily remember the proper positions. 1. For the body position we use the capital letter A and to achieve the correct position of the body we will call this position a tall A. The purpose of these descriptive adjectives is to help the student to: Take a relaxed bent knee sitting position. To sit tall with the shoulders back and the chin up as in school having the proper posture. 2. When referring to the Y position that is made with the arms and the club we will refer to that as a hanging loose Y. It is used only for launches and pitches. we want the student to have the arms hanging from the shoulders and not placed in a rigid position as well as being loose and relaxed prior to making the swing. In the chip the Y is a Long Y which is formed as the club and arm form a straight line to the ball prior to launching and is maintained throughout the swing from 8 o clock to 4 o clock. In the roll the elbows and club shaft are spread forming a wide Y Pitch The letter L is used to indicate the power wrist set on each side of the ball in the full launch. This letter is formed on the take-away swing with the taught front arm and club shaft. The L is formed on the throughswing with the taught rear arm and the club shaft. In the precision pitch shot the L is formed only in the take-away swing and held on the through swing Launch 19


20 Hoop Clocks We encourage you to use hoop clocks in your instructions. Simply take stickers and write 6,3,9 and 12 so that the student can use these for references as they look down on the ground. The launch pad should be placed in front of the 6 o clock position. For the pitch shot the student stands inside the hoop and should feel as though their hands are the hands of a clock as they circle away to 9 o clock then swing through to finish at 3 o clock and on to the finish. When the stu-dents are looking down at the dot on the back of the ball and they begin to make their swing around the hoop, they should actually feel as if they are trac-ing the outside of the hoop with their hands around to the desired clock/hand positions. When using the hoop you may also desire to use it for foot position when setting up. Use your imagination when using the hoop. You will find value in having the students feel as well as see the right positions. This will aid them in becoming task-focused rather than mechanics-focused. 20


21 Power Source Images Full Swing/Launch The full swing or launch is similar to golf in many ways. The main picture that you should present to your students is that the SNAG club always revolves around the body in a circular manner. The big circle of the club head goes around the body to the top of its arc and then back around in a circular motion sending the ball to its target and the club head continues around to its finish. The students should be making a total circular motion with the club head as they strike the SNAG ball. SNAG is no different from other sports in that the swing is circular very much like a baseball swing. The SNAG circle simply goes down on a tilt. A baseball player swings around, makes an L with the bat and his arm on his back swing to set up, and then he swings around and makes an L on the forward swing. This is the same motion that you use in SNAG. You may even wish to use a baseball bat to have your students try that and work with it. Then they will be able to relate that motion to swinging their SNAG club. Have them set up, make a circular motion up high with the bat, and then get into a SNAG swing. Then do it with a SNAG club. We want to be able to have people understand and see the similarities between the two swings. Pitch Shot For the pitch shot, the SNAG swing is very much like a soccer style kicker in football. When he prepares to kick a field goal, he pulls his rear leg backwards, cocking the knee and forming a power L. When he explodes through and kicks through the football, his leg will straighten out, and he will hold that to the finish. This is the same way that the pitch shot is made with the SNAG club. The arms swing back making an L at approximately 9:00, and then they swing through holding the Y, very much like the football kick. Because the soccer style kick shot and the pitch are precision shots there is a holding of the follow through. In the pitch if you were to reset your wrists through the ball too much power may be applied. There are many other positions in other sports that you may wish to use when you teach and communicate the SNAG swing to your students. 21


 hand with the thumb on the red dots.")


 hand. 4.")
22 The Hold ROLL The same hold is used for the roll as the three launches with a minor adjustment. Following are the steps for placing the club in the hands of the SNAGster in preparation for a roll. 1. In the fingers of your right (rear) hand hold the club shaft in front of the body with the grip end pointing at the ankles. 2. Wrap the fingers of the left (target) hand around the bottom of the grip placing the thumb on the yellow dots. 3. Slide the right (rear) hand down the shaft and grip, snug against the fingers of the left (target) hand with the thumb on the red dots. (The target thumb will not be covered and the grip will be more in the palms of both hands). This hand position will also help to promote the desired wide Y position. Word Cue: Left on Yellow-Connect-Right on Red LAUNCH The same hold is used for the 3 launches, big launch, pitch and chip. Following are the steps for placing the club in the hands of the SNAGster in preparation for a launch. 1. In the fingers of the right (rear) hand hold the club shaft in front of the body with the grip end pointing at the ankles. 2. Wrap the fingers of the left (target) hand around the bottom of the grip placing the thumb on the yellow dots. 3. Slide the right (rear) hand down the shaft and grip, snug against the fingers of the left (target) hand. 4. Hide the left (target) thumb under the right (rear) palm, placing the right (rear) thumb on the red dots. Word Cue: Left on Yellow-Connect-Right on Red 22


 foot.")
 foot.")

 foot.")
 foot.")
 foot. 3.")
23 The Stance The foot position in setting up for the launch or roll is critical. It helps to enable the SNAGster to produce the desired shot. Take your time instructing your students in these important positions. After repetition this will become a natural habit. For younger children, ages 4-7, you may wish to have them spread their feet to a comfortable position rather than getting into the technical foot positions shown below. LAUNCH 1. Feet together toes pointing to the center of the launch pad. 2. Take a small side step with the target (left) foot. 3. Take a big side step with the rear (right) foot. The SNAG ball should be positioned just inside the target (left) foot. PITCH 1. Feet together toes pointing to the center of the launch pad. 2. Take a small side step with the target (left) foot. 3. Take a small side step with the rear (right) foot. The SNAG ball should be positioned in the middle of the stance. CHIP 1. Feet together, toes pointing towards the center of the launch pad.. 2. Take a small side step with the left (target) foot and no step with the right (rear) foot. When the step toward the target is made, it promotes the proper Long Y. The SNAG ball should be positioned just inside the right(rear) foot. ROLL 1. Feet together toes pointing to the SNAGball. 2. Take a small side step to the left (target) foot. 3. Take a small side step with the right (rear) foot. The SNAG ball should be positioned in the middle of the stance. 23


 to")

24 Roll Preparation ROLL 1. Place the ball on the ground with the dot facing to the rear and the arrow pointing towards the target. 2. With both feet together and pointed at the ball (the student should be holding the club in his/her palms), make the proper hold with Left on Yellow-Connect-Right on Red 3. Bow to the ball-bend knees and Dot your Eye by placing the bullseye on the roller head behind the dot on the ball and the line on the roller aligned with the arrow on the ball. 4. Spread the feet (according to Stance requirements - Page 21) to form a Tall A. 5. Point your elbows out to each side, making a Wide Y. 6. You are now in the Ready Position Word Cues: Left on Yellow-Connect-Right on Red Bow to the ball-bend knees Dot your Eye Tall A. Wide Y


25 The Roll The roll truly resembles a clock s pendulum motion. The SNAGSTER is encouraged to practice repeating TIC-TOC as the hands swing away and then through. The wide Y formed by the arms and roller should retain its position throughout the roll. FUNDAMENTALS Assume the ready position ( tall A, wide Y ). Brush away to 7 o clock-tic. Brush through to 5 o clock-toc. Word Cues: Brush 7 to 5 - Tic Toc Breaking Rolls When the Flagsticky is resting on a slope the SNAGster must determine how much break the roll will make. They must then set the ball, club face and body lines to the direction of the roll. The key is to roll straight towards the target point allowing the slope to carry the ball to the Flagsticky. 1. Aim the SNAGball arrow to the apex of the roll, with the dot on the rear side. 2. Set up square to the ball and assume the ready position. 3. Brush right through and allow the slope to carry the ball to the Flagsticky. 25


26 The chip is used to produce a launch that has little air- time and greater ground time. It is similar to a bowling motion. The setup with the ball in front of the rear foot and the target arm and club in a straight line enables the SNAGSTER to produce the desired low running launch. As the target foot is moved sideways toward the target, this straight line is naturally formed. The wrists should never set or reset. The long Y should retain its position throughout the stroke. FUNDAMENTALS Assume the ready position ( tall A, long Y ). Swing away to 8 o clock. Brush through to 4 o clock, holding the long Y. The Chip Word Cues: 8 to 4 - Tic Toc! The Pitch The pitch is used to produce a shot which has more airtime than ground time. The shot resembles the motion and arc which would be produce by tossing a ball underhand up onto the short stuff and bouncing towards the Flagsticky. Word Cues: 9L to 3 - Hold the Y! FUNDAMENTALS 1. Assume the ready position (in the tall A hanging loose Y ). 2. Circle around to 9 o clock. 3. Set the wrists in the power L position. 4. Swing through to 3 o clock h olding the Y. 26


, make the proper hold.")


27 Launch Preparation For each shot there is a specific approach to preparing for the shots execution. All of these steps enable the SNAGster to place them in the best possible position for success. LAUNCH 1. Place launch pad down with the yellow arrow pointing at the target. 2. Place the ball on the launch pad tee with the dot facing to the rear and the arrow on to pointing towards the target. 3. With both feet together and pointed at the ball on the launch pad (the student should be holding the club in his/her fingers), make the proper hold. Left on Yellow-Connect-Right on Red 4. Bow to the ball-bend knees and Dot your Eye by placing the bullseye on the launcher head behind the dot on the ball. 5. Spread the feet (according to Stance requirements) to form a Tall A. 6. The target arm and club should form a Hanging loose Y. 7. You are now in the Ready Position. 8. Do a SNAGgle, then start the swing, using the word cues: Baseball swing-dot Your Eye then GO! Word Cues: Left on Yellow-Connect-Right on Red Bow to the ball-bend knees & 6. Dot your Eye Tall A. Hanging Loose Y


 is")


28 For each shot there is a specific approach to preparing for the shots execution. All of these steps enable the SNAGster to place them in the best possible position for success. If the proper SNAGgle pre-launch routine (see next page) is correctly made, the following positions should be achieved. Be aware not to focus too heavily on the mechanical positions. FUNDAMENTALS The Launch 1. Assume the Ready Position. 2. Hands swing around to 9 o clock. 3. Wrists set power L. 4. Hands swing to 10 o clock, then pause. 5. Hands swing around and through the ball to 3 o clock. 6. Hands reset to L. 7. Hands finish around at 2 o clock. 28


29 The Snaggle The SNAGGLE is a pre-launch exercise which builds the correct circular feelings needed for a powerful launch. The SNAGster is encouraged to perform these important steps before launching their SNAGball. In performing the SNAGGLE prior to launch it takes the focus off of the positions and allows the SNAGster to play by remembered practiced feelings. A correct Snaggle takes the focus off the mechanics of the launch, as well as promotes a free-flowing swing. 1. Assume the Ready Position. 2. Lift the club out in front of the shoulders and make a baseball swing around and through. 3. Take the same baseball swing around with the club head swinging just below the knees. 4. Reset the club head behind the ball dotting the eye and without hesitation swing around and send the ball towards the target. During the SNAGGLE the SNAGSTER should practice repeating to themselves, Up high, down low, dot the eye then go. For children, you may want to use one baseball swing, then Dot the eye then go. Word Cues: Baseball swing-dot Your Eye then GO! 29
30


31 Sticky Roll Rolling Drills Have the students set up with the ball position towards the Flagsticky. Then have them take their normal stance and place the roller right up against the SNAG ball and then brush the SNAG ball towards the Flagsticky. They should not look up until they hear the ball stick on the Flagsticky. This is an excellent drill to help students feel how they need to brush always towards the Flagsticky keeping their head very still, always listening to the noise of the ball striking the Flagsticky before they look up to see it SNAGged out. No Lookie Set up in the correct ready position. Then, as you roll the SNAG ball toward the sticky, do not look up until you hear the SNAG ball snag out. This will allow for a nice, steady body during the stroke, which is much needed in rolling No Peek Set up in the ready position for a roll, and then just before rolling the stroke, close the eyes and don t peek until after you have made the roll of the SNAG ball to the flag sticky, and this will help you conceptualize the distance needed for the roll. 31


32 Rolling Drills Wheelie Put the flag sticky onto a slope of the short stuff, then place four SNAG balls at different positions around the flag sticky as if they were the spokes of a wheel, being the arrows in the correct position to accommodate the break of the roll, then proceed to go around the wheel, rolling each SNAG ball towards the Flagsticky. Line em Up! Place SNAG balls at various intervals lined up towards the flag sticky. You may choose to do this beginning at one foot, two foot, three foot, and four foot, or one roller length, two roller length or three roller lengths, then proceed to roll the SNAG balls to the flat sticky. If you miss one, then start over. This makes an excellent SNAG ercise for practicing your rolls. 32


33 Chipping Drills Flip/Flop Cross Handed The key element in chipping is to ensure that your wrists do not break and that the target arm and club form a straight line all the way through the shot, keeping the ball rolling to the target. Remember less air time and more ground time is the key. Take your normal stance and set up to a ball. Then switch your hands with the target hand going down below the rear hand. Now take some practice strokes. Feel how your left arm and the club shaft stay together with this drill. Practice chipping SNAG balls onto the short stuff. The image that you want to have is that of pulling a wagon with your left arm. Another picture would be your arm and club being a giant train with the club head being the caboose and your upper arm being the engine. When you swing do not jackknife the train. Split Finger Set up into the correct ready position for a chip shot. Then, with the rear hand, take the forefinger and place it on top of the grip so that the shaft rests between the forefinger and the middle finger. You should feel as though your hand is forming a claw. Then practice with this, chipping some SNAG balls. What this will help you feel is the left is the target arm swinging back and forth, pacing the distance needed. It will eliminate a flipping motion with the forefinger, which is a very prevalent, incorrect motion for the chip. Stepover/Crosslegs Get into the proper ready position for the chip, and then take the rear foot and step over the target foot, and launch some chips. The feeling here is how the hands and arms stay well ahead of the ball during the chip shot. It will eliminate the scooping motion that is very prevalent with chips, which is a prevalent incorrect motion. 33


34 Pitching Drills Stork Drill Tee up a SNAGball on the launch ball and assume your position. Then stand on just one leg like a stork and practice swinging away and through. This will help you to really gain a nice swing without moving too much. You will see that when you practice with this, you have to stay very balanced and let the club do the work. Rear Arm Only Set up to the SNAG ball and get the correct ready position for the pitch, then take your target arm from the grip and place it behind the back or to the side, then slowly make your swing using only your rear arm, and play some pitch shot. This will help you to feel the swinging pendulum motion needed for the correct pitch shot. The wrist will hinge naturally at 9 o clock. Thumb & Finger Set up to the pitch shot and gain the correct ready position. Then, with the rear hand hold it between the thumb and fore-finger only. Then, practice with the club held only with the target hand and the thumb and forefinger of the rear hand. This will help you gain the correct func-tioning of the hands throughout the pitch shot. It will eliminate chopping and push-ing, and will help you to feel the swinging of the club head, which is much needed with the pitch shot. 34


35 Launching Drills One Low/One High The one low/one high hold will help the student to correctly hinge and re-hinge the wrists, making the proper L s throughout the swing at the various clock positions desired. Begin by taking the normal placement of the hands on the grip, then slide the lower hand down to the very bottom of the grip so that it is almost touching the shaft of the club. Then set up and play some shots, swinging very slowly to gain the correct feelings. You should find that the wrist will hinge and L out at approximately 9 o clock on the rear swing, and approximately 3 o clock on the for-ward swing. This is an excellent drill to gain the much needed L positions. Sticky Feet Address the ball using the correct grip and posture, and then stick your feet together and play your swing. This drill will help you to gain the proper rotation of the hips and shoulders, and the swinging motion needed in the performance of the correct SNAG swing. Start From The Finish Set up to the ball with the normal pre-launch position, then place the club head on the target side of the ball and swing around to the finished position, then make a swing all the way back around over the top of the ball to the L position at 10 o clock, then swing around launching the ball and back around to the finished position. This SNAGercise will greatly help you to gain the overall circular feeling of the swing without hitting and chopping at the SNAG ball. Launch & Step Assume the correct posture and ready position for your swing. Then, as you launch the ball off of the launch pad, step forward with your rear foot toward the target. This SNAGout will help you feel the correct movement of the body s momentum as you swing through the SNAG ball. 35
36 SNAG ball Due to the ink transfer process during manufacture, this ink is not permanent and will fade to the face of the Launcher because of friction when struck. This is normal and is easily removed using a household cleanser and an abrasive sponge. Repeated pulling from the hook material will damage the SNAG ball cover over time. Launch Pad TM The friction caused when the sole of the Launcher strikes the yellow arrow on the pad will cause some of the yellow ink to transfer to the sole of the Launcher. This is normal and is easily removed using a household cleanser and an abrasive sponge. Over time the blue tee will become damaged or wear out. Additional tees have been provided. Snapper TM The streamer attached has been designed to fray during use. This is normal. The frayed end helps create the popping sound made when you use your hands properly during the swing. The frayed end will not reduce the performance of the streamer. SNAGazoo TM, RollerBrush TM & Flagsticky TM Care should be taken to handle these items properly. They are made of durable plastic and will last a long time if they are used correctly. Do not use these items for anything other than their intended use. Also remember, when the weather is really cold (32 or below), DO NOT PUT WATER IN THE FLAGSTICKY! It will freeze, swell and crack. Use sand instead. If you are not using it, bring it in out of the cold. Warranty Information SNAG Golf Australia is committed to the performance and durability on all of its products. We have a 90-day warranty from the date of purchase on all of our products that are found to be defective in materials and workmanship. We will, at our discretion, repair or replace any such product within 90 days of purchase. If the product cannot be repaired or is no longer produced, the defective product will be replaced with a comparable product. Any product sent for repairs or replacement beyond the 90-day warranty period will be subject to a fee. All defective products must be returned with evidence of purchase to SNAG Golf Australia at the following address: SNAG Golf Australia Unit 2 19 Broadway Street Pelican Point WA 6230 Sales: Jennie Freeman admin@snaggolfwa.com.au (08)
Golf In School Initiative
 Golf In School Initiative 2012-2013 Midwest Section PGA In School Initiative Certification Workbook Contents Contents 1 Introduction Letter 2 SNAG Certification 3 What is SNAG? 4-5 SNAG Science 6-7 SNAG
Sessions
 3-4 5-6 7 8-9 10-11 16 26 28 30 32 35 38 43 55 69 83 95 107 121 133 Introduction SNAG Coaching System Coaching Philosophy Coaching Kit SNAGology Equipment & Training Tools Teaching Methods Stations Layout
The BIG BOOK of Golf Drills
 The BIG BOOK of Golf Drills 1 How to Use This Guide Congratulations on purchasing the Big Book of Golf Drills! This book is designed to use as a reference guide. We do not recommend printing this out as
PLAY BETTER GOLF and HAVE MORE FUN
 PLAY BETTER GOLF and HAVE MORE FUN Randy Meyer PGA Table of Contents Chapter Page Teaching Philosophy 1 Philosophy and Approach 3 Swing Fundamentals 2 Pre-swing 4 In-swing 5 Golf Tips 3 Ball position,
2 SNAG Golf SNAG GOLF
 Product catalogue 2014 2 SNAG Golf SNAG GOLF WELCOME TO SNAG SNAG (Starting New At Golf) is a successful learning and training concept for golfers and golf beginners of all ages. Especially for children
Lesson 3. Golf. Lesson Objectives. Personal Conditioning. Prepare Students... 3 min Explain/Demonstrate/Practice
 Lesson 3 Lesson Objectives Time Page Equipment & Materials Personal Conditioning Lesson 25........................................... 5 min. Prepare Students.................................... 3 min........
SESSION 2 PUTTING: STANCE, ALIGNMENT, POSTURE CHIPPING: STANCE, ALIGNMENT, POSTURE
 SESSION 2 PUTTING: STANCE, ALIGNMENT, POSTURE CHIPPING: STANCE, ALIGNMENT, POSTURE SESSION 2 PUTTING: STANCE, ALIGNMENT, POSTURE WHAT IS NEEDED? Golf balls: Either 10 modified golf balls or 10 real golf
PLAYer Sample Lesson Plan
 tft116275_playerlessonplans10.5x17rsg 2/4/09 2:10 PM Page 11 PLAYer Sample Lesson Plan GOOD-BETTER-HOW Feedback (at least 3 Goods and 1 Better/How) What was GOOD? Coach Name: Date: Chapter: Core Lesson:
Name of School Golf Club Program. Student s Manual
 Name of School Golf Club Program Student s Manual Contact Information: Kim Shafer, PGA, LPGA Director, Events-Marketing Golf House Kentucky 502-243-8295, ext. 307 kshafer@kygolf.org First Lesson: Station
Golf 8 Week Training Plan
 Golf 8 Week Training Plan Week #1 1. Welcome and introductions; introduce the game of golf and go over safety procedures: 1 Provide necessary equipment; wear appropriate clothing; protect against sun and
Randolph College Softball 2008 Summer Program
 Randolph College Softball 2008 Summer Program Week 1 Week 2 Endurance: 1 mile run 4x per Endurance: 1.25 mile run 4x per Core workout: 4x per Core workout: 4x per Week 3 Week 4 Endurance: 1.5 mile run
T-Ball and Pinto Coaching Guide (01/15/18)
") T-Ball and Pinto Coaching Guide (01/15/18) Introduction: Whether you are a parent whose child is about to start T-Ball for the first time or you are about to take on the responsibility of coaching a T-Ball
T-Ball and Pinto Coaching Guide (01/15/18) Introduction: Whether you are a parent whose child is about to start T-Ball for the first time or you are about to take on the responsibility of coaching a T-Ball
Beginning Softball Pitching Adapted from a guide created by Stan VanderSlik
 Beginning Softball Pitching Adapted from a guide created by Stan VanderSlik Pitching a softball is not like throwing a softball. Pitching is an underhand motion that, when done correctly, can result in
Welcome Statement. 1. the Plan. 2. the History. 3. the Warm Up. 5. the Setup. 6. the Swing 7. the Glue 8. the Tour Draw Practice Station.
 table of contents.. Welcome Statement. 1 the Plan. 2 the History. 3 the Warm Up. 5 the Setup. 6 the Swing 7 the Glue 8 the Tour Draw Practice Station. 9 the Tour Draw Assessment. 10 Summary. 11 Key Phrases.
Swing Trainers. You Can Find At Home. By Kevin Sprecher
 Swing Trainers You Can Find At Home By Kevin Sprecher Golf is a game that requires both innate feel and learned technique. There are distinct drills and exercises to create a swing change and new, more
PEE WEE AND LIONS RULES AND SKILLS HANDOUT (April 2005) THE RULES
 THE RULES") PEE WEE AND LIONS RULES AND SKILLS HANDOUT (April 2005) THE RULES 1. When the whistle is blown by the coach, stand still, be quiet, and look at the coach; 2. If you want to speak raise your hand and wait
PEE WEE AND LIONS RULES AND SKILLS HANDOUT (April 2005) THE RULES 1. When the whistle is blown by the coach, stand still, be quiet, and look at the coach; 2. If you want to speak raise your hand and wait
After-School Golf Club at Your Facility. KPGA Professional s Lesson Plans
 After-School Golf Club at Your Facility KPGA Professional s Lesson Plans Contact Information: Kim Shafer, PGA, LPGA Director, Events-Marketing Golf House Kentucky 502-243-8295, ext. 307 kshafer@kygolf.org
Carolina Trace Country Club
 Carolina Trace Country Club Short Game School Michael Krick Head Golf Professional Trace Member Table Of Contents Putting 1, 2 Putting Evaluation Matrix 3 Putting Positions 4 Chipping 5, 6 Pitching 7,
SESSION 11 PUTTING: HOLD POSITION & PRESSURE PUTTING: POSTURE
 PUTTING: HOLD POSITION & PRESSURE PUTTING: POSTURE PUTTING: HOLD POSITION & PRESSURE WHAT IS NEEDED? Golf balls: Either 10 modified golf balls or 10 real golf balls per golfer Clubs: Either a modified
Coaches Handbook. Coaches Handout Page 1
 Coaches Handout 2009 Page 1 General Session 1: How to Warm-up! Players are put through basic warm-ups and exercises that they should perform each week when they come to Tball. Stretching should be the
WEEK 5: TEAMWORK T-Ball Practice Plan
 WEEK 5: TEAMWORK T-Ball Practice Plan INTRODUCTION, STRETCHES & WARM UP - 7 MINUTES 1. Have players share their favorite part about last week and talk about what they think teamwork means. 2. Refer to
LEVEL 1 SKILL DEVELOPMENT MANUAL
 LEVEL 1 SKILL DEVELOPMENT MANUAL Lesson Manual C A Publication Of The USA Hockey Coaching Education Program The USA Hockey Coaching Education Program is Presented By LESSON C-1 SPECIFIC OBJECTIVES 1. Refine
Fielding Throwing and Catching Techniques, Practice and Drills
 Fielding Throwing and Catching Techniques, Practice and Drills Not to be reproduced without permission 1 1) Teach proper Fielding mechanics Ball grip Hand, glove and arm position Proper stance Throwing/Catching
to Successful & Effective Practices
 COACH S GUIDE to Successful & Effective Practices Thank you for volunteering your time to coach a Junior Giants team this summer! New to coaching? Great! We created step-by-step Practice Plans for volunteers
LEVEL 1 SKILL DEVELOPMENT MANUAL
 LEVEL 1 SKILL DEVELOPMENT MANUAL Lesson Manual A A Publication Of The USA Hockey Coaching Education Program The USA Hockey Coaching Education Program is Presented By LESSON A The Beginner Where to start?
Batting Fundamentals
 Batting Fundamentals Hitting Program Elements 1. Teach proper Hitting mechanics Batting grip Bat and Plate position Training the batters eyes Proper swing Upper body Mechanics Lower body mechanics Finishing
AYRA International League Minimum Skills
 AYRA International League Minimum Skills The International League should continue to work on all previous teachings and build upon these skills. This is a good age to start introducing more advanced skills,
Coaching Principles. 1. Introduce 2. Demonstrate 3. Explain 4. Organize 5. Execute 6. Correct 7. Practice
 5 Pin Bowling Drill Book Updated August 2008 Coaching Principles STEPS IN TEACHING A DRILL 1. Introduce 2. Demonstrate 3. Explain 4. Organize 5. Execute 6. Correct 7. Practice GENERAL PRINCIPLES Drills
Finally Out of the Sand
 Finally Out of the Sand A Guide to Success in the Bunker Written By: Master Teaching Professional Adam Kolloff www.scratchgolfschool.com Introduction I can't tell you how many people roll their eyes when
QUICK TIPS THROWING & FIELDING
 PRACTICE ACTIVITIES The number one reason children decided to stop playing baseball is they get bored. The best approach to planning and organizing practices is to make sure players are always active rather
A Publication Of The USA Hockey Coaching Education Program The USA Hockey Coaching Education Program is Presented By
 LEVEL 1 SKILL DEVELOPMENT MANUAL Lesson Manual B A Publication Of The USA Hockey Coaching Education Program The USA Hockey Coaching Education Program is Presented By LESSON B-1 SPECIFIC OBJECTIVES 1.
Juniors BB Curriculum. Baserunning Curriculum (Juniors Level)
") Juniors BB Curriculum 1. Baserunning 2. Catcher 3. Batting 4. Infield 5. Outfield 6. Pitcher Objectives: Baserunning Curriculum (Juniors Level) Learn to take extra bases on a batted ball or an error Focus
Juniors BB Curriculum 1. Baserunning 2. Catcher 3. Batting 4. Infield 5. Outfield 6. Pitcher Objectives: Baserunning Curriculum (Juniors Level) Learn to take extra bases on a batted ball or an error Focus
The drills and practice plans listed below are to be used in conjunction with any other drills you may have in your own coaching arsenal.
 INTRODUCTION It s likely that this is the first youth baseball experience for most players and coaches and all are excited for the new season. These skills and practiced plans are designed to introduce
TRY IT! Athlete s name. Station #0 Warm up/balance. Station #6 Basketball Skills catch, dribble, pass, shoot and rebound
 TRY IT! Athlete s name Station #0 Warm up/balance Station #1 Running Tried it Did it Got it Station #2 Jumping Tried it Did it Got it Station #3 Ball Rolling Tried it Did it Got it Station #4 Throwing
OFFENSIVE SKILLS FOOTBALL SKILLS-SUCCESSFUL OFFENSE TAKING A SNAP GRIPPING THE BALL QUARTERBACKS STANCE
 OFFENSIVE SKILLS S E C T I O N I I I QUARTERBACKS STANCE Stand up straight with feet even, shoulder width. Have weight even on each foot, toes pointing straight ahead. Bend knees, keep back straight and
Stance Recap Blocking Positions To the Right:
 Stance Recap We must create the ability to block out of both the primary (no runners on base) and the secondary (runners on base) stances. We have to put ourselves in a position to be able to get our feet
Putting Basics. If You Can Putt You Can Score. Written by: Randy Sparks Purestrike Golf Academy Destin, Florida
 Putting Basics If You Can Putt You Can Score Written by: Randy Sparks Purestrike Golf Academy Destin, Florida Putting Now that you've built your chipping, pitching, and full swing motions, it's time to
U12 Goalkeeping. *Goalkeepers should be able to consistently make saves from a ball struck with a medium pace using:
 U12 Goalkeeping *Goalkeepers should be able to consistently make saves from a ball struck with a medium pace using: *Three basic catches: Low ball scoop: Hands together, fingers pointing towards the ground
Warmupweek. Etiquette. Technical. Rules EAGLES LESSON1.
 LESSON1 Warmupweek It may have been some time since you have been golfing. Can you remember the basics? Use this space to write a few notes about Grip.............................................. Posture...........................................
RJT. Pupil Task Cards: Throwing JUMP THROW RUN
 RJT s: Throwing RUN JUMP THROW s: Introduction Introduction to the s An important part of every child s cognitive development is to encourage them to explore new things and use self-guided learning to
11 Short Game Drills To Help You Up And Down It From Anywhere!
 Table of Contents Introduction... 3 Chipping... 4 Drill #1 - Wrist Firm (Part 1)... 4 Drill #2 - Wrist Firm (Part 2)... 4 Drill #3 - Chipping Accuracy... 6 Pitching... 8 Drill #1 - Distance Control (Part
Responsibility And Judgment SPRING LESSON FOCUS:
 Responsibility And Judgment SPRING LESSON FOCUS: Life Skills Respect Courtesy Responsibility & Judgment Honesty Sportsmanship Perseverance & Confidence Discuss And Observe In golf, it is important to demonstrate
THROWING SKILLS RUN JUMP THROW
 RUN JUMP THROW CHAPTER 7: KEY IDEAS Throwing activities can be divided into the following sub-groups: pushing activities which lead to shot put pulling activities which lead to javelin throw slinging activities
Basic Quarterback Training
 Basic Quarterback Training This tip provided by Todd Kreuger, Football Tools For Active.com Repetition is the key to becoming a good quarterback. Below are some of the most important techniques a high
T-Ball is a baseball game for young boys and girls. It is a way to have fun while learning how to play.
 Coaching youth baseball is an exciting and rewarding way to be involved with youth sports. It is not always easy though. A majority of the coaches at T-ball level are coaching for the first time and sometimes
The Golf Swing. The Fundamentals
 The Golf Swing The Fundamentals Fundamental #1 Grip & Set-Up The grip and set-up should be viewed as putting parts of a machine together. The right parts connected in the right way will allow the machine
2 ND 3 RD FOOTBALL STANDARDS GRADE LEVEL STANDARD DESCRIPTION
 FOOTBALL FOOTBALL STANDARDS GRADE LEVEL STANDARD DESCRIPTION PE.2.M.1.7 Move in different directions to catch a variety of objects softly tossed by a stationary partner. 2 ND 3 RD PE.2.M.1.8 PE 2.C.2.2
Player Development. Pitching 1
 Pitching Player Development Pitching 1 Delivery Mechanics Checklist: 1. Feet slightly spread on throwing arm side of rubber 2. Body weight positioned over stride leg 3. Torso upright 4. Hips and shoulders
-$9(/,1²/(9(/ Learning Activities. 78/ THROW (Javelin Level 1) Run, Jump, Throw and away we go! (2001)
 Run, Jump, Throw and away we go! (2001)") -$9(/,1²/(9(/ Learning Activities OVERHEAD SOCCER THROWS (LARGE BALL) x Both hands are on the ball and it is thrown from overhead with both feet on the ground. Note the whipping action created. Limit to
-$9(/,1²/(9(/ Learning Activities OVERHEAD SOCCER THROWS (LARGE BALL) x Both hands are on the ball and it is thrown from overhead with both feet on the ground. Note the whipping action created. Limit to
Pitching Skills and Drills
 Pitching Skills and Drills Copyright Notice -IT IS ILLEGAL TO POST THIS DOCUMENT ONLINE The material enclosed is copyrighted. You do not have resell rights or giveaway rights to the material provided herein.
Softball Pitching Mechanics
 Softball Pitching Mechanics When teaching softball pitching mechanics, the best way to avoid injury, develop consistency, and see results is through repetition and attention to detail. Even a slight change
Week 1 Balance. Practicing balance can be incorporated into daily activities. TIPS
 Week 1 Balance Agility, balance, and coordination are valuable in almost all sports. Developing these ABCs, is an important part of physical literacy, and can be achieved through involvement in a variety
There are 9 positions on the softball field labeled as follows
 DEFENSE There are 9 positions on the softball field labeled as follows THROWING MECHANICS Dynamic throwing warmup o Wrist flicks, wrist snap is super important for a strong, fast accurate throw. Have arm
Special Olympics Summer Sports Rules GOLF
 1 The Official Special Olympics Sports Rules for Golf shall govern all Special Olympics competitions. As an international sports program, Special Olympics has created these rules based upon The Rules of
HANDY HINTS FOR EIGHT BALL
 HANDY HINTS FOR EIGHT BALL The Stance 1. Comfort is essential 2. Weight forward 3. Rear leg fairly straight and braced rigid 4. Front knee taking the weight Position your legs in line with your shoulders
LEVEL 1 SKILL DEVELOPMENT MANUAL
 LEVEL 1 SKILL DEVELOPMENT MANUAL Lesson Manual D A Publication Of The USA Hockey Coaching Education Program The USA Hockey Coaching Education Program is Presented By 1. Proper Stance: LESSON D-1 SPECIFIC
DOYLE BASEBALL TERMINOLOGY
 www.doylebaseball.com/siebert DOYLE BASEBALL TERMINOLOGY THROWING (Part One/Upper Half) Stance spread and flex lower half Show throwing arm extended straight out to the side of the body then bend elbow
WGAAA Baseball Skill/Coaching Manual
 WGAAA Baseball Skill/Coaching Manual All baseball players regardless of age should have a base knowledge and capability of proper baseball mechanics. If a team is mechanically sound, more often than not,
The Simple Swing
 The Simple 1-2-3 Swing The Amazing "1-2-3 Swing" Guarantees The Average Golfer Can Break 90 In Less Than a Week! The Amazing "1-2-3 Swing" Guarantees Average Golfers Can Learn To Consistently Hit The Ball
AfL Playbook: 5-8 years old 12 days of active fun for kids, parents, and caregivers
 12 days of active fun for kids, parents, and caregivers Ready to have fun developing movement skills? Active for Life has created a set of games and activities for you and your child to play together.
ShuttlE. Schools Badminton LESSON PLANS 10 STARTER LESSONS
 Schools Badminton LESSON PLANS 10 STARTER LESSONS Schools Badminton LESSON PLANS 10 STARTER LESSONS Badminton World Federation 2011. First published November 2011. Overview 1. Introduction 10 Starter
Skills and Drills The Center's Skills
 Introduction to Offensive Fundamental Skills Skills and Drills This section reviews the fundamental skills of flag football, explains why each is important and emphasizes the skill s basic teaching points.
COACH RIC EVERMAN THE BASICS FOR BECOMING A FAST-PITCH SOFTBALL PITCHER
 COACH RIC EVERMAN THE BASICS FOR BECOMING A FAST-PITCH SOFTBALL PITCHER IMPORTANT: There are a lot of steps to learn here. Don t try to do them all of them at once. Take things one at a time. Nobody learns
Special Olympics Junior Athletes. Floorball
 Special Olympics Junior Athletes Floorball FLOORBALL Floorball is a very popular sport around the world. The sport s success is due to the fact that it can be played by boys, girls, men and women of just
SKLLS TEACHING POINTS: HOLDING THE BALL
 SKLLS TEACHING POINTS: HOLDING THE BALL - Fingers spread around the ball - Thumbs on top - Fingers underneath - As a possible guide for beginners, putting the index finger on the seams helps put the hands
KPGA Golf in Schools Program Student s Manual
 KPGA Golf in Schools Program Student s Manual Contact Information: Kim Shafer, PGA, LPGA Director, Events-Marketing Golf House Kentucky 502-243-8295, ext. 307 kshafer@kygolf.org First Lesson: Putting How
LEARN TO SKATE CURRICULUM
 LEARN TO SKATE CURRICULUM INTRODUCTION The focus and goal of the Learn to Skate (L2S) curriculums are designed to teach beginner hockey players the fundamentals of skating. Every association will have
PAR Class Lesson Plan # 3
 PAR Class Lesson Plan # 3 Core Lesson: Meeting and Greeting with A-L-R Core Values: Review from Player: Responsibility Accounting for one s actions; dependable: Players are responsible for their actions
AMATEUR HOCKEY ASSOCIATION ILLINOIS, INC. MITE 8 & UNDER AMERICAN DEVELOPMENT MODEL
 Mite 8 & Under American Development Model Week 1 This coach s manual is intended to provide the instructions and tools to conduct the Mite and 8 & Under Illinois Hockey - Skills Challenge. Mite
10 th Kup White Belt. The Basics
 10 th Kup White Belt Starting Tae Kwon Do as a white belt often feels rather daunting, especially when there are so many students around you that appear to make all the moves seem effortless. Just remember
COACHING WINDMILL PITCHERS GETTING STARTED
 COACHING WINDMILL PITCHERS GETTING STARTED INTRODUCTION Coaching pitchers in NOT difficult. All you need is some interest and a little information to understand what you're doing. The interest has to come
to : entire team - warmup exercises (jumping jacks, leg stretches, arm circles, etc.) ( 10 minutes )
 ( 10 minutes )") Practice Plan - Minors: ( 2 hour practice) Practice #1 Date: Time: Team Roster: to : entire team - warmup exercises (jumping jacks, leg stretches, arm circles, etc.) ( 10 minutes ) to : entire team - throwing
Practice Plan - Minors: ( 2 hour practice) Practice #1 Date: Time: Team Roster: to : entire team - warmup exercises (jumping jacks, leg stretches, arm circles, etc.) ( 10 minutes ) to : entire team - throwing
Specialists Philosophy
 Specialists Philosophy The special teams include a variety of players form the offense and defense. In addition, we will have a few players that play major roles on special teams. These are our specialists,
The Secrets Of The Swing
 The Secrets Of The Swing brought to you by www.golfclubdistance.org and Amazing Golf Mind Table of Contents 1. The Address 2. The Take Away 3. The Top Of The Backswing 4. The First Move 5. The Downswing
The Takeaway. The waggle can be an excellent opportunity to rehearse your takeaway
 The Takeaway Your approach to the ball is the final step over which you have total control. Once you actually start the swing, you need to depend on rhythm, tempo and balance to see you through the swing.
Spring Sports Program. Junior Kindergarten T-Ball Manual
 Spring Sports Program Junior Kindergarten T-Ball Manual Message from the Bridlewood Community Association (BCA): Thank you for taking part in the Spring Sports Program and making it a success year after
PART 5: TEACHING SKIPPING SKILLS
 : TEACHING SKIPPING SKILLS This section includes: Learning skipping skills Skipping skills Individual Skipping skills Partner Skipping skills Long rope Skipping skills Double Dutch There are hundreds of
PRACTICE 2 TIP : Rebounding From Mistakes (Mistake Ritual)
") PRACTICE GOALS: What Your Team Should Learn 1. Be able to hold a ball with a four seem grip 2. How to throw to a two-hand target using a four-seam grip 3. Run through first base 4. Attempt to catch the
PRACTICE GOALS: What Your Team Should Learn 1. Be able to hold a ball with a four seem grip 2. How to throw to a two-hand target using a four-seam grip 3. Run through first base 4. Attempt to catch the
TAI CHI SHORT HAND FORM CLASSICAL YANG STYLE Updated 10/03/ updates available from
 TAI CHI SHORT HAND FORM CLASSICAL YANG STYLE Updated 10/03/2017 - updates available from www.taichichuan.org.uk During my 17 years learning of tai chi with Tony I have developed the following notes, both
Kent Canoe Services
 Kent Canoe Services www.thecanoeshop.co.uk Eskimo Rolling (Kayaks) Introduction: Welcome to our article on Eskimo rolling. Years ago eskimo rolling was considered to be an advanced skill only performed
I. General Coaching Tips
 I. General Coaching Tips 1. Be Enthusiastic 2. Build Confidence n Help kids believe in themselves n Instead of being critical or creating pressure 3. Enthusiasm and confidence building more important than
10U/12U PHASE II - AGILITY & BALANCE LADDER: TAPIOCA 10U/12U PHASE II - AGILITY & BALANCE LADDER: TAPIOCA
 0U/U PHASE II - AGILITY & BALANCE LADDER: TAPIOCA 0U/U PHASE II - AGILITY & BALANCE LADDER: TAPIOCA Begin by standing sideways at one end of the ladder with the lead foot directly next to the ladder. Move
The Rochester Avon Recreation Authority appreciates your support and involvement and thank you for your time.
 COACHES HANDBOOK Table of Contents: Foreword... 1 T-Ball League Rules... 2 Coaches Introduction... 3 T-Ball Tips For Coaches... 4 Coaches Checklist... 6 T-Ball Skills Checklist... 8 Practice Tips... 12
Techniques To Treat Your Pain At Home (512)
") Techniques To Treat Your Pain At Home (512) 288-5322 7010 W. TX-71 Suite 360 Austin TX, 78735 Arm Only Bird Dog Start in the quadruped position (all fours) with arms and thighs perpendicular to the floor.
Techniques To Treat Your Pain At Home (512) 288-5322 7010 W. TX-71 Suite 360 Austin TX, 78735 Arm Only Bird Dog Start in the quadruped position (all fours) with arms and thighs perpendicular to the floor.
Ultimate Hitting Drills
 If You Enjoy This Report, Please Check Out Ultimate Hitting Drills Discover 56 Game-Te Tested Hitting Drills For A Faster, Smoother, And More Powerful Swing! Get Instant Access To The Complete Report Today,
Shoulder Exercises for Combined Labrum Repair Rehabilitation Protocol
 Shoulder Exercises for Combined Labrum Repair Rehabilitation Protocol The exercises illustrated and described in this document should be performed only after instruction by your physical therapist or Dr.
FUNDAMENTAL SOFTBALL SKILLS (DEVELOPING FUNDAMENTAL SKILLS)
") FUNDAMENTAL SOFTBALL SKILLS (DEVELOPING FUNDAMENTAL SKILLS) Learning outcomes: At the completion of this Module the candidate will be able to: Identify the fielding positions in softball and the responsibilities
FUNDAMENTAL SOFTBALL SKILLS (DEVELOPING FUNDAMENTAL SKILLS) Learning outcomes: At the completion of this Module the candidate will be able to: Identify the fielding positions in softball and the responsibilities
PLAYer Class Lesson Plan # 5
 Core Lesson: Judgment PLAYer Class Lesson Plan # 5 Core Values: Judgment to make a decision or form an opinion. Healthy Habit: Safety following the rules and using proper equipment helps you stay safe.
Baseball Hitting Principles Version 2
 Baseball Hitting Principles Version 2 Scott Kluemper 2/17/2013 Scott Kluemper 1 Table of Contents Page Swing Phases 3 Stance 4 Negative Move 10 Positive Move 12 Toe Touch 15 Heel Plant 17 Posture Lines
By Mark Favell with Al Barkow
 Golfers get into trouble when they try to align their body first, especially their feet, which are the least important element. By Mark Favell with Al Barkow Because golfers stand at the side of the ball
 Hi Coach! Thanks for checking out this free report. Inside, you're going to discover 20 "plug and play" tips that will dramatically improve any hitter's swing. For better quality at-bats, improved contact,
SESSION 5 PUTTING/CHIPPING: ALIGNMENT & WEIGHT DISTRIBUTION PUTTING/CHIPPING: DISTANCE CONTROL
 SESSION 5 PUTTING/CHIPPING: ALIGNMENT & WEIGHT DISTRIBUTION PUTTING/CHIPPING: DISTANCE CONTROL SESSION 5 PUTTING/CHIPPING: ALIGNMENT & WEIGHT DISTRIBUTION WHAT IS NEEDED? Golf balls: Either 10 modified
Mark Wood s Full-Swing Basics. 7 Steps to Jump-Start Your Game for 2015
 Mark Wood s Full-Swing Basics 7 Steps to Jump-Start Your Game for 2015 On giving short 30-minute corporate clinics, I am normally speaking with a large group of golfers who are of varying abilities. As
Welcome. 1. The Plan. 2. Irons. 3. Wedges Greenside Bunker. 10. Chipping. 13. Putting. 16. Summary. 19. Key Terms and Phrases.
 p: 1 Table of Contents Welcome. 1 The Plan. 2 Irons. 3 Wedges............................................... 7 Greenside Bunker. 10 Chipping. 13 Putting. 16 Summary. 19 Key Terms and Phrases. 20 Stay in
Belton High School Marching Fundamentals 2016
 Belton High School Marching Fundamentals 2016 Fundamentals of Teaching Fundamentals: 1. Say the name of the maneuver (INSTRUCT) 2. State its purpose (INSTRUCT) 3. Demonstrate it slowly, several times,
RIFLE DRILL. 1. General. Before commencing instruction in rifle drill, it is important that the cadets receive instruction in the parts of the rifle.
 RIFLE DRILL 1. General. Before commencing instruction in rifle drill, it is important that the cadets receive instruction in the parts of the rifle. 2. Rifle Movements. Unless stated otherwise, cadets
The Fundamentals of Putting
 The Fundamentals of Putting Episode 1 - Setup and Aiming A proper setup position is a prerequisite of a good putt. Setup includes body posture, gripping the putter, alignment of body relative to the ball
Stance Starting point; need vision, balance, and plate coverage. Grip Loose grip in the fingers with the Door Knocking knuckles lined up to unlock
 Stance Starting point; need vision, balance, and plate coverage. Grip Loose grip in the fingers with the Door Knocking knuckles lined up to unlock the wrists and allow for greater bat speed. Weight Shift
Instructional Manual
 Instructional Manual TABLE OF CONTENTS MEDICUS Dual 2000 Instructional Manual The Proper Grip 1 Posture, Stance & Alignment 2 Breakpoint 1: Takeaway 3 Breakpoint 2: Toe-up Position 4 Breakpoint 3: Setting
Purpose: This drill is designed to teach the players to catch with both hands and build confidence.
 Drills Fielding Drill Drill: Soft Hands Drill Age Group: 4 8+ year olds Purpose: This drill is designed to teach the kids the proper way to catch the ball with two hands and builds confidence. Equipment: