GG/DH Owner s Manual
|
|
|
- Ashley Farmer
- 6 years ago
- Views:
Transcription

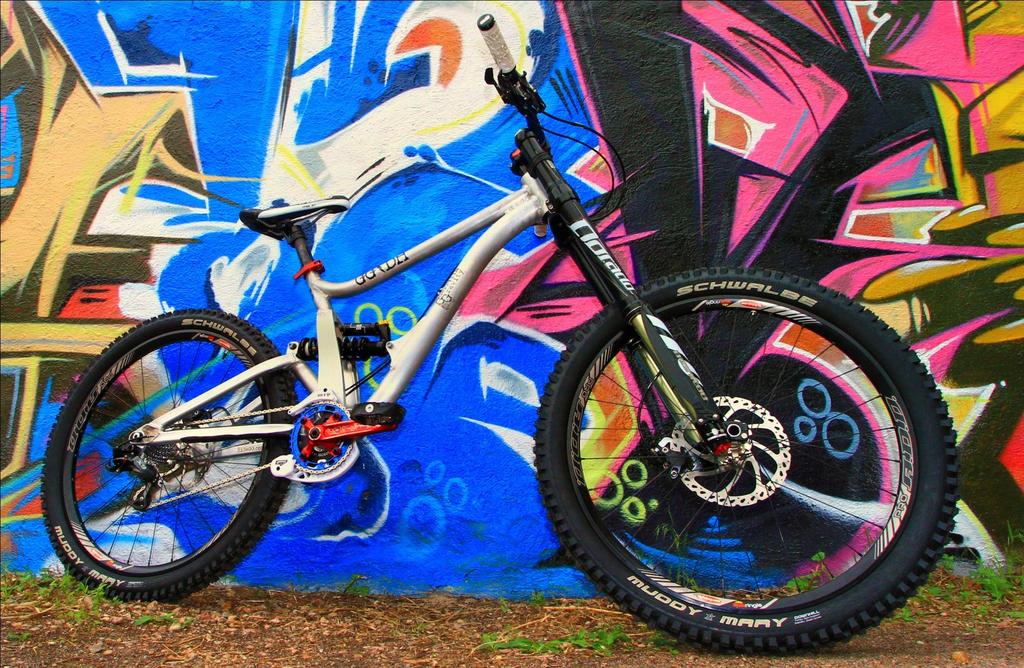
1 GG/DH Owner s Manual
2 Hell yeah! You just bought one of the first Guerrilla Gravity bikes! First things first, thank you for supporting us and supporting American manufacturing. As we re sure you re already aware, you re pretty awesome. Now, we have a few important points to cover. We have structured this owner s manual to include the information we feel is the most important for your ownership of the GG/DH to come first and have left everything the Consumer Product Safety Commission dictates we must include at the end.

3 Table of Contents Details on the GG/DH Beta prototypes and owner expectations Frame adjustments - Seatpost height - Chainstay length and derailleur hanger - Bottom bracket height and head angle Recommended maintenance Bearing and pivot axle assembly Warranty Required CPSC info

4 GG/DH Beta prototype details and owner expectations The GG/DH Betas are an intermediary prototype designed to be a preproduction validation. We have taken everything that we learned from the Alpha prototypes and improved the frames in regards to ease of ownership, frame strength, and its fabrication processes to eliminate imperfections. While we have taken all precautions to make sure the bikes are production quality, please keep in mind that there may be imperfections still and that s why they are a below-cost, limited-quantity prototype batch. As Beta riders, we are looking to you for feedback on what you think can be improved. Anything on the frame is up for discussion. Our aim is to make the GG/DH a frame that performs as well as, or better than, the best frames on the market, yet is easier to maintain and own than any other. So, as you ride your GG/DH Beta, think about any ride characteristics that could be improved. And, as you maintain your bike, ask yourself if anything you re doing could be made easier. With your feedback, we think the GG/DH will be the best downhill and park bike on the market!

5 Frame adjustment Seatpost height Please note that there is a maximum seatpost height adjustment. The seatpost must be visible in the viewhole drilled into the non-drive side of the seat tube. If you cannot see the seatpost through this hole, it is too high and you are at risk for doing catastrophic damage to your GG/DH frame and possibly yourself, as well. Seatpost must be visible *Always make sure that anyone else who rides your GG/DH is also aware of the maximum seatpost height.

6 Frame adjustment Chainstay length and derailleur hanger The chainstay length of your GG/DH frame is adjustable between 17 and 17.5 via the axle mount eccentrics. Whether you should run it in the long setting or short setting is largely personal preference. For general guidelines, though, run it in the shorter setting if you re a shorter rider, like a snappier rear end, ride tight, technical trails, or like the frontend of the bike to pop up more easily. Run the longer setting if you re a taller rider, prefer to ride more rearward on the bike, or prefer a more stable platform for high-speed trails. Our aim was to make the adjustment easy enough so that it is easy to experiment with, finding the setting that s right for you, and so that it s easy to adjust based on the type of trails you may be riding that particular day.
 - Using a 2 mm hex wrench, remove the bolt affixing the derailleur hanger and - Reaffix the derailleur hanger")
7 Frame adjustment Chainstay length and derailleur hanger To perform the adjustment: - Remove the axle with either an 8mm hex wrench or a 17mm box wrench - Remove the rear wheel - Remove the eccentrics from each side; if they don t come out easily, tap them with a mallet and a punch (drift) - Using a 2 mm hex wrench, remove the bolt affixing the derailleur hanger and - Reaffix the derailleur hanger and bolt fore or aft of its current position to your desired adjustment - Reinstall the eccentrics in the new desired adjustment - Reinstall the wheel - Check to make sure that the axle slot is aligned between the derailleur hanger and the eccentrics - Clean, re-grease, and reinstall the axle


8 Frame adjustment BB height and head tube angle The bottom bracket (BB) and head angle (HA) of your GG/DH frame is adjustable between the low/slack setting with a 13.6 BB height and 63.5 HA and tall/steep setting with a 14 BB height and 64.2 HA. Similar to the chainstay adjustment, the setting that s right for you is largely personal preference, but there are some general guidelines that can help you choose the right setting for trail conditions. For steeper trails, the slack HA in the low/slack setting will be beneficial. The lower BB height in this setting will also help to get your center-of-gravity lower for better cornering characteristics. The tall/steep setting will be better for trails that are not very steep and trails that have larger rocks for which the additional pedal and BB clearance will help you avoid strikes with the rocks. Low/Slack Setting
 - Flip the eccentrics to desired setting - Reinstall the shock and")
9 Frame adjustment Bottom bracket height and head tube angle To make the adjustment: - Remove the rear shock mount bolt - Remove the two shock mount eccentrics; if they don t come out easily, tap them with a mallet and a punch (drift) - Flip the eccentrics to desired setting - Reinstall the shock and mounting bolt
10 Recommended maintenance Checklist: Every ride Check your tire pressure and inflate them as specified by the tire manufacturer Lube your chain, wiping clean excess lubricant Ensure your brakes are working properly Ensure all the bolts on the bike are tight, including pivot axle caps Clean your bike of mud and debris, a clean bike is a happy bike Make sure your headset is tight by holding the front brake and rocking the bike back and forth and feeling for play or slop at the headtube, headset bearing cup junction Make sure spoke tension is adequate for both wheels, if a spoke is loose, tighten it so that its tension is uniform with the other spokes
11 Recommended maintenance Checklist: Every ten rides Check to make sure that your brake pads have sufficient pad material left, replace if pads are close to being worn down to their metal base Make sure your tires are safe to ride on, there are no gashes or holes in the tires casing, side knobs are adequate for support in corners, and that there is not excessive dry rotting that has occurred (especially prevalent if the bike has been sitting, unridden, for several weeks or months) Check the chain for stretching, if it is beyond 75%, replace it before it begins to affect your cassette and chainring(s)
12 Recommended maintenance Checklist: Every twenty rides Remove the shock and ensure that the GG/DH frame s bearing are still smooth, replace if there is stiction Inspect the frame carefully for any cracks that may have occurred Replace shifter cables and housing Bleed brake system Note: All parts wear out overtime. Make sure you, or a qualified mechanic, inspect your bike and all of its components every twenty rides.
13 Bearing and pivot axle assembly Bearing Replacement - The GG/DH comes from the factory with Enduro ABEC dual-lip sealed bearings with additional shielding built into the frame, and bearing life is longer than average. However, when the bearings need replacing, be sure to follow the below procedure

14 Remove rear wheel & shock Note: 1. Check suspension movement; if the rear triangle moves freely with minimal friction, the bearings most likely do not need replacement
15 Loosen pinch bolts Tool: 5mm Hex Wrench

16 Remove pivot axle Tool: 8mm Hex Wrench Important: Pinch bolts must be loosened first! Note: 1. Clean the old grease and dirt off of the pivot axle and cap

17 Remove rear triangle and spacers Note: 1. Clean old grease and dirt off of bearing spacers

18 Remove bearings Tool: Bearing puller Note: 1. Once bearings are removed, clean old grease and dirt out of bearing areas

19 Install both new bearings Tool: Bearing press, not a hammer! Notes: 1. Apply a thin layer of grease on the outside diatmeter of the bearing before installation. 2. After bearing install, apply liberal amounts of grease on both bearing seals- this is one more line of defense to keep water and dirt out of the bearing.

20 Reinstall spacers, rear triangle and axle Tool: Patience; make sure everything is aligned before pushing the pivot axle through Note: 1. See orientation of pivot axle spacers, highlighted in green.

21 Reinstall spacers, rear triangle and axle Tool: Patience; make sure everything is aligned before pushing the pivot axle through Note: 1. Apply thin layer of grease to pivot axle OD prior to installation 2. Apply linseed oil to pivot axle cap threads
22 Tighten Pivot Axle Assembly Tools: 5mm & 8mm Hex Driver, Torque Wrench Note: 1. Tighten pivot axle & cap to 12Nm 2. Tighten pinch bolts 10Nm 3. Check suspension for smooth movement 4. Reinstall shock
23 Warranty One-year frame warranty - For one year, we will replace a broken front or rear triangle that is the result of defective materials or workmanship - This is assumed that the failure is the result under normal riding conditions. Given that this is a prototype frame we don t recommend hucking your meat like Bender. This will void this warranty if a failure occurs - This warranty does not cover any components on the bicycle - This warranty is void if the failure is the result of improper assembly of components or hardware. If you are unsure if components or hardware are improperly assembled, contact a GG representative before riding the bike Eight-year crash replacement - For the first eight years of the frame s life we will provide an at-cost replacement for the front or rear triangle regardless of the situation under which the failure occurred. We still don t recommend hucking your meat like Bender. Any injury that occurs doing something like this ain t our fault. Ride within your abilities. - All bicycle frames have a usable life, especially ones made of aluminum, simply due to the natural aging of the materials A note on component failures - We are not responsible for any component failures attached to the bike, but we will help connect you with the proper manufacturer to rectify the issue. We do make an attempt to only provide components we are confident in, but failures do happen (and they re not our fault).
24 Required CPSC info Safe operation Brakes: Squeeze them with your forefinger to stop the bike, but don t squeeze them too hard or you may hurt yourself! And don t use two fingers that s just a bad habit. Gears: These are located next to your right brake lever. The lower lever makes it harder to pedal. The upper lever makes it easier. Yup, it s true. Wet weather: Riding in the wet is extremely dangerous and should be avoided at all cost. Any injury you may incur riding in the wet is your own fault for trying to have fun on a rainy day. Night riding: Riding at night is awesome, especially on really steep trails. We recommend lights and reflectors to help prevent things from hitting you, and vice versa. Oh yeah, it s also dangerous and not our fault if you hurt yourself doing it. On-road: If you happen to be riding your bike on the road, always assume cars do not see you and be very, very careful. We re not sure why you re on the road with a GG/DH, anyway. Off-road: Go fast, take chances, and if you get hurt, we re sorry, but it s not our fault and we are not liable for any injury that occurs because the gnar shred you, instead of the other way around. If your bike is less than fully assembled when you receive it, take it to a qualified mechanic. If you assemble it yourself, we assume no responsibility for improper construction leading to equipment failure or personal injury. If you re in doubt about who is a qualified mechanic, call us and we ll help you find one in your area. Minimum leg length If there is less than one inch between your crotch and the top tube, the bike is too big for you. Oops. Let us know if this is the case for you. Serial number Each Guerrilla Gravity bike has a serial number on the bottom of the bottom bracket. This number denotes the model, date of fabrication, and manufacturing location. Make a note of this number in your records in case your bike is stolen.
25 We know this info was incredibly interesting, so thanks for hanging in there with us. See ya in Shred Town
CRUZBIKE Quest 2.0 Assembly
 CRUZBIKE Quest 2.0 Assembly CRUZBIKE Quest 2.0 Assembly... 1 General notes on assembly... 2 Un box and evaluate the frame and major parts... 2 Unfold the rear swing arm and arrange the frame... 3 Rear
Assembly - Frame Fittings
 Owner s Manual Contents Assembly Frame fittings Fastener torque Fork compatibility Drivetrain compatibility ISCG Mount Setup Fork Shock install & orientation, air springs vs coil springs Suspension sag,
Contents. Assembly. Setup. Crush Mode/ Plush Mode Onboard Frame Storage Maintenance and Small Parts Safety
 Owner s Manual Contents Assembly Frame fittings Fastener torque Fork compatibility Drivetrain compatibility ISCG Mount Setup Fork Shock install & orientation, air springs vs coil springs Suspension sag,
comfort without compromising on performance and to fit your various needs on touring,
 Congratulations on your purchase of Goal-26X. Goal-26X is made to enhance comfort without compromising on performance and to fit your various needs on touring, shopping and communicating. Let s have fun
SANTA CRUZ BICYCLES Geometry Adjust Flip Chip
 SANTA CRUZ BICYCLES Geometry Adjust Flip Chip Copyright Santa Cruz Bicycles 2017 TABLE OF CONTENTS SAFETY INSTRUCTIONS... 3 GEOMETRY ADJUST FLIP CHIP... 3 INTRODUCTION...3 TOOLS AND SUPPLIES...3 MY18 NOMAD
Have questions? Chat with us live at raleighusa.com or call us at , 8am 5pm PST
 1 2 Have questions? Chat with us live at raleighusa.com or call us at 1-800-251-8435, 8am 5pm PST The bicycle you have purchased is a complex piece of equipment that must be properly assembled and maintained
Have questions? Chat with us live at raleighusa.com or call us at , 8am 5pm PST
 1 2 Have questions? Chat with us live at raleighusa.com or call us at 1-800-251-8435, 8am 5pm PST The bicycle you have purchased is a complex piece of equipment that must be properly assembled and maintained
600 Corporate Circle, Unit D Golden, CO USA P// //
 Yeti Cycles 600 Corporate Circle, Unit D Golden, CO USA P//303.278.6909 // 888.576.9384 www.yeticycles.com A R C - X O W N E R S M A N U A L 0 8-1 0 Table of Contents Brand Overview 6 Frame Features 8
SANTA CRUZ BICYCLES Cable Routing Procedure MY17
 SANTA CRUZ BICYCLES Cable Routing Procedure MY17 Copyright Santa Cruz Bicycles 2017 TABLE OF CONTENTS SAFETY INSTRUCTIONS... 3 CABLE ROUTING... 3 INTRODUCTION...3 TOOLS AND SUPPLIES...3 REAR DERAILLEUR
Have questions? Chat with us live at raleighusa.com or call us at , 8am 5pm PST
 1 2 Have questions? Chat with us live at raleighusa.com or call us at 1-800-251-8435, 8am 5pm PST The bicycle you have purchased is a complex piece of equipment that must be properly assembled and maintained
owner s manual 2012 yeti arc
 owner s manual 2012 yeti arc YETI CYCLES 600 Corporate Circle, Unit D Golden, CO 80401 888.576.9384 www.yeticycles.com Table of Contents Brand Overview 06 Frame Features 08 Geometery 10 Maintenance Schedule
TABLE OF CONTENTS INTRODUCTION
 R3 DISC MANUAL TABLE OF CONTENTS Introduction... 1 Frame Features... 2 Fork Preparation... 3 Small Parts... 5 Frame Preparation... 6 Brake Housing Installation... 7 Mechanical Cable Routing... 9 Electric
Santa Fe Cycles Assembly Guide Introduction
 Santa Fe Cycles Assembly Guide Introduction Congratulations on your purchase of your new Santa Fe bicycle. You have purchased a bicycle that has many features and qualities. Please take a few minutes and
Bicycle Noise Diagnosis
 Bicycle Noise Diagnosis Bottom bracket noise is a common complaint but most times the noise could be coming from another area on the bicycle. Noises that are telegraphing through the frame often sound
INSTRUCTION GUIDE TRANSITION CARBON (ALL MODELS)
") INSTRUCTION GUIDE TRANSITION CARBON (ALL MODELS) THIS INSTRUCTION GUIDE CONTAINS IMPORTANT INFORMATION. PLEASE READ CAREFULLY AND STORE IN A SAFE PLACE. Congratulations! The Specialized bicycle you have
INSTRUCTION GUIDE TRANSITION CARBON (ALL MODELS) THIS INSTRUCTION GUIDE CONTAINS IMPORTANT INFORMATION. PLEASE READ CAREFULLY AND STORE IN A SAFE PLACE. Congratulations! The Specialized bicycle you have
Thank you for purchasing a WIKE BOX BIKE!
 Thank you for purchasing a WIKE BOX BIKE! Contents Safety.....3 Front wheel.4 Kickstand..5 Handle Bar & Box 6 Seat post and Saddle 7 Final pre-ride check 8 Tools needed to assemble Bike: -High table or
UNPACKING AND ASSEMBLING YOUR DIAMONDBACK ROAD BIKE
 EMAIL SIGNUP BIKE REG SEARCH BIKES THE RIDE HEALTH FITNESS SKILLS SHOP MAINTENANCE CYCLING 101 RIDERS LIKE YOU TEAMS SUPPORT UNPACKING AND ASSEMBLING YOUR DIAMONDBACK ROAD BIKE 1. Begin by carefully cutting
TECHNICAL SUPPORT DOCUMENT 2018 CARBON MODELS 650B / 29 WARRANTY SMALL PARTS FRAME SPEC/SERVICING
 2018 CARBON MODELS 650B / 29 WARRANTY SMALL PARTS FRAME SPEC/SERVICING 2018 CARBON MODELS 650B / 29 PG.i NORCO BICYCLES NEW PURCHASE CONSUMER WARRANTY PROGRAM - EFFECTIVE ON ALL 2017 MODEL YEAR BICYCLES
OWNER S MANUAL 2013 ARC CARBON
 OWNER S MANUAL 2013 ARC CARBON YETI CYCLES 621 Corporate Circle, Unit B Golden, CO 80401 888.576.9384 www.yeticycles.com TABLE OF CONTENTS BRAND OVERVIEW 01 FRAME FEATURES 04 GEOMETERY 08 MAINTENANCE SCHEDULE
FRAME FEATURES TABLE OF CONTENTS INTRODUCTION
 R3 MANUAL TABLE OF CONTENTS Introduction...1 Frame Features...2 Fork Preparation...3 Small Parts...5 Frame Preparation...6 Mechanical Cable Routing...7 Electric Cable Routing...9 Seatpost Assembly & Installation...11
ASSEMBLY GUIDE TRUE GRIT. LaufCycling.com
 ASSEMBLY GUIDE TRUE GRIT LaufCycling.com Congratulations on your True Grit! We understand you are in a hurry to go riding a.s.a.p. - but please take a deep breath and read this installation guide first.
model - CYPRESS DX W
 Contents model - CYPRESS DX W Maintenenace manual Read and Save these instructions Welcome Contents 1 Preparing Nothing makes us happier than seeing people out riding bikes. For over thirty years Giant
Mini Glider Manual. Your Glider comes partially assembled. The front wheel and the handlebars require assembly.
 Mini Glider Manual Congratulations on your purchase of the Mini Glider! Your glider is designed for years of nearly carefree use by your child. These instructions include how to set up your glider and
E-trike Li Assembly Guide
 PREPARATION 1. Read this assembly manual BEFORE commencing assembly. 2. Carefully remove all the components and packaged hardware from the shipping boxes. 3. Unpack the contents of the large double box
R3 RIM MANUAL EN. Version 1 I
 R3 RIM MANUAL EN Version 1 I 07.02.2017 TABLE OF CONTENTS Introduction...1 Frame Features...2 Fork Preparation...3 Small Parts...5 Frame Preparation...6 Mechanical Cable Routing...7 Electric Cable Routing...9
TECH SHEET ORANGE PIVOT TOOL INSTRUCTIONS
 page 1 ORANGE PIVOT TOOL INSTRUCTIONS This is a guide of how to change the pivot bearings on an Orange frame with a bore style pivot axle. 4 8 Bore Type Pivot Axle Horiz-Hold Type Pivot Axle Please read
Congratulations on your purchase of a JC Series Performer trike! The Performer JC Series is designed for everything from touring to commuting and
 Congratulations on your purchase of a JC Series Performer trike! The Performer JC Series is designed for everything from touring to commuting and shopping in the city. The JC Series frames are made of
3. Fit. 1 Owner s manual
 3. Fit NOTE: Correct fit is an essential element of bicycling safety, performance and comfort. Making the adjustments to your bicycle which result in correct fit for your body and riding conditions requires
TECHNICAL SUPPORT DOCUMENT 2018 CARBON MODELS 650B / 29 WARRANTY SMALL PARTS FRAME SPEC/SERVICING
 2018 CARBON MODELS 650B / 29 WARRANTY SMALL PARTS FRAME SPEC/SERVICING 2018 CARBON MODELS 650B / 29 PG.i WARRANTY INFORMATION OWNERSHIP REGISTER YOUR BIKE The original owner must register his / her new
1. General Safety Information. Silvio V2.2 Assembly Instructions Assembly. Adjust to the rider.
 Silvio V. Assembly Instructions support@cruzbike.com. General Safety Information WARNING to avoid serious injuries:. If you are unsure about fitting, testing and adjusting brakes or gearing on a bicycle,
Parts List. 7. Handlebars 8. Grips 9. Handlebar Stem 10. Front Brake 11. Front Wheel 12. Crank 13. Chain
 Woodworm Cruise Parts List 1. Free Wheel with Rear Hub 2. Fenders 3. Fender Stay 4. Quick Release 5. Saddle 6. Seat Post 7. Handlebars 8. Grips 9. Handlebar Stem 10. Front Brake 11. Front Wheel 12. Crank
DM-MARD (English) Dealer's Manual. ROAD MTB Trekking. City Touring/ Comfort Bike REAR DERAILLEUR XTR RD-M9100 RD-M9120
 Dealer's Manual. ROAD MTB Trekking. City Touring/ Comfort Bike REAR DERAILLEUR XTR RD-M9100 RD-M9120") (English) DM-MARD001-00 Dealer's Manual ROAD MTB Trekking City Touring/ Comfort Bike URBAN SPORT E-BIKE REAR DERAILLEUR XTR RD-M9100 RD-M9120 CONTENTS CONTENTS...2 IMPORTANT NOTICE...3 TO ENSURE SAFETY...4
(English) DM-MARD001-00 Dealer's Manual ROAD MTB Trekking City Touring/ Comfort Bike URBAN SPORT E-BIKE REAR DERAILLEUR XTR RD-M9100 RD-M9120 CONTENTS CONTENTS...2 IMPORTANT NOTICE...3 TO ENSURE SAFETY...4
BICYCLE ASSEMBLY INSTRUCTIONS. dutchcycles.com.au. Distribution Centre
 BICYCLE ASSEMBLY INSTRUCTIONS dutchcycles.com.au Distribution Centre Shed 68, 400-422 Somerville Road, Tottenham, VIC 3012 email: service@dutchcycles.com.au BICYCLE COMPONENTS KEY INTRODUCTION CONGRATULATIONS
Folding Dual Suspension MTB. Instruction Manual
 Folding Dual Suspension MTB Instruction Manual Introduction The Stowabike Folding MTB has been made to last and with proper maintenance, it will give you years of enjoyable rides and journeys. The following
SECTION 1 UNPACKING INSTRUCTIONS
 ANDEAN USER GUIDE SECTION 1 UNPACKING INSTRUCTIONS 2 REMOVE PART BOX, ACCESSORY BOX AND SADDLE AND SEATPOST. SET ACCESORIES AND SEAT ASIDE FOR FINAL. PARTS BOX ACCESORY BOX 3 UNSTRAP WHEEL BLOCKS AND HANDLEBAR
EZee Glider Manual. Tools needed for Assembly: Wrench (included) Philips Screwdriver (not included) Assembly Instructions
 Philips Screwdriver (not included) Assembly Instructions") EZee Glider Manual Congratulations on your purchase of the EZee Glider! Your glider is designed for years of nearly carefree use by your child. These instructions include how to set up your glider and
EZee Glider Manual Congratulations on your purchase of the EZee Glider! Your glider is designed for years of nearly carefree use by your child. These instructions include how to set up your glider and
TB Title: Mountain Bike Maintenance Part 1 of 2
 Technical Brief No.: TB-09-0528 Title: Mountain Bike Maintenance Part 1 of 2 For many New England mountain bikers and other cyclist, spring is that time of the year to make sure your bike is safe and ready
user manual hard eddie
 user manual hard eddie Welcome to the family AT INTENSE, WE HAVE ONE GOAL - TO PROVIDE THE RIDE OF YOUR LIFE. Our team of designers, engineers and product experts are focused on one thing every day: your
TABLE OF CONTENTS FRAME FEATURES INTRODUCTION
 S3 DISC MANUAL TABLE OF CONTENTS Introduction...1 Frame Features...2 Fork Preparation...3 Small Parts...5 Frame Preparation...6 Brake Housing Installation...7 Mechanical Cable Routing...9 Electric Cable
E-116 Assembly Guide
 E-116 Assembly Guide Table of Contents Overview of the assembly.... 2 1. Cable housing installation.... 3 2. Front brake installation.... 4 3. Rear brake installation... 5-6 4. Seatpost installation....
Final Assembly Instructions Bikes with Threaded Headsets
 Final Assembly Instructions Bikes with Threaded Headsets Thank you for buying your new bicycle from L.L.Bean. Read these instructions carefully before beginning the final assembly. Prior to shipping, our
Ladies Shopper Bike Assembly Manual 28C03
 Ladies Shopper Bike Assembly Manual 28C03 Ecosmo Ltd 1 Know your bike 1. Wheel 2. Rear Derailleur 3. Chain 4. Crank Set 5. Pedal 6. Seat Quick Lock 7. Saddle and Post 8. Frame 9. Front Light 10. Front
FRAMESET ASSEMBLY GUIDE TRUE GRIT. LaufCycling.com
 FRAMESET ASSEMBLY GUIDE TRUE GRIT LaufCycling.com Congratulations on your True Grit Frameset! We understand you are in a hurry to go riding a.s.a.p. - but please take a deep breath and read this installation
ZIPP VUMAQUAD INSTALLATION INSTRUCTIONS
 ZIPP VUMAQUAD INSTALLATION INSTRUCTIONS CAUTION All Zipp Crank and BB products should be installed by a professional bicycle mechanic using the appropriate tools. Zipp assumes no responsibility for damages
NITROGEN DISC 286A: ASSEMBLY GUIDE
 NITROGEN DISC 286A: ASSEMBLY GUIDE Valid for MY2019 Nitrogen Disc 286A Revision 1.0-07-26-2018 NITROGEN DISC 286A: Table of Contents 1. Tools Needed and First Aid Kit...3 2. Frameset inspection...4 3.
BOTTOM BRACKET BEARINGS
 BOTTOM BRACKET BEARINGS This basic tutorial will demonstrate the workings of a typical 3 piece bottom bracket, showing the removal and installation of the various components that make up the bearing system.
Owner s Manual. The most comfortable upright bicycles ever made.
 Owner s Manual The most comfortable upright bicycles ever made. At Day 6, we hope you will enjoy riding our bicycles as much as we enjoy designing them. We have truly combined the best features of a recumbent
DH-9downhill nine. TECHNICAL guide. Table of Contents. Assembly Instructions. Exploded Views
 DH-9downhill nine TECHNICAL guide Table of Contents Assembly Instructions Exploded Views 2 5 TOOLS of thetrade yeti style > DEAD BLOW HAMMER > ADJUSTABLE WRENCH > 5MM T HANDLE > 4MM T HANDLE > 6MM ALLEN
EZ-3 USX HD Supplemental Owner s Manual
 EZ-3 USX HD Supplemental Owner s Manual Find us online at SunSeeker.Bike Revised 2/2016 CONGRATULATIONS! Congratulations and welcome to the Sun Seeker family! You have selected one of the most comfortable
Rothan Owner s manual
 Rothan Owner s manual www.islabikes.co.uk 1. Brake levers 2. Brake pads 3. Saddle 4. Seatpost 5. Seatpost clamp 6. Stem 7. Stem bolts 8. Headset 9. Headset spacers 10. Headset adjuster bolt 11. Handlebars
Course outlineimportant: As personnel i
 Bike SA Inc Advanced Bike Maintenence Course Course outlineimportant: As personnel i nvolved in this program it is your responsibility to familiarise yourself with this document Please familiarise yourself
2019 MADONE ASSEMBLY MANUAL
 2019 MADONE ASSEMBLY MANUAL 2019 MADONE Rim brakes and Di2 drivetrain Rim brakes and mechanical drivetrain Disc brakes and Di2 drivetrain Disc brakes and mechanical drivetrain TABLE OF CONTENTS Common
Rocky Mountain Element Technical Manual. Rev B
 Rocky Mountain Element Technical Manual Rev B 1 Table of Contents Materials Required... 3 Suspension Pivot Torque Guide... 4 Small Parts Torque Guide... 5 Assembly Instructions... 6 1) Bearing Installation...
HELMETS SAVE LIVES!!! ALWAYS WEAR A PROPERLY FITTED HELMET WHEN YOU RIDE YOUR SCOOTER. DO NOT RIDE AT NIGHT. AVOID RIDING IN WET CONDITIONS.
 HELMETS SAVE CORRECT FITTING - MAKE SURE YOUR HELMET COVERS YOUR FOREHEAD. LIVES!!! ALWAYS WEAR A PROPERLY FITTED HELMET WHEN YOU RIDE YOUR SCOOTER. DO NOT RIDE AT NIGHT. AVOID RIDING IN WET CONDITIONS.
Owner s Manual 700c Fixed Gear Bicycles
 Owner s Manual 700c Fixed Gear Bicycles This manual contains important safety, assembly, operation and maintenance information. Please read and fully understand this manual before operation. Save this
Final Assembly Instructions Bikes with Threaded Headsets
 Final Assembly Instructions Bikes with Threaded Headsets Thank you for buying your new bicycle from L.L.Bean. Read these instructions carefully before beginning the final assembly. Prior to shipping, our
Rothan Owner s manual.
 Owner s manual www.islabikes.com www.islabikes.com 1. Brake levers 2. Brake pads 3. Saddle 4. Seatpost 5. Seatpost clamp 6. Stem 7. Stem bolts 8. Headset 9. Headset spacers 10. Headset adjuster bolt 11.
Instructions for Assembly and Operation
 Instructions for Assembly and Operation Congratulations on the purchase of your new bike! With proper assembly and maintenance it will offer you years of enjoyable riding! IMPORTANT: Carefully read and
Oversized Pulley Wheel System for Shimano Mounting & Maintenance
 Oversized Pulley Wheel System for Shimano Mounting & Maintenance Congratulations with your new CeramicSpeed Oversized Pulley Wheel System for Shimano Personally, I want to thank you for joining the growing
HEIGHT ADJUSTABLE SEATPOST USER MANUAL
 HEIGHT ADJUSTABLE SEATPOST USER MANUAL This user manual covers the following models: Supernatural, Supernatural Remote, Supernatural Beam, Supernatural 272, Supernatural 272 Remote, Dropzone, Dropzone
We strongly recommend watching our video tutorial for the easiest installation process.
 Introduction We strongly recommend watching our video tutorial for the easiest installation process. GTRO is dedicated for all non-sports bicycles. Please, remember it has not been tested for heavy-duty
SCOTT VOLTAGE FR USER MANUAL
 SCOTT VOLTAGE FR USER MANUAL All rights reserved 2017 SCOTT Sports SA Distribution: SSG (Europe) Distribution Center SA, P.E.D. Zone C1, Rue du Kiell 60, 6790 Aubange, Belgium v6.3/040717 WWW.SCOTT-SPORTS.COM
R5 DISC MANUAL EN. Version 1 I
 R5 DISC MANUAL EN Version 1 I 30.04.2017 TABLE OF CONTENTS Introduction...1 Frame Features...2 Fork Preparation...3 Small Parts...5 Frame Preparation...6 Brake Housing Installation...7 Mechanical Cable
ST Shimano Total Integration. Technical Service Instructions. General Safety Information SI-6CT0B
 Technical Service Instructions SI-6CT0B t ST-4400 Shimano Total Integration Shimano Total Integration Features The Shimano Total Integration TIAGRA series features a dual action control lever which actuates
Co-Motion Co-Pilot Bicycles for travel
 Revised October 2014 Co-Motion Co-Pilot Bicycles for travel Packing and travel instructions Eugene Oregon USA Toll free 1-866-282-6336 www.co-motion.com Congratulations! A Co-Motion Co-Pilot is a great
Owner s Manual for Multi Speed & Freewheel Bicycles This Owner's Manual contains assembly, operation, and maintenance instructions.
 Your Model Number is: (write your model number here) Owner s Manual for Multi Speed & Freewheel Bicycles This Owner's Manual contains assembly, operation, and maintenance instructions. WARNING: - Check
MODEL: COMMUTER / ROAD BIKE
 STEP BY STEP BUILD GUIDE MODEL: COMMUTER / ROAD BIKE TABLE OF CONTENTS TOOLS 1 LET S GET STARTED 2 INSTALLING THE QUILL STEM 3 INSTALLING THE FRONT FENDER 4 INSTALLING THE QUICK RELEASE 5 INSTALLING THE
Special instruction of installation for SAINT FH-M800/RD-M800 and FH-M805/RD-M805
 Technical Service Instructions SI-5VB0E t RD-M805 / RD-M800 Rear derailleur Special instruction of installation for SAINT FH-M800/RD-M800 and FH-M805/RD-M805 A hub axle is an essential component for the
Item N o.: Item N am e:40cm Boys Rival Bike
 Item N o.:42272892 Item N am e:40cm Boys Rival Bike 9 bell 8 grip 30 crash pad 10 brake lever 26 wheel reflector 22 saddle 23 seat post 25 rear reflector 24 quick release 6 handle bar 7 stem 2 top tube
Installation Instructions
 Owner s Manual Installation Instructions It is extremely important that your ROCK SHOX fork is installed correctly by a qualified technician with proper tools. Improperly installed forks are extremely
TECHNICAL SPECIFICATIONS 1 BLUE PAPERS OIZ TECHNICAL MANUAL
 TECHNICAL SPECIFICATIONS BLUE PAPERS OIZ TECHNICAL MANUAL TECHNICAL SPECIFICATIONS CONTENT GEOMETRY AND SPECIFICATIONS 3 FRAME MATERIAL AND CARE 5 OIZ FRAME PARTS 6 CABLE ROUTING 3 TORQUE 0 SHOCK PREASSURE
NEVADA BICYCLING GUIDE
 NEVADA BICYCLING GUIDE BE BICYCLE SAFE EVERY TIME YOU RIDE LET S ALL BE SAFE TOGETHER. In Case of Emergency Contact: Name: Phone: Relationship: REMEMBER TO ALWAYS, BE SAFE AND BE SEEN! Before you head
2019 MADONE ASSEMBLY MANUAL
 2019 MADONE ASSEMBLY MANUAL 2019 MADONE Rim brakes and Di2 drivetrain Disc brakes and Di2 drivetrain Rim brakes and mechanical drivetrain Disc brakes and mechanical drivetrain TABLE OF CONTENTS Common
DISASSEMBLING & REASSEMBLING CARTRIDGE INSTALLING SEATPOST ON BIKE
 INTRODUCTION BILL OF MATERIALS SPECIFICATIONS & TOOLS PROCEDURES DISASSEMBLING & REASSEMBLING CARTRIDGE INSTALLING SEATPOST ON BIKE OPERATION OF SEATPOST GIANT LIMITED WARRANTY 1 INTRODUCTION Congratulations
TRAILMATE METEOR ASSEMBLY MANUAL
 TRAILMATE METEOR ASSEMBLY MANUAL (DISC BRAKE VERSION) The Trailmate Meteor recumbent has been designed for easy assembly. This means more time to enjoy the smooth ride with single speed, 3 speed coaster
Cycling. Scout s Name: Unit: Counselor s Name: Counselor s Ph. hypothermia, heat reactions, frostbite, dehydration, insect stings, tick.
 Cycling Merit Badge Workbookk This workbook can help you but you still need to read the merit badge pamphlet (book). No one can add or subtract from the Boy Scout Requirements #33216. Each Scout must do
RADON 237A: ASSEMBLY GUIDE. Revision Valid for MY2017 Radon
 RADON 237A: ASSEMBLY GUIDE Revision 3.0-05-29-2017 - Valid for MY2017 Radon RADON 237A: Table of Contents 1. Tools Needed and First Aid Kit... 3 2. Sizing Chart... 4 3. Seat Post Collar Assembly... 5 4.
Shiftable Unicycle Hub, Type KH
 Shiftable Unicycle Hub, Type KH 10/06/30 schlumpf innovations gmbh Dorfstr. 10 CH - 7324 Vilters/Switzerland Tel: +41 (0)81 723 80 09 Fax: +41 (0)81 723 83 64 email: info@schlumpf.ch www.schlumpf.ch Geschäftsführer/CEO:
Beinn 29 Owner s manual
 Owner s manual Setting up your 4 13 8 12 1 14 15 19 16 7 5 6 5 22 20 9 10 11 21 2 3 1. Brake levers 2. Brake calipers 3. Rotors 4. Saddle 5. Seatpost 6. Seatpost clamp 7. Saddle clamp 8. Stem 9. Stem bolts
USER GUIDE TO POWER ASSISTED BIKES
 USER GUIDE TO POWER ASSISTED BIKES 1 PAGE CONTENTS Page. 3 Unpacking Page. 3-4 Easy steps to get started Page. 5 General Assembly Instructions Page. 6 Aligning H/Bars, Page. 7 Tightening pedals onto Crank
Luath Owner s manual.
 Luath Owner s manual www.islabikes.com www.islabikes.com Setting up your Luath 3 11 7 12 1 16 14 6 4 5 8 9 10 13 15 2 21 19 20 22 23 17 18 Serial number Please make a record of your serial number. This
owner s manual 2012 yeti sb66
 owner s manual 2012 yeti sb66 YETI CYCLES 600 Corporate Circle, Unit D Golden, CO 80401 888.576.9384 www.yeticycles.com Table of Contents Brand Overview 06 Frame Features 08 Geometery 10 Maintenance Schedule
Troubleshooting Guide
 Troubleshooting Guide This troubleshooting guide outlines quick fixes to the most common technical questions about the ElliptiGO. If the problem persists or you feel uncomfortable performing these actions,
ASSEMBLY GUIDE AROUND THE BLOCK - 1, 3, 7, & 21 SPEED SIXTHREEZERO
 ASSEMBLY GUIDE AROUND THE BLOCK - 1, 3, 7, & 21 SPEED SIXTHREEZERO OUR COMMITMENT We want you to love your bike as much as we do. If you run into any issues, no matter how small, let us know and we ll
Assembly Tools. Assembly will take about an hour
 Assembly Guide Assembly Tools Included in your parts box: Pedals Toolkit (4+5mm combo Allen wrench, 13+15mm combo open-end wrench) Touch-up paint Spare fuses (for battery) Assembly will take about an hour
SANTANA STOWAWAY TANDEM WITH AIRLINER SAFECASE AND FTS FOAM TRAY SYSTEM ASSEMBLY AND DISASSEMBLY
 SANTANA STOWAWAY TANDEM WITH AIRLINER SAFECASE AND FTS FOAM TRAY SYSTEM ASSEMBLY AND DISASSEMBLY Congratulations! You are now the proud owner of the world s most travel-ready, performance tandem. The following
FRAME FEATURES TABLE OF CONTENTS INTRODUCTION. A guide to your Cervélo C Series frame.
 C SERIES MANUAL TABLE OF CONTENTS Introduction...1 Frame Features...2 Fork Preparation...3 Small Parts...5 Frame Preparation...6 Brake Housing Installation...7 Mechanical Cable Routing...9 Electric Cable
Bicycle Owner s Manual
 Bicycle Owner s Manual The following manual provides assembly and maintenance instructions, as well as a guide to safe usage of your new bicycle. WARNING Read the complete Owner s Manual before starting
Quattrocycle BV. Quattrocycle. User Manual. Last update February Quattrocycle BV Bremkant EJ Middelbeers. User Manual Quattrocycle 1
 Quattrocycle User Manual Last update February 2010 Quattrocycle BV Bremkant 6 5091 EJ Middelbeers User Manual Quattrocycle 1 Table of Contents Page Chapter 1: Introduction 3 Chapter 2: Instructions for
Bicycle Owner's Manual Easy Access Bike
 Bicycle Owner's Manual Easy Access Bike AGE: FROM 9 YEARS OLD AND UP IMPORTANT Check bike after assembly or any adjustments. Consult bicycle retailer with questions. Always wear a helmet. Children should
The Hub Bike Co-Op s Quick Guide to Winter Specific Maintenance and Riding:
 The Hub Bike Co-Op s Quick Guide to Winter Specific Maintenance and Riding: BEFORE winter begins Thoroughly clean the bike with a dry rag or soapy water Apply a frame polish or wax to help protect the
VERSA BIKE RACK INSTRUCTIONS
 VERSA BIKE RACK INSTRUCTIONS Models #8, 8 Important This rack is designed for use with a or. receiver hitch. The rack is designed to hold a maximum of two bicycles. Do not use it for anything other than
Final Assembly Instructions Bikes with Quill Stems
 Final Assembly Instructions Bikes with Quill Stems Thank you for buying your new bicycle from L.L.Bean. Read these instructions carefully before beginning the final assembly. Prior to shipping, our expert
E-118 Assembly Guide
 E-118 Assembly Guide Table of Contents Overview of the assembly.... 2 1. Fork installation.... 3-4 2. Cable housing installation.... 5 3. Handlebar installation... 6 4. Front brake installation.... 7-8
Owner's Manual Product Line
 Owner's Manual 2017 Product Line Table of contents 1. Safety Information 2. Quick release procedure I. Installation II. Adjustment and operation III. Inspection of proper installation 3. Registering your
INTRODUCTION TABLE OF CONTENTS 1. ENGLISH INTRODUCTION...PAGE 1 GEOMETRY / FRAME SPECIFICATIONS...PAGE 2-3 FRAME FEATURES...
 TABLE OF CONTENTS INTRODUCTION...PAGE GEOMETRY / FRAME SPECIFICATIONS...PAGE - FRAME FEATURES...PAGE -5 SEAT POST SET-UP...PAGE -5 FRAME HARDWARE KITS...PAGE 6-9 REPLACEABLE DERAILLEUR HANGER...PAGE 0-
owner s manual 2012 yeti sb95
 owner s manual 2012 yeti sb95 YETI CYCLES 600 Corporate Circle, Unit D Golden, CO 80401 888.576.9384 www.yeticycles.com Table of Contents Brand Overview 06 Frame Features 08 Geometery 10 Maintenance Schedule
DM-MBRD (English) Dealer's Manual. ROAD MTB Trekking. City Touring/ Comfort Bike. Rear Derailleur SLX RD-M7000 DEORE RD-M6000
 Dealer's Manual. ROAD MTB Trekking. City Touring/ Comfort Bike. Rear Derailleur SLX RD-M7000 DEORE RD-M6000") (English) DM-MBRD001-04 Dealer's Manual ROAD MTB Trekking City Touring/ Comfort Bike URBAN SPORT E-BIKE Rear Derailleur SLX RD-M7000 DEORE RD-M6000 CONTENTS IMPORTANT NOTICE... 3 TO ENSURE SAFETY... 4
(English) DM-MBRD001-04 Dealer's Manual ROAD MTB Trekking City Touring/ Comfort Bike URBAN SPORT E-BIKE Rear Derailleur SLX RD-M7000 DEORE RD-M6000 CONTENTS IMPORTANT NOTICE... 3 TO ENSURE SAFETY... 4
Beinn Owner s manual
 Beinn Owner s manual www.islabikes.co.uk Setting up your Islabike You can view our how to set up your Beinn video guides on our website: http://www.islabikes.co.uk/info-hub/islabike-setup-video-guides
Bicycle Owner s Manual Children s Bicycles
 Bicycle Owner s Manual Children s Bicycles The following manual provides assembly and maintenance instructions, as well as a guide to safe usage of your new bicycle. WARNING - Read the complete Owner s