Diving Procedures for Volunteer Divers
|
|
|
- Wesley Douglas
- 6 years ago
- Views:
Transcription

1 Diving Procedures for Volunteer Divers 2017 NCAFF Dive Safety Office North Carolina Aquarium at Fort Fisher 12/1/2017
2 2

3 North Carolina Aquarium at Fort Fisher Diving Procedures for Volunteer Divers 3
4 North Carolina Aquarium at Fort Fisher 900 Loggerhead Road, Kure Beach, NC, First Edition 2010 Second Edition 2011 Third Edition 2013 Fourth Edition 2014 Written and Edited by Dive Safety Staff: Brian Germick Dive Safety Officer North Carolina Aquarium at Fort Fisher Jason Sheremeta Assistant Dive Safety Officer North Carolina Aquarium at Fort Fisher Copyright 2014 North Carolina Aquarium at Fort Fisher 4
5 Revision History: August 8, 2010 July 29, 2011 September 30, 2011 November 2, 2011 November 18, 2011 November 30, 2011 December 6, 2011 December 7, 2011 March 6, 2013 March 20, 2013 May 14, 2013 September 6, 2013 January 15, 2014 November 19, 2014 December 1, 2017 Version 1 printed. Revision History Added, Exhibit Diving Manual added to Appendices, section name change to: Appendix H Exhibit Diving Procedures. Updated dive log (Figure 2) Page 13. Added address line on medical form Appendix C. Appendix L added Hazardous Marine Animals and Bacteria Along the Carolina Coast. Added Figure 4 Cleaning Map for the Cape Fear Shoals Exhibit Page 28. Dive credentials clearly defined Page 5. Index added. Dive log updated page 13, Liability Waiver updated, Diver Check list updated Appendix A. Added dive show game questions to Appendix I. Added conservation questions Appendix I. Text Editing, Added Job Description for Volunteer Divers Page 9. Added Bluntnose Stingray sheet Appendix I. Updated Volunteer Dive physical. Appendices C-E. Updated Vounteer Swim test. 5
6 Introduction Welcome to the North Carolina Aquarium at Fort Fisher (NCAFF). Thank you for volunteering. As a volunteer, you provide the essential time, energy and talent that keep this aquarium among the top ten most visited attractions in the state. This volunteer dive manual outlines the general responsibilities and practices of volunteer divers at the aquarium. The aquarium maintains the highest standards for all divers, subscribing to the guidelines of the American Academy of Underwater Sciences (AAUS), the Occupational Safety and Health Act (OSHA) and the NCAFF Dive Control Board for its diving practices. Although OSHA diving regulations and the scientific diving exemption contained within those regulations apply only to employees of the Aquarium, this manual will mention OSHA when describing some practices and tasks. This is needed because some practices and tasks of volunteer divers are often intertwined with those of employee divers or are occurring at the same time. This manual is intended as a training and review guide for volunteer divers at the aquarium. This manual includes prerequisites for diving, diver status designations, diver responsibilities including basic diving practices at the aquarium and topside responsibilities. This manual is not intended to supersede the NCAFF Dive Safety Manual; however, it is intended as a primer for new dive volunteers. For scientific dive training guidelines at the aquarium, consult the NCAFF Dive Safety Manual. Please note that the appendices of this document contain supplemental materials concerning animal husbandry, filter mechanics, and forms required for volunteer diving at NCAFF. This manual can be referenced in sections or read as a whole. It is meant to provide a firm understanding of procedures that divers must know to participate in the volunteer dive program at NCAFF. This document is subject to updates. The most recent updates are designated on the Section Updates page of this document, including date, section and page that contain changes. 6
7 Table of Contents Revision History: 5 Introduction 6 Table of Contents 7 List of Figures 8 Volunteer Diver Description of Duties 9 Prerequisites for Diving 9 Dive Status 11 Dive Teams 13 Diving Procedures 13 Other Volunteer Tasks 18 Dive Equipment 18 Cleaning Dive Gear 22 Daily Dive Routines 24 Restroom and Shower Care 26 Dive Precautions for Exhibit Care 27 Animal Interaction 29 Emergency Procedures 30 Zoonotic Diseases in Brief 32 Alerting Animal Husbandry Basics 37 Fish ID 39 Cape Fear Shoals Dive Presentation 52 Filtration Systems 84 References 92 Appendices 97 Appendices A-F Forms 99 Appendix G MSDS Terg-o-cide 112 Appendix H Exhibit Procedures 118 Appendix K Further Readings 160 Appendix L Hazardous Marine Life 190 Appendix M Index 196 7
8 List of Figures Figure 1 US Navy Dive Tables used to calculate pressure groups for dives at the NCAFF (Technical Diving International, 2005). 16 Figure 2 Sample of the NC Aquarium at Fort Fisher Diving Log. 17 Figure 3 Depressed white stem on the pressure indicator shows that it is empty (left). An elevated stem indicates that the air source is full (right). 21 Figure 4 Cleaning Map for the Cape Fear Shoals Exhibit. 28 Figure 5 Atlantic Spadefish (Chaetodipterous faber) (Froese, R. and D. Pauly, 2010). 38 Figure 6 Biological Filtration Using Bio-Balls. 84 Figure7 A Row of fluidized bed filters provide biological filtration for the Cape Fear Shoals exhibit. 85 Figure 8 A smaller fluidized bed filter provides the same function for smaller exhibits. 85 Figure 9 A Purpose Built Activated Carbon Filter Made By NCAFF Aquarist. 86 Figure 10 A Commercially Built Activated Carbon Filter. 86 Figure 11 A Small Foam Fractionator (Protein Skimmer). 87 Figure 12 An Ozone Contact Chamber Used To Oxidize Organics 88 Figure 13 Sand Filters Force Water Through The Chamber At A High Rate Of Speed. 89 Figure 14 Large Sand Filters Work With Other Filters To Clean Impurities From the Water. 89 Figure 15 A Bag Filter In Operation At The Touch Tank Life Support. 90 8
9 Volunteer Diver Description of Duties A volunteer diver assists NCAFF husbandry staff with in-tank algal removal of salt and fresh water exhibits. They interact with aquarium visitors during dive presentations and act as safety divers while diving. Volunteer divers also participate in special event activities that further the NCAFF s mission. Duties include: algal removal from acrylic panels, artificial rockwork and corals, dive show demonstrations and keeping current on the exhibits and collection information. In addition, a diver must learn to observe animal behavior, to report any irregularities to the Dive Safety Officer or the Assistant Dive Safety Officer, to keep accurate records, and to maintain clean gear and work areas. Occasionally, a diver may be requested to assist Aquarium staff in other areas or exhibits as needed. While volunteering, safety must always be a top priority. The volunteer diver must be familiar with all safety procedures as specified by NCAFF. NCAFF reserves the right to remove any volunteer from the program if his or her actions do not represent the Aquarium in a safe, professional, courteous, and knowledgeable manner. Prerequisites for Diving Becoming a volunteer diver at the North Carolina Aquarium at Fort Fisher is a goal of many volunteers who devote their time, energy and creativity to the aquarium. There are, however, specific requirements that a diver must meet before becoming an aquarium diver. Divers must meet these prerequisites before being considered for the volunteer dive program. Dive Certification - Each dive candidate must be certified as an Open Water diver from a nationally accredited diving organization (PADI, NAUI, SSI, etc.), and present his/her dive credentials to the dive safety office before engaging in any diving activities with the North Carolina Aquarium at Fort Fisher. Volunteer Hours Each dive candidate must complete 25 volunteer hours with the education department before beginning diver training. 9
10 General Briefing The dive candidate must attend a North Carolina Aquarium Volunteer General Information Briefing Session. Contact the volunteer coordinator for scheduling a briefing session. (See Appendix A for the Probationary Diver Training Checklist). Medical Forms Physician and participant forms entitled, Diving Medical Exam Overview for the Examining Physician, Medical Evaluation of Fitness for Scuba Diving Report and Diving Medical History, must be completed before scheduling any type of water activity, including the swim test. (See Appendix 2-4 for these forms). Liability Release Form Each diver must sign a Liability Release form before engaging in any volunteer activities with the North Carolina Aquarium at Fort Fisher. This form must be signed each year of volunteer activities (See Appendix E). Swim tests Candidate diver must successfully complete a watermanship evaluation that includes: 1. Swim 200 yards in less than 12 minutes without swim aids. 2. Tread water in water too deep to stand without swim aids for 10 minutes, or 2 minutes without the use of hands. Check Out Dive Each volunteer diver must complete the checkout dive with the Dive Safety Officer (DSO) or Assistant Dive Safety Officer (ADSO) for an initial assessment of diving ability. The DSO or ADSO will demonstrate each skill followed by the volunteer diver repeating each skill. This check out dive takes place in the Cape Fear Shoals exhibit and must be scheduled with the DSO. The skills assessed are: 1. Equipment assembly, adjustment, preparation 2. Pre-dive safety check 3. Buoyancy check at the surface attain neutral buoyancy 4. Proper descent 5. Regulator recovery and clearing 10
11 6. Mask removal, replacement and clearing 7. Use of alternate air source (Spare Air) 8. Free-flow regulator breathing 9. Controlled emergency swimming ascent 10. Hovering in mid-water for 30 seconds 11. Underwater swim without a mask 12. Remove and replace weights underwater 13. Remove and replace scuba unit underwater 14. Remove and replace scuba unit on the surface 15. Remove and replace weight system on the surface (PADI, 2005) Dive Status There are several levels of diver status for volunteer divers to achieve at NCAFF. Listed below are the definitions of each designation that a volunteer diver can achieve. A good motto to remember whether pursuing a new dive status or not, is that a good diver is always learning (Dive Training, 2010). Probationary Diver Once the pre-requisites have been successfully met, a volunteer diver becomes a probationary diver. During the probationary period a diver will be expected to master these basic skills: Basic SCUBA knowledge at the Open Water Diver level 1. Animal identification 2. Husbandry knowledge assessment 3. Adult Cardio-Pulmonary Resuscitation ARC standards 4. Adult First Aid ARC standards 5. Oxygen Provider for SCUBA related injuries 6. Basic SCUBA Rescue Skills 11
12 7. SCUBA equipment rigging and de-rigging 8. Cylinder handling procedures 9. Dive procedures 10. Dive facility operations 11. Diver health and welfare 12. Dive control procedures 13. Underwater skills assessment 14. Interspiro MkII or OTS Guardian Full-face Mask (FFM) familiarization dive 15. FFM out-of-air emergency reaction dive A probationary diver has limited dive privileges at the aquarium. The DSO or ADSO must be on the aquarium premises in order for a probationary diver to carry out diving activities. A probationary diver must always dive with divers who are scientific divers in training, scientific divers, or the DSO or ADSO. They may not act as a safety diver but can dive as a third diver or observer. Once the probationary diver has completed 12 supervised dives successfully, the diver is eligible to join a volunteer dive team or be listed as a substitute diver. Safety Diver To become a safety diver, a diver must complete satisfactorily 12 probationary dives and complete the full facemask training and check out dive with the DSO. The checkout is conducted in the Cape Fear Shoals tank. It includes clearing the mask, emergency procedures, and a swimming ascent using the alternate air source. Aquarium Scientific Diver in Training Once the diver fulfills probationary diver requirements, the diver attains scientific diver in training status. A volunteer diver with this designation may dive with probationary, scientific divers in training, presentation divers, or scientific divers. They can function as safety divers, remove algae or tasks that improve animal welfare during the dive. The diver must obtain full face mask training before being considered as a presentation diver. Presentation Diver To become a presentation diver, the volunteer diver must complete the animal husbandry test with a grade of 75 percent or higher, attend a presentation diver workshop (or have the equivalent experience) and successfully complete full face mask training including an out of air drill using the full face mask. Scientific Diver Additional dive certifications and a more extensive dive physical makes this level of training time consuming and more expensive for a volunteer diver. 12
13 NCAFF offers additional dive courses to attain this status for volunteers at the volunteer s expense. The time commitment for these certifications is extensive, but if you would like to pursue this level of training, please refer to the NCAFF Dive Safety Manual and discuss additional requirements with the DSO. Active Diver Divers must complete a minimum of 12 dives a year to maintain active diver status. If a diver falls below this requirement, the swim tests and skills must be repeated. Dive Teams Volunteer divers are assigned to one of seven dive teams. These teams consist of the team leader, presentation divers, safety divers and divers caring for animal welfare. The team leader is responsible for assigning gear and tasks to each team member. The team leader is also responsible for all record keeping for team activities. He/She must record dive times and pressures on the chalk board and keep the official dive record recorded on the NCAFF Dive Log. Divers must check the dive log to ensure that they are correct, but the team leader bears the responsibility of ensuring the log is correct in its entirety and sign it at the end of each day. The log is then placed in the dive log box on the counter in the dive locker office. Place the logs on top of the stack so that they remain in chronological order. Diving Procedures The procedures put forth in this section have been adapted from the North Carolina Aquarium at Fort Fisher Dive Safety Manual. For complete information concerning regulations for scientific divers, please refer to the Dive Safety Manual located in the dive locker office. All NCAFF divers must adhere to these requirements while diving for the aquarium. Dive Plans Dives must be based on the competency of the least experienced diver. Remember to plan your dive and dive your plan (PADI, 2005). 13

14 Diver s Responsibility Divers personally must ensure that their equipment is in proper working order and that the equipment is suitable for the dive. Each diver must have the capability of achieving and maintaining positive buoyancy. Solo Diving Prohibition All divers must have a buddy. The buddy system is based upon mutual assistance, especially in the case of an emergency. Solo diving is strictly prohibited. Refusal to Dive The decision to dive is that of the diver. A diver may refuse to dive without fear of penalty whenever he/she feels it is unsafe for him/her to make the dive. Safety The ultimate responsibility for safety rests with the individual diver. It is the diver s responsibility and duty to refuse to dive if, in his/her judgment, conditions are unsafe or unfavorable, or if he/she would be violating the precepts of his/her training or the regulations in this standard. Termination of the Dive It is the right of the diver to terminate the dive without fear of penalty whenever the diver feels it is unsafe to continue the dive unless it compromises the safety of another diver already in the water. The dive shall be terminated while there is still sufficient cylinder pressure to permit the diver to safely reach the surface. Divers must keep track of their air usage and return to the surface with at least 800 psi in the scuba cylinder. IT IS EVERY DIVER S RIGHT TO REFUSE TO DIVE OR TO TERMINATE A DIVE WITH NO QUESTIONS ASKED. Emergencies and Deviations from Regulations Any diver may deviate from the requirements of this standard to the extent necessary to prevent or minimize a situation that is likely to cause death, serious physical harm, or major environmental damage. A written report of such actions must be submitted to the Dive Control Board explaining the circumstances and justifications. 14
15 Required Incident Reporting All diving incidents requiring recompression treatment or resulting in moderate or serious injury or death shall be reported to the NCAFF s Dive Control Board and AAUS. The NCAFF s regular procedures for incident reporting including those required by the AAUS shall be followed. The report will specify the circumstances of the incident and the extent of any injuries or illnesses. The aquarium shall investigate and document any incident of pressure-related injury and prepare a report that is to be forwarded to AAUS during the annual reporting cycle. If an incident occurs on a dive, this record will be kept for a period of 5 years. Record Keeping Requirements A log must be kept of each dive. A separate log must be submitted for each exhibit dive for that day. The NCAFF uses the Smooth Log, an adaptation of the US Navy Dive log, and the Unlimited/No-Decompression Limits and Repetitive Group Designation Table for Unlimited/No Decompression Air Dives table for recording dive data and calculating pressure group designations. The diving log must include at least the following information: 1. Name of diver and dive buddy. 2. Date, time and location. 3. Diving modes used. (SCUBA, Full Face Mask, Hookah). 4. General nature of diving activities. 5. Approximate surface and underwater conditions. 6. Maximum depths, bottom time and surface interval time. 7. Diving tables or computers used. 8. Detailed report of any near or actual incidents (NCAFF, Office of Dive Safety, 2008). Dive Tables and Log Each dive must be recorded on a NCAFF Dive Log sheet. Dive tables must be completed using the Unlimited/No-Decompression Limits and Repetitive Group Designation Table for Unlimited/No Decompression Air Dives [US Navy dive tables] (Naval Sea Systems Command, 1999). This table is ideal for aquarium diving because it includes table calculations for diving as shallow as ten feet, and most of NCAFF s exhibits are less than ten feet deep. The logs are official records and are kept for a period of three years. If a dive involves an incident, accident or fatality, the log will be kept for five years. Examples of the US Navy dive tables and the smooth dive log are shown on the following pages. 15
.")
16 Figure 1 US Navy Dive Tables used to calculate pressure groups for dives at the NCAFF (Technical Diving International, 2005). 16

17 Figure 2 Sample of the NC Aquarium at Fort Fisher Diving Log. DIVE LOGS ARE OFFICIAL RECORDS. A DIVE THAT INVOLVES AN INCIDENT, ACCIDENT OR FATALITY THE LOG WILL BE KEPT FOR FIVE YEARS. 17
18 Other Volunteer Tasks Volunteer divers perform many tasks that are essential to maintaining smooth diving operations at the aquarium. Volunteer divers present the dive program in the Cape Fear Shoals exhibit. They also help maintain other tanks in the marine building and in the conservatory such as: Shark Tooth Ledge, Roan Island (Black Water Swamp), Raven Rock, and Hidden Hunters. These exhibits are cleaned on a regular basis. Cleaning - Although diving is the central activity dive volunteers perform, there are other tasks that divers must do to maintain the dive operation. Responsibilities such as cleaning dive gear, doing laundry, cleaning the lavatories and cleaning floors are also essential tasks volunteers do on an ongoing basis. Logging Hours Volunteers must continue to use Volgistics, the volunteer login system. A computer terminal is located in the docent lounge for logging into the system or volunteers may log in via the internet to track their volunteer hours. Dress Code Volunteers must continue to adhere to the Aquarium dress code. 1. A blue aquarium volunteer collared shirt issued by the volunteer coordinator. 2. Khaki tan trousers, shorts or skirts. 3. Closed toe shoes (no sandals or flip-flops). 4. Volunteers must wear an NCAFF issued name tag while on the premises. Dive Equipment The NCAFF provides dive gear for every diver to use on site. Divers are responsible for proper equipment use, for cleaning, proper disinfection and stowing gear after use. All equipment should be in good working order. If equipment is in need of repair, bring it to the dive safety office and always report broken equipment to the DSO. Never attempt any repairs yourself. 18
 The dive volunteers and staff use BCDs hanging on the wall nearest the entry ladder to the Cape")
.")
19 ALWAYS REPORT BROKEN GEAR TO THE DSO AND NEVER ATTEMPT EQUIPMENT REPAIR YOURSELF. Listed below is an inventory of gear available for volunteers to use: Buoyancy Control Devices (BCDs) The dive volunteers and staff use BCDs hanging on the wall nearest the entry ladder to the Cape Fear Shoals acclamation tank. They are back inflating BCDs with an integrated weight system and vary in size. The weight pockets are kept in a plastic crate under the gear assembly bench. Tanks Tanks used within the facility are steel 80 cubic foot tanks. Full tanks are located on the dive deck. A green tag looped around the valve indicates a full tank (over 3,000 psi). A white designates a short fill (between 2,000 psi and 3,000 psi), the tank s psi must be written on the white tag with a pencil so that the next diver will know the actual psi of the tank. A red tag indicates an empty tank (less than 2,000 psi but NOT less than 800 psi). Tanks with less than 2,000 psi must be returned to the rack for filling. If a tank falls, notify the DSO or ADSO so that the tank can be inspected for damage. DROPPED TANKS MAY CAUSE INJURY OR DEATH. REPORT ANY TANKS THAT HAVE FALLEN TO THE DSO FOR INSPECTION AND REPAIR. DIN Valves Tanks at NCAFF are fitted with DIN valves. These are valves in which the first stage of the regulator screws into the tank valve, trapping the O-ring securely. These are more reliable valves than yoke valves because the o-ring is well protected within the receptacle, beyond the screw threads (Flanders, 2008). Regulators Regulators are assigned by each dive team leader and hang in the dive locker. For the Cape Fear Shoals Exhibit, use rigs with no octopus second stage since redundant air sources are used in that exhibit. Rigs with an octopus may be chosen for 19
20 other exhibits. All rigs are attached to a DIN first stage. Remember to screw the first stage into the tank valve carefully; avoid cross threading or over tightening the regulator. To avoid over tightening the regulator, never use any tools to tighten any fittings. Full Face Mask with communication gear These masks hang in the dive locker office with the other regulators. Before using these masks, a volunteer must be trained and complete a check out dive with the DSO in the Cape Fear Shoals exhibit. It is essential that the diver be proficient with using the full face mask before the diver presents the program during the dive show or performs as a safety for the dive show. Octopus Some regulators are equipped with an octopus for an alternate air source. These rigs are only used in designated exhibits such as Roan Island (Black Water Swamp), Hidden Hunters, Blockade Runner and Shark Tooth Ledge. If divers are unsure of which rig to use, the diver should ask the DSO, ADSO or dive team leader. Masks Masks are provided by the aquarium for use in the exhibits. Divers can make arrangements with the DSO if the diver needs to use a personal mask. Personal masks must be disinfected for at least 15 minutes and rinsed before it can be introduced into an exhibit. Ideally, these masks should be black or clear with no patterns or prominent logos visible. Fins Several sizes and styles of fins are located near the dive ladder for use in the Cape Fear Shoals exhibit. Divers should select fins in advance of the dive. Inspect and adjust fin straps before entering the exhibit; this will prevent delays due to fin problems at the beginning of the dive. Gloves Small, medium and large gloves are located on the safety rail. Make sure that gloves are free of holes when choosing them for use. If gloves appear to be worn out, bring them to the dive office and alert the DSO or ADSO. Weights Hard and soft weights are located on the second shelf of the dive assembly bench. Inspect the soft weights before use to ensure they are not torn and will not spill the lead shot contents into the exhibit. After use spray the weights with fresh water and return to the shelf. Wetsuits The aquarium dive locker has wetsuits in three millimeter, five millimeter and some seven millimeter thicknesses and in a variety of men s and women s sizes. Wetsuits are disinfected after use so that they are hygienic for the next diver and safe for use in different exhibits throughout the facility. Dive Boots There are a variety of dive boot sizes and styles along the wall hanging under the wetsuits for use at the aquarium. Boots are disinfected after use. 20


21 DO NOT USE WORN OUT OR BROKEN DIVE GEAR. IT IS DANGEROUS, DISRUPTIVE AND UNPROFESSIONAL. Redundant Air Source Divers are equipped with a redundant air source in case of an out of air emergency. These units are located in the dive locker office in the black cabinet. Redundant air source cylinders are holstered and mounted on the BCD so that the diver can easily locate it if it is needed. No additional regulator is required for use with the redundant air source. The regulator is a part of the unit and is ready for use. Ensure that the unit has been filled with air before proceeding to dive. When the redundant air source is full, the white stem on the pressure indicator is elevated. When it is depressed, it is empty. The redundant air source must be used in the Cape Fear Shoals exhibit. Depressed stem shows empty air source. Elevated stem shows full air source. Figure 3 Depressed white stem on the pressure indicator shows that it is empty (left). An elevated stem indicates that the air source is full (right). Algal removal equipment The only implements approved for divers to use in the exhibits are brushes, cloths and suction handle. These implements are exhibit specific and will be issued by aquarist, aquarist technician, or lead diver. It is important that these implements are not used in other exhibits to prevent cross contamination. The 21

22 use of other equipment must be reviewed by the DSO prior to its use while on scuba to comply with OSHA regulations. ONLY USE DSO APPROVED IMPLEMENTS TO COMPLY WITH OSHA REGULATIONS *Wet Gear Keep wet dive gear out of the dive safety office and out of the compressor room. Wet gear can damage office equipment and compressor components. If you or your gear is wet, stay out of these two areas. IF YOU ARE WEARING WET GEAR, STAY OUT OF THE OFFICE AND COMPRESSOR ROOM Cleaning Dive Gear All dive equipment is life support equipment. This equipment allows divers to perform tasks underwater in a safe manner. The disinfectant, Terg-o-cide, is used to disinfect dive gear including: wet suits, boots, hoods, regulators, BCDs, and weights. This chemical is concentrated and comes in gallon jugs. These chemicals are kept in one of the bathrooms in the dive locker. The proper dilution for use is 2 oz. of Terg-ocide (Formula 236) per one gallon of water. There is a Material Safety Data Sheet (MSDS) located in the MSDS book near the docent lounge on the second floor. For more information concerning this product, see Appendix F. 22

23 Please follow dive protocols listed below. 1. If diving in a saltwater exhibit other than the Cape Fear Shoals, DO NOT use the bridge when returning. Walk around the acclimation tank to the showers in order to reduce the risk of dripping contaminated water into the Cape Fear Shoals exhibit. 2. Remove equipment after the dive and set it in a secure place to avoid damage. Remember to lay unsecured tanks down on the deck. 3. Rinse redundant air source, mask, empty weight pockets, brushes, suction handle, and window diapers in fresh water rinse bin before returning them. Rinse for a minimum of one hour if used in an exhibit other than Cape Fear Shoals. 4. Spray BCD including the inside air bladder with fresh water. Remember to empty air bladder of any water and inject a small amount of air in it before returning it to the rack. 5. Rinse weights on dive deck mat by spraying with fresh water before returning them to weight bins under the dive bench. 6. Please make sure the dust cap is in place BEFORE putting the first stage in the fresh water rinse. This will avoid damage to the first stage. Should you forget and immerse the first stage uncapped, inform DSO immediately. 7. After using the full face mask, spray regulator mouth/nose pocket and the inside of the full face mask with Terg-o-cide solution and allow the solution to remain in contact for a minimum of 15 minutes. After fifteen minutes, lightly spray the interior of the mask with fresh water and return it to its hanging position in the dive locker office. Do not submerge the mask in the rinse bin. 8. Regulators used in saltwater exhibits must be soaked in fresh water for a minimum of 30 minutes before being put away. After use, clean by rinsing regulators in the freshwater rinse bin located near the entry ladder of the Cape Fear Shoals exhibit. Spray Terg-o-cide on the mouth piece and leave out of the water for fifteen minutes, then rinse with fresh water. If equipment was used in a different exhibit, fill the gray bin with water and rinse gear on the far side of the exhibit nearest the exit. SECURE DUST CAP ON THE FIRST STAGE BEFORE PLACING IN THE FRESH WATER RINSE. 23
24 9. All wet suits, boots, hoods and hooded vests must be soaked in a terg-o-cide solution, located in the dive locker next to the showers, for a minimum of 15 minutes and then rinsed until the water runs clear and free of suds. Once rinsed, hang it up and return it to its space along the dive locker wall. 10. All equipment must be put away BEFORE leaving the facility. 11. Once a tank has been used, rinse it with fresh water (including the bottom of the boot) and the valve. After rinsing, replace the valve cover. Full and empty tanks must have covered valves to comply with OSHA regulations (Occupational Safety and Health Standards, 1985). Place the empty tank in the tank racks outside of the compressor room, and hang red tag around the tank valve. If there is sufficient air (about 2,000 psi), place a white tag around the tank valve and with a pencil write the remaining psi on the tag. If the tank was used in an exhibit other than Cape Fear Shoals, it must be disinfected with Terg-o-cide. Daily Dive Routines A sanitary work environment is essential for a healthy dive operation. Each volunteer diver performs essential tasks for making the dive locker a safe environment to operate. The following schedule illustrates what is needed to maintain a clean environment and a smooth dive operation. Divers should arrive a minimum of 30 minutes prior to their scheduled dive. Morning Routine 10:30 Dive 1. Before Diving a. Fill equipment rinse bucket with fresh water. b. Fill dive boot rinse bucket with fresh water, add 2 oz. of Terg-o-cide (Formula 236) per one gallon of water. c. Start laundry, priority to towels and then blue hand towels and cleaning rags. 2. After Diving a. Return full face mask to the dive safety office. b. Rinse and return fins. c. Retract and secure ladder from the acclimation tank. d. Soak brushes and cleaning cloths in fresh water rinse. 24
25 Mid-Day Routine 13:15 Dive 1. Before Diving a. Fold laundry; replace paper towels and toilet paper in restrooms as needed. b. Place blue hand towels in a plastic bag by the entrance for education staff pickup. c. Start any remaining loads of laundry (choose proper load size to conserve water and clean lint screen on the dryer). 2. After Dive a. Rinse and return fins. b. Soak brushes and cleaning cloths in fresh water rinse and store. Afternoon Dive Routine 14:30 Dive 1. Sunday only Empty and refill wetsuit rinse bucket with fresh water and recommended amount of terg-o-cide (2 oz per on gallon of water). 2. Clean and organize dive deck. 3. Return FFM and other regulators to the DSO office. 4. Rinse and return fins. 5. Retract and secure ladder from the acclimation tank. 6. Ensure that the alternate air sources are full. If not, notify the DSO or ADSO if any require air fills. 7. Empty trash before leaving. All Divers 1. Please allot one hour after the end of your scheduled dive to clean up, return gear and periodic safety training. 2. At the end of all dives, spray the regulator mouthpiece with Terg-o-cide and allow the regulator to sit for 15 minutes before rinsing with fresh water. 3. Please clean restrooms after each use and close windows in bathrooms. 25
26 Restroom and Shower Care Diver restrooms and showers are maintained by dive volunteers so as to provide a clean, healthy facility for divers. Toilets and showers must be kept germ-free and be cleaned and disinfected after every use. All cleaning products are provided by the Aquarium. Please conserve water. 1. Dive restrooms and showers are cleaned and disinfected after each use by the individual using the facility. 2. Countertops and mirrors should be sprayed with a hard surface cleaner and wiped down with paper towels after each use. 3. Each shower (walls & floor) must be disinfected with a spray medical-grade disinfectant after each use. Allow the disinfectant to stand on surfaces in accordance with the manufacturer s recommendations or 15 minutes, whichever is greater, after the appropriate disinfectant period. 4. All metal surfaces (sinks and shower units) should be polished with a powdered metal polish whenever water scale build-up and rust is observed, or as directed by the senior diver. Rinse excess and dry. 5. Each toilet must have the exterior surfaces disinfected with a spray medicalgrade disinfectant after use. Let disinfectant stand on the surfaces in accordance with the manufacturer s recommendations or 15 minutes, whichever is greater. The bowl interior will be cleaned with toilet bowl cleaner whenever solid wastes have been disposed of through it. 6. Please close bathroom windows after showering to conserve energy. 7. Report cleaning supply needs to the DSO. 8. Empty trash at the end of the day. 26

27 Dive Precautions for Exhibit Care Each exhibit differs in diving procedures. The dive procedures for all exhibits are located in Appendix G of this document. They are also posted near the dive entry point of the exhibit or near the ladder in the Conservatory s freshwater quarantine. Please review these documents before diving in the exhibit and always dive with someone experienced in that exhibit s procedures. Listed below are several features in common in the exhibits and that need special care. Coral and Sponges The coral structures in the exhibits are attached to the gunite rock structure. They will break away from the structure if not handled carefully. Use brushes and small toothbrushes to clean these free from dirt and debris. Sea Fans The sea fans are constructed of a flexible material that can tear easily. Care must be taken when cleaning the sea fans. Gently brush fans using one hand to brush while supporting the back of the fan with the other hand. View Panels The view panels on the exhibits are made of acrylic. Acrylic is stronger, lighter than glass and allows more of the visible light spectrum to pass through it; however, acrylic is scratched easily compared to glass (Advantages and Disadvantages of Acrylic Aquarium, 2009). When diving in an exhibit, be careful that dive equipment does not make contact with the acrylic panels. When cleaning the acrylic panels, use only soft cotton diapers or special scrub pads that will not scratch the panels and suction handles to maintain position in the water column. CLEAN PANELS WITH ONLY COTTON CLOTH DIAPERS OR SPECIAL SCRUB PADS THAT WILL NOT SCRATCH ACRYLIC. Inserts Several exhibits have free standing inserts made of fiber glass or gunite. When entering and exiting the exhibit, be careful of stepping on the inserts or knocking into them with gear. This can result in breaking the structure. Use brushes for cleaning surfaces, and do not enter any confined spaces within the insert. 27
28 Cape Fear Shoals Exhibit The Cape Fear Shoals exhibit has a specific cleaning schedule. A day of the week is designated for cleaning each section of the exhibit s interior. Please refer to the map to find the section to be cleaned each day. See Figure 4 for more details. Figure 4 Cleaning Map for the Cape Fear Shoals Exhibit. 28
29 Animal Interaction Volunteers must remember that the animals at the aquarium are wild animals. They are not pets, and they do not perform tricks or specific behaviors for visitors. When speaking with visitors, it is important to refer to the animals using their common or scientific names. Please avoid nicknaming the animals or attributing human characteristics (anthropomorphism) to the animals. Below are important items to remember when interacting with the animals at NCAFF. 1. When entering exhibits, enter carefully. In the Cape Fear Shoals exhibit, step down the entry ladder; avoid splashing in the exhibit; it disturbs the fish and could result in injuring an animal, your buddy, or yourself. 2. Avoid exaggerated gestures and make sure you look before you point to avoid accidently hitting an animal. The animals always have the right of way in the tank; divers must give way to an approaching animal. 3. If you have a concern about animal aggression, abort the dive and exit the tank. If you perceive a dangerous situation, remember to ascend close to a wall and with your dive buddy. Avoid ascending in the center of the tank. Once you have exited the exhibit, notify the DSO or ADSO and note the incident on the smooth dive log. 4. Remember that shark bites and other incidents are a matter of public record. It is important to disclose information truthfully to visitors if asked. If you have any questions, please ask the DSO for more information. 29
30 Emergency Procedures Although diving is a reasonably safe activity, injuries can occur when interacting with wild animals, water or breathing compressed air. Remember that CPR and First Aid are essential first responses in the chain of care. Good Samaritan laws protect lay responders as long as you do not exceed your training. It is essential to keep your skills up to date so that in case of an emergency, you will be ready to stop, think and then act. It is important that all divers know what procedures to follow in case of an emergency and where emergency equipment is located. Listed below are important emergency gear and their locations. A DAN Emergency Oxygen Unit, Guardian Plus First Aid Kit and Trauma Kit These units are located in the dive locker office. The office door is to be unlocked whenever divers are in the water. Latex gloves Gloves are located in each kit and spares are located inside the dive locker office to the right of the door. Remember to use proper barriers to prevent spreading germs and bacteria. Stokes basket and backboard A floating stokes basket and backboard with head immobilizer are located in the Cape Fear Shoals exhibit at the edge of the acclimation tank. These devices are accessible by a diver in the water. A second stokes basket and backboard are located in freshwater quarantine for use in the conservatory exhibits. Procedures regarding the use of these devices are covered in a separate document. Two-way radio and telephone These are located on the desk in the dive locker along with instructions for their use. Automated Electronic Defibulator (AED) NCAFF has two AED units. One is located with security the second is located outside of the docent lounge. Should this be needed, security should be called and asked to bring it with them to the location of the emergency. Potential Injuries All injuries will be reported to the DSO. The following are guidelines to follow and are not meant to supersede your first aid training. OSHA standards dictate the use of universal precautions when dealing with bodily fluids. 30

31 Self-care for minor injuries -- Minor injuries can become major problems if they are not cared for properly. When dealing with minor injuries, follow these procedures to minimize risk of infection. These suggestions do not take the place of professional medical advice or treatment. 1. Scrapes, scratches, contusions, abrasions a. Clean with antimicrobial soap b. Apply antibiotic ointment and bandage as needed c. Watch for signs of infection or irritation d. Seek medical attention if needed 2. Lacerations and minor bites a. Assist diver out of the water as needed and remove equipment b. Make sure diver is responsive c. Secure first aid kit and provide assistance as needed d. Remember to use personal protection equipment whenever dealing with bodily fluids These injuries should be monitored very closely for any inflammation. The victim should seek medical attention as soon as possible. ALWAYS USE BARRIERS WHEN ENCOUNTERING BODILY FLUIDS THAT ARE NOT YOUR OWN. 31
.")

32 Zoonotic Diseases in Brief Nearly every contact with other living organisms, whether it is with humans or other animals, carries some risk of disease transmission. Diseases that are spread from animals to humans are called zoonosis (adj. = zoonotic diseases). Contact areas for the general public can present increased risks that can be controlled with reasonable precautions. Avoiding direct animal contact can markedly reduce risks of zoonotic disease. However, this foregoes many valuable educational experiences and the establishment of a direct relationship between animals and the public. A reasonable alternative is adequate hand washing for those in direct contact with the animals. Hand washing is perhaps the single most effective personal hygiene procedure for reducing the risk of infection. CONTACT WITH OTHER LIVING ORGANISMS CARRIES SOME RISK OF DISEASE TRANSMISSION VIBRIO Infections These can be acquired through wounds exposed to ocean water or the drippings from raw saltwater fish, or through injuries from handling marine crustaceans such as crabs. Symptoms include: High fever, chills, nausea, vomiting, diarrhea, abdominal pain, low blood pressure, seizures, fluid-filled skin lesions, etc. Gastrointestinal infections via ingestion of Vibrio (eating raw oysters, etc) can cause rapid dehydration, and can lead to systemic infections if bacteria enter blood. Bacteria can multiply so rapidly that blood vessels and organs get clogged sometimes leading to amputation or death. Treatment -- Effective antibiotics include Tetracycline, Ampicillin, Penicillin, Gentamycin, etc. 32

33 ERYSIPELOTHRIX RHUSIOPATHIAE This infection is also known as erythema migrans, fish-handler's disease, fish poisoning, fish hand, sealer's finger, whale finger, blubber finger, etc. Infection with Erysipelothrix rhusiopathiae, in humans, dates back to at least This infection is carried by many animals, including dolphins, shellfish, and fish. Human infections occur primarily via direct contact with infected animals through open wounds. Symptoms include: Infection leads to a unique, raised, purple-red lesion with an intense burning sensation, fever, and malaise, pain in muscles & joints, severe headaches. Disease primarily occupational, people handling animals or their wastes can get it, e.g.: butchers, meat-processing workers, animal caretakers, farmers, fishermen, veterinarians, cooks/housewives, sewer workers, etc. Can persist in frozen meats. Incubation 1-7 days. Effects usually benign, but can be fatal. Treatment -- Systemic treatment is with antibiotics. ZOONOTIC DISEASES CAN BE SERIOUS AND EVEN FATAL. CONSULT YOUR PHYSICIAN IF YOU SUSPECT A ZOONOTIC INFECTION. 33
34 MYCOBACTERIUM MARINUM (Fish TB) -- also called fish tank granuloma, swimming pool granuloma. Related to human TB and leprosy. Symptoms include: People have acquired fish TB from fish spine punctures, cleaning fish/shrimp/crabs, getting scratched on fish tanks, from rose bushes and injuring bare feet in parking lots (infected water transferred during storms), mouthsiphoning fish tanks, dolphin bites, diving around reefs, splinters from fish net handles, etc. Usually occurs on extremities (hands, feet). Incubation ranges from 2 days to 2 years; usually takes about 2 weeks for granuloma to appear at site of infection. Infected area may be pink to purple in color, may discharge pus, and may be painful to touch. Usually not fatal. Can get into joints and mimic arthritis or carpal tunnel syndrome. Treatment -- Treated with human TB drugs (local doctors have used minocycline, rifampin, ethambutol, and biaxin); Bacteria are very resistant to treatment. It can take a year or more to cure. SALMONELLA -- There are over 1600 serotypes of Salmonella identified. - Infection by ingestion. Carried by many types of animals. The CDC reports that as high as 90% of reptiles and amphibians are natural carriers of Salmonella bacteria, harboring strains specific to the animal without any symptoms of disease. While it is true that many pets can carry Salmonella, the problem with reptiles and amphibians is that they carry Salmonella with such high frequency. It is prudent to assume that all reptiles and amphibians can be a potential source of Salmonella. It is important to note that Salmonella can be transmitted by direct contact (e.g. handling a reptile) or indirectly (e.g. touching surfaces contaminated with reptile feces, reptile equipment washed in the kitchen leading to contamination of food preparation areas). The CDC estimates that 74,000 cases of Salmonellosis per year are associated with exposure to reptiles or amphibians (directly or indirectly), which makes this a significant public health concern. Symptoms include: Mild to severe gastroenteritis. Can be fatal thru rapid dehydration, septicemia, and fecal infections. Incubation is 7-72 hours. 34

35 PFIESTERIA PISCICIDA -- A toxic dinoflagellate that has been associated with fish lesions and fish kills in coastal waters from Delaware to North Carolina. A natural part of the marine environment, dinoflagellates are microscopic, free-swimming, single-celled organisms, usually classified as a type of alga. The vast majority of dinoflagellates are not toxic. Although many dinoflagellates are plant-like and obtain energy by photosynthesis, others, including Pfiesteria, are more animal-like and acquire some or all of their energy by eating other organisms. Symptoms include: Pfiesteria exposure can lead to skin sores, memory loss, narcosis ("drugged" effect), reddening of eyes, severe headaches, blurred vision, nausea/vomiting, difficulty in breathing, kidney/liver dysfunction, severe cognitive impairment (can't remember name, address, etc), etc. Relapses have happened 6 years after initial exposure. Pfiesteria is now classed as a Biohazard III, and can be researched only in specially equipped labs. Due to the potential for infection, contact with fish or tanks should always be followed by hand washing or bathing after a dive. To protect yourself, do not handle organisms, water, and tanks if you have skin breaks; do not dive if you have skin breaks; do not mouth-siphon tank water, do not ingest raw seafood, etc. Always wash hands well after working on tanks, with seafood, and after diving. If punctured, or injured under water, allow the wound to bleed freely for a while to expel injected bacteria, then sterilize and protect wound. People with weakened immune systems are at greater risk for getting the above infections. People with AIDS, diabetes, liver dysfunction, kidney problems, or undergoing cancer treatment, etc. should be especially careful (Education Department, ND). See Appendix L for more marine hazards. TO PREVENT INFECTIONS WASH HANDS FREQUENTLY AND BATHE AFTER EVERY DIVE 35
36 Alerting 911 For serious emergencies that require transport to a medical facility, please refer to the following procedure for alerting 911. If necessary, follow this dialog verbatim. Calling security is essential since they will need to direct emergency personnel to the correct location, act as crowd control for visitors, and clear traffic in case of an emergency. The security staff is also trained in CPR and First Aid and can assist first responders before EMTs arrive. Call security using the hand held radio: Say, Security this is the dive locker, over. In Case of Emergency Call at least 3 times before calling on the telephone. Once security answers, tell them, We have an emergency in the dive locker, call 911. If more responders are needed immediately, say to security, Additional help is needed in the dive locker area, send help! Once security acknowledges your request, take the radio and the oxygen unit to the accident scene then continue/assist with primary care of the accident scene. If security does not respond to radio calls, switch to telephone intercom for assistance. Telephone intercom assistance is available using the following procedure: Push the red button on the lower right side of the telephone line tree. Once a dial tone is audible, dial 224 (front desk) using the touch pad. When the front desk answers, tell them, Front desk, this is the dive locker, we have an emergency, please tell security to call 911. Wait for a response, repeat the message as necessary. If you get no response from the front desk, call 911 directly. 36
37 Animal Husbandry Basics Volunteer divers are sometimes the first to notice irregular animal behavior or mechanical irregularities. During a routine dive, a volunteer may see problems with animal behavior or health or mechanical malfunctions with pumps or filters. With some specific knowledge of water chemistry, fish behavior and animal health, a diver can alert an aquarist if he/she is aware of any problems. Understanding basic mechanics of the aquarium will help divers recognize mechanical irregularities before they become catastrophic problems. Here are some basic definitions for common terms used at NCAFF concerning water chemistry, animal health and basic mechanics of aquarium filters and pumps (See Appendices IV for further readings). 1 st rule of Aquariology The first rule of aquariology is to never leave running water unattended. ph (potential Hydrogen) a measure of acidity or alkalinity. Defined as the negative logarithm of the hydrogen-ion concentration. The scale runs from 0, which is very acidic, to 14, which is very alkaline. Pure water is ph 7, which is neutral; below 7 is acidic, above 7 is alkaline ( Encyclopædia Britannica, Inc., ). The ph of the water is a measure of the acidity of the water. For freshwater fish, this should be in the range of Saltwater fish require a higher ph of Higher ph can enhance the formation of ammonia in the water, while low ph can adversely affect the function of the fishes' gills and can be detrimental to the growth of denitrifying bacteria. Water ph can be adjusted with commercially available buffers. Water ph can be measured in a tank using commercial test kits (Cooper, 2003). Salinity the target salinity for salt water exhibits at NCAFF is 32 parts per thousand (PPT) or a specific gravity of Quarantine a process where fish are placed in an isolation tank and treated for any illness, bacteria or parasite infestation. For new acquisitions, this time period is typically a 30 day treatment process before a specimen is introduced into a tank with other animals. Clinical Signs of Disease Clinical signs of disease in fish can be very vague. Frequently the animal is swimming slowly and often alone; it may swim on its side, the gills may move rapidly, the animal may move rapidly back and forth in one area, the fins are droopy, it doesn't eat, and it may be losing weight (Cooper, 2003). Listed below are specific signs to look for if you suspect a fish may be ill: 37

38 Bloat of the abdomen Discoloration of skin Drooping fins Losing weight Ragged looking fins Bleeding of the skin Not eating Fluffy white growth Rapid back and forth movement Ulcers on skin or mouth Bulging eyes Excessive slime Gills move rapidly Swimming on its side Swimming slowly Fish Identification There is a copy of the Peterson Field Guide: Atlantic Coast Fishes in the dive locker office. This guide provides descriptions as well as illustrations for most of the species in the NCAFF collection. The education office on the second floor has a library for further reference. Appendix H is the Cape Fear Shoals Dive Show that lists descriptions of species typically found in Cape Fear Shoals exhibit. Signature Fish the Atlantic Spadefish (Chaetodipterous faber) is the logo for the NC Aquariums. See image below: Figure 5 Atlantic Spadefish (Chaetodipterous faber) (Froese, R. and D. Pauly, 2010). 38

 Neon goby Elacatinus oceanops")


39 Fish ID Fish Commonly Kept at the NC Aquarium at Fort Fisher Yellowtail snapper Ocyurus chrysurus (Germick, Yellow snapper, Ocyurus chrysurus, 2012) Neon goby Elacatinus oceanops (Elacatinus oceanops-góbido neón, 2012) African pompano Alectis ciliaris (Germick, African pompano, Alectis ciliaris, 2012) Graysby Ephalopolis cruentata (Germick, Graysby, Ephalopolis cruentata, 2012) 39
")


40 Spotfin Hogfish Bodianus pulchellus (Cliff, 2008) Atlantic spadefish Chaetodipterus faber (Hoelscher, 2007) Spanish hogfish Bodianus rufus (Kurtis, 2011) Porcupinefish Diodon hystrix (Schultz, 2006) 40


 Atlantic tripletail Lobotes")
41 Gray Snapper Lutjanus griseus (Germick, Gray snapper, Lutjanus griseus, 2012) Sergeant major Abudefuf saxatilis (Ryschkewitsch, 2003) Tarpon Megalops atlanticus (Germick, Spotted Moray, Gymnothorax moringam punctatum, 2012) Atlantic tripletail Lobotes surinamensis (Sazima, 2013) 41
 Blackbar soldierfish")


42 Squirrelfish Holocentrus adscensionis (Lenoble, 2010) Blackbar soldierfish Myripristis jacobus Similar to squirrelfish but distinguished by narrow black bar extending vertically adjacent to operculum. (Scott W. Michael, NOAA, 2005) Longspine squirrelfish Holocentrus rufus (Ryan, Southern stingray, Dasyatis americana, 2006) Hogfish Lachnolaimus maximus (Lyle, 2010) 42
 Vermilion snapper")


43 Gag Mycteroperca microlepis (Germick, Gag, Mycteroperca microlepis, 2012) Vermilion snapper Rhomboplites aurorubens (Noble, 2007) Scamp Mycteroperca phenax Similar to Gag, but scamp has a more concave caudal fin with elongated 1 st and last fin rays coming out of the caudal fin. (Germick, Scamp, Mycteroperca phenax, 2012) Knobbed porgy Calamus nodosus (Burek, Knobbed Porgy, Calamus nodosus) 43
")

 44")
44 Bonnethead shark Sphyrna tiburo (MarineBio Conservation Society, 2013) Sandbar shark Charcharhinus plumbeus (MarineBio Conservation Society, 2013) Sandtiger shark Carcharias Taurus (Germick, Sandtiger Shark, Carcharias taurus, 2012) 44


45 White Spotted Bamboo Shark Chiloscyllium plagiosum (Welliver, White Spotted Bamboo Shark, Chiloscyllium plagiosum, 2013) Brownbanded Bamboo Shark Chiloscylliu (Welliver, Brown Banded Bamboo Shark, Chiloscylliu, 2013) 45

 Green")

46 Spotted moray Gymnothorax moringam punctatum (Germick, Spotted Moray, Gymnothorax moringam punctatum, 2012) Green Moray Gymnothorax funebris (Germick, Green Moray, Gymnothorax funebris, 2012) 46

")

 Bluntnose stingray")
47 Green turtle Chelonia mydas (Germick, Green turtle, Chelonia mydas, 2012) Horse-eye jack Caranx latus (Gratwicke, 2010) Southern stingray Dasyatis americana (Ryan, Southern stingray, Dasyatis americana, 2006) Bluntnose stingray Dasyatis say (Murch, 2001) 47


48 Rough triggerfish Canthidermis maculate (Germick, Rough triggerfish, Canthidermis maculate, 2012) Black durgon Melichthys niger (Charpin, Black Durgon, Melichthys niger, ) Bluestriped grunt Haemulon sciurus (Charpin, Bluestriped grunt, Haemulon sciurus, ) White grunt Haemulon plumieri (Charpin, White grunt, Haemulon plumieri, ) 48
 Gray")

 Tautog Tautoga onitis")
 Lookdown")
49 French angelfish Pomacanthus paru (Kok, 2008) Gray angelfish Pomacanthus arcuatus (Germick, Gray angel, Pomacanthus arcuatus, 2012) Tautog Tautoga onitis (Virginia Institute of Marine Science) Lookdown Selene vomer (Blair) 49
 Goliath grouper Epinephelus")


50 Slippery dick Halichoeres bivittatus (White) Goliath grouper Epinephelus itajara (Hoover) Queen triggerfish Balistes vetula (Ryan, Queen triggerfish, Balistes vetula, 2006) Jacknife Equetus lanceolatus (Burek, Jacknife fish, Equetus lanceolatus) 50


51 Red Grouper Epinephelus morio (Horn, 2010) Blue runner Carangoides crysos (Stener, 2012) 51
52 Cape Fear Shoals Dive Presentation While no dive show is the same, these are typical questions and scenarios that divers may experience during one of the two daily dive shows. Please familiarize yourself with this information before becoming a presentation diver. Cape Fear Shoals Dive Presentation for the General Public Created by the NC Aquarium at Fort Fisher Education Section Objectives: Participants better understand hard bottom reef habitat. Participants understand animals are an important part of the ecosystem as both predators and prey. Participants understand human impact on this ecosystem and how they can help. Time Frame: Dive presentation should run 20 minutes including time to answer questions and offer renewable energy credits. Background & Additional Resources: The habitat represented by Cape Fear Shoals is a hard bottom reef. Hard bottom reefs provide a suitable substrate for corals, seaweeds, and sponges, which in turn support a diverse reef fish community and many invertebrates. Hard bottom reefs are an unusual landmark off North Carolina s coast. The majority of the sea floor is flat and sandy. These hard bottom, or rocky, areas provide much needed shelter for smaller fishes, as well as a place to meet, spawn and hide for all fishes. Many of the species of fishes that inhabit North Carolina can be found in hard bottom environments. Hard bottom reefs cover an area in NC about the size of Rhode Island. In North Carolina more than 90% of the hard bottom occurs south of Cape Lookout, some very close to shore. Many of the commercially important fishes of North Carolina utilize hard bottom reefs. This exhibit recreates the Cape Fear Shoals off shore reef. If you were to go into the ocean at Cape Fear Shoals you could find many animals represented here at the Aquarium. Although this exhibit is realistic, the rockwork and corals have been synthetically created. It would take a lot of live corals to create this exhibit which would destroy natural environments. Also, some of the animals in this tank bite at or eat corals occasionally. There are two exhibits with live coral; The Pacific Reef and Cape Fear Ledge Exhibits. 52
53 There are many animals in this exhibit including: Atlantic spadefish, grouper, sharks (sandbar, sand tiger, and bonnethead), stingrays, black drum, moray eels, jacks, snappers and a green sea turtle. Many of the animals that make up the hard bottom reef, soft corals and sponges, are very sensitive to changes in the ocean s water chemistry. That chemistry is seeing some major changes. Like a person needs calcium for strong bones, some soft corals and sponges need calcium to be strong as well. Since they can t drink milk, they get their calcium from the ocean water. Unfortunately that calcium, in the form of calcium carbonate, is getting harder to find. Carbon dioxide binds with calcium carbonate in the water and changes it into a form that corals cannot use called calcium bicarbonate. Then the calcium bicarbonate breaks down into carbonic acid which is causing the ph of the ocean to change. As the amount of carbon dioxide in the ocean increases it becomes harder for many corals to build their skeletons. Where is this carbon dioxide coming from? As we burn oil, coal, and natural gas to power our lives, we add more carbon dioxide to the atmosphere. Since the atmosphere and the ocean touch over 70% of the planet, the ocean acts as a giant sponge and absorbs much of the extra carbon dioxide. This increase in carbon dioxide in the water is changing the ocean s chemistry in ways that will have big impacts. We may see a decline in many fisheries and a decrease in coral habitat. Thankfully it is not too late to make changes that will help our reefs and our ocean. If we work together to take a variety of actions, we can make a difference. Start with simple actions such as riding your bike around town or simply turning off the light switch when you leave a room. There is also a great app for your smart phone called Climate Counts that will allow you to select climate friendly businesses. To make an even bigger impact, get involved in your community. Make your voice heard about issues important to you and support causes that will help our ocean. Get your city to invest in green power, use public transportation and reduce plastic use. Even more importantly, you can talk to your legislatures about passing laws to help us decrease the amount of carbon dioxide we produce. The aquarium is also selling renewable energy credits. These credits can be purchased to offset your home s carbon footprint. If the visitors purchases credits through our program, the aquarium will receive an equal amount of credits. Our goal is to make the Aquarium 100% supported by clean energy and we need your help! This is a great way to help us all decrease our carbon footprint and protect the oceans. Strata Solar in Raleigh has agreed to donate REC's to the Aquariums for one year to start our campaign. Materials: Microphone & Speaker system Key to the Speaker System ipad with Renewable Energy Credit sales system Green Spadefish car clings only for people that buy RECs Disk with REC information video 53
54 Preparation: Arrive at the Cape Fear Shoals exhibit at least 5 minutes before scheduled feeding. Collect your green spadefish stickers. Make sure the batteries are working in the microphone. Make sure the REC slide is in the DVD player and that you have the remote to change the input when it s time. Clean up takes less than 1 minute. Make sure to turn the TV back on the animal identification video. Presentation: The educator is outside the exhibit to help facilitate the questions to the diver. Go to the front window and wait for the diver to give you the OK sign but before you begin speaking. Welcome audience. State your name and introduce the exhibit. Invite the visitors to have a seat on the floor or to stand to the edge of the room. Make sure they do not block the ramp for wheelchairs and strollers. Let them know that this is an interactive program. Invite the visitors to raise their hands if they have questions at any point in the show. Let them know you will do your best to get to as many as possible in the next twenty minutes. Begin with this introduction before passing it on to the diver: Before we start asking the diver questions, I have a question for you. How many of you are familiar with these fish? Since they are all native to our area, I m sure you may have met them either from visiting the beach, going fishing, or maybe from a nice seafood dinner. Because we live, work, and play in their home we have a responsibility to care for them and their habitat. Here is our diver to tell you more about these fish and what we can do to help protect them. Diver, would you like to introduce yourself and tell us a bit about the exhibit? Let the diver begin talking about the exhibit and start getting questions from the visitors. Below are some examples of the most commonly asked questions during our Cape Fear Shoals Dive Show presentation. It is a good place to start in learning your information for the dive show. 1) How many fish are in the tank? There are (check the census) fish in this tank. 2) How many different species are in this exhibit? There are (check the census) different species in this exhibit. 3) Why are the sharks not attacking the other fish? Or the divers? The sharks get fed plenty of food and are on a routine feeding schedule. For this reason they are not likely to attack the other fish. The divers are not of much interest to the sharks because sharks do not typically like to eat humans or harm them. 4) What kinds of sharks are in the exhibit? (Check the census) There are three types of sharks traditionally kept in the Cape Fear Shoals exhibit; the bonnethead shark, the sandbar shark and the sand tiger shark. 54
55 5) What do we feed the fish? Through scatter feeding the fish get fed squid, capelin and fish steaks such as mackerel by target feeding. 6) Do the divers feed the fish while they re in the tank? Divers DO NOT normally feed the fish while they are in the tank. There are rare exceptions when a diver will target feed an animal who is not coming up to eat at scheduled feeding times. 7) Do we know how old the fish are? We don t know the age of the fish. 8) Can your safety diver hear what we re saying? The safety diver cannot hear what is being said. 9) Why do you have a blue cord attached to you? The blue cord is used for communication much like a typical phone line. This cord allows the diver in the tank to speak and hear the presenter on the outside of the exhibit. 10) What kind of jobs do you have to do while you re in the tank? There are several jobs that can be done while in the tank. The most important job is to have fun while presenting information to the audience, but the divers also clean the coral and the windows of the tank. The divers are also responsible for watching their fellow diver and taking the necessary safety precautions that come along with scuba diving. 11) What kinds of eels are in the tank? (Check the census) The Cape Fear Shoals exhibit has had green moray eels, spotted eels and reticulated eels in the tank. Check the census for the current species and number of animals in the exhibit. 12) Why are the eels opening and closing their mouths? The eels open and close their mouths to breathe. When they open their mouth water flows across their gills and when they close their mouth the water exits back over their gills. 13) What is the biggest fish in the tank? The answer to this question actually varies depending on the measurement of interest. In length the eel is the largest fish, yet in volume or weight there could be a different response. The Southern Stingray is largest in circumference, but not weight. The Sand Tiger shark is probably largest in the volume and weight. 14) Can you see us as well as we can see you? 55
56 Yes, the diver can see us as well as we can see him/her. 15) Where and how do we get the fish? Our fish in this tank have come from a variety of places. Some have been given to us by another aquarium. Several have been caught from the wild, and others have come from other tanks in this aquarium where they stayed as juveniles and moved to this exhibit as they grew. 16) Are fish territorial? There are some fish that are territorial. The grouper, the black sea bass, and the eels are known to be territorial. 17) Where does the water come from? The water is from the public tap water. We filter out the chlorine, copper and other substances and then add about 7 tons of salt to form the salt water in this tank. By making our own saltwater we are able to have the clear water that you see and are also able to manage the water quality more effectively. 18) How long are you able to stay under the water? The length of time that the diver can stay under water varies with the individual diver s ability. However, there is a one hour limit to the amount of time the diver can be under the water. 19) Do you have to wear a wet suit? The divers are required to wear a wet suit; it is part of their uniform. 20) How thick are the windows of the tank? The front windows of the tank are 8 inches thick. The circular window on the side of the exhibit is ¾ inch thick in the center and two inches on the edges. 21) Can the divers touch the fish? The divers do not purposely touch the fish. On occasion it may appear like the divers are touching the fish with their flippers, but it is not intentional! Sometimes, divers must catch an animal to remove it from the tank. 22) Can the divers make the porcupine puffer fish puff up? The divers can make the porcupine puffer fish puff up, but they don t intentionally make them puff up because it is stressful for the animal. On occasion it may be viewed puffed up when it is under a stressful situation. 23) Do the lights stay on all night? The lights do not stay on at night. At night moon lights are turned on. This process allows for a more natural feeling daily light cycle for the fish. 56
57 24) Do the fish sleep? The fish in this tank do not get a full night sleep like we are supposed to get. The fish take catnaps where they slow down their activity for a period of time. 25) How do you become a diver in our tank? It s easy become a volunteer here at the aquarium! You must also be a certified open ocean diver and pass several tests that the aquarium requires for safety reasons. With about 5 minutes left of the dive show, ask the following question: Are the corals and sponges alive? Diver: The corals and sponges are not alive in this exhibit; they are made of latex materials. However, there are several exhibits in this aquarium that do have live coral such as the Cape Fear Ledge Exhibit. This habitat is called the hard bottom reef. Hard bottom reefs are areas where rocky outcroppings, like you see here, are covered with living organisms such as sea fans and sponges. (point out some). These areas are great for animal such as grouper and snapper. Fish love to hide among the fans and sponges for protection. Unfortunately, I ve heard that this habitat is at risk from something called Ocean Acidification. Has anyone heard of that before? Educator, can you tell us a bit about it? Your response should include the following: The hard bottom reef is important for these animals because soft corals and sponges offer food and habitat. Unfortunately this habitat is undergoing changes due to changing water chemistry. Many sea fans and sponges use calcium carbonate from the water to build their skeletons. This is similar to a person drinking milk for strong bones. When we drive cars and power our homes, we release carbon dioxide into the atmosphere. When the atmosphere touches the ocean, as it does over 70% of the planet, that extra carbon dioxide gets soaked up into the ocean. The carbon dioxide then binds with the calcium carbonate and turns it into a form that the sea fans and sponges can t use. This makes it harder for them to build their bodies. This is similar to a person developing brittle bone disease when they can t get enough calcium. If the sponges and fans can t get enough calcium carbonate they can t grow as well. This makes it harder for the grouper and other fishes to find places to hide. So if we want to see fish when we visit the beach, catch them when we are fishing, or enjoy a nice seafood dinner we need to take good care of our hard bottom reefs. As our aquarists take such good care of the animals here at the aquarium, we have a responsibility to care for them in the wild. Diver can you suggest some ways we can lower our carbon footprint? Diver The diver can suggest options for lowering their carbon footprint such as carpooling, adjusting their thermostat, and encouraging their towns to get involved. Make your voice heard about issues important to you and support causes that will help our ocean. Get your city to invest in green power, better public transportation and reducing plastic use. You can talk to your 57
58 legislatures about passing laws to help us decrease the amount of carbon dioxide we produce as community. Conclusion: Educator: If the diver didn t have any suggested options, you can list some here before continuing: Luckily, you have an opportunity to help protect these fish and the ocean before you even leave the aquarium today. Introduce them to the renewable energy credit program taking place at the aquarium. Explain that they can purchase renewable energy credits to offset the carbon produced by their homes and cars. If they purchase the credits through our program, the aquarium will receive a matching number of credits. They have help the aquarium go green while going green themselves. Our goal is to make the Aquarium 100% supported by clean energy and we need your help! They can purchase the credits from their own phone by texting Luna to They can also go online or use our ipad to purchase them. If they come to us and show us their completion page on their phone, we will give them a green spadefish car cling. Then let the audience know that you ll be happy to answer any questions at the end of the show. Direct them to the next program and thank them for coming. Then change the input on the TV at the Shoals to show the slide with the information on purchasing RECs. Use the remote found in the dive com. 58
59 MORE INFORMATION ABOUT THE CAPE FEAR SHOALS EXHIBIT The exhibit contains 235,000 gallons of saltwater. The exhibit is 23 feet deep. The temperature is maintained between 72 and 76 degrees Fahrenheit. The filtration on the CFS exhibit circulates at 1500 gallons per minute (gpm). Each main viewing panel is 16 feet tall, 10 feet wide and 8 inches thick. The hemisphere window is much stronger due to the structure of the hemisphere and is only 2 ½ inches thick on the sides and ¾ inches thick in the center. The CFS exhibit has an average of 200 fishes, and the current census should be quoted for accuracy. Most of the animals displayed at the aquarium were collected by our staff, and most were found around the Cape Fear River Basin and offshore areas. Fish are put in a quarantine holding tank for 30 days before they are allowed in the tank to prevent any unwanted disease/bacteria/parasites from entering the tank. The diets of our animals are made up of a variety of different foods. They eat capelin, squid, clams, pellets, and mackerel. The foods given to the animals are fortified with vitamins to ensure the animals get a wellbalanced and nutritional diet. The animals in the CFS exhibit receive close to 100 pounds of food a week. The exhibit is fed three times a week. Public feeding times vary and are announced on the aquariums public address (PA) system. The rockwork and corals in the CFS exhibit have been synthetically created. This was done by a local fabricator and a climbing rock wall company from Wisconsin. Natural structure and corals would not survive for long in such a small space, the harm to the environment from constantly replacing such things would be irreversible. The water in the CFS exhibit is synthetically created seawater. The water starts Kure Beach tap water, and after filtering and softening, a processed sea salt mixture is added. This mixture is diluted to the targeted salinity and specific gravity of our systems. This mixture contains all the elements, major and trace, of natural seawater. All of the corals, sponges are made from epoxy and urethanes and rocks are made out of a material called gunite. You can see live coral in Cape Fear Ledge (Oceans gallery) and Pacific Reef (Exotic Aquatics). Cape Fear Shoals Game Show Questions With large groups of visitors or with school groups, the educator may opt to play a game with those attending the dive show. The game is a Wheel of Fortune style game with true or false answers. When this game is played, the presentation diver takes a laminated true/false card with him/her. The educator asks questions of the audience and the audience answers true or false to the question. Once the audience answers, the diver will hold up the true/false card to reveal the correct answer and then the diver will briefly give more information related to the question. 59
60 Listed below are the questions used during the dive show. (Please note that these questions may be adjusted depending on the circumstances of the collection.) All of these questions are True or False Exhibit Questions 1. There are about 33 species of fishes in this tank. True. Check with the Dive Safety Officer for current numbers. 2. This exhibit is 23 feet deep. True. 3. The water in the tank came from the ocean. False. We created all of the water in this exhibit using freshwater from the Kure Beach city water. We take out chemicals that are bad for the fish and add a lot of salt. 4. The corals and sponges in this tank are real. False. To bring this many corals and sponges to the aquarium would destroy a lot of habitat in the ocean that many plants and animals depend on. These are very sensitive animals and would be difficult to keep alive in this exhibit because of their diet and the fact that other animals in the exhibit would eat them faster than we can grow them. 5. The front windows are 10 inches thick. False. they are 8 inches thick to keep in the 235,000 gallons of water in this exhibit. The weight of the water in this exhibit is equal to the weight of 70 school buses. That s really heavy. 235,000 gallons of water is equal to about 4,000 bathtubs full of water. 6. We put the fishes straight into the tank when we get them. False. Every animal must go through quarantine to make sure that they are not going to spread disease or parasites. Quarantine is where the fish go into a tank that doesn t have anything else in it so we can keep an eye on them. Once we are sure they are healthy and eating well we can add them to the exhibit. 60
61 Diver Questions 1. The blue cord is so the diver doesn t get lost. False. The cord contains the diver s communication cables so that we can talk back and forth. 2. The second diver is so the diver doesn t get lonely. False. Just as you never swim alone, you never dive alone. The second diver is to watch over our diver and keep them safe. 3. The diver is wearing a wetsuit so they don t get cold. True. Even though the water temperature is in the 70s, heat is lost faster in water than in the air. We want to make sure our divers stay warm while they are in the exhibit. 4. The divers have to keep the tank clean? True. Each dive team has a specific part of the tank that they are responsible for. It takes 7 days to clean this exhibit using brushes. 5. The divers can stay underwater for more than two hours. False. The divers never stay in the exhibit for more than an hour at a time. This helps us to make sure that the divers stay safe. Food Questions 1. We feed the animals live food. False. We do not want to confuse the animals between who is a friend and who is food. All of the food we feed is frozen to make sure there are no parasites. The fish get restaurant quality mackerel steaks, squid, and gel food. 2. We do two types of feedings in the Cape Fear Shoals. True. Some animals get target fed using a pole. When we target feed we use a long pole that allows us to put the food right in front of an animal. This helps us to make sure they are getting enough food. Other animals get a broadcast feed. This is where the aquarists throw food on the surface of the water and it s every fish for himself. 3. The sharks get fed three times a week. True. Sharks have a much slower metabolism than some of the other fish so they only get fed three times a week. 4. Sometimes the animals try to eat the sponges in the exhibit. True. The reason we do not have a sea turtle on exhibit is because it kept eating the fake sponges and sea fans. This tells us that the artist did a great job making those look real but it was not good for the turtle. 5. The divers feed the fishes by hand while they are in the water. False. Many of these fish could be released into the ocean and we do not want them to think of people as a source of food. We try to keep these animals as wild as possible. 61
62 Shark Questions 1. There are three different types of sharks in this exhibit. True. Discuss the Bonnetheads, Sand tigers, and Sandbars. 2. The sharks try to bother the divers. False. The sharks are kept well fed so they do not bother the divers. When wearing their equipment the divers are very large and noisy so the sharks tend to keep their distance. 3. All of the sharks will stay in the tank their whole life. False. Most of the sharks will get too large to stay in this tank for their whole lives. Since we catch most of our sharks ourselves we can rerelease them back to where we found them. Otherwise we can trade the sharks to another aquarium for a new fish. 4. The sharks often eat the other fish. False. Since we keep the sharks well fed they are pretty lazy. They are not mindless eating machines and only eat when they are hungry. We also make sure the fish stay healthy so that way the sharks aren t tempted to take a between-meal snack. In the ocean sharks are important for keeping populations balanced by eating the sick and dying fish. So it is part of their natural instinct to eat sick fish. 5. The sharks often lose teeth in the exhibit. True. One shark can lose 30,000 teeth in their lifetime. So we often find shark teeth in the exhibit. They are most often found under their feeding stations. Other Fishes Questions 1. The divers are supposed to touch the fishes so they become friendlier. False. The fish are not our pets so we try to treat them like wild animals. Many of these animals can be rereleased into the ocean and we want to make sure they can survive. 2. The fishes are found off shore from North Carolina. True. These fishes are native to the Atlantic Ocean and can be found off shore from the aquarium. 3. The stingrays try to sting the divers and other fish. False. Stingrays are not aggressive animals and only use their tail for protection. Most often when someone gets stung by a stingray it s because the person stepped on the ray. To avoid being stung by a ray when entering the ocean you want to do the stingray shuffle. 4. The Porcupine Fish sometimes puff up in the exhibit. True. Porcupine Fish puff up as a defense mechanism. They suck in water and can grow to be 4 times as large as they are normally. We do not try to make the Porcupine Fish puff up as this is very stressful. 5. The green moray eel can be 8 feet long. True. Green moray eels are the largest of the eel species. They are long and thin so they can hide in the cracks and crevices on a reef. 62
63 Conservation Questions 1. Sharks are disappearing from the oceans. True. Sharks are important to our oceans because they help to keep other fish populations healthy by eating the sick and dying animals. Sharks are being overfished for their fins and being caught as by catch. By-catch is anything you catch that isn t the fish you wanted. Since many sharks only have a couple pups at a time, it takes much longer for their populations to rebound. 2. We can catch many of these fishes when we go fishing. True. These fish are all native to the coast of North Carolina. Anyone over the age of 16 is required to have a Coastal Recreational Fishing License to catch finfish in the ocean. The annual cost for state residents is $15 and this money is used to maintain the health of coastal fish and their habitats. 3. The ocean is very healthy and we do not need to worry about taking care of it. False. The ocean is a very sensitive ecosystem and our actions have major impacts on its health. Regardless of where you live you are connected to the ocean. The ocean is important for regulating the climate, providing food, and recreation. Because the ocean impacts so much of our lives, it s important that we take good care of it. 4. It is bad to eat seafood. False. It is important to make good seafood choices. Over 75% of all commercially fished species are being over fished: that means we re taking too many of them. Some types of seafood are sustainable harvested and others are not. To make sure you are making good seafood choices, check out a Seafood Watch Card. These can be downloaded from the Monterey Bay Aquarium s website or as an app for your smart phone. 5. There is nothing we can do to protect these animals from land. False. It is important that we take steps to protect the ocean as a whole. When you visit the beach, take your trash with you when you leave. If you want a better challenge, pick up at least one extra piece of trash before you go. Even when you are not at the beach, make sure you pick up your trash as all rivers and streams eventually make it to the ocean. Sustainable and local seafood as another option just in case they never got to the sustainable seafood question. 63
64 DID YOU KNOW? CAPE FEAR SHOALS: The Cape Fear Shoals is an area 20 to 30 miles offshore. It is a habitat for a variety of different organisms, many of which you see here. In this tank, there are a little over 30 species with around animals. The number changes constantly because animals are taken out and replaced. All of the fish in this exhibit are caught locally or shipped to us from different areas to put on exhibit. Fish are put in a quarantine holding tank for 30 days before they are allowed in the tank to prevent any unwanted disease/bacteria/parasites from entering the tank. The water in this tank is man-made. It is a mixture of Kure Beach tap water and boxed salt. All of the corals, sponges are made from epoxy and urethanes and rocks are made out of a material called gunite. You can see live coral in Cape Fear Ledge (Oceans Gallery) and Pacific Reef (Exotic Aquatics). SHARKS: Sharks can replace rows of teeth every 9 to 12 days and can have up to 30,000 teeth in a lifetime. Gray, brown, or black sharks teeth found on the beaches are fossilized. New, white shark teeth are difficult to find because as soon as they fall out, seawater begins to interact with the teeth causing them to change in color and blend in with the sand. The bonnethead shark is the smallest member of the hammerhead family and will only grow to four feet. Sandbar sharks grow to 10 feet. The bonnethead sharks are full grown. The sandbar sharks are juveniles and are only 3 to 8 years old. It is difficult to tell the age of a fish/shark just by looking at it. The average lifespan of a shark is 25 years old, although some can live to be 100 years (whale sharks). The sharks in the Cape Fear Shoals do not bother the fishes or the divers for several reasons: o They leave the divers alone because the divers are bigger than the sharks and make a lot of noise in the water. o They will leave the fish alone (usually) because they are extremely well fed. o A shark will not attack a fish just because it is present; it usually will only attack if it is hungry or the fish is injured. Sharks eat less than the other fish. (They do not necessarily have a lower metabolism for example Mako Sharks). Sharks are fed three times a week from the top of the tank. Aquarists feed them chunks of mackerel from the end of a pole. You are more likely to be struck by lightning than to be bitten by a shark. Sharks have an oily liver that extends the length of their body this helps keep them buoyant in the water. 64
65 STINGRAYS: The stingrays in Cape Fear Shoals are southern stingrays and bluntnose rays. Southern stingrays can grow to 6 feet in diameter. All of the stingrays in Cape Fear Shoals are females. Stingray barbs are made of keratin, the same material as human fingernails. They are located towards the middle of the tail. Stingrays only sting people for defense if they are stepped on. To avoid being stung, the stingray shuffle can be used. GROUPERS: There are four species of grouper in the Cape Fear Shoals: Red, scamp, graysby, and gag grouper. All grouper begin life as females. The most dominant female in a given territory will change into a male. When that male dies, the next most dominant female will become a male. Some grouper are territorial. The three red grouper in this tank all have areas that are designated as theirs. They will spar with one another and change the coloration of the heads to defend their territory. Gag grouper are usually darker in color. The ones in this tank have changed to look albino to blend in with the rocks on the bottom of the tank. North Carolina s grouper fishery is healthy and well managed. This is not true everywhere. In some areas, groupers populations are threatened or endangered. If you enjoy eating grouper, make sure to ask if the fish you are ordering/purchasing is from North Carolina. The red grouper that sits near the front panel likes to be rubbed gently. Explain that touching fish is not something that you should do in the wild. It removes the protective mucus coating that can cause the fish to become sick. ATLANTIC SPADEFISH: The Atlantic spadefish are the logo fish for the aquarium. They are common along beaches and on offshore reefs. The spadefish s favorite food is shellfish and cannonball jellyfish. It is thought that this is the reason why you will sometimes see these fish biting the diver s hair. The spadefish might confuse the diver s hair with the tentacles of a jellyfish. 65
66 BLACK DRUM: The black drum is the largest member of the drum family. They can grow to five and a half feet and weight up to 145 pounds. The whiskers on the drum s chin are called barbels. These sensory organs help the fish find food on the sea floor. The Black Drum stays near the bottom where it will eat the gravel and make a crushing noise inside of the tank. Like most members of the drum family, the black drum can create a sound by manipulating its swim bladder. If you run your hand back and forth through the gravel on the bottom, near the black drum, it will come to your hand thinking it is food. MORAY EELS: Green moray eels are the largest species of moray eel. They can grow to eight feet in length. The largest one in the Cape Fear Shoals is about six feet. Their skin is actually gray-blue in color. They appear green because of a yellow mucus coating on their bodies (yellow + blue = green). There are also smaller, spotted and reticulated moray eels in the exhibit. They are only two to three feet in length. Make the audience guess what color the eel is. Then explain the above bullet. Moray eels constantly open and close their mouths. This is not an aggressive behavior towards humans. They do this to force water over their gills. They do not have gill coverings like the other bony fishes in Cape Fear Shoals. Moray eels hide in caves for most of the day. They are lie and wait predators. They can catch unsuspecting animals, such as octopus, as they swim by. Moray eels have very poor eyesight. In the wild, these eels have bitten divers who have attempted to feed them. They cannot distinguish between the food and the hand holding it. This is why you should never feed any animals in the wild. Many people ask about electric eels. Electric eels aren t eels at all. They are actually closely related to catfish and are only found in freshwater lakes and rivers. Eels do have swim bladders. PORCUPINE FISH: The porcupine fish can grow to lengths of three feet. They swell to over three times their original body size and have defensive spines that stick out when fully inflated. They inflate their bodies by ingesting water into their stomachs, which can make them the size of a large beach ball. They are very weak swimmers making this defense necessary. 66
67 JACKS (SCHOOLING FISH): The permit, African pompano, blue runners, and bar jacks are all closely related. These fish live in large schools, mainly for protection from predators. When groups of fishes swim together, they can confuse larger predators, and may appear bigger than they really are. Schooling fish will also allow slower, injured fish to swim in the middle of the school so they are further protected. SNAPPERS: There are yellowtail, vermilion, red snapper and one gray snapper in the tank. Yellowtail snappers flash bright pink during feeding time. Snappers are voracious predators. They eat other fish and invertebrates. TRIGGERFISH: Triggerfish are named after a unique interaction between their first and second dorsal spines. These spines help them to wedge themselves into reef crevices to hide from predators. Triggerfish eat plankton and invertebrates. The two in the Cape Fear Shoals are two black durgon and two rough triggerfish. Triggerfish are very protective of their habitats. They are also curious and attracted to red or shiny objects. SLIPPERY DICK: Go through three-color phases in its life. Are found in the Western Atlantic from NC to Bermuda as well as south to Brazil. They are commonly found on shallow reefs. Feed on invertebrates. HOGFISH: Largest member of the Wrasse family in the Western Atlantic. Coloring varies; the color pattern changes drastically between juvenile and adult hogfish. All members of this family begin life as a female and then change to a male. The head of the male hogfish resembles a pig s snout. That is how the fish got its name. 67
68 ANGELFISH: We have two types of angelfish in this exhibit: Gray and French. Found on shallow reefs Adaptations for living on the reef include being vibrantly colored and laterally compressed. These adaptations allow for hiding in the nooks and crannies of the reef (blending in) to occur more readily. Angelfish are commonly mistaken for butterfly fish. The difference between the two species is that the angelfish has preopercle spines (extensions of the gill covering) and the butterfly fish lacks them. The largest species of angelfish is the Gray Angelfish (we have two in the tank!), which can reach up to 60 cm (approx inches) in length. They are known as a bold fish and will commonly approach divers. INVERTEBRATES: There are no invertebrates, such as crabs, lobsters, and jellyfish, in the Cape Fear Shoals because these animals are generally prey for fishes. Coral and sponges are also marine invertebrates and not present in the cape Fear Shoals exhibit. OTHER INTERESTING FACTS: The fishes exhibit a behavior known as flashing. This is when the fishes come down to the bottom and scrape their sides on the rocks. It has not been proven, but they probably do this to scratch an itch or they are trying to remove a parasite or bacteria on their skin. We have a green sea turtle in the Cape Fear Shoals. Sea turtles act on instinct and feed on corals and sponges naturally. The fish in this exhibit are fed a variety of different foods and by various methods. The schooling fish are scatter fed capelin, silversides, and squid. The slower-moving fish are fed mackerel steaks and larger squid. The sharks are target fed mackerel steaks on poles. The rays can be either target fed or hand fed mackerel steaks. French angelfish are a tropical fish, but can come to North Carolina waters through the Gulf Stream. They form life-long pair bonds; in other words, they are a monogamous species of fish. MOST COMMONLY ASKED ABOUT FISH Sharks Bonnethead Sandbar Sand tiger Southern Stingray Bluntnose Stingray Yellowtail Snapper Black Drum African Pompano Porcupinefish Atlantic Spadefish Moray Eels Green Reticulate Spotted Grouper Red Scamp Gag 68

69 BONNETHEAD SHARK: Sphyrna tiburo Prepared by: Cathleen Bester The bonnethead shark is found in the warmer waters of the Northern Hemisphere from New England to the Gulf of Mexico and Brazil. They usually occur in small schools, however during migration events they can be found in groups of hundreds. The bonnetheads have a preference for warmer waters and migrate more in the winter months. DISTINGUISHING FEATURES: The shovel- or bonnet-shaped head is a distinguishing characteristic of this. The eyes are located at the ends of the evenly rounded lobes of the flattened head, increasing the field of vision. The bonnethead can be either gray or gray-brown in color occasionally with dark spots on their sides. The teeth of a bonnethead include small, sharp teeth in the front for cutting prey and large flat molars in the back for grinding. SIZE: Bonnetheads reach an average size of inches with a maximum length of approximately 59 inches, with females reaching greater lengths than males. DIET: Bonnetheads feed during daylight hours primarily on crustaceans, dominated by blue crabs. They also feed on mantis shrimp, pink shrimp, mollusks, and small fishes and occasionally sea grasses. Females tend to feed more often due to the need for increased amount of energy budgeted for reproductive efforts. REPRODUCTION: In Florida waters, bonnetheads are believed to mate during the spring and autumn or perhaps even year-round. After mating, the females can store sperm for up to four months prior to actually fertilizing the eggs. The control over the fertilization period is believed to be an adaptation to ensure that the pups are born during optimal conditions for their survival. Bonnetheads are "viviparous", or live bearing. Female bonnetheads produce eggs that are maintained and nourished by a yolk sac during the initial phase of gestation. The gestation period, shortest among all sharks, is only four to five months. PREDATORS: Larger sharks are potential predators of the bonnethead. IMPORTANCE TO HUMANS: Bonnetheads are a common inshore shark and are often taken by small fisheries with shrimp trawls, nets, longlines, and hook-and-line. The flesh is marketed as fresh, fresh frozen, or dried salted for human consumption as well as processed into fishmeal. Recreationally, bonnetheads can provide great sport on light tackle or fly fishing gear. 69

70 SAND TIGER SHARK: Carcharias Taurus The sand tiger shark can be found in most warm seas throughout the world except for the eastern Pacific. In the western Atlantic Ocean it ranges from the Gulf of Maine to Argentina and is commonly found in Cape Cod and Delaware Bay during the summer months. The sand tiger shark s range extends to a variety of areas including the surf zone, shallow bays, coral and rocky reefs and deeper areas around the outer continental shelves. The sand tiger is migratory within its region, moving poleward during the summer while making equatorial movements during the fall and winter months. Prepared by: Peter Cooper DISTINGUISHING FEATURES: Often swims with mouth open Two dorsal fins almost equal in size. Caudal fin with elongated upper lobe and prominent subterminal notch, Juveniles have yellow-brown spots. Conical snout, with mouth extending past the eyes. Large teeth arranged in three rows, which have long smooth narrow-edged cusps. The ragged looking teethe give the sand tiger shark its menacing look. SIZE: Average size ranges from four to nine feet with maximum length believed to be around 10.5 feet in females and 9.9 feet in males. DIET: The diet of this ravenous feeder mainly consists of a wide variety of small bony fish, rays, squids, crabs, lobsters and other smaller sharks. Cooperative feeding has been observed by schools of sharks surrounding and bunching schooling prey in order to feed on them. REPRODUCTION: Embryonic development is ovoviviparous. Usually only one pup survives in each uteri since the largest embryo ends up eating all of its smaller siblings during gestation. This generally limits litter sizes to two individuals. Gestation periods are believed to be around eight to nine months long and pups generally measure 39 inches at birth. PREDATORS: Juveniles are susceptible to predation by larger sharks. Mature individuals have no major predators. DISTINCTIVE BEHAVIOR: Gulps and stores air to be able to maintain neutral buoyancy in the water column. IMPORTANCE TO HUMANS In the North Pacific, Indian Ocean and off the tropical west coast of Africa, the sandtiger is commercially fished for food; fins are sold in oriental markets for sharkfin soup and jaws and teeth are used for trophies and ornaments. The sand tiger shark is not a commercially targeted species in North American waters, partially due to its protected. 70

71 SANDBAR SHARK: Carcharhinus plumbeus Prepared by: Craig Knickle The sandbar shark is a coastal-pelagic species that inhabits temperate and tropical waters. It has a global distribution, being found in the Western and Eastern Atlantic, including the Mediterranean. In the Indo-Pacific, it ranges from the Persian Gulf, Red Sea and South and East Africa to the Hawaiian Islands. It also inhabits the Revillagigedo and Galapagos islands in the Eastern Pacific. It is a bottom-dwelling, shallow coastal water species. It tends to prefer waters on continental shelves, oceanic banks, and island terraces but is also commonly found in harbors, estuaries, at the mouths of bays and rivers, and shallow turbid water. As with many sharks of its genus, the sandbar shark undergoes seasonal migrations. DISTINGUISHING FEATURES: The sandbar shark's most distinguishing characteristic is it s taller than average first dorsal fin. It has a bluntly rounded snout that is shorter than the width of the mouth. This shark is bluish to brownish gray dorsally, and a lighter shade of the same color to white ventrally. Although the tips and outer margins of the fins are sometimes a darker tone, this species has no obvious markings. The upper teeth are broadly triangular, serrated with high cusp, while the lower teeth are narrower and more finely serrated. SIZE: A moderately large shark that can reach up to 7.5 feet in length. The sandbar shark can weigh from lbs at maturity but averages 110 lbs for males and 150 lbs for females. DIET: The sandbar shark is an opportunistic bottom-feeder that preys primarily on relatively small fishes, mollusks and crustaceans. The sandbar shark feeds throughout the day but becomes more active at night. REPRODUCTION: In the northern hemisphere, mating occurs in the spring or early summer (May-June). Sharks in the southern hemisphere, in correlation with the warmer summer season, mate in late October to January. The gestation period can range from 8-12 months depending upon geographical location. Remarkably, both sexes are almost always represented in a 1:1 ratio. Young sandbar sharks resemble their adult parents, although the characteristically large first dorsal fin may not yet be as prominent at this early stage. PREDATORS: Juvenile sandbar sharks may fall prey to large sharks including the bull shark, however adults have few if any predators. IMPORTANCE TO HUMANS: The sandbar shark plays an important role in the commercial shark fishery along the eastern United States. In fact, because of its numbers, moderate size, palatable meat, and high fin-to-carcass ratio, it is the primary targeted species in this area. It is also harvested in the eastern North Atlantic as well as the South China Sea for its fins, flesh, skin and liver. In addition to the significant impact the sandbar shark has on the commercial fishery, it is valuable to recreational fishermen as a game fish. 71

72 SOUTHERN STINGRAY: Dasyatis Americana Prepared by: Nancy Passarelli and Andrew Piercy The Southern stingray occurs in tropical and subtropical waters of the southern Atlantic Ocean, as well as the Caribbean and the Gulf of Mexico. It is most abundant near Florida and the Bahamas. Like many rays the Southern ray prefers shallow coastal or estuarine habitats with sand/silt bottoms, although they have been observed in depths to 180 feet (53 m). As a bottom dweller, the southern stingray avoids walls and large reef structures where it is difficult to feed. DISTINGUISHING FEATURES: The flattened pectoral fins form a disc that continues anterior to the head and posterior to the pelvic region and is s more angular diamond shape than other rays. The head is elevated and contains spiracles that enable the ray to take in water dorsally while lying on the seabed. The gills, which expel water, are located ventrally. The tail contains a slightly flattened spine with teeth on either side. Dorsal coloration varies between dark gray, green, and brown. Ventral coloration is predominantly white with dorsal coloration often bleeding over the edges of the disc onto the ventral surface. Southern stingrays have multiple rows of teeth that are relatively uniform in size, which are also known as tooth plates. SIZE: The southern stingray reaches a maximum disc width of 79 inches (200cm) and weight of 214 lbs (97 kg). DIET: Feeding constantly during the day and night the Southern stingray feeds on large epibenthic prey such as teleosts and crustaceans. Other prey can include stomatopods, mollusks, and annelids. It feeds by slowly grazing along the sandy ocean floor, relying on electro-reception combined with a strong sense of smell and touch. REPRODUCTION: As with other rays, the embryo subsists on a yolk sac for nourishment early in development. When the yolk sac is absorbed, nourishment is provided through uterine milk from maternal secretions. Gestation takes 4-11 months and litter sizes range from 2-10 pups, with an average of 4 pups per litter. The pups have long, slender tails and broad wing-like pectoral fins at birth. PREDATORS: The Southern stingray is preyed on by many species of sharks and other large fishes. IMPORTANCE TO HUMANS: Research is being conducted by the biomedical and neurobiological industries on the venomous component of the tail spine and its possible future use in applications within these fields. Stingrays are of considerable importance to ecotourism, with D. americana often featured in dives such as at "Stingray City" in the Cayman Islands. Native people in Polynesia, Malaysia, Central America, and Africa have used stingray spines to make spears, knives, and other useful tools. 72

73 BLUNTNOSE STINGRAY: Dasyatis say DISTRIBUTION: Massachusetts to the Florida Keys; western Gulf of Mexico and Texas; Argentina, Brazil, West Indies and the Antilles HABITAT: Subtropical coastal waters, lagoons and estuaries; In northern regions of their distribution, these rays are known to migrate from coastal areas to estuaries during winter months. SIZE: Have been known to reach 39 inches in disk width and weigh up to 33 pounds; Females tend to be slightly larger than males FEEDING HABITS AND PREDATORS: Bottom feeders with a diet consisting of fish, shrimp, crabs, clams; Predators include large fish, including sharks REPRODUCTION: Give live birth; 1-6 young per litter; Gestation is months THREATS: Taken as bycatch in trawl and gillnet fisheries; Threat is currently considered to be minor 73

74 GREEN MORAY: Gymnothorax funebris Prepared by: Cathy Bester and Robert H. Robins The green moray occurs in the western Atlantic Ocean from New Jersey to Bermuda and the northern Gulf of Mexico, south to Brazil, including Ascensión Island. They are common throughout the warm waters of the Bahamas, Caribbean Sea, and Florida Keys. Associated with rocky shorelines, coral reefs, and mangroves, the green moray is a benthic, solitary fish. The species is also known from tidal creeks, harbors, areas over sand and mud bottoms, and among seagrass beds. DISTINGUISHING FEATURES: The elongate body is laterally compressed or "flattened" and this fish possesses a muscular appearance. A layer of yellowish mucus that protects the animal from parasites and diseases covers the scaleless, thick skin. It is this mucus that lends the moray the green tint for which it is named. The green moray lacks pelvic and pectoral fins. The mouth is constantly opening and closing, mechanically pumping the water required for respiration. This water passes over the small, spherical gills, eventually exiting via the gill slits. The gills and gill slits are very small, as the oxygen demands of this rather sedentary fish are not as great as more active species. SIZE: Max. reported size is 8ft and 65 pounds. Avg. size is likely closer to 6ft and 30 pounds. DIET: The green moray is nocturnal predator of fishes, crabs, cephalopods and shrimps that relies largely on its sense of smell to locate prey. REPRODUCTION: Moray eels, like all true eels, are oviparous. True eels along with the closely allied tarpon, bonefish, and ladyfish produce larvae known as leptocephali. These transparent, ribbon-like larvae drift w/ plankton as they develop. Leptocephali possess pectoral fins, while adults don t. It is during the transformation from leptocephalus to juvenile that the pectoral fins are reabsorbed. PREDATORS: Little is known regarding the predators of the green moray. Large individuals likely have few natural predators. IMPORTANCE TO HUMANS: Green morays are of interest to divers, private aquarists with the facilities to maintain them, and with visitors to large commercial aquaria. The aesthetic appeal of the green moray has therefore generated a great deal of economic interest. Within their native range some indigenous peoples eat them but the risk of contracting ciguatera poisoning from this species is considered great. 74


75 SPOTTED MORAY: Gymnothorax moringa The spotted moray occurs in the Western Atlantic from the USA to Bermuda and Brazil, including the Gulf of Mexico and the Caribbean. It is commonly found along the North Carolina coast. Spotted moray eels are solitary animals and are usually found in holes or crevices with only their heads protruding. DISTINGUISHING FEATURES: The Spotted moray is a typical medium-sized moray eel. It has a long snake-like body, is white or pale yellow in color with small overlapping dark-brown spots. SIZE: It can grow to over a meter in length and weigh up to 2.5 kg. DIET: They are active during the day and sometimes seen hunting with other predators. They feed primarily on fish and benthic crustaceans. IMPROTANCE TO HUMANS: Marketed fresh and salted and is often traded as an aquarium fish. RETICULATE MORAY: Muranena retifera The reticulate moray is found in the Western Atlantic from New England to Florida and through the Gulf of Mexico. It is also found in Yucatan and Venezuela. It is known only from moderate depths along outer continental shelf. DISTINGUSHING FEATURES: Reticulated pattern of light brown blotches on dark brown background. 75

76 PORCUPINEFISH: Diodon hystrix Prepared by: Casey Patton The porcupinefish and balloonfish are widely distributed species, found circumtropically and in temperate marine environments. The porcupinefish is the only member of its genus to be found in the Mediterranean Sea. Adults are generally found inshore in shallower waters, around areas that offer shelter, such as caves, shipwrecks, reefs, and ledges. They are nocturnal and solitary creatures, commonly residing in holes and crevices. DISTINGUISHING FEATURES: The porcupinefish gets its name from the numerous long spines located all over the head and body. There are approximately 20 spines in a row between the snout and dorsal fin.these fish are capable of expanding their body size by taking in water and inflating when threatened. The spines of the porcupinefish only stick out when the fish is inflated, at all other times the spines lay flat against the body. When fully inflated, the fish has can be three times its normal size and create a great presence to deter predators. Body is grayish-tan with small black spots. The teeth are fused together into a single unit, creating a strong, beak-like mouth. SIZE: Adults can reach lengths up to 36 inches (91 cm), making them the largest spiny puffer species. DIET: They are nocturnal predators, with strong jaws for feeding on snails, hermit crabs, and sea urchins. REPRODUCTION: The eggs are spherical, drift with the current, and hatch after about five days. Pelagic juveniles are often associated with large clumps of floating seaweeds called sargassum, and are often consumed by dolphin (mahi mahi) and billfishes. The duration of this pelagic stage is unknown, but at some point the juveniles travel to shallower waters to become adults. PREDATORS: The porcupinefish is eaten by large carnivorous fishes including the dolphinfish, wahoo, and sharks. IMPORTANCE TO HUMANS: They secrete a toxic skin substance so are usually considered poisonous, although they have been known to be eaten in Hawaii and Tahiti. In the orient the dried, inflated bodies are sold as tourist novelties. And on some Pacific islands, the dried skins were used in the past as war helmets. They are not normally caught for human consumption. 76

77 ATLANTIC SPADEFISH: Cheatodipturus faber Prepared by: Cathleen Bester The Atlantic Spadefish is limited in range to the Atlantic Ocean from Massachusetts (US) south to southeastern Brazil, including the northern Gulf of Mexico. It is also found off Bermuda and throughout the Caribbean. This schooling fish is abundant within the shallow marine and brackish waters of mangroves, beaches, harbors, and shipwrecks. It is found at depths of 3-35 m. Juvenile Atlantic spadefish reside in very shallow water, often swimming at an angle, disguising themselves as dead leaves or mangrove pods to avoid predation. DISTINGUISHING FEATURES: The Atlantic spadefish is a deep-bodied, compressed disk-shaped fish with a blunt snout. This fish is silvery in color with 4-6 black vertical bands on each side of the body. These bands sometimes fade or become obscure in larger fish. The first band runs through the eye and the last band runs through the caudal peduncle. This spadefish has small, brush-like teeth arranged in bands. There are no teeth on the roof of mouth. SIZE: The Atlantic spadefish reaches a maximum total length of 35.8 inches (91.0 cm) and a maximum reported weight of 19.8 pounds (9 kg). DIET: The Spadefish eats benthic invertebrates including crustaceans, mollusks, annelids, sponges, and cnidarians. This fish may also feed occasionally on plankton as well as nibble on jellyfish tentacles. Feeding occurs throughout the day with a peak around midday. REPRODUCTION: Spawning season runs from May through September on the inner shelf off the coast of the US. A single female may release up to one million eggs each spawning season. The eggs are small and buoyant, hatching after approximately 24 hours. PREDATORS: Predators of the Atlantic spadefish include sharks such as the smalltail shark (Carcharhinus porosus) as well as large fishes including the tripletail (Lobotes surinamensis). IMPORTANCE TO HUMANS: The Atlantic spadefish is of only minor commercial value. The flesh of this fish is considered relatively good although they have been associated with ciguatera poisoning. Atlantic spadefish are often residents of large public aquarium facilities and they have been successfully reared in captivity. 77

78 RED GROUPER: Ephinephelus morio Information from: This fish is found from Massachusetts to Florida including Bermuda, the Gulf of Mexico, the Caribbean, south to Brazil. The red grouper is most common around Florida and the Gulf of Mexico. The red grouper inhabits waters over a variety of bottoms, but mostly over rocks to about 75 fathoms. Juveniles are common inhabitants of seagrasses and shallow reef areas in south Florida, whereas fish less than 6 years old can be found in nearshore reefs. Adults occur in offshore hardbottom habitats, where they are harvested commercially and recreationally. DISTINGUISHING FEATURES: Eyes are large, and the nostrils are unequal in size. Body color is highly variable, but typical color is dark red to reddish brown, fading to pink or lighter red on the sides and ventral surface. Whitish spots and blotches are scattered over the body surface, with small black dots around the eyes. The dorsal, anal, and caudal fins all have dark outer margins. Red groupers have a shorter body, 11 dorsal spines, 9 soft rays on the anal fin, and by thicker skin at the bases of the dorsal and anal fins. SIZE: The Red Grouper grows to approximately 125 cm (4.1 feet) and may weigh 23 kg (50.7 pounds) or more. DIET: All groupers are unspecialized and opportunistic in their feeding habits. Red grouper are among the top predators in reef community food webs and may control some aspects of community balance in reef systems. The diet is varied but commonly includes lutjanid and sparid fishes, as well as many types of invertebrates including xanthid and portunid crabs, spiny lobster, snapping shrimp, stomatopods, octopus, and squid and penaeid shrimp. REPRODUCTION: Red grouper, like most serranid fishes, are protogynous hermaphrodites, beginning life as females, with some later transforming into males. Red grouper eggs are pelagic, measuring less than 1mm in diameter and having a single oil globule. Larval red grouper 78

79 leave the plankton after approximately 1 month and metamorphose to benthic juveniles when they reach approximately mm. PREDATORS: Predators of smaller groupers include other groupers and moray eels Larger groupers are likely preyed upon by sharks, among them the sandbar shark, Carcharhinus plumbeus; and the great hammerhead, Sphryna mokarran. HUMAN IMPORTANCE: The red grouper is both commercially and recreationally important throughout its range, and is one of the most abundant grouper species in southern Florida. SCAMP : Mycteroperca interstitialis Information from: The Scamp is found in the Western Atlantic, including the Gulf of Mexico, Bermuda, the Caribbean (mainly insular localities), and Brazil. Found mainly on rocky or coral bottoms from the shoreline to at least 55 m depth; small and middle-sized individuals commonly occur in mangrove-lined lagoons. More common in island waters than along the coast. DISTINGUISHING FEATURES: Dorsal spines (total): 11-11; Dorsal softrays (total): 16-18; Anal spines : 3; Anal soft rays: Tan to brown above, paler below; upper parts of head and most of body usually have small, brown, close-set spots; sometimes uniformly brown. The tricolored pattern of the juveniles mimics that of the juveniles of the clown wrasse, Halichoeres maculipinna. SIZE: Common to about 15 lbs. Maximum size recorded: 84.0 cm. Maximum weight recorded: 10.5kg Maximum reported age: 41 years DIET: Feeds on smaller fishes. REPRODUCTION: Sex reversal is observed in this species. The young individual females become male. The scamp is a pelagic spawner. PREDATORS: Predators of smaller groupers include other groupers and moray eels, larger groupers are likely preyed upon by sharks, among them the sandbar shark, Carcharhinus plumbeus; and the great hammerhead, Sphryna mokarran. HUMAN IMPORTANCE: Marketed fresh as food in markets. 79

80 GAG GROUPER: Mycteroperca microlepis Prepared by: Cathleen Bester The gag grouper is found in the western Atlantic Ocean from North Carolina south to the Yucatan Peninsula. Residing in brackish to marine waters, the gag grouper is found offshore on rocky bottom as well as inshore on rocky or grassy bottoms to depths of 500 ft. It is common on rocky ledges along the eastern Gulf of Mexico. Adult gag grouper school in groups of 5-50 individuals or may be found solitary. DISTINGUISHING FEATURES: The gag grouper is typical among the groupers with an oblong-shaped elongate body. The head is long while the mouth is large with a protruding lower jaw. The bases of the dorsal and anal fins are covered with scales and thick skin. Body color of the gag grouper is dependent upon the sex and age of the fish. Juveniles and mature females are pale to brown-gray with dark blotches and wormshaped markings resulting in a marbled appearance.. Inactive individuals sometimes display a camouflaged pattern with dark brown "saddles" separated by white bars just below the dorsal fin. Large mature males are pale to medium gray in color with barely visible reticulations below the dorsal fin. The ventral surface is darker gray to black in color. There are two well-developed canine teeth present anteriorly in each jaw. These are quite effective for holding prey items. SIZE: Gag grouper reach a maximum total length of 4.75 ft and a maximum weight of 80.5 lbs. DIET: Adult gag grouper primarily feed on fishes, crabs, shrimps, and cephalopods while juveniles measuring less than 8 in. in length feed on crustaceans residing in shallow grass beds. REPRODUCTION: Similar to other serranids, gag grouper are protogynous hermaphrodites. They begin life as female, however after a few years of spawning as a female, some gag groupers change sex, becoming functional males. This transition generally occurs at yrs of age. Spawning occurs from January through May in the Gulf of Mexico and the South Atlantic Bight at offshore spawning grounds. The fertilized eggs are pelagic and transparent, containing a single oil globule. Eggs hatch after approximately 45 hours at water temperatures of 70ºF (laboratory study). The kite-shaped larvae persist for days, as post larvae they migrate from the spawning grounds to inshore seagrasses, mangroves, oyster reefs and salt marshes. Juveniles remain in these locations for approximately 3-5 months before they migrate to offshore reefs. PREDATORS: Juvenile gag grouper may fall prey to cannibalism as well as to large fishes. Sharks and other large fishes are known predators of adult gag grouper. IMPORTANCE TO HUMANS: The gag grouper provides important recreational and commercial fisheries. It is caught with hook and line and the flesh is marketed fresh. 80

81 YELLOWTAIL SNAPPER:Lutjanus chrysurus Prepared by: Cathleen Bester The yellowtail snapper is found in the western Atlantic Ocean from Massachusetts to Bermuda and southward to southeastern Brazil, including the Gulf of Mexico and Caribbean Sea. It is most common in the Bahamas, off south Florida and in the Caribbean Sea. Adult yellowtail snappers live over sandy areas near deep reefs at depths of feet (10-70m), while small adults tend to congregate over hard bottom habitats. Once established, adult yellowtail snapper tend to remain in the same area for long periods of time. DISTINGUISHING FEATURES: In comparison with most other snapper species the head and mouth of the yellowtail snapper are small. The pectoral fins are long, reaching the anus. An unusual characteristic among snappers in our area, the caudal fin of this species is deeply forked with the upper lobe longer than the lower one. The yellowtail snapper has an olive to bluish back and upper sides with yellow spots. The lower sides and belly have alternating narrow, longitudinal pink and yellow stripes. Perhaps most conspicuously, a prominent midlateral yellow stripe begins at the mouth and continues to the caudal fin base, becoming broader as it passes the dorsal fins. The caudal fin is yellow while the anal and pelvic fins are whitish in color. Although most teeth in the upper jaw are densely packed, fine, or hair like "villiform" teeth, there are several canine teeth present as well the latter constituting a definitive characteristic of all snappers. SIZE: Adult yellowtail snappers may reach a maximum length of 30 inches. This fish rarely exceeds weights of 5 pounds. DIET: Adult yellowtail snappers are nocturnal predators. They feed on benthic organisms including crabs, shrimp, cephalopods, worms, and fish. Juveniles, living primarily among seagrasses, feed on plankton. REPRODUCTION: Spawning occurs year round, peaking at different times in different locations, with an overall activity decline in the winter months. Spawning yellowtail snapper form offshore aggregations. The spherical eggs are released into open waters and contain an oil droplet, which provides buoyancy in their pelagic environment. The eggs hatch within 24 hours, producing sparsely pigmented larvae. PREDATORS: Natural predators of adult yellowtail snapper include sharks and other large predatory fishes, including barracuda, mackerel and grouper in addition to other snapper species. Larvae and juveniles face a wide array of predators. IMPORTANCE TO HUMANS: The bar jack is a sport fish, caught mainly on light tackle. It also appears in commercial catches made using seines and trawls. Its edibility is fair to good and is marketed fresh in the Bahamas. 81

82 BLACK DRUM: Pogonias cromis Information from: The black drum is found on the Atlantic coast of the United States, Pogonias cromis occurs from southern New England south through Florida and the Gulf of Mexico, to Argentina. It is much more common south of Chesapeake Bay. Juveniles are found more often over muddy bottoms in estuaries. Adults are usually common over sand or sand/mud bottom types in shallow coastal and estuarine waters, especially in high runoff areas, oyster reefs and shell hash. Adults sometimes move onto nearshelf waters, but are primarily estuarine-dwelling and show little migratory behavior. Image Source: DISTINGUISHING FEATURES: The head is short with a blunt snout and inferior, horizontal mouth. The chin has 5 pores and short barbels set close to the inner edges of the lower jaw. The pharyngeal teeth are small and set in broad bands for effective grinding of mollusk and arthropod shells. The vomer, palatines and tongue lack teeth. Body color in adults is a silver to black base color, highlighted with a coppery or brassy sheen. Fins are dusky to black in color. Young typically have 4-6 vertical black bars along their sides. Coloration may change depending on habitat or age of the fish. SIZE: Grows to a maximum size of approximately 170 cm (67 inches) and may weigh as much as 51.3 kg (113.1 pounds).maximum age is estimated to be 43 years on Florida's Gulf coast, and 58 years on the Atlantic Coast. DIET: Black drum are primarily bottom feeders, though they have been occasionally observed feeding near the surface on small finfishes such as menhaden. Larvae feed primarily on zooplankton. Juveniles feed on annelids, soft crustaceans, amphipods, and small fishes. Larger drum consume mostly mollusks and crabs, while the largest specimens consumed mollusks and shrimp. REPRODUCTION: Pogonias cromis spawns in bays, estuaries and nearshore waters. Spawning periods are dependent upon geographic location. Black drum are multiple spawners with continuous oocyte recruitment throughout the spawning season, and are capable of spawning approximately every 3 days. Pearson (1929) estimated that a ripe female black drum measuring 1.1 m (43.3 inches) total length (TL) would produce approximately 6 million eggs annually. After hatching, larvae rely upon tidal currents for transport into estuaries, where they begin appearing in February or early March. PREDATORS: Juvenile black drum are preyed upon by a variety of larger fishes such as seatrout and jacks. Larger black drum are likely to be preyed upon by sharks. IMPORTANCE TO HUMANS: Black drum are not an important commercial species in Florida, but are considered important recreationally. 82

83 AFRICAN POMPANO: Alectis ciliaris The African Pompano is found in tropical waters (65-80 degrees F) worldwide at depths of less than 100 feet. They are found in the waters of the US, South America, Africa, throughout the Indian Ocean, and along Asia and Australia. Adults are found more commonly along the coastline, with juveniles occurring more in the open ocean. DISTINGUISHING FEATURES: Are a deep and laterally compressed fish in the Jack (or Carangidae) family. A major distinguishing feature of the adult is the curved shape of its head. The fish looks scaleless, but it actually has very small embedded scales on its body. The juveniles are distinctive due to having trailing anal and dorsal fin filaments which recede with age. The body is a silvery-metallic blue to blue-green color, being darkest on the head and upper shoulders while the underside is a more silver color. SIZE: Commonly reach a length of 130 cm; with a maximum length of 150cm. The maximum known weight for this fish is 22.9kg. DIET: A schooling predatory fish, consuming a wide range of crustacean (decapods, carids, copepods), small fish and cephalopods, REPRODUCTION: Not much is known about their reproductive habits, but a study in India indicated a bloom of Pompano larvae in April. PREDATORS: Preyed upon by larger fish especially tuna and mackerel as well as sharks. HUMAN IMPORTANCE:Caught through trawling and hook and line fishing, but are barely used in commercial/recreational activities. 83

84 Filtration Systems There are three basic types of filters -- biological, chemical and mechanical. NCAFF has all three systems used to maintain water quality in an aquarium. In this section, there are descriptions and pictures of types of filtration used at NCAFF. Biological Filtration this filter type provides surface area on which bacteria can grow. These bacteria break down ammonia into nitrites and nitrates. Ammonia and nitrites are toxic to fish; however, nitrates are less toxic to fish. These bacteria are essential in maintaining water quality (Cooper, 2003). One medium used for growing bacteria at NCAFF is called bio-balls. These black, multi-surfaced balls provide multiple surfaces for growing beneficial bacteria. Figure 6 Biological Filtration Using Bio-Balls. 84
.")

85 Fluidized beds are another form of biological filter used at the aquarium. Water slowly flows through the sand in the filter chamber causing the sand to become suspended in the water column (Crystal Reef, 2003). Beneficial bacteria grow on the multi-faceted granules of sand. The force of the water is gentle enough to promote growth without washing the bacteria off of the sand particles. Figure7 A Row of fluidized bed filters provide biological filtration for the Cape Fear Shoals exhibit. Figure 8 A smaller fluidized bed filter provides the same function for smaller exhibits. 85

.")
86 Chemical Filtration This process uses various particles to remove impurities by chemically bonding the two together. Examples of chemical filtration are as follows: 1. Activated carbon Activated carbon will remove a wide variety of organic molecules by simply trapping them in the carbon pores, by adsorbing them or by chemically bonding to them (Delbeek). Figure 9 A Purpose Built Activated Carbon Filter Made By NCAFF Aquarist. Figure 10 A Commercially Built Activated Carbon Filter. 86

87 2. Foam Fractionators (Protein Skimmer) A foam fractionator consists of a column through which a very fine mixture of air and water is pumped. If you have spent any time along an ocean shore, you may have noticed varying amounts of foam. This foam is produced by the action of the waves which combines air, water and certain polar organics to form a stable foam. A foam fractionator works in a similar manner. If the foam is collected, proteins and other organics can be removed from the water before they are mineralized into nitrogen-containing compounds and other toxins (Delbeek). Figure 11 A Small Foam Fractionator (Protein Skimmer). 87
.")
88 3. Ozone Ozone is generally used in conjunction with a foam fractionator or a pressurized air reactor. Ozone is mixed with air and introduced into a contact chamber. There, the ozone-air mixture mixes with the aquarium water and organics are oxidized (Delbeek). Figure 12 An Ozone Contact Chamber Used To Oxidize Organics 88

. Figure 13 Sand Filters Force Water Through The Chamber At A High Rate Of Speed.")
89 Mechanical Filtration This type of filtration traps suspended impurities as the water passes through the material. Sand is used to trap biological waste as water passes through it at high rates of speed (Crystal Reef, 2003). Figure 13 Sand Filters Force Water Through The Chamber At A High Rate Of Speed. Figure 14 Large Sand Filters Work With Other Filters To Clean Impurities From the Water. 89

90 Bag filters are another mechanical method for trapping biological waste. Impurities are trapped within the fibers of the fabric. These bags must be washed out and replaced in order to continue to be an effective means of filtration. Figure 15 A Bag Filter In Operation At The Touch Tank Life Support. 90
91 Nitrogen Cycle The nitrogen cycle of an aquarium is a chain reaction in nature resulting in the birth of various types of nitrifying bacteria, each with their own job to do. Each newborn bacterium consumes the previous one, and in turn gives birth to the next bacteria. The three components involved to make this happen are ammonia (NH³ or NH³+4), nitrite (NO²), and nitrate (NO³). In general the nitrogen cycling process usually takes about 30 days, but there is no exact time frame for this process to complete its task, as each aquarium is different. Factors such as how many fish, other livestock, and organic matter are present in the tank can vary the completion time (Hauter, 2010). Water Changes Water changes remove accumulated biological waste from the aquarium, correct ph problems in the tank and replenish trace elements. Cross Contamination This occurs when water from one exhibit is introduced into another exhibit of the same water type. Saltwater from one exhibit should not contaminate another saltwater exhibit. Freshwater should not be introduced into other freshwater exhibits. 91
92 References Encyclopædia Britannica, Inc. ( ). ph. Retrieved May 12, 2010, from Answers: answers.com (2010, June 20). Dive Training. Advantages and Disadvantages of Acrylic Aquarium. (2009). Retrieved 5 26, 2010, from Pet Happy: Blair, L. (n.d.). Selene vomer. Photo.net. Retrieved May 15, 2014, from Burek, J. a. (n.d.). Jacknife fish, Equetus lanceolatus. The ENCYCLOPEDIA OF THE SANCTUARY. Flower Gardens. Retrieved May 13, 2014, from Burek, J. a. (n.d.). Knobbed Porgy, Calamus nodosus. The ENCYCLOPEDIA OF THE SANCTUARY. Flower Gardens. Retrieved May 13, 2014, from =9 Charpin, F. ( ). Black Durgon, Melichthys niger. Reefguide.org. Grand Cayman. Retrieved May 15, 2014, from Charpin, F. ( ). Bluestriped grunt, Haemulon sciurus. Reefguide.org. Grand Cayman. Retrieved May 15, 2014, from Charpin, F. ( ). White grunt, Haemulon plumieri. Reefguide.org. Grand Cayman. Retrieved May 15, 2014, from Cliff. (2008, July 20). Spotfin Hogfish Bodianus pulchellus. Wikimedia Commons. Retrieved May 13, 2014, from Coleman, F. (2001). Shelf and Shelf-Edge Reefs of the West Florida Shelf. Ocean Explorer. Ocean Explorer. Retrieved May 15, 2014, from l Cooper, D. M. (2003). Retrieved March 27, 2010, from Aquaria: Crystal Reef. (2003). Retrieved April 20, 2003, from lemoorenet.com: 92
93 Davies, J. M. (2013, January 27). A metre long African Pompano on Cobblers Reef. Wikimedia Commons. Retrieved April 30, 2014, from Delbeek, J. C. (n.d.). Marine Aquarium Chemical Filtration. Retrieved March 27, 2010, from Education Department. (ND). Volunteer Manual Fort Fisher. Kure Beach: North Carolina Aquarium at Fort Fisher. Elacatinus oceanops-góbido neón. (2012, July 30). Reefstudio. Retrieved April 30, 2014, from Flanders, J. (2008, July 4). Article: The Enigma of DIN Valves -- Unveiled. Retrieved December 13, 2011, from Froese, R. and D. Pauly. (2010, March). Fish Base. Retrieved 6 1, 2011, from Germick, B. (2012, February 6). African pompano, Alectis ciliaris. Kure Beach, NC, USA: NC Aquarium at Fort Fisher. Germick, B. (2012, February 6). Gag, Mycteroperca microlepis. Kure Beach, NC, USA: NC Aquarium at Fort Fisher. Germick, B. (2012, February 6). Gray angel, Pomacanthus arcuatus. Kure Beach, NC, USA: NC Aquarium at Fort Fisher. Germick, B. (2012, February 6). Gray snapper, Lutjanus griseus. Kure Beach, NC, USA: NC Aquarium at Fort Fisher. Germick, B. (2012, February 6). Graysby, Ephalopolis cruentata. Kure Beach, NC, USA: NC Aquarium at Fort Fisher. Germick, B. (2012, February 6). Green Moray, Gymnothorax funebris. Kure Beach, NC, USA: NC Aquarium at Fort Fisher. Germick, B. (2012, February 6). Green turtle, Chelonia mydas. Kure Beach, NC, USA: NC Aquarium at Fort Fisher. Germick, B. (2012, February 6). Rough triggerfish, Canthidermis maculate. Kure Beach, NC, USA: NC Aquarium at Fort Fisher. Germick, B. (2012, February 6). Sandtiger Shark, Carcharias taurus. Kure Beach, NC, USA: NC Aquarium at Fort Fisher. 93
94 Germick, B. (2012, February 6). Scamp, Mycteroperca phenax. Kure Beach, NC, USA: NC Aquarium at Fort Fisher. Germick, B. (2012, February 6). Spotted Moray, Gymnothorax moringam punctatum. Kure Beach, NC, USA: NC Aquarium at Fort Fisher. Germick, B. (2012, February 6). Yellow snapper, Ocyurus chrysurus. Kure Beach, NC, USA: NC Aquariums at Fort Fisher. Retrieved April 30, 2014, from Encycolpedia of Life. Gratwicke, B. (2010, July 11). Caranx latus - horse-eye jack. St. Georges, Bermuda. Retrieved May 7, 2014, from Hauter, S. H. (2010). What is the Nitrogen Cycling Process? Retrieved 6 1, 2010, from Hoelscher, M. (2007, June 30). Atlantic spadefish, Chaetodipterus faber. Wikipedia. Retrieved May 13, 2014, from Hoover, P. (n.d.). Goliath grouper, Epinphelus itajara. Retrieved May 15, 2014, from Horn, L. (2010). Red grouper. Retrieved from Kok, A. (2008, January 19). French angelfish, Pomacanthus paru. Wikimedia Commons. Retrieved May 15, 2014, from Kurtis, K. (2011, May 21). Spanish hogfish, Bodianus rufus. Bonaire, Bonaire. Retrieved May 6, 2014, from Lenoble, P. A. (2010, April 14). Squirrelfish Holocentrus adscensionis. Wikimedia Commons. Retrieved May 13, 2014, from pg Lyle, J. (2010, October). Hogfish, Lachnolaimus maximus. Cozumel, Mexico. Retrieved from MarineBio Conservation Society. (2013, January 14). Bonnethead Sharks, Sphyrna tiburo. MarineBio.org. Retrieved May 13, 2014, from MarineBio Conservation Society. (2013, January 14). Sandbar Sharks, Carcharhinus plumbeus. MarineBio.org. Retrieved May 13, 2014, from Murch, A. (2001). Bluntnose stingray #001. Elasmodiver.com. Victoria, British Columbia, Canada. Retrieved May 15, 2014, from 94
95 Murphy, G. (n.d.). Black durgon, Melichthys niger. Retrieved from jpg Naval Sea Systems Command. (1999). U.S. Navy Diving Manual. Retrieved 5 25, 2010, from Noble, B. (2007, October 2). Rhomboplites aurorubens. Retrieved May 15, 2014, from ens01.html Occupational Safety and Health Standards. (1985, October 9). Regulations (Standards - 29 CFR). Retrieved June 2, 2010, from Regulations (Standards - 29 CFR): Office of Dive Safety. (2008). North Carolina Aquarium at Fort Fisher Standards for Scientific Diving. Kure Beach: North Carolina Aquarium at Fort Fisher. PADI. (2005). Skills for Evaluation. Padi Divemaster Slate 4. Rancho Santa Margarita: PROFESSIONAL ASSOCIATION OF DIVING INSTRUCTORS. PADI. (2005). Special Event Voluntary Liability Release and Assumption of Risk. In PADI, General Standards (pp. A-14). Rancho Santa Margarita: PROFESSIONAL ASSOCIATION OF DIVING INSTRUCTORS. Ryan, P. (2006). Queen triggerfish, Balistes vetula. Ryan Photographic - Nature Images from Around the World. Thornton, CO, USA. Retrieved May 15, 2014, from Ryan, P. (2006). Longspine squirrelfish Holocentrus rufus. Ryan Photographic - Nature Images from Around the World. Thornton, CO, USA. Retrieved May 13, 2014, from Ryan, P. (2006). Southern stingray, Dasyatis americana. Ryan Photographic - Nature Images from Around the World. Thornton, CO, Bahamas. Retrieved May 13, 2014, from Ryschkewitsch, G. (2003). Sergeant major, Abudefuf saxatilis. Ichthology at the Florida Museum of Natural Science. Retrieved May 13, 2014, from Sazima, C. (2013, January 22). Atlanticl tripletail, Lobotes surinamensis. The Fishes of the Sea of Italy. Retrieved may 13, 2014, from Schultz, G. (2006). Diodon hystrix - Spot-fin porcupinefish. Aquafind. Retrieved May 13, 2014, from 95
96 Scott W. Michael, NOAA. (2005, October 6). Blackbar Soldierfish, Myripristus jacobus. Wikimedia Commons. Retrieved May 13, 2014, from Stener, K. (2012, November 6). Blue runner. Marine Life Photography. Florida, USA. Retrieved May 22, 2014 Technical Diving International. (2005). International Training. Virginia Institute of Marine Science. (n.d.). Tautog. Virginia, USA. Retrieved May 15, 2014, from Welliver, K. (2013, March 20). Brown Banded Bamboo Shark, Chiloscylliu. Kure Beach, NC, USA: NC Aquarium at Fort Fisher. Welliver, K. (2013, February 03). White Spotted Bamboo Shark, Chiloscyllium plagiosum. Kure Beach, NC, USA: North Carolina Aquarium at Fort Fisher. White, J. (n.d.). Slippery dick. Retrieved from slippery-dick-grunt.html 96
97 Appendices Appendix A Probationary Diver Training Checklist Appendix B Release Of Liability For Volunteer Program Appendix C Diving Medical Exam Overview For The Examining Physician Appendix D Medical Evaluation Of Fitness For Scuba Diving Report Appendix E Diving Medical History Form Appendix F Special Event Voluntary Liability Release And Assumption Of Risk Appendix G Terg-o-cide (Formula 236) Material Safety Data Sheet Appendix H Dive Procedures for Exhibits Appendix I Further Readings Appendix J Hazardous Marine Animals and Bacteria Along the Carolina Coast 97
98 98
99 Appendices A-F Forms This section includes all forms needed for volunteer divers to begin the process of becoming a volunteer diver at NCAFF. 99
100 100
101 APPENDIX A PROBATIONARY DIVER TRAINING CHECKLIST Volunteer Name Start Date DIVE SAFETY OFFICER 1. Medical Exam Form 2. Swim Test 3. Signed Liability Waiver 4. U/W Skills Check 5. Full Face Mask out of air drill 6. SCUBA written test 7. DAN Oxygen Training 8. Rescue Training TRAINING TEAM 1. SCUBA (Basic safety rules, dive planner use, preparation for Aquarium dive, dive assembly, attire and equipment.) 2. Equipment care and use: Auxiliary air B.C.D. Diapers Fins Brushes Gloves Handle Mask Regulator Tanks Weights Wetsuit 3. Dive operation process (scheduling, dive board, NCAFF dive log, basic dive rules for the Aquarium, caution concerning coral and view panels). 4. Dive Facility Operations (Laundry operations, beginning and ending day procedures, shower room cleaning procedures). 5. Emergency Procedures (safety equipment and procedures, injured diver removal procedures, alerting 911, security procedures.) Date Initials 6. Aquariology/Husbandry Written Test: 1 st rule of Aquariology Filtration system ph Salinity Signs of fish disease Quarantine Fish identification Signature fish Nitrogen cycle Water changes Cross contamination Ozone 7. Adult First Aid Certification 8. CPR Certification 9. Attend 2 dry side of the dive show before starting presentations. o Probationary training requirements completed. 101
, in consideration for being permitted to participate as a volunteer by the North Carolina Aquarium at Fort Fisher hereby release and discharge the State of North Carolina, the")
102 900 Loggerhead Road, Kure Beach, NC (910) Fax: (910) APPENDIX B RELEASE OF LIABILITY FOR VOLUNTEER PROGRAM Read carefully before signing. I (please print), in consideration for being permitted to participate as a volunteer by the North Carolina Aquarium at Fort Fisher hereby release and discharge the State of North Carolina, the Aquarium, the Aquarium Society, and all its respective officers, directors, employees, agents, contractors, subcontractors, representatives, successors and assigns, and all persons conducting, directly or indirectly, the activities surrounding my involvement as a volunteer at the Aquarium from any and all claims, rights, demands, actions, causes of action, expenses and damages, which I or my heirs, personal representative, successor, assigns or anyone claiming by, through or under me ever had, now have, or may have against the parties identified above arising from any injury, act or omission relating in any way to my participation as a volunteer for the Aquarium. I also fully understand the risks involved in my participation as a volunteer including, but not limited to, those risks involved with working with the public, hand tools, supplies and equipment, cleaning supplies, cooking, motor vehicles and working with and around animals, including risk of disease and physical injury there from, and fully assume said risks for any injury, losses or damages of any kind resulting from such risks, and any risks involved in associated activities. I further agree to wear protective clothing/equipment when working with hand tools or as appropriate in other situations. I agree not to use hand tools unless properly trained. The Aquarium strongly encourages all dive volunteers to obtain Divers Accident Network (DAN) insurance coverage, ( which will cover divers wherever they dive. The volunteer and parent/guardian hereby understand and agree that he/she will not receive any form of compensation or remuneration for these services. The volunteer and parent/guardian also understand and agree that he/she is not entitled to any benefits from the Aquarium including, but not limited to, health or life insurance, workers compensation benefits or unemployment benefits, any claims to such benefit or compensation being expressly waived by the volunteer, parent/guardian, his/her heirs, executors or assigns. The volunteer and parent/guardian understand and agree that the Aquarium may discontinue the Volunteer Program at any time with no prior written notice. The undersigned further agree that the Aquarium may photograph and/or video tape the undersigned while engaged in the volunteer work at the Aquarium and that the Aquarium may retain rights to use these visual images in any manner without compensation to the undersigned. I acknowledge that I have read, fully understand, and voluntarily agree to this release and that no oral representations, statements or inducements apart from this Release may have been made to me. I agree I have received a copy of the Volunteer Manual for the North Carolina Aquarium at Fort Fisher and acknowledge my obligation to read, understand and comply with its contents. I understand that it is my responsibility to contact my supervisor or the Volunteer Services Coordinator if I have any questions or concerns about any of the information outlined in this manual. I understand that this Volunteer Manual is intended to provide an overview of the aquarium s policies and procedures and does not necessarily represent all such policies in force. I understand that these policies and procedures are continually evaluated and may be amended, modified or terminated at any time and at the sole discretion of the aquarium with or without notice. I have read and understand the information in this manual and agree to abide by the policies and procedures of the North Carolina Aquarium at Fort Fisher. Date Date Volunteer Signature Parent/Guardian Signature 102
103 APPENDIX C AAUS MEDICAL EVALUATION OF FITNESS FOR SCUBA DIVING REPORT Name of Applicant (Print or Type) Date of Medical Evaluation (Month/Day/Year) To The Examining Physician: Scientific divers require periodic scuba diving medical examinations to assess their fitness to engage in diving with self-contained underwater breathing apparatus (scuba). Their answers on the Diving Medical History Form may indicate potential health or safety risks as noted. Scuba diving is an activity that puts unusual stress on the individual in several ways. Your evaluation is requested on this Medical Evaluation form. Your opinion on the applicant's medical fitness is requested. Scuba diving requires heavy exertion. The diver must be free of cardiovascular and respiratory disease (see references, following page). An absolute requirement is the ability of the lungs, middle ears and sinuses to equalize pressure. Any condition that risks the loss of consciousness should disqualify the applicant. Please proceed in accordance with the AAUS Medical Standards (Sec. 6.00). If you have questions about diving medicine, please consult with the Undersea Hyperbaric Medical Society or Divers Alert Network. TESTS: THE FOLLOWING TESTS ARE REQUIRED: DURING ALL INITIAL AND PERIODIC RE-EXAMS (UNDER AGE 40): Medical history Complete physical exam, with emphasis on neurological and otological components Urinalysis Any further tests deemed necessary by the physician ADDITIONAL TESTS DURING FIRST EXAM OVER AGE 40 AND PERIODIC RE-EXAMS (OVER AGE 40): Chest x-ray (Required only during first exam over age 40) Resting EKG Assessment of coronary artery disease using Multiple-Risk-Factor Assessment 1 (age, lipid profile, blood pressure, diabetic screening, smoking) Note: Exercise stress testing may be indicated based on Multiple-Risk-Factor Assessment 2 PHYSICIAN S STATEMENT: 01 Diver IS medically qualified to dive for: 2 years (over age 60) 3 years (age 40-59) 5 years (under age 40) 02 Diver IS NOT medically qualified to dive: Permanently Temporarily. I have evaluated the abovementioned individual according to the American Academy of Underwater Sciences medical standards and required tests for scientific diving (Sec and Appendix 1) and, in my opinion, find no medical conditions that may be disqualifying for participation in scuba diving. I have discussed with the patient any medical condition(s) that would not disqualify him/her from diving but which may seriously compromise 103
104 subsequent health. The patient understands the nature of the hazards and the risks involved in diving with these conditions. MD or DO Signature Date Name (Print or Type) Address Telephone Number My familiarity with applicant is: This exam only Address Regular physician for years My familiarity with diving medicine is: 104
105 APPENDIX D AAUS MEDICAL EVALUATION OF FITNESS FOR SCUBA DIVING REPORT APPLICANT'S RELEASE OF MEDICAL INFORMATION FORM Name of Applicant (Print or Type) I authorize the release of this information and all medical information subsequently acquired in association with my diving to the Diving Safety Officer and Diving Control Board or their designee at (place) on (date) Signature of Applicant Date REFERENCES 1 Grundy, S.M., Pasternak, R., Greenland, P., Smith, S., and Fuster, V Assessment of Cardiovascular Risk by Use of Multiple-Risk-Factor Assessment Equations. AHA/ACC Scientific Statement. Journal of the American College of Cardiology, 34:
106 APPENDIX E DIVING MEDICAL HISTORY FORM (To Be Completed By Applicant-Diver) Name Sex Age Wt. Ht. Sponsor (Dept./Project/Program/School, etc.) Date / / (Mo/Day/Yr) TO THE APPLICANT: Scuba diving places considerable physical and mental demands on the diver. Certain medical and physical requirements must be met before beginning a diving or training program. Your accurate answers to the questions are more important, in many instances, in determining your fitness to dive than what the physician may see, hear or feel as part of the diving medical certification procedure. This form shall be kept confidential by the examining physician. If you believe any question amounts to invasion of your privacy, you may elect to omit an answer, provided that you shall subsequently discuss that matter with your own physician who must then indicate, in writing, that you have done so and that no health hazard exists. Should your answers indicate a condition, which might make diving hazardous, you will be asked to review the matter with your physician. In such instances, their written authorization will be required in order for further consideration to be given to your application. If your physician concludes that diving would involve undue risk for you, remember that they are concerned only with your well-being and safety. Yes No Please indicate whether or not the following apply to you Comments 1 Convulsions, seizures, or epilepsy 2 Fainting spells or dizziness 3 Been addicted to drugs 4 Diabetes 5 Motion sickness or sea/air sickness 6 Claustrophobia 7 Mental disorder or nervous breakdown 8 Are you pregnant? 9 Do you suffer from menstrual problems? 10 Anxiety spells or hyperventilation 11 Frequent sour stomachs, nervous stomachs or vomiting spells 106
107 12 Had a major operation 13 Presently being treated by a physician 14 Taking any medication regularly (even non-prescription) 15 Been rejected or restricted from sports 16 Headaches (frequent and severe) 17 Wear dental plates 18 Wear glasses or contact lenses 19 Bleeding disorders 20 Alcoholism 21 Any problems related to diving 22 Nervous tension or emotional problems 23 Take tranquilizers 24 Perforated ear drums 25 Hay fever 26 Frequent sinus trouble, frequent drainage from the nose, postnasal drip, or stuffy nose 27 Frequent earaches 28 Drainage from the ears 29 Difficulty with your ears in airplanes or on mountains 30 Ear surgery 31 Ringing in your ears 32 Frequent dizzy spells 33 Hearing problems 34 Trouble equalizing pressure in your ears 35 Asthma 36 Wheezing attacks 37 Cough (chronic or recurrent) 38 Frequently raise sputum 39 Pleurisy 107
108 40 Collapsed lung (pneumothorax) 41 Lung cysts 42 Pneumonia 43 Tuberculosis 44 Shortness of breath 45 Lung problem or abnormality 46 Spit blood 47 Breathing difficulty after eating particular foods, after exposure to particular pollens or animals 48 Are you subject to bronchitis 49 Subcutaneous emphysema (air under the skin) 50 Air embolism after diving 51 Decompression sickness 52 Rheumatic fever 53 Scarlet fever 54 Heart murmur 55 Large heart 56 High blood pressure 57 Angina (heart pains or pressure in the chest) 58 Heart attack 59 Low blood pressure 60 Recurrent or persistent swelling of the legs 61 Pounding, rapid heartbeat or palpitations 62 Easily fatigued or short of breath 63 Abnormal EKG 64 Joint problems, dislocations or arthritis 65 Back trouble or back injuries 66 Ruptured or slipped disk 67 Limiting physical handicaps 108
109 68 Muscle cramps 69 Varicose veins Yes No Please indicate whether or not the following apply to you Comments 70 Amputations 71 Head injury causing unconsciousness 72 Paralysis 73 Have you ever had an adverse reaction to medication? 74 Do you smoke? 75 Have you ever had any other medical problems not listed? If so, please list or describe below; 76 Is there a family history of high cholesterol? Is there a family history of heart disease or stroke? Is there a family history of diabetes? Is there a family history of asthma? Date of last tetanus shot? Vaccination dates? Please explain any yes answers to the above questions. I certify that the above answers and information represent an accurate and complete description of my medical history. Signature Date 109
110 APPENDIX F SPECIAL EVENT VOLUNTARY LIABILITY RELEASE AND ASSUMPTION OF RISK (Name of Event/Activity) Please read carefully and fill in all blanks before signing. I,, HEREBY DECLARE THAT I (Participant s Name) AM A CERTIFIED SCUBA DIVER, TRAINED IN SAFE DIVING PRACTICES, AND AM AWARE OF THE INHERENT HAZARDS OF SKIN AND SCUBA DIVING. I understand and agree that neither ; (Dive Center/Resort) nor the organizers or promoters of this event; nor International PADI, Inc., nor its affiliate or subsidiary corporations, nor any of their respective employees, officers, agents or assigns (hereinafter referred to as Released Parties ), may be held liable or responsible in any way for any injury, death or other damages to me or my family, heirs, or assigns that may occur as a result of my participation in this activity, or as a result of product liability or the negligence of any party, including the Released Parties, whether passive or active. I understand that diving with compressed air involves certain inherent risks, including but not limited to, air expansion injuries, decompression sickness, embolism and drowning. Hyperbaric injuries can occur that require treatment in a recompression chamber. I further understand that this activity may be conducted at a site that is remote, either by time or distance or both, from such a recompression chamber. I still choose to proceed with such activity in spite of the possible absence of a recompression chamber in proximity to the dive site. I declare that I am in good mental and physical fitness for diving, and that I am not under the influence of alcohol, nor am I under the influence of any drugs that are contraindicatory to diving. If I am taking medication, I declare that I have seen a physician and have approval to dive while under the influence of the medication/drugs. I understand that skin and scuba diving are physically strenuous activities and that I will be exerting myself during this activity and that if I am injured as a result of heart attack, 110
111 panic, hyperventilation, etc., that I assume the risk of said injuries and that I will not hold the Released Parties responsible for the same. I will inspect all of my equipment prior to the activity. I will not hold the Released Parties responsible for my failure to inspect my equipment prior to diving. In consideration of being allowed to participate in this activity, I hereby personally assume all risks in connection with the dive(s) for any harm, injury or damage that may befall me while I am a participant, including all risks connected therewith, whether foreseen or unforeseen. I further save and hold harmless said activity and Released Parties from any claim or lawsuit for personal injury, property damage, or wrongful death, by me, my family, estate, heirs, or assigns, arising out of my participation in this activity, including both claims arising during the activity or after I complete the activity. I further declare that I am of lawful age and legally competent to sign this liability release, or that I have acquired the written consent of my parent or guardian. I understand that the terms herein are contractual and not a mere recital, that this instrument is a legally binding document, and that I have signed this document of my own free act. I,, BY THIS INSTRUMENT DO HEREBY EXEMPT Participant s Name AND RELEASE, AND THE ORGANIZERS Dive Center/Resort AND PROMOTERS OF THIS EVENT, AND INTERNATIONAL PADI, INC., AND ALL RELATED ENTITIES AS DEFINED ABOVE, FROM ALL LIABILITY OR RESPONSIBILITY WHATSOEVER FOR PERSONAL INJURY, PROPERTY DAMAGE OR WRONGFUL DEATH, HOWEVER CAUSED, INCLUDING BUT NOT LIMITED TO PRODUCT LIABILITY OR THE NEGLIGENCE OF THE RELEASED PARTIES, WHETHER PASSIVE OR ACTIVE. I HAVE FULLY INFORMED MYSELF OF THE CONTENTS OF THIS LIABILITY RELEASE AND ASSUMPTION OF RISK BY READING IT BEFORE I SIGNED IT ON BEHALF OF MYSELF AND MY HEIRS (PADI, 2005). Participant s Signature Date (Day/Month/Year) Signature of Parent or Guardian (where applicable) Date (Day/Month/Year) 111
112 Appendix G MSDS Terg-o-cide Material Safety Data Sheet - Formula 236 Terg-o-cide 112
113 113
114 MATERIAL SAFETY DATA SHEET State Chemical Division State Industrial Products 3100 Hamilton Avenue, Cleveland, OH (216) CHEMICAL PRODUCT AND COMPANY IDENTIFICATION Product Name: FORMULA 236 TERG-O-CIDE FORMULA 236-NF HOSPITAL DISINFECTANT Product Description: Germicidal detergent and deodorant. MSDS Number: M Hour Emergency CHEMTREC Number: EPA Registration Number: EPA Establishment Number: OH-1 2. COMPOSITION/INFORMATION ON INGREDIENTS Active Ingredients CAS Number Weight ACGIH OSHA Didecyl Dimethyl Amonium Chloride % NE NE N-Alkyl (C12-16)-N,N-Dimethyl Benzyl Ammonium Chloride % NE NE 3. HAZARDS IDENTIFICATION ***EMERGENCY OVERVIEW*** Causes moderate eye irritation. Harmful if absorbed through skin. Harmful if swallowed or inhaled. POTENTIAL HEALTH EFFECTS Eye Contact: Causes eye irritation. Skin Contact: Causes skin irritation. Inhalation: May cause respiratory irritation. Vapors or mists of product may cause irritation to mucous membranes. Ingestion: Harmful if swallowed. May cause nausea, vomiting, diarrhea or abdominal pain. 4. FIRST AID MEASURES Have the product container or label with you when calling a poison control center or doctor or going for treatment. IF ON SKIN OR CLOTHING: Take off contaminated clothing. Rinse skin immediately with plenty of water for minutes. Call a poison control center or doctor for treatment advice. IF IN EYES: Hold eye open and rinse slowly and gently with water for minutes. Remove contact lenses, if present, after the first 5 minutes, then continue rinsing eyes. Call a poison control center or doctor for treatment advice. IF SWALLOWED: Call a poison control center or doctor immediately for treatment advice. Have a person sip a glass of water if able to swallow. Do not induct vomiting unless told to do so by a poison control center or doctor. Do not give anything by mouth to an unconscious person. IF INHALED: Move person to fresh air. If person is not breathing, call 911 or an ambulance, then give artificial respiration, preferably mouth-to-mouth if possible. Call a poison control center or doctor for treatment advice. 5. FIRE FIGHTING MEASURES Flashpoint: None to 200ºF. Lower Explosive Limit (LEL): NA Upper Explosive Limit(UEL): NA Autoignition Temperature: NA Flammable Properties: None expected. Extinguishing Media: Use extinguishing media appropriate for surrounding fire. 114
115 Fire Fighting Instructions: Wear a self-contained breathing apparatus with full protective clothing. 6. ACCIDENTAL RELEASE MEASURES Ventilate area. Halt spill at source, dike and contain. Absorb spill on absorbent, sand or vermiculite. Flush residues with plenty of water to drain. Do not discharge to natural waters. Dispose of in accordance with all Federal, State and Local Regulations. 7. HANDLING AND STORAGE Handling: This product is for industrial use only. Use with adequate ventilation. Wash thoroughly after handling. Do not take internally. Empty product containers may contain product residue. Avoid contact with skin, eyes and clothing. Avoid breathing vapors. Storage: Keep out of reach of children. Keep containers closed when not in use. Store in a wellventilated, cool, dry area. Keep away from heat, sparks and open flames. Store in an upright position. Do not reuse empty containers. Do not contaminate water, food or feed by storage or disposal. Keep from freezing. Spilled material is slippery. 8. EXPOSURE CONTROLS / PERSONAL PROTECTION Engineering Controls: Use general or local ventilation to keep exposure levels below exposure limits. Personal Protective Equipment: Respiratory: If workplace exposure limit is exceeded, a NIOSH/MSHA approved air supply respirator is advised in the absence of environmental control. Eye: Wear approved safety glasses or goggles with unperforated sideshields or faceshield. Skin: Wear chemically impervious gloves. Wear long sleeves and long pants. Other: An emergency eyewash station or source of clean potable water should be available in case of accidental eye contact. 9. PHYSICAL AND CHEMICAL PROPERTIES Appearance: Clear or Colored. Physical State: Liquid. Odor: Unfragranced or Fragranced ph: Solubility in Water: Complete. Specific Gravity: / Density: 8.35 lbs/gal. VOC Content: 0% 10. STABILITY AND REACTIVITY Stability: Stable. Hazardous Polymerization: Will not occur. Conditions to Avoid: None expected. Incompatibility: Strong oxidizers and anionic compounds. Hazardous Decomposition Products: Carbon Monoxide, Ammonia, Nitrogen Oxides, Hydrogen Chloride. 11. TOXICOLOGICAL INFORMATION IARC / NTP / OSHA: This product contains no ingredients listed as a carcinogen in quantities greater than or equal to 0.1% Hazardous Ingredients CAS Number LD50 LC50 Didecyl Dimethyl Amonium Chloride NE NE N-Alkyl (C12-16)-N,N-Dimethyl Benzyl Ammonium Chloride NE NE 12. ECOLOGICAL INFORMATION Do not discharge to natural waters. 115
116 13. DISPOSAL CONSIDERATIONS Do not reuse empty containers. Pesticide wastes are acutely hazardous. Improper disposal of excess pesticide spray or mixture or resale is a violation of Federal law. Triple rinse containers, puncture and dispose of in a sanitary landfill or offer to a re-conditioner for recycling. Incinerate or burn if allowed by State and Local authorities. Do not discharge to natural waters. Follow all Federal, State and Local Regulations regarding waste disposal. 14. TRANSPORT INFORMATION DOT Shipping Data: Not Regulated. Canadian TDG: Not available for sale in Canada. 15. REGULATORY INFORMATION TSCA: All ingredients in this product are listed or exempt from listing on the TSCA Chemical Inventory. CEPA: All ingredients in this product are listed or exempt from listing on the Canadian DSL/NDSL. Proposition 65: This product may contain trace amounts of the following chemicals that are known to the state of California to cause cancer, birth defects or other reproductive harm. Acetaldehyde < 0.05 ppm Benzene < 5 ppm Benzyl Chloride < 5 ppm N-Nitrosodiodimethylamine < 26 ppm Propylene Oxide < 0.52 ppm Toluene < 5 ppm SARA 313: This product contains no toxic chemicals subject to the reporting requirements of Section 313 of the Emergency Planning and Community Right-To-Know Act of 1986 (40CFR372). HMIS Rating: HEALTH = 2 FLAMMABILITY = 0 REACTIVITY = 0 PPE = B WHMIS Rating: Not available for sale in Canada. 16. OTHER INFORMATION NA = Not Available or Not Applicable NE = Not Established Read and follow all label directions and precautions before using the product. This product is intended for industrial and institutional use only. NOT FOR HOUSEHOLD USE OR RESALE. KEEP OUT OF THE REACH OF CHILDREN. While we believe that the data contained herein is factual and the opinions expressed are those of qualified experts, the data is not to be taken as a warranty or representation for which the company assumes legal responsibility. The data is offered solely for your consideration, investigation, and verification. Any use of this data and information must be determined by the user to be in accordance with applicable Federal, State, and Local Laws and regulations. HEALTH AND SAFETY INFORMATION: (216) Prepared On: September 2009 Replaces: February 2009 Completed By: Regulatory Affairs 116
117 117


118 Appendix H Exhibit Procedures Exhibit Diving Procedures 118
119 119
120 FOREWORD This document is an effort to establish diving protocols for each exhibit at the North Carolina Aquarium at Fort Fisher. It includes safety procedures and emergency protocols that are specific to each exhibit. This volume establishes the minimal safety standards for scientific diving in an aquarium setting at the NCAFF. It is the responsibility of every diver to see that diving practices reflect state of the art procedures and practice safe diving techniques at all times. ACKNOWLEDGEMENTS The North Carolina Aquarium at Fort Fisher thanks the numerous dedicated individuals and organizations for their contributions and editorial comments in the production of these standards. Revision History: February 2011 June 6, 2011 November 30, 2011 First draft for Sections disseminated for approval Draft Sections accepted by Dive Control Board Shoals Map added 120
121 Contents FOREWORD ACKNOWLEDGEMENTS SECTION 1.00 GENERAL PROCEDURES 1.10 General Procedures for Exhibit Diving SECTION 2.00 EXHIBIT SPECIFIC DIVING PROCEDURES CAPE FEAR SHOALS (CFS) 2.10 Cape Fear Shoals (CFS) Exhibit 2.11 Routine Dive Procedure 2.12 Emergency Procedures Cape Fear Shoals Exhibit SECTION 3.00 EXHIBIT SPECIFIC DIVING PROCEDURES Hidden Hunters (HH) 3.10 Hidden Hunters (HH) Exhibit 3.11 Routine Dive Procedure 3.12 Emergency Procedures Hidden Hunters Exhibit SECTION 4.00 EXHIBIT SPECIFIC DIVING PROCEDURES BLACK WATER SWAMP (BWS) 4.10 BLACK WATER SWAMP (BWS) Exhibit 4.11 Routine Dive Procedure 4.12 Emergency Procedures Black Water Swamp Exhibit SECTION 5.00 EXHIBIT SPECIFIC DIVING PROCEDURES SHARK TOOTH LEDGE (STL) 5.10 Shark Tooth Ledge (STL) Exhibit 5.11 Routine Dive Procedure 5.12 Emergency Procedures Shark Tooth Ledge Exhibit SECTION 6.00 EXHIBIT SPECIFIC DIVING PROCEDURES HOOKAH DIVING RAVEN ROCK 6.10 HOOKAH Diving Raven Rock 6.11 Routine Dive Procedure 6.12 Emergency Procedures Hookah Diving Raven Rock SECTION 7.00 EXHIBIT SPECIFIC DIVING PROCEDURES BLOCKADE RUNNER (BR) 7.10 Blockade Runner (BR) Exhibit 121
122 7.11 Routine Dive Procedure 7.12 Emergency Procedures Blockade Runner Exhibit 122
123 List of Figures Figure 2.1 Make sure that SCUBA tanks are secured into the brackets while on the assembly bench. Figure 2.2 Diver checks entry and backs down the ladder. Figure 2.3 Diver enters CFS with fins and communications cord in hand Figure 2.4 Ladder in stowed and lowered positions Figure 2.5 DAN Trauma Kit, Guardian First Aid Kit and O2 DAN emergency oxygen unit Figure 2.6 Floating stokes basket and backboard with head immobilizer Figure 2.7 AED is located outside of the docent lounge. Figure 2.8 Unresponsive diver must be tied off to the extraction area before emergency call is made Figure 2.9 Cleaning Map for the Cape Fear Shoals Exhibit. Figure 3.1 Tanks properly secured to prevent rolling. Figure 3.2 Ladder set up and stanchion position for the Hidden Hunters exhibit. Figure 3.3 Diver enters exhibit without gear (left) second diver hands gear over the viewing panel (right) Figure 3.4 Inflated BC floats nearby (left) diver secures weight belt before stepping off the platform (right) Figure 3.5 DAN Trauma Kit, Guardian First Aid Kit and O2 DAN emergency oxygen unit Figure 3.6 Stokes basket located behind the garage door in the conservatory Figure 3.7 AED is located outside of the docent lounge. Figure 4.1 Secure tanks on cart using anti-roll device. Figure 4.2 With dive buddy s assistance, don SCUBA gear Figure 4.3 Divers entering Black Water Swamp. Figure 4.4 Avoid entanglements in Black Water Swamp. Figure 4.6 Stokes basket located behind the garage door in the conservatory Figure 4.7 AED is located outside of the docent lounge. Figure 4.5 DAN Trauma Kit, Guardian First Aid Kit and O2 DAN emergency oxygen unit Figure 5.1 Diver assembles SCUBA unit on the catwalk of Shark Tooth Ledge Figure 5.2 Diver lowers gear into the water Figure 5.3 Diver s entry into Shark Tooth Ledge Figure 5.4 Diver avoids using the bridge over Cape Fear Shoals to prevent cross contamination Figure 5.5 DAN Trauma Kit, Guardian First Aid Kit and O2 DAN emergency oxygen unit Figure 5.6 AED is located outside of the docent lounge. 123
124 Figure 6.1 Redundant air holster is attached to the back of the HOOKAH weight belt. Figure 6.2 HOOKAH transported to work site using HOOKAH cart. Figure 6.3 HOOKAH cart stationed inside stanchions to keep non-staff observers at a safe distance. Figure 6.4 Staff carefully set up ladder. Figure 6.6 Stokes basket located behind the garage door in the conservatory Figure 6.7 AED is located outside of the docent lounge. Figure 7.1 Divers transport gear in the gray bin and unload it close to the entrance to the exhibit. Figure 7.2 DAN Trauma Kit, Guardian First Aid Kit and O2 DAN emergency oxygen unit Figure 7.3 Stokes basket located behind the garage door in the conservatory Figure 7.4 AED is located outside of the docent lounge 124
125 Section 1.00 Applies to scientific aquarium divers only Definition - A scientific aquarium diver is a scientific diver who is diving solely within an aquarium. An aquarium is a shallow, confined body of water, which is operated by or under the control of an institution and is used for the purposes of specimen exhibit, education, husbandry, or research. It is recognized that within scientific aquarium diving there are environments and equipment that fall outside the scope of those addressed in this standard. In those circumstances it is the responsibility of the Aquarium s Dive Control Board to establish the requirements and protocol under which diving will be safely conducted. Note: All of the standards set forth in other sections of this standard shall apply, except as otherwise provided in this section General Procedures for Exhibit Diving Because of varied depths and configurations of each exhibit, exhibit specific procedures must be followed. However, each exhibit guideline will conform to the following outline format. Please read exhibit procedures before diving in the exhibit. ALWAYS dive with someone who has had previous experience diving in the exhibit. A. Equipment Check Out B. Staff and Volunteer Qualifications C. Pre Dive Preparations D. Exhibit Specific Entry Protocols E. Exhibit Specific Dive Protocols F. Exhibit Specific Exit Procedures G. Post Dive Protocols H. Gear Cleaning and Personal Care I. Dive Log Management 1.11 Exhibit Specific Emergency Procedures Each exhibit has specific emergency procedures. Extraction techniques and emergency protocols are determined by the location and configuration of each exhibit. Please refer to exhibit specific emergency procedures before diving in the exhibit. 125
126 2.10 Cape Fear Shoals (CFS) Exhibit The following procedure is for program and maintenance diving and includes animal capture. Any dive outside of these guidelines will be evaluated for proper execution protocol Routine Dive Procedure A. Equipment 1. Regulator with primary 2 nd stage, submersible pressure gauge and low pressure inflator hose a. Inspect mouth piece and all hose connections for problems or defects b. Report any regulator problems to DSO or lead diver 2. Redundant air source (spare air in office cabinet) 3. Exposure Protection a. Wet Suit b. Boots c. Hood or Hooded Vest (optional) d. Gloves (optional) 4. Weight belt or integrated weight system 5. Buoyancy control device (BC) 6. Check out mask a. Regular masks for safety divers b. Full Face Mask (FFM) for presentation divers 1) Only wear full face mask if you have successfully completed the checkout dive with the Dive Safety Officer (DSO) or Assistant Dive Safety Officer (ADSO) 2) FFM the mask must be worn over the hood for easy removal in case of an emergency a. Minimum of 2500 psi for program dives b. Minimum of 2000 psi for safety dives 9. Brushes, rags or hand held nets, hoop nets, stretchers, catch bags, tickle sticks a. Because of Occupational Safety and Health Administration (OSHA) regulations, these are the only tools covered under regulation 29 CFR Part 1915, Subpart A (Occupational Safety and Health Standards, 1985). b. Any other tools must be evaluated by the DSO for proper protocols as needed 10. One submersible timing device per buddy team (can be computer console) 11. One two-way radio to remain dry and outside of the exhibit tank B. Staff 1. Two divers with the following ratings a. Two scientific divers in training b. One scientific in training and one probationary diver REMINDER -- Dive Safety Officer (DSO) or Assistant Dive Safety Officer (ADSO) must be on site for a probationary diver to dive in any exhibit. c. For program dives, both divers must be FFM safety approved with one approved as a presenter 2. The NC Aquarium at Fort Fisher and the AAUS prohibits solo diving C. Pre Dive 1. Arrive in dive locker 30 minutes before dive for gear assemblage and checkout 2. Check out regulator and redundant air system from DSO or lead diver 126
 d.")
127 3. Secure all other dive gear 4. Log regulator number on chalk board and in dive log 5. Select tank from compressor room or tank rack a. Green tags indicate full tanks b. Red tags indicate empty tanks c. Place tank on bench making sure it is locked into the roll control system mounted on the wall (See Figure 2.1) d. Tank may be placed on its side on the floor and blocked with weights to prevent rolling 6. Assemble SCUBA system (tank, BC, regulator) If you must leave tank unattended, properly secure it in roll control system or lay tank down on the deck and block from rolling. 7. Turn on tank air a. Check for leaks b. Check tank psi 10. Don exposure protection 15 minutes before dive time 11. Lower entry ladder 12. Don SCUBA system 10 minutes before dive time 13. Check the Cape Fear Shoals cleaning map to locate area in which to clean. (See Figure 2.9) ALL PROGRAM DIVES MUST START ON TIME 14. Complete safety check with buddy 15. Perform sound check a. Turn system on by pushing the black button labeled talk in the top gray electrical box in the dive locker office b. Push the lower button to talk on small control box labeled MAS- TER (Green light will illuminate) c. Place headset over ears and speak directly into the micro phone D. Entry 1. Partially inflate BC 2. Proceed down ladder backwards (see figure 2.2) a. Carry fins down the ladder (see figure 2.3) b. Carry communication cord in one hand c. Use tank only if it contains more than 2000 psi Figure 2.1 Make sure that SCUBA tanks are secured into the brackets while on the assembly bench. 8. Assemble weight belt or weight integrated system 9. Attach redundant air system using holsters found on rail above fresh water rinse c. Make sure area is clear of animals 3.Enter water with minimal splash 4. Clear ladder for second diver entry PLEASE be mindful of what you say whenever speaking on the FFM or Headset as you are live on the mic. 127


128 5. Put on fins 6. Wait for dive buddy in acclimation area 7. Note entry time of dive E. Dive F. Exit 1. Descend into acclimation tank 2. Make any needed adjustments 3. When ready, give the OK sign and wait for buddy s response 4. Give way to all sharks, eels and rays 5. Presenter will give OK to education staff outside tank when he/ she is ready to start the program 1. At the end of the dive, buddies will signal each other to ascend 2. Ascend at an angle into the acclimation area giving way to large animals and retrieving communication cord 3. Remove fins while holding onto ladder 4. Exit water (2 nd diver should remain clear of ladder until 1 st diver is out of water) G. Post Dive 1. Last diver out should raise ladder and secure in the stowed position (See Figure 2.4) 2. Check time and record on board 3. Remove gear with buddy s assistance 4. Make sure tank is securely snapped into roll control system or lying down Figure 2.2 Diver checks entry and backs down the ladder. Figure 2.3 Diver enters CFS with fins and communications cord in hand 7. Purge regulator until empty of air 8. Remove regulator from tank a. Dry regulator dust cap before replacing b. Make sure dust cap is i place before lacing 1 st stage into rinse tank; failure to do so can harm the regulator and the pressure gauge or dive computer. 5. Check air and log on board before turning off tank 6. Turn air off Figure 2.4 Ladder in stowed and lowered positions 128
129 H. Gear Cleaning and Personal Care 1. Clean gear for the next user a. Spray mouth piece or FFM with Terg-o-cide and allow a minimum of 15 minutes contact time for disinfecting b. Place regulator with the exception of the 2 nd stage or the FFM in soak tank for a minimum of 15 minutes c. Place mask, gloves and redundant air system into fresh water soak d. Disassemble weight system 1) Remove weight pockets from BC 2) Remove weights 3) Rinse weights on deck 4) Place weight pockets in soak tank a). Rinse BC with fresh water inside of BC with freshwater b). Rinse tank to include inside of tank valve, bottom of tank c). OSHA regulations require divers to place valve covers on tank valve (Occupational Safety and Health Standards, 1985). d). Return tank to racks outside of compressor room e). Affix a red tag signifying empty to the valve f). Remove boots and place in 5 gallon bucket of disinfectant for a minimum of 15 minutes g). Remove wetsuit and hood and place in barrel of disinfectant for a minimum of 15 minutes h). Remove all exposure protection and rinse with fresh water inside and out until suds stop forming i). Remove mask, regulator, gloves and redundant air system from soak tank and rinse with fresh water 2. Personal Care to reduce exhibit cross contamination or zoonotic infection a. Shower with antimicrobial soap (provided in showers) b. Clean and disinfect shower (instructions posted on each shower room door) c. Place towel in laundry basket d. Ensure all faucets, showers and hoses are turned completely off e. Report leaks to DSO or ADSO I. Dive Log Management 1. Log each dive on chalk board and on log sheet a. Record dive on log sheet and complete group designation calculations b. Lead diver checks to ensure that the log is complete and correct before signing and placing in completed box 2. A separate log must be submitted for each exhibit for that day a. Dive log must include: 1) Name of diver and dive buddy 2) Date, time and location 3) Diving modes used (SCUBA, Full Face Mask, HOOKAH) 4) General nature of diving activities 5) Approximate surface and underwater conditions 6) Maximum depths, bottom time and surface interval time 7) Diving tables or computers used 8) Detailed report of any near or actual incidents b. Each log must be signed by the diving supervisor j). Properly replace all equipment back into appropriate storage areas 129
 b. DAN emergency oxygen unit c. Guardian Plus first aid kit d. Trauma kit (See Figure 2.5) Figure 2.")

 a. Floating stokes basket b. Backboard with head immobilizer 3.")
130 2.12 Emergency Procedures Cape Fear Shoals Exhibit A. Location of emergency equipment 1. Dive locker office houses first response items a. Two-way radio and a telephone (instructions for their use on clipboard above the phone) b. DAN emergency oxygen unit c. Guardian Plus first aid kit d. Trauma kit (See Figure 2.5) Figure 2.6 Floating stokes basket and backboard with head immobilizer b. REMINDER: DO NOT use AED in wet environment; improper use could cause injury or death Figure 2.5 DAN Trauma Kit, Guardian First Aid Kit and O2 DAN emergency oxygen unit e. Latex gloves 1) Each kit contains gloves 2) Spare gloves inside the office to the right of the door The dive locker office must remain unlocked whenever divers are in the water 2. Edge of acclimation tank accessible by a diver in the water (See Figure 2.6) a. Floating stokes basket b. Backboard with head immobilizer 3. AED is located on the 2 nd floor of the Marine building outside of the lounge (See figure 2.7) a. Ask security to bring AED Figure 2.7 AED is located outside of the docent lounge. B. Potential Injuries All injuries regardless of how small or seemingly insignificant will be reported to the DSO. The injured person will be instructed as to what measures to take to prevent the transmission of zoonotic disease. The following are guidelines to follow and are not meant to supersede your first aid training or the recommendation of a medical professional. 1. Scrapes, scratches, contusions, abrasions a. Clean with antimicrobial soap 130

131 b. Apply antibiotic ointment and bandage as needed c. Watch for signs of infection or irritation d. Seek medical attention if needed 2. Lacerations and minor bites a. Assist diver out of the water as needed and remove equipment b. Make sure diver is ok c. Secure first aid kit and provide assistance as needed Remember to use personal protection equipment whenever dealing with bodily fluids. Injuries should be monitored very closely for any inflammation. The victim should seek medical attention as soon as he/ she notices any sign of infection. 3. Envenomation -- Stingray stings a. Remove diver from the exhibit in a safe, expedient manor 4. Unconscious diver a. Assess the area before responding and make sure it is clear of all hazards b. Approach diver and check for breathing for at least 10 seconds c. If diver is not breathing begin in water rescue breathing d. If help is needed and no one is in the immediate area, blow the whistle located on your BC to alert 3rd floor staff e. If still no response, secure victim, in stokes basket and tie off to exit area (See Figure 2.8) 1) Exit the exhibit 2) Call security on the radio located in the office 3) Emergency script is located on the clip board in the office a) Security, this is the dive locker over b. Notify DSO and security c. Monitor ABC s for signs of shock or anaphylaxis d. Apply bandages as needed to control bleeding e. Expose affected area and submerge in hot water f. Advise victim to seek medical attention to make sure wound is clean and free of foreign objects Figure 2.8 Unresponsive diver must be tied off to the extraction area before emergency call is made 131
132 b) After receiving a response, We have an emergency in the dive locker, call f. Re-enter water as needed g. Monitor ABC s if the diver is breathing this can be done from the exit platform h. Remove diver with assistance and begin first aid as required i. Start documenting incident j. Monitor ABC s and provide first aid until EMS arrives 132

133 Figure 2.9 Cleaning Map for the Cape Fear Shoals Exhibit. 133

134 SECTION 3.00 EXHIBIT SPECIFIC DIVING PRO- CEDURES Hidden Hunters (HH) 3.10 Hidden Hunters (HH) Exhibit The following procedure is for safety diving to include animal capture. Any dive beyond these guidelines will be evaluated for proper execution protocol Routine Dive Procedure A. Equipment 1. Regulator with primary 2nd stage, alternate air source, submersible pres sure gauge and low pressure inflator hose. 2. Redundant air source if regulator doesn t have alternate air 3. Exposure protection, wet suit, boots, hood and gloves as needed 4. Weight belt with quick release or integrated weight system 2. The NC Aquarium at Fort Fisher and the AAUS prohibits solo diving. C. Pre Dive 1. Arrive in dive locker 30 minutes before dive for gear assemblage and checkout 2. Check out regulator and redundant air system from DSO or lead diver 3. Secure all other dive gear 4. Log regulator number on chalk board and in dive log 5. Select tank from compressor room or tank rack a. Place on flat cart making sure it is blocked to keep from rolling (See Figure 3.1) b. You may also lay the tank on its side on the floor and block it with weights 6. Assemble SCUBA system (tank, BC, regulator) in the dive locker 5. Buoyancy control device (BC) with low pressure inflator 6. Mask 7. One 80 cubic foot tank per diver with a minimum of 3000 psi for safety 8. Brushes, rags or hand held nets (these are the only tools covered under these procedures) 9. One submersible timing device per buddy team 10. One 2-way radio located on flatbed cart used to transport equipment. 11. Entry and exit ladder B. Staff 1. Two divers with a rating of scientific diver in training, or one scientific and one probationary as long as a DSO is on site and one of the two have completed a training dive in the sys- tem. Figure 3.1 Tanks properly secured to prevent rolling. If you must leave tank unattended, properly secure it in roll control sys- tem or lay tank down on the deck and block from rolling. 7. Turn on tank air a. Check for leaks b. Check tank psi c. Use tank only if it contains 3000 psi or more 134
 Figure 3.")
 3. Diver A inflates both BC s so that they float on the surface (See Figure 3.4) 4.")
 diver secures weight belt before stepping off the platform (right) E. Dive 1. Descend into tank 2. Make any needed adjustments 3.")
135 8. Assemble weight belt or weight integrated system 9. Don exposure protection before leaving locker or in 2nd floor showers a. Transport equipment to the exhibit on flat cart b. Set up entry ladder c. Position stanchions around entry and exit point (see Figure 3.2) Figure 3.3 Diver enters exhibit without gear (left) second diver hands gear over the viewing panel (right) Figure 3.2 Ladder set up and stanchion position for the HiddenHunters exhibit. D. Entry 1. First diver enters water 2. The second diver hands dive gear over the viewing panel to diver A (See Figure 3.3) 3. Diver A inflates both BC s so that they float on the surface (See Figure 3.4) 4. Don SCUBA system and weight belt while standing on platform or floating on surface 5. Complete safety check with buddy Figure 3.4 Inflated BC floats nearby (left) diver secures weight belt before stepping off the platform (right) E. Dive 1. Descend into tank 2. Make any needed adjustments 3. When ready, give the OK sign and wait for buddy s response 4. Clean window panels first 5. Hidden Hunters becomes a low visibility environment as the tank is being cleaned a. Move slowly and cautiously b. Keep one hand in front to avoid collisions 135
136 F. Exit 1. Both divers agree when the dive is over and return to the exit. 2. Dive must end when any diver reaches 800 psi 3. Remove weight system and place on platform 4. Diver A removes SCUBA system 5. Diver B secures system while diver A exits the water 6. Diver B removes weight system and places it on the platform and then removes SCUBA unit 7. Diver B hands both sets of equipment to diver A before exiting the water G. Post Dive 1. Check air and log on board before turning off tank 2. Turn air off 3. Purge regulator until all air is out 4. Remove regulator from tank a. Dry regulator dust cap before replacing b. Make sure dust cap is in place before placing 1st stage into rinse tank; failure to do so can harm the regulator and the pressure gauge or dive computer. H. Gear Cleaning and Personal Care 1. Clean gear for the next user a. Dip regulator, weight system, redundant air system (if used) and BC in Terg-o-cide and allow a minimum of 15 minutes contact time for disinfecting. b. Spray SCUBA tank with Terg-o-cide and allow a minimum of 15 minutes contact time for disinfecting c. Rinse BC and tank to include inside of tank valve, bottom of tank and inside of BC with freshwater d. Disassemble weight system and rinse with fresh water e. Take tank to racks outside of compressor room, replace valve cap and affix a red tag signifying empty to the valve e. Place mask, gloves, and boots in 5 gallon bucket of disinfectant for a minimum of 15 minutes remove and rinse with fresh water f. Place wetsuit and hood and place in barrel of disinfectant for a minimum of 15 minutes g. Remove and rinse with fresh water inside and out until suds stop forming h. Properly replace all equipment back into appropriate storage areas 2. Personal Care to reduce exhibit cross contamination or zoonotic infection a. Shower with antimicrobial soap (provided in showers) b. Clean and disinfect shower (instructions posted on each shower room door) c. Place towel in laundry basket d. Ensure all faucets, showers, hoses are turned completely off and report leaks to DSO or ADSO I. Dive Log Management 1. Log each dive at the bottom of the chalk board a. Record dive on log sheet and complete group designation calculations b. Lead diver checks and corrects dive log before signing and placing in box 2. A separate log must be submitted for each exhibit for each day a. Dive log must include: 1) Name of diver and dive buddy 2) Date, entry time, exit time and location 3) Diving modes used. (SCUBA, Full Face Mask, HOOKAH) 4) General nature of diving activities 5) Approximate surface and underwater conditions 136
137 6) Maximum depths, bottom time and surface interval time 7) Diving tables or computers used 8) Detailed report of any near or actual incidents b. Each log must be signed by the diving supervisor 137
 d. Latex gloves e. Each kit contains gloves f. Spare gloves inside the office to the right of the door Figure 3.")

138 3.12 Emergency Procedures Hidden Hunters Exhibit A. Location of emergency equipment 1. Dive locker office houses first response items a. DAN emergency oxygen unit b. Guardian Plus first aid kit c. Trauma kit (See Figure 3.5) d. Latex gloves e. Each kit contains gloves f. Spare gloves inside the office to the right of the door Figure 3.6 Stokes basket located behind the conservatory garage door Figure 3.5 DAN Trauma Kit, Guardian First Aid Kit and O2 DAN emergency oxygen unit The dive locker office must remain unlocked whenever divers are in the water 2. Floating stokes basket located in freshwater quarantine inside the garage door (See Figure 3.6) 3. AED is located on the 2nd floor of the Marine building outside of the lounge (See figure 3.7) a. Ask security to bring AED b. REMINDER: DO NOT use AED in wet environment; improper use could cause injury or death Figure 3.7 AED is located outside of the docent lounge. B. Potential Injuries All injuries regardless of how small or seemingly insignificant will be reported to the DSO. The injured person will be instructed as to what measures to take to prevent the transmission of zoonotic disease. The following are guidelines to follow and are not meant to supersede your first aid training or the recommendation of a medical professional. 138
139 1. Scrapes, scratches, contusions, abrasions a. Clean with antimicrobial soap 1) Apply antibiotic ointment and bandage as needed 2) Watch for signs of infection or irritation 3) Seek medical attention if needed b. Lacerations and minor bites f. Re-enter water as needed g. Monitor ABC s if the diver is breathing h. Remove diver with assistance and begin first aid as required i. Start documenting incident j. Monitor ABC s and provide first aid until EMS arrives 1) Assist diver out of the water as needed and remove equipment 2) Make sure diver is ok 3) Secure first aid kit and provide assistance as needed Remember to use personal protection equipment when ever dealing with bodily fluids. Injuries should be monitored very closely for any inflammation. The victim should seek medical attention as soon as he/she notices any sign of infection. 2. Unconscious diver a. Assess the area before responding and make sure it is clear of all hazards b. Approach diver and check for breathing for at least 10 seconds c. If diver is not breathing begin in water rescue breathing d. If help is needed and no one is in the immediate area, blow the whistle located on your BC to alert surrounding staff e. If still no response, secure victim, by clipping victim s BC to the ladder 1) Exit the exhibit 2) Call security on the radio located on the cart a) Security, this is [diver s name] over b) After receiving a response, We have an emergency in the Conservatory, call
140 SECTION 4.00 EXHIBIT SPECIFIC DIVING PRO- CEDURES BLACK WATER SWAMP (BWS) 4.10 BLACK WATER SWAMP (BWS) Exhibit The following procedure is for safety diving to include animal capture. Any dive outside of these guidelines will be evaluated for proper execution protocol Routine Dive Procedure A. Equipment 1. Regulator with primary 2nd stage, alternate air source, submersible pressure gauge and low pressure inflator hose. 2. Redundant air source if regulator doesn t have alternate air 3. Exposure protection, wet suit, boots, hood and gloves as needed 4. Weight belt with quick release or integrated weight system C. Pre Dive 1. Arrive in dive locker 30 minutes before dive for gear assemblage and checkout. 2. Check out regulator and redundant air system from DSO or lead diver 3. Secure all other dive gear 4. Log regulator number on chalk board and in dive log 5. Select tank from compressor room or tank rack a. Place on flat cart making sure it is blocked to keep from rolling (See Figure 4.1) b. You may also lay the tank on its side on the floor and block it with weights in order to prevent rolling c. Assemble in dive locker 6. Transport equipment on flat cart to behind the scenes area of alligator exhibit (See Figure 4.2) 5. Buoyancy control device (BC) with low pressure inflator 6. Mask 7. Fins are not permitted in this exhibit 8. One 80 cubic foot tank per diver with a minimum of 3000 psi for safety 9. Brushes, rags or hand held nets (these are the only tools covered under these procedures). They are located in freshwater quarantine. 10. One submersible timing device per buddy team 11. One 2-way radio at the edge of the exhibit entry point Figure 4.1 Secure tanks on cart using anti-roll device. 7. Don SCUBA gear behind alligator exhibit 8. Complete safety check with dive buddy B. Staff 1. Two divers with a rating of scientific diver in training, or one scientific and one probationary as long as a DSO is on site and one of the two have completed a training dive in the sys- tem. 2. The NC Aquarium at Fort Fisher and the AAUS prohibits solo diving. 140

 3. Discard all brushes, rags, etc.")

141 E. Dive 1. Keep in mind that the tree insert is fragile and avoid entanglement at all times (See Figure 4.4) 2. Remember to securely attach 2nd stage to avoid dragging across sand F. Exit 1. Both divers agree when the dive is over and return to the exit. 2. Dive must end when any diver reaches 800 psi D. Entry Figure 4.2 Donning SCUBA gear 1. While wearing SCUBA gear, walk on path through the woods to the entry point of the exhibit. 2. Partially inflate BC 3. Remember to use caution; entry rocks in this exhibit are extremely slippery 4. Carefully step into the water while holding the adjacent tree in order to maintain balance (See Figure 4.3) 3. Discard all brushes, rags, etc. in order to insure that both hands are free to keep balance and help avoid slipping. 4. Exit from exhibit in the same manner you entered wearing full set of gear, remembering to move slowly and carefully when stepping on slick rocks. G. Post Dive 1. Exit through the path back to behind the scenes of the alligator exhibit and remove gear there and place on cart 2. Transport gear back to the dive locker 5. Descend once you reach chest level Figure 4.3 Divers entering Black Water Swamp. Figure 4.4 Avoid entanglements in Black Water Swamp. 141
142 3. Check air and log on board before turning off tank 4. Turn air off 5. Purge regulator until all air is out 6. Remove Regulator from tank H. Gear Cleaning and Personal Care 1. Clean gear for the next use a. Dip regulator, weight system, redundant air system (if used) and BC in Terg-o-cide and allow a minimum of 15 minutes contact time for disinfecting. b. Spray SCUBA tank with Terg-o-cide and allow a minimum of 15 minutes contact time for disinfecting. c. Rinse BC and tank to include inside of tank valve, bottom of tank and inside of BC with freshwater d. Disassemble weight system and rinse with fresh water e. Take tank to racks outside of compressor room, replace valve cover and affix a red tag signifying empty to the valve. f. Place mask, gloves, and boots in 5 gallon bucket of disinfectant for a minimum of 15 minutes then rinse with fresh water. g. Remove all exposure protection and place in Terg-o-cide barrel. h. Allow a minimum of 15 minutes contact time for disinfecting i. Remove and rinse with fresh water inside and out until suds stop forming d. Ensure all faucets, showers and hoses are turned completely off e. Report leaks to DSO or ADSO I. Dive Log Management 1. Log each dive at the bottom of the chalk board a. Record dive on log sheet and complete group designation calculations b. Lead diver checks to ensure that the log is complete and correct before signing and placing in completed box 2. A separate log must be submitted for each exhibit for each day a. Dive log must include: 1) Name of diver and dive buddy 2) Date, entry time, exit time and location 3) Diving modes used. (SCUBA, Full Face Mask, HOOKAH) 4) General nature of diving activities 5) Approximate surface and underwater conditions 6) Maximum depths, bottom time and surface interval time 7) Diving tables or computers used 8) Detailed report of any near or actual incidents b. Each log must be signed by the diving supervisor j. Properly replace all equipment back into appropriate storage areas. 2. Personal Care to reduce exhibit cross contamination or zoonotic infection a. Shower with antimicrobial soap (provided in showers) b. Clean and disinfect shower (instructions posted on each shower room door) c. Place towel in laundry basket 142
143 4.12 Emergency Procedures Black Water Swamp Exhibit A. Location of emergency equipment 1. Dive locker office houses first response items a. DAN emergency oxygen unit b. Guardian Plus first aid kit c. Trauma kit (See Figure 4.5) Figure 4.6 Stokes basket located behind the garage door in the conservatory Figure 4.5 DAN Trauma Kit, Guardian First Aid Kit and O2 DAN emergency oxygen unit d. Latex gloves 1) Each kit contains gloves 2) Spare gloves inside the office to the right of the door The dive locker office must remain unlocked whenever divers are in the water 2. Floating stokes basket located in freshwater quarantine inside the garage door (See Figure 4.6) 3. AED is located on the 2nd floor of the Marine building outside of the lounge (See figure 4.7) a. Ask security to bring AED b. REMINDER: DO NOT use AED in wet environment; improper use could cause injury or death Figure 4.7 AED is located outside of the docent lounge. B. Potential Injuries All injuries, regardless of how small or seemingly insignificant, will be reported to the DSO. The injured per- son will be instructed as to what measures to take to prevent the transmission of zoonotic disease. 143
144 The following are guidelines to follow and are not meant to supersede your first aid training or the recommendation of a medical professional. 1. Scrapes, scratches, contusions, abrasions a. Clean with antimicrobial soap b. Apply antibiotic ointment and bandage as needed c. Watch for signs of infection or irritation d. Seek medical attention if needed b) After receiving a response, We have an emergency in the Conservatory, call f. Re-enter water as needed g. Monitor ABC s if the diver is breathing h. Remove diver with assistance and begin first aid as required i. Start documenting incident j. Monitor ABC s and provide first aid until EMS arrives 2. Lacerations and minor bites a. Assist diver out of the water as needed and remove equipment b. Make sure diver is ok c. Secure first aid kit and provide assistance as needed Remember to use personal protection equipment whenever dealing with bodily fluids. Injuries should be monitored very closely for any inflammation. The victim should seek medical attention as soon as he/she notices any sign of infection. 3. Unconscious diver a. Assess the area before responding and make sure it is clear of all hazards b. Approach diver and check for breathing for at least 10 seconds c. If diver is not breathing begin in water rescue breathing d. If help is needed and no one is in the immediate area, blow the whistle located on your BC to alert surrounding staff e. If still no response, secure victim in shallow area of the exhibit 1) Exit the exhibit 2) Call security on the radio located on the cart a) Security, this is [diver s name] over 144
145 SECTION 5.00 EXHIBIT SPECIFIC DIVING PRO- CEDURES SHARK TOOTH LEDGE (STL) 5.10 Shark Tooth Ledge (STL) Exhibit The following procedure is for program and safety diving and includes animal capture. Any dive outside of these guidelines will be evaluated for proper execution protocol Routine Dive Procedure A. Equipment 1. Regulator with primary 2nd stage, octopus, submersible pressure gauge and low pressure inflator hose a. Inspect mouth piece and all hose connections for problems or defects b. Report any regulator problems to DSO or lead diver 2. Exposure Protection a. Wet Suit b. Boots c. Hood or Hooded Vest (optional) d. Gloves (optional) 3. Weight belt or integrated weight system 4. Buoyancy control device (BC) 5. Mask 6. Fins are not permitted in this exhibit 7. One 80 cubic foot tank per diver with at least 3000 psi 8. Brushes, rags or hand held nets, hoop nets, stretchers, catch bags, tickle sticks (these are the only tools covered under these procedures; others tools must be evaluated by the DSO for proper protocols as needed). 9. One submersible timing device per buddy team (may be computer console) 10. One two-way radio to remain dry and outside of the exhibit tank 145 B. Staff 1. Two divers with the following ratings a. Two scientific divers in training b. One scientific in training and one probationary diver 2. *REMINDER -- Dive Safety Officer (DSO) or Assistant Dive Safety Officer must be on site for a probationary diver to dive in any exhibit. C. Pre-Dive 1. Arrive in dive locker 30 minutes before dive for gear assemblage and checkout 2. Check out regulator from DSO or lead diver 3. Secure all other dive gear 4. Log regulator number on chalk board and in dive log 5. Select tank from compressor room or tank rack 6. Decontaminate all gear before using in Shark Tooth Ledge a. Spray tank including under the tank boot with Terg-o-cide b. Submerge BC, regulator and all other gear in the Terg-o-cide barrel c. Rinse all gear cleaned with Terg-o-cide with fresh water after 15 minutes of contact time If you must leave tank unattended, properly secure it in roll control system or lay tank down on the deck and block from rolling. d. Using the elevator, transport equipment in gray bin. Unload bin onto catwalk and ensure cart is not blocking walkway. 7. Assemble SCUBA system (tank, BC, regulator) on catwalk (See Figure 5.1) a. Turn on tank air b. Use tank only if it contains more than 3000 psi c. Check for leaks Check tank psi


146 F. Exit 1. When dive has been completed return to the initial point of entry a. Inflate BC b. Float on surface c. Remove weight and other gear that may interfere with removing the SCUBA system d. With buddies assistance remove BC allow it to float alongside buddy. 2. Exit the water by using the flat part of the ledge adjacent to the entrance and climb out of water. 3. Remove SCUBA unit from the water by lifting the system by the valve with the assistance of your buddy. 4. Place system out of the way, and assist buddy in similar fashion Figure 5 1 Diver assembles SCUBA unit on the catwalk of Shark Tooth Ledge D. Entry 1. Inflate BC and carefully lower SCUBA system in the water one at a time (See Figure 5.2) 2. While maintaining visual contact on the system, enter the water feet first by sitting on the edge of the I beam adjacent the entry site and easing yourself into the tank (See Figure 5.3). 3. Approach gear and begin donning one at a time while your buddy assists you. Remember to have your mask on your face and your primary regulator in your mouth as soon as you can. E. Dive 1. Deflate BC and dive remembering to be cautious of the fragile nature of the exhibit 2. Dive should last no more than 120 minutes or until one diver has no less than 800 psi 3. Keep in mind that barotraumas and lung over expansion injuries are possible even in shallow water, so remember to equalize and never hold your breath. 146 Figure 5.2 Diver lowers gear into the water.


147 G. Post Dive 1. Place all gear into the bin 2. Transport gear back to dive locker for cleaning and storage 3. In the dive locker, walk around the Cape Fear Shoals tank and avoid using the bridge to prevent cross contamination of the exhibit (See Figure 5.4). Figure 5.4 Diver avoids using the bridge over Cape Fear Shoals to prevent cross contamination H. Gear Cleaning and Personal Care 1. Clean gear for the next user a. Fill gray bin so that water covers SCUBA equipment, allow freshwater contact for at least one hour for decontamination b. Connect clear tubing to the valve at the bottom of the bin c. Make sure open end of the hose is inserted in the drain cover d. Open valve to empty water from bin e. Take tank to racks outside of compressor room, replace valve cover and affix a red tag signifying empty to the valve f. Place mask, gloves, and boots in 5 gallon bucket of disinfectant for a minimum of 15 minutes then rinse with fresh water. g. Remove all exposure protection and place in Terg-o-cide barrel. Allow a minimum of 15 minutes contact time for disinfecting. Rinse with fresh water inside and out until suds stop forming. h. Properly replace all equipment back into appropriate storage areas Figure 5.3 Diver's entry into Shark Tooth Ledge. i. Remove wetsuit and hood and place in barrel of disinfectant for a minimum of 15 minutes 147
148 2. Personal Care to reduce exhibit cross contamination or zoonotic infection a. Shower with antimicrobial soap (provided in showers) b. Clean and disinfect shower (instructions posted on each shower room door) c. Place towel in laundry basket d. Ensure all faucets, showers and hoses are turned completely off. Report leaks to DSO or ADSO 5.12 Emergency Procedures Shark Tooth Ledge Exhibit A. Location of emergency equipment 1. Dive locker office houses first response items a. DAN emergency oxygen unit b. Guardian Plus first aid kit c. Trauma kit (See Figure 5.5) I. Dive Log Management 1. Log each dive at the bottom of the chalk board a. Record dive on log sheet and complete group designation calculations b. Lead diver checks to ensure that the log is complete and correct before signing and placing in completed box 2. A separate log must be submitted for each exhibit for each day a. Dive log must include: b. Name of diver and dive buddy c. Date, entry time, exit time and location d. Diving modes used. (SCUBA, Full Face Mask, HOOKAH) e. General nature of diving activities f. Approximate surface and underwater conditions g. Maximum depths, bottom time and surface interval time h. Diving tables or computers used i. Detailed report of any near or actual incidents 3. Each log must be signed by the diving supervisor Figure 5.5 DAN Trauma Kit, Guardian First Aid Kit and O2 DAN emergency oxygen unit d. Latex gloves 1) Each kit contains gloves 2) Spare gloves inside the office to the right of the door 2. A floating backboard with head immobilizer is located on the third floor to the left of the elevator. 3. A 2- way radio will be located on the cat walk of the exhibit 4. AED is located on the 2nd floor of the Marine building outside of the lounge (See figure 5.6) a. Ask security to bring AED b. REMINDER: DO NOT use AED in wet environment; improper use could cause injury or death 148
149 Remember to use personal protection equipment whenever dealing with bodily fluids. Injuries should be monitored very closely for any inflammation. The victim should seek medical attention as soon as he/she notices any sign of infection. 3. Unconscious diver a. Assess the area before responding and make sure it is clear of all hazards b. Approach diver and check for breathing for at least 10 seconds Figure 5.6 AED is located outside of the docent lounge. B. Potential Injuries and Injury Care All injuries regardless of how small or seemingly insignificant will be reported to the DSO. You will be instructed as to what measures to take to prevent the transmission of zoonotic disease. The following are guidelines to follow and are not meant to supersede your first aid training or the recommendation of a medical professional. 1. Scrapes, scratches, contusions, abrasions a. Clean with antimicrobial soap b. Apply antibiotic ointment and bandage as needed c. Watch for signs of infection or irritation d. Seek medical attention if needed 2. Lacerations and minor bites a. Assist diver out of the water as needed and remove equipment b. Make sure diver is ok c. If diver is not breathing begin in water rescue breathing d. If help is need and no one is in the immediate area, blow the whistle located on your BC to alert surrounding staff e. If you still don t get a response, secure victim, in stokes basket and tie off to exit area 1) Exit the exhibit and call security on the radio located on the cat walk 2) Security, this is [give your name], over. 3) After receiving a response, We have an emergency in Upstairs Saltwater Quarantine, call 911. f. Re-enter water as needed and monitor ABC s if the diver is breathing this can be done from the exit platform g. Remove diver with assistance and begin first aid as required h. Start documenting incident i. Monitor ABC s and provide first aid until EMS arrives c. Secure first aid kit and provide assistance as needed 149
150 SECTION 6.00 EXHIBIT SPECIFIC DIVING PRO- CEDURES HOOKAH DIVING RAVEN ROCK 6.10 HOOKAH Diving Raven Rock The following procedures are for safety diving to include animal capture. Any dive outside of these guidelines will be evaluated for proper execution protocol Routine Dive Procedure A. Equipment 1. Hookah hose retainer/ quick release weight belt system 2. Redundant air system with holster 3. One each 100 cubic foot SCUBA cylinder per diver with a minimum pressure of 3000 psi 4. One Hookah system with primary 2nd stage, SPG and first stage per diver 5. Mask 6. Brushes, rags or hand held nets, hoop nets, stretchers, catch bags, tickle sticks (these are the only tools covered under these procedures; other tools must be evaluated by the DSO for proper protocols as needed). 7. One two-way radio to remain dry and outside of the exhibit tank 8. Hookah log or waterproof slate to record entry and exit times 9. One submersible timing device per buddy team, this can be worn by the tender 10. Entry ladder for exhibit B. Staff 1. Two divers with the following ratings a. Two scientific divers in training b. One scientific in training and one probationary diver 2. Divers must be trained in HOOKAH diving including the proper assembly and use of all equipment prior to diving 3. A third person must act as tender to monitor gauges 4. Tender must be trained in the proper assembly and use of equipment prior to being allowed to tend divers in any exhibit. a. Tenders job will be to assist divers donning and doffing equipment during entry and exit. b. Tender will remain at tanks in order to monitor pressure, but must also be visible to the divers for hand signal communication. 5. The NC Aquarium at Fort Fisher and the AAUS prohibits solo diving. C. Pre Dive 1. Arrive in dive locker 30 minutes before dive for gear assemblage and checkout. 2. Check out HOOKAH and redundant air system from DSO or lead diver 3. Inspect mouth piece and all hose connections, if there is a problem with gear; bring to the attention of the DSO or the lead diver 4. Draw any additional equipment i.e. redundant air, weight system, boots, and mask 5. Log regulator number on chalk board and in dive log 6. Use tanks located on the Smart Gear Cart 7. Assemble hookah system in dive locker. If you must leave tank unattended, properly secure system or lay system down and block from rolling. (See Figure 6.1). 8. Turn on air and check for leaks and the minimum amount of air required 9. Assemble weight belt 10. Insert redundant air system into holster, located on back of weight belt with the mouthpiece facing up (See Figure 6.2) 11. Don exposure protection 15 minutes before dive or sooner if you need extra time 12. Transport equipment to dive location on cart (See Figure 6.3) 150


151 13. Call security for stanchions to keep non-staff at a safe distance (See Figure 6.3) Figure 6.1 Redundant air holster is attached to the back of the HOOKAH weight belt. Figure 6.3 HOOKAH cart stationed inside stanchions to keep non-staff observers at a safe distance. D. Entry 1. Perform safety check of equipment prior to leaving dive locker 2. Secure and setup entry/exit ladder (See Figure 6.4) Figure 6.4 Staff carefully set up ladder. 3. Don weight belt and secure hose, with assistance from tender prior to ascending entry ladder 4. Tender will log entry time on log sheet 5. Upon entering exhibit divers will turn toward viewing panel and give the tender an OK Figure 6.2 HOOKAH transported to work site using HOOKAH cart. E. Dive 1. After entering exhibit tender will bring other equipment up the ladder and hand it to the divers 151
152 2. Tender will return to the tanks after getting an OK from both divers 3. Monitor tank pressures F. Exit 1. Upon completion of the dive, divers will return to the entry platform and follow these procedures. 2. Keep regulator in mouth until weights have been removed 3. Remove quick release weight pouches and hand them to tender 4. Tender will descend ladder and allow divers to exit water G. Post Dive 1. Return all equipment to cart 2. Remove ladder from exhibit 3. Notify aquarist so they can clean viewing panel 4. Tender will log exit time on log sheet H. Gear Cleaning and Personal Care 1. Clean gear for the next user a. Dip regulator, weight system, and redundant air system in Terg-o-cide and allow a mini- mum of 15 minutes contact time for disinfecting. b. Spray SCUBA tank with Terg-o-cide and allow a minimum of 15 minutes contact time for disinfecting c. Rinse weight system and tank to including the inside of tank valve and the bottom of tank with freshwater d. Disassemble weight system and rinse with fresh water e. Take tank to racks outside of compressor room replace valve cover and affix a red tag signifying empty to the valve f. Place mask, gloves, and boots in 5 gallon bucket of disinfectant for a minimum of 15 minutes then rinse with fresh water g. Remove all exposure protection and place in Terg-o-cide barrel. Allow a minimum of 15 minutes contact time for disinfecting. Rinse with fresh water inside and out until suds stop forming. h. Properly replace all equipment back into appropriate storage areas i. Remove wetsuit and hood and place in barrel of disinfectant for a minimum of 15 minutes 2. Personal Care to reduce exhibit cross contamination or zoonotic infection a. Shower with antimicrobial soap (provided in showers) b. Clean and disinfect shower (instructions posted on each shower room door) c. Place towel in laundry basket d. Ensure all faucets, showers and hoses are turned completely off. Report leaks to DSO or ADSO I. Dive Log Management 1. Log each dive at the bottom of the chalk board a. Record dive on log sheet and complete group designation calculations b. Lead diver checks to ensure that the log is complete and correct before signing and placing in completed box 2. A separate log must be submitted for each exhibit for each day 3. Dive log must include: a. Name of diver, dive buddy and tender b. Date, entry time, exit time and location c. Diving modes used. (SCUBA, Full Face Mask, HOOKAH) d. General nature of diving activities e. Approximate surface and underwater conditions f. Maximum depths, bottom time and surface interval time 152
 3. A 2- way radio will be located on the dive cart in front of the exhibit. 6.12 Emergency Procedures Hookah Diving Raven Rock A.")
153 g. Diving tables or computers used h. Detailed report of any near or actual incidents 4. Each log must be signed by the diving supervisor 2. Floating stokes basket located in freshwater quarantine inside the garage door (See Figure 6.6) 3. A 2- way radio will be located on the dive cart in front of the exhibit Emergency Procedures Hookah Diving Raven Rock A. Location of emergency equipment 1. Dive locker office houses first response items a. DAN emergency oxygen unit b. Guardian Plus first aid kit c. Trauma kit (See Figure 6.5) d. Latex gloves 1) Each kit contains gloves 2) Spare gloves inside the office to the right of the door The dive locker office must remain unlocked whenever divers are in the water Figure 6.6 Stokes basket located behind the garage door in the conservatory 4. AED is located on the 2nd floor of the Marine building outside of the lounge (See figure 6.7) a. Ask security to bring AED b. REMINDER: DO NOT use AED in wet environment; improper use could cause injury or death Figure 6.5 DAN Trauma Kit, Guardian First Aid Kit and O2 DAN emergency oxygen unit B. Potential Injuries and Injury Care All injuries regardless of how small or seemingly insignificant will be reported to the DSO. You will be instructed as to what measures to take to prevent the transmission of zoonotic disease. 153
154 3. Unconscious diver a. Assess the area before responding and make sure it is clear of all hazards b. Approach diver and check for breathing for at least 10 seconds c. If diver is not breathing begin in water rescue breathing d. If help is need and no one is in the immediate area, blow the whistle located on you BC to alert surrounding staff Figure 6.7 AED is located outside of the docent lounge. The following are guidelines to follow and are not meant to supersede your first aid training or the recommendation of a medical professional. 1. Scrapes, scratches, contusions, abrasions a. Clean with antimicrobial soap b. Apply antibiotic ointment and bandage as needed c. Watch for signs of infection or irritation d. Seek medical attention if needed 2. Lacerations and minor bites a. Assist diver out of the water as needed and remove equipment e. If you still don t get a response, secure victim, in stokes basket and tie off to exit area 1) Exit the exhibit and call security on the radio located on the flat cart 2) Security, this [give your name], over. 3) After receiving a response, We have an emergency in [name the location], call 911. f. Re-enter water as needed and monitor ABC s if the diver is breathing this can be done from the exit platform g. Remove diver with assistance and begin first aid as required h. Start documenting incident i. Monitor ABC s and provide first aid until EMS arrives b. Make sure diver is ok c. Secure first aid kit and provide assistance as needed. Remember to use personal protection equipment when ever dealing with bodily fluids. Injuries should be monitored very closely for any inflammation. The victim should seek medical attention as soon as he/she notices any sign of infection. 154
155 SECTION 7.00 EXHIBIT SPECIFIC DIVING PRO- CEDURES BLOCKADE RUNNER (BR) 7.10 Blockade Runner (BR) Exhibit The following procedure is for program and maintenance diving and includes animal capture. Any dive outside of these guidelines will be evaluated for proper execution protocol Routine Dive Procedure A. Equipment 1. Regulator with primary 2nd stage, octopus, submersible pressure gauge and low pressure inflator hose. a. Inspect mouth piece and all hose connections for problems or defects b. Report any regulator problems to DSO or lead diver 2. Exposure Protection a. Wet Suit b. Boots c. Hood or Hooded Vest (optional) d. Gloves (optional) 3. Weight belt or integrated weight system 4. Buoyancy control device (BC) 5. Mask 6. Fins are not permitted in this exhibit 7. One 80 cubic foot tank per diver 8. Brushes, rags or hand held nets, hoop nets, stretchers, catch bags, tickle sticks (these are the only tools covered under these procedures; others tools must be evaluated by the DSO for proper protocols as needed). 9. One submersible timing device per buddy team (can be computer console) 10. One two-way radio to remain dry and outside of the exhibit tank B. Staff 1. Two divers with the following ratings a. Two scientific divers in training b. One scientific in training and one probationary diver 2. REMINDER -- Dive Safety Officer (DSO) or Assistant Dive Safety Officer must be on site for a probationary diver to dive in any exhibit. C. Pre Dive 1. Arrive in dive locker 30 minutes before dive for gear assemblage and checkout 2. Check out regulator from DSO or lead diver 3. Secure all other dive gear 4. Log regulator number on chalk board and in dive log 5. Select tank from compressor room or tank rack 6. Decontaminate all gear before using in Blockade Runner a. Spray tank including under the tank boot with Terg-o-cide b. Submerge BC, Regulator and all other gear in the Terg-o-cide barrel c. Rinse all gear cleaned with Terg-o-cide with fresh water after 15 minutes of contact time If you must leave tank unattended, properly secure it in roll control sys- tem or lay tank down on the deck and block from rolling. d. Assemble SCUBA system (tank, BC, regulator) e. Turn on tank air f. Check for leaks g. Check tank for minimum 3000 psi 155

156 7. Transport gear in gray bin down the elevator (see figure 7.1) a. Unload bin onto catwalk b. Do not block walkway with bin c. Use tank only if it contains more than 2500 psi system to the first diver 3. First diver puts on BC a. Diver 2 lowers second set of gear into water b. Diver 1 secures 2nd set of gear c. Diver 2 enters the water E. Dive 1. Deflate BC and descend 2. CAUTION: the insert is fragile a. Avoid damaging viewing panels b. Be aware of dive position c. Pass under the paddle wheel do not swim over it 3. Divers must constantly be aware of their path of retreat in the event of an out of air emergency 4. Dive should last no more than 120 minutes or until one diver is down to 800 psi 5. Keep in mind that barotraumas and lung over expansion injuries are possible even in shallow water, so remember to equalize and never hold your breath. F. Exit 1. When dive has been completed return to the initial point of entry, inflate your BC and float on surface. Figure 7.1 Divers transport gear in the gray bin and unload it close to the entrance to the exhibit. D. Entry 1. The first diver enters the water with only mask and exposure protection a. Support some weight on the deck b. Step down onto the edge of the insert c. Move down insert to a wide area d. Float between insert and back wall of tank 2. The second diver lowers partially inflated BC 2. Diver 1 removes BC unit while in water and hands it to diver 2 3. Diver 1 exits the water in the same manner as entering it 4. Both divers assist in removing equipment from water 5. Once equipment is removed, diver 2 exits G. Post Dive 1. Place all gear into the bin 2. Transport gear back to dive locker for cleaning and storage 156
157 H. Gear Cleaning and Personal Care 1. Clean gear for the next user a. Fill gray bin so that water covers SCUBA equipment 1) Leave in freshwater for at least one hour for decontamination 2) Connect clear tubing to the valve at the bottom of the bin 3) Make sure open end of the hose is inserted in the drain cover 4) Open valve to empty water from bin b. Take tank to racks outside of compressor room, replace valve cover and affix a red tag signifying empty to the valve c. Place mask, gloves, and boots in 5 gallon bucket of disinfectant 1) Let items soak for at least 15 minutes 2) Rinse with fresh water d. Remove all exposure protection and place in Terg-o-cide barrel. 1) Let items soak for at least 15 minutes 2) Rinse with fresh water inside and out until suds stop forming a. Record dive on log sheet and complete group designation calculations b. Lead diver checks to ensure that the log is complete and correct before signing and placing in completed box 2. A separate log must be submitted for each exhibit for each day a. Dive log must include: 1) Name of diver and dive buddy 2) Date, entry time, exit time and location 3) Diving modes used. (SCUBA, Full Face Mask, HOOKAH) 4) General nature of diving activities 5) Approximate surface and underwater conditions 6) Maximum depths, bottom time and surface interval time 7) Diving tables or computers used 8) Detailed report of any near or actual incidents b. Each log must be signed by the diving supervisor 3) Return all equipment back into appropriate storage areas 2. Personal Care to reduce exhibit cross contami nation or zoonotic infection a. Shower with antimicrobial soap (provided in showers) b. Clean and disinfect shower (instructions posted on each shower room door) c. Place towel in laundry basket d. Ensure all faucets, showers and hoses are turned completely off. Report leaks to DSO or ADSO I. Dive Log Management 1. Log each dive at the bottom of the chalk board 157
 d.")
158 7.12 Emergency Procedures Blockade Runner Exhibit A. Location of emergency equipment 1. Dive locker office houses first response items a. DAN emergency oxygen unit b. Guardian Plus first aid kit c. Trauma kit (See Figure 7.2) d. Latex gloves 1) Each kit contains gloves 2) Spare gloves inside the office to the right of the door The dive locker office must remain unlocked whenever divers are in the water 2. Floating stokes basket located in freshwater quarantine inside the garage door (See Figure 7.3) Figure 7.3 Stokes basket located behind the garage door in the conservatory Figure 7.2 DAN Trauma Kit, Guardian First Aid Kit and O2 DAN emergency oxygen unit 3. A 2- way radio will be located on ledge at the entry point. 4. AED is located on the 2nd floor of the Marine building outside of the lounge (See figure 7.4) a. Ask security to bring AED b. REMINDER: DO NOT use AED in wet environment; improper use could cause injury or death Figure 7.4 AED is located outside of the docent lounge. B. Potential Injuries and Injury Care All injuries regardless of how small or seemingly insignificant will be reported to the DSO. You will be instructed as to what measures to take to prevent the transmission of zoonotic disease. 158
159 The following are guidelines to follow and are not meant to supersede your first aid training or the recommendation of a medical professional. 1. Scrapes, scratches, contusions, abrasions a. Clean with antimicrobial soap b. Apply antibiotic ointment and bandage as needed c. Watch for signs of infection or irritation d. Seek medical attention if needed 2. Lacerations and minor bites a. Assist diver out of the water as needed and remove equipment b. Make sure diver is ok c. Secure first aid kit and provide assistance as needed. Remember to use personal protection equipment when ever dealing with bodily fluids. Injuries should be monitored very closely for any inflammation. The victim should seek medical attention as soon as he/she notices any sign of infection. 3. Unconscious diver a. Assess the area before responding and make sure it is clear of all hazards b. Approach diver and check for breathing for at least 10 seconds c. If diver is not breathing begin in water rescue breathing d. If help is need and no one is in the imme- diate area, blow the whistle located on you BC to alert surrounding staff. e. If you still don t get a response, secure victim, in stokes basket and tie off to the ex- hibit 1) Exit the exhibit and call security on the radio located on the flat cart 2) Security, this [give your name], over. 3) After receiving a response, We have an emergency in [name the location], call 911. f. Re-enter water as needed and monitor ABC s if the diver is breathing this can be done from the exit platform g. Remove diver with assistance and begin first aid as required h. Start documenting incident b. Monitor ABC s and provide first aid until EMS arrives 159
160 Appendix K Further Readings Further Readings These articles pertain to aquarium enthusiast for home aquariums. Although these concepts apply to home aquariums, they are illustrative to operations and animal care at NCAFF. 160
161 161
162 Basics of Fish Care By Dale M. Cooper, DVM There are nearly 22,000 species of fishes that have been identified. They show adaptations ranging from luminescence for deep sea life to lungs and "legs" for crossing land in times of drought. This document cannot deal with all the different needs of fishes. However, it will address some basic concepts important to the types of fishes normally kept as pets. Basic Aquariology For fish, water is the air they breathe, the house they live in, their source of all things necessary for their life. Fish are not able to protect themselves from their environment to the extent that land animals can. They don't have fur nor the ability to regulate their body temperature. Living in water puts them in intimate contact with toxins and bacteria that do not have the same effect on land animals because air and our dry skin provides a natural barrier. Therefore, ensuring that fish have high quality water to live in is essential. It is so important that the majority of this document deals with maintaining the quality of the water and environment the fish live in. The needs of fresh and salt water fishes are slightly different, but there are also some common needs. Toxins Water must be free of toxins. Toxins can be present in the water supply and they also are produced by the fishes themselves, as waste products of their metabolism. Toxins present in the water supply include chlorine and chloramine that are added to prevent bacterial growth in drinking water, copper and other metals which may come from water pipes, and other chemicals which may be present in ground water. The toxins produced by the fishes are primarily ammonia. Chlorine, chloramine and ammonia can be measured in a tank using commercial test kits. Toxins in water are controlled by pre-treating water and by filtration of the water in the tank. Water may be pre-treated by treating it chemically with sodium thiosulfate (1 ml of 1% thiosulfate/10 gallons of water) or an equivalent product, to remove chlorine. Some chemical products available in pet stores will remove both chlorine and chloramine. Chlorine may also be removed by exposing the water to light for 24 hours, or by aerating it. Activated carbon will remove both chlorine and chloramine, as well as some other toxins. If there is heavy metal contamination of the water, it will probably be necessary to find another source of water. 162
163 Filtration There are three separate components of filtration: mechanical, chemical and biological filtration. Mechanical filtration refers to removal of solid particles in the water. Substances such as floss, gravel or a foam filter cartridge serve as mechanical filters. Chemical filtration is accomplished using activated carbon, ammonia absorbents or water softeners. Biological filtration is provided by normal denitrifying water bacteria (Nitrosomonas and Nitrobacter spp) which break down ammonia into nitrites and nitrates. Ammonia and nitrites are toxic, while nitrates are non-toxic to fishes. Water bacteria play an essential role in maintaining water quality. There are a number of filtration systems which accomplish these tasks. Corner Filters are a very simple system that utilizes an air supply to create a slight vacuum to draw water into the filter. There, floss and activated carbon help to filter the water. The filter also provides a substrate for denitrifying bacteria to grow. The air supply in addition provides aeration for the water. These filters can only filter a limited amount of water and support a limited number of fish in a tank. The filter contents need to be changed when they become soiled. It is recommended to used them in conjunction with aquarium gravel to provide an extra substrate for denitrifying bacteria to grow on. Outside Power Filters use an electrical pump to draw large amounts of water into the filter and pass it over filter floss and carbon to efficiently filter the water. They also provide excellent aeration for the water. They can support a larger number of fish than other methods. The filter contents need to be changed when they become soiled. This filter does not provide as efficient of biological filtration, and gravel is recommended for the bottom of the aquarium to provide a substrate for denitrifying bacteria to grown on. Undergravel Filters use an air supply to create a vacuum which draws water through the gravel. The gravel provides both mechanical and biological filtration, but not chemical. These systems are extremely low maintenance, but do not support as may fish as other systems. This system should be supplemented with periodic "vacuuming" of the gravel with a siphon or pump to remove trapped debris. Foam Filters are attached to an air supply and placed into the tank. They provide excellent aeration and a substrate for the growth of denitrifying bacteria to provide biological filtration. They also provide some mechanical filtration by trapping debris. These filters are usually used as adjuncts to other systems or a the sole filtration for small tanks with few fishes. Canister Filters are a filtration system that is placed in-line in a pump. Like outside filters they can process a large amount of water and provide all three 163
164 types of filtration. However, attention must be paid to regular changing of the filter substrate, as it will cease to function when overloaded. Flow-Through Systems have a continuous water supply and drain. These systems can support large numbers of fish but must have a water supply conditioning system and consume large amounts of water. These are not recommended for most pet fish needs. Filter Substrates can have an effect on water quality: Dolomite gravel can elevate the ph of the water. This can be useful in areas where water hardness is low. Zeolites can help buffer water and maintain it in an ideal range of 7.4. Peat moss can be used for softening water and reducing ph. It may stimulate ovulation in breeding fish. Temperature Temperature is a very important part of a fish's environment. Improper temperatures can adversely affect a fish's health. High temperatures reduce the amount of oxygen in the water, reducing tank capacity. It is important to consult an aquarium book to determine the temperature range of the fish you are keeping. In general, goldfish and native fishes prefer cooler temperatures: no more than 75 F and they may tolerate temperatures just above freezing. Tropical fish prefer temperatures over 75 F and F are preferable for many species. Heaters can be used to provide temperatures above room temperature. It may be necessary to keep fish in a cold room or area if lower temperatures are needed. Temperature is monitored using any of a number of available thermometers. ph The ph of the water is a measure of the acidity of the water. For freshwater fish, this should be in the range of Saltwater fish require a higher ph of Higher ph can enhance the formation of ammonia in the water, while low ph can adversely affect the function of the fishes' gills and can be detrimental to the growth of denitrifying bacteria. Water ph can be adjusted with commercially available buffers. Water ph can be measured in a tank using commercial test kits. Oxygen Like all animals, oxygen is essential to the survival of fish. Oxygen is absorbed at the water-air interface. Providing turbulence to the water through the use of a pump or an air supply can increase oxygenation of water. Cooler water can hold more oxygen than warmer water can. Excessive oxygenation can be detrimental to some animals that are accustomed to living in stagnant water, or if the water becomes hyperoxygenated through use of a water pump. This is not likely to be a problem for most aquarium fishes. Oxygen concentration can be measured in a tank using commercial test kits. It should be between 5 and 7 ppm. 164
165 Specific Gravity The specific gravity of water is a measure if the ionic strength of water; i.e. the amount of other chemicals dissolved in it. Pure water has a specific gravity of 1.0. The addition of salt in levels of % to freshwater may reduce the amount of energy needed for freshwater fish and reduce stress. This may be used when they are ill or otherwise stressed, such as during shipping. Saltwater fish must have a specific gravity in the range of to For saltwater fish, the lower end of the range can be used to aid the fish when stressed. However, the high end of the range should be used under normal circumstances as it may combat some parasitic infections. Specific gravity can be measured in a tank using commercial test kits or a refractometer. Hardness and Alkalinity The hardness of water refers to the amount of calcium and magnesium dissolved in the water. The alkalinity of water refers to the amount of other anions, such as carbonates, bicarbonates, hydroxides, silicates and borates, that are dissolved in the water. Generally these two measures are very close. They can be measured using commercial test kits and are expressed in parts per million (ppm). Soft water has a hardness/alkalinity less than 100 ppm. Hard water has a hardness/alkalinity between 100 to greater than 200 ppm. Water needs to have a certain amount of hardness to provide an optimal environment for the fish. It helps to buffer ph changes. If using soft water it may be necessary to add commercially available ph buffers, which is essentially extra "hardness" for the water. Decorations Decorations such as rocks, wood, plants, and other plastic items can be functional, in providing hiding places for fish. When using natural products such as rocks or wood, it is a good idea to test them with some extra fish before adding to the main tank. Rocks may leech out heavy metals that can be toxic to fish. Wood and natural plants may carry harmful bacteria or disease vectors such as snails that may endanger the tank. Wood may be dried first to decontaminate it. Plants can be submitted to an alum or potassium permanganate (3 ppm) bath for several minutes to osmotically damage any parasites that are being carried. Plants Plants are useful in aquariums because they provide hiding places for fish and serve as territorial markers for more aggressive fish. Plants also improve water quality because they utilize nitrogen and phosphate waste products produced by fish. However, plants do add another level of complexity to management of the tank. For many people, plastic plants are preferable. They still provide habitat for the fish. Water quality can be taken care of by ancillary filtration methods. For those who want live plants, there are several things to consider: Plants require a full-spectrum light source in the tank. Not all aquarium lights are full-spectrum, so buy accordingly. The light should be powerful enough to provide 2 watts per gallon of tank. The light source cannot be too far from the plant. Tall hexagonal tanks are less suited for plants than are horizontal tanks. 165
166 Plants require something to grow in. At least 5 inches of gravel is needed, or they can be planted in a small pot with soil which is then covered with grave. Burrowing fish or fish that move gravel around like goldfish, generally do not work out well if you are trying to maintain plants. Plants should be added after the "run-in" period. Plants need a water temperature of F, water with a hardness of less than 100 ppm, ph of , occasional fertilizer, and water movement supplied by a power filter or aerator. Because of the extra debris created by dead plant leaves, the gravel must be vacuumed. Carrying Capacity The carrying capacity of a fish tank is the number of fish it can hold. This is determined by many things such as filtration system, type of fish, presence of hiding places for less aggressive fish, water temperature, oxygenation and other things. A rule of thumb is that freshwater aquariums can hold 1 inch of fish per gallon. Saltwater aquariums can hold 1/2 inch of fish per gallon. New Fish When adding new fish to an aquarium, it is best to gradually introduce them to the aquarium. If you have extremely valuable fish, the best approach is to have a "quarantine" tank that new fish are held in for 1-2 weeks. This will allow any diseases that they may be carrying to become obvious before they are introduced to the main tank. It will also make it easier to treat any problems that do arise. Treatment with 1-2 ml formaldehyde and 250 mg metronidazole per 10 gallons water can remove parasites which commonly infect fish. Treat the fish for 8 hours and then change the water completely. If a quarantine tank is not an option, it is recommended to at least allow the water temperature to equilibrate by floating the bag or container the new fish came in within the main tank for minutes before releasing them. Setting up a New Tank The time period when a new tank is set up is one of the most critical times for water quality. There is a 2-4 week "conditioning" or "run in" time that is needed before water quality stabilizes. Basically it takes time for a healthy population of denitrifying bacteria to develop that can degrade the metabolic waste products of the fish in the tank. This is true regardless of the filtration system used. All tanks need a biological filtration system. There are several ways to minimize the run-in period. Only add a few fish and perform frequent water changes(1-2 times a week). "Seed" the tank with bacteria by using gravel from another tank (about 20% of the total added), or a foam filter that was just taken from another tank (if it is allowed to dry out, the bacteria will die). This doesn't transmit pathogenic bacteria, as they are usually free in the water or attached to the fish, rather than to the gravel. Use hardy fish initially, such as tetras or goldfish. 166
167 Test ammonia levels and change as needed. Use commercially available ammonia absorbers. Water Changes Periodically changing the water in a tank is essential to maintain water quality. It removes accumulated toxins and often corrects phproblems. The volume of water changed each time and the frequency with which it is performed varies with tank size and the density of the fish population. For an average tank at the carrying capacity recommended above, changing 10-20% of the water every 2 weeks is a good starting point. For more dense tanks, the frequency may be increased, or the volume changed each time is increased. It is not recommended to change all the water in a tank routinely. Save this for when there is a health problem or if a tank is being depopulated and then repopulated. The best way to change the water is to use a "vacuum". The simples vacuum available is a siphon with a large cylinder on one end attached to a long, narrow tube. 1. The large end is placed in the tank, the small end in a bucket that is below the level of the tank. 2. Push the large end up and down in the tank to start a water flow into the bucket. 3. Push the large end of the siphon into the gravel and move it up and down. This "vacuums" debris out of the gravel. 4. Repeat this over the entire bottom of the tank, until the bucket is full. 5. Then pull the siphon end out of the tank to stop the water flow. If more water is to be changed, this can be repeated. This process removes organic debris at the bottom of a tank which reduces the burden on the denitrifying bacteria to detoxify nitrogen waste in the tank. 6. Replace the removed water with new, conditioned water that has been adjusted to the same temperature as the tank. There are electric vacuums available for this purpose as well. The siphon is so easy to use, I wouldn't recommend an electric pump unless you have a large number of tanks to clean, or if the tanks are low to the ground, preventing a regular siphon from working. Diet Because of the extremely wide range of fishes available to aquarium owners, their dietary needs vary widely. Fish may be carnivores (eating mostly other animals), herbivores (eating plants), or omnivores (eating both plant and animal). Goldfish and bottom feeders are omnivores. Tropical fish fall into all categories. Good quality commercial fish foods will generally provide for the needs of most aquarium fish, however it is a good idea to consult a fish reference to determine your fish's dietary habits to determine if supplementation is needed. Be sure to purchase the commercial fish food appropriate for the species you are using. Goldfish food is different than tropical fish food. Supplements like shrimp or tubifex worms may be needed if you have a lot of carnivorous fish in your tank. Herbivores like Pleicostomus may only need the algae growing in the tank. However, if your tank doesn't have a lot of algae, a 167
168 supplement like lettuce may be needed. Any fresh supplements should be removed periodically if not eaten. How much do you feed the fish? The rule of thumb is to feed no more than will be eaten in 15 minutes. Feed 2-3 times daily. Excess food will simply decompose in the bottom of the tank and add to the ammonia burden of the tank. Bottom feeders like goldfish and catfish will consume some of this, but not enough to overcome overfeeding. Because fish need to eat frequently, and because of the rotting food problem just described, "loading up" a tank with food prior to vacation will likely result in problems when you return. Vacation feeders work OK, but generally are not ideal. It is recommended that over vacations you arrange to have someone come in and feed you fish daily rather than rely on other means. Large fish may survive several days without any food, however, smaller fish have a higher metabolic rate and will not do well. Health and Disease Disease management in fishes is particularly difficult for the aquarium owner. Despite the advice given in pet stores, most diseases cannot be diagnosed simply by looking at the animal. That doesn't work for any other animal or for humans, why should it work for fish? True disease diagnosis will require a veterinarian and some diagnostic tests. A diagnosis is needed to arrive at the best treatment plan. Because of the low cost of fish compared to the high cost of a visit to the veterinarian, and because expertise in fish medicine is rare among veterinarians, this leaves you back at the pet store, or consulting a reference trying to diagnose your fish's problem by sight. Here are several considerations: General Treatment Considerations 1. If you have valuable fish or if you have an ongoing health problem in your tank that is not resolved using lay advice, seek out a veterinarian trained in fish medicine. It will be money saved in the long run. These veterinarians generally won't be listed in the phone book. A good starting point would be to contact your state veterinary college to obtain a referral. 2. When a sick fish is observed, isolate it in a small "hospital" tank. This tank should have some sort of filtration system, or the water must be changed frequently. Isolation will prevent spread of disease, allow you to more closely monitor the fish, and simplify treatment you are giving. 3. Most health problems in aquatic animals are either directly or indirectly related to poor water quality. While there are some primary pathogens (organisms that can cause disease all by themselves), most are opportunistic; they may be present all the time and only cause clinical disease when the fish is stressed. Temperature changes, high ammonia, abnormal ph, overcrowding and other tank conditions represent stresses to the fish. 4. Before doing anything else, when you have sick fish, look for potential stressors (test your water using a commercial kit) and correct them. Do a water change regardless of when the last time you did it was. 5. Add 0.1% (1.2 t per gallon) salt to freshwater tanks, or reduce the specific gravity of saltwater tanks to 1.017, to reduce stress to the fish. When adding salt, table 168
169 salt will work, but aquarium salt or pickling or canning salt is preferred because they do not have additional iodine added. 6. Disinfect the net by dipping in a disinfectant for 15 minutes and rinsing well, or drying the net out between use. 7. A diagnosis is not always needed to treat an animal. Based on clinical signs, some guesses can be made as to the likely cause of the problem. Modern medicines tend to have a broad-spectrum of activity, meaning they are effective against a number of organisms that can cause disease. These treatments are often available at pet stores. The fall into several categories- antibiotics for bacterial infections, antiparasitics for parasite infestations, antifungals for fungal infections, and medications that can treat more than one type of infection. Follow the package directions closely. "Extending" the life of the medicine over the recommended changing frequency, or diluting it because the fish really isn't that sick will cause treatment failure, and may actually exacerbate the problem. 8. If this type of "shotgun" therapy is not effective, it may be time to consult a veterinarian, or if that is not affordable, start over from scratch with new fish. This may seem extreme, but frequently infectious disease outbreaks can be impossible to treat. Limiting their spread may be all that is possible. 9. Diagnosis of fish diseases can be difficult, particularly on small fish. Laboratory samples such as blood, bacterial or fungal cultures, gill biopsies, and skin scrapings are all moderately damaging to the fish. In addition, these samples can be used to detect diseases from the outside of the fish, but not necessarily the inside. Often for a definitive diagnosis, a sick fish must be euthanized and a postmortem examination performed to get all needed laboratory samples. This works for disease problems that are occurring in a number of fish: one fish is sacrificed to find a treatment for the others, but does not help to treat an individual fish health problem. Clinical Signs of Disease Clinical signs of disease in fish can be very vague. Frequently the animal is swimming slowly- often alone, it may swim on its side, the gills may move rapidly, the animal may move rapidly back and forth in one area, the fins are droopy, it doesn't eat, and it may be losing weight. These signs don't tell you much more than that the fish is sick. If that is all you see, without diagnostic tests run by a veterinarian, the only type of treatment that is recommended is isolation in a 0.1% salt bath, perhaps with antibiotics added. Other clinical signs can indicate a specific type of disease, or can be seen with several types of diseases. Skin and mouth ulcers usually indicate a bacterial infection. Bleeding of the skin, fins, mouth or gills can indicate a bacterial or a parasite infection. Ragged looking fins can indicate a bacterial or parasite infection. Fluffy white growth from the skin usually indicates a fungus infection,but can also be a bacterial infection. Excessive slime is a sign of skin irritation. This can be from bacterial or parasite infections, or excessive salt or medication. 169
170 Discoloration of the skin can indicate bacterial infection, some parasitic conditions, poor nutrition, excessive light, or other stress. Bloat of the abdomen can indicate an internal bacterial or parasitic infection. Bulging of the eyes can indicate a tumor behind the eye, or a bacterial or parasite infection. Bacterial Infections A variety of bacteria can infect fish and cause clinical signs such as hemorrhage, ulcers, ragged fins, mouth lesions, bloat and bulging of the eyes. These bacteria include species such as Aeromonas sp, Pseudomonas sp, Flexibacter columnaris, Vibrio anguillarum, and Mycobacterium sp. The only way to definitively identify most bacteria is to culture them, although some can be identified just by using special stains. These tests must be performed by a veterinarian and a diagnostic laboratory. Bacterial infections often require antibiotic therapy, although the water quality should also be tested at and the diet must be examined to determine if it is optimal for the species in question. Antibiotics that are often used are tetracyclines (minocycline), nitrofurantoin, nalidixic acid, and others. These are available over the counter in pet stores and should be used according to package direction. Antibiotics are usually mixed in the water for convenience, however, antibiotic treated food, or injections of antibiotics are usually more effective. Some bacteria can be resistant to antibiotics and it may be necessary to try a different one if the one does not work. Often for resistant infections, the bacteria must be cultured by a veterinarian and tested for its sensitivity to antibiotics. Parasite Infections There are a large number of parasites than can infect fishes. These can only be identified by examining them under a microscope. It takes a trained veterinarian or parasitologist to identify these organisms. Parasites can fall into several categories: Protozoa are one-celled parasites. These include species that live on the skin or in the gills, such as Ichthyophthirius multifilis ("Ich"), Cryptokaryon irritans, Ichthyobodo necatrix, Costia necatrix, Cholodonella cyprini, Brooklynella horridus, Oodonium, Trichodonids, Tetrahymena pyriformis, Uronema miamiensis, Epistylis sp, and Vorticella sp. Internal protozoans include Hexamita and Spironucleus sp, Plistophora hyphessobryconis and other myxosporidia, cryptosporidia and coccidia such as Eimeria. The point being, there's a lot of them and they all have names you'll never remember. Helminths are worms that like Protozoans, can live in different parts of the fishes' bodies. Species such as Dactylogyris sp, Gyrodactylus and the Turbellarians live in the skin. Other species live internally such as Neascus sp, Clinostomum spp, Diplostomulum sp, tapeworms, Eustrongylides spp, Capillaria and Camallanus spp. Crustaceans or shelled animals can act as parasites. Learnea and Ergasilus are species that resemble worm, but are actually copepods. They can parasitize the skin, as can the fish louse, Argulus. Another parasite that has been classified as both a crustacean and as a tepeworm, that can act as a skin parasite is Livoneca symmetrica. 170
171 Parasites can be treated with a number of drugs. However, as with bacterial infections, parasite problems are almost always secondary to poor water quality. The parasite will live in a symbiotic state with the fish as long as environmental conditions are optimal for the fish. When the animal is stressed, its immune system becomes depressed and the parasites get the upper hand. Some antiparasitic drugs are specific for a certain category of parasite. Over the counter products are available for common parasites like "Ich". Use as directed on the package. Other parasite treatments such as formaldehyde, malachite green, metronidazole, praziquantel, methylene blue, potassium permanganate, acriflavine, nasoten and copper should only be used by persons trained in their use (many of the products are only available to veterinarians). Fungal Infections Fungal infections are diagnosed by examining a laboratory sample under a microscope, or by culturing the organism. Fungal infections can be extremely difficult to treat in fish. Often the lesion is scraped free of fungus and iodine (povidone iodine, not tincture of iodine) can be applied. Other drugs that are used to treat human fungal infections may also be used. These require daily treatments for several weeks. Overall the prognosis is poor. Fungal infections often occur secondary to an injury or to poor water quality. Dietary Deficiencies Because dietary deficiencies can be extremely complex to sort out, the best approach is to only feed a commercial food for the species you are caring for. Feeding excessive fresh ingredients such as a fish diet, shrimp, tubifex worms, etc. to fish that do not specifically require them will result in deficiencies, as they will eat less of the balanced commercial diet. If you have an unusual species that does not have a commercial diet, consider consulting an expert in the area for dietary recommendations. Otherwise research its feeding habits and use a commercial diet for a comparable type of fish. These recommendations on fish health and husbandry are very general. A trained veterinarian or other expert in aquaculture should always be consulted for a problem that does not resolve itself though control of water quality and removal of diseased animals. (Accessed 3/27/2010 found at 171
172 Marine Aquarium Chemical Filtration Marine aquarium chemical filtration is very important in a reef tank but is often misunderstood. By J. Charles Delbeek The topic of chemical filtration is described in just about every textbook written on marine aquariums, yet few people really seem to understand its capabilities, limitations and applications. There are numerous forms of filtration that could fall under the category of chemical filtration depending on their mode of operation. For the purposes of this article, we will limit our discussion to the common forms of chemical filtration used in reef systems: activated carbon, foam fractionation (also known as protein skimming), molecular adsorbants and ozone. Due to the various biological processes that occur in an aquarium, a build-up of organic substances takes place. These substances are referred to as organic because they all contain the element carbon in their chemical composition. The list of substances is quite lengthy and includes such items as amino acids, proteins, phenols, creosols, terpenoids, fats, carbohydrates, hydrocarbons, plant hormones, vitamins, carotenoids and various organic acids such as fatty, acetic, lactic, glycolic, malic and citric (degraaf, 1981; Moe, 1989). Fortunately, these various substances can be lumped together under the all-encompassing term of dissolved organic carbon (DOC). Taken as a whole, these DOCs often have various deleterious effects on aquarium inhabitants, including reduced growth, reduced disease resistance and metabolic stress. DOCs are processed in different ways in an aquarium. Some are mineralized into ammonia by bacteria present in the tank. The ammonia is then oxidized by nitrifying bacteria into nitrite and then into the final product, nitrate. Unless utilized by plants as food, nitrate tends to accumulate in the aquarium water. Many organic substances are not mineralized but also tend to accumulate in the aquarium. This is why water changes are usually advocated as part of aquarium maintenance. Hobbyists are often under the impression that the purpose of a water change is to lower the nitrate concentration. While water changes do reduce nitrate levels, a more significant result is that the DOC content of the water is also lowered. Because nitrate is easier to measure than DOC, and because nitrate and DOC concentrations are often directly related, nitrate levels can be used as a yard stick to determine when a water change is needed. The concept behind chemical filtration is that if much of the DOC can be removed before it accumulates or is converted into ammonia, the need for water changes can be reduced, the load on the biological filter will be less and nitrate levels will decrease. The result will be improved growth and health for the fish and invertebrates in the tank. 172
173 I would like to make it very clear that I am not saying that the use of chemical filtration eliminates the need for water changes. Water changes are still essential. To begin with, no method of chemical filtration is 100 percent efficient, and many substances in aquarium water are difficult to remove by chemical filtration. In addition, water changes provide other benefits, such as helping maintain the correct ph and appropriate levels of trace elements and calcium. Even in the most carefully maintained aquarium, the effects of a water change on the inhabitants can be quite revealing. Colors improve and the animals exhibit greater alertness and activity. The primary benefit of chemical filtration is to help maintain a much lower concentration of DOC in your tank, which becomes extremely important when dealing with invertebrates such as hard corals. Activated Carbon Many of us remember our early experiences with aquarium filtration when we were less ''sophisticated'' about filters. I am thinking particularly of using charcoal in the corner box filter of a freshwater tank. This form of chemical filtration consisted of small, shiny, irregularly shaped pieces of bone or wood charcoal. Charcoal, of course, is not really suitable for use in aquariums. The material of choice is always "activated" carbon. The term activated refers to carbon that has been subjected to very high pressures and temperatures to drive out all impurities and gases, leaving behind extremely porous and pure grains of carbon. Particle size, the type of gas used, the activation temperature and, in some instances, the addition of inorganic salts (zinc, copper, phosphate, silicate and sulphate) before activation all provide carbon with specific adsorption characteristics (Moe, 1989). Therefore, activated carbon can be tailored to the specific types of impurities that one wishes to remove. By creating this extremely porous structure within the carbon grains, the effect is that of an efficient sponge that can absorb many compounds from the passing water. Activated carbon will remove a wide variety of organic molecules by simply trapping them in the carbon pores (absorption) or by chemically bonding them (adsorption). Adsorption relies on the fact that many organic molecules are polar in nature. This means that the two ends of a molecule differ in their affinity for water. One side is repelled by water and is termed hydrophobic (''water hating'') while the other end is attracted to water and is called hydrophilic (''water loving''). When a polar molecule comes close to a polar surface such as activated carbon, they become attached to each other, effectively removing the molecule from solution. Moe (1989) gives a detailed discussion of the properties of activated carbon and the factors that determine its efficiency. Perhaps the most common mistake made in using activated carbon in reef aquariums is its placement in trickle filters. It is the nature of flowing water to take the path of least resistance. When activated carbon is used in outside power filters, for example, it is placed so that the water must flow through the carbon, not around it. This lesson appears to have had little impact on many of the designers of trickle filters. All too often, 173
174 bags of activated carbon are placed in the sumps of trickle filters in such a manner that the majority of the water passes around the carbon, not through it. In a correctly designed sump, all of the water is forced to flow through the carbon chamber. In a trickle filter in which the flow of water cannot be controlled, there are a couple of options available. One is to hook up a canister filter filled with activated carbon to the sump so that water is pumped out through the canister filter and then back to the sump. The other is to build an in-line contact chamber in the return from the trickle filter to the tank. This consists of a section of PVC pipe with hose fittings at both ends. The pipe is filled with activated carbon and placed in the return line so that all of the water returning to the tank passes through it. Thiel (1988, 1989) and Moe (1989) describe the construction and placement of this type of unit. There are two commonly asked questions concerning the use of activated carbon: 1) how much to use and 2) how often to replace it. These questions are very difficult to quantify simply because no two systems are identical. Differences in bioloads and the kinds of fish and invertebrates being kept greatly influence the composition and quantity of DOC produced. For example, aquariums filled with marine algae will produce a greater variety of DOC than systems with very little algal growth. Thiel (1988) recommends using 36 ounces of activated carbon per 50 gallons of water and Wilkens and Birkholtz (1986) recommend 500 grams per 100 liters, which is roughly equivalent. These figures are quite generous, and it may be possible to use somewhat smaller quantities. The real indicators as to whether there is adequate amounts of carbon in the system are the condition of the animals being kept and the color of the water (a yellowish tint indicates a build-up of DOCs). Careful observation of the tank and its inhabitants is the key. Too many aquarists today are turning toward technological wizardry to maintain their aquariums. Hobbyists are constantly talking about ozone, redox potential and carbon dioxide systems, yet many of them cannot correctly identify their tank inhabitants or do not fully understand what ph is. The marine life in our aquariums is far more sensitive to water chemistry than any meter, and it is therefore better to spend time watching them than looking at test instruments. Observing these animals will keep you attuned to the conditions in your tank. As with the quantity of carbon, it is difficult to recommend a specific time period after which the carbon should be replaced. Various authors of marine texts have stated that carbon should remain active for five to seven months before needing replacement (Moe, 1989; Wilkens and Birkholtz, 1986). Generally, the presence of a yellowish tint in the water can be used as a guide to determining whether the carbon needs to be replaced, because the substances that tint the water are easily removed by carbon and will start to accumulate in the water when the carbon becomes saturated. Moe (1989) describes the following method for using water color as an indicator of carbon activity. Obtain a strip of white plastic and color one half very light yellow with a 174
175 marker. Place the strip in the water and observe from a distance. When you can no longer distinguish the yellow half from the white half, the water contains significant amounts of DOC and it is time to replace the activated carbon in the filter. Because activated carbon is a very porous material, nitrifying bacteria will quickly colonize it. If you use large amounts of activated carbon and replace all of it at the same time, the sudden loss of a large population of nitrifying bacteria could lead to elevated ammonia or nitrite levels. It might be wiser to replace 30 percent of the carbon and rinse the remaining 70 percent with seawater (Wilkens and Birkholtz, 1986). The new carbon can be placed in a separate bag and located in front of the old carbon in the filter. This will preserve a large amount of the bacteria that have colonized the carbon. Because only a portion of the carbon is being replaced each time, the maintenance schedule for the carbon may need to be increased in frequency. The addition of activated carbon to a filtration system that has not contained carbon previously also requires caution. Wilkens and Birkholtz (1986) recommend that when activated carbon is added to an established aquarium, it be done gradually. For example, 20 grams of carbon per 100 liters of water (1½ ounces per 26 gallons) can be added monthly to the filter until a sufficient total quantity is reached. The sudden addition of a large quantity of activated carbon to an established aquarium can remove such a large amount of DOC that the animals may become severely shocked. There are numerous brands of activated carbon being marketed today, some of which have fancy names, such as ''research grade.'' Unfortunately, not all activated carbon is created equal, and the levels of efficiency and quality vary greatly from brand to brand. Ideally, the grains of activated carbon should be small, dull black in color and as dustless as possible. Recent studies of activated carbon-filtered aquarium water have shown that certain brands of activated carbon appear to actually add phosphate to the water, which is exactly what we are trying to avoid (J. Sprung, personal communication)! A different problem is that as activated carbon ages, some of the substances it has adsorbed and absorbed may be released back into the water (Thiel, 1988, 1989). If the activated carbon is changed on a regular basis, however, this problem can be avoided. A final caveat concerning activated carbon is that, along with the other forms of chemical filtration to be mentioned in this article, it indiscriminately removes substances from the water, including some useful ones. Therefore, regular water changes take on added importance when chemical filtration is present. Foam Fractionation A method of chemical filtration that has been available for decades but only recently has become popular is foam fractionation (protein skimming). A foam fractionator consists of a column through which a very fine mixture of air and water is pumped. If you have spent any time along an ocean shore, you may have noticed varying amounts of foam. This foam is produced by the action of the waves, which combines air, water and certain 175
176 polar organics to form a stable foam. A foam fractionator works in a similar manner. If the foam is collected, proteins and other organics can removed from the water before they are mineralized into nitrogen-containing compounds and other toxins. As a result, the quality of the tank water is improved and is easier to maintain. Of the various chemical filtration methods available, only foam fractionation completely removes most organics before they begin to break down (Moe, 1989). The list of substances removed by fractionation includes amino acids, proteins, metals such as copper and zinc complexed with the proteins, fats, carbohydrates, phosphate, iodine, fatty acids and phenols. A more detailed discussion of foam fractionators, including their operation and construction, will appear in a future issue of AFI. In my opinion, a foam fractionator is an indispensable piece of equipment for a marine aquarium, particularly in a reef system. Foam fractionators have been used in European aquariums for years and are often the sole form of filtration in these tanks. This level of filtration, however, cannot be achieved with the smaller, inside-the-tank fractionators that have been commonly sold for years in North America. What is required are larger, external models, which are only now becoming more common in North America. These units have traditionally been imported from Europe, but a number of companies in North America have introduced a variety of models. Although the majority of fractionators sold today are driven by wooden airstones, some models are available that incorporate a venturi design. A venturi fractionator utilizes a strong water pump and a small air inlet, creating a suction that forms a fine mixture of air and water in the fractionator. Such devices are more powerful and require less maintenance than the standard wooden airstone-driven models. Because of their efficiency, they can also be smaller in size. There are a few items of concern to keep in mind using a foam fractionator. First, the continuous removal of small amounts of seawater by the fractionator, along with replenishment of evaporated water with freshwater, can lead to a gradual lowering of salinity. Therefore, the periodic addition of seawater may be necessary to maintain the desired level of salinity. Secondly, efficient fractionators can remove some trace elements. Periodic water changes or the addition of trace elements may be necessary to maintain sufficient levels of these elements. Finally, the addition of certain kinds of buffers and molecular adsorption filter pads can cause a fractionator to foam excessively. The best solution for this is to turn down the skimmer for a day and then gradually restart it. Molecular Adsorption Filters This form of chemical filtration is a relatively new addition to marine aquariums. At the moment, the hobbyist market is dominated by a single product, Polyfilter(TM), marketed by Polybio Marine Inc. This type of filtration consists of various styrene or acrylic polymers that selectively adsorb polar organics and nitrogen-containing compounds onto their surface (Moe, 1989). Some authors (Thiel, 1988) claim that these products 176
177 will remove phosphate from the aquarium. Although I do not measure phosphate in my own aquarium, I have noticed that the growth of red microalgae visibly slowed after the addition of such a filter pad. If the ionic interference caused by seawater can be overcome, and molecular adsorbents become more specific for particular substances, we should see a proliferation of such filter products in the future. For example, products that selectively remove nitrate and phosphate down to the parts per billion level would be especially useful. As with activated carbon, molecular adsorbents should be situated so that water is forced through the medium, not around it. At this time, it is not known whether longterm use of such filters will lead to trace element depletion. Ozone Ozone is a naturally occurring gas in the upper atmosphere, where its ultravioletabsorbing properties have been given wide exposure in relation to its recent depletion caused by chlorofluorocarbons. Ozone is a powerful oxidant that consists of three atoms of oxygen (O 3 ). O 3 readily releases what is an extra oxygen atom to become O2, which is more stable. It is this property that we utilize in an aquarium. The oxidizing ability of ozone breaks down organics and nitrite. Unfortunately, other products, such as hypochlorite and hypobromite, can also be produced in this process and can damage delicate invertebrates and fish gills (Moe, 1989). Ozone is generally used in conjunction with a foam fractionator or pressurized air reactor. Ozone is mixed with air and introduced into a contact chamber. There, the ozone-air mixture mixes with the aquarium water and organics are oxidized. The effluent water is then passed through a container of activated carbon before being returned to the aquarium, which removes any residual ozone and any harmful byproducts that may have been produced. Used in conjunction with a redox controller, precise regulation of a system's redox potential can be obtained. Stated simply, redox potential is the ability of the aquarium water to oxidize and/or reduce substances in the water. Measurements of redox potential in the ocean vary from 350 to 400 millivolts (Moe, 1989) to as low as 160 to 190 millivolts (Wilkens and Birkholtz, 1986). However, caution is advised in any comparisons due to differences in measuring conditions, techniques and equipment used. Recommended redox levels in marine tanks range from 375 to 450 millivolts, but each aquarist must judge the appropriate value on the basis of the appearance of the aquarium. Differences in probe placement, frequency of tank maintenance, bioload and so on all affect redox readings. It is not so much the numerical value that is important but the appearance of the aquarium's inhabitants. Once a redox level is reached at which you feel your tank looks best, that is where to keep it. Do not strive for specific redox levels simply because they are recommended by others. Although many periodicals and books make note of the quite common use of ozone in Europe (i.e., Moe, 1989), I have read numerous articles from both Germany and 177
178 Holland that advocate not using ozone. It is unclear what the exact basis of this opposition is, but the main criticisms appear to be that ozone is not necessary to maintain a successful tank, that its use will cause problems in the long run and that the various by-products produced are potentially dangerous to the inhabitants (Hebbinghaus, 1989; Stuber, 1989; Wilkens and Birkholtz, 1986). Nonetheless, I have seen many beautiful aquariums here in North America that use ozone, in conjunction with redox controllers, on a continuous basis. One thing that I and others have noticed, though, is that reef systems run with ozone tend to have higher nitrate levels than reef systems that do not. This may be a reflection of the increase in nitrate production caused by the oxidation of nitrite into nitrate by ozone and/or some inhibitory ozone effect on denitrification of nitrate. Stuber (1989) reports the growth of more than 11 species of reef-building hard corals without the use of ozone in an aquarium with a measured redox of 180 millivolts! Both Moe (1989) and Thiel (1988, 1989) go into much more detail on redox and ozone and their application to reef systems. I urge you to consult these references for additional information. Whether used by itself or in conjunction with biological and mechanical filtration, it is safe to say that chemical filtration is an important component of a reef aquarium filtration system. Therefore, it should be considered an essential element in any reef References degraaf, F Handboek Voor Het Tropisch Zeewateraquarium. A. J. G. Strengholt Boeken, Utrecht, The Netherlands. Hebbinghaus, R De stand van de zeeaquariumhouderij in de Duitse Bondsrepubliek. Het Zee-Aquarium 39(11): Moe, M. A., Jr The Marine Aquarium Reference: Systems and Invertebrates. Green Turtle Publications, Plantation, FL. Stuber, D Wat doen ze daar in Berlijn eigenlijk? Het Zee-Aquarium 39(11): Thiel, A The Marine Fish and Invert Aquarium. Aardvark Press, Bridgeport, CT. Thiel, A Advanced Reef Keeping I. Aardvark Press, Bridgeport, CT. tank. Wilkens, P. and J. Birkholtz Niedere Tiere - Roehren-, Leder und Hornkorallen. Engelbert Pfriem Verlag, Wuppertal. 178
179 What Is Protein Skimming and How Does It Work? Next to primary biological filtration 1, foam fractionating, better known as protein skimming, is the next most important aspect of any healthy marine system. Wow, pretty powerful statement, huh? Although there are systems that claim to be "skimmer-free", such as Dr. Jaubert's Live Sand Plenum System 2, for most of us DOC's (dissolved organic compounds), phenol oils, and other yellowing agents are a nuisance that only active protein skimming can eliminate. Before we jump into the subject matter any deeper, let's discuss how these devices work. To be as unscientific and as clear as possible, let's simply say that the air bubbles inside the skimmer's body strip the water of undesirable waste by-products. How the bubbles accomplish this is a neat trick that needs some explanation. Ever blow bubbles as a kid? Remember all the rainbow colors on them? Just as the soap clung to the giant bubbles you were creating so too, does all the junk and other organic gunk in your aquarium water. Those pretty rainbow colors were the light refracting off the soap film...you could actually see it! In our skimmers, the bubbles are microscopic and the results can only be "seen" after they burst and deposit their "films" into the collection cup! No pretty rainbow of color here...nope. Only the vilest and nastiest looking sludge imaginable ride our skimmer's bubbles. How does this happen? It was discovered long ago in waste treatment plants that by injecting high volumes of air bubbles into a column of waste water, the resulting effluent was purer and much cleaner than before. How could this be? Actually, quite simple. Surface tension. Surface tension? What's that? The interaction between the oxygen bubble and the surrounding water creates a kind of friction between the two. This friction in turn "charges" the molecules in the water. This About.com page has been optimized for print. To view this page in its original form, please visit: About.com, Inc., a part of The New York Times Company. All rights reserved. Links in this article: m 179

180 What Is Protein Skimming, and How Does It Work? By Stan & Debbie Hauter, About.com Guide Co-Current Skimming Don Carner Playing on the old law of physics, "opposites attract," the charged gunk molecules "stick" to the bubbles, riding them up the column of water. Once the bubbles reach the surface air they burst, depositing their hitchhikers into a collection cup. This collection cup keeps the accumulated gunk from slipping back down into the water column inside the reaction chamber. Due to the very nature of saltwater, this process is possible. Freshwater protein skimming just isn't feasible at our level as the technology to make it possible just isn't practical at the hobby level. Co-Current Skimming Bubble size is a fundamental ingredient to a successful protein skimmer and various methods are used to create this "perfect" bubble. Originally, lime wood was and still is used to create the froth. The European hobbyists were amongst the first to recognize the importance of skimming their aquariums. Specifically, the Germans marketed some of the finest models in their day, and still do. Tunze and others brought protein skimming to our shores with the original design. This was called Co-Current skimming. The basic, Co-Current skimmers used an open-ended tube or cylinder with the bubble source mounted at it's base. As with uplift tubes utilized with under gravel filter plates, Co-Current skimmers used the volume of air bubbles rising in the column to bring the system water into contact within the chamber body. The water was "drawn" up into the cylinder from below the water's surface and once the bubbles burst at the collection cup, the treated or stripped waters simply "fell" back down into the aquarium. Above is a typical co-current skimmer, either hang-on or sump mounted. This About.com page has been optimized for print. To view this page in its original form, please visit: 180

181 Counter-Current Skimming Don Carner This method works but isn't terribly efficient. Why? Dwell time. Dwell time is the length of time the water is in contact with the bubbles. By lengthening the reaction chamber, more water could be processed and more "gunk" removed. Trouble was, not many folks wanted a 6' monster tube sticking up behind their aquariums! Research and development created the next step in skimmer evolution: Counter- Current Skimming. If anyone is familiar with amateur astronomy my analogy of a Newtonian telescope v.s. a refracting telescope, illustrates my point. Just as bending light waves by reflecting them off a mirror can double the focal length of a telescope, so too can we double the dwell time in a skimmer. By injecting the water at the top of the reaction tube, the bubble source at the bottom of the reaction tube and having an isolated outlet fitting, also on the bottom of the chamber, the water has to pass against or "counter" to the rising wall of bubbles. This effectively doubles the dwell time making for a more productive unit. Many companies today market variations on this Counter-Current design. Venturi Style Skimming In the pursuit of building a "better mousetrap", Mazzei developed what came to be known as the Mazzei Valve. Today all skimmers that use this method of air-injection are called Venturi-Style skimmers. These models do not use any airstone or limewood diffuser to create the bubble column. They rely on a venturi valve to deliver both the water to be treated and the billions of microscopic bubbles. This is accomplished within the wasp-waste design. Venturi Style Skimming 181
182 Skimmer Venturi Valve Don Carner This is a typical threaded venturi valve. The high velocity water entering from the left is bottle-necked at the molded wasp waist. The intake nipple is arranged at the top of the tube where the water movement creates air-draw. This is how the bubbles are formed inside the valve. The froth exiting the valve is introduced into the main skimmer body where it removes organics. As high velocity water is pumped into the valve's main body, the channel suddenly reaches a choke-point where baffling and an outlet or "nipple" allows room air to be drawn into the valve, injecting it into a swirling jet of water to be shot into the skimmer's reaction chamber. By offsetting the fitting at the bottom of the cylinder, a vortex is created and the contact or dwell time is magnified many, many fold. Up until just a few years ago this was the professional's choice for serious foam fractionating, and in many circles it remains as such. These skimmers require an outlet pipe as the volume of water that they can process in an hour necessitates a "flowthrough" design. Usually, the effluent is high on the skimmer's main body, being directed back into a sump or display tank. You can modify a common powerhead to provide virtually the same results. These modifications make small volume powerheads available for smaller skimmers in micro reef systems. Even today many Hang-On Style skimmers use the modified powerhead as a main pump. They mimic the venturi valve concept by allowing air to be drawn into the impeller housing where the impeller chops the water-air mixture and shoots it into the skimmer. Simple and elegant. This About.com page has been optimized for print. To view this page in its original form, please visit: About.com, Inc., a part of The New York Times Company. All rights reserved. 182

183 ETS's & Down-Draft Skimming Don Carner ETS's & Down-Draft Skimming Another,even simpler design became popular just a few years ago. The "ETS" (Environmental Tower Skimmer) was introduced to the hobby. Also known as Down- Draft skimmers, these models use a long tube connected to a sump with nothing more than an internal baffle plate and a drain valve. Inside the long vertical tube, bioballs are placed to diffuse the high velocity water that is injected at it's top. As the water shoots down over the bioballs, it is smashed and resmashed on the tower of bioballs. By the time the water reaches the sump at it's base, the water is a white sea of foam. The baffle inside the sump creates dwell time and allows the protein-rich froth to rise up into a wide-mouthed tube with the collection cup mounted above it. These designs can process huge volumes of water and are favored by big tank owners. Smaller designs that follow the tenants of its' larger cousins allow smaller capacity systems to benefit as well. There are other designs that are variations on this original theme, but I will not elaborate on individual company's products here. This then has been a brief overview of what skimming is and the basic methods used in the hobby today. In the Part 2 1 I cover the actual design and operation of the models, and which is right for you and your system. Happy Skimming Don Carner 183
184 This About.com page has been optimized for print. To view this page in its original form, please visit: About.com, Inc., a part of The New York Times Company. All rights reserved. Links in this article: 184
185 185
186 186
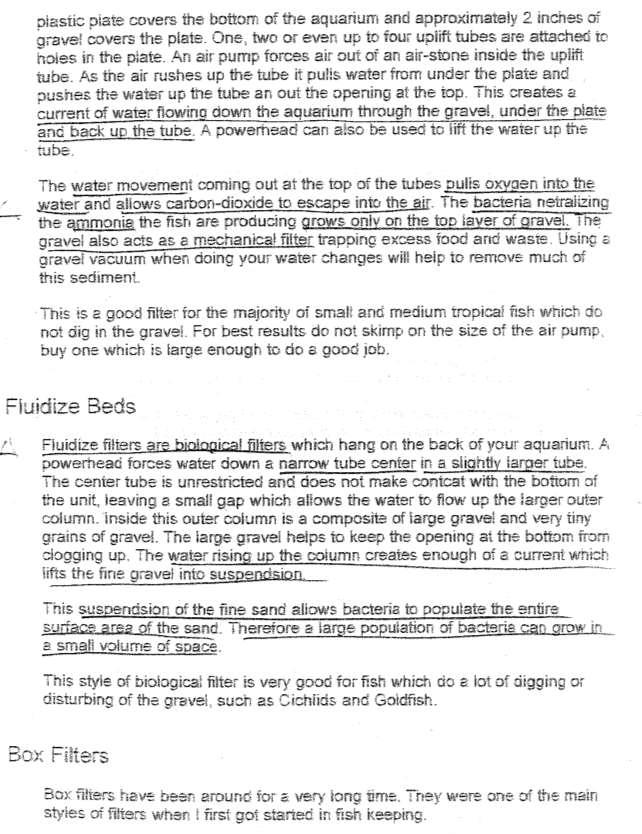
187 187

188 188

189 189
190 Appendix L Hazardous Marine Life Hazardous Marine Animals and Bacteria Along the Carolina Coast, Peter Meyer, MD Copyright
191 191
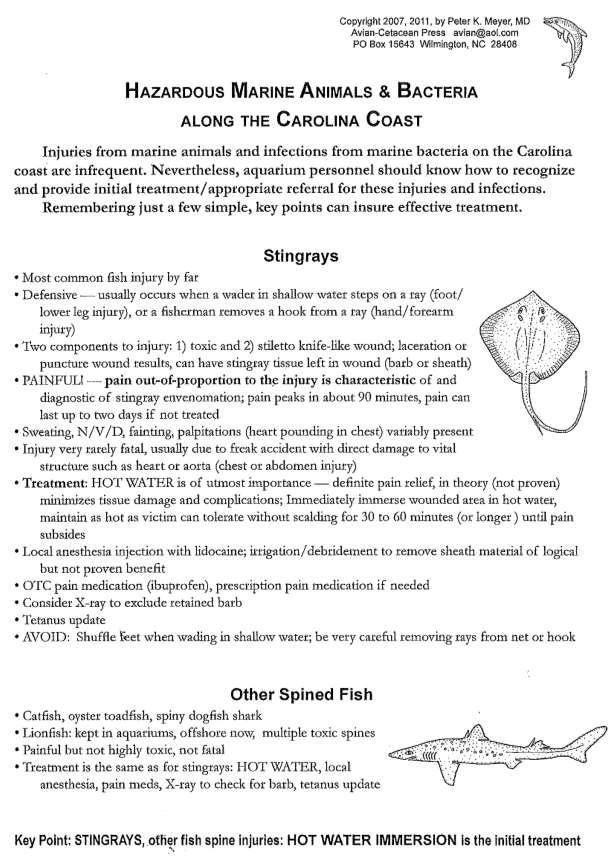
192 192
193 193

194 194

195 195
Exhibit Diving. Revised December 5, 2012
 Exhibit Diving Revised December 5, 2012 Arnold Postell Senior Biologist / Dive Safety Officer Work: (843) 579-8536 Email: apostell@scaquarium.org January 29, 2007 It is the mission of the South Carolina
Exhibit Diving. Revised March 25, 2017
 Exhibit Diving Revised March 25, 2017 South Carolina Aquarium Dive Operations Arnold Postell Dive Safety Officer / Senior Biologist (843) 579-8536 apostell@scaquarium.org Ryan Yuen Assistant Dive Safety
Appendix C Health and Safety Guidelines for investigators
 38 Appendix C Health and Safety Guidelines for investigators Introduction Investigations must be conducted in a safe manner. This document provides an overview of the health and safety guidelines investigators
University System of Maryland (USM) Dive Plan Approval Form To be submitted to the USM Scientific Diving Safety Officer
 Dive Plan Approval Form To be submitted to the USM Scientific Diving Safety Officer") University System of Maryland (USM) Dive Plan Approval Form To be submitted to the USM Scientific Diving Safety Officer Date Submitted: Proposed Expedition Dates: Dive Plan through Dive Platform Name:
University System of Maryland (USM) Dive Plan Approval Form To be submitted to the USM Scientific Diving Safety Officer Date Submitted: Proposed Expedition Dates: Dive Plan through Dive Platform Name:
Divemaster. Divemaster
 Divemaster OVERVIEW AND QUALIFICATIONS The NAUI Divemaster rating is the highest NAUI leadership level certification with the exception of instructor. The program is designed to train experienced and knowledgeable
COMMUNITY RESPONSE TO MEDICAL EMERGENCIES:
 COMMUNITY RESPONSE TO MEDICAL EMERGENCIES: For any on-campus emergency, dial x456 from an on campus phone or From a cell phone dial 508-494-9010. A medical emergency can occur anywhere on campus. The reaction
13. Shallow Water Scuba Diver
 13. Shallow Water Scuba Diver 13.1 Introduction This entry-level certification course is designed to give students the necessary skills to safely conduct open water dives in conditions similar to their
Hygiene and Sanitation Policy For Employees
 Hygiene and Sanitation Policy Report to work in good health, clean, and dressed in clean attire. Wash hands properly, frequently, and at the appropriate times. Keep fingernails trimmed, filed, and maintained
LABORATORY HAZARD AWARENESS TRAINING
 Open minds. Open doors. TM LABORATORY HAZARD AWARENESS TRAINING FOR NON LABORATORY PERSONNEL Objectives Hazard Awareness Be familiar with the hazards, warning signs and labels Protective measures PPE Training
Surface Supplied Air Diving. Revised June 29, 2016
 Surface Supplied Air Diving Revised June 29, 2016 South Carolina Aquarium Dive Operations Arnold Postell Dive Safety Officer / Senior Biologist (843) 579-8536 apostell@scaquarium.org Ryan Yuen Assistant
The Johns Hopkins University/The Johns Hopkins Hospital Health, Safety and Environment Manual Safety Policies:
 Page 1 of 6 Keywords: Airborne Combustible, Atmospheric Monitoring, Atmospheric Oxygen, Authorized Entrant, Body Harness, Combustible Gas Meter, Communication Procedure, Confined Space, CPR, Entry, Entry
County of Santa Clara Emergency Medical Services System
 County of Santa Clara Emergency Medical Services System Policy # 700-S01 Ebola Virus Prevention and Control EBOLA VIRUS PREVENTION AND CONTROL Effective: October 30, 2014 Replaces: October 8, 2014 (Version
Team Blue Immersion. TecRec Overview. Technical Instructor Course
 Team Blue Immersion TecRec 40-45-50 Overview Technical Instructor Course Contents DSAT Tec 40, 45 & 50 DSAT Tec 40, 45 & 50 Standards... 1 Discover Tec Prerequisites... 1 Tec 40 Prerequisites... 1 Tec
Scope: This plan applies to all personnel, including contractors, who enter or work in confined spaces, or supervise such activities.
 11/13/1995 4 5/20/2013 1 of 10 Authority and Scope Regulation: 29 CFR 1910.146 Scope: This plan applies to all personnel, including contractors, who enter or work in confined spaces, or supervise such
WAKE COUNTY POOL PERMIT PRE-SEASON AUDIT 2014
 A DEPTH MARKINGS There are Depth Markings on and around a. On the vertical wall of the pool and on this pool that are at least 4 inches high; in contrasting color to the background; of a slip resistant
FIRST AID. Study Topics. At a minimum, the following topics are to be studied for the first aid exam.
 FIRST AID Study Topics At a minimum, the following topics are to be studied for the first aid exam. TOPIC Avoid getting air in stomach during rescue breathing Burns Kinds of Burns & Care Calling for Help
Acting in an Emergency
 Acting in an Emergency Shelley Westwood, RN, BSN Adapted from Ed Reesor, RN I can: Explain how pathogens are transmitted from one person to the next. Describe standard precautions (SP) and how they can
Laboratory Safety Guideline Emergency Eyewash and Safety Showers
 Introduction The purpose of this program is to ensure that all safety eyewashes and showers supply clean, potable water and are in proper working order. This program describes procedures for emergency
Laboratory Emergency Response & Incident Reporting Guide. Occupational & Environmental Safety Office Duke University Health System.
 Laboratory Emergency Response & Incident Reporting Guide Occupational & Environmental Safety Office Duke University Health System Quick Reference Revised 2016 Blood/Body Fluid Hotline From a Duke phone...
What is a wound? An injury to the skin and some times other deeper soft tissues. Types:
 1 Dr. Samer Sara What is a wound? An injury to the skin and some times other deeper soft tissues. Types: Open wounds: Skin is torn or cut, often leads to bleeding. Closed wounds: Skin is not affected and
Student Shop Safety. University of Tennessee Safety Guide GS-005. Purpose. Scope and Applicability. Definitions and Abbreviations.
 Student Shop Safety University of Tennessee Safety Guide GS-005 Document Contact: EHS Date effective: August 1, 2012 Revision Date: June 7, 2017 Purpose Machine shops are present in many departments and
Laboratory Safety Training. Environmental Health and Safety
 Laboratory Safety Training Environmental Health and Safety Why You Need Lab Safety Training Hazardous materials and/or equipment. You need to understand the risks and how to mitigate them. OSU requires
HOW-TO CONDUCT A WEEKLY SAFETY MEETING
 HOW-TO CONDUCT A WEEKLY SAFETY MEETING 1. Hold the meeting on the job, preferably where everyone can sit and relax. 2. Hold the meeting at the beginning of the shift, right after lunch, or after a break.
STANDARD OPERATING PROCEDURE (SOP): URETHANE
: URETHANE") TEMPLE UNIVERSITY A Commonwealth University Environmental Health & Radiation Safety (EHRS) STANDARD OPERATING PROCEDURE (SOP): URETHANE LABORATORY/USER INFORMATION Principal Investigator (PI): Phone #
TEMPLE UNIVERSITY A Commonwealth University Environmental Health & Radiation Safety (EHRS) STANDARD OPERATING PROCEDURE (SOP): URETHANE LABORATORY/USER INFORMATION Principal Investigator (PI): Phone #
McLane / Black Lake Fire Department Policy & Procedural Guideline PPG #
 Subject: EMERGENCY DECONTAMINATION Section: PPG# 4400.55 Chapter: Operations Effective Date: 11/12/2015 1.0 POLICY 1.1 1.2 1.3 It shall be the policy of the McLane Black Lake Fire Department to provide
Hazardous Materials Spill Response
 Hazardous Materials Spill Response The University of Iowa Rev. 02/10 Department Lab/Room Number PI/Lab Coordinator After Hours Contact Number University Public Safety (Phone 911) Fire, Police, Ambulance
4D Diving and Adventures Safety Protocol Revised Nov 1, 2017
 4D Diving and Adventures Safety Protocol Revised Nov 1, 2017 The Safety Policy as posted on this Web site shall be considered the current and accurate version and is subject to change. For other policies,
High School Safety Acknowledgment Form
 High School Safety Acknowledgment Form Note to science teachers and supervisors/administrators: Safety is the most important part of a science lesson. This includes monitoring student behavior and taking
SWIMMING POOL POLICY AND PROCEDURE
 SWIMMING POOL POLICY AND PROCEDURE REVIEW DATE 10 th December 2017 Owner Vice Principal Version Number: 2 Legal Sign: N/a Type of Policy: staff Authorised by: Principal Authorised by Board: N/a Effective
FIRST AID. Toolbox Talk
 FIRST AID Toolbox Talk Cuts 1. Stop the Bleeding Apply direct pressure on the area. 2. Clean and Protect Clean the area with warm water and gentle soap. Apply an antibiotic ointment to reduce chance of
7. Open Water Scuba Diver
 7. Open Water Scuba Diver 7.1 Introduction This certification course is designed to give students the necessary skills to conduct open water dives in conditions similar to their training without the direct
USF/FIO Dive Plan Approval Form To be submitted to both the: Keys Marine Lab & the USF/FIO Scientific Diving Office
 USF/FIO Dive Plan Approval Form To be submitted to both the: Keys Marine Lab the USF/FIO Scientific Diving Office Dive Plan Date Submitted: Proposed Expedition Dates: Dive Platform Name: (vessel, lab or
General Policies July Hydrotherapy Pool Policy
 Hydrotherapy Pool Policy HYDROTHERAPY POOL POLICY Contra-indications to a User with the advice of a Doctor, the School Nurse and/or Physiotherapist: Infectious skin disease Infectious upper respiratory
1. Unlimited, so long as adequate facility, supplies and time are provided to ensure comprehensive and complete training of subject matter
 13. Dry Suit Diver 13.1 Introduction This course allows the student to develop knowledge and skills to properly use a dry suit. It will discuss the types of dry suits, accessories, maintenance and how
RUN TIME: 50 MIN PL02 Page 1 of 7 POGIL LAB EXERCISE 02 What Makes the Lab a Safe and Effective Place to Do Chemistry?
 RUN TIME: 50 MIN PL02 Page 1 of 7 POGIL LAB EXERCISE 02 What Makes the Lab a Safe and Effective Place to Do Chemistry? Each member should assume their roles at this time (Table 1). Table 1. Group Member
*See Supervised Diver Upgrade procedure #6.12 for certification requirements.
 6. Supervised Diver 6.1 Introduction This course is designed to give students the necessary skills to conduct open water dives in conditions similar to their training under the direct supervision of a
REB SOP 02 Page 1 of 6. Finger Prick Blood Sampling. Effective Date April Approved by REB April Version Number 1 A.
 REB SOP 02 Page 1 of 6 Short Title Finger Prick Effective Date April 2016 Approved by REB April 2016 Version Number 1 A. PURPOSE Finger prick blood sampling method is used when only a small sample is required
1.1 OHS Policy and Responsibilities
 1.1 OHS Policy and Responsibilities At Canadian Rope Access Specialists Inc. safety is our primary concern and the health and safety of our employees, clients and contractors is of paramount importance
3.0 Manage. hazardous substances. risks IN THIS SECTION:
 3.0 Manage hazardous substances risks IN THIS SECTION: 3.1 Hazardous substances can damage your health 3.2 Applying substance controls 3.3 Prepare an inventory of your hazardous substances 3.4 Find and
Soft Tissue Injuries
 KNOWLEDGE OBJECTIVES Soft Tissue Injuries 1. List two signs of closed wounds. 2. List four purposes of bandaging. 3. Describe the best initial defence against infection of an open wound. 4. Describe how
Standard Operating Procedures (v9 5/1/17)
") Standard Operating Procedures (v9 5/1/17) Safe Working Practices for Cell Sorting on the Influx Table of Contents I. General Facility Information II. Facility Orientation and Training III. Approval to
Standard Operating Procedures (v9 5/1/17) Safe Working Practices for Cell Sorting on the Influx Table of Contents I. General Facility Information II. Facility Orientation and Training III. Approval to
SAFETY ORIENTATION. University of Evansville Department of Chemistry
 SAFETY ORIENTATION University of Evansville Department of Chemistry Safety Topics 1. Personal Protection and Proper Attire 2. Personal Hygiene and Conduct 3. Proper Handling of Chemicals 4. Safety Equipment
Cryptosporidium Incident Response
 WWA Response Plan Cryptosporidium Incident Response Summary Cryptosporidium ( crypto ) is a diarrheal illness caused by a microscopic parasite that lives in the intestines of humans & animals. For a number
Hazardous Materials Spill Response
 Hazardous Materials Spill Response The University of Iowa Rev. 01/2019 Department: Lab/Room Number: PI/Lab Coordinator: After-hours Contact Number: University Public Safety - 911 Fire, Police, Ambulance
CONFINED SPACE ENTRY PROGRAM FOR GOUCHER COLLEGE
 I. INTRODUCTION CONFINED SPACE ENTRY PROGRAM FOR GOUCHER COLLEGE The Goucher College campus has confined spaces that, due to various chemical and physical properties, may cause death or serious injury
Hydrofluoric Acid SOP
 Introduction Hydrofluoric acid (HF) has a number of chemical, physical, and toxicological properties, which make handling this material especially hazardous. Anhydrous HF is a clear, colorless, fuming,
Effective Date: 24-April-2017 Version: 6 Page: 1 of 8 TITLE: SAF-370, PERSONAL PROTECTIVE EQUIPMENT GUIDELINES. Table of Contents
 24-April-2017 Version: 6 Page: 1 of 8 Table of Contents 1.0 Introduction... 2 1.1 Purpose... 2 1.2 Scope... 2 1.3 Definitions... 2 1.4 Responsibilities... 3 Environmental Health and Safety Office (EHSO),
Standard Operating Procedure (SOP)
") Standard Operating Procedure (SOP) For using Cryogenics (Liquid Nitrogen) #1 General Process Description Liquid nitrogen is used for many different applications in the department of Materials Science and
Standard Operating Procedure (SOP) For using Cryogenics (Liquid Nitrogen) #1 General Process Description Liquid nitrogen is used for many different applications in the department of Materials Science and
Safety in the Collision Center Paint Department. Safety Tips while working
 Safety in the Collision Center Paint Department Mercedes-Benz is committed to promoting safe work practices at all times. To heighten your awareness of the safety issues in body and paint departments PPG
The health hazards of HF are dependent upon the concentration, temperature and nature of exposure.
 Hydrofluoric Acid Safe Handling and Use Hydrofluoric acid (HF) is a corrosive acid used for many processes including mineral digestion, surface cleaning, glass etching, and biological staining. HF is a
BREATHE SAFELY: The Proper Use of Respiratory Protection
 BREATHE SAFELY: The Proper Use of Respiratory Protection This easy-to-use Leader s Guide is provided to assist in conducting a successful presentation. Featured are: INTRODUCTION: A brief description of
We currently conduct the Underwater Skills Program as follows:
 529 Upper Sherman Avenue Hamilton, Ontario L8V 3L9 905.385.0300 www.recandtekscuba.com mitch@recandtekscuba.com 2018 JOINING INSTRUCTIONS We currently conduct the Underwater Skills Program as follows:
DIVE PLAN SUBMITTAL FORM
 DIVE PLAN SUBMITTAL FORM University of South Florida Diving Safety Program William Dent PED 214 Date Submitted: Proposed Expedition Dates: Dive Platform Name: (vessel, lab or shore) General Dive Site Location:
Health, Safety, Security and Environment
 Document owner and change code Document Owner Aaron Perronne Title HSSE Manager Mark X Change Code Description X N/A First Issue A Typographical/Grammatical correction; formatting change; text clarification-no
2018 Lawndale Swim & Tennis Club Handbook
 2018 Lawndale Swim & Tennis Club Handbook Welcome to Lawndale Swim & Tennis Club the best summer community in Greensboro! We thank you for your membership and look forward to another season of fun and
Safety Plan for Sole Proprietors
 Safety Plan for Sole Proprietors SAFETY POLICY Safety Policy for (Company Name) It is the policy of that safety is a number one priority and to provide as safe a workplace as possible for all of our colleagues
A Guide to Safe Operation of Spray Pad/Splash Pad
 A Guide to Safe Operation of Spray Pad/Splash Pad 160 Exmouth Street Point Edward, ON N7T 7Z6 Telephone: 519-383-8331 1-800-667-1839 www.lambtonhealth.on.ca Revised 2011 A Guide to Safe Operation of Spray
SCUBA DIVING SAFETY MANUAL
 SCUBA DIVING SAFETY MANUAL Revised: 11 July 2017 TABLE OF CONTENTS Preamble... 3 Disclaimer... 3 Abbreviations... 3 Definitions... 3 General Requirements... 4 Additions... 4 CAUS 3.1 Organization Requirements....
A. Evaluation of the written program
 A. Evaluation of the written program Begin your audit with an evaluation of the written respiratory protection program. In addition to the operating procedures describing respirator selection and use in
General Job Responsibilities and Duties. Greater Cleveland Aquarium. Reports to: Diving Safety Coordinator
 Reports to: Diving Safety Coordinator General Summary of Job Duties The assists in the planning, development, training and implementation of all SCUBA activities for the including but not limited to care
CHAPTER 13: FIRST AID MEDICAL PROCEDURES
 CHAPTER 13: FIRST AID MEDICAL PROCEDURES General Overview First aid cases include one-time treatment and subsequent observation of minor scratches, cuts, burns, splinters, and so forth, which do not ordinarily
Essential Chemical Safety & Hygiene Training 2015
 Essential Chemical Safety & Hygiene Training 2015 Introduction What does this training cover? Knowledge of working with cleaning chemicals Forms part of induction training Forms part of on-going job training
First Aid - immediate care that is given to the victim of an injury or illness until experts can take over - Oftentimes, it s the difference between
 First Aid First Aid - immediate care that is given to the victim of an injury or illness until experts can take over - Oftentimes, it s the difference between life and death or recovery vs permanent disability
Emergency Shower & Eyewash. Training Guide
 Emergency Shower & Eyewash Training Guide No matter how many precautions employees take, accidents sometimes happen. In these situations quick action is essential, and if the incident involves a hazardous
Cabinet. 1.0 POLICY It is the policy of Calvin College to comply with the MIOSHA Respiratory Protection Standard Part 451.
 Calvin College Respiratory Protection Program Prepared by: Date: Heather Chapman 10/7/10 Approved by: Cabinet Revision 2 Date: 1.0 POLICY It is the policy of Calvin College to comply with the MIOSHA Respiratory
Chapter 4: Implementing Effective Exposure Controls
 Chapter 4: Implementing Effective Exposure Controls Implementing effective controls to protect workers from health hazards requires attention and dedication. For example, equipment needs to be purchased,
SAFETY AND HEALTH IN THE USE OF CHEMICALS AT WORK
 THEME nº44: RESPONSIBLE: Basics Principles of Prevention FOUR PRINCIPLES OF OPERATIONAL CONTROL The general objective in the control of hazards relating to chemicals in the workplace is to eliminate or
PERFECT POOLS EMPLOYEE MANUAL
 PERFECT POOLS EMPLOYEE MANUAL THIS MANUAL/CONTRACT IS RIGHT PROTECTED AND IS THE SOLE PROPERTY OF PERFECT POOLS. THE OPERATION OF OUR POOLS REQUIRES AN EFFICIENT STAFF, DEDICATED TO SERVING THE PUBLIC.
Yeo Soh Bee A/Prof Dan Yock Young 28/03/2016 Prepared by Approved By Issue Date
 Page: 1 of 6 Yeo Soh Bee A/Prof Dan Yock Young 28//2016 Prepared by Approved By Issue Date 1. OBJECTIVE The purpose of this SOP is to outline the procedures of cleaning up chemical spills. It will provide
Working Safely with Hydrofluoric Acid
 SAFE WORK PROCEDURE Insert Reference Code: UBC-RMS-OHS-SWP-17-002 Department of www.rms.ubc.ca Effective date: November 27, 2017 Review date: NA Supersedes: NA Working Safely with Hydrofluoric Acid 1.
Student Information & Laboratory Safety Contract
 Student Information & Laboratory Safety Contract Mrs. Mawhiney Student Information Last Name First Name Preferred Name Home Address (including ZIP) Home Phone student e-mail Parent/Guardian Name Relationship
NOAA DIVING PROGRAM MINIMUM STANDARD FOR DECOMPRESSION DIVING USING OPEN-CIRCUIT SCUBA EQUIPMENT
 NOAA DIVING PROGRAM MINIMUM STANDARD FOR DECOMPRESSION DIVING USING OPEN-CIRCUIT SCUBA EQUIPMENT NOAA Diving Center 7600 Sand Point Way, N.E. Seattle, WA 98115-0070 NOAA DIVING PROGRAM MINIMUM STANDARD
In an emergency the safety of all personnel and the public is of priority.
 P272 : Emergency Planning & Response This DOCUMENT and any linked FORMS have been created to provide specific requirements under the Amalgamated Operating System. For additional information and guidance,
Swimming Pool/ Spa Safety Plan
 Swimming Pool/ Spa Safety Plan Name of Facility: Facility Address: City/State/Zip: A. Organization and Management 1.) Outline the Chain of Command for your facility below: 2.) Pool Job Duties and Descriptions
Exhibit Diving. Revised February 25, 2016
 Exhibit Diving Revised February 25, 2016 South Carolina Aquarium Dive OperaAons Arnold Postell Dive Safety Officer / Senior Biologist (843) 579-8536 apostell@scaquarium.org Ryan Yuen Assistant Dive Safety
General Safety Rules
 General Safety Rules 1. The goggles provided by the university are to be properly worn at all times in the lab. 2. You are to be properly dressed in the lab. a. Close-toed shoes. b. At least a short sleeve
1 Great Western Painting Inert Space Entry
 Great Western Painting 29 CFR 1910.1046, Permit-Required Confined Spaces INERT SPACE ENTRY Per 29 CFR 1926.21(b)(6)(i), Safety Training and Education, all employees required to enter into confined or enclosed
EHS-SWP-140. Safe Work Practice. Animal Projects with Chemicals. 1.0 Hazard Description
 EHS-SWP-140 This document is to be used when completing the hazard assessment portion of an Animal Use Protocol. Safe Work Practice Animal Projects with Chemicals 1.0 Hazard Description Chemicals utilized
National Aquarium, Baltimore Volunteer Dive Program Apprenticeship Training Syllabus and Schedule
 National Aquarium, Baltimore Volunteer Dive Program Apprenticeship Training Syllabus and Schedule Day 1 Apprenticeship (DRY) Orientation, Administrative, Safety, and Observation Volunteer Office Orientation,
Personal Protective Equipment
 Northland Community & Technical College June 1, 2017 Personal Protective Equipment Safety Officer Cory Feller Chemical Hygiene Officer Kristel Kizer Telephone: 218-683-8633 1 Personal Protective Equipment
CHESTERFIELD COUNTY FIRE AND EMERGENCY MEDICAL SERVICES PROCEDURES
 CHESTERFIELD COUNTY FIRE AND EMERGENCY MEDICAL SERVICES PROCEDURES Division: Emergency Operations Procedure: Emergency Operations #24 Subject: Toxic Exposure Reduction Supersedes: Authorized by: Deputy
Newport News Shipbuilding Contractor Environmental, Health and Safety Resource Manual Sewage
 Newport News Shipbuilding Contractor Environmental, Health and Safety Resource Manual Sewage Newport News Shipbuilding Page 1 SEWAGE 1. Hazard, Reference and Requirements a. Sewage is a potential hazard
SDI Instructor Manual
 SDI Instructor Manual Copyright 1999 By Scuba Diving International (SDI) Copyright 1999 by Scuba Diving International (SDI) All rights reserved. Printed in the United States of America. Except as permitted
Turnout gear is comprised of boots, coat, pants, suspenders, hood, gloves, helmet, and SCBA Facepiece.
 Purpose: Turnout gear is a vital piece of personal protection for every member of the Fire Department. The City of Bryan Fire Department will provide its members with protective clothing and equipment
YMCA of the USA. YMCA Pool Operator s Manual (3 rd Edition)
") The Pool Operator YMCA of the USA YMCA Pool Operator s Manual (3 rd Edition) Study Guide 1. A Pool Operator can help keep pools and facilities safe, list six actions to keep pools safe: _ 2. Identify four
The Pool Operator YMCA of the USA YMCA Pool Operator s Manual (3 rd Edition) Study Guide 1. A Pool Operator can help keep pools and facilities safe, list six actions to keep pools safe: _ 2. Identify four
Timber Times. Safety Flyer SPECIAL POINTS OF INTEREST. Partners for Healthy Forests
 Timber Times Partners for Healthy Forests SPECIAL POINTS OF INTEREST Protecting Your Eyes at Work Potential Eye Hazards How to Protect Eyes from Injury Contact Lenses? What to do During an Eye Emergency
ENVIRONMENTAL HEALTH AND SAFETY PERSONAL PROTECTIVE EQUIPMENT
 ENVIRONMENTAL HEALTH AND SAFETY PERSONAL PROTECTIVE EQUIPMENT PERSONAL PROTECTIVE EQUIPMENT Table of Contents A. Scope... 1 B. General Requirements... 1 C. Responsibility... 1 1. Supervisor... 1 2. Department
YWCA Aquatic Center LIFEGUARD MANUAL
 YWCA Aquatic Center LIFEGUARD MANUAL Table of Contents Manual Objectives... 2 Introduction to the YWCA... 2 General Responsibilities... 3 Office Responsibilities... 4 Timecard Procedure... 4 Absence Policy...
1.0 Scope and Application. 2.0 Definitions. Cal Poly Risk Management Confined Space Program Page 1
 Page 1 1.0 Scope and Application The following procedures describe safe operating practices in confined spaces. These may be sewers, pipelines, tanks, boiler compartments, ducts, vaults, pits, vats, bins
EMPLOYEE SAFETY ORIENTATION - PHYSICAL PLANT, RESIDENCE
 Name Department Initial Orientation Date Supervisor Review Instructions: Check off each section once you have read and discussed it with your Supervisor. EMPLOYEE SAFETY ORIENTATION - PHYSICAL PLANT, RESIDENCE
E3628 THE RESPIRATORY PROTECTION PROGRAM: EMPLOYEE TRAINING. Leader s Guide ERI Safety Videos EMPLOYEE TRAINING
 E3628 THE RESPIRATORY PROTECTION PROGRAM: EMPLOYEE TRAINING Leader s Guide 2007 ERI Safety Videos THE RESPIRATORY PROTECTION PROGRAM: EMPLOYEE TRAINING This easy-to-use Leader s Guide is provided to assist
Sandy Palmatter Office: Cell: Steven Sipes Office: Cell:
 Calvin College Swimming Pool Contingency and Emergency Action Plan Prepared by: Date: Approved by: Aquatics Director & EHS 2/18/19 Revision 9 Date: CEHS 4/27/2007 1.0 PURPOSE Michigan s Public Health Code,
Techniques for Deeper Diving
 Techniques for Deeper Diving Deeper diving is usually defined as dives deeper than 60 feet. These dives must take into consideration better use of many diving skills that we might take for granted on shallower
EMERGENCY PHONE NUMBERS
 EMERGENCY GUIDE EMERGENCY PHONE NUMBERS 434-592-3911 or 3911 (Campus Phones) EMERGENCY STATUS In the event of a major emergency affecting the campus, check the Emergency status web page: http://www.liberty.edu/index.cfm?pid=18468
Licking County Health Department 675 Price Rd., Newark OH (740)
") For Pool Staff 12 Steps for Prevention of Recreational Water Illnesses (RWIs) Licking County Health Department 675 Price Rd., Newark OH 43055 (740) 349-6535 www.lickingcohealth.org Twelve steps for reducing
For Pool Staff 12 Steps for Prevention of Recreational Water Illnesses (RWIs) Licking County Health Department 675 Price Rd., Newark OH 43055 (740) 349-6535 www.lickingcohealth.org Twelve steps for reducing
Smart Guide. How To Avoid. Running Out of Air
 Smart Guide How To Avoid Running Out of Air 1 DAN S SMART GUIDE TO AIR CONSUMPTION Our self-contained underwater breathing apparatuses are only useful as long as the cylinder contains sufficient breathing
CONFINED SPACE WRITTEN PROGRAM
 CONFINED SPACE WRITTEN PROGRAM Maple River Public Schools ISD#2135 Confined Space Entry Plan (Permit Required) Maple River Public School Plan last updated: October, 2014 Authority and Scope Regulation:
12. Trimix Instructor
 12. Trimix Instructor 12.1 Introduction The TDI Trimix Instructor course provides the training required to competently and safely teach breathing gases containing helium with no less than 18 percent oxygen
Confined Space Program
 Insert City Name Page 1 of 6 Purpose Regularly, confined spaces must be entered for inspection, cleaning or repair. Such spaces can present unusual hazards such as lack of sufficient oxygen, special mechanical
Product Name:Heat Sink Compound 1801 Morgan Street MSDS Number:148
 Section 4 - Fire & Explosion Hazard Data Flash Point (method): Flammable Limits-LEL: Flammable Limits-UEL: Extinguishing Agents: Fire Fighting Procedures and Equipment: Decomposition Products May Include: