Cool Springs and Clarksville store call Cookeville store call Bowling Green store call
|
|
|
- Zoe Hill
- 6 years ago
- Views:
Transcription
1
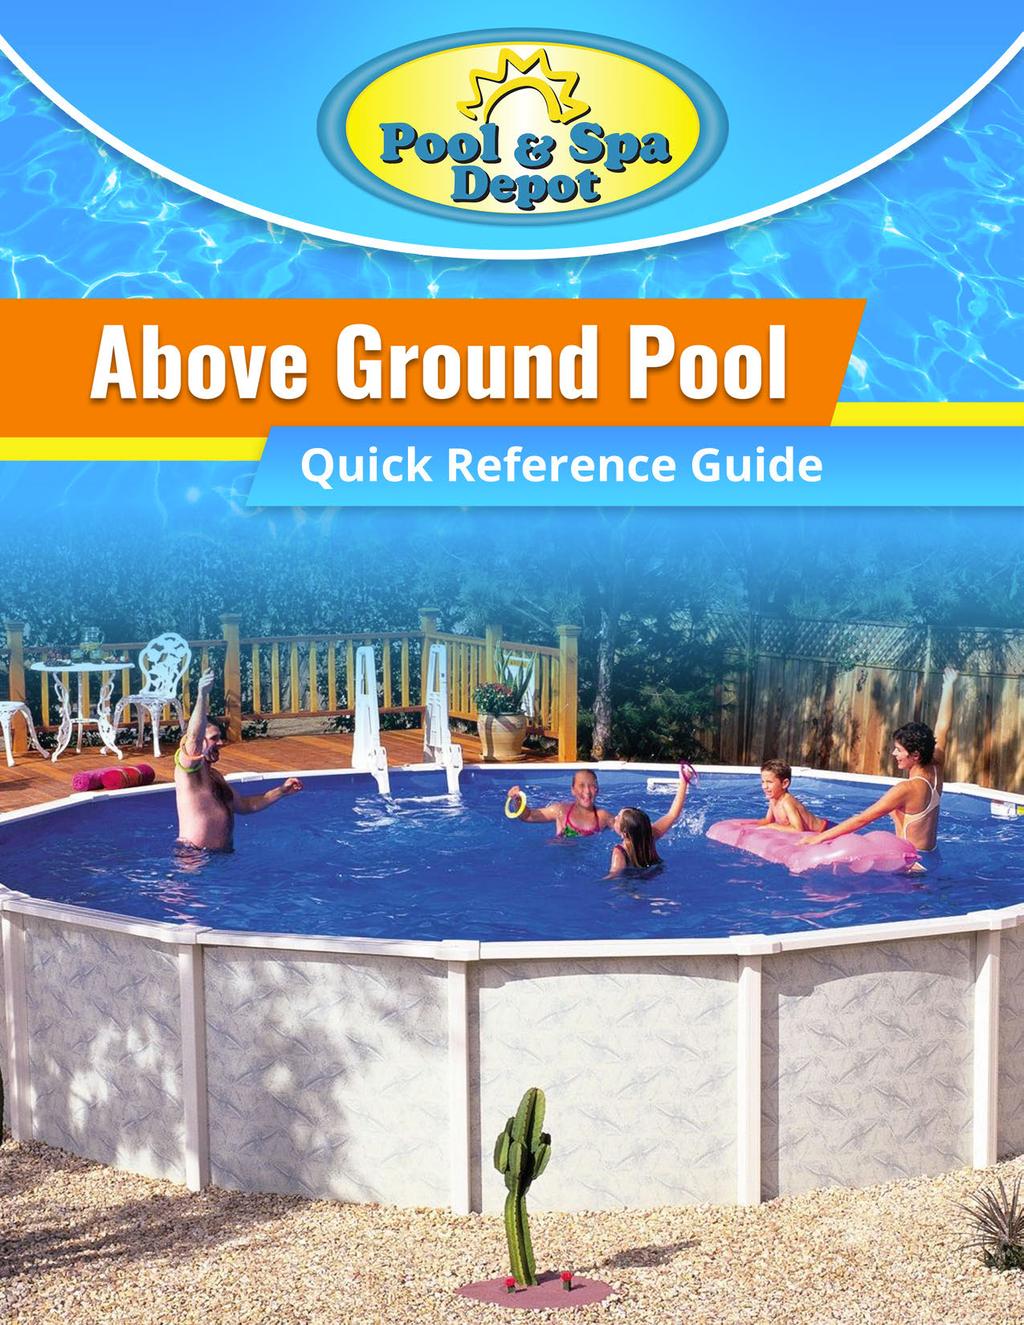
2 Welcome to the Pool & Spa Depot family! The following guide is to help you understand what's involved in building your new above ground pool. Your above ground pool installation will require the following input from you. 1. To mark the desired location of the pool and equipment 2. To order the necessary sand for the size of your pool 3. To check with your local codes office for permits and other requirements You can follow our Before Installation Guide to walk you through step-by-step. It can help answer questions you might have during the process. Like any outdoor construction project, unforeseen circumstances may occur (weather, scheduling, ground conditions, etc.). Our service department will reach out to you and schedule a day that is convenient for your installation within days of your finalized purchase. If you have any questions, at any point in the process, please reach out to your local store's service department: Cool Springs and Clarksville store call Cookeville store call Bowling Green store call Service@Poolandspadepot.com

3 Before the Installation To begin, make sure that the pool site is not within 15 of any overhead power lines, and 10 from any trees. The pool cannot be built over any part of a septic system, and you are responsible for making sure the pool is not infringing on any property lines, easements or built over any utility lines. Note: Required distances from property lines vary in every community. Most of this information can be obtained when you get your permit. Round Pools: Once you have chosen your site, place a screwdriver into the ground at the center of the pool. Secondly, measure a section of string that is half of the diameter of your pool, plus and extra 2. For example 24 pool would require a 14 string. The extra 2 is for the over dig of the pool site. We will need to have a minimum of 2 around the pool to have the room for proper installation. Next, tie one end of the string to the screwdriver, and while pulling the string tight, walk the circumference of the pool, and mark it with several stakes or paint. Oval Pools: Oval pools are done in about the same manner. Keep in mind that, due to the side braces on an oval Pool, the overdig requires the dimensions of the pool, plus 7 on the width, and 4 on the length. For example, an 18 x 33 oval would be staked out at 25 x 37. Stake out, or paint, the area as best you can, and the installer will verify and square up the site for you. Remember these keys questions: Approximately how far out of level is the pool site (inches)? Are there overhead power lines near the pool site? Are there underground utilities? Are there any trees or tree stumps near the pool site? Do you have a septic system?
4 Before Installation Check List Underground Lines: Locate and clearly mark electric, phone, cable, any other utility lines, septic tank or field lines on or near pool site prior to excavation. Permits: Check with local, county and state codes department and provide any permits required to issue complete compliance with all code ordinances. Pool Plus Pump & Filter Location: Locate and mark the pool site and filter location prior to excavation and in accordance with all state and local codes. Remember to follow the steps above in laying out your pool. Find Our Access: Provide 8 access path for excavation equipment. Pool and Spa Depot will not be responsible for damage to the yard, driveway, or any obstacles in access path. Sand Material: Order and pay for fine mason sand and arrange for delivery. Sand is to be placed within 20 of pool site, but not directly on the area to be excavated. Sand Requirement: POOL SIZE SAND TO ORDER POOL SIZE SAND TO ORDER 15 Pool 4 tons of sand 27 Pool 9 tons of sand 18 Pool 5 tons of sand 30 Pool 10 tons of sand 21 Pool 6 tons of sand 33 Pool 12 tons of sand 24 Pool 7 tons of sand 15 x 30 Pool 10 tons of sand 12 x 23 Pool 8 tons of sand 18 x 33 Pool 12 tons of sand AFTER INSTALLATION Fill Pool: Furnish water and fill the pool to the proper level (approximately 1/2 way up the skimmer opening) before starting filter system. Install Steps: Placement of steps (if purchased) into the pool after filling with water. (Note: we DO NOT install the steps during installation. We will leave the steps a few feet away from the pool) It is the homeowner's responsibility to put the steps in the water. Grading Services: Grade, remove, spread and/or backfill any excess dirt or sand left around the pool. (Note: we DO NOT provide grading or haul off services in our installation) This is the homeowner responsibility. Extra Services: Pay for any excavation beyond what is included. Requests for additional work must be made prior to installation. Payment is to be made to the excavator. Pool Safety: Teach pool safety to family and guests, specifically NO DIVING, SHOVING, PUSHING or HORSE PLAY. Install and use alarms and all other safety devices ensuring compliance with all safety regulations. Note: POOL AND SPA DEPOT IS NOT RESPONSIBLE FOR WATER REPLACEMENT FOR ANY REASON. Electrical Requirements The customer must provide a 20 amp 110v power source for the filter that is protected by a Ground Fault Circuit Interrupter (or G.F.C.I.). This service should be provided by a qualified electrician in accordance with state and local codes after the pool has been installed. This specifically includes a pool alarm, as required by Tennessee State Codes. Note: An extension cord does not meet electrical codes and will void the pump manufacturer's warranty. You will need to schedule your electrical the DAY OF or AFTER the pool is installed, not before.

5 Installation Photos Most homeowners would like to know what their project will look like after installation. Below are some great photos of our installation and what to expect after the project is completed. This is left over pool sand on the job site. It is more cost-saving to order more sand and have a little left over then to order and pay another delivery charge if you don t have enough. This pool had a very small slope, but you can see how much dirt is left behind. Additional excavation, grading and dirt work beyond that which is required for leveling the pool site is available by bid only. Some jobs have a little rock in the ground when we dig, so be aware that your yard could be the same. This is a great picture of your pump and filter. Notice the dirt ground after digging out the pool. This is very common, and mo st homeowners plant seed and straw to grow back the grass after installation. This picture shows where a homeowner asked us to move the dirt to the end of his property. This can be done by paying the excavator directly after the pool is installed. A local bobcat operator can be found to move dirt and grade your yard after the build for an affordable rate.

6 Installation with an Existing Deck If you have an existing deck around your pool, we can still install a new pool. The illustration below shows what your new pool will look like if your pool size is different, and also the 6 inch gap that may be left when installing the same size pool. Even when replacing an identical size pool, difference in manufacturers and pool models often vary slightly in dimensions or number of uprights. This can result in the need for a carpenter to modify your deck before or after the installation.
 We will leave the steps a few feet away from the pool. The reason for this is that you have to wait until the pool is 100% filled before putting the steps in the pool.")
 and the Platform (B). Secure the Handrail.")
 and insert one end of each Support Tube.")
7 Smart Steps The placement of steps (if purchased) into the pool after filling with water is your responsibility. (Note: we DO NOT install the steps during installation.) We will leave the steps a few feet away from the pool. The reason for this is that you have to wait until the pool is 100% filled before putting the steps in the pool. Since the homeowner fills the pool, this is your responsibility to put the steps back in the water. STEP BY STEP ASSEMBLY INSTRUCTIONS Step 1 - Platform and Handrail Assembly Locate the left and right Handrail Assemblies (A) and the Platform (B). Secure the Handrail. Step 2 - Adjustable Support Feet Preparation Insert the Adjustable Support Feet (C) into the Handrail Assembly sockets as shown in the diagram. DO NOT INSERT HARDWARE AT THIS TIME. Step 3 - Platform Support Tubes Locate the Support Tube sockets on the underside of the Platform (B) and insert one end of each Support Tube. Place the Support Tube Base (H) on the ground and insert other end of Adjustable Support Tube (G) in Support Tube Base (H). DO NOT SECURE WITH HARDWARE AT THIS TIME. Step 4 Secure the Adjustable Support Feet Position the in-pool step and the ladder assembly as shown in Fig.1 below. Secure the Adjustable Support Feet (C) to the top step using eight (8) 1" Pan Head screws (S), one in each corner of each Adjustable Support Foot (C) (Fig. 2). Screw positions are noted by notches in the Adjustable Support Foot (C). DO NOT SECURE ADJUSTABLE SUPPORT FEET TO HANDRAIL ASSEMBLY AT THIS TIME. Step 5 Cut to Fit Depending upon pool wall height, it may be necessary to cut the Adjustable Support Feet (C) or the Comfort Incline Extensions if using model T. At this time the Adjustable Support Tubes (G) may also need to be cut. The Platform (B) must be flat and level over the pool top rail. Measure from the underside of the Platform (B) to the ground. Compare with the distance from the pool bottom to the surface of the top rail. The Platform (B) should be flat and level on the pool top rail. Remove Ladder Handrail Assembly (A) from secured Adjustable Support Feet (C) if using Model T or T. Step 6 Position Step or Ladder in the Pool & Ladder Assembly in Final Position Position the in-pool step in the final desired position and weight down as per the step instructions. Position the ladder assembly over the pool wall and confirm the Platform (B) is flat and level over the pool wall. Secure the Adjustable Support Feet (C) or the Comfort Incline (200740T) to the Handrail Assembly (A) using two (2) 2-1/4" Phillips Head Bolts (P), 1/4" Flat Washers (R ) and 1/4" Acorn Nuts (Q).

.")
 to Platform (B) using two (2) #14 x 3/4\" Tapping Screws (M) and to the Support Tube Base (H) using four (4) #14 x 3/4\"")
 to the Outside Ladder Body (D) using four (4) 3/8 x 4\" Carriage Bolts (J), 3/8\" Flat")
 for support.")
8 Step 7 Secure Assembly to Pool Top Rail Using the Ladder Secure Straps (I), begin inserting one of the straps as shown in Fig. 3 below. Continue to weave the strap as shown in Fig. 4. With Platform (B) flat and level to the pool top rail, feed the end of the strap under the pool top rail and secure it to the clasp on the other end of the strap as shown in Fig. 5. Pull tight and repeat with other Ladder Secure Strap (I). Step 8 Apply Hardware to Support Tubes After confirming secure fit of Adjustable Support Feet (C) and Adjustable Support Tubes (G); secure Adjustable Support Tubes (G) to Platform (B) using two (2) #14 x 3/4" Tapping Screws (M) and to the Support Tube Base (H) using four (4) #14 x 3/4" Tapping Screws (M). Step 9 Outside Ladder Body Secure the Ladder Foot Extension (E) to the Outside Ladder Body (D) using four (4) 3/8 x 4" Carriage Bolts (J), 3/8" Flat Washers (L) and 3/8" Hex Nuts (K). Adjust to fit your pool height. It is recommended to position a patio block under the Ladder Foot Extension (E) for support. Step 10 Lift-N-Lock Outside Ladder Body When your entry system is not in use, swing up and remove the Outside Ladder Body (D). Lift the Outside Ladder Body (D) and Foot Extension Assembly (E) so that you can position the tabs on the Ladder Foot Extension (E) onto the hooks of the Platform (B) as shown in Fig. 6. Then snap the tabs on the sides of the Outside Ladder Body (D) into the slots on the outside of the Handrails (A) as shown in Fig. 7.
9 Filling Instructions Pool liners are designed to stretch slightly as they fit the pool during filling. Weather conditions and air temperature directly effect the pace in which the filling can be completed. If the pool is filled at night, or too quickly during the day without sunlight reaching the pool, the liner can buckle the wall or pull down causing a sag in the wall pattern. These are not usually structural problems. However, they are unattractive. The installation guarantee does not cover the liner sags or wall buckles caused by improper filling. We have included detailed suggestions below to help prevent these issues from happening Degree Filling: During the final stages of installation, the installers will begin to fill the pool to seat the liner. They will remove any folds from the packaging and position the liner evenly around the wall and floor. After the installers have left, continue filling the pool until you reach a total of 6 inches. Please do not continue to fill the remainder of the pool for the rest of the day. The following days if weather allows, begin to add 2 to 3 inches of water each day. Special Instructions: A. Only add water on days that direct sunlight is reaching the pool. B. Do not add more than 3 inches unless the water is 65 degrees. If it is above 65 degrees and direct sunlight is reaching the pool, do not add more than 6 inches. C. Continue this process until you reach a total of 24 inches. After 24 inches you may fill the remainder of the pool. Only add water on the days that have direct sunlight reaching the pool. 65 & Warmer Filling: During the final stages of installation, the installers will begin to fill the pool to seat the liner. They will remove the folds from the packaging and position the liner evenly around the wall and floor. After the installers have left, continue filling the pool until direct sunlight is no longer reaching the pool. Please DO NOT continue to fill the pool for the remainder of the day. The following day (if the sun allows), begin to add water as direct sunlight is reaching the pool each day. Special Instructions: A. Only add water on days that have direct sunlight reaching the pool. B. If the temperature is above 65 degrees and direct sunlight is reaching the pool, you may continue filling the pool until direct sunlight is no longer reaching the pool. C. Continue this process until you reach a total of 24 inches. After reaching 24 inches, you may fill the remainder of the pool.
10 Other Important Information: Pool & Spa Depot does NOT recommend Quick Filling methods, such as water tanker, fire hydrant and/or multiple hose use. If these methods are the only source of filling available, please do not attempt to fill the pool unless the temperature is above 75 degrees and direct sunlight is reaching the pool. Also, please request the lowest level of water pressure is used during the filling. DO NOT ENTER THE POOL AND/OR STAND ON THE LADDER/STEP SYSTEM BEFORE THE POOL IS COMPLETELY FULL OR THE SAND BOTTOM WILL BE COMPROMISED (I.E. FOOTPRINTS, HEEL INDENTIONS, ETC.). THE INSTALLATION GUARANTEE DOES NOT COVER THESE OCCURRENCES. LINER DAMAGE CAUSED BY NUTGRASS, INSECTS, NEGLECT OR ACTS OF GOD ARE NOT COVERED UNDER ANY WARRANTY. YOU ARE NOW READY TO ENJOY YOUR ABOVE GROUND POOL! On behalf of everyone at Pool & Spa Depot, we would like to take a moment to thank you for choosing us to be your swimming pool installer. The building of an above ground swimming pool can be an exciting and quick process. For any future service or operational needs, contact our Service Department: CoolSprings and Clarksville store call Cookeville store call Bowling Green store call Service@Poolandspadepot.com
")


11 THANK YOU FOR CHOOSING POOL & SPA DEPOT NASHVILLE (Cool Springs) 7115 Bakers Bridge Ave, Brentwood, TN Phone: POOL CLARKSVILLE 160 Terminal Rd, Clarksville, TN Phone: COOKEVILLE 1470 Interstate Dr, Cookeville, TN Phone: BOWLING GREEN 1830 Wallace Ct, Bowling Green, KY Phone:
SAVE THESE INSTRUCTIONS DEALER/INSTALLER: GIVE TO HOMEOWNER OCEAN BLUE ABOVE GROUND POOL LADDERS
 SAVE THESE INSTRUCTIONS DEALER/INSTALLER: GIVE TO HOMEOWNER OCEAN BLUE ABOVE GROUND POOL LADDERS ASSEMBLY AND INSTALLATION MANUAL FOR A-FRAME AND INPOOL LADDERS A-FRAME Part No. 400100 PROUDLY MADE IN
To purchase replacement parts and accessories, or to obtain technical assistance, visit:
 IMPORTANT Read this guide and follow all instructions carefully before assembling or using this product. To purchase replacement parts and accessories, or to obtain technical assistance, visit: www.splasharoundpools.com
MODEL #7100X A-FRAME LADDER
 SAVE THESE INSTRUCTIONS DEALER/INSTALLER: GIVE TO HOMEOWNER MODEL #7100X A-FRAME LADDER LADDER MUST BE ATTACHED TO POOL FRAME... DO NOT USE WITH INFLATABLE POOLS ASSEMBLY AND INSTALLATION MANUAL The Anti-Entrapment
SERIES 2 RAMP OWNER S MANUAL TOOLS REQUIRED: BEFORE YOU BEGIN... Read and understand these instructions before beginning a ramp setup.
 SERIES 2 RAMP OWNER S MANUAL BEFORE YOU BEGIN... Read and understand these instructions before beginning a ramp setup. Use caution and care for your back when lifting, pushing, pulling, folding or unfolding
SWIMMING POOL & SPA DOCUMENT SUBMITTAL LIST
 SWIMMING POOL & SPA DOCUMENT SUBMITTAL LIST Completed Application for Construction or Use (Permit application). Application must include authorized signature from the property owner if it is not owner
RESIDENTIAL SWIMMING POOL REQUIREMENTS
 CITY OF GRANDVIEW / BUILDING SERVICES 1200 MAIN STREET, GRANDVIEW, MO 64030 PHONE: (816) 316-4817 FAX: (816) 316-4809 WWW.GRANDVIEW.ORG RESIDENTIAL SWIMMING POOL REQUIREMENTS Community Development Department
City of Lockport Above Ground Pool Regulations
 Location: City of Lockport Above Ground Pool Regulations Pool to be at least 6 feet from both rear and side lot lines, but not in any easements. If located on a corner lot, pool must be located behind
SAVE THESE INSTRUCTIONS
 SAVE THESE INSTRUCTIONS DEALER/INSTALLER: GIVE TO HOMEOWNER MODEL #8100X OUTSIDE SAFETY LADDER 48" TO 54" FOR USE WITH CONFER PLASTICS IN POOL STEPS LADDER MUST BE ATTACHED TO POOL FRAME... DO NOT USE
LoneStar Fiberglass Pools. Do-It-Yourself. Installation Manual
 LoneStar Fiberglass Pools Do-It-Yourself Installation Manual Chris 1/3/2008 Do-It-Yourself The installation of a LoneStar Fiberglass pool is a much simpler task than most people think. What is important
St. Kitts 54" Round Pools
 St. Kitts 54" Round Pools Installation Instructions 573-3774/0317 Installation Instructions HOW TO USE THESE INSTRUCTIONS Be sure to read these instructions completely before beginning assembly or installation.
A-FRAME RESIN IN & OUT FLIP UP LADDER
 A-FRAME RESIN IN & OUT FLIP UP LADDER NE1222 NOTE FOR SAFETY PURPOSES ALL LADDERS SHOULD BE SECURED BY ATTACHING THEM TO THE TOP LEDGE OF THE POOL. (See step 13 for details) In order for the ladder to
Model: LG IP CL ADULT SUPERVISION REQUIRED
 420969 Model: LG IP CL 313 Regina Avenue Rahway, NJ 07065-4891 732-574-1500 GENERAL Before you start, check to see that you have the correct number of parts. Use the packing list on the next page. Carefully
Swimming Pools, Hot Tubs and Spas
 OLATHE FIRE DEPARTMENT BUILDING CODES 1225 S. Hamilton Circle Olathe, KS 66061 / Main: (913) 971-7900 / Fax: (913) 971-9812 Swimming Pools, Hot Tubs and Spas Definitions: Swimming Pool- Any structure intended
Step 1. PLANNING FOR THE INSTALLATION TOOLS REQUIRED
 Installation Guide Fiji Step 1. PLANNING FOR THE INSTALLATION TOOLS REQUIRED In planning for the installation of a new Viking pool, there are many important considerations that must be evaluated in order
TOWN of CHEEKTOWAGA Permit Application for Swimming Pools, Hot Tubs, or Personal Spas
 Permit Application for Swimming Pools, Hot Tubs, or Personal Spas / 20 - Date of Application Received By Permit No. APPLICANT to COMPLETE the PINK PORTION! ( ) ( ). Applicant s Name Daytime Phone No. Cell
Address: South Elgin, IL Phone: ( ) - Fax: ( ) - Cell: ( ) - Phone: ( ) - Fax: ( ) - Cell: ( ) - Contact Type:
 - Fax: ( ) - Cell: ( ) - Phone: ( ) - Fax: ( ) - Cell: ( ) - Contact Type:") Village of South Elgin Community Development Department 10 N. Water Street Monday Friday 847 741 3894 8:30 a.m. 5:00 p.m. 847 741 3959 FAX www.southelgin.com SWIMMING POOL/HOT TUB PERMIT APPLICATION PROPERTY
Village of South Elgin Community Development Department 10 N. Water Street Monday Friday 847 741 3894 8:30 a.m. 5:00 p.m. 847 741 3959 FAX www.southelgin.com SWIMMING POOL/HOT TUB PERMIT APPLICATION PROPERTY
CONFER ABOVE GROUND CURVE STEP / ABOVE GROUND CURVE STEP SYSTEM ASSEMBLY AND INSTALLATION MANUAL
 SAVE THESE INSTRUCTIONS DEALER/INSTALLER: GIVE TO HOMEOWNER CONFER ABOVE GROUND CURVE STEP / ABOVE GROUND CURVE STEP SYSTEM ASSEMBLY AND INSTALLATION MANUAL Model CCX-AG Note: 40 lbs. of sand required!
RESIDENTIAL SWIMMING POOLS AND SPAS A GUIDE FOR HOMEOWNERS
 RESIDENTIAL SWIMMING POOLS AND SPAS A GUIDE FOR HOMEOWNERS City of Redding 777 Cypress Avenue Redding CA 96001 Telephone: (530) 225-4013 FAX: (530) 225-4360 A Swimming Pool is any body of water 18 inches
Installation Instructions for the AlphaDeck Staging System
 Installation Instructions for the AlphaDeck Staging System Step 1 - Preparation A. Before setting up this system, determine the location of the stages and all the parts you will need. B. Read through the
Assembly Instructions. -Cantilever Boat Lifts
 Assembly Instructions -Cantilever Boat Lifts Winch Instruction Page Safety Information 1. The winch is built for the multipurpose of hauling and lifting operations. It is not to be used as a hoist for
Marine 6-Boat Free-Standing Racks SKU: Updated November 2011
 Marine 6-Boat Free-Standing Racks SKU: 30-061 Updated November 011 Contains: Marine -Boat Free-Standing Racks (SKU 1-003) Marine 3 rd Boat Expansion Racks (SKU 1-0303) Marine Back Legs (SKU -001) 3 Sets
MODEL CCX-AG CURVE STEP / CURVE STEP SYSTEM
 To reduce the risk of drowning, entrapment, falls, paralysis, electrocution, or other serious injury or death: Dealer/Installer: Give manual to homeowner. Installer: Read "Safe Installation" on p. 2 and
Address: South Elgin, IL Phone: ( ) - Fax: ( ) - Cell: ( ) - Phone: ( ) - Fax: ( ) - Cell: ( ) - Contact Type:
 - Fax: ( ) - Cell: ( ) - Phone: ( ) - Fax: ( ) - Cell: ( ) - Contact Type:") Village of South Elgin Community Development Department 10 N. Water Street Monday Friday 847 741 3894 8:30 a.m. 5:00 p.m. 847 741 3959 FAX www.southelgin.com SWIMMING POOL/HOT TUB PERMIT APPLICATION PROPERTY
Village of South Elgin Community Development Department 10 N. Water Street Monday Friday 847 741 3894 8:30 a.m. 5:00 p.m. 847 741 3959 FAX www.southelgin.com SWIMMING POOL/HOT TUB PERMIT APPLICATION PROPERTY
Big Ride ASSEMBLY AND INSTALLATION INSTRUCTIONS * * C A U T I O N * *
 Big Ride ASSEMBLY AND INSTALLATION INSTRUCTIONS * * C A U T I O N * * S.R. SMITH BIG RIDE SLIDES ARE MANUFACTURED FOR INSTALLATION AND USE ON INGROUND SWIMMING POOLS ONLY. THE BIG RIDE IS NEVER TO BE INSTALLED
P/N S OVAL POOL INSTALLATION MANUAL
 P/N 39184 S OVAL POOL INSTALLATION MANUAL ABOVE GROUND POOL SAFETY PLEASE READ BEFORE INSTALLATION warning FAILURE TO HEED THESE WARNINGS CAN RESULT IN PERMANENT INJURY, PARALYSIS FROM A BROKEN NECK, ELECTROCUTION
CONFER IN-GROUND CURVE STEP / IN-GROUND CURVE STEP SYSTEM ASSEMBLY AND INSTALLATION MANUAL
 SAVE THESE INSTRUCTIONS DEALER/INSTALLER: GIVE TO HOMEOWNER CONFER IN-GROUND CURVE STEP / IN-GROUND CURVE STEP SYSTEM ASSEMBLY AND INSTALLATION MANUAL Model CCX-IG Note: 40 lbs. of sand required! SAND
Installation Instructions
 116-3027, 116-3017 X-Pando Adjustable Steel Protector Installation Instructions 1404 N. Marshall Ave. El Cajon CA. 92020 For technical support call us at (800) 368-3075 NB 6/28/10 607-0112 Step 1. Mounting
7 & 9 Top Rail Pool Series 52 and 54 Oval Pools
 1989 560-1041 WARNING NO DIVING! Shallow water. You can be permanently injured. Copyright 7 & 9 Top Rail Pool Series 52 and 54 Oval Pools Installation Instructions 573-4036 Installation Instructions HOW
RESIDENTIAL SWIMMING POOL
 MAIL PICK-UP A. SWIMMING POOL PERMIT TYPE ABOVE-GROUND POOL B. IDENTIFICATION PROJECT LOCATION (ADDRESS): NORTH WHITEHALL TOWNSHIP 3256 LEVANS ROAD, COPLAY, PA 18037 610-799-3411 610-799-9629 FAX www.northwhitehall.org
PERMANENT POOLS. Location
 Community Development Department 211 Walnut Street - PO Box 426 Neenah, WI 54957-0426 Phone: (920) 886-6130 Fax: (920) 886-6129 Web site: www.ci.neenah.wi.us PERMANENT POOLS A pool is any man-made structure,
Pool Component Installation Manual. A. Introduction to Installing your Pool
 SECTION 1 Pool Component Installation Manual General Instructions A All Round Pools Part No. 1920283 rev. 4 A. Introduction to Installing your Pool Read all instructions completely before you begin. These
Tripod Setup Guide (M-TPx)
") Items needed: 1/2 inch wrench, mast level (M-MLA), medium size wire cutters, crescent wrench, all-purpose grease, tape measure, tie wraps, redi-mix cement (optional), shovel (optional), sledge hammer (for
Items needed: 1/2 inch wrench, mast level (M-MLA), medium size wire cutters, crescent wrench, all-purpose grease, tape measure, tie wraps, redi-mix cement (optional), shovel (optional), sledge hammer (for
SWIMMING POOL BUILDING PERMIT REQUIREMENTS FOR THE UNINCORPORATED TERRITORY OF DOUGLAS COUNTY, KANSAS
 SWIMMING POOL BUILDING PERMIT REQUIREMENTS FOR THE UNINCORPORATED TERRITORY OF DOUGLAS COUNTY, KANSAS ALL CONSTRUCTION SHALL BE BUILT IN ACCORDANCE WITH STANDARDS SET FORTH IN THE 2012 International Code
SARATOGA. 10-1/2" Top Rail Oval Pools. Parts List
 SARATOGA 10-1/2" Top Rail Oval Pools Parts List 573-3495 Oval Pools Parts List 24' x 12' 24' x 16' 28' x 16' 32' x 16' 34' x 18' 41' x 21' ITEM # DESCRIPTION PART# QTY. PART# QTY. PART# QTY. PART# QTY.
Round pool 52 (1,32m)
") Round pool 52 (1,32m) www.aquabois.com above ground or semi-inground Instructions for the assembly and installation of a wood pool Dear client, Congratulations, you have purchased a pool of superior quality
Round pool 52 (1,32m) www.aquabois.com above ground or semi-inground Instructions for the assembly and installation of a wood pool Dear client, Congratulations, you have purchased a pool of superior quality
Relaxing Meadow ABOVE GROUND POOL OVAL INSTALLATION MANUAL
 Relaxing Meadow ABOVE GROUND POOL OVAL INSTALLATION MANUAL 95-0444 02.16 ABOVE GROUND POOL SAFETY PLEASE READ BEFORE INSTALLATION warning FAILURE TO HEED THESE WARNINGS CAN RESULT IN PERMANENT INJURY,
Saltwater Series SALTWATER 8000 INSTALLATION MANUAL ROUND POOL 01.16
 Saltwater Series SALTWATER 8000 INSTALLATION MANUAL ROUND POOL 0.6 Above Ground Pool SAfety PleASe read before installation warning Failure to heed these warnings can result in permanent injury, paralysis
Adobe Canyon III. Oval Pool. Parts List the original portable pool
 the original portable pool Adobe Canyon III Oval Pool Parts List 573-2948 Adobe Canyon III Oval Pool Parts List 20' x 12' x 48" 24' x 12' x 48" 28' x 12' x 48" 24' x 16' x 48" 28' x 16' x 48" ITEM # DESCRIPTION
HoldUp Plus2. Safety Kit included: See additional instructions for installation. REAR WHEEL TRAY. BASE (1x) lock WASHER (1x) KEY (2x) SAFETY CLIP (1x)
 lock WASHER (1x) KEY (2x) SAFETY CLIP (1x)") HoldUp Plus2 InsTAll This product on 2" hitch version of the HoldUp Front WHEEL TRAY assembly (1x) REAR WHEEL TRAY assembly (1x) wrench (1x) BASE (1x) bolt (8X) Lock WASHER (8X) Washer (8x) KEY (2x) SAFETY
HoldUp Plus2 InsTAll This product on 2" hitch version of the HoldUp Front WHEEL TRAY assembly (1x) REAR WHEEL TRAY assembly (1x) wrench (1x) BASE (1x) bolt (8X) Lock WASHER (8X) Washer (8x) KEY (2x) SAFETY
RUDDER KIT INSTRUCTIONS
 C I N S T R U C T I O N S RUDDER KIT INSTRUCTIONS PAMLICOS-0,0,T, T, 60T, Excel Rotomolded Pamlico 0, 0, T, T, 60T, Excel The addition of a rudder to a kayak results in additional control and efficiency,
Installing the Top Rails & Verticals
 Additional Installation Information Important Read Me First For Esprit Round Pools SECTION 4 Esprit Round Pools Part No. 1920717 rev. 0 Installing the Top Rails & Verticals When you come to Section 4,
This manual must be left with the pool owner. Pool Component Installation. Safety Rules For Pool Owners
 This manual must be left with the pool owner Pool Component Installation SECTION 1 Manual General Instructions A All Round Pools Part No. 1920283 rev. 4 Safety Rules For Pool Owners Your pool contains
Step-by-Step Planning Guide
 B A C K Y A R D P L A N N I N G G U I D E Step-by-Step Planning Guide Whether you are considering purchasing a Michael Phelps Signature Swim Spa by Master Spas, or can t wait for yours to be delivered,
-- SGP (NOVA TEAM SQUARE)
") -- SGP-100 -- (NOVA TEAM SQUARE) Installation Instructions Call Jaypro Sports Equipment at 1-800-243-0533 during regular business hours for technical support. www.jaypro.com Rev-B Page 1 of 9 JAYPRO SPORTS
-- SGP-100 -- (NOVA TEAM SQUARE) Installation Instructions Call Jaypro Sports Equipment at 1-800-243-0533 during regular business hours for technical support. www.jaypro.com Rev-B Page 1 of 9 JAYPRO SPORTS
Lomart TRIMLINE OVAL POOLS POOL ASSEMBLY AND INSTALLATION INSTRUCTIONS
 Lomart TRIMLINE OVAL POOLS POOL ASSEMBLY AND INSTALLATION INSTRUCTIONS THINK SAFETY FIRST Safe and correct use of your new Lomart pool means swimming and wading only. DO NOT DIVE OR JUMP! The above-ground
General Instructions
 This manual must be left with the pool owner Pool Component Installation SECTION 1 Manual General Instructions Safety Rules or Pool Owners Channel Lok-I Oval Pools Part No. 1920586 rev. 1 Your pool contains
Pool Component Installation Manual. A. Introduction to Installing your Pool
 SECTION 1 Pool Component Installation Manual General Instructions A All Round Pools Part No. 1920283 rev. 4 A. Introduction to Installing your Pool Read all instructions completely before you begin. These
Confer Plastics Inc. - Installation Manuals CONFER PLASTICS, INC. CONFER PLASTICS, INC. POOL ENTRY SYSTEM FOR ABOVE-GROUND POOLS
 Page 1 of 6 Other Installation Manuals CONFER PLASTICS, INC. CONFER PLASTICS, INC. POOL ENTRY SYSTEM FOR ABOVE-GROUND POOLS Adjusts to fit most above-ground pools with flat or slightly dished bottoms PARTS
T A POOL ASSEMBLY AND INSTALLATION MANUAL. Above Ground Aluminum Delta Sheetwall Oval Pools
 T3667-60A POOL ASSEMBLY AND INSTALLATION MANUAL Above Ground Aluminum Delta Sheetwall Oval Pools Note: Deck and fence accessories shown are optional. THIS MANUAL EXPLAINS THE CORRECT METHOD TO ASSEMBLE
V35047 INSTALLATION MANUAL - CHANNEL LOK II OVAL POOLS POOL MODEL - Caribbean 11.13
 V35047 INSTALLATION MANUAL - CHANNEL LOK II OVAL POOLS POOL MODEL - Caribbean 11.13 Above Ground Pool Safety Please read before installation warning Failure to heed these warnings can result in permanent
-Round Down- Description & Overview. VEX Classroom Competition Round Down
 -Round Down- Description & Overview Round Down is a head-to-head robotics competition designed and scaled to be run in a classroom environment by a single teacher. This game provides a challenge for designers
FOLD AND ROLL PLAYBACK TABLE TENNIS TABLE
 OWNER'S MANUAL FOLD AND ROLL PLAYBACK TABLE TENNIS TABLE MODEL NOs. T8268 T8168 Thank you for buying our product. We try hard to ensure that our products are of high quality and free of problems, such
Lil Fun Walker ASSEMBLY INSTRUCTIONS ADULT ASSEMBLY REQUIRED Styles and colors may vary
 Lil Fun Walker ASSEMBLY INSTRUCTIONS ADULT ASSEMBLY REQUIRED Styles and colors may vary Required: Phillips Screwdriver IMPORTANT: Read all instructions before assembly and use of the Walker Keep the instructions
Foos 300 Assembly Instructions
 Foos 300 Assembly Instructions Thank you for purchasing a Shelti product. All of us at Shelti want you to be completely satisfied with your Foos game, so feel free to contact us for help with the assembly
City of Naperville Transportation, Engineering & Development (T.E.D.) Services Team
 Services Team") City of Naperville Transportation, Engineering & Development (T.E.D.) Services Team PERMIT APPLICATION INFORMATION for SWIMMING POOLS, SPAS AND HOT TUBS THE FOLLOWING MUST BE INCLUDED WITH EVERY APPLICATION
City of Naperville Transportation, Engineering & Development (T.E.D.) Services Team PERMIT APPLICATION INFORMATION for SWIMMING POOLS, SPAS AND HOT TUBS THE FOLLOWING MUST BE INCLUDED WITH EVERY APPLICATION
Owner s Manual. Model H4685
 Owner s Manual Model H4685 TABLE OF CONTENTS Important Information.................................... 3 Parts.................................................. 4 Battery Installation......................................
SWIMMING POOL PERMITS ARE ABOUT HEALTH AND SAFETY
 SWIMMING POOL PERMITS ARE ABOUT HEALTH AND SAFETY Swimming Pool Booklet Washington County, Maryland Published 2004 Revised 03/10/05 Revised 02/10/06 Department of Permits & Inspections 80 West Baltimore
AMITY TWP POOL REQUIREMENTS
 AMITY TWP POOL REQUIREMENTS Construction In-ground, Above-ground and Storable pools and Spas shall be designed and constructed in conformance with International Swimming Pool & Spa Code (ISPSC) Location
NEXT GENERATION FLEX FENCE
 NEXT GENERATION FLEX FENCE Area To Be Fenced.. With Next Generation Flex Fence any post that is not in a straight line with another post must be braced. Layout your fence installation. Determine all end
GRAVITY BIKE RACK ASSEMBLY & OPERATING INSTRUCTIONS
 GRAVITY BIKE RACK 94479 ASSEMBLY & OPERATING INSTRUCTIONS Due to continuing improvement, actual product may differ slightly from the product described herein. 3491 Mission Oaks Blvd., Camarillo, CA 93011
Aboveground Pool Installation Manual
 97-0753 Aboveground Pool Installation Manual Thismanual must be left with the pool owner www.wilbargroup.com Section 1 GENERAL INSTRUCTIONS ROUND POOL GROUND PREPARATION Safety Rules for Pool Owners Your
Whitehall Township Swimming Pool, Spa and Hot Tub Code Guide
 Whitehall Township Swimming Pool, Spa and Hot Tub Code Guide THIS IS A GUIDE ONLY! YOU MUST COMPLY WITH ALL APPLICABLE PROVISIONS OF THE ADOPTED EDITION OF THE INTERNATIONAL RESIDENTIAL CODE (IRC). FOR
DO NOT use any Alien Flier Zip Line Products or Accessories until you read and understand these SAFETY WARNINGS!
 ! WARNING DO NOT use any Alien Flier Zip Line Products or Accessories until you read and understand these SAFETY WARNINGS! A zip line can be very dangerous. Do not use this kit if you do not understand
Cover EX Installation Instructions
 Cover EX Installation Instructions 1. Lay out all the parts and verify that they are all present according to the Cover EX Parts and Hardware List. See Fig 1. Call 800-730-7727 for all replacement and
$ Plan Review Fee when Permit Application is submitted HOT TUBS AND SPAS BUILDING PERMIT APPLICATION. COST: $80.
 Community Development 1050 W Romeo Rd, Romeoville, IL 60446-1530 (815) 886-7200 Fax #: (815) 886-2724 Email: buildinginspections@romeoville.org HOT TUBS AND SPAS BUILDING PERMIT APPLICATION Application
ROUND ASSEMBLY. Positioning
 ROUND ASSEMBLY Positioning To ensure maximum enjoyment and efficiency, consider the following steps when selecting the desired location of you pool. Select a location that receives maximum sunlight for
Permit and Inspection Requirements for Swimming Pools
 Permit and Inspection Requirements for Swimming Pools Building Inspection Office (817) 503.1030 City of Colleyville 100 Main Street Colleyville, TX 76034 Inspection Request Line (817) 503.1172 Building
U.S. Patent No. 7,922,246. Patents Pending
 U.S. Patent No. 7,922,246 Patents Pending 2 Table of Contents Page General Information... 3 Warnings and Cautions... 4 Tools... 6 SmartDock Parts... 6 Initial Set-Up and Adjustment... 7 Select Valve Retaining
Stand-N-Fish FULL DETAIL INSTALLATION INSTRUCTIONS
 1 Stand-N-Fish FULL DETAIL INSTALLATION INSTRUCTIONS Thank you for purchasing the incredible new Stand-N-Fish Kayak Fishing System. Once installed on your kayak the Stand-N-Fish will take your kayak fishing
Palmer township, Pennsylvania. Pool & Fence Details Based on the 2009 International Residential Code (Designed and Printed January 2012)
") Palmer township, Pennsylvania Pool & Fence Details Based on the 2009 International Residential Code (Designed and Printed January 2012) CONTENTS General Information... 2 Prohibited Barrier Locations..
Palmer township, Pennsylvania Pool & Fence Details Based on the 2009 International Residential Code (Designed and Printed January 2012) CONTENTS General Information... 2 Prohibited Barrier Locations..
Backboard and Rim Owners Manual
 REQUIRED TOOLS AND MATERIALS: Two (2) Capable Adults Tape Measure Backboard and Rim Owners Manual Customer Service Center N53 W24700 South Corporate Circle Sussex, WI 53089 U.S.A. Step Ladder - 8ft. (2.4
LEGACY II TM STARTING PLATFORMS
 LEGACY II TM STARTING PLATFORMS INSTALLATION INSTRUCTIONS CORPORATE HEADQUARTERS WESTERN SALES AND MANUFACTURING PLANT P.O. Box 400 1017 SW Berg Parkway Canby, Oregon 97013 (503) 266-2231 Fax (503) 266-4334
Gerber Sabre 404 and 408 Installation Instructions
 1 TITLE: Gerber FastFact # Supplied by: Last Modified: Summary: Gerber Sabre 404 and 408 Installation Instructions 5002 Gerber Service November 13, 2001 This document provides the installation and set-up
Swimming Pool Installation
 Swimming Pool Installation The following information is provided to assist in the planning and installation of swimming pools and hot tubs within the City of Vandalia, OH. Zoning, Fence and Electric Permits
Swim Spa Pre-delivery Guide
 Swim Spa Pre-delivery Guide Hello! This document is designed to provide all the information you need to ensure the smooth delivery and installation of your spa or swim spa. Please read it carefully and
Instruction Manual for ZY-021 Height adjustable Acrylic Backboard with Chain net
 Instruction Manual for ZY-021 Height adjustable Acrylic Backboard with Chain net WARNING: IMPROPER INSTALLATION OR SWINGING ON THE RING MAY CAUSE SERIOUS INJURY OR DEATH Notice to assemblers: All basketball
*A Certificate of Survey for the property may be on file at City Hall if the house was built after 1984.
 Swimming Pools ** Permits are required for pools having a water surface area exceeding 100 square feet ** Permits are required for pools having a water surface area exceeding 100 square feet (11-3-3/8
Falcon 3 145, 170, 195 and Tandem Owner / Service Manual
 Falcon 3 145, 170, 195 and Tandem Owner / Service Manual January 2007 - Second Edition Removing The Sail From The Airframe And Short Packing The Glider Many maintenance and repair procedures will require
Above Ground Pool Assembly & Installation
 P/N 95-0735 Above Ground Pool Assembly & Installation OVAL SLAT WALL POOL WA R N I N G : THIS POOL IS NOT DESIGNED FOR DIVING OR JUMPING. DANGEROUS INJURY CAN RESULT-SHALLOW WATER!!! Your pool is designed
Swing Set. Sheffield Model 22-PS320
 Swing Set Sheffield Model 22-PS320 Important! The owner s manual contains safety, assembly, use and maintenance instructions. The Playsafe Swing Set must be assembled by an adult who has read and understands
Model Rollguard A-Frame Safety Ladder
 A-FRAME LADDERS Model 7200 Rollguard A-Frame Safety Ladder Standard features of the Rollguard Ladder: Aesthetically pleasing contemporary design in beautiful warm gray color to complement today s brown
Installation and Operating Manual
 Safety Instructions Important Information Please read prior to installation ATTENTION! ELECTRICAL HAZARD FOR INGROUND POOLS AND ABOVEGROUND POOLS Installation and Operating Manual IMPORTANT Pool Owner,
Assembly Guide ST200 FUNCTIONAL TRAINER
 Assembly Guide ST200 FUNCTIONAL TRAINER Assembly Guide ST200 FUNCTIONAL TRAINER To avoid possible damage to this Functional Trainer, please follow these assembly steps in the correct order. Before proceeding,
1/2 METER FLYTE-DECK II FIBERGLASS STAND (6' BOARD) (8' BOARD) (10' BOARD)
 (8' BOARD) (10' BOARD)") 1/2 METER FLYTE-DECK II FIBERGLASS STAND 70-209-736 (6' BOARD) 70-209-738 (8' BOARD) 70-209-740 (10' BOARD) CAUTION ALL MINIMUM WATER ENVELOPE DIMENSIONS FOR RESIDENTIAL INGROUND SWIMMING POOLS MUST MEET
1/2 METER FLYTE-DECK II FIBERGLASS STAND 70-209-736 (6' BOARD) 70-209-738 (8' BOARD) 70-209-740 (10' BOARD) CAUTION ALL MINIMUM WATER ENVELOPE DIMENSIONS FOR RESIDENTIAL INGROUND SWIMMING POOLS MUST MEET
V35046 INSTALLATION MANUAL - ROUND POOLS POOL MODEL - Caribbean 11.13
 V35046 INSTALLATION MANUAL - ROUND POOLS POOL MODEL - Caribbean 11.13 Above Ground Pool Safety Please read before installation warning Failure to heed these warnings can result in permanent injury, paralysis
IMPORTANT: RECEIVING INSTRUCTIONS:
 Instruction Sheet Sidewinder Mechanical Bender IMPORTANT: RECEIVING INSTRUCTIONS: Visually inspect all components for shipping damage. If any shipping damage is found, notify carrier at once.shipping damage
No ' Long No ' Long
 ASSEMBLY, INSTALLATION & USAGE MANUAL BATTING CAGES No. 0150-50' Long No. 0170-70' Long No. 0150 BATTING CAGE - 50' Long No. 0170 BATTING CAGE - 70' Long Upon completion of the assembly/installation of
ROCKSOLID DUAL POST ANCHOR
 ROCKSOLID DUAL POST ANCHOR INSTALLATION INSTRUCTIONS CORPORATE HEADQUARTERS WESTERN SALES AND MANUFACTURING PLANT P.O. Box 400 1017 SW Berg Parkway Canby, Oregon 97013 (503) 266-2231 Fax (503) 266-4334
Read Instructions carefully before use. Rollator is designed for indoor & outdoor use. Do NOT use as a wheelchair or as a transport chair.
 Charcoal Red Seat Height 500-10191 500-10195 19 500-10211 500-10215 21 500-10241 500-10245 24 User Manual Read Instructions carefully before use. Rollator is designed for indoor & outdoor use. Do NOT use
Vessel Installation and Operating Manual
 For In-ground and Aboveground Pools Vessel Installation and Operating Manual Important Safety Information Please read this manual prior to installation. Nature 2 Express is designed to sanitize in-ground
General Instructions
 This manual must be left with the pool owner Pool Component Installation SECTION 1 Manual General Instructions Safety Rules For Pool Owners Gibraltar Oval Pools Part No. 1920585 rev. 0 Your pool contains
-SWEPT AWAY- Description & Overview. VEX Classroom Competition Swept Away
 -SWEPT AWAY- Description & Overview Swept Away is a head-to-head robotics competition designed and scaled to be run in a classroom environment by a single teacher. This game provides a challenge for designers
RUDDER KIT INSTRUCTIONS
 A I N S T R U C T I O N S RUDDER KIT INSTRUCTIONS TARPON 0/40/60/60i The Tarpon series is designed as a high performance sit-on-top kayak tailored for the sport paddler. Our rudder system is designed to
Installation Instructions - Electric Aluminum Drive Systems for Arm Sets to 22 Electric Arm Systems , ,
 Installation Instructions - Electric Aluminum Drive Systems for Arm Sets to 22 Electric Arm Systems - 204-025, 206-025, 22-025 NB /0/ 607-0020 404 N. Marshall Ave. El Cajon CA. 92020 For technical support
Spectrum AquaLight (SAL ) Color Underwater Light Owner s Manual
 Color Underwater Light Owner s Manual") Spectrum AquaLight (SAL ) Color Underwater Light Owner s Manual IMPORTANT SAFETY INSTRUCTIONS READ AND FOLLOW ALL INSTRUCTIONS SAVE THESE INSTRUCTIONS Table of Contents Section I. Installing Light Fixture
Spectrum AquaLight (SAL ) Color Underwater Light Owner s Manual IMPORTANT SAFETY INSTRUCTIONS READ AND FOLLOW ALL INSTRUCTIONS SAVE THESE INSTRUCTIONS Table of Contents Section I. Installing Light Fixture
Installation Instructions - Electric Steel Drive Systems for Arm Sets to ,
 Installation Instructions - Electric Steel Drive Systems for Arm Sets to 22 208-025, 209-025 NB /0/ 607-0029 404 N. Marshall Ave. El Cajon CA. 92020 For technical support call us at (800) 368-3075 Step.
Building Standards Department Pool Requirements 111 N. Michigan AV, Bradley, IL Phone Fax PRIVATE SWIMMING POOLS
 Building Standards Department Pool Requirements 111 N. Michigan AV, Bradley, IL 60915 Phone 815-933-5008 Fax 815-933-5068 PRIVATE SWIMMING POOLS GENERAL PERMIT PROCEDURES: Call J.U.L.I.E. at 1-800-892-0123
CO V E R S TA R AU TO MAT I C S A F E T Y CO V E R INSTALLATION GUIDE
 CO V E R S TA R AU TO MAT I C S A F E T Y CO V E R DECKMOUNT SYSTEM INSTALLATION GUIDE SECTIONS System Parts Reference...3 Standard Top Track...4-6 Mechanism... 7-10 Cover Fabric...11-16 Home Owner & Builder
MATRIX OVAL YARDMORE POOL INSTRUCTIONS
 V P/N 95-0432 03/08 MATRIX OVAL YARDMORE POOL INSTRUCTIONS Your pool is designed for years of pleasurable, safe, family fun. But, when used incorrectly, a swimming pool can be dangerous. To insure your
ASSEMBLY INSTRUCTIONS
 XR 9-2009:new odc 1018 revised 2/17/10 9:11 AM Page 1 ODC XR 9 OUTDOOR DISCOVERY CRAFT ASSEMBLY INSTRUCTIONS Your ODC XR 9 Pontoon Boat comes in two separate cartons consisting of the following parts: