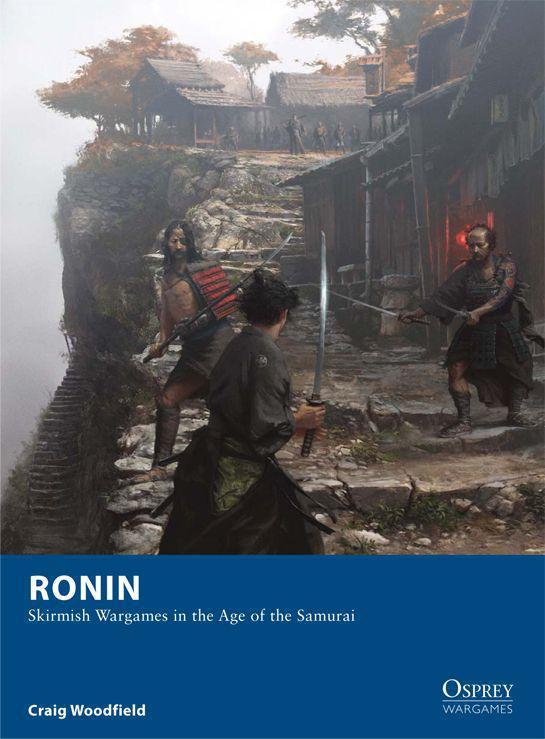
RONIN SKIRMISH WARGAMES IN THE AGE OF THE SAMURAI CRAIG WOODFIELD
|
|
|
- Samson Cain
- 5 years ago
- Views:
Transcription
1

2 RONIN SKIRMISH WARGAMES IN THE AGE OF THE SAMURAI CRAIG WOODFIELD 2
3 CONTENTS INTRODUCTION What You Need To Play Ronin Models Basic Principles BACKGROUND A Time Of War And Armour GAMEPLAY Turn Sequence Priority Phase Move Phase Combat Phase Action Phase End Phase SPECIAL RULES Banners Mounted Models FACTIONS Bushi Ikko-Ikki Sohei Koryu Bandits Koreans Ming Chinese Peasants Swords-For-Hire A Sample Buntai SCENARIOS Setting Up The Game Skirmish Capture Duel Defence Assassination Tournament Defend The Village 3
4 CAMPAIGNS Progression TOURNAMENTS ADVANCED RULES Fatigue APPENDIX OTHER PERIODS Kamakura Period Late Edo Period FURTHER READING Recommended Reading Films COUNTERS SHEET REFERENCE SHEET BUNTAI ROSTER 4
5 INTRODUCTION Ronin is a small-scale skirmish game set in late 16th-century Japan in which small groups of warriors referred to as Buntai fight each other for honour or riches. Rather than just rolling a few dice, Ronin allows players to make tactical decisions about how the models that they control will fight offensively, defensively, or applying special martial skills. WHAT YOU NEED TO PLAY RONIN A Buntai of at least 4 and up to 20 models. A table and a few pieces of scenery. A tape measure and a handful of six-sided dice (referred to as d6). About a dozen counters or tokens for each player in two distinct colours, shapes, or sizes. Markers to represent wounds (a total of 3 different types) and slain warriors. MODELS These rules were designed and play-tested using 28 mm scale miniatures based on 25mm round bases that are referred to through these rules as Models. In Ronin, each model has the following Characteristics: Name and Type this describes the type of model. Rank the relative importance of the model: Rank 0 models are peasants and other civilian types with little combat ability. Rank 1 and 2 models are basic foot soldiers, well-trained and well-equipped. Rank 3 and 4 models are elite warriors with excellent training and equipment. Rank 5 models are the best of the best. Combat Pool the capacity of the model to make attacks in hand-to-hand combat, as well as defend itself. Rank 0 and 1 models only have a combat pool of 1, Rank 2 have a combat pool of 2, Ranks 3 and 4 have a Combat Pool of 3 and 4 respectively, whilst Rank 5 models have a Combat Pool of 5. Initiative the ability of the model to strike quickly, which will often be modified by the type of weapon it is wielding. Fight the model s skill with hand-to-hand weapons, ranging from 1 to 5. Shoot the model s skill with missile weapons, usually 1. Armour the type of armour the model is wearing (if any). the weapons carried by the model. special skills and abilities that the model has. Points the cost of the model when building your Buntai. BASIC PRINCIPLES The following basic principles are applied when playing Ronin. Measurement any player is allowed to measure any distance at any time. Reduced movement a number of factors reduce the movement of models, but this can never fall below 1. 5

6 Reduced Characteristics a number of factors will reduce models Characteristics such as Fight and Initiative. Characteristics can be reduced to 0, but cannot be negative. D6 rule when in doubt or disagreement over a particular situation or rule, roll a d6 to determine which interpretation to use. Facing models do not have facing in Ronin, so models are not disadvantaged or affected by things that happen behind them. Similarly, a model can be rotated on the spot at any time and any number of times, and this does not count as movement. 6
7 BACKGROUND A TIME OF WAR Ronin is set in the late 16th century near the end of the Sengoku Jidai or Age of Warring States period, when feudal lords called Daimyos battled for control of Japan, fighting countless wars and skirmishes against each other. The Emperor of Japan had long been an impotent figurehead and true power was held by the Shogun, the greatest of the Daimyos. It was during this time the elite warriors known as Samurai reached the peak of their martial abilities. The constant warfare against other Samurai, warrior monks, bandits and pirates produced a class of warrior that was devoted to warfare. Even as Japan was slowly unified under first Oda Nobunaga and then Toyotomi Hideyoshi, the Samurai armies were redeployed to Korea in a long and ultimately futile war of conquest against the Koreans and their Ming Chinese allies. WEAPONS AND ARMOUR The weapons and armour of 16th-century Japan were diverse and complex. This section briefly explains the more common sorts used in these rules. WEAPONS Katana: The katana has become one the most famous weapons in history and is commonly known as the Samurai sword. Renowned for its cutting ability, the effectiveness of the katana is a result of its design, construction and the skill of the swordsmen that used it. A typical katana would have a blade length of 60 75cm. The single-edged, concave blade was usually wielded with two hands, but was still effective when used one-handed. Japanese swordmakers perfected a technique of wrapping an incredibly strong but brittle layer of steel around a softer, more flexible one, creating a resilient and versatile weapon. In these rules katana is used as a generic term to describe all Japanese long swords, though this is not strictly correct. Wakizashi: This smaller sword was often worn paired with a katana (known as daisho), particularly by Samurai. Tanto: A dagger Nodachi: The nodachi was a true two-handed sword, with a blade of up to 120 cm long. It was worn across the back and presented its wielder with many problems, not least how to draw it! It was, however, capable of delivering a devastating cut and was originally designed to be used against cavalry. Naginata: The polearm known as the naginata was the principal weapon of the Sohei warrior monks and also of many Samurai. It consisted of a long, curved blade on a pole up to two metres long. The length of the shaft gave the wielder a distinct advantage against swordsmen, and the curved blade could be used to deliver devastating blows. Yari: The yari is a spear, functionally identical to those used by almost all warrior cultures throughout history. Nagae-yari: This is a very long spear or pike, which provided great reach but was very clumsy at close quarters. 7

8 Ashigaru defeat a Samurai, by Angus McBride Osprey Publishing Ltd. Taken from Elite 23: The Samurai. Kasurigama: This unusual weapon consisted of a weight on a long chain attached to a short sickle. Fiendishly hard to master, the weight could be used to entangle or disarm an opponent before he was finished off with the blade. Tetsubo: This ponderous weapon was a heavy, iron-studded club that required great strength to use. Jo: The jo was a short staff a little more than 4 feet long. It was developed as a counter to the katana. Bo: The long staff, or bo, was the height of a man. Yumi: The Japanese bow was asymmetrical and came in a variety of sizes, but for the purposes of these rules all yumi are considered to be identical in strength and range. Teppo: The matchlock arquebus known as the teppo was introduced to Japan by Portuguese traders in 1543 and was rapidly adopted by the Samurai. Although it never completely replaced the yumi, its major shortcomings were more than compensated for by its relative ease of use and devastating stopping ability. Shuriken: The shuriken, or throwing star, was a short ranged missile weapon used by the spies and assassins known as Ninja. 8

9 ARMOUR Japanese armour was ornate and highly complex, with many specialist pieces. Sections were often laced together and lacquered, and bright colours were common. Generally speaking, the more ornate and complex the armour, the more important the individual wearing it. As firearms became more common, some high-ranking Samurai began to wear European-style iron cuirasses or helmets. Some of the major components of Japanese armour: Do: Cuirass Kusazuri: Tassets hanging over the thighs Sode: Shoulder guards Kote: Gauntlets Nodowa: Throat protector Mempo: Facemask, often ornate with snarling visages and even horsehair moustaches! Kabuto: Helmet Jingasa: A conical helmet typical of the Ashigaru In Ronin, the following classes of armour are used: Light: A model armoured in this way wears only two or three pieces of armour, perhaps designed to protect his usual fighting aspect or perhaps because it is all that he owns! A bandit or down-on-his-luck ronin may be equipped with light armour. Medium: A model wearing medium armour has most of his body well protected, e.g. an Ashigaru or Sohei. Heavy: A model wearing heavy armour is likely to be a Samurai or similar high-class warrior, with virtually every part of his body protected. 9
10 GAMEPLAY TURN SEQUENCE A game of Ronin consists of a number of turns, each representing a few seconds of actual time. Each turn is further divided into five phases, shown below in the order in which they are undertaken. Generally, play will alternate between players in each phase (beginning with the player with Priority), but in some phases actions are simultaneous. 1. Priority Phase 2. Move Phase 3. Combat Phase 4. Action Phase 5. End Phase PRIORITY PHASE The player who will have Priority for the rest of this turn is determined in this phase. The Morale level of each Buntai is also checked if casualties were suffered in the previous turn or if certain other conditions have been met. MOVE PHASE During this phase players have the opportunity to move models or use missile weapons. COMBAT PHASE In this phase all hand-to-hand combat is resolved. ACTION PHASE During this phase models will have the opportunity to use missile weapons again as well as undertake certain special actions. END PHASE In the final part of the turn, some tidying up occurs and Victory Conditions are checked. PRIORITY PHASE During the Priority Phase, the player with Priority is determined and then Morale is tested. 1. DETERMINE PRIORITY Each player rolls a d6 (re-rolling ties). The winner has Priority for this turn. The player with Priority will have the opportunity to choose which combats are resolved first and which models move or fire first. In any situation where there is an opportunity for more than one model to do something, the player with Priority will always have the option to go first. 2. TEST MORALE Combat is a frightening experience, and despite the best of plans of commanders, warriors will often lose the will to fight. In Ronin, this is simulated by the Morale of a Buntai. There are three 10

11 levels of Morale Steady, Wavering and Routing. A Buntai will always start a battle with Morale at Steady. However, if members of the Buntai are killed then its Morale may move to Wavering or even Routing. You must to check to see if your Buntai s Morale has changed if at least one of the following conditions applies: The Buntai s Morale is currently Wavering. At least 25% of the starting strength of the Buntai suffered a Critical wound in the previous turn (for example, if a Buntai that started the game with 10 models loses 3 to critical wounds in any one turn, it must test the following turn). The Leader of the Buntai suffered a Critical wound in the previous turn. To test Morale, roll 2d6 and add the two dice together. The resulting number is the Morale Test. Compare this to the Buntai s Morale Rating (which can be found in the special rules for each faction). If the Morale Test is equal to or less than the Morale Rating of the faction, then one of the following will happen: If the Buntai s Morale is currently Steady, then nothing will happen. If the Buntai s Morale is currently Wavering, it will change to Steady. If the Morale Test exceeds the Buntai s Morale Rating, then there will be one of two effects: If the Buntai s Morale is currently Steady, it will change to Wavering. If the Buntai s Morale is currently Wavering, it will change to Routing. Once a Buntai s Morale changes to Routing, it will remain so for the rest of the game. 11
 is always a success and a natural roll of 12 (two 6s)")
12 Certain conditions will add modifiers to this Morale Test: The Buntai is at less than half strength: +1 The Buntai s Morale is currently Wavering: +1 The Buntai has at least one model with the Commander ability: -1 The Buntai has a banner: you may choose to reroll the Morale Test In any case, a natural Morale Test of 2 (you roll two 1s) is always a success and a natural roll of 12 (two 6s) is always a failure. WAVERING When a Buntai s Morale changes from Steady to Wavering, it is beginning to lose the will to fight. Warriors become uncertain and unwilling to risk their lives. Each time that you activate a model in order to move it into base-to-base contact with an enemy model, roll a d6 and add that model s Rank. If the result is 7 or more, then you may move the model. Otherwise, the model may not move into contact, though it may take other actions. ROUTING When a Buntai s morale moves to Routing, it begins to withdraw from the battlefield. Each time you activate a model, roll a d6 and add that model s Rank. If the result is 7 or more, the model may act as you wish. Otherwise, it must make a Run or Gallop move towards the nearest table edge, avoiding any enemy models as it moves. If it leaves the table it may not return. Models that are engaged are not affected. Once a Buntai is Routing, it stays that way for the remainder of the game. MOVE PHASE During this phase models move or use missile weapons. The player with Priority selects a model to move or use a missile weapon, resolves this, then the other player selects a model, and so on. Once a player passes on the opportunity to move or use a missile weapon, the phase ends for that player. 1. MOVEMENT The distance a model moves depends on a number of factors, detailed below. Under normal circumstances, models may never move over or through other models, and there must always be room for the model s base where it stops. However, models may move in any direction and may 12
13 make any number of turns as part of their movement. A model may normally move up to 6, which may take it into base-to-base contact with an enemy model. A model may make a Run move of up to 9 if it does not pass within 1 of an enemy model during any part of its movement. A model s movement is halved if it meets any of the following criteria: The model is Stunned or has a Grievous wound. The model is Encumbered. The model moves through Difficult terrain (see below). A model may not move if it has used a missile weapon in this phase or is engaged in combat, except to Withdraw. WITHDRAW A model that is in base-to-base contact with one or more enemy models may move up to 2 out of contact. The enemy model (or models) has three options in this situation: 1. The enemy model(s) may choose to not move and make a single attack against the departing model. This happens just like a normal attack, but without any opportunities for Enhancing. Additionally, the attacking model gets an additional +1 to its Attack Roll. 2. Do nothing. 3. Move back into base-to-base contact as that model s activation. TERRAIN Terrain affects the way models move on the tabletop, and provides cover and concealment. There are four main types of terrain: Difficult, Impassable, Buildings and Water. Before starting the game, it is important that both players discuss the terrain that is to be used and what game effects that it will have in terms of movement and cover (see below). Difficult terrain: Difficult terrain is that which requires some effort to travel through. Examples include rice paddies, shallow streams and ponds, very rocky ground, thick mud or thick underbrush. Forests do not generally count as difficult ground unless also associated with thick underbrush, and neither do shallow streams. Low walls and fences and similar man-made obstacles will count as difficult terrain. If a model starts its movement in difficult terrain, finishes its movement in difficult terrain or at any point during its movement passes through difficult terrain, its movement will be reduced by half. This stacks with effects detailed above, so if a model is Stunned AND in Difficult Terrain, it will only move 1.5. Impassable terrain: Impassable terrain includes walls too high to easily climb, cliffs, deep water and so on. Models cannot move through this terrain, they must move around it. Buildings: Buildings are a special type of terrain and can cause some issues if the rules are not carefully discussed before the start of a game. Because they are easy to defend, generally only one model will be able to attack any enemy model standing in a doorway or window. Many Japanese buildings of this time had light internal walls that could easily be broken through. If agreed to prior to the game, models may move through internal walls as if they were passing through Difficult Terrain. Models armed with long handled weapons (including yari, nagae-yari, tetsubo, nodachi and naginata) suffer a -1 Initiative penalty and -1 penalty to Attack Rolls when fighting inside buildings, unless the combat is taking place in a very large room. 13
14 Water: The effects of water also deserve special attention. A model that is in water that counts as Difficult terrain may drown if it received any Stunned counters. In this situation, a roll of 6 on a d6 results in the model drowning (a type of Critical wound) and being removed as a casualty. If the model is wearing heavy armour, a roll of 5 or 6 gives this result. 2. USE A MISSILE WEAPON This is the first of two opportunities to use a missile weapon during a turn, the second being in the Action Phase. Using a missile weapon in this turn is considered to be a hurried shot, perhaps at a moving target, and so incurs a penalty to hit. However, models armed with bows will be able to fire up to twice per turn, albeit with reduced effectiveness. Any model that is not Stunned and not engaged may use a missile weapon in this phase. Using a missile weapon is undertaken slightly differently to hand-to-hand combat, with only the attacker rolling dice. SHOOTING PROCEDURE 1. Select a target model, and then measure range (from the edge of one base to the edge of the target s) and check line of sight. 2. The model that is shooting rolls 2d6, adds its Shoot Characteristic and then adds or subtracts other modifiers due to the range and/or weather conditions. This is the Shooting Attack Roll. 3. The base Shooting Defence Score is 6 for all models, and the target adds any modifiers due to armour or cover to this value. 4. Subtract the final Shooting Defence Score from the Shooting Attack Roll. The resulting number is the Wound Score. If the Wound Score is 1 or more, then a wound may have been caused. Refer to the Wound Table (page 19). If the Wound Score is negative or 0, the attack has failed. Modifiers to Shooting Attack Roll Target is less than 6 away +1 Target is away -1 Target is away -2 (-3 if shooting with a teppo) Target is more than 36 away -3 (-4 if shooting with a teppo) Target is engaged in combat -1 (plus see special rules for shooting into combat) Shooting Model made a normal move this turn -1 Shooting Model made a Run or Gallop move this turn -2 Shooting Model previously fired this turn -1 Shooting Model is shooting in the Move Phase -1 Shooting Model has a Grievous wound -1 All Modifiers are cumulative. Modifiers to Shooting Defence Score Target has light armour +1 Target has medium armour +2 14

15 Target has heavy armour +3 Target is in Light cover +1 Target is in Heavy cover +2 All Modifiers are cumulative. LINE OF SIGHT AND COVER Certain types of terrain will offer cover to models that are targeted by Shooting Attacks. There are two types of cover Light and Heavy. Light cover includes vegetation such as shrubs and hedges, which obscure the target and offer minor protection. Models benefitting from Light cover gain a +1 benefit to their Defence Score. Heavy cover includes walls, building, embankments, wooden palisades and so on, and provides a +2 bonus to the Defence Score. Line of sight is the ability of a model to see a target. If there is no line of sight, an attack may not be made. The following situations block line of sight: If a straight line between any part of the attacker s base to any part of the target s base crosses any part of the base of another model. If there is more than 2 of Light cover in between the model and the target. If there is any amount of Heavy cover AND the target model has not moved or used a missile weapon this turn. MISSILE WEAPONS Weapon Shuriken (throwing star) Samurai launch a night attack, by Richard Hook Osprey Publishing Ltd. Taken from Campaign 170: Osaka Maximum Range Wound Modifier Special 6-2 There is no penalty for moving and using a shuriken. 15
16 Teppo (arquebus) 48 Special The teppo, or arquebus, must be reloaded before it can be fired again (see Action Phase, below). Whenever a teppo is fired, it is helpful to place a small ball of cotton wool or similar next to the model to signify this. A teppo is inaccurate at long ranges, and so all shots of more than 24 incur an additional -1 penalty. Models that are fired at with a teppo do not gain any benefts from light or medium armour, and heavy armour is considered to be light armour. Yumi (bow) 48 SHOOTING INTO COMBAT Sometimes you will elect to shoot at a model already engaged in combat. This is a risky proposition, and if the shot misses it may hit one of the other combatants. The usual process is followed, but if the Shooting Attack is a failure, randomly select another model in the combat and conduct a completely new Shooting Attack against that model, including a new dice roll. This represents the initial shot missing the target model but potentially hitting a second model. If this second attack fails, then the shot was a failure do not continue for a third model in the combat (if one exists). SHOOTING EXAMPLE An Ashigaru with a yumi decides to shoot at a Samurai during the Move Phase. The Ashigaru hasn t moved and can draw a clear line of sight to the Samurai, so is eligible to shoot at him. He rolls 2d6, getting a 7, and adds his Shoot Characteristic of 1. Because the Samurai is 14 away, he subtracts 1 from this score and, finally, he subtracts an additional 1 for shooting in the Move Phase. His final Shooting Attack Roll is 6. The Samurai s basic Shooting Defence Score is 6 (as it is for all models). He adds 3 for his heavy armour giving him a final Shooting Defence Score of 9. Subtracting the Samurai s Shooting Defence Score of 9 from the Ashigaru s Shooting Attack Roll of 6 gives a Wound Score of -3, so no wound results. 16

17 Later in that turn, during the Action Phase, the Ashigaru decides to shoot again at the Samurai, who has since closed to just 5 worryingly close. This time the Ashigaru rolls 10 on 2d6, and again adds his Shooting Characteristic of 1. Because the Samurai is less than 6 away he gets a +1 modifier, but because he has already shot once this turn, there is an additional -1 modifier. This time his final Shooting Attack Roll is 11. As before, the Samurai s Defence score is 9. Subtracting this from the Ashigaru s final Shooting Attack Roll of 11 gives a Wound Score of 2. Consulting the Wound Table, this means that the Samurai has suffered a Light wound. But will this be enough to save the plucky Ashigaru archer? COMBAT PHASE During this phase models that are engaged fight in hand-to-hand combat. The key mechanic for resolving combat in Ronin is the use of Attack and Defence Counters, which are drawn from the relevant model s Combat Pool. We recommend using black and white stones such as those used in the Japanese strategy game Go, but any sort of counter that comes in two clearly distinguishable colours, shapes or sizes can be used. Before starting the game, make sure that each player is clear about which counters are which! Each player should have a pool of around half a dozen of each colour, perhaps stored in a small bowl or container. Each combat will have a number of opportunities for attack or defence by each of the models involved in the combat. It is not compulsory, however, for any attacks to be made and indeed an entire combat round may pass without this happening. All models that are in base-to-base contact with one or more enemy models are considered to be engaged in hand-to-hand combat. Up to four models may fight against a single model models in excess of this make no contribution to the combat. Sometimes more than one model from each side will become involved in a single combat. In this case, the models should be separated into a logical number of separate combats, depending on 17

18 the sequence in which they joined the combat and which models are in base-to-base contact with which. Common sense needs to be applied in these situations, and the golden rule is that only ONE side will ever have multiple combatants in any given combat. The player with Priority picks one model that he controls that is engaged, and has yet to fight this turn, and that combat is resolved. Then the other player picks a model that he controls that is in combat and resolves it, and this process continues until all combats have been resolved. Each model will only fight one round of combat under normal circumstances. Minowa Castle, 1564, by Johnny Shumate Osprey Publishing Ltd. Taken from Weapon 5: Katana: The Samurai Sword. COMBAT PROCESS 1. The player with Priority picks one model that he controls that is engaged. 2. Players secretly draw counters equal to the value of the Combat Pool of the models that they control that are involved in the combat, choosing between Attack and Defence Counters. 3. Each player then reveals his Combat Pool, placing it in front of him. 4. Initiative is determined. Each player rolls a d6 (2d6 if he chooses to Enhance, discarding one die see rules for Enhancing below) for each model that he controls in the combat, adding the relevant model s Initiative Characteristic and any other modifiers. The result is the model s Initiative score for this combat, and determines the order in which models have the opportunity to declare an attack. In the case of a draw, the models involved roll off to see who goes first, 18
19 adding no modifiers and with no further opportunity for Enhancing. If this is drawn, they roll again, and so on. 5. The model with the highest Initiative has the option to make one or more attacks (see below). However, that model may instead elect to pass and not make an attack. 6. Once this has been resolved the model with the next highest Initiative score has the opportunity to declare an attack, and so on, returning to the model with the highest Initiative. 7. Once all models have emptied their Combat Pool, or each model has passed once in succession, the combat is over. MAKING AN ATTACK 1. Nominate the model to make the attack (the Attacker) and the target of the attack (the Defender). 2. Remove an Attack Counter from the Attacker s Combat Pool. 3. The Defender may choose to Enhance his Defence Roll (see below for details). If he chooses to do so, remove one Defence Counter from his Combat Pool. 4. The Attacker may now choose to Enhance his Attack Roll (see below for details). If he chooses to do so, remove one additional Attack Counter from his Combat Pool. 5. The Attacker may choose to declare a Special Attack (see below). 6. The Attacker rolls 2d6 (3d6 if he chooses to Enhance, discarding one die see rules for Enhancing below) and adds his Fight Characteristic and any special modifiers. This is the Attack Roll. 7. The Defender rolls 1d6 (2d6 if he chose to Enhance, keeping both dice see rules for Enhancing below) and adds his Fight Characteristic, modifiers for armour and any special modifiers. This is the Defence Roll. 8. Subtract the Defence Roll from the Attack Roll this is the Wound Score. If the Wound Score is 1 or more, then a wound may have been caused. Refer to the Wound Table ( page 19). If the Wound Score is 0 or negative, the attack has failed. Modifiers to Defence Roll Target has light armour +1 Target has medium armour +2 Target has heavy armour +3 Target is engaged by 3 or more enemy models -1 ENHANCING ROLLS At certain points in the Combat Phase, a model may Enhance its roll by removing a counter from its Combat Pool. Only one Enhancement may ever be applied to a single roll. The opportunities for Enhancing and the rules governing them are as follows: Enhancing Initiative: Before the dice are rolled to determine Initiative, any model can discard an Attack Counter from his Combat Pool to roll an additional die and then choose which one to keep. Enhance Defence Roll: The Defender may choose to Enhance his Defence Roll if he has at least one Defence Counter in his Combat Pool. Remove this Defence Counter, and the player may roll an additional d6 as part of the Defence Roll. 19

20 Enhance Attack Roll: The Attacker may choose to Enhance his Attack Roll if he has at least one Attack Counter in his Combat Pool. Remove this Attack Counter, and the player may roll an additional d6 as part of the Attack Roll, and then choose which two dice are retained, discarding the third. Summary: Enhancing is different for each situation When you Enhance an Initiative Roll, you roll 2 dice and discard 1. When you Enhance an Attack Roll, you roll 3 dice and discard 1. When you Enhance a Defence Roll, you roll 2 dice and keep both. MULTIPLE COMBATS A model may never make more attacks than its Combat Pool Characteristic. As has been mentioned, in a combat where multiple models are fighting on the same side, their Combat Pools are combined. So, in order to ensure that no model expends too many Counters, it is important to keep track of which models have done what. This is best done by placing counters next to models as they expend them. Additionally, a model may expend a Defence Counter to Enhance the Defence Roll of another model, but may only ever expend Attack Counters on its own attacks. HAND-TO-HAND WEAPONS Weapon Katana (sword) Initiative Modifier Wakizashi (short sword) -1 Nodachi (two-handed sword) Attack Roll Modifier Tanto (dagger) -1-1 Naginata (halberd) Special Yari (spear) Attack Roll Modifier if mounted and making a ride-by attack. This weapon provides a +3 Initiative bonus in the first round of 20
 +1 Bo (quarterstaff) Tetsubo (long club) -1 +1 Kasurigama (sickle and chain) +1/- Weaponless -1-1 Improvised weapon -1 This weapon provides a +1 Initiative bonus in the first round")
21 Nagae-yari (pike) +3/-2 combat. However, if this same combat continues for another turn, the wielder suffers a -2 Initiative penalty for each subsequent turn. Jo (short staff) +1 Bo (quarterstaff) Tetsubo (long club) Kasurigama (sickle and chain) +1/- Weaponless -1-1 Improvised weapon -1 This weapon provides a +1 Initiative bonus in the first round of combat and +1 to any Subdue attempt. This represents fighting without a weapon, using punches, kicks and grappling techniques. Such attacks suffer an additional -1 penalty when directed against models equipped with heavy armour. WHICH WEAPON? Many models are equipped with multiple weapons in Ronin. One of these will be the model s primary weapon, which will usually be the one that the actual figure is using. However, at the start of each combat, the player controlling the model may declare that it is using a different weapon. A model may switch weapons during a combat (for example, if it is disarmed), but this will cost an Attack Counter, and the switch happens instead of the model in question making an attack. Okehazama, 1560, by Angus McBride Osprey Publishing Ltd. Taken from Elite 23: 21
22 The Samurai. SPECIAL ATTACKS There are two types of special attacks that can be made Disarm and Subdue. These attacks are declared after counters have been allocated but before Initiative is rolled. When making a Disarm attack, a model attempts to destroy or otherwise make unusable its opponent s weapon. No special rules apply, and if at least a Grievous wound is caused by the attack, it is successful. No wound is actually caused, but the defending model loses the use of the weapon it was fighting with and must use another. If it is not equipped with another weapon, it is considered weaponless. If only a Stunned or Light wound is caused, or if the attack is not successful, then there is no effect. A Subdue attack is an attempt to capture an opponent without causing it harm. As with Disarm, if at least a Grievous wound is caused by the attack, it is successful. No wound is actually caused, but the defending model cannot take any action, fight in combat, move etc. while it remains in contact with any enemy model. If more than one model is engaging the defending model when the Subdue special attack is attempted, these can contribute to the Subdue attempt by removing one additional Attack Counter for each model in addition to the first. Each additional Attack Counter adds +1 to the Attack Roll. Unlike a Disarm attack, any Light wound or Stunned result still count as normal, though the Subdue will not have worked. WOUNDS There are four types of wounds that models can suffer. These are represented by placing the relevant marker next to the model. A model may accrue any number of Stunned markers, but will only ever have one Light or Grievous wound, and never both at the same time, as is explained further below. Stunned markers are periodically removed as part of the game, but Light and Grievous wound markers remain in place for the rest of the game. WOUND DESCRIPTIONS Stunned: A minor blow that disorientates the model and stops it from acting at full capacity for a short period of time. A model may accumulate any number of Stunned results, but these do not stack with each other, so the effects are only applied once. However, because Stunned counters are removed randomly, a model may remain Stunned for more than one turn. Light wounds: These wounds only slightly affect a model s capacity to act, but are potentially serious. Grievous wound: This type of wound is very serious and may well prove fatal in time. Critical wound: These are fatal wounds. Remove the model and indicate its place on the board with a Slain marker, as the body of the fallen warrior may yet play a part in the game. WOUND TABLE Use the table below to determine whether or not a wound has been caused. Wound Score Result Effect 1 Stunned -1 to Initiative 2 3 Light wound -1 to Initiative, -1 to Fight 22
23 4 5 Grievous wound -2 to Initiative, -1 to Fight, -1 to Combat Pool, -1 to Shoot 6 Critical wound This model has been killed If a model with a Light wound suffers another Light wound, it will immediately become a Grievous wound. If a model with a Grievous wound suffers any sort of wound, it will immediately become a Critical wound. Wounds come into effect immediately, so if a model that is in combat and has yet to attack suffers a Grievous wound, its statistics (including Combat Pool) immediately drop by the indicated amount. It is up to the controlling player to decide how to reduce a model s Combat Pool when this occurs. If it has no counters left in its Combat Pool, then this effect is ignored. COMBAT EXAMPLE In this example, a Samurai armed with a naginata (controlled by Player A) is fighting 2 Ashigaru, one armed with a yari and one with a katana (controlled by Player B). The first step is to determine the Combat Pools for each side. The Samurai has a Combat Pool Characteristic of 3 and, deciding to hedge his bets, Player A secretly chooses two black counters (for Attack) and one white counter (for Defence). Player B has a Combat Pool of 4 (as both Ashigaru have a Combat Pool Characteristic of 2), and he chooses 2 counters for Attack and 2 for Defence. The next step is to determine Initiative. Player A rolls one d6 whilst Player B rolls two d6, being careful to indicate which die relates to which of his two models. The Samurai scores a 3 which, combined with his Initiative Characteristic of 3 and a +1 bonus for his naginata, gives a score of 7. The Ashigaru with the yari rolled a 4, which also gives him a total of 7, while the Ashigaru with the katana rolls a 3, giving him a total of 5. The Samurai and the Ashigaru with the yari do a straight roll off with no modifiers, with the Samurai rolling a 5 and the Ashigaru a 2. So the Samurai will have the first attack opportunity, the Ashigaru with the yari the second, and the Ashigaru with the katana will go last. The Samurai elects to attack the Ashigaru with the yari. He removes a black counter from his Combat Pool. The Ashigaru decides to Enhance his Defence Roll, so he removes a white counter from his Combat Pool. The Samurai player elects to not Enhance his Attack Roll, and so the dice are now rolled. The Samurai rolls a 4 and a 5. As he has chosen the Naginatatjutsu Attribute, he could choose to re-roll one of these dice, but he is quite happy with his score of 9. Added to his Fight Characteristic of 3 and a +1 modifier for his Naginata, this gives him an Attack Roll of 13. The Ashigaru player rolls a 4 and a 1, giving him a score of 5. He adds +2 to this for his medium armour and another 2 for his Fight Characteristic, giving him a Defence Roll of 9. The Samurai has caused a wound as the Attack Roll is greater than the Defence Roll. Referring to the Wound Table shows that a difference of 4 causes a Grievous wound. The Ashigaru with the yari will suffer -2 to Initiative and -1 to his Fight for the rest of the game. His Combat Pool is also reduced by 1, and since this takes effect immediately, Player B must discard one counter from his Combat Pool. He chooses to discard a white counter, leaving two black (attack) counters in his Combat Pool. This completes the Samurai s attack. The model with the next highest initiative is the Ashigaru with the yari. However, he has already expended a Defence Counter in his futile attempt to parry the Samurai s attack, and because of the Grievous wound that he suffered, his Combat Pool has 23
24 decreased by 1. So this model cannot make any further attacks. Therefore, it falls to the last Ashigaru, armed with a katana, to make an attack. He chooses to do so, and removes one black counter. The Samurai player, sensing the desperation of his opponent, elects to Enhance his Defence Roll, and so removes his only white counter. The Ashigaru player now elects to Enhance his Attack Roll, and so removes his last black counter. The dice are now rolled. The Ashigaru rolls three dice because it is a Enhanceed Attack. He gets a 3, 4 and 6, and discards the 3. Added to his Fight Characteristic of 2, this gives him an attack roll of 12. The Samurai player rolls 2 dice, getting a 2 and a 3. This time, he elects to use his Naginatatjutsu Attribute and re-rolls the 2, getting a 3. Hardly much better, but when adding this total of 6 to his Fight Characteristic of 3 as well as +3 for his heavy armour, it gives him a score of 12. As the scores are the same, no wound is caused. The opportunity to make another attack now returns to the Samurai. As he has a single black counter remaining, he declares an attack on the grievously wounded Ashigaru. Player B has no counters left in his Combat Pool, so it is down to the dice rolls. The Samurai rolls a 2 and a 4. He elects to use his Naginatatjutsu Attribute to re-roll the 2, but this time gets a 1, which he must keep. Added to his Fight of 3 and adding +1 for the naginata, this gives him an Attack Roll of 9. The hapless Ashigaru rolls a 4 which, added to his Fight of 2 and his medium armour gives him an 8. However, his Grievous wound means that his Fight Characteristic is at -1, reducing his Defence Roll to just 7. A Light wound has been caused which, combined with the Grievous wound, means that the Ashigaru with the yari has suffered a Critical wound. The model is removed and a Slain marker is put in its place. Things are looking grim for the remaining Ashigaru, while the Samurai is anticipating the opportunity of collecting two heads for his daimyo... ACTION PHASE During this phase, models that are not engaged may undertake one of the following actions: Use a missile weapon Reload a teppo Loot a body or collect a head Pick up an object Mount or dismount Rest Starting with the player with Priority, each player selects an eligible model and performs one of these actions until no eligible models remain. USE A MISSILE WEAPON See the rules in the Move Phase for using missile weapons. RELOAD A TEPPO The matchlock firearm known as the teppo is slow to reload once it has been fired. If a model armed with a teppo did not move, did not shoot, is not Stunned and did not fight in hand-to-hand combat this turn, it may reload. Remove the counter signifying that the teppo has been fired to denote that it is available to be fired again from the beginning of the next turn. Note that teppos are 24

25 considered to begin the game loaded and ready to be fired. LOOT A BODY OR COLLECT A HEAD Any model that is not Stunned and/or not engaged, and is also in base-to-base contact with a Slain marker, may loot that body or collect its head during this phase. PICK UP AN OBJECT Any model that is not Stunned and/or not engaged may pick up an object during this phase. This will generally be a scenario requirement. There are two types of objects. Light objects can be picked up and carried by a single model without any hindrance. Examples include weapons, banners, small boxes, and so on. Heavy objects can be picked up by a single model, but that model will be Encumbered and will move only at half pace. Alternatively, two models that are both in base-to-base contact with a heavy object may carry it without penalty. In this case, both models are activated simultaneously. Examples of heavy objects include bodies and large chests. A model that is carrying an object is assumed to drop it if engaged by the enemy. However, it can choose not to drop it, in which case it suffers a -1 penalty to all Initiative, Attack and Defence Rolls MOUNT OR DISMOUNT Any model that is not Stunned and/or not engaged may mount or dismount during this phase. Note that a model may only mount if it is adjacent to a horse and if it could normally be allowed to be fielded as mounted. See Special Rules for more information on mounted models. REST A model may rest during this phase, in which case it gains a +1 modifier when rolling to remove Stunned counters in the End Phase. END PHASE REMOVE STUNNED COUNTERS 25
26 Roll a d6 for each model that has one or more Stunned counters and apply the result shown in the table below. Apply a -1 modifier to this roll if the model is engaged in combat, and a +1 modifier if the model rested in the Action Phase. 1 2 No effect. 3 5 Remove one Stunned Counter 6 Remove up to two Stunned Counters VICTORY CONDITIONS Check to see if the Victory Conditions of the scenario have been met. 26

27 SPECIAL RULES BANNERS Large banners were common in many armies of the era, and as in other cultures were used as rallying points and to inspire troops. Certain factions in Ronin may field banners as part of their Buntai, as indicated in the Faction rules. The following rules apply to models that are carrying banners: The model may not voluntarily engage in combat. If engaged in combat by the enemy, the model suffers a -1 penalty to all Initiative, Attack and Defence Rolls. The model may only use a katana (or equivalent) in combat. If the model carrying the banner is killed, the banner is left and may be picked up by any model in the Action Phase. Banners are worth Victory Points if captured by the enemy, as detailed under Scenarios. While the banner is in the possession of a living model, the Buntai may re-roll failed Morale Tests. MOUNTED MODELS Models that are mounted on a horse have special rules for combat and movement. Mounted models may move up to 12 in the Move Phase and still engage in combat. A mounted model may make a Gallop move up to 18 as long as it does not move within 1 of an enemy model. Mounted models may not enter difficult terrain or buildings. A mounted model may also choose to make a ride-by attack (see below). 27
28 FIGHTING WHEN MOUNTED Fighting while mounted incurs a -2 penalty to the Attack Roll. Using a yumi while mounted incurs a -2 penalty to the Shooting Attack Roll. A teppo may not be used while mounted. Models with the Bajutsu Attribute will ignore these penalties. A foot model that is in combat with a mounted model may choose to attack either the mount or its rider. In mounted-versus-mounted combat, the riders must attack each other. When attacking a mount, it is considered to have a Fight Characteristic of 1 and no armour but always has Enhanced Defence Rolls. If a mount suffers a Grievous wound (or worse) then its rider is immediately thrown (see below). SHOOTING AT MOUNTED MODELS There are two ways to shoot at a mounted model. The shooter can attempt to target either the rider or the mount, which will incur an additional -1 penalty to the Shooting Attack Roll. Otherwise, before making the Shooting Attack Roll, roll a d6. On a result of 1 4 the target of the attack is the mount, and on a 5 6 it is the rider. Mounts are considered to have light armour against shooting attacks, which is automatically negated if shot at by a teppo. RIDE-BY ATTACK A ride-by attack is a special type of attack that can only be made by mounted models. Unlike other movement, this happens in the Combat Phase. To be eligible to make a ride-by attack, the model must not already be engaged and must not have moved this turn. The model is activated in the Combat Phase (ignoring the normal rule of only activating models that are in combat). The model is then moved up to 9 into base-to-base contact with one or more enemy models. A combat is fought as usual, except that all models must halve their Combat Pool (rounding up, with a minimum of one). The rider has an Initiative bonus of +1 in this combat. As soon as the combat is resolved, the mounted model may, if able, immediately move up to 9 (not passing within 1 of an enemy model). THROWN RIDERS When a rider is thrown, replace the mounted model with a foot model and give this model a Stunned counter. The mount leaves play and cannot be used again. WARHORSES Some horses are particularly suited to combat Samurai often rode ungelded stallions into battle to capitalise on the animal s natural aggression. Warhorses have a Fight Characteristic of 1, a single Attack Counter and an Initiative of 1, and fight in combat like all other models. If the combat is between two mounted models, the warhorse must attack the other mount. ATTRIBUTES Some models have exceptional skills and abilities, referred to as, that allow them to do things that other models cannot. These are generally only available to high-ranked models. There are two types of Abilities and Bujutsu (Japanese for martial art ). There are many sub-types of Bujutsu, as explained below, and each of these counts as an Attribute in its own right. ABILITIES 28
29 Acrobatic Commander Fast Fearless Inexorable Intuition Powerful Tough Yojimbo Yojimbo This model is extremely agile and not affected by Difficult terrain, and also counts Impassable terrain as Difficult terrain. Also, this model may not be attacked if it chooses to Withdraw. Finally, this model can move through friendly models so long as there is room for the model s base wherever it completes its movement. If a Buntai has at least one model with this ability, it gets a -1 Modifier on any Morale check. This model gains +1 to all Initiative Rolls and automatically wins any Initiative draws. This model ignores the results of any Morale Test. A model with Inexorable may move short distances and attack different models during a single Combat Phase. If a model with this ability kills all of the models that it is fighting in the Combat Phase (in other words, inflicts Critical wounds on them all) it may immediately move up to 2 into base-to-base contact with another enemy model. If this model still has at least one Attack Counter in its Combat pool, it may use this move to engage another enemy model. This may result in a number of situations: If the enemy model is not currently engaged and has not yet been activated this turn, then it must draw counters equal to its Combat Pool and it fights a combat. The attacking model, however, is limited to the Attack Counters that remained from the previous combat that it fought. If the enemy model is not currently engaged but has already been activated this turn, then it is allocated a single Defence Counter and the two models fight a combat. The attacking model is still limited to the Attack Counters that remained from the previous combat that it fought. If the model has no option other than to engage more than one enemy model when using this ability (i.e. moves into base-to-base contact with several models) then it must fight all of them using the rules above. This model gains one free Defence Counter each turn. This model gains +1 to all Attack Rolls. This model is particularly hardy and ignores the effects of Light wounds. However, the model still counts as having a Light wound, so if it suffers an additional Light wound it will have a Grievous wound, and so on. Additionally, if this model suffers a Critical wound it is not removed until the end of the current Combat Phase, and so may have the opportunity to make a final attack. Yojimbo is Japanese for bodyguard. Once per game, at the beginning of the turn, you may choose to physically swap this model with the Leader of its Buntai as long as the two models are within 3 of each other. Additionally, once per turn, if the highest ranking model in the Buntai is the target of a shooting attack, that attack may be directed at the model with Yojimbo instead if it is within 3. 29

30 Hachimanbara, 1561, by Wayne Reynolds Osprey Publishing Ltd. Taken from Campaign 130: Kawanakajima BUJUTSU Bujutsu literally means martial art. The study and perfection of martial skills is common in all cultures, but the Japanese are rightly famous for taking this to a new level. In Ronin there are two types of Bujutsu Bujutsu and Advanced Bujutsu. WEAPONS BUJUTSU Each type of Bujutsu is linked to a particular weapon type, giving that model an advantage when wielding that weapon. When using that weapon, the model is permitted to re-roll one Attack or Defence Roll die each time time it makes an Attack or Defence Roll (or Shooting Attack Roll if the Bujutsu relates to a missile weapon). If this ability is used in conjunction with a Enhanceed Attack Roll, the re-roll must be done AFTER the additional die is discarded. Bujutsu Weapon Special Kenjutsu Katana/wakizashi/nodachi Naginatatjutsu Naginata Sojutsu Yari Jojutsu Jo Bojutsu Bo Tetsubojutsu Tetsubo 30

31 Kasurigamajustsu Kasurigama +1 to Subdue and Disarm special attacks Jujutsu Weaponless +1 to Subdue special attacks Kyujutsu Yumi Hojutsu Teppo ADVANCED BUJUTSU Chikumagawa Ford, 1561, by Wayne Reynolds Osprey Publishing Ltd. Taken from Campaign 130: Kawanakajima Bujutsu Niten (two swords) Yadome-jutsu (arrow stopping) Bajutsu (horse riding) Senjo-jutsu (tactics) Effect This art requires the model to already have the Kenjutsu proficiency. The model may fight with a katana in one hand and wakizashi in the other, which increases the model s Combat Pool by +1. This art requires the model to already be proficient in any of the Bujustu. All attacks from yumi against this model suffer an additional -2 penalty to the Attack Roll on top of any other Modifiers. This art allows the model to fight while mounted without any penalty. This art allows the player to either re-roll the Priority die roll or force his opponent to re-roll his Priority die roll. 31
32 FACTIONS The following list of factions allows players to build a Buntai to play Ronin. Buntai means roughly squad or team in Japanese, and is used in these rules for what are loose collections of warriors. Each Faction listing has detailed rules and information about that particular faction. 100 points is enough for a small game of Ronin playable in about an hour, and for most factions this will require fewer than 10 models. Each Faction listing has the following sections: BACKGROUND A brief background for the faction. COMPOSITION This section provides rules for how many models of each type can be fielded, and also outlines limits on certain weapons, particularly missile weapons. Where the rules refer to a percentage limit on a particular weapon, always round down. For example, no more than 25% of the Models in a Bushi Buntai may be armed with teppos. So if you have 8 models, 2 may be armed with teppos. But if you have 10 models, the teppo limit is still 2. SPECIAL RULES This section details any special rules that apply to the faction with regards to weapons, Victory Points or banners. MORALE This lists the Morale Rating of the faction and any special rules relating to Morale. SWORDS-FOR-HIRE A list of the Swords-for-Hire available to this faction. No more than 25% of the number of Models in your Buntai may be Swords-for-Hire. MODEL LIST This is the complete list of models belonging to the faction and the options available to them. It is very important that the models that you field match as exactly as possible the description of the model. So if you select a Samurai with a yumi in your Buntai, then you must have a Samurai figure with a yumi to put on the tabletop! Each Buntai must have a Leader, which will always be the highest ranked model. If more than one model of the same rank is fielded, the player decides which is to be the Leader. BUSHI Having been born into the house of a warrior, one s intentions should be to grasp the long and the short swords and to die. Kato Kiyomasa ( ) BACKGROUND Bushi are the professional soldiers of this period, the Ashigaru and the Samurai. These would 32
 were the common infantry, equipped with mass-produced arms and armour by their daimyo and trained to fight en masse with yari or yumi.")
33 serve a single lord, or daimyo, who provided for their equipment and upkeep. Ashigaru (literally light foot ) were the common infantry, equipped with mass-produced arms and armour by their daimyo and trained to fight en masse with yari or yumi. Despite their lowly status, during this period of Japanese history Ashigaru could still hope to rise through the ranks, as the great general Toyotomi Hideyoshi did. Units of Ashigaru were commanded by Gashira or Gogashira captains and lieutenants. Ashigaru could be distinguished by the distinctive conical helmets (called jingasa), which often bore the mon (a type of family crest) of their daimyo. Samurai formed the elite warrior caste and trained in the use of multiple weapons. Although the paired swords and particularly the katana were closely associated with the Samurai, he was just as likely to fight with a spear or the deadly polearm known as the naginata. Samurai also trained in the use of the yumi and even the teppo. Samurai armour was more substantial and much more ornate than Ashigaru armour, and they would often wear a sashimono, a flag attached to the back plate of their armour. Samurai sought single combat with worthy opponents, rather than fighting en masse. Even the Samurai had ranks, with the elite being the hatamoto ( horse guards ) who were the bodyguards of the daimyo. Bushi are the default faction for Ronin, and historically fought against all of the other factions as well as each other! This is a strong faction and has access to the best arms and armour and a range of skills and abilities. COMPOSITION There must be at least two Rank 1 and/or Rank 2 models for each Rank 3 or higher model; OR each model in the Buntai must be Rank 3 or higher. There must be at least three Rank 1 models for each Rank 2 model (if any Rank 1 or 2 models are selected). For each Rank 4 model, there must be at least one Rank 3 model. There may only be one Rank 5 model. No more than 25% of the models may be armed with a teppo, and no more than 50% may have a missile weapon. SPECIAL RULES Models in this Faction score Victory Points in the following manner, in addition to any scenariospecific conditions: Each friendly model killed by an enemy model of a lower rank: -1 Each head of an enemy model that was collected by a Samurai still alive at the end of the game: 33
34 +1 Additionally, if the game is lost but the Bushi Leader is still alive at the end of the game, he may commit seppuku to score an additional 2 Victory Points. This may never result in the Bushi winning the game (even if the seppuku gives them the most points), but may create a draw. One Ashigaru or Ashigaru-gashira may carry a banner. A banner bearer may only use a katana, so an Ashigaru given a banner costs -3 points and loses the option of carrying a yari, nagae-yari, yumi or teppo. An Ashigaru-gashira may take a banner for no cost, but may not be given additional equipment. This banner is called a nobori and will usually display the daimyo s personal mon and other heraldic symbols. Due to the relatively high points cost of Bushi models, a player may find himself quite a few points short of an agreed points total when selecting his Buntai. He may, however, purchase up to three Fearsome Kiai options for 5 points each. Each Fearsome Kiai expended allows the Bushi player to automatically win Priority, and must be declared before any dice are rolled in the Priority Phase. If two players attempt to use Fearsome Kiai in the same turn, then roll as usual. MORALE The Morale Rating of Bushi is 9. SWORDS-FOR-HIRE Bushi may hire Ronin, Warrior Monks (limit of one) or Ninja (limit of one). If a Ninja is hired, the Bushi will suffer a -1 Victory Point penalty. MODEL LIST ASHIGARU Ashigaru Medium 18 Katana and either yari, nagae-yari, yumi or teppo None ASHIGARU-GASHIRA May be fielded with no armour for -4 points Ashigaru Medium 18 SAMURAI Katana Commander May have one of yari, nagae-yari, teppo or yumi for +3 points May be fielded with no armour for -4 points 34
35 Samurai Heavy 24 HATAMOTO Katana and wakizashi Commander and may choose one additional Attribute for +3 points May have one of naginata, nodachi, yari, tetsubo, teppo or yumi for +3 points May be fielded with no armour for -6 points. Samurai Heavy 29 BUSHOU Katana and wakizashi Commander and may choose up to two additional for +3 points each May have one of naginata, nodachi, yari, tetsubo, teppo or yumi for +3 points May be mounted on a horse for +10 points or a warhorse for +15 points May be fielded with no armour for -6 points Samurai Heavy 34 Katana and wakizashi Commander and may choose up to three additional for +3 points each May have one of naginata, nodachi, yari, tetsubo, teppo or yumi for +3 points May be mounted on a horse for+10 points or a warhorse for+15 points May be fielded with no armour for -6 points IKKO-IKKI Renounce this defiled world and attain the Pure Land Ikko-Ikki slogan, 16th century BACKGROUND The Ikko-Ikki, or Single-minded League, was the largest and most successful of a curious group of Japanese religious and social movements. Adherents of the Jodo-Shinshu Buddhist sect, the Ikko-Ikki rebelled against local daimyos and eventually gained control of 3 entire provinces. Ikko- Ikki armies were large and diverse, comprising a mixture of peasants, foot soldiers (known as Monto), warrior monks and even Samurai. Many would have ad hoc armour and weapons, but many would also be virtually indistinguishable from their Bushi equivalents. 35

36 The Ikko-Ikki fought many battles against the Bushi and Sohei. The great Samurai warlords Tokugawa Ieyasu and Oda Nobunaga eventually destroyed them as a major force in Japan. The Ikko-Ikki did not take part in the Imjin War, so never faced the Koreans or Chinese in battle. The Ikko-Ikki is a strong faction quite capable of taking on the Bushi. COMPOSITION There must be more Rank 0 and Rank 1 models than Rank 2 or higher. There must be at least 3 Rank 1 models for each Rank 2 model. There may only be one Rank 4 model. No more than 25% of the models may be armed with a teppo, and no more than 50% may have a missile weapon. SPECIAL RULES Ikko-Ikki often carried large banners into battle with Buddhist slogans on them. Any Monto or Monto-gashira may carry a banner for no cost, and may not be given any additional equipment. MORALE The Morale Rating of Ikko-Ikki is 8, or 9 if the Buntai has a banner. SWORDS-FOR-HIRE Ikko-Ikki may hire Ronin or Ninja (limit of one). MODEL LIST PEASANT 36
37 Peasant None 4 Improvised weapon None May have yari for +4 points MONTO Monto Light 13 Katana None None MONTO-GASHIRA May have one of yari, nagae-yari, teppo or yumi for +3 points May be fielded with no armour for -2 points Samurai Medium 18 SAMURAI Katana Commander May have one of yari, nagae-yari, teppo or yumi for +3 points May be fielded with no armour for -4 points Samurai Heavy 24 SOHEI Katana and wakizashi Commander and may choose one additional Attribute for +3 points May have one of naginata, nodachi, yari, tetsubo, teppo or yumi for +3 points May be fielded with no armour for -6 points Sohei Medium 26 HANSHOU Katana and one of naginata, tetsubo, yumi or teppo Fearless and may choose one additional Attribute for +3 points May be fielded with no armour for -4 points 37

38 Samurai Heavy 29 Katana and wakizashi Commander and may choose up to two additional for +3 points each May have one of naginata, nodachi, yari, tetsubo, teppo or yumi for +3 points May be mounted on a horse for +10 points or a warhorse for +15 points May be fielded with no armour for -6 points SOHEI Thereupon a monk kicked over the shield in front of him and sprang forward, whirling his naginata like a water wheel. Account of the 14th-century attack of the Mount Hei monastery on Kyoto from the Taiheiki Sohei defend Kyoto against the Ikko-Ikki, by Wayne Reynolds Osprey Publishing Ltd. Taken from Warrior 70: Japanese Warrior Monks AD BACKGROUND Sects of Buddhist warrior monks known as Sohei could be found in temples across Japan during this period. The Sohei are strongly associated with the Ikko-Ikki, but are entirely separate and predate that particular movement by many centuries. Sohei monasteries could be relatively small affairs in remote areas or the equivalent of small towns with thousands of residents. While not 38
39 fundamentally aggressive, the Sohei had no hesitation in taking up arms if they or their interests were threatened. As such, they fought in many campaigns during the Sengoku Jidai with and against the Samurai and Ikko-Ikki, though they did not take part in the invasion of Korea. Sohei wore priest-like robes over their armour, and often had shaved heads or wore a cowl. Sohei were famed for their martial skill, particularly with the naginata, but they were proficient in many other weapons, including the teppo and yumi. Though not diverse, the Sohei form a solid faction that can hold its own against the other factions. COMPOSITION There may only be one Rank 5 model. No more than 25% of the models may be armed with a teppo, and no more than 50% may have a missile weapon. SPECIAL RULES No special rules apply to the Sohei. MORALE Most Sohei are Fearless and so never check Morale. Temple Attendants test on a Morale of 7. SWORDS-FOR-HIRE Sohei may not use Swords-for-Hire. MODEL LIST TEMPLE ATTENDANT Sohei None 8 INITIATE Yari Fearless when within 3 of any model of Rank 2 or higher None Sohei Medium 19 SOHEI Katana and one of naginata, tetsubo, yumi or teppo Fearless May be fielded with no armour for -4 points Sohei Medium 26 Katana and one of naginata, tetsubo or yumi 39
40 Fearless and may choose one additional Attribute for +3 points May be fielded with no armour for -4 points SENIOR SOHEI Sohei Medium 31 Katana and one of naginata, tetsubo or yumi Fearless and may choose up to two additional for +3 points each May be fielded with no armour for -4 points GRANDMASTER Sohei Medium 36 Katana and one of naginata, tetsubo or yumi Fearless and may choose up to three additional for +3 points each May be fielded with no armour for -4 points KORYU From one thing, know ten thousand things. Miyamoto Musashi ( ), Go Rin No Sho BACKGROUND Koryu means roughly traditional school and represents the martial arts schools of medieval Japan. There were hundreds of such schools specialising in different weapons and fighting techniques, and many have survived to this day. Some Koryu would be relatively small affairs, with just a handful of students studying under a single master in a secluded place, while others would be large institutions in major population centres. Most Koryu would specialise in one particular weapon or technique, but most would also provide less intense training in others. A good example of an actual Koryu is Shinto Muso-ryu jojutsu, founded in the early 17th century by Muso Gonnosuke Katsuyoshi. The principal weapon of this art is the jo, with 6 series of kata ( forms of practice ) totalling more than 50 techniques. However, Shinto Muso-ryu practioners also trained with a number of other weapons, including the katana, wakizashi, kasurigama and walking stick. Competition between schools could often be fierce, leading to many duels both formal and spontaneous. This is a specialist faction, and its lack of armour means that it will be at a disadvantage against factions such as Bushi. COMPOSITION There may only be one Rank 5 model. SPECIAL RULES Most Koryu specialise in one type of weapon, with limited training in others. When selecting a 40
41 Koryu Buntai, one melee weapon must be chosen as the primary weapon of the Koryu from the list below, and up to two others may be chosen as secondary weapons. At least half the models in the Buntai must be armed with the Koryu s primary weapon. Although Koryu existed that specialised in missile weapons, this can be unbalancing in game terms so that option has not been included here. However, if you feel differently you are welcome to try it. Weapon Points cost per model Katana +0 Wakizashi +0 Nodachi +3 Naginata +3 Yari +3 Jo +0 Bo +0 Tetsubo +3 Kasurigama +0 Weaponless +0 The profile for each model that is eligible to have an Attribute has already been assigned the Bujutsu for the Koryu s primary weapon, and the points cost of this Bujutsu is already included in the model s cost. Other may be chosen as normal. Each model that fights in combat with its Koryu s primary weapon earns the Buntai an additional 1 Victory Point at the end of the game if it survives. MORALE The Morale Rating of Koryu is 9 as long as the Sensei is still on the table (and alive). Otherwise, it drops to 7. SWORDS-FOR-HIRE Koryu may hire a Shugyosha. MODEL LIST NOVICE Koryu None 7 INITIATE Special None None 41

42 Koryu None 14 Special Bujutsu for the Koryu s primary weapon None KOHAI Koryu None 20 SENPAI Special Bujutsu for the Koryu s primary weapon None Koryu None 26 SENSEI Special Commander, Bujutsu for the Koryu s primary weapon, and many choose one additional Attribute for +3 points None Koryu None 31 Special Commander, Bujutsu for the Koryu s primary weapon, and many choose up to two additional for +3 points each None 42

43 Japanese wako raid a Chinese village, by Richard Hook Osprey Publishing Ltd. Taken from Warrior 125: Pirate of the Far East. BANDITS What? His sword? I exchanged it in town for liquor. Tajomaru the Bandit, Rashomon BACKGROUND During the almost constant warfare of the Sengoku Jidai there were plenty of opportunities for lawless bands of criminals, pirates, refugees and deserters to prey on the weak and defenceless. This faction represents the bandits that roamed the countryside or even the pirates (known as wako) that plagued shipping on the Sea of Japan. Some wako raids on Korea and China were virtually mini-invasions. As most of its equipment will be looted or stolen, a Bandit Buntai will have a highly irregular appearance. The Leader and his lieutenants will have the best arms and armour and may even pass for low-level Samurai, though they do not have the same fighting abilities. The rest of the Buntai have a mixture of weapons and armour. Bandits would have come into conflict with all the other factions in Ronin, and no doubt could be found in Korea during the Imjin Wars as well. While not a strong faction, it is colourful and fun to play. COMPOSITION There must be more Rank 0 and Rank 1 models than Rank 2 or higher. 43

44 There may only be one Rank 3 model. No more than 10% of the models may be armed with a teppo, which may not be well maintained. On an Attack Roll of double 1 or double 2, the teppo becomes useless and may not be fired again this game. No more than 50% of the models may have a missile weapon. SPECIAL RULES This faction scores additional Victory Points for collecting loot. For every model that survives and was able to loot the body of enemy model of Rank 3 or higher, an additional 1 Victory Point is scored. MORALE The Morale Rating of Bandits is 7. If a Morale Test is failed, you may remove as a casualty any friendly model within 6 of the Leader to change the result to a pass. SWORDS-FOR-HIRE Bandits may hire Ronin. MODEL LIST PEASANT Peasant None 4 Improvised weapon None May have yari for +4 points BANDIT 44
45 Bandit Light 13 Katana None May have one of yari, yumi or teppo for +3 points May have medium armour for+2 point May be fielded with no armour for -2 points GASHIRA Samurai Light 20 LEADER Katana Commander and up to 50% of the Gashira in the Buntai may choose one additional Attribute for +3 points May have one of naginata, nodachi, yari, tetsubo, teppo or yumi for +3 points May be mounted on a horse for+10 points May have medium armour for+2 points May be fielded with no armour for -2 points Samurai Heavy 24 Katana Commander and may choose one additional Attribute for +3 points May have one of naginata, nodachi, yari, tetsubo, teppo or yumi for +3 points May be mounted on a horse for+10 points May exchange heavy armour for medium armour for -2 points May be fielded with no armour for -6 points 45

46 The capture of Pusan Fortress, by Peter Dennis Osprey Publishing Ltd. Taken from Campaign 198: The Samurai Invasion of Korea KOREANS The war is at its height wear my armour and beat my war drums. Do not announce my death. Admiral Yi Sun-shin at the Battle of Noryang, 1598 BACKGROUND Korea was the only foreign country ever to be invaded by the Samurai armies of Japan in a brutal war which caused unimaginable suffering and hardship for the Korean people. Korea was at that time a vassal state of Ming China, and although it had a large standing army, it was poorly trained, disorganised and ineptly led. Consequently, the Koreans were systematically defeated by the battle-hardened Japanese in almost every major battle. However, the Koreans did mount an effective guerrilla war against the Japanese and large parts of the country remained in Korean hands, even if many major cities and fortresses were captured. The Korean navy was considerably more successful and inflicted a lot of damage on Japanese transports and troop ships, disrupting supplies and reinforcements. Korean foot soldiers were unarmoured and, although brave, were no match for the armoured Bushi. The Koreans did appear to have had better-equipped heavy infantry and cavalry, but these troop types were relatively scarce. Many Korean monks also took up arms against the invaders. The Koreans have a good selection of troops but suffer from poor Morale. COMPOSITION There must be more Rank 0 and 1 models than Rank 3 or 4 models. There may be no more than one Rank 2 model for every four Rank 0 or Rank 1 models. There may only be one Rank 4 model. No more than 10% of the models may be armed with an arquebus and no more than 50% of the 46
47 models may have a missile weapon. If Monks are fielded, then no Heavy Cavalry or Heavy Infantry may be used. SPECIAL RULES Koreans score one additional Victory Point for each Samurai model that is killed. Some Korean models may be armed with a flail, which adds +2 to the Attack Roll but -1 to Initiative. One Korean Soldier or Monk may be equipped with a banner for no cost. This Model may not have any additional equipment. MORALE The Morale Rating of Koreans is 7. SWORDS-FOR-HIRE No Swords-for-Hire may be selected. MODEL LIST PEASANTS Peasant None 4 SOLDIER Improvised weapon None None Soldier None 11 MONK Sword None May have one of spear, arquebus or bow for +3 points Monk None 13 CAPTAIN Sword Fearless May have one of spear, arquebus or bow for +3 points 47
48 Soldier None 14 Sword Commander May have one of spear or bow for+3 points May have shield (light armour) for+1 point HEAVY INFANTRY Soldier Heavy 23 HEAVY CAVALRY Sword and shield May choose one Attribute for +3 points May exchange shield (armour becomes medium) for one of bow, spear or halberd for +3 points May exchange shield (armour becomes medium) for an additional sword (Combat Pool increases to 4) for no cost Soldier Medium 31 COMMANDER Sword and horse May choose one Attribute for +3 points May have one of flail or bow for+3 points May have an additional sword (Combat Pool increases to 4) for +3 points Soldier Heavy 28 Sword and shield Commander and may choose up to two additional for +3 points each May exchange shield (armour becomes medium) for one of bow, spear or halberd for+3 points May exchange shield (armour becomes medium) for an additional sword (Combat Pool increases to 5) for no cost. May be mounted on a horse for +10 points MING CHINESE The opportunity to secure ourselves against defeat lies in our own hands, but the opportunity of defeating the enemy is provided by the enemy himself. Sun Tzu BACKGROUND 48

49 Even before the Japanese invasion of Korea, the Ming Chinese were accustomed to Japanese aggression. Large-scale pirate raids often targeted the Chinese mainland, some so large that they almost amounted to mini-invasions. When the Japanese invaded Korea in 1592, the Ming government was distracted by two separate rebellions elsewhere and was subsequently slow to react. It was almost three months before the first Chinese forces marched into Korea, and another 6 months of bitter fighting before the Japanese began to be driven back. A second Japanese invasion in 1597 initially regained lost ground, but the combined might of China and Korea was eventually too much for the outnumbered Japanese. Ming troops, by Christa Hook Osprey Publishing Ltd. Taken from Men-at-Arms 307: Late Imperial Chinese Armies The Ming Chinese were well-armed and well-led. They had access to firearms as well as cannon, and could draw upon bow-armed steppe cavalry. This is a strong faction and a good match for Bushi. COMPOSITION There must be more Rank 0 and Rank 1 models than Rank 3 or 4 models. There may be no more than one Rank 2 model for every four Rank 0 or Rank 1 models. There may only be one Rank 4 model. No more than 25% of the models may be armed with an arquebus, and no more than 50% of the models may have a missile weapon. SPECIAL RULES One Soldier may be equipped with a banner for no cost. This model may not have any additional equipment. 49
50 MORALE The Morale Rating of Ming Chinese is 9. SWORDS-FOR-HIRE No Swords-for-Hire may be selected. MODEL LIST SOLDIER Soldier Medium 15 LIGHT CAVALRY Sword None May have one of spear, arquebus or bow for +3 points Soldier None 28 CAPTAIN Sword, bow and horse Bajutsu None Soldier Medium 18 HEAVY INFANTRY Sword and shield Commander May have one of spear or bow for +3 points Soldier Heavy 23 HEAVY CAVALRY Sword and shield May choose one Attribute for +3 points May exchange shield (armour becomes mec halberd for +3 points May exchange shield (armour becomes medium) for an (Combat Pool increases to 4) for no cost s of bow, spear or additional sword 50
51 Soldier Medium 34 Sword, spear and horse May choose one Attribute for +3 points None COMMANDER Soldier Heavy 28 Sword, and shield Commander and may choose up to two additional for +3 points each May exchange shield (armour becomes medium) for one of bow, spear or halberd for +3 points May be mounted on a horse for +10 points PEASANTS What do you think of farmers? You think they re saints? Hah! They re foxy beasts! Kikuchiyo, Seven Samurai BACKGROUND Common farmers would often be caught up the wars of this time, usually coming off second-best. The classic film Seven Samurai tells the story of a group of peasants who fight back, hiring ronin to assist them. This final Buntai is not particularly powerful, but has plenty of character! COMPOSITION At least 30% of points must be spent on Peasants. SPECIAL RULES This Buntai scores additional Victory Points for collecting loot. For every model that survives and was able to loot the body of an enemy model of Rank 1 or 2, an additional ½ Victory Point is scored. Each model that survives and has looted an enemy model of Rank 3 or higher earns his Buntai an additional 1 Victory Point. MORALE The Morale Rating of Peasants is dependent on the degree to which they outnumber the enemy Buntai. If the ratio of Peasant models to enemy models is at least 3:1, then Peasant Morale is 8. If it is less than 3:1 but more than 2:1, then Morale is 7. If it is less than 2:1, it is 6. SWORDS-FOR-HIRE Any number of Ronin and/or up to one Warrior Monk or Shugyosha may be hired. MODEL LIST 51
52 PEASANT Peasant None 4 Improvised weapon None May have yair for +4 points SWORDS-FOR-HIRE Even bears come out of the woods when they re hungry villager, Seven Samurai The models in this section may join certain Buntai as individuals or in small groups. These models will not be subject to any special scoring rules and are not counted when determining Buntai composition. RONIN Ronin were masterless Samurai, often down on their luck. They roamed Japan during the Sengoku Jidai as mercenaries, bodyguards and, occasionally, bandits. SPECIAL RULES Ronin are unreliable. If the Morale level of the Buntai is Wavering, roll a d6 for each Ronin. On a roll of 4+, that Ronin model will use its activation to move at maximum speed towards the nearest table edge until it has left the table. If it is in combat, it will Withdraw. If the Morale of the Buntai drops to Routing, Ronin will automatically follow the procedure described above. You may only ever field one Senior Ronin and only if you have already selected at least two other Ronin. 52

53 RONIN Samurai None 17 SENIOR RONIN Katana and wakizashi May choose up to two for +3 points each May have one of naginata, nodachi, yari, tetsubo, teppo or yumi for +3 points May have light armour for +2 points May have medium armour for +4 points May have heavy armour for +6 points Samurai None 22 Katana and wakizashi Commander and may choose up to three additional for +3 points each May have one of naginata, nodachi, yari, tetsubo, teppo or yumi for +3 points May have light armour for +2 points May have medium armour for +4 points May have heavy armour for +6 points WARRIOR MONK The warrior monks of Japan fought for and against the Samurai and Ikko-Ikki. One of the most 53
54 famous of these was Benkei, who lived in the 12th century and became the companion and bodyguard of the Samurai Minamoto no Yoshitsune. Warrior monks were famous for their use of the Naginata. SPECIAL RULES Sohei are Fearless and so never check Morale. WARRIOR MONK Sohei Medium 26 Katana and one of naginata, tetsubo or yumi Fearless and may choose up to two additional for +3 points each May be fielded with no armour for -4 points SHUGYOSHA Great martial artists such as Miyamato Musashi could be found wandering throughout Japan during this period, testing their skills against other warriors, gathering disciples or seeking enlightenment. These men were known as shugyosha. Some would dress simply, almost as beggars, while others would wear flashy clothes and loudly proclaim their martial virtues wherever they went. Sometimes these individuals would lend their skills to a particular fight. You may only ever field one Shugyosha. SHUGYOSHA Shugyosha None 28 Katana Commander and may choose up to four additional for +3 points each May exchange katana for jo, bo or kasurigama at no cost May exchange katana for naginata, nodachi or tetsubo for +3 points NINJA Ninja were spies, saboteurs and assassins. Although popular culture depicts them dressed in black, in reality they would have taken on any guise necessary to fulfil their mission. So if you field a Ninja, it can take the form of a specific model in your Buntai, leaving your opponent guessing as to who it is! SPECIAL RULES You may only ever field one Ninja, but you do have the option of fielding it as disguised or undisguised. If you are fielding an undisguised Ninja, then use the profile below. After both sides have deployed, you may place the Ninja model anywhere on the board, provided it is not within 6 of an enemy model. If you are fielding a disguised Ninja, then it will take the place of a Rank 0 or 1 model of your choice and will be deployed with the rest of your Buntai. You do not need a special model for a 54
55 disguised Ninja it will appear exactly as a normal model of that type. Before the game starts, you must declare that you are fielding a Ninja and set aside a piece of paper with a description of which model is the Ninja. Of course, you may also choose to declare that you are fielding a Ninja even if you are not, just to give your opponent some food for thought! However, this will earn you a -1 Victory Point penalty at the end of the game. You may choose to conceal the Ninja s identity for as long as you wish, even to the extent of under-representing the Combat Pool and Fight Characteristic of the Ninja in combat. You can at any point declare the presence of the Ninja, confirming this fact by showing the note you had written before the game. If the Ninja is in combat with any model at the moment of its declaration, the opposing model (or models) immediately loses one counter from its Combat Pool of your choice. UNDISGUISED NINJA Ninja Light 26 Katana and shuriken Acrobatic and one Bujutsu May exchange katana for kasurigama at no cost DISGUISED NINJA Ninja As model 26 Shuriken and all the equipment of the model it is impersonating Acrobatic and one Bujutsu None A SAMPLE BUNTAI A player decides to build a Bushi Buntai starting at 100 points, which he will later expand. His first selection is an Ashigaru armed with a teppo for 18 points. He then adds an Ashigaru with yumi for another 18 and two Ashigaru with yari for 36 points. He has 28 points left and so selects a Samurai with Kenjutsu for 27 points, who is also a logical leader for his Buntai. His Buntai consists of the following models: 55

56 1 Ashigaru with teppo 18 points 1 Ashigaru with yumi 18 points 2 Ashigaru with yari 36 points (18 points each) 1 Samurai with Kenjutsu 27 points Total 99 points To expand his small force up to 200 points, he decides to add a Hatamoto with naginata, Naginatajutsu and the Powerful Ability, and a Samurai with yari and Sojutsu. These expensive but potent models come in at a total of 65 points. To add some additional support, and to make the list conform to its composition rules, he includes another two ashigaru one with a teppo and one with a yumi for another 36 points. 2 Ashigaru with teppo 36 points (18 points each) 2 Ashigaru with yumi 36 points (18 points each) 2 Ashigaru with yari 36 points (18 points each) 1 Samurai with Kenjutsu 27 points 1 Samurai with yari and Sojutsu 30 points 1 Hatamoto with naginata, Naginatajutsu and Powerful 35 points Total 200 points 56
57 SCENARIOS SETTING UP THE GAME PLAYING AREA The size of an ideal playing area for a 100-point game of Ronin is 24 x24. For larger games of between 100 and 200 points, a playing area of 36 x36 is recommended. For very large games of more than 200 points, at least 48 x48 is recommended. TERRAIN Terrain is an important part of Ronin, providing cover for models and defining the battlefield. It also looks good, vastly adding to the aesthetic enjoyment of the game. Each scenario has recommendations for the terrain to be used and there are rules for the placement of this terrain. However, many players prefer to simply randomly put some terrain on the table and then get playing, and this is a perfectly acceptable approach. RANDOM TERRAIN PLACEMENT 1. First, determine the location of the battle and therefore the type of terrain by rolling on the following table: D6 roll Location of Battle Terrain Examples 1 Urban Houses, walls, gardens 2 3 Rural Fields, rice paddies, farmhouses, streams 4 5 Wilderness Forests, marshes, hills, rivers 6 Mixed Roll twice more, ignoring further rolls of 6, and split the terrain evenly between the two results 2. Next, determine the number of terrain pieces: d3+3 for a game up to 200 points in size and d3+5 for game of more than 200 points. 3. The size of the terrain pieces is determined as follows. Small terrain pieces are anything smaller than 6 in diameter, whilst large pieces are up to 12 in diameter. The size of terrain pieces is going to vary considerably, so use your discretion on how you decide to classify it. Total number of terrain pieces Number of large terrain pieces Number of small terrain pieces Terrain is then placed randomly by dividing the playing area into quarters. Both players roll a d6 (re-rolling draws) and the player with the highest score places one piece of terrain in each 57

58 of three different quarters of his choice. The second player may then move two of these terrain pieces by up to 6. The second player then places the next three pieces, again no more than one to a quarter, and the first player may then move two of these new pieces by up to 6. Finally, the first player places any remaining terrain, again no more than one per quarter, and the second player may move up to two of these by up to 6. WEATHER Some scenarios will be affected by different types of weather. If you decide to use weather, roll a d6 and consult the table below: D6 roll Weather Effect 1 2 Heavy Mist Line of sight is reduced to Rain Line of sight is reduced to 24. Teppo may only be fired once 5 6 Wind All yumi suffer an additional -1 penalty on Attack Rolls TIME OF DAY Not all battles take place during the day. If you wish to change the time of day, roll a d6 and consult the table below: D6 roll Time of Day Effect 1 2 Night Line of sight is reduced to Dusk Line of sight is reduced to 18 in Turn 3 and to 12 from Turn 4 onwards 5 6 Dawn Line of sight is 18 in Turn 1 and 2, and unrestricted thereafter VICTORY POINTS The winner of a battle will be determined by the number of Victory Points that are earned. Some Factions and scenarios have special Victory Point conditions, but these general rules apply to most scenarios: Each side gains Victory Points equal to the Rank of each enemy model killed (Rank 0 Models are worth 0.5 points each). 58

59 Captured enemy Banners are worth 5 Victory Points. Each enemy model that has Routed and left the table is worth Victory Points equal to half its Rank. DEPLOYMENT RULES There are a number of different deployment options. Edges Once terrain has been placed, both players roll a d6. The player with the highest roll selects one table edge and deploys his figures up to 2 in from that edge. The second player then does likewise on the opposite edge. Corners Once terrain has been placed, both players roll a d6. The player with the highest roll selects one table corner and deploys his figures up to 6 in from that corner. The second player then does likewise on the opposite corner. Reserves If the Reserves rule is used, then each player may only deploy half of his models (rounding up), with the other half being kept off-table. Half of these reserve models (rounding up) may move onto the table during the Move Phase of the second turn. All remaining models may move onto the table during the Move Phase of the third turn. SKIRMISH SCENARIO DESCRIPTION In this generic scenario, two forces of equal size meet and fight a battle. SCENARIO RULES Forces: Both sides select a force of equal points value. Terrain: Use the standard terrain placement rules. Weather: Roll a d6. On a 5 or 6, roll again on the weather table. Otherwise, the weather will have no effect on the game. Time of Day: Roll a d6. On a 6, roll again on the time of day table. Otherwise the engagement takes place during daylight hours. Deployment: Both players roll a d6. The player who rolls highest chooses either Edge or Corner deployment. Reserves may be used if both players agree. 59
60 VICTORY POINTS Standard Victory Points are used. Additionally, each side must roll on the following table to determine a minor objective. Achieving this Minor Objective is worth 5 Victory Points. D6 roll Minor Objective 1 Capture any enemy model of at least Rank 2 2 Control the table by having the most models in each table quarter 3 Kill the enemy Leader 4 Lose no more than 25% of your force 5 Kill more than 75% of the enemy Buntai 6 Same Minor Objective as opponent. If both players roll a 6, neither has a Minor Objective. GAME LENGTH The game lasts for d6+6 turns (determined at the start of the game) or until one side withdraws, concedes or is destroyed. CAPTURE SCENARIO DESCRIPTION In this scenario both sides attempt to take control of an objective. This may be a religious artefact, the body of a slain commander, a treasure trove or something of equivalent value that is worth fighting over. SCENARIO RULES Forces: Both sides select a force of equal points value. Terrain: Use the standard terrain placement rules. The objective must be placed in the exact centre of the board, inside or on top of any terrain that may be present. Weather: Roll a d6. On a 5 or 6, roll again on the weather table. Otherwise, the weather will have no effect on the game. Time of Day: Roll a d6. On a 6, roll again on the time of day table. Otherwise the engagement takes place during daylight hours. Deployment: Edge deployment. Reserves are not used. VICTORY POINTS Both sides are attempting to take control of the objective, which counts as a heavy object. To count as having control, a model must be in base-to-base contact with the objective and not be engaged or two friendly models must be carrying the objective and not be engaged. If one side controls the objective at the end of the game (or has been able to remove it from the board), it gains an additional 5 Victory Points. GAME LENGTH The game lasts for 8 turns. 60

61 DUEL SCENARIO DESCRIPTION Duels were common in Japan during this period, and ranged from highly formal pre-arranged affairs between two individuals to spontaneous brawls. This scenario represents such a duel, initially between just two models, but eventually the entire Buntai will be drawn in. SCENARIO RULES Forces: Both sides select a force of equal points value. Terrain: Use the standard terrain placement rules, except that a 12 circular area in the middle of the table must be left clear of all terrain. Weather: Roll a d6. On a 5 or 6, roll again on the weather table. Otherwise, the weather will have no effect on the game. Time of Day: Roll a d6. On a 6, roll again on the time of day table. Otherwise the engagement takes place during daylight hours. Deployment: Roll a d6. The player who rolls highest places his nominated duellist (see below) at some point on the edge of the duelling area and the rest of his models within 6 of the duellist but not within the duelling area. The other player follows the same procedure. Roll a d6 once more to see which player goes first. VICTORY POINTS Standard Victory Points are used, along with the special modifiers below. GAME LENGTH The game lasts for d6+6 turns or until one side withdraws, concedes or is destroyed. SPECIAL RULE: DUELLISTS At the start of the game, each player nominates one model from his Buntai to be his duellist. The 61
62 duellists from each side will initially be the only models allowed inside the duelling area and will be the only models that fight. If a duellist is critically injured, another model can be nominated to replace it and may use its next movement to enter the duelling area. This model is now considered a duellist. For the first 2 turns, only the duellists may be activated and they may not use any missile weapons. All other models must remain where they are deployed. From Turn 3, all models may be activated as normal. Certain actions will count as negative Victory Points. The first non-duellist model to attack another model (either in hand-to-hand or with shooting, whether successful or not) will incur -2 Victory Points. The first non-duellist model that enters the duelling area will incur -2 Victory Points. DEFENCE SCENARIO DESCRIPTION In this scenario, one side attempts to defend a strategic point at any cost. This may be a shrine, a hill, a building or something similar. The attacking side gets twice as many points as the defending side, and must wrest control of the objective. SCENARIO RULES Forces: Determine which side is attacking and which side is defending (roll randomly if necessary). The Attacker has twice as many points as the Defender. Terrain: Use the standard terrain placement rules. However, a small piece of terrain that will act as the objective must be placed in the centre of the table, and no other terrain piece may be within 8 of this. This terrain piece must be substantial enough to provide heavy cover. Weather: Roll a d6. On a 5 or 6, roll again on the weather table. Otherwise, the weather will have no effect on the game. Time of Day: Roll a d6. On a 6, roll again on the time of day table. Otherwise the engagement takes place during daylight hours. Deployment: The defending side deploys first and must place all of its models within 12 of the objective. The Defender then nominates the table edge along which the Attacker will deploy. The Attacker uses the Reserves rule. VICTORY POINTS Standard Victory Points are used. Additionally, the side that controls the objective gets an additional 10 Victory Points. GAME LENGTH The game lasts for d6+6 turns or until one side withdraws, concedes or is destroyed. ASSASSINATION SCENARIO DESCRIPTION In this scenario, one side attempts to foil an assassination attempt by a group of Ninja controlled by the other. 62
63 SCENARIO RULES Forces: The defending player selects 150 points of models. The attacking player fields 1 Chunin and 5 Ninja, using the profiles provided below. Terrain: Once the location of the battle and number of terrain pieces are determined, the attacking player deploys all of the terrain. The defending player may then move half of the terrain pieces by up to 6. Weather: Roll a d6. On a 5 or 6, roll again on the weather table. Otherwise, the weather will have no effect on the game. The Attacking player may choose to re-roll the initial roll OR the roll on the weather table, but must abide by the second roll. Time of Day: Roll a d6. On a 6, roll again on the time of day table. Otherwise the engagement takes place during daylight hours. The Attacking player may choose to re-roll the initial roll OR the roll on the time of day table, but must abide by the second roll. Deployment: This game is played on a 36 square table. The attacking player deploys all of the defending players models within 12 of the centre of the table, and then all of his own models anywhere on the table, but no nearer than 9 to any of the defending player s models. The defending player may then move no more than half of his models up to 6. Finally, the attacking player may re-deploy two of his models anywhere he wishes. VICTORY POINTS The Attacker s objective is to kill the Defender s Leader the Defender s objective is to prevent this. No other scoring criteria are used. GAME LENGTH The game lasts for d6+6 turns or until one side withdraws, concedes or is destroyed. SPECIAL RULE: NINJA The attacking player uses the following profiles for his Buntai of 1 Chunin and 5 Ninja. The attacking player automatically wins priority on the first turn. Ninja do not have to check Morale. NINJA Ninja Light n/a CHUNIN Katana and shuriken Acrobatic and Kenjutsu Ninja Light n/a Katana and shuriken Acrobatic and Kenjutsu TOURNAMENT 63
64 SCENARIO DESCRIPTION In this scenario, two Buntai fight a series of formal matches to determine which is the stronger. This is a special type of scenario, as only two models will ever be fighting at one time, and terrain does not play a part. The tournament may take place in a large room, the courtyard of a fortress or a clearing in a wilderness setting. SCENARIO RULES Forces: This scenario does not use points. Both players agree on the number of models and the ranks of the models that will participate in the tournament. These models may then be equipped in any way that is permitted by their lists. Terrain: This scenario does not require terrain except for aesthetics. All that is required is a 12 circular duelling area. Weather: The weather is fine, there is no need to roll. Time of Day: This engagement takes place during daylight hours or inside a well-lit building. Deployment: Deployment is not used. VICTORY POINTS No Victory Points are used see Special Rule: The Tournament, below. GAME LENGTH The game lasts until one side withdraws, concedes or is destroyed. SPECIAL RULE: THE TOURNAMENT Each player secretly records the order in which his models will fight. When both players have done this, the first model from each side will fight a match. Each match lasts for 6 turns, or until one model is killed. At the end of 6 turns, if both models are still alive, the winner is the model that has scored the most match points, where a Light wound is worth 1 match point, a Grievous wound is worth 2 and a Critical wound is worth 3. If both models have the same number of match points or none were scored, the match is draw. 64

65 Ninja assault a castle, by Wayne Reynolds Osprey Publishing Ltd. Taken from Warrior 64: Ninja AD The winner of the scenario is the side that won the most matches. If both sides are equal, the winner is the side that scored the most match points. If this is also equal, the two highest ranking surviving models on each side fight another match, with no time limit. The winner of this final match is the winner of the tournament. DEFEND THE VILLAGE SCENARIO DESCRIPTION In this scenario, one Buntai is tasked with defending a group of civilians from the other Buntai. These civilians are mostly helpless, but some will show some fight if attacked by the enemy. SCENARIO RULES Forces: Both sides select a force of equal points value. For every 25 points, one civilian model is required. Roll a d6 to determine which side is the Attacker and which side is the Defender. Terrain: The Defender places the terrain. At least one building is ideal. Weather: Roll a d6. On a 5 or 6, roll again on the weather table. Otherwise, the weather will have no effect on the game. Time of Day: Roll a d6. On a 6, roll again on the time of day table. Otherwise the engagement takes place during daylight hours. Deployment: The Defender deploys his entire force first, along with the civilians, anywhere on 65
66 the table. The Attacker then deploys his entire force anywhere within 3 of a table edge (models do not necessarily have to be grouped together). VICTORY POINTS Standard Victory Points are used. In addition, for each civilian model left on the board at the end of the game the Defender gains +3 Victory Points. For each civilian slain, the Attacker gains +3 Victory Points. GAME LENGTH The game lasts until one side withdraws, concedes or is destroyed. SPECIAL RULE: CIVILIANS Civilian models will not deliberately engage an enemy model in combat. If a civilian model is engaged, roll a d6. On a result of 1 3, the civilian is considered to have a Fight and Combat Pool of 0. On a 4 6, the civilian has the Characteristics below: Peasant None n/a Improvised weapon None Civilians many move up to 6 in the Move Phase if there is friendly model within 6 of them, but they may not leave the board. 66
67 CAMPAIGNS Campaigns add a lot of enjoyment to wargaming. This brief campaign system allows two players to play a number of linked games. Each player builds a master roster up to an agreed number of points 300, for example. Each player must then secretly prepare three small Buntai, using only models from the master roster. Normal composition rules may be ignored for the small Buntai, but not the master roster. Each small Buntai must be between 25% and 50% of the total points cost of the master roster. Each player then secretly assigns one of these Buntai to one of the following scenarios Skirmish, Capture and Defend. Players then play each of these scenarios, recording the models that are killed and wounded. All surviving models on both sides then compete in another Skirmish battle to determine the winner of the campaign. Models that end their initial game with a Light wound may be used in the final battle. Models that suffer a Grievous wound are only available on a roll of 4+ on a d6. PROGRESSION If you have regular games against the same opponents, you may decide to allow progression, where models gain experience in battle and develop their skills, eventually increasing in Rank. Some of the greatest warriors of this period began life as lowly Ashigaru. All models start with 0 Experience. Experience is gained in the following way: Surviving a battle: +1 Inflicting a Light wound (or worse) on an enemy model of equal or greater Rank: +1 Capturing a banner: +1 Models may then spend Experience to progress to the next Rank. The cost of progressing from one Rank to the next is as follows: 67

68 Rank 0 to Rank 1: 5 points Rank 1 to Rank 2: 5 points Rank 2 to Rank 3: 5 points Rank 3 to Rank 4: 10 points Rank 4 to Rank 5: 15 points Models that go up a Rank automatically gain the and options available to their new Rank. All existing are retained. This may lead to a model having more than a model of similar Rank. Progression is not mandatory you may choose to leave a model at the same Rank. With most factions, movement from one Rank to the next is obvious. Bushi, for example, only have one type of model of each Rank. The exceptions are detailed below: Ikko-Ikki: a Monto may progress to become a Sohei, but a Sohei will progress to become a Senior Sohei (as detailed under the Sohei Faction) and then to a Grandmaster. Koreans: a Captain may choose to progress to become either Heavy Cavalry or Heavy Infantry. Ming Chinese: a Captain may choose to progress to become either Heavy Cavalry or Heavy Infantry. Only a Soldier equipped with a bow may progress to become Light Cavalry, and this model must gain enough Experience to jump two levels before it progresses again, when it will become Heavy Cavalry. 68

69 TOURNAMENTS Tournaments are a good way to play a number of games in one day against different opponents and forces. The standard format is the well-known Swiss Draw system, where players are randomly decided in the first round and then allocated against opponents with a similar win/loss ratio from there on. Performance in any Ronin tournament should be decided on the number of wins, with accrued Victory Points used as a tie-breaker. More adventurous tournament organisers may like to try a different method by requiring each player to submit an army that is substantially larger than the game sizes, and then manage the casualties suffered throughout the course of the tournament. For example, for a 150-point tournament players may be allowed to bring a 400-point roster, and select 150 points of models from it at the beginning of each game. The composition of the roster must comply with the composition rules for the faction. The compositions of each 150-point Buntai must also comply with the composition rules as closely as possible, though the wounds suffered by models during the games may make this impossible (see below). In this situation, each Buntai must align with the composition rules as closely as possible. Models that end each game with wounds may not be available for the next. Models with Stunned counters or Light wounds are considered healthy again for the next game, but Models that suffer a Grievous wound must rest for one game, after which they are considered back to full heath again. Models that are slain are no longer available. 69
70 ADVANCED RULES The following rules add an extra level of complexity and record-keeping to the game of Ronin, so not all players may wish to use them. They do, however, add an extra dimension to the game and so are included here as optional advanced rules. FATIGUE Combat is an exhausting experience, more so than all other activities, and may lead to a model becoming fatigued. To use Fatigue, each model gains an extra Characteristic called Resilience. The Resilience Characteristic of all models of Rank 0, 1 and 2 is 7; Rank 3 and 4 models have a Resilience of 8; and Rank 5 models have a Resilience of 9. Fatigue is checked in the End Phase after Stunned counters are removed, in the order described below: 1. Remove Fatigue counters: Each model that did not fight in combat this turn and has at least one Fatigue counter may remove d3 Fatigue Counters. 2. Check for Fatigue: For each model that did fight in combat this turn, roll 2d6 and compare the sum of the two dice with the model s Resilience Characteristic. If this number is lower than or equal to the Resilience of that model, it has passed its Resilience Test for this turn and suffers no ill effects. However, if the result is higher, the model gains a Fatigue counter. The following modifiers apply to this roll: o Model already has at least one Fatigue counter: +1 o Model has a Grievous wound: +1 o Model Rested during the Action Phase: -2 A model that has at least one Fatigue counter is Fatigued, and suffers -1 to its Initiative and Shoot Characteristics. NEW ATTRIBUTE: TIRELESS If you decide to use Fatigue in your games, then include this new Attribute. Models with Tireless do not accumulate Fatigue. 70
71 APPENDIX OTHER PERIODS This appendix provides some brief guidelines on using Ronin to wargame other key periods of Japanese history. While not full-blown lists, there is sufficient information to play these periods. As with the main game, players are encouraged to come up with their own rules and variations. KAMAKURA PERIOD The most significant events of the Kamakura Period of Japanese history (roughly AD) were the two Mongol invasions in 1274 and The Mongol emperor Kublai Khan had already subjugated the Korean peninsula and sent a number of envoys to Japan in the late 1260s to demand that it became a vassal state. Not unexpectedly, the Japanese refused, leading to the first Mongol invasion in The Mongol armies initially made significant progress against the Samurai, but made the catastrophic decision to re-embark their army to ride out a large storm. Many of their ships were sunk along with a large proportion of their army, and they were eventually forced to withdraw. The Japanese were much better prepared for the second invasion in 1281, having reorganised their forces and fortified sections of the coast. The Mongols made little progress this time before a massive typhoon almost completely destroyed their fleet. The Samurai of this period favoured the bow over other weapons and, in melee, sought single combat whenever possible. The Mongols, on the other hand, had advanced tactics and exotic weapons such as hand grenades. There was no faulting the bravery of the Japanese, who even resorted to rowing out to the Mongol fleet in small fishing boats to attempt desperate and often suicidal boarding missions. FACTIONS BUSHI The existing Bushi list may be used for the Japanese of this period, with the following adjustments: All Samurai may only be equipped with medium armour, resulting in a points adjustment of -2. Samurai must select Kyujutsu or Bajutsu before any other attribute is selected. Two Samurai may not combine to engage a single enemy model. Teppo may not be selected. Ashigaru (called Retainers in this period) may only be equipped with light armour, resulting in a points adjustment of -2. Ninja may not be selected as Swords-for-Hire. MONGOLS The Mongol army was very diverse, including both Korean and Chinese troops. The Mongols may use any models from the Ming Chinese list as well as Soldiers and Captains from the Korean list. The following adjustments apply: The Morale Rating of the Mongols is 9. No models may be equipped with arquebus, but models that could normally be equipped with arquebus may be equipped with a single grenade for the same points cost. Special Rules: The Mongols used an early version of a grenade an earthenware pot packed with gunpowder and shrapnel. Grenades have a range of just 6 and can only be used once. To use a 71

72 grenade, the attacker selects a target point and then makes a standard Shooting Attack against that location (which obviously does not have any armour, though it may be in cover). If the attack is unsuccessful, the fuse of the grenade has gone out or something else has gone wrong and there is no effect. If the attack is successful, then all models that are at least partially within 2 of the target point must roll a d6 and add their armour modifier to the result (light +1, medium +2, heavy +3). Subtract the resulting score from 7 and refer to the Wound Table to see if a wound has been suffered. BANDITS The existing Bandit list may be used, but no teppo or heavy armour may be selected. SOHEI The existing Sohei list may be used, but no teppo may be selected. LATE EDO PERIOD The end of the 19th century saw massive changes in Japanese society. After centuries of selfimposed isolation, the country was forced to open up to the outside after the intervention of an American warship. The Shogunate began to slowly disintegrate and the country was rocked by two significant civil wars the Boshin War and the Satsuma Rebellion. These conflicts saw traditional Bushi fight with and against European-trained rifle-armed infantry, and in at least one case a Westerner donned Samurai armour and fought alongside the Japanese (though he was French, not American!). SPECIAL RULES REVOLVER A revolver has a maximum range of 12, and suffers a -1 penalty to hit for distances over 6. However, like a yumi it can be fired repeatedly and models that are targeted by a revolver treat their armour as one class worse (heavy armour is considered medium, and so on). RIFLE From the 1840s modern firearms began to be imported into Japan, replacing the outdated matchlock teppos. Rifles may be fired every turn (but only once) whether the model moves or not, and their targets do not gain any benefits from light or medium armour, while heavy armour is 72
SAMURAI INFANTRY. Name QUA TYP STR RES WOR ARM WEA MOV SAV TER BAD PTS UPG MIN MAX. Infantry Poor Disc md 2h 15 no no night 3 +1med 5 20
 SAMURAI The Samurai belong to the faction known as "Good". Allies, Mercenaries and Auxiliaries: The army of the Samurai can deploy either the Ikko-Ikki or the Ninja as regular units and characters of the
NIPPON/SAMURAI TRIAL RULES by Robert S. Waller Last Update:
 NIPPON/SAMURAI TRIAL RULES by Robert S. Waller cpbelt@att.net Last Update: 11-11-02 BACKGROUND: I have based these rules on historical Japan c1550-1600, commonly called the Sengoku civil war period, which
HEROIC SAMURAI. One Brain Cell Rules for Clan Feuding in Classical Japan Version 1.01 January 2007
 HEROIC SAMURAI One Brain Cell Rules for Clan Feuding in Classical Japan Version 1.01 January 2007 In the Beginning These are rules for playing a wargame with toy soldiers. It is intended for several players
A Splendid Victory! Copyright. Trevor Raymond. Version 3: May, 2012 (Exodus 20:15 - Thou shall not steal.")
") A Splendid Victory! Copyright. Trevor Raymond. Version 3: May, 2012 (Exodus 20:15 - Thou shall not steal.") Page 1 of 28 A Splendid Victory is a basic set of rules designed for the table-top wargaming
A Splendid Victory! Copyright. Trevor Raymond. Version 3: May, 2012 (Exodus 20:15 - Thou shall not steal.") Page 1 of 28 A Splendid Victory is a basic set of rules designed for the table-top wargaming
Chosen Men Fat. 1. Sequence of play. Base Morale;
 Chosen Men Fat 1. Sequence of play v2.1 CCWG Assign cards to each unit in play then shuffle the deck and turnover the top 2 cards. These units then; 1) Test morale. 2) Perform an action. (Move, Load, Fire,
Brimstone and Iron. Heroic Combat System.
 Brimstone and Iron. Brimstone and Iron was originally an attempt to unify the rules of Warhammer Fantasy Battle, Warhammer Skirmish and Mordheim. I ve dropped that idea since Games Workshop change the
QUICK REFERENCE SHEETS
 QUICK REFERENCE SHEETS 1 QUICK REFERENCE SHEETS Survivor Action Point Table Actions AP Cost Walking (3 ) 1 Turning more than 180 degrees 1 Spotting 1 Running (6 ) 1 Diving (1 ) 2 Crawling (1 ) 1 Going
ONE IF BY LAND" - AMERICAN 1:10 SCALE WAR OF INDEPENDENCE RULES by Bob Bergman. Infantry/Cavalry figure 10 men Artillery crew figure 5 men
 ONE IF BY LAND" - AMERICAN 1:10 SCALE WAR OF INDEPENDENCE RULES by Bob Bergman Ground Scale 1 inch = 15 yards One Turn About five minutes Infantry/Cavalry figure 10 men Artillery crew figure 5 men Artillery
Introduction:... 4 Character Classes;... 4 Weapons:... 4 Organisation:... 4 Actions:... 5 Movement:... 5 Shooting:... 5 To Hit:...
 State of war A.C.W. Skirmish Wargame Rules Tyneside Wargames club Version 1a 1 2 Table of contents Introduction:... 4 Character Classes;... 4 Weapons:... 4 Organisation:... 4 Actions:... 5 Movement:...
Feudal Skirmish and Tourney Rules
 Feudal Skirmish and Tourney Rules Al Hewitt, Ric Willey, Neil Houltby, and Tony Morley Initiative Throw d20, highest has initiative and can move first. If a figure is contacted by a higher initiative figure
FIRETEAM Wargame Rules for Modern Combat Operations
 FIRETEAM Wargame Rules for Modern Combat Operations By Rory Crabb Written By Rory Crabb Version 1.0 July 2016 Miniatures from the collection of the author and terrain by Paul Davies 1 FIRETEAM Wargame
EN GARDE! Swashbuckling Skirmish Wargames Rules OSPREY WARGAMES. Craig Woodfield 21/09/ :58
 EN GARDE! Swashbuckling Skirmish Wargames Rules Craig Woodfield OSPREY WARGAMES 21/09/2015 13:58 AUTHOR Craig Woodfield is a defence analyst from Canberra, Australia, and has previously written for magazines
Tactical Combat Rules By David Newport
 Tactical Combat Rules By David Newport Tactical Combat is a game covering company and battalion level actions using 20 th century weapons. The game was designed for World War II action, but it handles
QRS QUICK REFERENCE QUICK REFERENCE SHEETS. Shooting Modifiers table. Survivor Action Point Table. Hand-to-Hand Modifiers Table
 QRS QUICK REFERENCE SHEETS Shooting Modifiers table Survivor Action Point Table Actions AP Cost Target Modifier Walking (3 ) Per AP to aim (max APs / +4 modifier) + Turning more than 80 degrees Target
King George Commands and We Obey
 King George Commands and We Obey Basing Army Commanders 80mm dia base with a vignette on it, min 3 figures. Divisional Commanders 80mm dia base with a vignette on it, max 2 figures. Brigade Commanders
...& Blenheim Palace. Amendments to Black Powder For battles with model soldiers In the Age of Marlborough
 ...& Blenheim Palace Amendments to Black Powder For battles with model soldiers In the Age of Marlborough Black Powder "Black Powder" rules are copyright Warlord Games, and quoted here purely for the purpose
To End All Wars. WW1 Miniature Game V1.2
 To End All Wars WW1 Miniature Game V1.2 Introduction: The Western Front in World War I was dominated by a series of trenches cutting its way through the French countryside. Commanders on both sides would
Seven Years War. Generals
 Seven Years War By Will McNally Introduction These rules have been written to give an easily playable game which reflects the style of European land warfare during the Eighteenth Century, particularly
PROCONSUL RULES FOR ANCIENT BATTLES
 Index Section Subject Page 1.0 Basic Concepts 2 1.1 Command Groups 2 1.2 Stands and Basing 2 1.3 Strength Points [SP] 2 1.4 Game Play 2 2.0 Command and Control 3 2.1 Moving Commanders 3 2.2 Losing a Commander
Bundok and Bayonet Colonial Wargames Rules by Bob Cordery
 Introduction Bundok and Bayonet Colonial Wargames Rules by Bob Cordery Part 1 - The Basic Rules The following Colonial Wargames rules were written for my own personal use and reflect my philosophy that
Fields of Blue & Grey
 Fields of Blue & Grey A very different kind of American Civil War rules, that allow the grand sweep of corp level actions to be recreated while still using the regiment as the basic combat element. A simple
Rules Update for Warmaster Ancients
 Rules Update for Warmaster Ancients P25 Skirmishers Evading a Charge delete all four paragraphs and replace as follows. Note that this new rule replaces the rules addition Evades from close range become
TRENCH RAIDER: World War I Wargaming in Ten Minutes by David Raybin 2014
 TRENCH RAIDER: World War I Wargaming in Ten Minutes by David Raybin 2014 INTRODUCTION Instead of a generic set of WW1 rules I determined to make the rules fit the game scenario rather than the other way
3rd Edition RULES OF PLAY
 Command & Colors Napoleonics 1 Game Design by Richard Borg 3rd Edition RULES OF PLAY 2 Command & Colors Napoleonics The battlefield is a scene of constant chaos. The winner will be the one who controls
Order Code. Test reaction if:
 Move Sequence in each period 1. Dice for arrivals and returns 2. Test reaction for first time in charge reach or shot at 3. Declare and Test for charges. Test Reaction for all other causes 5. Charge Response,
To End All Wars WW1 Miniature Game V1
 To End All Wars WW1 Miniature Game V1 Introduction: The Western Front in World War I was dominated by a series of trenches cutting its way through the French countryside. Commanders on both sides would
The Rise of Unarmed Combat Methods in Ancient Japan
 The Rise of Unarmed Combat Methods in Ancient Japan Copyright 2010, Steven Lefebvre, Bujinkan Dojo, LLC. All rights reserved. No part of this book/course including interior design, or cover design may
OPERATIONAL OBJECTIVE ZONES
 OPERATIONAL OBJECTIVE ZONES The nature of combat on the Operational level varied between Open field battles and those fought over built-up and fortified areas. The cohesion of both the defender and attacker
FRENCH AND INDIAN WARS SKIRMISH
 FRENCH AND INDIAN WARS SKIRMISH 25/28 MM FIGURES 1 Figure equal to 1 Figure otherwise 1 to 5,10 15 20 Foot/Artilleryman 15mm frontage Depth 15mm,18mm,20mm depending on figure Cavalryman 25mm frontage Depth
Age of the Trebuchet. Introduction. Contents
 Draft number 2 6 th October 2005 Special thanks to Dave Smith (lotrhithero), Paul Mullis(Osbad), Richard Heath (Yith) and Tony Barnes for comments on Draft 1. For those of you who saw Draft, there a number
COMITATUS Warfare in the Dark Ages AD
 COMITATUS Warfare in the Dark Ages AD 250-1100 Scenario 1 The Battle of Daras AD 50 Historical Background The young East Roman General Belisarius, in his first major command, was sent to defend the city
Musket and Pike Users Manual
 1 Musket and Pike Introduction Musket and Pike is a series of games that cover the battles and campaigns associated with the era where muskets and pikes dominated the fighting. Each game can be played
Naval Wargame Rules for the Russo-Japanese War
 - 1 - Naval Wargame Rules for the Russo-Japanese War Mike Adams September 2003 Introduction These rules are based on De Bellis Navalis by Colin Standish, published in Wargames Illustrated #143 August 1999.
SNAPHANCE RULES FOR PIKE AND SHOT BATTLES
 Index Section Subject Page 1.0 Basic Concepts 2 1.1 Command Groups 2 1.2 Stands and Basing 2 1.3 Strength Points [SP] 3 1.4 Game Play 3 2.0 Types of Stands 3 2.1 Combat Stands 3 2.2 Support Stands 4 3.0
A Marvellous Victory! Copyright. Trevor Raymond. Version 3: April, 2012 (Exodus 20:15 - Thou shall not steal.")
") A Marvellous Victory! Copyright. Trevor Raymond. Version 3: April, 2012 (Exodus 20:15 - Thou shall not steal.") Page 1 of 28 A Marvellous Victory is a basic set of rules designed for the table-top wargaming
A Marvellous Victory! Copyright. Trevor Raymond. Version 3: April, 2012 (Exodus 20:15 - Thou shall not steal.") Page 1 of 28 A Marvellous Victory is a basic set of rules designed for the table-top wargaming
CHARLES THE BOLD SCENARIO
 Scottish War of Independence - Battle of Falkirk 1298 Page 1 of 5 Battle of Falkirk 22 July 1298 In 1296 Edward I of England declared himself overlord of Scotland deposing the Scottish king. Rebellion
[DRAFT] SNAPHANCE RULES FOR PIKE AND SHOT BATTLES
![[DRAFT] SNAPHANCE RULES FOR PIKE AND SHOT BATTLES](/thumbs/86/93539375.jpg "[DRAFT] SNAPHANCE RULES FOR PIKE AND SHOT BATTLES") Index Section Subject Page 1.0 Basic Concepts 2 1.1 Command Groups 2 1.2 Stands and Basing 2 1.3 Strength Points [SP] 2 1.4 Game Play 2 2.0 Types of Stands 2.1 Combat Stands 2.2 Support Stands 3.0 Command
Index Section Subject Page 1.0 Basic Concepts 2 1.1 Command Groups 2 1.2 Stands and Basing 2 1.3 Strength Points [SP] 2 1.4 Game Play 2 2.0 Types of Stands 2.1 Combat Stands 2.2 Support Stands 3.0 Command
COMMANDS AND COLORS NAPOLEONICS PLUS
 COMMANDS AND COLORS NAPOLEONICS PLUS CAMPAIGN RULES Version 3.00 2018-09-20 Contents LEADERS... 3 Leader Casualty Fate... 3 Leader Replacement... 4 Leadership Quality... 4 CAPTURING A THOPHY... 4 GLORY...
SNAPHANCE SCENARIO Franco-Dutch War - Battle of Seneffe 11 August 1674
 Franco-Dutch War - Battle of Seneffe 11 August 1674 Note: the woods on the hilltop are orchards. Page 1 of 5 Franco-Dutch War - Battle of Seneffe 11 August 1674 William of Orange invaded Northern France
Night Goblins v.1.5. Warband Special Rules. Warband Special Rules. Gork Complex Night Goblin warbands have +2 Ld to all Rout Tests they have to take.
 - Night Goblins v.1.5 Gork Complex Night Goblin warbands have +2 Ld to all Rout Tests they have to take. Animosity At the start of each of your own turns (i.e. not opponent s), roll a D6: On (2-6) nothing
Napoleonic Battles. Introduction
 Napoleonic Battles Introduction Napoleonic Battles is a series of games that cover the battles and campaigns associated with Napoleon. Each game can be played alone versus the computer, or against a human
Faction: Steppes Tribes
 Faction designed by : Vincent Auger with Alex Buchel Written by : Vincent Auger, John Fry and Wayne Richards Layout : Fred achu Studio Tomahawk Faction: Steppes Tribes Innumerable different tribes occupied
THE BACKGROUND GENERAL NOTES ACTIONS MORALE CLASS
 or: The Phantom Crown. Maximilian Rules! - Rules for wargaming the Maximilian Adventure by Mark W. Shearwood These rules originally appeared in Wargames Illustrated 160, (December 000). Many thanks to
PROCONSUL SCENARIO Dacia 87CE
 Dacia 87CE Page 1 of 5 Dacia 87CE The Kingdom of Dacia [present day Romania] frequently launched raids across the Danube into Roman territory. On several occasions the Romans tried to bring them to heel.
THE RULES. Wing Scale. 15 minutes per turn 50 men per strength point 1 gun per strength point
 INTRODUCTION The late Greg Novak developed the following variant of Volley & Bayonet for fighting at the Wing scale in the Americas. All Volley & Bayonet rules not modified below remain in force. Paul
BATTLE FOR 2MM EARTH 1418: The Great War (Version 0.8)
") BATTLE FOR 2MM EARTH 1418: The Great War (Version 0.8) INTRODUCTION The Battle for 2mm Earth rules are suitable for any large combat up until around the end of the 19 th Century. I designed 1418 semi-independently
BATTLE FOR 2MM EARTH 1418: The Great War (Version 0.8) INTRODUCTION The Battle for 2mm Earth rules are suitable for any large combat up until around the end of the 19 th Century. I designed 1418 semi-independently
Brimstone and Iron. Some Alternate Weapon Rules for Warhammer Fantasy.
 Brimstone and Iron. Some Alternate Weapon Rules for Warhammer Fantasy. This page originally started off as some house rules for some of the weapons in Warhammer. The following rules suggestions can be
FUBA RULEBOOK VERSION
 FUBA RULEBOOK 15.07.2018 2.1 VERSION Introduction FUBA is a board game, which simulates football matches from a tactical view. The game includes its most important details. The players take roles of the
TRAVEL & EQUIPMENT. Standard Price List. Land Travel. Table 5A : Daily Sea Weather. Table 5B : Sailing Table. Table 1D : Encumbrance Values
 TRAVEL & EQUIPMENT Land Travel 1 day of travel on foot = 20 miles 1 day of travel on horseback = 30 miles Difficult terrain = halve all distances Table 5A : Daily Sea Weather D10 Weather Conditions 1-2
Official Errata and FAQs, Version 1.3
 Official Errata and FAQs, Version 1.3 This document presents amendments to the rules of and our responses to players frequently asked questions. When changes are made, the version number will be updated
Wagenburg. ranks) Heavy Infantry 3cm (or 4cm) Light Infantry 4cm Missile troops 4cm
 Heavy Infantry 3cm (or 4cm) Light Infantry 4cm Missile troops 4cm") 1.0 INTRODUCTION 1.1 IMPETUS AND BASIC IMPETUS Impetus is a set of wargame rules that aims to simulate battles with toy soldiers in the ancient, medieval and renaissance period. Basic Impetus is a free,
1.0 INTRODUCTION 1.1 IMPETUS AND BASIC IMPETUS Impetus is a set of wargame rules that aims to simulate battles with toy soldiers in the ancient, medieval and renaissance period. Basic Impetus is a free,
TACTICAL FOOTBALL GAME RULEBOOK fubatacticalfootballgame. Game design by Hannu Uusitalo
 TACTICAL FOOTBALL GAME RULEBOOK 2.0 Game design by Hannu Uusitalo www.fubaboardgame.com fubatacticalfootballgame 1 2 3 WHAT YOU NEED TO PLAY Game board The game board (rubber mat) is divided into 13 areas,
Necromunda Frequently Asked Questions and Errata
 Necromunda Frequently Asked Questions and Errata The Necromunda: Underhive box set is a great introduction to the game of Necromunda, and the rulebook it contains allows players to fight brutal tunnel
Mini-Nap 2 WARGAME RULES FOR THE NAPOLEONIC ERA. Copyright. Trevor Raymond. January 2015 (Exodus 20:15 - Thou shall not steal.")
") Page 1 of 42 The Basics Mini-Nap 2 WARGAME RULES FOR THE NAPOLEONIC ERA Copyright. Trevor Raymond. January 2015 (Exodus 20:15 - Thou shall not steal.") Mini-Nap 2 is a set of rules specifically designed
Page 1 of 42 The Basics Mini-Nap 2 WARGAME RULES FOR THE NAPOLEONIC ERA Copyright. Trevor Raymond. January 2015 (Exodus 20:15 - Thou shall not steal.") Mini-Nap 2 is a set of rules specifically designed
Free-For-All (Fair Fight)
") Free-For-All (Fair Fight) In highly-mobile engagements it is not uncommon for forces to suddenly find themselves in contact with the enemy. The freewheeling battles that result are little more than all-in
Free-For-All (Fair Fight) In highly-mobile engagements it is not uncommon for forces to suddenly find themselves in contact with the enemy. The freewheeling battles that result are little more than all-in
ATTRIBUTES & DERIVED STATS HINDRANCES GEAR
 NAME: RACE: RANK: XP: PERSONAL INFO ICONIC FRAMEWORK ATTRIBUTES & DERIVED STATS HINDRANCES AGILITY SMARTS SPIRIT CHARISMA PARRY PACE STRENGTH VIGOR SKILLS GEAR SKILL DIE ITEM STRAIN WT EDGES & ADVANCES
Pig Wars Late Medieval Variant
 Pig Wars Late Medieval Variant 1337 to 1485 Introduction Pig Wars LMV is a variant of Tod Kershner s Pig Wars Dark Age skirmish rules that covers the period of the Hundred Years War to the end of the Wars
WARHAMMER 40,000 HOUSE RULES EDITION V1.3
 WARHAMMER 40,000 HOUSE RULES EDITION V1.3 THE TURN UNIT ACTIVATIONS Before the game begins the players must each place an appropriate number of tokens (with markings or colours specific to that player)
SWORDCRAFT. Live the Adventure! Medieval Live Action Battle Game & LARP. Web:
 SWORDCRAFT Live the Adventure! Medieval Live Action Battle Game & LARP Web: www.swordcraft.com.au Email: info@swordcraft.com.au 2018-03-21 1 Swordcraft Combat Rules 1. BASIC COMBAT 1.1 Play fair and use
Combat Skills. Dodge: Great Weapons Warrior has a 6+ ward save vs. Great Weapons. (Ward saves stack. - A natural 1 always fails to save.
 Combat Skills Weapons Training: Close Warrior can use all close combat weapons, not just those on his list. This skill does not grant proficiency with shields. Dodge: Great Weapons Warrior has a 6+ ward
Musket and Pike User Manual
 Musket and Pike User Manual 1 Musket and Pike Users Manual Introduction Musket and Pike is a series of games that cover the battles and campaigns associated with the era where muskets and pikes, or sometimes
DBA-RRR. Renaissance, Reformation and Restoration Extension Rules v By Tony Aguilar
 DBA-RRR Renaissance, Reformation and Restoration 1500-1700 Extension Rules v. 1.21 By Tony Aguilar DBA-RRR Renaissance, Reformation and Restoration Rules v. 1.21 (January 2012) Page 1 DESIGNER NOTES This
Command Combat: Civil War The Battle of Bull Run / Manassas July 21, 1861
 Command Combat: Civil War The Battle of Bull Run / Manassas July 21, 1861 Game Design by Jeff McArthur (c) Bandwagon Books, 2011 This scenario is from the Command Combat: Civil War series. To learn more
Glory Days! Introduction. Troop Types and Figures. freewargamesrules.co.uk presents. by Craig Cartmell
 Introduction. freewargamesrules.co.uk presents Glory Days! by Craig Cartmell These are a set of rules for fighting the American Civil War at regimental and brigade level. The smallest unit sizes are infantry
Modified D20 System for Wild Pig Comics. Congratulations soldier! You have been given control of a 40 ton fighting machine, known as
 Modified D20 System for Wild Pig Comics WELCOME TO THE FUTURE OF COMBAT Congratulations soldier! You have been given control of a 40 ton fighting machine, known as a Mech. It is a complex machine when
THE CARAVANSERAI. The Caravanserai version /2004 1
 THE CARAVANSERAI This game has been designed as an extension kit to the OUTREMER/CROISADES sister games. The kit includes a new map (The Caravanserai), new counters for camels, this set of rules and additional
OVER THE TOP! Using Normal Flames Of War Missions in the Great War. by Mike Haught. Adding Trenches. Great War Table Size
 OVER THE TOP! Using Normal Flames Of War Missions in the Great War by Mike Haught The Great War booklet covers three distinct, almost cinematic, missions. The story of starts with the Big Push, the attacker
Green Jackets Rules for Napoleonic Skirmishes
 web.archive.org https://web.archive.org/web/20121011231318/http://www.btinternet.com/~r.denning/wargames/greenj.htm Contents Green Jackets Rules for Napoleonic Skirmishes R.J. Denning 1.Introduction 2.Scale
Intro. Basics. Pilots. Fighters
 Intro Black Skies Generic Star Fighter Combat Rules Quick and simple rules intended to create a fast moving star fighter game, where out thinking your opponent is as important as out shooting him. Games
Mortem et Gloriam Magna
 16/10/2018 Mortem et Gloriam Magna Small Table Variant for.. 28mm figures on a 6'x4' or 15mm figures on a 4' x 3' table Introduction Mortem et Gloriam Magna is a simple adaptation of the main MeG game
Mini-Nap. RULES FOR CORPS SCALE WARGAMES IN THE NAPOLEONIC ERA USING THE 6mm SCALE
 Mini-Nap RULES FOR CORPS SCALE WARGAMES IN THE NAPOLEONIC ERA USING THE 6mm SCALE Copyright. Trevor Raymond. Version 8: August, 2009 (Exodus 20:15 - Thou shall not steal.") www.runtus.org Page 1 of 25
Black Powder House Rules
 Black Powder House Rules Command & Movement Disordered Moves Flank Attacks Woods Skirmishers Skirmish Company Mixed Formation Grande Bandes Infantry Tactics Charge Contact Massed Columns Must Form Square
1978 Dawn Associates, All Right Reserved
 Index 1.0 Introduction 2.0 Game Equipment 3.0 Setting Up for Play 4.0 Sequence of Play 5.0 Human Movement 6.0 Shooting Zombies 7.0 Zombie Movement 8.0 Zombie Attacks 9.0 Hidden Zombies 10.0 Berserk Zombies
ASLSK Basic Infantry Tactics
 Basic Infantry Tactics ASLSK Basic Infantry Tactics Daniel F. Savarese Last Updated: 2005-03-04 Copyright 2004, 2005 Daniel F. Savarese 1 The original Squad Leader rule book contained a section at the
Original concept from:
 Original concept from: http://home.earthlink.net/~duanevp/dnd/building%20d&d/buildingdnd17.htm. The A.D.D.I.C.T. Short Form I. Check for Surprise A. The DM can determine that surprise exists (or does NOT
Through incessant wars for its control,
 Through incessant wars for its control, the Lords of Time put the source of immortality at risk. To prevent its drying up and their own demise, they created the Time Arena : a sacred place where they fight,
CLOSE COMBAT MANEUVERS All close combat maneuvers are at Point Blank Range, which modifies the difficulty by 1
 CLOSE COMBAT MANEUVERS All close combat maneuvers are at Point Blank Range, which modifies the difficulty by 1 Charging Attack/Knock-Back [modified house rule]: Decide whether to inflict Damage or shove
Reference Revised Combat Rules
 Revised Combat Round Reference Revised Combat Rules I. Check for Surprise a. Roll 1d10 (see Surprise Modifiers) with a 1, 2, or 3 meaning surprise. Determine Initiative (once for given encounter) a. Each
SWORDCRAFT. Live the Adventure! Medieval Live Action Battle Game & LARP. Web:
 SWORDCRAFT Live the Adventure! Medieval Live Action Battle Game & LARP Web: www.swordcraft.com.au Email: info@swordcraft.com.au 2018-10-17 1 Swordcraft Combat Rules 1. BASIC COMBAT 1.1 Play fair and use
Dog-Fighting Rules for GURPS 4th ED
 Dog-Fighting Rules for GURPS 4th ED Introduction First off, this system was designed for use with WW2-era aircrafts but could easily be used in post-war or modern times with a few adjustments. GURPS is
THE WAR OF THE SPANISH SUCCESSION PAPERBOYS RULES
 THE WAR OF THE SPANISH SUCCESSION PAPERBOYS RULES This is a little set of rules written to continue the tradition of each Paperboys book having an associated set. Andy Callan s ideas abound here, but Peter
RULE BOOK. Warfare in the Middle Ages
 RULE BOOK Warfare in the Middle Ages Table of Contents 1.0 Introduction... 2 2.0 The Components... 2 3.0 Sequence of Play... 4 4.0 Activation and Continuity... 4 5.0 Movement... 4 6.0 Facing... 5 7.0 Zones
Overview. Components. Robotics Team Card
 Overview Aerial Assault is based on a real-life robotics competition where robots compete at a game of what looks a little bit like robot basketball. The robotics competition takes place on a flat gymnasium-sized
Warm-Up: Imagine you are a samurai invited to the New Year dinner by the Shogun. What do you think will be on the menu and served for dinner tonight?
 The Samurai Warm-Up: Imagine you are a samurai invited to the New Year dinner by the Shogun. What do you think will be on the menu and served for dinner tonight? The Menu The Menu in early medieval Japan
Borderlands Warhammer 40,000 Escalation League Rules Booklet
 Borderlands is hosting a Warhammer 40,000 Escalation League. The league runs for 8 weeks, with players playing up to 3 games per week and in a tournament each month. The league starts players off with
ERES TO YOU FUZZY WUZZY by Bob Cordery
 1. Introduction ERES TO YOU FUZZY WUZZY by Bob Cordery ETYFW relies upon the use of both average dice (AvDs produce more predictable results) and normal dice (D6s produce less predictable results) to reflect
FORCES OF VALOR BATTLE TACTICS 2005, Unimax Toys Limited, All Rights Reserved
 FORCES OF VALOR BATTLE TACTICS 2005, Unimax Toys Limited, All Rights Reserved Forces Of Valor, The Game allows you to fight exciting and realistic war games. All you need to play are Forces Of Valor soldiers
napoleon's battles at divisional and onehalf
 napoleon's battles at divisional and onehalf scales I am trying to find a Napoleonic rule-set to play minor, i.e divisional, engagements occurring at the Campaign of Leipzig or in any other Napoleonic
PaintBall. Mini
 Game Setup Each paintball team consists of 6 paintballers and 1 Marshal. You will need some six sided dice (d6's) to play the game. The game is designed to use the hexon II board system by Kallistra. The
Initial Set-Up. Officer s Handbook Game Walk-Through
 Officer s Handbook Game Walk-Through O H W - D : 29 M 2018 The game was fought in a North African Desert environment in late 1940 between British and Italian Forces, depicting a hasty engagement where
HIVE OF THE DEAD ADVANCED RULES
 HIVE OF THE DEAD ADVANCED RULES The Adventure Sheet The Adventure Sheet is where you can keep track of your Statistics, Equipment, Ammunition and other information relevant to your adventure. You are free
1. MELEE EXPERT Melee Expert covers troops who were especially good at hand-to-hand combat for their quality grade. So an AVERAGE Melee Expert is
 1. MELEE EXPERT Melee Expert covers troops who were especially good at hand-to-hand combat for their quality grade. So an AVERAGE Melee Expert is good at melee for average troops; a SUPERIOR non-melee
To begin OMOG requires a few things.
 Omog (One Man One Gun) is a game for toy soldiers and any available space. It can be played on a desktop, a coffee table, a countertop or other surface. The game itself is simple, easy to learn and easy
Official Errata and FAQs, Version 1.0
 Official Errata and FAQs, Version 1.0 This document presents amendments to the rules of and our responses to players frequently asked questions. The Warhammer Underworlds: Nightvault rules replace the
Land of the Samurai. Contents. Army Lists
 Land of the Samurai Contents Army Lists Creating an army with the Mortem et Gloriam Army Lists Historical Introduction ō ō ō ō ō ō ō ō ō ū ō Ō ō Army Commander 1 Any Instinctive Dates 500 BCE. to 250
Official Errata and FAQs, Version 1.4
 Official Errata and FAQs, Version 1.4 This document presents amendments to the rules of and our responses to players frequently asked questions. When changes are made, the version number will be updated
Chief: Each warband must have one Chief, no more, no less! Woodsmen: Your warband may include any number of Woodsmen
 WOODSMEN DE ARTOIS Large tracts of Brettonia are covered by forest and woodland. These are owned by the Lords and Barons who let them to tenants to work. The people of the forests are more independent
tdoherty Page 1 02/18/05
 La Bataille Revised Infantry Assault and Charge Sequence The reasons for changing the mêlée sequence have been discussed on CSW. It is my view that historically assaults would often degenerate into inconclusive
March Toward the Sound of Guns
 March Toward the Sound of Guns Very Fast Napoleonic Rules Version1.1 By Herbert Wong A) Game Scale The game will, for convenience, follow Avalon Hill s Napoleon s Battles game scale; in fact the game works
Unreleased Profiles. Faramir, Prince of Ithilien (Man) Points Value: 150. Theoden, King at Pelennor (Man) Points Value: 130
 Points Value: 150. Theoden, King at Pelennor (Man) Points Value: 130") Unreleased Profiles Unofficial additional rules and profiles designed for Lord of the Rings and The Hobbit Strategy Battle Games. Published by www.thelastalliance.com The Golden Rule: All Unreleased Profiles
Unreleased Profiles Unofficial additional rules and profiles designed for Lord of the Rings and The Hobbit Strategy Battle Games. Published by www.thelastalliance.com The Golden Rule: All Unreleased Profiles