INTRODUCTION & DESCRIPTION CHANGES WARRANTY SERVICE FEATURES & SPECIFICATIONS SAFETY PRECAUTIONS ITEMS REQUIRED
|
|
|
- Coral Benson
- 6 years ago
- Views:
Transcription

 when boarding and operating your retrieval craft, i.")

1 WARNING: NEVER attempt to swim after a stalled R/C boat!. Never operate your R/C boat while standing in the water. Never operate your R/C boat in the presence of swimmers. Always use a Personal Flotation Device (PFD) when boarding and operating your retrieval craft, i.e. Jon boat or duck boat. NOTE: Because of the sharp running hardware included with this R/C boat, we do not recommend a rubber blow up raft. R/C boat running hardware is very sharp. Be very careful when working on and around the metal parts. AquaCraft products are to be used by ages 14 and over. aquacraftmodels.com
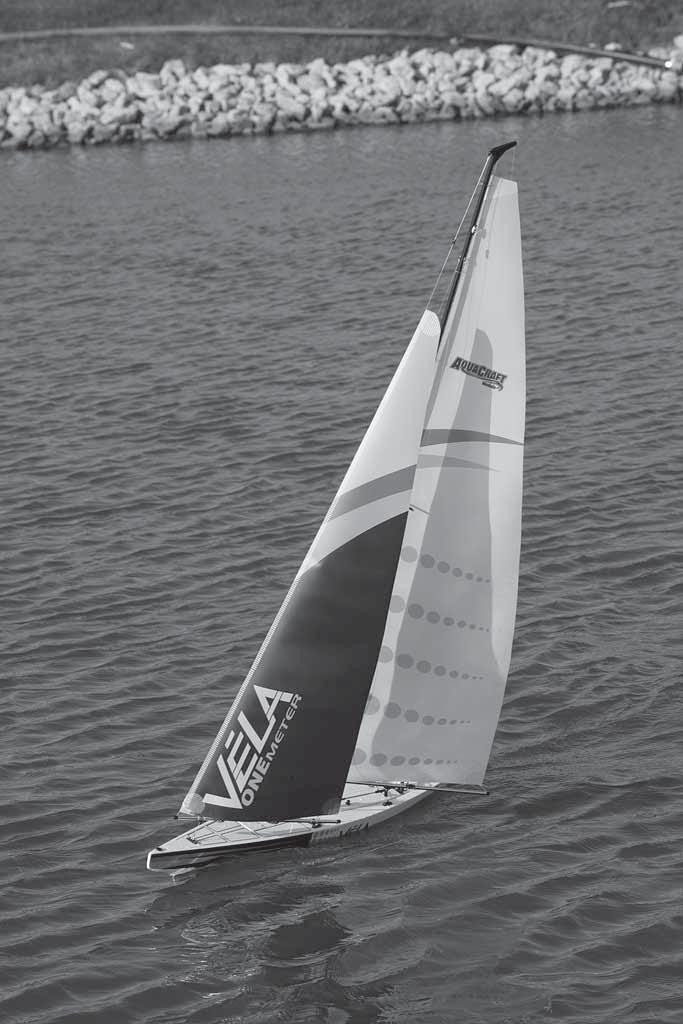
2 INTRODUCTION & DESCRIPTION CHANGES WARRANTY SERVICE Thank you for purchasing the AquaCraft Vela! We want the time you spend with your new R/C boat to be fun and successful so please fully read the manual. If for any reason you think this R/C model is not for you, return it to your local hobby dealer immediately. Your hobby dealer cannot accept returns on any model after fi nal assembly or after your boat has been operated. All pictures, descriptions, and specifi cations found in this instruction manual are subject to change without notice. AquaCraft maintains no responsibility for inadvertent errors in this manual. FEATURES & SPECIFICATIONS BOAT FEATURES: Prepainted lightweight fi berglass hull Pre-assembled preprinted sails Water-resistant radio hatch Modern, 1-meter design Tactic TTX GHz two-stick surface radio system Tactic TR325 2 Channel RX Tactic TSX382 sail winch servo (installed) AquaCraft TSX100 rudder servo (installed) Prefi nished wood boat cradle Quick and easy fi nal assembly BOAT SPECIFICATIONS: Boat Specifi cations: Hull Length: 40" [1016mm] Beam: 6.5" [165mm] Overall Height: 79" [2006mm] Weight: 6lbs [2720g] ITEMS REQUIRED Eight AA batteries #2 Phillips screwdriver 2.5mm hex wrench Grease (Grimracer cable grease, AQUB9500) AquaCraft will warrant your Vela for 90 days after the purchase from defects in materials or workmanship of original manufacture. AquaCraft, at their option, will repair or replace at no charge, the incorrectly made part. This warranty does not cover damage caused by crash, abuse, misuse, alteration or accident. To return your boat for service you will need to provide proof of purchase, i.e., your store receipt or product invoice. IN NO EVENT SHALL THE PURCHASER BE ENTITLED TO ANY INCIDENTAL, SPECIAL, INDIRECT OR CONSEQUENTIAL DAMAGES, WHETHER RESULTING FROM THE USE, MISUSE OR INABILITY TO USE THE PRODUCT OR FROM DEFECTS IN THE PRODUCT. This warranty gives you specifi c legal rights and you may also have other rights, which vary from state to state. Outside USA and Canada, contact local importer for warranty information. Hobby Services 3002 N. Apollo Drive, Suite 1 Champaign, Illinois Attn: Service Department Phone: (217) :00 am - 5:00 pm Central Time M-F hobbyservices@hobbico.com SAFETY PRECAUTIONS Never, ever, attempt to swim after a stalled R/C boat. DO NOT get in the water for any reason to retrieve your boat. Your Vela has flotation added to the interior of the hull and will not sink. To aid you in retrieving a stalled R/C boat you can use a fishing reel with a tennis ball tied to the end of the line. Or better yet get yourself a small boat so you can row out and pick up your boat. Remember to use a PFD any time you enter your retrieval craft. AquaCraft products are to be used by ages 14 and over. The speed and mass of this boat can infl ict property damage and severe personal injury if a collision occurs. Never run this boat in the presence of swimmers or where the possibility of collision with people or property exists. This boat is controlled by radio signals, which are susceptible to possible interference from electrical noise. If your Vela should happen to loose signal, wind and water currents will slowly carry it to shore. The bad news is that the boat could be carried to the opposite shore. When surveying areas to run your model, keep variables in mind such as wind direction, size of the lake, etc. It is not advisable to run R/C boats on any free-fl owing bodies of water such as creeks or rivers. 2


3 CRADLE ASSEMBLY Begin by removing the sailboat components from the box and assembling the boat stand. You re going to need the cradle to aid in the assembly and rigging of your Vela. Use a #2 Phillips screwdriver and the M4X16 wood screws to assemble the cradle. Take note that the support straps go over (not under) the top bars. 3
4 SAILBOAT TERMINOLOGY BACKSTAY: A backstay is the line that runs from the top of the mast to the stern of the boat. Like other stays, it is a strong wire, rod, or line that is used to prevent the mast from being blown over. The backstay is specifi cally designed to prevent the mast from blowing forward. Backstays sometimes have adjustable tension in order to shape the mast (and consequently the sail) in varying wind conditions. BOOM: A boom is a horizontal spar that is generally attached to the mast at one end, and attached to the aft corner of a sail (the clew) at the other end. The boom is used to hold the sail out in a horizontal direction. BOW: The bow is the front of the boat. BOWSIES: Adjustment blocks located between the tops of the sails and the mast. BOWSPRIT: The bowsprit is a spar that extends forward of the hull of a boat. It can be used for a variety of things, including a more forward point to attach a forestay and/or a sail such as a spinnaker or jib. CLEAT: A cleat is a piece of hardware designed to hold a line. In the most traditional sense, a cleat is a piece of metal or wood that is shaped somewhat like an anvil. A special cleat knot is used to tie a line to these traditional cleats. DECK: The deck of a boat is the horizontal outside surface that one walks upon. When you are outside on a boat, the deck is your fl oor. When you are in the cabin of a sailboat the deck is usually the ceiling above you. FOOT: The foot of a sail is a reference to the bottom edge of a sail. The forward corner of the foot is the tack, and the aft corner of the foot is the clew. FORESTAY: The stay that runs from the top of a mast to the bow of the boat. As with other stays, a forestay is made from strong wire, rod, or line, and is used to prevent the mast from being blown over. On some sailboats, the forestay attaches to the mast slightly below the very top. If this is the case, the sailboat is considered to have a "fractional rig". A forestay may also be called a headstay. HULL: The main structural outer skin of a boat. Most modern boats have fi berglass hulls. JIB: The sail that goes forward of a mast. The leech of a jib generally does not go any further aft than the position of the mast. If it is larger than that, it is considered a genoa. KEEL: The part of a boat's hull that extends below the waterline, on the boat s centerline, that is used to counterbalance the tendency of wind to blow a sailboat over. A keel generally is shaped something like a fi n, so as to cut through the water and prevent sideways motion of the boat. It also will always have weight at its lowest point to prevent the sailboat from tipping over. LUFF: The forward edge of a sail. The luff runs between the head of a sail (at the top of a mast), to the tack of a sail (at the lower forward corner of a sail). MAINSAIL: The sail that is located aft of the mast on a sloop. MAST: The vertical spars on boats. A mast is supported by stays so that it does not blow over from the force of the sails. The purpose of the mast is to provide the basic support for the system of sails. Masts were originally made of wood, then aluminum, and now they are sometimes made of carbon fi ber. The weight of a mast is extremely important because it cancels out weight in the keel. MASTHEAD: The top of the mast. PORT: This is the left side of the boat when aboard and facing the front (bow). An easy way to remember this is that port and left both contain four letters. RUDDER: Blade that turns the boat STARBOARD: This is the right side of the boat when aboard and facing the front (bow). STERN: The back of a boat. WEATHER AND LEE HELM: If the boat tends to turn windward, it s called weather helm. If the boat tends to turn away from the wind, it s called lee helm. BOWLINE KNOT: FIGURE 8 KNOT: SQUARE (OR "REEF") KNOT: TYING BASIC KNOTS 4

5 BACKSTAY MAST MAINSAIL JIB DECK BOOM STERN BOW RUDDER HULL KEEL 5


6 SAILBOAT ASSEMBLY Assemble the rudder, grease and a 2.5mm hex wrench. Remove both hatches from the deck by turning the winch drums 90. Very lightly grease the rudder post and slip it up into the rudder stuffi ng tube located on the bottom of the boat. Align the tiller arm so the rudder post is able to slide through. Tighten the tiller arm screw using a 2.5 hex wrench. Make sure you align the screw with the fl at spot on the rudder post. 6


7 Remove the brass thumb nut from the keel post. Slip the keel into the hole in the bottom of the hull. Using the brass thumb nut, tighten the keel in place. PERFORMANCE TIP: If you are looking for the ultimate in performance and don t foresee the need to remove the keel, you can epoxy the keel into the bottom of the boat as you assemble it. You can then very carefully fi ll and sand the area the keel around the attachment point to keep drag to a minimum. The same fi ll-and-sand procedure can be done where the counterweight and keel attach as well as around the screw bosses that hold the counterweight together. 7


8 Unroll the sails on your work table. The larger sail is the mainsail and the smaller one is the jib. Lay out the mast on your work table. You will notice there are two sections of mast (upper and lower), along with pre-attached and labeled lines. Slip the mast joiner into the lower mast. If you feel you have no need to break down the mast, you can epoxy the halves together; just remember you are not going to be able to take it back apart. Place the lower mast into the mast pocket on the top deck of the hull. You might want to lean the mast against a wall or have somebody help you stabilize it as you work. 8

.")


9 Undo the upper hook line of the jib sail and hook it to front hole of the upper stay. Attach the lower hook (A) of the jib boom onto the furthest forward attachment point (A). Match the letters and attach the side load strings B, C, D, and E, as well as the backstay line (F). Snug up the blocks to hold the mast upright. It s not necessary to make them tight at this time. 9


10 Next, slip the mainsail upper attachment line through the hole near the center of the upper stay. Tie off the line on the open cleat near the top of the mast. Open the sail clips and clip the sail on to the mast. Slip the lower mainsail attachment line through the open hole of the boom mast mount. Tie off the line on the open cleat located above the mount. 10


11 Slip the rear sail line through the back hole of the boom and tie off the line on the open cleat of the boom. The longer of the winch lines attaches to the jib by slipping the line through the guide on the jib boom and tying off on the forward open cleat. Attach the last of the winch lines to the mainsail by sliding the line through the mast and tying it off on the open cleat on the main boom. 11


12 TRANSMITTER The transmitter is not water resistant and should never come in contact with water Move the left stick to the full up position. The sails should now open to 80. It might be necessary to adjust the full tight position again as both of these adjustments are dependent on each other. Slide off the battery door on the back of the transmitter. Install 4 fresh AA batteries into the transmitter in the confi guration molded into the battery compartment. Re-install the battery door onto the back of the transmitter. Install 4 fresh AA batteries into the receiver battery holder. LED Sail Control Stick Sail Control Trim Rudder Control Stick Rudder Control Trim LAUNCH PROCEDURE 1. Turn ON the power to the transmitter and receiver (in that order). Re-install the hatch covers and turn the winch drums to secure the covers. 2. Gently place the boat in water that is at least 20" deep and free of obstacles (weeds, rocks, sticks, etc.). The mast of the Vela sailboat is NOT A HANDLE. Do not hold the boat by the mast. 3. When fi nished running, be sure to turn the power OFF to the receiver and transmitter (in that order). 4. When you are through sailing for the day, remove the keel and rudder and allow them to dry. On/Off Switch Turn the transmitter on using the switch on the front. The red LED should light up. If it does not light up, turn the transmitter off and check to make sure that the batteries are installed properly. If you see a fl ashing red LED, the batteries are low and need to be replaced. TRANSMITTER SETUP 1. Place the left transmitter stick in the center position. Turn on the transmitter and then the receiver. 2. The large sail servo arm should center as well as the rudder. Move the left stick to the lowest position for the next step. 3. With the left stick in the lowest position, reposition each sail such that the sails control lines are tight. The mainsail and jib sail should now be full in and tight. OPERATION AND TUNING TIPS Make sure your mast does not lean to the left or to the right. Adjust the line blocks to adjust this. For your fi rst runs, make sure the main mast is straight front to back. After you have some time on the boat, you can adjust for weather helm and or lee helm. Adjust (lean) the mast forward to compensate for weather helm. Adjust (lean) the mast rearward to compensate for lee helm. Ultimately you want just a small amount of Weather helm during your run Adjust the rudder to provide 30 defl ection to the right and left. You can add or remove rudder defl ection to your liking, but we have found 30 to be about best. 12
13 SAILING Unlike propeller-driven boats that you basically point and accelerate, sailboats present an interesting challenge. Sailing requires constant reaction to water movements, wind gusts and direction changes. These reactions then require adjustment of the rudder and sails in order to fi nd the best possible course. In some cases, transmitter adjustments are suffi cient. At other times, it will be necessary to make physically adjust the sails via the rigging lines. There is no substitute for actual on-thewater experience and after your fi rst couple of outings you may want to re-read this manual to help you to gain a better understanding of the art of sailing. While learning to sail, it is a good idea to pick up on as much sailing terminology as possible; this will make it easier to grasp some aspects. READING THE WIND When you get to your favorite pond, take a few moments to observe wind direction, speed, and frequency of gusts and adjust your sailboat s rigging as necessary. What follows are guidelines for tuning your ship s sails and rigging, but with experience you will gain the ability to fi ne-tune your sails and rigging for optimal performance, regardless of conditions. For light wind conditions (1-5 mph): Use the adjustment blocks (bowsies) located between the tops of the sails and the masthead to tighten the sails so they will respond to the slightest push from the wind. For medium wind (6-10 mph): Loosen the sails slightly in order to fi nd the most effi cient combination of sail shape and tension. As a rough guideline, you will want it somewhere in-between the light and high wind set-up. For high wind conditions (11-15 mph): Loosen the jib and mainsail further. They will be better able to handle the high winds and your hull will be less likely to lay over on its side. GETTING WHERE YOU NEED TO GO Sailboats can easily sail downwind but sailing against the wind can be quite challenging. In fact, sailboats cannot sail directly into the wind and attempting to do so will leave you in irons. Sailboats can sail at up to a 45 angle against the wind. Movement against the wind is known as tacking. Take a moment to study the diagram at right as you read through these defi nitions. PORT TACK CLOSE-REACHED BEAM REACH BROAD REACH PORT TACK CLOSE-HAULED BROAD REACH IN IRONS DOWNWIND STARBOARD TACK CLOSE-HAULED BROAD REACH STARBOARD TACK CLOSE-REACHED BEAM REACH BROAD REACH 13
14 Downwind: Sailing with the wind coming from stern (a.k.a. running and sailing free). In Irons: A sailboat is said to be in irons when the boat stalls with its bow pointed directly into the wind and no wind in the sails. If you fi nd yourself in this position, simply move the rudder stick to either side and hold it until the sails catch some air. You will need to adjust the tension on the sails with the sail control stick to get the boat moving. Release the rudder when the ship reaches the desired heading. Luffing: When the sails are unable to fi ll with wind and begin fl apping wildly (like a fl ag). Tacking: Sailing towards the wind in a series of maneuvers diagonal to the wind source. There are basically two tacking directions. Starboard tack occurs when the wind comes from starboard and the sail boom hangs over the port side. Port tack is just the opposite, with the wind coming from port with the sail boom hanging over the starboard side. There are varying degrees of tack angle and it is important to learn when each will be useful and how to get your sailboat into position, especially when racing. For instance, when trying to reach a specifi c position upwind, sailing close-hauled may be the most direct route. Sailing close-reached allows you to get upwind faster, but is not as direct. In any case, you basically want the sails to be full of air and just on the verge of luffi ng. Here are some terms that describe different sailing positions in relation to the wind: Close-Hauled: Sailing against the wind at (up to) 45 angles. Close-Reached: Sailing against the wind at a much shallower angle. Beam Reach: Sailing with the boat at about a 90 angle to the wind. Broad Reach: Sailing with the wind coming diagonally from behind (a.k.a. sailing large or quartering wind). PLEASE READ BEFORE RUNNING THE VELA SAILBOAT: NEVER attempt to swim after a stalled or stuck boat! Wait patiently for the wind currents to return the boat to shore or use a tennis ball attached to the end of a fi shing line to retrieve it. Sailing the Vela in winds over 15 mph is not advised. It is dangerous to operate any R/C vehicle when there is insuffi cient light. CAUTION: Windy conditions cause rough water that will affect the performance of your sailboat and increase the chances of taking on water. Your Vela sailboat may occasionally take on small amounts of water, especially when running in high winds or rough water, or making tight turns. Keep a roll of paper towels handy and dry out the hull interior after every run. Check for leaks if you notice excessive amounts of water in the hull. IMPORTANT: If, for whatever reason, your boat takes on a large amount of water causing the electronics to get wet, you must do the following immediately: Remove the radio equipment from the boat. Allow the components to air dry completely before reassembling. Reinstall the components and check for proper operation before running the boat in water. Total run time of the Vela sailboat is approximately minutes (assuming you begin with new batteries in the receiver box). When you notice a decrease in power or sluggish response, it means the batteries are nearly drained and it s time to head for shore. As soon as the boat reaches shore, turn off the power to the receiver and transmitter (in that order). MAINTENANCE Make sure you replace low batteries. Leave the hatch covers off overnight to allow any water to evaporate from the inside of the hull. Clean the exterior of the hull with standard household cleaners and check for any loose knots or screws. NATIONAL ORGANIZATION The American Model Yachting Association is a not-for-profi t organization dedicated to promoting the designing, building, racing, and preservation of all model sailing yachts, and membership is open to all who are interested in these activities. theamya.org REPLACEMENT PARTS To order replacement parts for the AquaCraft Vela use the stock numbers in the list below. Replacement parts may be purchased from your local hobby shop or by mail order. If you need help locating a dealer, visit aquacraftmodels.com and click on Where to Buy. If you are missing parts, contact AquaCraft Product Support at: Phone: Fax: boatsupport@hobbico.com AQUB6403 AQUB6490 AQUB7110 AQUB7500 AQUB7501 AQUB7502 AQUB7825 AQUB7826 AQUB7827 AQUB7828 AQUB8660 AQUB8661 AQUB8662 AQUB8750 AQUB8751 AQUB8802 AQUB8820 TACJ2410 TACL0325 Deck Guides and Rigging Cleats Jib Support with Tie Rod Sailboat Stand Keel Keel and Bulb Thumb Nuts Keel Bulb with Weight Main Mast with Blocks Main and Jib Sail Mast Head Main and Jib Boom with Blocks Rigging Line 12-Meters Rigging Line Adjuster Blocks Rigging Line Clips Rudder Rudder Control Arm Spreaders Sail Clips Tactic TTX410 4-Channel TR625 SLT System Tactic TR325 3-Channel Receiver 14
15 15
16 2015 AquaCraft Models, a Hobbico company. AQUB0201
WARNING: NEVER attempt to swim after a stalled R/C boat! Never operate your R/C boat while standing in the water. Never operate your R/C boat in the
 WARNING: NEVER attempt to swim after a stalled R/C boat! Never operate your R/C boat while standing in the water. Never operate your R/C boat in the presence of swimmers. Always use a Personal Flotation
THUNDER INSTRUCTIONS A LMOST READY TO SAIL MODEL YACHT
 THUNDER INSTRUCTIONS A LMOST READY TO SAIL MODEL YACHT Long: 1000mm High:1890mm Toatl sail area: 0.4 m2 1 MODEL YACHT ASSEMBLY INSTRUCTIONS & SAILING HINTS Thank you for purchasing one of our range of
ANGEL INSTRUCTIONS ALMOST READY TO SAIL MODEL YACHT
 ANGEL INSTRUCTIONS ALMOST READY TO SAIL MODEL YACHT Long: 920mm High:1840mm Toatl sail area: 0.4 m2 1 MODEL YACHT ASSEMBLY INSTRUCTIONS & SAILING HINTS Thank you for purchasing one of our range of model
INSTRUCTION MANUAL WARNING. aquacraftmodels.com
 aquacraftmodels.com INSTRUCTION MANUAL WARNING Never attempt to swim after a stalled R/C boat. Never operate your R/C boat while standing in the water. Never operate your R/C boat in the presence of swimmers.
Warranty. Before Building: ASSEMBLY AND OPERATION MANUAL
 ASSEMBLY AND OPERATION MANUAL by Warranty AquaCraft will warrant this kit for 90 days after the purchase from defects in materials or workmanship. AquaCraft will either repair or replace, at no charge,
Sanibel Owners Manual
 Sanibel 36-600 Owners Manual TM Specifications Length (Hull):... 36 inches Height (Mast):... 51.5 inches Height (Overall):... 69 inches Beam:... 7.5 inches Radio: JR Beat Gear w/sail winch servo Sail area:
Warranty. Before Building:
 ASSEMBLY AND OPERATION MANUAL by Warranty AquaCraft will warrant this kit for 90 days after the purchase from defects in materials or workmanship. AquaCraft will either repair or replace, at no charge,
shown as diagram SSEMBLE THE HULL,KELL AND MASTER
 When you attain the sailing ship which this is attractive and also is rich in challenges, please do not have eagerly to install the components below, asks you first to soak the cup coffee or the tea slowly,reads
Instruction Manual. Features. Specification: Length: 730mm Width: 500mm Height: 1000mm Sail Area: 0.15m 2. Weight: 692g (w/o battery & receiver)
") AN UNBELIEVABLE SPEED MACHINE Instruction Manual Features Specification: Length: 730mm Width: 500mm Height: 1000mm Sail Area: 0.15m 2 Weight: 692g (w/o battery & receiver) Thank you for purchasing your
AN UNBELIEVABLE SPEED MACHINE Instruction Manual Features Specification: Length: 730mm Width: 500mm Height: 1000mm Sail Area: 0.15m 2 Weight: 692g (w/o battery & receiver) Thank you for purchasing your
In each step, the needed parts are shown the number right below. Locate all parts for the step.
 Tools Required for Assembly Phillips Screwdriver, Med Needle Nose Pliers Sandpaper (#400 grit) Hobby Knife Scissors CA Instant Glue Rubbing Alcohol Drill Bit 1/16", 1.6mm 5/64, 2mm 1/8, 3mm 5/32, 4mm Before
No.5550 INTRUCTION MANUAL WARRANTY WARNING. Notice This is not a toy. Assembly and operating of this boat requires adult supervision.
 INTRUCTION MANUAL WARRANTY Thunder Tiger guarantees this model kit to be free from defects in both material and workmanship. The total monetary value under warrant will in no case exceed the cost of the
WARNING. aquacraftmodels.com
 aquacraftmodels.com WARNING Never attempt to swim after a stalled R/C boat. Never operate your R/C boat while standing in the water. Never operate your R/C boat in the presence of swimmers. Always use
Table of Contents DO NOT RETURN THIS PRODUCT TO THE STORE
 2 Table of Contents If you have questions about operating or installing your new Megatech product, or if you are missing parts... Please Call Megatech First! DO NOT RETURN THIS PRODUCT TO THE STORE Call
ODOM CLASS SPECIFICATIONS
 ODOM CLASS SPECIFICATIONS Effective March 1, 2004 1. GENERAL 1.1 Purpose of the Measurement Rules 1.1.1 The ODOM is a One-Design Class as defined by the American Model Yachting Association (AMYA). However,
ASSEMBLY MANUAL HOBIE CATSY
 ASSEMBLY MANUAL HOBIE CATSY HOBIE CAT EUROPE ZI Toulon Est, BP 50 8078 Toulon cedex 9, France Tel : + (0)9 08 78 78 - Fax : + (0)9 08 99 Email : hobiecat@hobie-cat.net - http://www.hobie-cat.net ASSEMBLY
North Sails Seattle Thunderbird Tuning Guide
 Page 1 of 6 North Sails Seattle Thunderbird Tuning Guide Introduction The following tuning guide is meant as a good starting point in setting up your boat. Since not all Thunderbirds are exactly alike
Basic Keelboat Sailing Standard (ASA 101)
") Basic Keelboat Sailing Standard (ASA 101) Prerequisites: None General Description: Description: Demonstrated ability to skipper a sloop-rigged keelboat of approximately 20 to 27 feet in length by day in
Basic Keelboat Sailing Standard (ASA 101) Prerequisites: None General Description: Description: Demonstrated ability to skipper a sloop-rigged keelboat of approximately 20 to 27 feet in length by day in
CR 914 Class Rules. Revised July 15, 2000 See also CR-914 Class Rule Interpretations
 CR 914 Class Rules Revised July 15, 2000 See also CR-914 Class Rule Interpretations 1 GENERAL - CLASS: The CR 914 is a One-Design class. The Class objective is that the sailing skills of the skipper shall
TUNE YOUR SAILS SPEED. Optimist Tuning Guide. Photo Wavelength
 TUNE YOUR SAILS FOR OUTRIGHT SPEED Photo Wavelength PEAK / HEAD THROAT TACK CLEW THANK YOU for choosing North Sails for your Optimist. Whether you are just starting out in an Optimist you are an experienced
Table of content Introduction 5 1. Part 1. Assembly Tools needed for Assembly Glossary Hulls Mounting the beams 7
 Table of content Introduction 5 1. Part 1. Assembly 6 1.1. Tools needed for Assembly 6 1.2. Glossary 6 1.3. Hulls 7 1.3.1. Mounting the beams 7 1.3.2. Fixing the mast rotation cleats 8 1.3.3. Placing the
TECHNICAL DESCRIPTION MASTHEAD SLOOP:
 NEW SAILOR TECHNICAL DESCRIPTION MASTHEAD SLOOP: What is a masthead sloop?.page 2 Parts and function of the masthead sloop sail... Page3 Parts and function of the masthead sloop rigging Page 4 Parts and
CSC Learn to Sail Class
 CSC Learn to Sail Class JUNE 2014 Pedram Leilabady LNYC Nomenclature Sailors Lingo! Direc@ons Ahead Astern 1 6/3/14 Main Parts Mainsail Jib Sails / Spars Head Mast Head Leech Luff Leech Luff Mainsail Clew
Topaz OMEGA Rigging Instructions
 Topaz OMEGA Rigging Instructions www.toppersailboats.com TOPAZ OMEGA RIGGING INSTRUCTIONS CONTENTS 02. Introduction 02. Manufacturers Details 03. Maintenance 04. Raising the Mast 05. Attaching the Boom
Sailing Upwind. Section 14. Close-hauled. Starboard Tack. Port Tack Figure 14 1 Port Versus Starboard Tack. 14 Sailing Upwind 111
 14 ing Upwind 111 Section 14 ing Upwind Close-hauled. ing as close to the wind, or as directly into the wind, as possible. Also, on-the-wind or by-the-wind, beating. Cunningham (Rig). An arrangement of
An Australian Classic by spectre.com
 An Australian Classic by www.go spectre.com Your Bug! Welcome to the Balain Bug experience!!!!!! The Bug kit has been designed so as to be a modern version of the Traditional Bug now you can sail like
Sailboat Rigging and Tuning
 Sailboat Rigging and Tuning February 13, 2006 The following texts are compiled from three main sources, Bob Sterne (www.crya.ca), Greg Fisher (www.modelyacht.org), and the Soling 1M website (www.solingonemeter.org).
EP RTR Sailboat. Owners Manual
 EP RTR Sailboat Owners Manual Specifications Length (Hull): 24 in (610mm) Height (Mast): 36.5 in (927mm) Beam: 6.25 in (158.75mm) Radio: Spektrum DX2M 2.4GHz Motor: 380-size The Pro Boat Endeavor comes
Melges 24 Sailing Guide
 RACING GUIDES www.ullmansails.com Upwind Sailing Melges 24 Sailing Guide The Melges is most efficient when sailed as flat as possible. Excessive heel causes leeway which is slow. The skipper must work
Wysiwig - Wayfarer Rigging Guide
 Wysiwig - Wayfarer 8767 - Rigging Guide GENERAL NOTES Before you go afloat, make sure that the self-bailer is closed. It is operated through the cut-out in the starboard floorboard. If you do not close
Most sail with 5 or 6 in the boat. Here are the names I will use for the various positons (from the back forward):
:") Racing the Oakcliff Sailing Match 40 s Dave Perry notes May 17, 2016 There are many ways to do things. Here are some notes on how we do things on the Match 40 s at Oakcliff. Most sail with 5 or 6 in the
Racing the Oakcliff Sailing Match 40 s Dave Perry notes May 17, 2016 There are many ways to do things. Here are some notes on how we do things on the Match 40 s at Oakcliff. Most sail with 5 or 6 in the
DRAGONFLITE 95 RESTRICTED CLASS RULES 2016
 DragonFlite Force 95, Restricted Class Rules 2016 2013 Version 1.0 DRAGONFLITE 95 RESTRICTED CLASS RULES 2016 Version 1.0 DF Racing Rules Committee 2016 Introduction The DragonFlite 95 (DF95) project started
Follow these easy steps to properly assemble your new Zim 420
 Thank you for buying a Zim 420 and welcome to the Zim Sailing family. We are extremely proud of the quality of our boats and the race results are proven. Many of the top sailors are choosing Zim over other
2018 Osprey Yacht Club
 Page 1 2018 Osprey Yacht Club Optimist Sailboat Youth Training Manual Or How to have a lot of fun on a small sailboat! Revision Date: August 19, 2017 Page 2 Table of Contents Table of Contents... 2 What
Sail Trimming Guide for the Beneteau 40
 INTERNATIONAL DESIGN AND TECHNICAL OFFICE Sail Trimming Guide for the Beneteau 40 October 2007 Neil Pryde Sails International 1681 Barnum Avenue Stratford, CONN 06614 Phone: 203-375-2626 Fax: 203-375-2627
Hansa 2.3 Rigging Guide
 Hansa 2.3 Rigging Guide Manufactured by Hansa Sailing Systems Pty Ltd ABN 56 079 318 031 4/4 Cumberland Avenue SOUTH NOWRA NSW 2541 AUSTRALIA Postal: PO Box 5048 NOWRA DC NSW 2541 Telephone: +61 2 4403
650mm R/C High Performance Racing Sailboat
 650mm R/C High Performance Racing Sailboat For more information about the boat and the DragonForce 65 racing class. visit: www.dfracing.world Specification Length: 650mm Beam: 116.5mm Rig Height: 915mm
AMYA SeaWind Class Rules
 AMYA SeaWind Class Rules Revised 4/1/2011 1 GENERAL - CLASS: The SeaWind is a one design class. The class objective is competition where the skill of the skipper in sailing and adjusting his boat will
Sail Trimming Guide for the Beneteau 343
 INTERNATIONAL DESIGN AND TECHNICAL OFFICE Sail Trimming Guide for the Beneteau 343 June 2006 Neil Pryde Sails International 1681 Barnum Avenue Stratford, CONN 06614 Phone: 203-375-2626 Fax: 203-375-2627
Index 1. Trampoline 2. Main Foils 3. Spinnaker Pole 4. Mast Setup 5. Mast Rigging 6. Rig Tension 7. Trapeze Lines 8. Rudders 9. Boom 10. Main Sheet an
 By User Manual Index 1. Trampoline 2. Main Foils 3. Spinnaker Pole 4. Mast Setup 5. Mast Rigging 6. Rig Tension 7. Trapeze Lines 8. Rudders 9. Boom 10. Main Sheet and Traveler 11. Main Sail 12. Downhaul
E Scow Racing and Rigging Manual
 E Scow Racing and Rigging Manual Written by Mark Ehlers Editing and content revisions by Andrew Bartling Aspects of Sailing E Scows Crew weight should never exceed 675lbs. The target weight for 4 people
1 Tuning Platform Reseating Beam Pads Rudder alignment Noisy Foils Rig Tension...
 Contents 1 Tuning... 2 1.1 Platform... 2 1.2 Reseating Beam Pads... 2 1.3 Rudder alignment... 3 1.4 Noisy Foils... 3 1.5 Rig Tension... 4 1.6 Mast rake... 4 1.7 Spreader rake... 5 1.8 Diamond tension...
TUNE YOUR SAILS SPEED
 TUNE YOUR SAILS FOR OUTRIGHT SPEED J/70 Tuning Guide Rev. R02 After countless hours sailing, testing and competing in the J/70 One Design, North Sails has updated our tuning notes and tips in an effort
TUNE YOUR SAILS SPEED. J/70 Tuning Guide Rev. Q10a. Photo Chris Howell
 TUNE SAILS FOR OUTRIGHT SPEED J/70 Tuning Guide Rev. Q10a Photo Chris Howell After countless hours sailing, testing and competing in the J/70 One Design, North Sails has updated our tuning notes and tips
Pico rigging manual 2007.doc Page 1 of 28
 Pico rigging manual 2007.doc Page 1 of 28 Pico Rigging Instructions The Pico rigging instructions are a guide to rigging your boat. Due to production supplies certain parts may be slightly modified from
AMYA SeaWind Class Rules
 AMYA SeaWind Class Rules Revised 4/1/2013 1 GENERAL - CLASS: The SeaWind is a one design class. The class objective is competition where the skill of the skipper in sailing and adjusting his boat will
F-27 RIGGING GUIDE EXTRACTED FROM ORIGINAL F-27 SAILING MANUAL
 F-27 RIGGING GUIDE EXTRACTED FROM ORIGINAL F-27 SAILING MANUAL By Ian Farrier not be possible if the towing vehicle is a van. When trailering, allow extra distance for stopping. Watch also for low bridges,
Sail Trimming Guide for the Beneteau 373
 INTERNATIONAL DESIGN AND TECHNICAL OFFICE Sail Trimming Guide for the Beneteau 373 March 2004 Neil Pryde Sails International 354 Woodmont Road #18 Milford, CT 06460 Phone: 203-874-6984 Fax: 203-877-7014
TUNE YOUR SAILS SPEED
 TUNE YOUR SAILS FOR OUTRIGHT SPEED Rev R05 Important Notes l We recommend not exceeding 350lbs total crew weight as this puts excess stress on the mast and the boat. l When sailing, the boat performs best
J/70 Tuning Guide. For any question you may have on tuning your J/70 for speed, contact our experts:
 Photo Paul Todd/OUTSIDE IMAGES For any question you may have on tuning your J/70 for speed, contact our experts: Tim Healy 401-683-7997 tim.healy@northsails.com Will Welles 401-683-7997 will.welles@northsails.com
Introduction to Dinghy Sailing AYF - TL1 Course Notes
 North Harbour Sailing Club Established 1948 Introduction to Dinghy Sailing AYF - TL1 Course Notes CONTENTS Introduction. Safety. Parts of the Boat. Rigging. Boat Handling. Leaving and Returning to Shore.
Sonar Tuning Guide. Jud Smith Tomas Hornos Send order forms to:
 Sonar Tuning Guide Jud Smith jsmith@doylesails Tomas Hornos tomas@doylesails.com Send order forms to: onedesign@doylesails..com Rig Tune We recommend checking your shroud tuning before going sailing. Start
J/22 Dave Perry. Based on sailing the POW in the Ft Worth Boat Club (TX) boats in 2006 We sailed with three in the boat
 boats in 2006 We sailed with three in the boat") J/22 Dave Perry Based on sailing the POW in the Ft Worth Boat Club (TX) boats in 2006 We sailed with three in the boat GENERAL Boats spin fast! Boats go fast sideways when downspeed Use weight to help
J/22 Dave Perry Based on sailing the POW in the Ft Worth Boat Club (TX) boats in 2006 We sailed with three in the boat GENERAL Boats spin fast! Boats go fast sideways when downspeed Use weight to help
The Basics of Victory Sailing II
 The Basics of Victory Sailing II Torrey Pines Sailing Club Sailing from Island Palms Marina on Shelter Island San Diego, CA Visit us at our web site 1 Boating Safety Safety First Life jacket Suntan lotion
Far East Boat Optimist Rigging Instructions
 Far East Boat Optimist Rigging Instructions These instructions are written specifically for Far East Boats Championship and Racing Optimist. Parts of the Optimist PAGE 1 Sprit Wind Indicator Sail Mast
Rhodes 19 Tuning Guide
 Rhodes 19 Tuning Guide Jud Smith jsmith@doylesails Tomas Hornos tomas@doylesails.com Send order forms to: onedesign@doylesails..com SETTING UP YOUR RHODES 19 FOR DOYLE SAILS BEFORE STEPPING THE MAST 1.
Y-FLYER TUNING GUIDE ONSHORE ADJUSTMENTS
 Y-FLYER TUNING GUIDE Congratulations on your purchase of North Y-Flyer sails. We are confident you will find superior speed over all conditions. Your sails are designed to be fast, as well as easy to trim
SAFETY PRECAUTIONS PARTS NEEDED TO COMPLETE YOUR RIO EP SPECIFICATIONS MANUAL SPECIFICATION AND DESCRIPTION CHANGES
 PARTS NEEDED TO COMPLETE YOUR RIO EP Necessary components for operating your Rio EP: Four AA batteries (for transmitter) Onyx 100 AC/DC Peak Charger (DTXP4190) Onyx 7.2V 1800mAh NiCd stick pack (DTXC2010)
 Table of content Introduction 5 1. Part 1. Assembly 6 1.1. Tools needed for Assembly 6 1.2. Glossary 6 1.3. Hulls 7 1.3.1. Mounting the beams 7 1.3.2. Fixing the mast rotation cleats 8 1.3.3. Mounting
Rigging Guide. July, Revision: 1.6
 Rigging Guide July, 2016 Revision: 1.6 INDEX 1 Unpacking... 3 1.1 Before starting... 3 1.2 Removing contents... 3 1.3 Trolley Assembly... 3 2 Hull & Wings... 4 2.1 Hull... 4 2.2 Wing Frame Assembly & Control
J/70 Tuning Guide. onedesign.com Follow North Sails on... For any question you may have on tuning your J/70 for speed, contact our experts:
 Photo Paul Todd/OUTSIDE IMAGES For any question you may have on tuning your J/70 for speed, contact our experts: Ruairidh Scott 01329 443 430 ruairidh.scott@northsails.com Tim Healy 401-683-7997 tim.healy@northsails.com
Your new Quantum asymmetrical. is designed and engineered to be. easy to set and trim. Fundamental. principals of asymmetrical trim are
 Asymmetrical Trim Guide Your new Quantum asymmetrical is designed and engineered to be easy to set and trim. Fundamental principals of asymmetrical trim are outlined in this guide. For more detailed information,
Bladerider X8 Assembly Help Notes
 2.1 Remove All Parts & Have Some Tools Handy Remove all items from the box and identify each part as per the packing sheet and check that nothing is missing. If there is something missing, please email
Weta Basic Rigging Guide
 Weta Basic Rigging Guide A quick reference guide of how to rig your Weta, with some tips to make rigging quick and easy! For a more indepth guide see our Weta Manual under Weta Owners on the website. 1.
CALLIOPE SEA SCOUT GROUP BASIC SAILING MANUAL
 The Calliope Sea Scout Group The Ship King Edward Parade DEVONPORT CALLIOPE SEA SCOUT GROUP BASIC SAILING MANUAL This manual has been produced to give all Calliope Sea Scouts a Basic guide to understanding
A Guide to Yacht Racing
 Guide to Yacht Racing Congratulations on choosing to go racing with Equinox Sailing. Yacht racing is one of the most exciting team sports around, requiring skill and team work. One-design yacht racing
Tuning Guide January 2012
 Tuning Guide January 2012 www.skud.org This tuning guide has been prepared by the IACA SKUD 18 Committee to assist new sailors in the SKUD 18 class to prepare their MkI or MkII boat to a competitive level
Wind Light Moderate Heavy Speed 0-8 mph 9-17 mph 18 + mph
 Hobie 20 Racing Setting - Compiled by Bob Mimlitch, Fleet 23, Dallas, TX Most of the information is from Bob Curry's articles in Catamaran Sailor published by Mary Wells. Wind Light Moderate Heavy Speed
Introduction. low deck spinnaker launching and retrieval system for quick and easy sail handling to allow the real focus to be on sailing.
 Introduction The Farr 280 One Design is a new production racing sailboat by Farr Yacht Design that will deliver the excitement of grand prix racing to the under-30 one design arena. As a modern one design,
DRAGONFLITE 95 RESTRICTED CLASS RULES 2016
 DragonFlite Force 95, Restricted Class Rules 2016 2013 Version 1.2 1.0 DRAGONFLITE 95 RESTRICTED CLASS RULES 2016 Version 1.2 DF Racing Rules Committee 2016 Introduction The DragonFlite 95 (DF95) project
T 10 Tacking Ver
 T 10 Tacking Assume sailing upwind in moderate conditions Ensure Jib sheets are clear both in the cockpit and forward. Ensure new course is clear of other boats, shipping, and navigation hazards. Ensure
Dolly wheels in slot #8 for Boat #10.
 Rigging: Laser SAIL SELECTION: The International Laser Class has three different official rigs. Each sail is designed for sailors of different weights. The Standard Rig was designed for sailors weighing
CII Rigging suggestions
 CII Rigging suggestions This mini-manual uses photographs of the final prototype sail and the final pre-production mast. Where changes occurred between these and the production units, they are described
TUNE YOUR RIG FOR OUTRIGHT SPEED. J/88 Tuning Guide Solutions for today s sailors
 TUNE YOUR RIG FOR OUTRIGHT SPEED 2 We hope you enjoy your J/88 Tuning Guide. North class representatives and personnel have invested a lot of time to make this guide as helpful as possible for you. Tuning
SOLUTIONS FOR TODAY S SAILORS J/88
 SOLUTIONS FOR TODAY S SAILORS J/88 Tuning Guide Contents Initial Headstay Set-up... 3 Onboard Headstay Adjustment... 5 J/88 Tuning Guide... 7 Sailing Setup... 8 North Sails Tips for J/88... 9 Jib Leech
Taming the Kite! Wineglasses. Wineglasses occur when the top half of the kite fills before the bottom with a twist in the middle.
 Taming the Kite! What goes wrong? Wineglass when launching can happen in light or heavy weather Broaching on a reach usually in heavy weather Death rolls usually in heavy weather Gybing disasters worse
Knowing how to trim your sails properly will take your cruising to the next level to the next level of performance and comfort.
 How To Trim the Main Knowing how to trim your sails properly will take your cruising to the next level to the next level of performance and comfort. QUANTUM SAILS Posted MAY 18, 2016 Knowing how to trim
Stevenson Projects Building the Hull Top Deck and Bulkheads
 Stevenson Projects Building the Hull 1. Print out both piece sheets. 2. Cut out one keel piece and glue it to a piece of balsa wood or dense cardboard. Cut out the second keel piece and glue it to the
Introducing the new Farr 25 OD Built by OD Yachting
 Introducing the new Built by OD Yachting... e n g i n e e r e d f o r p e r f o r m a n c e w i t h s u p e r i o r h a n d l i n g Specs LOA LWL Beam Draft Displ Ballast 7.62 m 6.96 m 2.47 m 1.80 m 930
Tuning C420 Sails By Brian Doyle and Dave Kirkpatrick
 Tuning C420 Sails By Brian Doyle and Dave Kirkpatrick In the spring of 2003, the Club 420 Class sails were redesigned to provide a better competitive and useful lifespan. Now that several events have been
M32 CATAMARAN ASSEMBLY MANUAL
 M32 CATAMARAN ASSEMBLY MANUAL 1 M32 CATAMARAN ASSEMBLY MANUAL MANUAL SUMMARY M32 ASSEMBLY Parts and tools Instructions MAST PLATFORM Parts and tools Instructions MAST STEPPING Instructions MAIN HALYARD
TUNE YOUR SAILS FOR OUTRIGHT SPEED. MC Scow Tuning Guide. Rev Q10
 TUNE YOUR SAILS FOR OUTRIGHT SPEED Rev Q10 Sail Designs Z-MAX MAINSAIL The Z-MAX has proven to be a fantastic all around sail for all sailors. Simple to set up, easy to use and trim. This new sail has
The USA Canterbury J. Class Rules
 Canterbury J Class Owners Association The USA Canterbury J Class Rules 2010 As Accepted 2008 and Revised February 2010 Published March 2010 The Canterbury J Class Rules ~ 2008 Page 1 of 10 THE CANTERBURY
Vanguard Sailboats 300 Highpoint Avenue Portsmouth, RI For the dealer nearest you call SAIL
 Vanguard Sailboats 300 Highpoint Avenue Portsmouth, RI 02871 For the dealer nearest you call 800. 966.SAIL Unpack the major parts listed below and lay them out on a soft piece of ground free of sharp objects.
OWNER S MANUAL. for Inters and Nacra F-18
 OWNER S MANUAL for Inters and Nacra F-18 Tools you ll need: 9/16 socket Wrench Phillips Screwdriver Allen Wrench (included) HULL ASSEMBLY Place hulls boxes approx. 8 feet apart. Make sure both hulls are
Basic Cruising Standard
 Basic Cruising Standard OBJECTIVE To be able to cruise safely in familiar waters as both skipper and crew of a sloop rigged keelboat of 6 to 10 meters in moderate wind and sea conditions by day. PREREQUISITES
Small Sailboat Pocket Manual With Water Riddles And Memory Tips
 Small Sailboat Pocket Manual With Water Riddles And Memory Tips By Floyd Jay Winters http://smallsailboats.net ii Copyright Notice Copyright 2016, 2017 by Floyd Jay Winters Small Sailboats Made Fun and
ITEMS INCLUDED WARRANTY INTRODUCTION SAFETY PRECAUTIONS. UL-1 Hull Canopy Cowl Vertical Wings (Installed) Transmitter Manual Boat Stand
 Transmitter Manual Boat Stand") WARNING: Never attempt to swim after a stalled R/C boat. Never operate your R/C boat while standing in the water. Never operate your R/C boat in the presence of swimmers. Always use a Personal Flotation
WARNING: Never attempt to swim after a stalled R/C boat. Never operate your R/C boat while standing in the water. Never operate your R/C boat in the presence of swimmers. Always use a Personal Flotation
3. Sail Kit. Table of Contents: Portland Pudgy Safety Dinghy: 3. Sail Kit
 Table of Contents: 3. Sail Kit Sailing the Portland Pudgy... 1 Sailing Tips... 1 Reducing the Sail Area (Reefing the Sail)... 2 Method 1. Reducing Sail without the Exposure Canopy... 2 Method 2. Reducing
Now we get to the really fun part of cat sailing, but first you need to know about apparent wind.
 Shelley Sailing Club Inc. Notes for informal catamaran training course, Alec Duncan, 14/3/2015 Part 4: Reaching and running Now we get to the really fun part of cat sailing, but first you need to know
Laser A USER S MANUAL R A D I O C O N T R O L L E D
 Laser R A D I O C O N T R O L L E D R A USER S MANUAL LOA: 41.5" (105.41cm) LWL: 37.75" (95.88cm) DSPL : 9 lbs (3.4kg) BEAM: 13.125" (33.33cm) MAIN HOIST: 52" (132.08cm) DRAFT: 16" (40.64cm) SAIL AREA:
Assembly Instructions Star Kayak Sails kit to a Hobie Mirage drive kayak.
 Assembly Instructions Star Kayak Sails kit to a Hobie Mirage drive kayak. 1. Remove packaging lay out contents. Separate the plastic tubes from the aluminium tubes. 3 plastic and 4 aluminium. ( Giant Star
TUNE YOUR SAILS FOR OUTRIGHT SPEED. E Scow Tuning Guide Rev Q10 Photo David Thoreson
 TUNE YOUR SAILS FOR OUTRIGHT SPEED Photo David Thoreson Knowledge is power. We see this in every sport throughout the world. Racing sailboats is much different from the other sporting events. Sailing requires
Essential Rig Tuning Guide The Ins and Outs of tuning your mast.
 Essential Rig Tuning Guide The Ins and Outs of tuning your mast. Tuning Your Rig The main goal in tuning your mast is to achieve a spar that s straight. By doing this it will help you gain control of sail
Raider 16/Sport - Spinnaker Rigging. Rigging Spinnaker
 Rigging Spinnaker Step 1: Run the spinnaker halyard (minimum 52' in length) through the block then back down the mast. Step the mast as you normally would. Step 2: Temporally tie one end of the spinnaker
Daysailer Tuning Guide
 Daysailer Photo Deb McCaffrey For any question you may have on tuning your Daysailer for speed, contact our experts: Brian Hayes 203-783-4238 brian.hayes@northsails.com Chris Snow 619-226-1415 chris.snow@northsails.com
HOW TO RIG A CORMORANT
 HOW TO RIG A CORMORANT Page 1 of 6 Instructions adapted from Cormorant Owner s Handbook 1 Ensure that peak halyard, throat halyard and topping lift are attached to the mast as shown in Fig. 1. 2 Set-up
C&C 30 TUNE YOUR RIG FOR OUTRIGHT SPEED. C&C30 Tuning Guide Solutions for today s sailors
 C&C 30 TUNE YOUR RIG FOR OUTRIGHT SPEED 2 C&C 30 The C&C 30 is a relatively light boat which makes it very receptive to positive trimming. It is imperative to have the sail trim spot on as well as have
Tacking (sailing on port, tacking to starboard)
") 1. 2. Tactics 3. Main. Pit. 4. Genoa Port Tack. Guy. 5. Genoa Stbd Tack. Sewer. 6. Spinnaker Sheet. 7. Mast. 8. Bow. RS EB CC CM MK SA JS SK Tacking (sailing on port, tacking to starboard) Goto low-side
1. 2. Tactics 3. Main. Pit. 4. Genoa Port Tack. Guy. 5. Genoa Stbd Tack. Sewer. 6. Spinnaker Sheet. 7. Mast. 8. Bow. RS EB CC CM MK SA JS SK Tacking (sailing on port, tacking to starboard) Goto low-side
FDR CHRYSLER 16' CATAMARAN (MUSKETEER) The initial rigging of a sailboat is not difficult, but if the boat is strange
 The initial rigging of a sailboat is not difficult, but if the boat is strange") Page of 6 Revised 2/0/76 RIGGING INSTRUCTIONS FDR CHRYSLER 6' CATAMARAN (MUSKETEER) The initial rigging of a sailboat is not difficult, but if the boat is strange to the new owner, or the new owner is
Page of 6 Revised 2/0/76 RIGGING INSTRUCTIONS FDR CHRYSLER 6' CATAMARAN (MUSKETEER) The initial rigging of a sailboat is not difficult, but if the boat is strange to the new owner, or the new owner is
ASA104 Instructions Page 1
 ASA104 Instructions Page 1 Main Maststep Fore Maststep Aft (Stern) Fore (Bow) Main Mast Shrouds Mizzen Mast Shrouds Bowsprit Shrouds End of Bowsprit To begin: Place the ship in the stand. Carefully unroll