User Manual Article number: I
|
|
|
- Rudolph Poole
- 6 years ago
- Views:
Transcription


1
2
3 User Manual Fluido Irrigation Fluid Warmer Article number: I INT/R347-EN/0-01/11
4
5 Foreword...3 Disclaimer Temperature Management Fluid Warming Fluido Irrigation Fluid Warmer Description of the Fluido Irrigation The Fluido Irrigation Fluid Warmer The Control Panel Control Panel Symbols Control thermometer Fluido Irrigation Disposable Sets and Accessories Description of cassette Preparing the Fluido Irrigation for use User instructions Connection to power supply Switching on Positioning the Fluido Irrigation URO Set Priming Fluido Irrigation URO Set Priming the Fluido Irrigation URO Set Priming the Fluido Irrigation URO Patient line Start Warming De-aeration Stop warming Post-operative options Post-operative non-heated irrigation Fluido Irrigation URO Spike Set Fluido Irrigation URO Female cap Extra options Problems and solutions Symbols and Warnings & Precautions Symbols Warnings & precautions Maintenance Storage and cleaning Warranty Specifications
6 Foreword Congratulations on your purchase of the Fluido Irrigation Fluid Warmer. This device is developed in accordance with the latest safety standards. We wish you every success in preventing and controlling hypothermia and we are sure that the Fluido Irrigation Fluid Warmer can help you to do so. Please read this manual carefully before working with the Fluido Irrigation. If you identify any improvements and/or discover any other applications during the use of the Fluido Irrigation products, please let us know. TSCI (The Surgical Company International B.V.) Disclaimer The manufacturer reserves all rights. No part of this document may be reproduced or published, electronically, mechanically, in print, photographic print, on microfilm or by any other means whatsoever, without the explicit consent of manufacturer. The content of this document has been compiled with the greatest possible care and this information can be regarded as reliable. Nevertheless, the manufacturer reserves the right to make alterations and improvements to the device. These may not yet have been described in the instructions. The manufacturer cannot be held liable for the final outcome of the patients treatment. This document contains proprietary information that may not be disclosed to third parties. This document may not be used without the explicit written consent of the manufacturer. These instructions are intended for personnel authorised to work with the medical device described in this manual. 3
7 1 Temperature Management Hypothermia, an abnormal drop in body temperature, is a threat to human life. Hospital patients in particular run serious risks if their body temperature falls below 36 ºC. The risk of hypothermia is particularly high at times when they are vulnerable, such as pre-, per-, and post-surgical procedures. Factors that can contribute to hypothermia include the duration of the surgical procedure, the location of the wound, the amount of blood loss, the surface area of the wound, the environmental temperature and the anaesthetic technique. 2 Fluid Warming The use of irrigation fluids can cause hypothermia. If inadequately warmed the fluids can exacerbate drops in temperature. Many of these operations are carried out under regional anaesthesia, which has been shown to attenuate the thermogenic response to hypothermia, it showed a clinically significant, adverse, hemodynamic response in those patients who were not warmed aggressively. Hypothermia can be reduced by the use of irrigation fluid that has been warmed. 4

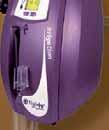
8 3 Fluido Irrigation Fluid Warmer The Fluido Irrigation makes it possible to warm fluids, fast safe and easy. Fluido Irrigation Fluid Warmer ( I) Fluido PowerLifter II (I-U02237) 5
. 4.1 The Fluido Irrigation Fluid Warmer Control panel Eject button Slot for the Fluido Irrigation disposable sets 4.")

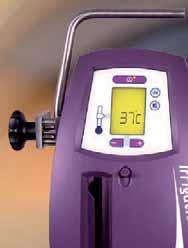
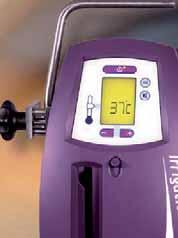
9 4 Description of the Fluido Irrigation The Fluido Irrigation ( I) is a fluid warmer that is easy to operate. Five lamps ensure rapid fluid warming. The Fluido Irrigation comes with disposable sets for irrigation (see Chapter 4.3). 4.1 The Fluido Irrigation Fluid Warmer Control panel Eject button Slot for the Fluido Irrigation disposable sets 4.2 The Control Panel The control panel is easy to use and the display shows all required information. The control thermometer at the left side indicates continuously whether the end of the line temperature equals the set temperature 1. In case of a malfunction, an audible alarm sounds and the control thermometer turns completely red (see Chapter 4.2.2). Stand-by / Start button Switch button: Flow indicator & volume meter Suppress Audible alarm (3min.) Control thermometer Temperature setting 1 The end temperature cannot be guaranteed when an extension line is being used. Please pay attention to the margins mentioned in the Technical Data Sheet, Chapter 13. 6
10 4.2.1 Control Panel Symbols Flow in ml per minute, increments of 1ml (0-20), 5ml (20-150) and 10ml (as of 150) Total volume in litres Total hours that the Fluido Irrigation has been in operation Displayed between 1000 and 1500 operating hours for 5 sec. after switching ON the Fluido Irrigation. It is still possible to operate the Fluido Irrigation but maintenance must take place 2. Displayed between 1500 and 2000 operating hours continuously after switching ON the Fluido Irrigation. It is still possible to operate the Fluido Irrigation but maintenance must take place 3. Displayed after 2000 operating hours continuously after switching ON the Fluido Irrigation, joined by a continuous audible beep. This beep can be suppressed for 3 minutes after pressing the button. It is still possible to operate the Fluido Irrigation but maintenance must take place 3. Status of the five lamps. A flashing bar shows that the relevant lamp needs replacing Insert the cassette of the Fluido Irrigation disposable set into the Fluido Irrigation There is a malfunction. Reset the Fluido Irrigation or contact your service centre Audible alarm suppressed Set temperature at the end of the line 2 Maintenance can only be done by a trained/certified technician of your local supplier or the manufacturer. 3 Please pay attention to the margins mentioned in the Chapter 13. 7
11 Remove the cassette from the Fluido Irrigation Fluid Warmer Tilt sensor alarm Alarm code Control thermometer The control thermometer is not illuminated. There is no warming. The lower section is green. The end temperature is more than 1º C lower than the set temperature. The lower and middle sections are green. The end temperature equals the set temperature 3. The top section is red. The incoming temperature or the output temperature is higher than the set temperature. An alarm signal sounds. The entire control thermometer is red. There is a malfunction. An alarm signal sounds and a spanner symbol appears (see Chapter 8). 8
12 4.3 Fluido Irrigation Disposable Sets and Accessories The Fluido Irrigation shall only be used with Fluido Irrigation disposable sets. A Fluido Irrigation disposable set consists of a cassette with the accompanying tubing. Pressure must not exceed 300 mmhg. Usage of a (manually operated) pressure device without a pressure indicator is NOT allowed! Fluido Irrigation URO Set This is a Urology set, which is suitable for Urology. Its capacity is 680 ml/min (normothermic flow). It is a complete set, including a separate patient line and a Luer Lock bore cap. The de-aeration chamber contains a backflow valve. The priming volume is 220 ml. This URO Set shall only be used in combination with the Fluido Irrigation URO Patient Line, URO Spike Set and URO Female Cap. Article number: B Fluido Irrigation URO Patient Line This is a patient line with extra Luer Lock cap that shall only be used in combination with the Fluido Irrigation URO Set and/or URO Spike Set Article number: B Fluido Irrigation URO Spike Set This is a URO Spike Set; a drip chamber with spikes that shall only be used in combination with the Fluido Irrigation URO Patient Line. Article number: B Fluido Irrigation URO Female Cap This is a bore cap that shall only be used in combination with the Fluido Irrigation URO Set. Article number:
13 4.3.1 Description of cassette The core of the heating cassette consists of ten channels through which the fluid flows. Two partitions in the bends ensure that the fluid is mixed well. The flow and temperature are measured at four measuring points. The front of the Fluido Irrigation disposable cassette is transparent. The back is made of black plastic. Use The disposable cassette is sterile packed. Please check the tube connections before use. The disposable cassette must be undamaged and clean and can be used for a maximum of 24 hours. In order to avoid damaging the Fluido Irrigation, do not use damaged cassettes. Pressure must not exceed 300 mmhg. Usage of a (manually operated) pressure device without a pressure indicator is NOT allowed! 10
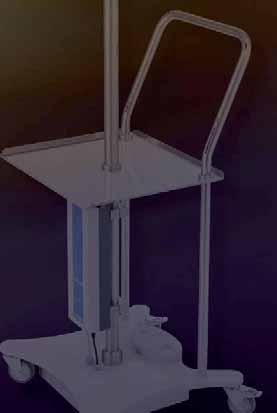
 IV-pole or Fluido Powerlifter II. Any variation from this must not exceed an angle of 2.5º forward or backward.")
14 5 Preparing the Fluido Irrigation for use Before using the Fluido Irrigation, it should be attached to a (Fluido ) IV-pole or Fluido Powerlifter II The Fluido Irrigation should hang upright on the (Fluido ) IV-pole or Fluido Powerlifter II. Any variation from this must not exceed an angle of 2.5º forward or backward. Ensure that the Fluido Irrigation is not damaged and that the ventilation grids (on the side and bottom of the Fluido Irrigation) are not covered. Plug the unit into the main supply. The Fluido Irrigation will first perform a self-test*. When the display unit is illuminated green and the light from the stand-by button turns orange, the Fluido Irrigation is ready for use. * If a cassette is inside the Fluido Irrigation, the test is automatically postponed until after removal of the cassette! If required, a safety test in accordance with the hospital protocol will follow. To ensure that the Fluido Irrigation is stable, the wheelbase of the IV-pole must be in a certain ratio to the height of the Fluido Irrigation clamp. See below graph for use with a 4 or 5 wheel support IV-pole. 11


15 6 User instructions 6.1 Connection to power supply a b c d a. Plug the unit into an earthed socket. b. The Fluido Irrigation will now perform a four-second self-test, which includes a light flash. c. The display panel will illuminate green and the light next to the stand-by button will turn orange. d. The Fluido Irrigation is now in Stand-by. 6.2 Switching on a b c a. Switch the Fluido Irrigation on by pressing the Stand-by button. b. A short audible signal will sound. The display will briefly show all symbols and the control thermometer will illuminate green and red for a moment. The light at the side of the Stand-by button will then turn green and the following symbol will appear on the display panel:. c. The Fluido Irrigation is now ready for use. If the Fluido Irrigation is not in use for 15 minutes, it will automatically switch to Stand-by and the light at the side of the Stand-by button will turn back to orange. 12

16 6.3 Positioning the Fluido Irrigation URO Set a b c d e a. Inspect the package to make sure that it is undamaged. Take a Fluido Irrigation URO Set out of the packaging. b. Hold the disposable cassette by the clamp next to the drip chamber, with the clamp at the top. c. Insert the disposable cassette vertically into the Fluido Irrigation, until you hear a click. d. The display panel will now show the temperature and flow. e. The Fluido Irrigation URO Set is now positioned. 6.4 Priming Fluido Irrigation URO Set Priming the Fluido Irrigation URO Set a b c d e f g a. Close all the clamps on the Fluido Irrigation URO Set. b. Spike the drip fluid container. c. Hold the drip chamber of the giving set upside down. d. Open all the clamps except the one on the unused spike. e. Allow the drip chamber to half-fill with fluid. f. Turn the drip chamber upright again. g. Close the roller clamp. 13
17 h. Turn the de-aeration chamber upside down. i. Open the roller clamp. j. Fill the de-aeration chamber full with fluid. k. Turn the de-aeration chamber upright again. l. De-aerate the rest of the line. m. Close the roller clamp. n. Place the de-aeration chamber in the holder of the Fluido Irrigation. o. The Fluido Irrigation URO Set is now primed Priming the Fluido Irrigation URO Patient line a. Take the Fluido Irrigation URO Patient Line out of the packaging and place it in the sterile field. b. Close the roller clamp of the Fluido Irrigation URO Patient Line. c. Remove the protective caps from the disposable cassette and the URO Patient Line and connect the two. d e f g d. Open the roller clamps from top to operating element. e. De-aerate the rest of the Fluido Irrigation URO Patient Line. f. Close the roller clamp. g. The Fluido Irrigation URO Set and URO Patient Line are now primed. 14
 pressure device without a pressure indicator is NOT allowed! a. Remove the protective cap and connect the system to the operating element.")

18 6.5 Start Warming The Fluido Irrigation is switched on and a Fluido Irrigation URO Set has been positioned. The initial temperature is shown on the display panel. The default temperature setting is 37º C. Pressure must not exceed 300 mmhg. Usage of a (manually operated) pressure device without a pressure indicator is NOT allowed! a. Remove the protective cap and connect the system to the operating element. b. Regulate the flow with the roller clamp. c. Set the required temperature using the + and - buttons. d. The Fluido Irrigation warms the fluid. The display indicates the flow per minute and the control thermometer will be illuminated green, including the arrow. e. The fluid at the end of the Fluido Irrigation URO Patient Line is the correct (set) temperature. 6.6 De-aeration 15 a. De -aeration shall take place when the de-aeration chamber is filled with one-quarter of air. b. Twist off the cap of the de-aeration chamber. c. Twist a syringe with Luer Lock onto the opening of the de-aeration chamber. d. Suck the air from the de-aeration chamber. e. Fill the de-aeration chamber full with fluid. f. Remove the syringe from the de-aeration chamber. g. Replace the cap on the de-aeration chamber. h. The de-aeration chamber is now properly de-aerated.


19 6.7 Stop warming a. First press the stand-by button (the fan will continue for another 2 minutes). b. Close the clamps. c. Disconnect the working element. d e f g d. Press the eject button. The disposable cassette will eject. e. Remove the disposable cassette. f. An orange light will come on next to the stand-by button. g. The Fluido Irrigation is now in Stand-by and ready for re-use. 6.8 Post-operative options Post-operative non-heated irrigation a b c d e f a. Close all clamps b. Disconnect URO Patient Line from the Fluido Irrigation URO Set c. Disconnect the spike set from the Fluido Irrigation URO Set d. Connect the spike set of the URO Set to the URO Patient Line. e. Remove the URO Patient Line from the working element and connect it to a urinary catheter f. Open the clamps to start irrigating 16
20 6.8.2 Fluido Irrigation URO Spike Set a b c d e f g h a. Take the Fluido Irrigation URO Spike Set out of the packaging and slide the clamps down to the center of Y section. b. Close the clamps of the Fluido Irrigation URO Spike Set. c. Spike the drip fluid container. d. Hold the drip chamber of the giving set upside down. e. Open all the clamps except the one on the unused spike. f. Allow the drip chamber to half-fill with fluid. g. Turn the drip chamber upright again. h. Close the clamp. i. Connect the URO Spike Set to the URO Patient Line j. Open the clamps. k. De-aerate the rest of the patient line. l. Close the roller clamp. m. The Fluido Irrigation URO Spike Set is primed Fluido Irrigation URO Female cap The Fluido Irrigation URO Set includes an extra URO Female Cap. The URO Female Cap is also available as a separate article. The URO Female Cap can be connected to the Fluido Irrigation URO Set. 17
21 7 Extra options Request total operating time To see the total number of hours that the Fluido Irrigation has been in operation, press the + and buttons while in stand-by for a few seconds. The total number of hours will be displayed. Request total volume To see the total volume of fluid warmed, press the button during operation or in stand-by. The total volume will be displayed in litres. Reset total volume To reset the total volume, press the and button for five seconds, the volume counter will + return to 0. The counter will automatically return to 0 after 15 minutes during stand-by, Request alternating volume and flow Flow & volume Volum Flow There are three options: the display panel can show the flow, the volume or both, alternately. Press the button to alternate the readings. See the illustration. Suppress audible alarm The audible alarm can be suppressed for three minutes. Press the button. The symbol will appear on the display panel. Add to restored volume In stand-by, press the button, hold it and then + press the button to switch on. Now the total volume will be stored in the memory. The next given volume will be added cumulative. 18
22 8 Problems and solutions In the event of an alarm, follow the steps in the procedure below. 1 Suppress the alarm 2 To obtain the alarm code, press the + and button together (at the same time) The code will appear on the display panel 3 Reset the Fluido Irrigation by taking the following actions: A Press the + and the button together B Hold the + and together with the ml button C Hold these 3 buttons for 2 seconds The Fluido will now be ready to use If the alarm keeps appearing, take a note of the alarm code and contact the service centre. 19
23 Do not use the Fluido Irrigation if one of the following situations arises (and cannot be solved), unless stated otherwise. Problem Cause Solution No power The stand-by button is not lit Fluido Irrigation malfunction Check the plug, socket and earth Contact the service centre + The stand-by button is not illuminated and there is a continuous alarm signal Control system malfunction Contact the service centre + The Fluido Irrigation does not start and the remove cassette symbol is flashing The lamp next to the stand-by button goes out during use and the alarm sounds There is a Standard Set or Trauma set in the Fluido Irrigation (instead of a URO Set) The URO Set is in the unit during the self-test Power failure Clamps are closed Remove the cassette and place the Fluido Irrigation URO Set Remove the cassette Press the stand-by button and wait 10 sec. The symbol appears in the display panel Restore power. If this takes place within 30 sec., the process will restart automatically. If not, remove the cassette and restart the Fluido Irrigation. Open the clamps Fluido Irrigation shows there is no flow Blockage in system Bend in tube Replace drip system Unbend tube Fluid is used up Replace fluid bag Control thermometer entirely red, spanner appears and continual alarm signal Control system malfunction and / or the temperature of the fluid is equal to or higher than 45º C. Contact the service centre Top section of control thermometer is red, pulsing signal heard and no flow registration. Temperature of incoming or outgoing fluid exceeds the set temperature Stop administration of warmed fluid Fluido Irrigation automatically stops warming and restarts warming when temperature is lowered If the Fluido Irrigation stays 20
24 Problem Cause Solution alarming: Check sensors, use RS-232 tool to check individual temperature readings On stand-by, the middle three bars flash, spanner symbol appears and alarm signal sounds Top or bottom bar flashes, control thermometer is completely red, spanner symbol appears and alarm signal sounds continuously Thermometer is completely red, t appears on the display panel One of these lights is defective. Major light is defective The Fluido Irrigation doesn t hang upright on the IV-pole. The angle of variation exceeds 2,5º forwards or backwards. Contact the service centre to replace the light. Contact the service centre to replace the light. Hang the Fluido Irrigation upright, the alarm will automatically disappear. Slot cover sticks Damage or dirt Contact the service centre. Fluid leaks from Fluido Irrigation slot The Fluido Irrigation set is leaking Stop administration and remove the cassette. Contact the service centre. The eject button does not work Damage or malfunction Leave the cassette in place and contact the service centre. 21
25 9 Symbols and Warnings & Precautions 9.1 Symbols 0344 CE marking of conformity 0344 = identification number of Notified Body (KEMA Quality) Serial number Part number See manual/instructions for use Manufacturer Fuse type AC voltage Protection against vertically falling fluid drops (according to IEC 60529) Type CF equipment (according to IEC ) Equipotentiality Transport and storage ambient temperature range Transport and storage relative humidity range Dispose in accordance with European Community Directive 2002/96/EC (WEEE) Sterile, method of sterilisation; ethylene oxide Lot number Expiry date, year/month 22 For single patient use only. Do not re-use, risk of cross contamination
26 This medical device contains phthalates (DEHP). It has been confirmed that DEHP poses no general risk to human health. Areas of possible risk might be the following special patients groups: Children Pregnant or nursing women TSCI recommends that the physician evaluates the risk and benefits of using the Fluido disposables in the treatment of the above mentioned special patient groups on a case by case basis. For more information see Caution Does not contain latex components 9.2 Warnings & precautions Electrical shock hazard. Do not disassemble the Fluido Irrigation. There are electrically live parts inside the Fluido Irrigation. The Fluido Irrigation must not be used if damage has occurred. The Fluido Irrigation disposable set must not be used if damage occurs. Connect the Fluido Irrigation to an earthed socket only. 23 To avoid injury or damage to the Fluido Irrigation, do not use damaged cassettes. The giving set should be de-aerated with irrigation fluid before the Fluido Irrigation is used. Pressure must not exceed 300 mmhg! Usage of a (manually operated) pressure device without a pressure indicator is NOT allowed! The Fluido Irrigation must hang upright on the IV-pole. The angle of variation must not exceed 2.5º forward or backward. Do not use Fluido Irrigation near flammable anaesthetics, to avoid the risk of explosion.

27 The Fluido Irrigation should not be moved on a IV-pole during use. Remove the Fluido Irrigation before moving. Maintenance and repairs should be performed by qualified medical instrument technicians only. Do not immerse the Fluido Irrigation in fluid. Clean the appliance with standard cleaning agents: a moist cloth or alcohol tissues. To keep the Fluido Irrigation stable, the wheelbase of the IV-pole must be in a particular ratio to the clamp height. See the diagram in chapter 5 Preparing the Fluido Irrigation for use Warning: remove the air deflector if the Fluido Irrigation is in operational use at a table or mounted to the Fluido Powerlifter II The Fluido is certified according IEC for electromagnetic interference. However, if nevertheless interference effects with different devices occur, the user is encouraged to correct the interference by one or more of the following measures: Turn devices in the vicinity off and on to isolate the offending equipment. Reorient or relocate the other receiving device. Increase the distance between the interfering equipment and the Fluido Irrigation Fluid Warmer, use another power socket. If assistance is required, please contact your local dealer. Using power cords or replacement parts for internal components other than specified by TSCI may result in increased emission or decreased immunity of the Fluido Irrigation Fluid Warmer The Fluido Irrigation URO set, URO Patient Line and URO Spike Set shall be used for warming irrigation fluids only. The Fluido shall not be used for warming platelets, cryoprecipitates or granulocyte suspense. Check patient s condition & temperature at least every 15 minutes 24
28 10 Maintenance The Fluido Irrigation has no parts that can be maintained by users. Users should not repair or open the Fluido Irrigation in the event of a malfunction. This can damage the appliance and will invalidate the guarantee. The TSCI service centre should service the appliance at least once a year. Have the Fluido Irrigation serial number ready when you contact the TSCI service centre for technical support. The serial number is on the back of the Fluido Irrigation. 11 Storage and cleaning Keep the appliance and all parts in a cool, dry place when they are not in use. Wipe down the Fluido Irrigation with standard cleaning agents: a moist cloth or alcohol tissues. 12 Warranty The manufacturer guarantees end users that, for a period of 1 year from date of dispatch, every Fluido Irrigation blood and fluid warmer will be free of material and finishing defects with normal use and maintenance. The warranty does not apply to any item that is not produced or approved by the manufacturer if this item is the cause of the malfunction. The manufacturer has no obligation under this warranty to perform repairs or replacements resulting partially or in full from accidents, errors or negligence on the part of the user. This warranty applies only to the use of the Fluido Irrigation. If this warranty is invoked, the relevant part shall be properly packed and returned to the local supplier. 25
29 13 Specifications Article number Fluido Irrigation Fluid Warmer I Voltage 230 VAC Frequency 50 / 60 Hz Current 6 A Peak Power 1400 W Fuses 8 A GMDN codes and Weight ± 9.5 kg Dimensions 387 mm x 215 mm x 255 mm Classification (MDD 93/42/EEC) Class IIb Classification (IEC ) Class I, CF Classification (IEC 60529) IPX1 Max. temperature of T out 43 C Alarm limit (software) 46 C Alarm limit (hardware) 47.5 C ± 0.5 C Normothermic flow ml/min Set point temperature 30 39ºC Unit of temperature increase 1 ºC Display type Green lit LCD Heating and measuring technology Infrared 4 Accuracy of temperature at T out ± 2.5 C Accuracy of flow measurement ± 20% Environmental conditions Ambient temperature ºC Relative humidity 30% to 75% Atmospheric pressure 700 hpa 1060 hpa Transport and storage conditions Ambient temperature -40 to 70ºC Relative humidity % (non-condensing) Atmospheric pressure 500 hpa hpa 4 This is not the accuracy at the end of the line. T out is the temperature of the blood and fluid at the T out sensor (temperature sensor inside the cassette near the outlet) 5 A change in the environmental temperature can be of influence to the temperature at the end of the line 26
30
31
32
Fluido AirGuard System
 Fluido AirGuard System High Flow Blood and Fluid Warming Fast Safe Easy The Next Generation for Blood and Fluid Warming The Fluido blood and fluid warming unit is based on infra red technology. It is a
Fluido AirGuard System
 Fluido AirGuard System High Flow Blood and Fluid Warming Fast Safe Easy The Next Generation for Blood and Fluid Warming The Fluido blood and fluid warming unit is based on infra red technology. It is a
Instruction Manual for Configura Cushionair Portable Pump
 Instruction Manual for Configura Cushionair Portable Pump Fitted with battery powered pump, suitable for Configura Portable chairs V E R S I O N O N E M A Y 2 0 1 6 Contents Introduction 3 Set up of Cushionair
The next generation of Blood and Fluid Warming
 The next generation of One of the contributing factors of unintended hypothermia is the intravenous (IV) delivery of cold blood and fluids, resulting in a reduction of the main body temperature by 0.25ºC
The next generation of Blood and Fluid Warming
 The next generation of One of the contributing factors of unintended hypo- at all flow rates. Maintaining the right patient body tem- thermia is the intravenous (IV) delivery of cold blood perature results
The Univentor 1250 Anaesthesia Unit
 THE UNIVENTOR 1200/1250 ANAESTHESIA UNIT The Univentor 1250 Anaesthesia Unit TABLE OF CONTENTS EDITION 1 Section 1 - WARRANTY & SERVICE 1.1. WARRANTY 2 1.2. DAMAGED SHIPMENTS 2 1.3. SERVICE 2 Section 2
THE UNIVENTOR 400 ANAESTHESIA UNIT
 THE UNIVENTOR 400 ANAESTHESIA UNIT TABLE OF CONTENTS EDITION 3 Section 1 - WARRANTY & SERVICE 1.1. WARRANTY 2 1.2. DAMAGED SHIPMENTS 2 1.3. SERVICE 2 Section 2 - INTRODUCTION 2.1. INTRODUCTION 3 Section
STAGE, STADIUM & X-TREME SHOT.
 USER AND INSTALLATION MANUAL ENGLISH STAGE, STADIUM & X-TREME SHOT. CONFETTI & STREAMER FX PART01339 rev 01-00 DISCLAIMER WARNING Read this manual carefully before installing and/or using this product.
USER MANUAL SAVE THESE INSTRUCTIONS. For the most current manual revision, please visit our Website:
 USER MANUAL Model: PM4300 Series SAVE THESE INSTRUCTIONS For the most current manual revision, please visit our Website: www.precisionmedical.com 300 Held Drive Tel: (+001) 610-262-6090 Northampton, PA
Regalia Oxygen Concentrator
 Regalia Oxygen Concentrator REGALIA INSTRUCTION MANUAL P/N 5167 Rev B January 2014 Table of Contents Warnings and Cautions... 3 Indications for Use... 4 Introduction... 4 Important Safety Instructions...
Model UB-328. Wrist Digital Blood Pressure Monitor. Instruction Manual. Manuel d instructions. Manual de Instrucciones. Manuale di Istruzioni
 Wrist Digital Blood Pressure Monitor Model UB-328 Instruction Manual Manuel d instructions Manual de Instrucciones Manuale di Istruzioni WM+PD4000913 ENGLISH Dear Customers Congratulations. You have purchased
In Vivo Scientific, LLC INSTRUCTION MANUAL
 CO 2 Controller In Vivo Scientific, LLC INSTRUCTION MANUAL CONTENTS CONTENTS...1 ABOUT THIS MANUAL...2 INTRODUCTION...2 Cautions and Warnings...2 Parts List...2 Unpacking...2 INSTRUMENT DESCRIPTION...3
Introduction. Medley TM Medication Safety System. Alaris Medical Systems
 Medley TM Medication Safety System Alaris Medical Systems Introduction The ALARIS Medley Medication Safety System is designed to help you provide the best possible patient care, by avoiding potential adverse
MAGICFX CONFETTIPISTOL USER AND INSTALLATION MANUAL
 English MAGICFX CONFETTIPISTOL USER AND INSTALLATION MANUAL CONFETTI FX / STREAMER FX Manual trigger PART01129 rev 01-00 DISCLAIMER WARNING Read this manual carefully before installing and/or using this
MODEL Maverick Heavy Duty Aerosol Compressor Operator s Manual
 MODEL 50012 Maverick Heavy Duty Aerosol Compressor Operator s Manual This page left blank intentionally CONTENTS Page No. INSPECTION... 1 GENERAL INFORMATION... 1 SAFETY PRECAUTIONS... 2 BASIC OPERATING
ORB-400 BUBBLE/HAZE MACHINE. Item ref: UK User Manual
 ORB-400 BUBBLE/HAZE MACHINE Item ref: 160.462UK User Manual Caution: Please read this manual carefully before operating Damage caused by misuse is not covered by the warranty Introduction Thank you for
Digital Melting Point Apparatus
 Digital Melting Point Apparatus Heating Plateau Ramping Start/Stop Plateau set Ramp stop Hold User Guide Version 1.1 Heating Viewing tube Sample Chamber IEC power inlet socket Power on/off Temperature
Operation Manual. H & R Healthcare 1750 Oak Street Lakewood, NJ Phone: Fax:
 Operation Manual H & R Healthcare 1750 Oak Street Lakewood, NJ 08701 Phone: 800-801-5533 Fax: 732-367-6231 www.handrhealthcare.com Congratulations and thank you for purchasing this Relief Aire Alternating
U S E R M A N U A L AIR FLOWMETER. MODELS: 1MFA2001 (shown) 1MFA9001 CAUTION. ISO Certified
 1MFA9001 CAUTION. ISO Certified") U S E R M A N U A L AIR FLOWMETER MODELS: 1MFA2001 (shown) 1MFA9001 ISO 13485 Certified Authorized Your EU local Representative: distributor: EMERGO EUROPE, INC. Molenstraat 15 2513866 BH -624 The -3952
U S E R M A N U A L AIR FLOWMETER MODELS: 1MFA2001 (shown) 1MFA9001 ISO 13485 Certified Authorized Your EU local Representative: distributor: EMERGO EUROPE, INC. Molenstraat 15 2513866 BH -624 The -3952
A4s Operation Manual
 A4s Operation Manual Safety Instruction Please read this manual carefully, also with related manual for the machinery before use the controller. For installing and operating the controller properly and
User Manual PTW-DensiX. D / Di/Zi
 User Manual PTW-DensiX D148.131.0/3 2005-05 Di/Zi General Information General Information The product bears the CE-mark "CE-0124" in accordance with the Council Directive 93/42/EEC about Medical Devices
D10S/D20S Wall/Post Mount Inflator Quick Start Manual
 PART NUMBER SERIAL NUMBER D10S/D20S Wall/Post Mount Inflator Quick Start Manual Please read and save these instructions. Read carefully before attempting to assemble, install, operate or maintain the product
Roller AC Servo System
 Safely Instruction Roller AC Servo System HMI-15 User Manual Please read this manual carefully, also with related manual for the machinery before use the controller. For installing and operating the controller
SC505 Sof Care Inflator. Operating Instructions and Service Manual
 SC505 Sof Care Inflator Gaymar Industries, Inc. 10 Centre Drive Orchard Park, NY 14127 Toll Free +1 800.828.7341 + 1 716.662.2551 Fax +1 800.993.7890 Outside USA +1 716.662.8636 Outside USA Fax +1 716.662.0730
Theatre Control Panel. Instructions for Use. January 2017 ASF-29 (1)
") Theatre Control Panel Instructions for Use January 2017 0197 ASF-29 (1) Contents 1. Instructions For Use 1.1. Introduction 1.2. Explanation of Symbols 1.3. General Safety Instructions Intended Use Operating
Theatre Control Panel Instructions for Use January 2017 0197 ASF-29 (1) Contents 1. Instructions For Use 1.1. Introduction 1.2. Explanation of Symbols 1.3. General Safety Instructions Intended Use Operating
Type Operating Instructions. 2/2-way solenoid valve 2/2-Wege Magnetventil Electrovanne 2/2 voies.
 2/2-way solenoid valve 2/2-Wege Magnetventil Electrovanne 2/2 voies We reserve the right to make technical changes without notice. Technische Änderungen vorbehalten. Sous réserve de modifications techniques.
Intermittent Pneumatic Compression System
 User Manual Intermittent Pneumatic Compression System To ensure safe use of this device, it is essential that you read and fully understand the information contained within this manual. Mechanical prophylaxis
BODYGUARD 2CH TWIN CHANNEL INFUSION PUMP
 BODYGUARD 2CH TWIN CHANNEL INFUSION PUMP The BodyGuard 2CH Twin Channel Infusion Pump is an ambulatory multi-therapy pump suitable for hospital and homecare environments with five infusion programs (continuous,
Safety instructions and operating manual
 5-Master Safety instructions and operating manual TBF-PyroTec GmbH Lichterfelder Str. 5 A 21502 Geesthacht Tel.: + 49 (0)4152 157 9950 Fax: + 49 (0)4152 157 9951 Flame projector 5-Master Safety instructions
A4 Operation Manual. Fig.1-1 Controller Socket Diagram
 A4 Operation Manual Safety Instruction Please read this manual carefully, also with related manual for the machinery before use the controller. For installing and operating the controller properly and
Fingertip Pulse Oximeter
 Instruction Manual Fingertip Pulse Oximeter Item # 40-810-000 Item # 40-811-000 Item # 40-812-000 Item # 40-813-000 Please read this guidebook completely before operating this unit. Limited Two-Year Warranty
Infrared Ear and Head Thermometer Instruction Manual
 DMT-316 Infrared Ear and Head Thermometer Instruction Manual Manual Ver.: 2.1 Issuing Date: 2017/02/03 2017. All rights reserved. Thank you for choosing the iprovèn Dual Mode Thermometer. The DMT-316 can
testo Leakage detector for refrigerants Instruction manual
 testo 316-3 Leakage detector for refrigerants Instruction manual 2 1 Contents 1 Contents 1 Contents... 3 2 Safety and the environment... 4 2.1. About this document... 4 2.2. Ensure safety... 4 2.3. Protecting
Calibration Gas Instrument INSTRUCTION MANUAL. Release I. Advanced Calibration Designs, Inc.
 Advanced Calibration Designs, Inc. Calibration Gas Instrument INSTRUCTION MANUAL Release I www.goacd.com Instruction Manual Gas Generator Release I TABLE OF CONTENTS I. General Description Page 2 II. Start-Up
KMW3000C. User Manual. Water Chiller for Xcalibur and Gemini systems. Version 1.6, September 2010
 KMW3000C Water Chiller for Xcalibur and Gemini systems User Manual Version 1.6, September 2010 Agilent Technologies XRD Products 10 Mead Road, Yarnton, Oxfordshire. OX5 1QU, UK Tel: +44 (0)1865 291600
Infrared Thermometer Instruction manual
 Dual Mode Infrared Thermometer Instruction manual DMT-489 Manual Ver.: 1.0 Issuing Date: 2016/09/26 Thank you for choosing the iprovèn Dual Mode Digital Infrared Thermometer. With its unique technology,
U S E R M A N U A L. Model: PM4300 Series SAVE THESE INSTRUCTIONS
 U S E R M A N U A L Model: PM4300 Series (PM4351 Shown) SAVE THESE INSTRUCTIONS CAUTION Federal (USA) law restricts this device to sale by or on the order of a physician. 300 Held Drive Tel: (+001) 610-262-6090
Budget Range Operators Handbook
 Budget Range Operators Handbook BAMBI AIR COMPRESSORS LTD 152 Thimble Mill Lane Heartlands Birmingham B7 5HT United Kingdom Tel: 0121 322 2299 Fax: 0121 322 2297 Email: sales@bambi-air.co.uk www.bambi-air.co.uk
EC214 EC215 - EC215R Bench Conductivity Meters
 Instruction Manual EC214 EC215 - EC215R Bench Conductivity Meters http://www.hannainst.com These Instruments are in Compliance with the CE Directives Dear Customer, Thank you for choosing a Hanna Instruments
1 METRON MANIPULATION TABLES - WARRANTY STATEMENT
 1 METRON MANIPULATION TABLES - WARRANTY STATEMENT Metron Medical Australia Pty Ltd. will warrant this table, for parts only against defects in manufacture for a period of two (2) years for structural integrity,
Med Aire Alternating Pressure Pump and Pad System
 User Manual Med Aire Alternating Pressure Pump and Pad System 14002E 14001E Symbols & Statements NOTE Indicates some tips or some information users should be aware of. CAUTION Indicates correct operating
HI 2314 HI 2315 HI 23151
 Instruction Manual HI 2314 HI 2315 HI 23151 Multi-Range Conductivity Meters for Laboratories www.hannainst.com Dear Customer, Thank you for choosing a Hanna Instruments product. Please read this instruction
User manual. MNPG 102 Rev. 04 Edition 04/02/16. Pressotherapy model. Power-Q1000 Premium
 User manual MNPG 102 Rev. 04 Edition 04/02/16 Pressotherapy model Power-Q1000 Premium I.A.C.E.R. Srl Via S. Pertini 24/A 30030 Martellago (VE) ITALY Tel. 041.5401356 Fax 041.5402684 e-mail: iacer@iacer.it
USER MANUAL SAVE THESE INSTRUCTIONS. 300 Held Drive Tel: (+001) Northampton, PA USA Fax: (+001) ISO Certified
 Northampton, PA USA Fax: (+001) ISO Certified") USER MANUAL Model: PM4300 Series (PM4351 Shown) SAVE THESE INSTRUCTIONS Federal (USA) law restricts this device to sale by or on the order of a physician. 300 Held Drive Tel: (+001) 610-262-6090 Northampton,
USER MANUAL Model: PM4300 Series (PM4351 Shown) SAVE THESE INSTRUCTIONS Federal (USA) law restricts this device to sale by or on the order of a physician. 300 Held Drive Tel: (+001) 610-262-6090 Northampton,
DEH Instructions. Three-Phase, Platform-Mounted Distribution Transformers
 g DEH 40050 Instructions Three-Phase, Platform-Mounted Distribution Transformers Introduction The equipment covered by these instructions should be operated and serviced only by competent technicians familiar
Rigel 601 CHECKBOX. Instruction Manual. 348A551 Issue 2.0. April Seaward Electronic Ltd. Issue 2.0
 Rigel 601 CHECKBOX Instruction Manual 348A551 Issue 2.0 April 2006 2006 Seaward Electronic Ltd. Issue 2.0 Limited Warranty & Limitation of Liability Rigel Medical guarantees this product for a period of
Solenoid gas valve. The solenoid gas valve is also applicable as a main gas valve Pilot gas valve for forced draft burners
 7 634 VGS1... with AGA67 connector VGS2... with AGA67 connector Solenoid gas valve VGS The solenoid gas valve is also applicable as a main gas valve Pilot gas valve for forced draft burners The VGS and
LSX Low Smoke Convertor Operations Manual
 LSX Low Smoke Convertor Operations Manual V.05.25.05 Table of Contents Page 1 Page 2 Page 3 Page 4 Page 5 Page 5 Page 6 Page 7 Page 8 Introduction Warning Technical Specifications Operating Procedure Control
! Warning, refer to accompanying documents.
 About this Manual To the best of our knowledge and at the time written, the information contained in this document is technically correct and the procedures accurate and adequate to operate this instrument
Dual Release Walkers 6291 Series. 1 General. 1.1 Symbols WARNING
 User Manual DEALER: This manual MUST be given to the user of the product. USER: BEFORE using this product, read this manual and save for future reference. Dual Release Walkers 6291 Series EN User Manual...page
OPERATOR S MANUAL HOTLINE 3 Blood and Fluid Warmer
 l OPERATOR S MANUAL - HOTLINE 3 Blood and Fluid Warmer < HL-390-38 6 s l HOTLINE 3 Blood and Fluid Warmer < HL-390-38 OPERATOR S MANUAL PN 4534013EN Rev. 002 s G e n e r a l I n f o r m a t i o n HOTLINE
CJMJ.DPNQBDU. Instruction for use. Neonatal phototherapy device. BILI-COMPACT WY 1816/ Year of manufacture D2017_00
 Instruction for use Neonatal phototherapy device CJMJ.DPNQBDU D2017_00 GmbH > BILI-COMPACT WY 1816/ Year of manufacture Herrenhöhe 4 D-51515 Kürten/Germany 02207-9698-0 02207-4750 E-mail: info@weyermed.com
F-330 Instruction manual. Magic Glove Bio Skin Smoother High Frequency Ultrasound Galvanic
 F-330 Instruction manual Magic Glove Bio Skin Smoother High Frequency Ultrasound Galvanic Warning Never under any circumstances attempt to open or inspect the internal components or accessories of the
SPECIFICATIONS ATTENTION
 VPS 504 S06 Installation Manual - P/N 80122 - Ed. 01/09 VPS 504 S06 and S05 Valve Proving System Installation Instructions VPS 1 6 Gases Natural gas, air and other inert gases. NOT suitable for butane
TrekMill USER'S MANUAL MM5050
 Read the safety and comfort guide in this manual before using this equipment. USER'S MANUAL TrekMill MM5050 Serial Number: Date Purchased: Find the serial number in the location shown below. CONTENTS Safety
AHE58/59 AC Servo System
 AHE58/59 AC Servo System HMI-12 User Manual Safely INstruction Please read this manual carefully, also with related manual for the machine head before use. For perfect operation and safety, installing
BOC: Living healthcare. Manual. LIV IQ BOC Integrated Valve with digital display portable delivery system for Medical Oxygen. BOC: Living healthcare
 BOC: Living healthcare Manual LIV IQ BOC Integrated Valve with digital display portable delivery system for Medical Oxygen. BOC: Living healthcare 02 Manual LIV IQ Oxygen Manual LIV IQ Oxygen 03 Contents.
Endo-Flush Order # ZUTR30004 OPERATION MANUAL. Zutron Medical, LLC W 98 th St #40-27 Lenexa, KS Phone Fax
 OPERATION MANUAL Zutron Medical, LLC 17501 W 98 th St #40-27 Lenexa, KS 66219 Phone 877-343-5873 Fax 913-967-5944 ZUT-Lab-004-30004 REV. 03312017 Table of Contents 2 Introduction 1. Intended Use 2. Labels,
Comfortmax Thermax Hot/Cold Water Circulation System. Instructions for Use
 Comfortmax Thermax Hot/Cold Water Circulation System Instructions for Use THIS DEVICE CAN BE COLD ENOUGH TO CAUSE SERIOUS INJURY. SERIOUS ADVERSE REACTIONS AND SAFETY HAZARDS MAY OCCUR WHEN USING THIS
3 GALLON, OILLESS PANCAKE COMPRESSOR INSTRUCTIONS. Item #31289
 3 GALLON, OILLESS PANCAKE COMPRESSOR INSTRUCTIONS Item #31289 The EASTWOOD 3 GALLON, OILLESS PANCAKE COMPRESSOR, with an Integral Air Regulator, efficiently supplies all compressed air requirements for
Operating Instructions Part No
 DIGITAL AUTOMATIC TYRE INFLATOR Operating Instructions Part No. 11.0578 Thank you for selecting this Jamec Pem Automatic Tyre Inflator. Please read this manual before carrying out any installation or service
INFUSION SYSTEM (110V) (220V) USER S MANUAL
 (220V) USER S MANUAL") INFUSION SYSTEM 20-6000-00 (110V) 20-6005-00 (220V) USER S MANUAL 8000 South Kolb Road Tucson, AZ 85756 Phone 800.528.1597 Fax 520.885.1189 www.wellsgrp.com email: sales@wellsgrp.com GENERAL DESCRIPTION
INFUSION SYSTEM 20-6000-00 (110V) 20-6005-00 (220V) USER S MANUAL 8000 South Kolb Road Tucson, AZ 85756 Phone 800.528.1597 Fax 520.885.1189 www.wellsgrp.com email: sales@wellsgrp.com GENERAL DESCRIPTION
Operator s Manual. The Bullet Blender Gold BB24-AU, BB5E-AU
 Operator s Manual The Bullet Blender Gold BB24-AU, BB5E-AU Congratulations! Congratulations on your purchase of a Bullet Blender Gold by Next Advance, Inc., for lysing, disrupting, and homogenizing your
VERTICAL AIR COMPRESSORS
 VERTICAL AIR COMPRESSORS MODEL NO: VE15C150, VE18C150, VE25C150 PART NO: 2226010, 2226020, 2226025 OPERATION & MAINTENANCE INSTRUCTIONS LS0715 INTRODUCTION Thank you for purchasing this CLARKE Vertical
AQUARIUS. Operating Instructions for the. Type 70 Electrolytic Gas Soldering / Welding Unit. Table of Contents
 AQUARIUS Operating Instructions for the Type 70 Electrolytic Gas Soldering / Welding Unit Table of Contents 1. Important General Remarks 2 2. Safety Instructions 2 3. Description of the Soldering Unit
VERTICAL AIR COMPRESSORS
 VERTICAL AIR COMPRESSORS MODEL NO: VE11C150, VE15C150, VE18C150 PART NO: 2226005, 2226000, 2226015 OPERATION & MAINTENANCE INSTRUCTIONS LS0615 INTRODUCTION Thank you for purchasing this CLARKE Vertical
User Manual. Quantos Automated Dosing Liquid Module
 User Manual Liquid Module 1 Safety Information 1.1 Definition of warnings and symbols Signal Words WARNING for a hazardous situation with medium risk, possibly resulting in severe injuries or death if
Stirring Water Bath. Instruction Manual
 Stirring Water Bath Instruction Manual Catalog Nos. SWB-10L-1-110 / 220 SWB-10L-2-110 / 220 SWB-20L-1-110 / 220 SWB-20L-3-110 / 220 www.majorsci.com service@majorsci.com Version 01A October 20, 2009 Un
5000TOC Sensor Standard Operating Procedure for TOC Calibration Conductivity Calibration Temperature Calibration Flow Rate Calibration
 Part No. 84468 5000TOC Sensor Standard Operating Procedure for TOC Calibration Conductivity Calibration Temperature Calibration Flow Rate Calibration This document contains proprietary information, which
Norrsken Family Booklet
 Section 1: Introduction Low Energy Designs produce efficient and effective LED based lighting products for commercial, retail and industry purposes. Each product may contain specific details on its operation
Operating Instructions Part No
 DIGITAL AUTOMATIC TYRE INFLATOR Operating Instructions Part No. 11.0545 Thank you for selecting this Jamec Pem Automatic Tyre Inflator. Please read this manual before carrying out any installation or service
Dual Release Walkers 6291 Series. 1 General. 1 Dual Release Walkers. 1.1 Symbols WARNING
 User Manual DEALER: This manual MUST be given to the user of the product. USER: BEFORE using this product, read this manual and save for future reference. Dual Release Walkers 6291 Series EN User Manual...page
MIE Medical Research Ltd Digital Analyser Pinch/Grip Instruction Manual
 Doc 116-03 Copyright 1998-2004 MIE Medical Research Ltd Getting Started MIE Medical Research Ltd Unpack your Digital Analyser and check that the following components are present: 1 x Digital Analyser
Installation, Operation & Maintenance Instructions
 Installation, Operation & Maintenance Instructions Please leave this instruction booklet with the home owner as it contains important guarantee, maintenance and safety information Read this manual carefully
Oxygen Dialflow Meter. Instructions for Use
 Oxygen Dialflow Meter Instructions for Use 702-0031.12 December 2017 1. Symbols Warning! Caution! Indicates a potentially hazardous situation which, if not avoided, could result in injury to the patient,
RPS900W Redundant Power Supply. Installation Guide.
 RPS900W Redundant Power Supply Installation Guide www.edge-core.com Installation Guide RPS900W Redundant Power Supply Single DC Output Port with Dual Output Voltages RPS900W E10013-CS-R01 1500000081A
VENTI-O 2 plus. O 2 switching valve for: VENTImotion from serial number 4000 VENTIlogic from serial number 4000 VENTImotion 2
 VENTI-O 2 plus O 2 switching valve for: VENTImotion from serial number 4000 VENTIlogic from serial number 4000 VENTImotion 2 Device description and operating instructions Overview VENTI-O 2 plus with therapy
Measurement accessories METPOINT OCV for the measurement in systems up to 40 bar
 EN - english Instructions for installation and operation Measurement accessories METPOINT OCV for the measurement in systems up to 40 bar Dear customer, Thank you for deciding in favour of the METPOINT
USER MANUAL. JET TST and JET TST S.
 USER MANUAL JET TST and JET TST S www.sisteven.com Types of Jet fans: JET TST UNI: Impulse axial fan single direction JET TST S UNI: Impulse axial fan single direction (short case) JET TST REV: Impulse
77-I0PN230 Rev. A. Model 1030 User Manual
 77I0PN230 Rev. A TABLE OF CONTENTS FUNCTION...2 TREATMENT...3 INDICATIONS FOR USE...4 CONTRAINDICATIONS...4 CLEANING...4 MAINTENANCE...4 CLASSIFICATION & SYMBOLS...4 DISINFECTION / STERILIZATION...4 SAFETY
OC Panel High Limit Aquastat Kit, Manual Reset p/n
 OC Panel High Limit Aquastat Kit, Manual Reset p/n 233202 Instruction Sheet APPLICATION The OC (Option Control) Panel High Limit Aquastat Kit provides electronic temperature sensing in a UL limit-rated
Contents. Operating instructions. Pressure switch, heavy-duty version Model PSM-520
 Operating instructions Contents EN Pressure switch, heavy-duty version Model PSM-520 1. General information 2. Design and function 3. Safety 4. Transport, packaging and storage 5. Commissioning, operation
Air Plus User Manual
 Air Plus User Manual Alternating pressure mattress for prophylaxis and treatment of pressure sores Indications for use The Air Plus has been developed as a state of the art pressure relieving system for
Installation & Maintenance Instructions TEC-11N TIMER. Analogue electronic timer 02/09
 Installation & Maintenance Instructions TEC-11N TIMER Analogue electronic timer 02/09 GENERAL OPERATION The TEC-11N timer is produced using SMT (Surface Mounting Technology), ensuring improved performance
Gebrauchsanweisung Mode d' emploi Instrucciones para el uso Istruzioni per l'uso Инструкции по зксплуатации. ri-fox N
 Rudolf Riester GmbH Postfach 35 DE-72417 Jungingen Germany Tel.: +49 (0)74 77-92 70-0 Fax: +49 (0)74 77-92 70-70 info@riester.de www.riester.de Operator s manual Gebrauchsanweisung Mode d' emploi Instrucciones
Notice. VeraCode Vortex Incubator User Guide
 Notice This publication and its contents are proprietary to Illumina, Inc., and are intended solely for the contractual use of its customers and for no other purpose than to operate the system described
Instructions for use. medisun 400 / 700. UV-phototherapy-device. UVB-311nm UVA UVA / UVB 3,3% Lamp configuration:
 Instructions for use UV-phototherapy-device medisun 400 / 700 Lamp configuration: UVB-311nm UVA UVA / UVB 3,3% Manufacturer: Schulze & Böhm GmbH Hermülheimer Str. 10 D-50321 Brühl, Germany Tel : +49-2232-57998-0
30000 Series Treatment Tables
 30000 Series Treatment Tables Operating Instructions November 2013 Important! Read the instructions fully before using the device Contents 1. MFG 30000 Series Treatment Tables 1 1.1. Description of parts
HZ-300 HAZER MACHINE USER MANUAL. Congratulations on the purchase of your new ANTARI HZ-300 Haze Machine.
 HZ-300 HAZER MACHINE USER MANUAL Congratulations on the purchase of your new ANTARI HZ-300 Haze Machine. Read and save these instructions 2005 Antari Lighting and Effects Ltd 2 User Manual Antari HZ-300
Quiz for Module 2: Aquarius Training (Rev. 1) Lesson 1: Introduction to Aquarius
 Lesson 1: Introduction to Aquarius") Quiz for Module 2: Aquarius Training (Rev. 1) Lesson 1: Introduction to Aquarius page 1 of 2 Name: Date: Score: Instructor: Location: Please circle the correct answers: 1. Select the answer(s) that represent
Quiz for Module 2: Aquarius Training (Rev. 1) Lesson 1: Introduction to Aquarius page 1 of 2 Name: Date: Score: Instructor: Location: Please circle the correct answers: 1. Select the answer(s) that represent
KERN EG/EW Version /02
 E KERN EG/EW Version 1.5 07/02 Operating Instructions Electronic Precision Balances Contents 1 TECHNICAL DATA... 20 2 UNPACKING AND STANDARD ACCESSORIES... 23 3 SETTING UP THE BALANCE... 23 4 EXTERNAL
PULSOX -2 INSTRUCTION MANUAL
 Oxygen Saturation Monitor PULSOX -2 INSTRUCTION MANUAL For North America UL, C_ UL: WITH RESPECT TO ELECTRIC SHOCK, FIRE AND MECHANI- CAL HAZARDS ONLY IN ACCORDANCE WITH UL 2601-1, CAN/ CSA C22.2 No.601.1
AIR COMPRESSOR 12 V DIRECT DRIVE MULTI-FUNCTION INSTRUCTION MANUAL. Model no
 Model no. 009-0- V DIRECT DRIVE MULTI-FUNCTION AIR COMPRESSOR IMPORTANT: Questions, problems, missing parts or for technical service? Before returning to your retailer, call our customer service department
WARNING: EXPLOSION HAZARD
 Section 1 Safety 1.1 Instructions for the Safe Operation and Use of the Pulse Oximeter Do not attempt to service the Pulse Oximeter yourself. Only qualified service personnel should attempt any necessary
Alfred ECMO Circuit Priming and Storage Guide
 Alfred ECMO Circuit Priming and Storage Guide 1 March 2012 Check List Page 2. Assembly, Priming and Storage Page 3. Prepare ECMO trolley and Circuit immediately before use Page 6. Connection to Patient
POWERPRESS UNIT. User Manual. Gradient Pneumatic Sequential Compressor. Neomedic
 TIMER (MIN) POWERPRESS UNIT 40 70 40 80 90 10 60 100 MIN MAX PRESSURE (mmhg) User Manual Neomedic 9601 Owens mouth Ave. #8 Chatsworth, CA 91311 Toll Free: 866-990-1168 Tel: 818-998-1023 Fax: 818-998-0277
AutoChanger Installation & User Guide Issue 2
 1 INDEX Page 1. Introduction... 3 2. AutoChanger Components Guide 4 3. Installation. 5-11 a) Installation Guidelines.. 5 b) Installation Retrofit... 6-11 c) Installation New... 11 4. AutoChanger User Guide
INSTRUCTION MANUAL MANUAL INFLATION BLOOD PRESSURE MONITOR
 INSTRUCTION MANUAL MANUAL INFLATION BLOOD PRESSURE MONITOR Model HEM-412C TABLE OF CONTENTS Introduction 3 Know Your Unit 4 Quick Reference Guide 5 Battery Installation/Replacement 6 How To Apply The Arm
Instruction Manual BA90 Precision Barometer
 Instruction Manual BA90 Precision Barometer halstrup-walcher GmbH Stegener Straße 10 D-79199 Kirchzarten Germany Phone: +49 (0) 76 61/39 63 0 Fax: +49 (0) 76 61/39 63 99 E-Mail: info@halstrup-walcher.com
USER GUIDE. Fog Generator. ATMOSPHERE APS TM Series Haze Generator. MAX APS TM Series. No: , Revision A/a
 ATMOSPHERE APS TM Series Haze Generator MAX APS TM Series Fog Generator USER GUIDE No: 120815, Revision A/a MADE IN CANADA FABRIQUÉ AU CANADA Les Générateurs de Brouillard Ltée / Fog Generators Ltd 10301