BUOYANCY COMPENSATOR DEVICE OWNER S MANUAL
|
|
|
- Rodger Pierce
- 6 years ago
- Views:
Transcription
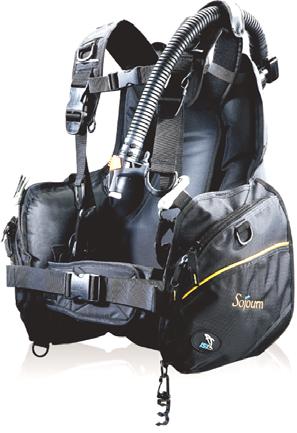
 Female exclusive BCD Sojourn (J-1500) EN 250 EN 1809 0426 www.istsports.com Ver.")
1 BUOYANCY COMPENSATOR DEVICE OWNER S MANUAL For models: Alpha (J-1000) Hydro D (J-1200) Artemis (J-1300) Female exclusive BCD Sojourn (J-1500) EN 250 EN Ver. E
2 CONTENTS I. INTRODUCTION 3 II. WARNINGS & PRECAUTIONS.. 4 III. BCD COMPONENTS ) IST INDEPENDENT HARNESS ) INFLATOR AND VALVES ) INTEGRATED WEIGHT SYSTEM IV. USING YOUR BCD / CARE AND MAINTENANCE 21 1) BEFORE A DIVE. 21 2) DURING A DIVE. 23 3) POST-DIVE CARE / MAINTENANCE 25 V. BUOYANCY. 26 VI. WARRANTY 27 I. INTRODUCTION THANK YOU FOR CHOOSING IST Buoyancy Compensator Device (BCD). Your new BCD has been designed and manufactured to the highest standard in diving equipment manufacturing. Only the best materials were chosen to make in this vital piece of diving equipment so you can have many years of reliable service from it. Notice: Buoyancy compensator device is considered a PPE (Personal Protective Equipment). All IST BCDs mentioned in this User s Manual were submitted for testing and design validation and were certified according to Art. 10 of Directive EEC by: Italcert (Notified body No. 0426) Viale Sarca 336, Milano, Italia The CE marking on this device represents compliance to the basic health and safety requirements of Annex II of Directive 89/686/EEC (European standard EN1809:1997 (Category II PPE) and EN250:2000 (Category III PPE)). The number 0426 represents the certifying body Italcert, which was entrusted to perform the task of the EC quality control system according to Art.11 A of Directive 89/686/EEC. The manufacturing process is carried out under strict supervision by: IST Sports Corp. Room A, 6 th floor, No. 6, 345 Alley, Yangkuang Street, Neihu, Taipei, Taiwan
3 II. WARNINGS AND PRECAUTIONS! A BCD is NOT a life jacket! It is a scuba diving equipment and does NOT guarantee a person floating at the surface in a head-up position and therefore it does not meet U.S. Coast Guard regulations for a life preserver. Before using this BCD, you must have already received certification in SCUBA diving and buoyancy control from a recognised training agency, or using it while under the supervision of a properly trained and qualified SCUBA instructor during training exercises. THE USE OF SCUBA EQUIPMENT BY ANY UNCERTIFIED OR UNSKILLED PERSON IS DANGEROUS AND CAN RESULT IN SERIOUS INJURY AND / OR DEATH. Before diving with your new IST BCD for the first time, please read and fully understand the information provided in this manual. Your authorized IST dealer can answer you any question with regards to this new dive equipment. We strongly suggest to familiarising yourself with this BCD in confined waters (e.g. a swimming pool) before using it in open waters. Misusing the BCD while diving may result in loss of buoyancy control (uncontrollable ascent / descent), which can lead to serious or fatal injury. It is imperative to perform pre-dive and post-dive inspections to make sure your BCD functions properly and is not faulty in anyway. If in doubt, DO NOT USE it until inspection and / or repair is carried out by an authorised IST dealer. Any modification to the BCD will not only void the warranty, there is a danger it may not work properly underwater, resulting in equipment damage, personal injury or even death. Always use designated pockets to store weight, i.e. the non-removable trim weight pockets on the back of the BCD (if equipped), the A.B.R.S. II (Advanced Ballast Removal System II) weight pockets on J-1000 Alpha BCD, J-1200 Hydro D BCD, J-1300 Artemis BCD and the B.R.S. weight pockets on J1500 Sojourn. If more weight is needed, always use a weight belt. DO NOT put any weight in the BCD s storage pockets because they can not be jettisoned quickly in an emergency. In an emergency such as out-of-air situation or uncontrollable descent, it is important to remove and jettison all releasable weight immediately. DO NOT depend solely on using your BCD s buoyancy to lift you to the surface. If neutral buoyancy can not be re-established in the event of an uncontrollable, rapid ascent, it is important to vent gas from your BCD immediately and continually to slow your ascent. YOUR BCD IS NOT A LIFT BAG! Do not use it to bring any heavy / big objects up to the surface because there is a great risk resulting in uncontrollable ascent, which could not only damage your BCD but cause serious personal injuries or death due to conditions such as embolism or decompression sickness. DO NOT INHALE FROM YOUR ORAL INFLATOR! The BCD s air cell may contain harmful contaminants or gas, which could cause injuries / death if inhaled. All BCD models covered by this manual are intended to be used down to a MAXIMUM depth of 50m (164ft) and can be used in cold water with temperature below 10 (50 ). Do not prolong the exposure of the BCD to direct sun-light as harmful UV rays will invariably reduce its useable life. This equipment is intended to be used with normal breathing air (i.e. 21% oxygen and 79% nitrogen). The use of other gas blends or enriched air may cause deterioration or corrosion of metal and rubber parts (such as o-ring seals), which could lead to premature aging and / or part failure. Using enriched air also increases the risk of fire and / or explosion. Should any repair / service job become necessary, only qualified technicians from IST authorised dealerships can perform the task. Unauthorised repair / service will void your BCD s warranty. III. BCD COMPONENTS The main function of a buoyancy compensator device is to give you the ability to stay afloat at surface (but NOT NECESSARILY in a head-up position remember, your BCD is NOT a life jacket), to effortlessly ascend or descend and to maintain neutral buoyancy at any depth underwater. 1) IST INDEPENDENT HARNESS The harness on each BCD model covered in this manual offers multiple adjustments so it can snugly conform to your torso as much as possible! Unlike a traditional jacket style BCD which is often constructed with the fastening system as a part of the buoyancy control component, IST s harness can be treated as a completely separate unit. The air cell hangs onto the harness so it acts independently while comfort remains unaffected! Before using your BCD for the first time, you should have the harness adjusted on land while wearing your diving suit in order to bring out the best of the BCD s features


![2] and not the air cell itself for better comfort and trim](/docs-images/79/80277240/images/4-2.jpg "adjustments.")

 Shoulder straps The padded shoulder straps")


4 Here are the main features of the independent harness: For J-1000 Alpha, J-1300 Artemis and J-1500 Sojourn: The straps of these BCDs are anchored to the harness backpack wing plates [pic. 2] and not the air cell itself for better comfort and trim adjustments. There are 2 adjustment slots and if you feel the straps are too tight / loose around your armpit / shoulder region, you can change the slider anchor position for more comfort: A) Shoulder straps The padded shoulder straps come with quick-release buckles for the convenience in putting on the BCD and its post-dive removal [pic. 1]. These buckles also allow for quick height adjustments of the BCD in relation to the torso. Pic. 2 To adjust the position, simply push a corner of the slider anchor out to free it [pic. 3] then pull the anchor through the vacant slot diagonally [pic. 4]. ALWAYS check if it is securely fitted by tugging the strap Pic. 1 Pic. 3 Pic


5 The supporting strap [pic. 5] helps to bring the bladder closer to the body when the weight pocket is loaded so your trim can be adjusted according to your personal preference Another female-diver friendly feature is the shoulder strap width adjuster, which is located near the junction of the shoulder straps and the backpack. As female shoulders tend to be narrower than men s, this adjuster can change the strap width to suit each individual diver. Pic. 5 and additional exclusive features for J-1300 Artemis: Please note there is a padded cover on each side of J-1300 Artemis. This comfort orientated feature is unique to this female specific BCD. The adjustments shown above can be accessed by pushing the cover aside. Pic. 8 For J1200 Hydro D: As there are no backpack wing plates in this back-inflation BCD, the shoulder straps are anchored [pic. 9] directly to the side pockets (which are not a part of the buoyancy control system). There are 2 anchor positions to choose from and the sliding anchors can be relocated the same way as the previous BCD models. Pic. 6 Pic Pic. 9


![illustrated [pic. 13-16] before using. Pic.](/docs-images/79/80277240/images/6-5.jpg "10 Cummerbund: On BCD J-1000 Alpha, J-1300 Artemis and J-1500 Sojourn,")


6 B) Cummerbund The cummerbund is designed to provide a wide range of adjustments to hold your BCD snug and secure just below your ribcage. It consists of 2 parts: Quick-release buckle (on all models): It is located in front of the cummerbund [pic. 10]. Once closed, its straps can be pulled to bring the side panels / pockets closer for a better trim. C) Cylinder belt The scuba cylinder is connected to your BCD by the cylinder cam belt. It is designed to work with scuba tank with diameters from 174mm to 204mm. The nylon webbing must be threaded through the buckle in the sequence illustrated [pic ] before using. Pic. 10 Cummerbund: On BCD J-1000 Alpha, J-1300 Artemis and J-1500 Sojourn, there are 2 vertical slots on the lower part of each backpack wing plate [pic. 11] which you could use to either extend or shorten the cummerbund length. J1200 Hydro D s inherent design means it is without backpack wing plates but its padded cummerbund has ample amount of Velcro fastener for adjustment [pic. 12]. Pic. 13 Pic. 14 Pic. 15 Pic. 16 Note: If there is any doubt on how to thread the webbing through the buckle, please seek help from a dive professional. It is dangerous to attach a BCD to a tank with an incorrectly threaded buckle. Serious injury or death may occur if the tank comes off whilst in a diving situation. Pic. 11 Pic


 [pic.")
![19] is located on the other side of the carrying handle (back of the BCD).](/docs-images/79/80277240/images/7-3.jpg "Use the locator strap to hang the BCD over the cylinder valve (without")

 BCD carrying handle (D1) and tank locator strap (D2) The carrying handle")


7 Note: On IST J1200 Hydro D and J1500 Sojourn, there is a lower, auxiliary tank belt [pic. 17]. Its main purpose is only to provide underwater stability and is NOT INTENDED to function as a primary belt. Failure to observe this may result in damaged equipment or contribute to an accident while diving. The tank locator strap (D2) [pic. 19] is located on the other side of the carrying handle (back of the BCD). Use the locator strap to hang the BCD over the cylinder valve (without regulator) to allow you to set it at a preferred height on the cylinder the before fastening the cylinder cam band (and auxiliary tank strap, if applicable). Pic. 17 D) BCD carrying handle (D1) and tank locator strap (D2) The carrying handle (D1) can be found inside the collar [pic. 18], just above the backpack and in between the shoulder straps. It can be used to carry the BCD when NOT ATTACHED TO A TANK or to hang the BCD for drying/ storage purpose. Pic. 19 Note: The tank locating strap is NOT a handle. Please do not use it to carry or to hang the BCD to dry. E) Sternum strap This feature increases stability when using your BCD by reducing the load on your shoulders. Fasten the side squeeze buckle and pull its strap to tighten Pic Pic. 20

![A) Over-pressure valve(s) Located on the back of the BCD, the number of the valves depends on the model: Pic. 23 Pic. 21 Pic. 22 - Power inflator [pic. 21]: An important part of a BCD.](/docs-images/79/80277240/images/8-1.jpg "It has a male quick release connector so the low pressure hose can pass air into the bladder through it.")

![22]: This is a standard feature on all IST BCD which allows a diver to vent gas rapidly from the air cell when activated.](/docs-images/79/80277240/images/8-3.jpg "- Low pressure hose: One end is connected to a first stage and the other the power inflator. It is responsible to supply air to the BCD so neutral or positive buoyancy can be easily achieved.")
8 2) INFLATOR AND VALVES The same power inflator unit is used on all BCDs covered by this manual. It has been tried and tested to give you the most reliable service. Its assembly drapes over the left shoulder and consists of a power inflator, a corrugated hose, a shoulder rapid exhaust valve and a low pressure hose. A) Over-pressure valve(s) Located on the back of the BCD, the number of the valves depends on the model: Pic. 23 Pic. 21 Pic Power inflator [pic. 21]: An important part of a BCD. It has a male quick release connector so the low pressure hose can pass air into the bladder through it. The power inflator has 2 separate buttons the oral inflation / manual deflation button and the automatic inflation button. - Corrugated hose: its function is to transfer air to and from the air cell. It also houses the link between the power inflator and the shoulder exhaust valve. - Rapid exhaust valve [pic. 22]: This is a standard feature on all IST BCD which allows a diver to vent gas rapidly from the air cell when activated. - Low pressure hose: One end is connected to a first stage and the other the power inflator. It is responsible to supply air to the BCD so neutral or positive buoyancy can be easily achieved. Hand screw in the threaded end of the hose into a suitably located low pressure port (3/8 UNF). Do not screw into a high pressure port or significant damage can occur to you and your equipment! Warning: DO NOT connect the low-pressure inflator hose to any port supplying gas at a pressure greater than 12 bar (174psi) as this may cause the equipment failure and / or serious injury or death. Also, make sure the intermediate pressure is not below 8 bar (116psi) so the inflator can work properly J-1000 Alpha: 2 (right shoulder and right waist) J-1200 Hydro D: 3 (right shoulder, right waist and left waist) J-1300 Artemis: 2 (right shoulder and right waist) J-1500 Sojourn: 1 (right waist) The primary function of this valve is to protect your BCD from over inflation. When the air cell reaches a certain pressure over the ambience, the valve will automatically open to release excess gas. It will automatically close after the pressure falls below the valve s pre-set limit. When adjusting buoyancy, gas can also be released on demand through any of these over-pressure valves by pulling its handle away from the BCD Pic. 24
")


.")


9 3) INTEGRATED WEIGHT SYSTEM All BCDs featured in this manual have either Advanced Ballast Removal System II (A.B.R.S. II) or Balast Removal System (B.R.S.). Both use a holster system with removable weight pockets, thus eliminates the need of a conventional weight belt in most situations. On selective models, they are also equipped with additional non-releasable trim weight pockets on the back of the BCD. J-1000 Alpha, J-1200 Hydro D and J-1300 Artemis: A.B.R.S. II technology is used on these models. It is used on both side pockets and the maximum weight holding capacity is 4kg / 9lb per pocket. If more weights are needed, use a conventional weight belt. DO NOT EXCEED THE MAXIMUM! To fill the A.B.R.S. II pouch, swiftly pull the weight pouch s handles forward to release them (see pic.28-30). Open each pouch to insert weights and securely close the velcro when done. Slide the pouches back into the BCD holsters with the sliver reflective strips facing outside. Tip: When loading weight, be sure that each pocket has the same amount of weight so optimum balance can be achieved in water. The A.B.R.S. II latch must be properly closed after the pouches are loaded. Firstly insert the 2 black prongs into the receiver on the holster then push the orange locking tab inward until the word locked appears. [pic ] Pic. 27 Warning: BEFORE EVERY DIVE, MAKE SURE EACH WEIGHT POCKET IS SECURELY HELD SO THEY CAN NOT FALL OUT WHILE DIVING. It can be extremely dangerous to have a sudden loss of ballast mid dive as this can lead to loss of buoyancy, uncontrollable ascent and embolism / DCI or other life threatening conditions.. If needed, the A.B.R.S. II pouches can be removed during a dive. With one handle in each hand, push swiftly forward (like throwing a punch) and the force will open the A.B.R.S. II latches. Continue moving your arms forward until the pouches are freed [pic ]. Pic. 25 Pic Pic. 28 Pic


.")

10 Tip: These pockets allow supplement weight to be carried there, if required, or a portion of the overall weight that would otherwise be placed in the A.B.R.S. II pouch so underwater balance can be better achieved. To install weight, unfasten the side-squeeze buckles, drop the weight in and close. Pic. 30 Tip: It may be difficult to look down and see the A.B.R.S. II handles while diving. Please practice this movement in confined / shallow water to familiarise yourself with the action. PLEASE WATCH YOUR BUOYANCY WHEN PRACTICING. Warning: TO AVOID INJURING OTHER DIVERS, ALWAYS LOOK BELOW BEFORE DROPPING YOUR WEIGHT! You will also find two separate trim weight compartments on the back of the air cell and the maximum weight capacity is 1kg / 2lb. each. WARNING: Weight stored in these trim pockets are NOT RELEASABLE mid dive. They can not be a part of your primary weight!!! It is also very important to check your weighting and buoyancy in shallow / confined water with the scuba gear you intend to use and a full cylinder attached to the BCD. J1500 Sojourn: The Sojourn has a special Velcro-fastening weight system (B.R.S.). The maximum loading capacity is 4kg / 8.8lb per pocket. To load weight, peel back the Velcro fastener and pull out the weight pouch [pic. 32]. Open the pouch s flap to fill in the weight required (remember to distribute the weight evenly!). When ready, close the flap and slide the pouch back into the BCD by keeping the B.R.S. holster opening separate. Push the pouch all the way in (but leave the handles out) before fasten the Velcro closure Pic Pic. 32


![Continue until the whole pouch is removed [pic. 34]. IV.](/docs-images/79/80277240/images/11-2.jpg "USING THE BCD / CARE AND MAINTENANCE Note: This manual is not intended to substitute proper dive training.")
 Before a dive a) Remove and load the A.B.R.S. II / B.R.S. weight pockets and put them aside until later so donning the BCD becomes an easier task.")
![b) Slide the cylinder belt over the cylinder [pic. 35] (if your BCD has a lower supporting strap, slide it over as well).](/docs-images/79/80277240/images/11-4.jpg "Use the carrying handle and tank locating strap to assist setting the BCD at a desired height.")
 hand without too much difficulty / discomfort in an emergency [pic. 36] Pic. 33 Pic.")
11 Note: ALWAYS double-check the whether B.R.S. pouches are securely installed and closed before a dive. It can be extremely dangerous to have a sudden loss of weight mid-dive as this can lead to loss of buoyancy, uncontrollable ascent and embolism / DCI or other life threatening conditions To remove the J1500 B.R.S. weight pouch during a dive, firmly grab its handle and pull forcefully away from the torso to open up the Velcro closure [pic. 33]. Continue until the whole pouch is removed [pic. 34]. IV. USING THE BCD / CARE AND MAINTENANCE Note: This manual is not intended to substitute proper dive training. The information contained within only explains how to use and maintain your IST BCD. 1) Before a dive a) Remove and load the A.B.R.S. II / B.R.S. weight pockets and put them aside until later so donning the BCD becomes an easier task. b) Slide the cylinder belt over the cylinder [pic. 35] (if your BCD has a lower supporting strap, slide it over as well). Use the carrying handle and tank locating strap to assist setting the BCD at a desired height. The cylinder should be set at a height so your head can not hit the cylinder valve / regulator assembly when bending backward BUT the cylinder valve should be reachable by your (right) hand without too much difficulty / discomfort in an emergency [pic. 36] Pic. 33 Pic. 34 Warning: ALWAYS CHECK BELOW BEFORE DROPPING YOUR WEIGHT TO AVOID INJURING OTHER DIVERS,! Pic. 35 Pic. 36 Tip: Undo the last step (4 th ) of the cam buckle threading procedure mentioned previously so you can pull the strap tightly to secure the tank. Close the buckle half-way (it will stand against the cylinder) then complete the threading of the buckle before closing it Tip: It is also helpful to wet the tank belt prior to securing the BCD to a tank to increase its grip

12 c) After the belt s cam buckle is closed, hook the strap end to the Velcro fastener so it can not be accidentally opened. d) The tank should be tightly held and there is no slack in the belt. Grab the shoulder straps and lift the whole BCD and tank assembly off the ground a little to double-check. If there is an excessive movement, reset the cylinder strap and cam buckle until everything is firmed attached. Note: It is very dangerous to have a tank loosely attached to a BCD. Serious damage to equipment, injury or death (due to loss of buoyancy / air, impact from the weight of the tank) may occur if the tank comes off whilst diving. 2) During A DIVE - Use and functions of your inflation system To gain buoyancy / to be afloat on the surface Oral inflation: To orally inflate your BCD, if the conditions allow, place the oral inflator s mouthpiece to your mouth and exhale a small amount of air into it. That will purge any water that may be in the housing. While continuing to exhale, depress the oral inflator button to inflate the BCD [pic. 29]. At the end of the exhaling phase, release the oral inflator button to prevent air from escaping. e) If needed, load weight into the rear trim pockets (if equipped) in the back of the BCD. f) Install the regulator assembly and connect the LP hose to the power inflator. To connect the LP hose, grip the sleeve at the connection fitting with your thumb and forefinger and slide the sleeve back. Place the fitting over the quick disconnect plug and firmly push inward while releasing the sleeve. Check to be sure that the hose is securely attached. g) Open the tank valve slowly after your regulator is attached. Test your equipment for proper performance use the power inflator to fill the bladder, pull every over-pressure valve and shoulder pull dump, your regulator etc. Then inflate your BCD until it feels firm and let it stand for a few minutes (while waiting, it is a good idea to check the BCD s exterior for damages). If the air cell is not as firm as when inflated or there is any doubt, please seek assistance and do not dive until the problem has been solved. h) Put the BCD on (with the assistance of your dive buddy) and securely and snugly fasten the harness to your torso (shoulder straps / sternum strap / cummerbund). Further adjustments may have to be made once in the water as buoyancy and pressure change. i) Install the weight pouches and make sure the A.B.R.S. II / B.R.S. closures are closed properly. Warning: MAKE SURE EACH WEIGHT POCKET IS SECURELY HELD SO THEY CAN NOT FALL OUT WHILE DIVING. It can be extremely dangerous to have a sudden loss of counterweight mid-dive as this can lead to a loss of buoyancy, uncontrollable ascent and embolism / DCI or other life threatening conditions. Pic. 29 Automatic inflation: To use the power inflator to automatically inflate your BCD, simply depress the orange power inflator button and the gas from your cylinder will flow into the air cell. Warning: DO NOT press and hold the inflator button underwater as this could cause you to become excessively buoyant very quickly. Instead, depress the button in short bursts until you achieve the buoyancy you need

13 To reduce buoyancy When releasing air from your BCD, always remember air will escape from the BCD s highest point in closest to the surface and it is not always your shoulders! Deflation via mouthpiece: Hold the power inflator up so it is pointing to the surface and is higher than any other part of the BCD. Press the deflation button to release air. Be sure to release the button before bubbles stop coming out to prevent water entering your BCD. Tip: Deflation using this method can be particularly easy to achieve when in a upright position. Deflation through the rapid exhaust valve: Hold the power inflator and pull directly away from the shoulder. Note: The rapid exhaust valve has a travel limit of approximately 1/4 and it does not need to be tugged forcefully! Deflation via Over-pressure valve: This exhaust valve provides an effective and convenient way to vent gas from the BCD while either in an upright or horizontal (facedown) swimming position. Simply pull its handle away from the BCD to reduce buoyancy. It also functions as an overpressure valve that will open automatically to relief air when a certain pressure inside the bladder is reached. 3) POST DIVE CARE / MAINTENANCE It is important to perform the following simple cleaning procedures at the end of EACH day s diving activity so this IST BCD can bring you years of trouble free service. Please proceed as follows: a) Immerse the BCD in fresh water and clean its exterior b) Press and hold the oral inflation button and fill the BCD bladder with fresh water to about 1/5 full through the power inflator s mouthpiece c) Orally inflate the BCD partially and shake it in all directions so the inside of the bladder can be rinsed. d) Turn the BCD upside down and press the oral inflation button to drain water e) Repeat step b ~ d once or twice more to thoroughly clean the bladder f) Remove the power inflator / corrugated hose assembly (including the female shoulder valve cover) and all over-pressure valves for rinsing and cleaning. g) To clean the inside of the power inflator / corrugated hose assembly, run water through the power inflator s mouthpiece by pressing the oral inflation / deflation button. Some residual water will remain inside the power inflator mechanism. To drain the remaining water, hold the power inflator up (with the exhaust valve end hanging) and press the auto inflation button. Water will then drain from the low-pressure BC hose connector. Keep the button pressed until no more water comes out. h) Hang the BCD and parts in a shaded area until completely dried. Never store the BCD while it is still damp. i) Reinstall the power inflator / corrugated hose assembly and all over-pressure valves until just taut (there is no need to over-tighten). j) Always partially inflate the bladder before putting it away. Do not store the BCD folded or with any heavy and / or sharp object sitting atop
14 k) Always store it in a cool, dry, shaded place. Prolonged exposure to the sun will significantly reduce the BCD s fabric covering and bladder s life. The prescribed service / maintenance interval is once a year and this task should be performed by a technician who is authorized by an official IST distributor. This service includes the checking of the BCD s bladder integrity and all valves / mechanical parts well being. INSPECTION AND SERVICE INTERVAL Your BCD should be inspected by an authorized IST dealer at least once a year, and more often if you dive frequently. This is a required action to keep your warranty in effect. INSTALLATION OF NEW PARTS Use of non-factory parts or any change to the product not specifically authorized by IST Sport Corp. may cause improper operation, damage, or leaking of the BCD resulting in a loss of buoyancy control or air holding capability. This could result in injury and / or death, and will void your warranty. ONLY replace worn or damaged items with genuine, factory supplied or specified parts. V. BUOYANCY VI. WARRANTY The warranty of this floatation device is valid to the original owner only (proof of purchase is necessary) AND it covers any defects in materials and / or workmanship for the period of 2 years from the date of purchase. Proper maintenance as prescribed in this manual is required and this warranty does not cover any wear and tear under normal usage AND any commercial / rental usage. The following action will also invalidate the warranty: incorrect use of the BCD, the use of non-original parts, any modification, servicing task performed by an unqualified, non-ist authorised dealer. Equipment in question should be returned, prepaid, to your authorised IST dealer, along with proof of purchase. In the event no authorised IST dealer is readily accessible, the original purchaser should contact the nearest IST distributor for warranty return authorisation. Model # J-1000 J-1200 J-1300 J-1500 Serial # Date of purchase (dd) / (mm) / (yy) Dealer s name & address SIZE MODEL / BUOYANCY* (approx.) J-1000 Alpha J-1200 Hydro D J-1300 Artemis J-1500 Sojourn XS 105N (10.7kgf) 140N (14.3kgf) 85N (8.7kgf) 80N (8.2kgf) S 125N (12.7kgf) 140N (14.3kgf) 105N (10.7kgf) 95N (9.7kgf) M 155N (15.8kgf) 140N (14.3kgf) 125N (12.7kgf) 135N (13.8kgf) L - 140N (14.3kgf) 140N (14.3kgf) - L-XL 195N (19.9kgf) N (17.3kgf) XL - 180N (18.4kgf) - - * The lift capacity of each size and model is measured in freshwater at sea level with each BC fully inflated. Purchaser: (Dealer s stamp)


15 Ver. E
J800 HOPE BUOYANCY COMPENSATOR OWNER S MANUAL
 J800 HOPE BUOYANCY COMPENSATOR OWNER S MANUAL EN1809 0 www.istsports.com 1 0120 I. INTRODUCTION I. INTRODUCTION CONTENTS II. GENERAL WARNING AND CAUTION Definition of WARNING, CAUTION and ATTENTION III.
LTS BCD USER GUIDE. Hollis (2014) Doc r01 (8/29/14)
 Doc r01 (8/29/14)") LTS BCD USER GUIDE Contents NOTICES...3 DANGERS, WARNINGS, CAUTIONS, & NOTES...3 WARNINGS...4 INTRODUCTION...5 CARE AND MAINTENANCE...5 INFLATOR AND DUMP VALVE USE...6 ATTACHING A TANK...7 INTEGRATED WEIGHT
LTS BCD USER GUIDE Contents NOTICES...3 DANGERS, WARNINGS, CAUTIONS, & NOTES...3 WARNINGS...4 INTRODUCTION...5 CARE AND MAINTENANCE...5 INFLATOR AND DUMP VALVE USE...6 ATTACHING A TANK...7 INTEGRATED WEIGHT
Travel Wing. Buoyancy Compensator User Instruction Manual
 Travel Wing Buoyancy Compensator User Instruction Manual 2 P a g e T r a v e l Contents Important Information... 4 Intended Use... 5 Introduction... 5 Integrated Weights or Equipment Stowage... 7 Stowage
BUOYANCY COMPENSATOR DEVICE MANUAL
 INTRIGUE WS SPORTPAK H2Odysey USER / OWNER BUOYANCY COMPENSATOR DEVICE MANUAL DESCRIPTION INDEX PAGE INTRODUCTION #1 CAUTION #1 / #2 / #15 BCD USE and FUNCTION #3 FEATURES #4 CONSTRUCTION and MATERIALS
B.C.D. Buoyancy Compensator Device User Manual
 B.C.D. Buoyancy Compensator Device User Manual English ver 2.2 CONTENTS Important Warnings Preparation before diving - How to assemble the retaining rubber bungees - How to assemble the tank straps - How
RG2200 BC Integrated Octopus
 175 NW Washington Street Lake City, Florida 32055, USA Web: www.diverite.com Phone: 386.752.1087 Fax: 386.755.0613 RG2200 BC Integrated Octopus Product description The Rite Source is both a BC inflation/deflation
Women's Buoyancy Compensator. Owner's Manual
 Women's Buoyancy Compensator Owner's Manual Copyright Notice This owner s manual is copyrighted, all rights reserved. It may not, in whole or in part, be copied, photocopied, reproduced, translated, or
COPYRIGHT NOTICE WARNINGS, CAUTIONS AND NOTES
 TABLE OF CONTENTS Copyright Notice Warnings, Cautions and Notes Safety Information Dealer Inspection and Service Warranty Information Basic Setup Weight Integration Features Inflation Methods Deflation
WSX Sidemount Owner s Manual
 WSX Sidemount Owner s Manual P/N 18418 Rev 05/15 2 WSX Sidemount Owner's Manual INTRODUCTION Congratulations and thank you for choosing Apeks. Your buoyancy compensator meets all existing standards for
BD Buoyancy Compensator
 BD Buoyancy Compensator User's Manual 2 BD BUOYANCY COMPENSATOR USER'S MANUAL Copyright Notice This owner s manual is copyrighted, all rights reserved. It may not, in whole or in part, be copied, photocopied,
T3200 TransPlate Harness
 T3200 TransPlate Harness www.diverite.com Product Description The TransPlate Harness is designed specifically for use with hard back-plates, such as stainless steel or aluminum. The TransPlate Harness
with SureLock OWNER'S MANUAL
 0 with SureLock OWNER'S MANUAL 2 Pro QD+ with SureLock Owner's Manual CONTENTS Safety Information............................... 3 General Precautions & Warnings...3 Basic Setup....................................
ZEOS 28 ZEOS 38 HYDROS 40 HYDROS 50 READ CAREFULLY. YOUR COMFORT AND SAFETY IS WORTH MORE THAN 15 MINUTES.
 ZEOS 28 ZEOS 38 HYDROS 40 HYDROS 50 USER MANUAL ENGLISH READ CAREFULLY. YOUR COMFORT AND SAFETY IS WORTH MORE THAN 15 MINUTES. CONGRATULATIONS! YOU HAVE PURCHASED A PERFECT PRODUCT IN WHICH, WITHOUT ANY
Note: For CE certification, this wing was tested with the T3000 TransPac Harness System.
 Product Description and Specifications The Rec Wing (Buoyancy Compensator Wing) provides superior performance, reliability and durability in a versatile single or redundant bag design that can be used
ZEOS 28 ZEOS 38 HYDROS 40 HYDROS 50. User manual English
 ZEOS 28 ZEOS 38 HYDROS 40 HYDROS 50 User manual English 1 Introduction Congratulations! You have purchased a perfect product in which, without any compromise, we have connected the best existing materials
Congratulations on the purchase of your new EDGE Buoyancy Compensator (BC).
.") Congratulations on the purchase of your new EDGE Buoyancy Compensator (BC). EDGE has designed, engineered and tested your new BC with extreme care in order to provide you with a product that has exceptional
Congratulations on the purchase of your new EDGE Buoyancy Compensator (BC). EDGE has designed, engineered and tested your new BC with extreme care in order to provide you with a product that has exceptional
READ CAREFULLY. YOUR COMFORT AND SAFETY IS WORTH MORE THAN 15 MINUTES.
 PROJECT USER MANUAL ENGLISH READ CAREFULLY. YOUR COMFORT AND SAFETY IS WORTH MORE THAN 15 MINUTES. INDEX CONGRATULATIONS! YOU HAVE PURCHASED A PERFECT PRODUCT IN WHICH, WITHOUT ANY COMPROMISE, WE HAVE
AIR SOURCE. Owner's Manual
 AIR SOURCE Owner's Manual CONTENTS INTRODUCTION... 5 WHAT IS THE AIR SOURCE?...5 GUIDELINES & LIMITATIONS... 6 DAMAGE...6 LUBRICATION...6 SAFETY PRECAUTIONS... 7 INSTALLATION... 8 INFLATION... 10 OPERATION
Gemini Owner s Manual
 Gemini Owner s Manual WARNING - Improper use of the Gemini Breathable Inflator may result in serious injury or death. Do not attempt to use this product unless you have received certified scuba instruction
Pearl TABLE OF CONTENTS. English. Copyright Notice
 TABLE OF CONTENTS Copyright Notice Warnings, Cautions and Notes Safety Information Dealer Inspection and Service Annual Service and Inspection Record Warranty Information Limited Lifetime Warranty Product
SIDE 16 Sidemount System User Manual
 SIDE 16 Sidemount System User Manual Version 1.1, April 15, 2014 Disclaimer This document is proprietary to Scubatech Sp. z o. o. ("Scubatech") and no ownership rights are hereby transferred. No part of
fenzy x4 technical manual PN (orange) PN (black)
 PN (black)") fenzy x4 technical manual PN 854710 (orange) PN 854420 (black) Copyright Notice This owner s manual is copyrighted, all rights reserved. It may not, in whole or in part, be copied, photocopied, reproduced,
fenzy x4 technical manual PN 854710 (orange) PN 854420 (black) Copyright Notice This owner s manual is copyrighted, all rights reserved. It may not, in whole or in part, be copied, photocopied, reproduced,
Wave TABLE OF CONTENTS. Copyright Notice. Weight Integration Features. Warnings, Cautions and Notes. Inflation Methods. Safety Information
 TABLE OF CONTENTS Copyright Notice Warnings, Cautions and Notes Safety Information Dealer Inspection and Service Warranty Information Basic Setup Donning and Adjustment Procedures Weight Integration Features
Ocean Management Systems, Inc. P.O. Box 146, Montgomery, NY 12549
 Buoyancy Compensator User s Guide Ocean Management Systems, Inc. P.O. Box 146, Montgomery, NY 12549 Phone: 845.692.3600 fax: 845.692.3623 www.omsdive.com E-mail: mailto:info@omsdive.com Buoyancy Compensator
READ CAREFULLY. YOUR COMFORT AND SAFETY IS WORTH MORE THAN 15 MINUTES.
 ZEN USER MANUAL ENGLISH READ CAREFULLY. YOUR COMFORT AND SAFETY IS WORTH MORE THAN 15 MINUTES. INDEX CONGRATULATIONS! YOU HAVE PURCHASED A PERFECT PRODUCT IN WHICH, WITHOUT ANY COMPROMISE, WE HAVE CONNECTED
QUICK REFERENCE. Right Shoulder dump valve. Pull knob for right shoulder dump valve. Hide-away pocket flap. Rear dump valve (1 of 2)
") OWNER S MANUAL R 2 Fusion Owner s Manual QUICK REFERENCE Right Shoulder dump valve Pull knob for right shoulder dump valve Hide-away pocket flap Rear dump valve (1 of 2) SureLock weight release mechanism
OWNER S MANUAL R 2 Fusion Owner s Manual QUICK REFERENCE Right Shoulder dump valve Pull knob for right shoulder dump valve Hide-away pocket flap Rear dump valve (1 of 2) SureLock weight release mechanism
Axiom TABLE OF CONTENTS. English. Copyright Notice
 TABLE OF CONTENTS Copyright Notice Warnings, Cautions and Notes Safety Information Dealer Inspection and Service Annual Service and Inspection Record Warranty Information Limited Lifetime Warranty Product
Katana Sidemount Harness USER GUIDE
 Katana Sidemount Harness USER GUIDE Contents NOTICES...3 DANGERS, WARNINGS, CAUTIONS, & NOTES...3 WARNINGS...4 INTRODUCTION......5 UNDERSTANDING THE KATANA SIDEMOUNT HARNESS...6 HOW TO "RIG" YOUR CYLINDERS...7
Table of Contents 2 ATOMIC AQUATICS BC1 OWNERS MANUAL
 OWNERS MANUAL Table of Contents BC1 Key Design Features... 3 BC1 Features... 4 Warranty Registration... 6 Precautions and Safety Information... 7 Adding ballast... 8 High Performance Inflator Options...
SCUBATECH. User Instruction Manual. Buoyancy compensators. Range of models
 SCUBATECH User Instruction Manual Buoyancy compensators Range of models Tecline Donut 15, 17, 22 Tecline Donut (17, 22, 30) Special Edition Tecline Donut 22 Special Edition Rebreather Tecline Peanut 21
Rapid Diver System User's Manual
 Rapid Diver System User's Manual Rev 7/17 2 Rapid Diver User's Manual INTRODUCTION Congratulations and thank you for choosing Aqua Lung. Your Rapid Diver System meets all existing standards for quality
SURFACE SUPPLIED HARNESS
 SURFACE SUPPLIED HARNESS USER S MANUAL REV 4/10 2 Surface Supplied Harness User s Manual Copyright Notice This owner s manual is copyrighted, all rights reserved. It may not, in whole or in part, be copied,
Axiom i3 TABLE OF CONTENTS. English. Copyright Notice
 TABLE OF CONTENTS Copyright Notice Warnings, Cautions and Notes Safety Information Dealer Inspection and Service Annual Service and Inspection Record Warranty Information Limited Lifetime Warranty Product
ExtendAire TM II. Intermediate Pressure Accessory Kit USER INSTRUCTIONS
 ExtendAire TM II Intermediate Pressure Accessory Kit USER INSTRUCTIONS THIS MANUAL MUST BE CAREFULLY READ AND FOLLOWED BY ALL PERSONS WHO HAVE OR WILL HAVE THE RESPONSIBILITY FOR USING OR SERVICING THIS
ANNUAL SELF INSPECTION / SERVICING INSTRUCTION SHEET
 ANNUAL SELF INSPECTION / SERVICING INSTRUCTION SHEET These instructions relate ONLY to the following models of inflatable PFD s: Watersnake Inflatable PFD & Watersnake Deluxe PFD (ADULT AND CHILDRENS SIZES)
SMS75 HARNESS USER GUIDE
 SMS75 HARNESS USER GUIDE Contents NOTICES......3 DANGERS, WARNINGS, CAUTIONS, & NOTES...3 WARNINGS...4 INTRODUCTION......5 UNDERSTANDING THE SMS75 HARNESS...6 HOW TO "RIG" YOUR CYLINDERS...7 ATTACHING
WTX-D Buoyancy System
 TABLE OF CONTENTS Copyright Notice Warnings, Cautions and Notes Safety Information Apeks WTX Harness Apeks WTX-D Buoyancy Cells Attaching the MP Hose to the First Stage Mounting a WTX-D Buoyancy Cell Using
AP100 AUTO AIR. User Instruction Manual
 AP100 AUTO AIR User Instruction Manual Contents Important Information... 3 Introduction... 4 How the Auto Air Works... 5 Emergency Breathing... 5 Using the Auto Air as an alternative 2nd stage or "Octopus"....
SAFETY INFORMATION... 3 BASIC SETUP... 5 WEIGHT INTEGRATION FEATURES... 9 DONNING AND ADJUSTMENT PROCEDURES INFLATION METHODS...
 OWNER S MANUAL R 2 Latitude Owner s Manual SAFETY INFORMATION... 3 General Precautions & Warnings...3 BASIC SETUP... 5 Attaching the LP Hose to the First Stage... 5 Securing the BC to the Cylinder... 6
RG3100 and RG3100Ice Regulator System
 RG3100 and RG3100Ice Regulator System User Guide www.diverite.com Date of purchase: www.diverite.com RG1208-5 & RG1208-5Ice www.diverite.com First Stage Regulator Product Description The RG1208-5 and RG1208-5Ice
BC4300, BC4400 Buoyancy Compensator Wings. Product Description and Specifications REC EXP BC4300
 Product Description and Specifications Providing superior performance, reliability, and durability, the Rec EXP and Classic EXP wings are well-suited for use with anything from single tank open water diving
Introduction. 2. Limited Lifetime Warranty. 3. Drysuit Guidelines.. 4. Responsible Drysuit Diving... 5
 Drysuit Manual CONTENTS Introduction. 2 Limited Lifetime Warranty. 3 Drysuit Guidelines.. 4 Responsible Drysuit Diving... 5 Personalizing your Drysuit for Initial Use... 7 Neck & Wrist Seals... 7 Trimming
WETSUIT OWNER S MANUAL
 WETSUIT OWNER S MANUAL Please read this entire manual before diving. Failure to follow the instructions in this manual can result in serious injury or death. Waterproof Wetsuit Owners Manual Page 1 of
NORTHERN DIVER PFD MANUAL
 PFD MANUAL NORTHERN DIVER PFD MANUAL Thank you for purchasing this Northern Diver PFD. To help ensure your future safety, do not use this product before reading this manual. It is important to fully understand
Halcyon. Contour BC OWNER S MANUAL
 Halcyon Contour BC OWNER S MANUAL 1 TABLE OF CONTENTS WARNINGS, CAUTIONS, AND NOTES 3 CONTACTING HALCYON 3 GENERAL PRECAUTIONS AND WARNINGS 4 HALCYON CONTOUR COMPONENTS 6 PRE-DIVE BC SYSTEM INSPECTION
SHERWOOD PRO OWNER S MANUAL
 SHERWOOD PRO OWNER S MANUAL Blizzard Pro Regulator SRB9950 PRE-DIVE DIVE Side View Thank you for choosing Sherwood Regulators. To get the most satisfying use of this product, please take time to read this
NATIONAL (NATO) STOCK NUMBER: NSN
 STOCK NUMBER: NSN") THE SKED RESCUE SYSTEM NATIONAL (NATO) STOCK NUMBER: NSN 6530-01-260-1227 FLOTATION INSTRUCTIONS Please Post In Your Training Area SKED RAPID DEPLOYMENT FLOATATION SYSTEM Thank you for your purchase of
THE SKED RESCUE SYSTEM NATIONAL (NATO) STOCK NUMBER: NSN 6530-01-260-1227 FLOTATION INSTRUCTIONS Please Post In Your Training Area SKED RAPID DEPLOYMENT FLOATATION SYSTEM Thank you for your purchase of
Pontoon Slide Owner s Manual
 Pontoon Slide Owner s Manual Introduction Water sports can be safe and fun for all levels of enthusiasts. The Owner s Manual is presented to enhance your enjoyment of the sport. It is intended to alert
REGULATOR OWNER S GUIDE
 REGULATOR OWNER S GUIDE CONTENTS TOC NOTICES...3 CE INFORMATION...3 INTRODUCTION...4 GENERAL WARNINGS...4 NITROX/O2...5 DIVING IN COLD WATER...5 SETUP & DIVE...6 REGULATOR FIRST STAGES...7 Preparation
SHERWOOD OWNER S MANUAL
 SHERWOOD OWNER S MANUAL Thank you for choosing Sherwood Regulators. To get the most satisfying use of this product, please take time to read this entire manual to understand the use and limitations of
DIVATOR RS4 USER MANUAL
 DIVATOR RS4 USER MANUAL USER MANUAL HAZARD INDICATORS... 3 SAFETY NOTICE... 4 TECHNICAL DESCRIPTION... 5 PREPARING FOR USE... 9 PRE-DIVE PROCEDURES... 11 CHECKS DURING DIVING... 12 DIVING IN COLD WATER...
Inflatable Stand Up Paddle Board Manual
 Inflatable Stand Up Paddle Board Manual V-Max AIR 12 6 Voyager AIR 11 6 Koa AIR 10 2 and 10 8 Heavy duty built in carrying handles Steel D Ring Built in Cargo Straps EVA Deck Pad High Pressure Air Valve
CREWFIT 165 SPORT. self care and maintenance manual
 CREWFIT 165 SPORT self care and maintenance manual Crewsaver lifejackets must be serviced by an accredited service AGENT every 3 years. Please print and read the self care and maintenance instructions
1 waterp wa r te o rp o r f o - of us us a a..com co m Waterproof Wetsuit Manual
 waterproof-usa.com 1 IMPORTANT! Please read this entire manual before diving. Failure to follow the instructions in this manual can result in serious injury or death. Waterproof USA LIFE TIME WARRANTY
NORTHERN DIVER WETSUIT MANUAL
 WETSUIT MANUAL NORTHERN DIVER WETSUIT MANUAL This manual describes materials, construction, use, care, maintenance, repair, and inherent risks involved in the use of neoprene wetsuits for SCUBA Diving.
R0001. Northern Diver. HYDRA Regulator Manual
 R0001 v Northern Diver HYDRA Regulator Manual Northern Diver Hydra Reg Manual East Quarry Appley Lane North, Appley Bridge, Wigan, WN6 9AE, UK Owner s manual Copyright Notice: This owners manual is copyrighted,
APPENDIX D. On-Site Fatality Investigation Checklists. Steven M. Barsky Marine Marketing & Consulting 2419 E. Harbor Blvd. #149 Ventura, CA USA
 APPENDIX D On-Site Fatality Investigation Checklists Steven M. Barsky Marine Marketing & Consulting 2419 E. Harbor Blvd. #149 Ventura, CA 93001 USA Diving Accident Equipment Inspection Victim s name: Location
MANUAL SIDE MOUNT SYSTEM
 MANUAL Razor T Weight System SIDE MOUNT SYSTEM Content Table of contents 1 The Razor T Weight System 3 1.1 Package Content 3 1.2 Overview 4 2 Rigging the TWS Lumbar Strap 7 3 Rigging the TWS Waist Strap
X-Tech CLV User Manual. English
 X-Tech CLV User Manual English Sommary 03. Use 04. Maintenance 05. Caution 06. Technical specifications 08. Cold water use (
BUOYANCY COMPENSATOR OWNERS MANUAL
 BUOYANCY COMPENSATOR OWNERS MANUAL ULTIMATE PERFORMANCE IN ANY CONDITION This Zeagle BC Owners Manual is copyrighted and all rights are reserved. It may not, in whole or in part, be copied, photocopied,
32364B01 USER MANUAL DIVATOR RESCUE BC
 32364B01 USER MANUAL DIVATOR RESCUE BC CONTENTS 1 WARRANTY INFORMATION...5 1.1 OWNER S RESPONSIBILITIES...5 1.2 LIMITED LIFETIME GUARANTEE TO THE ORIGINAL OWNER...6 2. GENERAL INFORMATION AND SPECIFICATIONS...7
Installation, Operation & Maintenance Manual for Flo-Max Coupler Bracket Model FM150
 Installation, Operation & Maintenance Manual for Flo-Max Coupler Bracket Model FM150 January 2013 Form FVC 084 - Rev 02 IMPORTANT: KEEP THIS DOCUMENT WITH THE PRODUCT UNTIL IT REACHES THE END USER. 1.
Pontoon Slide Owner s Manual
 Pontoon Slide Owner s Manual WWW.RAVESPORTS.COM Copyright 2018 All rights reserved. No part of this publication may be reproduced or transmitted in any form or by any means, electronic or mechanical, including
Buoyancy Control Device
 Owner s manual for FLY 13, FLY 13 RESCUE, FLY 16H, FLY 17D, FLY 20D, FLY 21H, FLY 25D Buoyancy Control Device Distribution and service FINN SUB s.r.o. Rakovecka 35 63500 Brno Czech Republic www.finnsub.com
Usage and Care Instructions
 SUPERSTAR Student Transportation Add-On Restraint Usage and Care Instructions SUPERSTAR 25-90 lbs. (11.3-40.8 kg) 52 in. (132 cm) tall or less at least 2 years of age *927360* Table Of Contents Store this
Owner s Guide. ElevateSUP.com
 Owner s Guide ElevateSUP.com IMPORTANT READ THIS IMPORTANT INFORMATION BEFORE USING YOUR STAND UP PAD- DLEBOARD Disregarding any of the safety precautions and instructions contained in the owner s manual
User Instruction Manual
 User Instruction Manual 4500 psi Air Compressor Ver 2, 1.18 Contents Parts Included...3 Assembly Instructions...3-5 Operation Instructions...6-7 Oil Change Intervals...8 Air Filter Replacement...9 Setting
Training. Testor Training Manual
 Training Testor Training Manual Index Section 1 Introduction and Safety Warnings Section 2 Test Procedures Section 3 Test Hoses Section 4 Fault Location 1:1 1.1 Introduction The Dräger Testor test equipment
Safety, Operating and Maintenance Manual. TRAIN Rat DS9-TRAIN
 Safety, Operating and Maintenance Manual TRAIN Rat DS9-TRAIN Industry s first air powered entry tool! Quickly, quietly and reliably opens passenger train doors! Introducing the TRAIN Rat. This innovative
Service and Repair Manual
 II stage R2 Ice/ Special, II stage R 1 Pro DOWNSTREAM 2 nd STAGE REGULATOR Service and Repair Manual Introduction Safety Precautions...4 General Procedures, Maintenance Schedules...5 Initial Inspection
Sea Rebel Kayak Owner s Manual
 Sea Rebel Kayak Owner s Manual www.ravesports.com Table of Contents Product instructions and warnings...2 Inflating instructions...3 Proper use.. 4 Deflating and storage.........6 Cleaning and troubleshooting...8
WTX Buoyancy System TABLE OF CONTENTS. Mounting a Single or Twin Cylinder(s) Using Nuts and Bolts. Copyright Notice. Warnings, Cautions and Notes
 Using Nuts and Bolts. Copyright Notice. Warnings, Cautions and Notes") TABLE OF CONTENTS Copyright Notice Warnings, Cautions and Notes Safety Information Apeks WTX Harness Apeks WTX Buoyancy Cells Attaching the MP Hose to the First Stage Mounting a WTX Buoyancy Cell Using
TABLE OF CONTENTS Copyright Notice Warnings, Cautions and Notes Safety Information Apeks WTX Harness Apeks WTX Buoyancy Cells Attaching the MP Hose to the First Stage Mounting a WTX Buoyancy Cell Using
Pressure Relief Valve Instruction Manual
 CVR3-M0_062017 Pressure Relief Valve Instruction Manual MODEL: CVR3 SFA Companies 10939 N. Pomona Ave. Kansas City, MO 64153 Tel: 888-332-6419 * Fax: 816-448-2142 E-mail: sales@bvahydraulics.com Website:
RG1200 Regulator System
 RG1200 Regulator System UserGuide Date of purchase: www.diverite.com DEVELOPED BY COPYRIGHT NOTICE WARRANTY INFORMATION Dive Rite 175 NW Washington Street Lake City, FL 32055 Phone: 386.752.1087 Fax:
Rapid Survival System
 Rapid Survival System Model W User Manual Emergency Floatation for Moving Water Self Rescue Version 10.02 Contents User Manual... 1 Part 1: Description and Function... 3 Part 2: Package Contents... 3 Part
In this manual; Warnings, Cautions and Notes calls your attention to information provided to help ensure your safety. Always dive safely.
 In this manual; Warnings, Cautions and Notes calls your attention to information provided to help ensure your safety. Always dive safely. A WARNING indicates a procedure or situation that, if not avoided,
Pay special attention to information provided in warnings, cautions and notes that are accompanied by one of these symbols:
 TABLE OF CONTENTS General Information Outlaw / Rogue Components ModLock Connectors Waistband / Shoulder Strap Assembly Aircell Assembly ModLock Connector Disassembly Waistband Extender Double Cylinder
117 West Washington Street Lake City, FL USA Phone (386) Fax (386)
 Fax (386)") 117 West Washington Street Lake City, FL 32055 USA Phone (386) 752-1087 Fax (386) 755-0613 www.diverite.com Transpac II Owner s Manual Page 2 Dive Rite Transpac II Limited Warranty Dive Rite will at its
117 West Washington Street Lake City, FL 32055 USA Phone (386) 752-1087 Fax (386) 755-0613 www.diverite.com Transpac II Owner s Manual Page 2 Dive Rite Transpac II Limited Warranty Dive Rite will at its
CS150 CAP STAPLER OWNER S MANUAL
 Operation Revised 6/2013 www.stingerworld.com CS150 CAP STAPLER OWNER S MANUAL! Maintenance Safety Warranty PLEASE READ! This manual contains important information about product safety. WELCOME TO STINGER
G7S Hand Pump Owner s Manual
 G7S Hand Pump Owner s Manual Copyright Air Venturi 2018 Version 4-18 Specifications 24.80 inches long closed 43.31 inches long extended 4500 psi/310 bar max pressure Features Integral manometer (pressure
SASK-A-POLE OWNERS AND USERS MANUAL
 SASK-A-POLE OWNERS AND USERS MANUAL GENERAL INFORMATION The Saskatchewan Abilities Council s Sask-a-Pole accessibility and transfer aid is designed to help provide safe and easy access to chairs, beds,
WATER SLIDE. Limbo Beach
 84694 Limbo Beach WATER SLIDE IMPORTANT SAFETY INSTRUCTIONS. PLEASE READ AND SAVE THESE INSTRUCTIONS BEFORE SETUP AND USE. KEEP THESE INSTRUCTIONS IN A SAFE PLACE FOR FUTURE REFERENCE. FOR AGES 5-12 ADULT
STEALTH 2.0 Side Mount System
 STEALTH 2.0 Side Mount System User manual English 1 Introduction Congratulations! You have purchased a perfect product in which, without any compromise, we have connected the best existing materials made
Congratulations on your Drysuit Purchase
 Model: Kodiak 360 Version: 04/2017 Congratulations on your Drysuit Purchase Your drysuit has been designed to provide you with the highest degree of comfort and convenience. Our suits have been used by
Pontoon Slide Owner s Manual
 Pontoon Slide Owner s Manual www.ravesports.com Table of Contents Introduction... 2 Safety rules and information... 3 Boat compatibility guide.5 Assembling and using your Pontoon Slide... 6 Cleaning and
Unit 3- Diving Skills- Instructor Notes- Page 1
 Instructor Materials: Teaching notes, any training aids to help present diving skills. INTRODUCTION Attention Step: Scuba diving depends on our ability to adapt to an alien environment with the help of
RB70 Automatic Diluent Valve Maintenance Manual. Version 1.1 November 2006 Written by Tino de Rijk. Page 1 of 23
 RB70 Automatic Diluent Valve Maintenance Manual Version 1.1 November 2006 Written by Tino de Rijk Page 1 of 23 Table of Contents 1. Introduction... 3 2. ADV diagram and parts list (Pre June 2006)... 4
SMA2100 Series CONSTANT WEAR LIFE PRESERVER VEST (CWLP) SMA2160 OWNERS MANUAL
 SMA2160 OWNERS MANUAL") SMA2100 Series CONSTANT WEAR LIFE PRESERVER VEST (CWLP) SMA2160 OWNERS MANUAL CONTENTS INTRODUCTION... 3 DESCRIPTION... 5 SMA2160 DESIGN & CONSTRUCTION... 5 VISUAL INSPECTION CHECKLIST PRIOR USAGE... 6
SMA2100 Series CONSTANT WEAR LIFE PRESERVER VEST (CWLP) SMA2160 OWNERS MANUAL CONTENTS INTRODUCTION... 3 DESCRIPTION... 5 SMA2160 DESIGN & CONSTRUCTION... 5 VISUAL INSPECTION CHECKLIST PRIOR USAGE... 6
Airtrim Line MANUALE D ISTRUZIONI USER S GUIDE BEDIENUNGSANLEITUNG MANUEL D UTILISATION MANUAL DE INSTRUCCIONES MANUAL DE INSTRUÇÕES
 MANUALE D ISTRUZIONI USER S GUIDE BEDIENUNGSANLEITUNG MANUEL D UTILISATION MANUAL DE INSTRUCCIONES MANUAL DE INSTRUÇÕES GEBRUIKERSHANDLEIDING ANVÄNDARINSTRUKTIONER ΟΔΗΓΊΕΣ ΧΡΉΣΗΣ KÄYTTÄJÄN OPAS INSTRUKCJA
Flathead VI Owner s Manual
 Flathead VI Owner s Manual This owner s manual uses signal words recommended by the American National Standards Institute (see ANSI Z535.4) to designate levels of hazard seriousness. These signal words
Auto-Rewind Hose Reels INSTRUCTION MANUAL FOR OXY-LPG MODEL
 Auto-Rewind Hose Reels INSTRUCTION MANUAL FOR OXY-LPG MODEL Introduction Thank you for purchasing a Retracta Auto Rewind Hose Reel. The Retracta range of hose reels are a breakthrough in industrial quality
SMA1060 INSTRUCTIONS FOR SELF INSPECTION SMA1061 MANUAL INFLATION SMA1062 AUTO INFLATION
 SMA1060 INSTRUCTIONS FOR SELF INSPECTION SMA1061 MANUAL INFLATION SMA1062 AUTO INFLATION Table 1 CONTENTS VISUAL INSPECTION CHECKLIST PRIOR USAGE... 1 Serial Number Date Purchased Quarterly visual inspection
Ambient Pressure Diving Ltd. Back Mounted Counterlungs. User Instruction Manual
 Ambient Pressure Diving Ltd. Back Mounted Counterlungs User Instruction Manual Contents Important Information... 2 Introduction... 3 Rebreather Configuration... 4 Assembly... 5 Upgrade Kit Components...
SMA1500 Instructions for Self Inspection SMA MANUAL INFLATION SMA AUTO INFLATION
 SMA1500 Instructions for Self Inspection SMA1501 - MANUAL INFLATION SMA1502 - AUTO INFLATION CONTENTS CONTENTS... i VISUAL INSPECTION CHECKLIST PRIOR USAGE... 1 RE-ARMING ACCORDING TO YOUR MODEL... 4 ROUTINE
Owner s Manual. MD3196 and MD3091 Compact Tactical Life Preservers. *Shown with the MA3090 Chest Belt/Crotch Strap Assembly
 Owner s Manual MD3196 and MD3091 Compact Tactical Life Preservers *Shown with the MA3090 Chest Belt/Crotch Strap Assembly CONTENTS Page 1 Description 2 Instructions for Use 3 Check Your LP Before Using
DBML-60/80 Squeeze Tool
 DBML-60/80 Squeeze Tool OPERATORS MANUAL Description The Mustang Model DBML-60/80 Hydraulic squeeze tool has been manufactured since 1995. A Mustang 3 3/4 bore doubleacting cylinder producing 41,000 lbs
TABLE OF CONTENTS. English
 X-Tek TABLE OF CONTENTS IMPORTANT WARNINGS... 2 CE CERTIFICATION... 2 EN 250: 2000 norm regulations and what they mean...3 Definition of SCUBA according to EN 250: 2000...3 Limitations provided by EN 250:
MOOWII MANUAL. Using a kite is dangerous and can cause severe injuries. Before use, carefully read this manual.
 MOOWII MANUAL Using a kite is dangerous and can cause severe injuries. Before use, carefully read this manual. Release of liability By assembling or using this CrazyFly kiteboarding product (further named
AS/NZS 1801 USE AND CARE BOOKLET OCCUPATIONAL PROTECTIVE HELMET
 AS/NZS 1801 USE AND CARE BOOKLET OCCUPATIONAL PROTECTIVE HELMET 2 EN DANGER! intended use of this helmet involves activities that are extremely dangerous. FAILURE TO HEED AND FOLLOW THESE INSTRUCTIONS
4 ANGLE GRINDER MODEL NO: CAT 52 PART
 4 ANGLE GRINDER 4 ANGLE GRINDER MODEL NO: CAT 52 PART No: 3110685 OPERATION & MAINTENANCE INSTRUCTIONS 0807 Fig.1 SPECIFICATIONS Model:...CAG52 Part Number:...3110685 Rated Wheel...Capacity: 4 x 1/4 (type