VWR HIGH PERFORMANCE PIPETTOR
|
|
|
- Harry Osborne
- 5 years ago
- Views:
Transcription


1 USER GUIDE EN Light-Weight Ergonomics Precise & Reliable Secure Results
2 Contents Page 1- INTRODUCTION 3 2- PARTS CHECK LIST 3 3- DESCRIPTION 4 4- SETTING THE VOLUME 6 5- USER ADJUSTMENT 8 6- PIPETTING GENERAL GUIDELINES FOR GOOD PIPETTING ACCESSORIES AND STAND GLP FEATURES TROUBLESHOOTING LEAK TEST MAINTENANCE CLEANING AND STERILIZATION SPECIFICATIONS SPARE PARTS MAINTENANCE & CALIBRATION TECHNICAL SERVICES WARRANTY COMPLIANCE WITH LOCAL LAWS AND 28 REGULATIONS 20- EQUIPMENT DISPOSAL 28 2
3 USER S GUIDE 1 - INTRODUCTION The VWR High Performance Pipettor is an air displacement mechanism and is used with disposable pipette tips. This pipettor line provides: Light and comfortable body Low pipetting forces ensuring ergonomics and users well-being Unique patented Volume locking mecanism for results you can trust Eight single channel models cover a volume range from 0.2 µl to 10 ml. Eight multichannel models (4 x 8-ch and 4 x 12-ch) cover a volume range from 0.5 µl to 300 µl. 2 - PARTS CHECK LIST Just take a moment to verify that the following items are present: Single models VWR High Performance Pipettor, User s Guide, Certificate of conformity, Calibration Key, Tip-ejector extention for 2µL and 10µL models. Multichannel models VWR High Performance Pipettor, User s Guide, Ejector spacer for short collar tips (only for multichannels models 10 µl), Certificate of conformity, Calibration key. 3


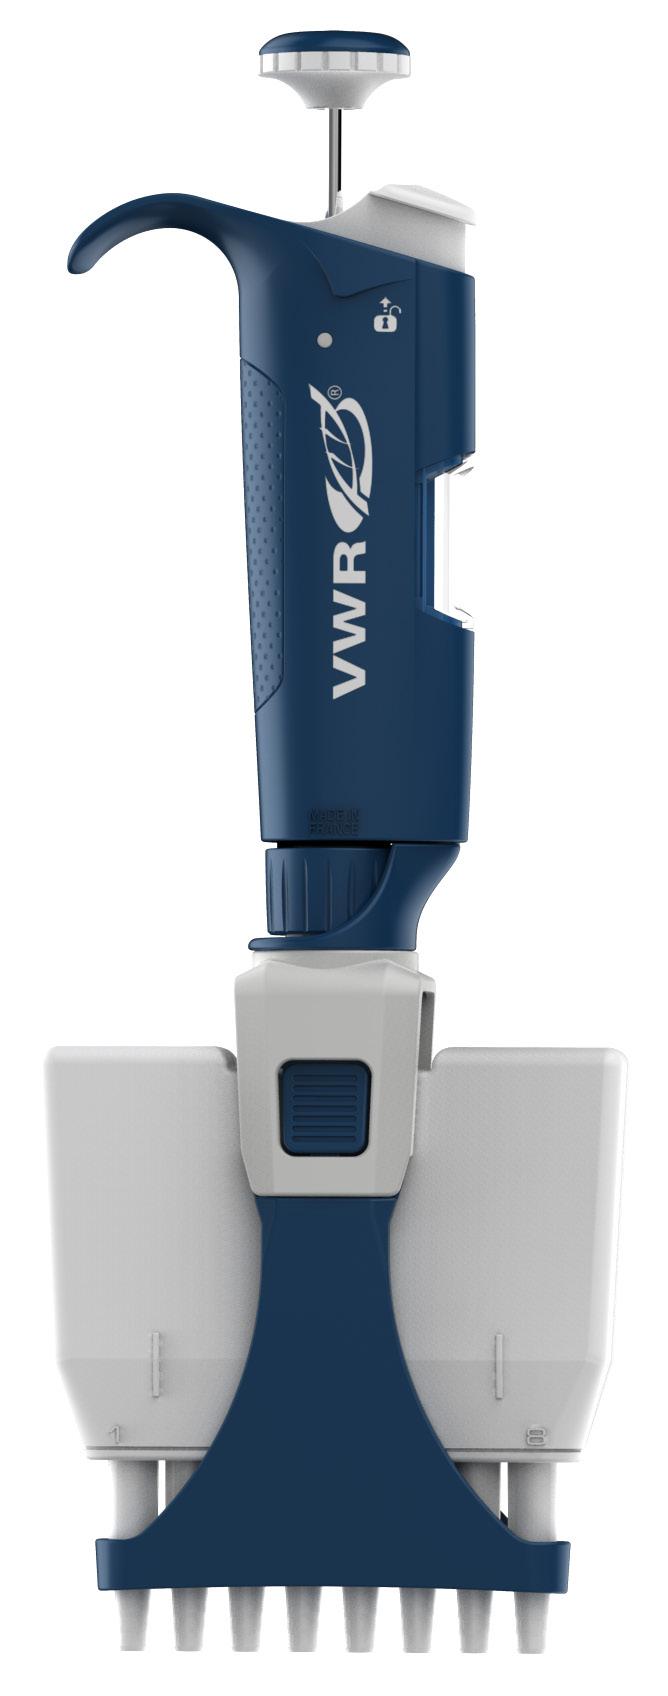
4 3 - DESCRIPTION Single channel models Color-coded push-button Lock/Unlock mechanism & Tipejector button Multichannel models Handle Counter Connecting nut Tip-holder Ejector clip Ejector support Ejector lock Tip-ejector Cover FIGURE 1 Tip-holders 3 - DESCRIPTION For 2µL and 10µL Single channel models, a tip-ejector extention is supplied to fit with short tips models. To fit a tip-ejector extention: Slide the extention over the tip-holder Push the extention firmly onto the end of the tip-ejector until it clicks into place (see figure 2) FIGURE 2 4
5 USER S GUIDE To remove a tip-ejector extention: Gently twist the extention Pull it away from the pipettor Ejector spacer for Multichannel models (X10µL only) Multichannel models fit with long collar tips. If you use short collar tips, you might have to insert the ejector spacer especially indicated for that: Remove the tip-ejector, keep both ejector locks depressed; pull the tip-ejector down. Insert the broad ejector spacer and click it to the tip-ejector. To refit the tip-ejector, gently re-insert the tip-ejector vertically into the rails of the ejector support. Ejector spacer FIGURE 3 Long collar tips Short collar tips 5
6 4 - SETTING THE VOLUME The volume of liquid to be aspirated is set using the volumeter. The digits are colored either black or red to indicate the position of the decimal point, depending on the model (see examples below). Single models Multichannel models 2µl µl µl µl X10µl X20µl µl 7.5 µl 12.5 µl 75 µl 7.5 µl 12.5 µl 200µl µl µl mL X200µl X300µl µl 0.75 ml 1.25 ml 7.5 ml 125 µl 125 µl MODEL Color of volumeter digits Black Red Increment 2µl µl 0.01 µl µl 10µl to 20µl µl 0.1 µl 0.02 µl 8X-10µl, 8X-20µl 12X-10µl, 12X-20µl µl 0.1 µl 0.02 µl 100µl, 200µl, 8X-200µl, 12X-200µl µl µl 8X-300µl, 12X-300µl µl µl 1000µl 0.01 ml ml ml 5000µl 0.01 ml ml ml 10 ml ml 0.1 ml 0.02 ml 6


7 USER S GUIDE Lock system: For trusted results, the volume selection is lockable. First step, with the thumb, unlock the tip-ejector button by pushing it up Unlocked Position Second step, the volume is set by turning the push button 3 Third step, push down the tip-ejector button. The selected volume is locked. To obtain maximum accuracy when setting the volume, proceed as follows: > when decreasing the volume setting, slowly reach the required setting, making sure not to overshoot the mark. > when increasing the volume setting, pass the required value by 1/3 of a turn and then slowly decrease to reach the volume, making sure not to overshoot the mark. > To adjust perfectly the last digit, it is even more precise to do so on the Lock position. 7


8 5 - USER ADJUSTMENT The calibration of the VWR High Performance Pipettor has been performed with distilled water and very high precision volumetric instruments. Adjusting the pipettor can be necessary for different solutions due to their density, viscosity, surface tension and/or vapor pressure etc. Calibration is sometimes recommended when it is used in high altitudes or with special tips. It can also be recalibrated when long pipette tips are used. Performance testing should take place in a draught-free room at C, constant to ± 0.5 C and humidity above 50 %. Part 1 To adjust the volume setting: Part 2 Remove the push button. Use the calibration key to take off the block cover. a. Insert the metal rod into the calibration tool on the hexagonal side. b. Engage the two rectangular hooks of part 2 into the two holes of the block cover. You should feel them clipped on firmly in the hidden part of the pipettor (see figure 5). FIGURE 5 Part 1 Part 2 c. Make sure to hold the part 1 at the top cap, along the part 2. d. Turn the part 2 counterclockwise slowly to remove the block cover (see figure 6). FIGURE 6 Put the block cover apart. 8
.")


9 USER S GUIDE Use the calibration key to adjust the pipettor FIGURE 7 a. Insert the metal rod into the calibration key on the circle tip side (see figure 7). Lock it into place. You should feel the internal part of the calibration key clamped and clipped on firmly. If it is not the case, turn it counterclockwise slowly. Then, turn the plastic connecting nut of the part 1 slowly until it s locked in place (see figure 8). b. Hold the connecting nut of the part 1 with one hand and turn the part 2 with the other one according to the correction needed (see figure 9). FIGURE 8 FIGURE 9 Part 1 Part 2 Once the desired volume is set, remove the calibration key and put back the block cover using the hexagonal side. Turn it clockwise to lock the block cover. Put back the push button. With reference water, one revolution (1/8 turn of the calibration tool) of the volume setting corresponds to: Volume range Vol. per 1/8 turn (equivalence in µl) 2µl i.e: 1 full turn is µl µl µl µl µl µl ML 48 8X-10µl 12X-10µl X-20µl 12X-20µl X-200µl 12X-200µl X-300µl 12X-300µl
10 6 - PIPETTING Fitting the tips VWR High Performance Pipettor have been designed to fit VWR tips. Pre-rinse the tips Some liquids (e.g.protein-containing solutions and organic solvents) can leave a film of liquid on the inside wall of the tip; pre-rinse the tip to minimize any errors that may be related to this phenomenon. Pre-rinsing consists of aspirating the first volume of liquid and then dispensing it to waste. Tips will not fall off nor will they have to be manually positioned. Make sure first that the pipettor is calibrated with the tips that you are using. Then, subsequent volumes that you pipettor will have levels of accuracy and precision within specifications. Using other tips may require a validation of the pipetting system. 1 st stop 2 nd stop 1 st stop FIGURE 10 10
11 USER S GUIDE Aspirate Press the push-button to the first stop (this corresponds to the set volume of liquid). Hold the pipettor vertically and immerse the tip in the liquid. Release the push-button slowly and smoothly (to top position) to aspirate the set volume of liquid. Wait one second; then withdraw the pipette tip from the liquid. You may wipe any drop lets away from the outside of the tip using a medical wipe, however if you do so take care to avoid touching the tip s orifice. / For the multichannel models, use a reagent reservoir. Dispense Place the end of the tip against the inside wall of the recipient vessel (at an angle of 10 to 40 ). Press the push-button slowly and smoothly to the first stop. Wait for at least a second, then press the push-button to the second stop to expel any residual liquid from the tip. Keep the push-button pressed fully down and (while removing the pipettor) draw the tip along the inside surface of the vessel. Release the push-button, smoothly. Eject the tip by pressing firmly on the tipejector button. / For the multichannel models, use a reagent reservoir. 11
12 7 - GENERAL GUIDELINES FOR GOOD PIPETTING Make sure that you operate the push-button slowly and smoothly. Table Immersion Depth and Wait Time When aspirating, keep the tip at a constant Model Immersion Wait Time depth below the surface of the liquid (refer to Depth (mm) (seconds) the table). Change the tip before aspirating a different liquid, sample, or reagent. 2µl 10µl Change the tip if a droplet remains at the end of the tip from the previous pipetting operation. 20µl 100µl Each new tip should be pre-rinsed with the liquid to be pipetted. 200µl 1000µl Liquid should never enter the tip-holder; to prevent this: 5000µl 10mL press and release the push-button slowly 8X-10µl, 12X-10µl 1 1 and smoothly, 8X-20µl, 12X-20µl never turn the pipettor upside down, 8X-200µl, 12X-200µl never lay the pipettor on its side when there 8X-300µl, 12X-300µl is liquid in the tip. If you use the same tip with a higher volume, pre-rinse the tip. For volatile solvents you should saturate the air-cushion of your pipettor by aspirating and dispensing the solvent repeatedly before aspirating the sample. When the pipetted liquid is not at room temperature, pre-rinse the tip several times before use. You may remove the tip-ejector (see chapter 12 - Maintenance) to aspirate from very narrow tubes. After pipetting acids or other corrosive liquids that emit vapors, remove the tip-ejector, the tip-holder, rinse, dry and lubricate the piston (see chapter 12 - Maintenance). Do not pipette liquids having temperatures above 70 C or below 4 C. The pipettor can be used between +4 C and +40 C but the specifications may vary according to the temperature (refer to the ISO standard for conditions of use). / Pipettors should be held in the vertical position. 12

 Identification clips (green, set of 10) Identification clips (blue, set of 10) Identification clips (white, set of 10) FE07060 FE07061 FE07062 FE07063 FE07064 FE07065 9 -")
13 USER S GUIDE 8 - ACCESSORIES AND STAND To store your pipettors, several stands are available. To avoid the possibility of liquid running back into the pipettor, store the pipettor vertically. VWR High Performance Pipettor is sold with the plastic tip ejector but it is available in stainless steel as a spare part. To identify or personalize your pipettor, identification clips are available (Figure 12): FIGURE 12 Identification clips (mixed colors set of 10) Identification clips (red, set of 10) Identification clips (yellow, set of 10) Identification clips (green, set of 10) Identification clips (blue, set of 10) Identification clips (white, set of 10) FE07060 FE07061 FE07062 FE07063 FE07064 FE GLP FEATURES The Serial Number is engraved on the body of the pipettor. It provides a unique identification of the pipettor and the manufacturing date. Example: 15A1425 To know the specific details about your pipettor, see the table. The Bar Code on the box and the certificate of conformity provide traceability of your pipettor. Year /CODE Month/CODE NUMBER (example) 2015/15 January/A /16 February/B /17 March/C /18 April/D /19 May/E /20 June/G /21 July/H /22 August/J /23 September/K /24 October/L /25 November/M /26 December/N
14 10 - TROUBLESHOOTING A quick inspection of the pipettor may help you to detect a problem. The following tables may help you to identify and correct the problem you might encounter. For any other symptom or if you can t solve the problem, please contact your supplier. For Single channel models Symptom Possible Cause Action Pipettor is leaking sample Pipettor won t aspirate Pipettor is inaccurate Pipettor is not precise Damaged tip-holder Worn O-ring or seal Worn O-ring or seal Damaged tip-holder Connecting nut is loose Damaged or corroded piston Improper repair or assembly Improper repair or assembly Unscrewed tip-holder Connecting nut is loose Tip-holder is loose Connecting nut is loose Incorrect operator technique Damaged or corroded piston(s) Damaged tip-holder(s) Worn O-ring or seal Low quality tips Replace the tip-holder Replace both parts and lubricate Replace both parts and lubricate Replace the tip-holder Tighten connecting nut Return pipettor to supplier See Chapter 12 - Maintenance See Chapter 12 - Maintenance Tighten connecting nut Tighten connecting nut Tighten connecting nut Tighten connecting nut Operator training Return pipettor to supplier Replace the tip-holder Replace both parts and lubricate Use VWR tips to have optimum fit correctly results of the pipetting system Tips fall off or do not fit correctly Dirty tip-holder Damaged tip-holder(s) Clean the tip-holder with isopropanol or ethanol Replace the tip-holder The tip-ejector is loose Assemble the tip-ejector properly The ejector lock is misaligned Align the ejector lock Pipetting seize up Piston need lubricant Lubricate piston assembly 14


15 USER S GUIDE For Multichannel models Symptom Possible Cause Action Low quality tips Use VWR tips to have optimum results of the pipetting system Tips fall off or do not fit Tip-ejector damaged Replace tip-ejector correctly Ejector spacer damaged Replace ejector spacer Dirty tip-holder Clean them with ethanol or isopropanol Damaged tip-holder Contact your local supplier Pipettor won t aspirate Connecting nut is loose Tighten connecting nut Pipettor is inaccurate Connecting nut is loose Tighten connecting nut Pipettor is not precise Connecting nut is loose Tighten connecting nut Incorrect operator technique Operator training 11 - LEAK TEST This test may be performed at any time to check that the pipettor does not leak, especially after performing a maintenance or sterilization procedure. If a pipettor fails this test, replace the O-ring and seal. After making sure that the pipettor is correctly reassembled, repeat this test. FIGURE 14 no leak For the 2µL to 200µL Single channel models: Fit with VWR Pipette Tips. Set the pipettor to the maximum volume given in the specifications, and pre-rinse. Aspirate the set volume from a beaker of distilled water. Maintain the pipettor in the vertical position and wait for 20 seconds. If a water droplet appears at the end of the tip there is a leak. If you see no droplet, re-immerse the tip below the surface of water. The water level inside the tip should remain constant; if the level goes down there is a leak. 15
16 For the 1000µL, 5000µL and 10mL Single channel models: Fit with VWR Pipette Tips. Set the pipettor to the maximum volume given in the specifications. Aspirate the set volume from a beaker of distilled water. Maintain the pipettor in the vertical position and wait for 20 seconds. If a water droplet appears at the end of the tip, there is a leak. For the Multichannel models (8X - 12X): Fit with VWR Pipette tips. Set the pipettor to the maximum volume given in the specifications, and prerinse. Aspirate the set volume from a reagent reservoir of distilled water. Maintain the pipettor in the vertical position and wait for 20 seconds; fluid level in tips should remain constant. If a water droplet appears at the end of the tip, there is a leak. If you see no droplet, for volumes below 200 µl, re-immerse the tip below the surface of water. The water level inside the tip should remain constant; if the level goes down there is a leak. 12A - MAINTENANCE FOR THE SINGLE CHANNEL MODELS ONLY Routine maintenance will help to keep your pipettor in good condition, ensuring a continued high level of performance. Maintenance is limited to: Cleaning or sterilization (see Chapter 13 - Cleaning and Sterilization). Replacing spare parts. Greasing the piston assembly. Lubricant tube 1g is available under (check the spare parts list on VWR.com) 2µL and 10µL Single channel models should not be disassembled, so you may only replace the push-button, tip-ejector, and its adapter. With these pipettors if the tip-holder is damaged, the piston may also be damaged. 16
 the tip-ejector on the body of the pipettor.")
.")
17 USER S GUIDE Changing the tip-ejector To remove Push the ejection button. Push laterally (to the left) the tip-ejector. Slide and remove the tip-ejector. To refit Push the ejection button. Slide the tip-ejector along the tip-holder. Clip and push laterally (to the right) the tip-ejector on the body of the pipettor. FIGURE 15 Changing the tip-holder no tools required Remove the tip-ejector (see above). Unscrew the connecting nut by turning it clockwise. Carefully separate the lower and upper parts. Remove the piston assembly and the seals. Clean, sterilize, or replace the tip-holder. If necessary, lubricate lightly the piston and its seals (see below). Reassemble the pipettor (refer to the figure 16). Tighten the connecting nut (turn counterclockwise). Refit the tip-ejector (see above). Servicing the piston assembly You may remove the piston assembly for cleaning purposes only. If the piston assembly is changed, the pipettor must be adjusted and calibrated in the Supplier Service Center. As the models 2µL and 10µL single channel models contain miniaturized parts, it is best not to disassemble these pipettors yourself. Remove the tip-ejector (see above). Unscrew the connecting nut by turning it clockwise. Carefully separate the lower and upper parts. Remove the piston assembly, O-ring and seal. 17
18 Leave exposed the piston, clean it with isopropanol or ethanol and lubricate lightly. For 20µL, 100µL, 200µL Single channel models: lubricate only the useful part of the piston (20 ±5 mm length) and the O-ring. For 1000µL single channel model: lubricate the piston. For 5000µL, 10mL single channel model: disassemble the seals, lubricate their internal part and lubricate the piston. Do not lubricate the O-ring. Reassemble the pipettor (refer to the figure 16). Tighten the connecting nut (turn counterclockwise). Refit the tip-ejector (see above). Changing the seals The O-ring and seal are on the piston; if worn or damaged in any way (chemical or mechanical), they must be replaced. As the models 2µL and 10µL single channel models contain miniaturized parts, it is best not to disassemble these pipettors yourself, please contact your Supplier Service Center. The dimensions of the O-ring vary depending on the model of pipettor. Remove the tip-ejector (see above). Unscrew the connecting nut by turning it clockwise. Carefully separate the lower and upper parts. Remove the piston assembly, O-ring and seal. If necessary clean the piston and replace the seal ; lubricate them lightly. Please place them in the correct order. Reassemble the pipettor (refer to the figure 16). Tighten the connecting nut (turn counter clockwise). Refit the tip-ejector (see above). 18

19 USER S GUIDE FIGURE 16 Color-coded push-button (volume setting) 20µL 100µL 200µL Connecting nut 1000µL Piston assembly 10mL Tip-ejector Tip-holder 19
20 12B - MAINTENANCE FOR THE MULTICHANNEL MODELS ONLY Routine maintenance will help keep your pipettor in good condition, ensuring a continued high level of performance. Maintenance is limited to: Cleaning or sterilization (see Chapter 13 - Cleaning and Sterilization) Replacing spare parts Greasing the piston assembly. FIGURE 17 20
21 USER S GUIDE Changing the tip-ejector To remove the tip-ejector, keep both ejector locks depressed. Pull the tip-ejector down. To refit the tip-ejector, gently re-insert the tip-ejector vertically into the rails of the ejector support. Pull lightly on the tip-ejector to check the position. FIGURE 18 Ejector spacer 13 - CLEANING AND STERILIZATION VWR High Performance Pipettor are designed so that the parts normally in contact with liquid contaminants, can easily be cleaned and decontaminated. However, because the models 2µL and 10µL single channel models contain miniaturized parts, it is best not to disassemble these pipettors yourself; please contact your Supplier Service Center. Liquid must never enter the upper part (handle) of any pipettor. Cleaning for the Single channel models only The pipettor must be cleaned, as described below, before it is decontaminated. Soap solution is recommended for cleaning these models. External cleaning Remove the tip-ejector. Wipe the tip-ejector with a soft-cloth or lint-free tissue impregnated with soap solution. 21
22 Wipe the entire pipettor with a soft-cloth or lint-free tissue impregnated with soap solution, to remove all dirty marks. If the pipettor is very dirty, a brush with soft plastic bristles may be used. Wipe the entire pipettor and the tip-ejector with a soft cloth or lint-free tissue soaked with distilled water. Refit the tip-ejector and allow the pipettor to dry. Internal cleaning The following components only can be immersed in a cleaning solution: connecting nut, tip-ejector, tip-holder, piston assembly, seal and O-ring. Disassemble the pipettor as described in the chapter 12A - Maintenance. Set aside the upper part in a clean, dry place. Clean the individual components of the lower part of the pipettor using an ultrasonic bath (20 minutes at 50 C) or with a soft-cloth and brushes. Note that the piston assembly and seals must be degreased with isopropanol or ethanol before being immersed in another ultrasonic bath. Small round brushes with soft plastic bristles may be used to clean the interior of the tip-holder. Rinse the individual components with distilled water. Leave the parts to dry by evaporation or wipe them with a clean soft-cloth or lint-free tissue. Reassemble the pipettor as described in the chapter 12A - Maintenance. FIGURE 19 Cleaning for the Multichannel Models only Tip-ejector The pipettor must be cleaned, as described below, before it is decontaminated. Soap solution is recommended for cleaning these models. The following components only can be immersed in a cleaning solution: tip-ejector and ejector spacer. Ejector spacer for 10µl models only Remove the tip-ejector and the ejector spacer. Immerse the tip-ejector, and ejector spacer in the cleaning solution or wipe them with a soft cloth or lint-free tissue impregnated with the cleaning solution. Rinse the components with distilled water. 22
23 USER S GUIDE Wipe the entire pipettor with a soft cloth or lint-free tissue impregnated with the cleaning solution. Wipe it with distilled water. Leave the parts to dry by evaporation or wipe them with a clean soft-cloth or lint-free tissue. Refit the tip-ejector as described in Changing the tip-ejector. Chemical Decontamination You may choose to decontaminate your pipettor chemically, in accordance with your own procedures. Whatever decontaminant you use, check with the supplier of the decontaminant that it is compatible with stainless steel and the plastics used in the construction of the pipettor: PBT (Polybutylene Terephtalate), PC (Polycarbonate), PC/PBT (Polycarbonate/Polybutylene Terephtalate), PEEK (Polyetheretherkitone), PEI (Polyetherimide), POM (Polyoxymethylene), PPS (Polyphenylene Sulfide), PVDF (Polyvinylidene Fluoride), or PP (Polypropylene). For the single channel models: Upper Part (handle) Wipe the upper part (handle) of the pipettor with a soft cloth or lint-free tissue impregnated with the chosen decontaminant. Wipe the upper part of the pipettor with a soft cloth or lint-free tissue soaked with distilled water or sterile water. Lower Part (Volumetric module) The following components only can be immersed in a decontaminant solution: connecting nut, tip-ejector, tip-holder. Piston assembly and seals must be degreased with methyl alcohol before being immersed in decontamination solution in separate vessel. Disassemble the pipettor as described in the chapter 12A. Immerse tip-ejector, tip-holder and connecting nut in the cleaning solution. Degrease the piston assembly, the seals and immerse them in another vessel. Rinse each component with distilled water. Leave the parts to dry by evaporation (or wipe with a soft cloth the tip-ejector, the tip-holder and connecting nut). Lubricate the piston assembly and the seals. Reassemble the piston assembly, the tip-holder and the tip-ejector. 23
24 For the multichannel models: The following components only can be immersed in a decontamination solution: tipejector and ejector spacer. Remove the tip-ejector and the ejector spacer. Immerse the tip-ejector and ejector spacer in the decontamination solution or wipe them with a soft cloth or lint-free tissue impregnated with the decontamination solution. Rinse the components with distilled water. Wipe the entire pipettor with a soft cloth or lint-free tissue impregnated with the decontamination solution. Wipe it with distilled water. Leave the parts to dry by evaporation or wipe them with a clean soft-cloth or lint-free tissue. Refit the tip-ejector as described in Changing the tip-ejector. Sterilization The entire autoclavable range of pipettors can be sterilized by steam autoclaving at 121 C (252 F), 1 atm for 20 minutes. The single and multichannel pipettors can be autoclaved without special precautions. Use of a bag is not recommended in order to improve the drying of the pipettor. After autoclaving, check the connecting nut is fully tightened and screw it if it is not the case. The pipettor needs to dry completely and cool down to room temperature. (1/2 day if your autoclave has a dry cycle or otherwise overnight before use). The piston does not need to be lubricated after autoclaving, except if grease was removed during cleaning. Gravimetric checking is recommended after every 5 autoclave cycles for single channel pipettors and after 1 cycle for multichannel pipettors. 24
25 USER S GUIDE 14 - SPECIFICATIONS VWR High Performance Pipettor are high quality. These pipettors are compatible with universal tips. Checking and recalibrating your pipettor with the tips that you use may be needed. Each pipettor is inspected and validated by qualified technicians in accordance with the VWR Quality System. VWR declares that its manufactured pipettors comply with the requirements of the ISO8655 standard, by type testing. The adjustment is carried out under strictly defined and monitored conditions (described in the internal manufacturer procedure wich are based on the ISO8655). Single models SPECIFICATIONS - Error limits Model Volume Volume Systematic error Random error range (µl) (µl) (µl) (%) (µl) (%) 0.2 ± ± µl ± ± ± ± ± ± µl ± ± ± ± ± 0.11 ± µl ± 0.12 ± ± 0.20 ± ± 0.39 ± µl ± 0.44 ± ± 0.80 ± ± 0.55 ± µl ± 0.88 ± ± 1.60 ± ± 3.3 ± µl ± 4.4 ± ± 8.0 ± ± 13 ± µl ± 17 ± ± 33 ± ± 33 ± mL ± 44 ± ± 60 ±


26 The data given in the tables are achieved with VWR standard length series pipette tips. If you are using VWR 10 µl extended length series pipette tips, you will need to recalibrate your pipettor to comply with specifications. Multichannel models Model 8X-10µl SPECIFICATIONS - Error limits Volume Volume Systematic error Random error range (µl) (µl) (µl) (%) (µl) (%) 0.5 ± 0.09 ± ± 0.22 ± X-10µl 10 ± 0.22 ± X-20µl 2 ± 0.11 ± ± 0.22 ± X-20µl 20 ± 0.40 ± X-200µl 20 ± 0.55 ± ± 1.10 ± X-200µl 200 ± 2.20 ± X-300µl 20 ± 1.10 ± ± 1.65 ± X-300µl 300 ± 3.30 ± The data given in the tables is conform to the ISO Standard. With a precise pipetting technique (see Chapter 7 - General guidelines for good pipetting) the 2µL single channel model may be used to aspirate volumes as low as 0.1µL and the 10µL single channel model as low as 0.5 µl SPARE PARTS Please check the separate spare parts list on VWR.com 26
27 USER S GUIDE 16 - MAINTENANCE & CALIBRATION VWR recommends pipettor calibration and maintenance at least once annually by the authorized service provider. Please contact VWR directly or visit the VWR website at TECHNICAL SERVICE Web Resources Visit the VWR website at for: Complete technical service contact information Access to the VWR Online Catalogue, and information about accessories and related products Additional product information and special offers For information or technical assistance contact your local VWR representative or visit: WARRANTY VWR warrants that this product will be free from defects in material and workmanship for a period of 36 months from date of delivery. If a defect is present, VWR will, at its option and cost, repair, replace, or refund the purchase price of this product to the customer, provided it is returned during the warranty period. This warranty does not apply if the product has been damaged by accident, abuse, misuse, or misapplication, or from ordinary wear and tear. If the required maintenance and inspection services are not performed according to the manuals and any local regulations, such warranty turns invalid, except to the extent, the defect of the product is not due to such non-performance. Items being returned must be insured by the customer against possible damage or loss. This warranty shall be limited to the aforementioned remedies. IT IS EXPRESSLY AGREED THAT THIS WARRANTY WILL BE IN LIEU OF ALL WARRANTIES OF FITNESS AND IN LIEU OF THE WARRANTY OF MERCHANTABILITY. 27

28 19 - COMPLIANCE WITH LOCAL LAWS AND REGULATIONS The customer is responsible for applying for and obtaining the necessary regulatory approvals or other authorisations necessary to run or use the Product in its local environment. VWR will not be held liable for any related omission or for not obtaining the required approval or authorisation, unless any refusal is due to a defect of the product EQUIPMENT DISPOSAL This equipment is marked with the crossed out wheeled bin symbol to indicate that this equipment must not be disposed of with unsorted waste. Instead it s your responsibility to correctly dispose of your equipment at lifecycle end by handling it over to an authorized facility for separate collection and recycling. It s also your responsibility to decontaminate the equipment in case of biological, chemical and/or radiological contamination, so as to protect from health hazards the persons involved in the disposal and recycling of the equipment. For more information about where you can drop off your waste of equipment, please contact your local dealer from whom you originally purchased this equipment. By doing so, you will help to conserve natural and environmental resources and you will ensure that your equipment is recycled in a manner that protects human health. Thank you. 28
29 LT801587/A 12/2017
WITOPET PREMIUM PIPETTE USER S GUIDE
 WITOPET PREMIUM PIPETTE USER S GUIDE WITOPET PREMIUM PIPETTE Contents Page 1- INTRODUCTION 3 2- PARTS CHECK LIST 3 3- DESCRIPTION 4 4- SETTING THE VOLUME 6 5- USER ADJUSTMENT 7 6- PIPETTING 8 7- GENERAL
NEO. User s Guide. Do not lubricate this pipette. The use of lubricant cancels the warranty of this pipette. NOTICE
 NEO User s Guide EN NOTICE Do not lubricate this pipette. The use of lubricant cancels the warranty of this pipette. TABLE OF CONTENTS INTRODUCTION 3 Parts Checklist 3 GLP Features 3 Description 4 Specifications
User s Guide VARIABLE VOLUME MODELS. Variable volume single and multichannel models and fixed volume models
 User s Guide EN FULLY VARIABLE VOLUME MODELS AUTOCLAVABLE Variable volume single and multichannel models and fixed volume models TABLE OF CONTENTS INTRODUCTION 3 Parts Checklist 3 GLP Features 3 TABLE
Comfortable and Secure by Nature!
 Comfortable and Secure by Nature! USER S GUIDE pipetman L single, multichannel & Fixed models Contents Page 1 - INTRODUCTION 2 2 - Parts Check List 2 3 - DESCRIPTION 3 4 - setting THE VOLUME - Only for
PIPETMAN F ENGLISH. Other languages available on our website:
 PIPETMAN F ENGLISH Other languages available on our website: www.gilson.com. PIPETMAN F CONTENTS page 1 - INTRODUCTION 2 2 - SPECIFICATIONS 3 3 - OPERATION 4 4 - USER ADJUSTMENT 5 5 - PRE-RINSING 6 6 -
VWR UHP j :01 Page 1. ENGLISH 1 22 DEUTSCH FRANÇAIS ESPAπOL ITALIANO
 VWR UHP 01.09.2010 5j 240.9001.0.09 1-09-10 16:01 Page 1 1 22 DEUTSCH 23 44 FRANÇAIS 45 66 ESPAπOL 67 88 ITALIANO 89 110 VWR UHP 01.09.2010 5j 240.9001.0.09 1-09-10 16:01 Page 2 Pipettors are equipped
MICROMAN ENGLISH. Other languages can be consulted and downloaded on our website,
 MICROMAN ENGLISH Other languages can be consulted and downloaded on our website, www.gilson.com. MICROMAN CONTENTS page 1 - INTRODUCTION 2 2 - Parts Check List 3 3 - DESCRIPTION 4 4 - OPERATING Ranges
RayPette Plus Autoclavable Pipette. User Manual
 RayPette Plus Autoclavable Pipette User Manual CONTENTS 1. YOUR NEW PIPETTE... 1 1.1. Adjustable volume pipettes... 1 1.3 Fully autoclavable... 2 2. UNPACKING... 3 3. INSTALLING THE PIPETTE HOLDER... 4
Artisan Technology Group is your source for quality new and certified-used/pre-owned equipment
 Artisan Technology Group is your source for quality new and certified-used/pre-owned equipment FAST SHIPPING AND DELIVERY TENS OF THOUSANDS OF IN-STOCK ITEMS EQUIPMENT DEMOS HUNDREDS OF MANUFACTURERS SUPPORTED
Ergonomic Pipetting for Problem Liquids!
 Ergonomic Pipetting for Problem Liquids! Contents Page 1 - INTRODUCTION 3 2 - PARTS CHECKLIST 4 3 - DESCRIPTION 4 4 - OPERATING RANGES AND MATERIALS 5 5 - FITTING THE CAPILLARY AND PISTON 5 - SETTING THE
The pipettes cover a volume range from 0.1µl to 10ml.
 CONTENTS 1. YOUR NEW PIPETTE 1 1.1. Adjustable volume pipettes 1 1.2. Fixed volume pipettes 2 1.3 Fully autoclavable 3 2. UNPACKING 3 3. INSTALLING THE PIPETTE HOLDER 4 4. PIPETTE COMPONENTS 5 5. PIPETTE
The pipette of Choice for Problem Liquids!
 The pipette of Choice for Problem Liquids! Contents Page 1 - INTRODUCTION 2 2 - Parts Check List 3 3 - DESCRIPTION 3 4 - OPERATING Ranges and materials 5 5 - UsING microman 5 6 - fitting the capillary
Pipettor. User Manual
 Pipettor User Manual Product Code Description Single Chanel Pipettor Variable 550.002.055 Volume 0.5 to 10ul 550.002.060 2 to 20ul 550.002.065 10 to 100ul 550.002.070 20 to 200ul 550.002.075 100 to 100ul
A N F G J I C D D L A B C D E F
 A1 A2 B A N C D E F G J I C D L A B C D E F Model GM2 GM10 GM20 GM100 GM200 GM1000 GM5000 GM10000 Volume range [μl] 0.1-2 0.5-10 2-20 10-100 20-200 100-1000 1000-5000 1000-10000 CONTENTS 1 - INTRODUCTlON
CALIBRATION AND ADJUSTMENT
 CALIBRATION AND ADJUSTMENT All SMART pipettes are been quality tested according to ISO8655/DIN 12650. The quality control according to ISO 8655/DIN 12650 involves gravimetric testing of each pipette with
User s Manual. Autoclavable & UV resistant. Multi-channel digital micro pipette. In Vitro Medical Diagnostic Devices (98/79/EC)
") Autoclavable & UV resistant Multi-channel digital micro pipette User s Manual In Vitro Medical Diagnostic Devices (98/79/EC) Annex III self-declared ISO 8655 STANDARD CERTIFIED ISO9001 Thank you very much
Autoclavable & UV resistant Multi-channel digital micro pipette User s Manual In Vitro Medical Diagnostic Devices (98/79/EC) Annex III self-declared ISO 8655 STANDARD CERTIFIED ISO9001 Thank you very much
MULTICHANNEL. Labnet International, Inc.
 Labnet International, Inc. A B A1 A2 C F D H E 4A 4B 4C 4D G CONTENTS 1 - INTRODUCTION 2 - VOLUME SETTING 3 - METHOD OF PIPETTING 4 - RECOMMENDATIONS - RECALIBRATION 6 - CLEANING AND STERYLIZATION 7 -
A N B P F G J I C D D L A B C D E F
 A1 A2 B P C E A N F G J I C L A B C E F 4 5 6 4A 4B 4C 4 5A 6A 2-1000 µl P 5B P 6B 5000 µl, 10000 µl 6C 5000 µl, 10000 µl 7 CONTENTS 1 - INTROUCTlON 2 - SETTING THE VOLUME 3 - ASPIRATING AN ISPENSING LIQUIS
Fisherbrand. Finnpipette INSTRUCTIONS FOR USE PARK LANE Pittsburgh PA
 Fisherbrand Finnpipette INSTRUCTIONS FOR USE 1 0. 0 1 0. 0 0 2000 PARK LANE Pittsburgh PA 15275 800-766-7000 1 CONTENTS PRODUCT DESCRIPTION 3 PIPETTE OPERATION 4 PIPETTING TECHNIQUES 4, 5 CALIBRATION 6,
User s Manual. Autoclavable & UV r e s i s t a n t. Digital micro pipette for liquid handling. In Vitro Medical Diagnostic Devices (98/79/EC)
") Autoclavable & UV r e s i s t a n t Digital micro pipette for liquid handling User s Manual In Vitro Medical Diagnostic Devices (98/79/EC) Annex III self-declared ISO 8655 STANDARD CERTIFIED ISO9001 Thank
Autoclavable & UV r e s i s t a n t Digital micro pipette for liquid handling User s Manual In Vitro Medical Diagnostic Devices (98/79/EC) Annex III self-declared ISO 8655 STANDARD CERTIFIED ISO9001 Thank
Operating Instructions. Rainin Classic Manual Pipette
 Operating Instructions Rainin Classic Manual Pipette Rainin Classic Continuously Adjustable Pipettes Rainin Classic Intent of Use Rainin Classic air-displacement pipettes are intended for dispensing liquids
Decontamination Procedures for Gilson Pipettes
 Standard Operating Procedure for Pipettes Decontamination Procedures for Gilson Pipettes (defined for Users to Incorporate in SOPs) in Accordance with ISO8655 Standard Procedure LT802288/E - 2008 Gilson
SoCal BioMed, LLC 4695 MacArthur Court, 11th Floor Newport Beach, CA Phone: +1 (424) Fax: +1 (323)
 Fax: +1 (323)") SoCal BioMed, LLC 4695 MacArthur Court, 11th Floor Newport Beach, CA 92660 Phone: +1 (424) 400-2340 Fax: +1 (323) 372-3546 info@socalbiomed.com www.socalbiomed.com A1 A2 B P A N F C D E G J I C D L The
SoCal BioMed, LLC 4695 MacArthur Court, 11th Floor Newport Beach, CA 92660 Phone: +1 (424) 400-2340 Fax: +1 (323) 372-3546 info@socalbiomed.com www.socalbiomed.com A1 A2 B P A N F C D E G J I C D L The
A N B P G J I C D L D E
 A1 A2 B P A N F C D E G J I C D L CONTENTS 1 - INTRODUCTION 2 - SETTING THE VOLUME 3 - OPERATION 4 - PRE-RINSING 5 - DENSE AND VISCOUS LIQUIDS 6 - DENVILLE PIPETTE TIPS 7 - RECOMMENDATIONS 8 - RECALIBRATION
Other languages available on our website:
 Other languages available on our website: www.gilson.com. CONTENTS PAGE 1 - INTRODUCTION 2 2 - OPERATION 3 3 - RECOMMENDATIONS 9 4 - SPECIFICATIONS 9 5 - MAINTENANCE 10 6 - DECONTAMINATION 13 7 - SPARE
VITLAB micropipette. Standard Operating Procedure (SOP)
") VITLAB micropipette Standard Operating Procedure (SOP) VITLAB GmbH Linus-Pauling-Str.1 63762 Grossostheim Germany tel: +49 6026 97799-0 fax: +49 6026 97799-30 info@vitlab.com www.vitlab.com Table of contents
VITLAB micropipette Standard Operating Procedure (SOP) VITLAB GmbH Linus-Pauling-Str.1 63762 Grossostheim Germany tel: +49 6026 97799-0 fax: +49 6026 97799-30 info@vitlab.com www.vitlab.com Table of contents
Varipette Operating manual
 Operating manual Copyright 2013 Eppendorf AG, Hamburg. No part of this publication may be reproduced without the prior permission of the copyright owner. Eppendorf and the Eppendorf logo are registered
Transferpette -8/-12
 Transferpette -8/-12 Testing Instructions (SOP) May 2009 1. Introduction The standard DIN EN ISO 8655 describes both the design and the testing of the piston operated pipette Transferpette 8/ 12. The following
Nichipet EX Plus II. User s Manual. Autoclavable & UV resistant. Digital micro pipette for liquid handling
 Autoclavable & UV resistant Nichipet EX Plus II Digital micro pipette for liquid handling User s Manual In Vitro Medical Diagnostic Devices (98/79/EC) Annex III self-declared ISO 8655 STANDARD CERTIFIED
Chapter 2. Pipetting techniques. Guide to Pipetting
 Chapter 2 Pipetting techniques 16 Guide to Pipetting 2.1 Adjust the volume display CHAPTER 2 Reading and adjusting the volume The volume is shown on the volumeter Hold the body of the micropipette in one
Corning Step-R. Repeating Pipettor. Instruction Manual
 Corning Step-R Repeating Pipettor Instruction Manual Table of Contents 1. Introduction... 1 2. Using the Step-R Repeating Pipettor... 1 3. Corning Syringe Tips... 4 4. Recommendations... 5 5. Recalibration...
User s Manual. Autoclavable & UV resistant Nichipet EX II. Digital micro pipette for liquid handling. In Vitro Medical Diagnostic Devices (98/79/EC)
") Autoclavable & UV resistant Nichipet EX II Digital micro pipette for liquid handling User s Manual In Vitro Medical Diagnostic Devices (98/79/EC) Annex III self-declared ISO 8655 STANDARD CERTIFIED ISO9001
Autoclavable & UV resistant Nichipet EX II Digital micro pipette for liquid handling User s Manual In Vitro Medical Diagnostic Devices (98/79/EC) Annex III self-declared ISO 8655 STANDARD CERTIFIED ISO9001
Adjust the Volume Display
 PIPETTING TECHNIquES Chapter 2 PIPETTING TECHNIquES Adjust the Volume Display The volume is shown on the volumeter Reading and Adjusting the Volume Hold the body of the micropipette in one hand and use
User s Manual. Digital micro pipette for liquid handling CERTIFIED ISO9001
 Digital micro pipette for liquid handling User s Manual In Vitro Medical Diagnostic Devices (98/79/EC) Annex III self-declared ISO 8655 STANDARD CERTIFIED ISO9001 Thank you very much for purchasing NICHIRYO
Tips for Proper Pipette handling and Maintenance. D. Muruganand, Ph.D ILQA - Bangalore, Feb 2014
 Tips for Proper Pipette handling and Maintenance D. Muruganand, Ph.D ILQA - Bangalore, Feb 2014 Liquid handling tools Manual pipettes Electronic pipette and dispenser Automated systems Principles of Pipetting
Transferpette. Testing Instructions (SOP) 1. Introduction. October 1998
 1. Introduction. October 1998") Transferpette Testing Instructions (SOP) October 1998 1. Introduction The standards ISO DIS 8655 and DIN 12650 describe both the design and the testing of the piston operated pipette Transferpette. The
Transferpette Testing Instructions (SOP) October 1998 1. Introduction The standards ISO DIS 8655 and DIN 12650 describe both the design and the testing of the piston operated pipette Transferpette. The
Eppendorf Research fix variable multi Instruction Manual Bedienungsanleitung Mode d emploi Instruzioni d impiego Manual de Instrucciones
 Eppendorf Research fix variable multi Instruction Manual Bedienungsanleitung Mode d emploi Instruzioni d impiego Manual de Instrucciones Fig./Abb. 1 Research variable / fix Single-Channel / Einkanal Research
Tacta Mechanical Pipette User Manual
 Tacta Mechanical Pipette User Manual Table of Contents 1. Introduction...3 1.1 Intended Use...3 1.2 Pipette Parts and Materials...3 1.3 Sartorius Pipette Tips...4 1.4 Adjustment Tool...4 2. Package Contents...4
Transferpette. Testing Instructions (SOP) 1. Introduction. May 2009
 1. Introduction. May 2009") Transferpette Testing Instructions (SOP) May 2009 1. Introduction The standards DIN EN ISO 8655 describe both the design and the testing of the piston operated pipette Transferpette. The following Testing
Transferpette Testing Instructions (SOP) May 2009 1. Introduction The standards DIN EN ISO 8655 describe both the design and the testing of the piston operated pipette Transferpette. The following Testing
THE UNIVERSITY OF NEWCASTLE - DISCIPLINE OF MEDICAL BIOCHEMISTRY
 THE UNIVERSITY OF NEWCASTLE - DISCIPLINE OF MEDICAL BIOCHEMISTRY Page: 1 of 9 1. Risk Assessment: This risk assessment has been prepared using the National Safety Council of Australia Risk Score Calculator
User's Manual. Autoclavable Nichipet EX Plus Digital micro pipette for liquid handling CERTIFIED ISO9001
 Autoclavable Nichipet EX Plus Digital micro pipette for liquid handling User's Manual For repair, service or information you may contact your local distributor. CERTIFIED ISO9001 00 MANUFACTURER: 4-10.
Contents Page Warranty
 User's Guide Warranty Gilson warrants this product against defects in material under normal use and service for a period of 12 months from the date of purchase. Gilson is not responsible for incidental
Improving Pipetting Techniques
 Improving Pipetting Techniques for Better Accuracy and Performance 49 Basic pipetting techniques Pipette cycle Specifications - How to select the optimal volume range for your pipette Basic techniques
Chapter Pipette service & maintenance. Pipette specifications according to ISO Repair in the lab or return for service?
 Pipette specifications according to ISO 8655 Chapter 5 5.1 The ISO 8655 standard gives the accuracy and precision limits as both absolute and relative values. Specifications will depend on the technique
25/04/56. LTC Carmen A. Bell Chief, Laboratory Operations USAMC-AFRIMS
 Pipette Theory and Maintenance LTC Carmen A. Bell Chief, Laboratory Operations USAMC-AFRIMS carmen.bell@afrims.org +6602-696-2725 1 References Pharma Express: http://pharma.financialexpress.com/2008063
Userts Manual. Digital micro pipette for liquid handling. In Vitro Medical Diagnostic Devices (98/79/EC) Annex III self-declared ISO 8655 STANDARD
 Annex III self-declared ISO 8655 STANDARD") Digital micro pipette for liquid handling Userts Manual In Vitro Medical Diagnostic Devices (98/79/EC) Annex III self-declared ISO 8655 STANDARD CERTIFIED ISO9001 Thank you very much for purchasing NICHIRYO
Digital micro pipette for liquid handling Userts Manual In Vitro Medical Diagnostic Devices (98/79/EC) Annex III self-declared ISO 8655 STANDARD CERTIFIED ISO9001 Thank you very much for purchasing NICHIRYO
SoftGrip Single Channel Pipettes User Manual New Photo To Come
 SoftGrip Single Channel Pipettes User Manual New Photo To Come 1 of 12, 1773-1 (Rev. E) Welcome Thank you for choosing a SoftGrip TM pipette from the Hamilton Company. Before using your new pipette, please
UNCC Biotechnology and Bioinformatics Camp. Dr. Jennifer Weller Summer 2010
 UNCC Biotechnology and Bioinformatics Camp Dr. Jennifer Weller Summer 2010 Using Micropipettes Lab Intro Micropipettes How do you control volume in the microliter range? How do you verify that the volume
Thermo Scientific F1-ClipTip Single Channel Multichannel
 Thermo Scientific F1-ClipTip Single Channel Multichannel Instructions for Use Part of Thermo Fisher Scientific 1 This product complies with the European Union Directive 98/79/EC, and it is marked with
Service and Repair Manual
 II stage R2 Ice/ Special, II stage R 1 Pro DOWNSTREAM 2 nd STAGE REGULATOR Service and Repair Manual Introduction Safety Precautions...4 General Procedures, Maintenance Schedules...5 Initial Inspection
Laboratory #2 Pipetting Technique and Micropipette Calibration Skills=40 pts
 Laboratory #2 Pipetting Technique and Micropipette Calibration Skills=40 pts Objectives: Upon completion of this unit, the student should be able to: 1. List and describe 3 categories of pipets. 2. List
Liquidator 96 Manual benchtop pipetting system
 Liquidator 96 Manual benchtop pipetting system Liquidator 96 Controls 8 3 4 2 1 5 7 9 10 6 1. Transport lock 2. Pipetting grip & lever 3. Volume selector 4. Volume lock 5. Tip mounting lever 6. Tip rack
Pipetting Small Volumes
 Pipetting Small Volumes Introduction Serological and micropipettes are used to accurately transfer small liquid volumes (micro-liter to milli-liter) accurately and precisely. Continuously adjustable Can
Instruction Manual LIMITED 1 YEAR WARRANTY. Hydraulic Punch Driver Read this material before using this product.
 Instruction Manual Hydraulic Punch Driver 902-483 LIMITED 1 YEAR WARRANTY We make every effort to assure that its products meet high quality and durability standards, and warrant to the original purchaser
Improve pipetting results in pharmaceutical formulation by using MICROMAN E
 Improve pipetting results in pharmaceutical formulation by using MICROMAN E Application Note LT805005 Nadège Belhadj, Gilson, France nbelhadj@gilson.com In pharmaceutical formulation, properties of used
Lab Skills Practice: Pipetting Small Volumes. B3 Summer Science Camp at Olympic High School 2016
 Lab Skills Practice: Pipetting Small Volumes B3 Summer Science Camp at Olympic High School 2016 Pipetter types Serological and micropipettes are used to accurately transfer small liquid volumes (micro-liter
SSS SWEEPERS MODELS MS-31 & MS-39
 SSS SWEEPERS MODELS MS-31 & MS-39 INTRODUCTION OPERATING & MAINTENANCE INSTRUCTIONS READ THIS BOOK This operator s book has important information for the use and safe operation of this machine. Read this
Register your instrument! Eppendorf Research plus. User Adjustment
 search nt plus stment N) Register your instrument! www.eppendorf.com/myeppendorf User Adjustment Copyright 2013 Eppendorf AG, Hamburg. No part of this publication may be reproduced without the prior permission
HELMETS SAVE LIVES!!! ALWAYS WEAR A PROPERLY FITTED HELMET WHEN YOU RIDE YOUR SCOOTER. DO NOT RIDE AT NIGHT. AVOID RIDING IN WET CONDITIONS.
 HELMETS SAVE CORRECT FITTING - MAKE SURE YOUR HELMET COVERS YOUR FOREHEAD. LIVES!!! ALWAYS WEAR A PROPERLY FITTED HELMET WHEN YOU RIDE YOUR SCOOTER. DO NOT RIDE AT NIGHT. AVOID RIDING IN WET CONDITIONS.
SSS SWEEPERS MODELS MS-21 & MS-29
 SSS SWEEPERS MODELS MS-21 & MS-29 INTRODUCTION OPERATING & MAINTENANCE INSTRUCTIONS This operator s book has important information for the use and safe operation of this machine. Read this book carefully
Sterile Visual Flow Indicator
 Sterile Visual Flow Indicator Sanitary Process Connection Installation / Operation / Maintenance Manual P.O. Box 1116 Twinsburg, OH 44087 Phone: 330/405-3040 Fax: 330/405-3070 E-mail: view@ljstar.com Web
Transferpette. Lightweight precise rugged reliable!
 Lightweight precise rugged reliable! Transferpette Solutions for S cience F I R S T C L A S S B R A N D The Transferpette S microliter pipettes provide all features required for pipetting in Life Science
VIAFLO 96. Electronic 96 Channel Hand Held Pipettor
 VIAFLO 96 Electronic 96 Channel Hand Held Pipettor VIAFLO 96 Unique Multichannel microplate pipetting is a growing task because of the need to increase productivity and improve the quality of the data
Register your instrument! Eppendorf Xplorer / Eppendorf Xplorer plus. Adjustment
 lorer /Eppendorf N) t Xplorer plus Register your instrument! www.eppendorf.com/myeppendorf Eppendorf Xplorer / Eppendorf Xplorer plus Adjustment Copyright 2015 Eppendorf AG, Germany. All rights reserved,
Transferpette. Lightweight precise rugged reliable!
 Lightweight precise rugged reliable! Transferpette Solutions for S cience F I R S T C L A S S B R A N D The Transferpette S microliter pipettes provide all features required for pipetting in Life Science
Type BBS-03, BBS-05, BBS-06, BBS-25
 Type BBS-03, BBS-05, BBS-06, BBS-25 Sterile connection elements Sterile Verbindungselemente Raccords union stériles Operating Instructions Bedienungsanleitung Manuel d utilisation 1. THE OPERATING INSTRUCTIONS
12S 1st Stage. -Maintenance Procedure-
 12S 1st Stage -Maintenance Procedure- 1 Warning! All maintenance and repair procedures MUST be performed by a Mares authorized Service Center and/or Distributor. Therefore, the information provided below
Standard Operating Procedure. Air Displacement Pipette Calibration
 University of Colorado at Denver October 28, 2003 - Revision 1.00 Page 1 of 7 1 Background: Standard Operating Procedure An accurate pipette is one of the most important tools in performing accurate analytical
II. MATERIALS REQUIRED FOR PERFORMANCE TESTING
 TSP-016 P/N L038-058 4-001 Rev. D February 8, 2000 Page 1 of 14 DISTRIBUTION: VistaLab Technologies Customers EQUIPMENT: MLA Pipettes SUBJECT: Pipette Performance Verification Protocol PURPOSE: To evaluate
Service and Repair Operative Manual MC9 1 st STAGE. MC9 1 st Stage. 1 st STAGE MC9. Jannuary Rev. MC9 /B Ed. C/13
 MC9 1 st Stage 137 1 st STAGE MC9 Jannuary 2009 - Rev. MC9 /B Ed. C/13 138 WARNING! This manual is intended for use by expert technicians who should attend or have already received training in equipment
Using a micropipette to transfer exact liquid measurements in scientific experiments By: Nicole Hume
 Using a micropipette to transfer exact liquid measurements in scientific experiments By: Nicole Hume Introduction A micropipette is a scientific tool used to transfer small, exact volumes of liquid between
For accurate measurements and to prevent damage to the micropipets, follow these important guidelines:
 OXFORD VERSION #2 MEASURE FOR MEASURE MICROPIPETTING AND THE METRIC SYSTEM Concept: Work with DNA and enzymes frequently involves measuring very small volumes, often in the microliter range. A microliter
Transferpette. Single and Multichannel Pipettes
 Transferpette Transferpette -8/-12 Transferpette Single and Multichannel Pipettes The Transferpette pipette from BRAND is designed for routine lab and research applications in a shape that is adapted to
Technical Procedure for General Laboratory Equipment
 Technical Procedure for General Laboratory Equipment 1.0 Purpose - This procedure specifies the required elements for the use of general laboratory equipment. 2.0 Scope - This procedure applies to all
Technology for Vacuum Systems Instructions for use
 page 1 of 28 Technology for Vacuum Systems Instructions for use 8-channel tip adapter with ejector page 2 of 28 After sales service: Contact your local dealer or call +49 9342 808-5500. Trademark index:
GM-121: Container End Lock Anchor Wand Page 1 WINSAFE CORP. GM 121 CONTAINER END LOCK ANCHOR WAND OPERATING INSTRUCTIONS AND MAINTENANCE
 GM-121: Container End Lock Anchor Wand Page 1 WINSAFE CORP. GM 121 CONTAINER END LOCK ANCHOR WAND OPERATING INSTRUCTIONS AND MAINTENANCE US Patent No. 6834745 This equipment conforms to 0321 EN795:1996
MAINTENANCE PROCEDURE FOR X 650
 MAINTENANCE PROCEDURE FOR X 650 X 650 25. juli 2005-1/6 MAINTENANCE PROCEDURE FOR X 650 2 ND STAGE WARNING: This maintenance procedure is only for appointed Scubapro technicians that completed a course
RG1200 Service and Repair Manual
 Dive Rite RG 1200 Regulator Service and Repair Manual Page 1 Text and Photography by Pete Nawrocky Copyright ( ) 1999-2000, Lamartek, Inc., dba Dive Rite RG1200 Service and Repair Manual First Stage.........................................
Cleaning rod: spring steel, stainless steel or carbon fibre cleaning rod - only use a one-piece rod. Avoid using snakes.
 Telemark Biathlon Where performance and precision come together http://telemarkbiathlon.com Rifle Cleaning Date : July 19, 2013 Anschutz Rifle Manual - Click Here Izhmash 7-3 Rifle Manual - still looking
Hydraulic Punch Drivers
 SERVICE MANUAL 7804SB / 7806SB Quick Draw 7704SB / 7706SB Quick Draw Flex Quick Draw Hydraulic Punch Drivers Serial Codes AHJ and YZ Read and understand all of the instructions and safety information in
Proline Plus Mechanical Pipette
 Proline Plus Mechanical Pipette 1 Proline Plus mechanical pipettes Dependable durability Sartorius Biohit s mechanical pipette family Proline Plus is designed to offer comfort and quality in every day
MODEL 840 AIR HYDRAULIC PUMP INSTRUCTION
 MODEL 840 AIR HYDRAULIC PUMP INSTRUCTION Jackco Transnational Inc. 202 South El Monte, CA 888-452-2526 www.jackco.com FOR YOUR SAFETY Read all instructions, warnings and cautions carefully. Follow all
Lab 1. Instrumentation Familiarity: Using Micropipetters and Serological Pipettes
 Instrumentation Familiarity: Using Micropipetters and Serological Pipettes Introduction: In molecular biology we sometimes need to measure volumes as small as one millionth of a liter (a liter is about
Prepared By: Lisa McAvoy 30/Nov/17 dd/mmm/yy. Approved By: Veronica Harris-McAllister 30/Nov/17 dd/mmm/yy
 Standard Operating Procedure Pipettes SOP Number: SOP-P-01 Category: Lab Equipment Supersedes: N/A Effective Date: December 1, 2017 Pages 5 Subject: Pipettes Prepared By: Lisa McAvoy 30/Nov/17 dd/mmm/yy
DISCOVERY PRO - features
 DISCOVERY PRO DECEMBER, 2010 DISCOVERY PRO - features The ultimate pipette for tough market reality To match leader s ergonomics and performance.ultra light weight and extremaly low pipetting forces Outstandingly
User Guide. Pall Laboratory Manifold. For laboratory use. Not for use in a manner other than indicated. Introduction. Regulatory References
 User Guide Pall Laboratory Manifold For laboratory use. Not for use in a manner other than indicated. Introduction Application and Intended Use The membrane filtration (MF) technique is a method of analyzing
General European OMCL Network (GEON) QUALITY MANAGEMENT DOCUMENT
 QUALITY MANAGEMENT DOCUMENT") General European OMCL Network (GEON) QUALITY MANAGEMENT DOCUMENT PA/PH/OMCL (09) 64 R5 QUALIFICATION OF EQUIPMENT ANNEX 6: QUALIFICATION OF PISTON PIPETTES Full document title and reference Document type
General European OMCL Network (GEON) QUALITY MANAGEMENT DOCUMENT PA/PH/OMCL (09) 64 R5 QUALIFICATION OF EQUIPMENT ANNEX 6: QUALIFICATION OF PISTON PIPETTES Full document title and reference Document type
For accurate measurements and to prevent damage to the micropipets, follow these important guidelines:
 OXFORD 4 SIZES VERSION MEASURE FOR MEASURE MICROPIPETTING AND THE METRIC SYSTEM Concept: Work with DNA and enzymes frequently involves measuring very small volumes, often in the microliter range. A microliter
Calibration Gas Instrument INSTRUCTION MANUAL. Release I. Advanced Calibration Designs, Inc.
 Advanced Calibration Designs, Inc. Calibration Gas Instrument INSTRUCTION MANUAL Release I www.goacd.com Instruction Manual Gas Generator Release I TABLE OF CONTENTS I. General Description Page 2 II. Start-Up
Instruction Sheet. Important Note: Information that requires special emphasis. Note: Information that supplements points in the main text.
 Hach LDO Sensor Instruction Sheet 00745589 Safety Precautions Please read this entire instruction sheet before operating this sensor. Pay particular attention to all danger and caution statements. Failure
SodaStream is the modern way to enjoy delicious bubbles. without the bottles. No more lugging or storing heavy
 QUICK START GUIDE SPIRIT / FIZZY / EASY Please read this Quick Start Guide before using the Sparkling Water Maker. SMART SodaStream is the modern way to enjoy delicious bubbles without the bottles. No
Picus NxT Electronic Pipettes Ergonomic, Efficient, & Safe
 Picus NxT Electronic Pipettes Ergonomic, Efficient, & Safe Picus NxT Electronic Pipettes Excel in Ergonomics, Efficiency, and Safety Are you looking for the following qualities in a pipette and are not
WELLS JOHNSON HIGH VOLUME CANISTERS
 WELLS JOHNSON HIGH VOLUME CANISTERS USER MANUAL DISASSEMBLY OF HARVESTING CANISTERS Please follow the instructions provided to disassemble 5L, 3L, 2L, and 1L, 250mL and 500mL harvesting canisters. 1. Unscrew
Assembly Drawing: W-311B-A01, or as applicable Parts List: W-311B-A01-1, or as applicable Special Tools: , , &
 REDQ Regulators Model 411B Barstock Design Powreactor Dome Regulator OPERATION AND MAINTENANCE Contents Scope..............................1 Installation..........................1 General Description....................1
Certified ISO 9000 INSTALLATION AND OPERATION INSTRUCTIONS. Before Installing or Operating, Read and Comply with These Instructions
 ADI 1219-M Certified ISO 9000 1600 Series Dual-Range Flowmeters INSTALLATION AND OPERATION INSTRUCTIONS Before Installing or Operating, Read and Comply with These Instructions Controls Corporation of America
Yoke Block Instruction Manual
 Yoke Block Instruction Manual ! WARNING IMPORTANT: READ MANUAL COMPLETELY BEFORE OPERATING THIS DEVICE This manual contains instructions on periodically required checks to be performed by the user. These
BioAerosol Nebulizing Generator. Operation and Maintenance User Manual
 BioAerosol Nebulizing Generator Operation and Maintenance User Manual INTRODUCTION The BANG or BioAerosol Nebulizing Generator is a unique nebulizer for the generation of aqueous aerosols at a low air
Pectoral Machine. User manual E S S E N T I A L S T R E N G T H
 E L E M E N T and the cable E S S E N T I A L S T R E N G T H User manual 1 and the cable and The identification plate of and manufacturer, affixed on the back panel of the weight stack, gives the following
M3-LED. Operator s Manual. Operator s Manual MADE IN THE USA USA
 M3-LED Operator s Manual Operator s Manual MADE IN THE USA USA Section TABLE OF CONTENTS Page Warnings and Cautions... 1 M3-LED Parts Diagram... 4 Mounting... 6 Dismounting... 8 Switch Operation... 10
accidents which arise due to non-observance of these instructions and the safety information herein. SPECIFICATIONS
 18 GAUGE 1-1/4 INCH BRAD NAILER Model: 7611 CALIFORNIA PROPOSITION 65 WARNING: You can create dust when you cut, sand, drill or grind materials such as wood, paint, metal, concrete, cement, or other masonry.