Service ADVANCE Service Center ADVANCE website Warranty Parts LIGHTNESS
|
|
|
- Chester Chapman
- 6 years ago
- Views:
Transcription
1 User manual Edition 2 / 07_2015

2 Edition 1 / 10_2014
3 Contents Thank you for flying ADVANCE....6 About ADVANCE The LIGHTNESS Innovations & Features General advice about paragliding Handle with Care Preparing the product Delivery Delivery package Setting up the harness Large choice of speedbag Start at the basic settings Set the speedbag length Setting the upper body angle Checking the settings Fine adjustment Fitting the speed system Closing the speedbag Cockpit and instrument panel Stowage compartment More details Installing the reserve Use in practice Adjusting the rucksack Flying in general Using the speedbag Using the speed system Throwing the reserve Walking with the LIGHTNESS Packing the rucksack Packing the LIGHTNESS 2 back and under-seat pockets Using the harness with other brands of paraglider Winching Acro flying Tandem flying Replacing parts Care, repairs and checks Technical details Technical data Materials used
4 Service ADVANCE Service Center ADVANCE website Warranty Parts LIGHTNESS

5 5
6 Thank you for flying ADVANCE Congratulations and many thanks for choosing a LIGHTNESS 2, an ADVANCE quality product. We hope that it will bring you many rewarding hours in the air. This owner s handbook is an important component of this flying equipment. In it you will find instructions and important advice about safety, care and maintenance, so we suggest that you read it carefully before your first flight with this product. The latest version of this handbook and updated information can be found on Any new safety-related advice about the product will also be published there. If you have a query or problem please go to the retailer, or contact ADVANCE directly. Now we wish you a lot of pleasure with your LIGHTNESS 2 and «happy landings», every time. Team ADVANCE 6
7 About ADVANCE ADVANCE is one of the worldwide leading paraglider manufacturers, based in Switzerland. Since its founding in 1988 the company has always followed its own ideas and concepts, in both development and production. The results are well-finished products with distinctive character and qualities. Behind the brand is a team of specialists who share a passion for, and confidence in the ADVANCE products they create. At home in the air themselves, they bring valuable personal experience and commitment to the working processes. Comprehensive supervision of the production process and control of working practices at ADVANCE s own factory in Vietnam guarantees a high quality of workmanship. A many-year relationship with cloth and line manufacturers ensures that ADVANCE knowhow flows directly into the development of new materials. ADVANCE put great value on after-sales customer care, and a worldwide service network has been built up to this end. New knowledge is constantly gained by an on-going exchange of experience with customers, which finds its way into new ADVANCE products thus completing the «Circle of Service». 7
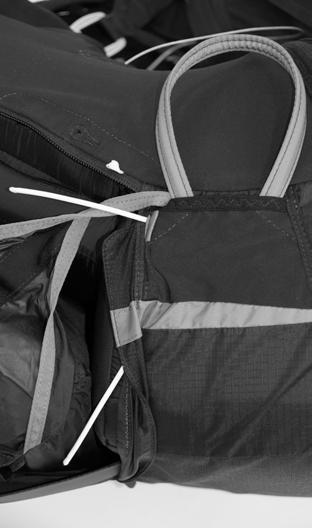
8 The LIGHTNESS 2 Well-proven now perfected. The LIGHTNESS concept created a new category of harness, and now this second generation takes the best of the original and adds to its safety, comfort and style. With a weight from 2.8 kg the LIGHTNESS 2 is a light harness, but, in its current form, it completely satisfies the needs of the ambitious cross country pilot. It has an integrated reserve, certified protector and improved aerodynamics; and again comes with its own rucksack, now including a COMPRESSBAG light. Fully loaded 3 products, 1 concept. With its LTF certified foam protector and built-in reserve system the LIGHTNESS 2 is a fully operational harness for XC and Hike&Fly pilots who like to travel in comfort with light equipment. In the package are the harness and its LIGHTPACK 2, including the COMPRESSBAG LIGHT. Comfortable LIGHTNESS 2 geometry has been further developed, and the harness now has an ergonomic seat shell which adapts itself to the small of the back. This provides perfect back support; and pressure points become a thing of the past. Feedback from our test pilots: «The most comfortable reclining harness in the history of ADVANCE!» Light It was possible to save weight when developing the LIGHTNESS 2 by refining the design and choosing the right materials, without compro mising the well-known ADVANCE quality. The new COMPRESSBAG LIGHT allows the paraglider to be packed very small in the LIGHTPACK. When put together these make up a light but complete package. Furthermore High level of handling comfort: Setting up the harness is straightforward and clear. Unlike the original Lightness the LIGHTNESS 2 straps can be adjusted in flight. This makes life much easier and more comfortable for the LIGHTNESS 2 pilot. Improved aerodynamics:: The spoiler on the speedbag guides the airflow up over the upper body, and the (previously empty) zone around the neck is now provided with an inflated cushion, that rounds off the streamlines. An incidental advantage of this inflatable design is that it does not disturb the pilot on the ground / taking off. 8
9 Innovations & Features LTF certified foam protector Interchangeable speedbag sizes ( like the IMPRESS 3) Two-buckle ADVANCE system for the chest and leg straps (Safe-T-System) Closure Remember System Tear-resistant 10mm / 15 mm strap system with «easy adjust» buckles Integrated reserve system with shoulder support points Drink tube openings and holding loops on the shoulder straps Additional stowage space Neoprene covers on the leg straps Air-filled neck area coordinates an elegant outline Clearly defined sitting position for optimal aerodynamics Speed system with ball bearing pulleys Opening for relief tube 9
10 Safety advice Like all commercially available reserves paraglider harnesses are not at all suitable for freefall use because of their design features. The reserve parachute and its connections to the harness are not constructed for an abrupt opening. Every pilot bears exclusive responsibility for all risk encountered when carrying out paragliding, including resulting injury and/or death. Neither the manufacturer nor the seller of the equipment can guarantee the safety of the pilot or be held responsible for it. All adjustments to the harness should be carried out before flight. Correct set-up of the harness plays an important part in ensuring satisfactory function, safety and flying comfort. The LIGHTNESS 2 is exclusively to be used for paraglider flying. General advice about paragliding To take part in the sport of paragliding appropriate training and well-founded knowledge of the equipment are needed, as are the necessary insurance and licensing. A pilot has to be able to correctly assess the weather conditions before flight. His abilities must be good enough to manage the demands of the paraglider that is to be used. When carrying out paragliding the pilot must also take responsibility for his care of the natural world and the landscape. Other essential items include the wearing of an adequate helmet, suitable shoes and clothing, and the carriage of an emergency parachute (reserve). Equipment must be checked for damage and its airworthiness confirmed before every flight. A pre-takeoff check must always be carried out. 10
11 Handle with Care ADVANCE LIGHTNESS 2 products are extremely lightly built and intended for specialised use. This puts particularly high demands on their handling and care. A committed interest in the products and their characteristics is essential. Because of the choice of materials and construction rucksack and harness are much more vulnerable to wear and tear from improper use than regular ADVANCE products. Caution: ADVANCE considers it important that you remain aware of the lightweight fabrics in the LIGHTNESS products. You can enjoy the harness and rucksack for a long time but only if you look after them carefully. The label Handle with Care is there to remind you that the lifespan of these products depends very much on your own care and attention. LIGHTNESS 2 products should never be dragged over the ground. All the zips are for light use only; they should never be closed under heavy loading. Pointed and sharp objects do not belong in the harness back compartment, underseat stowage, speedbag side pockets, or the rucksack; they can damage the fabric. When accelerating make sure the feet stay in the centre of the speedbag or centred on the carbon footboard, and do not press into the speedbag floor or sides where they will cause undesired friction and wear. 11
12 Preparing the product Delivery Before delivery every ADVANCE product has to be checked by the authorised dealer for completeness of the delivery package and correct basic settings. A fully completed warranty form ensures that deficiencies in the product, attributable to the manufacturer, are covered by the ADVANCE warranty (see Warranty in the section Service ). Delivery package LIGHTNESS 2 delivery includes: Reserve V-connection and reserve handle connected to the four-flap inner container Speed system Getting started booklet The Kit contains (not fitted): Removable instrument panel Harness and Speedbag with carbon footboard 2 Alias carabiners COMPRESSBAG LIGHT LIGHTPACK 2 Integrated cockpit Detachable mini chest strap EN/LTF foam protector for the seat area Comfort foam for the back 12
13 Setting up the harness The LIGHTNESS 2 can fit your body shape perfectly. ADVANCE actually recommend the LIGHTNESS 2 basic setting as an efficient and good set-up; it has been arrived at and refined by the ADVANCE test team. It will give the majority of pilots a comfortable and optimum fitting, assuming you have chosen the right harness size. (See Technical Data ) Start out from the basic settings and make your own adjustments step by step according to the instructions that follow. They cover all the important criteria, such as upper body support, pressure distribution, speedbag length and the best speedbag angle for performance. All buckles can be adjusted in flight. The rest of the LIGHTNESS 2 adjustment system can only be set on the ground; ADVANCE therefore recommend that you get well acquainted with the adjustments before your first flight in the harness. In any case, your first test flight should take place in quiet weather conditions. not happen the foundation for the highest level of comfort on long flights has been laid. Can a LIGHTNESS 2 be combined with a speedbag of a different size? A suitable harness can be found for just about any pilot because the speedbag also comes in the three standard sizes, S, M and L, and is made of stretchy material. In special cases each harness can be combined and ordered with a speedbag of a different size because all three speedbags are interchangeable. If a speedbag is changed for a different size make sure that you use the speedbag lines of the new speedbag! Important: ADVANCE recommend that you try both adjacent sized speedbags if you fall in an in-between, grey-area harness region (165cm 172cm, S or M? & 178cm 183cm, M or L?). A correct speedbag length is essential for your comfort and a smooth and efficient harness shape. Large choice of speedbag A well fitting and adjusted speedbag is the fundamental factor for comfortable LIGHTNESS 2 flying. When this adjustment is correct the harness seat shell fits like a second skin; sliding around does 13


14 Caution: Setting up your LIGHTNESS 2 is not complicated or difficult so long as you follow the recommended step by step procedure. ADVANCE recommend that you try to achieve the ideal position as described. Caution: Small changes to any of the straps have a large effect on the overall setting. Proceed towards your individual fitting in very small steps and always set all straps symmetrically, left and right, so that your glider likes to fly straight. Tip: Pack the back compartment and install the reserve before you start adjusting. This will give something close to a realistic flying attitude. 1. Start at the basic settings To begin with make sure all the straps, including the speedbag lines, are at their basic settings. This is indicated by the base of an end loop level with its corresponding white mark. The harness is delivered in this condition. Note: Speedbag line settings are marked by the mark showing at both sides of the knots. 14
15 1 Legstrap 2 Breaststrap 3 Thigh straps 4 Speedbag lines 5 Back straps 6 Shoulder straps 15
16 2. Set the speedbag length Now you can adjust the speedbag length to suit your leg length. This setting positions your centre of gravity on the harness, and sets the speedbag flying angle. For best aerodynamic results the underside of the speedbag should be horizontal. To set the length first loosen the upper speedbag lines completely, then adjust the lower speedbag lines which carry most of the leg load to your perfect speedbag length. Now pull in the upper speedbag lines as far as you need for a comfortable foot angle. A good speedbag length will support the legs lightly on the footboard, without effort or strain. Upper and lower speedbag lines should both be under light tension, and symmetrical (same left and right ). More adjustments: The angle of the footboard itself can be adjusted by slightly altering the top to bottom relationship of the speedbag lines. Tip: Foot support is part of the speedbag and this is what supports you in your reclining position. The speedbag is removable, but only for repair or replacement (see section Replacing parts ). The LIGHTNESS 2 harness only works with its speedbag. Tip: Compared with the original LIGHTNESS the LIGHTNESS 2 calls for noticeably less force on the footboard to keep the legs horizontal. This has been achieved by improved line geometry. Important: A well fitting and adjusted speedbag is the basis of comfortable LIGHTNESS 2 flying. When this adjustment is correct the harness seat shell fits like a second skin; there s no sliding around the foundation for the highest level of comfort on long flights has been laid. 16
17 3. Setting the upper body angle Now you can alter your upper body recline angle using the back straps The back straps are mounted relatively high at the sides. This gives good back support and takes pressure off the shoulders. Finally you can tighten or loosen the shoulder straps as you wish quite loose, or providing light support but without putting pressure on the shoulders. 4. Checking the settings Run through the following points to check your perfect position: Is the underside of the speedbag still horizontal? If not you can move your centre of gravity by changing the length of the upper and lower speedbag straps. It s best to get an observer to check the speedbag angle. Are the back straps low enough so that they don t cut into your armpits? The front edge of the harness should not be pressing the backs of your knees. The speedbag should not have any obvious wrinkles. Repeat the procedure as often as necessary after every flight (if you like). Perfect is best: it works well. 5. Fine adjustment Supporting the lower back The lower back strap does the following two things: Improves comfort (the harness conforms to the small of your back, like a good car seat ) Pushes the body centre of gravity forward if the lower surface of the speedbag is not horizontal, and points uphill. It can help to find the ideal position Upper thigh strap You can extend the support line of the seat shell under your thighs with the help of the upper thigh straps. Fine adjustment here can increase your comfort. Setting the leg straps Leg straps are not adjustable. 17
18 Adjusting the chest strap You can alter the carabiner distance by varying the chest strap setting. The ADVANCE development team recommend a good shoulder width of about 45 cm as ideal. The possible adjustment range is between 40 und 48 cm, measured between carabiner base centres. The chest strap is closed by Cobra buckles and makes up the Safe-T-System. The wider the chest strap the more agile will be the seat, and weight steering will be more effective. A narrow setting gives quiet, damped flying characteristics. The adjustable range is large and you can match harness agility to the conditions during flight, as you wish. Important: Always close the chest strap first, then the Closure Remember System, and after that the speedbag. Before every takeoff, especially after an unsuccessful takeoff attempt, check that both buckles are closed by a firm pull on the webbing. If the chest strap is not closed you can fall out of the harness. Caution: Always make sure that all buckles are closed. Tip: The most important thing about chest strap adjustment is that you feel good in the harness. The LIGHTNESS 2 is provided with the Closure Remember System. This is a safety device attached to the chest/leg straps which draws the pilot s attention to the chest strap when he closes the speedbag before takeoff, thus reminding him that the chest strap should also be closed. This safety device may prevent the pilot who unfastens the chest strap, leaves the speedbag closed (e.g. following a failed takeoff), then takes off again, from falling out of the harness. 18

19 19

20 Fitting the speed system Connect the speed system to the glider using Brummel hooks or an anchor hitch. The length of the speed system can be adjusted on the short grey lines inside the speedbag. Move the overhand knots symmetrically. The speed system is correctly adjusted if you can use the glider s whole accelerate range. Make sure the lines are not adjusted so short that the glider is always accelerated. Stowage compartment There is a 6 litre volume compartment for your choice of equipment in the best place under the seat, close to the centre of gravity. Closing the speedbag To close the speedbag put the left side over the right and the plastic ball through its loop. When the flying position is taken up after takeoff stretching the legs on the footboard automatically closes the speedbag and pulls the cockpit into its flying position. Cockpit and instrument panel The cockpit is part of the speedbag and has a zip-fastened pocket on top. At delivery there is a foam blank in the pocket which supports the cockpit and makes the spoiler shape. You can leave the blank there or use the space for your own things. The instrument panel supplied in the kit goes directly on the cockpit. The panel has room for a GPS and/or vario, as well as several tape loops for securing instruments. The panel itself and the instruments can also be secured by line to loops on the cockpit. 20


21 More details Shoulder holders LIGHTNESS 2 shoulder straps have a Velcro patch and neoprene loop. These can be used for holding items such as an emergency alarm or Solario vario. Drink system routeing In the back compartment outside the comfort foam is a pocket for a drink system container. The drinking tube can be led out through an opening in the centre of the back compartment and secured by the neoprene loop on a shoulder strap. Pilot relief system routeing There is an opening in the speedbag neoprene, on the right, behind the outer side pocket, for leading a pilot relief tube overboard. Follow the side pocket seam inside the speedbag to find this opening. 21
22 Installing the reserve General advice Every reserve/harness combination has its own peculiarities. It is essential that pilots and parachute packers familiarise themselves with the system and how it works especially if any part of it is new (new reserve in existing harness or vice versa), so that reliable operation can be assured. Suitable reserves Reserve compartment volume Basically, bulky old-style reserves in compact, modern harnesses can be difficult to release, especially under high g loading. The certified volumes for the LIGHTNESS 2 are specified as a function of harness size: size S 3 to 5.5 litres, size M 3 to 6 litres; size L 3 to 6.5 litres. A very rough volume approximation can be obtained from the reserve weight by using this formula (Reserve weight in Kgs x 2.7 = Volume in Litres). But, depending on packing quality and style, it could still be possible that a reserve does not release faultlessly, even though it conforms to the approved maximum volume if calculated by this formula. In the end analysis a compatibility test will decide in every case whether a particular reserve/harness combination works properly. Caution: A reserve parachute volume can expand by up to 30% when it has been newly folded. ADVANCE therefore strongly recommend that a new compatibility test is carried out after every repack. Steerable reserves A steerable reserve can be connected directly to the two coloured support points under the shoulder strap covers, using two similar Maillons Rapide of 2400 dan safe working load. The parachute risers run into the reserve compartment in the channel provided. The normal harness V-connection (not used) can be led into the back compartment through the existing opening, then stowed away in the comfort foam pocket. Once again a compatibility test will decide if the chosen reserve works properly with the LIGHTNESS 2. Caution: Steerable reserves tend to take up more volume. Info: You can also use Quick-Out carabiners with a steerable reserve on the LIGHTNESS 2. 22


23 Packing a reserve in the LIGHTNESS 2 The LIGHTNESS 2 reserve compartment is in the best aerodynamic position near the pilot s centre of gravity. The harness/reserve connection runs in a channel at the side of the harness, closed by a zip fastener. The reserve compartment is closed by a closure flap; the reserve system is thereby well protected from the outside, and accidental releases are hardly possible. A well-designed release system guarantees reliable and fast opening. Caution: Installing a reserve should be done by a qualified person. Inner container and its fixed reserve handle The reserve handle and the four-flap inner container are permanently connected together, and are designed so that the pull of the handle is directed evenly over the width of the container. This minimises the risk of the container turning and jamming in the compartment, or becoming caught up in the reserve lines, and guarantees a perfect reserve throw. The reserve handle and the four-flap container are a part of the harness, and meet the latest LTF certification requirements. Only the original reserve handle and its fourflap inner container may be used. 23


24 Packing the reserve in the inner container Pack your reserve to match the shape and size of the official inner container; for the LIGHTNESS 2 this means that the reserve has to be packed in a long and narrow shape. Put the reserve lines on the opposite side to that of the reserve handle. 24

25 Connecting harness V-connection and reserve bridle Connect the harness V-connection and the reserve bridle using a Maillon of at least 2400 dan safe working load. Stabilise V-connection and bridle on the Maillon using rubber O-rings: this is to prevent them slipping round and side-loading the Maillon when the reserve is thrown. To make this connection by direct looping should only be done by the harness manufacturer or a trained and qualified person. If the loops are not positioned correctly there is a risk that slipping, heating by friction and failure may occur when the reserve opens. Caution: Do not use sticky tape or cable ties (instead of O-rings) to stabilise the Maillon connections. 25

26 Putting the inner container into the reserve compartment Spot to spot First lay the V-connection and reserve bridle in the reserve compartment, then the inner container. It is essential that the inner container is installed with the closure flaps facing downwards. The reserve handle connection must not be twisted. When correctly installed spot faces spot. Caution: If the reserve has already been packed but does not fit the shape of the inner container it must be folded again to match the inner container. 26
 to the side, through the red marking (B) and out of the neoprene pocket.")
 through the eyelet (4) with the lower ( longer ) cable and guide its end into the red bordered channel provided for it.")
27 Closing the reserve compartment First lead the lower, longer yellow cable (1) though the buttonhole in the neoprene pocket (2) then through the channel on the underside of the harness to the outside. Then lead the shorter yellow cable (A ) to the side, through the red marking (B) and out of the neoprene pocket. Tip: If this V-connection channel zip gets pulled open, the whole zip fastener must be reset by opening it completely and closing it again. Now fit the reserve handle into its neoprene pocket. Put its connecting strap into the gap provided for it. Then secure the loop (3) through the eyelet (4) with the lower ( longer ) cable and guide its end into the red bordered channel provided for it. Open the zip fastener on the side (C) all the way to its start, then close it completely. Caution: use Feeling - not strength! Stow the zip puller in its garage. Protect the start end of the zip with the upper ( short ) cable, by pulling this through the loop ( D ) and stowing it in the buttonhole. 27


28 28


29 29
30 Doing a compatibility test In every case correct stowage of a reserve must be checked by means of a test release. To do this you must be sitting in the harness while it is hanging up by its carabiners, with the back compartment packed as for flight. It is not good enough to pull out the reserve or release the handle if you are not sitting in the harness. For a successful test you must be able to release the reserve while in the flying position, in accordance with the guidelines in this manual, without problem. Make sure that the release force is not less than 4 dan and not more than 7 dan. If you are not sure about this do not hesitate to contact a qualified person or your ADVANCE dealer. The reserve must release as a result of the correct throwing action for the LIGHTNESS 2 a pull to the side. If this is not the case throwing your reserve could be a problem. The following factors can make reserve throwing difficult or prevent it, especially if they apply together: The reserve is too big or too bulky for the compartment or inner container. The reserve has not been packed to the lengthwise shape of the inner container. The reserve is not thrown using the correct technique. A sideways throwing motion is required (Caution: don t pull it upwards). The reserve volume was OK when fitted into a new harness, but now it s too big after a repack. The pilot s arm length can be a factor for successful reserve throwing. Small people with short arms might sometimes not be able to release a reserve. When throwing is attempted under high g-loading (> 3G, e.g. in a spiral ). Info: Successful compatibility tests carried out by pilots promotes confidence in their emergency systems. Caution: Before every flight check that the reserve handle is in the correct position, and that the yellow cables are correctly routed. Tip: We recommend that, during every flight, you briefly put a hand on the reserve handle so as to remind yourself where it is. We advise that you mentally rehearse the sideways throwing action. 30

31 31
32 Use in practice Adjusting the rucksack The LIGHTPACK 2 Rucksack has been designed specially for the LIGHTNESS 2 harness. The two sizes, S/M and L, are arranged to carry a normal size paraglider, the LIGHTNESS 2 harness and speedbag, reserve, helmet and the most important items of clothing. The compactness and geometry of the system provides a high degree of carrying comfort. Side pockets provide space for small objects and for a drink system. The two lower side pockets are easy to reach while walking. Never close the light duty zip fasteners under tension. For an ideal individual adjustment ADVANCE recommend that you proceed as follows for a fully packed rucksack: 1. Adjust the waist strap The fastened waist strap of a packed rucksack should lie on the hip bones. Pull the waist strap in at this position as far as feels good. A correctly adjusted waist strap should carry most of the rucksack weight on the hips. 2. Adjust the shoulder straps Pull in the shoulder straps so that you can feel tham, but not so that they put pressure on the shoulders. The low mounting of the shoulder straps adapts to different upper body lengths. When correctly adjusted the shoulder straps lie over the shoulders, but do not press or load them. There s room for clothes and instruments in the LIGHTPACK 2. Side stowages, pockets at the back and in the waist strap, as well as the multi-purpose bungee on the cover provide space for additional things. When the rucksack is full the side pockets can each carry a 1.5L plastic bottle. The two lower side pockets are easy to reach while walking. Hiking poles can be carried in the fastening loops on the outside of the rucksack. Caution: never drag the LIGHTPACK 2 over the ground. Never pack pointed or sharp objects in the rucksack, or in any of the pockets. They can damage the fabricc. 32
33 Flying in general The LIGHTNESS 2 is flown in a reclining position. If you have adjusted the harness correctly information from the wing will be transmitted directly to your nether regions. Your weight will be evenly distributed from the thighs to the shoulder blades. This means that pressure points will be avoided, circulation will continue unimpeded, and you will maintain your concentration on long flights. The aerodynamically optimised speedbag protects you from the cold while serving as a foot support. Do the following takeoff checks before every takeoff: 1. Helmet and harness chest strap fastened, reserve ok 2. Lines free 3. Canopy open 4. Wind direction and strength checked 5. Airspace and view free Caution: Always fasten the chest strap first, then the speedbag. Before every takeoff, and especially after a failed takeoff, check by a physical pull with the hand that you have closed both quick release buckles correctly. If the chest strap is not closed you can fall out of the harness. Using the speedbag After lift off keep the forward-leaning upper body position so that you do not slide down in the harness: you can then easily pick up the dangling speedbag with a foot preferably the right one. A quick look down at the speedbag opening makes this easier to do. The speedbag closes automatically when you stretch your legs in it, and pressure on the footboard pushes you back into a comfortable reclining position. After taking up the flying position and stretching your legs the speedbag closure system will automatically close the speedbag top and bring the cockpit into position. For landing take both feet out of the speedbag in good time, and take up an upright position. Always make a stand up landing, so as to avoid damage to body or equipment. Tip: The speedbag can be very warm; if it gets too warm inside bend a knee to let air in. 33
34 Using the speed system The speed loop is tensioned forward so you can always easily reach it. One leg should always be straight to keep tension in the speedbag. When you wish to use the second speed loop step, the foot already on the first speed step automatically takes over this function. Accelerating with one foot means you can feel the wing better and use the speed system for active flying. While pushing the speed loop be careful not to push your heels into the speedbag floor in your enthusiasm to burn rubber. This could overstress the speedbag material. (See also Fitting the speed system in the section Using the harness.) Caution: Always connect your speed system to the wing. Free-hanging speed lines could interfere with a reserve throwing. Throwing the reserve In an emergency pull the reserve handle out with a firm tug and throw it (and the inner container) into free airspace. The lines will straighten, which opens the inner container. The reserve canopy will extend and fill. Disable the paraglider by pulling down strongly on the B or C risers, so that it does not compete with the reserve and encourage scissoring. This happens when both canopies pull against each other on opposite sides of the vertical flight path. 34


35 Walking with the LIGHTNESS This is most comfortable when the rucksack is full and under light full up tension. The volume of the rucksack is partly taken up by a correctly folded glider, then fine tuning follows automatically with the expansion of the harness protector foam, which takes up the available space. The rucksack does not need a compression strap. Pack hiking poles points upward in the harness back compartment, not too full of course, and without creating extra tension. An overstuffed back pocket can affect inflation during flight. Tip: ADVANCE recommend that you always have rubber tips available for your walking poles. These not only protect others ears from the annoying clacking on the road, but protect the rucksack when all are stowed in the back of the harness in flight. Tip: To save space don t carry drinks in plastic bottles or food in plastic containers, but in zip bags or in bar form. When empty the bags take up little space. Drink systems (like a camelbak ) can be stowed in the rucksack side pocket and the tube secured in a shoulder strap loop. 35


36 Packing the rucksack Fold the paraglider to the width of the rucksack and pack it in its COMPRESSBAG LIGHT in the rucksack first, on the back padding, and push it to the bottom. Fold the harness in half with the carabiners inside. Lie the harness with the comfort foam on top - on the glider and slide it completely down in the rucksack. Compress the package so that you can fold the rucksack cover down and easily close the zip fasteners. Finally stand the rucksack up. Clothing can be pushed behind the harness and the remaining space on top filled with helmet, instruments and supplies. Caution: Never drag LIGHTNESS 2 products over the ground. Close all the zip fasteners gently and never under tension. Never pack pointed or sharp objects in the harness back pocket, the under-seat pocket or inside the rucksack: they can damage the fabric. 36
37 Packing the LIGHTNESS 2 back and under-seat pockets ADVANCE give you a compression bag with the LIGHTNESS 2 so that the paraglider takes up minimum space in the rucksack. The COMPRESSBAG LIGHT is ideal for the LIGHTNESS 2. The COMPRESSBAG LIGHT is delivered in 2 sizes; however you cannot choose your own size. The S/M COMPRESSBAG LIGHT goes with the 82Ltr LIGHTPACK 2, and size L the 90Ltr LIGHTPACK 2. Careful packing of the 2 harness stowages has a significant effect on flying comfort. Oddly shaped and hard objects can be felt through the back and lower seat shell surface and can affect your reclining comfort. First pack the COMPRESSBAG LIGHT in the harness back compartment and push it all the way down. Roll up the LIGHTPACK 2 long and thin, and push that into the back pocket. The remaining space should be used sensibly. Pack hiking poles (rubbered points upwards), rations and clothes cautiously around the rolled rucksack, but do not pack too full, or strain the back compartment. Using the harness with other brands of paraglider The LIGHTNESS 2 can be used with any glider - there is no restriction. Winching All ADVANCE harnesses are suitable for winching. Connect your LIGHTNESS 2 to the tow link using rope loops or Maillons from the main carabiners. If in doubt always consult the winch driver, or someone authorised by the manufacturer. Acro flying The LIGHTNESS 2 is not suitable for acro flying. Freestyle manoeuvres pose no problem, however. Tandem flying The LIGHTNESS 2 s size and purpose mean that it is not at all suitable for tandem flying whether for a pilot or passenger. 37

38 Replacing parts The LIGHTNESS 2 harness is delivered with a foam protector under the seat, comfort foam in the back and a fitted speedbag, footboard and speed lines. These parts can be removed for replacement or repair. Foam protector and comfort foam The foam protector compartment is under the seat, between the reserve and the ballast stowage. Open the zip fastener, and take out the foam protector. The comfort foam is in its own compartment in the back pocket. Open the zip fastener, and take out the comfort foam. 38
39 Speedbag To fit a new speedbag first take the carabiners out of the red loops. Then open both zips, the Velcro strip, and disconnect the speed lines. The blue lower footboard (speedbag) lines, that go from the seat shell front and back up through the pulleys must also be undone (at the speedbag and seat shell! ). Now you can remove the old speedbag and fit the new one by refitting the speed lines, the blue lines (to the seat shell ), then the Velcro and the two zips. Caution: Always use the official blue lines that come with the new speedbag.. Caution: Hang all the red loops in the carabiners, otherwise the speedbag zips will be irreparably damaged when loaded. Info: The footboard is a part of the speedbag, and provides an essential support for the reclining position. The LIGHTNESS 2 harness only works with the speedbag. Speed loop To fit a new speed loop start at the grey connecting loop on the end. This attaches to the bungee coming from the footboard inside the speedbag. Now lead the grey speed lines through the first pulleys, (1) then through the red markings (2). Pull them through the second pulleys, and out of the harness through the openings in the sides of the speedbag (3), where they can be connected to the wing by Brummel hooks or anchor hitches. The length of the speed lines can now be adjusted at the grey interconnect lines inside the speed bag. Move the overhand knots the same amount each side. Caution: Check that the speed lines do not cross and rub against the lower speedbag lines. Caution: Only use the original speed lines and loop. Other lines, or a speedbar, could chafe and damage the speedbag and harness. Footboard A new footboard should be pushed into the footboard pocket in the speedbag, and the pocket secured with the Velcro. 39
40 40

41 41
42 Care, repairs and checks Weight saving was a priority when it came to the choice of materials. The harness was designed for high loadings, but not for extreme physical punishment. The lifespan depends very much on the care of the user. We recommend that signs of wear or damaged seams and webbing are always investigated and, where necessary, individual components of the harness be replaced. In particular, suspected defects should be taken to an authorised service centre for rectification, without delay. Caution: Do not modify your harness, and never fly with a harness whose straps and webbing parts are damaged in any way. It is recommended that a harness has a complete inspection regularly. This must include a check of the condition of seams and webbings as well as of the functioning of closure buckles. This recommendation also includes the regular airing and repacking of the reserve. If the reserve has been thrown in an emergency, the harness should be inspected by the manufacturer or an authorised service centre. Ultraviolet light, temperatures below -20 C and above +60 C, dampness, seawater, aggressive cleaning agents, improper storage and mechanical stress (dragging on the ground) accelerate the ageing process. The lifespan of your harness can be significantly prolonged if the following points are observed: Allow a wet or damp harness to dry in the shade at room temperature. Always repack the reserve. A harness in contact with seawater should be thoroughly rinsed with fresh water. Always repack the reserve. Only clean a harness with fresh water, and neutral soap if necessary never with solvents. Inspect the connection lines between harness and reserve after every airborne reserve opening. Have the harness inspected by a qualified person after any high loading (e.g. heavy crash landing or failed takeoff). Regularly check the harness for defective seams and webbing. Above all check the reserve V-connection and the seams at the carabiner supports. Do not expose the harness to large temperature changes, and make sure it gets enough air circulation to prevent condensation. Do not leave the harness in the sun (UV light) for longer than necessary. 42
43 To ensure reliable and fast opening most reserve manufacturers recommend a reserve inspection and repack every 6 months. If the reserve gets wet, damp or very hot it must be repacked without delay. We emphatically recommend that a trained and qualified person be allowed to repack your reserve. In addition ADVANCE strongly recommend that you regularly check the reserve handle yellow cables in their bootlace loops. Make sure they slide easily. Foam protector The foam protector does not need special attention, but should definitely be checked for damage after a crash. If the outer cover is damaged the protector must be replaced. Check All your equipment must undergo a check every 24 months. With intensive use (> 150 flying hours/month) an annual check is required. A check involves a visual assessment of fabric, straps and connections, the most important sewing and the main carabiners. All parts will be inspected for tears, kinks, damaged seams, general damage and evidence of serious abuse. Finally the overall condition of the harness will be assessed and recorded on the service record in the owners handbook. More information about the check can be found under «Service» in the handbook, or at Repairs Fundamentally you may not carry out harness repairs yourself. Sewing of the various seams has been done with utmost precision. Only the manufacturer or an authorised service centre may carry out repairs, using original materials. Disposal Protection of the environment is an important feature in the choice of materials and the production of an ADVANCE product. We use exclusively non-hazardous materials and compounds that have undergone long-term quality and environmental impact assessments. When your harness has eventually come to the end of its useful life please remove all the metal parts and dispose of the rest of it at a suitable waste incineration plant. 43
44 44
45 Technical details Technical data LIGHTNESS 2 S M L Pilot height cm Seat width cm N/A * N/A * N/A * Carabiner height cm N/A * N/A * N/A * Chest strap width cm Total harness weight including comfort foam and 2 alu carabiners kg Load test Foam protector certification LTF 91/09 EN 1651 /LTF 91/09, 120 kg LIGHTPACK 2 l * The seat shell adapts itself to the pilot s shape so the seat width and carabiner height vary accordingly. 45
46 Materials used We routinely check and test the many raw materials available to us. Like all ADVANCE products the LIGHTNESS 2 has been created and manufactured using the latest knowledge and techniques. Outer fabric Ripstop Nylon 70D, PU3 Seat surface fabric Nylon Oxford 210D PU3 / Ripstop Nylon 70D We have chosen the materials used very carefully, taking into account the strictest quality demands. Certification The LIGHTNESS 2 was tested and certified in accordance with DIN EN-Norm 1651 at 120 kg supported weight. The airbag has LTF certification. Seat surface base Cordura 210 Speedbag Neopren 1.5 mm Straps Polyster 25 mm 800 kg Chest strap closure system Austrialpin alu Cobra buckles Reserve connection Dyneema 10 46
47 Service ADVANCE Service Center ADVANCE runs two company-owned service centres which carry out checks and repairs of any kind. These centres based in Switzerland and France are official DHV approved maintenance operations soundly based on many years experience and comprehensive product-specific expertise. The worldwide ADVANCE service network comprises further authorised service centres which provide the same level of service. All workshops use exclusively ADVANCE original materials. All the information about checks and repairs and relevant addresses can be found on download the check application form as a PDF prior to sending your equipment in to ADVANCE. find an answer to a smouldering question from the FAQs (frequently asked questions). sign up for the ADVANCE Newsletter, and get regular s about new developments and products. It s worth making a regular visit to the ADVANCE homepage because the range of services is constantly developed. ADVANCE website On you can find detailed information about ADVANCE and their products as well as helpful addresses who you can contact for queries. Among other things, on the website you can complete the online warranty card up to 10 days after purchase, and enjoy the comprehensive advantages of the ADVANCE warranty. find out new, safety-relevant knowledge about ADVANCE products. 47
48 Warranty To benefit from the comprehensive ADVANCE warranty please fill in the appropriate form within 10 days of purchase. This form is available on the website under «Warranty». As part of the ADVANCE warranty we undertake to rectify any defects in our products that are attributable to manufacturing faults. To make a claim on the warranty you must notify ADVANCE immediately on discovering the defect, and send the defective product in for inspection. The manufacturer will then decide how a possible manufacturing fault is to be rectified (repair, replacement of parts, or of the product ). This warranty is valid for 3 years from the date of purchase of the product. The ADVANCE warranty does not cover any other claim. In particular it does not cover damage caused by careless or incorrect use of a product (e.g. inadequate maintenance, unsuitable storage, overloading, exposure to extreme temperatures etc.). The same applies to damage attributable to an accident or normal wear and tear. 48

49 49

50 Parts LIGHTNESS 2 1 Mainstrap 2 Shoulderstrap 3 Backstrap 4 Lower Backstrap 5 Frontstrap 6 Breaststrap 7 Legstrap 8 Breast Buckle 9 Adjustment buckle 10 Adjustment buckle 11 V-Line emergency 12 Speedbag lines 50

51 51
52 advance thun ag uttigengstrasse 87 ch 3600 thun fon fax
IMPRESS 3 Manual supplement Competition Speedbag
 IMPRESS 3 Manual supplement Competition Speedbag Edition: 04/2014 Contents Introduction... 2 Fitting the speedbag... 2 Closing the speedbag... 2 Cockpit and Instrument panel... 2 Installing this second
english Getting started
 english Getting started Welcome to ADVANCE Many thanks for choosing an ADVANCE product. Founded in 1988 and based in Switzerland, as one of the worldwide leading paraglider manufacturers we have always
Technical Data. Flying with the range2. Maintenance and Repair
 Manual/Service 1 Contents Technical Data Fundamentals of the range2 Speed System Rescue System Rescue System Installation adjustment Possibilities Cross Bracing Ballast Container Pockets Towing Operation
Contents. Technical Data. Permittable load. Suspension height. 45 cm, incl. carabiner. Speed System. Weight (without rescue system) 7 kg (size L)
 7 kg (size L)") Manual/Service 13 Contents Technical Data Fundamentals of the RANGE Technical Data Intended Use Permittable load Suspension height Glider Harness 120 kg 45 cm, incl. carabiner Speed System Rescue System
Manual/Service 13 Contents Technical Data Fundamentals of the RANGE Technical Data Intended Use Permittable load Suspension height Glider Harness 120 kg 45 cm, incl. carabiner Speed System Rescue System
OPERATION, INSTALLATION AND WARNING RELATING TO THE SUP'AIR "PERMANENT AIRBAG" PROTECTION SYSTEM BEFORE FLYING, CHECK: WARNING
 Thank you for choosing one of our products; we hope you will have long, pleasant flights in your harness. When we design our products, we pay particular attention to all aspects of comfort, durability
Version 1.3 June 2017
 1 Contents Contents Welcome 3 Introduction 5 Specifications 6 SNUG diagram 7 Reserve parachute installation 8 Removing the reserve 10 Attaching the speedbar 12 Harness adjustment 13 Pre-flight checks 14
Version 1.01, May /05/2015 version 1.01
 01/05/2015 version 1.01 1 2 Contents Welcome 4 Introduction 6 Specifications 7 SNUG diagram 8 Reserve parachute installation 9 Removing the reserve 13 Harness adjustment 14 Pre-flight checks 15 Use 16
Installation instructions for the Yepp Maxi Easyfit
 Installation instructions for the Yepp Maxi Easyfit The Yepp Maxi Easyfit is suitable for: - fitting to an Easyfit luggage carrier* (fig 1A) or - fitting in combination with the Yepp Maxi Easyfit carrier
MOOWII MANUAL. Using a kite is dangerous and can cause severe injuries. Before use, carefully read this manual.
 MOOWII MANUAL Using a kite is dangerous and can cause severe injuries. Before use, carefully read this manual. Release of liability By assembling or using this CrazyFly kiteboarding product (further named
THANK YOU! SAFETY NOTE
 version 2.0 English THANK YOU! We would like to thank you for having chosen one of our products, and we invite you to read this important document, the User Manual for the harness. Please pay special attention
APCO Aviation Setting Future Standards. Revision: 1.0
 Revision: 1.0 APCO Aviation Setting Future Standards Factory: 7, Chalamish Street - Industrial Park - Caesarea 38900 ISRAEL H Tel: +972 4 6273727 Fax +972 4 6273728 1. Introduction 3 2. Harness Sizing
Liko MasterVest, Mod. 60, 64 TeddyVest, Mod. 60, 64
 Liko MasterVest, Mod. 60, 64 TeddyVest, Mod. 60, 64 Instruction Guide English 7EN160168-04 Mod. 60 Mod. 64 Mod. 60 with leg harness and padded cases Product Description This instruction guide is valid
J800 HOPE BUOYANCY COMPENSATOR OWNER S MANUAL
 J800 HOPE BUOYANCY COMPENSATOR OWNER S MANUAL EN1809 0 www.istsports.com 1 0120 I. INTRODUCTION I. INTRODUCTION CONTENTS II. GENERAL WARNING AND CAUTION Definition of WARNING, CAUTION and ATTENTION III.
Manual. Cruiser NG. AVA Sport Ltd. Zahari Stoyanov St. 44 P.O. Box Montana Bulgaria
 Manual Cruiser NG Cruiser NG AVA Sport Ltd. Zahari Stoyanov St. 44 P.O. Box 334 3400 Montana Bulgaria Owner s manual 18.10.2010 Paragliding Harness With the Cruiser NG you got one of the most comfortable
Slash2011. CAUTION! Using a kite is dangerous and can cause severe injuries. Before use, carefully read this manual. USER MANUAL
 WE ADVICE YOU TO REGISTER YOUR KITE ON: www.crazyflykites.com/register Slash2011 USER MANUAL CAUTION! Using a kite is dangerous and can cause severe injuries. Before use, carefully read this manual. yflykites.com
Trampoline & Enclosure Assembly Instructions
 Trampoline & Enclosure Assembly Instructions Safe user weight 250 lbs (115 kg) Version 718602 The information in this document is subject to change without notice. Copyright Springfree Trampoline Inc.
Falcon 3 145, 170, 195 and Tandem Owner / Service Manual
 Falcon 3 145, 170, 195 and Tandem Owner / Service Manual January 2007 - Second Edition Removing The Sail From The Airframe And Short Packing The Glider Many maintenance and repair procedures will require
AS/NZS 1801 USE AND CARE BOOKLET OCCUPATIONAL PROTECTIVE HELMET
 AS/NZS 1801 USE AND CARE BOOKLET OCCUPATIONAL PROTECTIVE HELMET 2 EN DANGER! intended use of this helmet involves activities that are extremely dangerous. FAILURE TO HEED AND FOLLOW THESE INSTRUCTIONS
SETTING THE HANDLE HEIGHT ON THE ROLLATOR
 Model No: Maximum User Weight: 10910C (Lightweight) 10928C (Heavy duty) 125kg (20st) (Lightweight) 170kg (27st) (Heavy duty) Height of handles: 780-915mm (30.5-36 ) (Lightweight) 790-930mm (31-36.5 ) (Heavy
Manual. Passenger NG. AVA Sport Ltd. Zahari Stoyanov St. 44 P.O. Box Montana Bulgaria
 Manual Passenger NG AVA Sport Ltd. Zahari Stoyanov St. 44 P.O. Box 334 3400 Montana Bulgaria AVA Sport Ltd. Zahari Stoyanov St. 44 P.O. Box 334 3400 Montana Bulgaria Owner s manual 19.11.2012 Paragliding
Butler Parachute Systems, Inc
 Butler Parachute Systems, Inc A division of Butler Parachute Systems Group, Inc. TT-600 GEN 1 & 2 TETHERED TANDEM BUNDLE DELIVERY SYSTEM ASSEMBLY MANUAL 1 JUN 2010 INTRODUCTION This manual contains all
Liko SafetyVest, Mod. 93, 94
 Liko SafetyVest, Mod. 93, 94 Instruction Guide English 7EN160146-02 Mod. 93 Mod. 94 Product Description The Liko SafetyVest is a sit-to-stand vest that is unique in terms of safety, form and function.this
alphabelt Holding & Rescue Belt Revolutionary Safe Gear to Restrain and Rescue Yourself
 alphabelt Holding & Rescue Belt Revolutionary Safe Gear to Restrain and Rescue Yourself Because every life has a purpose... alphabelt A Revolution in Safety Previous fall protection solutions, like firefighter
NORTHERN DIVER PFD MANUAL
 PFD MANUAL NORTHERN DIVER PFD MANUAL Thank you for purchasing this Northern Diver PFD. To help ensure your future safety, do not use this product before reading this manual. It is important to fully understand
USER MANUAL. All rights reserved
 USER MANUAL All rights reserved Dear User, Congratulations on purchasing your PARKIS! PARKIS is a household equipment for vertical bicycle parking which lets you free up precious storage space on the floor
Semi Freddo Snow kite [Ram Air]
![Semi Freddo Snow kite [Ram Air]](/thumbs/89/97639710.jpg "Semi Freddo Snow kite [Ram Air]") User manual Semi Freddo Snow kite [Ram Air] This manual gives you detailed instructions on how to use your new Semi Freddo kite. We recommend you take your time to read the instructions. In case you have
User manual Semi Freddo Snow kite [Ram Air] This manual gives you detailed instructions on how to use your new Semi Freddo kite. We recommend you take your time to read the instructions. In case you have
INDEX. Specifications 1. Important Safety Precautions 2. Operating Instructions 3, 4. Optional Extras (Meal Tray & Footrest) 5.
 5.") INDEX Specifications 1 Important Safety Precautions 2 Operating Instructions 3, 4 Optional Extras (Meal Tray & Footrest) 5 Air System 6 Service & Maintenance 7 Warranty / Service Contract 8 SPECIFICATIONS
INDEX Specifications 1 Important Safety Precautions 2 Operating Instructions 3, 4 Optional Extras (Meal Tray & Footrest) 5 Air System 6 Service & Maintenance 7 Warranty / Service Contract 8 SPECIFICATIONS
UNIVERSAL HIGH LEVEL FOIL KITE
 UNIV ER SAL I NS P I RED NAT U RE / / D RI V EN H IGH T HE E LEMEN TS LEVEL FOIL KIT E UNIVERSAL HIGH LEVEL FOIL KITE The Chrono V3 is also available in an Ultra Light version. This is the same design
Butler Tactical Parachute Systems, LLC
 Butler Tactical Parachute Systems, LLC A division of Butler Parachute Systems Group, Inc. TT-600 TETHERED TANDEM BUNDLE DELIVERY SYSTEM PACKING MANUAL (REVISION A ) Page 1 of 62 INTRODUCTION This manual
Mammut Special Features
 Mammut Special Features It s not only «Swiss quality» and one hundred percent dependability over a long life span which sets our harnesses apart. Our research engineers are continually developing innovative
USER MANUAL PLEASE READ THIS CAREFULLY BEFORE DOING ANYTHING WITH YOUR NEW WINGSUIT CONTENTS
 USER MANUAL CONGRATULATIONS ON YOUR PURCHASE OF A SQUIRREL SWIFT 3 ( PRODUCT ). BY PURCHASING THIS PRODUCT, YOU ACKNOWLEDGE THAT ENGAGING IN SKYDIVING, BASE JUMPING, PARACHUTING, AND WINGSUITING IS AN
Leglifter. user instructions. Simple solutions for everyday independence
 user instructions Simple solutions for everyday independence The by Mangar International enables people to raise their legs onto the bed independently or with minimal assistance. Power is provided by the
Liko SupportVest, Mod. 91
 Liko SupportVest, Mod. 91 Instruction Guide English 7EN160145-03 Product description Liko SupportVest is a comfortable sit-to-stand vest that is easy to use and requires relatively little individual adjustment.
4-Line and 5-Line modes
 ozone // Håkon Mæland a n e w I NS P I RED NAT U RE / / e r a D RI V EN T HE ELEMEN TS The Hyperlink V1 is also available in an Ultra Light version. This is the same design produced with high quality lightweight
INSTRUCTIONS FOR USE BODY ARMOR PRO TERM
 INSTRUCTIONS FOR USE BODY ARMOR PRO TERM INDICATIONS Postoperative treatment following Chopart and Lisfranc amputation. Controindications None. TECHNICAL DATA 2 sizes: M = lenght of stump 16 cm, L = lenght
2018 ACCESSORY ATTACHMENTS OWNER S MANUAL
 2018 ACCESSORY ATTACHMENTS OWNER S MANUAL WWW.RADPOWERBIKES.COM We are here to help! Please contact us at SUPPORT@RADPOWERBIKES.COM or 1-800-939-0310 if you have questions. REV031418 Welcome Thanks you
Assembly, Fitting, Care & Maintenance
 Assembly, Fitting, Care & Maintenance Assembly 1.1 Remove All Parts and Tools from Packaging 1.2 Part and Tools required for assembly 1.3 Check Foot & Leg Assembly 1.4 Adjust Upper-Leg-Support (ULS) Height
MARIN COUNTY SHERIFF S OFFICE GENERAL ORDER WRAP RESTRAINT POLICY
 MARIN COUNTY SHERIFF S OFFICE GENERAL ORDER CHAPTER 4 - WEAPONS GO-04-09 Page 1 of 3 DATE 04/12/07 WRAP RESTRAINT POLICY When a Deputy deems it reasonable to restrain a violent or potentially violent person
Stand-N-Fish FULL DETAIL INSTALLATION INSTRUCTIONS
 1 Stand-N-Fish FULL DETAIL INSTALLATION INSTRUCTIONS Thank you for purchasing the incredible new Stand-N-Fish Kayak Fishing System. Once installed on your kayak the Stand-N-Fish will take your kayak fishing
Portable Massage Table
 User Manual [Revision 3.0 January 2018] READ THIS MANUAL CAREFULLY BEFORE USE FAILURE TO DO SO MAY RESULT IN INJURY, PROPERTY DAMAGE AND MAY VOID WARRANTY. KEEP THIS MANUAL FOR FUTURE REFERENCE. Products
Wingsuit Owners Manual
 Tony Uragallo flying the Apache, photo Jeff Nebelkopf Wingsuit Owners Manual Version 1 - April 2012 Dear Tony Suit Customer Thank you for your recent wingsuit purchase. Please take a few minutes to read
ultimate All-round Performance
 ultimate All-round Performance During the development of the R1 V2 we experienced the overall enhancement in performance achieved from a lighter weight kite. The Chrono V2 UltraLight combines our high
Bimini Top, Bimini Top Plus for Jeep Wrangler Vehicles Items # , # and #
 MT_BIMINI_TOPS_INST_LTRR.qxp_Layout 1 8/9/17 3:34 PM Page 1 Installation Instructions Bimini Top, Bimini Top Plus for 2007-2017 Jeep Wrangler Vehicles Items #14100335, #14300335 and #14300435 Bimini Top
USER MANUAL PLEASE READ THIS CAREFULLY BEFORE DOING ANYTHING WITH YOUR NEW WINGSUIT CONTENTS
 USER MANUAL CONGRATULATIONS ON YOUR PURCHASE OF A SQUIRREL FUNK 3 ( PRODUCT ). BY PURCHASING THIS PRODUCT, YOU ACKNOWLEDGE THAT ENGAGING IN SKY-DIVING, BASE JUMPING, PARACHUTING, AND WINGSUITING IS AN
User Instructions Series Descent Device
 User Instructions - 199 Series Descent Device This document serves as the Manufacturer s Instructions, and is to be used as part of an employee training program for the system, as required by OSHA. ATTENTION:
 www.myrower.com support@myrower.com ASSEMBLY Congratulations on purchasing the MyRower! Please see the following pages for instructions on assembling your MyRower. Bits bag contents: Rail Cross Bolt (90mm)
LH 050 / 150 /250 FLIGHT HELMET
 LH 050 / 150 /250 Flight Helmet Instruction Manual Page 1 of 14 CGF GALLET LH 050 / 150 /250 FLIGHT HELMET Instruction Manual ENGLISH Compiled into PDF Format by Flight Helmets Australia Specialising in
PRO BANDS TRAINING GUIDE
 PRO BANDS TRAINING GUIDE Thank you for choosing SKLZ Pro Bands. We are dedicated to providing you with the best tools and instruction possible to help you unleash your athletic potential. If there is anything
T130/T131/T147. Economy Basket Stretcher with Lifting Kit
 T130/T131/T147 Economy Basket Stretcher with Lifting Kit User s Manual PLEASE READ THE INSTRUCTIONS CAREFULLY BEFORE USING THE BASKET STRETCHER! ASPLI SAFETY LTD, 209-211 HUNSLET ROAD, LEEDS, LS10 1PF.
FAILURE TO COMPLY WITH THE MANUFACTURER S INSTRUCTIONS CAN LEAD TO SERIOUS INJURY OR DEATH OF THE PASSENGER/RIDER!
 FAILURE TO COMPLY WITH THE MANUFACTURER S INSTRUCTIONS CAN LEAD TO SERIOUS INJURY OR DEATH OF THE PASSGER/RIDER! Installation instructions for the Yepp Mini The Yepp Mini is suitable for carrying children
Congratulations! You own an R9 Cobra! A compact, fast handling and powerful crossbow for your serious shooting enjoyment!
 COBRA SYSTEM R9 COBRA SYSTEM R9 CROSSBOW INSTRUCTION MANUAL Congratulations! You own an R9 Cobra! A compact, fast handling and powerful crossbow for your serious shooting enjoyment! The limb set comes
T3200 TransPlate Harness
 T3200 TransPlate Harness www.diverite.com Product Description The TransPlate Harness is designed specifically for use with hard back-plates, such as stainless steel or aluminum. The TransPlate Harness
1. Bridge 2. Frontal straps (RFS / LFS) 3. Thick sponge padding 4. Occipital mesh 5. Scaled rubber strap 6. Suspension arm 7. Adaptor A 8.
 3. Thick sponge padding 4. Occipital mesh 5. Scaled rubber strap 6. Suspension arm 7. Adaptor A 8.") 1. Bridge 2. Frontal straps (RFS / LFS) 3. Thick sponge padding 4. Occipital mesh 5. Scaled rubber strap 6. Suspension arm 7. Adaptor A 8. Adaptor B 9. Adaptor C 10. Extender 11. Metallic tube with protector
1. Bridge 2. Frontal straps (RFS / LFS) 3. Thick sponge padding 4. Occipital mesh 5. Scaled rubber strap 6. Suspension arm 7. Adaptor A 8. Adaptor B 9. Adaptor C 10. Extender 11. Metallic tube with protector
SQWUREL. Variable Friction Descender for Canyoneering
 SQWUREL Variable Friction Descender for Canyoneering Made in UTAH, USA 7075 T6 Aluminum DIM: 6.539 x 3.781 x 0.375 Inches Weight: 4.4 Ounces Patent Pending Single Rope: 8mm - 11mm Double Rope: 8mm - 9mm
REDMAN SUIT ASSEMBLING AND PACKING INSTRUCTIONS
 ASSEMBLING AND PACKING INSTRUCTIONS RedMan Training Gear Train realistically and you train to survive. RedMan Training Gear empowers law enforcement, corrections, military and security professionals to
MANUAL SIDE MOUNT SYSTEM
 MANUAL Razor Harness 2 SIDE MOUNT SYSTEM ontent Table of contents 1 The Razor Harness 2 3 1.1 Package content 3 1.2 Hardware Layout: 4 2 Rigging the Razor Harness 2 7 2.1 Tools 7 2.2 Overview 8 Step 1:
Liko SupportVest, Mod. 91
 Liko SupportVest, Mod. 91 Instruction Guide English 7EN160145-04 Product Description Liko SupportVest is a comfortable sit-to-stand vest that is easy to use and requires relatively little individual adjustment.
Lifting Slings. Before equipment use, please read this operation manual carefully. Serial Number: Date Purchased:
 Lifting Slings OPERATION MANUAL This operation manual is intended as an instruction manual for trained personnel who are in charge of installation, maintenance, repair etc. Before equipment use, please
BMW Motorrad. Installation Instructions. BMW Motorrad Communications System for Schuberth C3
 BMW Motorrad Installation Instructions BMW Motorrad Communications System for Schuberth C3 Order No. 01 29 2 219 831 BMW Motorrad 05/2011 Be sure to read these instructions carefully and completely before
REMS Swing INSTRUCTION MANUAL SINGLE-HAND TUBE BENDER SWING ANCRA
 REMS Swing INSTRUCTION MANUAL SINGLE-HAND TUBE BENDER SWING 1800 4 ANCRA www.ancraaustralia.com Fig. 1 3 6 4 2 8 9 5 3 3 1 7 Fig. 2 Fig. 3 L R L 10 11 9 9 Fig. 4 Biegesegment für Rohre Ø mm/zoll ( Biegeradius
SEAGO LIFERAFT GX MODEL
 SEAGO LIFERAFT GX MODEL OWNERS MANUAL & OPERATING HANDBOOK First steps 1. Register the liferaft to activate warranty at www.seagoyachting.co.uk/register or post the registration form provided. 2. Affix
SIDE 16 Sidemount System User Manual
 SIDE 16 Sidemount System User Manual Version 1.1, April 15, 2014 Disclaimer This document is proprietary to Scubatech Sp. z o. o. ("Scubatech") and no ownership rights are hereby transferred. No part of
ANNUAL SELF INSPECTION / SERVICING INSTRUCTION SHEET
 ANNUAL SELF INSPECTION / SERVICING INSTRUCTION SHEET These instructions relate ONLY to the following models of inflatable PFD s: Watersnake Inflatable PFD & Watersnake Deluxe PFD (ADULT AND CHILDRENS SIZES)
**INJURY OR DEATH MAY OCCUR IF THESE INSTRUCTIONS ARE NOT FOLLOWED**
 **INJURY OR DEATH MAY OCCUR IF THESE INSTRUCTIONS ARE NOT FOLLOWED** 4 MIN STERNUM STRAP MUST SIT AT LEAST 4 BELOW YOUR NECKLINE. ALL LATCHES MUST BE SECURE. HARNESS, SHOULDER AND LAP STRAPS MUST BE TIGHTENED
Congratulations on purchasing a Peter Lynn Arc, the new form of traction kite technology for kitesurfing and kitesailing, but also very useful for
 Congratulations on purchasing a Peter Lynn Arc, the new form of traction kite technology for kitesurfing and kitesailing, but also very useful for buggying and other power kiting activities. Their basic
BRAKE WINCH RUP 503-[T/BT] EQUIPMENT FOR LIFTING LOADS. AT 053-[T/BT] xx
![BRAKE WINCH RUP 503-[T/BT] EQUIPMENT FOR LIFTING LOADS. AT 053-[T/BT] xx](/thumbs/88/115945274.jpg "BRAKE WINCH RUP 503-[T/BT] EQUIPMENT FOR LIFTING LOADS. AT 053-[T/BT] xx") Reference number: BRAKE WINCH RUP 503-[T/BT] EQUIPMENT FOR LIFTING LOADS DESIGNATED USE The brake winch RUP 503-[...]T series is a load lifting / lowering device. Device is equipped with safety brake for
Reference number: BRAKE WINCH RUP 503-[T/BT] EQUIPMENT FOR LIFTING LOADS DESIGNATED USE The brake winch RUP 503-[...]T series is a load lifting / lowering device. Device is equipped with safety brake for
Rapid Response Shelters. Rubber Product Manual
 Rapid Response Shelters Rubber Product Manual 1 Index Technical Data Parts List Materials List Operational Instructions Packing Maintenance & Procedures Repairs & Storage 3 4 5 6 8 10 11 WARNING: Carefully
Navaro Buggy Instruction Manual INSTRUCTION BOOKLET
 INSTRUCTION BOOKLET Safety Thank you for purchasing your new Flexifoil buggy. If operated and looked after properly, your new buggy will serve you well. Before assembling and using this buggy, you must
Duo/Trio Office Bike Owner s Manual
 Duo/Trio Office Bike Owner s Manual Welcome Congratulations on choosing to enhance your productivity and wellness with LifeSpan. You ve made a healthy decision, as the need for increased amounts of daily
You may order this publication from WCB Publications and Videos, Please quote ordering number BK60.
 The following material is the property of the Workers Compensation Board of British Columbia and may not be reproduced by those outside of B.C. For those within British Columbia, this material may only
PRE-JUMP FOR FORT BRAGG UNITS OCTOBER 2016
 The first items I will discuss are the five points of performance. The first point of performance is proper exit, check body position, and count. Jumpers hit it. Upon exiting the aircraft, snap into a
CHOKER JOKER LIGHT CAMBIUM SAVER
 USER AND MAINTENANCE INSTRUCTIONS CHOKER JOKER LIGHT CAMBIUM SAVER EN 795:2012 TYPE B / TESTED AND COMPLIES WITH TS 16415:2013 REF. FTC/JOKER/EL/110 110 cm JULY 2017 VERSION (TRANSLATED) 1355, chemin de
LIGHTWEIGHT TRIWALKER OWNER S HANDBOOK
 LIGHTWEIGHT TRIWALKER OWNER S HANDBOOK Triwalker Owner s Handbook (Z25987 Rev A) Page 1 of 12 CONTENTS 1. Contents 2. Introduction 3. Parts Description 4. Personal Safety 5. Adjustments for Comfort 6.
ROLLATOR (R6 and R8) OWNER S HANDBOOK
 OWNER S HANDBOOK") C O N T E N T S The Drive Medical lightweight 4- wheeled rollator is designed to aid the user to walk and, as an option, carry items such as shopping. The R6 is ideal for indoor use, whilst the R8 is suitable
C O N T E N T S The Drive Medical lightweight 4- wheeled rollator is designed to aid the user to walk and, as an option, carry items such as shopping. The R6 is ideal for indoor use, whilst the R8 is suitable
FALL RANGE PROTECTION
 FALL PROTECTION RANGE PS53 544 FP19 506 Fall Protection is put in place to prevent the risks associated with falling from heights, reducing impact force, restricting obstacle/ground collision and restricting
USER MANUAL. Before you BASE, Skydive. Please read this carefully before doing anything with your new wingsuit.
 USER MANUAL CONGRATULATIONS ON YOUR PURCHASE OF A SQUIRREL FUNK ( PRODUCT ). BY PURCHASING THIS PRODUCT, YOU ACKNOWLEDGE THAT ENGAGING IN SKY-DIVING, BASE JUMPING, PARACHUTING, AND WINGSUITING IS AN INHERENTLY
catalyst The Art of Progress
 catalyst v2 The Art of Progress i n s p i r e d b y n a t u r e / / d r i v e n b y t h e e l e m e n t s The Art of Progress The Catalyst V1 has been a great success but the Ozone design team is never
User Manual Important, read before use!
 EN User Manual Important, read before use! SMART Congratulations on your new rollator! Volaris Smart The Volaris Smart will make your life easier in many ways. We ask you to read carefully through this
Usage and Care Instructions
 SUPERSTAR Student Transportation Add-On Restraint Usage and Care Instructions SUPERSTAR 25-90 lbs. (11.3-40.8 kg) 52 in. (132 cm) tall or less at least 2 years of age *927360* Table Of Contents Store this
FIX ROAD & FIX STRAP cargo securing systems Operating Instruction Manual
 FIX ROAD & FIX STRAP cargo securing systems Operating Instruction Manual NWE NETWORK ENGINEERING OY AB VAT: FI 09628099 1 Introduction Please ensure you read these instructions and understand them fully
"RIGGING SAFETY IN CONSTRUCTION ENVIRONMENTS"
 PRESENTER'S GUIDE "RIGGING SAFETY IN CONSTRUCTION ENVIRONMENTS" Part of the "CONSTRUCTION SAFETY KIT" Series Quality Safety and Health Products, for Today...and Tomorrow OUTLINE OF MAJOR PROGRAM POINTS
Assembly instructions nortik scubi 2 Recreational kayak
 Assembly instructions nortik scubi 2 Recreational kayak QR-Code assembly video: Assembly instructions nortik scubi 2 Dear Customer, You have purchased a nortik scubi 2, an innovative hybrid kayak for recreational
NORTHERN DIVER WETSUIT MANUAL
 WETSUIT MANUAL NORTHERN DIVER WETSUIT MANUAL This manual describes materials, construction, use, care, maintenance, repair, and inherent risks involved in the use of neoprene wetsuits for SCUBA Diving.
B.C.D. Buoyancy Compensator Device User Manual
 B.C.D. Buoyancy Compensator Device User Manual English ver 2.2 CONTENTS Important Warnings Preparation before diving - How to assemble the retaining rubber bungees - How to assemble the tank straps - How
Accessible Performance is True Performance
 Accessible Performance is True Performance I N S P I R E D B Y N AT U RE / / D RI V EN B Y T HE EL EMENT S Our understanding of True Performance is not just raw power or speed - it s the combination of
Pectoral Machine. User manual E S S E N T I A L S T R E N G T H
 E L E M E N T and the cable E S S E N T I A L S T R E N G T H User manual 1 and the cable and The identification plate of and manufacturer, affixed on the back panel of the weight stack, gives the following
Zip-Line Kit Instructions
 1 Zip-Lines Ireland - Zip-Line Kit Instructions DC001A Zip-Line Kit Instructions Thank you for your purchase of the ZLI Zip-line kit! This product was engineered to provide safe fun for all ages when the
USER GUIDE. approved ntents
 approved ntents 07 USER GUIDE .2 All content of this document, including text, images and graphics, is the exclusive property of STARKITES and is protected by international copyright and other intellectual
Inflatable Stretcher. Product Manual
 Inflatable Stretcher Product Manual MFC International 2017 1 Index Technical Data / Capacity Parts Parts List Materials List Operational Instructions Packing Storage Maintenance & Test Procedures Repairs
The only thing. is everything
 p u r e I NS P I RED B Y NAT U RE / / D RI V EN B Y T HE E LEMEN TS p e r f o r m a n c e The only thing that s changed is everything Race performance at it s best yet the all-new R1 V2. Taking a completely
PRE- JUMP TRAINING (T-11)
") THE FIVE POINTS OF PERFORMANCE: PRE- JUMP TRAINING (T-11) The first point of performance is PROPER EXIT, CHECK BODY POSITION, AND COUNT. JUMPERS HIT IT. Upon exiting the aircraft, snap into a good tight
THE FIVE POINTS OF PERFORMANCE: PRE- JUMP TRAINING (T-11) The first point of performance is PROPER EXIT, CHECK BODY POSITION, AND COUNT. JUMPERS HIT IT. Upon exiting the aircraft, snap into a good tight
BABYSEAT II. Suspension Child Carrier
 BABYSAT II Suspension Child Carrier User's Guide D FR S IT JP KR CHS User needs check whether there are any laws specific to the carrying of children in seats attached to cycles that apply in the country
Flat Fold Highchair INSTRUCTION MANUAL. Designed and manufactured to BS EN 14988: 2012 IMPORTANT:
 Flat Fold Highchair INSTRUCTION MANUAL Designed and manufactured to BS EN 14988: 2012 IMPORTANT: Thank you for choosing our product. Please read and understand these instructions before using this flat
USER GUIDE ROLLING WALKERS INSTRUCTIONS FOR USE JANUARY, Maximum User Weight: 170kg (Do not exceed this weight)
") USER GUIDE ROLLING WALKERS INSTRUCTIONS FOR USE JANUARY, 2013 Model Nos: BE07889T Maximum User Weight: 170kg (Do not exceed this weight) Model Nos: BE07890TB Maximum User Weight: 227kg (Do not exceed this
USER GUIDE ROLLING WALKERS INSTRUCTIONS FOR USE JANUARY, 2013 Model Nos: BE07889T Maximum User Weight: 170kg (Do not exceed this weight) Model Nos: BE07890TB Maximum User Weight: 227kg (Do not exceed this
CREWFIT 165 SPORT. self care and maintenance manual
 CREWFIT 165 SPORT self care and maintenance manual Crewsaver lifejackets must be serviced by an accredited service AGENT every 3 years. Please print and read the self care and maintenance instructions
Miller Revolution Key Features
 Thank you for purchasing the Miller Revolution Harness. The Revolution is an all new and totally innovative harness engineered with seven (7) unique components and more than eleven (11) key product features.
RO LLATO R (R6 and R8) O W NER S HANDBO O K
 O W NER S HANDBO O K") RO LLATO R (R6 and R8) O W NER S HANDBO O K R6/R8 Owner s Handbook (Z25988 Rev B) Page 1 of 12 C O N T E N T S 1. Contents 2. Introduction 3. Parts Description 4. Personal Safety 5. Adjustments for Comfort
RO LLATO R (R6 and R8) O W NER S HANDBO O K R6/R8 Owner s Handbook (Z25988 Rev B) Page 1 of 12 C O N T E N T S 1. Contents 2. Introduction 3. Parts Description 4. Personal Safety 5. Adjustments for Comfort
Tripod Series OPERATOR S MANUAL
 Tripod Series OPERATOR S MANUAL #1630 - Solo 75 2-Stage Tripod (Alloy) #1501 - Solo 75 2-Stage Tripod #2001 - Solo 75 3-Stage Tripod #1505 - Solo 100 3-Stage Tripod Features and Controls 75mm Bowl or 100mm
Trampoline & Enclosure Assembly Instructions
 Trampoline & Enclosure Assembly Instructions Safe user weight 330 lbs (150 kg) Version 718702 The information in this document is subject to change without notice. Copyright Springfree Trampoline Inc.
Installation Manual. Version 12-10
 Installation Manual The products and parts shown herein are to be installed and used adjusted in accordance with these instructions. Any deviation by the buyer, installer, or user from these instructions