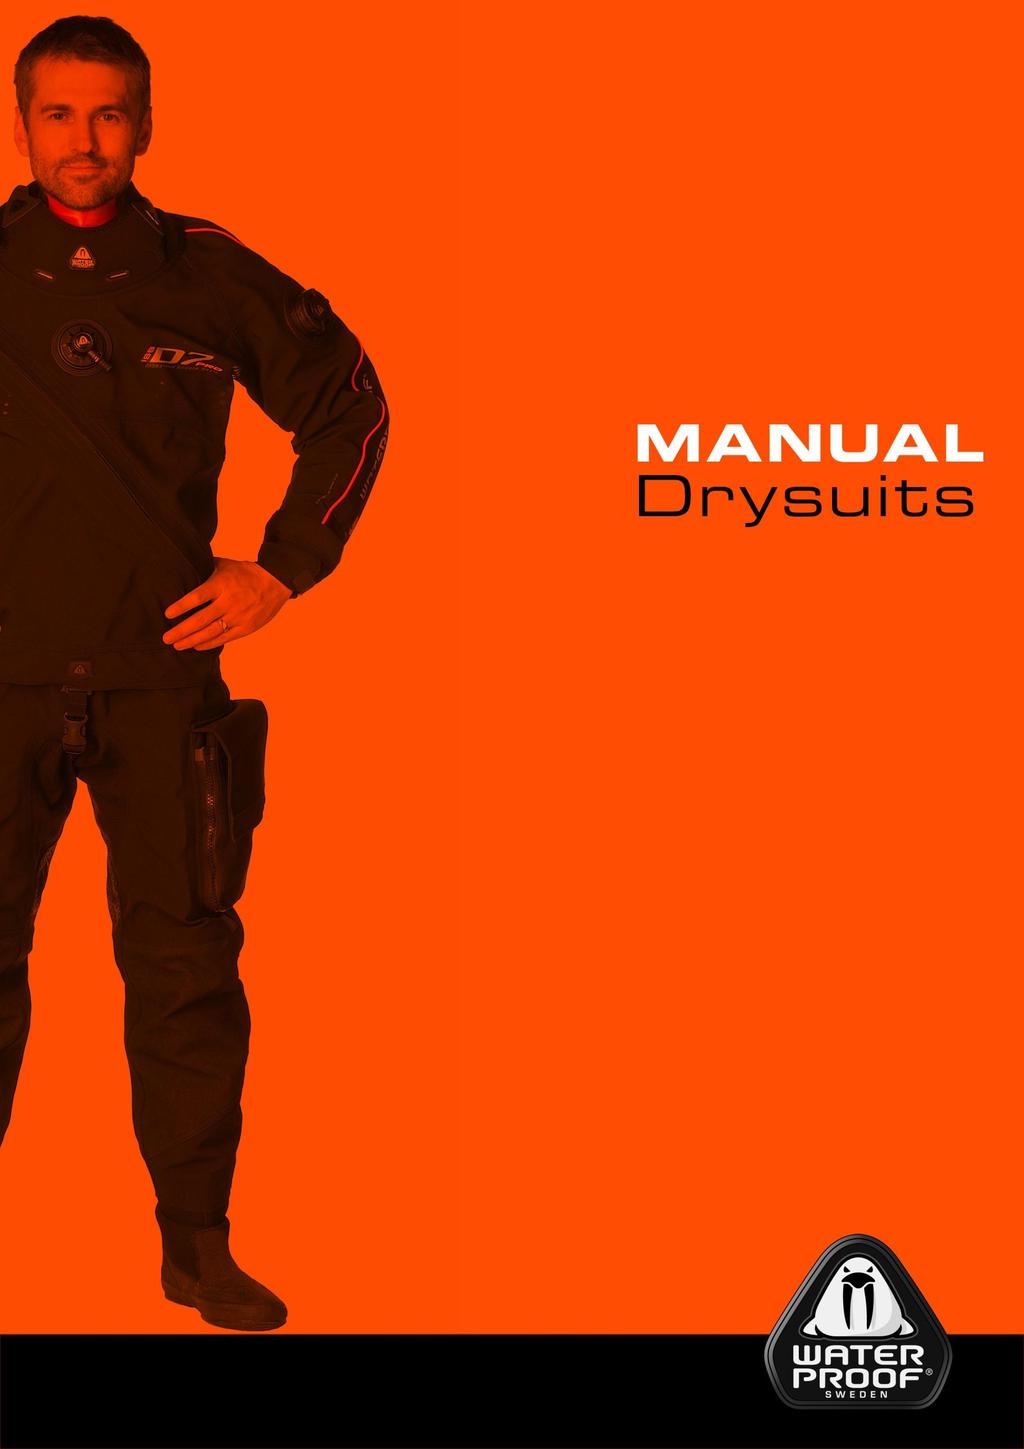
Waterproof Drysuit Manual
|
|
|
- Irene Stokes
- 5 years ago
- Views:
Transcription
1 1
2 IMPORTANT! Please read this entire manual before diving. Failure to follow the instructions in this manual can result in serious injury or death. The Waterproof World Wide Warranty Waterproof warranties these Drysuits against defects in materials and workmanship to the original purchaser for a period of two years. This warranty does not cover damage due to abuse, neglect, improper usage, lack of proper maintenance or normal wear and tear. Lack of proper maintenance will cause abnormal deterioration. Please be sure to enter and completely fill out the warranty form within 30 days from purchasing to validate the World Wide Waterproof warranty. EC Type Examination by: RINA Test Laboratory Calata G. Gadda Genova Notified Body no Congratulations on purchasing a Waterproof Drysuit! This suit has been carefully manufactured from the best available materials, and with reasonable care it will give you many years of service. Please read the care, maintenance and use information in this manual and follow the suggestions carefully. Stay safe Drysuit diving can add immensely to the comfort, enjoyment, and safety of cold water divers. But while Drysuits are easy to use, like any piece of diving equipment they require instruction in proper use and safety procedures. If you are unfamiliar with diving in Drysuits, or with the type of suit you have purchased, make sure you have received training in a confined water situation before attempting to dive in open water. A Drysuit course is an excellent idea. At minimum, you should have some supervised confined water training in Drysuit use that meets the standards of your certifying agency. Certain aspects of weighting, buoyancy control and emergency procedure must be handled differently in a Drysuit, and while the techniques are easy to master for most divers (many feel diving in a Drysuit is easier than diving in a wetsuit) proper instruction can make your initial open water experience more enjoyable and much safer. User Instructions Before Diving Make sure both valves are securely screwed into the suit. Ensure that the inflator valve and exhaust valve work properly by operating them before every entry into the water. Inspect the latex/silicone seals for damage. Pay particular attention that edges of the seals are not cracked or torn. If they are, it could indicate that the seals are damaged and could fail. Damaged seals should be replaced before diving. Make sure you have removed watches, rings, or any jewelry with sharp points prior to donning the suit. Do not wear anything which could catch the seals and tear them. Make sure the zipper is lubricated. Use wax lubricants only, DO NOT use silicone, silicone sprays, or petroleum based lubricants. These products will damage the zipper and the suit. 2
3 Check the teeth to make sure they are in good condition and that the slider operates freely. Lubricate the seals to ease entry into the suit. In a dry environment, unscented talc makes a good lubricant. In a wet environment (rain or a boat) many divers prefer to carry a small bottle of a water based lubricant. DO NOT use silicone or petroleum based lubricants as they will damage the suit. When donning the suit make very sure that the undergarments do not catch in the zipper. Pulling the zipper closed over an obstruction can break the zipper. Suit use These instructions are a general guide only and do not substitute for instruction in a Drysuit diving course. Comprehensive Drysuit diving instruction should be obtained from a certified instructor. Seals It is essential that the seals are properly trimmed to fit and that they lay flat against your skin with no wrinkles that could allow water to enter the suit. If you are not experienced in trimming Drysuit seals have your dealer or instructor help you get a good fit. (See Adjustment of Seals) Weight yourself properly Spend some time getting your weight right, work with your dealer and/or instructor to become relaxed and comfortable with your diving system. Buoyancy control In order to relieve the squeeze caused by the compression of the air inside the suit and to maintain neutral buoyancy it will be necessary to introduce air into the suit via the inflation valve as you descend. When ascending it will be necessary to vent air from the suit using the adjustable exhaust valve in order to keep from ascending too fast. Practice buoyancy control with all of your equipment including your drysuit in controlled conditions in confined water before diving in open water. Suit Inflation Valve use The Waterproof Drysuits come equipped with a swivelling inflation valve, which allows for convenient positioning of the low pressure inflator hose. The low pressure inflator hose must be connected to a low pressure port on the first stage of your regulator and attaches to the suit inflator valve via a quick release connector. Pull back the spring loaded flange on the quick release connector and push the connector to engage the fitting on the suit inflator valve. Release the flange to lock the connector in position. Always make sure that the inflator hose is securely fastened before diving. To release the hose from the valve pull back on the spring loaded flange and pull the hose away from the valve assembly. Practice this procedure with all of your diving gear on (including gloves) as it might be necessary to perform it in an emergency. Suit Exhaust Valve use The automatic adjustable exhaust valve is designed to vent excess air form the suit by simply positioning yourself underwater so that the valve is in the high position. The amount of air pressure the valve will retain inside the suit is adjustable. Rotating the valve flange clockwise will increase the air held inside the suit, rotating the flange counter clockwise will cause the suit to retain less air. Even when the valve has been rotated fully clockwise so as to retain the maximum air, pressing downwards on the flange will cause air to vent as if the valve were fully opened, as long as the pressure is maintained. Most divers find that diving with the valve completely or nearly completely opened (turned counter clockwise 3
4 as far as possible) allows for the most precise buoyancy control while underwater. Turning the valve to a more closed position when on the surface (so as to retain more air) may make resting or swimming more comfortable. Your diving instructor or retailer can help you find the buoyancy and weighting combination that works best for you. After Diving/Suit Storage DO NOT use silicone sprays/lubricants on the seals or zipper. They will not help the seals last longer and will make seal or zipper replacement difficult or impossible if the silicone has soaked into the suit material. Seals should be cleaned with soap and water and then lubricated with unscented talc. Rinse your suit with fresh water after diving, taking particular care to clean sand and salt from the valves and zipper. The valves should be operated while being rinsed. Always dry the suit after diving, do not store it wet. If perspiration has made the interior of the suit damp it may be necessary to air the suit inside out, or hang it with the zipper completely open until dry. these will degrade the latex seals more rapidly. Suits stored for extended periods will be well protected if stored on a hanger in a dry cool place. Do not store your suit where it will be subjected to high temperatures. Drysuits can be damaged by excessive heat, as in the trunk of a car in summer sun. Lubricate the zipper with paraffin wax before storage. When the suit is stored or transported in its bag the zipper must be open. When the zipper is open it is very flexible, when closed it becomes stiff and could be damaged or broken if inadvertently bent. Before storage dust the seals with unscented talc (available from a Waterproof dealer). This will help prevent the seals from sticking together and will make the suit easier to put on the next time. Be sure to use only unscented talc, as scented varieties contain oils that might damage the seals. Neoprene suits should not be hung for extended periods on narrow hangers, as the suit material may become stressed where it passes over the hanger. Extra wide WP Hangers especially designed for dry or wetsuit storage may be used. Suits may be stored in their bag, but take care with the Neoprene suits not to repeatedly fold them in the same spot, as this may create permanent creases in the suit material. If your suit is equipped with Latex seals it is important to store the suit away from sources of ozone (electric motors, gas water heaters, home furnaces, etc.), and away from sources of UV radiation (mainly sunlight), as both of Silicone Seals If your suit is equipped with I.S.S, Integrated Silicone Seals please read the Silicone Seal Manual at the end of this manual. Latex seals Adjustments of Seals On a new suit, or one that has had new neck or wrist seals installed, the seals will most likely need adjusting. The seals don t need to be uncomfortable to seal properly. They only need to be snug against the skin for a proper fit. If you are not familiar with the proper fitting or trimming of seals contact your drysuit dealer before cutting. If neck and/or 4
5 wrists seals are too tight cut a little (1/4 inch/6mm or less) off the end/length of the seal. A pair of sharp scissors will cut the seal easily. Latex seals are marked with rings for cutting guides. Then check fitting over wrists or neck. If you cut too much you may cause a seal to leak and it will have to be replaced. Care of the Latex Seals Latex seals are mounted on some models of Waterproof Drysuits, neoprene seals are available as an option. Most divers find that latex provides a dryer and more comfortable seal, however the nature of the latex material means that more care is required than for neoprene seals and after some time the latex seals may need to be replaced. Latex seal replacement is not difficult but must be done correctly. Workshops in seal replacement are offered by some dealers if you want to learn to do it yourself, however we recommend that you take your suit to a Waterproof dealer experienced in Drysuit repair. You can help your latex seals to last by following these suggestions: Store the suit away from sources like Ozone and UV radiation or Sunlight. Rinse seals with fresh water and let them dry before storage. Always dust dry latex seals with unscented talc (available from your Waterproof dealer) before storage. Keep the seals away from sharp objects. Periodically wash the seals with soap and water to remove body oils that may accumulate and cause degradation of the material. Care of the Dry Zipper The Dry zipper is the heart of your Drysuit and its most expensive component. With the right care the zipper can last for the life of the suit. All zippers are examined and pressure tested before leaving the factory. The Drysuit zippers can only be damaged by mishandling. Please treat with care. We cannot take responsibility for zippers damaged by misuse. Lubricate the zipper (on the outside of the teeth only) with paraffin wax (available from your Waterproof dealer) or beeswax, DO NOT use silicone or petroleum based lubricants. Avoid sticky waxes, as they will tend to attract sand and grit. A very small amount of wax is sufficient. Clean zipper with fresh water after diving being sure to remove any debris from between zipper teeth. Dry the zipper before storage. When storing or transporting the suit keep the zipper unzipped. When opened the zipper is much more flexible, when closed the zipper becomes semi-rigid and might be damaged if it is folded, or if a heavy object were inadvertently placed on it. When opening and closing the zipper be sure the teeth are in alignment and that the supporting tape is not kinked. This will normally require two hands. Take great care not to zip undergarment material into the dry zipper, as this is the most common way the zipper gets broken. Care of the Valves The inlet and exhaust valves require little maintenance besides keeping them clean. They should be periodically (at least annually) checked by a qualified service facility. DO NOT attempt to disassemble the valves yourself. Rinse the valves after diving to remove sand and foreign material. Only use undergarments that do not produce excessive lint. Lint can become caught in the exhaust valve and cause it to leak. 5
6 Tips to stay warm A few tips to help you stay warm and comfortable. Use only undergarments made from nonabsorptive materials. Don t wear cotton sweatshirts, t-shirts, or other garments next to the skin. Cotton is highly absorptive and will soak up like a sponge any moisture your body puts out. This creates a thermal conduit which will conduct heat away from your body and make you feel cold. Use undergarments that are not restrictive. Tight fitting or confining undergarments that restrict motion detract from both comfort and safety. Waterproof s Drysuit undergarment system is designed to allow completely unrestricted motion. In diving as in other active sports, layering undergarments is generally preferable to a single thick layer. This allows the diver to match insulation to the conditions on a given dive. If you have a leak Almost everyone who dives actively in a drysuit sooner or later experiences a leak. Most of these are minor and result only in slight dampness, however, if you notice water entering your suit during a dive, end the dive and surface to determine the cause, do not tough it out. A serious leak could cause loss of buoyancy, chilling, rapid air consumption, or other problems. The most likely causes are easy to fix and you can be back in the water soon. While major leaks or seal failures are extremely rare, you will probably at some point come up from a dive with an area of dampness that seems more than would be accounted for by normal perspiration. Carefully note the location of the dampness. Check to see if it is near a wrist or neck seal, a valve, or the location of the zipper. This will give you an excellent clue as to the location of the leak. The most common causes of leaks in Drysuits are: Failure to get a good seal before entering the water. Hair or undergarments might be trapped under the seals or the seal might be folded in such a way as to make an entry point for water. Failure to completely close the zipper before entering the water. Double check the zipper closure as a part of your pre-dive procedure. Valve leaks can be caused by loose valves, connecting the inflator hose while in the water can cause a very small amount of water to enter the suit, or foreign material could have become lodged in the exhaust valve. If this latter is the case it can often be corrected by flushing the valve with water to wash out the foreign material. Something might have punctured the suit. Sea urchin spines, sharp shells, and wire, hooks, or sharp metal on boats or wrecks are common offenders. Locating a very small puncture is sometimes difficult. If the puncture is not visually obvious, the best procedure is to seal the wrist and neck seals with cans or by folding, zip the suit up, and inflate it fully. A soapy water solution can then be sprayed or sponged on the suspect area. Small leaks show themselves by producing bubbles. Mark the spot and dry the suit before repairing the leak. Most small holes and tears (1/2 inch/12mm or less) in either trilaminate or neoprene suits can be temporarily repaired with an Aquaseal type product that is sold in dive equipment stores. You might have a tear or a pinhole in one of the seals. If it is a Silicone seal, replace it. If it is a latex seal check the latex material 6
7 carefully, particularly along the edges. If a leak is found you should take your Drysuit to a dealer that is qualified in Drysuit servicing but the patching of small leaks can be an easy doit-yourself project with a couple of readily available items. Small size cuts or tears in latex seals can easily be repaired with the rubber patching materials used in fixing the leaks in bicycle tires. These types of small repairs can last for years even though they are considered temporary or field repairs. It is recommended that before your next dive trip that you have the repairs inspected by a dealer that is familiar with Drysuit servicing. We wish you a safe dive and a great experience! The Waterproof Team Waterproof Diving International AB Industrivägen Partille, Sweden 7
8 MANUAL Silicone Seals 8


9 SILICONE ADVANTAGES Silicone seals were introduced to the market in 2009 by Waterproof. Silicone Seals have no chemical or environmental sensitivity and they have approximately 40% better stretch than latex seals. This elasticity makes donning the suit much easier and it seals with your skin more effectively. Since the pressure is lower on the wrists your hands will stay warmer. The comfort really is enhanced during long technical dives and decompression stops. A few of the features are listed below: 100 % UV and Ozone resistant Very stretchable Enhanced durability No latex allergy Easy donning and doffing Extremely fast mounting Interior Glide Coating Safety Ridge seal! After a dive check and clean the seal for tears or damage, especially in the fold where it comes out from the oval stiff ring. The seals are glide treated but it is advisable to use unscented talc powder to enhance a troublefree donning. TRIMMING SEALS When trimming seals, use sharp scissors. Cut edges should be as smooth and straight as possible. Make sure there are absolutely no pointed cuts into the seal. Do not trim across trim lines. GENERAL ADVICE Even though silicone seals are better in many ways than regular latex seals they still must be handled with care. Overstretching, sharp objects and poor trimming can cause your seal to tear. Even if the silicone seals have more stretch than latex seals, do not stretch the seal more than required. Assist yourself with a free hand when pulling the seals over your head or hands - both for the seal and your comfort. Avoid contact with sharp objects, like finger nails or rings, when handling seals. Use a product such as unscented talc on a regular basis to minimize frictional strain on the seal and for personal comfort. THE PARTS The ISS wrist seal consists of three parts. 1. PU ring (Polyurethane ring) which is glued to the suit. This ring is soft. 2. Oval Stiff Ring is the inner plastic ring that holds the Silicone Seal. 3. The Silicone Seal MAINTENANCE Silicone Seals are virtually maintenance free, but there are a couple of things to think of. Never try to glue or patch a broken silicone 9


10 REPLACING A WRISTSEAL 1. Fold up the zipper cover and remove the neoprene cuff. 2. Hold the ring system with both hands with the seal towards you. 3. Place both thumbs in the groove and push/bend the soft PU-ring upwards/ backwards towards arm and at the same time push down the back end of the ring with your other fingers. Push hard until the inner stiff ring loosens. 3a. Carefully insert the tool between the PUring and the Stiff ring and bend upwards until the ring pops out. Bend carefully without twisting the tool. If it is too hard to get the tool in position at the short side of the ring, start at the recess and slide the tool to the side. 4. Clean the inner PU-ring and the Oval stiff ring thoroughly. 1 2 If you find it too difficult to dismount the ring by hand you can use a standard plastic bike tire removal tool. These images illustrate two different ways of positioning the seal depending on the design and fabric of the Drysuit and how the PU-Ring is attached into the Drysuit. One of these mounting alternatives will work better than the other. It is important to try assembling the components both ways to see which one works best. The suit comes from the factory with seals in position 1. If leakage occurs after changing a seal or ring, try mounting the seal in position 2. 10


11 5. Mount the new seal by placing the ridge of the seal in the groove with the glide coated side out. 7. Align the oval stiff ring to the alignment mark on the suit and carefully fit the seal in the suit. 6. Add waterbased lubricant on both the seal and inside the suit PU-ring. It is better to use too much than too little. It should slide easily. 8. It is very important that the Seal doesn t get any wrinkles when mounting it in the suit. Push the seal slowly and carefully little by little until it stops. Then push the last bit until you hear a clicking sound. Again, it should slide very easily into position, if not, use more lubricant. 11


12 3. When the tool has reached the bottom of the groove, it s time to use the tool to bend up the Lock Ring from the groove. 9. Grab the end of the seal as the image shows and pull it gently away from the joint to ensure that it is seated properly. NECKSEAL DETACHMENT Make sure you have the SI Tech Neck Tite Tool. 1. Press the Neck Tite Tool towards the bottom of the groove in the PU-ring. 4. Press up the Lock Ring from the groove. 5. When you have successfully released the Lock Ring you can use your fingers to pull the seal and Lock Ring out of its position. If the same seal shall be used again, please be careful and check for damages on the seal. 2. Press the tool in the direction of the arrow and force the groove in the PU-ring to open up and start releasing the Lock Ring. 12


 with the Lock")

13 NECKSEAL ATTACHMENT down into the tapered groove of the PU-Ring so that the Lock Ring enters the groove and locks into position. Use a flat surface when performing this operation. 1. Place the Lock Ring on the inside of the seal. Ensure that approx. 1,5 cm of the seal is pulled over the Lock Ring. 4. Push the Neck Tite Tool forward along the Lock Ring until all of it has been forced into the groove in the PU-Ring. 2. Put the seal in position over the PU-Ring (mounted on your drysuit) with the Lock Ring on top of the tapered groove in the PU-Ring. Make sure that the bellow of the Neckseal faces the back of the suit. 5. Ensure that the excess part of the seal is similar throughout the entire dressing. We recommend between: 1,5-2 cm. 3. Put the Neck Tite Tool in position as image displays. By applying force, press the Lock Ring 13


14 6. Check that the Lock Ring is in position by following the groove After completing the seal attachment section, perform a security check: Grab the end of the seal as the image shows and pull it gently away from the joint to ensure that it is seated properly. Do not use excessive force! Simulate the same force as used when donning the suit. RECOMMENDATIONS Make pre-dive checks at all times. Always check seals for scratching and pinching. Always check your Neck Tite Tool for sharp edges that might occur over time. Avoid exposing the seals to direct sunlight. Always clean sand and dirt from your seals. Use unscented talc on seals to extend the lifespan. Remove seals from your suit during long periods of storage. 14
15 CONTACT WATERPROOF DIVING INTL AB Industrivägen Partille, Sweden
WETSUIT OWNER S MANUAL
 WETSUIT OWNER S MANUAL Please read this entire manual before diving. Failure to follow the instructions in this manual can result in serious injury or death. Waterproof Wetsuit Owners Manual Page 1 of
1 waterp wa r te o rp o r f o - of us us a a..com co m Waterproof Wetsuit Manual
 waterproof-usa.com 1 IMPORTANT! Please read this entire manual before diving. Failure to follow the instructions in this manual can result in serious injury or death. Waterproof USA LIFE TIME WARRANTY
Photo: Jonas Wall ANTARES OVAL DRY GLOVE SYSTEM BY SI TECH.
 Photo: Jonas Wall ANTARES OVAL DRY GLOVE SYSTEM BY SI TECH www.sitech.se The Oval revolution We want to congratulate you on your purchase of the ANTARES Modular Dry Glove System. The oval design and quick
Drysuit Care Information
 Drysuit Care Information SUIT WASHING AND DRYING Washing a suit after use is best done by hanging it upside down and spraying it with a hose pipe. If there were any leaks during your dive then spray up
ANTARES. User Manual ANTARES OVAL DRY GLOVE SYSTEM BY SI TECH. Photo: Jonas Andersson, Lysekil
 ANTARES User Manual Photo: Jonas Andersson, Lysekil ANTARES OVAL DRY GLOVE SYSTEM BY SI TECH ANTARES - User manual We want to congratulate you on your purchase of the ANTARES, a Dry Glove System developed
Quick Neck. User Manual. Photo: Jonas Dahm / Deep Sea Productions
 Quick Neck User Manual Photo: Jonas Dahm / Deep Sea Productions www.sitech.se Quick Neck User Manual We want to congratulate you on your purchase of the Quick Neck system, a Dynamic and Modular Quick Change
QCS Oval. User Manual. A MODULAR QUICK CHANGE SOLUTION BY SI TECH Prepared for the ANTARES Dry Glove System. Photo: Johanna Strömgren
 QCS Oval User Manual Photo: Johanna Strömgren A MODULAR QUICK CHANGE SOLUTION BY SI TECH Prepared for the ANTARES Dry Glove System QCS Oval User Manual 1. Mounting seals We want to congratulate you on
Glove Lock QCP. User Manual. Photo: Anders Salesjö, Lysekil
 Glove Lock QCP User Manual Photo: Anders Salesjö, Lysekil www.sitech.se Glove Lock QCP User Manual We want to congratulate you on your purchase of the Glove Lock QCP, a Dry Glove system developed and manufactured
VIRGO. User Manual. Photo: Jonas Wall
 VIRGO User Manual Photo: Jonas Wall www.sitech.se VIRGO Dry Glove System We want to congratulate you on your purchase of the VIRGO Dry Glove System developed and manufactured by SI TECH in Sweden. By reading
Congratulations on your Drysuit Purchase
 Model: Kodiak 360 Version: 04/2017 Congratulations on your Drysuit Purchase Your drysuit has been designed to provide you with the highest degree of comfort and convenience. Our suits have been used by
Introduction. 2. Limited Lifetime Warranty. 3. Drysuit Guidelines.. 4. Responsible Drysuit Diving... 5
 Drysuit Manual CONTENTS Introduction. 2 Limited Lifetime Warranty. 3 Drysuit Guidelines.. 4 Responsible Drysuit Diving... 5 Personalizing your Drysuit for Initial Use... 7 Neck & Wrist Seals... 7 Trimming
Owner s Guide. ElevateSUP.com
 Owner s Guide ElevateSUP.com IMPORTANT READ THIS IMPORTANT INFORMATION BEFORE USING YOUR STAND UP PAD- DLEBOARD Disregarding any of the safety precautions and instructions contained in the owner s manual
Gluing Guide QCS Oval & Quick Cuff
 Gluing Guide QCS Oval & Quick Cuff General information SI TECH has an extensive background and history in the development and design of premium drysuit components that dates back to the early 1960 s. This
1. Unlimited, so long as adequate facility, supplies and time are provided to ensure comprehensive and complete training of subject matter
 13. Dry Suit Diver 13.1 Introduction This course allows the student to develop knowledge and skills to properly use a dry suit. It will discuss the types of dry suits, accessories, maintenance and how
Latex & Silflex Wrist & Neck Seals
 Latex & Silflex Wrist & Neck Seals Latex Neck & Cuff Seals Features & Maintenance: All seals are exceptionally supple and give an excellent life expectancy. Cuff seals come in two styles tapered or bottle
Congratulations! You own an R9 Cobra! A compact, fast handling and powerful crossbow for your serious shooting enjoyment!
 COBRA SYSTEM R9 COBRA SYSTEM R9 CROSSBOW INSTRUCTION MANUAL Congratulations! You own an R9 Cobra! A compact, fast handling and powerful crossbow for your serious shooting enjoyment! The limb set comes
NORTHERN DIVER WETSUIT MANUAL
 WETSUIT MANUAL NORTHERN DIVER WETSUIT MANUAL This manual describes materials, construction, use, care, maintenance, repair, and inherent risks involved in the use of neoprene wetsuits for SCUBA Diving.
IMMERSION SUIT MAINTENANCE GUIDE IMMERSION SUIT MAINTENANCE GUIDE 1409 SERIES. SCMG003A Maintenance Guide - Immersion Suits USA ENGLISH.
 SCMG003A Maintenance Guide - Immersion Suits USA ENGLISH.indd 1 MAINTENANCE GUIDE IMMERSION SUIT 1409 SERIES IMMERSION SUIT MAINTENANCE GUIDE 6/26/2014 10:21:12 AM IMMERSION SUIT MAINTENANCE GUIDE B C
Dry Glove Systems & Quick Change Systems
 Dry Glove Systems & Quick Change Systems Combination Concepts Quick Glove #60230 1 The end user has numerous combination options for dry glove styles and field replaceable seals. Choices are available
ZipSeals. NECK Installing a Neck ZipSeal 1.Your drysuit must be equipped with a ZipRing on the neck.turn the suit inside out.
 Installing & Using DUI ZipSeals & ZipGloves Congratulations on purchasing DUI ZipSeals and/or ZipGloves. Properly used they will make your diving more comfortable and enjoyable. DUI ZipSeals and ZipGloves
An active ERDI Instructor that has been certified to teach this ops component
 ERDI 4. Dry Suit Ops 4.1 Introduction The ERDI Dry Suit is designed to develop the knowledge and skills necessary for dry suit diving operations in emergency response diving. 4.2 Student Prerequisites
DRYSUIT USER S MANUAL
 DRYSUIT USER S MANUAL CONGRATULATIONS ON YOUR CHOICE OF AN OCEAN RODEO DRYSUIT Your suit has been designed to provide you with the highest degree of mobility, temperature versatility and ruggedness. Built
SPUD OWNER S MANUAL ALWAYS WEAR A COAST GUARD APPROVED FLOTATION DEVICE WHEN OPERATING THE SPUD KAYAK.
 SPUD OWNER S MANUAL ALWAYS WEAR A COAST GUARD APPROVED FLOTATION DEVICE WHEN OPERATING THE SPUD KAYAK. Know the limits of your abilities and the limits of your equipment. Changes in air temperature and
DX300 drysuit USER GUIDE
 DX300 drysuit USER GUIDE Contents NOTICES...3 WARNINGS...4 DRYSUIT LIMITED WARRANTY PROGRAM...5 INTRODUCTION...6 GUIDELINES...7 DIAGRAM...8 NECK AND WRIST SEALS...9 FEATURES...14 PRE-DIVE PREPARATION...16
Congratulations on your Drysuit Purchase
 Congratulations on your Drysuit Purchase Your drysuit has been designed to provide you with the highest degree of comfort and convenience. Since 1956 we have been constructing suits with the finest quality
RB70 Automatic Diluent Valve Maintenance Manual. Version 1.1 November 2006 Written by Tino de Rijk. Page 1 of 23
 RB70 Automatic Diluent Valve Maintenance Manual Version 1.1 November 2006 Written by Tino de Rijk Page 1 of 23 Table of Contents 1. Introduction... 3 2. ADV diagram and parts list (Pre June 2006)... 4
Inflatable Stand Up Paddle Board Manual
 Inflatable Stand Up Paddle Board Manual V-Max AIR 12 6 Voyager AIR 11 6 Koa AIR 10 2 and 10 8 Heavy duty built in carrying handles Steel D Ring Built in Cargo Straps EVA Deck Pad High Pressure Air Valve
THE OWNER'S MANUAL IS IN TWO VOLUMES: VOLUME 2 TECHNICAL SPECIFICATIONS - ASSEMBLY PROCEDURE ZODIAC
 CAUTION NOTICE: CAREFULLY READ THIS MANUAL BEFORE OPERATING YOUR BOAT. THIS OWNER S MANUAL IS IN TWO VOLUMES THAT MUST BE KEPT TOGETHER. THE OWNER'S MANUAL IS IN TWO VOLUMES: - VOLUME 1 DEALS WITH OPERATING
MSD901. Industrial Dry Suit User's Manual
 MSD901 Industrial Dry Suit User's Manual Things You Should Know i Application i Configuration ii Maintenance and Care ii Inspection ii Warranty ii Contact CONTENTS Assembly 1 6 The MSD901 Assembly Steps
Owner s Instruction Manual
 Owner s Instruction Manual IMPORTANT! PLEASE READ THIS MANUAL CAREFULLY BEFORE PROCEEDING. AFTER READING THIS MANUAL, SAVE THESE INSTRUCTIONS FOR FUTURE REFERENCE. Congratulations on your purchase of the
275 RID Assembly Instructions
 75 RID Assembly Instructions Part No. 0003003 v. Lscsep0 PARTS LIST (Specifications and contents subject to change without notice) Description Part # A. RID Track...0000050 B. Capacity Plate...0053 C.
Pontoon Slide Owner s Manual
 Pontoon Slide Owner s Manual Introduction Water sports can be safe and fun for all levels of enthusiasts. The Owner s Manual is presented to enhance your enjoyment of the sport. It is intended to alert
User Guide. 117 West Washington Street Lake City, FL USA Phone (386) Fax (386)
 Fax (386)") User Guide 117 West Washington Street Lake City, FL 32055 USA Phone (386) 752-1087 Fax (386) 755-0613 www.diverite.com 905 Dry Suit User Guide Page 2 Dive Rite 905 Dry Suit Limited Warranty Dive Rite will
User Guide 117 West Washington Street Lake City, FL 32055 USA Phone (386) 752-1087 Fax (386) 755-0613 www.diverite.com 905 Dry Suit User Guide Page 2 Dive Rite 905 Dry Suit Limited Warranty Dive Rite will
Inflatable Stand-Up Paddle Boards SUPS OWNER S MANUAL
 Inflatable Stand-Up Paddle Boards SUPS OWNER S MANUAL WARNING: Read carefully and understand all ASSEMBLY AND OPERATION INSTRUCTIONS before operating. Failure to follow the safety rules and other basic
OWNER S MANUAL AirTop Large and AirTop Small
 It is the owner s responsibility to read and understand the material presented in this manual and to instruct all users or operators on how to use product safely. By inflating the product, you hereby agree
Our Spa covers. About Spa Cover Vinyl
 Our Spa covers Whether you are in the market for a new Spa cover or just want to get the most out of your existing one, this guide will give you a wealth of helpful information. These basic maintenance
ROPV R40 E Series User Manual
 HARBIN ROPV INDUSTRY DEVELOPMENT CENTER ROPV R40 E Series User Manual For Use with the Following ROPV Pressure Vessel Models: R40 300E R40 450E Headquarters Tel:(+86)451-82267301 Fax:(+86)451-82267303
Rapid Survival System
 Rapid Survival System Model W User Manual Emergency Floatation for Moving Water Self Rescue Version 10.02 Contents User Manual... 1 Part 1: Description and Function... 3 Part 2: Package Contents... 3 Part
Drysuit Owner s Manual
 Drysuit Owner s Manual INCLUDING DUI 2005 Introduction DUI Drysuit Owner s Manual Congratulations on purchasing a DUI drysuit. It has been carefully manufactured to exacting standards using high quality
DURAS INFLATABLE BOAT OWNER'S MANUAL
 DURAS INFLATABLE BOAT OWNER'S MANUAL Table of Contents About your new Duras Inflatable Boat Page 1 Assembly Instruction Page 3 Motor Installation Page 5 Capacities Page 5 Troubleshooting Page 6 Using
Santa Fe Cycles Assembly Guide Introduction
 Santa Fe Cycles Assembly Guide Introduction Congratulations on your purchase of your new Santa Fe bicycle. You have purchased a bicycle that has many features and qualities. Please take a few minutes and
Owner s Instruction Manual
 Owner s Instruction Manual IMPORTANT! PLEASE READ THIS MANUAL CAREFULLY BEFORE PROCEEDING. AFTER READING THIS MANUAL, SAVE THESE INSTRUCTIONS FOR FUTURE REFERENCE. Congratulations on your purchase of the
Owner s Instruction Manual
 Owner s Instruction Manual IMPORTANT! PLEASE READ THIS MANUAL CAREFULLY BEFORE PROCEEDING. AFTER READING THIS MANUAL, SAVE THESE INSTRUCTIONS FOR FUTURE REFERENCE. Congratulations on your purchase of the
LESSON PLAN January TERMINAL OBJECTIVE: Partially supported by this lesson topic: COURSE TITLE: Surface Rescue Swimmer Courses, A
 LESSON PLAN January 2007 COURSE TITLE: Surface Rescue Swimmer Courses, A-050-0500 CLASSIFICATION: Unclassified LESSON TOPIC NUMBER: 4.11 LESSON TOPIC: Dry Suit ALLOTTED LESSON TIME: 0.5 Classroom 2.5 Laboratory
3/8" Dr. Air Butterfly Impact Wrench
 8192106 3/8" Dr. Air Butterfly Impact Wrench Owner s Manual Read and understand all instructions before use. Retain this manual for future reference. Specifications Construction: Polished aluminum and
OWNER S MANUAL ALWAYS WEAR A GOVERNMENT APPROVED FLOATATION DEVICE WHEN FISHING. Know the limits of your ability and the limits of your equipment.
 OWNER S MANUAL ALWAYS WEAR A GOVERNMENT APPROVED FLOATATION DEVICE WHEN FISHING. Know the limits of your ability and the limits of your equipment. Changes in air temperature and elevation could cause the
Sea Rebel Kayak Owner s Manual
 Sea Rebel Kayak Owner s Manual www.ravesports.com Table of Contents Product instructions and warnings...2 Inflating instructions...3 Proper use.. 4 Deflating and storage.........6 Cleaning and troubleshooting...8
Inflatable Dock Slide Owner s Manual
 Inflatable Dock Slide Owner s Manual Introduction Water sports can be safe and fun for all levels of enthusiasts. The Owner s Manual is presented to enhance your enjoyment of the sport. It is intended
IMPORTANT SAFETY INSTRUCTIONS. PLEASE READ AND SAVE THESE INSTRUCTIONS BEFORE SETUP AND USE. KEEP THESE INSTRUCTIONS IN A SAFE PLACE FOR FUTURE
 31562 Spray N Splash ELEPHANT POOL IMPORTANT SAFETY INSTRUCTIONS. PLEASE READ AND SAVE THESE INSTRUCTIONS BEFORE SETUP AND USE. KEEP THESE INSTRUCTIONS IN A SAFE PLACE FOR FUTURE REFERENCE. FOR AGES 3+
TABLE OF CONTENTS. Hello! Happy Paddling, SAFETY WARNING WHAT S INCLUDED IN YOUR BOX GENERAL USE INFORMATION INFLATION INSTRUCTIONS FIN INSTALLATION
 Hello! Thank you for purchasing an inflatable stand up paddle board and WELCOME TO THE TEN TOES FAMILY! We are a small team of outdoor adventurers who strive to make paddle boarding as enjoyable and fulfilling
Combination Breathing Apparatus
 and Combination Breathing Apparatus ULTRAVUE FACEPIECE TAL 502 (L) Rev. 0 MSA 2005 Prnt. Spec. 10000005389 (I) Mat. 10064385 Doc. 10064385 ULTRAVUE FACEPIECE COMPONENTS Item Part No. Description 800509
Pontoon Slide Owner s Manual
 Pontoon Slide Owner s Manual WWW.RAVESPORTS.COM Copyright 2018 All rights reserved. No part of this publication may be reproduced or transmitted in any form or by any means, electronic or mechanical, including
Underwater Housing for Canon EOS M
 Underwater Housing for Canon EOS M User Manual 1 Table of Contents 1. Introduction 2. Specifications 3. Function Controls 4. Set up Instructions 5. Use & Care of Housing 6. Service 7. Warranty 1. Introduction
Invacare Twilight II Nasal Mask
 Assembly, Installation, and Operating Instructions Invacare Twilight II Nasal Mask LATEX FREE USER: Before using this nasal mask, read this manual and save for future reference. DEALER: This manual must
SMA1060 INSTRUCTIONS FOR SELF INSPECTION SMA1061 MANUAL INFLATION SMA1062 AUTO INFLATION
 SMA1060 INSTRUCTIONS FOR SELF INSPECTION SMA1061 MANUAL INFLATION SMA1062 AUTO INFLATION Table 1 CONTENTS VISUAL INSPECTION CHECKLIST PRIOR USAGE... 1 Serial Number Date Purchased Quarterly visual inspection
Underwater Housing for Canon G7X Mark II
 Underwater Housing for Canon G7X Mark II Product Number 6146.08 Product Registration Please register your product at ikelite.com within 15 days of purchase. Our product registration database is the best
Spray N Splash JUNGLE FUN POOL
 23188 Spray N Splash JUNGLE FUN POOL IMPORTANT SAFETY INSTRUCTIONS. PLEASE READ AND SAVE THESE INSTRUCTIONS BEFORE SETUP AND USE. KEEP THESE INSTRUCTIONS IN A SAFE PLACE FOR FUTURE REFERENCE. FOR AGES
Assembling & Installing your Pool Cleaner
 Assembling & Installing your Pool Cleaner STEP 1: Check Contents of the Box Remove the Badu Clean Supreme body and all parts from the box and check that the following components are included. Refer to
Owner s Instruction Manual
 Owner s Instruction Manual IMPORTANT! PLEASE READ THIS MANUAL CAREFULLY BEFORE PROCEEDING. AFTER READING THIS MANUAL, SAVE THESE INSTRUCTIONS FOR FUTURE REFERENCE. Congratulations on your purchase of the
WATER SLIDE. Limbo Beach
 84694 Limbo Beach WATER SLIDE IMPORTANT SAFETY INSTRUCTIONS. PLEASE READ AND SAVE THESE INSTRUCTIONS BEFORE SETUP AND USE. KEEP THESE INSTRUCTIONS IN A SAFE PLACE FOR FUTURE REFERENCE. FOR AGES 5-12 ADULT
Contents. Stainless Steel Side Block. 1.1 Separating the Side Block. Stainless Steel Side Block Reassembly of. Assembly from the Helmet Shell
 Separating the Side Block Assembly from the Helmet Shell Contents SSB-1 SSB-3 SSB-5 SSB-5 SSB-7 1.1 Separating the Side Block Assembly from the Helmet Shell 1.2 Side Block Assembly Replacement 1.3 Defogger
AR STYLE FIREARMS OWNER'S MANUAL: OPERATION, HANDLING, DISASSEMBLY / REASSEMBLY & SAFETY INSTRUCTIONS
 AR STYLE FIREARMS OWNER'S MANUAL: OPERATION, HANDLING, DISASSEMBLY / REASSEMBLY & SAFETY INSTRUCTIONS - DO NOT DISCARD THIS MANUAL - READ THIS MANUAL CAREFULLY, PAYING CLOSE ATTENTION TO THE INSTRUCTIONS
5 Gallon Pressure Pot with HVLP Spray Gun and Hose
 California Air Tools 5 Gallon Pressure Pot with HVLP Spray Gun and Hose Model No. 365 Technical Data Type of feed.pressure Maximum pressure in the tank... 0,413Mpa (60PSI) Working pressure in the tank.0,
GAS STRUT SAFETY INFORMATION
 VERSION 4.0 - PAGE 1 CONTENTS 1. SAFETY REQUIREMENTS 2. INSTALLATION 3. DO S AND DON TS 4. PERIODIC INSPECTION 5. SERVICE LIFE 6. FUNCTIONAL SAFETY 7. DAMAGED GAS STRUTS VERSION 4.0 - PAGE 2 SAFETY REQUIREMENTS
MAGNETIC INDOOR CYCLING BIKE
 MAGNETIC INDOOR CYCLING BIKE SF-B1805 USER MANUAL IMPORTANT! Please retain owner s manual for maintenance and adjustment instructions. Your satisfaction is very important to us, PLEASE DO NOT RETURN UNTIL
RG3100 and RG3100Ice Regulator System
 RG3100 and RG3100Ice Regulator System User Guide www.diverite.com Date of purchase: www.diverite.com RG1208-5 & RG1208-5Ice www.diverite.com First Stage Regulator Product Description The RG1208-5 and RG1208-5Ice
DM-RD (English) Dealer s Manual. ROAD Rear Derailleur RD-9000 RD-6800 RD-5800 RD-4700
 Dealer s Manual. ROAD Rear Derailleur RD-9000 RD-6800 RD-5800 RD-4700") (English) DM-RD0003-09 ROAD Rear Derailleur Dealer s Manual RD-9000 RD-6800 RD-5800 RD-4700 CONTENTS IMPORTANT NOTICE...3 TO ENSURE SAFETY...4 LIST OF TOOLS TO BE USED...6 INSTALLATION...8 Chain length...
(English) DM-RD0003-09 ROAD Rear Derailleur Dealer s Manual RD-9000 RD-6800 RD-5800 RD-4700 CONTENTS IMPORTANT NOTICE...3 TO ENSURE SAFETY...4 LIST OF TOOLS TO BE USED...6 INSTALLATION...8 Chain length...
Technical Service Bulletin June 2015 TSB122.06
 Technical Service Bulletin June 2015 TSB122.06 Element Loading Guidelines This bulletin provides general information and guidelines for installing Hydranautics elements in order to provide optimally reliable
VAC-U DRIVE Swinging float arm for Acrobat like agility 36 Fin disk with DEEP VEE Scoop
 ACROBAT Vac-U-Drive Automatic Pool Cleaner VAC-U DRIVE Swinging float arm for Acrobat like agility 36 Fin disk with DEEP VEE Scoop Proven technology:diaphragm driven strength & quietness Unique hose design
USER MANUAL. All rights reserved
 USER MANUAL All rights reserved Dear User, Congratulations on purchasing your PARKIS! PARKIS is a household equipment for vertical bicycle parking which lets you free up precious storage space on the floor
CREWFIT 165 SPORT. self care and maintenance manual
 CREWFIT 165 SPORT self care and maintenance manual Crewsaver lifejackets must be serviced by an accredited service AGENT every 3 years. Please print and read the self care and maintenance instructions
Pontoon Slide Owner s Manual
 Pontoon Slide Owner s Manual www.ravesports.com Table of Contents Introduction... 2 Safety rules and information... 3 Boat compatibility guide.5 Assembling and using your Pontoon Slide... 6 Cleaning and
Model 23H Hand Crank Seamer
 OPERATOR'S MANUAL Model 23H Hand Crank Seamer If you are not experienced with your seamer, please read and understand this manual before operating the machine. If you have a question discuss it with your
INSTRUCTIONS FOR THE CATALYST CASE FOR IPHONE 5/5S
 INSTRUCTIONS FOR THE CATALYST CASE FOR IPHONE 5/5S The Catalyst case is a waterproof, drop proof all weather case that allows you to utilize your iphone 5/5S in, around, and under water. This case has
BELT DRIVE INDOOR CYCLING BIKE SF-B1712 USER MANUAL
 BELT DRIVE INDOOR CYCLING BIKE SF-B1712 USER MANUAL IMPORTANT! Please retain owner s manual for maintenance and adjustment instructions. Your satisfaction is very important to us, PLEASE DO NOT RETURN
j i m m y s t y k s. c o m
 OWNERS GUIDE READ THIS INFORMATION BEFORE USING YOUR PUFFER INFLATABLE PADDLE BOARD TABLE OF CONTENTS DISREGARDING ANY OF THE SAFETY PRECAUTIONS AND INSTRUCTIONS CONTAINED IN THE OWNER S MANUAL AND/OR
Rapid Response Shelters. Rubber Product Manual
 Rapid Response Shelters Rubber Product Manual 1 Index Technical Data Parts List Materials List Operational Instructions Packing Maintenance & Procedures Repairs & Storage 3 4 5 6 8 10 11 WARNING: Carefully
BUTTERFLY VALVES Series 800
 BUTTERFLY VALVES Series 800 WARNING Before proceeding read ALL instructions and become familiar with the equipment and associated drawings. Follow ALL applicable safety regulations and codes for pressurized
OPERATIONS and SAFETY MANUAL
 OPERATIONS and SAFETY MANUAL LIFETIME WARRANTY SPECIAL SAFETY FEATURES: 1. Hook starts to open when device exceeds weight limit. 2. Latch Pops when weight is exceeded. At this point remove the load from
Thank you for choosing Xuma.
 WPC-150 WPC-160 Waterproof Pouch for iphone 6, iphone 6 Plus, and other Smartphones User Manual 1 Welcome Thank you for choosing Xuma. This Xuma Waterproof Pouch keeps your smartphone protected and dry
PRODUCT MANUAL TACTICAL AIRCREW DRY SUIT SYSTEM. FOR MODEL NUMBERS: MSF300 & MSF300vGB
 PRODUCT MANUAL TACTICAL AIRCREW DRY SUIT SYSTEM FOR MODEL NUMBERS: MSF300 & MSF300vGB TABLE OF CONTENTS SCOPE 2 PRODUCT DESCRIPTION AND FEATURES.. 2-3 SIZING. 4 WRIST SEAL FITTING NEOPRENE... 5-6 WRIST
DuPont Personal Protection Instruction Manual for Universal Pressure Test Kit No
 DuPont Personal Protection Instruction Manual for Universal Pressure Test Kit No. 990810 Effective: October 2006 BE SURE TO READ AND UNDERSTAND THESE INSTRUCTIONS BEFORE ATTEMPTING TO PERFORM AN INFLATION
Cleaning rod: spring steel, stainless steel or carbon fibre cleaning rod - only use a one-piece rod. Avoid using snakes.
 Telemark Biathlon Where performance and precision come together http://telemarkbiathlon.com Rifle Cleaning Date : July 19, 2013 Anschutz Rifle Manual - Click Here Izhmash 7-3 Rifle Manual - still looking
Operating Instructions and Parts Manual 24529
 Please read and save these instructions. Read through this owner s manual carefully before using product. Protect yourself and others by observing all safety information, warnings, and cautions. Failure
accidents which arise due to non-observance of these instructions and the safety information herein. SPECIFICATIONS
 18 GAUGE 1-1/4 INCH BRAD NAILER Model: 7611 CALIFORNIA PROPOSITION 65 WARNING: You can create dust when you cut, sand, drill or grind materials such as wood, paint, metal, concrete, cement, or other masonry.
IMPORTANT: RECEIVING INSTRUCTIONS:
 Instruction Sheet Sidewinder Mechanical Bender IMPORTANT: RECEIVING INSTRUCTIONS: Visually inspect all components for shipping damage. If any shipping damage is found, notify carrier at once.shipping damage
J800 HOPE BUOYANCY COMPENSATOR OWNER S MANUAL
 J800 HOPE BUOYANCY COMPENSATOR OWNER S MANUAL EN1809 0 www.istsports.com 1 0120 I. INTRODUCTION I. INTRODUCTION CONTENTS II. GENERAL WARNING AND CAUTION Definition of WARNING, CAUTION and ATTENTION III.
RAVE Inflatable Pool/Social Floats
 RAVE Inflatable Pool/Social Floats www.ravesports.com Thank you for purchasing this RAVE product. It has been designed and constructed to provide you and your family lasting memories of hours of exciting
LUBRICATOR ASSEMBLY AND OPERATING INSTRUCTIONS
 AIR FILTER, REGULATOR AND LUBRICATOR 4035 ASSEMBLY AND OPERATING INSTRUCTIONS 349 Mission Oaks Blvd., Camarillo, CA 930 Visit our Web site at http://www.harborfreight.com Copyright 004 by Harbor Freight
HELMETS SAVE LIVES!!! ALWAYS WEAR A PROPERLY FITTED HELMET WHEN YOU RIDE YOUR SCOOTER. DO NOT RIDE AT NIGHT. AVOID RIDING IN WET CONDITIONS.
 HELMETS SAVE CORRECT FITTING - MAKE SURE YOUR HELMET COVERS YOUR FOREHEAD. LIVES!!! ALWAYS WEAR A PROPERLY FITTED HELMET WHEN YOU RIDE YOUR SCOOTER. DO NOT RIDE AT NIGHT. AVOID RIDING IN WET CONDITIONS.
Assembly Drawing: W-311B-A01, or as applicable Parts List: W-311B-A01-1, or as applicable Special Tools: , , &
 REDQ Regulators Model 411B Barstock Design Powreactor Dome Regulator OPERATION AND MAINTENANCE Contents Scope..............................1 Installation..........................1 General Description....................1
ASSEMBLING INSTRUCTION - TRITON LADOGA 2 ADVANCED
 ASSEMBLING INSTRUCTION - TRITON LADOGA 2 ADVANCED Touring and sea kayak Assembly video: Assembling Instruction - Triton Ladoga 2 advanced Dear Customer, At first: please do not be alarmed by the extent
DIVATOR RS4 USER MANUAL
 DIVATOR RS4 USER MANUAL USER MANUAL HAZARD INDICATORS... 3 SAFETY NOTICE... 4 TECHNICAL DESCRIPTION... 5 PREPARING FOR USE... 9 PRE-DIVE PROCEDURES... 11 CHECKS DURING DIVING... 12 DIVING IN COLD WATER...
BUOYANCY COMPENSATOR DEVICE MANUAL
 INTRIGUE WS SPORTPAK H2Odysey USER / OWNER BUOYANCY COMPENSATOR DEVICE MANUAL DESCRIPTION INDEX PAGE INTRODUCTION #1 CAUTION #1 / #2 / #15 BCD USE and FUNCTION #3 FEATURES #4 CONSTRUCTION and MATERIALS
Underwater Housing for Panasonic Lumix DMC-ZS60, DMC-TZ80
 Underwater Housing for Panasonic Lumix DMC-ZS60, DMC-TZ80 Product Number 6170.60 Product Registration Please register your product at ikelite.com within 15 days of purchase. Our product registration database
Chapter 9 Accessories
 SuperLite 17B Chapter 9 Accessories 9.1 Introduction This section provides the manufacturer s advice on how to install KMDSI accessories including the Hot Water Shroud, Low Pressure Inflator Hoses, and
CRANKSET 1 - TECHNICAL SPECIFICATIONS 2 - COMPATIBILITY CHAIN LINE SIZE 53/39-55/42-54/42 BORA ULTRA. 11s BORA ULTRA CRANKSET
 BORA ULTRA 1 - TECHNICAL SPECIFICATIONS 53/39-55/42-54/42 BOLT CIRCLE DIAMETER CHAIN LINE MINIMUM CHAINSTAY LENGHT AXLE THREADS 1.1 - CHAIN LINE SIZE Chain line for double crankset (Fig, 1) LINEA CHAIN
AIR COMPRESSOR. Failure to follow all instructions as listed below may result in electrical shock, fire, and/or serious personal injury.
 2 GALLON AIR COMPRESSOR Model: 7517 DO NOT RETURN TO STORE. Please CALL 800-348-5004 for parts and service. CALIFORNIA PROPOSITION 65 WARNING: You can create dust when you cut, sand, drill or grind materials
G7S Hand Pump Owner s Manual
 G7S Hand Pump Owner s Manual Copyright Air Venturi 2018 Version 4-18 Specifications 24.80 inches long closed 43.31 inches long extended 4500 psi/310 bar max pressure Features Integral manometer (pressure
PETERSEN 161-SERIES HIGH PRESSURE LIFTING AIR BAGS OPERATING INSTRUCTIONS WARNING!
 PETERSEN 161-SERIES HIGH PRESSURE LIFTING AIR BAGS OPERATING INSTRUCTIONS WARNING! Read and understand instructions before using Petersen Plugs. Failure to comply may result in property damage, serious