USER MANUAL. you pedal, something amazing happens
|
|
|
- Elmer Pearson
- 5 years ago
- Views:
Transcription
1 TM USER MANUAL you pedal, something amazing happens


2 THANK YOU! In our humble beginnings we ran a bike-powered smoothie booth at Northern California music festivals called The Juice Pedaler. We saw the smiles and excitement as people jumped on our bike blender and poured their heart into a thick tangy smoothie. Now we re excited to have you joining our quest to spread the spirit of pedaling. contents sledgehammer box includes these parts: Pedaling to power an LED tower may seem like a small act, but for many people it ll be their first time giving energy back, which can open the door to many other personal choices that benefit their health and fitness and our environment. So thank you! And please keep us posted on your progress as you Rock The Bike! frame rear legs front crossbeam Yours, find rock the bike on Paul Freedman, Founder TABLE OF CONTENTS generator wheel seat & post handlebars Contents... 3 Anatomy and Components... 4 Assembly... 6 Usage Tips General Information tools 15mm Wrench 8, 6, 5 & 4mm Hex Keys bolts & washers x2 Rear Leg Bolts x2 Crossbar Bolts rectifier cable what you will need for TOOLS: 21mm Wrench, or Medium/Large Crescent Wrench, plus the included tools (see Contents, right) TIME: Allow minutes TEAM: 1 person, but 2 people works best Look for the screen icon around this manual for video tech tips on our website. right pedal In most cases, the LEFT pedal is already installed on the frame. circuit box STAND led panels 3


3 SLEDGEHAMMER ANATOMY AND COMPONENTS Frame Components 1. Stem 2. Grip 3. Bell 4. Handlebars 5. Light Tower 6. Generator Wheel 7. Circuit Box 8. Transport Wheel Socket 9. Leveling Feet 10. Front Crossbeam 11. Wheel Mounting Slot 12. Rectifier Cable 13. Chain 14. Pedal 15. Chain Guard 16. Chainring 17. Rear Legs 18. Seatpost Lever 19. Seatpost 20. Spring Guard 21. Saddle/Seat Moving the sledgehammer from one spot to another becomes as easy as pulling a rolling suitcase. Select from a set of two inflated rubber tires, or two heavy-duty rubber wheels. Both kits use quick-release axles for simple, secure connecting ROUND CONNECTOR big tooth thumb tab CONNECT TO circuit box RECTIFIER CABLE CONNECT TO GENERATOR WHEEL GENERATOR WHEEL 4 small tooth strain relief 7 5


. 2.")
4 CROSSBEAM ASSEMBLY 1. Place the frame on its side on a soft surface such as carpet or cardboard. 2. Using the smaller bolts and washers, connect the crossbeam to the frame, make sure the feet are facing down and the wheel sockets facing forward. 3. Tighten the bolts securely using the 6mm hex key. PEDALS 1. Identify the right side pedal by it s sticker or stamp, then install it into the right crank arm using the 15mm wrench. 2. Once the pedal is fully threaded into the crank arm, give it a good, hard turn to secure. Damage can occur if not tight. If the left pedal needs to be removed, rotate the threaded portion counter-clockwise. REAR LEGS 1. Turn frame back over on to crossbeam. 2. Align the holes in the rear legs with the holes through the frame. 3. Insert the larger set of bolts, tighten each four turns to make sure the threads are in place. 4. Firmly tighten the bolts with the 8mm hex key. SEATPOST 1. Open the seatpost lever, and Insert the seatpost (a). 2. Align the seatpost groove with the machine screw on the back of the seat tube (b). 3. Tighten the screw as much as possible with your fingers, making sure that the screw is in the groove. 4. Finish tightening the screw with the 5mm hex key (c). (a) (b) (c) 6 see included coaching card for seat HEIGHT tips 7
. 3.")
, lift the wheel and slide the axle into the wheel mounting slots.")
. Firmly hold the wheel in position and have a friend tighten the axle nuts with a wrench.")


 If your chain got tangled during shipping, see how to detangle it at: rockthebike.com/troubleshooting-tips. 2.")
5 GENERATOR WHEEL 1. Place the Generator Wheel inside the frame behind the wheel mounting slots. With the wheel s cog on the same side as the chain ring, loop the chain over the chain ring and the cog (a). 3. The Generator wheel is heavy, so it helps to have a friend for this step. Noting the position of the anti-rotate washers (b), lift the wheel and slide the axle into the wheel mounting slots. Pull the wheel towards you and while holding the chain taught, adjust the wheel so it is straight and aligned with frame (c). Firmly hold the wheel in position and have a friend tighten the axle nuts with a wrench. People will be pedaling hard, so push down to tighten them hard. 4. Check chain tension by rotating the pedals backwards a few turns. If there is a tight spot in the rotation, loosen the skewer and move the wheel backwards so the chain is taught as possible without causing a tight spot in the rotation. If the chain is loose and sagging, loosen the nuts and pull the wheel forward. (a) If your chain got tangled during shipping, see how to detangle it at: rockthebike.com/troubleshooting-tips. 2. The Generator Wheel has an axle with flat sides and toothed washers. Rotate the wheel until the flats align with the wheel mounting slots, and the output wire faces forward. Loosen the nuts to the end of the axle by rotating them counterclockwise, then move the tooth washers out to the nuts. 8 (b) (c) 9


. 2.")
 (b) Don t tighten the screws all the way yet. 3.")

. 3.")
.")
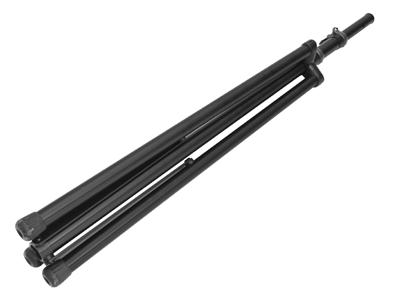
6 HANDLEBARS AND STEM 1. Unscrew and keep all four screws in stem plate then place the handlebars in the round hole of the stem. STAND 1. Loosen the lower leg collar by turning the knob counterclockwise. 2. Turn the stand upside down and open the legs (a). Set the stand upright, and slide the collar to adjust leg width (b). 2. With the bars centered start by tightening each bolt two turns using the 6mm hex key. (a) (b) Don t tighten the screws all the way yet. 3. Once the bolts are tight enough to hold the handlebars, adjust the bars so their grips are parallel to the ground. 4. Finish by firmly tightening all six bolts (two stem side bolts and four stem plate bolts). 3. Position the braces level to the ground for maximum stability (c). 4. Tighten the knob enough to fix the legs in place, but do not over-tighten (d). SAFETY CHECK Look for an equal gap on the top and bottom part of stem. If the gap is not equal on both sides go back to step 2. (c) braces (d) Test your handlebars by trying to move them up/down and left/right. If they move, realign them and tighten the bolts


7 LED PANELS LED panels attach to the stand with a rubber block and velcro strap. Loop the strap around the pole and through its rectangular ring. Pull the strap TIGHT, looping it back on itself to secure. 3. Attach the matching 3-pin cables of the green and blue panels. Note: Your connectors may look different than those pictured. 1. Attach the green panel to the top of the pole, with its 3-pin cable pointing down. Position the panel in between the two legs that face away from the hand knobs. 2. Loosen the top collar and raise the pole enough to attach the blue panel, then re-tighten it. Position that panel with its matching 3-pin cable pointing up. Align both panels, connect the velcro flap, then secure the rubber block and velcro strap. 4. Loosen the top collar and raise the pole until it stops. Make sure the panels are still aligned between the tripod legs, and away from the collar knob. Re-tighten top collar. 5. Position the red panel with its 5-pin cable pointing up. Align the red and blue panels, and connect their velcro attachments to fix them in place. 6. Attach the matching 5-pin connectors of the blue and red panels. All panels should now be aligned between the two legs, with the red panel angled slightly out. 12 For additional height, loosen the bottom collar and raise the pole so that its braces point up. But be aware, this will decrease stability! 13


8 CONNECT TO circuit box RECTIFIER CABLE usage TIPS CONNECTING GENERATOR WHEEL The Rectifier Cable connects the Generator Wheel to the circuit box. CONNECT TO GENERATOR WHEEL ROUND CONNECTOR big tooth thumb tab usage TIPS CONNECTING TOWER On the left side of the circuit box is a larger silver socket labeled LED Tower. Attach the cable on the red panel by inserting the large round connector with a push-and-twist motion. LED TOWER SOCKET small tooth strain relief 1. Join the cables flat connectors. If they don t snap in, flip one side over and retry. 2. On the right side of the circuit box is a black socket labeled Bike Input. Insert the round connector with a push-and-twist motion. GENERATOR WHEEL BIKE INPUT SOCKET HOW TO DISCONNECT THE ROUND CONNECTOR: 1. Slide the thumb tab back toward the cable. 2. Twist the connector 1/8 of a turn counter-clockwise, then pull. Don t unscrew the blue strain relief. Twist the whole connector, not just the blue part TESTING THE SYSTEM An adjustable difficulty knob controls the five levels of resistence. Easier modes offer less resistence, require less effort, and cannot light the halogen bulbs on top of the green panel. Harder modes can light the bulbs, and will challenge even strong cyclists. 1. Turn the difficulty knob to its easiest setting. 2. Get on the bike and pedal gently at first, then increase speed. As you pedal vigorously, a small light inside the circuit box will turn on. Next, the red panel will light up, followed by blue and green. 3. Light up all three stages and maintain them for a few seconds. The panels will flash in sequence to indiate a win on easy mode. 4. As the circuit resets following this win, all LED panels and halogen bulbs should light up. Watch to see that all lights are in working order
9 TROUBLESHOOTING Seat angle slips out of adjustment: Seat should be level when viewed from the side, and have no play in the under-seat-clamp. If it needs adjustment, open the seatpost lever, slide the post up to a high position for better access, and close the lever. Using a 6mm hex key, loosen the upwards facing bolt in the under-seat-clamp, adjust the seat to level and very firmly re-tighten the bolt. Chain falls off chainring: If the chain appears to be loose, see page 8 to adjust chain tension. If you re having problems call Tech Support at (10am-5pm PST M-F) SAFETY SPECS general INFORMATION Use the sledgehammer tower and Generator Pro on a level surface. Do not use this product in the rain, snow, or other wet conditions that could cause damage to you or your Rock the Bike product. Children should be supervised when using this product. Avoid contact with moving parts. This includes, but is not limited to: fingers, hands, toes, feet, hair, clothing, and shoes. Never operate the sledgehammer if the generator wheel, Pro frame, tower, or LED panels appear damaged. Call Tech Support at for assistance. Assembled Dimensions (Bike): 56 long, 39 tall, 31 wide Assembled Weight (Bike): 60 lbs Assembled Dimensions (Tower): 126 tall, 62 diameter at base Assembled Weight (Tower): 35 lbs Max. Rider Weight: 220 lbs Min. Rider Leg Length: 23 inseam (roughly 7 years old) Use: Household, Educational or Commercial Manufacturer: Rock the Bike - Oakland, CA USA TRANSPORTATION Whether you re going to a classroom down the hall or a trade show across the country, Rock the Bike has a helpful accessory or tip: Walkable: Easy Rolling Transport Wheels clip into your wheel socket to help you roll the bike around effortlessly. Best used on even ground. Bikeable: The Pro Trailer Kit slides into your wheel sockets to allow towing behind your bicycle; the truest and most impressive way to express your passion for human power. Drivable: You can load your bike into a vehicle or mount it onto the rear of your vehicle with a bike rack. For pictures and details see: rockthebike.com/transport-vehicle. Longer Distances: You can repack and ship your Fender Blender Pro in the same box you received it. Our Pro Shipping Sleeves padding will protect your frame during shipping, and has dedicated pockets for small parts like bolts and screws. We recommend shipping assembled Fender Blender Pros on a pallet with a freight carrier. Transit accessories are available for purchase on our website: rockthebike.com/store/46-transit-accessories STORAGE Store in a cool, dry place, away from direct sunlight. WARRANTY general information Rock the Bike products come with a 2-year warranty against manufacturing defects. This warranty does not cover damage due to wear and tear, loss, overloading, misuse, abuse, incorrect, incorrect use, or anything else beyond Rock the Bike s direct control. The warranty is valid for the original owner, for purchases from an approved distributor or dealer. The use of an unauthorized attachments may cause injury or damage and will void the warranty
10 the game GAMEPLAY It is important that each rider knows the goal of the game and the strategy to win. If they try but don t know how to win, they may be frustrated when they could have been a winner. RULES Pedal! You will soon see lights begin to climb in the light tower. The energy powering those lights is your leg power! The harder you pedal, the higher the lights will climb in the tower. But as more of these light panels turn on, it gets harder and harder to get to the next level. If you succeed in getting the lights all the way to the top and then sustain that light level for a solid 3 seconds, you ll win! A win is announced by a bottom to top chase sequence that is distinctly different from regular game play. After the win sequence, all lights turn on for a few moments then off. When this happens, the game is over. Stop pedaling. This is the game resetting itself. STRATEGY This is not a sustained effort. This is a short intense sprint. Don t drag it out! Go for the win immediately. DIFFICULTY KNOB The all-important difficulty knob on the circuit box sets how hard people have to try to win. The harder section makes you have to illuminate 100 extra Watts of halogens (inside the aluminum box at the top of the tower). Challenging for most riders! 18 19
11 TM Rock the Bike 6323 San Pablo Ave. Oakland, CA BIKE (2453) fax
USER MANUAL. you pedal, something amazing happens
 TM USER MANUAL you pedal, something amazing happens THANK YOU! In our humble beginnings we ran a bike-powered smoothie booth at Northern California music festivals called The Juice Pedaler. We saw the
Final Assembly Instructions Bikes with Quill Stems
 Final Assembly Instructions Bikes with Quill Stems Thank you for buying your new bicycle from L.L.Bean. Read these instructions carefully before beginning the final assembly. Prior to shipping, our expert
USER S MANUAL QUESTIONS? CAUTION. Model No. FMEX Serial No. Write the serial number in the space above for reference. Serial Number Decal
 Model No. FMEX81110.0 Serial No. Write the serial number in the space above for reference. USER S MANUAL Serial Number Decal QUESTIONS? If you have questions, or if parts are damaged or missing, please
Final Assembly Instructions Bikes with Threaded Headsets
 Final Assembly Instructions Bikes with Threaded Headsets Thank you for buying your new bicycle from L.L.Bean. Read these instructions carefully before beginning the final assembly. Prior to shipping, our
comfort without compromising on performance and to fit your various needs on touring,
 Congratulations on your purchase of Goal-26X. Goal-26X is made to enhance comfort without compromising on performance and to fit your various needs on touring, shopping and communicating. Let s have fun
7130 Lancer Rear Drive Magnetic Commercial Indoor Cycling Bike
 7130 Lancer Rear Drive Magnetic Commercial Indoor Cycling Bike Owner s Manual Made in Taiwan INDEX IMPORTANT SAFETY INFORMATION... 1 EXPLODED DRAWING... 2 PARTS LIST... 3 ASSEMBLY INSTRUCTION... 4-9 USER
FIRST TEAM SPORTS, INC Storm Portable Series Assembly Instructions
 FIRST TEAM SPORTS, INC Storm Portable Series Assembly Instructions WARNING! WARNING! WARNING! THIS BASKETBALL SYSTEM IS SPRING LOADED AND SHIPPED UNDER TENSION. ATTEMPTING TO ASSEMBLE OR DISASSEMBLE ANY
TRAILMATE METEOR ASSEMBLY MANUAL
 TRAILMATE METEOR ASSEMBLY MANUAL (DISC BRAKE VERSION) The Trailmate Meteor recumbent has been designed for easy assembly. This means more time to enjoy the smooth ride with single speed, 3 speed coaster
EZee Glider Manual. Tools needed for Assembly: Wrench (included) Philips Screwdriver (not included) Assembly Instructions
 Philips Screwdriver (not included) Assembly Instructions") EZee Glider Manual Congratulations on your purchase of the EZee Glider! Your glider is designed for years of nearly carefree use by your child. These instructions include how to set up your glider and
EZee Glider Manual Congratulations on your purchase of the EZee Glider! Your glider is designed for years of nearly carefree use by your child. These instructions include how to set up your glider and
INDOOR CYCLING BIKE SF-B1110 USER MANUAL
 INDOOR CYCLING BIKE SF-B1110 USER MANUAL IMPORTANT! Read all instructions carefully before using this product. Retain owner s manual for future reference. For customer service, please contact: support@sunnyhealthfitness.com
Congratulations on your purchase of a JC Series Performer trike! The Performer JC Series is designed for everything from touring to commuting and
 Congratulations on your purchase of a JC Series Performer trike! The Performer JC Series is designed for everything from touring to commuting and shopping in the city. The JC Series frames are made of
BELT DRIVE INDOOR CYCLING BIKE SF-B1712
 BELT DRIVE INDOOR CYCLING BIKE SF-B1712 USER MANUAL IMPORTANT! Read all instructions carefully before using this product. Retain owner s manual for future reference. For customer service, please contact:
Final Assembly Instructions Bikes with Threaded Headsets
 Final Assembly Instructions Bikes with Threaded Headsets Thank you for buying your new bicycle from L.L.Bean. Read these instructions carefully before beginning the final assembly. Prior to shipping, our
BICYCLE ASSEMBLY INSTRUCTIONS. dutchcycles.com.au. Distribution Centre
 BICYCLE ASSEMBLY INSTRUCTIONS dutchcycles.com.au Distribution Centre Shed 68, 400-422 Somerville Road, Tottenham, VIC 3012 email: service@dutchcycles.com.au BICYCLE COMPONENTS KEY INTRODUCTION CONGRATULATIONS
Final Assembly Instructions Bikes with 16 Wheel Size
 Final Assembly Instructions Bikes with 16 Wheel Size Thank you for buying your new bicycle from L.L.Bean. Read these instructions carefully before beginning the final assembly. Prior to shipping, our expert
MAGNETIC INDOOR CYCLING BIKE
 MAGNETIC INDOOR CYCLING BIKE SF-B1805 USER MANUAL IMPORTANT! Please retain owner s manual for maintenance and adjustment instructions. Your satisfaction is very important to us, PLEASE DO NOT RETURN UNTIL
HOME ASSEMBLY INSTRUCTIONS
 HOME ASSEMBLY INSTRUCTIONS This Papillionaire Bicycle now belongs to you. It will take you to work, wait patiently outside your local cafe, and carry your groceries home. This is the start of your long-term
MODEL: FIXIE / TRACK
 STEP BY STEP BUILD GUIDE MODEL: FIXIE / TRACK TABLE O F CON TENTS TOOLS 1 LET S GET STARTED 2 INSTALLING THE HANDLEBAR 3 INSTALLING THE FRONT WHEEL 4 ALIGNING THE STEM 5 INSTALLING THE SEATPOST 6 OPTIMIZING
CRUZBIKE Quest 2.0 Assembly
 CRUZBIKE Quest 2.0 Assembly CRUZBIKE Quest 2.0 Assembly... 1 General notes on assembly... 2 Un box and evaluate the frame and major parts... 2 Unfold the rear swing arm and arrange the frame... 3 Rear
Ladies Shopper Bike Assembly Manual 28C03
 Ladies Shopper Bike Assembly Manual 28C03 Ecosmo Ltd 1 Know your bike 1. Wheel 2. Rear Derailleur 3. Chain 4. Crank Set 5. Pedal 6. Seat Quick Lock 7. Saddle and Post 8. Frame 9. Front Light 10. Front
Santa Fe Cycles Assembly Guide Introduction
 Santa Fe Cycles Assembly Guide Introduction Congratulations on your purchase of your new Santa Fe bicycle. You have purchased a bicycle that has many features and qualities. Please take a few minutes and
E-trike Li Assembly Guide
 PREPARATION 1. Read this assembly manual BEFORE commencing assembly. 2. Carefully remove all the components and packaged hardware from the shipping boxes. 3. Unpack the contents of the large double box
Parts List. 7. Handlebars 8. Grips 9. Handlebar Stem 10. Front Brake 11. Front Wheel 12. Crank 13. Chain
 Woodworm Cruise Parts List 1. Free Wheel with Rear Hub 2. Fenders 3. Fender Stay 4. Quick Release 5. Saddle 6. Seat Post 7. Handlebars 8. Grips 9. Handlebar Stem 10. Front Brake 11. Front Wheel 12. Crank
Thank you for purchasing the Hollander II Bike from Made.com
 Thank you for purchasing the Hollander II Bike from Made.com Please take time to identify the hardware as well as the individual components of this product. As you unpack and prepare for assembly, place
Mini Glider Manual. Your Glider comes partially assembled. The front wheel and the handlebars require assembly.
 Mini Glider Manual Congratulations on your purchase of the Mini Glider! Your glider is designed for years of nearly carefree use by your child. These instructions include how to set up your glider and
Assembly Tools. Assembly will take 1-2 hours
 Assembly Tools Included in your parts box: Pedals Quick release skewer Reflectors (if not already installed) Toolkit (4+5mm combo Allen wrench, 13+15mm combo open-end wrench) Helpful Tools: Scissors (for
Parts: Included in the parts box: Inner Rear Tire Tray. Inner Front Tire Tray. Trail Doc Clamp. Pivot Assembly. Trail Doc Post.
 NV 2.0 2 Parts: Outer Front Tire Tray Inner Front Tire Tray Outer Rear Tire Tray Inner Rear Tire Tray Pivot Assembly Trail Doc Clamp Trail Doc Post Included in the parts box: 6mm Allen Wrench M6 Lock Washer
Thank you for purchasing a WIKE BOX BIKE!
 Thank you for purchasing a WIKE BOX BIKE! Contents Safety.....3 Front wheel.4 Kickstand..5 Handle Bar & Box 6 Seat post and Saddle 7 Final pre-ride check 8 Tools needed to assemble Bike: -High table or
INSTALLATION INSTRUCTIONS
 KIT CONTENTS: INSTALLATION INSTRUCTIONS PART NUMBER: DESCRIPTION: E361SXA302 roof MOUNT BICycle CARRIER SINGLE Short Carriage Bolt 1x Long Carriage Bolt 3x Over-Molded Wrench 1x Button Head Screw 2x Washer
Assembly Tools. Assembly will take about an hour
 Assembly Guide Assembly Tools Included in your parts box: Pedals Toolkit (4+5mm combo Allen wrench, 13+15mm combo open-end wrench) Touch-up paint Spare fuses (for battery) Assembly will take about an hour
To save this document, scroll up and select the download icon
 Thank you for purchasing a RustySpokes Softcruise. We know you are going to enjoy the bike, but if you had it shipped to you, there are a few things you need to do to assemble the bike. The seat, pedals
INSTALLATION INSTRUCTIONS
 INSTALLATION INSTRUCTIONS KIT CONTENTS: PART NUMBER: DESCRIPTION: E361SXA300 ROOF MOUNT BICYCLE CARRIER B9 TRIBECA Short Carriage Bolt Long Carriage Bolt 3x Over-Molded Wrench Button Head Screw 2x Washer
Have questions? Chat with us live at raleighusa.com or call us at , 8am 5pm PST
 1 2 Have questions? Chat with us live at raleighusa.com or call us at 1-800-251-8435, 8am 5pm PST The bicycle you have purchased is a complex piece of equipment that must be properly assembled and maintained
Helios Separable Tandem Manual
 Helios Separable Tandem Manual This manual accompanies the Helios owners manual Introduction The separable kit fitted to your Helios tandem allows for even greater flexibility in the way you can enjoy
HELMETS SAVE LIVES!!! ALWAYS WEAR A PROPERLY FITTED HELMET WHEN YOU RIDE YOUR SCOOTER. DO NOT RIDE AT NIGHT. AVOID RIDING IN WET CONDITIONS.
 HELMETS SAVE CORRECT FITTING - MAKE SURE YOUR HELMET COVERS YOUR FOREHEAD. LIVES!!! ALWAYS WEAR A PROPERLY FITTED HELMET WHEN YOU RIDE YOUR SCOOTER. DO NOT RIDE AT NIGHT. AVOID RIDING IN WET CONDITIONS.
BackCountry ebikes 2019 MULE Assembly
 BackCountry ebikes 2019 MULE Assembly Required Tools: Cutting Pliers (to cut box poly strapping and heavy bike banding) Scissors (to remove bubble wrap) Allen wrenches (3mm, 4mm, 5mm, 6mm) Wrenches (10mm,
T-016 ASSEMBLY MANUAL MODEL ROCK AND ROLL Main Street NE Minneapolis, MN
 MODEL T-016 ASSEMBLY MANUAL ROCK AND ROLL 5280 Main Street NE Minneapolis, MN 55421 1.877.226.7824 www.kurtkinetic.com COMPONENTS Tools Required for Assembly: 17mm Wrench or Adjustable Wrench When unpacking,
Have questions? Chat with us live at raleighusa.com or call us at , 8am 5pm PST
 1 2 Have questions? Chat with us live at raleighusa.com or call us at 1-800-251-8435, 8am 5pm PST The bicycle you have purchased is a complex piece of equipment that must be properly assembled and maintained
Have questions? Chat with us live at raleighusa.com or call us at , 8am 5pm PST
 1 2 Have questions? Chat with us live at raleighusa.com or call us at 1-800-251-8435, 8am 5pm PST The bicycle you have purchased is a complex piece of equipment that must be properly assembled and maintained
CLASS CYCLE P8000 OWNER'S MANUAL JOHNSON HEALTH TECH. CO., LTD.
 CLASS CYCLE P8000 JOHNSON HEALTH TECH. CO., LTD. No.26, Ching Chuan Rd., Taya Hsiang, Taichung Hsien 428, Taiwan, R.O.C. TEL: +886-4-2566700 FAX: +886-4-2560087 E-mail: sales@johnsonfitness.com http://www.johnsonfitness.com
SPINNER RIDE GETTING STARTED GUIDE. Welcome to a personalized fitness experience for your members
 This addendum accompanies your equipment documentation and is additional information concerning the heart rate features for your equipment and console. Important The heart rate feature is intended for
HoldUp Plus2. Safety Kit included: See additional instructions for installation. REAR WHEEL TRAY. BASE (1x) lock WASHER (1x) KEY (2x) SAFETY CLIP (1x)
 lock WASHER (1x) KEY (2x) SAFETY CLIP (1x)") HoldUp Plus2 InsTAll This product on 2" hitch version of the HoldUp Front WHEEL TRAY assembly (1x) REAR WHEEL TRAY assembly (1x) wrench (1x) BASE (1x) bolt (8X) Lock WASHER (8X) Washer (8x) KEY (2x) SAFETY
HoldUp Plus2 InsTAll This product on 2" hitch version of the HoldUp Front WHEEL TRAY assembly (1x) REAR WHEEL TRAY assembly (1x) wrench (1x) BASE (1x) bolt (8X) Lock WASHER (8X) Washer (8x) KEY (2x) SAFETY
#59114 Rola 2-Bike Rack Carrier (Shown Assembled) (A) (C) (B)
 (A) (C) (B)") Use for Parts: #59114 Rola -Bike Rack System #59115 Rola 1-Bike Add-On TOOLS REQUIRED 10mm or 13/3 Socket & Wrench #59114 Rola -Bike Rack Carrier (Shown Assembled) Tray Attachment Hardware: (3) Plastic
Use for Parts: #59114 Rola -Bike Rack System #59115 Rola 1-Bike Add-On TOOLS REQUIRED 10mm or 13/3 Socket & Wrench #59114 Rola -Bike Rack Carrier (Shown Assembled) Tray Attachment Hardware: (3) Plastic
Drive Belt Instructions
 Drive Belt Safety Do not roll, pry, twist, invert or bend the belt back on itself. Do not zip tie the belt. The acceptable temperature range for your belt drive is -53 C to 85 C. Do not lubricate the belt
RS Important Notes. Contact. Bicycle Maintenance Stand instructions manual. Warranty Period : 1 year (from the date of your purchase)
") Warranty Period : 1 year (from the date of your purchase) RS-1700 Bicycle Maintenance Stand instructions manual (ver.1.2 2016/12) For more details, read the attached "Minoura Limited Warranty Policy" card.
Warranty Period : 1 year (from the date of your purchase) RS-1700 Bicycle Maintenance Stand instructions manual (ver.1.2 2016/12) For more details, read the attached "Minoura Limited Warranty Policy" card.
BELT DRIVE INDOOR CYCLING BIKE SF-B1712 USER MANUAL
 BELT DRIVE INDOOR CYCLING BIKE SF-B1712 USER MANUAL IMPORTANT! Please retain owner s manual for maintenance and adjustment instructions. Your satisfaction is very important to us, PLEASE DO NOT RETURN
Folding Dual Suspension MTB. Instruction Manual
 Folding Dual Suspension MTB Instruction Manual Introduction The Stowabike Folding MTB has been made to last and with proper maintenance, it will give you years of enjoyable rides and journeys. The following
SANTANA STOWAWAY TANDEM WITH AIRLINER SAFECASE AND FTS FOAM TRAY SYSTEM ASSEMBLY AND DISASSEMBLY
 SANTANA STOWAWAY TANDEM WITH AIRLINER SAFECASE AND FTS FOAM TRAY SYSTEM ASSEMBLY AND DISASSEMBLY Congratulations! You are now the proud owner of the world s most travel-ready, performance tandem. The following
UNPACKING AND ASSEMBLING YOUR DIAMONDBACK ROAD BIKE
 EMAIL SIGNUP BIKE REG SEARCH BIKES THE RIDE HEALTH FITNESS SKILLS SHOP MAINTENANCE CYCLING 101 RIDERS LIKE YOU TEAMS SUPPORT UNPACKING AND ASSEMBLING YOUR DIAMONDBACK ROAD BIKE 1. Begin by carefully cutting
ASSEMBLY GUIDE: Izip & Ezip Electric Bicycles with Rack-Top Mounted Batteries ( RTMB Bicycles )
") ASSEMBLY GUIDE: Izip & Ezip Electric Bicycles with Rack-Top Mounted Batteries ( RTMB Bicycles ) Please Refer to your Owner s Manual for Detailed Setup Instructions Technical & Customer Service: 1-800-377-4532
ASSEMBLY GUIDE: Izip & Ezip Electric Bicycles with Rack-Top Mounted Batteries ( RTMB Bicycles ) Please Refer to your Owner s Manual for Detailed Setup Instructions Technical & Customer Service: 1-800-377-4532
LITERIDER 2&3 IMPORTANT WARNING. 2Bike (1x) Bolt (1x) Nut (1x) Small Hex Wrench (1x)
 Bolt (1x) Nut (1x) Small Hex Wrench (1x)") LITERIDER 2&3 3 Bike (1x) Bolt (1x) Flat Washer (2x) Nut (1x) Large Hex Wrench (1x) 2Bike (1x) wrench (1x) Small Hex Wrench (1x) keys (2x) Long Strap (1x) 2-Zip Strips (6x) 3-Zip Strips (9x) Wheel strap
LITERIDER 2&3 3 Bike (1x) Bolt (1x) Flat Washer (2x) Nut (1x) Large Hex Wrench (1x) 2Bike (1x) wrench (1x) Small Hex Wrench (1x) keys (2x) Long Strap (1x) 2-Zip Strips (6x) 3-Zip Strips (9x) Wheel strap
Important Note: Tighten lock nuts so the support tubes still swing freely see figure 2. There must be 1 2 threads of bolt past end of lock nuts.
 Kit Contents: DESCRIPTION QTY. DESCRIPTION QTY. 2 Shank Assembly 1 Support Tube Assembly 1 Side Tube - Short 2 1-1/4 Shank 1 Center Tube - Long 1 3/8-16 x 2.0 Carriage Bolt 2 5/16-18 x 2.25 Carriage Bolt
OWNER'S MANUAL. Copyright 1999 ATS - All Rights Reserved
 OWNER'S MANUAL AL Issue 2 - August 19, 1999 Copyright 1999 ATS - All Rights Reserved OWNER'S MANUAL TABLE OF CONTENTS PAGE 1... WARRANTY PAGE 2... ASSEMBLY INSTRUCTIONS PAGE 4... MOUNTING THE RACQUET PAGE
Bicycle Owner's Manual Easy Access Bike
 Bicycle Owner's Manual Easy Access Bike AGE: FROM 9 YEARS OLD AND UP IMPORTANT Check bike after assembly or any adjustments. Consult bicycle retailer with questions. Always wear a helmet. Children should
BELT DRIVE PREMIUM INDOOR CYCLING BIKE SF-B1509 USER MANUAL
 BELT DRIVE PREMIUM INDOOR CYCLING BIKE SF-B1509 USER MANUAL IMPORTANT! Please retain owner s manual for maintenance and adjustment instructions. Your satisfaction is very important to us, PLEASE DO NOT
DM-FD (English) Dealer's Manual. Front derailleur FD-M9000 FD-M9020 FD-M9025 FD-M8000 FD-M8020 FD-M8025 FD-M612 FD-M617 FD-M618 FD-M672
 Dealer's Manual. Front derailleur FD-M9000 FD-M9020 FD-M9025 FD-M8000 FD-M8020 FD-M8025 FD-M612 FD-M617 FD-M618 FD-M672") (English) DM-FD0003-04 Front derailleur Dealer's Manual FD-M9000 FD-M9020 FD-M9025 FD-M8000 FD-M8020 FD-M8025 FD-M612 FD-M617 FD-M618 FD-M672 FD-M677 CONTENTS IMPORTANT NOTICE... 3 TO ENSURE SAFETY...
(English) DM-FD0003-04 Front derailleur Dealer's Manual FD-M9000 FD-M9020 FD-M9025 FD-M8000 FD-M8020 FD-M8025 FD-M612 FD-M617 FD-M618 FD-M672 FD-M677 CONTENTS IMPORTANT NOTICE... 3 TO ENSURE SAFETY...
Assembly Instructions And User Guide
 EZ-1/EZ-CLASSIC QUADRIBENT By Blackbird Designs Inc. Mark 5.2 June 2011 Assembly Instructions And User Guide 1 The Quadribent is 2-seat, side-by-side, human powered vehicle that enables almost anyone to
222 Schwinn Recumbent Exercise Bike Parts List Full Size Hardware Chart Product Illustration Assembly Instructions
 222 Schwinn Recumbent Exercise Bike Parts List Full Size Hardware Chart Product Illustration Assembly Instructions FITNESS SAFEGUARDS AND WARNINGS Before starting any exercise program, consult with your
Front derailleur. Dealer's Manual FD-M9000 FD-M9020 FD-M9025 FD-M8000 FD-M8020 FD-M8025 FD-M612 FD-M617 FD-M618 FD-M672 FD-M677
 (English) DM-FD0003-05 Front derailleur Dealer's Manual FD-M9000 FD-M9020 FD-M9025 FD-M8000 FD-M8020 FD-M8025 FD-M612 FD-M617 FD-M618 FD-M672 FD-M677 CONTENTS IMPORTANT NOTICE... 4 TO ENSURE SAFETY...
OWNER'S MANUAL. Copyright 2003 GAMMA - All Rights Reserved
 OWNER'S MANUAL AL Issue 1 - December 2003 Copyright 2003 GAMMA - All Rights Reserved OWNER'S MANUAL TABLE OF CONTENTS PAGE 1... WARRANTY PAGE 2... ASSEMBLY INSTRUCTIONS PAGE 4... MOUNTING THE RACQUET PAGE
600 / 600FC OWNER'S MANUAL
 PROGRESSION 600 / 600FC OWNER'S MANUAL Issue 2 / Version E - Dec. 10, 1997 Copyright 1997 GAMMA Sports - All Rights Reserved PROGRESSION 600 / 600FC OWNER'S MANUAL TABLE OF CONTENTS PAGE 1... WARRANTY
VERSA BIKE RACK INSTRUCTIONS
 VERSA BIKE RACK INSTRUCTIONS Models #8, 8 Important This rack is designed for use with a or. receiver hitch. The rack is designed to hold a maximum of two bicycles. Do not use it for anything other than
ASSEMBLY GUIDE AROUND THE BLOCK - 1, 3, 7, & 21 SPEED SIXTHREEZERO
 ASSEMBLY GUIDE AROUND THE BLOCK - 1, 3, 7, & 21 SPEED SIXTHREEZERO OUR COMMITMENT We want you to love your bike as much as we do. If you run into any issues, no matter how small, let us know and we ll
MODEL: COMMUTER / ROAD BIKE
 STEP BY STEP BUILD GUIDE MODEL: COMMUTER / ROAD BIKE TABLE OF CONTENTS TOOLS 1 LET S GET STARTED 2 INSTALLING THE QUILL STEM 3 INSTALLING THE FRONT FENDER 4 INSTALLING THE QUICK RELEASE 5 INSTALLING THE
INSTALLATION INSTRUCTIONS. Parts List. Tools Required. Before You Begin. Installation. Customer Information BICYCLE ATTACHMENT JUL.
 INSTALLATION INSTRUCTIONS JUL. 2006 Parts List Bicycle attachment Key plates (2) Tools Required Phillips screwdriver Flat-tip screwdriver Before You Begin Customer Information This Bicycle Attachment is
Lectric Cycles Mid-Drive Electric Motor Installation
 Lectric Cycles Mid-Drive Electric Motor Installation This write-up describes the installation of a Lectric Cycles electric motor. The model is the e-rad Mid-Drive 750 Watt conversion kit, installed on
Indoor Bike Trainer. [Applicable Wheel Size] 650c 700c inch [Applicable Wheebase Size] 930 1,200mm. Caution. Contact MADE IN JAPAN
![Indoor Bike Trainer. [Applicable Wheel Size] 650c 700c inch [Applicable Wheebase Size] 930 1,200mm. Caution. Contact MADE IN JAPAN](/thumbs/88/115234993.jpg "Indoor Bike Trainer. [Applicable Wheel Size] 650c 700c inch [Applicable Wheebase Size] 930 1,200mm. Caution. Contact MADE IN JAPAN") Indoor Bike Trainer (ver.1.1 2016/12) [Applicable Wheel Size] 650c 700c 26 29 inch [Applicable Wheebase Size] 930 1,200mm (Shown with 700c road bike) Caution Contact This trainer is designed for use only
Indoor Bike Trainer (ver.1.1 2016/12) [Applicable Wheel Size] 650c 700c 26 29 inch [Applicable Wheebase Size] 930 1,200mm (Shown with 700c road bike) Caution Contact This trainer is designed for use only
Read Instructions carefully before use. Rollator is designed for indoor & outdoor use. Do NOT use as a wheelchair or as a transport chair.
 Charcoal Red Seat Height 500-10191 500-10195 19 500-10211 500-10215 21 500-10241 500-10245 24 User Manual Read Instructions carefully before use. Rollator is designed for indoor & outdoor use. Do NOT use
Front derailleur. Dealer's Manual XTR FD-M9000 FD-M9020 FD-M9025 DEORE XT FD-M8000 FD-M8020 FD-M8025 DEORE FD-M612 FD-M617 FD-M618 SLX FD-M672 FD-M677
 (English) DM-FD0003-06 Dealer's Manual ROAD MTB Trekking City Touring/ Comfort Bike URBAN SPORT E-BIKE Front derailleur XTR FD-M9000 FD-M9020 FD-M9025 DEORE XT FD-M8000 FD-M8020 FD-M8025 DEORE FD-M612
USER GUIDE TO POWER ASSISTED BIKES
 USER GUIDE TO POWER ASSISTED BIKES 1 PAGE CONTENTS Page. 3 Unpacking Page. 3-4 Easy steps to get started Page. 5 General Assembly Instructions Page. 6 Aligning H/Bars, Page. 7 Tightening pedals onto Crank
BELT DRIVE PREMIUM INDOOR CYCLING BIKE SF-B1509 USER MANUAL
 BELT DRIVE PREMIUM INDOOR CYCLING BIKE SF-B1509 USER MANUAL IMPORTANT! Read all instructions carefully before using this product. Retain owner s manual for future reference. For customer service, please
Troubleshooting Guide
 Troubleshooting Guide This troubleshooting guide outlines quick fixes to the most common technical questions about the ElliptiGO. If the problem persists or you feel uncomfortable performing these actions,
INSTALLATION INSTRUCTIONS
 INSTALLATION INSTRUCTIONS Accessory P/N 08L07-E09-100 Application 2013 ODYSSEY Publications No. AII 13265 Issue Date AUG 2012 Put this information in the glove box with the vehicle owner s manual. PARTS
DM-MARD (English) Dealer's Manual. ROAD MTB Trekking. City Touring/ Comfort Bike REAR DERAILLEUR XTR RD-M9100 RD-M9120
 Dealer's Manual. ROAD MTB Trekking. City Touring/ Comfort Bike REAR DERAILLEUR XTR RD-M9100 RD-M9120") (English) DM-MARD001-00 Dealer's Manual ROAD MTB Trekking City Touring/ Comfort Bike URBAN SPORT E-BIKE REAR DERAILLEUR XTR RD-M9100 RD-M9120 CONTENTS CONTENTS...2 IMPORTANT NOTICE...3 TO ENSURE SAFETY...4
(English) DM-MARD001-00 Dealer's Manual ROAD MTB Trekking City Touring/ Comfort Bike URBAN SPORT E-BIKE REAR DERAILLEUR XTR RD-M9100 RD-M9120 CONTENTS CONTENTS...2 IMPORTANT NOTICE...3 TO ENSURE SAFETY...4
2012 K9100 COMPACT Worldwide Cycling Solutions Through Creative Innovations.
 Home Instruction Sheet Step-1Please check for any missing parts. Model K9100 COMPACT (Basic AirCaddy) aircaddy web page 20 04/03/12 98% (1) T3230-00 METAL WHEEL TRUCK Model K8350 (Aircraft Kit) (Optional)
CHAIN DRIVE PREMIUM INDOOR CYCLING BIKE SF-B1509C USER MANUAL
 CHAIN DRIVE PREMIUM INDOOR CYCLING BIKE SF-B509C USER MANUAL WARNING! Your indoor cycling bike is not designed for reverse pedaling! Failure to comply with this warning may result in permanent damage to
602 STRINGING MACHINE OWNER'S MANUAL
 PROGRESSION 602 STRINGING MACHINE OWNER'S MANUAL AL Issue 1- April 2000 Copyright 2000 GAMMA Sports - All Rights Reserved PROGRESSION 602 STRINGING MACHINE TABLE OF CONTENTS PAGE 1... WARRANTY PAGE 2...
DM-RD (English) Dealer s Manual. ROAD Rear Derailleur RD-9000 RD-6800 RD-5800 RD-4700
 Dealer s Manual. ROAD Rear Derailleur RD-9000 RD-6800 RD-5800 RD-4700") (English) DM-RD0003-09 ROAD Rear Derailleur Dealer s Manual RD-9000 RD-6800 RD-5800 RD-4700 CONTENTS IMPORTANT NOTICE...3 TO ENSURE SAFETY...4 LIST OF TOOLS TO BE USED...6 INSTALLATION...8 Chain length...
(English) DM-RD0003-09 ROAD Rear Derailleur Dealer s Manual RD-9000 RD-6800 RD-5800 RD-4700 CONTENTS IMPORTANT NOTICE...3 TO ENSURE SAFETY...4 LIST OF TOOLS TO BE USED...6 INSTALLATION...8 Chain length...
ELECTRON PRO 245A: ASSEMBLY GUIDE. Revision Valid for MY2017 Electron Pro
 ELECTRON PRO 245A: ASSEMBLY GUIDE Revision 2.0 04-19-2017 Valid for MY2017 Electron Pro ELECTRON PRO 245A: Table of Contents 1. Tools Needed and First Aid Kit...3 2. Specifications...4 3. Configurations...5
INSTALLATION INSTRUCTIONS
 INSTALLATION INSTRUCTIONS Accessory (ROOF) P/N 08L07-E09-100 Application 6 PILOT Publications No. Issue Date JUN 5 PARTS LIST 6 Washers Bicycle attachment 2 Brackets Hex wrench 4 Knobs 2 Keys 1 Rear Bracket
Magnetic Bike. Model No: AENERGISER BODY WORX. Retain this owner s manual for future reference Read and follow all instructions in this owner s manual
 BODY WORX Magnetic Bike Model No: AENERGISER Retain this owner s manual for future reference Read and follow all instructions in this owner s manual Version A 1 EXPLODE DRAWING -02- PARTS LIST AND TOOLS
PRO1030 Bi-Directional Assembly Replacement
 PRO1030 Bi-Directional Assembly Replacement 1. Remove both side covers using the Crank and Cover Removal procedure. Fig. 1 2. Disconnect both brake cables (not shown) from the brake (S3611). (Fig. 1) 3.
SPM INDOOR TRAINING CYCLE ASSEMBLY MANUAL MODEL: SPM
 SPM INDOOR TRAINING CYCLE ASSEMBLY MANUAL MODEL: SPM Questions? As a quality exercise equipment supplier we are committed to your complete satisfaction. If you have questions, or find missing or damaged
Assembly Instructions. -Cantilever Boat Lifts
 Assembly Instructions -Cantilever Boat Lifts Winch Instruction Page Safety Information 1. The winch is built for the multipurpose of hauling and lifting operations. It is not to be used as a hoist for
INSTALLATION INSTRUCTIONS
 INSTALLATION INSTRUCTIONS Accessory (ROOF) P/N 08L07-E09-100 Application 2013 CROSSTOUR Publications No. AII 13168 Issue Date NOV 2012 PARTS LIST 6 Washers Bicycle attachment 2 Brackets Hex wrench 4 Thumbwheel
POWER ASSISTED BICYCLES OWNERS MANUAL
 POWER ASSISTED BICYCLES OWNERS MANUAL WE HAVE INCLUDED A BICYCLE OWNER S MANUAL WHICH YOU SHOULD REFER TO FOR ALL GENERAL CYCLE MAINTENANCE. CONTENTS Page. 3 Unpacking. Page. 3-4 Easy steps to get started.
Owner s Manual for Coaster Brake Bicycles This Owner's Manual contains assembly, operation, and maintenance instructions.
 Your Model Number is: (write your model number here) Owner s Manual for Coaster Brake Bicycles This Owner's Manual contains assembly, operation, and maintenance instructions. WARNING: - Check operation
OWNER S MANUAL. Important Safety and Product Information EVELO.COM
 OWNER S MANUAL Important Safety and Product Information EVELO.COM TABLE OF CONTENTS WELCOME! Welcome! Contact Information Unboxing Your Evelo Electric Bicycle Registration Warranty Battery Care and Maintenance
ES-701 INSTRUCTIONS FOR USE
 BIKE ES-701 MANUAL ES-701 INSTRUCTIONS FOR USE 1) The model ES-701 is designed to be used as a group cycle in fitness studios and health clubs. It has a fixed wheel driven flywheel and should only be used
RAVE SUP STAND UP PADDLE BOARD User Guide/Owner s Manual
 RAVE SUP STAND UP PADDLE BOARD User Guide/Owner s Manual ! W A R N I N G This product is not a lifesaving device. Always wear a nationally approved personal floatation device when using this product. Not
User Manual GRI- 1500Li
 User Manual GRI- 1500Li Your Cart Tek caddy cart was thoroughly quality control checked and road tested before being shipped to your address. We do everything possible to assure that your caddy is in perfect
INSTRUCTION GUIDE TRANSITION CARBON (ALL MODELS)
") INSTRUCTION GUIDE TRANSITION CARBON (ALL MODELS) THIS INSTRUCTION GUIDE CONTAINS IMPORTANT INFORMATION. PLEASE READ CAREFULLY AND STORE IN A SAFE PLACE. Congratulations! The Specialized bicycle you have
INSTRUCTION GUIDE TRANSITION CARBON (ALL MODELS) THIS INSTRUCTION GUIDE CONTAINS IMPORTANT INFORMATION. PLEASE READ CAREFULLY AND STORE IN A SAFE PLACE. Congratulations! The Specialized bicycle you have
RADROVER REAR RACK INSTALLATION MANUAL
 RADROVER REAR RACK INSTALLATION MANUAL WWW.RADPOWERBIKES.COM We are here to help! Please contact us at SUPPORT@RADPOWERBIKES.COM or 1-800-939-0310 if you have questions. REV022216 Welcome Thanks you for
Trike-Bike Assembly Manual
 Be sure to check our website for more instruction details, videos and photographs as well as a complete listing of each Nut and Bolt for the Trike Bike. www.trike-bike.com.au Go to the page marked ASSEMBLY
ELECTRON PRO: ASSEMBLY GUIDE. Revision Valid for MY2017 Electron Pro
 ELECTRON PRO: ASSEMBLY GUIDE Revision 1.0 10-20-2016 Valid for MY2017 Electron Pro ELECTRON PRO: Table of Contents 1. Tools Needed and First Aid Kit...3 2. Specifications...4 3. Configurations...5 4. Geometry...7
Attention. Chainguards. Cranks and Chains. Flywheel Sprocket
 Attention When ordering parts for newer Schwinn IC Pro cycles reference the following service bulletins to ensure you are ordering the correct revisions. Handlebar and sleeve Chainguards Cranks and Chains
Trilogy Theory of Operation
 INSTALLATION & OVERVIEW... 2 Load Height... 2 Approach Angle... 2 Footprint... 3 Protrusion... 3 Mounting the... 4 General Torque Specs... 4 OPERATION OF BIKE RACK... 5 Loading Bikes... 5 Unloading Bikes...
BICYCLE TO MOTORCYCLE BICYCLE RACK
 BICYCLE TO MOTORCYCLE BICYCLE RACK Install Manual Warning: You are responsible for securing the rack to your motorcycle., checking the attachments prior to use and periodically inspecting the products
Rhino-Rack Mountain Trail Bike Carrier (RBC035)
") Important: Please read these instructions carefully prior to installation. Please refer to your fitting instruction to ensure that the bike rack is installed in the correct locations. Check the contents
Important: Please read these instructions carefully prior to installation. Please refer to your fitting instruction to ensure that the bike rack is installed in the correct locations. Check the contents
BR-2444 ROWING MACHINE
 BR-2444 ROWING MACHINE Important Safety Information Please keep this manual in a safe place for reference. 1. It is important to read this entire manual before assembling and using the equipment. Safe