Newton /PowerPod CdA Measurement Instruction Manual. January 2017 Newton FW PowerPod FW 6.21+
|
|
|
- Annabella Cummings
- 5 years ago
- Views:
Transcription


1 Newton /PowerPod CdA Measurement Instruction Manual January 2017 Newton FW PowerPod FW
 has the CdA key installed, connect your Device to your")
 CdA Key is installedà FOR MORE INFORMATION ABOUT PURCHASING THE CdA")
2 THE CDA FEATURE REQUIRES FW 5.15 OR HIGHER (NEWTON), OR FW 6.21 OR HIGHER (POWERPOD), AND PURCHASE OF THE OPTIONAL CDA FIRMWARE KEY. Use Isaac to check the version of firmware in your Device: To see if your PowerPod or Newton ( Device ) has the CdA key installed, connect your Device to your computer and launch Isaac. Then, go to Device/Unlock Feature, then click the Get Unlock Status button. If the key is installed on your PowerPod/Newton it will be listed as CdA Function (TT Key) CdA Key is installedà FOR MORE INFORMATION ABOUT PURCHASING THE CdA KEY, VISIT: 2

3 NOTE: FOR BEST RESULTS WE STRONGLY RECOMMEND THAT YOU FAMILIARIZE YOURSELF WITH ISAAC INSTRUCTIONS BEFORE READING THIS MANUAL. ISAAC INSTRUCTIONS ARE AVAILABLE THROUGH THE HELP MENU OF ISAAC SOFTWARE 3
4 GETTING STARTED The PowerPod and Newton are precision measurement instruments that, when used with with a Direct Force Power Meter (DFPM) provide wind-tunnel-like measurements of CdA (aerodynamic drag) and related parameters ( Time Advantage ). However, accurate CdA measurements can happen only after proper setup and calibration of your PowerPod/Newton and Direct Force Power Meter! BEFORE STARTING CDA TESTING, PLEASE READ AND CAREFULLY FOLLOW THE INSTRUCTIONS IN THIS MANUAL. IMPORTANT: Make sure you review the operating manual of your Direct Force Power Meter (DFPM), and make sure your DFPM is properly temperature acclimated and calibrated/zeroed, prior to beginning CdA measurements. NOTE: ONE-LEG POWER METERS SUCH AS STAGES ARE NOT RECOMMENDED FOR CDA TESTING. CdA measurements are best when: 1) Device setup and calibration is performed properly (!) 2) (Newton only) Cal Wind is performed before the testing, after the Newton is acclimated to outdoor temperature (ride 10 minutes to stabilize all electronics) 3) You re doing a solo ride (not in a pack) 4) The pavement type is the same as that used in the calibration ride 5) Outdoor winds are calm 6) You are not testing in cross-winds 7) You make repeated measurements, over the same roads, on the same day, of at least 3 minutes per measurement run 8) Temperature is reasonably constant during testing 9) Bike is working properly (i.e. brakes aren t rubbing on the wheels, tires are inflated properly) 10) Your DFPM is calibrated properly and working properly CdA measurements aren t accurate when: 1) You re drafting/riding in a pack 2) You are riding in strong winds 3) You ve have not performed Device setup and calibrations 4) You have not cycled for at least 10 minutes prior to starting CdA testing 5) Your DFPM is not calibrated, or is a one-leg DFPM (Stages, etc.) 6) (Newton only) you do not perform Cal Wind properly before the ride 7) Road conditions are significantly different from your calibration ride (e.g. you calibrated on asphalt but you re doing your tests on chip-seal) 8) You are riding at speeds less than 15 mph 9) Your bike s condition has changed significantly (e.g. tire pressure is low) 10) You re riding indoors, where Newton/PowerPod does not measure opposing forces 4
5 EQUIPMENT REQUIREMENTS To do CdA testing you will need ALL of the following: 1) PowerPod or Newton with CdA key installed a. To confirm that the CdA key is installed on your Device, use the Isaac command Device/Unlock Feature/Check Unlock Status. If CdA key is installed you will see it listed in the Unlock List 2) Compatible bike computer (PowerPod only) 3) ANT+ or ANT+/BLE speed and cadence sensors 4) ANT+ or ANT/BLE Direct Force Power Meter (DFPM) (note: due to potential accuracy issues, one-leg power meters such as Stages and 4iii are not recommended) 5) Isaac software NOTE: CdA aerodynamic measurements are tricky to make, especially outdoors. Please follow these instructions carefully so you will get good results! NOTE: ONE-LEG POWER METERS SUCH AS STAGES ARE NOT RECOMMENDED FOR CDA TESTING. 5
6 STEP 1: SETUP POWERPOD/NEWTON PROFILE For accurate CdA measurements, you ll need to customize your PowerPod/Newton profile for you and your bike. Do the following: 1) Connect your PowerPod or Newton (Device) to Isaac 2) Go to Device/Setup Newton (NOTE: Newton commands work both for PowerPod and Newton) 3) Follow the setup screens, and enter your rider weight; rider height; weight of bike + gear; normal riding position, and tire type and road type. 4) CRITICAL: on the final setup screen, click BEST ACCURACY. This puts your Device into Out and Back calibration mode. If you accidentally click a different button (Better Accuracy or Keep Accuracy, simply go through the Device/Setup Newton wizard again) 5) You ll get a confirmation message saying that your device s profile has been updated. STEP 2: DFPM SETUP AND CALIBRATION Because of the sensitivity of CdA measurements you need to do the following with your DFPM: 1) Pair your DFPM to your PowerPod/Newton Device (STEP 3, below) 2) Prior to any CdA testing, ride with your DFPM for at least 10 minutes, to make sure it is acclimated to outdoor temperature 3) Before starting your CdA measurements, confirm that your DFPM has been calibrated (zeroed) using the Calibrate feature of your ANT+ bike computer STEP 3: ANT+ SENSOR PAIRING After installing your CdA key, you will need to do a one-time sensor pairing of your Device to your ANT+ sensors, including your DFPM. NOTE: DFPM PAIRING TO YOUR DEVICE WON T WORK UNLESS THE OPTIONAL CDA KEY HAS BEEN PURCHASED AND INSTALLED. NOTE: FOR DETAILED INSTRUCTIONS REGARDING THE CALIBRATION AND USE OF YOUR DFPM, CONSULT THE DFPM OWNER S MANUAL THAT WAS INCLUDED WITH YOUR DFPM STEP 4: OUT-AND-BACK CALIBRATION RIDE Your PowerPod or Newton requires an out-and-back (O&B) calibration ride, to fine-tune its tilt and wind sensors. An O&B calibration ride MUST be done before performing any CdA measurements. 6
 After selecting the Best Accuracy button in ISAAC, the center window of the Newton will start to flash do Cal, indicating that your Newton is now configured for an out-and-back calibration ride")
 Make sure your DFPM is operating and that it has been calibrated properly 5) Attach your Newton to its mount, then click any button to wake up the Newton. Speed is shown in the top window.")
.")
 If you want to keep riding and start your Cal Ride at a different place from your current location, that s OK!")
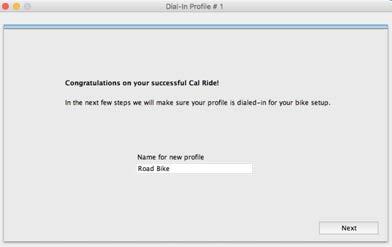
7 NEWTON OUT AND BACK CALIBRATION RIDE: 1) Make sure you have completed STEP 1 above to set your Newton to Best Accuracy. Best Accuracy enables the out-and-back calibration ride. 2) After selecting the Best Accuracy button in ISAAC, the center window of the Newton will start to flash do Cal, indicating that your Newton is now configured for an out-and-back calibration ride (Cal Ride). 3) Pick a quiet, low-traffic place to do a solo (no drafting allowed) Cal Ride. The road can be flat or hilly; it makes no difference. 4) Make sure your DFPM is operating and that it has been calibrated properly 5) Attach your Newton to its mount, then click any button to wake up the Newton. Speed is shown in the top window. You ll see ----W and do Cal alternate in the center window, indicating that your Newton is set for a Cal Ride. 6) Start riding. IMPORTANT: DURING YOUR CAL RIDE, STAY IN YOUR NORMAL RIDE POSITION YOU USE MOST OFTEN (FOR EXAMPLE, HOODS POSITION ON YOUR ROAD BIKE, OR TIME TRIAL POSITION ON YOUR TT BIKE). 7) After 8 seconds of riding the Newton screen changes. Cal appears in the middle window, and Start flashes in the bottom window. 8) If you want to keep riding and start your Cal Ride at a different place from your current location, that s OK! Just keep riding to your desired starting point; while you ride to it the Cal Start message will continue to flash. 9) When you are ready to begin the Cal Ride, click the center button to start the Cal Ride. Remember: DURING YOUR CALIBRATION RIDE, STAY IN THE RIDE POSITION YOU USE MOST OFTEN (FOR EXAMPLE HOODS ON YOUR ROAD BIKE, OR TIME TRIAL ON YOUR TT BIKE) 10) The top window shows bike speed, the center window alternates between Cal and distance traveled, and the progress bar fills as you ride. 11) During the Cal Ride you can bike at a leisurely pace, and it s OK to stop if needed. Your Cal Ride will be unaffected. 12) Ride for five minutes, until go bac(k), turn 180 degrees flashes. 7
 Ride back to the starting point, along the same route as the Out portion of your ride. 16) The progress bar empties as you ride back.")
8 13) If you still need to keep riding a bit farther to get to a place where you can turn around safely, it s OK. 14) When safe, slow to a STOP, then turn around. 15) Ride back to the starting point, along the same route as the Out portion of your ride. 16) The progress bar empties as you ride back. Keep riding until the progress bar is completely empty, and Cal Done flashes. 17) Once the Cal Ride is completed, your Newton returns to its normal screens, and your Newton is calibrated. NOTICE: AFTER BEGINNING YOUR CAL RIDE, IF YOU WISH TO TERMINATE (ABORT) IT, PRESS-HOLD THE CENTER BUTTON FOR TWO SECONDS. THIS ABORTS THE CAL RIDE AND LEAVES ANY PRIOR RESULTS UNCHANGED. 8
9 POWERPOD (PP) OUT AND BACK CALIBRATION RIDE 1) Make sure you have completed STEP 1 above to set your PowerPod to Best Accuracy. Best Accuracy enables the out-and-back calibration ride. 2) Pick a quiet, low-traffic place to do a solo (no drafting allowed) Cal Ride. The road can be flat or hilly; it makes no difference. 3) Make sure your DFPM is operating and that it has been calibrated properly 4) Attach PP to your bike, making sure that PP cannot rotate after its mount screw is tightened (see PowerPod illustrated instructions for details). 5) Wake up your sensors and your PP. The PP light shows solid yellow. 6) With the status light showing solid yellow, start riding your bike. After 10 seconds of riding, the light changes to flashing red/green, indicating that the PP is now armed and to begin the out-and-back (O&B) calibration measurements. 7) Ride your bike to the place you ve selected to start your O&B ride. PowerPod status light will flash between red and green while you ride to your starting point. 8) When you ve reached starting point of your O&B ride, confirm that the PP light is flashing red/green. 9) To start O&B calibration measurements, click the PowerPod button. The light will change from flashing red/green to flashing yellow. 10) Now, ride your bike five minutes for the out portion of your ride. While riding the light will continue to flash yellow and your bike computer watts will start to climb slowly, from 1 to 50. The power number indicates the % completion of the calibration ride (i.e. 25W means the O&B ride is 25% complete) 11) Your bike speed during the O&B ride is not important, but DO NOT DRAFT BEHIND OTHER CYCLISTS OR CARS. 12) After riding five minutes (the end of the out portion/half-waycomplete/50% completion point of the ride), the status light will change to solid red, and watts will no longer increase, but will stick at 50W. 13) When it is safe, SLOW TO A COMPLETE STOP. It s OK if you have to continue to ride a while with the watts stuck at 50, before you find a safe place to stop and turn around. 14) After coming to a complete stop, get off your bike, and cross the road, turn around, and then ride back along the same route to the starting point. 15) On the back portion of your ride the status light will change from solid red to flashing yellow and your watts will slowly climb to 100W. 16) Ride back to the starting point of your ride. You can ride fast or slow and stop if needed, it makes no difference. The watts will slowly climb from 51W to 100W (51% to 100% complete). 17) Near your starting point the O&B you will see 100W (100% complete) on your bike computer. The flashing yellow light will go out. Your PowerPod is now calibrated and, after a few seconds, actual watts will appear on your bike computer screen. SEE NEXT PAGE FOR A PICTORIAL DESCRIPTION OF POWER POD CALIBRATION NOTICE: AFTER BEGINNING YOUR CAL RIDE, IF YOU WISH TO TERMINATE (ABORT) IT, PRESS-HOLD THE POWERPOD BUTTON UNTIL THE STATUS LIGHT GOES TO SOLID YELLOW. THIS ABORTS THE CAL RIDE AND LEAVES ANY PRIOR RESULTS UNCHANGED. 9
10 PowerPod Out-and-Back Ride 10
. 1.")
: 3.")
11 STEP 4: CALCULATE NORMAL CDA After completing your Calibration Ride (STEP 3) the opposing force (PowerPod/Newton) and applied force (DFPM) data from your calibration ride is stored in your PowerPod/Newton ride file. Your cal-ride data will be used to determine your Normal CdA (that is, your CdA measured from the normal ride position you used during your out-and-back ride). 1. Attach your Device (PowerPod or Newton) to Isaac 2. Click on the Download Ride Data button or use the Isaac command Device/Download Ride Data A window similar to this will appear (your ride file content will be different): 3. Click the Show Download Window button. A new window will appear (your window will look different in its details): 4. In the box to the far left of the Autoname Format, type the name you d like to give to your ride file (in this example, Serotta ). Notice that the name of the ride file in the dropdown menu changes to what you have typed: 11
: 6.")
12 5. Now, click on the Select a Ride Dropdown menu bar. A complete list of your ride files stored in your Device appears, with a check mark and blue highlight placed next to your most recent ride (AT THE VERY BOTTOM OF THE LIST): 6. LOOK FOR RIDE FILES THAT END IN CalRide.ibr. These files are your out-andback cal rides. Your most recent cal ride will be located closest to the bottom of the list, ( Serotta_01_27_2017_0937_4km_CalRide.ibr in the list above) 7. Click on the cal ride you want to download; your download will commence 8. After your download finishes, a profile wizard will pop-up, allowing you to fine tune your settings in a series of windows. As you click through the screens you ll see the same entries as you made when you performed STEP 1 12
13 13


14 9. On the last window, make sure to click the Send to Newton ; a confirming message will be sent afterwards 10. Your cal ride data will now appear in the main window of Isaac 11. Now, we will determine the normal value of CdA as measured during your Cal Ride, using the command Analyze/Check Calibration 14


15 12. A pop-up window appears, asking you if you want to use DFPM data. Click the Use DFPM button 13. Isaac will now perform calculations in the background, determining the best fit CdA value between your DFPM data and PowerPod/Newton data. You will see Before and after values in the Calibration Changes table. The CdA in the right column is your measured CdA: ß measured CdA is on right Measured CdAà 14. Click the Send Profile to ibike button to load your best-fit profile into your PowerPod/Newton You are now ready to start CdA measurements! 15
16 How CdA measurements work The governing principle behind CdA measurement that the force you apply to the pedals is equaled by the forces opposing the bike s forward motion (Newton s Third Law). Your PowerPod (or Newton) measures opposing forces: opposing gravity (hills), opposing acceleration (inertia), opposing wind, and opposing friction. These opposing forces slow down the bike, requiring you to apply force at the pedal to keep the bike moving. The forces applied by you precisely equals the opposing forces (Newton s 3 rd law), moment-by moment. For CdA aerodynamic measurements, applied and opposing forces must both be known. Why? When applied and opposing forces are measured simultaneously, then CdA drag coefficient calculations can be made in a straightforward manner. In conjunction with a DFPM, your PowerPod or Newton measures CdA continuously during your bike ride. Newton reports Continuous CdA TM numbers on its display; after the ride, both PowerPod and Newton ride files allow you to see CdA information in Isaac. NEWTON Continuous CdA TM and Time Advantage measurements Continuous CdA. By comparing opposing force data (measured by your Newton or PowerPod) and your DFPM force data, Newton computes and displays CdA information in real time, while you are pedaling. Time Advantage TM. When you re positioned more aerodynamically (as compared with your normal ride position), for the same amount of power you will go faster. Time Advantage computes how much time you ve gained (or lost) due to changes in normal ride position. Newton displays cumulative Time Advantage on its screen After the ride, CdA and Time Advantage data from PowerPod and Newton can be accessed in Isaac POWERPOD Continuous CdA and Time Advantage measurements Using PowerPod, in the same manner as described for Newton, you will perform your CdA tests in the field. During your testing PowerPod records both your applied forces (from the DFPM) and your opposing forces (from the PowerPod) in the PowerPod ride file. After the ride, Isaac software provides post-ride measurement and analysis of Continuous CdA and Time Advantage. You will download your PowerPod file to Isaac, then use the Isaac command Tools/CdA Analysis to display your CdA and Time Advantage data. Note that, when riding PowerPod, CdA data cannot be shown on your ANT or BLE bike computer screen. 16
17 MEASURING CONTINUOUS CDA WITH POWERPOD/NEWTON AND DFPM Before proceeding with CdA measurements, make sure you ve performed Steps 1 through 4 of these instructions. If these four steps are not done properly, then your CdA measurements won t be accurate. Also, before beginning actual CdA measurement testing, ride at least 8 minutes, so that your PowerPod/Newton and DFPM both acclimate to outdoor riding conditions. Here is the recommended test procedure for CdA testing: 1) Find a spot with calm winds, very light traffic, and where the road surface is like the one where you did your out-and-back calibration ride. 2) Ideally, you ll want a flat course with good pavement and very light traffic. If you can find a loop that is ideal, because wind effects will be minimized. 3) NEWTON ONLY: Select the power window on your Newton screen a. Press-hold the center button of your Newton (to enter Setup). When in setup, click the up arrow repeatedly until you find CdA off (it might say CdA On ). Click the center button; the bottom window flashes. Click the up arrow until on flashes. Then, click the center button to accept; done flashes. Press-hold the up arrow to exit Setup. 4) Ride your bike for at least 8 minutes to allow your PowerPod/Newton and DFPM to acclimate. 5) Now, start your CdA testing: hold the same riding position for about 3 minutes. This allows lots of data to be gathered. NEWTON ONLY: you ll see CdA and Time Advantage data rotate on the bottom window of your power screen. 6) After you ve gathered your CdA data for your testing parameters, try experimenting with different ride positions, different gear, etc. Ride for at least 3 minutes for each test, and do NOT remove your PowerPod or Newton between measurements. NEWTON ONLY: you can mark each test with the Lap marker (press-hold left arrow) 7) We suggest you write down your testing configurations 8) During testing on Newton ONLY: CdA measurements are displayed live on the main power screen, with two significant digits. NOTE: DURING CdA MEASUREMENTS YOU CANNOT APPLY BRAKES, TURN SHARP CORNERS, OR BE BUFFETED BY WIND GUSTS (cars, other cyclists, etc.). IF ANY OF THESE HAPPEN YOUR CdA MEASUREMENTS WILL BE INACCURATE. NOTE: WE DO NOT RECOMMEND USING ONE-LEG DIRECT FORCE POWER METERS FOR CDA MEASUREMENTS, BECAUSE ONE-LEG POWER METERS DO NOT MEASURE THE CYCLIST POWER PRODUCED BY BOTH LEGS. 17
18 TIME ADVANTAGE Time Advantage is another feature, related to CdA measurement, that is exclusive to the PowerPod/Newton/DFPM combination. What is Time Advantage? When you ride a bike, most of the time you re riding in your normal riding position. DEFINITION: YOUR NORMAL RIDING POSITION IS THE POSITION YOU MEASURED WHEN PERFORMING THE OUT AND BACK CALIBRATION RIDE WITH YOUR DFPM. As long as you stay in your normal riding position, the total amount of time it takes to complete your training ride is unaffected by your riding position; that is, your normal riding position gives a normal training time. Now, suppose you re on a ride and you have deviated from your normal riding position for a portion of your ride, say, by going into a tuck. Did going into a tuck save you time compared to staying in your normal riding position? Clearly, the answer is yes, but how much time did you save? Here s another situation: you attacked a hill and stood up to get more power. You know that standing up is less aerodynamically efficient and costs you some time. How much extra time did it take to climb the hill due to aerodynamic inefficiencies? A final situation: you ve perfected your normal ride position using your PowerPod or Newton. During a long ride, however, you get tired and your ride position becomes a bit sloppy. How much longer did it take you to complete your ride because your ride position became worse? Time Advantage answers all these questions, and more. DEFINITION: AT ANY POINT OF YOUR RIDE, TIME ADVANTAGE IS THE CUMULATIVE AMOUNT OF TIME YOU HAVE GAINED (OR LOST), DUE TO DEVIATIONS FROM YOUR NORMAL RIDE POSITION. Time advantage is measured in seconds. Suppose you look at your Newton at mile 6.2 of your ride and Time Advantage reads a positive 30. This means that, at mile 6.2 of your ride, you have gained 30 seconds of time, relative to your normal riding time, because of moment-to-moment improvements of your normal riding position. Alternative if, instead, your Time Advantage reads -15, the way you have changed ride positions means that you ve lost fifteen seconds compared to staying in your normal riding position. How are Continuous CdA and Time Advantage related? If your current value CdA is higher than your baseline CdA then you are relatively less aerodynamically efficient compared to your normal riding position and, for the same amount of applied force, you won t go as fast. Conversely, if your current CdA is lower than your normal value then you are MORE aerodynamic and you ll go faster compared to your normal riding position. 18
 computes the cumulative amount of time you gain or lose, moment-by-moment,")
19 Time Advantage compares your Continuous CdA to your baseline, normal CdA, momentby-moment. Using the comparative CdA values between your baseline CdA and your Continuous CdA, the Newton (or PowerPod, using Isaac) computes the cumulative amount of time you gain or lose, moment-by-moment, due to deviations from your baseline CdA. The Newton display reports the net time effect of better-and-worse ride positions and displays the cumulative Time Advantage number in the bottom window of your Newton (the bottom window alternates automatically between cadence, HR, Continuous CdA, and Time Advantage). Note that with PowerPod you cannot see Time Advantage statistics during your ride. With PowerPod CdA and Time Advantage reports are available only after riding, when you download your ride to Isaac. Graphical Example Here is a graphical depiction of an actual PowerPod/Newton ride with a DFPM, using the Tools/CdA Analysis feature of Isaac The top graph shows CdA versus distance. The middle graph shows Time Advantage vs. distance, and the bottom graph shows speed vs. distance. This ride was about 29 miles long. In the top window, you see in purple the rider s CdA vs distance. Note that an imaginary horizontal line can be drawn through the purple graph at about CdA = The value CdA = 0.39 is this rider s normal CdA value as determined by the O&B calibration ride done previously with the DFPM. 19
20 For the first 4.4 miles of this ride the rider had CdA measurements that, most often, were above his normal value of A higher-than-normal CdA means the rider was relatively less aerodynamic, and that he lost time due to his relatively poor riding position. How much time did his high CdA cost him? According to the graph, the time lost peaked at -42 seconds at mile 4.4. What does negative 42 seconds mean? It means that if the rider had pedaled equally hard, but had always stayed in his normal ride position, then he would have arrived at mile 4.4 about 42 seconds sooner. Said differently: at mile 4.4, aerodynamic riding inefficiencies has cost this rider about 42 seconds compared to his normal riding position. At mile 4.4 the rider improves his riding position (becoming more aero ) and his CdA drops below his baseline value. He reverses his negative Time Advantage and picks up a lot of time. In fact, by mile 5.2 the rider is nearly back to zero Time Advantage meaning that he is on pace compared to his normal riding position. Between miles 6 and 8 there are some high CdA spikes but the Time Advantage curve does not react accordingly (a high CdA should cause Time Advantage to go more negative). Why does Time Advantage not move? Time Advantage measurements become less accurate as bike speed and wind speed drop. Accordingly, the Newton does not record changes in Time Advantage when bike speed is below 15 mph or when net opposing wind speed is below 5 mph (caused typically by tailwinds). In this example, the rider is just below the 15 mph threshold between miles 6 and 7, and there also appears to be a tailwind too, causing wind speed to drop below 5 mph (we can t tell this from the graph). Time Advantage does NOT change between miles 6 and 8 because the Newton is operating below its minimum measurement threshold. Just after mile 8 the rider goes into a tuck and his bike speed increases to nearly 30 mph. The rider gains a tremendous amount of Time Advantage: between mile 9.5 and 10 he gains about 35 seconds! The faster you re riding, the more Time Advantage you get from a more aero riding position. The rider continues the tuck until about mile At this point he has gained 50 seconds overall since the beginning of the ride. Between mile 11.5 and 16 his Time Advantage remains flat at about 50 seconds. This is due to low bike speeds of around 10 mph, a result of hill climbs. At low bike speeds aerodynamic forces don t affect Time Advantage significantly. At mile 16 the rider goes into an aggressive tuck and really picks up the pace, too. Between mile 16 and 29 he picks up an ADDITIONAL 150 seconds of time advantage, and by the end of the ride his total time advantage is about 200 seconds. What does 200 seconds of Time Advantage mean? It means that he finished his ride 200 seconds (3 minutes, 20 seconds) SOONER than he would have had he ridden in his normal riding position for the entire ride! Using a PowerPod or Newton gives this rider feedback about the quality of his riding position (Continuous CdA), AND quantifies the Time Advantage of his aerodynamic improvements. 20
21 USING CONTINUOUS CDA AND TIME ADVANTAGE ON POWERPOD OR NEWTON Once you ve set up your PowerPod/Newton and DFPM you can ride as usual: 1) For Newton, all traditional functions, measurements, and screens of the Newton are unchanged. 2) PowerPod functionality is unchanged. During your riding PowerPod will record both DFPM and PowerPod data, for download and analysis after the ride, using Isaac. 3) On Newton, to enable on-screen CdA display, go to Setup/CdA off. Press the center button, click the up arrow to set CdA On, and click to accept. 4) With CdA On, the bottom window of your Power Screen will alternate between cadence, heart rate, Continuous CdA, and Time Advantage. 5) When viewing the Power Screen, the power number displayed in the middle window is the power reported by the DFPM. 6) When bike speed is less than 15 mph Continuous CdA displayed on Newton will be your baseline value. 7) When bike speed is less than 15 mph or total opposing wind speed is below 5 mph, Time Advantage will not be changed on Newton. 8) To reset Time Advantage to zero, perform a Trip Reset. 9) Ride files downloaded to Isaac will contain both Newton/PowerPod and DFPM information. Other important things to remember: 1) Continuous CdA and Time Advantage measurements are accurate only when riding solo; these measurements won t be accurate when riding in a pack. 2) Continuous CdA and Time Advantage measurement accuracy will be adversely affected by changes in frictional drag. For example, if you go from normal pavement to soft dirt your CdA and Time Advantage measurements will be inaccurate while you ride in the soft dirt. 3) For maximum accuracy, you MUST be sure to let your Newton acclimate to outdoor temperature AND to perform a wind offset calibration prior to each ride. 4) Make sure to calibrate (zero-offset) your DFPM prior to your ride. 5) Remember: the accuracy of the PowerPod/Newton/DFPM combination is highly dependent upon proper setup, calibration, and use. NOTE: CDA DATA IS GATHERED ON EVERY RIDE WHERE YOU USE A POWERPOD/NEWTON AND DFPM. REMEMBER, THOUGH, THAT CDA MEASUREMENTS WON T BE AS RELIABLE WHEN YOU RE NOT DOING CAREFUL TESTING. 21
; Time Advantage, and Speed.")
22 USING ISAAC SOFTWARE TO ANALYZE CDA DATA Once you ve finished your on-the-road CdA testing, you can download your PowerPod/Newton ride file, and use the Tools/CdA Analysis command to view and analyze your CdA data: A window like this will appear: Here you can see your CdA vs time (or distance, by changing the top right menu item); Time Advantage, and Speed. The parameters plotted can be selected in the window below the graphs. NOTE: THE CdA and Time Advantage vs. time graph numbers in the graph are correspond to the numbers displayed on a Newton power screen during your ride. 22
23 Note that you can select what data is displayed in each window. For example, if we wanted to compare CdA and Time Advantage to elevation, we might shift the bottom scale to distance, and bottom graph to elevation: This graph can be used to help understand WHERE ride position is changed and WHEN to be extra careful about ride position. 23
24 POWER METER COMPARISON If you d like to see how your Device and your DFPM power measurements compare moment-by-moment, select Tools/Power Meter Comparison. The following graph will appear: Newton power is shown in white, and DFPM power is shown in green. 24

25 HELP: WHERE TO FIND IT The Help menu of Isaac software includes a complete list of documentation for PowerPod, Newton, and Isaac: Select the document to view the corresponding information. VELOCOMP POWER METER FORUM There are tens of thousands of Velocomp power meter owners; here s a great place to meet many of them, to get your questions answered, and to contribute your insights to others: TECHNICAL SUPPORT If you have questions that are addressed by the Help documents and links, please us at: technicalsupport@velocomp.com We will get back to you quickly. 25
PowerStroke TM Operating Instructions. November 2015 PROTECTED BY ONE OR MORE OF THE FOLLOWING US PATENTS 7,387,029; 7,377,180; D528,451
 PowerStroke TM Operating Instructions November 2015 PROTECTED BY ONE OR MORE OF THE FOLLOWING US PATENTS 7,387,029; 7,377,180; D528,451 NOTE: THESE INSTRUCTIONS ARE TO BE USED IN CONJUNCTION ISAAC SOFTWARE
ibike Newton TM PowerStroke TM Operating Instructions Newton OS 3.0 and higher Isaac SW 2.0 and higher June 2013
 ibike Newton TM PowerStroke TM Operating Instructions Newton OS 3.0 and higher Isaac SW 2.0 and higher June 2013 PROTECTED BY ONE OR MORE OF THE FOLLOWING US PATENTS 7,387,029; 7,377,180; D528,451 NOTE:
Copyright Velocomp LLP 2006
 ibike Pro Cadence Handlebar Mount Owners Manual January 2007 1 Table of Contents Installing the ibike Pro cadence mount on your bicycle Installing the ibike Pro cadence mount on your time trial bike Installing
Quick Guide. SGX-CA500 Cycle Computer SGY-PM Series Power Meters
 Quick Guide SGX-CA500 Cycle Computer SGY-PM Series Power Meters Easy Installation and Advanced Functionality Fast Facts: Pioneer Power Meter Cranksets and arms ship pre-set in the ANT+ Format Simply install
#LZ400 LEAKALYZER. Water Loss Sensor INSTRUCTION MANUAL Country Dr. #190 St. Paul, MN
 #LZ400 LEAKALYZER Water Loss Sensor INSTRUCTION MANUAL 2885 Country Dr. #190 St. Paul, MN 55117 800-348-1316 www.leaktools.com Your Partner in Swimming Pool Water Conservation Product Purpose: 2 The Leakalyzer
This is the Quick Start Guide for the Optibike Pioneer Allroad electric bicycle. The Guide provides for basic information required to ride the
 This is the Quick Start Guide for the Optibike Pioneer Allroad electric bicycle. The Guide provides for basic information required to ride the Allroad. It is not intended to be an extensive manual. It
Cover Page for Lab Report Group Portion. Head Losses in Pipes
 Cover Page for Lab Report Group Portion Head Losses in Pipes Prepared by Professor J. M. Cimbala, Penn State University Latest revision: 02 February 2012 Name 1: Name 2: Name 3: [Name 4: ] Date: Section
Chromat Calibration Updated October 27th, 2017
 Chromat Calibration Updated October 27th, 2017 Calibrating the Chromatograph Performing the Chromat Calibration is highly recommended when starting a new well. The MLogger already has a default calibration
PRODUCT INFO SHEET. NEO 2 Smart. PRODUCT INFO NEO 2 Smart T Box
 PRODUCT INFO SHEET NEO 2 Smart Last updated: October 19, 2018 Product name SKU code MOQ Packaging (box/card) EAN product EAN MOQ Product category Country of origin Dimensions (LxBxH)(cm-in) Dimensions
Viva TPS. TS11/15 Total Stations Check and Adjust Procedure. October Summary
 Viva TPS October 2010 TS11/15 Total Stations Summary Leica builds total stations to the highest quality and calibrates each instrument before it leaves the Factory. After the instrument is shipped or used
Gravity: How fast do objects fall? Teacher Version (Grade level: 4 7)
") Gravity: How fast do objects fall? Teacher Version (Grade level: 4 7) *** Experiment with Audacity to be sure you know how to do what s needed for the lab*** Kinematics is the study of how things move
Gravity: How fast do objects fall? Teacher Version (Grade level: 4 7) *** Experiment with Audacity to be sure you know how to do what s needed for the lab*** Kinematics is the study of how things move
Boyle s Law: Pressure-Volume Relationship in Gases
 Boyle s Law: Pressure-Volume Relationship in Gases The primary objective of this experiment is to determine the relationship between the pressure and volume of a confined gas. The gas we will use is air,
Experiment P18: Buoyant Force (Force Sensor)
") PASCO scientific Physics Lab Manual: P18-1 Experiment P18: (Force Sensor) Concept Time SW Interface Macintosh file Windows file Newton's Laws 45 m 300/500/700 P18 P18_BUOY.SWS EQUIPMENT NEEDED CONSUMABLES
PASCO scientific Physics Lab Manual: P18-1 Experiment P18: (Force Sensor) Concept Time SW Interface Macintosh file Windows file Newton's Laws 45 m 300/500/700 P18 P18_BUOY.SWS EQUIPMENT NEEDED CONSUMABLES
READ-ME-FIRST RMF-01. DOWNLOAD COMPLETE TECHNICAL OWNER MANUAL
 RMF-01 READ-ME-FIRST DOWNLOAD COMPLETE TECHNICAL OWNER MANUAL www.nuvincicycling.com/downloads HOW TO GET STARTED WITH NFINITY TM GROUP SETS (330/380)? 2 Components of group sets 2 Shifting 3 Adjusting
REACTOR 40 MECHANICAL Configuration Guide
 REACTOR 40 MECHANICAL Configuration Guide Important Safety Information WARNING See the Important Safety and Product Information guide in the product box for product warnings and other important information.
Cover Page for Lab Report Group Portion. Pump Performance
 Cover Page for Lab Report Group Portion Pump Performance Prepared by Professor J. M. Cimbala, Penn State University Latest revision: 02 March 2012 Name 1: Name 2: Name 3: [Name 4: ] Date: Section number:
Vector. Pedal-based cycling power meter
 Vector 2 Pedal-based cycling power meter P = W t P = Power (Watts) W = Work (N-m, Joules) t = Change in time Pedal-based cycling power meter Power is an objective measure of your cycling performance on
Exercise 3. Power Versus Wind Speed EXERCISE OBJECTIVE DISCUSSION OUTLINE. Air density DISCUSSION
 Exercise 3 Power Versus Wind Speed EXERCISE OBJECTIVE When you have completed this exercise, you will know how to calculate the power contained in the wind, and how wind power varies with wind speed. You
Cover Page for Lab Report Group Portion. Boundary Layer Measurements
 Cover Page for Lab Report Group Portion Boundary Layer Measurements Prepared by Professor J. M. Cimbala, Penn State University Latest revision: 30 March 2012 Name 1: Name 2: Name 3: [Name 4: ] Date: Section
Technology. In the My Files [My Files] submenu you can store all the programs that you have made on the NXT or downloaded from your computer.
![Technology. In the My Files [My Files] submenu you can store all the programs that you have made on the NXT or downloaded from your computer.](/thumbs/74/70002303.jpg "Technology. In the My Files [My Files] submenu you can store all the programs that you have made on the NXT or downloaded from your computer.") NXT Main Menu My Files Files are automatically placed into the appropriate folders. When you download a program using a Sound file to the NXT, the program will be placed under Software files while the
NXT Main Menu My Files Files are automatically placed into the appropriate folders. When you download a program using a Sound file to the NXT, the program will be placed under Software files while the
Walk-O-Meter User Manual
 Walk-O-Meter User Manual For BlackBerry Z10 and Q10 Version 2 Date 2013-09-26 1 Thank you for purchasing the Walk-O-Meter App from Cellimagine LLC. Walk-O-Meter pedometer app for your Z10 is the ultimate
ZIPWAKE DYNAMIC TRIM CONTROL SYSTEM OUTLINE OF OPERATING PRINCIPLES BEHIND THE AUTOMATIC MOTION CONTROL FEATURES
 ZIPWAKE DYNAMIC TRIM CONTROL SYSTEM OUTLINE OF OPERATING PRINCIPLES BEHIND THE AUTOMATIC MOTION CONTROL FEATURES TABLE OF CONTENTS 1 INTRODUCTION 3 2 SYSTEM COMPONENTS 3 3 PITCH AND ROLL ANGLES 4 4 AUTOMATIC
ISCORE INTEGRATION IOS SCORING GUIDE
 ISCORE INTEGRATION IOS SCORING GUIDE TABLE OF CONTENTS TABLE OF CONTENTS... 2 INTRODUCTION... 4 INTEGRATION REQUIRMENTS... 4 GETTING STARTED... 4 Discover Games... 4 GAME INFO... 5 Game Info Options...
MicroTim XB. User Manual. Precision Digital Barometric Altimeter / Barometer / VSI. Document Revision 1.0 Firmware Version 3.0
 MicroTim XB Precision Digital Barometric Altimeter / Barometer / VSI User Manual Document Revision 1.0 Firmware Version 3.0 Table of Contents Table of Contents...2 1 General Operation...5 1.1 Altitude
FIG: 27.1 Tool String
 Bring up Radioactive Tracer service. Click Acquisition Box - Edit - Tool String Edit the tool string as necessary to reflect the tool string being run. This is important to insure proper offsets, filters,
QUICK WARM UP: Thursday 3/9
 Name: pd: Unit 6, QUICK WARM UP: Thursday 3/9 1) The slope of a distance vs. time graph shows an object s. 2) The slope of a position vs. time graph shows an object s. 3) Can an object have a constant
HEATEC TEC-NOTE. Setting Siemens Pressure Transmitter. Used on Heatec Vertical Asphalt Tanks. Publication No , Revised
 HEATEC TEC-NOTE, Revised 1-5-15 Setting Siemens Pressure Transmitter Used on Heatec Vertical Asphalt Tanks This document provides information on setting Siemens pressure transmitters used on Heatec vertical
Heat Engine. Reading: Appropriate sections for first, second law of thermodynamics, and PV diagrams.
 Heat Engine Equipment: Capstone, 2 large glass beakers (one for ice water, the other for boiling water), temperature sensor, pressure sensor, rotary motion sensor, meter stick, calipers, set of weights,
Microsoft Windows Software Manual for FITstep Stream Version 4
 Thank you for purchasing this product from Gopher. If you are not satisfied with any Gopher purchase for any reason at any time, contact us and we will replace the product, credit your account, or refund
FRDS GEN II SIMULATOR WORKBOOK
 FRDS GEN II SIMULATOR WORKBOOK Trotter Control Inc 2015 Document# Revision Revised 9001-0038 FRDS GEN II Simulator Workbook E 02/15/2015 by DC FRDS GEN II Simulator Workbook This workbook is a follow-on
Quick Start Guide. A. Hardware installation B. Software installation C. Start the software for the first time D. Do your first measurement
 Quick Start Guide This Quick Start Guide describes the hardware and software installation process and the Measurement feature in a simple way. Please follow the sequence of the steps to avoid problems
USER GUIDE USER GUIDE
 1 TABLE OF CONTENTS GETTING STARTED 2 Included in the box 2 Compatible smartphones 2 Accessories: 2 Download Mobitee and PIQ application 2 GET STARTED WITH MOBITEE AND PIQ 3 Create your Account and Login
Lesson: Pitch Trim. Materials / Equipment Publications o Flight Training Manual for Gliders (Holtz) Lesson 4.4 Using the Trim Control.
 Lesson 4.4 Using the Trim Control.") 11/18/2015 Pitch Trim Page 1 Lesson: Pitch Trim Objectives: o Knowledge o An understanding of the aerodynamics related to longitudinal (pitch) stability o Skill o Use of the pitch trim system to control
11/18/2015 Pitch Trim Page 1 Lesson: Pitch Trim Objectives: o Knowledge o An understanding of the aerodynamics related to longitudinal (pitch) stability o Skill o Use of the pitch trim system to control
TrackMan Operator Training
 TrackMan Operator Training The following setup and use information is the same for using TrackMan in the Indoor setting or Outdoor setting unless noted Extend the two bottom legs and single back leg before
PART 5 - OPTIONS CONTENTS 5.1 SYSTEM EXPANSION 5-3
 PART 5 - OPTIONS CONTENTS Para Page 5.1 SYSTEM EXPANSION 5-3 5.2 SENSORS 5-3 5.2.1 Trim Angle Sensor 5-3 5.2.2 Mast Rotation Sensor 5-3 5.2.3 Heel Angle Sensor 5-3 5.2.4 Barometric Pressure Sensor 5-3
Create a road in your house
 2016.5.20 All cyclists should be able to enjoy sport cycling without regard for the place or time. We want cyclists to be able to ride as hard as they want indoors regardless of the weather or time of
uemis CONNECT: Synchronisation of the SDA with myuemis
 uemis CONNECT: Synchronisation of the SDA with myuemis 1 What is myuemis? In myuemis, your private area on the Internet portal www.uemis.com, you can visualise your dives, manage your database and transfer
How to set up and use DeWiggler Analyst
 How to set up and use DeWiggler Analyst The most important mission of an instrument system is correctly reporting wind direction (see http://www.ockam.com/functrue.html). DeWiggler Analyst is an application
BUYER S GUIDE AQUAlogger 530WTD
 OCEAN & ENVIRONMENTAL BUYER S GUIDE AQUAlogger 530WTD Wireless Temperature and Depth Logger AQUAlogger 530WTD The AQUAlogger 530WTD has an innovative design that includes the ability to transfer stored
Thermal Profiling the Reflow Process
 Thermal Profiling the Reflow Process The Nomadics TCProfile system is a cost-effective instrument to measure the temperature characteristics of any process where the thermal profile is important to the
Tru Flight TRUFLIGHT INSTALLATION GUIDE TRUGOLF.COM
 Tru Flight T R A C K I N G S Y S T E M TRUFLIGHT INSTALLATION GUIDE TRUGOLF.COM TruFlight Camera Tracking System Setup & Installation TruFlight : How It Works... 1 TruFlight Components... 1 TruFlight Installation...
EZ Boom 2010 System for the EZ Guide 500 Lightbar Triangle Ag Services Users Guide
 EZ Boom 2010 System for the EZ Guide 500 Lightbar Triangle Ag Services Users Guide Parts of the Controller (For details on the parts of the EZ Boom controller refer to Appendix F) Status Indicator Rate
ELIMINATOR COMPETITION DRAG RACE Program Manual Firm Ver 4.11
 ELIMINATOR COMPETITION DRAG RACE Program Manual Firm Ver 4.11 The Portatree Eliminator Super 2000 Competition Track Timer can be used with an IBM Compatible Personal Computer connected through Com Port
La Crosse Technology, Ltd. Page 1
 XG-55 FAQS The links below will work in most PDF viewers and link to the topic area by clicking the link. We recommend Adobe Reader version 10 or greater available at: http://get.adobe.com/reader CONTENTS
Positioned For Speed
 Positioned For Speed Positioned For Speed Global Network Retül Alphamantis Technologies PowerTap VELO Sports Center Pro Tour Level Team Support Team Sky Garmin Sharp Orica GreenEDGE Team Europcar Columbia
Figure SM1: Front panel of the multipatcher software graphic user interface (GUI) at the beginning of multipatcher operation.
 at the beginning of multipatcher operation.") APPENDIX 2. Multipatcher Software Setup and Operation. The multipatcher program is organized into four panels. There are controls that allow the user to specify various parameters into the system. The
APPENDIX 2. Multipatcher Software Setup and Operation. The multipatcher program is organized into four panels. There are controls that allow the user to specify various parameters into the system. The
Anatomy of a Homer. Purpose. Required Equipment/Supplies. Optional Equipment/Supplies. Discussion
 Chapter 5: Projectile Motion Projectile Motion 17 Anatomy of a Homer Purpose To understand the principles of projectile motion by analyzing the physics of home runs Required Equipment/Supplies graph paper,
Technical Bulletin. Seametrics Smart Sensors: Barometric Compensation (with optional DTW setting) Introduction. How Pressure is Measured
 Introduction. How Pressure is Measured") Seametrics Smart Sensors: Precision Environmental Sensors An ONICON Brand The Barometric Compensation Utility is specifically for the PT2X and LevelSCOUT sensors. It uses barometric data to compensate
Seametrics Smart Sensors: Precision Environmental Sensors An ONICON Brand The Barometric Compensation Utility is specifically for the PT2X and LevelSCOUT sensors. It uses barometric data to compensate
The Weekend Warrior. VeloSano Training Guide
 VeloSano Training Guide The Weekend Warrior By Dr. Michael Schaefer This guide includes suggestions for training for the VeloSano Bike to cure event of your chosen distance. If you are new to bicycling,
Bikes and Energy. Pre- Lab: The Bike Speedometer. A Bit of History
 Bikes and Energy Pre- Lab: The Bike Speedometer A Bit of History In this lab you ll use a bike speedometer to take most of your measurements. The Pre- Lab focuses on the basics of how a bike speedometer
Ideal gas law. Introduction
 Ideal gas law Introduction We think of a gas as a collection of tiny particles in random, thermal motion. When they collide with the sides of a container, they exert a force on the container walls. The
Equine Cannon Angle System
 Equine Cannon System How to interpret the results December 2010 Page 1 of 14 Table of Contents Introduction... 3 The Sagittal Plane... 4 The Coronal Plane... 5 Results Format... 6 How to Interpret the
Add this important safety precaution to your normal laboratory procedures:
 Student Activity Worksheet Speed and Velocity Are You Speeding? Driving Question What is speed and how is it related to velocity? Materials and Equipment For each student or group: Data collection system
nvisti Kestrel Companion Pro For Android
 nvisti Kestrel Companion Pro For Android The nvisti Kestrel Companion App is the most versatile, accurate and user friendly dual purpose app available. This app allows for both remote viewing for firing
Copyright 2004 by the Thomas G. Faria Corporation, Uncasville CT No part of this publication may by reproduced in any form, in an electronic
 Copyright 2004 by the Thomas G. Faria Corporation, Uncasville CT No part of this publication may by reproduced in any form, in an electronic retrieval system or otherwise, without the prior written permission
ACV-10 Automatic Control Valve
 ACV-10 Automatic Control Valve Installation, Operation & Maintenance General: The Archer Instruments ACV-10 is a precision automatic feed rate control valve for use in vacuum systems feeding Chlorine,
Reflow Oven HHL3000 INSTRUCTION MANUAL POHUA - jedyny autoryzowany przedstawiciel w Polsce
 POHUA - jedyny autoryzowany przedstawiciel w Polsce www.pohua.pl AOYUE TONGYI ELECTRONIC EQUIPMENT FACTORY Jishui Industrial Zone, Nantou, Zhongshan City, Guangdong Province, P. R. China www.aoyue.com
LEO SEM SOP Page 1 of 9 Revision 1.4 LEO 440 SEM SOP. Leica Leo Stereoscan 440i
 LEO SEM SOP Page 1 of 9 LEO 440 SEM SOP Gun (Filament) Column Manual Valves Chamber Window Chamber Stage Movement Leica Leo Stereoscan 440i 1. Scope 1.1 This document provides the procedure for operating
Dynamic Positioning Control Augmentation for Jack-up Vessels
 DYNAMIC POSITIONING CONFERENCE October 9-10, 2012 Design and Control Session Dynamic Positioning Control Augmentation for Jack-up Vessels By Bradley Deghuee L-3 Communications 1 Introduction Specialized
Lab 1. Adiabatic and reversible compression of a gas
 Lab 1. Adiabatic and reversible compression of a gas Introduction The initial and final states of an adiabatic and reversible volume change of an ideal gas can be determined by the First Law of Thermodynamics
BIOGAS COMBUSTION PLANT MAINTENANCE MANUAL
 BIOGAS COMBUSTION PLANT MAINTENANCE MANUAL (PLANT MAINTENANCE MANUAL) Puente Gallego Landfill, Rosario (Argentina) ARIA.BIZ S.A. Montevideo 589, 7 floor 1019 Capital federal Argentina Tel: +54 11 5171
USER GUIDE. Download the latest version at: v by Rob Rubin
 USER GUIDE Download the latest version at: http://drafttracker.weebly.com v. 2.01 by Rob Rubin Contents INTRODUCTION... 4 WHAT IS DRAFTTRACKER?... 4 SYSTEM REQUIREMENTS... 5 LEAGUE SETUP TAB... 6 LEAGUE
WELCOME TO THE REVOLUTION
 USER GUIDE WELCOME TO THE REVOLUTION THANK YOU FOR CHOOSING THE GCQUAD We listened to what you wanted - and created the most accurate, versatile and game-enhancing ball and club analysis solution available
VELODYNE REFERENCE MANUAL
 VELODYNE REFERENCE MANUAL W E LCOME TO V E LO DY N E Wind resistance, hills, pursuits, attacks, time trials; aerobic fitness, cadence eff i c i e n c y, speed: the exhilaration and the physical benefits
KEM Scientific, Inc. Instruments for Science from Scientists
 KEM Scientific, Inc. Instruments for Science from Scientists J-KEM Scientific, Inc. 6970 Olive Blvd. St. Louis, MO 63130 (314) 863-5536 Fax (314) 863-6070 E-Mail: jkem911@jkem.com Precision Vacuum Controller,
COMPARISON DRIVO - DIRETO
 COMPARISON DRIVO - DIRETO EN DRIVO Interactive hometrainer with direct transmission Simply choose the course or the training program and Drivo will automatically adjust resistance. Simulates Challenging
Air Ball! Evaluation copy
 Air Ball! Computer 24 Do you ever wonder how the National Basketball Association (NBA) decides how much air should be in the basketballs used during a game? The NBA measures the pressure inside the ball
Relative Humidity Calibration Kit
 Revised 1.4.11 Relative Humidity Calibration Kit For Calibrating All RH Measuring Kestrel Meters Model Numbers 3000, 3500, 4000, 4100, 4200, 4250, 4300, 4500 While the calibration process is very simple,
Sontek RiverSurveyor Test Plan Prepared by David S. Mueller, OSW February 20, 2004
 Sontek RiverSurveyor Test Plan Prepared by David S. Mueller, OSW February 20, 2004 INTRODUCTION Sontek/YSI has introduced new firmware and software for their RiverSurveyor product line. Firmware changes
Laboratory Mortar Mixer (Testing)
") TomTom-Tools GmbH Zelgli 20 8905 Arni info@tomtom-tools.com Switzerland www.tomtom-tools.com User Manual Version February 22, 2015 Laboratory Mortar Mixer (Testing) 1 Introduction The Laboratory Mortar
TomTom-Tools GmbH Zelgli 20 8905 Arni info@tomtom-tools.com Switzerland www.tomtom-tools.com User Manual Version February 22, 2015 Laboratory Mortar Mixer (Testing) 1 Introduction The Laboratory Mortar
Kestrel LiNK Ballistics For Android and iphone - Kestrel 5700 Elite & Sportsman with LiNK
 Kestrel LiNK Ballistics For Android and iphone - Kestrel 5700 Elite & Sportsman with LiNK The Kestrel LiNK Ballistics App is the most versatile, accurate and user friendly dual purpose app available. This
Mapping a Magnetic Field. Evaluation copy. Figure 1: Detecting the magnetic field around a bar magnet
 Mapping a Magnetic Field Experiment 16 The region around a magnet where magnetic forces can be detected is called a magnetic field. All magnets, no matter what their shape, have two poles labeled north
Pegas 4000 MF Gas Mixer InstructionManual Columbus Instruments
 Pegas 4000 MF Gas Mixer InstructionManual Contents I Table of Contents Foreword Part I Introduction 1 2 1 System overview... 2 2 Specifications... 3 Part II Installation 4 1 Rear panel connections...
Vapor Sorption Analyzer
 Vapor Sorption Analyzer Quick Start Guide 1. Getting Started Place the AquaLab VSA on a flat surface. Use the bubble level(figure 1: Adjustment and bubble level) and use the adjustable feet to level the
UNIVERSITY OF WATERLOO
 UNIVERSITY OF WATERLOO Department of Chemical Engineering ChE 524 Process Control Laboratory Instruction Manual January, 2001 Revised: May, 2009 1 Experiment # 2 - Double Pipe Heat Exchanger Experimental
Exercise 5-2. Bubblers EXERCISE OBJECTIVE DISCUSSION OUTLINE. Bubblers DISCUSSION. Learn to measure the level in a vessel using a bubbler.
 Exercise 5-2 Bubblers EXERCISE OBJECTIVE Learn to measure the level in a vessel using a bubbler. DISCUSSION OUTLINE The Discussion of this exercise covers the following points: Bubblers How to measure
SHIMADZU LC-10/20 PUMP
 SHIMADZU LC-10/20 PUMP Clarity Control Module ENG Code/Rev.: M091/70C Date: 24.10.2017 Phone: +420 251 013 400 DataApex Ltd. Fax: +420 251 013 401 Petrzilkova 2583/13 clarity@dataapex.com 158 00 Prague
GolfLogix: Golf GPS. User Guide for: BlackBerry Curve. Version 1.0. Software Release , 8330, 8350i, 8800, 8820, 8830, 8900
 GolfLogix: Golf GPS User Guide for: BlackBerry Curve 8310, 8330, 8350i, 8800, 8820, 8830, 8900 Version 1.0 Software Release 1.0 1 Table of Contents Topic Page Topic Page Getting Started Statistics Downloading
1)! DO NOT PROCEED BEYOND THIS MARK
! DO NOT PROCEED BEYOND THIS MARK") Operating Instructions for X-ray Photoelectron Spectrometer: Physical Electronics Model 555 XPS/AES (John H. Thomas, III, Ph.D., Electron Spectroscopy) Sample Insertion: figure 1. Sample insertion rod
Operating Instructions for X-ray Photoelectron Spectrometer: Physical Electronics Model 555 XPS/AES (John H. Thomas, III, Ph.D., Electron Spectroscopy) Sample Insertion: figure 1. Sample insertion rod
ECE 477 Digital Systems Senior Design Project Rev 9/12. User Manual
 User Manual Year: 2014 Semester: Fall Team: 7 Project: Digital Knockout Creation Date: November 17, 2014 Last Modified: October 7, 2015 Author: Email: rdacted@purdue.edu Assignment Evaluation:
USER MANUAL. Intelligent Diagnostic Controller IDC24-A IDC24-AF IDC24-AFL IDC24-F IDP24-A * IDP24-AF * IDP24-AFL * IDP24-F * 1/73
 USER MANUAL Intelligent Diagnostic Controller IDC24-A IDC24-AF IDC24-AFL IDC24-F IDP24-A * IDP24-AF * IDP24-AFL * IDP24-F * *) Require software ID: DID-SW-001 1/73 Table of contents 1 General... 3 1.1
GETTING STARTED. Main MENu SCREEN: When starting E6, the Main Menu screen displays the following buttons:
 CONTENTS Getting Started... 2 Play Golf... 5 Players 7 Courses 7 Holes 8 Modes 8 Configuration 10 Start 10 Back 10 Playing A Round 11 E6 Cube Menu for Play Mode 13 Stats & Options Screen 16 Practice...
SomnoSuite FAQ. Setup. Calibration 4. What are the calibration requirements for the SomnoSuite? Settings
 SomnoSuite FAQ V1.3 January 2015 Setup 1. How do I connect the SomnoSuite to my oxygen source? 2. Is there a way to speed up the downward movement of the pusher block when setting the empty position? 3.
Spatial Methods for Road Course Measurement
 Page 1 of 10 CurtinSearch Curtin Site Index Contact Details Links LASCAN Spatial Sciences WA Centre for Geodesy COURSE MEASUREMENT This page is a summary of results of some of the research we have recently
New product release. Universal Rebreather Monitor (URBM) Three cell / Independent backup
 Three cell / Independent backup") New product release Closed Circuit Research is pleased to announce the launch of our range of Universal Rebreather Monitors Universal Rebreather Monitor (URBM) Three cell / Independent backup Key features
New product release Closed Circuit Research is pleased to announce the launch of our range of Universal Rebreather Monitors Universal Rebreather Monitor (URBM) Three cell / Independent backup Key features
v2.3 USER MANUAL
 v2.3 USER MANUAL www.foresightsports.com Table of Contents 03 04 05 09 12 17 20 21 Activation Getting Started Play Compete Improve Settings Update Manager Glossary 04 11 05 12 03 Activation FSX Activation
Measurement of court speed and bounce. Rod Cross, Physics Department, Sydney University 2nd July 2006
 1 Measurement of court speed and bounce Rod Cross, Physics Department, Sydney University 2nd July 2006 The speed of a surface refers to the change in ball speed in a direction parallel to the surface.
Standard Operating Manual
 Standard Operating Manual Allwin21 AW610 RTP Page 1 of 18 Contents 1 Picture and Location 2 Process Capabilities 2.1 Cleanliness Standard 2.2 Recipes 2.3 Performance of Allwin21 AW610 RTP 3 Contact List
TABLE OF CONTENTS INTRODUCTION 3 SAFETY PRECAUTIONS 3 PACKAGE CONTENTS 4 DEVICE OVERVIEW 4 BUTTON OPERATION SUMMARY 5 BASIC OPERATION 6
 TABLE OF CONTENTS INTRODUCTION 3 SAFETY PRECAUTIONS 3 PACKAGE CONTENTS 4 DEVICE OVERVIEW 4 BUTTON OPERATION SUMMARY 5 BASIC OPERATION 6 CURRENT TIME MODE 7 FUNCTIONAL DISPLAY 7 WEATHER FORECAST FEATURE
LABORATORY EXERCISE 1 CONTROL VALVE CHARACTERISTICS
 Date: Name: LABORATORY EXERCISE 1 CONTROL VALVE CHARACTERISTICS OBJECTIVE: To demonstrate the relation between valve stem position and the fluid flow through a control valve, for both linear and equal
A differerential pressure anemometer
 A differerential pressure anemometer S. Kazadi, J. Lee, T.Lee, A. Bose June 6, 2015 Abstract There are a number of different applications where omnidirectional anemometers are needed rather than directional
Datasheet: K-30 ASCII Sensor
 Datasheet: K-30 ASCII Sensor The K30 ASCII sensor is a low cost, infrared and maintenance free transmitter module intended to be built into different host devices that require CO2 monitoring data. The
Relative Humidity Calibration Kit
 Relative Humidity Calibration Kit For calibrating the following Kestrel Meters Model Numbers 3000, 3500, 4000, 4200, 4250, 4300, 4400, 4500, 4600 (Not to be used for calibrating Kestrel 5 Series units
ME217 Fall 2017 Calibration Assignment
 ME217 Fall 2017 Calibration Assignment Jane Doe November 6, 2017 1 1 Summary of problem statement Prof. Mammoli seeks to estimate the mechanical energy needed to propel himself and his roadbike from his
Superconducting Susceptometer (MPMS-5S) Quantum Design Room 296 (MPMS)
 Quantum Design Room 296 (MPMS)") Superconducting Susceptometer (MPMS-5S) Quantum Design Room 296 (MPMS) Sensitivity: 1x10 11 A m 2 Applied DC fields: 0 T to 5 T Applied AC fields: 0 G to 3 G (zero-to-peak), 0.01 Hz to 1000 Hz Temperatures
Superconducting Susceptometer (MPMS-5S) Quantum Design Room 296 (MPMS) Sensitivity: 1x10 11 A m 2 Applied DC fields: 0 T to 5 T Applied AC fields: 0 G to 3 G (zero-to-peak), 0.01 Hz to 1000 Hz Temperatures
Boyle s Law: Pressure-Volume Relationship in Gases. PRELAB QUESTIONS (Answer on your own notebook paper)
") Boyle s Law: Pressure-Volume Relationship in Gases Experiment 18 GRADE LEVEL INDICATORS Construct, interpret and apply physical and conceptual models that represent or explain systems, objects, events
Boyle s Law: Pressure-Volume Relationship in Gases Experiment 18 GRADE LEVEL INDICATORS Construct, interpret and apply physical and conceptual models that represent or explain systems, objects, events
GolfLogix: Golf GPS. User Guide for: iphone 3G & 3GS. Version 1.0. Software Release 1.0
 GolfLogix: Golf GPS User Guide for: iphone 3G & 3GS Version 1.0 Software Release 1.0 1 Table of Contents Topic Page Topic Page Getting Started Statistics Downloading the GolfLogix Application 4 Statistic
How to set up and use DeWiggler Analyst
 The most important mission of an instrument system is correctly reporting wind direction (see http://www.ockam.com/functrue.html). DeWiggler Analyst is an application for determining wind direction change
BALL PLACEMENT 1 Driver, Woods, Hybrids & Irons Chip Shots Putting
 MANUAL by CONTENTS BALL PLACEMENT 1 Driver, Woods, Hybrids & Irons Chip Shots Putting GETTING STARTED 3 Main Menu Options - Camera, Sound, Auto Continue, Tracer Style, Top view Tracers, Flybys, Measurements,
ECHO MANUAL WARNING. L B A ltim e te rs. ECHO is a trademark of LB Altimeters, Denmark
 ECHO MANUAL L B A ltim e te rs ECHO is a trademark of LB Altimeters, Denmark LB Altimeters operates a policy of continuous development Therefore, we reserve the right to make changes and improvements to