Hoyt USA 543 North Neil Armstrong Road Salt LAke City, Utah (801) phone (801) fax
|
|
|
- Gwendolyn Stevenson
- 5 years ago
- Views:
Transcription
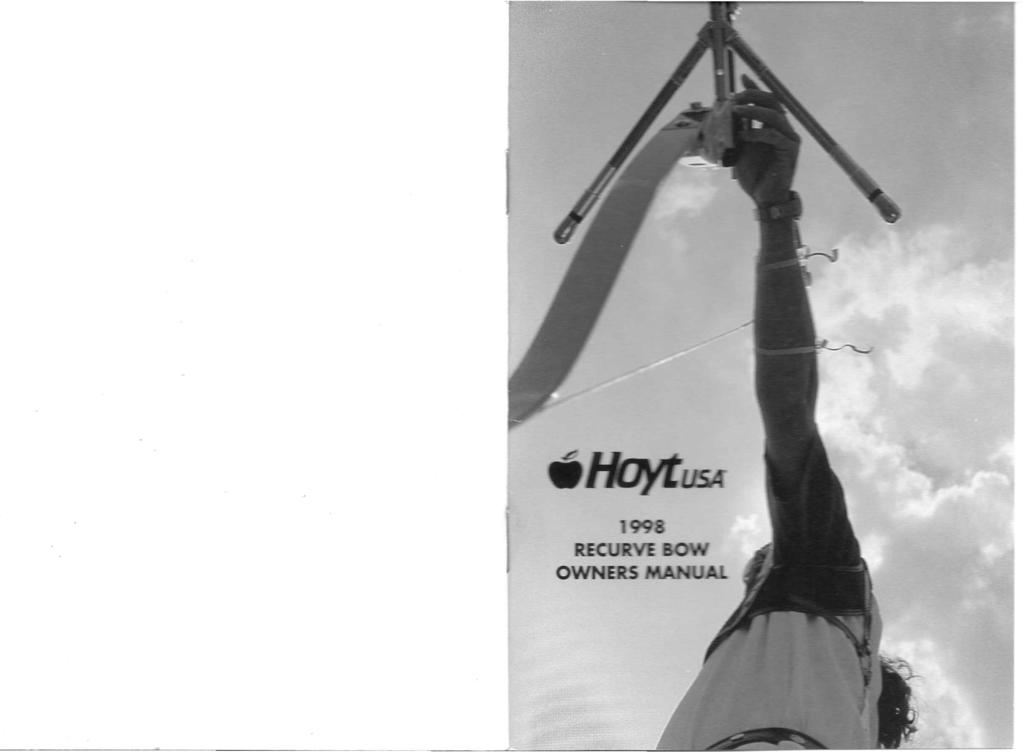
1 RE OWNERS
2 Hoyt USA 543 North Neil Armstrong Road Salt LAke City, Utah (801) phone (801) fax 2. Recurve Bow Terminology 3 3. Important Information 7 4. Hoyt Recurve Bow Limbs 8 World Class Limbs for Radian, Avalon and Gold Medalist 8 Sprint Recurve Limbs Hoyt Avalon/Radian Recurve Bows 10 Installing Limbs Stringing Your Avalon/Radian Brace Heigh! Avalon Limb Alignment Adjustments. 12 Bow Limb Adjustments. 13 Weight Adjustments Tiller Adjustments 15 Clicker Extension Plate Hoyt Gold Medalist Recurve Bow 18 Installing Limbs 18 Stringing Your Gold Medalist Bow Limb Adjustments. 20 Weight Adjustments Tiller Adjustments 22 Gold Medalist Verla-Tune System Hoyt Sprint Recurve Bow 25 Installing Limbs...25 Stringing Your Bow Brace Height Recurve Bow Tuning 27 Nocking Point Center Shot.. 27 Target Face Tuning 28 Paper Tuning. 29 Additional Tuning Options. 30 Tuning Tiller Hoyt Recurve Bow Warranty Warranty Statement Warranty Service
3 RECURVE AVALON BOW TERMINOLOGY Hoyt Recurve Bow Model _ Limb Type and Length Weight # Purchased From _ Important Note: Save your sales receipt. That receipt is your proof of date-of-purchase. Proof of date-ofpurchase will be required should your bow ever require warranty service. Pocket Adjustment Screw Pocket Adjustment Lock Bolt The following space has been reserved for you to staple or tape your sales receipt for safe and convenient keeping Avalon Grip Lower Front Stabilizer Mounting WeightfTilier / Adjustment Bolt Lower Back Stabilizer Mounting WeightfTilier Locking Bolt Pocket Adjustment Lock Bolt Pocket Adjustment Screw IMPORTANT! Staple or tape you r sales receipt here for safekeeping.
4 RECURVE BOW TERMINOLOGY RECURVE BOW TERMINOLOGY RADIAN GOLD MEDALIST Weighl/Tiller "J".m~~,,~ Top Stabilizer Mounting _ Clicker Mounting Recess Stabilizer Bushing Weighl/Tiller Adjustment Center Stabilizer Bushing---- Weighl/Tiller Adjustment Lower Rear Stabilizer Bushing Weighl/Tiller Adjustment Bolt Tiller Measurement Point
5 RECURVE BOW TERMINOLOGY SPRINT Limb Mounting Bolt and Cupped Washer "" 1. NEVER DRY FIRE YOUR BOW. Dry fire means to draw and release your bow without an arrow. Shooting without an arrow to absorb most of the bow's stored energy could cause severe damage to the bow and possible injury to the shooter or others close by. NEVER EXPOSE YOUR BOW TO EXTREME HEAT OR PROLONGED EXTREME MOISTURE. Excessive heat, such as could be experienced on a sunny day inside of a closed vehicle, could cause limb failure. Prolonged storage in a hot, dry attic or damp basement could also be damaging. This voids your warranty. CAREFULLY INSPECT YOUR BOW BEFORE EACH SHOOTING SESSION. Carefully note condition of bowstring, limbs and riser before you shoot. Frayed bowstrings should be replaced. Damaged or suspect limbs should be reported to the dealer where you purchased your bow. MAINTENANCE OF BOWSTRING AND BOW LIMBS. Apply a light coat of bowstring wax to your bow's string on a regular basis. With target bows, use a quality car polish to protect the finish and luster of your bow's limbs. Limb Mounting Bolt / and Cupped Washer ALWAYS BE SAFE. Never shoot your bow straight up. Always be sure of your target area and the area immediately behind it. INSPECT ALL ARROWS. Before shooting, inspect your arrows for defects. Replace cracked nocks. Discard fractured or dented arrows. Replace loose fletch. This bow is a deadly weapon. Always abide by all safety advisements. Children should be supervised by an adult.
6 HOYT RECURVE BOW LIMBS HOYT WORLD CLASS RECURVE LIMBS FOR AVALON, RADIAN AND GOLD MEDALIST Hoyt World Class Recurve Limbs are available in three winning styles: Carbon Plus Laminated Limbs, Wood/Carbon Laminated Limbs and Wood Core Laminated Limbs. Each style is available in three championship limb lengths: Long, Medium and Short. The Hoyt Sprint is 56 inches in length. Sprint limbs are wood core dual laminated and are available in weights from 15 to 35# in five pound increments. Marked Sprint weights are measured at 24 inches. Actual bow length is determined by the combination of limb length and riser type (length). The following chart shows the relationship between Hoyt World Class Recurve Limbs and Hoyt Avalon, Radian and Gold Medalist risers. Hoyt USA Recurve Riser Long Limbs Medium Limbs Short Limbs Avalon L Riser 70" 68" 66" Radian L Riser 70" 68" 66" Gold Medalist Riser 70" 68" 66" Avalon S Riser 68" 66" 64" Radian S Riser 68" 66" 64" Hoyt World Class Recurve Limbs are available in marked weights from 22 to 50# in two pound increments. This marked weight is measured at 28 inches of draw when the limbs are used with either a Gold Medalist, Avalon L or Radian L riser. Shifting the same limbs to a shorter Avalon S or Radian S riser will result in a weight increase of approximately two pounds.
.")
7 HOYT RADIAN AND AVALON RECURVE BOWS INSTALLING LIMBS ON YOUR HOYT RADIAN I AVALON Your Hoyt Radian or Avalon has a remarkable limb mounting and limb weight/tiller adjustment system. Internally, the butt end of each limb is engaged in a circular channel. That channel is adjustable for weight control and limb balance (tiller). The special dovetail limb guide bushing aligns and captures each limb to prevent it from disengaging from the riser should bowstring breakage occur. A spring loaded detent button also holds the limbs in place while stringing. To install each limb in its respective pocket, carefully enter the limb guide bushing in the dovetail groove and gently push the limb forward until the limb butt seats into the channel at the back of the pocket. Firmly push the limb home to engage the detent button. Special attention should be given to the proper procedure for stringing any recurve bow. The safest and only procedure recommended by Hoyt USA is to use a bow stringer. Preadjust the length of the bow stringer according to the manufacturers instructions. Begin by placing the larger loop of the bowstring over the upper limb and slipping the bowstring's smaller loop in the string groove of the lower limb. Next, place the large cup of the bow stringer over the lower limb tip and the small cup over the upper limb tip. With the upper limb of the bow held to the left, step (some prefer to use both feet) on the middle of the bow stringer with instep (back of bow up) and pull with the right hand on the bow grip, flexing the bow su.fficie:ntly to easily slil? the upper loop of the bowstring Into the upper 11mb string groove. To unstring, reverse this procedure. BRACE HEIGHT FOR YOUR RADIAN I AVALON AND GOLD MEDALIST Brace height is the perpendicular distance from the ~owstring to the pivot point of the handle. This height IS an Important part of tuning. The following chart gives you the recommended brace height range for your Hoyt Radian, Avalon or Gold Medalist. C~ntrary to popular opinion, changing the brace height does not change bow weight. But changing brace height does drastically effect bow performance. F.or instance, each 1/2 inch change in brace height will effect velocity approximately 2 1/2 feet per second. A higher brace height will decrease velocity. A lower brace height will increase velocity. Stored energy and the length of the power stroke are both effected by brace height, thus affecting arrow speed. Optimum brace height is one that gives smooth bow action, good arrow flight, tight grouping and a quiet shot. ~enerally, slight variations of brace height are not critical, but at the extremes, you may get erratic arrow flight and/or excessive string noise. long limbs Medium limbs Short limbs Radian/Avalon Short Riser 81/2-9 " 8-81/2" 7 3/4-8 1/4" Radian/Avalon long Riser 9-91/2" 81/2-9" 8-8 1/2" Gold Medalist Riser 9-91/2" 81/2-9" 8-8 1/2"
8 HOYT AVALON ALIGNMENT ADJUSTMENT INSTRUCTIONS The Hoyt USA Avalon is equipped with an adjustable pocket system to make fine adjustments of limb/riser alignment. The system is designed to make one or many adjustments while the bow is strung. A 5/32" hex key is provided to make all adjustments. The components of the system are: 1) the pocket adjustment screws located on the sight window side of each pocket and (2) the adjustment lock bolts, located adjacent to the adjustment bolt inside the cut out portion of the riser. To make a pocket adjustment, determine which direction to adjust the top or bottom limb by centering the bowstring in the holes that provide the lock down bolt access for the tiller/poundage adjustment. Center the bowstring in the bottom hole, then compare the alignment at the top hole and visa/versa. (Tip: having your center stabilizer attached forms another point of reference to center the bowstring with. As you check the alignment with the limb tiller lock access holes, also check that the bowstring centers with the stabilizer.) HOYT AVALON ALIGNMENT ADJUSTMENT INSTRUCTIONS (CONT.) If you have an arrow on the string, on the arrow rest and against the plunger, it is easy to see the movement that each turn of the adjustment screw makes. The goal is to have the arrow parallel with the center stabilizer and have the string centered on the bow limbs and through the center of the riser. Once this is achieved, tuning for the correct arrow flight can be started. If the limb pockets have been changed, you must re-tune for correct arrow flight as any adjustments in the pocket will affect your tune. If adjustment is necessary, loosen the appropriate adjustment lock bolt using the hex key wrench. To adjust a limb tip toward the sight window side of the bow, rotate the pocket adjustment screw clockwise using the hex key wrench.to move a limb tip away from the sight window side of the bow, rotate the pocket adjustment screw counter clockwise. (Warning: There is only 3/4 of a turn of adjustment in either direction). Once the adjustments are complete tighten the pocket adjustment lock bolt until the pocket adjustment screw is secure. Note: The limb pockets of the Avalon are set at the factory and should therefore be very close if not perfect. Need for adjustment should be very minor, if at all!)

9 Bow weight and limb tiller adjustments are accomplished with the Hoyt Radian or Avalon by using the two allen wrenches provided with the bow. Preferably, these adjustments are made when the bow is strung. The Limb Adjustment Channel at the back of the Radian/Avalon limb pocket is factory adjusted to minimum bow weight. Initially, it is suggested that adjustments be left as is until tuning procedures (described later in this manual) are completed. Should bow weight or tiller changes be desired, begin by loosening the WeightITiller Locking bolt. Do this by using one of the provided allen wrenches to hold the WeightITiller Adjustment Bolt in place. Use the other wrench to loosen the WeightlTiller Locking Bolt. Adjust weight and/or tiller with the WeightlTilier Adjustment Bolt. When all adjustments are completed, re-tighten the WeightlTilier Locking Bolt with both of the allen wrenches provided. One wrench should be used to hold the Weight/Tiller Adjustment Bolt in place while the other wrench is used to tighten the WeightITiller Locking Bolt. The Hoyt Radian and Avalon are weight adjustable in a range of approximately 10% above the weight indicated on the limbs. For example, if the limbs are marked 40 pounds, the bow is capable of adjustment to approximately 44 pounds. As a fine tuning aid, sometimes changing bow weight to accommodate arrow spine is desirable - increasing weight for a stiff spine and decreasing it for a weak spine. Turning the WeightITiller Adjustment Bolt clockwise will increase bow weight. Turning the same bolt counter-clockwise will decrease bow weight. Bow tiller should be checked after all bow weight changes. Some bow weight changes may necessitate tiller corrections. Strengthening or weakening one limb relative to the other is called tillering. Turning the Weight/Tiller Adjustment Bolt clockwise on one limb will strengthen that limb and decrease the distance between the limb and the string. Turning the WeightlTilier Adjustment Bolt counter-clockwise will produce opposite results. To adjust tiller on the Hoyt Radian without affecting bow weight, adjust each WeightlTilier Adjustment Bolt an equal amount but in opposite directions. When a tiller adjustment is made, shoot several ends to stabilize the change and recheck the tiller. It is best to make tiller or weight adjustments with bow braced. Normally, in the course of shooting, all bows will change tiller to some degree whether limbs are adjustable or non-adjustable. Some bows have been known to reverse tiller under extreme conditions. With very few exceptions, bows that change tiller will return to their normal tiller after resting in an unstrung condition for only a few hours.
10 '-11---'--- '-'-' WeightITilier Adjustment Bolt 3/16 Allen Wrench Radian and Avalon offer the serious FITA archer a built-in clicker extension system. Each Radian and Avalon riser is supplied with three different length clicker extension plates. To change plates, remove retaining screw and replace the existing clicker extension plate with the desired plate. WeightITilier ~ LOC~king Bolt ~============: /16 Allen Wrench Therefore, with any recurve bow, do not jump into making premature tiller adjustments as soon as a change in tiller is observed. After the bow has rested and is restrung, normal tiller will typically return. However, there are times when limb balance (tiller) may need to be adjusted after some use of the bow has occurred. Should this be the case, make an initial tiller adjustment, then shoot several ends and recheck tiller.
11 HOYT GOLD MEDALIST RECURVE BOW INSTALLING LIMBS IN YOUR HOYT GOLD MEDALIST Your Hoyt Gold Medalist has a remarkable limb mounting and limb weight/tiller adjustment system. Internally, the butt end of each limb is engaged in a channel. That channel is adjustable for weight control and limb balance (tiller). Also, the special dovetail limb guide aligns and captures the limb to prevent it from disengaging from the riser should bowstring breakage occur. A spring loaded detent button also holds the limb in place while stringing. To install ead) limb in its respective pocket, carefully enter the limb guide bushing in the dovetail groove and gently push the limb forward until the limb butt seats into the channel at the back of the pocket. Firmly push the limb home to engage the detent button. Preadjust the length of the bow stringer according to the manufacturer's instructions. Begin by placing the larger loop of the bowstring over the upper limb and slipping the bowstring's smaller loop in the string groove of the lower limb. Next, place the large cup of the bow stringer over the lower limb tip and the small cup over the upper limb tip. With the upper limb of the bow held to the left, step (some prefer to use both feet) on the middle of the bow stringer with instep (back of bow up) and pull with the right hand on the bow grip, flexing the bow sufficiently to easily slip the upper loop of the bowstring into the upper limb string groove. To unstring, reverse this procedure. Special attention should be given to the proper procedure for stringing any recurve bow. The safest, and only procedure recommended by Hoyt USA is to use a bow stringer.

12 Bow weight and limb tiller adjustments are accomplished with the use of the special allen wrench provided. Preferably, these adjustments are made when the bow is strung. The Limb Adjustment Channel at the back of the Gold Medalist limb pocket is factory adjusted to minimum bow weight. Initially it is suggested that adjustments be left as is until tuning procedures (described later in this manual) are completed. Should bow weight or a change in tiller be desired, first unlock the Hollow (see through) Lock Screw (at least one full turn counter-clockwise) bearing against and locking the Channel Drive Screw (limb adjustment bolt) locked at each end of handle, face side. Use the limited entry (dimpled end) of the wrench on the Hollow Lock Screw. With the opposite end of the wrench, insert through the Hollow Lock Screw and into the channel Drive Screw of the Gold Medalist. Turn the Channel Drive Screw clockwise or counter-clockwise (see Weight and Tiller adjustment, page 12 and 13) the desired amount, reverse the wrench and firmly lock the Hollow Lock Screw against the Channel Drive Screw. If the channel bottoms out at the front or back of the pocket, do not force the Drive Screw. SPECIAL NOTE: The Channel has a limited amount of rotational play and the limbs, when inserted into the Channel, have a limited amount of fore and aft play. This is a design feature. All play ceases and the limbs lock up solidly when the bow is strung. The Gold Medalist is weight adjustable in a range about 10% above the weight indicated on the limbs. For example, if the limbs are marked 40 pounds, the bow is capable of adjustment for approximately 44 pounds at 28 inch draw. As a fine tuning aid, sometimes changing bow weight to accommodate arrow spine is desirable - increasing weight for a stiff spine and decreasing it for a weak spine. Turning both Channel Drive Screws clockwise in equal amounts will increase bow weight, counter-clockwise will decrease bow weight. Should a substantial change be made in weight (2 Ibs. or more) turning Channel Drive Screws equal amounts for both limbs will most likely show the tiller has not remained constant and a correction needs to be made.

13 Strengthening or weakening one limb relative to the other is called tillering. Turning the Channel Drive Screw clockwise on one limb will strengthen that limb and decrease the distance between the limb and the string. Turning the Channel Drive Screw counterclockwise will produce opposite results. To adjust tiller on the Hoyt Gold Medalist without affecting bow weight, adjust each Channel Drive Screw an equal amount, but in opposite directions. When a tiller adjustment is made, shoot several ends to stabilize the change and recheck the tiller, It is best to make tiller or weight adjustments with bow braced. Normally, in the course of shooting, all bows will change tiller to some degree whether limbs are adjustable or non-adjustable. Some bows have been known to reverse tiller under extreme conditions. With very few exceptions, bows that change tiller will return to their normal tiller after resting in an unstrung condition for only a few hours. Therefore, with any recurve bow, do not jump into making premature tiller adjustments as soon as a change in tiller is observed. After the bow has rested and is restrung, normal tiller will typically return. However, there are times when limb balance (tiller) may need to be adjusted after some use of the bow has occurred. Should this be the case, make an initial tiller adjustment, then shoot several ends and recheck tiller. Contrary to popular opinion, limb tiller should not be considered a critical factor in tuning recurve bows! Why? Because tiller is only a measure of static balance; the dimensional relationship of the stationary upper and lower limbs to the string of the braced bow. Within reasonable limits, variances in tiller have very little bearing on dynamic balance (the limbs as they move), the truly important factor. Surprisingly, a variance of 7/8 inch reverse tiller (lower limb farthest from the string) to 7/8 inch normal tiller (upper limb farthest from the string) will show little if any effect on grouping accuracy. The nocking point may need to be moved to accommodate the tiller change, but only a minimal amount. Keep in mind that when the correct nocking point is located to prevent arrow porpoising, relative dynamic balance between the limbs has been achieved. As a practical matter and as a starting point with your Gold Medalist, we suggest placing the tiller at 1/8 inch, to 1/2 inch more on the upper limb (normal tiller) as measured perpendicular to the string at each end of the riser. The rationale for this is two fold. First, it makes the lower limb stronger to offset the greater strain imposed on it and the subsequent tendency of the lower limb to "let down", especially after a day of hard shooting in hot, humid weather. Second, some of the more skilled shooters sense a greater stability with positive tiller because it creates a more relaxed bow hand and a tendency to aim finer.

14 HOYT GOLD MEDALIST VERTA - TUNE ARROW REST SYSTEM ADJUSTMENT The Hoyt Gold Medalist features a remarkable arrow rest tuning system called the Verta-Tune System. The Verta-Tune System allows the archer to adjust the vertical position of the arrow rest. Experimentation should be used by the archer to establish the vertical rest position which provides the most accurate arrow groupings. HOYT SPRINT RECURVE BOW INSTALLING LIMBS ON YOUR HOYT SPRINT Each Hoyt Sprint Limb mounts securely and conveniently into the independent limb pockets by means of a single limb mounting bolt and cupped washer with pad. The limb should be carefully positioned into the independent limb pocket and the limb mounting bolt snugged down firmly. Avoid over tightening the limb mounting bolts. Snug is firm enough. At no time should your Hoyt Sprint be shot with the limb mounting bolts other than snugged firmly all the way down against the face of the limb. There is no weight adjustability with a single set of limbs on the Hoyt Sprint. The only way to change draw weight, is to change to a differently weighted set of Hoyt limbs. Special attention should be given to the proper procedure for stringing any recurve bow. The safest, and only procedure recommended by Hoyt USA is to use a bow stringer. Preadjust the length of the bow stringer according to the manufacturers instructions. Begin by placing the larger loop of the bow string over the upper limb and slipping the bowstring's smaller loop in the string groove of the lower limb. Next, place the large cup of the bow stringer over the lower limb tip and the small cup over the upper limb tip. With the upper limb of the bow held to the left, step (some prefer to use both feet) on the middle of the bow stringer with instep (back of bow up) and pull with the right hand on the bow grip, flexing the bow sufficiently to easily slip the upper loop of the bowstring into the upper limb string groove. To unstring, reverse this procedure.
15 Brace height is the perpendicular distance from the bowstring to the pivot point of the handle. This height is an important part of tuning. Contrary to popular opinion, changing the brace height does not change bow weight. But changing brace height does drastically effect bow performance. For instance, each 1/2 inch change in brace height will effect velocity approximately 2 1/2 feet per second. A higher brace height will decrease velocity. A lower brace height will increase velocity. Stored energy and the length of the power stroke are both effected by brace height, thus affecting arrow speed. Optimum brace height is one that gives smooth bow action, good arrow flight, tight grouping and a quiet shot. Generally, slight variations of string height are not critical, but at the extremes, you may get erratic arrow flight and/or excessive string noise. RECURVE BOW TUNING INSTALLING A NOCKING POINT A nocking point marks the exact positio~ ~f the ar~ow on the bowstring for each shot. To begin Installation, slip the nock set on the string above the center serving. Then, slide it carefully down into the correct position. Initially set the nocklng point at approximately 3/8 " above level. To close the nock set, use proper nock set pliers. CI~se the nock set a small amount, then rotate the pliers and comple~e closing the nock set until the ends butt together. This simple procedure keeps the nock set round. Never shoot a bow with a nock set that has not been completely closed. It is recommended that the brace height of your Hoyt Sprint is to be maintained in the range of 6-61/2 inches.

16 The objective here is to position the arrow directly in line with the power path of the bowstring. To do that, begin by putting a small reference mark in Arrow Point the center of the upper limb just '" above the top end of the riser. Place an arrow on the string and arrow rest and position the bow so that your eye aligns the bowstring with the reference mark on the upper limb. Now, keeping that alignment, adjust the arrow rest or cushion plunger in or out so that the inside edge of the arrow shaft at its point end aligns with the bowstring. See diagram. Have on hand three fletched arrows and three bare shafts, all identical, straight and carefully nocked. Shoot from about 15 to 20 meters at a 40 centimeter (or other suitable size) target face. Sight in with the fletched shafts. Once you have developed a grouping pattern, shoot the bare shafts and note how they group relative to the fletched shafts. Your first consideration is the nocking point. If the bare shafts are grouping below the fletched shafts, lower the nocking point. If the bare shafts are grouping above, move the nocking point up. Each time the nocking point is moved requires a new sighting in of the fletched arrows. Continue until both sets group relatively together. Finer adjustment may be needed later. Next, work with the cushion plunger tension. From your previous grouping pattern, note the lateral relationship of the bare shafts to those fletched. If the bare shafts hit to the right of the fletched shafts, increase the spring tension on the cushion plunger. Should the bare shafts hit to the left of those fletched, loosen the spring tension. With each change in spring tension, a resighting is needed before shooting the bare shafts. Reverse these instructions if you are left handed. IMPORTANT NOTE: The shooter's level of skill will determine just how well this tuning method will work. Generally the bare shaft group will be twice the diameter of the fletched shaft group. For example, if you shoot a three inch diameter fletched arrow group, the bare shaft group will be approximately six inches in diameter. In paper tuning, an arrow (usually a fletched arrow) is shot through paper at point blank range to collect facts about actual arrow flight. The hole or tear the arrow makes as it passes through the paper becomes both a record of the arrow's flight pattern and an indicator of required tuning adjustments. Newspaper, butcher paper or computer paper all work well. The paper should be tightly taped over a rigid framework (an old picture frame works fine).
17 Shoot at 10 feet from the paper and note the tear pa,ttern. V~rtical tears indicate nocking point adjustment IS needed, For a high tear (nock end of arrow enters pape:r high), lower the nocking point. For a low tear, raise the nocking point. Right tear (nock end of arrow t~ars paper to right) indicates ~pnng ten~lon of cushion plunger is too stiff. Loosen It. If tear IS to the left, tighten spring tension. The reverse would be true if you are left handed. []] []J BB High Low Right Left ADDITIONAL TUNING OPTIONS Sometim~s fine, tuning can be enhanced by simple changes In equipment. If these options are open to you, here are examples, based on a right hand shooter. Even though we have found that static bow limb tiller has relatively little bearing on accuracy, many shooters sense a stabilizing effect with positive tiller. When the degree of static tiller is found that is correct for you, your bow hand should be more relaxed and your aim finer. To achieve proper static tiller, stand about 10 to 15 yards from the target. Raise your arm and aim at the bullseye. Slowly draw the string back to your anchor and try to keep the sight on the bullseye. If the sight moves up while drawing back, increase the tiller of the upper limb. If the sight moves down while drawing back, decrease the tiller. Eventually you will be able to keep the sight close to the bullseye as you draw slowly back. Once accomplished, this procedure projects a feeling of solidarity and a psychological aid to accuracy. When you are comfortable with your static tiller and your bow hand feels relaxed, record the tiller for future reference. A. For a bare shaft hitting to the left in the Target Face Test or a nght tear on t~e Pap.er Tuning Test (stiff spine): 1. Us~ a heavier weight arrow point or add point weight. 2. Increase weight adjustment. 3. Decrease number of strands in bowstring. 4. Try a weaker spined arrow. B. For a bare shaft hitting to the right in the Target Face Test or a left tear on the Paper Tuning Test (weak spine): 1. Use a lighter weight point 2. Decrease weight adjustment. 3. Increase number of strands in bowstring. 4. Try a stiffer spined arrow.
18 Hoyt USA recurve bows are backed by a solid two year limited warranty. For the first year from date of purchase, Hoyt recurve bows are fully warranted against factory defects in materials and workmanship. For the second year from date of purchase, all warranty repairs or replacements on Hoyt recurve bows will be made at a charge of 50% of manufacturers suggested retail price. A copy of your retail sales receipt, establishing date of purchase, is required for all warranty service. There are no other warranties, expressed or implied, that extend beyond those written here. No agent, employee or representative of Hoyt or its dealers has the authority to bind Hoyt to any agreement not herein stated. Buyer agrees that the sole and exclusive remedies for breach on any warranty concerning Hoyt bows shall be repair or replacement of defective parts. Hoyt shall not be liable for injury or property other than the bows themselves. To obtain warranty service, you should return to the Hoyt Dealer where you purchased your Hoyt bow. The dealer can help you determine if Hoyt factory service is required or if the repair can be completed by the dealer. If the bow must be returned to the factory, the bow owner is responsible for the return postage to Hoyt. Hoyt, in turn, will pay the postage for reshipping the repaired bow. Be ore any bow is returned to the Hoyt factory for warranty -ervice, a Hoyt Return Authorization Number must be ained by calling Hoyt USA at (801 ) Y bow returned to the Hoyt factory for warranty service: 1. must be sent postage paid 2. must include a copy of the dated sales receipt 3. must include a short note explaining the nature of the problem 4. must include a Hoyt Return Authorization Number 5. should not include accessories unless otherwise instructed when the Return Authorization Number is obtained. - e most important part of any new bow selection is the careful and correct matching of the bow to the archer. We lieve that such personal service can only be accomplished face-to-face with a qualified pro shop expert such as can be ;. nd in any authorized Hoyt USA Dealership. For this reason, OYT USA WILL NOT PROVIDE ANY WARRANTY ON ANY HOYT RECURVE BOW PURCHASED BY MAIL ORDER. Hoyt recurve bows requiring Hoyt factory warranty service should be sent to: Hoyt USA 543 North Neil Armstrong Road, Salt Lake CitY,Utah
OWNER s MANUAL GUIDE BOOK FOR YOU
 OWNER s MANUAL GUIDE BOOK FOR YOU TABLE OF CONTENTS IMPORTANT INFORMATION 01 RECURVE BOW TERMINOLOGY IMPORTANT INFORMATION WIN&WIN BOW RECURVE INFORMATION 05 WIN&WIN BOW stringing brace height LIMB POCKET
Technical Service and Warranty Manual
 Technical Service and Warranty Manual T hank you for selecting a Champion Bow. We feel confident you will be pleased with the performance and durability we build into each and every bow we manufacture.
Made in the USA OWNER S MANUAL
 Made in the USA OWNER S MANUAL Service and Repair Information Your local archery retailer should be your first resource for service and repair. The retail establishment where you purchased your bow has
OWNER S MANUAL. Made in the USA
 Made in the USA OWNER S MANUAL SERVICE & REPAIR INFORMATION Your local archery retailer should be your first resource for service and repair. The retail establishment where you purchased your bow has knowledgeable
CONGRATULATIONS ON YOUR NEW PRIME
 CONGRATULATIONS ON YOUR NEW PRIME Prime bows are engineered, machined, and assembled with the highest quality craftsmanship in the USA. Please review the entire manual before operating your new Prime bow.
This bow is strictly intended for recreational use only.
 Your Kinetic Stylized bow is warranted to be free of defects in materials and workmanship for the lifetime of the original owner when purchased from an Authorized Retailer. This warranty includes all bow
CROSSBOWS XR175. Recurve Crossbow OWNER S MANUAL
 CROSSBOWS XR175 Recurve Crossbow OWNER S MANUAL READ ALL INSTRUCTIONS AND WARNINGS BEFORE USING If you have any questions about this product or need some help, do not return the product to the store before
The selection, set-up and tuning of a Recurve bow
 The selection, set-up and tuning of a Recurve bow Malcolm Grant January 2005 Firstly: there are several cost and design differences to be considered when deciding on an individual archer s equipment. Budget:
Copyright All Rights Reserved. By Rick Stonebraker.
 Page 1 of 17 Copyright 2000 All Rights Reserved By Rick Stonebraker http://www.texasarchery.org FOREWORD Page 2 of 17 An important part of archery is the equipment. The skill of the archer is also important
This bow is strictly intended for recreational use. only.
 Your Kinetic Mirage bow is warranted to be free of defects in materials and workmanship for the lifetime of the original owner when purchased from an Authorized Retailer. This warranty includes all bow
2014 Technical Manual
 2014 Technical Manual TUNING AND TECHNICAL INFORMATION FOR THE ENERGY 32, ENERGY 35, SPIRIT AND TOUR COMPOUND BOWS DISCLAIMER OF LIABILITY: Elite Archery is not liable for any personal injury, death or
Page 1. Tuning. for. T4T Copyright 1993 T4BB Copyright All Rights Reserved. Barebow. By Rick Stonebraker
 Page 1 Tuning T4T Copyright 1993 T4BB Copyright 2018 for All Rights Reserved By Rick Stonebraker Barebow Page 2 FOREWORD This manual is a guide to basic barebow tuning and only addresses the most common
ARCHERY KRONOS. Compound Bow OWNER S MANUAL
 ARCHERY KRONOS Compound Bow OWNER S MANUAL READ ALL INSTRUCTIONS AND WARNINGS BEFORE USING If you have any questions about this product or need some help, do not return the product to the store before
SAFETY FIRST LIMITED LIFETIME WARRANTY
 LIMITED LIFETIME WARRANTY Your Kinetic Rave bow is warranted against defects in materials and workmanship to the original owner. When purchased at an authorized retailer, for the life of the original owner.
CROSSBOWS XR175. Recurve Crossbow OWNER S MANUAL
 CROSSBOWS XR175 Recurve Crossbow OWNER S MANUAL READ ALL INSTRUCTIONS AND WARNINGS BEFORE USING If you have any questions about this product or need some help, do not return the product to the store before
WIN&WIN BLACK Bow Owner s Record
 WIN&WIN BLACK Bow Owner s Record WIN&WIN Bow Model Dealer Name Dealer Address COMPOUND BOW OWNER'S MANUAL Dealer Phone Number Purchase Date Draw Length String Length Timing Cable Length Draw Weight Buss
Page 1 of 6. Important Safety Rules for Parents Supervising Family Archery
 WARNING DANGEROUS PROJECTILE: A mishandled arrow or bowstring may result in serious injury or even death. Parental Supervision Required. Bows and arrows are not toys. Page 1 of 6 Failure to follow Instructions
600 / 600FC OWNER'S MANUAL
 PROGRESSION 600 / 600FC OWNER'S MANUAL Issue 2 / Version E - Dec. 10, 1997 Copyright 1997 GAMMA Sports - All Rights Reserved PROGRESSION 600 / 600FC OWNER'S MANUAL TABLE OF CONTENTS PAGE 1... WARRANTY
CROSSBOWS TYRO. Recurve Crossbow OWNER S MANUAL
 CROSSBOWS TYRO Recurve Crossbow OWNER S MANUAL READ ALL INSTRUCTIONS AND WARNINGS BEFORE USING If you have any questions about this product or need some help, do not return the product to the store before
602 STRINGING MACHINE OWNER'S MANUAL
 PROGRESSION 602 STRINGING MACHINE OWNER'S MANUAL AL Issue 1- April 2000 Copyright 2000 GAMMA Sports - All Rights Reserved PROGRESSION 602 STRINGING MACHINE TABLE OF CONTENTS PAGE 1... WARRANTY PAGE 2...
2017 Technical Manual
 2017 Technical Manual TUNING AND TECHNICAL INFORMATION OPTION 6, OPTION 7, TEMPO, EMERGE, IMPRESSION, REVOL IMPULSE 31, IMPULSE 34, ENERGY 35, VICTORY, VICTORY 37 DISCLAIMER OF LIABILITY: Elite Outdoors
Final Assembly Instructions Bikes with Quill Stems
 Final Assembly Instructions Bikes with Quill Stems Thank you for buying your new bicycle from L.L.Bean. Read these instructions carefully before beginning the final assembly. Prior to shipping, our expert
WILDCAT C5 Veloci-Speed Synthetic Systems. Manual Includes the Following:
 WILDCAT C5 Veloci-Speed Synthetic Systems Manual Includes the Following: Safety Guidelines Assembly Guides Trouble Shooting General Information Warranty Information Care and Maintenance congratulations,
ASSEMBLY INSTRUCTIONS FOR EMPIRE TERMINATOR / RECON HYBRID RECURVE CROSSBOW LINE
 OWNER S INSTRUCTION & SAFETY MANUAL ASSEMBLY INSTRUCTIONS FOR EMPIRE TERMINATOR / RECON HYBRID RECURVE CROSSBOW LINE PRESENTED BY SA SPORTS LLC. IMPORTANT! Read the following Instructions carefully before
Recurve Crossbow OWNER S MANUAL
 PRIMAL Recurve Crossbow OWNER S MANUAL READ ALL INSTRUCTIONS AND WARNINGS BEFORE USING If you have any questions about this product or need some help, do not return the product to the store before talking
OWNER'S MANUAL. Copyright 2003 GAMMA - All Rights Reserved
 OWNER'S MANUAL AL Issue 1 - December 2003 Copyright 2003 GAMMA - All Rights Reserved OWNER'S MANUAL TABLE OF CONTENTS PAGE 1... WARRANTY PAGE 2... ASSEMBLY INSTRUCTIONS PAGE 4... MOUNTING THE RACQUET PAGE
OWNER'S MANUAL. Copyright 1999 ATS - All Rights Reserved
 OWNER'S MANUAL AL Issue 2 - August 19, 1999 Copyright 1999 ATS - All Rights Reserved OWNER'S MANUAL TABLE OF CONTENTS PAGE 1... WARRANTY PAGE 2... ASSEMBLY INSTRUCTIONS PAGE 4... MOUNTING THE RACQUET PAGE
Final Assembly Instructions Bikes with Threaded Headsets
 Final Assembly Instructions Bikes with Threaded Headsets Thank you for buying your new bicycle from L.L.Bean. Read these instructions carefully before beginning the final assembly. Prior to shipping, our
Congratulations! You own an R9 Cobra! A compact, fast handling and powerful crossbow for your serious shooting enjoyment!
 COBRA SYSTEM R9 COBRA SYSTEM R9 CROSSBOW INSTRUCTION MANUAL Congratulations! You own an R9 Cobra! A compact, fast handling and powerful crossbow for your serious shooting enjoyment! The limb set comes
X-6 STRINGING MACHINE OWNER'S MANUAL. Issue 1 - May Copyright 2004 GAMMA Sports - All Rights Reserved
 X-6 STRINGING MACHINE OWNER'S MANUAL Issue 1 - May 2004 Copyright 2004 GAMMA Sports - All Rights Reserved OWNER'S MANUAL GAMMA X-6 TABLE OF CONTENTS PAGE 1... WARRANTY PAGE 2... FEATURES PAGE 3...ASSEMBLY
OWNERS MANUAL. Model Shown with optional Primary Mooring Cleats. Portable Mooring System SAFETY OPERATION MAINTENANCE PARTS
 OWNERS MANUAL Model 2400 Shown with optional Primary Mooring Cleats. Portable Mooring System SAFETY OPERATION MAINTENANCE PARTS CAUTION: Before using your new Pier Tender, read rules for Safety, Operation,
SNIPER. Compound Crossbow OWNER S MANUAL
 SNIPER Compound Crossbow OWNER S MANUAL READ ALL INSTRUCTIONS AND WARNINGS BEFORE USING If you have any questions about this product or need some help, do not return the product to the store before talking
MATRIX and MICRO Series OWNER S MANUAL
 MATRIX and MICRO Series OWNER S MANUAL WWW.EXCALIBURCROSSBOW.COM Thank you for purchasing an Excalibur crossbow. We are confident that your new crossbow will bring years of enjoyment and enhance your hunting
200 STRINGING MACHINE
 200 STRINGING MACHINE OWNER S MANUAL Issue 1 - July 2010 Provided by www.gssalliance.com 200 OWNER S MANUAL TABLE OF CONTENTS WARRANTY...PAGE 2 FEATURES...PAGE 3 ASSEMBLY INSTRUCTIONS...PAGE 4 MOUNTING
Assembly Instructions For your Faux Bow Pro (FBP)
") Owner s Manual Assembly Instructions For your Faux Bow Pro (FBP) Please take the time to read your instructions carefully and to familiarize yourself with all the parts. Assembly is very easy once you
Owner s Manual Assembly Instructions For your Faux Bow Pro (FBP) Please take the time to read your instructions carefully and to familiarize yourself with all the parts. Assembly is very easy once you
CROSSBOWS SAFETY INFORMATION. FIRestorm ASSEMBLY INSTRUCTIONS and OWNERS MANUAL. Outdoors. Outdoors. Please keep for future reference
 SAFETY INFORMATION FIRestorm ASSEMBLY INSTRUCTIONS and OWNERS MANUAL NOT A TOY. ADULT SUPERVISION REQUIRED l MISUSE OR CARELESS USE MAY CAUSE INJURY OR DEATH l THE RANGE OF THIS CROSSBOW COULD BE DANGEROUS
Archery Fundamentals
 Archery Fundamentals Objectives Common bow types and their basic parts Basic parts of an arrow and its usage Safe practices for archers Responsible shooter Good shooting form Know Your Bow and Arrows Modern
READ THESE INSTRUCTIONS CAREFULLY BEFORE OPERATING YOUR PSE CROSSBOW. FANG SERIES CROSSBOW DISTRIBUTED BY: OWNER S GUIDE
 TOXIC & ENIGMA CROSSBOW OWNER S GUIDE READ THESE INSTRUCTIONS CAREFULLY BEFORE OPERATING YOUR PSE CROSSBOW. FANG SERIES CROSSBOW DISTRIBUTED BY: OWNER S GUIDE READ THESE INSTRUCTIONS CAREFULLY BEFORE OPERATING
Traditional Archery Academy
 Crows Head Archery offers a wide range of Traditional Longbows, Recurves, Arrows, Quivers and Bow Building Supplies. If you are looking for a high quality Traditional Bow and great customer service, then
Final Assembly Instructions Bikes with Threaded Headsets
 Final Assembly Instructions Bikes with Threaded Headsets Thank you for buying your new bicycle from L.L.Bean. Read these instructions carefully before beginning the final assembly. Prior to shipping, our
X-6 STRINGING MACHINE
 X-6 STRINGING MACHINE MMAN-37 (MGX6-12) GAMMA SPORTS 200 Waterfront Drive Pittsburgh, Pennsylvania 15222 Phone: 800.333.0337 Fax: 412.323.0317 Visit our website at www.gammasports.com Copyright 2011 GAMMA
SPECIALIST 370. Compound Crossbow OWNER S MANUAL
 SPECIALIST 370 Compound Crossbow OWNER S MANUAL READ ALL INSTRUCTIONS AND WARNINGS BEFORE USING If you have any questions about this product or need some help, do not return the product to the store before
Sunset Swings By Health in Motion, LLC
 Sunset Swings By Health in Motion, LLC Model 421 Lounge Swing Assembly and Operation Manual Record Serial Number Here www.sunsetswings.com by Health In Motion, LLC. 1/30/2013 Caution: READ! VERY IMPORTANT
FITA BEGINNERS MANUAL. Black. Arrow
 Black Arrow 35 CURRICULUM FOR THE FITA BLACK ARROW AWARD. PERFORMANCE: Shooting distance: 14 meters Minimum required score: 115 points SKILLS Your shooting sequence should include the following: Draw process:
DISASSEMBLING & REASSEMBLING CARTRIDGE INSTALLING SEATPOST ON BIKE
 INTRODUCTION BILL OF MATERIALS SPECIFICATIONS & TOOLS PROCEDURES DISASSEMBLING & REASSEMBLING CARTRIDGE INSTALLING SEATPOST ON BIKE OPERATION OF SEATPOST GIANT LIMITED WARRANTY 1 INTRODUCTION Congratulations
Brixham Archers Arrow Workshop 2015
 Brixham Archers Arrow Workshop 2015 Arrow Making Aluminium/Carbon Composite Copyright Brixham Archers LTD Contents Parts of an Arrow Arrow Types (Aluminium, Carbon Composite) Choosing the Right Arrow Spines
ANNEXURE TO THE LEVEL 1 INSTRUCTION MANUAL
 ANNEXURE TO THE LEVEL 1 INSTRUCTION MANUAL Table of Contents BASIC IFAA RULES GOVERNING THE BOW... 2 IFAA APPROVED BOWS:... 2 DRAW WEIGHT AND ARROW SPEED:... 2 WARANTY AND MAINTENANCE OF EQUIPMENT... 2
X-6FC STRINGING MACHINE OWNER'S MANUAL. Issue 1 - May Copyright 2004 GAMMA Sports - All Rights Reserved
 X-6FC STRINGING MACHINE OWNER'S MANUAL Issue 1 - May 2004 Copyright 2004 GAMMA Sports - All Rights Reserved OWNER'S MANUAL GAMMA X-6FC TABLE OF CONTENTS PAGE 1... WARRANTY PAGE 2... FEATURES PAGE 3...
INTRODUCTION BILL OF MATERIALS SPECIFICATIONS & TOOLS PROCEDURES OPERATION OF SEATPOST GIANT LIMITED WARRANTY
 INTRODUCTION BILL OF MATERIALS SPECIFICATIONS & TOOLS PROCEDURES OPERATION OF SEATPOST GIANT LIMITED WARRANTY 1 INTRODUCTION Congratulations on the purchase of your new GIANT CONTACT SWITCH seatpost. This
Final Assembly Instructions Bikes with 16 Wheel Size
 Final Assembly Instructions Bikes with 16 Wheel Size Thank you for buying your new bicycle from L.L.Bean. Read these instructions carefully before beginning the final assembly. Prior to shipping, our expert
2,500/4,000 LB Easy Riser Vertical Cable Feighner Lift
 2,500/4,000 LB Easy Riser Vertical Cable Feighner Lift CAUTION - PUT SAFETY FIRST 1. Before attempting to install or operate this lift, study and fully understand the proper operating procedures and safety
Congratulations on your purchase of a JC Series Performer trike! The Performer JC Series is designed for everything from touring to commuting and
 Congratulations on your purchase of a JC Series Performer trike! The Performer JC Series is designed for everything from touring to commuting and shopping in the city. The JC Series frames are made of
InstallatIon and owner s InstrUCtIons
 InstallatIon and owner s InstrUCtIons Wall Mount Series Adjustable and Fixed Height Goal Systems table of Contents Safety Instructions... 2 Goal Specifications... 3 Frame Attachment... 4 Frame Assembly
Chapter Eight: Athletes' Equipment
 Chapter Eight: Athletes' Equipment 8. 8.1 General 8.1.1 For all specifications relating to athletes equipment such as Recurve, Compound and Barebow Recurve, refer to current World Archery Rules and any
This document to be used with Hurley traditional Davits
 ~ InstructIon Manual ~ This document to be used with Hurley traditional Davits WarnIngs WarnIng - Failure to install, maintain, protect, and operate the system properly can cause malfunction resulting
SASK-A-POLE OWNERS AND USERS MANUAL
 SASK-A-POLE OWNERS AND USERS MANUAL GENERAL INFORMATION The Saskatchewan Abilities Council s Sask-a-Pole accessibility and transfer aid is designed to help provide safe and easy access to chairs, beds,
STRINGING MACHINE OWNER'S MANUAL. Issue 5 - November 2012
 602 STRINGING MACHINE OWNER'S MANUAL Issue 5 - November 2012 2 602 MP602-12 OWNER S MANUAL TABLE OF CONTENTS WARRANTY... PAGE 3 FEATURES... PAGE 4 ASSEMBLY INSTRUCTIONS... PAGE 5 MOUNTING THE FRAME...
user manual SC73003 WARNING:
 user manual SC73003 WARNING: WHO WE ARE Southern Crossbow is built on the idea of integrating age-old American resourcefulness and perseverance with modern equipment. These one-of-a-kind, tactical crossbows
7130 Lancer Rear Drive Magnetic Commercial Indoor Cycling Bike
 7130 Lancer Rear Drive Magnetic Commercial Indoor Cycling Bike Owner s Manual Made in Taiwan INDEX IMPORTANT SAFETY INFORMATION... 1 EXPLODED DRAWING... 2 PARTS LIST... 3 ASSEMBLY INSTRUCTION... 4-9 USER
CROSSBOWS SAFETY INFORMATION. Blaze II ASSEMBLY INSTRUCTIONS and OWNERS MANUAL. Outdoors. Outdoors. Please keep for future reference
 SAFETY INFORMATION Blaze II ASSEMBLY INSTRUCTIONS and OWNERS MANUAL NOT A TOY. ADULT SUPERVISION REQUIRED l MISUSE OR CARELESS USE MAY CAUSE INJURY OR DEATH l THE RANGE OF THIS CROSSBOW COULD BE DANGEROUS
ATD /8 x 50 Retractable Air Hose Reel Owner s Manual
 ATD-31166 3/8 x 50 Retractable Air Hose Reel Owner s Manual Features Heavy-gauge, all-steel reel assembly 8-position ratchet mechanism locks reel at desired hose length 5-position adjustable roller outlet
Congratulations, you are the proud owner of the finest production crossbow in the world!
 Congratulations, you are the proud owner of the finest production crossbow in the world! Please follow all safety, assembly and troubleshooting instructions contained in this manual. It is extremely important
Book 4 Field & 3D Archery Rules
 Book 4 Field & 3D Archery Rules Page 1 / 12 Chapter 22 Athletes Equipment This article lays down the type of equipment athletes are permitted to use when shooting in World Archery competitions. It is the
BOW DRAW WEIGHT ADJUSTED WEIGHT CHART
 BOW DRAW WEIGHT ADJUSTED WEIGHT CHART Proper spine selection is the key to optimum arrow flight. With today's modern compounds, there are many variables that affect how an arrow reacts when it is thrust
FX IMPACT OWNER S MANUAL
 made in sweden FX IMPACT OWNER S MANUAL Warranty Information All FX Airguns carry a One Year Warranty against faulty workmanship and defective materials. If it becomes necessary, first contact the dealer
STYRIGGER PRODUCT MANUAL
 STYRIGGER PRODUCT MANUAL Thank you for choosing the Styrigger kayak and canoe stabilizer. A kayak or canoe equipped with a Styrigger (safety outrigger) is an excellent choice for a beginner or someone
USER GUIDE ROLLING WALKERS INSTRUCTIONS FOR USE JANUARY, Maximum User Weight: 170kg (Do not exceed this weight)
") USER GUIDE ROLLING WALKERS INSTRUCTIONS FOR USE JANUARY, 2013 Model Nos: BE07889T Maximum User Weight: 170kg (Do not exceed this weight) Model Nos: BE07890TB Maximum User Weight: 227kg (Do not exceed this
USER GUIDE ROLLING WALKERS INSTRUCTIONS FOR USE JANUARY, 2013 Model Nos: BE07889T Maximum User Weight: 170kg (Do not exceed this weight) Model Nos: BE07890TB Maximum User Weight: 227kg (Do not exceed this
CHOOSING A RECURVE BOW SET UP
 CHOOSING A RECURVE BOW SET UP Here at On Target Archery Products, I found fitting archers with their first recurve bows a very delicate task as there are many considerations to take on board. Getting the
8MAY15 US RACK, Inc Falcon Drive, Madera, CA
 8MAY15 US RACK, Inc. - 2850 Falcon Drive, Madera, CA 93637-559-661-3050 INSTRUCTIONS for Bedrail-mounted MOTORCYCLE RACK, Model 2001-4TRA WARNING: Do NOT attempt to install or use this rack without following
OWNER S MANUAL. MISSIONCROSSBOWS.COM 919 River Road, Sparta, WI 54656
 OWNER S MANUAL MISSIONCROSSBOWS.COM 919 River Road, Sparta, WI 54656 SAFETY RULES & INSTRUCTIONS WARNING SAFE USE OF YOUR MISSION CROSSBOW IS YOUR PERSONAL RESPONSIBILITY AND THE FAILURE TO FOLLOW ALL
ARTICLE II NFAA Shooting Styles and Equipment Rules A. General 1. A conventional bow of any type may be used provided it subscribes to the accepted
 ARTICLE II NFAA Shooting Styles and Equipment Rules A. General 1. A conventional bow of any type may be used provided it subscribes to the accepted principal and meaning of the word bow as used in archery
Allington Castle Archers
 Allington Castle Archers Nocking Point March 2014 Dates for your diary The Indoor Portsmouth BA Friday 7th Portsmouth 14th, 21st, & End of season fun shoot 28th The Outdoor Fun Field Shoot 2nd attempt
Item # in1 Rotating Table. Inch BILLIARDS AIR HOCKEY TABLE TENNIS
 Item # 45-6066 3-in1 Rotating Table 3 BILLIARDS AIR HOCKEY TABLE TENNIS 84 Inch ! WARNING: Rotating game should be done under adult supervision. Rotating table may cause a pinching hazard for young children
ARCHERY & SCOUTING. PRESENTATION POINTS: Equipment & Safety Personal Safety Facility Safety 10 steps to good shooting
 ARCHERY & SCOUTING PRESENTATION POINTS: Equipment & Safety Personal Safety Facility Safety 10 steps to good shooting Kathleen Millar, CAE, OCT NCCP Level 4 Coach EQUIPMENT SAFETY Stringing & Unstringing
60 farm jack. Distributed exclusively by Harbor Freight Tools Mission Oaks Blvd., Camarillo, CA 93011
 60 farm jack 66183 Set up And Operating Instructions Distributed exclusively by Harbor Freight Tools. 3491 Mission Oaks Blvd., Camarillo, CA 93011 Visit our website at: http://www.harborfreight.com Read
spinner sport owners manual
 spinner SPORT owners manual contents 1 Welcome to the Spinning Program 2 Spinning Program Safety 4 Your Spinner Bike 5 Caring for Your Spinner Sport Bike 6 Bike Assembly 8 Testing the Bike 9 Troubleshooting
TRAILMATE METEOR ASSEMBLY MANUAL
 TRAILMATE METEOR ASSEMBLY MANUAL (DISC BRAKE VERSION) The Trailmate Meteor recumbent has been designed for easy assembly. This means more time to enjoy the smooth ride with single speed, 3 speed coaster
Introduction to Basic Archery
 Introduction to Basic Archery Archery includes a complex set of activities, from backyard target shooting to formal or field competitions, from family fun to bow hunting and bow fishing, or even the Olympic
MAGNETIC CYCLING TRAINER SF-B0419 USER MANUAL
 MAGNETIC CYCLING TRAINER SF-B049 USER MANUAL IMPORTANT: Read all instructions carefully before using this product. Retain owner s manual for future reference. For customer service, please contact: support@sunnyhealthfitness.com
Operation & Instruction Manual
 Operation & Instruction Manual AMS Retriever Pro Mounting Instructions Play Video Diagram Assembly Adjustments Play Video Big Game Retriever Pro Set-up Play Video Assembly/Diagram Adjustments Play Video
Paintball Marker. User s Manual. 530 South Springbrook Road Newberg, OR 97132
 Paintball Marker User s Manual 530 South Springbrook Road Newberg, OR 97132 Component Concepts, Inc., 530 South Springbrook Road, Newberg, OR 97132 Phone: (503) 554-8095 Fax: (503) 554-9370 www.phantomonline.com
RADROVER REAR RACK INSTALLATION MANUAL
 RADROVER REAR RACK INSTALLATION MANUAL WWW.RADPOWERBIKES.COM We are here to help! Please contact us at SUPPORT@RADPOWERBIKES.COM or 1-800-939-0310 if you have questions. REV022216 Welcome Thanks you for
DIRECT DRIVE DIXIE DOUBLE SEAMER Model 25D
 OPERATOR'S MANUAL DIRECT DRIVE DIXIE DOUBLE SEAMER Model 25D LUBRICATE DAILY: A. Gears inside gear housing at chuck shaft (1) Oil B. Seam rolls and cam rolls (4) - Oil C. Seam roll levers through gear
DANAGE TARGET face type 'TUNING'. Tuning guide.
 DANAGE TARGET face type 'TUNING'. Tuning guide. Danage Target face type 'Tuning' Instructions - 2 - Danage Target face type 'Tuning', instructions. Introduction. These instructions for using Danage Target
USERS GUIDE. Where Accuracy Begins With Craftsmanship. About Your Bow. Safety. Maintenance. Storage
 USERS GUIDE About Your Bow Safety Maintenance Storage Where Accuracy Begins With Craftsmanship Born on Date Congratulations. We would like to say thank you for choosing Moxie Archery! It is your faith
SANTA CRUZ BICYCLES Cable Routing Procedure MY17
 SANTA CRUZ BICYCLES Cable Routing Procedure MY17 Copyright Santa Cruz Bicycles 2017 TABLE OF CONTENTS SAFETY INSTRUCTIONS... 3 CABLE ROUTING... 3 INTRODUCTION...3 TOOLS AND SUPPLIES...3 REAR DERAILLEUR
User s Manual. USB Golf Simulator. Contents
 USB Golf Simulator User s Manual Contents safety information...1 identifying the components...2 assembly in 3 easy steps...3 plug & play...4 playing tips...5 care...6 troubleshooting...7 notes...8 warranty...9
TECHNICAL SUPPORT DOCUMENT FULL SUSPENSION MODELS C7 C9 WARRANTY SMALL PARTS FRAME SPEC/SERVICING
 2016-2018 FULL SUSPENSION MODELS C7 C9 WARRANTY SMALL PARTS FRAME SPEC/SERVICING 2016-2018 FULL SUSPENSION MODELS C7 C9 PG.i WARRANTY INFORMATION COMPLETE BIKES ONE YEAR LIMITED WARRANTY NORCO Bicycles
isup MANUAL THANK YOU FOR PURCHASING A KAHUNA isup, WE HOPE YOU HAVE MANY YEARS OF PADDLING ENJOYMENT.
 i isup MANUAL THANK YOU FOR PURCHASING A KAHUNA isup, WE HOPE YOU HAVE MANY YEARS OF PADDLING ENJOYMENT. THIS MANUAL IS A GENERAL GUIDELINE FOR SET-UP, CARE AND PROPER USE. PLEASE REFER TO OUR WEBSITE
 WALKING / K-WALKER 149K Strovolou Avenue, Strovolos, Nicosia, 2048, Cyprus T: +357 22250115, F: +357 22250116, M: +357 70008830 www.abletools.com.cy info@abletools.com.cy B SERIES KAYE POSTURE CONTROL
Owner s manual EDGE_Owners_Manual-2011.indd 1 3/1/11 12:36:43 PM
 Owner s manual EDGE_Owners_Manual-2011.indd 1 3/1/11 12:36:43 PM contents 1 Welcome to the Spinning Program 2 Spinning Program Safety 4 Your Spinner Bike 5 Caring for Your Spinner EDGE Bike 6 Bike Assembly
Shoreline Cantilever Lift 2500lb Capacity Models: (108" inside width) - Part # (120" inside width) - Part #
 - Part # (120 inside width) - Part #") Shoreline Cantilever Lift 2500lb Capacity Models: 25108 (108" inside width) - Part # 1017402 25120 (120" inside width) - Part # 1017403 1. 2. 3. 4. 5. CAUTION - PUT SAFETY FIRST Before attempting to install
Shoreline Cantilever Lift 2500lb Capacity Models: 25108 (108" inside width) - Part # 1017402 25120 (120" inside width) - Part # 1017403 1. 2. 3. 4. 5. CAUTION - PUT SAFETY FIRST Before attempting to install
Spinning program. contents
 Owner s manual contents 1 Welcome to the Spinning Program 2 Spinning Program Safety 4 Your Spinner Bike 5 Caring for Your Spinner AERO Bike 6 Bike Assembly 8 Testing the Bike 9 Troubleshooting 10 Lubricating
 Page 1 of 5 FAQ 3D Archery Various FAQ in view of the adapted FITA 3D Rules as per 1.4.2012 Book 2, Events Which distance for which 3D targets in a competition course? See Book 2, Chapter 9, Field of Play
Detroit Speed, Inc. Rear Coilover Conversion Kit Camaro/Firebird P/N: &
 Detroit Speed, Inc. Rear Coilover Conversion Kit 1982-02 Camaro/Firebird P/N: 042440 & 042441 The Detroit Speed Inc., Rear Coilover Conversion Kit allows the latest in coilover spring/shock technology
Material and tools needed for making and installing d- loops
 When making a d-loop, the proper material must be used or the loop may fail and cause damage to the archer and/or bow. The material must have sufficient strength and be of a material that will allow for
USER GUIDE TO POWER ASSISTED BIKES
 USER GUIDE TO POWER ASSISTED BIKES 1 PAGE CONTENTS Page. 3 Unpacking Page. 3-4 Easy steps to get started Page. 5 General Assembly Instructions Page. 6 Aligning H/Bars, Page. 7 Tightening pedals onto Crank
FIRST TEAM SPORTS, INC Storm Portable Series Assembly Instructions
 FIRST TEAM SPORTS, INC Storm Portable Series Assembly Instructions WARNING! WARNING! WARNING! THIS BASKETBALL SYSTEM IS SPRING LOADED AND SHIPPED UNDER TENSION. ATTEMPTING TO ASSEMBLE OR DISASSEMBLE ANY
Model 23H Hand Crank Seamer
 OPERATOR'S MANUAL Model 23H Hand Crank Seamer If you are not experienced with your seamer, please read and understand this manual before operating the machine. If you have a question discuss it with your
BELT DRIVE INDOOR CYCLING BIKE SF-B1712 USER MANUAL
 BELT DRIVE INDOOR CYCLING BIKE SF-B1712 USER MANUAL IMPORTANT! Please retain owner s manual for maintenance and adjustment instructions. Your satisfaction is very important to us, PLEASE DO NOT RETURN