Introduction...4 The Simple Diamond Kite...5 Simple Diamond Kite Step By Step Instructions...6
|
|
|
- Marvin Craig
- 5 years ago
- Views:
Transcription
1
2 Table of Contents Introduction...4 Format... 4 Using Printouts... 4 The Simple Diamond Kite...5 Simple Diamond Kite Step By Step Instructions...6 Simple Diamond Kite Measuring The Sail... 6 Simple Diamond Kite - Cutting The Sail... 6 Simple Diamond Kite - Adding The Spars... 7 Simple Diamond Kite - Attach The Flying Line... 8 Simple Diamond Kite - Attach The Tail... 8 Simple Diamond Kite Flying!... 9 Simple Diamond Kite Selected Flight Report...10 The Simple Delta Kite...12 Simple Delta Kite Step By Step Instructions...13 Simple Delta Kite - Measuring The Sail Simple Delta Kite - Cutting The Sail Simple Delta Kite - Adding The Spars Simple Delta Kite - Attach The Flying Line Simple Delta Kite - Attach The Tail Simple Delta Kite - Flying! Simple Delta Kite Selected Flight Report...18 The Simple Sled Kite...20 Simple Sled Kite Step By Step Instructions...21 Simple Sled Kite - Measuring The Sail Simple Sled Kite - Cutting The Sail Simple Sled Kite - Adding The Spars Simple Sled Kite - Towing Points Simple Sled Kite - Attach The Bridle Simple Sled Kite - Flying! Simple Sled Kite Selected Flight Report...25 Which Kites To Make Next?...27 Page 2 of 36
3 Appendix 1 Requirements...28 Materials Tools Appendix 2 Flying Line And Storage...30 Appendix 3 Knots...31 The Loop Knot The Lark's Head Knot The Slip Knot Update History...35 Even More Kites To Make!...36 Page 3 of 36
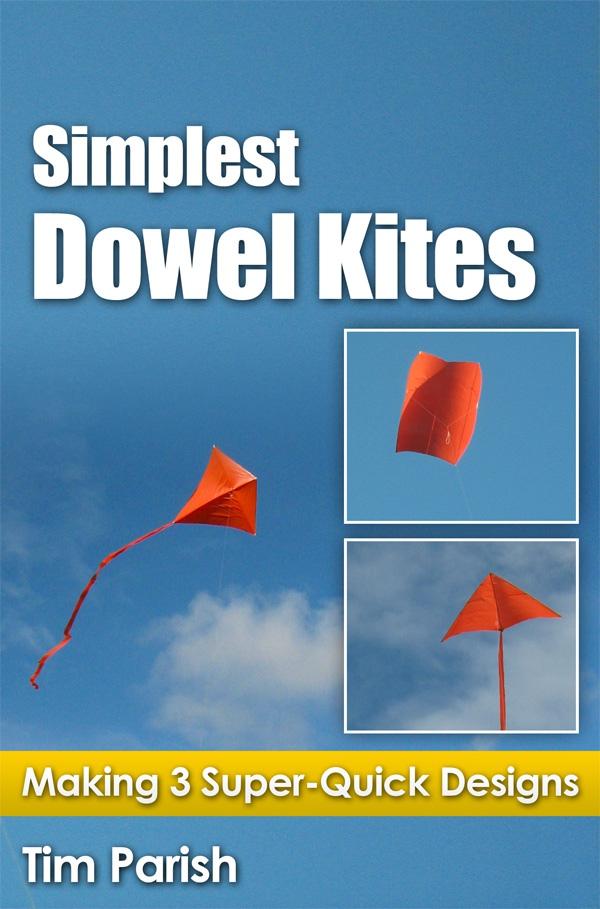
4 Introduction This e-book provides very detailed step-by-step construction information for all three kites in the MBK Simple Series. The whole idea is for you to get a working kite in the air as quickly as possible. Required tools are quite minimal just a small cheap hack-saw and a pair of scissors. Everything else is even cheaper and quite likely to be found around the house somewhere. I hope you find it much more convenient to work from this PDF document rather than numerous web pages - when constructing a kite. Particularly if you decide to print off the relevant pages to have them beside you as you work. Format... Here's a summary of the information and images provided for each Dowel kite... A large in-flight photo, introduced with a short description. Detailed step-by-step instructions, including many close-up photos. A selected Flight Report, in which I share a flying experience with the original kite. The 3 Appendices at the end of this ebook provide extra information which will be useful for the first-time builder of an MBK Dowel kite. I'd definitely recommend a quick read of each Appendix before you start building. Using Printouts... You might like to print out this entire e-book and bind it in a simple cover or folder. Magazine shops usually have binders and covers of various kinds. Another approach is to just print out the information you need for the day. For example, the instructions for the Delta kite plus Appendix 2 on making up a flying line. The Table of Contents makes this easy, since you can just look up the page-ranges needed for printing. To save a bundle on ink costs, find GrayScale in your printer's Properties settings, and set it so color ink isn't used. For color, you can always refer back to this PDF on the screen. Also, look for Draft or Fast in the Properties. This will ensure the printer uses much less black ink too. If you are a Mac user, you should be able to find similar settings for your printer. Page 4 of 36

5 The Simple Diamond Kite This is the first in the short 3-kite Simple Series. Super simple kites which are quick and easy, yet fly quite well. Enjoy making this classic Diamond shaped kite, and then flying it within minutes! It has no bow-line, no bridle and only the simplest of tails... Page 5 of 36


6 Simple Diamond Kite Step By Step Instructions Now's the time to read up in Appendix 1 about kite materials and other things needed to build an MBK kite from the Simple Series, if you haven't already. Simple Diamond Kite Measuring The Sail Place your plastic bag flat on the floor, with the closed end at the top. Starting from just below the top-left corner of the bag, measure and mark 3 dots on the plastic. I've high-lighted the dots in yellow, in the photo. Judge the horizontal direction by eye. If you're careful, there's no need for a T-square. Simple Diamond Kite - Cutting The Sail Take your ruler and connect the dots with the black marker pen, as shown in the photo. (OK, the lines appear a bit faint in the photo!) Flip the plastic over and trace over all the black lines. Page 6 of 36


7 Cut along the top and right side of the bag, and open it out to show the complete sail outline, as in the left photo above. Take your scissors and cut along all the black lines. As in the right photo above, your Diamond kite sail is nearly complete! Simple Diamond Kite - Adding The Spars Lay a length of your 5mm (3/16") dowel down the center-line of the sail, line it up with the top sail corner and saw it off at the bottom corner. See the left photo, above, where the dowel has not yet been cut. Cut off a 5 cm (2 inch) length of insulation tape, and stick down the dowel to the plastic. See the right photo, above. Page 7 of 36


8 Do the bottom end of the dowel the same way. Do the other dowel similarly, so the kite looks like the photo on the right. Note: After flying this kite for several months, I now recommend you add another piece of tape to the top corner of the sail, at right-angles to the first tape. For added strength! Simple Diamond Kite - Attach The Flying Line Poke a hole in the plastic sail, right over where the dowels cross each other. Thread the free end of your flying line through the hole, and wrap it several times around the crossing-point, as in the photo. Tie it off tightly so it can't come loose. Ignore the loop in the photo, unless you want to make a simple bridle like I did... Simple Diamond Kite - Attach The Tail From spare scraps of sail plastic, make up a long narrow strip no shorter than 5 times the length of the kite itself. The strip should be about 5 cm (2 inches) wide. Thread one end of the tail around the bottom of the vertical spar, as you can see in the photo. Tie the tail to the dowel with a simple knot. If you like, trim off the excess so it's neater than the one in the photo! Page 8 of 36


9 Simple Diamond Kite Flying! That's it, you're ready to fly. Take the kite out whenever you can see leaves moving in the trees or bushes. If it won't stay up, try letting out plenty of line and then towing it up at jogging pace. It might find enough wind higher up! Avoid flying in very windy weather. Hope you enjoyed learning how to make a Diamond kite! When you feel ready to try making a more advanced Diamond, the MBK Dowel Diamond is just the thing. Full instructions can be found in the Making Dowel Kites book. This kite flies higher, smoother and needs less wind than the Simple Diamond! The sail is edged too, so it lasts a lot longer. There it is, over on the right... Page 9 of 36

10 Simple Diamond Kite Selected Flight Report Wing-Wagging At 350 Feet, And A Small Design Change Trying for the 3rd day in a row, the Simple Diamond kite finally enjoyed perfect winds today! Not the greatest day for photography with a cheap digital camera though. Overcast skies kept the light levels well down. But at least the punishing cold Southerly had moderated a lot overnight. We went down to a local grassed oval where there are often a handful of other people. Golfers, joggers, amateur dog trainers, you name it. However, today we had it to ourselves. The breeze seemed ideal, with almost-moderate gusts coming through from minute to minute. The Simple Diamond kite popped into the air with ease and was soon floating on about 10 meters (35 feet) of line. Just right for the obligatory 3 or 4 snapshots with hardly any zoom necessary. From there, I let the kite out to about 20 meters (70 feet), pulled a little more zoom on the camera, and shot around a minute of video. There's a selected 10 second's worth down there near the bottom of this page. With the camera tucked away, it took us a minute or two to walk across the oval, letting out line all the way. Easy peasy! 30 meters, 60 meters then 90 meters (400 feet) out by the time we reached the other side. The line tension was firm but not excessive, so it was just a matter of pulling loops off the winder a few at a time, and letting the line slip through my hand. The kite followed along obediently, floating at 30 or 40 degrees to the horizontal since it wasn't being given a chance to rise any higher for now. At this point we turned and headed off upwind to give the kite more room. Just as well, as you'll find out later... A low log fence surrounded the oval, and with all 150 meters (500 feet) of line out, I wound 5 1/2 turns around the horizontal railing. With this number of turns, the friction was enough to stop any slippage, even with no tension at the winder. The Simple Diamond kite settled out at just over 45 degrees of line angle, occasionally pushing up a little higher to 50 or 55 degrees. In terms of altitude, that was between 350 and just under 400 feet above ground. Page 10 of 36
11 The simple single-point bridle meant the kite was in constant motion. Very little fish-tailing today in the delightfully ideal wind strengths, but the wing-waggling was always there. Typical of 2-point bridle Diamonds too. And this brings us to the First Failure... The tape spar-caps had become somewhat brittle and partially unstuck since I first made this kite. So I had replaced a couple of them before coming out to fly. Guess what happened to the one I had decided was OK... Yep, it gave way and down came the kite all the way from 350 feet! With one side of the sail completely folded back, the kite executed a stately slow nose-first dive, tail streaming behind and above. The Simple Diamond gently contacted the ground with no other damage. After this surprise, I fixed the spar cap on the spot and sent the kite straight back up. It waggled its way to where it was before, in seconds. As the months go by, the insulation tape can let go a bit, but it's so quick and simple to fix. You just have to get in the habit of taking that spare roll of tape with you every time you fly! Just in case. Again, the Simple Diamond kite spent a considerable period of time high up in the overcast sky. Perhaps half an hour or more. What happened next was not so much normal wear and tear, but a small design flaw. With the constant wing-waggling, the single strip of tape holding the nose of the sail to the vertical spar gave way. Despite being freshly applied before we went out to fly! The kite belly-flopped gracefully to the ground, on a tight line. So, I'll be updating the instructions shortly, to recommend adding a second strip of tape to the nose of the kite, at right angles to the first one. After doing this today, there was no more trouble. The Simple Diamond kite probably logged almost a couple of hours of flight time today. It was a pity there was not more sunshine, but otherwise it was a pretty successful and enjoyable outing. Page 11 of 36

12 The Simple Delta Kite This is the second in the short 3-kite Simple Series. Super simple kites which are quick and easy, yet fly quite well. Enjoy making this classic Delta kite, and then flying it soon after, in light winds! No keel and a very simple tail makes this a do-able project for anyone... Page 12 of 36


13 Simple Delta Kite Step By Step Instructions Now's the time to read up in Appendix 1 about kite materials and other things needed to build an MBK kite from the Simple Series, if you haven't already. Simple Delta Kite - Measuring The Sail Place your plastic bag flat on the floor, with the closed end at the top. Starting from just below the top-left corner of the bag, measure and mark 3 dots on the plastic. I've high-lighted the dots in yellow, in the photo. Judge the horizontal direction by eye. If you're careful, there's no need for a Tsquare. Simple Delta Kite - Cutting The Sail Take your ruler and connect the dots with the black marker pen, as shown in the photo. (OK, the lines appear a bit faint in the photo!) Flip the plastic over and trace over all the black lines. Page 13 of 36

 dowel and cut off a 70 cm (28 inch) length.")

14 Cut along the top and right side of the bag, and open it out to show the complete sail outline, as in the photo above. Take your scissors and cut along all the black lines. As in the photo over there on the right, your Delta kite sail is nearly complete! Simple Delta Kite - Adding The Spars Take some 5mm (3/16") dowel and cut off a 70 cm (28 inch) length. Lay this down the center line of the sail. Now cut off 2 more lengths, each 80 cm (32 inches) in length. Lay these down over the leading edges of the sail. Using 6 pieces of insulation tape, each 5 cm (2 inch) long, stick them down in the positions shown in the top left photo, above. Fold all the tapes around to the underside of the plastic. See the top right photo, above. Page 14 of 36
 long, lay them over the crossing points.")


15 Cut off a 70 cm (28 inch) length of dowel and lay it across the sail, 31 cm (12 1/4 inches) from the nose. Using 2 pieces of insulation tape, each 20 cm (8 inches) long, lay them over the crossing points. See the photo over there on the right. Carefully wind the tapes around the dowels, without getting them stuck to the sail! Now, each join should look like the photo on the right. Add an extra tape to the middle of each leading edge, to help keep the sail in place. Also tightly wind an 8 cm (3 inch) piece of tape around the spar join. See the photo on the right, which was actually taken after some test flying in strong wind! Page 15 of 36


16 Simple Delta Kite - Attach The Flying Line Get your flying line, which I'm assuming has been wound onto a spool or winder of some sort. 30 pound line from a kite shop is great for this kite. Poke a hole in the plastic sail, right over where the horizontal and vertical dowels cross each other. Thread the flying line through the hole, wrap around the vertical spar at least 3 times, then tie it off tightly. Do NOT tie the line around the horizontal spar! This dowel floats free while the kite flies. Simple Delta Kite - Attach The Tail From spare scraps of sail plastic, make up a long narrow strip no shorter than 4 times the length of the kite itself. The strip should be about 5 cm (2 inches) wide. Thread one end of the tail around the bottom of the vertical spar, as you can see in the photo. Tie the tail to the dowel with a simple knot. Page 16 of 36


17 Simple Delta Kite - Flying! That's it, you're ready to fly. Take the kite out whenever you can see leaves moving in the trees or bushes. If it won't stay up, try letting out plenty of line and then towing it up at jogging pace. It might find enough wind higher up! Avoid flying in very windy weather, which can force the spreader to slip through the tape on each side. Hope you enjoyed learning how to make a Delta kite! When you feel ready to try making a more advanced Delta, the MBK Dowel Delta is just the thing. Full instructions can be found in the Making Dowel Kites book. This kite flies steeper, doesn't need a tail and needs less wind than the Simple Delta. It looks more elegant and bird-like too! There it is, over on the right... Page 17 of 36

18 Simple Delta Kite Selected Flight Report Tricky Down Low, But Redeemed Itself Up High! Yesterday the Simple Delta kite was able to show what it could do in a fairly smooth moderate breeze, on 100 meters of line. Looking outside, it was evidently another thermal day, although the average wind strength seemed to be a lot less than on the previous outing with this kite. Down at the reserve, it proved tricky to launch the Delta in the long lulls due to its fairly modest light wind performance. By the look of the numerous cumulus clouds drifting slowly overhead at around 4000 feet, the winds aloft seemed to be at least moderate in strength. Down low, it was pretty light and gusty, with the wind direction changing dramatically from minute to minute. I managed to get a few camera shots of the Simple Delta kite while it was still low enough for a goodquality picture. It took a few tries, with the kite tending to drop to the ground while I was clicking away with one foot on the winder! Half an eye had to be kept on little Aren too, who had found his way to the play equipment not far away. At one stage, I backed up while trying to keep the Delta airborne and ended up some distance from the winder. Aren got it for me, but then tried to get my attention by throwing the weighty rough-edged hunk of wood at my head! Toddler logic. He got my attention alright... However, such is my dedication to kite flying and bringing all the sublime details to you, that I soldiered on with the flying session. Despite a numb ear covered in blood from a small gash. A couple of investigating fingers ended up covered in blood too. For some time after this, the Simple Delta kite was up a bit higher but still losing height during lulls. Hence there were a few reel-ins and a bit of fancy footwork to help keep it in the air. Eventually the Delta managed to get some decent height, and then the magic started to happen... Up over 100 feet or so, the air was much less gusty, with smoother increases and decreases in strength. The line angle varied between 30 and 65 degrees depending on wind strength and thermal assistance. For quite a while, the kite seemed to be flying at close to its optimum wind speed, at 60 degrees from the horizon. Of the 4 or 5 longish flights it's had so far, this was the smoothest this Delta had ever flown. Page 18 of 36
19 I kept walking back upwind, letting out more line. Once or twice I had to haul some line back in, before climbing the kite back up in the next long gust or patch of rising air. It was enjoyable letting line slip through my fingers at just the right speed to climb the Simple Delta kite out along the line-of-sight. That is, keeping the line angle constant. For a minute or so, the wind strength was right on the limit for the kite, causing it to travel a long way to the left or right. The Simple Delta kite would do this completely on its side, before recovering and heading back towards the top center of the flying window. With around 100 meters (350 feet) of line out, I found myself amongst the trees near the edge of the reserve. This was necessary to keep the kite a safe distance from the trees far downwind. The wind was blowing across the reserve in a direction which gave less room in case of a sudden problem with the kite. For the first time, I was able to enjoy flying the Simple Delta kite at a decent height and line angle for more than half an hour. No slipping spars this time, so its light wind performance was better than before. Line tensions varied from very firm during the sideways flying mentioned earlier, to very light as the Delta floated gently upwards in lifting air. Sometimes, during these light-tension episodes, the line would bow in several directions at once, as it encountered differing wind gusts along its length. Also, the Delta sometimes just glided around like a paper plane when wind speeds dropped far enough, almost drooping the line onto the grass. Finally, a strong, extended period of fresh wind forced the kite into a dive towards the ground. All the way from 250 feet or so! Just before impact, I noticed a tree rather close to the kite, just down-wind of it. Hence I didn't throw the winder down-wind to cushion the crash. It was a knee-jerk decision, since I normally try to take all the tension out of the line to slow down the kite in this kind of situation. In this case, I guess I could just see the kite plunging deep into that tree if it went any further down-wind. Aren and I walked to the kite, winding on line as we went. Surprisingly, the Simple Delta kite showed no signs of any damage despite the full-on power dive smacking it into the ground! The ground was grassed and perhaps a bit soft from recent rain, so that would have helped, no doubt about it. Fortunately, the kite missed the asphalt parking area just a few meters away. The Simple Delta kite is already looking a little patched up, with several bits of tape near the tail where the sail was starting to split from previous sudden contacts with the ground. The kite still returned some good flying though! Page 19 of 36

20 The Simple Sled Kite This is the third design in the short 3-kite Simple Series. Super simple kites which are quick and easy, yet fly quite well. Enjoy making this super-basic Sled kite, and then flying it almost straight away, in light or moderate winds. No need for tails, unless you would like to add one at the bottom end of each spar, just for looks! Page 20 of 36


21 Simple Sled Kite Step By Step Instructions Now's the time to read up in Appendix 1 about kite materials and other things needed to build an MBK kite from the Simple Series, if you haven't already. Simple Sled Kite - Measuring The Sail Place your plastic bag flat on the floor, with the closed end at the top. Starting from just below the top-left corner of the bag, measure and mark 5 dots on the plastic. I've high-lighted the dots in yellow, in the photo. Judge the horizontal and vertical directions by eye. If you're careful, there's no need for a T-square. Simple Sled Kite - Cutting The Sail Take your ruler and connect the dots with the black marker pen, as shown in the photo. (OK, the lines appear a bit faint in the photo!) Flip the plastic over and trace over all the black lines. Page 21 of 36


 length of insulation tape, and stick down the dowel to the plastic.")
22 Cut along the top and right side of the bag, and open it out to show the complete sail outline, as in the left photo above. Look closely, the lines are faint. Take your scissors and cut along all the black lines. As in the right photo above, your Sled kite sail is nearly complete! Simple Sled Kite - Adding The Spars Lay down a length of your 5mm (3/16") dowel on the sail, line it up with a top sail corner and saw it off at the bottom corner. See the left photo, above, where the dowel has not yet been cut. Cut off a 5 cm (2 inch) length of insulation tape, and stick down the dowel to the plastic. See the right photo, above. Do the bottom end of the dowel the same way. Do the other dowel the same as the first one, so the kite looks like the photo on the right. Page 22 of 36


23 Simple Sled Kite - Towing Points Snip off 2 pieces of electrical insulation tape, each 10 cm (4 inches) long. Go to the right-most corner of the sail, and lay down the tapes as shown in the left photo above. Fold the tapes around onto the underside of the plastic, as shown in the right photo above. Press firmly all over to make sure the tapes are fully stuck to the plastic. Go to the left side of the kite and do exactly the same thing, using 2 more strips of tape. All that remains is to add the bridle! Simple Sled Kite - Attach The Bridle Cut off a length of flying line that is at least 5 times longer than the kite is tall. Tie one end of the line to the right side towing point of the kite, as in the photo. Wind the line around twice before tying a knot. Make it as tight as possible, to crush the tape. Similarly, tie the other end of the line to the other towing point. Page 23 of 36
, right near the end. The 2 bridle lines should be exactly the same length.")


24 Nearly finished! Lay the kite on the floor, folded in half so the towing points and spars are 1 on top of the other. See the photo. Stretch out the bridle lines and tie in a simple Loop knot (Appendix 3), right near the end. The 2 bridle lines should be exactly the same length. I've brought the Loop knot back into the picture, so you can see it in the photo. Simple Sled Kite - Flying! Your flying line can now be tied to the loop. That's it, you're ready to fly. However, remember that the dowel spars need to be on the down-wind side of the kite when flying. On the side facing away from you in other words, as you can see in that photo on the left... Avoid flying in very windy weather. Hope you enjoyed learning how to make a Sled kite! When you feel ready to try making a more advanced Sled, the MBK Dowel Sled is just the thing. Full instructions can be found in the Making Dowel Kites book. This kite flies higher, pulls harder and needs less wind than the Simple Sled. Kids like those cool diamond-shaped cut-outs too! There it is, over on the right... Page 24 of 36

25 Simple Sled Kite Selected Flight Report Circling Overhead In A Massive Thermal! The Simple Sled kite seemed a reasonable choice since wind conditions seemed very light and not overly gusty. By the way, you read the title correctly - the Simple Sled did indeed circle overhead today! More on that further down... Just walking around for a while before getting the kite out, the sun on our necks had some bite to it. Can't remember noticing this since last Summer. Massive Cumulus clouds were everywhere, blotting out the sun from time to time. The appearance of strong thermal conditions was confirmed by a small hawk. Lazily circling upwards, the bird was at around 1000 feet above us. On this classic 'light-wind and thermals' day, I was prepared to see the Sled drop out of the sky from time to time. All it takes is a gust from behind or even just a big lull in the wind strength! I took some photos with the Simple Sled kite on a fairly short line, perhaps 20 meters (70 feet) or less. Down below tree-top height there was very little consistent breeze. The bright orange Sled barely flew, staying below a 30 degree line angle most of the time. The sail collapsed often due to insufficient air pressure. Unlike a rigid kite, a Sled in free-fall is just a 'pile of washing'. When forced to float down on its face, it tends to flatten out, slip sideways and then roll up into an untidy bundle as it begins to plummet down. It's always a bit of a game to try to re-inflate the sail in such a situation, by pulling in line quick enough. A nice feeling when you manage it, and the kite pops open before sailing back upwards again! Finally, a lengthy gust got the Simple Sled kite up much higher and into a few knots of steady wind. Flying at around 45 to 60 degrees, it was straightforward to quickly let out line to 60 meters (200 feet). There it flew for a while. Sometimes steady, sometimes changing shape in response to gustier air, the Sled had the feel of a small Manta Ray at times! So far, so good, so out went the flying line to 90 meters (300 feet)! At this line length, the Simple Sled kite experienced 1 or 2 collapses due to lulls, but it quickly climbed back up. One of these slow dives burned through 250 feet of height before I just managed to re-inflate the sail, about 30 feet off the grass. Page 25 of 36

26 Actually, I noticed today that the kite will occasionally recover all by itself. The random nature of wind turbulence sometimes interacts with the falling pile of dowels and plastic to pop it open, parachute-like. The wind direction was ideal for avoiding obstacles on the ground, so it was time to 'max out' with 120 meters (400 feet) of flying line! Even if the kite collapsed all the way to the ground, I had a good chance of landing it in an open space of the reserve. You might think, with all this talk of collapses, that the Simple Sled kite is hard to keep airborne. Not at all! On a day with fairly smooth air, or at a coastal sea-breeze location, this kite will just hang up there and not even look like collapsing. For an hour or 3, just as long as the wind blows. Anyway, before long, the flying line tightened, and a large thermal powered the orange Sled right overhead. Check out the photo over there on the right, which shows what the camera saw with no zoom. You can just make out the flying line, towards the bottom of the picture. For at least a couple of minutes, the Simple Sled kite remained overhead at 400 feet altitude. With a tight line. Fortunately I was using our 50 pound line, after having tossed up whether to try the 20 pound line since winds seemed so light! At one stage the Simple Sled executed a big loop, pulling hard the whole time. This is not the usual scenario when you have a kite looping under excess wind speed! After dropping out of the strongest area of lifting air, the Sled slowly descended to a 20 degree line angle. This probably had a lot to do with a wide area of sinking air surrounding the core of the thermal. Since we had forgotten our sunscreen and hats, we decided to call it a day at this point. I started bringing the kite down, helped by a few more collapses in the very active air. Even after we had it down to 50 meters (170 feet) of line, it wasn't long before the Simple Sled kite was nearly overhead again. Wind, wind, wind, wind it in. In terms of flying fun per minute of construction time, this kite just has to be the best value of the 3 kites in my Simple Series! Mind you, the Simple Delta would have gone overhead today too... Page 26 of 36

27 Which Kites To Make Next? There isn't much kite-making info on the Internet that really 'holds your hand' like these MBK books do. Lots of free stuff is available, for sure but a lot of it is for experienced kite-makers. And a lot of the designers just haven't been really careful about testing their instructions to make sure nothing is missing or unclear! I make kites from my own instructions to make sure everything is covered. The idea is for everyone to have a good experience with it. The steps are checked, and double-checked. The logical step up from this Simplest Dowel Kites book is Making Dowel Kites. Check it out! For just a few dollars, you get... many more designs to choose from the kites are bigger (some are much bigger!) and have better flying characteristics they can all be taken apart and rolled up for transport you get to learn a whole bunch of useful knots which will serve you well no matter what kind of single-liner you end up making later. There's enough in there to keep you happily building and flying for years! Page 27 of 36

28 Appendix 1 Requirements Materials Flying line. I recommend at least 200 feet of 30 pound Nylon or Dacron from a kiteshop. The photo shows Dacron line on my home-made winder. However, if you try any old string, thread or twine that you can't snap easily with your own strength, you should have some success! 2-ply plastic bags, at least 0.5 meters (2 feet) wide and 1 meter (4 feet) tall. The packaging will usually mention 'low-stretch', 'strong' or something similar, if the bags are more than 1-ply. Also, they will be at the top end of the price range for the size. But they are only plastic bags, so still very cheap compared to other materials! Another clue - the lightest bags are very see-through, but the multi-ply ones much less so, with stronger color. Electrical insulation tape. Yellow or black looks nice on orange sails! Alternatively, you can try and match the colors. Hard-wood dowel, 5 mm (3/16 inch) in diameter. The ones available to me happen to be Tasmanian Oak. Just use whatever is available. Page 28 of 36

29 Tools Scissors. Just about any type of ordinary paper-cutting scissors will do. A black marking pen. Preferably not too fine. A cheap hack-saw or fine-toothed wood saw for the dowels. A ruler, with measurements in cm or inches. These are probably the bare minimum 'tools', if you can call them that, for learning how to build kites! Page 29 of 36

30 Appendix 2 Flying Line And Storage As you can see over there on the left, I went to some trouble to make a nice-looking, nice-handling winder. It can let line out rapidly if desired, and also lets you wind it back in quite quickly. However, in order to get a Simple Series kite high in the air and down again within a reasonable length of time, much simpler ideas can still work. The critical thing is to make the winder long enough where the line goes round it. If this length is much less than about 30cm (1 foot), you will find yourself taking an annoyingly long time to get the kite back in particularly if you have 500 feet or so of line out! So don't use a pencil :-) That might do for a tiny kiddy kite made in the first year or 3 of school, but it won't do for a 'real' high-flying kite like the Simple Diamond, Delta or Sled. The legal altitude limit in Europe is 150 meters, 80 in the U.K. (poor beggars). In the U.S. it's 500 feet, while in Australia it's 100 meters above the ground. Just a lump of wood will do. Or thick cardboard... Until you become a keen kite-flier and hence a little fussier about your equipment, any old lump of wood that takes at least 30cm (1foot) of line for every half a turn will do. If you want to, file a bit of wood away in the middle of each end, so the wraps of line can't easily fall off the sides. No wood lying around? Try a couple of squares of heavy cardboard, 30cm x 30cm (1ftx1ft). Bind them face-to-face with packing tape, for a bit more width and rigidity. Keep this cardboard winder dry and don't wind line onto it under a lot of tension, or it will buckle! The flying line... A small slot cut into the wood or the cardboard can provide a means to secure the line to the winder. Pass the line through the slot and tie off tightly so when nearly all the line is out, it won't suddenly disappear into the wild blue yonder! Also, if the winder remains attached to the line, you have a sporting chance of chasing it down should it accidentally slip from your grasp. The 3 kites described in this ebook are perfectly capable of flying between 300 and 400 feet on a 400 feet length of flying line, depending on weather conditions. However, a lot of fun can be had on just 30 meters (100 feet) of line, which is cheaper but still lets the kite fly high enough to find smoother air. Page 30 of 36
31 Appendix 3 Knots Have you noticed how I have been a bit vague about the knot-tying so far? That's because I didn't want to slow you down on your first attempt to make a flying kite. Any old knot that doesn't fall apart or come loose too quickly will do, in order to get your kite in the air. At least for the first few outings! However, there are advantages to using 'all the correct knots'. The bigger and the more sophisticated a kite is, the more you will appreciate what these knots can do for you. Part of the fun of kite-building is learning and applying these knots. The few knots described in this Appendix are just a small sample taken from the corresponding Appendix in my big Making Dowel Kites book. Notice that besides just showing you how to tie the knots, I have also made a few comments about each knot's application to various Dowel kites. Page 31 of 36


32 The Loop Knot This is the simple Loop Knot that is commonly used for forming a Lark's Head Knot at the end of a flying line. Now, the simple loop on the end of a flying line is fine for small kites, where the line usually has ample strength. However, for much bigger kites, it's a good idea not to weaken the line unnecessarily. In particular, there are 2 knots which offer greater strength than the simple Loop - the Double Loop and the Figure Eight knots. Other uses for this knot include... The bow-line loop through which you insert the toggle, to bow the spar. This applies to my Dowel Series of kites in particular. A handy large knot to stop a Lark's Head from slipping off the bridle line. I put a short line with a Loop Knot at the end on just about all my kites except the Deltas. A knot with a very small loop is handy to stop Slip Knots from slipping through. The loop itself doesn't do anything, but the double-size knot in the line sure holds the Slip Knot securely. The Dowel Sode uses 2 long loops of flying line to tension the bowed horizontal spars away from each other. The simple Loop is adequately strong in this situation too. Page 32 of 36


33 The Lark's Head Knot The Lark's Head Knot is an amazingly simple yet useful knot! The great thing about this one is that no matter how tightly it gets stressed while holding all the tension of a flying line, it is fairly easy to remove. Regarding getting it loose again, here are a couple of tricks I have discovered from experience... Grab the line to which the Lark's Head is attached, on either side of the knot. Loosen the line, then ping it tight again by separating your hands, several times. Often, the Lark's Head will loosen just a little, making it easier to unpick. Get a finger-nail in between the 2 strands of the Lark's Head, right where it is sitting on the other line. Work the 2 loops apart a little. This also can make the knot easier to unpick. The lighter the line, the more useful those tips might prove to be! When you need reading glasses, 20 pound Dacron line is pretty hard to work with. Personally, I use eye exercises to improve the situation a lot, but that's another story... Every MBK kite uses a short connecting line between the bridle and the flying line. It's part of the bridle really. The flying line is attached to this connector with a Larks Head Knot, making it easy to swap the line from kite to kite. Where else might you use a Lark's Head? Well, I use it to connect the lower bridle lines of the Roller and Dopero kites to their keels. In those cases the knot stays done up all the time. That's because the kites can be packed away after carefully pulling some of the lower bridle lines' length through the holes in the sail. One more application. I use the Lark's Head to attach tensioning lines to the upper and lower horizontal spar bow-lines of the Dowel Sode kite. What a mouthful that was :-) With the 2 bowed spars tensioned away from each other, the kite has a tighter sail and flies much better. Page 33 of 36


34 The Slip Knot A small Loop Knot in the end of the line prevents this Slip Knot from coming undone. At least in theory! In practice, the loop can still loosen off with handling, allowing even a large knot to slip through. A tiny dob of glue will make the knot permanent after it is first tied and tightened. Alternatively, you can simply check all the knots before each flight, re-tightening where necessary. They are less likely to loosen in-flight. I have used this knot many times for securing bridle lines to spars. If you keep the Loop Knot as small as possible, it doesn't look too untidy. It's a good idea to not fix the knots with glue until after the kite has had it's first test flight or 2. Just in case you decide to make any changes! For a double wrap Slip Knot, just wrap the line around the spar twice instead of once, before slipping the Loop Knot through. Not surprisingly, this version stays tight a lot longer. For a time, I experimented with using the single-wrap knot to secure the sail corner ties of the Dowel Roller and Dopero to the horizontal spar. You have no adjustment though, so I'm sticking with Half Hitches now. Not the most secure, but at least you can adjust the length of the tie, if you don't get it right the first time. It's just a matter of un-picking the knot and re-tying. Page 34 of 36
35 Update History The most recent updates are listed first... Jul 2018 added circular logos Mar 2015 text corrections to Delta measurements in inches Jun 2012 graphical updates Apr 2012 first published as a free e-book Page 35 of 36


36 Even More Kites To Make! This free e-book has given you just a glimpse into the content and style of other MBK kiting e-books. I hope it has proven useful and fun! So just in case you want to make lots more kites over the coming months and even years... The "MBK Book Bundle" is the complete collection of my kiting e-books. And it represents great value for money, too. Simplest Dowel Kites Making 3 Super-Quick Designs Copyright , Tim Parish. All rights reserved worldwide. ~ ~ ~ ~ ~ ~ End Of E-book ~ ~ ~ ~ ~ ~ Page 36 of 36
FISH NET REPAIR. By Alfred Carlson
 FISH NET REPAIR By Alfred Carlson 2 Contents 1. Contents 2 2. 3-Spot Repair (One Broken mesh) 3 3. V-Shaped Repair (Two Broken meshes ) 23 4. N-Shaped Repair (Three Broken meshes) 33 5. M-Shaped Repair
Chapter 1: A Magical Repertoire: The Techniques of High Performance Flying
 Chapter 1: A Magical Repertoire: The Techniques of High Performance Flying If you are a good sport kite flier, we can help you be a better one. There are certain basic skills that are used in all types
5200 Lawrence Place Hyattsville, Maryland 20781, USA Toll Free: Phone: Fax:
 5200 Lawrence Place Hyattsville, Maryland 20781, USA Toll Free: 1-888-416-0174 Phone: 301-277-3888 Fax: 301-277-3323 www.premierkites.com Congratulations on your purchase of the Wolf NG sport kite. The
THE AMERICAN BARN DOOR KITE
 THE AMERICAN BARN DOOR KITE Oregon Kitemaker s Retreat January 2007 Rod Beamguard 4104 NW 112 th Way Vancouver, WA 98685-3578 (360) 574-8050 home (360) 750-9833 office kytfevr@wa-net.com PLANFORM BARN
Kite Flying Tips. Moon Glow SPORTS 2016 MoonGlowSports moonglowsports.com
 Kite Flying Tips Moon Glow SPORTS 2016 MoonGlowSports moonglowsports.com Congratulations on your kite purchase! Whether you are an absolute beginner or a kite flying veteran, you will find information
5200 Lawrence Place Hyattsville, Maryland 20781, USA Toll Free: Phone: Fax:
 5200 Lawrence Place Hyattsville, Maryland 20781, USA Toll Free: 1-888-416-0174 Phone: 301-277-3888 Fax: 301-277-3323 www.premierkites.com Congratulations on your purchase of the Osprey sport kite. The
You can use a variety of materials for this kite, such as Tyvek, ripstop nylon, Orcon, paper, or mylar or mylar-like plastic gift wrap films.
 Woody's " Woodtick " Fighter Kite This kite is easy to make and easy to fly. It's performance will allow you to learn all fighter kite flying skills, plus put an ear to ear grin on your face. What more
MAKING A SIMPLE FLEMISH TWIST BOWSTRING #1 by Kirby
 MAKING A SIMPLE FLEMISH TWIST BOWSTRING #1 by Kirby Here is a tutorial on making a flemish bowstring. I don't own a jig so I use my workbench. I put two nails in the bench as pegs, 6 to 8 inches longer
Bottle Rocket Launcher P4-2000
 WWW.ARBORSCI.COM Bottle Rocket Launcher P4-2000 BACKGROUND: The Bottle Rocket Launcher allows for the exploration of launching rockets using commonly available materials such as plastic soda bottles and
TUNE YOUR SAILS SPEED. Optimist Tuning Guide. Photo Wavelength
 TUNE YOUR SAILS FOR OUTRIGHT SPEED Photo Wavelength PEAK / HEAD THROAT TACK CLEW THANK YOU for choosing North Sails for your Optimist. Whether you are just starting out in an Optimist you are an experienced
It isn t hard to imagine where some of these hot tricks and techniques came from.
 Chapter 8: Magical Illusions and Hot Tricks It isn t hard to imagine where some of these hot tricks and techniques came from. A flier jerks on the line to try and relaunch a downed kite. The kite rolls
Chapter 6: The Magician's Tools: High Performance Tuning
 Chapter 6: The Magician's Tools: High Performance Tuning How your kite is tuned determines how it flies. You can leave it set on the regular performance marks provided by the factory and probably have
A Foundation Of Trust. Hanging By A Thread
 Hanging By A Thread PROPS: Rope maker (See video at DoingWorks.com/movies.) 1 spool of cord for each team [I like to use 10 lb (4 kg test, 525 feet (160 meters) sisal cord] 1 spool of cord to use for demonstration
How Scott Builds a Fighter Kite, May 2011 Updated Sept 2018
 How Scott Builds a Fighter Kite, May 2011 Updated Sept 2018 MAKE A TEMPLATE 1. Draw half sail plan on 17x22 pad with 4x4 (1/4 inch) grid. Add ¼ inch extra on nose (for reinforcement) and plenty of extra
MAKING A FLEMISH TWIST BOWSTRING by Ron Harris
 MAKING A FLEMISH TWIST BOWSTRING by Ron Harris The techniques I use to make a Flemish Twist bowstring are not necessarily the only way to do it, but it works for me. Making a Flemish Twist string is relatively
CHAPTER TWO: FIRST FLIGHT BEFORE YOU LEAVE THE HOUSE KITE KITE ASSEMBLY
 CHAPTER TWO: FIRST FLIGHT BEFORE YOU LEAVE THE HOUSE Most people who ride bikes remember falling off or crashing when they first started learning. So did they quit trying? Of course not -- they picked
CHAPTER THREE: PILOTING BASICS
 CHAPTER THREE: PILOTING BASICS STEERING All right! Now let s fly. Here s how to steer: Hold EVEN to go STRAIGHT. PULL RIGHT to turn RIGHT. PULL LEFT to turn LEFT. And that s all there is to it! There are
Foam Plate Glider: Sonic Silhouette
 Designed by: Ritchie Kinmont Project #40 Page 1/25 Foam Plate Glider: Sonic Silhouette About this project: The Foam Plate Glider Sonic Silhouette is the first in a series of flying glider projects made
Teachings From An American Style Fighter Kite
 Teachings From An American Style Fighter Kite When flying a fighter kite, one of my goals is to adjust the kite so its flight characteristics match, as close as possible, the way I want the kite to fly.
Shiel e d Kite t By B y Sam & Ca C rir King Ore r g e o g n o Kite t m e aker e rs s Retr t e r a e t t2013
 Shield Kite By Sam & Cari King Oregon Kitemaker s Retreat 2013 SAIL ASSEMBLY Your pre-cut sail pieces include half-inch seam allowances. This provides enough material to complete a 1/4 inch double rolled
Table Of Airplanes. Arrow 1. Bulldog 4. Bullet 8. Canard 11. Classic Dart. Condor 17. Delta 20. Dragonfly 23. Raptor 26. Spade 31
 Table Of Airplanes Plane Page Arrow 1 Bulldog 4 Bullet 8 Canard 11 Classic Dart 14 Condor 17 Delta 20 Dragonfly 23 Raptor 2 Spade 31 Arrow This plane is easy to fold and flies straight and smooth. Add
Lesson Plan: Bernoulli s Lift
 Lesson Plan: Bernoulli s Lift Grade Level: 5-6 Subject Area: Time Required: Science Preparation: 30 minutes Activity: 3 40-minute classes National Standards Correlation: Science (grades 5-8) Physical Science
HOW TO DIG A TEST PIT
 HOW TO DIG A TEST PIT An archaeological test pit is a small 1m by 1m trench dug in a series of layers, or spits, to a depth of approximately 1m. The archaeological materials collected from these layers
KNOTS OFTEN USED BY FIGHTER KITE MAKERS AND FLYERS
 KNOTS OFTEN USED BY FIGHTER KITE MAKERS AND FLYERS There happens to be quite a few of us who don't know much about knots. We don't know how to tie them and don't know which knot to use in a particular
Basic fly fishing knots Compiled by the guys in Cabela s richfield wisconsin fly shop
 Page 24 Loop to loop connection The preferred & probably the best method of attaching a leader to the built-in loop on a fly line, avoiding wear and tear on the vinyl coated fly line loop. A loop to loop
"Aircraft setup is a constant process really. Every
 The R/C Aircraft Proving Grounds - Aerobatics Setup Set Up for Success by: Douglas Cronkhite "Aircraft setup is a constant process really. Every time something is changed, there is the chance it will affect
Pro Bow. .com. the construction. one using to use the. video. The. with. We would. love to hear others. Figure 1
 Pro Bow The Hand www.probowthehand..com Instructions for Small Hand 1 Ribbon Congratulations on your purchase of Pro Bow The Hand. This item truly revolutionizes the construction of bows. Never before
Balloon twisting 101. August learning events. Lizbeth Kohler Lkohler.zoominternet.net
 Balloon twisting 101 August learning events Lizbeth Kohler e-mail: Lkohler.zoominternet.net basic info Balloons to be used Most sculptures are created using 260 balloons (2 inches in diameter and 60 inches
PT 11 trouble-shooting and maintenance.
 PT 11 trouble-shooting and maintenance. Does your rudder not stay down?...your back seat slip off?...your knobs tight and your leather pads loose? Maybe we can help. We have used our PT 11 s hard enough
Apple Basket with Swing Handle
 Apple Basket with Swing Handle GH PRODUCTIONS, INC. The Basket Maker's Catalog www.basketmakerscatalog.com Materials are available from your basketry supply store, or contact: Copyright 2000 GH Productions,
3 SIZE NAGASAKI HATA
 3 SIZE NAGASAKI HATA MADE FROM MODERN MATERIALS By Peter (P-air) Stauffer June 2000 The kite and resulting plans and instructions, I have made because of a request by Uli Wahl and Rico Argent, as Rico
Your kit contains the following items. Additional Items You May Need. Pre- cut parts Propeller rigging and rubber Sandpaper Covering sheet
 Your kit contains the following items Pre- cut parts Propeller rigging and rubber Sandpaper Covering sheet The SkyFox offers great glide performance in a rubber powered plane due to its built up wing.
Objective: To launch a soda bottle rocket, achieve maximum time of flight, and safely land a payload (tennis ball).
.") Bottle Rocket Project 2016-17 Objective: To launch a soda bottle rocket, achieve maximum time of flight, and safely land a payload (tennis ball). Materials: 2 liter plastic soda bottle (carbonated beverage
Bottle Rocket Project 2016-17 Objective: To launch a soda bottle rocket, achieve maximum time of flight, and safely land a payload (tennis ball). Materials: 2 liter plastic soda bottle (carbonated beverage
Chapter 7: Most Magical Maneuvers: Formidable Precision Figures
 Chapter 7: Most Magical Maneuvers: Formidable Precision Figures Here are some figures that are designed to make you sweat. But they are also designed to challenge you and make you feel good about your
Now that you have a Safety Break or
 The SAFETY BREAK SYSTEM User Instructions push block breaking button Glass Breaking Tools The three-part UN-PLIER CENTER Safety Break Safety Break System and the onepiece M-80 allow glass breaking anywhere
Introduction. Have Fun Pat Morgan patsplanes.com. The cool paper airplane site!
 Folded Designs Introduction Since at least 1909 paper planes have been folded and flown and become addictive to the true fan. I have been folding paper airplanes for over 45 years and designing them for
MICRO - DLG. This kit should only take 30 minutes to compile, very simple and quick.
 MICRO - DLG This kit should only take 30 minutes to compile, very simple and quick. You will need: Hot Glue ( small tip preferably ) Sharp razor blade Ruler a strip of strong fiber tape Thin nose Pliers
Module 3: Waist Deep
 Activity Book Module 3: Waist Deep Welcome to HSBC Family Literacy First, a program created to bring together parents and children to have fun while learning as a family. Developed by ABC Life Literacy
Sails. Sails: extract from 'Super-detailing the Cutter Sherbourne' page 1 George Bandurek
 Sails There are many arguments for adding or omitting the sails on a model ship. There is no right answer and I decided to have a combination of set and furled sails on my model of HM cutter Sherbourne
Taming the Kite! Wineglasses. Wineglasses occur when the top half of the kite fills before the bottom with a twist in the middle.
 Taming the Kite! What goes wrong? Wineglass when launching can happen in light or heavy weather Broaching on a reach usually in heavy weather Death rolls usually in heavy weather Gybing disasters worse
End. Standing Part. An underhand loop is made by crossing the end under the standing part.
 Knot Board Learn to tie the four basic camping knots as illustrated as well as others you might add. Practice them until you can tie them well. Display them on a knot board made from a square of peg board
Evaluation: 1. Can participants on a regular basis cast with a spin-casting reel with little effort 2. Can participants get close to a target.
 Spin-casting Sharon Rushton- Best Time: This lesson can be taught as the first lesson on casting. Depending on the age group and time you have available, you may want to start with the Can-Casting Lesson,
Tying Farm Knots. Working with Heifers
 Tying Farm Knots A rope is one of the most common of tools used to restrain animals. Unfortunately, most people never learn which knots are most efficient to use in given situations. Practice tying the
Installing N-Strike Recon CS-6 Stage 1 and Stage 2 Performance Kits
 Installing N-Strike Recon CS-6 Stage 1 and Stage 2 Performance Kits The Nerf N-Strike Recon CS-6 is a currently available blaster that is relatively easy to modify. The guys at Orange Mod Works have produced
Congratulations on purchasing a Peter Lynn Arc, the new form of traction kite technology for kitesurfing and kitesailing, but also very useful for
 Congratulations on purchasing a Peter Lynn Arc, the new form of traction kite technology for kitesurfing and kitesailing, but also very useful for buggying and other power kiting activities. Their basic
SX Trainer Instruction Manual WARNING
 SX Trainer Instruction Manual WARNING DO NOT USE THIS PRODUCT UNLESS YOU HAVE READ AND UNDERSTAND THESE WARNINGS, CAUTIONS, AND INSTRUCTIONS WHICH ARE FOR YOUR SECURITY AND PROTECTION. THIS INFORMATION
Fit for Success. Science Year 3/4A Autumn 1. Animals, Including Humans. Session 3. Resource Pack
 Science Year 3/4A Autumn 1 Animals, Including Humans Fit for Success Session 3 Resource Pack Original resource copyright Hamilton Trust, who give permission for it to be adapted as wished by individual
KNOTS. A very short guide to knotting terminology used on these pages.
 KNOTS A very short guide to knotting terminology used on these pages. This is not an exhaustive list of knotting terms; it just contains some of the more unfamiliar words that we have used. If you wish
Friction. Experiment 1 A Soleful Experiment
 Friction Now let s talk about the other ever present force on this Earth, and that s friction. Friction is the force between one object rubbing against another object. Friction is what makes things slow
X Marks the Blind Spot
 X Marks the Blind Spot Human Body 10 minutes In this activity, students will learn about how their eyes and brains work together to trick them. Materials Needed 3x5 index cards Black marker Ruler or straight
Transcript for the BLOSSMS Lesson. An Introduction to the Physics of Sailing
 [MUSIC PLAYING] Transcript for the BLOSSMS Lesson An Introduction to the Physics of Sailing Do you ever wonder how people manage to sail all the way around the world without a motor? How did they get where
LEVELED BOOK K. All About Kites. Written by Elizabeth Austin Illustrated by Maria Voris. All About Kites
 LEVELED BOOK K All About Kites Written by Elizabeth Austin Illustrated by Maria Voris www.readinga-z.com K N R All About Kites A Reading A Z Level K Leveled Book Word Count: 636 Visit www.readinga-z.com
Flow Control of the Kite
 SAILING WORLD posted June 16, 2015 Flow Control of the Kite Symmetric spinnakers are often the most dynamic and challenging sail to trim perfectly. By understanding how they behave at different wind angles,
Adding Sculpted Toes to a Cloth Doll Foot
 Adding Sculpted Toes to a Cloth Doll Foot by Sherralyn St. Clair, www.sherralynsdolls.com Many cloth doll patterns leave the doll's foot as a simple rounded shape. I have found that adding sculpted toes
1. Double the line and form a loop about 10cms long. Pass it through the eye of the hook. 2. Form an overhand knot on the eye of the hook.
 42 NSW Recreational SALTwater Fishing Guide n 2011 Knots and Rigs KNOTS and RIGS Palomar knot. The palomar knot is quick to tie and forms a strong knot. It is a general-purpose connection used in joining
LEVELED BOOK K. All About Kites. Written by Elizabeth Austin Illustrated by Maria Voris. All About Kites
 LEVELED BOOK K All About Kites Written by Elizabeth Austin Illustrated by Maria Voris www.readinga-z.com K N R All About Kites A Reading A Z Level K Leveled Book Word Count: 636 Visit www.readinga-z.com
CORN HUSK DOLLS. 2. Lay the bath towels on your worktable to absorb excess water from the husks.
 CORN HUSK DOLLS I. GOAL: Students will learn how children in the 1840s entertained themselves by making simple toys. II. OBJECTIVES: A. Each child will make a corn husk doll. B. Through discussion and
Pre-Paint>Fuselage>Empennage>Fit vertical tail fin. Objectives of this task: Materials and equipment required: Fit the spar extender
 Pre-Paint>Fuselage>Empennage>Fit vertical tail fin Objectives of this task: To fit the vertical tail fin to the fuselage, including fitting the static probe, static tube, optional strobe light wiring and
Semi Freddo Snow kite [Ram Air]
![Semi Freddo Snow kite [Ram Air]](/thumbs/89/97639710.jpg "Semi Freddo Snow kite [Ram Air]") User manual Semi Freddo Snow kite [Ram Air] This manual gives you detailed instructions on how to use your new Semi Freddo kite. We recommend you take your time to read the instructions. In case you have
User manual Semi Freddo Snow kite [Ram Air] This manual gives you detailed instructions on how to use your new Semi Freddo kite. We recommend you take your time to read the instructions. In case you have
Make Bruce's High Performance 'F3' Fighter Kite In Less Than 2 Hours For Under $3
 Make Bruce's High Performance 'F3' Fighter Kite In Less Than 2 Hours For Under $3 This article was inspired from a chapter in NORTH AMERICAN FIGHTER KITES, my 400+ page fighter kite book on CD ROM. If
Building a Rocket (Advanced) Before you build a rocket try the bottle on the launcher to test if it holds pressure and fits correctly.
 Before you build a rocket try the bottle on the launcher to test if it holds pressure and fits correctly.") You Will Need 3X 2ltr Bottles 1X Paper lip 1X Glue/Double Sided Tape 1X ardboard 1X Bin Liner 1X Roll of Fishing Line or Thin s Sheets of Paper Side A of Fin 1X Hot Glue Gun 1X Pair of Scissors 1X Fine
You Will Need 3X 2ltr Bottles 1X Paper lip 1X Glue/Double Sided Tape 1X ardboard 1X Bin Liner 1X Roll of Fishing Line or Thin s Sheets of Paper Side A of Fin 1X Hot Glue Gun 1X Pair of Scissors 1X Fine
Building 'TANGLER' The Fighter Kite That Helped Me Win The 2003 Fighter Kite Line-Touch World Cup Championship. Bruce Lambert
 Building 'TANGLER' The Fighter Kite That Helped Me Win The 2003 Fighter Kite Line-Touch World Cup Championship Bruce Lambert kitefighter@yahoo.com The following method of building a fighter kite works
Science Ideas for Guides and Pathfinders
 Science Ideas for Guides and Pathfinders BALANCING WEIGHT Equipment: Cardboard, a 12 piece of 18 gauge floral wire, or a straightened coat hanger, a thumb tack, glue, two small play dough balls, a pop
Try it! You ll like it!
 083016 1 Lashing is a method used to join together poles (or spars as they are often called) with rope to build camp projects like wash stands, tables, and even a camp shower! Knowing how to attach two
THE GARRISON BINDER ...
 Did you ever wonder why (to quote Andy Rooney) the Garrison binder is for many rodmakers the source of contentious problems while other rodmakers never seem to have problems. One of the primary reasons
MARK WILLIAMS: We would like to welcome Tony Romo to the interview room at the Corales Puntacana Resort & Club Championship.
 PRE-TOURNAMENT INTERVIEW March 20, 2018 TONY ROMO MARK WILLIAMS: We would like to welcome Tony Romo to the interview room at the Corales Puntacana Resort & Club Championship. Tony, welcome. It's kind of
!""#$%!!!!!!!!!!!!!!! "#$%!&'()*!$%!*(%+!,-!.-'/!()/!.'$*%!%,0($1#,!()/!%2--,#3!!4//!(!%2(''!(2-5),!-.!5&! *'*6(,-0!.-0!'-)1!'*6*'!.'$1#,%3!!!!!!!!
*!$%!*(%+!,-!.-'/!()/!.'$*%!%,0($1#,!()/!%2--,#3!!4//!(!%2(''!(2-5),!-.!5&! *'*6(,-0!.-0!'-)1!'*6*'!.'$1#,%3!!!!!!!!") ""#$% "#$%&'()*$%*(%+,-.-'/()/.'$*%%,0($1#,()/%2--,#34//(%2(''(2-5),-.5& *'*6(,-0.-0'-)1'*6*'.'$1#,%3 70$*),,#*,*2&'(,*8$,#,#*9:;
""#$% "#$%&'()*$%*(%+,-.-'/()/.'$*%%,0($1#,()/%2--,#34//(%2(''(2-5),-.5& *'*6(,-0.-0'-)1'*6*'.'$1#,%3 70$*),,#*,*2&'(,*8$,#,#*9:;
Tuning C420 Sails By Brian Doyle and Dave Kirkpatrick
 Tuning C420 Sails By Brian Doyle and Dave Kirkpatrick In the spring of 2003, the Club 420 Class sails were redesigned to provide a better competitive and useful lifespan. Now that several events have been
PREPARING AND CLEARING THE NET (Instructions shown are for right handed throwers. Reverse for left handed)
") PREPARING AND CLEARING THE NET (Instructions shown are for right handed throwers. Reverse for left handed) We recommend that you first view our movie of this process at www.perfectcirclenetthrower.com
PREPARING AND CLEARING THE NET (Instructions shown are for right handed throwers. Reverse for left handed) We recommend that you first view our movie of this process at www.perfectcirclenetthrower.com
1 Korean-American Scientists and Engineers Association National Mathematics and Science Competition. 1. Raft Rally
 1 Korean-American Scientists and Engineers Association 1. Raft Rally GOAL The goal of raft rally contest is to understand the concept of buoyancy and apply it to the design of a mini boat that can hold
Contents. introduction, contents. terminology, putting in and removing sticks. pre-inflation, attaching lines
 Congratulations on purchasing your Peter Lynn Kite! Using Twin Skin technology this kite sets new standards in jumping, upwind performance and depower. This manual contains information on how to set up
Oak Hill Country Club ~ Rochester, NY JAY HAAS
 Oak Hill Country Club ~ Rochester, NY Hole # 1 2 3 4 5 6 7 8 9 Out 10 11 12 13 14 15 16 17 18 Out Total Yardage 452 401 214 570 428 170 461 428 418 3,542 429 188 372 598 323 181 439 460 469 3,459 7,001
TUNE YOUR SAILS FOR OUTRIGHT SPEED. Starling Tuning Guide Solutions for today s sailors
 1 TUNE YOUR SAILS FOR OUTRIGHT SPEED 1 The object of the Starling class is for all sails and masts to be identical. We pride ourselves on our ability to reproduce sails identically, so please feel free
Scout Skills Lashings
 Scout Skills Lashings 0845 300 1818 INFORMATION SHEET Lashings are used to join together poles (or spars as they are often called), most commonly for making up frameworks in pioneering projects such as
Swing Your Partner. by Beth Hester. GH Productions, Inc. The Basket Maker's Catalog
 Swing Your Partner by Beth Hester GH Productions, Inc. The Basket Maker's Catalog Materials are available from your basketry supply store or contact: The Basket Maker's Catalog GH Productions, Inc. 521
12.9 Gennaker. February Setting up and sailing with the 12.9 Gennaker
 12.9 Gennaker Setting up and sailing with the 12.9 Gennaker February 2013 The 12.9 Gennaker is a new bigger gennaker for the Weta. The standard gennaker is 8 sqm and the 12.9 gennaker is 12.9 sqm. The
stress relief build play 2013 catalogue
 build play stress relief 2013 catalogue play build stress relief Bezu ballz, Bezu barz & Bezu blockz are powerful rare earth magnets that can be shaped, moulded, torn apart & snapped together in unlimited
PART 1 Rocket Assembly
 PART 1 Rocket Assembly Please understand that there are many ways for you to do this. Here is one way Bottle Rocket Lab Activity Student Edition OBJECTIVE: The Student will design, construct, assemble,
Trimming and Flying a Hand Launch Glider A basic and beginners guide by Kevin Moseley
 Trimming and Flying a Hand Launch Glider A basic and beginners guide by Kevin Moseley First and foremost, I am by no means a master at what I have done, or do, in hlg or the class. I am fortunate enough
Start by crossing the two sticks or dowels at perpendicular or 90 degree angles.
 Square Lashing Used to fasten two spars or poles together. Start by crossing the two sticks or dowels at perpendicular or 90 degree angles. Make a Clove Hitch on the vertical stick or dowel near the point
The grade 5 English science unit, Speed, meets the academic content standards set in the Korean curriculum, which state students should:
 This unit deals with the speed of objects. Speed is a basic concept used to quantify an object s movement, which can be measured by positional changes over time. It is important to express an object s
Cable Grip Fitting Procedure General
 Cable Grip Fitting Procedure General 1 Ensure the grip is labelled for the correct diameter range and working load limit. (unless otherwise labelled, WLL is one third of the UTS). 2 Always inspect the
What do we know about air? What have we observed?
 Air and Flight---Properties of Air Air: - we know it exists, - it s all around us, - we see moving trees, - it fills our lungs, - it has substance but can t be seen Air: - colourless, odourless and tasteless,
Manual 1: working with cutting films. MANUAL 1. Working with cutting films. March 2017
 Manual 1: working with cutting films. MANUAL 1 R Working with cutting films March 2017 Manual 1: working with cutting films. R 1 NECESSARY TOOLS It goes without saying that you need the right tools if
6C Science Fair Knowledge
 6C Science Fair Knowledge Our Science Paragraph By: Bella,Heidi and Jasjot Our science fair experiment was if we could study the features of the flying squirrel and how it glides so we could apply that
 64 Loops and loops... Text: Miki Äikäs Photos: Miki Äikäs and Toni Valkonen Connecting fly lines with loops has occasionally caused serious problems at least for me. I have tried every imaginable looping
The author's TD Coupe, used as a towplane, and the Airhopper. The gas model is equipped with an automatic towline release.
 THE AIRHOPPER BY STANLEY ORZECK PLANS BY PAUL PLECAN An eight-foot sailplane either towed by a gas model or launched by hand tow. The author's TD Coupe, used as a towplane, and the Airhopper. The gas model
Now we get to the really fun part of cat sailing, but first you need to know about apparent wind.
 Shelley Sailing Club Inc. Notes for informal catamaran training course, Alec Duncan, 14/3/2015 Part 4: Reaching and running Now we get to the really fun part of cat sailing, but first you need to know
Thermals, sources and streets.
 Thermals, sources and streets. My theories as to the development of thermals and streets as the two blend together, I have considered over some years and consistently appear to be proved correct. Most
UNIT V. The Balloon Man. Does a balloon man visit your market? Let s see what this balloon man brings with him.
 UNIT V Does a balloon man visit your market? Let s see what this balloon man brings with him. The Balloon Man He always comes on market days And holds balloons a lovely bunch And in the market square he
Case studies from classes led by Dr. Ron Fulbright, University of South Carolina Upstate. INNOVATIVE ANALYSIS A BETTER KITE
 INNOVATIVE ANALYSIS A BETTER KITE 1 1. BRIEF DESCRIPTION OF THE SITUATION A kite is a tethered aircraft. The necessary lift that makes the kite wing fly is generated when air flows over and under the kite's
Troyer s Gourd Rack 8 unit F R H O P
 B E A D I M-N L Vertical Parts F R H O P Horizontal Parts C G J Updated 11/16 Parts List A: Top of Pole B: Bottom of Pole C: 48 Ground Stake D: Top Perch rods 48 long E: Hub F: Rope Winder w/ attached
Raptor by Steve Childers
 Raptor by Steve Childers Raptor Series Fighter This kite is somewhat difficult to build but well worth the effort. It's performance characteristics are, a good spin rate, excellent tracking, and wind window
SWIMFIT 1KM. Your 12 week guide to swim 1km Freestyle
 FIT 1KM Your 12 week guide to swim 1km Freestyle 200 1KM TAKE THE PLUNGE If you re a competent swimmer and want to get back in the water, or are wanting to push yourself in the pool, this is the programme
April 4, Eye of Experience #12: Understanding the Stall
 April 4, 1999 Eye of Experience #12: Understanding the Stall Stall entry and recovery is one of the most discussed and cussed portions of a flight training syllabus. Yet, AVweb's Howard Fried believes
Laying out the Grid Laying out an accurate grid pattern in the sand is very important in order to get the columns and rows straight and true.
 Laying out the Grid Laying out an accurate grid pattern in the sand is very important in order to get the columns and rows straight and true. As of this writing, the plot is 72 feet wide by 156 feet deep
Grandpa's Homemade Rocket for About a Dollar!
 Grandpa's Homemade Rocket for About a Dollar! Grandpa and Granny Co. 2012 The most common items needed: (The number of Rocket parts from each item is before the parts name and its proportionate cost is
Basket for Janice. by Beth Hester. GH Productions, Inc. The Basket Maker s Catalog
 Basket for Janice by Beth Hester GH Productions, Inc. The Basket Maker s Catalog Materials are available from your basketry supply store or contact: The Basket Maker s Catalog GH Productions, Inc. 521
Ropework. Stopper knots. Overhand Knot ROPEWORK. Figure of Eight 3.
 Ropework 1 Ropework Stopper knots Stopper knots are used as a temporary method of stopping a rope from fraying or as a method of locking other knots which maybe prone to lossening. The knots are the Overhand
KITES CHRISTIAN. A. GRIMA
 KITES by CHRISTIAN. A. GRIMA What is a KITE? A Kite is.. A toy consisting of a light frame with thin material stretched over it, flown in the wind at the end of a long string. OXFORD dictionary The Light