Anchoring -OWNER S MANUAL-
|
|
|
- Britton Lamb
- 5 years ago
- Views:
Transcription
1 ARE YOU READY TO Anching -OWNER S MANUAL-
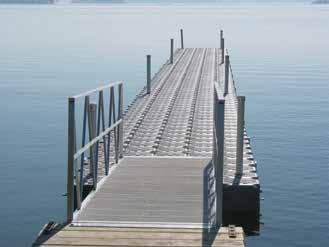
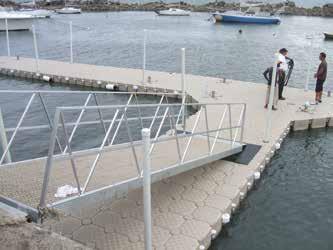
2 TABLE OF CONTENT ANCHORING METHODS RELATED PRODUCTS PILINGS G2 POST CUBE DISPOSITION ( low profile and regular ) 2 7/8 STEEL PILE INSTALLATION ( galvanized staineless steel ) 3 1/2 PVC PIPE AND CAP IMAGES PILLING GUIDE (6 to 15 inches diameter ) P.2 P.3 P.4 P.5 P.6 UNDER WATER ANCHOR POINTS WITH ANCHOR LINES ANCHORING PLATE FOR CHAIN CHAIN ADJUSTER EXTERIOR ANCHORING RING FOR CHAIN ( regular H.D. ) G2 CONNECTING PIN FOR ANCHORING CHAIN ( 3/8 5/16 gages, galvanised staineless steel ) TMS ( TIDE MANAGEMENT SYSTEM ) CONFIGURATION GUIDE LINES AND TIPS P.7 P.7 P.8 P.8 P.9 P.9 P.10 ANCHORING STRUTS ( aluminum staineless steel ) P.11 ANCHORING STRUTS MISCELLANEOUS DOCK LEG SUPPORT WALL ANCHORAGES (painted steel stainless steel ) SPECIFIC HARDWARE FOR CONCRETE P.13 P.13 P.14 *** Note that it is preferable to consult the manual on a COLORED printed version, directly on your computer screen*** *The following instructions are guidelines to be followed. Candock will not be responsible f damages incured by the non-compliance to these guide lines. All distributs are required and responsible to provide theetical and practical training to clients on the complete use of the different dock systems. Candock inc. can not be held responsible in any way f any damages resulting from the fact that the client has not received adequate training. P.1
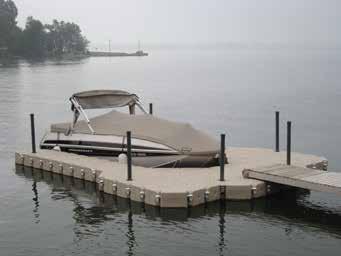
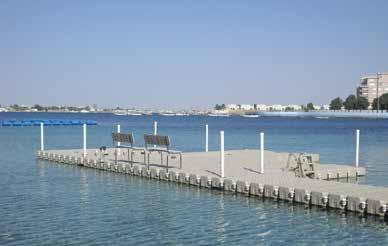
3 G2 POST CUBE TERMINOLOGY FLANGE High-density polyethylene resin Interi filled with expanded polystyrene Surface : Anti-skid L x W : 48 cm (19 ) x 48 cm (19 ) H : 36 cm (14 ) Dimensions (low profile cube) : L x W : 48 cm (19 ) x 48 cm (19 ) H : 23 cm (9 ) Weight : Cube: 9.55 kg (21 lbs.) Low profile cube : 7.5 kg (16.5 lbs.) G2 key f pin combo-pack Key f nut Ratchet key f nut + ratchet tool Piling bull 2 7/8 Piling driver 2 7/8 Piling lever ( f pile removal ) Zip cut grinder ( to cut-off exceeding pipe ) PVC glue ( to glue on the PVC cap ) Needed accessies 2 7/8 steel pipe PVC pipe ( 3 ) PVC cap FLANGE FLANGE: Ultra resistant plastic insert that allows a fluid yet durable system. Allowing the G2 POST CUBE to move up and down on the pile ( with tidal seasonnal variations ) witout any restriction while ensuring a sturdy and durable anching method. G2 POST CUBES AND PILING INSTALLATION See regular G2 CUBE assembly procedure as f the G2 POST CUBE installation while abiding to these rules: The pilings are mainly used in shallow water conditions ( MAX 2 meters ). Needing soft muddy sea bottoms, pilings are mainly used on she lines where the soil is soft and tractable. If the evironment is filled with rocks other solid debris, other methods should be prefered to anch your CANDOCK dock. An imptant aspect of the piling method consists in keeping the piles perfectly vertical. Using a level other precision tools is mandaty f every pile. If the sea bottom is made of clay, be careful not to penetrate the soil too deep as a suction effect will make the removal of those pilings practically impossible. Another imptant notion, never use pilings in agitated water ( maximum waves 0.6 meter / 2 feet ). Furtherme, pilings should not be used in areas that are consisting of loose soils and that are exposed to waves as the pilings maybe pulled out of the ground by wave action. G2 POST CUBES DISPOSITION MAX 7-9 meters (25-30 ) -Maximum 7 to 9 meters between each post cubes. ( ideally cubes ) -Always surround POST-CUBE with 5 regular cubes on a minimum of 3 faces* (*To optimse efficiency ) -Always try to wk the pilings in pairs. x x x x P.2
 Piling bull 2 7/8 Piling driver 2 7/8 Piling lever ( f pile removal ) Zip cut grinder ( to cut-off exceeding pipe ) Needed accessies PVC pipe ( 3 ) PVC cap G2 POST CUBE G2 POST")
. Needing soft muddy sea bottoms, pilings are mainly used on she lines where the soil is soft and tractable.")
4 2 7/8 STEEL PILE ( galvanized staineless steel ) Galvanized steel OR Staineless steel Diameter (exteri) : 2 7/8 (73 mm) Gage:.100 Weight : 3.5 lbs / linear foot (5.25 kg / linear meter) Piling bull 2 7/8 Piling driver 2 7/8 Piling lever ( f pile removal ) Zip cut grinder ( to cut-off exceeding pipe ) Needed accessies PVC pipe ( 3 ) PVC cap G2 POST CUBE G2 POST CUBES AND PILING INSTALLATION See regular G2 CUBE assembly procedure as f the G2 POST CUBE installation while abiding to these rules: The pilings are mainly used in shallow water conditions ( MAX 2 meters ). Needing soft muddy sea bottoms, pilings are mainly used on she lines where the soil is soft and tractable. If the evironment is filled with rocks other solid debris, other methods should be priised to anch your CANDOCK dock. An imptant aspect of the piling method consists in keeping the piles perfectly vertical. Using a level other precision tools is mandaty f every pile. If the sea bottom is made of clay, be careful not to penetrate the soil too deep as a suction effect will make the removal of those pilings practically impossible. Another imptant notion, never use pilings in agitated water ( maximum waves 0.3 meter ). PILING INSTALLATION -Using the piling driver piling bull, insert piles into the ground by pounding on the top of the piles. MAX. depth 2 meters (6 to 8 feet ) MIN. penetration 1 meter (3 feet) 90 -F optimal resistance, we suggest to use the proper material. Staineless steel being adapted f salt water and galvanized steel f fresh water environement -Maximum dept of water: 2 meters. Penetration: depending on water dept and the soil, minimally 1 meter. -Make sure to insert the pilings perfectly vertical ( 90 degrees ) P.3
5 3 PVC PIPE and CAP PVC Diameter (exteri) : 3 1/2 gage: 1/4 Weight : 1 lbs / linear foot (.45 kg / linear meter) Zip cut grinder ( to cut-off exceeding pipe ) PVC glue Needed accessies PVC pipe ( 3 ) PVC cap G2 POST CUBE Piece of cloth foam PVC CAP PVC PIPE AND CAP INSTALLATION Ususal lenght: 2 meters (6 to 8 feet ) -Always use PVC pipe sleeve f pile covering to prevent premature wear of the POST CUBE flange. Anticipate water level variation without risking pre-mature wear and tear of the G2 POST CUBE flange by lenghtening the PVC pipe under usual water line. PVC CAP PVC PIPE STEEL PIPE -Use PVC CAP to give a me finished look to your pilings. Make sure to insert provided ruber disc into the PVC CAP pri to inserting it onto the PVC pipe. The rubber disk will act as a damper to absb the shocks if the PVC pipe slides up and down on the steel pile. -Simply use PVC glue to secure the cap on the topof the PVC pipe. P.4


6 P.5
 -1 Aluminum 90 degrees bracket with UHMW slide plate -1 SS 316 cable ( 48 / 121 cm )")
: -2 CANDOCK LUG CONNECTORS -2 CANDOCK NUTS 1 Using")


7 PILLING GUIDE (6 to 15 inches diameter ) -Aluminum -Staineless Steel 316 hardware Components: -1 Aluminum bracket ( against cube ) -1 Aluminum 90 degrees bracket with UHMW slide plate -1 SS 316 cable ( 48 / 121 cm ) -11 UHMW rollers -SS 316 harware and manillas Needed tools: -Key f nut -Ratchet key f nut -wrench key -pliers Needed accessies to install the product ( sold seperately ): -2 CANDOCK LUG CONNECTORS -2 CANDOCK NUTS 1 Using the requested CANDOCK LUG CONNECTORS(2) and CANDOCK NUTS(2), secure the aluminum bracket against the cube assembly Using the supplied hardware, fasten the adjustable 90 degrees slider at ideal position depending on the pile position. Adjust the cable lenght and roller assembly to optimize vertical movement while eliminating lateral movements. Proper hardware is already included in the bracket kit 3 DISPOSITION MAX 7-9 meters (25-30 ) P.6


8 ANCHOR PLATE FOR CHAIN Staineless steel 316 5/16 chain gage OR 3/8 chain gage 15/16 key wrench Key f nut Ratchet key f nut + ratchet tool DISPOSITION Needed accessies 1 CANDOCK LUG CONNECTOR 1 CANDOCK NUT 1-Simply insert the CANDOCK LUG CONNECTORS into the cube tabs wherever the ANCHORING PLATES are needed. Secure by screwing the proper CANDOCK NUTS with proper toolings. (KEY FOR NUT RATCHET KEY FOR NUT) MAX 7-9 meters (25-30 ) *If in doubt refer your self to the CANDOCK LUG CONNECTOR section of the regular products OWNER S MANUAL. 2-Insert the Staineless steel anch plate into the CANDOCK LUG CONNECTOR, and to firmly secure it with the provided hardware. Make sure to angle it in the desired direction pri to final tightening. SEE CONFIGURATION GUIDELINES FOR DETAILS CHAIN ADJUSTER Staineless steel 304 Designed f 5/16 chain gage Pliers to manipulate the manilla Key f nut Ratchet key f nut + ratchet tool Included components: 1 CANDOCK LUG CONNECTOR 1 CANDOCK NUT 1 manilla DISPOSITION 1-Simply insert the CANDOCK LUG CONNECTORS into the cube tabs wherever the CHAIN ADJUSTERS are needed. Make sure to insert the 90 degrees angled staineless steel part pri inserting the CANDOCK LUG CONNECTOR. Secure by screwing the proper CANDOCK NUTS with proper toolings. (KEY FOR NUT RATCHET KEY FOR NUT) MAX 7-9 meters (25-30 ) *If in doubt refer yourself to the CANDOCK LUG CONNECTOR section of the regular products OWNER S MANUAL. **Make sure to secure your assembly by fastening the exeeding chain back to anch line with a regular manilla. SEE CONFIGURATION GUIDELINES FOR DETAILS P.7
 Staineless steel 304 (REGULAR) Staineless steel 316 (H.D.")

9 EXTERIOR ANCHORING RING FOR CHAIN ( REGULAR OR H.D. ) Staineless steel 304 (REGULAR) Staineless steel 316 (H.D.) Interi diameter of the loop; 2 5/8 (67mm) 15/16 key wrench Key f nut Ratchet key f nut + ratchet tool Needed accessies 1 CANDOCK LUG CONNECTOR 1 CANDOCK NUT DISPOSITION 1-Simply insert the CANDOCK LUG CONNECTORS into the cube tabs wherever the ANCHORING RINGS are needed. Secure by screwing the proper CANDOCK NUTS with proper toolings. (KEY FOR NUT RATCHET KEY FOR NUT) MAX 7-9 meters (25-30 ) *If in doubt refer your self to the CANDOCK LUG CONNECTOR section of the regular products OWNER S MANUAL. 2-Insert the Staineless steel TREADED ROD into the CANDOCK LUG CONNECTOR and firmly secure with the provided hardware. Make sure to determine ideal vertical position pri to final tightening. SEE CONFIGURATION GUIDELINES FOR DETAILS G2 CONNECTING PIN FOR ANCHORING Staineless steel 304 HDPE Concrete Designed f 5/16 chain gage G2 key f pin combo-pack Pliers Needed accessies 1 Manilla DISPOSITION 1-Simply follow the regular G2 CONNECTING PIN assembly procedure. Make sure to validate their positionning pri to placing them. Connect chain to anching pin from underneath the dock ( in the water ). MAX 7-9 meters (25-30 ) IDEAL APPLICATIONS These G2 CONNECTING PNS FOR ANCHORING are made to simply give a me aesthetic anching method. Also restricting its access, this method discourages any malicious person from stealing your <floating system. SEE CONFIGURATION GUIDELINES FOR DETAILS P.8
 SEE CONFIGURATION GUIDELINES FOR DETAILS TMS ( TIDE MANAGEMENT SYSTEM ) -304 Staineless steel eyelet -Flexible materiel:")

 to the middle section of the line if water level fluctuates if location is exposed to regular waves and")
10 CHAIN ( GALVANIZED OR STAINELESS STEEL, 5/16 OR 3/8 GAGE ) Staineless steel Galvanized 5/16 3/8 Chain cutter zip-cut grinder DISPOSITION MAX 7-9 meters (25-30 ) SEE CONFIGURATION GUIDELINES FOR DETAILS TMS ( TIDE MANAGEMENT SYSTEM ) -304 Staineless steel eyelet -Flexible materiel: Natural latex -Orange wrap: Polyester sheath Needed accessies 2 Manillas 1 meter OR 2 meters 1-Simply insert this TMS cable to middle section of your anching lines. Using proper shackles and harware, securely fasten each ends against the the fixed anch point and the dock line sections of your anching lines. IDEAL APPLICATIONS Install TIDE MANAGEMENT SYSTEM ( TMS ) to the middle section of the line if water level fluctuates if location is exposed to regular waves and rough waters.make sure to use proper shakles depending on the requirements. SEE CONFIGURATION GUIDELINES FOR DETAILS P.9

 on the middle section of the line if water level is fluctuating ( tidal seasonnal ) if location is")

11 CONFIGURATION GUIDELINES Pri to every installation, make sure to analyse these few key points to ensure a proper installation: -NATURE OF SEA BED -TIDAL VARIATIONS -WATER CURRENTS -RULES AND REGULATIONS APPLYING TO YOUR AREA -MOST COMMON AND USUAL WEATHER CONDITIONS -USUAL LOADS THAT WILL BE APPLIED TO THE DOCK SUFFICIENT SPACE BETWEEN LINES 45 DEGREE RULE 1 -Leave sufficient spacing between crossing lines to prevent friction and premature wear. PARITY IN APPLIED FORCES TIDE MANAGEMENT SYSTEM -Install TIDE MANAGEMENT SYSTEM ( TMS ) on the middle section of the line if water level is fluctuating ( tidal seasonnal ) if location is exposed to regular waves and rough waters.make sure to use proper shakles depending on the requirements. NOTE THAT THE CABLES CAN BE COMBINED TO CREATE A STURDIER ANCHORING, DEPENDING ON THE CHARGES THAT WILL BE APPLIED TO THE DOCK. 2 UP / DOWN -Always keep parity between opposing lines and achs. Also equally adjust tensions in lines 2 4 [TOP VIEW] -When applying tension on anching lines, always pull away from the system with a 45 degrees angle. Such method will ensure an even tension in the lines and will optimize the stability of the anching pattern When using TIDE MANAGEMENT SYSTEMS (TMS), make sure to complete the procedure at low tide f an optimum efficiency. ALWAYS INSTALL CABLES UNDER TENSION 3 UP / DOWN P.10


12 PROPER ANCHOR CHOICE AND POSITIONNING 5 2 FOR 1 RULE 1-Abide to the 2 f 1 rule to maximise the stability of your anching. Complete the procedure at low tide f an optimal efficiency. X=2Y i.e -If the depth of the water plan is 2 meters, you have to move the fixed anch aside from the fixing point of a minimum of 4 meters. 6 ANCHOR TYPES 1-Concrete blocks 2-Chemical anchs 3-Helicoidal hook 4-Earth Anchs Use proper anchs depending on the nature of the seabed and loads applied to the dock. Y 2 meters If sea bottom is rocky and slipery, A series of dead weight combined together with chain may be suitable to prevent anch movements X 4 meters 5 6 PROPER LINE CONFIGURATIONS A UPPER SECTION F the upper section of the line, either chain proper rope are suggested to facilitate adjustements through out the season. Proper shakles and hardwares are mandaty If using rope as line upper section material, make sure to use proper rope and attach it as following to ensure a strong and adjustable layout. Simply insert shackle pin trough the ropestrands. Make sure to insert in the very middle of the rope to maximise strenght.finally, simply attach the shackle to the anch point on the dock *If using a TMS, another shackle should be used on the rope at a much lower point so when you put the TMS under tension, the shackle used to definitively secure the rope to the dock can be easily inserted. If rope is used between lower section and upper section ( TMS ), make sure to link both sections to the rope with proper splicing methods including stainless steel sleeve in loop to prevent premature wear of the rope. A B MIDDLE SECTION B Install TIDE MANAGEMENT SYSTEM ( TMS ) on the middle section of the line if water level is fluctuating if location is exposed to regular waves and rough waters.make sure to use proper shakles depending on the requirements. C BOTTOM SECTION Always use chain f the first section of the line to prevent premature wear against debris laying on sea bottom C P.11


13 ANCHORING STRUTS ( ALUMINUM OR STAINELESS STEEL ) CUBE END OF THE STRUTS: SHORE END OF THE STRUTS: IDEAL APPLICATIONS When used perpendicularly: UP TO 5 METERS VARIATION When used with a certain angle: UNDER 1 METER VARIATION Aluminum OR Staineless steel 316 lenth of Custom lengths also available upon request Key wrench kit Hammer drill Regular drill Bits and hardware* *Depending on the environement and utility of the arms. Needed accessies 1 CANDOCK LUG CONNECTOR 1 CANDOCK NUT The anching struts are very useful in different situations; making it possible to solidly anch a dock to she line foundations rocks, these arms have practicaly no limitations. CANDOCK offers a wide range of these arms depending on the size of the project and the conditions it is operating in. From 1 meter long to 10 meter long, f tidal variations up to 5 meters, these anching systems are a great way to securelly attach your dock to permanent structures. Swivelling head, fixed head, aluminium staineless steel body, everything is possible. Depending on the situation, struts should be installed every 6 to 9 meters ( 20 to 30 ). 1- CUBE END OF THE ARMS: 1-Simply insert the LUG CONNECTORS into the cube tabs wherever the ANCHORING ARMS are needed. Secure by screwing the proper CANDOCK NUTS with proper toolings. (KEY FOR NUT RATCHET KEY FOR NUT) *If in doubt refer your self to the CANDOCK LUG CONNECTOR section of the regular products OWNER S MANUAL. 2-Install the destined part of the arms on the CANDOCK LUG CONNECTORS and firmly secure it with the provided hardware. Make sure to angle it in the desired direction pri to final tightening. 2- SHORE END OF THE ARMS *** If installed on a concrete wall/structure, see last page of this manual f specific hardware suggestion*** 1-Using proper hardware and tools, secure the fastening plate against concrete structure. Other structures may act as anch points but an extensive analysis of the structure must be done to insure a strong and durable anch point f the arm. NOTES -Make sure you install the arms at low tide and verify that they will accept variations. Make sure the installation moves freely in all conditions. -If installed perpendicular to she, use steel cables chains positionned in a X conguration to prevent unwanted lateral movements. -If used in a 45 degree angle, water level variations will be limited and a minimum of 3 struts should be used in oposite directions to prevent lateral movements SEE IMAGES LOWER P.11


14 ALLOWING VERTICAL VARIATIONS ( TIDAL, SEASONNAL OR FLASH FLOOD SURGES ) ANCHORING STRUTS allowing imptant tidal variations and offering unmatched resistance and sturdiness. UP / DOWN [UP TO 5 METERS] STRUTS COMPOSITION -Aluminum 6061 T6 -Staineless steel 316L PREVENTING ANY LATERAL MOVEMENTS STIFFENING CABLES P.12


15 DOCK LEG SUPPORT Aluminum Diameter of piles : 1 11/16 Needed accessies Pile 1 11/16 Piling driver 1 11/16 Zip cut grinder ( to cut-off exceeding pipe ) Key wrench Drill and bits The DOCK LEG SUPPORT, combined with piles 1 11/16", is a simple and affdable way to suppt our gangways and / fixed dock sections. Indeed, they can be adjusted in height and are easy to manipulate. It can also be used to connect our floating systems to aa existing, floating OR fixed, structure. When installing the bracket on a floating structure, the 1 11/16 " galvanized steel pile is to be inserted into the DOCK LEG SUPPORT,then into the cubes tabs and, finally, it must lengthened up to about 1 meter (3 feet) below the water line. If the suppt is to be installed on a fixed structure, the pile will necessarily have to sunked into the seabed to ensure durability. You can create an effective, affdable and easy to install attachment point to connect our systems to all other structures, floating OR fixed. WALL ANCHORAGES ( PAINTED STEEL OR STAINLESS STEEL ) Painted steel Satineless steel 15/16 key wrench Key f nut Ratchet key f nut + ratchet tool Included accessies: 1 CANDOCK LUG CONNECTOR 1 CANDOCK NUT Other needed accessies and tools: Proper hardware and tools to fix the bracket to existing floating structure. 1-FIXING THE BRACKET TO THE CUBE: 1-Simply insert the CANDOCK LUG CONNECTORS into the cube tabs wherever the WALL ANCHORAGE are needed. Secure by screwing the proper CANDOCK NUTS with proper toolings. (KEY FOR NUT RATCHET KEY FOR NUT) *If in doubt refer your self to the CANDOCK LUG CONNECTOR section of the - regular products OWNER S MANUAL. 2-Install the destined part of the bracket on the CANDOCK LUG CONNECTORS pri to firmly secure it with the provided hardware. Make sure to angle it in the desired direction pri to final tightening. 2-FIXING THE BRACKET TO THE FLOATING STRUCTURE: 1-Using proper hardware and tools, secure the fastening plate against the floating structure*. Other structure may act as anch points but an extensive analysis of the structure must be done. (*additionnal parts and brackets may be needed to properly connect to the dock if heights don t concur) MUST BE INSTALLED ON A FLOATING STRUCTURE OR AGAINST A FIXED STRUCTURE IN AN ENVIRONMENT WHERE WATER DOES NOT FLUCTUATE. P.13
TOOLS -OWNER S MANUAL-
 ARE YOU READY TO TOOLS -OWNER S MANUAL- TABLE OF CONTENT KEY FOR G2 PIN COMBO PACK KEY NUT, RATCHET, CAN. KEY FOR WHITE NUTS PILING BULL 2 7/8 PILING DRIVER 2 7/8 PILE LEVER 2 7/8 P.4 *** Note that it
THOR 10 HAMMER CAGE INSTRUCTIONS
 75 " 7m 78 4" m 6" 8.8m 45 ".70m 4.9deg 6 4" 6m 44 4".67m 75 " 7m 9 4" 0m 44".m 497 4".64m The 70, Thor Hammer Cage, consists of four heavy duty aluminum net poles. The unique pole structure reduces the
RIGGERS SAFETY SAFETY IS IN THE DETAILS FULL LINE CATALOG
 RIGGERS SAFETY SAFETY IS IN THE DETAILS FULL LINE CATALOG Riggers Safety is a California-based manufacturer of Personal Fall Arrest Systems (PFAS) and Fall Prevention Products. Our automated manufacturing
RIGGERS SAFETY SAFETY IS IN THE DETAILS FULL LINE CATALOG
 RIGGERS SAFETY SAFETY IS IN THE DETAILS FULL LINE CATALOG Riggers Safety is a California-based manufacturer of Personal Fall Arrest Systems (PFAS) and Fall Prevention Products. Our automated manufacturing
TRAVSMART permanent single-cable horizontal lifeline system
 The Travsmart single-line system provides a smooth travel. It allows the traveler to move freely over the intermediate anchors, minimizing wear and eliminating user assistance. The user s hands remain
MSA Confined Space Entry Equipment
 MSA Confined Space Entry Equipment Because every life has a purpose... MSA Confined Space Entry Equipment MSA XTIRPA Manhole Guard System Use for confined space vertical entry and fall protection when
Miller DuraHoist Safety Systems
 Portable Confined Space System designed for manhole and confined space entry/ retrieval and fall arrest applications. Portable Fall Arrest Post provides three independent swivel tie-off points for fall
QUALITY ALUMINUM BOAT LIFTS, INC. INSTRUCTIONS. Dominator Lake Lift
 INSTRUCTIONS Dominator Lake Lift PHONE:251-986-3882 * FAX:251-986-3136 QABLDOMINATORINST.2014 P a g e 1 Quality Aluminum Boat Lifts, INC. Installation Instructions: Dominator Lake Lift Thank you for your
Low Wind High Yields Series
 Low Wind High Yields Series Wind Turbines USER S MANUAL Introduction Low Wind High Yields Series rotor blades apply the latest advanced thermoplastic engineering and are manufactured by precision injection
Array Solutions 350 Gloria Rd Sunnyvale, TX Phone FAX
 Array Solutions 350 Gloria Rd Sunnyvale, TX 75182 Phone 972-203 2008 FAX 972-203 8811 E-mail: info@arraysolutions.com Installation Instructions AS-AYL-4 WM Array Solutions K9AY Loop Wire/Mast Kit Thank
GM-121: Container End Lock Anchor Wand Page 1 WINSAFE CORP. GM 121 CONTAINER END LOCK ANCHOR WAND OPERATING INSTRUCTIONS AND MAINTENANCE
 GM-121: Container End Lock Anchor Wand Page 1 WINSAFE CORP. GM 121 CONTAINER END LOCK ANCHOR WAND OPERATING INSTRUCTIONS AND MAINTENANCE US Patent No. 6834745 This equipment conforms to 0321 EN795:1996
PoolLock Easy Pool Cover
 PoolLock Easy Pool Cover INSTALLATION MANUAL The packaging of the PoolLock Easy Cover contains: 1. PoolLock Easy cover (rolled up) 2. One or two manual cranks (according to the pool size) Plastic bag contains:
2,500/4,000 LB Easy Riser Vertical Cable Feighner Lift
 2,500/4,000 LB Easy Riser Vertical Cable Feighner Lift CAUTION - PUT SAFETY FIRST 1. Before attempting to install or operate this lift, study and fully understand the proper operating procedures and safety
CSO/STORMWATER MANAGEMENT. HYDROVEX FluidMoon Self-Adjusting Knife-Gate Regulator
 CSO/STORMWATER MANAGEMENT HYDROVEX FluidMoon Self-Adjusting Knife-Gate Regulator HYDROVEX FLUIDMOON SELF-ADJUSTING KNIFE-GATE REGULATOR APPLICATION The Hydrovex FluidMoon Self-Adjusting Knife-Gate Regulator
-Round Down- Description & Overview. VEX Classroom Competition Round Down
 -Round Down- Description & Overview Round Down is a head-to-head robotics competition designed and scaled to be run in a classroom environment by a single teacher. This game provides a challenge for designers
Gas Cylinder Storage Structures
 Gas Cylinder Storage Structures O These Heavy Duty Storage Structures Provide Galvanized Steel Floors Ensuring Cylinders Will Be Stored On A Level, Dry Surface $ 15,976.00 Order No: L62-3117 Custom Designs
DIY Shallow Water Anchor Assembly Instructions for Rods, T-grips, Stainless Tips, Stainless Couplers, and the 4-in-1 Paddle
 DIY Shallow Water Anchor Assembly Instructions for Rods, T-grips, Stainless Tips, Stainless Couplers, and the 4-in-1 Paddle All Shallow Water Anchor Parts First, start by laying out and identifying all
TorqBolt Wedge Anchors Torque Controlled Expansion Anchor
 TorqBolt Wedge Anchors Torque Controlled Expansion Anchor Product Description The Torqbolt wedge anchor is a torque-controlled, wedge expansion anchor for heavy duty fastening applications where high pull
How Do I Install My Garden Master Bucket Garden?
 How Do I Install My Garden Master Bucket Garden? 1. On the arrival of your Bucket Garden open the bucket and remove the 4 screws from the outside of the bucket rim and pull the 2 buckets apart. Check the
Tripod Setup Guide (M-TPx)
") Items needed: 1/2 inch wrench, mast level (M-MLA), medium size wire cutters, crescent wrench, all-purpose grease, tape measure, tie wraps, redi-mix cement (optional), shovel (optional), sledge hammer (for
Items needed: 1/2 inch wrench, mast level (M-MLA), medium size wire cutters, crescent wrench, all-purpose grease, tape measure, tie wraps, redi-mix cement (optional), shovel (optional), sledge hammer (for
Below are the instructions to build a roller-furling unit for under $10. Read the entire process before beginning the project.
 Greg Cowens' $10 PVC Roller Reefing for CP-16's by Greg Cowen Below are the instructions to build a roller-furling unit for under $10. Read the entire process before beginning the project. Materials: 2
Installation and Training Manual
 AirForce1 Tower Kit Installation and Training Manual FuturEnergy Limited Ettington Park Business Centre Stratford upon Avon CV37 8BT +44 (0)1789 451070 Table of Contents Safety Notes... 3 Parts Supplied
Operator s Safety Manual Sumner Max Jax / Beam Jax
 May 2013 Operator s Safety Manual Sumner Max Jax / Beam Jax www.sumner.com 7514 Alabonson Road Houston, TX 77088 U.S.A ph: 281.999.6900 fax: 281.999.6966 75 Saltsman Drive Unit 5 Cambridge, ON N3H 4R7
Security and confidence at height.
 A Security and confidence at height. Vertical Systems DISTRIBUTED BY M DBI-SALA Vertical Systems are designed to complement your ability to work while meeting all applicable OSHA and ANSI standards. Vertical
FLEXIBLE AND RELIABLE ANCHORING
 Spiral rope anchor and FLEX Head FLEXIBLE AND RELIABLE ANCHORING 1 THE SMARTER ANCHOR FLEXES. The flexibility of the whole system is crucial for both rockfall barriers and other protection systems. Why?
Wellhead Mast. Installation and Operation Guide. Nanometrics Inc. Kanata, Ontario Canada
 Installation and Operation Guide Nanometrics Inc. Kanata, Ontario Canada 2001 2005 Nanometrics Inc. All Rights Reserved. Installation and Operation Guide The information in this document has been carefully
Inflatable Packer Single & Double. Single & Double Packer Dimension. Wireline Packer. Water Testing Packer (WTP) Packer
 Packer") Inflatable Packer Single & Double Single & Double Packer Dimension Wireline Packer Water Testing Packer (WTP) Packer Packer Working Pressure & Depth Chart Packer Water Hand Pump Packer Air Driven Pump
Inflatable Packer Single & Double Single & Double Packer Dimension Wireline Packer Water Testing Packer (WTP) Packer Packer Working Pressure & Depth Chart Packer Water Hand Pump Packer Air Driven Pump
PHOENIX, ARIZONA USA
 NEW PRODUCTS MODEL: US-AASS-80 DESCRIPTION: Cantilever Arm 80 MEETS OSHA & ANSI Z359.14 CLASS B 1-800-850-5914 PHOENIX, ARIZONA USA WWW.ULTRASAFEUSA.COM CANTILEVER ARM The Ultra-Safe cantilever arm has
Troyer s Gourd Rack 8 unit F R H O P
 B E A D I M-N L Vertical Parts F R H O P Horizontal Parts C G J Updated 11/16 Parts List A: Top of Pole B: Bottom of Pole C: 48 Ground Stake D: Top Perch rods 48 long E: Hub F: Rope Winder w/ attached
L.Ph. Bolander & Sons 1355 Evans Ave. 800/
 L.Ph. Bolander & Sons 1355 Evans Ave. 800/434-5611 San Francisco, Ca. 94124 Fax 415/648-0402 GOUNDSET ALUMINUM FLAGPOLE INSTALLATION INSTRUCTIONS STEP 1: DIG THE HOLE TO THE DIMENSIONS LISTED BELOW STEP
Foundation Products. Poured In Ground Anchor Bolts E1 - E4. Structural Foundations E5 - E12. Copyright 2016 s Industry Inc. SIE-RA-CMP EN
 Foundation Products Poured In Ground Anchor Bolts E1 - E4 Structural Foundations E5 - E12 EA EB Poured in Ground Anchor Bolts Layout SIEMENS Anchor Bolts 131702-4X shown for reference purposes only! Actual
The All New DIAMOND & DIAMOND BT
 The All New DIAMOND & DIAMOND BT. Specs The Diamond The Diamond BT Type Badminton Badminton & Tennis Pulling Method Constant Pull Constant Pull Tension Range 10 38 lbs 10 88 lbs Tension Increments 0.1
XTS-Impact. XTS-Terminal (hold)
") XTS-Impact The XTS-Impact is used to support the XTS-Linked system, as a standalone anchorage point and as an anchorage point in horizontal temporary lifeline systems. The anchorage point is tested according
XTS-Impact The XTS-Impact is used to support the XTS-Linked system, as a standalone anchorage point and as an anchorage point in horizontal temporary lifeline systems. The anchorage point is tested according
WELL COMPLETION & PROTECTION. www. .com MINERAL EXPLORATION ENVIRONMENTAL GEOTECHNICAL GEOTHERMAL ROTARY SONIC HDD
 WELL COMPLETION & PROTECTION MINERAL EXPLORATION ENVIRONMENTAL GEOTECHNICAL GEOTHERMAL ROTARY SONIC HDD www..com WELL COMPLETION & PROTECTION TABLE OF CONTENTS TABLE OF CONTENTS (FLUSHMOUNTS)... 2-5 MONITORING
NAVIGATOR Product demonstration prop building instructions
 NAVIGATOR Product demonstration prop building instructions Regional competitions may build product demonstration props out of materials other than PVC pipe. Your regional coordinator will inform you of
TECHNICAL HANDBOOK nvent CADDY Speed Link Manual. SLS Locking Device
 TECHNICAL HANDBOOK nvent CADDY Speed Link Manual SLS Locking Device Contents 1. WIRE ROPE SUPPORT OVERVIEW 3 A. Using Wire Rope 3 B. The nvent CADDY Speed Link Manual 3 C. SLS Features 4 D. SLS Mechanism
SERIES 2 RAMP OWNER S MANUAL TOOLS REQUIRED: BEFORE YOU BEGIN... Read and understand these instructions before beginning a ramp setup.
 SERIES 2 RAMP OWNER S MANUAL BEFORE YOU BEGIN... Read and understand these instructions before beginning a ramp setup. Use caution and care for your back when lifting, pushing, pulling, folding or unfolding
5/16 MAXFLOW SPOUTS 17/64 MAXFLOW SPOUTS. 5/16 black spout with barbs $0.25 $ /64 white spout without barbs. 5/16 white spout without barbs
 FITTINGS The new line of 5/16" Maxflow fittings was specifically designed and developed for maple producers wanting to operate over 25 in-hg (high vacuum). These fittings enable a perfect seal with a vacuum
1. Product Name. 2. Product Code. 3. Colour. 4. Brief Description. 5. Contents. Itinerant Frame. Likely to be as shown
 1. Product Name Itinerant Frame 2. Product Code 21542 3. Colour Likely to be as shown 4. Brief Description Height adjustable! The first real portable suspension system available for travelling therapists
GM-120: Container Top Lock Anchor Wand Page 1 WINSAFE CORP. GM 120 CONTAINER TOP LOCK ANCHOR WAND OPERATING INSTRUCTIONS AND MAINTENANCE
 GM-120: Container Top Lock Anchor Wand Page 1 WINSAFE CORP. GM 120 CONTAINER TOP LOCK ANCHOR WAND OPERATING INSTRUCTIONS AND MAINTENANCE US Patent No. 6834745 This equipment conforms to 0321 EN795:1996
SAMPLE PAGE. Section 2... Wire Rope
 Section 2...................................................... Wire Rope Never use any kind of clip to directly connect two straight lengths of wire rope to form a continuous piece. Do not make up slings
Standard Operating Procedures
 Standard Operating Procedures GlassBore and GlassLine EUE 8RD Tubular Goods Composite Lining Systems Focus on Safety and Quality COMPOSITE LINING SYSTEMS Table of Contents Section 1 page 3 Arrival on Production
Crossed Roller Bearings Series Crossed Roller Bearings Series:
 Crossed Roller Bearings Series Crossed Roller Bearings Series: Proprietary 2V Grinding Technology 102 Crossed Roller Bearing Series: Overview High Precision Bearing Sets Proprietary 2V Grinding Technology
Telescopic winch handle Speedfriend"
 Winch handles, jib furlers JIB FURLERS - WINCH HANDLES - SPREADER COVERS 57 Floating winch handles Floating universal size winch handles Fitted with "Lock In" winch system; universal size for any winch;
Assembly instructions nortik scubi 2 Recreational kayak
 Assembly instructions nortik scubi 2 Recreational kayak QR-Code assembly video: Assembly instructions nortik scubi 2 Dear Customer, You have purchased a nortik scubi 2, an innovative hybrid kayak for recreational
DO NOT use any Alien Flier Zip Line Products or Accessories until you read and understand these SAFETY WARNINGS!
 ! WARNING DO NOT use any Alien Flier Zip Line Products or Accessories until you read and understand these SAFETY WARNINGS! A zip line can be very dangerous. Do not use this kit if you do not understand
Model: 5100 OmniSteel Volleyball System
 Model: 5100 OmniSteel Volleyball System Installation, Operation and Maintenance Instructions Please read all instructions before attempting installation or operation of these units SAVE THESE INSTRUCTIONS
602 STRINGING MACHINE OWNER'S MANUAL
 PROGRESSION 602 STRINGING MACHINE OWNER'S MANUAL AL Issue 1- April 2000 Copyright 2000 GAMMA Sports - All Rights Reserved PROGRESSION 602 STRINGING MACHINE TABLE OF CONTENTS PAGE 1... WARRANTY PAGE 2...
A-FRAME RESIN IN & OUT FLIP UP LADDER
 A-FRAME RESIN IN & OUT FLIP UP LADDER NE1222 NOTE FOR SAFETY PURPOSES ALL LADDERS SHOULD BE SECURED BY ATTACHING THEM TO THE TOP LEDGE OF THE POOL. (See step 13 for details) In order for the ladder to
SIMPLAIR PIPING TOOL. JXT Company
 SIMPLAIR PIPING INGERSOLL-RAND SIMPLAIR PIPING With push-in fittings and lightweight anodized aluminum pipe, a SimplAir system provides ideal connection throughout your entire air distribution system.
CARGO CONTROL Section 09 Page 52
 CARGO CONTROL Section 09 Page 52 Ratchet Straps Standard ratchet strap assemblies are made from polyester webbing with a heavy duty steel ratchet. Rhino Straps supply greater durability, strength and abrasion
Lectric Cycles Mid-Drive Electric Motor Installation
 Lectric Cycles Mid-Drive Electric Motor Installation This write-up describes the installation of a Lectric Cycles electric motor. The model is the e-rad Mid-Drive 750 Watt conversion kit, installed on
Casing Spacer Technology Leaders
 Casing Spacer Technology Leaders Benefit today. Save down the line. www.racispacers.com NORTH AMERICA Why Raci Raci has been the global leader in casing spacer technology since 1952. Our uniquely designed,
BACKSTROKE START DEVICE
 BACKSTROKE START DEVICE 1551 East 11th Street Loveland CO 80537 +1 970.667.1000 www.coloradotime.com 2016 Colorado Time Systems F1024 Rev 201604 You have purchased a Colorado Time Systems Backstroke Start
Boat Boat Loader Fitting Instructions
 Aerodynamic & Heavy Duty Roof Rack Systems Australian Made - Australian Owned www.rhinorack.com Boat Boat Loader Fitting Instructions CONTROLLED Balance point 3 Front eye nuts position 3 Transom eye nut
New Product Update - September 2017
 New Product Update September 2017 Series 1 Ball Bearing Utility Blocks Available Now With a sheave diameter of 1mm these are the smallest and lightest ball bearing blocks available! The single block delivers
FIRST TEAM SPORTS, INC Storm Portable Series Assembly Instructions
 FIRST TEAM SPORTS, INC Storm Portable Series Assembly Instructions WARNING! WARNING! WARNING! THIS BASKETBALL SYSTEM IS SPRING LOADED AND SHIPPED UNDER TENSION. ATTEMPTING TO ASSEMBLE OR DISASSEMBLE ANY
2019 MADONE ASSEMBLY MANUAL
 2019 MADONE ASSEMBLY MANUAL 2019 MADONE Rim brakes and Di2 drivetrain Rim brakes and mechanical drivetrain Disc brakes and Di2 drivetrain Disc brakes and mechanical drivetrain TABLE OF CONTENTS Common
Big Ride ASSEMBLY AND INSTALLATION INSTRUCTIONS * * C A U T I O N * *
 Big Ride ASSEMBLY AND INSTALLATION INSTRUCTIONS * * C A U T I O N * * S.R. SMITH BIG RIDE SLIDES ARE MANUFACTURED FOR INSTALLATION AND USE ON INGROUND SWIMMING POOLS ONLY. THE BIG RIDE IS NEVER TO BE INSTALLED
Fall Protection for Compliance Workman : Quality, Comfort & Value
 Fall Protection for Compliance Workman : Quality, Comfort & Value Fall Protection for Compliance Workman Full-Body Harnesses Quality, comfort, and value come together in the Workman line of products and
Order No Projection Backboard
 Basketball Basketball Single Post System The single-post basketball stand is made with oval aluminium profiles with a cross-section of 120 x 100 mm. The wall thickness of this robust apparatus is 4 to
MUELLER. A A Adjustable. Vertical Indicator Posts. Reliable Connections. General Information 2. Technical Data 3.
 Installation Instructions manual MUELLER table of contents PAGE A-20806 A-20807 Adjustable General Information 2 Technical Data 3 Dimensions 4 Installation 5-6 Parts 7 Maintenance 8 Vertical Indicator
Soma Wind Generators
 Soma Wind Generators 13M WINH TOWER INSTALLATION MANUAL ERTIFIED to AS4100 Steel Structures ode AS3995 (1994) Design of Steel Lattice Towers and Masts AS1170.2 (1989) SAA Wind Loading Manufactured by SOMA
Utility Anchor System
 Utility Anchor System The Dayton Superior Utility Anchor System is designed to economically simplify the lifting and handling of precast concrete elements. Its economics, ease of use and versatility will
COMPETITION EQUIPMENT. Enjoy the game
 COMPETITION EQUIPMENT Enjoy the game Competition Equipment The only board approved by FINA for world championships Powered by DURAFLEX aluminium springboards have been used exclusively in all Olympic diving
Poollift Delphin. Version: February, 2015 MANUAL AND OPERATING INSTRUCTIONS
 Poollift Delphin Version: February, 2015 MANUAL AND OPERATING INSTRUCTIONS Content 1. Introduction... 3 2. Technical Specifications... 3 Used materials... 3 3. Installation Instructions... 4 Fastening
SKI SPECIFICATIONS INSTALLATION, MAINTENANCE, SERVICE INSTRUCTIONS & ILLUSTRATED PARTS LIST
 SKI SPECIFICATIONS INSTALLATION, MAINTENANCE, SERVICE INSTRUCTIONS & ILLUSTRATED PARTS LIST AIRGLAS MANUAL NO. L 44000-105 (Rev C) FOR SKI SERIAL NO. S 1 THRU 1000 AIRGLAS MODEL L 44000-11 FSN 1630-912-3166
MUELLER. A Wall Type. Indicator Post. Reliable Connections. General Information 2. Technical Data/ Dimensions 3. Installation 4-5.
 Installation Instructions manual MUELLER table of contents PAGE A-20814 Wall Type General Information 2 Technical Data/ Dimensions Installation 4-5 Maintenance 6 Parts 7 Indicator Post! WARNING: 1. Read
2019 MADONE ASSEMBLY MANUAL
 2019 MADONE ASSEMBLY MANUAL 2019 MADONE Rim brakes and Di2 drivetrain Disc brakes and Di2 drivetrain Rim brakes and mechanical drivetrain Disc brakes and mechanical drivetrain TABLE OF CONTENTS Common
MAY 2015 EQUIPMENT LIST CONTENTS: 1. SWIMMING LANES 2. STARTING BLOCKS 3. STORAGE DRUMS FOR SWIMMING LANES 4. WATERPOLO GOALS AND FIELD LINES
 MAY 2015 EQUIPMENT LIST CONTENTS: 1. SWIMMING LANES 2. STARTING BLOCKS 3. STORAGE DRUMS FOR SWIMMING LANES 4. WATERPOLO GOALS AND FIELD LINES 5. SWIMMING POOL LADDERS 6. PACE CLOCKS 7. ELECTRONIC START
SET OF EUROLEAGUE BACKSTOP UNITS (Reference PK120)
") SET OF EUROLEAGUE BACKSTOP UNITS (Reference PK120) DESCRIPTION The EUROLEAGUE backstop unit is mainly designed for multi-sports pavilions and installations where the highest-level basketball competitions
SET OF EUROLEAGUE BACKSTOP UNITS (Reference PK120) DESCRIPTION The EUROLEAGUE backstop unit is mainly designed for multi-sports pavilions and installations where the highest-level basketball competitions
WINSAFE CORP. OPERATING AND MAINTENANCE INSTRUCTIONS GM184 TOP ACCESS END LOCK ANCHOR WAND
 WINSAFE CORP. OPERATING AND MAINTENANCE INSTRUCTIONS GM184 TOP ACCESS END LOCK ANCHOR WAND For more information on this innovative product line manufactured by Winsafe Corp., please contact: G. D. MacKay
BALL STOP INSTALLTION GUIDE
 BALL STOP INSTALLTION GUIDE GROUND SLEEVE INSTALLATION: 1. Locate the exact location of the ground sleeve. NOTE: Maximum recommended pole spacing is 20 feet on center. 2. Excavate the pole footing; refer
600 / 600FC OWNER'S MANUAL
 PROGRESSION 600 / 600FC OWNER'S MANUAL Issue 2 / Version E - Dec. 10, 1997 Copyright 1997 GAMMA Sports - All Rights Reserved PROGRESSION 600 / 600FC OWNER'S MANUAL TABLE OF CONTENTS PAGE 1... WARRANTY
Ropes for Subsea Cable Laying
 Ropes for Subsea Cable Laying SEAMASTER CABLE LAID BUOY & GRAPNEL ROPES [ BUOY & GRAPNEL ] Cable Laid combined (wire and natural fibre) ropes specially designed for Subsea Cable Laying duties Designed
Stand-N-Fish FULL DETAIL INSTALLATION INSTRUCTIONS
 1 Stand-N-Fish FULL DETAIL INSTALLATION INSTRUCTIONS Thank you for purchasing the incredible new Stand-N-Fish Kayak Fishing System. Once installed on your kayak the Stand-N-Fish will take your kayak fishing
Aquatic Trap Instructions and Information
 Aquatic Trap Instructions and Information Crayfish, Crabs, Shrimp Traps Model 405 Repeating Crayfish Trap featuring trap doors on both ends. Trap doors act as funnels for crayfish to enter. One of the
INSTRUCTION MANUAL. January 23, 2003, Revision 0
 INSTRUCTION MANUAL Model 810A In-Vitro Test Apparatus for 310B Muscle Lever January 23, 2003, Revision 0 Copyright 2003 Aurora Scientific Inc. Aurora Scientific Inc. 360 Industrial Parkway S., Unit 4 Aurora,
COASTAL IN-BOOM FURLING SYSTEM. Installation Manual
 COASTAL IN-BOOM FURLING SYSTEM Installation Manual 1 TABLE OF CONTENTS Page Number 3. Disclaimer 4. Components packing list & required tools 5. Gooseneck bracket location 6. Installation sail track 7.
Side-of-Pole Mount for 1 Module (SPM1) For Module Types A & B
 For Module Types A & B") Side-of-Pole Mount for 1 Module (SPM1) For Module Types A & B ASSEMBLY INSTRUCTIONS step-by-step assembly and installation Version 1, Rev A PCN 080311-2 SP3363-1 Side-of-Pole Mount for 1 Module (SPM1)
Side-of-Pole Mount for 1 Module (SPM1) For Module Types A & B ASSEMBLY INSTRUCTIONS step-by-step assembly and installation Version 1, Rev A PCN 080311-2 SP3363-1 Side-of-Pole Mount for 1 Module (SPM1)
Anchorage Connectors
 Anchorage Connectors ANCHORAGE CONNECTORS Have a minimum breaking strength of 5,000 lb. Compatible for use with MSA fall arrest and confined space entry/retrieval components Meets applicable ANSI standards
USER MANUAL. Beach volleyball posts BEACH CHAMP ID:
 USER MANUAL Beach volleyball posts BEACH CHAMP ID: 111203 INDEX USER MANUAL FOR BEACH VOLLEYBALL POSTS BEACH CHAMP General information Overview Overview: Floor mounting options City Beach - for a freestanding
Standard Hangers and Adapters
 Standard s and Adapters Cable Gripping Tabs Prevent cable slippage without the need for a permanently installed hoisting grip. Pre-Assembled and Captivated Hardware Eliminates the need for field assembly.
PORTABLE CAPSTAN WINCHES LINE-UP
 PORTABLE CAPSTAN WINCHES LINE-UP P a g e 2 PCW5000 APPLICATION: PULLING ENGINE: 4-STROKE HONDA GXH-50 cc CAPACITY: MAX. PULLING FORCE: 1000 kg SPEED WITH: 57 mm DRUM: 12 m/min 85 mm DRUM: 18 m/min WEIGHT
Spring steel fasteners KWHS-14R. KwikWire. Hanging system
 Spring steel fasteners KWHS-14R KwikWire Hanging system KwikWire Hanging System Takes the strain out of hanging with chain The KwikWire Hanging System is a flexible replacement for jack chain and all thread
SASK-A-POLE OWNERS AND USERS MANUAL
 SASK-A-POLE OWNERS AND USERS MANUAL GENERAL INFORMATION The Saskatchewan Abilities Council s Sask-a-Pole accessibility and transfer aid is designed to help provide safe and easy access to chairs, beds,
MODEL #7100X A-FRAME LADDER
 SAVE THESE INSTRUCTIONS DEALER/INSTALLER: GIVE TO HOMEOWNER MODEL #7100X A-FRAME LADDER LADDER MUST BE ATTACHED TO POOL FRAME... DO NOT USE WITH INFLATABLE POOLS ASSEMBLY AND INSTALLATION MANUAL The Anti-Entrapment
Precision Liquid Settlement Array Manual
 Precision Liquid Settlement Array Manual All efforts have been made to ensure the accuracy and completeness of the information contained in this document. RST Instruments Ltd reserves the right to change
B-LINE SERIES. Spring steel fasteners KWHS-15. KwikWire. Hanging system
 Spring steel fasteners KWHS-5 B-LINE SERIES KwikWire Hanging system KwikWire hanging system. Takes the strain out of hanging with chain Application Photos Applications for the KwikWire Hanging System include:
Float operated valve TYPE (SWDS)
") Float operated valve TYPE (SWDS) Assembly and Operating Instructions for all models Float operated valve Type SWDS Assembly and Operating Instructions Rev.0 Page 1 of 12 Table of Contents 1 General 3 2
Float operated valve TYPE (SWDS) Assembly and Operating Instructions for all models Float operated valve Type SWDS Assembly and Operating Instructions Rev.0 Page 1 of 12 Table of Contents 1 General 3 2
Ground Release Shackle
 Operator Manual Subhead Advantages: In the process of installing Slide Rail, the shackle connecting the top of posts, panels, and sheeting must be removed manually. This is normally done by climbing on
USER GUIDE / PRODUCT MANUAL
 1234 Main St. Swartz Creek, MI 48420 Phone support: 1 888 555 0123 support@sandaconda.com The Sandaconda Anchor System USER GUIDE / PRODUCT MANUAL For more information, please visit us atsandaconda.com
SIGNATURE DEF REELS Models: Bare Reel Reel Reel Reel
 SERVICE BULLETIN SB2023 Rev C 7/11 SIGNATURE DEF REELS Models: 2400-006 Bare Reel 2400-007 16 Reel 2400-008 20 Reel 2400-009 30 Reel Thoroughly read and understand this manual before installing, operating
COMPACT. VERSATILE. SAFE.
 NANO-LOK SELF RETRACTING LIFELINES ONLY 1.6 POUNDS! COMPACT. VERSATILE. SAFE. REPLACE YOUR LANYARD TO REDUCE FALL DISTANCE AND IMPROVE SAFETY. Model Shown 3101211 THE ULTIMATE IN FALL PROTECTION PRODUCT
Heavy Equipment & Rigging Specialist Training
 Heavy Equipment & Rigging Specialist Training Module 1 Unit 4: Intro to Rigging May08 1 Key Points Review of Exercise Goals Discuss Rigging Components Language of Crane Signals Review Anchor Installation
ISLAND MOORING SUPPLIES, LLC (IMS)
") (IMS) Established 2003 ~ Quality ~ 2019 CATALOG ~ Innovation ~ TITAN MOORING BUOY ~ Value ~ MAST BUOYS MOORING PENDANT EFFECTIVE AS OF 01/01/2019 Manufacturing Quality Products Since 2003 Page 1 INDEX
(IMS) Established 2003 ~ Quality ~ 2019 CATALOG ~ Innovation ~ TITAN MOORING BUOY ~ Value ~ MAST BUOYS MOORING PENDANT EFFECTIVE AS OF 01/01/2019 Manufacturing Quality Products Since 2003 Page 1 INDEX
20', 15', AND 12' BALL STOPS ASSEMBLY INSTRUCTIONS
 20'-0" 15'-0" 1 739020 739020A 20' BALL STOP; STRAIGHT POLE 739015 739015A 15' BALL STOP; STRAIGHT POLE 739012 739012A 12' BALL STOP; STRAIGHT POLE Read all of the instructions before beginning. Make sure
Deluxe Gourd Racks I D E G A. Parts List. Shown above are parts for the two-level, Deluxe Gourd Rack (DGR 12V)with 12 arms for vertically hung gourds.
with 12 arms for vertically hung gourds.") Deluxe Gourd Racks H F K I D E J C G A Shown above are parts for the two-level, Deluxe Gourd Rack (DGR V)with arms for vertically hung gourds. Parts List Code Quantity A B C D E F G H I J 6, or 4 6, or
Deluxe Gourd Racks H F K I D E J C G A Shown above are parts for the two-level, Deluxe Gourd Rack (DGR V)with arms for vertically hung gourds. Parts List Code Quantity A B C D E F G H I J 6, or 4 6, or
Kennel-Gear Plastic Bowl System
 Kennel-Gear Plastic Bowl System Product Information Our Kennel-Gear 20oz plastic bowls are constructed of durable polypropylene and are dishwasher safe. The kits come with a bowl and Kennel Bar Mount.
Installation and Operating Instructions for Automotive Winch Synthetic Rope
 Installation and Operating Instructions for Automotive Winch Synthetic Rope 2 1 Synthetic Rope Kit Parts List Part No. 251262 1. Rope Assembly (3/8 x 100 ) 2. Hook Strap WARNING: A minimum of EIGHT wraps