Br oa d s wo r d. Savage Tales of Fantasy. by Richard A. Johnson. Cover and Illustrations by Kim Allman
|
|
|
- Oswin Lawson
- 5 years ago
- Views:
Transcription
1
2 Br oa d s wo r d Adventures Savage Tales of Fantasy by Richard A. Johnson Cover and Illustrations by Kim Allman Copyright 2008 Rattrap Productions LLC
3 Table of Contents Introduction... 5 Basics of the Game... 6 Dice and Mechanics... 6 Stat Line... 6 Stat Test... 6 Initiative and Turn Sequence... 6 List of Actions... 7 Hero Points... 7 Hero Points and Measurement... 7 Hero Points and Combat... 8 Hero Points and Special Abilities... 8 Starting Hero Points... 8 Movement... 8 Terrain Effects... 8 Levels... 8 Climbing... 9 Flight... 9 Movement with Flyers... 9 Falling... 9 Improvised Movement... 9 Combat... 9 The Weapon Chart Ranged Combat Close Combat Combat and Flying Improvising an Attack Armor and Shields Combat Results Damage from Combat Panic Yield Arcana Willpower Spells and Actions Preparing the Spell Casting the Spell Holding a Spell Maintaining a Spell Dispelling Test of WIlls Artifacts Character Creation Model Grades Character Stat Chart Location Base DR Wound Level Character Abilities Virtues and Flaws Hero or Villain Character Archetypes Barbarians Chieftain (Grade 3) Shaman (Grade 3) Warlord (Grade 3) Hero (Grade 2) Shaman Apprentice (Grade 2) Beserker (Grade 1) Scout (Grade 1) Warrior (Grade 1) Arcana for Barbarians Civilized Peoples Court Astrologer (Grade 3) Defender of the City (Grade 3) Major Noble (Grade 3) Captain of the Guard (Grade 2) Minor Noble (Grade 2) City Guard (Grade 1) Observer (Grade 1) Retainer (Grade 1) Squire (Grade 1) Arcana for the Civilied Peoples Priesthood High Priest (Grade 3) Prelate (Grade 3) Acolyte (Grade 2) Captain of the Temple Guard (Grade 2).. 47 Patron (Grade 1) Initiate (Grade 1) Temple Guard (Grade 1) Zealot (Grade 1) Arcana for the Priesthood Knatterling (Grade 1) Savages Headman (Grade 3) Tribal Chieftain (Grade 3) Witch Doctor (Grade 3)... 58
4 Mighty Warrior (Grade 2) Old Mother (Grade 2) Smoke Dancer (Grade 2) Tribal Hunter (Grade 1) Tribal Warrior (Grade 1) Arcana for Barbarians Special Abilities Combat Skills Knowledge Skills Other Skills Virtues and Flaws Animals and Creatures Mounts Heroic Horse Animal Handling Creatures Creature Stat Charts Creature Abilities Creature Drawbacks Creature Close Combat Creature Special Abilities Scenario Building The Gamemaster The Plot Victory Conditions The Map/Game Board Encounter Markers Encounter Markers as Traps Encounter Markers as Clues/Bonuses Encounter Markers as Events The Characters Special Rules Terrain Modifiers Extreme Climate Campaign Rules Going on Campaign Planning the Campaign Chapters Ending Campaigns Advancing through the Ranks Heroic Experience Archetype Advancement Archetype Improvement Permanant Injuries On Certain Death Reputation Experience Replacing/Adding Characters Purchasing Scenario-Specific Equip Scenarios Rescue from the Ungeheuer Curse of the Black Skull By the Seven Sons of Myrdall! Slavers of the Zhunaweh Coast The Eye of Tehy... Sample Characters... Appendix 1: Thieves Appendix 2: Playing with Bigger Forces Hordes of Minions Squad Rules Blank Hero/Villain Sheets Hordes of Minion Markers
5 4
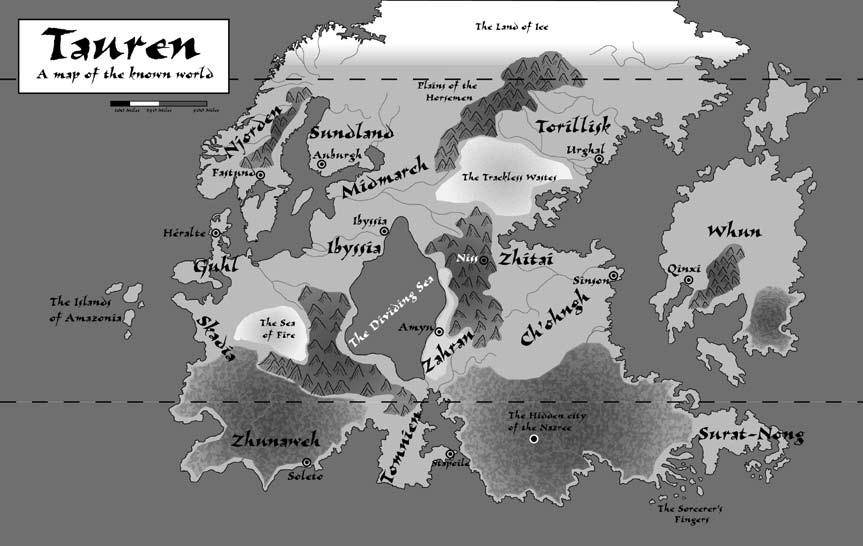
6 Introduction Welcome to the world of. This stand-alone, Narrative Adventure game is designed to provide all the rules necessary to play sword and sorcery action. Some basic background is provided on a few areas of the world of Tauren, but the character archetypes provided are not tied specifically to this world. The barbarians presented here would be equally at home in a historical setting or another fantasy world. What do we mean by Narrative Adventure? A Narrative Adventure game is one in which the player takes on the role of one to a handful of heroes or villains. But rather than players setting up point values for each side, a scenario is picked or designed and players take the figures that are appropriate for it. Then, when the game begins, they seek to solve puzzles and avoid traps all the while battling each other or a game master. A Narrative Adventure game is about the story and not the battle. Players should play their characters as they are supposed to act and not do what it takes to win. It s more exciting to have the hero drop the idol and race to save his friends than for him to race off the board, leaving them in the foul clutches of the villain. What You Need The game is illustrated with lots of miniatures on 3D terrain; from scratchbuilt to store-bought. But whereas some miniature games can be daunting from the sheer number of figures required, Broadsword Adventures can be played with as little as one figure per player. And, like a board game, the space required is minimal. The scenarios in the book are designed to fit on a space no larger than a small kitchen table, just 2 ft. by 2 ft. And if miniatures are just not your thing, the games can be played without them. From cardboard cutouts to board game pieces to paper chits, players can use their preference when playing. And even the 3D terrain can be replaced with simple 2 dimensional maps. Welcome to the world of Tauren and get ready for some Broadsword Adventures! Acknowledgements Many people helped with ideas, comments, criticsms, and playtesting along the way. Without their help, this game would not have made it to where it is today. For this I thank them. A few, though, require a special mention here. They are: Jim Grunt the Barbarian Stuht and Ryan Master of Misdirected Magic Flessing. Copyright 2008 by Rattrap Productions LLC. EAN ISBN
7 Dice and Mechanics This game uses only the 10-sided die (d10) for game mechanics. A roll is either an opposed roll during which players try to outscore each other, or an unopposed roll or stat test in which case a d10 roll plus an attribute value along with any bonuses or penalties are added together in an attempt to roll equal to or more than 10. Stat Line BASICS OF THE GAME Each of a model s stats is tied to a hit location. As a model takes wounds, the stats associated with that location are reduced; for example a model with wounds to the arms will suffer a reduction to both its Blade and Musket stats. The current stat is the one showing in the first unmarked box. When the last box is crossed off, the effects described at the end of the row are applied. Grade: The model s level in game terms. A Grade 3 model would be a hero, a Grade 2 would be a sidekick, and the Grade 1 would be the nameless soldier. Grades are explained more fully under Character Creation (see page 20). Brains (BR): A measure of mental fortitude. It is used in skill tests and some additional tests. Brawn (BW): Represents a model s physical strength. The stronger the model the more damage it can cause. Guts (GT): The bravery of a model. It is used to determine whether a model panics at the first sign of trouble or stands their ground against overwhelming odds. Blade (BD): The model s ability in hand-to-hand combat. Bow (BO): The model s ability with thrown or fired weapons. Dodge (DG): The quickness with which a model reacts to a situation. In ranged combat, models with faster reflexes are going to be more difficult to hit. Speed (SP): The distance that a model can move in one action in inches. Willpower (WP): A model s mental fortitude. A model that is not overly intelligent can still possess great mental resilience. Like Hero Points, Willpower can be spent and is discussed further in the section on Magic. 6 Stat Test In the course of a game a model might need to determine whether an action is successful based on a particular stat; this is called a stat test. The player rolls a d10 and adds the appropriate stat, together with any bonuses or penalties that apply. The test is successful if the total is equal to or more than 10. If it is less than 10, the test is failed. During a game many situations may arise, in which a character wishes to perform an action that is not covered by specific rules. In those cases, players should use the Stat Test and apply modifiers as shown below as long as the desired action is in the realm of the possible. Wanting your model to push down a castle wall and thinking this can be accomplished by passing a BRAWN test, is not possible Not a normal action, but not overly difficult; i.e. jumping through a window A difficult action; i.e. leaping onto a horse after crashing through a window A very difficult action; i.e. leaping onto a moving wagon after crashing through a window A heroic action; i.e. leaping onto a moving wagon after crashing through a window and attacking the driver Example: John s model is attempting to leap onto a moving wagon from a room in the tavern, and so needs to pass a stat test. DODGE is the most appropriate stat to use, so the model s DODGE of 3 is added to the roll of a d10 and a difficulty modifier of -2 is applied. John rolls a 5, for a total of 6. Since the result is lower than a 10, John s model fails the test. Had John rolled a 9 or more, the model would have passed. Initiative and Turn Sequence The turn begins with each player rolling a d10 for Initiative. The player who rolls highest has the Initiative. Ties are rolled off until there is an order of Initiative among all the players. The player with the highest Initiative can choose to activate any model on his team, regardless of the model s DODGE score. Then, starting with the model with the highest DODGE stat, the players take turns moving their models in the order of
8 Initiative. The player with Initiative will always have one of their models act first at each DODGE level. Example: If Pete wins initiative and has two models one with a DODGE of 3 and the other with a DODGE of 2 Mark (with the second highest Initiative roll) has the same, and Mike has models with DODGE scores of 4 and 2, then Pete will move one of his models, followed by Mike moving his DODGE 4 model. If Pete moved his DODGE 3 model first, then play would move to Mark s DODGE 3 model. If Pete had moved his DODGE 2 model first, then he would get to move his DODGE 3 before Mark since he has the Initiative. Once the DODGE 4 and DODGE 3 models have activated, the DODGE 2 models will activate, starting with the player with Initiative. List of actions Models can perform one action upon their activation unless a special ability allows them additional. Move: The normal movement of the model, which is represented by SPEED in the model s stat line. The model moves its SPEED stat in inches. Run: Allows a model to move at SPEED + 3. This movement must be in a straight line and it cannot be through terrain that hinders or slows movement. Models cannot combine this with a Missile Fire action. Models also cannot pick up items or check Encounter Markers. Jump: Assumed to be a standing jump, all models can jump up to 1 for every 2 points (round up) of BRAWN. A model can attempt to gain an additional 1 by taking a BRAWN Stat Test. Move & Missle Fire: A combined Move and Missile Fire action. Models doing this have a -5 modifier in ranged combat. The shot can be taken at any point during the Move action. Models with ranged weapons that require the use of both hands (bows and crossbows) can only Move at their SPEED -2 (minimum of 1 of movement). Missile Fire: A normal aimed shot taken by models with a ranged combat weapon. There is no modifier to hit. Charge: A combined Move and Close Combat attack action. The charging model receives a +2 modifier to their BLADE and Weapon Strength for that action only. A model must move at least 2 in order to gain the Charge bonus. Close Combat: This is the normal attack when a model is already within weapon range of a target. There is no modifier to hit. 7 Use Ability: This action refers to anything unrelated to the actions already listed, such as using a special ability, untying a horse, lighting a fuse, etc. Cast/Maintain Spell: A model casting or maintaining a spell must spend at least one action to do so, unless the spells states otherwise. Wait: Models that wait are holding their action in reserve until a later part of the turn in an attempt to counter the actions of opposing models. The waiting model can perform an action at any time before the end of the turn. A model cannot, with one exception, use Wait to interrupt an opposing model s action. The exceptionis that you can stop an opposing model at any point during its movement to use the Wait action. If two or more players activate models on Wait at the same time, the player with the higher Initiative goes first, followed by the next highest Initiative and so forth, until all players with models on Wait have gone. Models on Wait must take an action before the end of the turn. Prone: Models that are prone are crouching or lying down in an attempt to make the smallest target possible for an opponent s ranged combat attack. This makes them -2 to be hit in ranged combat. Prone models have their BLADE stat halved (rounding up). Stand: An action used by models to get up after being knocked down or after being prone. Hero Points At the beginning of the game each player receives a number of Hero Points, which can be used during the course of the game to change their die rolls. A player can move any die roll up or down by as many points as they have remaining (the one exception being the location of a wound; hits cannot normally be moved from one part of the body to another using hero points). Players can only change their own die rolls; they cannot change an opponent s die roll. For 2 points a player can re-roll a die, but the player must abide by the results of the second roll. If more than one player wishes to use Hero Points on the same action, each player announces their intention and secretly notes how many they wish to use (on paper, with a d6, etc.). Both then add their points to their scores as normal. Hero Points and Measurement Hero points can be used to affect a measurement. For example,
9 for each Hero Point expended, a player can add 1 to the range of their weapon, or add 1 to a Jump or Move action (the addition of this 1 or more does not require the model to take a BRAWN stat test if using a Jump action). Hero Points and Combat For each Hero Point expended, a player can increase the Weapon Strength (WS) of a weapon or the Defensive Rating (DR) for a specific location (combat is discussed later in the book). If Hero Points are used to increase a Weapon Strength or Defensive Rating, the points must be added before wound location is rolled. If both players wish to add points during the same action, then both should note secretly how many they wish to use (on paper, with a d6, etc.) and reveal them at the same time. Hero Points and Special Abilities There are some Special Abilities (see Special Abilities page 65) that require the use of a Hero Point in order to access the ability. Players can use Hero Points from one model to access the Special Ability of another unless inicated otherwise. Starting Hero Points The number of Hero Points each player receives is tied to the Grades of the models they use. Players receive 5 Hero Points for each Grade 3 and Grade 2 model in their group. Grade 1 models receive no Hero Points. These Hero Points can be used by any model in the player s group, not just the Grades 2 and 3 models. For example, if a player has models with Grades of 3, 2, 2, 1, and 1, they will get 15 Hero Points, and these points may be used by any Grade. movement. All terrain effects should be announced prior to the start of the game. Two simple guidelines to follow for all terrain effects are: 1) If movement is halved through a type of terrain, SPEED is always rounded up and 2) If movement penalties are applied (such as -1 movement) then a model s movement will never be reduced below 1. Levels The way Broadsword Adventures handles height, whether it is climbing or flying, is by Levels. Below are four different levels and their approximate height. Players do not have to measure each and every building, cliff, etc; simply assign values to scenics and terrain according to what works for the game. The list below gives an example of relative heights. Level 0 = Ground level Level 1 = 1 to 4 Level 2 = above 4 to 8 Level 3 = above 8 to 12 Level 4 = above 12 The use of levels allows players to build reasonable terrain but, still include the dangers of extreme height. If a player wanted to use terrain to represent a dangerous mountain pass with a sheer drop-off on one side, he could state that the path is at Level 4 (should a model fall off into the chasm) without having to build a mountain pass that is 12 high. 3 Additional Hero Points may be given for other factors or Special Abilities as well. Movement 2 Models move across normal ground at their SPEED score. As the model takes wounds to the Legs location, their starting SPEED will start to decrease, so players should remember that as the game progresses. Terrain Effects With so many different types of terrain and each player modifying the difficulty of terrain in their own way, players are encouraged to come up with their own terrain effects for 8 0 Phaecia is on Level 3, one Lion Guard is on Level 2 (he is about halfway down which puts him in the Level 2 range). and the last Lion Guard is on Level 0 or the Ground Level.
10 If players are using both high objects and deep objects, for example a mountain pass with a steep cliff on one side and a drop off on another, then count Levels in both directions. The cliff would be Level 4, the pass Level 0 and the chasm Level 4. Any model that falls from the top of the cliff into the chasm, would take the equivalent of two Level 4 falls. Climbing It takes a model two actions to climb up each Level. For each Level above Level 1, a model must pass a DODGE test before moving. If they fail, they are considered to have slipped and fallen and will take the appropriate Falling damage (see below). Flight Models can choose to fly as their action if they have an item that allows them, a spell that simulates it, or they have wings. All measurements are made from the Ground Level with appropriate modifiers added for the Flying model s height. This will prevent players from having to hold their models in the air to take measurements. Movement with Flyers Each flying model has a minimum and maximum SPEED value. A model must move its minimum SPEED value or else the model drops three Levels (see Falling below). If the model can hover (minimum SPEED 0 ), then the model can choose to remain stationary or move any distance up to its Maximum SPEED. A flying model can change one Level with no loss in horizontal movement. A model can attempt to change their height by two Levels, but must pass a DODGE test or else fall three Levels. If the model is still in the air, it must pass a DODGE test at the beginning of its next turn or lose its action as it attempts to regain control of the descent. A model can take off, move, and land in the same turn if it does not change Levels and it travels no more than half (rounded up) its Maximum SPEED. A flying model that hits the ground due to a failed test must take damage per the Falling rules below. The model must also pass a DODGE test or be placed Prone. Falling Models that fall and hit a solid object will take damage appropriate to the Level they started the turn at, regardless of whether their fall is interrupted by an intervening object. Models that fall do so straight down and do not get horizontal movement. Level 1 = WS 3, one location Level 2 = WS 6, one location Level 3 = WS 8, two locations Level 4 = WS 10, two locations Example: If Volmak the Nimble is scaling a tower wall to reach the great Jewel of Mök and he slips and falls just as he reaches Level 3, then he would suffer a WS 8 hit to two locations. If there was a ledge at Level 2, he would still suffer wounds as though he fell three levels. Improvised Movement No game can model every possible action that a player may want to take with a model due to the nature of a fantasy game, therefore some rules need to be laid out for improvised movement. Sometimes a player may want to move a model in some way other than on foot, such as by sliding down a banister, swinging on a tapestry or rope, or rolling under tables. These are all examples of improvised movements. Improvised movement requires a BRAWN or DODGE Stat Test, depending on whether the movement relies primarily on the model s arms or legs. Swinging on a tapestry, for instance, should require a BRAWN test, whereas running across a clothesline would require a DODGE test. If the test is passed, the model moves its SPEED, but no more than 6. If the model fails the test, it moves half its SPEED stat in the direction it would have traveled, but is considered Prone at the end of this movement. If this would result in a fall of 1 Level or more, the model takes Falling damage. COMBAT Combat is either Ranged (use of slings, bows and crossbows, or a thrown spear or knife), or Close (sword fighting, brawling, and bludgeoning with heavy objects). 9
11 The Weapon Chart The Weapon Chart below is broken down into four major columns (separated by a dark rule line). Each column represents a range band: Close Combat, Short, Medium, and Long. Each of these columns is in turn split into three statistics for each weapon: Range, TH, and WS. If a weapon has a dash in any of the columns, it means it cannot be used at that range. For example, the Bullwhip has dashes under the Close Table I: Weapon Chart Weapon Close Combat Short Medium long Range TH WS Range TH WS Range TH WS Range TH WS Fist 0 0 BN Special Rules: None Short Blade 0 +1 BN+1 BN+2 0 BN Special Rules: None Long Blade 1 +2 BN Special Rules: None 2-Handed Blade 1-1 BN Special Rules: Requires two hands to use. Cannot use shield or wield a second weapon. Club 1 +1 BN Special Rules: None Improvised 1 0 BN BN Special Rules: An improvised weapon is anything heavy that can be used in close combat. This includes heavy logs, chair legs, fireplace pokers, etc. These can also be thrown for a short distance. Polearm 2-1/0 BN Special Rules: Polearms require two hands to use. A model with a polearm can use a shield but cannot wield a second weapon. These weapons also work best outside base to base contact. If a model is in base contact with a polearmwielding model, the polearm-armed model has a -1 penalty. If the models are not in base contact, there is no penalty. Javelin/Spear 2 0 BN+2 BN+4-1 BN Special Rules: Javelins and spears can be thrown up to a short distance. Pike BN Special Rules: A pike can only be used if the target is between 2 to 3 inches away. If the target is closer than 2, the pike cannot be used. This weapon requires two hands to use. A model equipped with this cannot use a shield or wield a second weapon. Pikes can attack through the bases of friendly models of the same size. Bullwhip Special Rules: The player using the whip must declare entangle, disarm, or wound. In order to entangle, the attacker must first score a hit in combat, then the defender must fail a DODGE stat test. If successful, the defending model is considered prone. In order to disarm the attacker must first score a hit, then the defender must fail a BRAWN stat test. If successful, the defending model has dropped whatever it is carrying. Sling Special Rules: None Bow, Short Special Rules: Requires two hands to use. Cannot use shield or wield a second weapon. Bow, Long Special Rules: Requires two hands to use. Cannot use shield or wield a second weapon. Crossbow, Light Special Rules: Requires two hands to use. Cannot use shield or wield a second weapon. Crossbow, Heavy Special Rules: Requires two hands to use. Cannot use shield or wield a second weapon. This weapon requires one full action spent reloading between shots. Model cannot Move and Fire with this weapon. 10


12 Combat heading. This means that when a model gets into base contact with a model using a bullwhip, the whip can no longer be used. Range is the distance, from the previous range band up to and including the shown number for that range band. A short bow has a short range of 10, meaning any target outside of Close Combat and up to and including 10 would be at Short Range. The second column is TH your To Hit bonus. Add or subtract the shown number to your chance to hit, if the number is a +, then it is easier to hit at that range, if it is a -, then it is more difficult. A Short Bow at Short Range is +1 to hit, and at Long Range is -1. Finally, WS is Weapon Strength. This is the strength of the weapon and is compared to a model s Defensive Rating to determine wounds. The higher the Weapon Strength the easier it is to wound and the greater chance for multiple wounds (see Combat Results page 16). Ranged Combat Ranged combat is resolved on an opposed die roll. The attacker rolls a d10 and adds his BOW stat, along with any bonuses or penalties he may have (such as TH bonuses, Cover or Movement Modifiers, etc.). The defender rolls a d10 and adds his DODGE stat along with any bonuses or penalties. Height Differences Models more than 1 level above their opponent are considered obscured by terrain (as long as such terrain can obscure the shot a model standing on a wooden pole would not get the bonus since the pole would provide no real cover). Models more than 2 levels higher receive an additional 1 to be hit. Phaecia is on Level 3. She would not receive a cover bonus from the Lion Guard on Level 2 if he made a Ranged Combat attack as he is not more than 1 level below her. She would be at -3 to be hit by the Lion Guard on Level 0 as she is more than 2 Levels above him. Target Movement Modifiers Models that move more than 6 in the turn they are shot at are harder to hit in ranged combat. A model that moves more than 6 but less than 9 is 1 to be hit. If a model moves at least 9 but less than 12, it is 2 to be hit. If a model moves 12 or more it is 3 to be hit. A Wait action that interrupts a Move action always measures the distance covered, not the intended distance (Attacker s BOW stat +/- any bonuses + d10 result) against (Defender s DODGE stat +/- any bonuses + d10 result). If the attacker rolls higher, a hit is scored (see Combat Results page 16). If the defender rolls higher, then the shot is a miss. If the result is a tie, the defender is not hit, but must make a GUTS check as if he were (see Panic page 17). Cover If the defending model is obscured by terrain, it is considered to be in the shadow of terrain and is 2 to be hit by ranged attacks. If the model is in base contact with the terrain, then it also receives a Defensive Rating bonus for ranged attacks only of +2 to all body locations, except the head. Heftig is firing his sling at the Lion Guard. Lion Guard A is in base contact with the rocks so he gains +2 DR as well as -2 to be hit. Lion Guard B is not in base contact, but still gains the -2 to be hit for being obscured. 11 Thrown Weapons Some weapons, such as Short Blades, Javelins, and Spears, may be thrown by the model using them. If the weapon is thrown, the model no longer has access to it unless it is recovered. Heftig Lion Guard A Lion Guard B

13 Models may take duplicate versions of these weapons so that one can be thrown and the other used for Close Combat, but the equivalent amount of points must be spent on the duplicates. Close Combat Close Combat is resolved on an opposed die roll. The Attacker rolls a d10, and adds his BLADE stat, together with any bonuses or penalties that apply. This is compared with the Defender s d10 roll, plus the Defender s BLADE stat, together with any bonuses or penalties he might have. (Attacker s BLADE stat +/- any bonuses + d10 result) against (Defender s BLADE stat +/- any bonuses + d10 result) If the attacker rolls higher, a hit is scored (see Combat Results below). If the defender rolls higher, then the shot is a miss. If the result is a tie, the defender is not hit, but must make a GUTS check as if he were (see Panic below). Range In the Weapon Chart above, Close Combat weapons have a Range in inches. A Range of 0 means the model must be in base contact with the opposing model to use it. Some weapons have a longer reach. An attacking model with a Long Blade has a Range of 1, so it does not need to be in base contact in order to attack. Charging A charging model receives a +2 bonus to hit and to Weapon Strength when it charges. A model must begin at least 2 from its opponent in order to receive the +2 bonus. Waiting models must withdraw from combat, Missle Fire (before the charging model reaches them), or counter-charge or they will lose their Wait status. A withdrawing model moves up to its SPEED directly away from the enemy model. This movement is done after the charge has been declared but before the charging model has moved. Move a counter-charging model 2 towards the attacker, and then the charging model is moved into base contact. The counter-charging model receives the charge bonus. If the attacker did not move 2 before being counter-charged, then it does not receive the charge bonus. Pushback If an attacking model ties or wins in Close Combat, it can force the defending model back 1 for every 2 points its BRAWN exceeds the defending model s BRAWN. The defending model is moved in any direction in the attacking model s 180 front facing. A model that is able to push a defender back, can then move back into Close Combat if the player chooses (this does not count as a charge and no attack is made). 1 If a model has been attacked by a model at a range that is longer than the reach of its weapon and wishes to attack back on its activation it must first pass a BLADE stat test to move in closer. If the model fails the BLADE test, it can still move closer to attack but will be subject to a free attack by its opponent. The model that is the subject of the free attack gets no BLADE or weapon bonuses for this roll. 1 1 Lion Guard Goran Example: Goran, wielding a long blade, is attacked by a City Guard wielding a spear from 2 away. Goran survives the attack and wishes to strike the guardsman on his activation. Because his long blade only has a range of 1 and the spear has a range of 2, he must first pass a BLADE test to close the distance. If he fails the test, but still chooses to close the distance, the City Guard will be able to strike at him before he attacks. Goran will not be able to add his BLADE stat or weapon To Hit bonus to his roll. Breaking off from Close Combat Models in Close Combat with an enemy can attempt to break away from their opponent. To do this, the two models make an opposed BRAWN roll. If the model attempting to leave Close Combat scores higher, then it shoves off its opponent and can move its full SPEED. If the model loses the roll, then the two remain locked in close combat. Ties are awarded to the model trying to prevent the Breaking Off. 12

14 A model that breaks off from Close Combat may not use its movement to charge into a new combat. If a single model is in Close Combat with multiple opponents it receives a -1 penalty to its BRAWN test for each opposing model. Fighting Withdrawal To make a Fighting Withdrawal, the model moves half its SPEED rounded down (minimum of 1 ) in any direction that does not take it through an enemy model s base, and the opposing model is moved back into base-to-base contact even if the movement would exceed the model s SPEED score. No attack is made when using a Fighting Withdrawal. Example: Grimmor the Heartless (SPEED 5) is out in the open and engaged in Close Combat with a wounded City Guard (SPEED 1). He sees more guards approaching and wishes to get into a more defendable position. He chooses to use a Fighting Withdrawal. He would be able to move 2, however, the City Guard currently only has a SPEED of 1 and would normally not be able to move that distance. But, because Grimmor is making a Fighting Withdrawal, the City Guard can move that far. able to make multiple Close Combat attacks, each attack and its subsequent Close Combat outcome is resolved before the next attack is made. If multiple models are attacking a single model, each of the attackers gains a +1 bonus to their attack roll. Withdrawal and Multiple Friendly Combatants If multiple models are in Close Combat with the same opponent, then a model may break off from combat without penalties or checks, provided at least one friendly model remains in the Close Combat. The last model attempting to break off from combat must test as normal. Example: Volmak and Rodak are in Close Combat with Lord Graudürn. Rodak s player declares that his model is breaking off combat. Rodak may leave the Close Combat and move normally. If Volmak wanted to break off combat later, he would have to make a BRAWN check or Flee. Flee A player can choose to simply move from Close Combat without making an opposed BRAWN roll. If a player utilizes this option, the opposing model can make a single Close Combat attack at an additional +2 Weapon Strength. The fleeing model does not get its BLADE or Weapon TH bonuses added to its die roll. A model that flees from Close Combat may not use its movement to charge into a new combat. Close Combat with Multiple Opponents A model can be engaged in Close Combat with more than one opponent. On his activation, a model facing multiple opponents can attack only one of them at a time, unless the model is capable of making multiple attacks. If the model is 13 Disarm Rather than simply wounding their opponent, a model can declare that they are attempting to Disarm the opposing model. Combat proceeds as normal, but the attacker receives a -2 penalty to his roll. If the defending model is hit, then the


15 defender takes a BLADE Stat Test (there is no armor save). If the defender fails this test, it is disarmed. If the defender passes, it is assumed to have recovered its weapon by snatching it from the air or off the ground. The defending model does not suffer any damage regardless of outcome. A model that has been disarmed can be asked to Yield (see rules for Yield below). Weapon Trained Certain archetypes have trained in Close Combat for many years, learning to not only wound their opponent, but also to force them back, switch places with them in the heat of combat, or draw them toward a more advantageous position. Under the Character Archetypes, some models will be listed as Weapon Trained, others may become Weapon Trained by spending an ability point (see Character Creation page Example: Drawback Lion Guard Goran 1 20). Models that have this designation can choose to use the following outcomes in Close Combat, along with any wound they may cause, or they may choose Killing Stroke. Close Combat Outcomes Attacker wins by 5+ The attacking player can choose one from the following outcomes (Pushback, Draw Back, or Turnabout) when he wins the opposed Close Combat roll by 5 or more. -Draw Back The attacker tricks the defender into following up. The attacking player moves his model 1 in any direction in that model s 180 rear facing. The defending model is then moved back into close combat. This is useful for drawing enemies away from support or objectives, or into a choke point where the attacker can avoid being mobbed. This is different from a Fighting Withdrawal as the attacker can also wound the defender. -Pushback This is the same as Pushback from the previous page except that a Weapon Trained model does not need to have its BRAWN 2 points higher in order to Move a model 1. -Turnabout The attacker and defender trade places, which can be useful if the attacker is in danger of being forced into a bad situation, or the defender is standing in the way of an objective. Goran is in Close Combat with a Lion Guard. More guards approach from the hallway to his right. In order to prevent multiple opponents ganging up on him, he chooses to Draw Back after winning against the Lion Guard he is fighting. Lion Guard Goran moves back 1 to the entrance behind him. The Lion Guard must follow back into base contact. This move keeps the now wounded guard in combat and prevents additional models from ganging up on Goran. Goran 14 -Killing Stroke When a model chooses to make a Killing Stroke, they put all their strength into one final blow. The character is forgoing finesse and simply trying to cleave through their opponent. A player that chooses Killing Stroke must declare this before the attack. The model then subtracts points from their BLADE score and adds them to their Weapon Strength. A model can subtract as many points from their BLADE as they currently have, but the BLADE score cannot be reduced below 1. Close Combat Outcome Defender wins by 5+ -Repulse The attacker is beaten back by the defender with Weapon Trained, who stands his ground. The defending player moves the attacking model 1 in any direction in the attacking model s 180 rear facing. The models are no longer considered in Close Combat.
16 Example: Turnabout Goran Lion Guard penalty. If the same flying model was at Level 4, the modifier would be -2. Close Combat and Flying Flyers that charge a model on the ground are no longer considered in flight (unless they have a special ability that allows them to make attacks against ground targets and remain in the air). A flyer may charge any other flyer within one Level. If the attacking model does not move its minimum distance, then it falls per the Movement with Flyers rules above. Goran is being driven back toward a bottomless pit by a Lion Guard. When he wins combat, he chooses Turnabout in order to put the Lion Guard at the edge of the pit. Lion Guard Their positions are now reversed. If Goran can then force the Lion Guard back with his next attack, he can push the model into the gaping hole. COMBAT AND FLYING Models wounded while in flight automatically drop one Level. If the model is at Level 1 when it is wounded, then it must pass a DODGE test or be placed Prone as well as taking damage from the fall. Ranged Combat and Flying Models flying at Levels 1 or 2 can use scenery for cover as long as the object is at least Level 2 in height. Models flying at Levels 3 or 4 can use scenery for cover as long as the object is at least Level 4 in height. Flying models are -1 to be hit for every two Levels they are above their attacker. For example, if a model on the Ground shoots at a model flying at Level 2, it would receive a -1 Goran Characters able to charge flyers by leaping off higher objects or who have an ability that allows them to reach the flyer, receive -2 to their attack. This represents their lack of sustained flying abilities; they are basically hanging on to the flyer or trying to strike as they pass by. A model attempting to leap onto a flying model must beat the flyer in a comparative DODGE test. If the model is successful, it must win a comparative BRAWN test each turn in order to maintain a grip on the flyer. If unsuccessful, the model falls and takes the appropriate falling damage for that level. IMPROVISING AN ATTACK Like Improvised Movement, there might be times in the game when a model wants to throw a tankard or kick a bench at an opponent, pull the rug out from under his feet, or simply confuse him by shouting, Look behind you! A model can do any or all of these by making an improvised attack. First declare what the attack is going to be. Then, with the consensus of other players, determine what stat you and your opponent will use in an opposed roll. For instance, if you want to pull the rug out from under an enemy, you would use the BRAWN stat while your opponent would use his DODGE stat, but to confuse an enemy by yelling, What s that? you would both use the BRAINS stat. Each player then rolls a d10 and adds the appropriate stat. If the attacker s total is higher, the defender misses his next activation as a result. If the defender s roll is higher, the improvised attack is unsuccessful and nothing happens. A player can combine an Improvised Attack with a Move (at half the model s SPEED), or rise from Prone. 15
17 Thrown Models A player may want to have a model throw an opponent s model (through a window or over a railing, etc). Only models that have a higher BRAWN than their opponent, or have a special ability that allows it, can throw an opposing model. In order to throw a model, the player makes a normal Close Combat attack. If successful, instead of doing damage, the defender is moved back 1 + the difference in BRAWN between the models. Example: Roderick the Blacksmith has a BRAWN of 5 and Lothor the Rat has a BRAWN of 3, Roderick could throw Lothor 3 (1 + (5-3) ). Lothor, in turn, could not throw Roderick at all, as his BRAWN is not higher. In addition to being moved, the thrown model is placed Prone. If a model has a BRAWN that is at least 2 higher than its opponent it can lift the opposing model off the ground. If an attacker lifts a model off the ground it can move up to half its SPEED, rounded down, on its next action and then throw the opposing model. Example: Roderick (SPEED 4) lifts Lothor off the ground. On his next activation he can move 2 (half his SPEED) and then toss Lothor 3. Models that are held off the ground can attempt to break free by making a comparative BRAWN test with their opponent, but the held model will have -1 modifier, as it does not have the leverage to use its full strength. A held model can also attack the model holding it. The attacker s BLADE score will be reduced by half, rounded down, but its opponent will have a BLADE score of 0. If the attacker wounds an opponent and the opponent fails a GUTS check, the model is released and placed prone on the ground. Example: Roderick (BLADE 4, GUTS 6) has Lothor (BLADE 3) held over his head. Lothor attacks and rolls a 7 +1 (his BLADE score rounded down) for a total of 8. Roderick rolls a (his BLADE score reduced to 0 for holding Lothor off the ground) for a total score of 6. Lothor wins and wounds Roderick. Roderick rolls a 2 for his GUTS check and fails (2 + GUTS 6 = 8) dropping the hapless Lothor to the ground, where he is placed Prone. A Thrown model takes a hit to a random location at WS1 for each 2 the model is thrown. A model thrown 4 would suffer a WS2 hit, a model thrown 8 would suffer a WS4 hit, etc. Armor and Shields Armor is handled abstractly in Broadsword Adventures. Each archetype will show whether it has access to armor, which is listed as +X DR (Defensive Rating) to a specific Wound Location. A model that has Head +2 DR could be considered to have a helmet, natural armor plating, or simply a thick skull. Shields are slightly different than armor. A model with a shield rolls 2 d10 whenever it is attacked (either Close Combat or Ranged Combat). It then chooses the higher result and discards the other (though which die represents the shield should be stated before the dice are rolled; see The Dismal Failure below). The model does not roll the second die if it is the one attacking, unless specified otherwise by a special ability. All shields will be treated the same and there is no differentiation between a small wooden shield and a large metal shield. COMBAT RESULTS Damage from Combat When a model is hit in combat, the attacker rolls a d10 to determine the location. The Defensive Rating (DR) of that location is compared with the Weapon Strength (WS) of the attack. If the Weapon Strength equals or exceeds the Defensive Rating, one box is crossed off in that location on the defender s model sheet. If the Defensive Rating is higher than the Weapon Strength, the defender rolls a d10 and adds the difference between Defensive Rating and Weapon Strength to the roll. If the result is equal to or more than 10, then the damage is prevented. If the Weapon Strength is twice the Defensive Rating, then two boxes are crossed off. If the Weapon Strength of the attack is three or more times the Defensive Rating, then three boxes are crossed off. Once all boxes have been crossed off either the Arms or Legs location, any additional hits to that location are transferred to the Torso. However, the damage is not transferred to the Torso if at least one box is available to cross off in an Arm or Leg location, even if the wound would normally cross off multiple boxes. 16
18 Example: Damage If the above model was hit in the Arms location with a WS5 attack, the player would cross off one box on that location. The Model would now have a BLADE 3. If the same model was hit with a second attack of WS8, two additional boxes would be crossed off (WS8 is 2X the DR4). This model s BLADE score would now be 2. The Critical Hit If a player rolls a natural 10 on the d10 when attacking another model, then the hit is considered a Critical Hit. The Critical Hit has an additional +2 Weapon Strength for that attack only. The Dismal Failure If a model rolls a natural 1 on a d10 when attacking, it must pass a BLADE or BOW test, or the weapon they are using has broken. Models make a BLADE test if they are attacking in Close Combat and a BOW test if they are making a ranged attack. If a model is defending in Close Combat with a shield and they roll a 1 on their shield die, then they must pass a BLADE test or the shield has been shattered. Unconscious Some models that lose their last box in either the Head or Torso region, or suffer the effects of a poison are rendered unconscious. Models can try to regain consciousness by rolling a d10 and adding their last unmarked BRAWN stat -1. If the total is equal to or more than 10 the model has regained consciousness. Models that do not have an unmarked BRAWN score, or whose BRAWN stat -1 would equal 0, are considered to have a BRAWN of 1. If a model fails the test, it can spend a WILLPOWER point to immediately regain consciousness. Models that regain consciousness must take an immediate GUTS stat test. If the model fails, then they suffer the effects of panic described below. The final marked box that rendered the model Unconscious is used as the current stat on regaining consciousness. Further hits to that location will again render the model Unconscious. Panic Each time a model is wounded in combat it must take a 17 GUTS stat test. If the model fails then it loses a point of WILLPOWER. Once a model has no WILLPOWER left, then it will attempt to flee the board if it fails subsequent GUTS tests due to wounds. This means that for its next available action the model must move towards its entry zone (or a predetermined exit point). It must use its full SPEED in the direction of the entry zone, but can take advantage of cover to cower or avoid being shot at. At the beginning of its next activation, the model must pass a GUTS stat test or continue fleeing for the remainder of that turn also. This is repeated each turn until the model either leaves the board or rallies itself. If the model is in Close Combat, it must still Flee, making it subject to a free strike from its opponent. Yield There comes a time when even the bravest and strongest must yield or die. If a model has been disarmed in combat, lost all the boxes in its Arms location, or has only one box left in its Head and Torso location (except Grade 1 models as they start with this), an attacking model can demand it Yield. In order for a model to demand a defender Yield, it must be of equal or higher Grade level, it must have at least a WS4 attack, and it must be within 3 of the model it wants to have Yield. Once these conditions are met, the model being asked to Yield takes a GUTS test. If it passes, it can no longer be asked to Yield as the character has determined to continue on or Flee. If it fails, it has surrendered to its opponent and the victorious model must spend an action to bind the vanquished model. The model that has Yielded remains on the board but can take no actions unless a friendly model moves into base contact with it and spends an action to release it. At that point, the model may act normally.

19 Arcana Magic in Broadsword Adventures is challenging to cast and difficult to control, but when successful, it is very powerful. It is referred to as Arcana. The priests and sorcerers that delve in the magical arts spend all their time plumbing its depths and have very little time for anything else. Arcana is separated into two groups: Spells, which have difficulty ratings and must be prepared and cast, and Artifacts which are items that are imbued with some magical ability. WILLPOWER The WILLPOWER stat resembles a normal stat like BRAINS but it is also similar to Hero Points in that it can be spent to boost Magic tests. This stat is also used for maintaining the effects of a spell or resisting some spells, so the more points that are spent, the more difficult it will be to keep a spell in effect or resist one cast by an opponent. If a model has no WILLPOWER left, then it gets no save against spells that require a WILLPOWER test and immediately suffer the maximum effect of the spell. Spells and actions Preparing, Casting, Holding, Maintaining, and Dispelling are all actions. A spellcaster can perform no other action during the turn in which any of these actions are performed. A spellcaster can Move up to half its SPEED (minimum 1 ) while performing any of these actions. This movement can take place before or after the action. Preparing the Spell Each spell has a Difficulty. The more difficult a spell, the harder it will be to prepare. And once prepared, a spell does not immediately take effect. In order to prepare a spell, the player rolls a d10 and adds the difference between the Spell Difficulty and the model s BRAINS score. If the result is 10 or higher, the spell is prepared. Example: If the Spell has a difficulty of 3 and the model has a BRAINS of 6, the difference is 3. When the player rolls the d10, they would add the 3 to the result. If it is 10 or higher, then the spell is prepared. 18 If a model fails to prepare a spell, they can spend a WILLPOWER point to automatically prepare it, or on their next activation roll again, but add +2 to the roll. Example: If a model had a BRAINS of 2 (due to wounds, etc.) and the difficulty of the spell was 3, the difference would be -1. The model would need to spend a point of WILLPOWER to prepare it or it would have to wait a turn so that it could add +2 to the roll. If a model is interrupted while attempting to prepare, the spell must be started over. For example, if a model fails its first attempt and is struck in combat before it can activate again, it is interrupted and must begin again. Casting the Spell Once the spell has been successfully prepared, it must be cast using an Incrementing Test. In an Incrementing Test, the player rolls a d10 and if a 10 is rolled, the spell is cast. If the player rolls less than 10, he records the score and on the next activation rolls again. This roll is added to the result of the previous roll, if the total is 10 or higher, the spell is cast. If the total is still less than 10, then record the sum of the first two numbers and add it to successive rolls. A model attempting to cast can take no other actions while the Incrementing test is in progress. The first Incrementing Test is rolled on the same turn the spell is successfully prepared. A player can spend a WILLPOWER Point to automatically cast the spell. Holding a spell Once an Incrementing Test has succeeded, a player can choose to hold the spell for a more opportune time. A caster that is holding a spell can take no other action except to move up to half of its SPEED (minimum 1 ). If a model that is holding a spell is attacked, it does not get its BLADE or weapon TH bonuses added to its d10 roll unless it gives up the spell to defend itself. If a model is wounded while holding a spell, the model must take a WILLPOWER test. If successful, the spell is simply lost. If the model fails, the spell goes off with the caster as the center point and all models, including the caster, suffer the effects.

20 Maintaining a Spell A spell remains in effect until the next time the casting model activates. If a player wishes to maintain a spell, they must pass a WILLPOWER Stat Test. If the model has been spending WILLPOWER points, this stat will be lower. If the model fails the WILLPOWER Stat Test, then it must immediately pass a BRAWN test or lose another point of WILLPOWER. A player can spend a WILLPOWER Point to automatically maintain a spell (this must be declared before the WILLPOWER Stat Test). Models can choose to end spells before they activate, any effects of the spell, except for any physical damage caused, cease immediately. Dispelling Any model with the Special Ability Arcane Studies can attempt to dispel another caster s spell, but cannot dispel the effects of an Artifact. In order to dispel, the player rolls a d10 and adds the model s WILLPOWER. His opponent rolls a d10, adds WILPOWER and the difficulty rating of the spell. If the model attempting to dispel scores higher, the spell s effects cease immediately. If a model is one Grade higher than its opponent, it receives +2 to the die roll. If it is two Grades higher it receives +3. A player cannot spend WILLPOWER points to automatically dispel or to prevent a model from dispelling. Test of Wills Any succesful sorcerer able must possess a strong will. The first thing they are taught by their masters is how to test the will of their opponent. If a model with Arcane Studies is within 6 of another model, it can spend an action for Test of Wills. Both models roll a d10 and add their current WILLPOWER total. Spellcasters also add their Grade level. The model that loses, loses a point of WILLPOWER. Artifacts An Artifact refers to any item of magical ability. This can range from a simple Healing Balm that will cure wounds to a character to a death-dealing staff of untold power. Each group presented in the Character Archetypes section has access to some Artifacts. Most are reserved for the spell casters and their apprentices, but a few can be taken by other archetypes. Artifacts do not have a difficulty rating and their effects are immediate unless indicated otherwise. Model s do not need to pass a WILLPOWER or BRAINS test for most items in order to use them, though there are some that may require this. Artifacts cannot be dispelled and unless otherwise stated, their effects are permanant (the Healing Balm does not wear off after a certain time). In addition to the Artifacts presented under the specific groups, new Artifacts may be introduced in the scenarios. These Artifacts cannot be purchased, however, if players are taking part in a campaign, the gamemaster may allow these artifacts to stay with the character from one game to the next. 19
21 Broadsword Adventures is driven by the interplay between characters and the scenarios in which they are engaged. Stories set in the realm of fantasy are more than transcripts of epic battles characters scheme, solve riddles, and negotiate traps. Players can model fictional characters using these rules, or (best of all) they can create their own characters. The most successful games revolve around the recurring characters created by multiple players in pursuit of different goals. Model Grades A model s grade is an indicator of how powerful it is relative to other models. Grade 3 models are the most powerful, representing important heroes and villains. Grade 2 models represent the main supporting characters, either less important figures or servants to Grade 3s. Grade 1 models are the anonymous extras employed to round out scenes or who fall quickly to the flashing sword of the main character. Players may want to create a small band of characters, usually led by a Grade 3 character, with a supporting cast of Grade 2 and Grade 1 characters. However, it is not long before the question of balance arises. How do you ensure that two bands of characters are approximately equal in terms of game-play? The difficulty is that a Grade 3 character is not necessarily the equivalent of three Grade 1 characters. All Grade 3 characters are approximately equivalent to each other if one character type is strong in a particular area, it is correspondingly weak in another. Likewise, Grade 2s and Grade 1s are equivalent within their grades. It is not necessary for every game to have balanced forces. A scenario can give one side a strong advantage in characters, Example: Stat Chart CHARACTER Creation Willpower (4) rrrr Location (Die Roll) Base DR Wound Level Head (1) Brain=3 4 BR=3 BR=2 Unconscious Torso (2-5) Arms (6-8) Legs (9-10) Brawn=4 Guts=7 Bow=3 Blade=4 Dodge=3 Speed=4 4 BN=4 GT=7 4 BW=3 BD=4 4 DG=3 SP=4 BN=3 GT=7 BW=2 BD=3 SP=4 BN=3 GT=7 BW=2 BD=3 SP=3 and still be well-designed. Players should keep in mind that the primary goal when designing scenarios and bands of characters is a good time for everyone, and not simply winning the game. When creating bands, particularly at the start of a campaign, each player should use the same number of grades per team. For example, each player may bring a Grade 3, a Grade 2, and three Grade 1 models. For players unfamiliar with the rules, a single Grade 3 and Grade 2 will probably be sufficient to learn the rules and keep the game moving quickly. Character Stat Chart Location There are four areas of the body where a model can be hit: Head, Torso, Arms, and Legs. When a model is hit in close or ranged combat, the attacking player rolls a die to determine the location of the hit. The Die Roll (in parentheses after the location) shows the number needed on a d10 to hit that part of the body. Broadsword Adventures does not specify right or left arms or legs when it comes to wounding. Base This is the starting value for each of the model s stats (with the exception of WILLPOWER). This number is never changed on the chart and reflects the model s attribute level before skills are added. Stats are tied to specific locations, and the stats decline as damage is taken to those locations. DR This is the Defensive Rating for a particular location. Some models can improve the values for different locations by adding armor, usually in the form of a helmet, chain shirts, or padded jacket. The Defensive Rating can also BN=1 GT=6 BD=2 SP=2 Unconscious BD=2 SP=1 BD=-1 Cannot Carry Crawl Only, 1 movement reflect natural toughness. The Barbarian archetypes start off with a DR higher than the other archetyoes to reflect their natural resistance to debilitating injuries. 20
22 Wound Level As each location takes a wound, the player crosses off one or more boxes under the Wound Level for that location, starting with the first box to the left. When the final box with a stat in it is crossed off, the model suffers the effects shown in the last box. If all the wound boxes in the Arms or Legs location have been crossed off, additional hits move to the Torso. Grade 3 models that lose their last head or torso wound are knocked Unconscious. Grade 2 models are killed if they lose their last Head wound or rendered Unconscious if they lose their last Torso wound. Grade 1 models are killed if they take a wound to the head or torso. Models that lose all their Arms boxes cannot carry anything, and attack as though their BLADE score is -1 in Close Combat and cannot make any Ranged Combat attacks (players are advised to plead for mercy at that point). Models that lose their last Legs box can only crawl at the rate of 1 every other turn, and may not engage in Close Combat or Ranged Combat during any turn in which they move. Character Abilities A character archetype has a number of available attribute points, which are used to purchase weapons, armor, Special Abilties and in some instances arcana. This number is listed above the list of Special Ability options available to it. Next to this number there could be a Special Ability listed. If there is, the archetype receives that Special Ability at no cost. player may spend any number of attribute points, up to the limit for that skill class. Example: Special Abilities Chart Available Abilities (10) Weapon Trained Weapons (4) Short Blade (1) Long Blade (2) +2 TH (1 per +1) +2 WS (1 per +1) Club (1) Spear (1) Two-handed Blade (2) +1 TH (1) +1 WS (1) Armor (3) Head DR +3 (1 per +1) Torso DR +3 (1 per +1) Shield (2) Combat (4) Ambidextrous (1) Battle Cry (1) Blade Master (1) Combat Veteran (1) Expert Fighter (1) Feint (1) Ferocious +1 (1) Killer Instinct (1) Master of Arms +2 (1 per +1) Mighty Thews +1 (1) Shield Bash (1) Stalwart Defender (1) The archetype presented here has 10 Attribute Points to spend. It begins with Weapon Trained which it does not have to spend points on. It has 4 points to spend on Combat Abilities and the point cost for each ability is listed in parenthesis. Virtues and Flaws Virtues and Flaws allow players to personalize their heroes and villains to a greater extent by providing certain drawbacks to the character s personality. To make up for this drawback, the model that takes a Virtue or Flaw can add an additional Attribute Point to their character or can take an additional Hero Point each turn. The Hero Point can only be used by the model with the Virtue or Flaw and cannot be carried over from one turn to the next. Only Grade 3 and Grade 2 archetypes can take a Virtue or Flaw. There are three classes of Special Abilities: Combat, Knowledge, and Other. A model has a limited number of points to spend in each category. Example: even though the Grade 3 High Priest starts with 10 Attribute points, the player can spend no more than 3 of those points on Combat skills. Some abilities, typically those that raise an archetype s stats, are followed by (+X), such as Master of Arms (+2). For these abilities, one or more attribute points may be spent to raise the ability up to the corresponding number. For example, a player whose character can take Master of Arms (+2) may spend 1 point to raise that model s BLADE stat by 1, or 2 points to raise that model s BLADE stat by 2. The maximum number of ability points that can be spent in this way is the number shown after the particular skill. A model with True Aim (+1), for instance, cannot spend 2 points to get a +2 to their BOW stat. If no number is indicated (the skill shows +X), then the 21 The list of Virtues and Flaws is listed after the List of Special Abilities (see page 70) Hero or Villain? Most of these character archetypes are neither exclusively good nor evil. A savage may still act with a strong code of ethics and for good, and a person born noble may act with selfish depravity. If a player wants to utilize a character that is not identifiable with one of the archetypes, then they should consider the background of the character they have in mind, and which archetype s set of skills most closely matches it. Example: Rodak of Midmarch, a Master swordsman (Grade 3 Defender of the City), has been seen recently in the finest mead halls with the Lord High Mayor of Auburgh. Rodak is most often accompanied abroad by his cousin Mortimer (Grade 2 Captain of the Guard), and two mercenaries from the Black Company (Grade 1 City Guard).

23 CHARACTER ARCHETYPES The archetypes presented here are broken down into four groups; Barbarians, City Dwellers, Priesthood, and Savages. Players may choose to create their characters from any of the archetypes provided, but gain a bonus by taking all their characters from the same category. A description of the category and the bonus given for that category will precede the archetypes for each one. Barbarians The Barbarians of Broadsword Adventures are the noble savages of the pulps. Not constrained by the laws of cities and nations, Barbarians follow a personal code of honor. Often at odds with civilized men, the barbarian will do what is right to him, regardless of the consequences dictated by laws or officials. The Barbarian archetypes start with a higher DR than the other groups. In the World of Tauren, the lands of Njorden and most of Sundland and Midmarch consist of tribes of men whose personal honor and resistance to the laws of civilized people classify them as barbarians. Undying Loyalty If a player chooses an all Barbarian party, they gain the bonus of Undying Loyalty for all Grade 2 and Grade 1 models. This is automatically conferred on the models and does not need to be purchased individually. In addition, should a team s last Grade 3 model be rendered Unconscious, all Grade 1 models move their Undying Loyalty to a remaining Grade 2 model. 22
24 Chieftain (Grade 3) The Barbarian Chieftain is the head of the tribe. The chieftain must lead in both war and peace and so has a balanced mix of both combat and knowledge skills. The chieftain is often past his prime and so relies more on skill than brute strength. But this archetype should never be underestimated in combat as its options often provide lots of skills to slip beneath armor and hit the weak points of an opponent. Willpower (4) rrrr Location (Die Roll) Base DR Wound Level Head (1) Brain=3 4 BR=3 BR=2 Unconscious Torso (2-5) Brawn=4 Guts=7 4 BN=4 GT=7 BN=3 GT=7 BN=3 GT=7 BN=1 GT=6 Unconscious Arms (6-8) Bow=3 Blade=4 4 BW=3 BD=4 BW=2 BD=3 BW=2 BD=3 BD=2 BD=2 BD=-1 Cannot Carry Legs (9-10) Dodge=3 Speed=4 4 DG=3 SP=4 SP=4 SP=3 SP=2 SP=1 Crawl Only, 1 movement Available Abilities (10) Weapon Trained Weapons (4) Short Blade (1) Long Blade (2) +2 TH (1 per +1) +2 WS (1 per +1) Club (1) Spear (1) Two-handed Blade (2) +1 TH (1) +1 WS (1) Armor (3) Head DR +3 (1 per +1) Torso DR +3 (1 per +1) Shield (2) Combat (4) Ambidextrous (1) Battle Cry (1) Blade Master (1) Combat Veteran (1) Expert Fighter (1) Feint (1) Ferocious +1 (1) Killer Instinct (1) Master of Arms +2 (1 per +1) Mighty Thews +1 (1) Shield Bash (1) Stalwart Defender (1) Other (2) Fearful Presence (1) Fearless (1) Intimidate (1) Lucky +1 (1) Nerves of Steel +2 (1 per +1) Knowledge (3) Animal Handling (1) Boundless Will +1 (1) Genius +1 (1) Hunter (1) Iron Will (1) Savvy (1) Tactics +2 (1 per +1) Terrain Cognition (1) Voice of Command (1) Arcana (1) Elixir of the Savage Boar (1) Medicinal Balm (1) 23
25 Shaman (Grade 3) Barbarians distrust the magic of the more civilized nations but often find themselves in need of good omens, advice, or an advantage in a coming battle, so they turn to their Shamans. And even though they may be a part of the barbarian society, there is still distrust because of their consort with the dark arts. Willpower (5) rrrrr Location (Die Roll) Base DR Wound Level Head (1) Brain=4 4 BR=4 BR=3 Unconscious Torso (2-5) Brawn=2 Guts=7 4 BN=2 GT=7 BN=2 GT=7 BN=1 GT=7 BN=1 GT=6 Unconscious Arms (6-8) Bow=2 Blade=3 4 BW=2 BD=3 BW=2 BD=3 BD=2 BD=1 BD=1 BD=-1 Cannot Carry Legs (9-10) Dodge=4 Speed=5 4 DG=4 SP=5 DG=3 SP=4 DG=3 SP=3 SP=2 SP=1 Crawl Only, 1 movement Available Abilities (10) Arcane Studies Weapons (2) Short Blade (1) Club (2) Armor (1) Head +1 DR (1) Arms +1 DR (1) Combat (3) Concealed Weapon (1) Knife Thrower (1) Poison (2) Quick +2 (1 per +1) Weapon Trained (1) Other (2) Lucky +1 (1) Night Vision (1) Knowledge (5) Animal Handling (1) Arcane Sacrifice +1 (1) Boundless Will +2 (1 per +1) Genius +2 (1 per +1) Iron Will (1) Language (2) Healer (1) Arcana (6) Beserk Rage (2) Courage of the Great Bear (2) Eye of the Dark Gods (3) Gift of Forling (4) Strength of the Mighty Ox (3) Elixir of the Savage Boar x3 (1 per 1) Medicinal Balm x3 (1 per 1) Pelt of the Wolf (3) Staff of the Njorden (4) 24
26 Warlord (Grade 3) The Barbarian Warlord is at the peak of his physical and combat prowess. The Warlord does not lead the clan but is often the nominal head of all raiding parties or military actions even if the Chieftain is present. Willpower (3) rrr Location (Die Roll) Base DR Wound Level Head (1) Brain=2 4 BR=2 BR=1 Unconscious Torso (2-5) Brawn=4 Guts=7 4 BN=4 GT=7 BN=4 GT=7 BN=3 GT=7 BN=3 GT=6 Unconscious Arms (6-8) Bow=2 Blade=5 4 BW=2 BD=5 BW=2 BD=4 BW=2 BD=4 BD=3 BD=2 BD=-1 Cannot Carry Legs (9-10) Dodge=4 Speed=5 4 DG=4 SP=5 DG=3 SP=4 DG=3 SP=3 SP=2 SP=1 Crawl Only, 1 movement Available Abilities (10) Weapon Trained Weapons (4) Short Blade (1) Long Blade (2) +1 TH (1) +1 WS (1) Club (1) Spear (1) Two-handed Blade (2) +1 TH (1) +1 WS (1) Armor (2) Head DR +2 (1 per +1) Torso DR +2 (1 per +1) Shield (2) Combat (6) Battle Cry (1) Blade Master (1) Brawler +2 (1 per +1) Expert Fighter (1) Ferocious +2 (1 per +1) Flurry of Blows +2 (1 per +1) Killer Instinct (1) Master of Arms +2 (1 per +1) Mighty Cleave (1) Mighty Thews +3 (1 per +1) Quick +2 (1) Shield Bash (1) Other (2) Nerves of Steel +2 (1 per +1) Knowledge (2) Hunter (1) Iron Will (1) Savvy (1) Tactics +2 (1 per +1) Terrain Cognition (1) Arcana (0) 25
27 Hero (Grade 2) Barbarian Heroes have not risen to the rank of Chieftain or Warlord, but they are still exceptional fighters and often lead the charge on any attack by a barbarian raiding party. These Heroes have not yet learned all the more subtle arts and rely mainly on their physical prowess. Willpower (3) rrr Location (Die Roll) Base DR Wound Level Head (1) Brain=2 4 BR=2 BR=1 Killed Torso (2-5) Brawn=3 Guts=7 4 BN=3 GT=7 BN=3 GT=7 BN=1 GT=6 Unconscious Arms (6-8) Bow=2 Blade=4 4 BW=2 BD=4 BW=2 BD=3 BD=3 BD=1 BD=-1 Cannot Carry Legs (9-10) Dodge=3 Speed=5 4 DG=3 SP=5 DG=3 SP=4 SP=2 SP=1 Crawl Only, 1 movement Available Abilities (7) Weapon Trained Weapons (3) Short Blade (1) Long Blade (2) +1 WS (1) Club (1) Spear (1) Two-handed Blade (2) Sling (1) Short Bow (2) Armor (2) Head DR +2 (1 per +1) Torso DR +1 (1) Shield (2) Combat (4) Ambidextrous (1) Battle Cry (1) Brawler +2 (1 per +1) Dervish Strikes (1) Expert Fighter (2) Ferocious +1 (1) Flurry of Blows +1 (1) Master of Arms +2 (1 per +1) Mighty Thews +2 (1 per +1) Quick +1 (1) Rush Attack (1) Other (2) Camouflage (1) Fearless (1) Horsemanship (1) Ignore Pain (1) Intimidate (1) Leap (1) Mountaineering (1) Nerves of Steel +2 (1 per +1) Nimble (1) Fleet of Foot +1 (1) Knowledge (1) Hunter (1) Iron Will (1) Savvy (1) Tactics +1 (1) Terrain Cognition (1) Arcana (0) 26
28 Shaman Apprentice (Grade 2) The apprentice is usually chosen at a young age by the current village shaman. The shaman looks for signs when choosing an apprentice; from the passage of a flight of crows, to the appearance of a new wolf pack. In Njorden, where all magic is viewed with suspicion, even that of the local shaman, when a shaman chooses a child as an apprentice, that child immediately loses all ties to family and clan. They no longer exist and an elaborate funeral precedes the child leaving the village. The Shaman Apprentice is still learning the path to becoming a full shaman but has picked up some minor skills along the way. The Shaman Apprentice also tends to be slightly more capable of physical activity as the Shaman often places the burden of all labor on the apprentice. Willpower (3) rrr Location (Die Roll) Base DR Wound Level Head (1) Brain=3 4 BR=3 BR=1 Killed Torso (2-5) Brawn=3 Guts=7 4 BN=3 GT=7 BN=2 GT=6 BN=2 GT=6 Unconscious Arms (6-8) Bow=2 Blade=2 4 BW=2 BD=2 BW=2 BD=2 BD=1 BD=1 BD=-1 Cannot Carry Legs (9-10) Dodge=4 Speed=6 4 DG=4 SP=6 DG=3 SP=5 SP=3 SP=1 Crawl Only, 1 movement Available Abilities (7) Weapons (2) Short Blade (1) Club (2) Short Bow (2) Combat (3) Deadeyed (1) Ferocious +1 (1) Knife Thrower (1) Mighty Thews +1 (1) True Aim +1 (1) Knowledge (3) Animal Handling (1) Arcane Studies (2) Genius +1 (1) Language (1) Healer (1) Savvy (1) Armor (0) Other (3) Camouflage (1) Devotion (1) Leap (1) Lucky +1 (1) Nerves of Steel +2 (1 per +1) Fleet of Foot +1 (1) Undying Loyalty (1) Arcana (3) Courage of the Great Bear (2) Strength of the Mighty Ox (3) Elixir of the Savage Boar (1) Medicinal Balm (1) 27
29 Beserker (Grade 1) The Barbarian Beserker is usually a member of the clan who has lost all those dear to him. In battle, they work themselves into a frenzy, ignoring everything but charging into combat to kill as many of their enemies as possible or die in the process. Willpower (3) rrr Location (Die Roll) Base DR Wound Level Head (1) Brain=2 4 BR=2 Killed Torso (2-5) Brawn=4 Guts=6 4 BN=4 GT=6 Killed Arms (6-8) Bow=1 Blade=3 4 BD=3 BD=2 BD=-1, Cannot Carry Legs (9-10) Dodge=2 Speed=6 4 SP=6 SP=3 Crawl Only, 1 movement Available Abilities (4) Weapons (4) Short Blade (1) Long Blade (2) 2-handed Blade (2) Club (1) Combat (4) Ambidextrous (1) Battle Cry (1) Beserk (1) Ferocious +2 (1 per +1) Mighty Thews +2 (1 per +1) Knowledge (0) Armor (0) Other (1) Fleet of Foot +1 (1) Ignore Pain (1) Nerves of Steel +1 (1) Arcana (0) 28
30 Scout (Grade 1) The Barbarian Scout is a lightly armed and armored member of the raiding parties and warbands of a barbarian Warlord or Chieftain. The Scouts are often sent far ahead of the rest of the warband to spy and track potential enemies. Their main goal is to gather intelligence for their leader, but will fight if necessity calls for it. When combat does ensue, they often strike from the flans with bow, spear, or javelin. Willpower (3) rrr Location (Die Roll) Base DR Wound Level Head (1) Brain=2 4 BR=2 Killed Torso (2-5) Brawn=3 Guts=6 4 BN=3 GT=6 Killed Arms (6-8) Bow=3 Blade=2 4 BW=3 BD=2 BD=1 BD=-1, Cannot Carry Legs (9-10) Dodge=3 Speed=5 4 DG=3 SP=5 SP=1 Crawl Only, 1 movement Available Abilities (4) Weapons (3) Short Blade (1) Javelin/Spear (1) Sling (1) Short Bow (2) Armor (1) Head DR +1 (1) Combat (2) Quick +1 (1) True Aim +2 (1 per +1) Other (1) Camouflage (1) Fleet of Foot +1 (1) Knowledge (1) Hunter (1) Arcana (0) 29
31 Warrior (Grade 1) The Barbarian Warrior makes up the bulk of any raiding party or warband. From an early age the future Warriors are taught to fight for their survival. Once a child is old enough to wield a weapon, they are expected to earn their keep. Willpower (3) rrr Location (Die Roll) Base DR Wound Level Head (1) Brain=2 4 BR=2 Killed Torso (2-5) Brawn=3 Guts=6 4 BN=3 GT=6 Killed Arms (6-8) Bow=2 Blade=3 4 BW=2 BD=3 BD=1 BD=-1, Cannot Carry Legs (9-10) Dodge=3 Speed=5 4 DG=3 SP=5 SP=1 Crawl Only, 1 movement Available Abilities (4) Weapons (3) Short Blade (1) Long Blade (2) 2-handed Blade (2) Club (1) Javelin/Spear (1) Armor (2) Head DR +1 (1) Torso DR +1 (1) Shield (2) Combat (3) Battle Cry (1) Master of Arms +1 (1) Mighty Thews +1 (1) Other (1) Fleet of Foot +1 (1) Nerves of Steel +1 (1) Knowledge (0) Arcana (0) Arcana for the Barbarians Berserk Rage (Difficulty 2) --- When successfully cast, a friendly target model within the caster s WILLPOWER in inches is filled with berserk rage. The model ignores all wounds and uses its starting stats for the remainder of the turn. However, the model must make at least one close combat attack during the turn. If it does not, then it is rendered unconscious at the end of its action. Courage of the Great Bear (Difficulty 2) --- When successfully cast, all friendly models within the caster s WILLPOWER score in inches, will automatically pass any GUTS tests until the beginning of their next activation. The model is also immune to any fear type effect, whether it is Special Ability or Arcana. 30
32 Any model that is currently panicked or suffering the effects of fear, automatically recovers on its next activation. Eye of the Dark Gods (Difficulty 3) --- When successfully cast, an enemy model within the caster s current WILLPOWER x2 inches must roll two dice for all their actions for the remainder of the turn. The model must take the lower of the two die scores. The caster can add additional models to the effect for the cost of one WILLPOWER per model. Gift of Forling (Difficulty 4) --- When successfully cast, the caster can target all friendly models within their WILLPOWER in inches. These models can roll two dice for hit location on a successful attack and choose either of the results. Strength of the Mighty Ox (Difficulty 3) --- When successfully cast, a target friendly model within the caster s WILLPOWER score in inches, will receive +2 to its BRAWN score. An additional +1 to their BRAWN score can be added for each point of WILLPOWER the caster expends. Or the caster can add additional models to the effect for the cost of one WILLPOWER per model. The effect begin on the target model s next activation and lasts until the beginning of its following activation. Elixir of the Savage Boar: This one time use elixir gives the model +2 BRAWN for its next activation. Medicinal Balm: By spending an action to apply this one time use balm, the model regains a wound in any one location. Pelt of the Great Hunter: Shamans create these powerful animal skins to protect them from the magic of others. The many wards and glyphs inked onto the skin can repel the spells of other casters. A model wearing the Pelt of the Wolf can re-roll any unsuccessful save from a magical attack or spell aimed at it. However, the model must abide by the second roll and if it is a natural 1, then the pelt is destroyed in the attack. Staff of the Njorden: The Shaman s staff is as much a source of power as it is a weapon in combat. The staff of the Njorden can hold any spell the Shaman has stored in it (up to six difficulty levels total) and release it at any point during the game. To store a spell, the shaman simply casts it normally and rather than have the effects take place, they are stored in the staff to be released at a later time. The staff also acts as a Club in combat. 31

33 Civilized Peoples The Civilized Peoples are those that live and work within the major cities of the world. They rely on their city guard and nobles to maintain law and order and are not often expected to lend in the defense of their city or dispense their own justice. Though some might consider the Civilized Peoples to be soft and weak, their defenders are often well-disciplined and well-equipped. In Tauren, most of the city guards from Héralte, Ibyssia and all the way across the continent to Qinxi in Whun would use the archetypes here, though all lands have been known to hire promising barbarians and savages into their ranks, the bulk of any city guard unit would consist of men drawn from the surrounding area. Shield Wall If a player chooses all their team from the Civilized People s List, then they gain the ability of the Shield Wall. If a player has two or more City Guard models and they are equipped with shields, they can form a Shield Wall. City Guards must spend an action to form the Shield Wall, or if the player has a Captain of the Guard, he can spend an action to order them into formation. All models to be part of the Shield Wall must be within 3 of one another. Models in the Shield Wall act as a single model. They all move at the SPEED of the slowest member and all activate at the same time. They must remain in base contact with one another. All members of the Shield Wall get +2 DR to all locations. The Shield Wall is always attacked as a single model (the player can spread any wounds among the models.) However, each model in the Shield Wall can attack when the unit activates. Example: if three City Guard models have formed a Shield Wall and are attacked by a model with Mighty Cleave, the attacking model would only be able to attack the Shield Wall as though it were a single model and not strike all three models. The city guards though, would get three attacks on their activation. 32
34 Court Astrologer (Grade 3) Every royal court in Tauren and most of the major noble families have a Court Astrologer in their employ. Many never leave the safety of the noble s fortified manor or castle and spend their time poring over their star charts and divination items. There are some, though, that have the soul of an adventurer and can t resist looking for new magic on their own. Willpower (5) rrrrr Location (Die Roll) Base DR Wound Level Head (1) Brain=5 4 BR=5 BR=3 Unconscious Torso (2-5) Brawn=2 Guts=7 3 BN=2 GT=7 BN=2 GT=6 BN=1 GT=6 BN=1 GT=5 Unconscious Arms (6-8) Bow=2 Blade=3 4 BW=2 BD=3 BW=2 BD=2 BD=2 BD=1 BD=1 BD=-1 Cannot Carry Legs (9-10) Dodge=3 Speed=5 3 DG=3 SP=5 SP=4 SP=3 SP=2 SP=1 Crawl Only, 1 movement Available Abilities (10) Arcane Studies Weapons (1) Short Blade (1) Club (1) Armor (1) Head DR +1 (1) Arms DR +1 (1) Combat (1) Concealed Weapon (1) Knife Thrower (1) Poison (2) Quick +1 (1) Weapon Trained (1) Other (2) Lucky +1 (1 per +1) Meet My Minions (1) Night Vision (1) Observant (1) Knowledge (4) Arcane Sacrifice +2 (1 per +1) Boundless Will +2 (1 per +1) Deception (1) Genius +2 (1 per +1) Language (1) Savant (1) Arcana (7) Aligning of the Stars (3) Forseen Failure (2) Hand of Fate (6) Sands of Time (4) Medicinal Balm x2 (1 per 1) Scroll of Knowledge x3 (1 per 1) Scrying Bowl (2) Javelin of Tehy (2) 33
35 Defender of the City (Grade 3) The Defender of the City could be a powerful ruler, a general in the army, or a lowly but powerful warrior who has chosen the city as his or her home. Though not necessarily well-liked or admired, the Defender of the City seeks to prevent others from changing the status quo. Willpower (3) rrr Location (Die Roll) Base DR Wound Level Head (1) Brain=3 3 BR=3 BR=1 Unconscious Torso (2-5) Brawn=4 Guts=7 3 BN=4 GT=7 BN=3 GT=7 BN=3 GT=6 BN=2 GT=6 Unconscious Arms (6-8) Bow=4 Blade=4 3 BW=4 BD=4 BW=4 BD=4 BW=3 BD=3 BW=2 BD=3 BD=2 BD=-1 Cannot Carry Legs (9-10) Dodge=3 Speed=5 3 DG=3 SP=5 SP=4 SP=3 SP=2 SP=1 Crawl Only, 1 movement Available Abilities (10) Weapon Trained Weapons (5) Short Blade (1) Long Blade (2) +2 TH (1 per +1) +2 WS (1 per +1) Club (1) +1 TH (1) +2 WS (1 per +1) Spear (1) +1 TH (1) Two-handed Blade (2) +1 TH (1) +2 WS (1 per +1)) Armor (5) Head DR +4 (1 per +2) Torso DR +4 (1 per +2) Arms DR +4 (1 per +2) Legs DR +4 (1 per +2) Shield (1) Combat (3) Blade Master (1) Brawler +2 (1 per +1) Expert Fighter (1) Flurry of Blows +1 (2) Killer Instinct (1) Master of Arms +2 (1) Mighty Thews +2 (2 per +1) Quick +1 (1) Shield Bash (1) Stalwart Defender (1) True Aim +2 (1) Other (3) Fearful Presence (1) Fearless (1) Horsemanship (1) Ignore Pain (1) Intimidate (1) Lucky +2 (1 per +1) Nerves of Steel +2 (1 per +2) Knowledge (3) Arcane Studies (2) Boundless Will +1 (1) Deception (1) Iron Will (1) Language (1) Polymath (1) Savant (1) Savvy (1) Tactics +1 (1) Terrain Cognition (2) Arcana (2) Medicinal Balm x2 (1 per 1) Scroll of Knowledge x2 (1 per 1) Javelin of Tehy (2) 34
36 Major Noble (Grade 3) The Major Noble could be a scheming Duke looking to overthrow the king or a righteous Baron who leads his household in defense of the Prince. Whatever path the Major Noble takes, he is sure to be equipped with the best. The Major Noble is similar to the Defender of the City, but has access to more Knowledge and Arcana based on his or her position of power. Willpower (3) rrr Location (Die Roll) Base DR Wound Level Head (1) Brain=3 5 BR=3 BR=2 Unconscious Torso (2-5) Brawn=3 Guts=6 5 BN=3 GT=6 BN=3 GT=6 BN=2 GT=6 BN=1 GT=5 Unconscious Arms (6-8) Bow=3 Blade=3 3 BW=3 BD=3 BW=2 BD=3 BW=2 BD=2 BD=2 BD=1 BD=-1 Cannot Carry Legs (9-10) Dodge=3 Speed=5 3 DG=3 SP=5 SP=4 SP=3 SP=2 SP=1 Crawl Only, 1 movement Available Abilities (10) Weapons (4) Short Blade (1) Long Blade (2) +2 TH (1 per +2) +2 WS (1 per +2) Club (1) +1 TH (1) +2 WS (1 per +1) Spear (1) +1 TH (1) Armor (5) Head DR +6 (1 per +2) Torso DR +6 (1 per +2) Arms DR +4 (1 per +2) Legs DR +4 (1 per +2) Shield (1) Combat (3) Blade Master (1) Expert Fighter (1) Flurry of Blows +1 (2) Killer Instinct (1) Master of Arms +2 (1) Mighty Thews +1 (1) Quick +1 (1) True Aim +2 (1 per +1) Weapon Trained (1) Other (3) Fearful Presence (1) Fearless (1) Horsemanship (1) Ignore Pain (1) Intimidate (1) Lucky +2 (1 per +1) Majestic (1) Meet My Minions (1) Nerves of Steel +2 (1 per +2) Knowledge (4) Arcane Studies (1) Boundless Will +1 (1) Deception (1) Language (1) Polymath (1) Savant (1) Savvy (1) Tactics +2 (1 per +1) Voice of Command (1) Arcana (2) Medicinal Balm x2 (1 per 1) Scroll of Knowledge x2 (1 per 1) Javelin of Tehy (2) 35
37 Captain of the Guard (Grade 2) Every city in Tauren needs someone to lead the men who protect it and that is where the Captain of the Guard comes in. Unlike military commissions, which can be dispensed by any noble, the Captain of the Guard is someone who has to earn the position (through skill or treachery it makes little difference to some). An excellent fighter with access to better equipment than the Guardsmen he commands. Willpower ( 3 ) rrr Location (Die Roll) Base DR Wound Level Head (1) Brain=2 3 BR=2 BR=1 Killed Torso (2-5) Brawn=3 Guts=7 3 BN=3 GT=7 BN=2 GT=6 BN=1 GT=5 Unconscious Arms (6-8) Bow=3 Blade=4 3 BW=3 BD=4 BW=2 BD=3 BW=2 BD=3 BD=1 BD=-1 Cannot Carry Legs (9-10) Dodge=3 Speed=5 3 DG=3 SP=5 SP=4 SP=2 SP=1 Crawl Only, 1 movement Available Abilities (7) Weapon Trained Weapons (4) Short Blade (1) Long Blade (2) +1 WS (1) Club (1) +1 WS (1) Spear (1) +1 TH (1) Two-handed Blade (2) Bow, Long (3) Crossbow, Light (3) Armor (3) Head DR +4 (1 per +2) Torso DR +4 (1 per +2) Arms DR +1 (1) Legs DR +1 (1) Shield (1) Combat (2) Blade Master (1) Brawler +2 (1 per +1) Combat Veteran (1) Dervish Strikes (1) Expert Fighter (2) Feint (2) Master of Arms +2 (1 per +1) Mighty Thews +1 (1) Quick +1 (1) Shield Bash (1) Stalwart Defender (1) True Aim +2 (1 per +1) Other (2) Baleful Gaze (1) Fearful Presence (1) Intimidate (1) Knowledge (1) Genius +1 (1) Hunter (1) Iron Will (1) Savvy (1) Tactics +1 (1) Arcana (0) 36
38 Minor Noble (Grade 2) The Minor Noble is from a family whose holdings may be poor or the family may be out of favor with the royal court or he or she may be the youngest child in a large noble family with no hope of attaining the family lands. But being born to wealth does insure that the Minor Noble will have access to better equipment than most. Willpower ( 3 ) rrr Location (Die Roll) Base DR Wound Level Head (1) Brain=3 3 BR=3 BR=2 Killed Torso (2-5) Brawn=3 Guts=6 4 BN=3 GT=6 BN=2 GT=6 BN=1 GT=5 Unconscious Arms (6-8) Bow=3 Blade=3 3 BW=3 BD=3 BW=2 BD=3 BW=2 BD=2 BD=1 BD=-1 Cannot Carry Legs (9-10) Dodge=3 Speed=5 3 DG=3 SP=5 SP=4 SP=2 SP=1 Crawl Only, 1 movement Available Abilities (7) Weapons (4) Short Blade (1) Long Blade (2) +1 WS (1) Club (1) +1 WS (1) Spear (1) +1 TH (1) Two-handed Blade (2) Bow, Long (3) Crossbow, Light (3) Armor (2) Head DR +4 (1 per +2) Torso DR +4 (1 per +2) Arms DR +1 (1) Legs DR +1 (1) Shield (1) Combat (2) Blade Master (1) Combat Veteran (1) Dervish Strikes (1) Expert Fighter (1) Master of Arms +1 (1) Mighty Thews +1 (1) Quick +1 (1) Stalwart Defender (1) True Aim +2 (1 per +1) Weapon Trained (1) Other (1) Fearless (1) Horsemanship (1) Inspiring (1) Lucky +1 (1) Mounted (1) Nerves of Steel +1 (1) Observant (1) Knowledge (2) Animal Handling (1) Arcane Studies (1) Boundless Will +1 (1) Deception (1) Genius +2 (1 per +1) Hunter (1) Language (1) Savant (1) Arcana (1) Medicinal Balm (1) Scroll of Knowledge x1 (1) 37
39 City Guard (Grade 1) The City Guard provides the bulk of the defense for the cities and towns of Tauren. Normally charged with keeping order, the City Guard may also be asked to escort a noble or root out bandits in the surrounding countryside. Because of the steady pay, many of those without the skills or courage of a soldier will seek to join the City Guard. Willpower (2) rr Location (Die Roll) Base DR Wound Level Head (1) Brain=2 3 BR=2 Killed Torso (2-5) Brawn=3 Guts=5 3 BN=3 GT=5 Killed Arms (6-8) Bow=3 Blade=3 3 BW=3 BD=3 BD=1 BD=-1, Cannot Carry Legs (9-10) Dodge=3 Speed=5 3 DG=3 SP=5 SP=1 Crawl Only, 1 movement Available Abilities (4) Weapon Trained Weapons (3) Short Blade (1) Long Blade (2) Club (1) Spear (1) +1 TH (1) Pike (1) Bow, Long (2) Crossbow, Light (2) Armor (3) Head DR +2 (1 per +2) Torso DR +2 (1 per +2) Arms DR +1 (1) Legs DR +1 (1) Shield (1) Combat (1) Brawler +1 Master of Arms +1 True Aim +1 Other (1) Driver (1) Horsemanship (1) Nerves of Steel +1 (1) Fleet of Foot +1 (1) Knowledge (1) Hunter (1) Miner (1) Arcana (0) 38
40 Observer (Grade 1) A Court Astrologer guards his position jealously, never wanting anyone to catch the eye of the noble. Because of this, there are few Observers (apprentices) taken on and usually only much later in an Astrologer s life. An Observer may find himself aiding a number of Court Astrologers before finally receiving an appointment of his own. Willpower (3) rrr Location (Die Roll) Base DR Wound Level Head (1) Brain=3 3 BR=3 Killed Torso (2-5) Brawn=3 Guts=6 3 BN=3 GT=6 Killed Arms (6-8) Bow=2 Blade=2 3 BW=2 BD=2 BD=1 BD=-1, Cannot Carry Legs (9-10) Dodge=3 Speed=5 3 DG=3 SP=5 SP=1 Crawl Only, 1 movement Available Abilities (4) Weapons (1) Short Blade (1) Combat (1) Brawler +1 Concealed Weapon (1) Quick +1 (1) Knowledge (3) Arcane Studies (1) Boundless Will (1) Genius +1 (1) Healer (1) Language (1) Armor (0) Other (2) Devotion (1) Fleet of Foot +1 (1) Lucky +1 (1) Nerves of Steel +1 (1) Nimble (1) Arcana (2) Forseen Failure (2) Scroll of Knowledge x1 (2) Scrying Bowl (2) 39
41 RETAINER (Grade 1) Every court in Tauren, from the lowly Thane s village to the most powerful lord of Ibyssia, is populated by those with specific, but limited, purpose. These people are above slaves and servants but are not Minor nobles, nor do they have the more useful skills such as the Court Officials. Everyone from courtesans to court gossips fall into this category. Often nobles and very rich merchants will travel with two or more Retainers to service their specific vanity. Willpower (2) rr Location (Die Roll) Base DR Wound Level Head (1) Brain=3 3 BR=3 Killed Torso (2-5) Brawn=3 Guts=5 3 BN=3 GT=5 Killed Arms (6-8) Bow=2 Blade=2 3 BW=2 BD=2 BD=1 BD=-1, Cannot Carry Legs (9-10) Dodge=3 Speed=6 3 DG=3 SP=6 SP=1 Crawl Only, 1 movement Available Abilities (4) Weapons (1) Short Blade (1) Club (1) Armor (1) Arms DR+1 (1) Legs DR+1 (1) Combat (2) Ambidextrous (1) Concealed Weapon (1) Poison (2) Other (1) Horsemanship (1) Leap (1) Lucky +1 (1) Nimble (1) Fleet of Foot +1 (1) Knowledge (3) Deception (2) Genius +1 (1) Language (1) Savvy (1) Arcana (1) Medicinal Balm x1 (1) Scroll of Knowledge x1 (1) 40
42 Squire (Grade 1) Many Nobles, Captains of the Guard, and traveling swordsmen retain the services of a squire. The young man or woman that chooses to become a Squire, often seeks a life of adventure that is not possible at home. Though not yet skilled with weapons, they are devoted to those they follow and take on whatever task is handed to them. Willpower (2) rr Location (Die Roll) Base DR Wound Level Head (1) Brain=3 3 BR=3 Killed Torso (2-5) Brawn=2 Guts=7 3 BN=2 GT=7 Killed Arms (6-8) Bow=2 Blade=2 3 BW=2 BD=2 BD=1 BD=-1, Cannot Carry Legs (9-10) Dodge=3 Speed=5 3 DG=3 SP=5 SP=2 Crawl Only, 1 movement Available Abilities (4) Weapon Trained Weapons (2) Short Blade (1) Club (1) Spear (1) Bow, Short (2) Armor (1) Shield (1) Combat (1) Quick +1 (1) True Aim +1 Other (3) Devotion (1) Leap (1) Nerves of Steel +1 (1) Fleet of Foot +1 (1) Undying Loyalty (1) Knowledge (1) Hunter (1) Arcana (0) Arcana for the Civilized Peoples Aligning of the Stars (Difficulty 3) --- The Astrologer that successfully casts this spell has read the positive signs in the astrological charts. When cast on any model within the caster s WILLPOWER in inches, that model can choose to take the next Encounter Card it draws or hold it to play against the next draw by his. The player takes the card, if it is something useful, the model can keep it. If it is a trap or nothing, the model can replace the next card his opponent draws with this one. The card cannot be held beyond the opponent s next draw. 41
43 Forseen Failure (Difficulty 2) --- As well as seeing the positive outcomes for yourself, it is also good to know when your opponent will fail. When this spell is successfully cast, the caster targets an enemy model within its WILLPOWER x2 in inches. The caster can, at any time during the game, subtract 2 from any one die roll the model makes. For each point of WILLPOWER added to this spell, the modifier increases by -1. Hand of Fate (Difficulty 6) --- The most powerful of the Court Astrologer s spells, the Hand of Fate allows the caster to see the future and change the Hand of Fate. When successfully cast on any friendly model, the Court Astrologer has seen the future and taken steps to change it by replacing a character with a double. If the model that has Hand of Fate cast on it is killed, the caster makes a WILLPOWER test and if successful, the killed model reappears at the party s starting point. Only one model in a party can ever have the Hand of Fate cast on them. Hand of Fate will also cost the caster a point of WILLPOWER. Sands of Time (Difficulty 4) --- Knowing your opponent s plans can gain you a tactical advantage. When successfully cast, the caster has seen the moves his enemies are about to make and works to act before them. The casting model s party automatically wins initiative for the next round and can activate two models before returning to the normal mode of activation. For each point of WILLPOWER the caster spends after the spell is successfully cast, the party can add one additional model to activate first. Medicinal Balm: By spending an action to apply this one time use balm, the model regains a wound in any one location. Scroll of Knowledge: Every major noble in Tauren keeps detailed records of their history and accumulated knowledge. This information can be compiled into a powerful scroll that allows the user to instantly know an important fact or bit of information. If a model spends an action to use the scroll, they automatically pass a single BRAINS test. The information cannot be saved once read and the BRAINS test must be taken immediately. Scrying Bowl: The Scrying Bowl is an essential part of the Court Astrologer s equipment. It is through it that they peer into the future and the past. A Scrying Bowl will allow the model that carries it to check any Encounter Marker from its WILLPOWER x2 inches away if it passes a BRAINS test to interpret what it sees in the water. Javelin of Tehy: This powerful weapon looks like a normal javelin, but a model with sufficient will to command it can use its great ability to strike aywhere. The Javelin of Tehy can be thrown up to a model s WILLPOWER x2 inches. When thrown at an enemy model, rather than rolling to hit, the models make a comparative WILLPOWER test. If the target model loses, the javelin has hit and will cause damage equal to a normal javelin. The throwing model can use Hero Points to adjust the Wound Location even if they do not have the ability. By spending a point of WILLPOWER, the javelin s WS can be doubled. 42

44 The Priesthood There are many different gods in the World of Tauren. Some are minor and worshipped only locally. Others are major and temples can be found for them in most major cities and towns. Some of the more prominent may have more than one temple in a major city. In the city of Ibyssia alone there are five different temples dedicated to Tehy, the god of the skies. It is these that are depicted with this group. The priesthood for each these temples is well organized with a definite hierarchy. They also have the wealth to maintain their own guards in the hopes of discouraging thieves. Spell Channeling A player that takes their entire party from the Priesthood list, gains the ability to channel spells through followers. To channel, a player prepares and casts as normal, but the starting point becomes any model within the spellcaster s party. The only drawback is that any model that is used to channel, loses 1 point of WILLPOWER each time it is done. When a model has no WILLPOWER left, it cannot be used to channel spells. Gods of Tauren Forling: The Warrior God. Soldiers and mercenaries usually thank Ibyssia, the harvest. Tehy became the prominent god in Ibyssia when it him after a successful battle. Believers feel that he rewards those who first began it expansion a millennia ago. The Emperors of Ibyssia, felt show courage and skill in battle. To ask his help before battle is to that the best way to honor him was to unit everything under the sky admit weakness and is sure to displease him. in one glorious empire. It was at this time that the priesthood began supplanting Bella, the goddess of the harvest with Tehy. Bella: Goddess of the Harvest. One of the most ancient of goddesses, her worship was nearly erased during the 500-year expansion of Yasmire: Goddess of Healing and the underworld. It s said that those Ibyssia. Only once the empire began to crumble did her worship begin who are not chosen to join their own god s retinue in the afterlife are to flourish again. sent to the underworld. The underworld is neither cold nor warm, light nor dark, it is a middle ground where the departed wait for Grelling: The God of Mirth and Gamblers. Grelling rewards risk the sundering when the world will be divided between light and takers. He likes to see men put it all on the line in some risky venture. dark. Yasmire represents the balance. She is often portrayed as both a He is often invoked by merchants as travelling with goods can be quite beautiful maiden and an old crone. a gamble with fickle winds and roving pirates and brigands. Zoran: God of the Darians, desert dwellers and nomadic tribesman. Mök: Worshipped by those who seek power at any price. His price is He is the only god they worship and he has no particular sphere of always high but those who succeed can wield tremendous forces. Mök influence. They believe he is the only god and others are simply demons is said to be a demon and not a god at all. meant to lure them to folly. The worship of most of the other gods is tolerated in general, though local priests may drive them out from Tehy: God of the skies. Tehy is both a god of the weather and, in time to time. 43
45 High Priest (Grade 3) The High Priest is the leader of the temple. Many are simple priests who seek to serve their god in the best way they can. But they are also defenders of their faith and will call about their vast knowledge of Arcana to deal with a threat. Those who serve a more bloodthirsty god, actively work to subjugate the realms of men. A High Priest may be weak in physical combat, but the powers they can call upon are great and should never be taken lightly. Willpower (6) rrrrrr Location (Die Roll) Base DR Wound Level Head (1) Brain=6 3 BR=6 BR=3 Unconscious Torso (2-5) Brawn=2 Guts=7 3 BN=2 GT=7 BN=1 GT=7 BN=1 GT=6 BN=1 GT=5 Unconscious Arms (6-8) Bow=2 Blade=2 3 BW=2 BD=2 BD=2 BD=1 BD=1 BD=1 BD=-1 Cannot Carry Legs (9-10) Dodge=3 Speed=5 3 DG=3 SP=5 SP=4 SP=3 SP=2 SP=1 Crawl Only, 1 movement Available Abilities (10) Arcane Studies Weapons (1) Short Blade (1) Club (1) Knowledge (5) Animal Handling (1) Arcane Sacrifice +2 (1 per +1) Boundless Will +1 (1) Deception (1) Genius +2 (1 per +1) Healer (1) Language (1) Mesmerize (1) Savant (1) Telepathy (1) Combat (2) Concealed Weapon (1) Poison (2) Quick +1 (1) Other (2) Cause Fear Grade 1 (1) Fearful Presence (1) Meet My Minions (1) Nimble (1) Observant (1) Armor (2) Head Armor +2 (1 per +1) Arcana (8) Aura of Fear Grade 3 (1) Curse (3) Wall of Fire/Ring of Fire (3) Possession (4) Raise the Dead (5) Amulet of Mök (1) Arcana of Others (1+) Blood Blade (1) Medicinal Balm x3 (1 per 1) Night Dust (1) 44
46 Prelate (Grade 3) Every temple has need of an agent to handle delicate situations outside the temple walls. In these instances, the High Priest will rely on the Prelate. Traveling innocuously and usually with only a few close associates, the Prelate has access to the nobility as well as agents in every major city. Some have even been known to recruit bandits for their work. Willpower (4) rrrr Location (Die Roll) Base DR Wound Level Head (1) Brain=4 3 BR=4 BR=2 Unconscious Torso (2-5) Brawn=3 Guts=8 3 BN=3 GT=8 BN=3 GT=8 BN=2 GT=7 BN=1 GT=6 Unconscious Arms (6-8) Bow=3 Blade=3 3 BW=3 BD=3 BW=2 BD=3 BW=2 BD=2 BD=2 BD=1 BD=-1 Cannot Carry Legs (9-10) Dodge=4 Speed=5 3 DG=4 SP=5 DG=3 SP=4 DG=3 SP=3 SP=2 SP=1 Crawl Only, 1 movement Available Abilities (10) Weapons (4) Short Blade (1) +2 TH (1 per +2) +2 WS (1 per +1) Long Blade (2) +2 TH (1 per +2) +2 WS (1 per +1) Club (1) +1 TH (1) +2 WS (1 per +1) Light Crossbow (2) Armor (1) Head DR +1 (1) Torso DR +1 (1) Arms DR +1 (1) Combat (3) Blade Master (1) Concealed Weapon (1) Deadeyed (1) Expert Fighter (1) Feint (1) Killer Instinct (1) Knife Thrower (1) Master of Arms +2 (1 per +1) Poison (2) True Aim +2 (1 per +1) Weapon Trained (1) Other (2) Fearless (1) Horsemanship (1) Meet My Minions (1) Nimble (1) Observant (1) Shadow Stalk (2) Supreme Effort +2 (1 per +1) Knowledge (3) Animal Handling (1) Arcane Studies (1) Boundless Will +1 (1) Deception (1) Disguise (2) Genius +2 (1 per +1) Mesmerize (1) Polymath (2) Savvy (1) Arcana (1) Amulet of Mök (1) Medicinal Balm (1) Night Dust (1) 45
47 Acolyte (Grade 2) Acolytes are the next rung on the ladder to High Priest after Initiate. Though still doing a lot of the manual labor around the temple, the Acolyte has received more extensive training in the magical arts. An Acolyte still does not have access to the more powerful Arcana, but their skills can still prove quite useful. Willpower ( 4 ) rrrr Location (Die Roll) Base DR Wound Level Head (1) Brain=4 3 BR=4 BR=2 Killed Torso (2-5) Brawn=2 Guts=7 3 BN=2 GT=7 BN=1 GT=6 BN=1 GT=6 Unconscious Arms (6-8) Bow=2 Blade=3 3 BW=2 BD=3 BW=2 BD=2 BD=2 BD=1 BD=-1 Cannot Carry Legs (9-10) Dodge=3 Speed=5 3 DG=3 SP=5 SP=4 SP=2 SP=1 Crawl Only, 1 movement Available Abilities (7) Arcane Studies Weapons (2) Short Blade (1) +1 TH (2) Club (1) Combat (2) Ambidextrous (1) Concealed Weapon (1) Mighty Thews +1 (1) Quick +1 (1) True Aim +1 (1) Knowledge (3) Animal Handling (1) Arcane Sacrifice +1 (1) Boundless Will +1 (1) Genius +2 (1 per +1) Healer (1) Language (1) Savant (1) Armor (0) Other (1) Baleful Gaze (1) Devotion (1) Fearful Presence (1) Night Vision (1) Observant (1) Arcana (4) Aura of Fear (2) Curse (4) Wall of Fire (4) Blood Blade (1) Medicinal Balm x2 (1 per 1) Night Dust (2) 46
48 Captain of the Temple Guard (Grade 2) Since most Temple Guards are pulled from the ranks of worshippers, their lack of skill and experience needs to be supplemented by a seasoned soldier. Captains of the Temple Guard are often soldiers-for-hire willing to accept any belief in exchange for a purse full of silver. Captains are often excellent fighters but hold no long-term loyalty to the temple. They are more interested in protecting their own skins over that of the temple. Willpower ( 3 ) rrr Location (Die Roll) Base DR Wound Level Head (1) Brain=2 3 BR=2 BR=1 Killed Torso (2-5) Brawn=4 Guts=6 3 BN=4 GT=6 BN=2 GT=5 BN=1 GT=4 Unconscious Arms (6-8) Bow=3 Blade=4 3 BW=3 BD=4 BW=2 BD=3 BW=2 BD=3 BD=1 BD=-1 Cannot Carry Legs (9-10) Dodge=3 Speed=5 3 DG=3 SP=5 SP=4 SP=2 SP=1 Crawl Only, 1 movement Available Abilities (7) Weapon Trained Weapons (4) Short Blade (1) Long Blade (2) +1 WS (1) Club (1) +1 WS (1) Spear (1) +1 TH (1) Two-handed Blade (2) Crossbow, Light (3) Armor (3) Head DR +4 (1 per +2) Torso DR +4 (1 per +2) Arms DR +1 (1) Legs DR +1 (1) Shield (2) Combat (3) Blade Master (1) Brawler +2 (1 per +1) Combat Veteran (1) Expert Fighter (2) Feint (2) Master of Arms +2 (1 per +1) Mighty Thews +1 (1) Shield Bash (1) True Aim +2 (1 per +1) Other (2) Baleful Gaze (1) Fearful Presence (1) Intimidate (1) Knowledge (0) Arcana (0) 47
49 Patron (Grade 2) No temple can survive long without its Patrons. Patrons make frequent and generous donations in exchange for benedictions for themselves or loved ones (and an occasional curse on rivals). Patrons also recruit others of wealth to join in the donations, so it is important for the temple to keep the Patron happy. They do this by granting them access to some mysteries of the faith that a normal follower would not receive. Willpower ( 3 ) rrr Location (Die Roll) Base DR Wound Level Head (1) Brain=3 3 BR=3 BR=1 Killed Torso (2-5) Brawn=3 Guts=6 4 BN=3 GT=6 BN=2 GT=6 BN=1 GT=5 Unconscious Arms (6-8) Bow=3 Blade=2 3 BW=3 BD=2 BW=2 BD=2 BW=2 BD=1 BD=1 BD=-1 Cannot Carry Legs (9-10) Dodge=3 Speed=5 3 DG=3 SP=5 SP=4 SP=2 SP=1 Crawl Only, 1 movement Available Abilities (7) Arcane Studies Weapons (3) Short Blade (1) +1 TH (1) Long Blade (2) +1 TH (1) Club (1) Short Bow (2) Armor (2) Head DR +1 (1) Torso DR +1 (1) Arms DR +1 (1) Combat (3) Concealed Weapon (1) Mighty Thews +1 (1) Quick +1 (1) True Aim +1 (1) Other (1) Baleful Gaze (1) Devotion (1) Fearful Presence (1) Night Vision (1) Observant (1) Knowledge (2) Animal Handling (1) Boundless Will +1 (1) Genius +2 (1 per +1) Healer (1) Language (1) Savant (1) Arcana (1) Amulet of Mök (1) Arcana of Others (1) Night Dust (1) 48
50 Initiate (Grade 1) Among the followers, those who show great potential are presented as Initiates to their god. The Initiate spends most of his time cleaning the temple and doing the manual labor that the High Priests and Acolytes do not have time for. When not working, they are engrossed in the study of the history and precepts of their temple. Temples that have few or no wealthy patrons, often send their Initiates into the streets to beg for alms. Willpower (2) rr Location (Die Roll) Base DR Wound Level Head (1) Brain=2 3 BR=2 Killed Torso (2-5) Brawn=3 Guts=7 3 BN=3 GT=7 Killed Arms (6-8) Bow=2 Blade=2 3 BW=2 BD=2 BD=1 BD=-1, Cannot Carry Legs (9-10) Dodge=3 Speed=5 3 DG=3 SP=5 SP=1 Crawl Only, 1 movement Available Abilities (4) Weapons (1) Short Blade (1) Club (1) Combat (1) Brawler +1 (1) Knife Thrower (1) Quick +1 (1) Knowledge (2) Boundless Will +1 (1) Genius +1 (1) Savvy (2) Armor (0) Other (3) Camouflage (1) Devotion (1) Fearless (1) Fleet of Foot +1 (1) Leap (1) Nerves of Steel +1 (1) Undying Loyalty (1) Arcana (0) 49
51 Temple Guard (Grade 1) Even though many of the temples in Tauren rely on the City Guard for protecting them, they also know that thieves and rivals will slip past the city patrols and make it into the temple compound. The Temple Guards are usually chosen from the devout followers of the temple. As such, they are normally very loyal and willing to stand against intruders, but short on combat skills. Willpower (2) rr Location (Die Roll) Base DR Wound Level Head (1) Brain=2 3 BR=2 Killed Torso (2-5) Brawn=3 Guts=7 3 BN=3 GT=7 Killed Arms (6-8) Bow=2 Blade=2 3 BW=2 BD=2 BD=1 BD=-1, Cannot Carry Legs (9-10) Dodge=3 Speed=5 3 DG=3 SP=5 SP=1 Crawl Only, 1 movement Available Abilities (4) Weapons (2) Short Blade (1) Long Blade (2) Club (1) Spear (1) Crossbow, Light (2) Armor (2) Head DR +2 (1 per +1) Arms DR +1 (1) Legs DR +1 (1) Shield (2) Combat (1) Brawler +1 (1) Master of Arms +1 (1) Stalwart Defender (1) True Aim +1 (1) Weapon Trained (1) Other (2) Devotion (1) Nerves of Steel +1 (1) Undying Loyalty (1) Knowledge (1) Arcana (0) 50
52 Zealot (Grade 1) Every temple has them, followers who would do anything for those they worship. These fanatical followers fear almost nothing and would do anything for the priests and their temples. Whenever a member of the priesthood is outside the temple, they are almost guaranteed to have at least a few of the zealots swarming about them. Willpower (2) rr Location (Die Roll) Base DR Wound Level Head (1) Brain=2 3 BR=2 Killed Torso (2-5) Brawn=2 Guts=8 3 BN=2 GT=8 Killed Arms (6-8) Bow=2 Blade=2 3 BW=2 BD=2 BD=1 BD=-1, Cannot Carry Legs (9-10) Dodge=3 Speed=5 3 DG=3 SP=5 SP=1 Crawl Only, 1 movement Available Abilities (4) Weapons (2) Short Blade (1) Long Blade (2) Club (1) Combat (1) Brawler +1 (1) Ferocious +1 (1) Weapon Trained (1) Knowledge (0) Armor (0) Other (3) Devotion (1) Fearless (1) Nerves of Steel +1 (1) Undying Loyalty (1) Arcana (0) 51
53 Arcana for the Priesthood Aura of Fear Grade 3 (Difficulty 2)---When successfully cast, the model creates an Aura of Cause Fear with a radius equal to the model s current WILLPOWER. As this is the Grade 3 version of the special ability, all models within the radius must take a WILLPOWER test. A model can spend a WILLPOWER point to automatically succeed, this must be declared before the test is taken. If the model fails the test it immediately loses one point of WILLPOWER and must take a GUTS test. If the model passes the GUTS test, it must spend its next activation to move outside the range of the Aura. It can take no other action than Move (i.e. it cannot charge). If a model fails the GUTS test, then it loses it s next activation and remains immobile. If a model moves outside the aura or the spellcaster chooses not to maintain it, then the effect ends and the effected models can act normally. If a model enters the aura or is within it when it activates, it must take the WILLPOWER test immediately. A model moving into the Aura, is placed at the edge of the Aura s range if it fails the WILLPOWER test. Curse (Difficulty 4) --- This powerful spell is designed to hinder your enemies and cause their weapons and armor to fail at the worst time. The caster can target any model within 12. If successfully cast, the model must win a comparative WILLPOWER test against the caster. If it fails, then for the remainder of the scenario, the model s weapons and shield will automatically break on a die roll of 1 in combat instead of having to pass a BLADE test. Also, the Cursed model must pass a BLADE test if they roll a 2 in combat or else their weapon/shield is broken. Wall of Fire/Ring of Fire (Difficulty 4)---When successfully cast, this spell creates a wall of fire 3 long and 1 deep. Any model touched by the fire suffers 2 WS8 hits to random locations. The wall of fire can be placed up to the model s WILLPOWER in inches away from the caster. The Ring of Fire encircles any one, human-sized or smaller model and extends out 1. The model that is surrounded is not harmed by the flames, but cannot move while within them. The model can perform any other action as long as it does not move. Either the Wall or the Ring can be moved up to the caster s WILLPOWER in inches if it is maintained on following turns. The caster does not need line of sight to move the wall or ring. Possession (Difficulty 5) ---When successfully cast, this spell allows the caster to take possession of another model. The caster can choose to target any friendly model in line of sight. That model then comes under the control of the caster. While possessed, the model always uses its starting stat score, ignoring any wounds taken. A possessed model also does not take GUTS tests. A possessed model acts on either the caster s or it s own activation. A caster can take no other action while possessing another model and if attacked must pass a WILLPOWER test to retain control. If the caster fails the test, he loses 1 one point of WILLPOWER. If a possessed model is killed while possessed, the caster must pass a WILLPOWER test or take one wound to the Head. A caster can attempt to possess an enemy model within his WILLPOWER in inches. To do so, after the spell is successfully cast, the caster must win a comparative WILLPOWER test with the target model. If he fails, he loses a point of WILLPOWER. All other effects are the same as above. 52
54 Raise the Dead (Difficulty 6) --- When successfully cast, this spell allows the caster to animate the body of any Grade 1 model that has been killed in the scenario. If cast in an area where the dead already reside, such as a graveyard, no model needs to have been killed in order to use this spell. The animated body has the following stat sheet. Willpower (0) Location (Die Roll) Base DR Wound Level Head (1) Brain=0 8 BR=0 Killed Torso (2-5) Arms (6-8) Legs (9-10) Brawn=3 Guts=10 Bow=2 Blade=3 Dodge=2 Speed=4 8 BN=3 GT=10 8 BW=2 BD=3 8 SP=4 Special Abilities: Cause Fear Grade 1, Zombie Killed BD=1 SP=3 BD=-1, Cannot Carry Crawl Only, 1 movement Once raised, the dead warrior does not need to be controlled by the caster and is considered part of the caster s party. The caster must spend one point of WILLPOWER for each dead warrior raised. Amulet of Mök: The powerful magicks imbued in this amulet make the wearer appear far more threatening than they are. A model wearing the amulet is considered to have Intimidate (as the Special Ability) but all GUTS tests for it are made at -3. Arcana of Others: For one Special Ability point plus the point cost of the item, the model can take the Arcana from any other list. The cost for the Arcana is based on the point costs of the Shaman, Court Astrologer, and Witch Doctor. Blood Blade: This powerful sacrificial knife, crafted from rare metals, allows the wielder to steal WILLPOWER from his followers. By spending an action, the model can kill any living friendly Grade 1 model within 2. Any WILLPOWER the killed model had is now transferred to the caster. This WILLPOWER must be used on the model s next activation or it is lost. Medicinal Balm: By spending an action to apply this one time use balm, the model regains a wound in any one location. Night Dust: Night Dust is a very fine powder ground from the flowers of the Zomian Nightshade. When tossed at an opponent, the target is blinded by the powder. The model s BOW, BLADE, and DODGE are reduced to 0. If the model attempts to Move, it must pass a BRAINS test or move half its SPEED in a random direction. On successive turns, the target model must pass a BRAWN test to recover from the effects. The dust can be thrown up to a model s BRAWN in inches. If the target is within 2, the To Hit bonus is +3 due to the quantity of powder in the air. If the target is greater than 2 then the To Hit bonus is -3 due to dispersal. 53

55 Knatterling (Grade 1) Knatterlings are the lowest demons. Unable to hold any physical shape in our world, they are always bound to a human host. Those newly bound may look nearly human except for the glowing yellow eyes. But over time, their demonic nature begins to warp the human body forcing it to take on the demon s shape. Knatterlings are often slaves to powerful casters, doing menial tasks. Though physically strong, their greatest benefit to the caster is their ability to store magical energy that their master can tap when necessary. But taking too much does carry potential consequences. If a group has a High Priest as part of it, then a Knatterling can also be taken. Knatterlings cannot be customized and exist solely as shown here. Willpower (2) rr Location (Die Roll) Base DR Wound Level Head (1) Brain=2 3 BR=2 Killed Torso (2-5) Arms (6-8) Legs (9-10) Brawn=4 Guts=5 Bow=2 Blade=3 Dodge=3 Speed=5 3 BN=4 GT=5 3 BW=2 BD=3 3 DG=3 SP=5 Killed BD=2 SP=3 BD=-1 Cannot Carry Crawl Only, 1 movement Close Combat Short Medium Long Weapon Range TH WS Range TH WS Range TH WS Range TH WS Fist 0 +1 BW A caster that has bound a Knatterling to him can tap the WILLPOWER it stores. If a Knatterling is within 6 of the caster, then the caster can take a point of WILLPOWER for any spell casting (they cannot be taken to resist an opponent s spells). When the WILLPOWER of a Knatterling reaches 0, the caster must take a WILLPOWER test. If they pass, then the human host erupts in flames (any model in base contact must pass a DODGE test or suffer a WS5 hit to a random location) as the demon spirit is freed and returns to the abyss from which it came. If the caster fails the WILLPOWER test, then the Knatterling falls under the control of the opposing player and will now attempt to kill the caster. The Knatterling can only move to attack the caster and will do so until the caster is killed or it is. Once the caster is killed, the Knatterling erupts in flame as above. 54

56 Savages Savages are men that steeped in fear of the unknown. Many never leave the immediate vicinity of their villages and have little contact with people from other lands. They are are extremely territorial and are quick to kill or capture anyone who should enter their lands uninvited. Savages could be men living in the dense jungles of the south, the rugged highlands of the north or even the burning sands of the Trackless Wastes. Savages could also represent men outside the norms of society. Outlaws and bandits could use a combination of Civilized Peoples and Savages. Endless Hordes Savages prefer to attack in large groups. As such, they never enter an area without ample spears to protect them. A player that takes an all Savages party can take an additional Grade 1 model for each Grade 2 and 3 model in their group, regardless of any Grade limits set by the scenario. 55
57 Headman (Grade 3) Every tribal Chieftain has one or more advisors to help him govern. The Headman could be a village Elder, the head of an important family, or a relative of the Chieftain. His job is to provide advice to the chief and, when the occasion warrants, to travel on behalf of the chief. Willpower (3) rrr Location (Die Roll) Base DR Wound Level Head (1) Brain=3 3 BR=3 BR=2 Unconscious Torso (2-5) Brawn=4 Guts=7 4 BN=4 GT=7 BN=3 GT=7 BN=3 GT=6 BN=1 GT=5 Unconscious Arms (6-8) Bow=3 Blade=3 4 BW=3 BD=3 BW=2 BD=3 BW=2 BD=2 BD=2 BD=1 BD=-1 Cannot Carry Legs (9-10) Dodge=3 Speed=5 3 DG=3 SP=5 DG=3 SP=4 SP=3 SP=2 SP=1 Crawl Only, 1 movement Available Abilities (10) Weapons (3) Short Blade (1) Club (1) +2 TH (1 per +1) +2 WS (1 per +1) Spear (1) +1 TH (1) +1 WS (1) Sling (2) Armor (3) Head DR +1 (1 per +1) Torso DR +2 (1 per +1) Shield (2) Combat (4) Brawler +1 (1) Combat Veteran (1) Expert Fighter (1) Feint (1) Flurry of Blows +1 (1) Killer Instinct (1) Master of Arms +2 (1 per +1) Mighty Thews +1 (1) Quick +2 (1 per +1) Shield Bash (1) Weapon Trained (1) Other (2) Fearless (1) Fleet of Foot +1 (1) Ignore Pain (1) Leap (1) Lucky +1 (1) Nerves of Steel +2 (1 per +1) Knowledge (3) Animal Handling (1) Arcane Studies (2) Genius +1 (1) Hunter (1) Iron Will (1) Language (1) Savant (1) Savvy (1) Tactics +2 (1 per +1) Terrain Cognition (1) Arcana (1) Medicinal Balm x1 (1) Sleeping Dart x1 (1) 56
58 Tribal Chieftain (Grade 3) The Chieftain leads his people through guile, diplomacy, or outright warfare. But more often than not, it is a combination of all three. Though most Chieftains are only the head of their village, some have managed to pull other villages into their control. Willpower (3) rrr Location (Die Roll) Base DR Wound Level Head (1) Brain=4 3 BR=4 BR=2 Unconscious Torso (2-5) Brawn=3 Guts=7 3 BN=3 GT=7 BN=3 GT=7 BN=2 GT=6 BN=1 GT=5 Unconscious Arms (6-8) Bow=3 Blade=4 4 BW=3 BD=4 BW=2 BD=3 BW=2 BD=3 BD=2 BD=1 BD=-1 Cannot Carry Legs (9-10) Dodge=3 Speed=5 3 DG=3 SP=5 DG=3 SP=4 SP=3 SP=2 SP=1 Crawl Only, 1 movement Available Abilities (10) Weapon Trained Weapons (4) Short Blade (1) Club (1) +2 TH (1 per +1) +2 WS (1 per +1) Spear (1) +2 TH (1) +2 WS (1) Armor (3) Head DR +1 (2) Torso DR +2 (1 per +1) Shield (2) Combat (4) Battle Cry (1) Combat Veteran (1) Expert Fighter (1) Killer Instinct (1) Master of Arms +2 (1 per +1) Mighty Cleave (1) Mighty Thews +2 (1 per +1) Shield Bash (1) Stalwart Defender (1) Other (2) Fearful Presence (1) Inspiring (1) Majestic (1) Meet My Minions (1) Nerves of Steel +1 (1) Supreme Effort +1 (1) Knowledge (3) Animal Handling (1) Boundless Will +1 (1) Hunter (1) Iron Will (1) Language (1) Savvy (1) Tactics +1 (1 per +1) Terrain Cognition (1) Voice of Command (1) Arcana (1) Medinal Balm x1 (1) Sleeping Dart x1 (1) 57
59 Witchdoctor (Grade 3) The Witchdoctor is a person both feared and respected in the tribal community. His role is to insure that the will of the gods is obeyed and that the village is protected from its enemies. No one, even the chieftain, is immune from his curses should they fail to heed his warnings. Willpower (4) rrrr Location (Die Roll) Base DR Wound Level Head (1) Brain=4 3 BR=4 BR=3 Unconscious Torso (2-5) Brawn=3 Guts=6 3 BN=3 GT=6 BN=2 GT=6 BN=2 GT=5 BN=1 GT=5 Unconscious Arms (6-8) Bow=3 Blade=3 3 BW=3 BD=3 BW=2 BD=2 BW=2 BD=2 BD=1 BD=1 BD=-1 Cannot Carry Legs (9-10) Dodge=4 Speed=5 3 DG=4 SP=5 DG=3 SP=4 DG=3 SP=3 SP=2 SP=1 Crawl Only, 1 movement Available Abilities (10) Arcane Studies Weapons (2) Short Blade (1) Club (2) Spear (2) Armor (2) Head +1 DR (2) Torso +2 DR (1 per +1) Combat (2) Concealed Weapon (1) Dervish Strikes (1) Knife Thrower (1) Poison (2) Quick +2 (1 per +1) Weapon Trained (1) Other (2) Baleful Gaze (1) Fearful Presence (1) Lucky +1 (1) Meet My Minions (1) Night Vision (1) Knowledge (4) Animal Handling (1) Arcane Sacrifice +2 (1 per +1) Boundless Will +2 (1 per +1) Deception (1) Genius +2 (1 per +1) Language (2) Mesmerize (1) Savant (1) Savvy (1) Arcana (6) Spirit Guide (3) Summon Ancestor (6) The Great Trickster (4) Demon Mask (2) Monkey s Paw (3) Sleeping Dart x3 (1 per 1) Spirit Staff (2) 58
60 Mighty Warrior (Grade 2) The Mighty Warrior is a Tribal Warrior who has proven himself on numerous occasions to be a protector of the tribe. His skills and experience in combat have saved many members of the tribe. The younger warriors often look to him for guidance as he leads most of the hunting and war parties. Willpower (3) rrr Location (Die Roll) Base DR Wound Level Head (1) Brain=2 3 BR=2 BR=1 Killed Torso (2-5) Brawn=3 Guts=6 3 BN=3 GT=6 BN=3 GT=6 BN=1 GT=5 Unconscious Arms (6-8) Bow=3 Blade=4 4 BW=3 BD=4 BW=2 BD=3 BW=2 BD=3 BD=1 BD=-1 Cannot Carry Legs (9-10) Dodge=3 Speed=5 3 DG=3 SP=5 DG=3 SP=4 SP=2 SP=1 Crawl Only, 1 movement Available Abilities (7) Weapon Trained Weapons (3) Short Blade (1) +1 WS (1) Club (1) +1 WS (1) Spear (1) +1 WS (1) Short Bow (2) Armor (2) Head DR +1 (2) Torso DR +2 (1 per +1) Shield (2) Combat (4) Battle Cry (1) Brawler +2 (1 per +1) Dervish Strikes (1) Expert Fighter (2) Flurry of Blows +1 (1) Knife Thrower (1) Master of Arms +2 (1 per +1) Mighty Thews +2 (1 per +1) Quick +1 (1) Rush Attack (1) Other (2) Camouflage (1) Fearless (1) Ignore Pain (1) Intimidate (1) Leap (1) Lucky +1 (1) Mountaineering (1) Nerves of Steel +2 (1 per +1) Nimble (1) Fleet of Foot +1 (1) 59 Knowledge (1) Hunter (1) Iron Will (1) Savvy (1) Tactics +1 (1) Terrain Cognition (1) Arcana (0)
61 Old Mother (Grade 2) Whereas the role of the Witchdoctor is to protect the tribe from outside forces, the role of the Old Mother is to help it thrive. She tells them when to hunt, when to plant, and works to heal those who are ill. The Old Mother is the tribal matriarch and often the mother or grandmother of the current Chieftain. Willpower (4) rrrr Location (Die Roll) Base DR Wound Level Head (1) Brain=4 3 BR=4 BR=2 Killed Torso (2-5) Brawn=2 Guts=8 3 BN=2 GT=8 BN=1 GT=8 BN=1 GT=6 Unconscious Arms (6-8) Bow=2 Blade=2 3 BW=2 BD=2 BW=2 BD=1 BD=1 BD=1 BD=-1 Cannot Carry Legs (9-10) Dodge=3 Speed=5 3 DG=3 SP=5 SP=3 SP=2 SP=1 Crawl Only, 1 movement Available Abilities (7) Weapons (1) Short Blade (1) Club (1) Armor (2) Head DR +1 (2) Torso DR +1 (2) Combat (2) Concealed Weapon (1) Expert Fighter (2) Knife Thrower (1) Poison (2) Quick +1 (1) Other (2) Camouflage (1) Fearless (1) Lucky +1 (1) Nerves of Steel +2 (1 per +1) Nimble (1) Supreme Effort +1 (1) Knowledge (3) Animal Handling (1) Arcane Studies (1) Boundless Will +1 (1) Genius +1 (1) Healer (1) Mesmerize (1) Savvy (1) Terrain Cognition (1) Arcana (3) Spirit Guide (3) Medicinal Balm x2 (1 per 1) Monkey s Paw (2) Sleeping Dart x2 (1 per 1) 60
62 Smoke Dancer (Grade 2) When the Witchdoctor begins his rituals to protect the tribe, select Warriors are elected to dance for the ritual. When they do, they enter a trance-like state and are more receptive to the magic of the Witchdoctor. Smoke Dancers are fearless, but reckless in combat, believing themselves to be invulnerable to harm. Willpower (3) rrr Location (Die Roll) Base DR Wound Level Head (1) Brain=2 4 BR=2 BR=1 Killed Torso (2-5) Brawn=4 Guts=8 4 BN=4 GT=8 BN=3 GT=8 BN=2 GT=7 Unconscious Arms (6-8) Bow=1 Blade=4 5 BD=4 BD=3 BD=3 BD=2 BD=-1 Cannot Carry Legs (9-10) Dodge=2 Speed=6 4 SP=6 SP=5 SP=3 SP=1 Crawl Only, 1 movement Available Abilities (7) Weapon Trained Weapons (2) Short Blade (1) +1 WS (1) Club (1) +1 WS (1) Spear (1) +1 WS (1) Combat (5) Battle Cry (1) Berserk (1) Brawler +2 (1 per +1) Dervish Strikes (1) Flurry of Blows +2 (1 per +1) Mighty Cleave (1) Mighty Thews +2 (1 per +2) Quick +1 (1) Rush Attack (1) Knowledge (1) Iron Will (1) Armor (0) Other (3) Fearless (1) Fleet of Foot +2 (1 per +1) Ignore Pain (1) Intimidate (1) Leap (1) Nimble (1) Arcana (1) Demon Mask (1) 61
63 Tribal Hunter (Grade 1) Those members of the tribe who are too young to be full-fledged warriors or too old or infirm act as support for the warriors. Armed with range weapons, they are more likely to pullback if an enemy draws close, only to reform and launch another volley. Willpower (2) rr Location (Die Roll) Base DR Wound Level Head (1) Brain=2 3 BR=2 Killed Torso (2-5) Brawn=3 Guts=5 3 BN=3 GT=5 Killed Arms (6-8) Bow=3 Blade=2 4 BW=3 BD=2 BD=1 BD=-1, Cannot Carry Legs (9-10) Dodge=3 Speed=5 3 DG=3 SP=5 SP=1 Crawl Only, 1 movement Available Abilities (4) Weapons (2) Short Blade (1) Spear (1) Sling (1) Short Bow (2) Combat (2) True Aim +1 (1) Weapon Trained (1) Knowledge (1) Animal Handling (1) Hunter (1) Terrain Cognition (1) Armor (0) Other (3) Camouflage (1) Fleet of Foot +2 (1 per +1) Mountaineering (1) Nimble (1) Shadow Stalk (2) Undying Loyalty (1) Arcana (0) 62
64 Tribal Warrior (Grade 1) The Tribal Warrior is the backbone of the defense of the tribe, both at home and for important tribal members who are traveling. From raiding parties to escort missions, the Tribal Warrior is the mainstay. Willpower (2) rr Location (Die Roll) Base DR Wound Level Head (1) Brain=2 3 BR=2 Killed Torso (2-5) Brawn=3 Guts=5 3 BN=3 GT=5 Killed Arms (6-8) Bow=2 Blade=3 4 BW=2 BD=3 BD=2 BD=-1, Cannot Carry Legs (9-10) Dodge=3 Speed=5 3 DG=3 SP=5 SP=1 Crawl Only, 1 movement Available Abilities (4) Weapon Trained Weapons (2) Short Blade (1) Club (1) Spear (1) Armor (2) Shield (2) Combat (2) Brawler +1 (1) Devish Strikes (1) Ferocious +1 (1) Master of Arms +1 (1) Mighty Thews +1 (1) Rush Attack (1) Other (1) Camouflage (1) Fleet of Foot +1 (1) Nerves of Steel +1 (1) Undying Loyalty (1) Knowledge (1) Terrain Cognition (1) Arcana (0) 63
65 Arcana for Savages Spirit Guide (Difficulty 3) --- The caster enters a trance-like state and contacts a Spirit Guide. The Spirit Guide can travel up to the caster s WILLPOWER x2 inches and check any Encounter Marker or examine any area the caster could not normally see and report back to the caster. The Spirit Guide moves on the caster s first activation after the spell has been successfully cast. The Spirit Guide cannot be targetted by attacks but can be dispelled. Summon Ancestor (Difficulty 6) --- Ancestor spirits are powerful beings, capable of causing great damage. The caster may target any model within its WILLPOWER in inches. When successfully cast, the target is attacked by a BLADE 6, WS9 attack. The target model can see the attacker, so it can defend itself, but no return attack can be made. A model cannot use a Wait to countercharge or move away. This attack lasts only one turn unless the caster successfully maintains it. The Great Trickster (Difficulty 4) --- There are many trickster spirits that like to move items and deceive people. When successfully cast, the caster can switch places with any friendly model the switch takes place immediately after the spell is successfully cast. The caster can switch places with an opposing model by winning a comparative WILLPOWER test. Demon Mask: This mask is a fearsome creation, designed to scare evil spirits away from a village. A model that wears this mask gains the Cause Fear Grade 1 and Intimidate Special Abilities. In addition, any model that has Cause Fear as one of their Special Abilities, must pass a GUTS test if a model wearing the mask is within 6 or suffer the effects of Panic. Medicinal Balm: By spending an action to apply this one time use balm, the model regains a wound in any one location. Monkey s Paw: A model with this powerful talisman can do great deeds. By passing a WILLPOWER test, the model with this artifact receives +1 Hero Point for the turn (it does not carry over to following turns). However, if the WILLPOWER test is failed, then the model loses one WILLPOWER point. Sleeping Dart: A powerful potion brewed over several days is applied to this dart. Just a tiny bit will render a model Unconscious. The dart can be thrown up to the model s BRAWN x2 inches with a +1TH and WS1. Any model hit that fails its armor save, must pass a BRAWN test or fall Unconscious. The model can ragain consciousness by passing a BRAWN or WILLPOWER test on their next activation. If they fail, then they will become conscious on the following activation. Spirit Staff: This staff is topped with the skull of a powerful vanquished foe. A model that wields this staff gains the Fearful Presence Special Ability. The staff also acts as a Club with +1TH and +1WS. 64
66 Combat Skills Ambidextrous: Models with this ability can use two onehanded weapons in combat. The model gets 1 attack action for each weapon it wields. For example, a model with a long and short blade would be able to use them both in close combat. This ability may not be taken in conjunction with Dervish Strikes or Flurry of Blows. Backstab +X: A model with this ability has learned to creep up on an oppoent from behind to strike quickly and with deadly accuracy. If a model with this ability attacks a model in its 180 rear facing, it gets +X WS and can adjust the hit location die roll by +X. Battle Cry: Models with this ability let out a terrifying yell when charging into close combat, temporarily paralyzing their opponents. Any enemy model charged by a model with Battle Cry must take a GUTS stat test or receive -2 to their BLADE score for the charge attack. Berserk: Models with this ability can work themselves into a furious fighting frenzy, ignoring all else in their quest to kill their enemies or die trying. By spending an action, the model becomes Berserk. The model ignores all GUTS checks but it can only perform one of two actions Run or Charge. While Berserk the model also adds +2 to its WS for whatever weapon it is using. Blade Master: A model with Blade Master twirls and waves the long blade in a fantastic display of control. Though it seems extraneous in combat, it serves to confuse the defender allowing the model with Blade Master to strike more accurately. Models with Blade Master add +1 to their TH bonus for a Long or Short Blade and can use hero points to change the location of their hit in close combat, but only if using a long or short blade. Brawler +X: Models with this ability prefer to pummel their opponent with their fists. Models with this ability get +X TH and +X WS for their Fist only. Combat Veteran: Models with this ability have learned lots of tricks to score wounds where another attacker would fail. A model with this ability wins all ties in close combat, and all combats where the defender wins by one point. Special Abilities 65 Concealed weapon: Models with this ability have learned to conceal weapons about their person, from stilettos concealed in bodices to dirks hidden in sleeves. Because of this, they often get the jump on an attacker. Whenever this model is attacked in combat, they can expend a hero point, if they have not already activated this turn, and attack before their opponent. Deadeyed: Models with this ability are expert marksmen and know how to hit a specific area of a target. Models with this ability may use Hero Points to alter the hit location roll for any ranged combat shot. Dervish Strikes: This style of combat keeps the blade moving rapidly, often causing numerous small wounds that help weaken an opponent. A model that uses this style strikes three times in close combat, but at a -2 WS and all strikes must be against the same target. A model with this ability may not take Flurry of Blows or Ambidextrous as an ability. Expert Fighter: This skill is similar to Deadeyed except it applies to close combat attacks. Models with this ability have learned to strike at vulnerable areas when in close combat. They may use Hero Points to adjust hit location in close combat. Feint: Models with this ability have trained extensively in the fine art of the counterattack. If this model is defending and wins the close combat by more than 5 the attacker takes a wound. Ferocious +X: Models with this ability are particularly vicious in close combat. They usually have claws or an inhuman bloodlust that drives them into a killing frenzy. Models with this ability get +X to their Weapon Strength when using fists/ claws. Flurry of Blows +X: Models with this ability are extremely skilled in close combat and able to strike repeatedly. The model receives one extra close combat. This ability cannot be taken in conjunction with Ambidextrous or Dervish Strikes. Killer Instinct: Models with this ability have learned through years of experience how to spot and exploit weak points on their targets. If the model expends a hero point, it doubles the Weapon Strength of the weapon for one action. This must be declared before the hit location is rolled.
67 Knife Thrower: Models with this ability are excellent knife fighters. They prefer the silence of a blade and can throw it with great accuracy. Models with this ability can use their BLADE stat for any ranged combat attack where they throw a short blade. A model with this ability may not take a sling, bow, or crossbow. Master of Arms +X: Models with this ability have learned to fight with any weapon available in close combat, including their own fists. The model gets +X to its BLADE score. Mighty Cleave: The model with this ability can attack all models within the reach of its primary weapon (player s choice) with a single action (roll each attack separately though). For each attack that fails to hit, the next model in line to be attacked is at -1 to be hit (so if a model is attacking three models all within range, and misses the first one, the two follow-up attacks are at -1. If the second attack also misses, the third is at -2). Mighty Cleave can only be used with short blade, long blade, 2-handed blade, and spear/polearm. Mighty Thews +X: Models with this ability are stronger than average men. Models get +X to their BRAWN stat. Poison: Models with this ability either have a natural venom attack or coat their weapon in some sort of poison. If a model is hit by a poisoned weapon, it must take a BRAWN stat test at the beginning of each turn or cross of another box in the area initially wounded. Models must continue to make this check until treated by a model with Medical Knowledge or the entire location has been crossed off. For example: a model wounded in the Torso during close combat with a poisoned dagger must make a BW test at the beginning of each turn or cross another box off in the Torso location until all Torso boxes are crossed off. When the last box in the area is crossed off the effect of the poison has ended. Quick +X: Models with this ability have quick reflexes. Models get +X to the DODGE stat. Rush Attack: Models with this ability can strike in close combat and continue their movement. The model is moved into combat, combat is resolved (with charge bonus) and then the model can continue with any remaining movement. A model must have an SP of at least 3 in order to use this ability. The model can move into base contact with another enemy model, but cannot attack in the turn they contact the second model. Shield Bash: A model with this ability still rolls an extra d10 when defending, but also can roll one when attacking. If the attack is successful, the opposing model can be knocked back an additional 1 (this would be on top of any results that occur normally). Stalwart Defender: Models with this ability never yield their ground, even when pressed. A model with this ability is never forced back as a result of close combat. If the model is using a shield, it also gains +1 DR to all locations. The model may still choose to Draw Back if it wins. True Aim +X: Models with this ability are expert marksmen. The model gets +X to their BOW stat. Weapon Trained: A model with this ability has received training in combat. They have learned to turn their opponent, draw them into a disadvantage or administer a Killing Stroke. A model with this ability can use any of the alternative close combat outcomes as well as Killing Stroke KNOWLEDGE SKILLS Animal Handling: Models with this ability spend most of their time working with and training animals. The model s intimate knowledge of the behavior of animals gives him +1 to his chance to hit in combat with a wild or trained animal. A model with this ability may also take a trained animal. The animal model will remain a part of the group as long as the handler is still alive (see rules for Animals). Arcane Studies: Models with this ability have studied the fine points of magic and are experienced in its use. A model with this ability can use magic that they find by successfully passing a BRAINS test. Arcane Sacrifice +X: Models with this ability have given up many years of their lives to the study of magic. Their reward for this time spent in poring over ancient scrolls, they can take more from their Arcana list than their archetype allows. A model that has a Maximum of Arcana 3 that takes Arcane Sacrifice +1, can take a Maximum of Arcana 4. Boundless Will +X: Models with this ability have an incredible store of Willpower. They get +X to their Willpower. Deception: Models with deception are fast talkers, sympathetic characters, or seductresses, and can use their action to deceive an enemy model within 3. If the model with the Deception 66
68 ability wins an opposed BRAINS roll versus the target model, then for the remainder of the turn any attacks directed at the model with deception (or any friendly model within 3 ) will strike the deceived model instead (this model feels the need to protect the deceiving model from all harm). Disguise: Models with this ability are masters of disguise and can appear as almost anyone. Once per game the model with this ability can attempt to switch places with any Grade 1 enemy model that has not taken an action in the current turn. The models make an opposed BRAINS roll. If the disguised model wins, then it is switched with the enemy model. The opposing player then places his model no closer than 6 from the model with disguise. If the enemy model wins, then the disguised model is left in place and cannot attempt to switch with an enemy model for the remainder of the game. Genius +X: Models with the Genius ability are smarter than others. They get +X to their BR stat. Healer: Models with this ability can attempt to heal their comrades. The model must start the turn in base-to-base contact with the wounded model. The model attempting the healing must pass a BRAINS stat test to restore 1 wound to any location on a wounded model or negate the effects of poison. No other action can be taken by either model during the turn in which the healing is being attempted. Hunter: Models with this ability gain +2 to their chance, and add +1 to the chance of all friendly models within 6, when attempting to avoid any trap while outdoors. Models with this ability also gain a +1 TH outdoors when shooting at models with the Camouflage ability. Iron Will: Models with this ability can force themselves to shake off the effects of wounds. By successfully passing a WILLPOWER stat test, the model can use the last marked wound box on their sheet if all the boxes in their Arms or Legs have been crossed off. This roll must be made each turn. If they are rendered unconscious, they get +1 to their roll to recover. Language: Models with this ability have learned many different languages, both those still used and those long dead. When faced with deciphering a language related clue, warning, etc, models with this ability must pass BR stat test to decipher it correctly. Mesmerize: A model with this ability can affect the will of others. By spending an action, the model can cause any friendly 67 model to become invisible to an enemy model. To cause the mesmerizing model to become invisible, the mesmerizing model declares a target model within 3. That model must take a BR stat test. If they fail, they are unable to act against the designated model for the remainder of the turn. If they pass, they are able to act as normal on their action. Miner: Models with this ability gain +2 to their chance, and add +1 to the chance of all friendly models within 6, when attempting to avoid any trap while indoors. Models with this ability also gain a +1 TH indoors when shooting at models with the Camouflage ability. Polymath: The character has been around enough to have picked up bits and pieces of many skills. He may attempt to use the skills Arcane Studies, Healer and Language without owning the skills. However he must make all tests for the skill he is attempting to use as if he had a BRAINS score of 1. Savant: There are many sciences and studies that are too infrequently used to warrant separate skills. These are known collectively as Savantry. This group of skills covers things such as history, nature, alchemy, etc. When this skill is given to a model, the nature of their study should be noted. Models with this ability gain a bonus when attempting to pass a test where this skill would be of use. For example, a model with Savant (Alchemy +1) would get +1 to a test where it must identify the nature of a poison. Savvy: Models with this ability know much about the local history and layout of their home turf. When a model with this ability moves within 4 of an encounter chit, they can use an action to take a BRAINS stat test to see what the encounter is. Tactics +X: Models with this ability add +X to their initiative roll at the beginning of the turn. Telepathy: Models with this ability can sense their opponent s thoughts. The model may take an opposed BRAINS test with any opponent within 10 at any point before the opposing model activates. If he wins, he may switch activations with that model for this turn. Terrain Cognition: Those who spend a lot of their time outside the safe confines of the city walls, learn how to understand the ground around them. They can walk narrow paths through dense foliage, tread the hard ground in a swampy area, and avoid loose rock on the side of a mountain. Models with this ability can ignore terrain movement penalties up to -2 (i.e.
69 if the terrain reduces SPEED by 1, they would ignore it, if it reduced SPEED by -3, the model would only be -1 ). Models with this ability also gain +2 to any DODGE roll for terrain based effects. For example, if a model triggers an Encounter that is loose rocks on a mountain, they would receive +2 to their DODGE roll to avoid it. Voice of Command: The model gives orders in a bellow that can be heard over the din of battle. If the model has not already acted this turn, it may trade activation with any friendly model in LOS for free. In addition, once per turn, the model may steal a friendly model s activation on a successful BRAINS stat test by the target. OTHER SKILLS Acclimated (Environment): This model has spent its life in environments hostile to Europeans. Choose an environment for this model, such as Jungle, Desert, or Arctic. This model does not need to test to see if it suffers ill effects in this environment. (See the section on Extreme Climate, pg 83). Baleful Gaze: Models with this ability can strike fear into lesser men just by looking at them. By spending an action the model may give the Baleful Gaze to any single model within 6. If the model fails its GUTS test it suffers the effect of Panic and immediately flees. Furthermore, for every hero point the model with Baleful Gaze spends, it can decrease the GUTS score of its target by one (1). Camouflage: Models with this ability know how to use the terrain to hide themselves. Any model with this ability that is prone or has not moved more than 1 during their last activation is at 1 to be hit. Cause Fear: Cause Fear comes in three Grades (just like model archetypes). The Grade level reflects which Grade type and lower the Fear effects. Cause Fear (Grade 2) will cause Models of Grade 2 and Grade 1 to take a GUTS test or suffer the effects of panic. Any model that comes within 6 of a Fear-Causing model must take the GUTS test. This ability is inhgerent and does not require an action. Devotion: Models with this ability would take a bullet for the hero (master). If the model with this ability is within 3 of a specified friendly Grade 3 model that is wounded, the owning player can be transfer the wound to the Devoted model instead (it is transferred to the exact same location). If the wound kills the Devoted model, then the Grade 3 model 68 can expend one Hero Point and take an immediate action (even if the model already acted this turn or the model would not act yet because of its DODGE score). Fearful Presence: A model with this ability strikes fear into his minions. They know failure will bring death (or worse!) As such, any model of lower grade that is within 6 of a model with Fearful Presence (who is not currently panicked) does not have to take a panic test. Fearless: Immune to the effects of Cause Fear and Battle Cry. Fleet of Foot +X: Models with this ability are faster than normal humans. Models add +X to their SPEED score. Horsemanship: Models with this skill are excellent riders. They get +1 to their BRAWN stat when trying to avoid being thrown from a mount. If wounded when on horseback, they may expend 1 Hero Point to transfer the damage to the horse instead. Ignore Pain: Models with this ability can ignore the pain their wounds cause them. They can use the last crossed off box on their wound chart, instead of the first unmarked box, for their stat rolls until the last box in a location is crossed off. At that point, they must abide by the rules for that location. Intimidate: Models with this ability cause enemy models to hesitate in fear. Any enemy model within 6 of an Intimidating model must take a GUTS stat test or be unable to act against the Intimidating model. The model can move away from the Intimidating model. Inspiring: The model knows just the right things to say to inspire others to greatness. If he is within 3 of another friendly model he may use his action to attempt to inspire the other model by making a WILLPOWER test. If it is successful, the friendly model receives an extra hero point to use on its next activation. Leap: Models with this ability can jump farther than normal men. The model gets an additional 2 to any jump action. Lockpick: Models with this ability have learned to manipulate the many types of locks available. When faced with a locked door or chest, the model can roll against its DODGE score instead of BRAINS or BRAWN. Lucky: Models with this ability are always getting themselves into trouble and fumbling at the worst time, but things
70 inevitably seem to work out for them. Models with this ability receive 1 Hero Point each turn which only they can use. The Point must be used in the current turn and does not carry over from one turn to the next (you cannot save them). The model also must select one of the following flaws for the model for each Lucky Hero Point they take. Clumsy - Whenever this model is shot at, it can double its DODGE stat by falling down, but the model is considered prone from that point until it spends an action to get up. Maladroit - Whenever this model is wounded, it drops whatever it is carrying. Items move up to 6 from the model in a direction chosen by the player. The item can land in the hands of another model. However, if there is an enemy model within 1 of the target point, then the player must expend a Lucky Hero Point in order to get the item to land in a friendly model s hands. Otherwise, both players make an opposed DODGE roll, the higher roll catches the item. Inept fighter - This model gets -1 to their BLADE stat. Inept fighter cannot be taken in conjunction with Master of Arms. By expending a Lucky Hero Point, the model, when wounded in close combat, can transfer the damage to any other model within 1, including enemy models, but excluding the attacker. If there are no enemy models within 1, then the model takes the wound. Vain Vain models are obsessed with their appearance. Whenever this model rolls a 1 for any skills test, they skip their next action as they dust off their clothes or admire themselves in the nearest reflective surface. If rolling a 1 for the skills test would normally have resulted in a lost action, then the Vain model loses an additional action as well. Majestic: The model radiates an aura of nobility that is impressive to friend and foe alike. Friendly models get a +1 to their GT stat tests, as long as the majestic model is not in disguise. Enemy models wishing to attack the model are at -1 to BOW for ranged attacks and BLADE for hand-tohand attacks. A model may not have both Majestic and Hide abilities. Meet My Minions: A model with Meet My Minions does not need to place any Grade 1 models from his team on the table at the start of the game. Any number of these models may be withheld for a pivotal confrontation or ambush. At any point where the villain is confronted with an enemy model within 3 he may simply state Enemy character 69 name, I d like you to meet my minions. A BRAINS test is required. Success allows all the Grade 1 minion models not in play to be placed within 3 of either the Villain or his nemesis. Placed minions activate as if they had been in the game by the normal initiative rules. Minions who are placed after their logical initiative turn are assumed to be waiting / ready. Minions cannot be initially placed in base contact with enemy models but can move into contact when it is their turn to go. Failure indicates the Villain looks around, but his minions have decided to not show at the right moment. The minions instead are placed by the opposing player anywhere on the board but at least 12 away from any enemy models (but not in traps or any spot that would cause immediate damage to the minion). Also, when the villain is knocked unconscious or unable to communicate he cannot have his minions appear. Mountaineering: Models with this ability climb 1 level per action and add +1 both to their DODGE and BRAWN score when making any roll that involves climbing. Mounted: Models with this ability always start the game mounted on an animal. The mount may be killed or may bolt from the board, but unless specified in the scenario, the model always begins the next game mounted. Nerves of Steel +X: Models with this ability add +1 to their GUTS stat. Night Vision: Models with this ability can see well in darkness. They can see 18 in the dark. Nimble: Models with this ability have excellent balance and the ability to quickly recover if knocked off-balance. Models with this ability can choose to re-roll any failed test against their DG stat (tests that combine DG with other stats cannot be re-rolled). The player must abide by the results of the second roll. Observant: Models with this ability are trained to observe their surroundings and always be aware of what s going on. The model with this ability can take a BRAINS stat test if they are within 3 of an encounter chit to determine what it is. Models with this ability also gain a +1 when attempting to spot models with the Shadow Stalk special ability. Shadow Stalk: Models with this ability can disappear into the shadows or have the ability to blend with their surroundings like a chameleon. Any model with this ability that does not move can slip into the shadows by spending an action. An
71 enemy model must take a BRAINS stat test to target a hidden model that is more than 3 away. If they pass, the model is visible as normal (the spotting model points it out to his comrades). Failure to spot causes the spotting model to lose the action. Once a model is in the shadows it can move its current SPEED -1 (minimum 1 ) without losing its hidden status but it cannot make ranged attacks or it is automatically spotted. A model in the shadows that charges another model that has not spotted it gains Killer Instinct and Expert Fighter for that attack. Supreme Effort +X: Models with this ability can overcome great physical adversity to perform actions as though unwounded. By taking this ability the model can change the stat in its last wound box to its starting value. Unlike other abilities with the +X designation, the one for Supreme Effort represents the number of wound locations for which it can be used. For example, a model that takes +2 can alter the stats in its Torso and Arms locations. A model with +3 could alter Head, Arms, and Legs. Undying Loyalty: Models with this ability are devoted to the person they follow. As long as their hero (or master) is around they won t run from a fight. Models with this ability never take a GUTS stat test as long as a specified friendly Grade 3 model is conscious and still on the board. VIRTUES AND FLAWS A Grade 2 or Grade 3 model can choose to take a Virtue or Flaw. These represent self-imposed limits, or personality defects which can present themselves at inopportune times. If a Virtue or Flaw is taken, then the player has a choice of an additional Ability point, or a special Hero Point which can be used once per turn but only by that model. The model is bound to follow the conditions in the Virtue or Flaw that is taken. Players that choose to take an additional ability point cannot exceed the maximum number of points that can be used in each category. Players do not have to take a Virtue or Flaw, and there is no limit on the number of Virtues or Flaws that may be taken by a character. Players should be aware that a character burdened with too many Virtues or Flaws may quickly find themselves in situations where they cannot bring their abilities to bear! Bloodthirsty: This model will not show mercy to an enemy. If an enemy model disengages from Close Combat with it, this model must try to render that enemy dead or unconscious before exploring an objective marker. This flaw may not be taken in conjunction with the Forbearing virtue. Braggart: This model makes great claims as to its ability to accomplish glorious deeds. The player must nominate an objective marker in a different quarter of the game board as his claim. The model must investigate this claimed marker before it can do anything else. If attacked along the way, the model may defend itself, but may not pursue an enemy. Disdainful: This model does not stoop to lower itself to unworthy opponents. The model may not initiate combat with any model of a lower grade. It may defend itself as normal, and once attacked may pursue an enemy that disengages. Drunken Sot: This model is almost perpetually addled by wine or strong drink. This model must pass a WILLPOWER test at the beginning of the game or it receives -1 to both BRAINS and DODGE but receives an additional +1 GUTS. Forbearing: This model believes in showing a measure of mercy to an enemy in flight. The model may not pursue any model that disengages from combat. Grudge: This model always begins a game with a complaint against his fellows. If this model is beyond 6 from the leader, and paired with a friendly model, this model must pass a BRAINS Stat Test or make a single Close Combat attak on the friendly model. Looter: This model compulsively loots the bodies of its victim. If this model defeats another model (by killing it or rendering it unconscious), then it must spend its next action looting the body. Prone to Flattery: This model cannot resist the temptation of a compliment, even in the most inappropriate situation. Any model may attempt to flatter this model by making an opposed BRAINS roll, but this model tests with a -2 penalty. If the model loses the test, it spends its next activation completely absorbed in self-admiration. Steadfast: This model will not abandon a friend in combat. If a friendly model within 12 is in close combat with a higher Grade model, this model must try to assist that model before it can investigate an objective marker. If the friendly model retreats or breaks off combat, the model may act as normal. 70
72 Animals and Creatures No fantasy world would be complete without animals and creatures to populate the dark jungles and subterranean labyrinths. Some may be useful like the steadfast mount of the hero, others can be deadly like the poisonous viper. Then, there are those creatures that are outside the realm of the Animal Kingdom; the Mad Boars of Midmarch, the bloodthirsty Ungeheuers, and the giant serpents used to guard the temples of Mök. MOUNTS A model that is mounted uses the DODGE and SPEED stats of the mount. A mounted model cannot hide, but it can still claim the advantage of intervening terrain for cover. A mounted model gets an additional +1 charge bonus in Close Combat (for a total charge bonus of +3) and an additional +2WS. The mounted model must still move 2 to count the charge bonus. A horse may cross an obstacle 1 inch high or 2 inches wide without penalty. This is assumed to be a small wall or hedge, or a ditch. Combination obstacles (for example: leaping over a sunken road bounded by farm fences) requires expending 1 Hero Point. Note that in this case, both obstacles must still be legal. For example, a 2-inch-wide ditch bounded by a 2-inchhigh hedge cannot be crossed. Donkeys and mules do not jump. A player may spend 1 Hero Point to increase the length his mount can jump. All mounted models are +2 to hit in both close and ranged combat. If a mounted model is hit, there is a 1-5 chance the attack hits the mount, instead of the model. If a mount is hit it will rear or flinch and try to throw the rider even if the hit does not wound the mount. The model riding the mount must take a BRAWN test to avoid being thrown. If the model passes, then there is no further effect. If the model fails, he takes one WS=2 hit to a random location and now counts as Prone. The mount of a fallen rider bolts; it takes no further part in the game and is removed from play. A rider whose mount dies under him automatically takes a WS=2 hit to a random location and now counts as Prone. Furthermore, the model must pass a BRAWN check before it can act again as he tries to free himself from being pinned by the mount. Camel Location (Die Roll) Base DR Wound Level Mount (1-5) DODGE=4 SPEED=8 DR=5 DG=4 SP=8 DG=4 SP=6 DG=3 SP=4 SP=3 SP=2 Mount Killed Horse (Standard) Location (Die Roll) Base DR Wound Level Mount (1-5) DODGE=5 SPEED=10 DR=5 DG=5 SP=10 DG=4 SP=8 DG=3 SP=6 SP=4 Mount Killed Mule/Donkey Location Base DR Wound Level (Die Roll) Mount (1-5) DODGE=4 SPEED=8 DR=5 DG=4 SP=8 DG=3 SP=6 SP=4 Mount Killed 71
73 Heroic Horse (Grade 1) The heroic horse is faster, more independent, and smarter than your average horse. The heroic horse uses all the same rules as a normal mount, but has access to some unique special abilities, explained below. The heroic horse may not activate encounter markers on his own but it can act independently of the rider. Willpower (2) rr Location (Die Roll) Base DR Wound Level Head (1) Brain=2 5 BR=2 Killed Torso (2-6) Legs (7-10) Brawn=6 Guts=8 Blade=* Dodge=5 Speed=10 5 BN=6 GT=8 5 BD=* DG=5 SP=10 BN=6 GT=8 BD=* DG=5 SP=10 * See Attributes below. Mount hit 50% of time when ridden as per Mount Rules. BN=5 GT=8 BD=* DG=4 SP=8 BN=4 GT=7 BD=* DG=3 SP=6 Killed BD=* SP=4 Killed Available Attributes: 3 Comes When Called: Upon his master s whistle (or some other signal), the heroic horse comes galloping to aid. If the owner begins a scenario dismounted, he may call his heroic horse. The heroic horse appears at his master s side on that model s activation. This ability may also be used to return the horse to play if it bolts after taking damage and throwing its rider. Horse Sense: The heroic horse can detect an imminent ambush or trap, and will attempt to warn his master. If the heroic horse and his rider are within 4 of a trap or concealed unfriendly model, the rider will discover the presence of the trap or ambush on a BR AINS stat test. Kick: The heroic horse delivers a wicked kick to anyone standing behind it. All models within 1 of the rear of the horse must pass a DG stat test or take a WS=5 hit to a random location. Rear: At his rider s command the heroic horse rears and kicks his forelegs. All models within 1 of the front of the horse must pass a DODGE stat test or take a WS3 hit to a random location. Note that the rider does not have to test for falling, and may make attacks of his own. Steeplechaser: The heroic horse is famous for its ability to jump over hedges and across ditches and ravines. The horse may leap over any obstacle up to 2 tall, or across a gap 4 wide. Stoic: The heroic horse handles injury without complaint. If the horse is injured, the rider gets an additional +2 to his BRAWN stat test to stay mounted. Swift as the Wind (+X): The heroic horse gets +1 to his Speed stat per ability point spent on this skill. 72
74 Animal Handling Some models have access to the Animal Handling Special Ability. Below are a list of animals that can be taken as companions. Also, heroes and villains may encounter different kinds of animals in the course of their adventures. The animals listed here can also be used as Encounters to harass the characters. bear Willpower (1) r Location (Die Roll) Base DR Wound Level Head (1) BRAINS=1 6 BR=1 Killed Torso (2-7) BRAWN=8 GUTS=7 BLADE=5 DODGE=4 SPEED=5 6 BW=8 GT=7 BD=5 6 DG=4 SP=5 BW=7 GT=6 BD=4 SP=4 BW=5 GT=5 BD=2 SP=3 Legs (8-10) Cannot Move SP=1 Attack: Bite (Range=0, TH=+2, WS=BW+3), Claw (Range=1, TH=+1, WS=BW+3) Special Abilities: Cause Fear Grade 1, Multiple Attack +1 (can make one claw and one bite attack with each attack action). Constrictor Willpower (1) r Location (Die Roll) Head (1-2) Torso (3-10) Base DR Wound Level Brains=1 Blade=5 Brawn=8 Guts=7 Dodge=4 Move=4 6 BR=1 BD=5 6 BW=8 GT=7 DG=4 MV=4 Killed BW=7 GT=5 DG=3 MV=3 BW=6 GT=5 MV=2 Killed BW=5 GT=4 MV=2 Attack: Bite (Range=1, TH=+1, WS=BW+4) Special Abilities: Constrict If a model is hit on two consecutive turns by a model with Constrict, then its BLADE and DODGE scores are reduced to 0 as it has become entwined by the attacking model. Falcon/Hawk Willpower (1) r Location (Die Roll) Base DR Wound Level Head (1) Brains=1 3 BR=1 Killed Torso (2-4) Brawn=2 Guts=6 3 BW=2 GT=6 GT=3 Killed Killed Talons (5-7) Blade=3 3 BD=5 BD=3 BD=2 No attacks Wings (8-10) Dodge=5 Speed=8 3 DG=5 SP=8 DG=3 SP=5 SP=3 No attacks Walk Only Attack: Bite (Range=0, TH=+1, WS=BW) Special Abilities: Flying This model may break off from close combat without penalty. 73
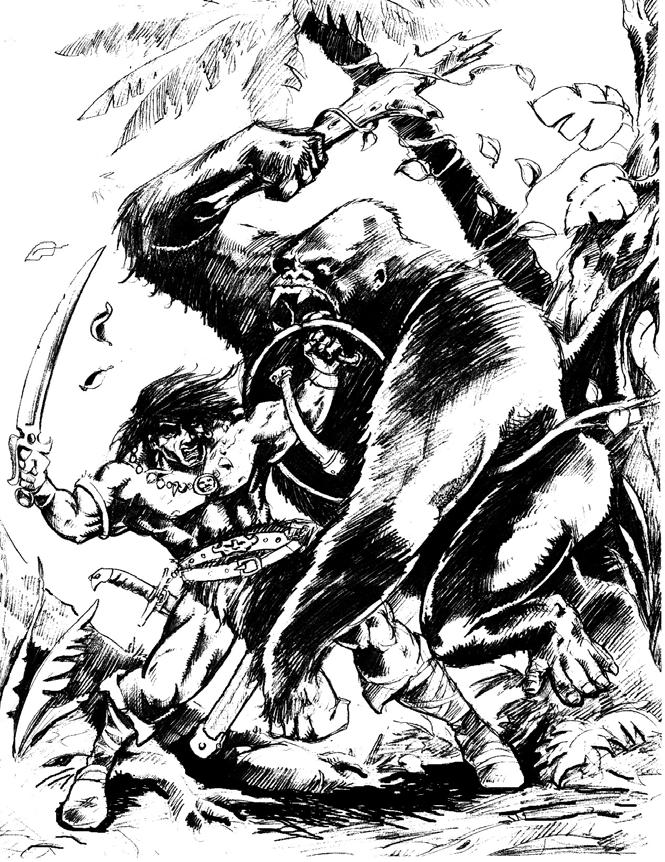
75 74
76 Guard Dog Willpower (1) r Location (Die Roll) Base DR Wound Level Head (1) Brains=1 4 BR=1 Killed Torso (2-4) Brawn=4 Guts=7 4 BW=4 GT=7 BW=3 GT=5 GT=3 Killed Front Legs (5-7) Blade=5 4 BD=5 BD=4 BD=3 BD=4 No attacks Back Legs (8-10) Dodge=4 Speed=7 4 DG=4 SP=7 DG=3 SP=5 SP=3 SP=1 Crawl only Attack: Bite (Range=0, TH=+1, WS=BW+1) Special Abilities: Ferocious +1 Viper Willpower (1) r Location (Die Roll) Head (1-2) Torso (3-10) Base DR Wound Level Brains=1 Blade=5 Brawn=2 Guts=6 Dodge=6 Move=4 2 BR=1 BD=5 2 BW=2 GT=6 DG=6 MV=4 Killed GT=5 DG=5 MV=3 GT=4 MV=2 Attack: Bite (Range=0, TH=+1, WS=BW) Special Abilities: Venomous Bite (model s hit in close combat by the viper must make an immediate BRAWN Stat Test or fall Unconscious). Wolf Willpower (1) r Location (Die Roll) Base DR Wound Level Head (1) Brains=2 4 BR=2 Killed Torso (2-7) Legs (8-10) BRAWN=6 GUTS=7 BLADE=5 DODGE=4 SPEED=5 4 BW=6 GT=7 BD=5 4 DG=4 SP=5 BW=5 GT=6 BD=3 DG=3 SP=4 BW=4 GT=5 BD=2 SP=3 Killed Killed SP=1 Cannot Move Attack: Bite (Range=0, TH=+1, WS=BW+1) Special Abilities: Pack Hunt: This model attacks in packs. The members work together to bring prey down. For each successful attack by a second or later model of the same type on the same defender, the defender must pass a BRAWN test or be placed prone as it is pulled down by the weight of the attackers. The more attackers on a single defender, the more BRAWN tests that must be taken. A maximum of 4 wolves can attack a single human sized model. 75
77 Creatures No fantasy game would be complete without the creatures that lurk around every corner, ready to rend heroes and villains alike. From demon posessed serpents to creatures from the maw of the abyss, the rules here will allow players to design their own creatures for scenarios. When creating creatures for your scenarios, keep in mind that the goal should be to challenge the players. Tailor your creatures to the skill level of the players. And you should never feel required to spend all the Stat points and Special Ability points. The creature should fit the scenario and not be made excessivly difficult to kill just because it can. Creature Stat Charts There are four different sizes of creatures: Man-sized and smaller, Large, Giant, and Huge. And within each of these sizes are three different configurations: Biped, Quadraped, and Legless. Each configuration will have a pool of starting Base Stat points with which to determine BRAINS, BRAWN, etc. However, the number of wound boxes will remain constant unless points are spent to change it. For example, Giant and Huge are the only sizes with more than 1 Head Wound box. The other two sizes will only have one. If because of stat placement, the stat is reduced to below 1, it becomes 1. So if you gave your giant slug a Dodge of 1, it would be 1, 1, 1, 1, 1, 1, 1. On the stat charts below, only Location and Wound Level are listed. The first column listed after Location would be the first wound column and not the Base column. In the following columns will be the Stat - X. The X amount will be what you subtract from your starting number in order to get the new stat for that Wound Level. Example: If a Large Biped creature started off with a DODGE of 3, it would go down to a 2 in the second wound box (3-1). In succeeding boxes it would have a 1, 1, 1. The points to build the base stats will also be used for the DR of each location. So if a Giant creature had 40 points, it would have to be split between stats and DR. All creatures start with a Base DR of 2. WILLPOWER should be half the GUTS score rounded down -2 with a Minimum of Special Abilities Each size also gets a number of abilities that can be split between Special Abilities, Armor, and Weapons. A model may never receive more than +3 in any one ability. So a model that spends 3 of its points on Brawler would have Brawler +3. Four points or more could not be spent. This restriction does not apply to armor. A player can add as much additional armor as they like. In addition to the Special Abilities listed on pages 65 to 70, there is a short list of Creature Specific Special Abilities listed at the end of this section. All Special Abilities cost 1 point with the exception of Poison which costs 2. All weapons cost 2 points. An additional box can be added to any Wound Location for the cost of 5 Special Ability Points. Man-sized and smaller 5 Ability Points Large 10 Ability Points Giant 15 Ability Points Huge 20 Ability Points Creature Drawbacks Due to their size, some creatures are easier to hit in combat. Man-sized and smaller +0 to be hit Large +1 to be hit Giant +2 to be hit Huge +3 to be hit Weak Point In addition, all creatures will have a Weak Point. A Weak Point is a gap in the armor, a soft spot on the head, or sensitive area on the torso that is more suscptible to damage. In order to discover the weak point on a creature, a model must take a Grade stat test. The player rolls a d10 and adds the Grade level of the model attempting to spot a weak point. Only models that have attacked a creature in close combat can attempt this test. The exception being, models with Savant or Professorship can also attempt it if they spend an action to do so. Once a Weak Point has been discovered, the player should determine if the weak point is the Head or Torso. Roll a d10. On a 1-2, it is the Head, on a 3-10 it is the Torso. All hits to that location by any model from that player s team are considered to have WSx2.
78 Man-Sized and Smaller Biped (35 Stat Points; Minimum 8 on DR; 5 Special Ability Points) Location Wound Level Head BRAINS Killed Torso BRAWN BRAWN-2 Killed GUTS GUTS-2 Arms BLADE BOW BLADE-1 BOW-1 BLADE-3 BOW-3 Legs DODGE SPEED DODGE-1 SPEED-2 DODGE-2 SPEED-4 Man-Sized and Smaller Quadraped (35 Stat Points; Minimum 8 on DR; 5 Special Ability Points) Location Wound Level Head BRAINS Killed Torso BRAWN BRAWN-1 BRAWN-2 Killed GUTS BLADE GUTS-1 BLADE-1 GUTS-2 BLADE-2 Legs DODGE SPEED DODGE-1 SPEED-1 DODGE-1 SPEED-2 DODGE-2 SPEED-3 DODGE-2 SPEED-3 Man-Sized and Smaller Legless (30 Stat Points; Minimum 8 on DR; 5 Special Ability Points) Location Wound Level Head BRAINS Killed Torso BRAWN GUTS BLADE DODGE SPEED BRAWN-1 GUTS-2 BLADE-1 DODGE-1 SPEED-1 BRAWN-1 GUTS-2 BLADE-2 DODGE-2 SPEED-2 BRAWN-2 GUTS-3 BLADE-2 DODGE-2 SPEED-3 BRAWN-3 GUTS-4 BLADE-3 DODGE-3 SPEED-4 Large Biped (40 Stat Points; Minimum 12 on DR; 10 Special Ability Points) Location Wound Level Head BRAINS Killed Torso BRAWN BRAWN-1 BRAWN-2 BRAWN-3 Killed GUTS GUTS-1 GUTS-2 GUTS-3 Arms BLADE BOW BLADE BOW-1 BLADE-1 BOW-2 BLADE-2 BOW-2 BLADE-3 BOW-3 Legs DODGE SPEED DODGE-1 SPEED-1 DODGE-2 SPEED-2 DODGE-3 SPEED-3 DODGE-3 SPEED-4 Large Quadraped (40 Stat Points; Minimum 12 on DR; 10 Special Ability Points) Location Wound Level Head BRAINS Killed Torso BRAWN BRAWN BRAWN-1 BRAWN-1 BRAWN-2 Killed GUTS BLADE GUTS-1 BLADE-1 GUTS-2 BLADE-1 GUTS-3 BLADE-2 GUTS-3 BLADE-2 Legs DODGE SPEED DODGE SPEED DODGE-1 SPEED-1 DODGE-2 SPEED-2 DODGE-2 SPEED-3 DODGE-3 SPEED-4 DODGE-3 SPEED-4 77
79 Large Legless (35 Stat Points; Minimum 12 on DR; 10 Special Ability Points) Location Wound Level Head BRAINS Killed Torso BRAWN GUTS BLADE DODGE SPEED BRAWN GUTS-1 BLADE DODGE-1 SPEED-1 BRAWN-1 GUTS-2 BLADE-2 DODGE-1 SPEED-2 BRAWN-1 GUTS-2 BLADE-2 DODGE-2 SPEED-3 BRAWN-2 GUTS-3 BLADE-3 DODGE-2 SPEED-3 BRAWN-2 GUTS-3 BLADE-3 DODGE-3 SPEED-3 BRAWN-3 GUTS-4 BLADE-4 DODGE-3 SPEED-4 Killed Giant Biped (45 Stat Points; Minimum 16 on DR; 15 Special Ability Points) Location Wound Level Head BRAINS BRAINS-2 Killed Torso BRAWN BRAWN-1 BRAWN-2 BRAWN-3 BRAWN-3 Killed GUTS GUTS-1 GUTS-2 GUTS-2 GUTS-4 Arms BLADE BOW BLADE BOW-1 BLADE-1 BOW-2 BLADE-2 BOW-2 BLADE-2 BOW-3 BLADE-3 BOW-4 Legs DODGE SPEED DODGE-1 SPEED-1 DODGE-2 SPEED-2 DODGE-2 SPEED-3 DODGE-3 SPEED-4 DODGE-3 SPEED-5 Giant Quadraped (45 Stat Points; Minimum 16 on DR; 15 Special Ability Points) Location Wound Level Head BRAINS BRAINS-2 Killed Torso BRAWN GUTS BLADE BRAWN-1 GUTS-1 BLADE BRAWN-2 GUTS-1 BLADE-1 BRAWN-2 GUTS-2 BLADE-2 BRAWN-3 GUTS-2 BLADE-3 BRAWN-4 GUTS-3 BLADE-3 Killed Legs DODGE SPEED DODGE-1 SPEED-1 DODGE-1 SPEED-2 DODGE-2 SPEED-2 DODGE-2 SPEED-3 DODGE-3 SPEED-4 DODGE-3 SPEED-5 DODGE-4 SPEED-6 Giant Legless (40 Stat Points; Minimum 16 on DR; 15 Special Ability Points) Location Wound Level Head Brains Brains-2 Killed Torso Brawn Guts Blade Dodge Speed Brawn Guts-1 Blade Dodge-1 Speed-1 Brawn-1 Guts-2 Blade-2 Dodge-1 Speed-1 BrAwn-1 Guts-2 Blade-2 Ddge-2 Speed-2 Brawn-2 Guts-3 Blade-3 Dodge-2 Speed-2 Brawn-2 Guts-3 Blade-3 Dodge-3 Speed-3 Brawn-3 Guts-4 Blade-3 Dodge-3 Speed-3 Brawn-3 Guts-4 Blade-4 Dodge-4 Speed-4 Brawn-4 Guts-4 Blade-4 Dodge-4 Speed-5 Killed Huge Biped (50 Stat Points; Minimum 20 on DR; 20 Special Ability Points) Location Wound Level Head Brains Brains-2 Killed Torso Brawn Guts Brawn-1 Guts-1 Brawn-2 Guts-2 Brawn-2 Guts-2 Brawn-3 Guts-3 Brawn-4 Guts-4 Killed Arms Blade Bow Blade Bow-1 Blade-1 Bow-2 Blade-1 Bow-2 Blade-2 Bow-3 Blade-2 Bow-3 Blade-3 Bow-4 LegS Dodge Speed Dodge-1 Speed-1 Dodge-1 Speed-2 Dodge-2 Speed-3 Dodge-2 Speed-4 Dodge-3 Speed-5 Dodge-4 Speed-6 78


80 Huge Quadraped (50 Stat Points; Minimum 20 on DR; 20 Special Ability Points) Location Wound Level Head Brains Brains-2 Killed Torso Brawn Brawn Brawn-1 Brawn-2 Brawn-2 Brawn-3 Brawn-4 Killed Guts Blade Guts-1 Blade Guts-2 Blade-1 Guts-2 Blade-2 Guts-3 Blade-2 Guts-4 Blade-3 Guts-4 Blade-3 Legs Dodge Speed Dodge-1 Speed Dodge-1 Speed-1 Dodge-2 Speed-2 Dodge-2 Speed-3 Dodge-3 Speed-4 Dodge-3 Speed-4 Dodge-4 Speed-5 Dodge-4 Speed-6 Huge Legless (45 Stat Points; Minimum 20 on DR; 20 Special Ability Points) Location Wound Level Head Brains Brains-2 Killed Torso Brawn Brawn Brawn-1 Brawn-1 Brawn-1 Brawn-2 Brawn-2 Brawn-3 Brawn-4 Brawn-4 Killed Guts Guts-1 Guts-1 Guts-2 Guts-2 Guts-2 Guts-3 Guts-3 Guts-4 Guts-4 Blade Blade Blade-1 Blade-2 Blade-2 Blade-3 Blade-3 Blade-4 Blade-4 Blade-5 Dodge Dodge-1 Dodge-2 Dodge-2 Dodge-2 Dodge-3 Dodge-3 Dodge-3 Dodge-4 Dodge-4 Speed Speed-1 Speed-2 Speed-2 Speed-3 Speed-3 Speed-4 Speed-5 Speed-6 Speed-6 Example: The Mad Boar of Midmarch (Large Quadraped) A Large Boar that terrorizes the woodlands. of Midmarch and Sundland It is designed to score maximum carnage by charging (Rush Attack) and does not bother much with finesse (Dodge=3). Two tusk attacks (Flurry of Blows +1) for maximum damage (Ferocious +3). And it s terrifying cry as it charges can cause peasants and the less experienced to quake in their boots (Cause Fear Grade 1). Its thick skull and well muscled body mean killing it can be difficult (Head and Torso armor +2). Willpower (2) rr Location (Die Roll) Base DR Wound Level Head (1) BRAINS=1 8 BR=1 Killed Torso (2-6) BRAWN=5 GUTS=8 BLADE=4 8 BW=5 GT=8 BD=4 BW=5 GT=7 BD=3 BW=4 GT=6 BD=3 BW=4 GT=5 BD=2 BW=3 GT=5 BD=2 Killed Legs (7-10) DODGE=3 SPEED=7 6 DG=3 SP=7 DG=3 SP=7 SP=6 SP=5 DG=3 SP=4 SP=3 SP=3 Creature Close Combat Range - TH - WS All creatures have a base attack range for their claw/fist/bite/etc. The TH always begins at 0 and the WS always begins at the creatures BRAWN score. The starting range for close combat is listed below. Size Close Combat Range Man-Sized and Smaller 0 Large-Sized 1 Giant-Sized 2 Huge-Sized 3 79
81 Creature Special Abilities Boosted To Hit +X (Cost 1 per +1): Because a creature may not have a weapon and many of the normal Special Abilities relate to weapons in order to get a +X TH bonus, this ability gives the creature a +1 TH for their claws/fists/etc. in Close Combat for each purchase of this ability. Burrow (Cost 1): A model with the Burrow special ability can spend two (2) actions to dig a tunnel. It can do nothing else while tunnelling. The two actions must be consecutive or the tunnel collapses. Any model within 3 of the burrower can also enter the tunnel. After the tunnel is completed, any model in the tunnel can be placed up to 6 from the tunnel starting point (all models must be placed together if more than one is in the tunnel). Tunnels can go under walls, water, etc. While underground, models in a tunnel cannot be targeted by models outside the tunnel. Additional actions may be spent to lengthen the tunnel by 3 per action spent. Constrict (Cost 1): A model with this skill can declare they are attempting to constrict in close combat! An attack is made as normal with the same modifiers for a regular attack. If the model attempting to constrict is not successful, no damage is done. If the constrict is successful no damage is done, but the defending model is now held in place and can only escape by winning a comparative BRAWN test on its activation or if the constrictor is killed. On the constrictor s next action it does an automatic hit at its current BRAWN to a random location. While constricted a model may not move, perform Ranged Combat or cast or maintain a spell. They are free to attack the constricting model with a melee weapon, but they do so at a penalty of half of their current BLADES score(rounded down). If the constricted model injures the constricting model, the constricting model must make a GUTS test or release the constricted model. Extended Reach +X (Cost 1 per +1): For each purchase of this ability, the model increases its Close Combat range by 1. A Huge creature that purchases this twice, will have a Close Combat range of 5. Paralysis (Cost 2): Rather than killing its prey, a creature with this ability prefers to paralyze them before feeding. In addition to doing damage from an attack, a model hit by a Paralysis causing creature must also pass a BRAWN test or lose its next action. If it loses an action, then on its next activation it must take a second BRAWN test or lose that action as well. The effect wears off after that. 80 Spider Climb (Cost 1): This ability encompasses any adaptation a creature has developed that would allow it to climb vertical surfaces with no penalty. A model with this ability can move up 1 Level per action and does not need to take a DODGE test for each level after the first. This model is also unhindered by Rough Ground. Spitting +X (Cost 1 per +1): Creatures that have developed a way to attack enemies from afar often spit a stream venom or caustic substances. This ability allows the model to spit up to 4 at WS4 for each purchase of it. If it is purchased the maximum 3x (at a cost of 3 points), the model can spit up to 12 at WS12. Models that take Spitting, can also take Spray (see below). A model must wait 1 turn for each purchase of this ability before being able to spit again. The model above that has purchased it 3x, can spit on the first turn, the fourth turn, the eigth turn, etc. Spray +X (Cost 1 per +1): A model must take Spitting before it can take Spray. This ability allows the creature to target more than one model with a single spitting attack. Instead of a stream, the attack is a spray. For each purchase of this ability, the area of effect increases by 1. Water Breather (Cost 1): Some creatures exist solely in the water. While in the water, their stats are normal. If taken out of the water, the creature s BLADE, DODGE, and SPEED stats are all reduced by half (rounding down). A model that is a Water Breather can attack any model on land that is within its Close Combat Range with no penalty. Models that are not Water Breathers must pass a BRAWN test each turn they are under water or lose one Wound Box on their Torso. Winged +X (Cost 1 per +1): A creature with wings is capable of Flight movement (see page 9). A winged creature always has a minimum Flight movement of 0 and a Maximum Flight movement of SPEED +X. Creatures with this ability can leave Close Combat with no penalty if they are attacking while flying. Zombie (Cost 2): Models with this ability have no free will and no physical sensations. This ability covers traditional zombies as well as other animated creatures such as skeletons and constructs. As such, they are immune to any test that requires a BRAINS or GUTS check, also, poisons have no effect on them. They cannot check clues (but they can trigger traps). Zombies can carry items but only after the item has been given to them by a non-zombie model.
82 Designing a scenario is both the easiest and the hardest thing to do. It is easy to throw a printed map on the table or put some scenics on your game board for the models to interact on then let the players battle it out, King of the Hill style. Such games may be fun from time to time. But a well-planned scenario with an intriguing back story, exciting Encounters, and a challenging climax will get your players clamoring for more. Whole books have been written about how to design the perfect scenario. Most of them go into extreme detail about character motivation, sub-plots, and keeping your players in character. To help in designing scenarios for Broadsword Adventures, a few simple guidelines and helpful hints are provided here. At the end of this book there are some sample scenarios to provide examples of these concepts in action. The Gamemaster Broadsword Adventures combines many elements of roleplaying into it, but unlike a roleplaying game, it does not require a Gamemaster. Two players can pick out a scenario from this book or work on one together and sit down to play a collaborative game where they both work together against random encounters or a competitive game where they compete against one another. One player could also choose to take on the role of the Gamemaster and set up the entire scenario for the other players. The Gamemaster brings an element of control to the game. Encounters can still be random, but oppoenets will act with a more defined purpose instead of randomly. Neither way is wrong, but it should be determined before the plot is designed whether there will be a Gamemaster. The Plot The first thing to start off with is the plot. Why have the characters assembled at this point? Are they in search of gold? Are they there to rescue/kidnap a nobleman s daughter? Until the rules have become second-nature to you, keep the plot simple. Stick to a single goal that all the players are trying to reach or half are trying to reach it and half are trying to prevent it. SCENARIO Building 81 It is a good idea to provide a little bit of back story for your plot. It does not need to be epic in nature; a paragraph or two should suffice. If it can be read aloud to players in less than 5 minutes, it s probably enough for the first few games. Victory Conditions Once the plot is ready, the Vistory Conditions should be spelled out. Most likely the Victory Conditions will be obvious from the plot. As more developed games are played, though, a player could win, even if they don t rescue the princess or find the treasure. Spelling out the Victory Conditions lets each player know what their objective is. The Map/Game Board The design of Broadsword Adventures allows for players to use elaborate terrain set-ups or simple printed maps. Players should use whichever they feel comfortable with and whichever will provide the most fun. Just because there are pictures of scratch-built terrain or expensive store bought pieces in this book, do not think that either are required for a great game. Whichever method you choose, make sure there roughly equal starting points for all players. It would be unfair to have one player forced into dealing with hazardous terrain every step of the way while another runs easily around the board. Encounter Markers The use of Encounter Markers is a tradmark of all Rattrap Productions games and Broadsword Adventures is no different. Encounter Markers provide unexpected events, traps, or clues/bonuses for the scenario. Encounter Markers are also used to advance the storyand allow players to do more than just fight each other or the Gamemaster. To use Encounter Markers, players place a number of random markers on the board that they then need to explore in order to find the clues to the scenario. These markers can be anything from paper cut-outs to specially constructed pieces as long as players can recognize them on the board easily. There is no magic number for how many should be placed. Each scenario will be different. A general rule of thumb is about 8-9 Encounter Markers in a game with two opposing
83 sides. That works out to about one clue/benefit, two traps, and one that is nothing for each side plus one extra that can be whatever the scenario needs. Whenever a model comes in contact with an Encounter Marker, the player should draw an Encounter Card. The Card will spell out whether the marker is a Trap, Clue, or nothing. Certain Special Abilities will allow models to check Encounter Markers before reaching them. Encounter Markers as Traps Every good pulp fantasy or sword and sorcery tale has the hero stumbling on or thwarting some devious trap. Traps provide nearly deadly delays for the hero, increasing the tension as time grows short. In Broadsword Adventures, traps should be designed to slow the players down. They should never be designed to outright kill an unwounded Grade 3 model. You never want to have a player lose their Hero to an overly powerful trap early in the game. At most, a trap should only do one wound box of damage. Traps can also do nothing more than delay the models. A pit trap does not need to cause damage. Instead, it could require a model to make two successive DODGE tests to climb out. A dart trap, rather than being poisoned can be coated with a hallucenogenic agent forcing the models to make WILLPOWER tests in order to function. Encounter Markers can also effect an area so that more than just the model that triggered it gets caught as well. The sample scenarios at the end of this book will feature some different types of traps to help provide ideas for designing new scenarios. Encounter Markers as Clues/bonuses The Clues/Bonuses will be very dependent on the scenario. Some scenarios may offer only bonuses, others only clues, and some a combination of both. The best way to find the right mix is to first look at your Victory Conditions. If they have the players looking to retrieve something, then only one may be a clue while the others are bonuses. If the Victory Conditions require the players to escape from a maze, then most of these may be clues leading to the exit. Example: The scenario calls for the characters to escape from the lair of an evil high priest. To escape, they must find a route 82 unguarded by henchmen. First they must find the map that shows the way through the secret passage, then they must locate the key to the secret door, finally, they have to find the secret door. All three of these things could be Encounter Markers. It would not matter what order they were found in, since all three are needed to win the scenario. Encounter Markers as Events Sometimes scenarios do not require any Encounter Markers at all, but still have random events. In cases like this, the scenario could call for an Encounter Card to be drawn at the beginning/end of each round. Or, if the characters are trying to sneak through a palace, then an Encounter Card could be drawn any time they have to attack someone or do soething that makes excessive noise. Example: The players have just killed the High Priest s summoned demon and its death throes are shaking the temple apart. The characters must race through the maze of tunnels and escape its imminent collapse. Players will not be stopping to check for clues, they will simply be trying to escape. So, each turn an Encounter Card can be drawn. One could be that the temple shakes violently and all models must pass a DODGE test or be thrown Prone. When designing scenarios, don t feel tied to the 1 Encounter Marker-1 Encounter Card set-up. If the scenarios feels best with multiple Encounter Card decks depending on which Encounter Marker is discovered then use that. If the scenario runs best with Events and Markers, then use them both. The Encoutner Markers and Encounter Cards are tools to help create the details of the scenario without requiring a Gamemaster to run it and not inflexible rules that must be obeyed to the letter. The Characters Once you have sketched out your scenario plot, players should create their bands of characters. A scenario can use Total Grades, Grade Limits, or Partial Grade Limits. In a Total Grades scenario each player can choose characters of any grade level that add up to a specified value. For example, a scenario might have a Total Grade value of 8. This means that one player might take one Grade 3 and five Grade 1 characters, while another could choose to take four Grade 2 characters, and another might take two Grade 3 characters and a Grade 2 character. In all these cases, the sum of the Grades taken equals 8 the value of the scenario.
84 In Grade Limit scenarios, each player must take the same number of grades. For example, each player could get exactly one Grade 3 character, two Grade 2 characters, and one Grade 1 character. In Partial Grade Limit scenarios, each player takes some fixed number of characters, but is free to use other characters to total some value. For example, each player may be required to take a Grade 3 and a Grade 2 character, but would also be allowed to take characters whose Grade values add up to a limit of 3 for the remainder. Special Rules Special Rules are those things that are unique to a scenario and may change from one to the next. Special Rules should be discussed before the game begins as players may want to prepare their adventuring bands. There are two areas not specifically covered in the rules that are presented here in the Special Rules. Both Terrain Modifiers and Extreme Climate are examples of Special Rules that players may wish to use. Like all special rules, they do not have to be played exactly as presented here all the time, but if you should make a change from these, all players should know in advance. Terrain Modifiers Terrain Modifiers are those effects created by terrain, that may not be modelled on your maps or game tables. Things such as line of sight, are easy to determine, but Rough Ground or Dense Foliage may not be obvious to players. Any time a Terrain Modifier is to be used (unless it s part of an Encounter Marker) all players should be made aware. Dense Foliage: Tropical jungles, dense coniferous forests, or thickets of thorny brambles are examples of Dense Foliage. Like Rough Ground, a model s movement is reduced by half and in order to enter and exit, this terrain, the model must pass a BRAWN test or become entagled in clinging vines and thorns. If caught, the model s DODGE score is reduced to 0 and the model can do nothing but attempt to extricate itself or defend if attacked in close combat at BLADE-1. Ice: Models that enter icy terrain risk falling if they move to quiickly. Models may move up to half their SPEED with no penalty. If a model moves more than half its SPEED then it must pass a DODGE test or be placed Prone. If the model attempts to Run, then it must pass a DODGE test at -2 or be placed Prone. Rough Ground: Rough Ground can be rocky, mountainous terrain, jagged ice packs, or even a rubble-strewn passageway. A model wishing to move through this terrain, must spend an extra 1 of movement for each 1 they want to move. For example, moving 2 will cost 4 of movement. Also, models that take any DODGE test while on Rough Ground will be at -1 to their die roll. Swift Water: A fast moving river or underground stream is capable of pulling characters off the board. If a model enters Swift Water, it s movement is reduced by half and each turn it begins its activation in the water it must pass a BRAWN test or be swept downstream 1d10. Extreme Climate Players may choose to set their Scenarios in places or climates where the weather is harsh and dangerous. Each turn a model is in these harsh environments without some kind of protection, that model must make a BRAWN stat test or fall victim to the hard climate. Some archetypes have access to the Acclimated (climate) Special Ability, which means they can ignore the effects of that climate. Some suggested weather effects are below: Arctic: The frozen tundra of the north or the harsh heart of winter can rob a person of feeling in their limbs. If the model fails this BRAWN stat test, they suffer one wound to their Legs, but this should never cross off the last Legs location box, if it would, then ignore this result. If the model is wearing more than +2 DR worth of armor, then they may add +1 to their BRAWN test. Desert: The shimmering heat of the deep desert can quickly lead to dehydration and confusion. If a model fails its BRAWN stat test, they receive -1 to all future BRAINS stat tests. If the model is wearing more than +1 DR worth of armor, then they make this test at -1. Jungle: The hot and humid jungle can sap a person s energy as they succumb to heatstroke. If the model fails this BRAWN stat test, they receive -1 to all future BRAWN stat tests. If the model is wearing more than +2 DR worth of armor, then it makes this test at
85 Storm: A torrential downpour makes ranged attacks impossible because bowstrings will get dampened and arrows warped. Furthermore, visibility is reduced to 12 and may not be extended by Night Vision skill. A model with Acclimated (Storms) still cannot use a ranged weapon while the storm is raging. Going on Campaign A campaign is a series of linked games where the results of, and things learned in, one game affect what happens in the next. A campaign can be likened to a novel being played out. Each scenario is like a chapter in the novel, with the entire campaign being the book as a whole. Characters reappear from scenario to scenario in a single campaign, and some players may choose to keep the same characters over many campaigns the equivalent of having the same protagonists in several books. A great advantage to playing campaigns in Broadsword Adventures is that there is no need for a dedicated Game Master. All players can be involved in designing the campaign, the Encounters in each scenario, and rules that govern how non-player characters behave. This serves to give everyone a sense of ownership in the campaign, and keeps enthusiasm high. Planning the Campaign A campaign begins with planning the plot or storyline. You can draw inspiration from history and fiction alike. A campaign should begin with an intriguing hook, then develop the action, and conclude with some climactic action. Here are some sample plots with some notes as to how they could be worked out in a pirate campaign. Variants of these plots could also be used in a more traditional swashbuckling campaign as well. Revenge!: The players are seeking revenge against a common enemy. The hook might be a scenario where players need to escape from the overwhelming forces of the enemy, while gathering clues as to their foe s identity. For example, a Brigands band may suddenly find their hideout under attack CAMPAIGN RULES 84 It is recommended that players use these sparingly in their campaigns, and that they provide mechanisms in the Scenario to counter or recover some of the effects. For example, a campfire may protect against the cold, or a cool spring allow models in the jungle to regain Brawn lost due to the heat. by wave after wave of City Guard. The brigands have to escape to the highlands (or an even more secret sanctuary) after finding enough evidence to point to who sent the invasion. The development might include scenarios where the brigands attempt to hijack a caravan or recruit more followers. A showdown with the corrupt nobleman would be the climactic final scenario. Treasure Hunt: Tauren is a fertile plain for lost cities and ancient magic lost to mankind. The players are looking for these riches. The hook might be a scenario where the players have to kidnap a temple acolyte in order to find out where a certain lost temple is located. The development might be a scenario where the players have to trek through a trapladen swamp in order to reach the temple. The discovery and exploration of the shattered ruins with its powerful guardian would provide the climax to the campaign. The Rescue: The players have been approached to rescue an important nobleman, taken hostage by a power-hungry High Priest. The hook could be a search through the roughest part of Héralte to find information as to where the High Priest is holding the nobleman. The development might be a trek though the shattered mountain keep where a powerful artifact could be used against the High Priest. The climax would be the daring rescue and battle with his captor. Chapters Once the plot line is sketched out, you will need to develop scenarios to complete the campaign. At least three scenarios are required in order to use the Advancement rules in this book. It may be easier to simply jot down rough ideas for each scenario, and then wait until one scenario ends before determining exactly how the next scenario should be set up. That way, you can adjust the conditions of the scenario based on the results of the previous game. This gives you the flexibility to reward players who are doing well, or handicap a player who is running the table against his opponents.

86 Ending Campaigns At the end of the last chapter of a campaign, reflect back on what went on over the course of the campaign. Were there any unresolved plots? Did anyone comment on something as being worth exploring later? Did the villain escape, or were the heroes unable to stop the villain s machinations? These can all prove useful in providing the hooks for a future campaign. Once you have played through a campaign, you will have plenty of ideas for starting a future campaign. Recurring characters and their animosities and rivalries allow players to stay engaged in the setting. You may eventually have a score of campaigns, all with the same characters. If players wish to retire their bands and create new ones, try to weave the story of that band into the continuity of the scenario. Perhaps a hero is wounded to the point of retirement. Perhaps a new member of the family inherits the hero s feud, or seeks to complete the work his illustrious predecessor could not. One benefit that Broadsword Adventures has over traditional RPG campaigns is that players do not need to start at the bottom in order to start a new band for an ongoing campaign. If the campaign has been set up according to one of the limits above, then a new band needs to simply conform to that limit. Advancing through the Ranks There are two types of experience awarded to an adventuring band. Heroic Experience and Reputation Experience. Heroic Experience is used to upgrade a models abilities or advance to a new archetype. Reputation Experience is used to purchase scenario specific equipment or add new Grade 1 models to the band. Heroic Experience points are awarded to the team and can be allocated among all eligible models. No model can ever receive more than 50% of the experience points at any one upgrade session. Example: Pete is taking part in a campaign and after three games he has 26 Experience Points, no more than 13 of those points can be allocated to a single model. If Pete chooses to not spend any of the points yet and for the next three games he receives 24 Experience Points, he would have 50 in total, but could spend no more than 25 on any single model. In order to gain a new ability, upgrade a current ability, or jump to a new archetype the model will need to pass a BRAINS stat test. Combat Skills are an exception, and require either a BOW or BLADE stat test. If the ability relates to your ranged combat score, such as Sharpshooter or Deadeyed, then the model must pass a BOW stat test in order to add the upgrade or new skill. If the ability relates to close combat, such as Battle Cry or Blade Master, then it must pass a BLADE stat test in order to add the upgrade or new skill. If the ability is not directly associated with either the BLADE or BOW stat, such as with Quick, then it is the player s choice which stat to use. Each ability or upgrade can only be attempted once. If the model fails the test, then it cannot attempt again on that ability or archetype change until the next time the campaign allows for upgrades in a long campaign that will typically be after 3 games. In order for players to use Reputation Experience and add new characters to their team, they will also need to pass a BRAINS stat test. This test is taken by the model designated as the leader of the team. The model must be a Grade 3. Players must state which new characters they would like to add to their team and then take the BRAINS stat test. If the player fails to get the new character, the Reputation Experience points are not lost and can be used the next time a team can add new models. Heroic Experience Heroic Experience points are points that characters can use to increase their skills or promote themselves to a new Grade level. Players earn Heroic Experience for completing games, with extra points awarded for completing victory conditions, finding clues, behaving Heroically (or particularly sinisterly). These Heroic Experience points are awarded after each scenario. Heroic Experience points are awarded to the band as a whole. 85

87 Heroic Experience Points 4 Points Each scenario completed by the band. actions in a subsequent scenario; Conan would not earn any points for allowing the Duke s daughter to fall victim to a hideous demon while he skulks away. Nor would a villainous band earn any points for a sudden change of heart. X Point(s) 1 Point Per Victory Point, Clue, or Objective completed at the end of the scenario. No more than 10 Heroic Experience Points can be earned in this fashion, and no single Objective can be worth more than 5 Victory Points. Every 2 unused Hero Points (not counting Lucky Hero Points) at the end of the scenario. Archetype Advancement Players that wish to increase the abilities of their characters can use their Heroic Experience. It costs 5 points to increase an ability or add a new one. Characters can never go beyond the maximum for any Skill or Skill area. Example: a Defender of the City has a Knowledge Skill max of 3. If he already has three Knowledge Skills, then he cannot use Heroic Experience to take a fourth one. The same archetype also has a maximum Mighty Thews of +2. If the model takes +1 to start, it can use Heroic Experience to take an additional +1 later, but cannot exceed the +2 total. 1 Point Each Majestic or Sinister action performed during the scenario. Heroic Experience points are one way to adjudicate victory conditions in a game, with the winner being the player who earns the most points in the game. No single Encounter or Objective can be worth more than 5 Victory Points, and the maximum number of Heroic Experience Points that can be earned this way is 10 per scenario. A Heroic action is one where the model intentionally puts itself in harm s way for another, or allows an opponent to gain an advantage to its own cost. Example: Norlac the Bold is fighting the High Priest Scarron, and is seriously wounded in the legs. The High Priest wins the initiative, but takes a Wait action to allow Norlac to limp away, and does not pursue. Scarron s band would earn a Heroic Experience Point for this. Archetype Improvement Some characters can move from one archetype to another. Those that can, rather than spending the experience on new skills, may put it toward archetype jumping. If a model purchases new Skills or improves Skills it already has, then it cannot upgrade to a new archetype. Models keep the skills they had from the previous archetype, but cannot increase an ability unless allowed in the new archetype and can only take abilities from the list for the new archetype. Models can only make one jump during each upgrade session in a campaign. Again, in a long campaign that might be after every third scenario. Example, a City Guard may spend 25 Heroic Experience Points to advance to the Captain of the Guard Archetype. It cannot immediately spend another 15 Heroic Experience Points to advance to the Defender of the City archetype, but must wait until another upgrade session to do so. A Sinister action is one where a villainous model does something particularly odious, such as wounding a Prone model to the point of unconsciousness, killing hostages on the cusp of being rescued, or attacking the team of animals pulling a coach. A band that has portrayed itself as essentially Heroic in a previous scenario is not entitled to earn points for Sinister 86
88 Archetype Improvement Tables It takes 25 Heroic Experience points to jump from a Grade 1 to a Grade 2, but only 15 Heroic Experience to jump from a Grade 2 to a Grade 3. Models can only advance along the paths listed below. Table I: Barbarians Grade 1 Grade 2 (25 Heroic Experience Points) Grade 3 (15 Heroic Experience Points) Beserker Hero Warlord Scout Hero Shaman Apprentice Chieftain Warlord Scout Shaman Apprentice Shaman Warrior Hero Chieftain Warlord Table II: Civilized People Grade 1 Grade 2 (25 Heroic Experience Points) Grade 3 (15 Heroic Experience Points) City Guard Captain of the Guard Defender of the City Observer Cour Astrologer Retainer Minor Noble Defender of the City Major Noble Squire Captain of the Guard Minor Noble Defender of the City Major Noble Table III: Priesthood Grade 1 Grade 2 (25 Heroic Experience Points) Grade 3 (15 Heroic Experience Points) Patron Acolyte High Priest Prelate Initiate Acolyte High Priest Temple Guard Captain of the Temple Guard Prelate Zealot Captain of the Temple Guard Prelate Zealot Acolyte High Priest Table IV: Savages Grade 1 Grade 2 (25 Heroic Experience Points) Grade 3 (15 Heroic Experience Points) Tribal Hunter Old Mother Witch Doctor Ghost Dancer Tribal Hunter Mighty Warrior Headman Tribal Chieftain Tribal Warrior Ghost Dancer Mighty Hero Headman Tribal Chieftain 87
89 Permanent Injuries If a Grade 2 or Grade 3 model loses all the wounds from a single location during a game and they are still lost at the end of the game (meaning the model has not had any wounds healed), the player will need to roll on the Disabilities Table after the game. Grade 1 models will not roll on the Disabilities Table. Disabilities can range from no noticeable effect to permanent disability. Players may use Heroic Experience Points to modify a die roll on any of the Disabilities Tables. Table I: Disabilities Table Die Roll Result 1 Roll on Permanent Disability Table for this Location 2 This model misses one game as it recuperates No lasting effect Table II: Head Permanent Disability Table Die Roll Result 1 Simpleton: This model s BRAINS stat is permanently reduced to 1. If this model suffers this result again, it is permanently removed from play. 2 Addled Brains: This model s BRAINS stat is permanently reduced by This model misses two games as it recuperates. 6-8 This model misses one game as it recuperates No lasting effect Table III: Torso Permanent Disability Table Die Roll Result 1 Constitutional Debilitation: This model s BRAWN stat is permanently reduced to 1. If this model suffers this result again, it is permanently removed from play. 2 Flayed Chest: This model s BRAWN stat is permanently reduced by This model misses two games as it recuperates. 6-8 This model misses one game as it recuperates No lasting effect Table IV: Arm Permanent Disability Table Die Roll Result 1 Total amputation: The model has its BOW and BLADE stats halved (rounded down). If this model suffers this result again, it is permanently removed from play, barring exceptional circumstances. 2 Partial amputation: This model has its BOW and BLADE stats reduced by This model misses two game as it recuperates. 6-8 This model misses one game as it recuperates No lasting effect 88
90 Table V: Leg Permanent Disability Table Die Roll Result 1 Total amputation: The model has its SPEED and DODGE stats halved (rounded down). If this model suffers this result again, it is permanently removed from play, barring exceptional circumstances. 2 Partial amputation: This model has its SPEED and DODGE stats reduced by This model misses two games as it recuperates. 6-8 This model misses one game as it recuperates No lasting effect A model that is supposed to be recuperating may choose to join in a game during its recuperation period, but begins the game with half of the wound boxes (rounded up) for that location marked off. On Certain Death In general, Grade 3 characters cannot be killed. However, there may be circumstances during campaigns where a Grade 3 character ends up in a situation where his or her demise appears to be a certain thing, such as a character being swept from the deck of a storm-tossed ship in icy waters. In this case, players have two options: either the character dies and is removed from further play, or a literary deus ex machina invoked and the Grade 3 character misses two games. Perhaps the character swims to a storm-wracked rock with his last gasps, and then manages to attract the attention of a passing merchant vessel (or could it be a corsair!) The exact determination is left up to the players in the campaign, but your author humbly submits that the Golden Rule is a good guide in these instances, and a plausibilitystretching deus ex machina often a thing of beauty in its own right. Reputation Experience Reputation Experience points are like the coin of the realm. If the campaign uses gold and silver, than Reputation Experience can be changed to that. But Reputation Experience is more than just money, it is prestige. A fighter of great reknown but little money may find it easier to hire others to join him while a rich merchant of questionable morals may not. In many of the classic sword and sorcery tales, men flock to the great heroes despite little pay initially. Broadsword Adventures uses Reputation Experience to allow players to replace Grade 1 models that have been killed or purchase scenario specific equipment. A scenario should state whether either of these may be purchased before the start. Adventuring bands earn Reputation Experience based on the table below. Reputation Experience Points 2 Points 2 Points 1 Point Each Model a band has left at the end of a scenario. Unconscious or dead models do not count towards this total. Each opposing player s model rendered dead or unconscious by the band in the course of the scenario. Every 2 Grade levels less than an opponent. In the case of a multi-player game, this is measured against the player with the highest Grade total for the scenario. 1 Point Each Majestic or Sinister action performed during the scenario. Replacing/Adding Characters A Grade 1 character may be replaced by spending 5 Reputation Experience Points. Players cannot purchase Grade 2 or Grade 3 characters. A player that wishes to replace or add a new Grade 1 model to the adventuring band must spend the 5 Reputation Experience points and then make a WILLPOWER test. If successful, the player may add a Grade 1 model of thier choice. If the test is failed, then the 89
91 Reputation Experience points are lost and the player can add no more Grade 1 models until the next session in which Reputation Experience points can be spent. Players can purchase as many Grade 1 models as they would like for their adventuring band as long as they have the points to spend and pass the WILLPOWER test. However, scenarios may still dictate how many models/grade levels can be used. Purchasing Scenario-Specific Equipment Players may also choose to purchase equipment that may be useful for specific jobs in a scenario, such as tools for burying treasure, lanterns for increasing their vision distance at night, and so forth. Each item will have specific uses for the chapter and what items are available should be noted before the game, allowing players to use their Reputation Experience to purchase them. The life of these items will be determined by the campaign. If the players purchase digging tools in Chapter 1, they may have no use in Chapter 2 and are no longer be considered part of the band s equipment. If a lantern is purchased to explore caves in Chapter 1 and Chapter 2 involves further exploration of the caves, then the lanterns purchased in Chapter 1 will continue to be in use for Chapter 2. The life span of equipment is at the players discretion and should be decided before the game begins. Along with normal equipment, if a party has a Barbarian Shaman, a Court Astrologer, a High Priest, or a Witch Doctor, then it can also purchase Artifacts that are available to that particular archetype. Artifacts purchased with Reputation Experience points cost 3x their Abilities Point cost. A Healing Balm that costs 1 Ability Point, will cost 3 Reputation Experience points. A Staff of the Njorden which normally costs the Shaman 4 Ability Points will cost 12 Reputation Experience points. Some examples of items are provided here. Players should feel free to create their own as well. Value Item Effect 2 Digging Tools +2 to all BRAWN stat tests to dig holes or dig up items. 3 Fur-lined Jacket This thick padded jacket is lined with the best furs, and will protect a model against Arctic climate effects, in addition to imparting a +1 DR to the Torso. 4 Gruesome Trophy This model may expend 1 Hero Point for each Grade 1 model in the faction to gain the equivalent of the Fearful Presence ability for the rest of the Scenario. 2 Lantern Increase night vision distance by 6 Requires 1 hand to use. 6 Lucky Charm +1 Hero Point, no more than 1 per model and 5 total in any band. 5 Map Some initial preparation has turned up a crude map of the area of the scenario. This party may take the top Encounter Card and play it at any time on any Encounter they trigger. 6 Medicine Bag A model with the Healer ability may use this to restore an extra Wound three times per Scenario, and all models in that faction may add +1 on a Permanent Disability chart roll. 5 Performer s Kit +1 to Disguise checks 5 Prearranged Signal +1 to all Meet my Minions checks 1 Rope Bind helpless enemy or double climbing speed 4 Skeleton Key Open locked door on d10 roll of 6+. Must be purchased by scenario and cannot carry over from one scenario to the next. 2 Water Skin Filled with the stuff of life, a Water Skin will prevent the effects of Desert Climate for 3 Turns. 3 Wine Skin By taking a swig from the Wine Skin a model gains +2 GUTS for the scenario, but they also receive -1 DODGE and -1 BRAINS. 90
92 Introduction Thousands of years ago, when the gods of Tauren still walked among men, there was a tribe that lived in the shadows of the mountains, called the Ungeheuer, that fell victim to the dark whispers of Mök. They believed his lies of their superiority over other men. Soon, they were casting out the priests of the other gods. The people began clamoring for war. And the leaders, more greedy and bloodthirsty than their people, were eager to oblige. They stormed down from the mountains killing and destroying all who stood before them. This was a time when fortified cities and standing armies were unheard of and the small towns and farming villages were no match for a large organized force. It took years for the people of Tauren to unite against this threat. The far-flung towns banded together and built walls around major communities and forts at important trade routes. Meanwhile, the Ungeheuer began to feud amongst themselves. Early and total victories were replaced by longdrawn out battles and sieges. The easy pickings that the people had grown accustomed to, disappeared. Blame was passed from one leader to the next. Though open warfare did not occur, raids by rival groups weakened the Ungeheuer. Seven years after the first attacks began, the free people of Tauren launched their first offensive. Marching out from the city of Ibyssia, 2,000 hardened veterans, the elite Lion Guard, struck a larger force of Ungeheuer on a cliff over-looking the Dividing Sea. The Priests of Tehy brought forth terrible storms over the water and surrounding lands to hide the approach of the army. When the clouds cleared, the Ungeheuer emerged from their tents to see the gleaming mail of the Ibyssian ranks lined up on the hill above them. Disorganized, but still brutal, the Ungeheuer fell in waves on the well-disciplined shield wall of the Lion Guard. The Ibyssians wavered, stiffened their ranks, then began pushing their foes back. Scenarios Provided here are five sample scenarios that players can use alone or as part of a larger campaign. Rescue from the Ungeheuer 91 At first the going was slow, but with each step the Ungeheuer gave more. Even as they entered the camp, the Lion Guard continued to push. They stopped only when the last of their enemies fell from the cliff s edge to the rocks below. This was the beginning of the end of the Ungeheuer threat. After this defeat, they found themselves fighting on all fronts. All the land they grabbed in seven years was nearly gone within two years. In some places, they were even pushed out of the foothills that had been thier ancestral homes. In desperation, the Ungeheuer beseeched Mök to help them. Their priests sacrificed all the slaves that they still retained. Blood flowed from high mountain temples like the melting snows. Mök demanded more. When enough prisoners could not be taken to satisfy him, the Ungeheuer began sacrificing their own kin. When the Ungeheuer were near collapse as a people, Mök answered their prayers. He gave them the strength to fight back, but in the process he twisted their minds and bodies. While they were once men, they were now brutish giants incapable of thoughts greater than their own base instincts. In the mountains, their great size and strength could hold back the advance of the men of Tauren, but never again could they venture forth to the plains below where the great numbers of men could overwhelm them. Over the millenia the Ungeheuer have grown even more fractured. They exist almost solely in the mountains in small bands of two or three. If more than that number gather in one place, they invariably turn to squabbling amongst themselves, until finally blood is shed and their number is reduced. Since they have no society and little to no skills in acquiring what they need to survive, they resort to taking what they can from the villages and towns around them or unwary travelers that stray too close to their lairs. If they linger too long in one area or if they strike at a particularly wealthy target, then, invariably, a party will be formed to track them down and elminate them.

93 Scenario and Victory Conditions A pair of Ungeheuer have raided a small farming community and taken the daughter of a prominent landowner. The village is not a wealthy one so they have not been able to atract the services of many interested parties. However, Heftig and Kurze, two companions of the Black Company mercenaries happend to be passing through when they heard of the town s plight. With their purses much lighter than they would like, they agree to find the Ungeheuer and rescue the captured woman. They will have the help of two members of the local town guard. The characters will need to locate the landowner s daughter within the cave of the Ungeheuer and exit the board with her and at least one other model. Game Board The 24 x 24 game board will represent the cave of the Ungeheuer. It will have numerous side rooms and alcoves. There should be one large room at the back of the cave and a single entrance on the opposite side of the board from the large room. There should also be lots of rubble piles and stalagmites breaking up line of sight within the tunnels and rooms. Characters The Heroes will have Heftig (Grade 2 Barbarian Hero), Kurze (Grade 2 Civiled Peoples Captain of the Guard), as well as two Grade 1 City Guard. As this is not an all Civilized Peoples party, the Heroes do not get Shield Wall. If the players with to use their own heroes, then they can take two Grade 2 models and two Grade 1 models. They will also get 10 Heroic Experience points with which to add upgrades to their models. The Heroes will begin the game at the board edge that represents the entrance to the cave. The Villains will have two Ungeheuer. The Ungeheuer are Large, Bipedal Creatures if players wish to replace them with creatures of their own. The Ungeheuer begin the game in the large room at the back of the cave. Encounter Markers This scenario uses nine Encounter Markers. These should be placed randomly about the board with most located in the rooms and alcoves of the cave. No Encounter Marker may be placed closer than 3 from any board edge and no closer than 3 from any other marker. If you are not using specific Encounter Cards, you can assign each of the events below to a card from a standard playing card deck. Landowner s Daughter: If this marker is found in any hallway, the Landowner s Daughter should be placed in the closest room or alcove within line of sight of the marker, even if that would place her near another Encounter Marker. She has been knocked unconscious and bound with stout ropes. It will take two actions to cut the ropes by any model in base contact with her or one action by each of two models in base contact with her. To wake her up, a model in base contact must pass a BRAINS test. If she is awake she will move with any friendly model the player assigns her to. She will not fight nor take any other action as she is far too terrified to take any direction. If Unconscious, she can be carried (even by Kurze) at -2 SPEED (minimum of 1 movement). Battered Shield: Tossed in amongst a pile of refuse is a battered but useable shield. If a model does not have a shield, it can use this one. However, due to its weakened condition, it will shatter on a 1 or 2 instead of just a 1 like a normal shield. 92
.")
94 Medicinal Balm: The remains of the last person to cross the Ungeheuer lie piled up here. It s obvious from the cracked bones that he was also a quick meal. Carefully examining the remains, you notice a small ceramic jar. From the runes on the outside you can tell that this is a Healing Balm (obviously unused by the last owner). This is the same as the Relic of the same name and along with the usual healing properties, if applied to an Unconscious model will immediately awaken them and allow them to take an immediate action. Hidden Pit: An underground stream has created a sink hole at this spot. If this Encounter is triggered all models within 3 of the marker must pass a DODGE test or fall into the watery pit below. The water breaks the fall and is only a few feet deep so no damage is caused. However, the pit is a Level 1 pit. Due to the damp walls, all attempts to climb are at -1 to the DODGE score. This would count as Triggering the Alarm (see Special Rules below). Cascade of Skulls: A pile of skulls is stacked up here. It s either a warning or simply the remains from many meals. A model that triggers this Encounter must pass a BRAINS test to realize the skulls are precariously balanced. If they fail, the skulls come crashing down. This would count as Triggering the Alarm (see Special Rules below). Falling Rocks: The roof in this section of the cave is weak and ready to fall. Even the slightest vibration of a character walking below could trigger it. If this Encounter is triggered, the player should roll a d10, on a 1-5, the vibrations have caused a partial collapse of the roof. The model must pass a DODGE test or suffer a WS4 hit to a random location. This would count as Triggering the Alarm (see Special Rules below). Nothing: The last three Encounter Markers are nothing. Special Rules The Ungeheuer: The Ungeheuer are drowsy having gorged themselves on stolen livestock. There will be an Incrementing Test at the beginning of the second turn. The Incrementing Test involves rolling a d10. If the result is 10, then the event is triggered. If the result is not 10, then that result is recorded and at the beginning of the next turn the d10 is rolled again. If the sum of the previous result and the new one are 10, then the event is triggered. If it is not, then the sum is recorded and a d10 is rolled at the beginning of the next turn and its result added to the two previous ones. This continues until the sum totals 10. Once the event is triggered, one of the Ungeheuer moves on the most direct route to the entrance of the cave and then back to the back room. It moves at its SPEED score and does not run. If any model other than the Landowner s Daughter is within his line of sight during the move, he will let out a bellow, awakening his companion. This would count as Triggering the Alarm (see below). Triggering the Alarm: Once the alarm is triggered, both Ungeheuer will move to attack. They will always attack the closest model and will continue to attack that model until it is dead or Unconscious at which point it will move on to the next closest model. They will not attack the Landowner s Daughter and move past her to attack one of the Heroes. Darkened Cave: The Ungeheuer have no problem seeing in the dark so there is no light coming into the cave. All line of sight is limited to just 6 unless the models have an alternative light source. Reputation Experience: If this scenario is being played as part of a campaign, players can spend Reputation Experience points before the start. If it is being played as a stand-alone scenario, then the Heroes get 10 Reputation Experience points to spend. Only equipment can be purchased and no Grade 1 models can be added to the party. 93
95 The Curse of the Black Skull Introduction Five hundred years ago, when the Ibyssian empire was at its peak, it controlled the lands of Guhl, Midmarch, Sundland, and some of Njorden. The Emperor at the time, Aurelius, decided to expand the empire south and take over the land of the ancient kingdom of Skadia, known also as the Dark Lands. The ruling priests of Skadia worshipped Mök. They kept their lands isolated from most of the rest of the world. Trade was very limited and visitors were not allowed beyond the cities and towns that hugged the borders. No traveler had seen the black basalt domes of the capital city and lived to tell of it, in decades. Even official emissaries from other kingdoms met their counterparts from Skadia in one of the coastal cities. Aurelius, a devout follower of Tehy, considered it his divine duty to rid the world of the worshippers of Mök. After all, it was Mök who blinded the god Tehy in his sleep so that the Sky god could not see his machinations in Tauren. The plan back-fired though and the War of the Gods began with Tehy finally banishing Mök to the dark abyss between worlds. Beginning with a month of prayers and sacrifices, Aurelius mustered his forces and marched south from Ibyssia. The great show that he put on gave the high priests of Skadia plenty of time to prepare. Even though the Skadian empire had fallen far from its greatness when Mök still walked among the gods, its High Priests were still among the greatest sorcerers. They used the time Aurelius had given them and constructed great engines capable of blasting armies with arcane fire. But it was the greatest among them, Khozzer Nil who crafted the Black Skull. The Black Skull was crafted from a piece of jet-black rock that had fallen from the sky. It radiated power even before Khozzer Nil began working with it. Others had tried to divine its secrets but had gone mad in the process. Khozzer s will was great, possibly the greatest since the height of the Skadian Empire. He worked the stone ofr weeks, enhancing and focusing its power. The armies of Ibyssia clashed with those of Skadia and still he kept at his work. Aurelius forces pushed deeper into Skadian territory, coming within sight of the cursed black city. The city s walls were impenetrable. Even the powerful storms whipped up by the 94 priests of Tehy could not batter them down. Both sides dug in for a drawn out siege. The defenders of the city beseeched Khozzer Nil to release the power of the Black Skull. He knew that if he could not control its power, it would destroy friend and foe alike. Two weeks into the siege, tunnelers had broken into the catacombs beneath the city. Aurelius sent five score soldiers into the tunnels. They were to fight their way straight to the gates and open them for the rest of the army. Under cover of darkness they emerged from underground. But their exit was noticed by a patrol on the wall and an alarm was sounded before they could silence the guards. Soon the whole city was up in arms, but chaos reigned with no one having any clear idea on what was going on. Troops raced back and forth across the city. Most felt the walls had been breached and the city would fall. A small cadre of priests decided that they could wait no longer and burst into the room where Khozzer Nil worked. The virile High Priest was a gaunt and pale shadow of himself. He tried to fend the others off, but in his weakened state he was quickly overpowered. One of the priests ripped the skull from his hands and raced to the top of the Tower of Sorrows, the highest point in the city. In the 15 minutes that it took the priest to reach the top, the power of the skull had aged the young priest by 20 years. He bent all his will on the Black Skull from his perch, but he was far weaker than Khozzer Nil. When the power was released it blew the top of the tower off. Those within arrow strike of the tower died instantly. Those within the city itself died within days. Outside the city walls, soldiers on the front lines aged 20 years, the veterans falling over dead, and the newest recruits suddenly finding themselves past their prime. Aurelius and his advisors had been well away from the city so that the Priests could not use their magics against them. A rider, a young boy now turned man, brought the news to Aurelius. The Emperor was well past middle-age already and fearing that he would age as well, quickly fled the area. What remained of the army followed the next day. The black city was abandoned after that, a new capital built far from it. Of the Black Skull, no word as to its fate ever emerged.

96 Scenario and Victory Conditions Phaecia, a high priestess from the Islands of Amazonia has found what she believes to be the location of the Black Skull in what has been called locally as Skull Valley. With the power of the Skull, she feels she can elevate Amazonia to greater power. However, others have learned of her plans and seek to thwart her. The High Priest Bhalin nok Fierzik has sent his tenple guard along with some of the Acolytes to stop her. Both sides will be exploring the ruins and attempting to find the Black Skull. In order to raise the Black Skull from its chamber, three altars must be located and a specific ritual performed at each. The party that is able to exit the board with the skull will be the winner. Game Board The 24 x 24 game board is going to represent the ruins of a temple in Skull Valley. There are only four points of entry onto the board. Each is in the center of one of the sides and is just 3 wide. The rest of each side is impassable terrain. The rest of the board should represent scattered ruins, rocky outcrops and scattered jungle. In the center of the board is the Skull Altar. It should be a large stone skull with a sacrificial altar near it. Characters One party will represent Phaecia (Grade 3 High Priest) and her three bodyguards (Grade 1 Temple Guard). This is an all Priesthood team so Phaecia will have access to the Spell Channeling group ability. If the players with to use their own heroes, then they can take one Grade 3 model and three Grade 1 models. They will also get 10 Heroic Experience points with which to add upgrades to their models. The second party will represent the group sent by Bhalin nok Fierzik. There will be one Grade 2 Acolyte, one Grade 2 Captain of the Temple Guard, and 3 Grade 1 Temple Guard. This is an all Priesthood team so the Acolyte will have access to the Spell Channeling group ability. If the players with to use their own heroes, then they can take two Grade 2 models and three Grade 1 models. Players should roll to determine which entrance they start at. The player who roll s highest should choose their starting point and the second player can choose any other entrance. Encounter Markers This scenario uses nine Encounter Markers. These should be placed randomly about the board. No Encounter Marker may be placed closer than 6 from any board entrance and no closer than 3 from any other marker. If you are not using specific Encounter Cards, you can assign each of the events below to a card from a standard playing card deck. Altar of Despair: This is the first altar. In order to raise the Black Skull, all three altars must be located and then the ritual for each performed. See the Special Rules below for the Ritual. A model that discovers this altar, must pass a GUTS test or lose a point of WILLPOWER as they are overwhelmed by the pain and suffering that permeate the stone. 95


97 Altar of Pain: This is the second altar. In order to raise the Black Skull, all three altars must be located and then the ritual for each performed. See the Special Rules below for the Ritual. A model that discovers this altar, must pass a BRAWN test or suffer a wound to a random location as the stone continues to sap the blood of those who come near it. Altar of Chaos: This is the third altar. In order to raise the Black Skull, all three altars must be located and then the ritual for each performed. See the Special Rules below for the Ritual. A model that discovers this altar, must pass a WILLPOWER test or be placed at one of the four entrances to the Valley as the altar is uncontrollable. Powder of the Green Orchid: The extremely rare Green Orchid, when ground down to a fine powder can be imbibed by a caster to increase their magical abilities. A small packet of the powder, enough for one use lies discarded here. A spell caster that uses the powder when casting arcana gains 1 point of temporary WILLPOWER. This point does not replace any WILLPOWER that was lost and cannot be held after the arcana is cast. Power Stone: A Power Stone can Hold up to 5 Difficulty Levels of spells. This one is currently empty. To hold spells, a caster simply prepares and casts the spell. It will then be held by the Power Stone. Any model can then cast that spell by passing a WILLPOWER test and spending an action. Warriors of Khozzer Nil: What appears to be nothing but a pile of bones suddenly stirs and rises from the ground. Three skeletons armed with long blades race to attack the trespassers. See Special Rules below for details on the Warriors of Khozzer Nil. Warriors of Khozzer Nil: What appears to be nothing but a pile of bones suddenly stirs and rises from the ground. Three skeletons armed with long blades race to attack the trespassers. See Special Rules below for details on the Warriors of Khozzer Nil. Warriors of Khozzer Nil: What appears to be nothing but a pile of bones suddenly stirs and rises from the ground. Three skeletons armed with long blades race to attack the trespassers. See Special Rules below for details on the Warriors of Khozzer Nil. Blood Pool of Mök: The Blood Pool of Mök is a copper basin filled with blood that never seems to empty. A model that stumbles upon this artifact must pass a WILLPOWER test or be compelled to drink from the basin. If a model does take a drink, it suffers a wound to a random location. The model will continue to spend an action doing this each turn until it passes a WILLPOWER test or is killed or rendered Unconscious. A model killed by the Pool, rises the next turn as a Warrior of Khozzer Nil. Special Rules Blood for the Dark God: Mök does not take lightly to his temples being disturbed without his approval. If three or more models are killed before the Black Skull has been revealed, then at the beginning of each turn a Warrior of Khozzer Nil will appear randomly at one of the entrances to the Valley. Impassable Cliff Walls: The walls of the valley are impassable at the start of the game, however, once models have entered, they can attempt to climb out. The walls of the valley are all Level 4. Reputation Experience: Players make up to 10 Reputation Experience Points in items. They cannot add Grade 1 models. Rituals: In order to raise the Black Skull from its resting place, the three altars must be found and their ritual performed. The Ritual requires the model to pass a BRAINS test and then spend a point of WILLPOWER. The Rituals for the Altar of Despair 96

98 and the Altar of Pain must be performed at the same time (a model must be on Wait and then activate either before or after the model at the other Altar). Once the rituals for the first two Altars have been completed, then the third can be done at any time. When the the third ritual is completed, the Black Skull will rise from the Skull Altar at the center of the board. Rising up with the Black Skull is Khozzer Nil (see below). The Skull can be taken by any model, however, any model that touches the Black Skull must pass a WILLPOWER test. If they fail, they lose one point of WILLPOWER. If the Black Skull has taken the model s last point of WILLPOWER, then the model is transformed into a Warrior of Khozzer Nil. Warriors of Khozzer Nil: All of those affected by the blast in the black city have been drawn to the Black Skull for millenia. Even in death, they are compelled to come to it. The Warriors of Khozzer Nil are all that remains of them. The Warriors will always attack the closest model and continue to attack until they are destroyed or the model they are attacking is killed or rendered Unconscious. If there are two models within 3 of a Warrior and it must choose which to attack, then the player who won Initiative on this round may choose the Warrior s target. The Warriors of Khozzer Nil will never attack Khozzer Nil. Khozzer Nil: Khozzer Nil was able to protect himself from the blast. After the devastation, he found the Skull sitting at the top of the ruined tower. But the power it released still coursed across the surface, when he grabbed it, his mind was quickly overwhelmed. Khozzer Nil went completely mad. The Black Skull has kept him alive over the centuries and he will not let it go without a fight. Khozzer Nil was at one time a High Priest, but he has been reduced to a gibbering madman, however he has access to some Arcana as long as the Skull is in his possession. Khozzer Nil does not need to prepare these spells and casting simply requires a WILLPOWER test. Create Warrior of Khozzer Nil: By spending a point of WILLPOWER Khozzer can turn any model that has died into a Warrior of Khozzer Nil. He can also use this spell to revive any Warrior that has previously fallen. The point of WILLPOWER is spent after the stat test is taken. Psychic Blast: Khozzer is able to send a powerful shockwave out from himself. This psychic blast pushes models away from him. All models within 8 are pushed back so that they are 8 from him. Models do not slam into objects and can be moved in any straight line away from Khozzer as long as they end up 8 away. Sap Will: Khozzer can target any model within 8 and line of sight. He then makes a comparative WILLPOWER test with the target model. If he wins, the other model loses a point of WILLPOWER and Khozzer can use it to replace any WILLPOWER he has lost. Khozzer Nil will use the Skull as a club if he is attacked in close combat. The Skull causes the same damage as a club. Also, if a model is struck by the Skull, they must pass a WILLPOWER test as though they have tried to grab the Skull (see Rules above). 97


99 By the Seven Sons of Myrdall! Introduction By the Seven Sons of Myrdall is a colliquial expression used to express shock, astonishment, disbelief. In Ibyssia it is considered a profanity and uttering it in front of a royal official in the capital city, punishable by a week in the stockade. Myrdall was a hunter in the far north of Tauren. The village he lived in with his wife and seven sons was on the fringes of the Ibyssian Empire. Only a small garrison of 10 soldiers was stationed there. One night, after their paybox had been delivered, the men became raucously drunk and rampaged through the town. Myrdall s wife, Arane, confronted them as they sought to break into a neighbor s home. Incensed that anyone should stand in the way of the royal army, the Captain of the guard hacked the woman down as her sons watched helplessly. Her body was kicked into an offal pit as the soldiers continued their revelry. The next morning, when Myrdall arrived back from the woods, he learned of what had happened. Blinded by grief, he caught the guards as they emerged from their barracks. Despite being outnumbered 10 to 1, Myrdall slew them all. As the rest of the village watched, he dragged each body out to the offal pit and kicked it in. He then sat by his wife s grave for three days, telling her all the things he had never told her while she lived. The provincial governor, upon hearing of the attack on his men, rode out with three score soldiers. Such a large force provided plenty of notice and Myrdall left his sons with his brother and went off into the woods. The governor sent his troops after the hunter, but they were unable to find the skilled woodsman. Enraged at being thwarted, the governor rounded up Myrdall s sons and determined to make an example of them for the whole village. His soldiers constructed a makeshift gallows and that evening, just before sundown, he sentenced all seven sons, the youngest just 3 years old, to be hung by the neck until dead. Many in the village openly wept and pleaded for their release. The governor would not be moved. He ordered the whole village assembled the next morning to watch as the bodies were cut down. Just after sunrise, as the governor railed against outlaws and traitors, one of the boys moaned. A collective gasp went up from the crowd and even some of the soldiers. Several women fell to their knees in prayer. The Captain of the governor s retinue examined each boy. Despite hanging by their necks through the night, each boy still lived. Many claimed that the gods had intervened to save them; that it was a sign. Agitation and anger began to build. The governor, sensing trouble brewing, ordered rocks to be tied to the boy s ankles. This would ensure their deaths and end any talk of signs. The following morning, the governor again herded all the people of the town out to see the lifeless bodies and again he found that the boys still lived. For three more days the boys hung there, guarded day and night by 20 men as villagers repeatedly sought to free them. Finally, Myrdall received word of his son s and the torture they endured. He raised a small force of hunters and villagers from the surrounding area and attacked the empire s troops. The governor and a handful of his soldiers escaped the onslaught and fled back to the provincial capital. Myrdall cut each of his son s down, refusing all help. Each boy whispered through dry, cracked lips. Each child told him of their oath to remain in this world until they saw their father again. They would not let him endure the pain he had at not being their when their mother died. Myrdall held all seven boys close as each one then slowly slipped away. The Ibyssian Empire s decline began shortly after this. Myrdall is said to have led the raid that finally brought an end to the provincial governor, but he disappears from the records after that. Some say he died in the final battle that drove Ibyssia out of Sundland, others say he wandered off into the mountains after he slew the governor where he eventually joined his wife and sons. 98

100 Scenario and Victory Conditions A hunter from Sundlan, tracking Great Northern Deer near the Land of Ice, has stumbled across a small temple built deep in a pine woods. Though he could not read the inscriptions on it, he was able to trace a symbol that was prominently featured. That sumbol, a Great Deer surrounded by seven stars, was the symbol Myrdall embalzoned on his shield during the wars. To find evidence of such a legendary figure would be a great boon to the kingdoms of the north. Ibyssia, on the other hand, would like to see all traces of the man eliminated. Two parties have set out to find the temple, one will seek to recover proof of Myrdall from it, that can be displayed in capital cities throughout the north while the other will seek to destroy all the evidence they can. But already winter has begun to take hold and could prove a deciding factor in the outcome. Game Board This 24 x 24 game board will represent the woods where the tenple that holds the body of Myrdall is located. It should be heavily wooded around the edges, up to about 6 in on all sides. In the center 12 x 12 area will be the temple has fallen into disrepair and is mostly ruins now. The temple can consist of the ruins of one large building or several smaller ones. Characters The first party represents the people of the north. Their goal is to recover as much proof as possible that this is the resting place of the great hero. It will consist of a Grade 3 Barbarian Warlord, a Grade 2 Shaman Apprentice, and 2 Grade 1 Barbarian Scouts. The second party has been sent by Ibyssia to destroy any trace of the villain Myrdall. It consists of a Grade 3 Major Noble, a Grade 2 Captain of the Guard, and 2 Grade 1 City Guard. Players should set up on opposite sides of the board. Encounter Markers This scenario uses nine Encounter Markers. These should be placed randomly about the board. No Encounter Marker may be placed closer than 6 from any board edge and no closer than 3 from any other marker. If you are not using specific Encounter Cards, you can assign each of the events below to a card from a standard playing card deck. Shield of Myrdall: Half buried under a small pile of stones you spy a hint of bronze glinting in the sun. If the model spends an action to move the stones away it will find the Shield of Myrdall. This great bronze shield is emblazoned with the symbols of Myrdall, the Great Deer surrounded by seven stars. Even after all this time, the shield has lost none of its strength. A model using this shield receives +2DR to all locations as well as the normal shield rules. If the model wielding it ever suffers a Critical Failure roll, they also receive +2 to prevent the shield from being sundered. The shield is a powerful symbol and worth 3 Victory Points. Helm of Myrdall: You stumble across something metal sticking out of the ground. Quickly reaching down you discover a metal helmet caked in mud. Apparently taken from his grave at some point, this magnificent iron helm obviously belonged to the great hero. It s horsehair top has long since disappeared, but Myrdall s name is clearly inscrobed on it. A model wearing this helm receives +2DR for the Head location. Not as potent a symbol as the shield, the helm is still worth 2 Victory Points. 99
101 Stone Tablet: A close examination of some rocks reveals that one of them has some writing on it. If the model passes a BRAINS test, then it can read the inscription and the story of Myrdall s final resting place. It was here, that Myrdall himself came and built the shrine in the waning years of his life. It was here that he prayed every day until one day, a local monk found his lifeless body at the altar and laid him to rest in the courtyard beside the temple. The Stone Tablet is worth 1 Victory Point. Herd of Great Deer: Startled from their grazing, a herd of Great Deer stampedes through the woods. The deer s path will start at the board edge closest to this marker and move in a straight line through this marker and off another board edge. The player that won initiative for this round can determine the path as long as it meets the criteria above. Any model within 1 of the path the deer take, must pass a DODGE test or suffer a single WS5 hit to a random location and be placed prone. The Mad Monk: A sudden rustling in the bushes nearby gets your attention. As you approach, a gaunt, somewhat mad looking figure leaps out at you. The monk will attack the model that triggered this encounter unless the model beats the monk in a comparative BRAINS test to convince the monk that it is here to honor Myrdall and not desecrate his temple. Since the first monk found Myrdall s body, there has been someone to watch over the site. Usually, the current monk will take a local hunter into his confidence and when he is about to die, pass the honor on to him. If the monk is convinced that you are there out of respect, then he will join your party and attack the opposing side. If the BRAINS test is failed, then no other model can attempt to convince him and he will continue to attack the closest model until he is killed or all the other models are dead or have left the board. Collpasing Crypt: As you search among the ruins, the ground beneath you suddenly gives way. You fall a short distance down. The model sufferes no damage but must spend an action to climb back out. If the Arctic Environment rules are in effect, the model must also pass a DODGE test in order to climb out. Another model, within 1 of the Encounter Marker, may spend an action to pull the model out instead. Fearsome Totem: Clearing some undergrowth away from a section of the temple you suddenly find yourself face to face with a Fearsome Totem. To protect the site from those who would seek to desecrate it, the monks that have guarded the temple have contructed a Fearsome Totem. The totem has the effect of Cause Fear Grade 1. Any Grade 1 model that comes with 6 of the totem, must pass a GUTS test or lose a point of WILLPOWER. If that was their last point of WILLPOWER, then they also suffer the effects of panic immediately. Nothing: The last two Encounter Markers are nothing. Special Rules Extreme Climate: After players have purchased any Reputation Experience point items, but before the game begins, roll to determine whether winter has set in or not. To determine this, roll a d10 and on a 1-5, winter has arrived and you should use the Arctic Environment rules (see page 83). Reputation Experience: If playing this scenario as part of a campaign, players can spend Reputation Experience before the start of this game. They can only purchase equipment and cannot add models to their team. If being played as a one-off scenario, then each player should receive 10 Reputation Experience points with which to euip their party with extra items. 100
102 Slavers of the Zhunaweh Coast Introduction The slave markets of Skadia, Zahran, and Tomnien are never without buyers. Because of this, the demand for slavers is always high. Anyone caught alone or in a party to small to resist a raid by slavers can find themselves for sale in the slave markets, whether he be high-born noble or lowest servant. The preferred method for the slaver is to ride the waves in a fast long boat. They will sail the coast lines looking for the signs of villages not far from the shore. A fishing boat, smoke from a campfire, a woman cleaning fish on a stretch of beach are all signs that mark a nearby village to a slaver. Once spotted, the long boat will continue on its way and double back under cover of night. It will then land close to where the captain feels the vilage could be and a small scouting party will begin the search. If a village is discovered before the first light of dawn, the slavers will remain and strike just as people begin to awaken. If no village is discovered, the long boat is quickly shoved back into the water. It will then find a place to anchor far from where it had begun its search and try again the following night. Once a village is found and subdued, the slavers quickly separate the men from the women. Those most physically fit and capable of pulling an oar or working a mine are shackled with heavy chains and loaded aboard. The weak and the elderly are driven into the countryside or killed. If a slaver crew happens to get more slaves than their boat can hold, they sometimes send part of the crew overland with those least likely to try and run off. But only the largest and most able crews would split their manpower since another slaver may just as easily find them to be easy pickings. Goran, one of the greatest heroes of Tauren, spent time as a slave on an Ibyssian warship. When he was still young, he had been apprenticed to a Shaman. It was during the first few months of his new life that slavers appeared off the coast of Njorden. Ibyssia was battling Guhl for control of the inner sea that separated them from Njorden. Though no large, pitched sea battles had taken place, the constant raids and skirmishes had led to the loss of men by both sides. Where once they had many seaman in their navies to man the oars, now those men were needed for other tasks on the boat. Both kingdoms turned to slavers to help them fill out their crews. One of these slave ships landed not far from where Goran and his master gathered the lichen needed for a particular ritual. The boat had landed in a sheltered cove and Goran stumbled on a group of men as he scrambled over some rocks. They were startled by his sudden appearance, but recovered quick enough to grab him before he could take off. They bound and gagged him. His master approached completely unaware. Goran was helpless to warn him. The old man s strength and skill surprised the slavers and one was laid low with a vicious blow to the head from the Shaman s staff. Bit the victory wa short-lived when one of the slavers let loose an arrow that struck the man in the heart. He slumped to the ground dead and Goran was hauled off to the waiting boat. He was sold for a few greasy pieces of silver and spent the next two years manning the oars of an Ibyssian warship. He was in over a dozen battles during that time. Many men, both slave and sailor, died around him. Sometimes he fought, still chained to his bench. The scars that criss-cross his back he received at the end of the slave keeper s whip. He finally gained his freedom during a night battle. The ship he was on was attacked by two from Guhl. They had been shadowing the larger Ibyssian ship since dawn, always staying out of sight of her watch. When the sun set, they quickened their pace and shaded their fires. When they were within arrow shot, they let loose a hail of flaming arrows. The mast and sail were quickly engulfed in flames. Men began scrambling about trying to douse the fire. As they did, the two Guhl ships moved in. Both disgorged their soldiers quickly onto the now burning warship. A terrific battle raged across the deck. Goran seized the opportunity to free himself from his oarsmen s bench and led several of the other slaves in an escape. The five men grabbed what weapons they could from the dead and dying and, after tossing sevral empty barrels overboard, leapt into the ocean. Goran was the last to jump. He spied the slave keeper looking to make good his own escape from the burning ship. He hefted the spear he had found and hurled it at the man. The spear struck right beneath man s arm and pierced his heart. The man was dead before his body fell. 101

103 Scenario and Victory Conditions Goran has traveled much of Tauren and now finds himself traveling with Mbeto a great warrior from Zhunaweh. Mbeto s village lies along the western coast of the kingdom and as they approach, they spy a slaver s ship hidden within a small cove. Mbeto knows that at this time of day, the hunters would be out until nearly sunset, still many hours away, and the village would have only women and old folks. Both parties will be attempting to get as many civilians as possible and escort them off the board. The heroes will be at a disadvantage since there will be only two of them. Game Board This 24 x 24 board will represent a jungle village. There will be a number of small huts in the center of the board surrounded by trees and jungle foliage. None of the jungle is difficult terrain as it has been cleared over time by the villagers. Characters The heroes will have Goran (Grade 3 Barbarian Warlord) and Mbeto (Grade 3 Savage Headman). They will be trying to get the villagers off their starting table edge The Slavers will have a Grade 2 Minor Noble and 5 Grade 1 Savage Warriors, They will be trying to capture prisoners and get them off their starting table edge. Players should set up on opposite table edges. Encounter Markers This scenario uses nine Encounter Markers. These should be placed randomly about the board. No Encounter Marker may be placed closer than 6 from any board edge and no closer than 3 from any other marker. If you are not using specific Encounter Cards, you can assign each of the events below to a card from a standard playing card deck. Villagers: You have found several villagers cowering in fear. The heroes must pass a BRAINS test in order to convince the people to follow them. The slavers must pass a BRAWN test to intimidate the people into following them. Each additional slaver model within 3 of the model that finds them adds +1 to the BRAWN test. Villagers: You have found several villagers cowering in fear. The heroes must pass a BRAINS test in order to convince the people to follow them. The slavers must pass a BRAWN test to intimidate the people into following them. Each additional slaver model within 3 of the model that finds them adds +1 to the BRAWN test. Village Children: You have found a small group of children trying to hide from the slavers. The heroes must pass a BRAINS test in order to convince the people to follow them. The slavers must pass a BRAWN test to intimidate the people into following them. Each additional slaver model within 3 of the model that finds them adds +1 to the BRAWN test. Because the children are small, any model moving with them is at SPEED -1 (minimum 1 movement). Fishing Net: A fishing net hangs to dry. This high quality net can be thrown up to a model s BRAWN in inches. If the target is hit, instead of taking a wound, the model becomes entangled. The only thing the model can do is attempt to break free from the net. To break free, the model must pass a BRAWN test. 102
104 Stash of Hunting Spears: You come across three hunting spears. These can be used as normal spears. War Shield: Not needed for the day s hunting, you find a warrior s shield. This can be used per the normal Shield rules. Constrictor: Sensing a chance to strike, a large constrictor drops from the trees onto the model that triggered this encounter. The constrictor will attack when the encounter is first triggered and then continue to attack at the end of each turn. If the initial model is able to break free, then the snake will attack the closest model on its activation. If it kills any model, it will drag its victim into the woods and no longer attack. Mantrapper Vines: As you move about the village you pause for a moment. as you do a large green vine curls about your leg and attempts to pull you into the jungle. The Mantrapper is a carnivorous plant of the jungles in the south. Capable of only minimal movement, the Mantrapper positions itself close to human settlements. It then sends its powerful vines out to catch unwary victims and drag them to its waiting maw. The model that is caught by the vine must pass a BRAWN test at -2 or be dragged 3 toward the nearest board edge. If it passes the test it is still held and cannot move. If the model is pulled off the edge. it is removed from the game. The Mantrapper vine can also be hacked at. All hits are automatic. It has a DR of 8 and three wound boxes. If it loses its last wound box, then the model is released as the vine is severed. Mud Pit: As you move about the vuillage you suddenly find yourself ankle deep in mud. Recent rains have turned the area in a muddy quagmire. The model must pass a DODGE test or be placed Prone as it slips in the mess. The model will remain Prone until it passes a DODGE test to regain its footing. Special Rules Rain Storm: The coastal area where this village is located is prone to sudden downpours of rain. At the beginning of every other turn, the player with Initiative should roll a d10. On a result of 1-3, thunderclouds begin to appear overhead. Every turn after this, the player with Initiative should roll a d10. On a result of 1-3 again, a torrential downpour begins. Models cannot make ranged weapon attacks. All models will also have their SPEED stat reduced by 1 (minimum of 1 movement). If a model attempts to run, it must pass a DODGe test beforehand or it is placed Prone after slipping in the mud. Slavers: The Slavers will not attempt to kill any of the villagers as there to capture as many as possible and even failure today means a return trip can be made later. They will not hesitate to try and kill the heroes, though. Villagers: If a Hero has discovered Villagers and has convinced them into following, they will stay with him unless he is rendered Unconscious. If that happens, a slaver must still Intimidate them into following him. If a slaver is engaged in combat and has Villagers following him, then another Hero can attempt to convince the Villagers to follow him. The model must make the same BRAINS test as if he had just found them. Mbeto receives +2 to all his BRAINS test to convince the villagers to follow him. 103

105 The Eye of Tehy Introduction When the world was young, the gods came down from the heavans and walked among men. They taught men how to hunt and farm; how to harness fire and how to build great temples. For one hundred years peace reigned. But during that time Mök arrived. He did not arrive with the other gods, and though they knew of him, they spoke little about him. Whenever the subject of Mök came up, people were told to avoid him. But Mök promised things to those who would listen; power, wealth, beauty, whatever the person desired could be theirs if they just listened to his words and followed his teachings. Soon, mistrust crept into the hearts of men. Open warfare did not come yet, that would be later with the Ungeheuer, but now locks went on doors and people armed themselves. Mök s plans did not go unnoticed, for the skies were ruled by Tehy from golden throne in the clouds. Anything that occurred beneath the sky he would see. Mök and his followers went deeper underground, but as soon as they came out from their hiding places, Tehy would see them and stop their plans. With his every step watched, Mök decided to seek a truce. He came before the Sky God with his words filled with remorse. Tehy was not fooled by his honeyed words, but accepted his apology and the two pledged to work toward better understanding. A feast was held in honor of the truce and everyone drank and ate heartily. That night, as the Sky God slept. Mök snuck into his bed chamber. No power that he possessed could kill Tehy, so his plan was to prevent the god from interfering in his plans. With a knife in each hand, he plunged them into the eyes of the Sky God and plucked them out. a heart of red at its center. These extremely rare diamonds became known as the Eyes of Tehy. Whenever these stones are found, the priests of Tehy are quick to lay claim to them. If they are unable to purchase them for a reasonable amount, they are not above hiring outsiders to acquire them. The priests believe that because Tehy was blinded that he now uses the stones to keep watch over the Tauren. Since the stones are rare to begin with and the priests of Tehy get most of the ones that are found, these gems are of the highest value. Every woman of noble birth seeks to have one hanging from her neck. Every ruler seeks to have one that he can display to those beneath him. With that kind of demand, there are always those who would be willing to risk their lives to get one. With criminal activity controlled by a boss in every city and none of them wishing to anger the priests, most of those seeking the gems will turn to outsiders with no local ties in. On top of the danger that simply securing the stones brings, anyone operating within a city without the consent of its Boss, risks having a priced placed on his head. It takes a gutsy and confident criminal to brave all those obstacles. Scenario and Victory Conditions Every temple to Tehy in the city of Ibyssia has at its center a clear diamond with a heart of red. These diamonds are well-guarded but still a tempting target for thieves. It rarely happens but sometimes a thief does prove brave enough to risk the guardians of the temple and reach the Eye at the heart of the temple. The skies raged that night as Tehy thundered in his search for Mök. Tears and blood streamed down his face. Each drop that hit the ground became a diamond of exquisite beauty with 104 You are one of those thieves. And together with a young companion, you seek to try your luck at stealing an Eye of Tehy.
106 Game Board This game will start off with a single 6 x 6 room. There will be two doors that exit from it opposite each other. There should be multiple additional rooms available, as described below in the Special Rules section, but these will not be placed until they are drawn from the deck of room cards. This will create an ever expanding layout that will change with each game played. Characters If played solo, the player will control the thief Degredo (Grade 2 Burglar; see Appendix 1 for more on the Burglar) and his companion (Grade 1 Pickpocket). His goal will be to find and exit the board with a the Eye of Tehy. Guards and guardians will be controlled by the game mechanics. If a second player is playing, then the guards will be controlled by him. Encounter Markers Instead of Encounter Markers, there will be a deck of 15 Encounter Cards and a deck of 10 Corridors/Room cards. At the begining of each turn that Degredo is not in combat, the player will draw a Room Card and an Encounter Card. The room or corridor can be placed at any opening that the player wishes. There are more Encounter Cards than there are rooms. This could lead to some Encounters never being drawn. But this will also allow players to continue to have events occur as they try and escape from the temple. Encounter Cards Guard: A guard has entered the newest room placed. He will have his back to the entrance that Delgredo is entering from and be positioned in the center of the room. If this card is drawn after all rooms have been placed, the guard should be placed in the last room that Degredo was in. If the card drawn was a corridor, he will be at the farthest end from Degredo. Guard: A guard has entered the newest room placed. He will have his back to the entrance that Delgredo is entering from and be positioned in the center of the room. If this card is drawn after all rooms have been placed, the guard should be placed in the last room that Degredo was in. If the card drawn was a corridor, he will be at the farthest end from Degredo. Guard: A guard has entered the newest room placed. He will be facing the entrance that Delgredo is entering from and be positioned in the center of the room. If this card is drawn after all rooms have been placed, the guard should be placed in the last room that Degredo was in. If the card drawn was a corridor, he will be at the farthest end from Degredo. Guard: A guard has entered the newest room placed. He will be facing the entrance that Delgredo is entering from and be positioned in the center of the room. If this card is drawn after all rooms have been placed, the guard should be placed in the last room that Degredo was in. If the card drawn was a corridor, he will be at the farthest end from Degredo. Guard Patrolling: A guard will begin in the newest room/corridor placed and enter the room Degredo is currently in on the next turn. If this card is drawn after all rooms have been placed, the guard should be placed in the last room that Degredo was in. Guard Patrolling: A guard will begin in the newest room/corridor placed and enter the room Degredo is currently in on the next turn. If this card is drawn after all rooms have been placed, the guard should be placed in the last room that Degredo was in. Guard Patrolling: A guard will begin in the newest room/corridor placed and enter the room Degredo is currently in on the next turn. If this card is drawn after all rooms have been placed, the guard should be placed in the last room that Degredo was in. 105
107 Zealots: Two zealots will enter the room from the last room Degredo was in at the end of the turn. They are deep in conversation so will be at -2 to any spotting checks (See In the Shadows under Special Rules below). Collection Box: A small collection box has been mistakenly left in the newest room/corridor added. Only a few coins rattle inside, but what providence has left, no thief should disregard. If used as part of a campaign, the collection is worth 2 Reputation Experience Points. Long Blade: Propped against a wall in the newest room placed is a well crafted Long Blade. Apparently, one of the temple captains put it down and forgot to retrieve it. This Long Blade is +2TH and +2WS. Javelin of Tehy: This should be placed in the newest room placed. It is mounted on the wall and left as an object of devotion. It has the same properties as the Arcana of the same name. Alarm: This room/corridor has been set with an alarm. It is a simple floor trigger, designed to catch the unwary. A model that enters the area with the alarm, must pass a DODGE test or alert all guards in the temple. If the model fails the test, then the alarm is sounded and all guards will begin moving toward the room/corridor. If no guards are currently on the board, then two guards are placed in the last room that Degredo was in and they will move toward the chamber. Nothing: The last three cards are no event. Rooms/Corridors Some rooms contain references to the cardinal points (north, south, east, and west). These are used for reference and do not mean that the room has to be aligned in that way. It is just a device to allow easy placement of particular elements of the rooms. Straight Corridor: This is a straight corridor. It should run approximately 8. It is well lit with sconces on the wall every 2 and no shadows. Straight Corridor: This is a straight corridor. It should run approximately 8. It is well lit with sconces on the wall every 2 and no shadows. Bent Corridor: This corridor travels for 4 and then turns 90 and goes for another 4. It is well lit with sconces on the wall every 2 and no shadows. Small Storage Room: This small room is just 6 x 6. There are doors on the south and east walls. Both doors are locked. But this is a non-essential storage rooms so the locks are simple and at +1 to open. The room is dark inside. If a Guard is drawn for this room, then that Encounter Card is shuffled back into the deck and no Encounter Card is taken. A Patrolling Guard will not enter this room if the door is locked and will stay in its starting room. Small Storage Room: This small room is just 6 x 6. There are doors on the south and east walls. Both doors are locked. But this is a non-essential storage rooms so the locks are simple and at +1 to open. The room is dark inside. If a Guard is drawn for this room, then that Encounter Card is shuffled back into the deck and no Encounter Card is taken. A Patrolling Guard will not enter this room if the door is locked and will stay in its starting room. Small Chapel: This small room is just 6 x 6. It is a small side chapel designed for more private worship. There is an altar at the north end of the room and two entrances located on the east and west walls. The room is mostly darkened as there is no one worshipping right now. Only the 2 from the north wall is illuminated. 106
108 Secondary Acolytes Chamber: This dormitory style room is 8 long by 6 wide. There is one door on each of the 6 sides. There are several bunk beds in the room. Because the main Acolytes chamber is elsewhere, this one is only used during special events when visiting acolytes arrive. The room has a wall sconce next to each door. The light only extends 2 from the doorway. Preparation Room: This is a small 4 x 4 room that the high priest of the temple uses to prepare for a ceremnony in the main temple. A brazier is always lit in the center of the room and it is well-illuminated. The Ceremonial Chamber: This large room is 12 x 12. There is one double row of pillars that runs from north to south. At the north end of the room is a large stone altar. There is a door at the south end, opposite the altar and one door on the east and one door on the west sides. These doors are on either side of the altar. Chamber of the Eye: This small room is just 6 x 6. In the center of the room is a pedastal on which rests The Eye of Tehy. The room is well lit with sconces on on the center of each wall. The door to this room is locked with a particularly difficult lock. All tests to open it are at -2. If a Guard is drawn for this room, then that Encounter Card is shuffled back into the deck and no Encounter Card is taken. A Patrolling Guard will not enter this room if the door is locked and will stay in its starting room. Special Rules Guards: The guards are Grade 1 Temple Guards. They should be armed with spears and shortblades, but can have any other ability. The guards are not overly vigilant as they believe the temple is fairly well guarded and not much of a tempting choice to thieves. Any attempt to spot a thief in the shadows will be at -1. If combat occurs in a room/corridor adjacent to a guard they will move to investigate and all spotting checks will be at +1. Combat consists of any return strike made by a Temple Guard on either of the two thieves. If only the thieves strike and the guard is killed, then other guards do not hear anything. In the Shadows: The shadows in the temple are deep and unless a model knows to look into them, will have a hard time spotting anything. If a guard enters a room and the thieves are in the shadows, the guard must pass a BRAINS test to post them. If a guard enters a room and does not spot anything, it will continue moving. It will move into the previous room that Degredo was in and after that it will return back to the initial room it was in. This pattern will not be repeated once the guard returns to its starting point, it will not move unless it hears combat. Chamber of the Eye: The Chamber of the Eye is locked, but that is not its only defense. Once inside the room, a thief must get past the traps and locks that guard it. First, the thief must pass a DODGE test to cross the floor without stepping on an alarm trigger. If the model fails the test, then the alarm is sounded and all guards will begin moving toward the chamber. If no guards are currently on the board, then two guards are placed in the last room that Degredo was in and they will move toward the chamber. Once across the floor, the thief must open the lock to the case that holds the Eye of Tehy. This intricate lock is -2 to open. The case cannot be shattered or moved with anything Degredo or his assistant have with them. If the lock is not opened, then an alarm sounds as above. Sneaking: Either of the thief models can attempt to sneak up on a guard. As long as the guard does not turn around the model can approach to within 3 without alerting the guard. Once the model gets within 3 the guard will take a BRAINS test to determine if he hears the approach. If he does hear the approach, he will spin to meet his attacker (no Backstab ability for the thief). 107
109 Sample Characters Name: Goran Class: Bar. Warlord (Grade 3) Willpower (3) rrr Location (Die Roll) Base DR Wound Level Head (1) Brain=2 4 BR=3 BR=2 Unconscious Torso (2-5) Arms (6-8) Legs (9-10) Brawn=4 Guts=7 Bow=2 Blade=5 Dodge=4 Speed=5 Broadsword Adventures Savage Tales of Fantasy 4 BN=5 GT=8 4 BW=2 BD=5 4 DG=4 SP=5 BN=5 GT=8 BW=2 BD=4 DG=3 SP=4 BN=4 GT=8 BW=2 BD=4 DG=3 SP=3 BN=4 GT=7 BD=3 SP=2 Unconscious BD=2 SP=1 Attack BD-1 Cannot Carry Crawl Only, 1 movement Skills: Shield, Expert Fighter, Flurry of Blows +1, Mighty Cleave, Weapon Trained, Arcane Studies, Savvy Weapon Close Combat Short Medium Long Range TH WS Range TH WS Range TH WS Range TH WS Fist 0 0 BN Long Blade 1 +2 BN Name: Phaecia Class: High Priest (Grade 3) Willpower (6) rrrrrr Location (Die Roll) Base DR Wound Level Head (1) Brain=6 3 BR=6 BR=3 Unconscious Torso (2-5) Arms (6-8) Legs (9-10) Brawn=2 Guts=7 Bow=2 Blade=2 Dodge=3 Speed=5 Broadsword Adventures Savage Tales of Fantasy 3 BN=2 GT=7 3 BW=2 BD=2 3 DG=3 SP=5 BN=1 GT=7 BD=2 SP=4 BN=1 GT=6 BD=1 SP=3 BN=1 GT=5 BD=1 SP=2 Unconscious BD=1 SP=1 Attack BD-1 Cannot Carry Crawl Only, 1 movement Skills: Arcane Studies, Deception, Savant, Wall of Fire, Arcana of Others (Forseen Failure), Night Dust Weapon Close Combat Short Medium Long Range TH WS Range TH WS Range TH WS Range TH WS Fist 0 0 BN Short Blade 0 +1 BN+1 BN+2 0 BN
110 Broadsword Adventures Savage Tales of Fantasy Name: Mbeto Class: Headman (Grade 3) Willpower (3) rrr Location (Die Roll) Base DR Wound Level Head (1) Brain=3 3 BR=3 BR=2 Unconscious Torso (2-5) Brawn=4 Guts=7 4 BN=4 GT=8 BN=3 GT=8 BN=3 GT=7 BN=1 GT=6 Unconscious Arms (6-8) Bow=3 Blade=3 4 BW=3 BD=4 BW=2 BD=4 BW=2 BD=3 BD=3 BD=2 Attack BD-1 Cannot Carry Legs (9-10) Dodge=3 Speed=5 3 DG=4 SP=5 DG=4 SP=4 DG=3 SP=3 DG=3 SP=2 SP=1 Crawl Only, 1 movement Skills: Shield, Killer Instinct, Weapon Trained, Iron WIll, Terrain Cognition Weapon Close Combat Short Medium Long Range TH WS Range TH WS Range TH WS Range TH WS Fist Spear 2 0 BN+2 BN+4-1 BN Broadsword Adventures Savage Tales of Fantasy Name: Khozzer Nil Class: Old Mother (Grade 2) Willpower (5) rrrrr Location (Die Roll) Base DR Wound Level Head (1) Brain=4 4 BR=2 BR=1 Killed Torso (2-5) Brawn=2 Guts=8 4 BN=3 GT=8 BN=2 GT=8 BN=2 GT=6 Unconscious Arms (6-8) Bow=2 Blade=2 4 BW=2 BD=2 BW=2 BD=1 BD=1 BD=1 Attack BD-1 Cannot Carry Legs (9-10) Dodge=3 Speed=5 4 DG=3 SP=5 SP=3 SP=2 SP=1 Crawl Only, 1 movement Skills: Concealed Weapon, Fearless, Terrain Cognition Weapon Close Combat Short Medium Long Range TH WS Range TH WS Range TH WS Range TH WS Fist 0 0 BN Club 0 +1 BN
111 Broadsword Adventures Savage Tales of Fantasy Name: Heftig Class: Barbarian Hero (Grade 2) Willpower (3) rrr Location (Die Roll) Base DR Wound Level Head (1) Brain=2 5 BR=2 BR=1 Killed Torso (2-5) Brawn=3 Guts=7 4 BN=4 GT=7 BN=4 GT=7 BN=2 GT=6 Unconscious Arms (6-8) Bow=2 Blade=4 4 BW=2 BD=5 BW=2 BD=4 BD=4 BD=2 Attack BD-1 Cannot Carry Legs (9-10) Dodge=3 Speed=5 4 DG=4 SP=5 DG=4 SP=4 DG=3 SP=3 SP=1 Crawl Only, 1 movement Skills: Weapon Trained, Savvy Weapon Close Combat Short Medium Long Range TH WS Range TH WS Range TH WS Range TH WS Fist 0 0 BN Long Blade 1 +2 BN Sling Broadsword Adventures Savage Tales of Fantasy Name: Kurze Class: Captain of the Guard (Grade 2) Willpower (3) rrr Location (Die Roll) Base DR Wound Level Head (1) Brain=3 5 BR=3 BR=1 Killed Torso (2-5) Brawn=3 Guts=7 5 BN=4 GT=7 BN=3 GT=6 BN=2 GT=5 Unconscious Arms (6-8) Bow=3 Blade=4 3 BW=4 BD=4 BW=3 BD=3 BW=3 BD=3 BW=2 BD=1 Attack BD-1 Cannot Carry Legs (9-10) Dodge=3 Speed=5 3 DG=3 SP=5 SP=4 SP=2 SP=1 Crawl Only, 1 movement Skills: Stalwart Defender. Weapon Trained Weapon Close Combat Short Medium Long Range TH WS Range TH WS Range TH WS Range TH WS Fist 0 0 BN Short Blade 0 +1 BN+1 BN+2 0 BN Short Blade 0 +1 BN+1 BN+2 0 BN
112 Broadsword Adventures Savage Tales of Fantasy Name: Class: Cap. Temple Guard (Grade 2) Willpower (3) rrr Location (Die Roll) Base DR Wound Level Head (1) Brain=2 3 BR=2 BR=1 Killed Torso (2-5) Brawn=4 Guts=6 3 BN=5 GT=6 BN=3 GT=5 BN=2 GT=4 Unconscious Arms (6-8) Bow=3 Blade=4 3 BW=3 BD=4 BW=2 BD=3 BW=2 BD=3 BD=1 Attack BD-1 Cannot Carry Legs (9-10) Dodge=3 Speed=5 3 DG=3 SP=5 SP=4 SP=2 SP=1 Crawl Only, 1 movement Skills: Shield, Weapon Trained, Intimidate Weapon Close Combat Short Medium Long Range TH WS Range TH WS Range TH WS Range TH WS Fist 0 +1 BN Long Blade 1 +2 BN Broadsword Adventures Savage Tales of Fantasy Name: Class: Acolyte (Grade 2) Willpower (4) rrrr Location (Die Roll) Base DR Wound Level Head (1) Brain=4 3 BR=5 BR=3 Killed Torso (2-5) Brawn=2 Guts=7 3 BN=2 GT=7 BN=1 GT=6 BN=1 GT=6 Unconscious Arms (6-8) Bow=2 Blade=3 3 BW=2 BD=3 BW=2 BD=2 BD=2 BD=1 Attack BD-1 Cannot Carry Legs (9-10) Dodge=3 Speed=5 3 DG=3 SP=5 SP=4 SP=2 SP=1 Crawl Only, 1 movement Skills: Concealed Weapon, Observant, Medicinal Balm x1, Night Dust x1 Weapon Close Combat Short Medium Long Range TH WS Range TH WS Range TH WS Range TH WS Fist 0 0 BN Short Blade 0 +1 BN+1 BN+2 0 BN
113 Broadsword Adventures Savage Tales of Fantasy Name: Ibyssian Lion Guard #1 Class: City Guard (Grade 1) Willpower (2) rr Location (Die Roll) Base DR Wound Level Head (1) Brain=2 3 BR=2 Killed Torso (2-5) Brawn=3 Guts=5 3 BN=3 GT=6 Killed Arms (6-8) Bow=3 Blade=3 3 BW=3 BD=3 BD=1 Attack BD -1, Cannot Carry Legs (9-10) Dodge=3 Speed=5 3 DG=3 SP=5 SP=1 Crawl Only, 1 movement Skills: Shield: Roll 2d10 when defending Close Combat Short Medium Long Weapon Range TH WS Range TH WS Range TH WS Range TH WS Fist 0 0 BN Long Blade 1 +2 BN Broadsword Adventures Savage Tales of Fantasy Name: Ibyssian Lion Guard #2 Class: City Guard (Grade 1) Willpower (2) rr Location (Die Roll) Base DR Wound Level Head (1) Brain=2 3 BR=2 Killed Torso (2-5) Brawn=3 Guts=5 3 BN=3 GT=6 Killed Arms (6-8) Bow=3 Blade=3 3 BW=3 BD=3 BD=1 Attack BD -1, Cannot Carry Legs (9-10) Dodge=3 Speed=5 3 DG=3 SP=5 SP=1 Crawl Only, 1 movement Skills: Shield: Roll 2d10 when defending Close Combat Short Medium Long Weapon Range TH WS Range TH WS Range TH WS Range TH WS Fist 0 0 BN Spear 2 0 BN+2 BN+4-1 BN
114 Broadsword Adventures Savage Tales of Fantasy Name: Class: City Guard (Grade 1) Willpower (2) rr Location (Die Roll) Base DR Wound Level Head (1) Brain=2 3 BR=2 Killed Torso (2-5) Brawn=3 Guts=5 3 BN=3 GT=6 Killed Arms (6-8) Bow=3 Blade=3 3 BW=3 BD=3 BD=1 Attack BD -1, Cannot Carry Legs (9-10) Dodge=3 Speed=5 3 DG=3 SP=5 SP=1 Crawl Only, 1 movement Skills: Shield: Roll 2d10 when defending Close Combat Short Medium Long Weapon Range TH WS Range TH WS Range TH WS Range TH WS Fist 0 0 BN Spear 2 0 BN+2 BN+4-1 BN Broadsword Adventures Savage Tales of Fantasy Name: Class: Temple Guard (Grade 1) Willpower (2) rr Location (Die Roll) Base DR Wound Level Head (1) Brain=2 4 BR=2 Killed Torso (2-5) Brawn=3 Guts=7 3 BN=3 GT=7 Killed Arms (6-8) Bow=2 Blade=2 4 BW=2 BD=2 BD=1 Attack BD -1, Cannot Carry Legs (9-10) Dodge=3 Speed=5 3 DG=3 SP=5 SP=1 Crawl Only, 1 movement Skills: Close Combat Short Medium Long Weapon Range TH WS Range TH WS Range TH WS Range TH WS Fist 0 0 BN Spear 2 0 BN+2 BN+4-1 BN Short Blade 0 +1 BN+1 BN+2 0 BN
115 Broadsword Adventures Savage Tales of Fantasy Name: Degredo Class: Burglar (Grade 2) Willpower (3) rrr Location (Die Roll) Base DR Wound Level Head (1) Brain=3 3 BR=3 BR=1 Killed Torso (2-5) Brawn=3 Guts=7 3 BN=3 GT=7 BN=2 GT=6 BN=1 GT=5 Unconscious Arms (6-8) Bow=2 Blade=3 3 BW=2 BD=4 BW=2 BD=3 BD=3 BD=2 Attack BD-1 Cannot Carry Legs (9-10) Dodge=3 Speed=5 3 DG=3 SP=5 DG=3 SP=4 SP=3 SP=1 Crawl Only, 1 movement Skills: Backstab +2, Nimble, Lockpick, Savvy Weapon Close Combat Short Medium Long Range TH WS Range TH WS Range TH WS Range TH WS Fist 0 0 BN Short Blade 0 +1 BN Broadsword Adventures Savage Tales of Fantasy Name: Class: Pickpocket (Grade 1) Willpower (2) rr Location (Die Roll) Base DR Wound Level Head (1) Brain=3 3 BR=3 Killed Torso (2-5) Brawn=2 Guts=5 3 BN=2 GT=6 Killed Arms (6-8) Bow=2 Blade=2 3 BW=2 BD=2 BD=1 Attack BD -1, Cannot Carry Legs (9-10) Dodge=4 Speed=5 3 DG=4 SP=5 SP=1 Crawl Only, 1 movement Skills: Backstab +1, Nimble Close Combat Short Medium Long Weapon Range TH WS Range TH WS Range TH WS Range TH WS Fist 0 0 BN Short Blade 0 +1 BN+1 BN+2 0 BN+1 114
116 Broadsword Adventures Savage Tales of Fantasy Ungeheuer (Large Biped) Willpower: (1) r Location Base DR Wound Level Head (1) Brains=2 5 BR=2 Killed Torso (2-5) Arms (6-8) Legs (9-10) Brawn=6 Guts=6 Bow=2 Blade=3 Dodge=3 Speed=6 5 BN=6 GT=6 5 BW=2 BD=3 5 DG=3 SP=6 Special Abilities: Cause Fear Grade 1 BN=5 GT=5 BD=3 SP=5 BN=4 GT=4 BD=2 SP=4 BN=3 GT=3 BD=1 SP=3 Close Combat Short Medium Long Weapon Range TH WS Range TH WS Range TH WS Range TH WS Fist 0 0 BN Club 1 +1 BN Killed BD=1 SP=2 Broadsword Adventures Savage Tales of Fantasy Warriors of Khozzer Nil(Man-Sized Biped) Willpower: (0) Location Base DR Wound Level Head (1) Brains=n/a 5 BR=N/A Killed Torso (2-5) Arms (6-8) Legs (9-10) Brawn=4 Guts=n/a Bow=1 Blade=2 Dodge=3 Speed=5 Special Abilities: Shield, Zombie 5 BN=4 GT=N/a 5 BD=2 5 DG=3 SP=5 BN=2 GT=N/A BD=1 SP=3 Killed BD=1 SP=1 Close Combat Short Medium Long Weapon Range TH WS Range TH WS Range TH WS Range TH WS Fist 0 0 BN Long Blade 1 +2 BN
117 Appendix 1: Thieves Nearly all the sword and sorcery tales feature a thief at some point. Whether that thief is solely out to enrich himself or one of the noble thieves who view the profession as more of a challenge than a need to steal, the two archetypes presented here can be used to play out the role. Thieves are unaligned to any of the four groups and if you add a thief to your party, you are not considered to be taking solely from one group and therefore will not get the Group Ability. In future supplements we will go into greater depth with the thieves of Tauren. Pickpocket (Grade 1) The Pickpocket is a young thief still learning his trade. Though still called pickpockets by those who have been at it longer, most have moved beyond simple pickpocketing and now rob unwary travelers and unguarded homes of careless nobles. Willpower (2) rr Location (Die Roll) Base DR Wound Level Head (1) Brain=3 3 BR=3 Killed Torso (2-5) Brawn=2 Guts=5 3 BN=2 GT=5 Killed Arms (6-8) Bow=2 Blade=2 3 BW=2 BD=2 BD=1 BD=-1, Cannot Carry Legs (9-10) Dodge=4 Speed=5 3 DG=3 SP=5 SP=1 Crawl Only, 1 movement Available Abilities (4) Weapons (1) Short Blade (1) Club (1) Armor (1) Head DR +1 (1) Combat (2) Ambidextrous (1) Backstab +1 (1) Brawler +1 (1) Knife Thrower (1) Mighty Thews +1 (1) Quick +1 (1) Weapon Trained (1) Other (2) Camouflage (1) Fleet of Foot +1 (1) Nerves of Steel +1 (1) Nimble (1) Knowledge (2) Language (1) Savvy (1) Terrain Cognition (1) Arcana (0) 116
118 Burglar (Grade 2) The Burglar is usually well-known and may even have acquired a nickname among his peers. More skilled than the pickpocket, the Burglar is on his way to becoming a Master Thief. A Burglar Willpower (3) rrr Location (Die Roll) Base DR Wound Level Head (1) Brain=3 3 BR=3 BR=1 Killed Torso (2-5) Brawn=3 Guts=7 3 BN=3 GT=7 BN=2 GT=6 BN=1 GT=5 Unconscious Arms (6-8) Bow=2 Blade=3 3 BW=2 BD=3 BW=2 BD=2 BD=2 BD=1 BD=-1 Cannot Carry Legs (9-10) Dodge=3 Speed=5 3 DG=3 SP=5 DG=3 SP=4 SP=3 SP=1 Crawl Only, 1 movement Available Abilities (7) Weapons (2) Short Blade (1) +1 WS (1) Club (1) +1 WS (1) Short Bow (2) Combat (3) Backstab +2 (1 per +1) Brawler +1 (1) Concealed Weapon (1) Flurry of Blows +1 (1) Knife Thrower (1) Master of Arms +1 (1) Mighty Thews +2 (1 per +2) Quick +2 (1 per +1) Weapon Trained (1) Knowledge (2) Arcane Studies (1) Disguise (2) Genius +1 (1) Language (1) Savant (1) Savvy (1) Armor (0) Other (4) Fleet of Foot +2 (1 per +1) Leap (1) Lockpick (1) Moutaineering (1) Nimble (1) Shadow Stalk (1) Arcana (0) 117
119 Appendix 2: Playing with Bigger Forces There are times whne players may find they need to have their heroes or villains face a large number of enemies. Below are two different ways to handle it. Hordes of Minions allows for several Grade 1s to be handled quickly with the use of markers. Squad Rules allow you to handle multiple units of Grade 1 models. The purpose of both is to allow players the maximum flexibility to run the scenarios they would like without presenting an entirely separate set of rules to handle larger armies. Hordes of Minions A scenario might rely on a larger number of Grade 1 models who are essentially identical. In this case, record keeping for that many figures is both cumbersome and unnecessary. Here is a suggestion on how to handle large numbers of identical Grade 1 models You will need a number of tokens marked with an A on one side and an L on the other, or some other way of marking arms and legs. All Grade 1 models have a 50% chance of being killed by a wound, as a single wound to the head or torso kills them. The only time a wound needs to be recorded is when it is on the arms or legs. When it is wounded in the arms, place the A side token next to it to show you where it is wounded likewise put the L side up if the model is wounded in the legs. The next time you need to refer to this model, you can simply refer to the master character sheet for all models of this type, and you are reminded that this one has a wound in the arms or legs. Squad Rules Basic Rules. Squads can only be created from Grade 1 models. No other Grade levels can create a squad. All models in a squad must be the same archetype and have the same skill(s), but can be armed differently from one another. So if you create a Barbarian Warrior squad, it must all have the same ability (like Battle Cry) but part of the squad can be armed with long blades and part with clubs. All squad members must remain within 4 of the center member of the squad. Models outside this range must still activate with the squad but do not add their number to the squad total for combat or GUTS tests. Each time a squad is wounded in combat, one model is removed. The squad will take a GUTS test for each model it loses. It can use the GUTS score of a Grade 3 model if the Grade 3 is within 3 of the squad. The Wound Chart for a squad is below. Simply start the Base number off as the modified stat chart for the archetype (so if you take Master of Arms +1, you would start your Base off at the archetype base +1). Underneath Wound Level is the number of models in the squad. Once a squad drops below 3 models, the remaining models activate as solo Grade 1s. If part of a squad moves and part attacks, only those that attack add their numbers to the attack. So a squad of 8 that has 3 models move (into cover, into range, etc.) then the remaining 5 members would attack using the 5-6 column and not the 7-8 one. Combat with Squads Squads can split their combat between two targets as long as each split has at least 3 models (ie. a squad with 5 models cannot split with 3 models attacking one target and two attacking another). If splitting combat targets, the squad attacks with the number of models in each split. So, a squad with 8 models is split with 5 attacking one target and 3 attacking another. The split with 5 will use the Wound Level column for 5-6 models and the 3 will use the 3-4. The squad will still take a GUTS test, as though they have 8 members. A unit always attacks with the lowest Weapon Strength value. So a squad with half the models only having fists and half having Long Blades will have their WS based on the Fist value. When determining bonuses for multiple models attacking a single model (since a squad counts as a single model for combat purposes), the number of attackers must outnumber the squad members. 118
120 If a squad is attacking a solo human-sized model in close combat, it can only use the 5-6 column for its BLADE and WS (this represents not every model being able to get in and attack). The squad must have at least 5 models or else it uses the lower 3-4 column. If the squad is attacking a Large size model it can use the 7-8 column (if it has that many models). And if a squad is attacking a Giant or Huge size model, then all models in the squad can attack. If attacking the squad with ranged combat, the attacker picks the target model for determing whether the squad receives a cover bonus. The player controlling the squad, however, determines which model is removed. Squad Wound Chart Base DR Squad Number Wound Level Head BRAINS=A X BR=A BR=A BR=A BR=A Torso BRAWN=B GUTS=C X BN=B+1 GT=C BN=B+2 GT=C+1 BN=B+3 GT=C+2 BN=B+4 GT=C+3 Arms BOW=D BLADE=E X BW=D+1 BD=E+1 BW=D+2 BD=E+2 BW=D+3 BD=E+3 BW=D+4 BD=E+4 Legs DODGE=F SPEED=G X DG=F SP=G-1 DG=F SP=G-1 DG=F-1 SP=G-2 DG=F-1 SP=G-2 Weapon Strength WS WS+2 WS+3 WS+2 (x2) WS+3 (x2) Example: Squad of Barbarian Scouts with Spears, True Aim +1, Quick +1, and Fleet of Foot +1 Squad Number Wound Level Base DR Head BRAINS=2 4 BR=2 BR=2 BR=2 BR=2 Torso BRAWN=3 GUTS=6 4 BN=4 GT=6 BN=5 GT=7 BN=6 GT=8 BN=7 GT=9 Arms BOW=4 BLADE=2 4 BW=5 BD=3 BW=6 BD=4 BW=7 BD=5 BW=8 BD=6 Legs DODGE=4 SPEED=5 4 DG=4 SP=5 DG=4 SP=5 DG=3 SP=4 DG=3 SP=4 Weapon Strength BN (x2) 12 (x2) 119
121 Broadsword Adventures Savage Tales of Fantasy Name: Class: (Grade 3) Willpower ( ) rrrrrr Location (Die Roll) Base DR Wound Level Head (1) Brain= BR= BR= Unconscious Torso (2-5) Brawn= Guts= BN= GT= BN= GT= BN= GT= BN= GT= Unconscious Arms (6-8) Bow= Blade= BW= BD= BW= BD= BW= BD= BW= BD= BW= BD= Attack BD-1 Cannot Carry Legs (9-10) Dodge= Speed= DG= SP= DG= SP= DG= SP= DG= SP= DG= SP= Crawl Only, 1 movement Skills: Weapon Close Combat Short Medium Long Range TH WS Range TH WS Range TH WS Range TH WS Fist Broadsword Adventures Savage Tales of Fantasy Name: Class: (Grade 3) Willpower ( ) rrrrrr Location (Die Roll) Base DR Wound Level Head (1) Brain= BR= BR= Unconscious Torso (2-5) Brawn= Guts= BN= GT= BN= GT= BN= GT= BN= GT= Unconscious Arms (6-8) Bow= Blade= BW= BD= BW= BD= BW= BD= BW= BD= BW= BD= Attack BD-1 Cannot Carry Legs (9-10) Dodge= Speed= DG= SP= DG= SP= DG= SP= DG= SP= DG= SP= Crawl Only, 1 movement Skills: Weapon Close Combat Short Medium Long Range TH WS Range TH WS Range TH WS Range TH WS Fist
122 Broadsword Adventures Savage Tales of Fantasy Name: Class: (Grade 2) Willpower ( ) rrrrrr Location (Die Roll) Base DR Wound Level Head (1) Brain= BR= BR= Killed Torso (2-5) Brawn= Guts= BN= GT= BN= GT= BN= GT= Unconscious Arms (6-8) Bow= Blade= BW= BD= BW= BD= BW= BD= BW= BD= Attack BD-1 Cannot Carry Legs (9-10) Dodge= Speed= DG= SP= DG= SP= DG= SP= DG= SP= Crawl Only, 1 movement Skills: Weapon Close Combat Short Medium Long Range TH WS Range TH WS Range TH WS Range TH WS Fist Broadsword Adventures Savage Tales of Fantasy Name: Class: (Grade 2) Willpower ( ) rrrrrr Location (Die Roll) Base DR Wound Level Head (1) Brain= BR= BR= Killed Torso (2-5) Brawn= Guts= BN= GT= BN= GT= BN= GT= Unconscious Arms (6-8) Bow= Blade= BW= BD= BW= BD= BW= BD= BW= BD= Attack BD-1 Cannot Carry Legs (9-10) Dodge= Speed= DG= SP= DG= SP= DG= SP= DG= SP= Crawl Only, 1 movement Skills: Weapon Close Combat Short Medium Long Range TH WS Range TH WS Range TH WS Range TH WS Fist
123 Broadsword Adventures Savage Tales of Fantasy Name: Class: (Grade 1) Willpower ( ) rrr Location (Die Roll) Base DR Wound Level Head (1) Brain= BR= Killed Torso (2-5) Brawn= Guts= BN= GT= Killed Arms (6-8) Bow= Blade= BW= BD= BW= BD= Attack BD -1, Cannot Carry Legs (9-10) Dodge= Speed= DG= SP= DG= SP= Crawl Only, 1 movement Skills: Close Combat Short Medium Long Weapon Range TH WS Range TH WS Range TH WS Range TH WS Fist Broadsword Adventures Savage Tales of Fantasy Name: Class: (Grade 1) Willpower ( ) rrr Location (Die Roll) Base DR Wound Level Head (1) Brain= BR= Killed Torso (2-5) Brawn= Guts= BN= GT= Killed Arms (6-8) Bow= Blade= BW= BD= BW= BD= Attack BD -1, Cannot Carry Legs (9-10) Dodge= Speed= DG= SP= DG= SP= Crawl Only, 1 movement Skills: Close Combat Short Medium Long Weapon Range TH WS Range TH WS Range TH WS Range TH WS Fist

124 Hordes of Minions Markers
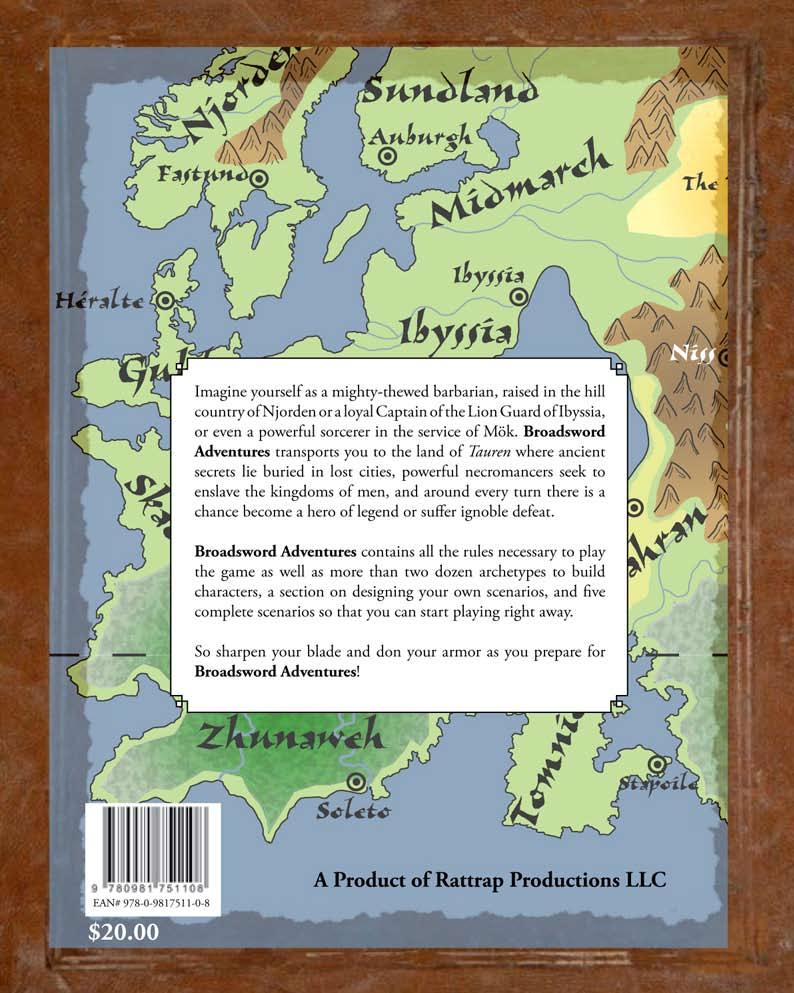
125
CLOSE COMBAT MANEUVERS All close combat maneuvers are at Point Blank Range, which modifies the difficulty by 1
 CLOSE COMBAT MANEUVERS All close combat maneuvers are at Point Blank Range, which modifies the difficulty by 1 Charging Attack/Knock-Back [modified house rule]: Decide whether to inflict Damage or shove
*(( *56 64 % *' (44 3.&%0%2$%&' &0!% !%$ % % % % 3 & & & % % %
 -( ' $!" & & & & -56 + & & -( ' (( 0122 56 6 -(5 2((6(2&( ( &02$ 5 2 6 &0! ( +, +, -56 + +, 56 6 -(/&0(1(2&( Commander Ace McGuire, a veteran space explorer, has seen countless worlds and defeated many
Brimstone and Iron. Heroic Combat System.
 Brimstone and Iron. Brimstone and Iron was originally an attempt to unify the rules of Warhammer Fantasy Battle, Warhammer Skirmish and Mordheim. I ve dropped that idea since Games Workshop change the
Modified D20 System for Wild Pig Comics. Congratulations soldier! You have been given control of a 40 ton fighting machine, known as
 Modified D20 System for Wild Pig Comics WELCOME TO THE FUTURE OF COMBAT Congratulations soldier! You have been given control of a 40 ton fighting machine, known as a Mech. It is a complex machine when
Feudal Skirmish and Tourney Rules
 Feudal Skirmish and Tourney Rules Al Hewitt, Ric Willey, Neil Houltby, and Tony Morley Initiative Throw d20, highest has initiative and can move first. If a figure is contacted by a higher initiative figure
Combat Skills. Dodge: Great Weapons Warrior has a 6+ ward save vs. Great Weapons. (Ward saves stack. - A natural 1 always fails to save.
 Combat Skills Weapons Training: Close Warrior can use all close combat weapons, not just those on his list. This skill does not grant proficiency with shields. Dodge: Great Weapons Warrior has a 6+ ward
Mutants & Masterminds Combat Cheat Sheet (PL 6)
") Actions Mutants & Masterminds Combat Cheat Sheet (PL 6) Adapted from Mutants & Masterminds, Second Edition Brandon Blackmoor, 2009-07-12 The types of actions your hero can perform during a round are standard
Actions Mutants & Masterminds Combat Cheat Sheet (PL 6) Adapted from Mutants & Masterminds, Second Edition Brandon Blackmoor, 2009-07-12 The types of actions your hero can perform during a round are standard
UNEARTHED ARCANA Sidekicks
 UNEARTHED ARCANA Sidekicks This article gives you a straightforward way to play and level up a sidekick in DUNGEONS & DRAGONS. The rules presented here take a creature with a low challenge rating and give
QUICK REFERENCE SHEETS
 QUICK REFERENCE SHEETS 1 QUICK REFERENCE SHEETS Survivor Action Point Table Actions AP Cost Walking (3 ) 1 Turning more than 180 degrees 1 Spotting 1 Running (6 ) 1 Diving (1 ) 2 Crawling (1 ) 1 Going
Reference Revised Combat Rules
 Revised Combat Round Reference Revised Combat Rules I. Check for Surprise a. Roll 1d10 (see Surprise Modifiers) with a 1, 2, or 3 meaning surprise. Determine Initiative (once for given encounter) a. Each
Children of Mordheim. Warband Special Equipment. Warband Special Rules
 Children of Mordheim Warband Special Rules Born and raised The children of Mordheim end each battle with the Streetwise skill regardless of who survived. Streetwise (+1/-1) If this warrior was deployed
HIVE OF THE DEAD ADVANCED RULES
 HIVE OF THE DEAD ADVANCED RULES The Adventure Sheet The Adventure Sheet is where you can keep track of your Statistics, Equipment, Ammunition and other information relevant to your adventure. You are free
STEP-BY-STEP RSBM THE FIGHTERS
 STEP-BY-STEP RSBM In RSBM all matches are to the death. There s a points system (gasp) that allows you to create and rate your gladiators. There s a Fame system to allow your gladiator to get better as
Original concept from:
 Original concept from: http://home.earthlink.net/~duanevp/dnd/building%20d&d/buildingdnd17.htm. The A.D.D.I.C.T. Short Form I. Check for Surprise A. The DM can determine that surprise exists (or does NOT
FORCES OF VALOR BATTLE TACTICS 2005, Unimax Toys Limited, All Rights Reserved
 FORCES OF VALOR BATTLE TACTICS 2005, Unimax Toys Limited, All Rights Reserved Forces Of Valor, The Game allows you to fight exciting and realistic war games. All you need to play are Forces Of Valor soldiers
Ascendancy LRP Basic Rules
 Ascendancy LRP Basic Rules Basic Rules Random Chance Normally if characters are performing an action suitable for their Skills and Talents they will automatically succeed. However, in order to simulate
Force Power Cards (front)
") Battle Strike You use the Force to enhance your battle prowess. Time: Swift action. Target: You. DC 15: Gain a +1 Force bonus on your next attack roll and deal an additional 1d6 points of damage if the
Battle Strike You use the Force to enhance your battle prowess. Time: Swift action. Target: You. DC 15: Gain a +1 Force bonus on your next attack roll and deal an additional 1d6 points of damage if the
COMBAT CARDS. The Easy Way to Assess Your Choices STEVE JACKSON GAMES. An e23 Game Aid for GURPS from Steve Jackson Games
 COMBAT CARDS The Easy Way to Assess Your Choices Combat is the most chaotic situation in any roleplaying game. So many targets, so many opportunities... so many options. Half the trick in figuring out
ATTRIBUTES & DERIVED STATS HINDRANCES GEAR
 NAME: RACE: RANK: XP: PERSONAL INFO ICONIC FRAMEWORK ATTRIBUTES & DERIVED STATS HINDRANCES AGILITY SMARTS SPIRIT CHARISMA PARRY PACE STRENGTH VIGOR SKILLS GEAR SKILL DIE ITEM STRAIN WT EDGES & ADVANCES
QRS QUICK REFERENCE QUICK REFERENCE SHEETS. Shooting Modifiers table. Survivor Action Point Table. Hand-to-Hand Modifiers Table
 QRS QUICK REFERENCE SHEETS Shooting Modifiers table Survivor Action Point Table Actions AP Cost Target Modifier Walking (3 ) Per AP to aim (max APs / +4 modifier) + Turning more than 80 degrees Target
BATTLE MEDITATION FORCE POWER TREE FORCE ABILITY BATTLE MEDITATION BASIC POWER RANGE CONTROL MAGNITUDE STRENGTH RANGE MAGNITUDE RANGE DURATION
 Prerequisites: Force Rating 2 + BATTLE MEDITATION BATTLE MEDITATION BASIC POWER The Force user directs allies in battle, making them more effective as a coordinated unit. The user may spend to add one
Attacks of Opportunity (Part Two) By Skip Williams
 By Skip Williams") Rules of the Game: All About Attacks of Opportunit... 1 of 5 Rules of the Game Home > Games > D&D > Articles Attacks of Opportunity (Part Two) By Skip Williams 11/02/2004 Printer Friendly Email A Friend
Rules of the Game: All About Attacks of Opportunit... 1 of 5 Rules of the Game Home > Games > D&D > Articles Attacks of Opportunity (Part Two) By Skip Williams 11/02/2004 Printer Friendly Email A Friend
A Splendid Victory! Copyright. Trevor Raymond. Version 3: May, 2012 (Exodus 20:15 - Thou shall not steal.")
") A Splendid Victory! Copyright. Trevor Raymond. Version 3: May, 2012 (Exodus 20:15 - Thou shall not steal.") Page 1 of 28 A Splendid Victory is a basic set of rules designed for the table-top wargaming
A Splendid Victory! Copyright. Trevor Raymond. Version 3: May, 2012 (Exodus 20:15 - Thou shall not steal.") Page 1 of 28 A Splendid Victory is a basic set of rules designed for the table-top wargaming
Alignment: Any. Hit Die: d8.
 Archer Of history s most persistent necessities, none has colored the art of death more strikingly than the ability to kill from afar. While this innovative concept came in many forms, no method was as
Skaven Clan Eshin v.2.4
 Skaven Clan Eshin v.2.4 Warband Special Rules Pack Tactics (+1 Ld) Skaven warbands add an extra +1 Ld modifier to all rout tests they have to take. Warriors with this rule flee 3D6 instead of the normal
FIRETEAM Wargame Rules for Modern Combat Operations
 FIRETEAM Wargame Rules for Modern Combat Operations By Rory Crabb Written By Rory Crabb Version 1.0 July 2016 Miniatures from the collection of the author and terrain by Paul Davies 1 FIRETEAM Wargame
Night Goblins v.1.5. Warband Special Rules. Warband Special Rules. Gork Complex Night Goblin warbands have +2 Ld to all Rout Tests they have to take.
 - Night Goblins v.1.5 Gork Complex Night Goblin warbands have +2 Ld to all Rout Tests they have to take. Animosity At the start of each of your own turns (i.e. not opponent s), roll a D6: On (2-6) nothing
Chosen Men Fat. 1. Sequence of play. Base Morale;
 Chosen Men Fat 1. Sequence of play v2.1 CCWG Assign cards to each unit in play then shuffle the deck and turnover the top 2 cards. These units then; 1) Test morale. 2) Perform an action. (Move, Load, Fire,
TRAVEL & EQUIPMENT. Standard Price List. Land Travel. Table 5A : Daily Sea Weather. Table 5B : Sailing Table. Table 1D : Encumbrance Values
 TRAVEL & EQUIPMENT Land Travel 1 day of travel on foot = 20 miles 1 day of travel on horseback = 30 miles Difficult terrain = halve all distances Table 5A : Daily Sea Weather D10 Weather Conditions 1-2
FUBA RULEBOOK VERSION
 FUBA RULEBOOK 15.07.2018 2.1 VERSION Introduction FUBA is a board game, which simulates football matches from a tactical view. The game includes its most important details. The players take roles of the
GURPS : COMBAT. Maneuvers
 GURPS : COMBAT Turn Sequence Combatant with highest Basic Speed goes first, then the one with the next-highest Basic Speed and so on. If tied, the one with the highest DX goes first. If still tied, roll.
ONE IF BY LAND" - AMERICAN 1:10 SCALE WAR OF INDEPENDENCE RULES by Bob Bergman. Infantry/Cavalry figure 10 men Artillery crew figure 5 men
 ONE IF BY LAND" - AMERICAN 1:10 SCALE WAR OF INDEPENDENCE RULES by Bob Bergman Ground Scale 1 inch = 15 yards One Turn About five minutes Infantry/Cavalry figure 10 men Artillery crew figure 5 men Artillery
Ship to Ship Combat (fast start rules) Optional Rules for Dungeons and Dragons 3.5
 Optional Rules for Dungeons and Dragons 3.5") Introduction Ship to Ship Combat (fast start rules) Optional Rules for Dungeons and Dragons 3.5 This is a paired down version of my full ship to ship combat rules. The main difference is that we are not
Introduction Ship to Ship Combat (fast start rules) Optional Rules for Dungeons and Dragons 3.5 This is a paired down version of my full ship to ship combat rules. The main difference is that we are not
Samurai. Special Ability
 Samurai Level Base Resist Reflex Will Defense Special Ability Attack Save Save Save Bonus 01 1 2 0 0 1 Code of Honor, Stance 1, Sword Style 1 02 2 3 0 0 1 03 3 3 1 1 2 Sword Style 2 04 4 4 1 1 2 05 5 4
Fields of Blue & Grey
 Fields of Blue & Grey A very different kind of American Civil War rules, that allow the grand sweep of corp level actions to be recreated while still using the regiment as the basic combat element. A simple
Errata to the Second Printing
 Errata to the Second Printing Savage World, Great White Games, the GWG shark, and the Pinnacle logo are 2009 Great White Games, LLC; DBA Pinnacle Entertainment Group. 1 First Strike The text for the First
Introduction:... 4 Character Classes;... 4 Weapons:... 4 Organisation:... 4 Actions:... 5 Movement:... 5 Shooting:... 5 To Hit:...
 State of war A.C.W. Skirmish Wargame Rules Tyneside Wargames club Version 1a 1 2 Table of contents Introduction:... 4 Character Classes;... 4 Weapons:... 4 Organisation:... 4 Actions:... 5 Movement:...
Critical Bullet and Melee Hit Chart 2
 Critical Bullet and Melee Hit Chart 2 Expect to be injured in our line of work. Bullet wounds can be most serious, but blade weapons can sometimes be just as deadly. This chart expands upon the previous
Fighting and Magic Skills
 Fighting and Magic Skills Fighting Skills: The Standard XP cost progression is 2,3,5,8,13,13,13 etc Pistol (standard XP cost)-the Player owns and is familiar with pistols. At the basic level, the player
Combat Options. Timothy J. Miller April 4, 2000
 Combat Options Timothy J. Miller April 4, 2000 Combat Options is a set of independant rules modules relating to Fudge combat. Any of these rules can be used separately, or in any combination. Each option
Tactical Combat Rules By David Newport
 Tactical Combat Rules By David Newport Tactical Combat is a game covering company and battalion level actions using 20 th century weapons. The game was designed for World War II action, but it handles
Chief: Each warband must have one Chief, no more, no less! Woodsmen: Your warband may include any number of Woodsmen
 WOODSMEN DE ARTOIS Large tracts of Brettonia are covered by forest and woodland. These are owned by the Lords and Barons who let them to tenants to work. The people of the forests are more independent
Official Errata and FAQs, Version 1.3
 Official Errata and FAQs, Version 1.3 This document presents amendments to the rules of and our responses to players frequently asked questions. When changes are made, the version number will be updated
6 th Kup - 5 th Kup (Green belt - blue tab)
") 6 th Kup - 5 th Kup (Green belt - blue tab) Long stance - Double knife-hand strike : Hammer-fist strike : Back-fist strike : Spear-Hand Punch : Back stance Single fist guarding block : Double fist guarding
6 th Kup - 5 th Kup (Green belt - blue tab) Long stance - Double knife-hand strike : Hammer-fist strike : Back-fist strike : Spear-Hand Punch : Back stance Single fist guarding block : Double fist guarding
Overview. Components. Robotics Team Card
 Overview Aerial Assault is based on a real-life robotics competition where robots compete at a game of what looks a little bit like robot basketball. The robotics competition takes place on a flat gymnasium-sized
TheTomeShow 15 Swordmage 57,000 Character Name Level Class Paragon Path Epic Destiny Total XP
 TheTomeShow Page Character Sheet Player Name TheTomeShow 5 57,000 Character Name Level Class Paragon Path Epic Destiny Total XP Shadar-kai Medium Race Size Age Gender Height Weight Alignment Deity Adventuring
BATTLE FOR 2MM EARTH 1418: The Great War (Version 0.8)
") BATTLE FOR 2MM EARTH 1418: The Great War (Version 0.8) INTRODUCTION The Battle for 2mm Earth rules are suitable for any large combat up until around the end of the 19 th Century. I designed 1418 semi-independently
BATTLE FOR 2MM EARTH 1418: The Great War (Version 0.8) INTRODUCTION The Battle for 2mm Earth rules are suitable for any large combat up until around the end of the 19 th Century. I designed 1418 semi-independently
Necromunda Frequently Asked Questions and Errata
 Necromunda Frequently Asked Questions and Errata The Necromunda: Underhive box set is a great introduction to the game of Necromunda, and the rulebook it contains allows players to fight brutal tunnel
NUMENERA SYSTEM CHEAT SHEET. Collated by Justin Alexander
 NUMENERA SYSTEM CHEAT SHEET Collated by Justin Alexander http://www.thealexandrian.net BASIC MECHANICS Abilities: Might, Speed, Intellect Task: 1d20 vs. target number DIFFICULTY/ NPC LEVEL DESCRIPTION
Alignment: Any. Hit Die: d10.
 Fighter As long as wars are raged on distant lands, there will be men and women who fight those wars. The fighter is no mere sword-swinger; he is a skilled combatant, combining strength of arm, knowledge
Race. In D&D, race refers to any intelligent humanoid species
 Race Race In D&D, race refers to any intelligent humanoid species Dwarf Elf Halfling Human Gnome Half-Elf Half-Orc Tiefling Race Select a race now and record it near the top of your character sheet Common:
OFFICIAL TORTURED EARTH ERRATA (02JULY2017)
") This is the first errata for the Tortured Earth Role-Playing System. Please check www.torturedearth.com https://www.facebook.com/torturedearth/ and https://twitter.com/torturedearth for updates! OFFICIAL
This is the first errata for the Tortured Earth Role-Playing System. Please check www.torturedearth.com https://www.facebook.com/torturedearth/ and https://twitter.com/torturedearth for updates! OFFICIAL
Green Jackets Rules for Napoleonic Skirmishes
 web.archive.org https://web.archive.org/web/20121011231318/http://www.btinternet.com/~r.denning/wargames/greenj.htm Contents Green Jackets Rules for Napoleonic Skirmishes R.J. Denning 1.Introduction 2.Scale
Dog-Fighting Rules for GURPS 4th ED
 Dog-Fighting Rules for GURPS 4th ED Introduction First off, this system was designed for use with WW2-era aircrafts but could easily be used in post-war or modern times with a few adjustments. GURPS is
Telengard Fighter s Handbook
 Telengard Fighter s Handbook 2/11/2011 Fighter Level Progression Experience Level Hit Dice Attack bonus (d8) 0 1 1 +1 2,000 2 2 +1 4,000 3 3 +2 8,000 4 4 +3 16,000 5 5 +4 32,000 6 6 +5 64,000 7 7 +6 120,000
GBH Great Battles Handbook
 GBH Great Battles Handbook Last revision: March 2005. Designed by Edgar Leo. 1. Some Terms Used xd10 = Numeric value between x and ten times x, resulting from throwing x ten sides dice (0 is 10). Military
THE BASIC GAME. Construction INTRODUCTION. Winning the Game
 SBG300 TM THE BASIC GAME INTRODUCTION MetalKrushers is a game in which each player controls a Krusher in a futuristic arena. In the basic game, players are familiarized with the Arena Rules, which stress
Soldier-4. Traits (see back for details)
") Abilities and Skills Strength 16 +3 Athletics +10 Defenses Traits (see back for details) Soldier-4 Saga Edition RPG Dexterity 16 +3 Acrobatics +3 Initiative +10 Pilot +10 Stealth +3 Constitution 16 +3
Abilities and Skills Strength 16 +3 Athletics +10 Defenses Traits (see back for details) Soldier-4 Saga Edition RPG Dexterity 16 +3 Acrobatics +3 Initiative +10 Pilot +10 Stealth +3 Constitution 16 +3
NECROMUNDA FREQUENTLY ASKED QUESTIONS AND ERRATA V.1
 NECROMUNDA FREQUENTLY ASKED QUESTIONS AND V.1 Although we strive to ensure that our rules are perfect, sometimes mistakes do creep in, or the intent of a rule isn t as clear as it could be. This document
Game System Sampler I and II The Gladiatorial Arena Magic and Missiles in the Gladiatorial Arena
 GameSys t em Sampl er Game System Sampler I and II The Gladiatorial Arena Magic and Missiles in the Gladiatorial Arena Page 1 of 32 Authors Andrew D. Kozak Vito J. Pandolfo Banner Art Ryan Pancoast Illustrations
T-404-LOKA, Final Project
 T-404-LOKA, Final Project GUMMS Bjarmi Árdal Bergsteinsson Finnbogi Darri Guðmundsson Guðný Björk Gunnarsdóttir Óskar Ögri Birgisson Þorgeir Auðunn Karlsson 2013 BSc Computer Science Instructor: Birgir
ASLSK Basic Infantry Tactics
 Basic Infantry Tactics ASLSK Basic Infantry Tactics Daniel F. Savarese Last Updated: 2005-03-04 Copyright 2004, 2005 Daniel F. Savarese 1 The original Squad Leader rule book contained a section at the
Name: Caste: Motivation: Archery Athletics Awareness Dodge Integrity. Melee Resistance Thrown War. Bureaucracy Investigation Lore Occult Medicine
 ANIMA BANNER : Caste: Motivation: Spirit Shape: Tell: Gender: ATTRIBUTES PHYSICAL Dexterity Stamina SOCIAL Charisma Manipulation Appearance MENTAL Perception Intelligence Wits EXPERIENCE SPENT TOTAL _
To End All Wars. WW1 Miniature Game V1.2
 To End All Wars WW1 Miniature Game V1.2 Introduction: The Western Front in World War I was dominated by a series of trenches cutting its way through the French countryside. Commanders on both sides would
COMMANDS AND COLORS NAPOLEONICS PLUS
 COMMANDS AND COLORS NAPOLEONICS PLUS CAMPAIGN RULES Version 3.00 2018-09-20 Contents LEADERS... 3 Leader Casualty Fate... 3 Leader Replacement... 4 Leadership Quality... 4 CAPTURING A THOPHY... 4 GLORY...
A Marvellous Victory! Copyright. Trevor Raymond. Version 3: April, 2012 (Exodus 20:15 - Thou shall not steal.")
") A Marvellous Victory! Copyright. Trevor Raymond. Version 3: April, 2012 (Exodus 20:15 - Thou shall not steal.") Page 1 of 28 A Marvellous Victory is a basic set of rules designed for the table-top wargaming
A Marvellous Victory! Copyright. Trevor Raymond. Version 3: April, 2012 (Exodus 20:15 - Thou shall not steal.") Page 1 of 28 A Marvellous Victory is a basic set of rules designed for the table-top wargaming
Rules of Play REDZONE! I. DESCRIPTION OF THE GAME: III. PLAY OF THE GAME: IV. HOW TO USE THE GAME EQUIPMENT: 1. Game Dice:
 . Game Dice: REDZONE! [A] OFFENSIVE DICE ( Black,White,Yellow): to determine the total on these dice, add 0 times the number on the black die to the sum of the numbers on the white, yellow dice. The offensive
SNAPHANCE SCENARIO Franco-Dutch War - Battle of Seneffe 11 August 1674
 Franco-Dutch War - Battle of Seneffe 11 August 1674 Note: the woods on the hilltop are orchards. Page 1 of 5 Franco-Dutch War - Battle of Seneffe 11 August 1674 William of Orange invaded Northern France
ANIMA BANNER ATTRIBUTES ABILITIES VIRTUES ESSENCE INFERNAL LIMIT MOTES ANIMA TORMENT. Name: Caste: Motivation: Player: Concept: Circle: Yozi: Gender:
 ANIMA BANNER : Caste: Motivation: Yozi: Gender: ATTRIBUTES PHYSICAL Strength Dexterity Stamina SOCIAL Charisma Manipulation Appearance MENTAL Perception Intelligence Wits _ Player: Concept: _ Circle: EXPERIENCE
TACTICAL FOOTBALL GAME RULEBOOK fubatacticalfootballgame. Game design by Hannu Uusitalo
 TACTICAL FOOTBALL GAME RULEBOOK 2.0 Game design by Hannu Uusitalo www.fubaboardgame.com fubatacticalfootballgame 1 2 3 WHAT YOU NEED TO PLAY Game board The game board (rubber mat) is divided into 13 areas,
MAN-TO-MAN COMBAT WITH ARCHAIC WEAPONS
 MAN-TO-MAN COMBAT WITH ARCHAIC WEAPONS I. INTRODUCTION Flavius Marcellus, youngest centurion of the Legion, was angry. They had been in this forest for three days. The German barbarians weren't showing
This character can spend 1 feat point to. use Battle Plan: Call to Action as a quick action. When he uses this battle plan,
 Race INT (Phy INT) Willpower 8 PER ARC POI AGL PRW str PHY spd s Character Portrait archetype Intellectual Gobber Shield INT COMMAND RANGE SPD PRW PER INITIATIVE PHY ARM SPD AGL PER DEF ability modifiers
Rules for pirate ship miniatures Alpha Playtest Rules, V 2.2 Updated 2/22/17 Designers: James Ernest, Max Clendenning, Rick Fish, Toivo Rovainen
 Cagway Bay Rules for pirate ship miniatures Alpha Playtest Rules, V 2.2 Updated 2/22/17 Designers: James Ernest, Max Clendenning, Rick Fish, Toivo Rovainen Summary: Cagway Bay is a set of basic rules for
Rules for playing a violent future sport using miniature figures and dice. Sample file. ] Complete board game included [
![Rules for playing a violent future sport using miniature figures and dice. Sample file. ] Complete board game included [](/thumbs/88/116447930.jpg "Rules for playing a violent future sport using miniature figures and dice. Sample file. ] Complete board game included [") Rules for playing a violent future sport using miniature figures and dice ] Complete board game included [ TABLE OF CONTENTS Designer Notes........................................... 3 A. The Game [How
Rules for playing a violent future sport using miniature figures and dice ] Complete board game included [ TABLE OF CONTENTS Designer Notes........................................... 3 A. The Game [How
Aidan Uth Twynam 8 Paladin Character Name Level Class Paragon Path Epic Destiny Total XP
 Aidan Uth Twynam Page Roy Verweij Character Sheet Player Name Roy Verweij Aidan Uth Twynam 8.000 Character Name Level Class Paragon Path Epic Destiny Total XP Human Medium 2 Male.78m 85kg Lawful Good Kiri-Jolith
Musket and Pike Users Manual
 1 Musket and Pike Introduction Musket and Pike is a series of games that cover the battles and campaigns associated with the era where muskets and pikes dominated the fighting. Each game can be played
Rules of Play REDZONE! I. DESCRIPTION OF THE GAME: II. EQUIPMENT INCLUDED: III. PLAY OF THE GAME: IV. HOW TO USE THE GAME EQUIPMENT: 1.
 REDZONE!. Game Dice: 06 Rules of Play I. DESCRIPTION OF THE GAME: [A] OFFENSIVE DICE (Black, White): to determine the total on these dice, add black die to the sum of the numbers on the white dice. The
WEAPONS WEAPON CATEGORIES
 WEAPONS WEAPON CATEGORIES Weapons are grouped into several interlocking sets of categories. These categories pertain to what training is needed to become proficient in a weapon s use (simple, martial,
Viking Class D&D 5e. Sample file. Created by Luke Nicholson and Tom. Design by Luke Nicholson & Tom
 Viking Class D&D 5e Created by Luke Nicholson and Tom Viking Class D&D 5e A daring mountain dwarf stares coldly into a horde of lifeless undead, he wipes the sweat of his forehead and yells a war cry before
To begin OMOG requires a few things.
 Omog (One Man One Gun) is a game for toy soldiers and any available space. It can be played on a desktop, a coffee table, a countertop or other surface. The game itself is simple, easy to learn and easy
Dungeons v 2.0 Special Abilities Card L M _ ` Speed Special Abilities
 GREEN RED Dungeons v 2.0 Special Abilities Card L M _ ` Speed Special Abilities CHARGE This warrior may make a close combat attack for a cost of 0 speed points, or this warrior may add 4 to his speed value
Rules Update for Warmaster Ancients
 Rules Update for Warmaster Ancients P25 Skirmishers Evading a Charge delete all four paragraphs and replace as follows. Note that this new rule replaces the rules addition Evades from close range become
Command Combat: Civil War The Battle of Bull Run / Manassas July 21, 1861
 Command Combat: Civil War The Battle of Bull Run / Manassas July 21, 1861 Game Design by Jeff McArthur (c) Bandwagon Books, 2011 This scenario is from the Command Combat: Civil War series. To learn more
Glory Days! Introduction. Troop Types and Figures. freewargamesrules.co.uk presents. by Craig Cartmell
 Introduction. freewargamesrules.co.uk presents Glory Days! by Craig Cartmell These are a set of rules for fighting the American Civil War at regimental and brigade level. The smallest unit sizes are infantry
All intact ice, roller and street hockey sticks are allowed, butt ends must be covered.
 DEKHOUNDS League Rules Below are the rules we use for our games. If rules are not listed specifically in this document then we follow the American Street Hockey Institute Dek Hockey rule book as listed
ALTERNATIVE Witch Hunters
 ALTERNATIVE Witch Hunters Warband Special Rules Break the Idols (D3+1 XP) In each post-battle sequence, a Witch Hunter warband may destroy any number of magical artefacts in its possession that have the
Mini-Nap 2 WARGAME RULES FOR THE NAPOLEONIC ERA. Copyright. Trevor Raymond. January 2015 (Exodus 20:15 - Thou shall not steal.")
") Page 1 of 42 The Basics Mini-Nap 2 WARGAME RULES FOR THE NAPOLEONIC ERA Copyright. Trevor Raymond. January 2015 (Exodus 20:15 - Thou shall not steal.") Mini-Nap 2 is a set of rules specifically designed
Page 1 of 42 The Basics Mini-Nap 2 WARGAME RULES FOR THE NAPOLEONIC ERA Copyright. Trevor Raymond. January 2015 (Exodus 20:15 - Thou shall not steal.") Mini-Nap 2 is a set of rules specifically designed
Brimstone and Iron. Some Alternate Weapon Rules for Warhammer Fantasy.
 Brimstone and Iron. Some Alternate Weapon Rules for Warhammer Fantasy. This page originally started off as some house rules for some of the weapons in Warhammer. The following rules suggestions can be
To End All Wars WW1 Miniature Game V1
 To End All Wars WW1 Miniature Game V1 Introduction: The Western Front in World War I was dominated by a series of trenches cutting its way through the French countryside. Commanders on both sides would
TRENCH RAIDER: World War I Wargaming in Ten Minutes by David Raybin 2014
 TRENCH RAIDER: World War I Wargaming in Ten Minutes by David Raybin 2014 INTRODUCTION Instead of a generic set of WW1 rules I determined to make the rules fit the game scenario rather than the other way
King George Commands and We Obey
 King George Commands and We Obey Basing Army Commanders 80mm dia base with a vignette on it, min 3 figures. Divisional Commanders 80mm dia base with a vignette on it, max 2 figures. Brigade Commanders
RULES. A: A targeted squad receives corner cover when the imaginary line of the attacking unit s line of sight passes through
 R e a d t h i s FAQ t h o r o u g h ly a n d k e e p i t s e c u r e i t m ay s av e l i v e s RULES Q: In what situations will a squad benefit from corner cover? A: A targeted squad receives corner cover
Iroquois Warband. Special Rules. All Iroquois are subject to the following special rules.
 Iroquois Warband Coming from the New World, usually under the patronage of Old World interests, particularly the Marienburgers, the Iroquois are a Confederation of Human Tribes living in a slightly primitive
Ship Combat. 3e Spelljammer:
 1.b.13 3e Spelljammer: Ship Combat Introduction Despite the vast size of Arcane Space, ships manage to come together in violence with alarming frequency. Such encounters use a set of rules with many similarities
CHARLES THE BOLD SCENARIO
 Scottish War of Independence - Battle of Falkirk 1298 Page 1 of 5 Battle of Falkirk 22 July 1298 In 1296 Edward I of England declared himself overlord of Scotland deposing the Scottish king. Rebellion
Free-For-All (Fair Fight)
") Free-For-All (Fair Fight) In highly-mobile engagements it is not uncommon for forces to suddenly find themselves in contact with the enemy. The freewheeling battles that result are little more than all-in
Free-For-All (Fair Fight) In highly-mobile engagements it is not uncommon for forces to suddenly find themselves in contact with the enemy. The freewheeling battles that result are little more than all-in
THE CARAVANSERAI. The Caravanserai version /2004 1
 THE CARAVANSERAI This game has been designed as an extension kit to the OUTREMER/CROISADES sister games. The kit includes a new map (The Caravanserai), new counters for camels, this set of rules and additional
Close Combat Weapons
 Close Combat Weapons Weapon Base Damage ST/DX Reach Maneuvers ENC AP/ HP Cost Battle Axe 1H 10% 1d6+2 11/9 2 Slash, Stun 2 4/8 100 Battle Axe 2H 10% 1d8+2 9/9 2 Slash, Sunder 2 4/8 100 Broadsword 5% 1d8+1
THE BACKGROUND GENERAL NOTES ACTIONS MORALE CLASS
 or: The Phantom Crown. Maximilian Rules! - Rules for wargaming the Maximilian Adventure by Mark W. Shearwood These rules originally appeared in Wargames Illustrated 160, (December 000). Many thanks to
PROCONSUL RULES FOR ANCIENT BATTLES
 Index Section Subject Page 1.0 Basic Concepts 2 1.1 Command Groups 2 1.2 Stands and Basing 2 1.3 Strength Points [SP] 2 1.4 Game Play 2 2.0 Command and Control 3 2.1 Moving Commanders 3 2.2 Losing a Commander