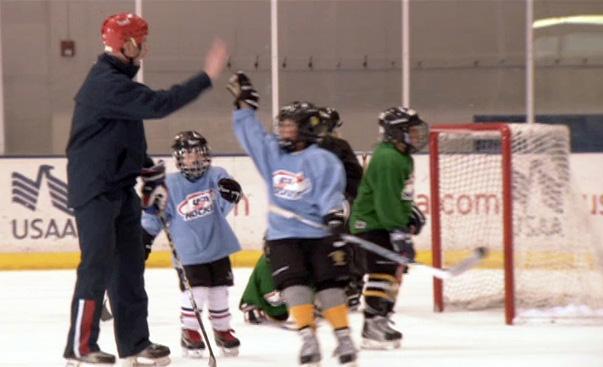
Teaching Skills Through Progressions
|
|
|
- Hilary Dorsey
- 6 years ago
- Views:
Transcription


1 AGES 8 AND UNDER Teaching Skills Through Progressions LESSON WORKBOOK TY HENNES
2 2 INTRODUCTION At this level, the main focus is on the development of skating skills. The better a player can skate, the more success he or she will have in playing the game. A great deal of skill development can be done through games and relay races. For example, when playing soccer on the ice, players are working on agility, balance, coordination, body control, spatial awareness and body contact. They are also having fun in a competitive environment. Building Blocks of Skills at this level Skating (without stick) Balance Knee Flexion Introduce stick principles (stick height, stick position, hand position) Cupping the puck moving it side to side Body balance and passing the puck Shooting In order to develop skills, the player needs to Have fun and enjoy the game Be challenged Receive positive reinforcement from the coach Experience success in order to build self-esteem Have repetition and reinforcement Have lots of opportunities for unstructured play Be introduced to concepts of cooperation and sportsmanship Practice skills in game-like situations, develop hockey sense Make practice challenging, the game becomes easier. TEACHING PROCESS One of our main objectives in working with youth hockey players is to expose them to effective methods of skill development in a fun environment. The outcome is measured by improvement in skill levels. Here are some recommended teaching principles the coach can use to reach the desired outcome. 1. The learning process begins where the learner is and not where the coach might hope him /her to be. Children should not be expected to perform the mature pattern of a skill right away as they are not miniature adults. 2. Too much detail will often confuse the players. Keep things simple. 3. Children learn at different rates and in different ways. Along these lines, people communicate in vastly different styles. Personalize as much of your instruction as you can. Provide useful feedback to each athlete regarding how to improve. 4. Repetition will consolidate learning as long as the skill is repeated correctly. Correction needs to be individual, short and positive. 5. Although activities are great for skills development, by themselves they do not ensure learning. Any drill or exercise must be understandable and meaningful to the learner.
3 3 6. Players tend to practice strengths. The coach should be sure to teach skills in both directions. Be positive with correction and reinforce the attempt to improve often. 7. Design activities that simulate game-like situations. TWO TEACHING APPROACHES There are two approaches commonly used in teaching simple skills: 1) imitation 2) demonstration/explanation followed by practice and feedback The Imitation Method Simple imitation is often the best way for players to learn. It requires them to focus on what is to be imitated or copied. Watch this Try it. Often the imitation is as accurate as it needs to be. You should then confirm it: Yes. That s it. Now remember that. If necessary, have it practiced several times. When minor corrections are required, point them out in a clear, matter-of-fact way. If players have trouble picking up the correct action or movement, then you should realize that, for some reason, it is not as simple as expected. The Demonstration/Explanation/Practice/Correction Method This method is used extensively. It involves these steps: Demonstrate first with minimal explanation: Watch this. Be careful to stand like this, and then shoot the puck. Try it. Allow for practice. Observe carefully, looking for correct features and common errors. Provide feedback while practice continues, if possible. If you must, stop practice and confirm correct actions and, if necessary, make suggestions to correct errors. Allow further practice and correct in more detail, if necessary. Mentors The coach can use players from an older age group to practice with a younger team and demonstrate drills. Younger players get the opportunity to practice with a player they might admire and see it takes to advance to the next level. The mentor players get extra ice time while developing leadership skills.
4 4 SKATING INTRODUCTION Skating is the primary skill of ice hockey. The better a person can skate, the better that person will play the game. TEACHING SKATING 1. The right way of skating is always the right way, no matter whether the skater grows from 5 feet to 6 feet or gains weight from 75 pounds to 175 pounds. Kids like to take shortcuts in their growing years. 2. Practice does not make perfect, only perfect practice does. You play the way you practice. If you practice poorly, the skill will not be learned properly. 3. Many skaters do not fulfill their destiny to become good skaters because of complacency. 4. We are what we repeatedly do. Excellence, then, is not an act but a habit. Aristotle 5. The best teacher is repetition, day after day, throughout the season. It must be recognition and instant reaction. John Wooden, They Call Me Coach 6. After developing a skill competency, you must do the skill with quality execution fast, faster, then the fastest you can do it. 7. Speed is the test of great competency. Speed will disintegrate an inefficient skill. 8. If the skill is being done inefficiently, re-teach, re demonstrate, use a different learning drill, or have a different coach teach until the skill is executed properly. READY POSITION Good skating starts from the ready position. Go to any practice or skating session and take a quick look around. In a glance, you will be able to pick out the good skaters. Skaters look like skaters, hockey players look like hockey players. They all have one thing in common good posture. Key Elements skates are shoulder width apart weight is on the inside edges of the skates knees are pushed out as far as possible over the toes back is straight, and the head, eyes, and chest are up shoulders are level and aligned over the knees hands are close together on the stick about eight inches apart stick is on the ice in front of the body, Let the ice carry the stick. stick moves to the bent, balancing knee when moving, so the stick moves in ready position with the body
 The closer a skater is to the ice, the more power, balance, and agility the")
5 5 Common Errors positioning the skates more than shoulder width apart (this limits the ability to move quickly) too much bend at the waist (this straightens the knees and reduces stability) positioning the skates less than shoulder width apart (this reduces stability and limits the ability to move quickly) The closer a skater is to the ice, the more power, balance, and agility the skater will have. The deeply bent knees are key factors. To move out of the stationary ready position into a moving ready position, the player must shift all his or her weight onto an edge, balance, pushdown/pushout to a full extension with the other leg, and then recover. Most inefficiencies are caused by a poor ready position or improper weight shift. If an inefficient skating style is practiced and not corrected, it will become engraved in that player s individual skating style. It will take a willing student many hours, many repetitions, and a patient coach to change. Suggestions for Coaching You should be able to press down on the outstretched hands of your players in a ready position, and they should be able to hold much of your weight. A good position will allow them to hold your weight and be able to skate and push you backwards. In a poor position, players will fall forward. EDGE CONTROL Each side of the blade has an edge. The edges on the outside of the blade closest to the little toe are called outside edges, and those on the inside of the blade closest to the big toe are called inside edges. All of the skills of skating are controlled by using these edges in a precise way that results from familiarity and practice. The ankles control the edges. Therefore, every player must develop skill in using ankle positioning in both stationary and moving situations. Key Elements ankles control the edges knee of glide leg is bent weight is on the correct edge (inside or outside) distribution of weight from the ball of the foot back to just in front of the heel

6 6 Common Errors failure to roll the ankle transferring the weight and gliding on the edge insufficient knee bend Suggestions for Coaching Drills are an excellent tool for becoming familiar with both the inside and outside edges. Generally, players should progress from stationary to moving and from inside to outside edges as they practice their edge control. FORWARD STRIDE The forward stride begins with a thrust off the inside edge of the skate. A full leg extension is necessary to obtain full power. The length of the stride is determined by the amount of knee bend in the gliding leg. At full extension, there should be an outward snap of the ankle which brings the blade off the ice to begin the recover phase. The head and eyes should be directed forward and the shoulders should be level. At full extension, the back is in a straight line with the extended leg. To help speed recovery, the skates must be kept low (next to the ice). As one skate returns to the gliding position with the knee bent, the opposite leg is initiating the thrust off the inside edge.

7 7 Key Elements For power, push down on inside edge and out to the side to full extension. To help speed recovery, the skate must be kept low and recover back under the hip with emphasis on full recovery. The knee is kept bent and weight over the glide foot. Keep a straight alignment of the trunk and thrust leg. Common Errors failing to place weight onto the glide leg not bending the knees sufficiently (this results in a short skating stride, i.e., short stroker ) thrusting backward off the toe instead of outward to the side ( walker ) high kick on the recovery phase of the stride ( high kicker ) straightening the glide leg after each stride (the skater must replace one bent gliding knee with another, i.e., bobber ) Suggestions for Coaching You should begin the teaching process with stationary exercises that will enhance technique and then progress to drills that may be done at 1/2 to 3/4 speed. Remember, it is the quality of the technique that is most important to the ultimate success of your players.

8 8 FORWARD START The forward start begins from the ready position. It is most commonly used when already facing straight ahead. Turn the toes of the skate out at approximately a 45 degree angle and the heels in. Thrust off the inside edge of one skate and strive to attain maximum extension with the leg. The knee of the thrusting leg must be bent with the body weight on that leg. This enables you to have more power available for thrust. As you thrust forward, your upper body or trunk will be in a straight line with your extended leg. The knee of the glide leg is bent out over the toe. There should be no bending at the waist.

9 9 The thrusting leg should be extended fully and returned quickly to its original position; then continue by thrusting off the inside edge of the opposite skate, once again striving for full extension. Rapid leg recovery is vital to fast starts. Remember that each rapid, running stride should take you further than the preceding one. Spring forward. Be careful not to move in an upward direction; your height off the ice should be minimal. The first several strides tend to appear short because there is minimal glide. Long gliding strides minimize power and thrust. Quick starts result from strong thrust, full extension, and rapid leg recovery. Key Elements Start on one skate with inside edge. Rotate chest and hips in intended direction of travel. Place skates in a heel to heel position. Thrust off the inside edge of the back skate while stepping forward with the front skate. Use full extension of the thrusting leg. Rapid, low leg recovery is essential. Common Errors Failing to turn the toes out at a 45 degree angle. Failing to bend the knee of the thrusting leg. Failing to transfer weight to the glide leg.


10 10 FORWARD START Right/Left In order to properly execute the forward start to the right, the skater must rotate the chest and hips to the right, placing the skates in a heel to heel position and then thrusting off the inside edge of the left skate while pointing the right skate in the intended direction. The thrusting leg should be extended fully. As in the forward start, the ankles are turned in with the weight on the inside edges. For a forward start to the left, reverse the process. Rotate the chest and hips to the left, bringing the skates to a heel to heel position pointing the left skate in your intended direction and thrusting off the inside edge of the right skate, extending the leg fully. Once again, the key to proper execution is full extension and rapid leg recovery. Key Elements Rotate the chest and hips in your intended direction. Place your skates in a heel to heel position. Thrust off the inside edge of the back skate while pointing the front skate in your intended direction. The thrusting leg should be fully extended. Common Errors Failure to rotate chest and hips properly. Failing to point the front skate in your intended direction. Not extending the thrusting leg fully.

11 11 THE CONTROL STOP Stop in Ready Position The primary objective of the control stop is to come to a complete stop in the ready position. This allows free and easy movement in any direction without a transfer of weight or change in the basic body position. When stopping, both skates are on the inside edges the front or lead skate pushing against the inside edge and the back or trailing skate pulling with the inside edge. Set the edges of both skates at the same time. An effective way to teach this technique is to break it into three phases. Phase 1: In two separate movements, pushing against the inside edge of the lead skate and pulling with the inside edge of the trailing skate. Phase 2: In a single movement, both legs are shuffled simultaneously using the inside edges of both skates in the same manner as in Phase 1. Phase 3: Practice this technique by taking one stride in either direction and stopping on both inside edges. Key Elements Stop on inside edge, both skates front (lead) skate, pushing down on inside edge back (trailing) skate, pulling with inside edge bend the knees skates shoulder width for stability majority of weight on front foot Common Errors Stopping with skates too far apart allows for stability but very little mobility. Stopping with skates too close together allows for mobility but little stability. TWO SKATE POWER STOP Change Direction Stop Hockey is a game that often demands quick stops and sudden changes in direction. The two skate power stop is often used to accomplish this. ]In order to properly execute this maneuver, the player must turn his or her body 90 degrees to his line of travel by rotating his shoulders and hips.
12 12 The knees must be flexed with a slight body lean backwards, with weight on the inside edge of the lead skate and the outside edge of the trailing skate. Your skates should be shoulder width apart. From the stop you should be prepared to move quickly in the opposite direction by utilizing the crossover start.players should practice this stop to both the right and left. Key Elements Stop on right skate. Rotate hips to left. Bend knee of right leg. Plant inside edge of right skate firmly in ice. Pick up left skate and go heel to heel at right angle, to right skate. Common Errors insufficient knee bend skates either too close together or too far apart


 skate and extend the leg fully. The stronger both edges cut into the ice, the tighter and quicker the turn will be.")
13 13 CONTROL TURNS The primary objective of this maneuver is to change direction quickly by executing a tight turn. Learning this turn may require assistance from the coach by supporting the ankles of a tentative skater. This will help him gain confidence in his edges. The control turn requires the skater to use the outside edge of one skate and the inside edge of the other at the same time. The skater must learn to transfer weight to the outside edge of the lead skate and thrust off the inside edge of the trailing skate. Thrust with the entire length of the blade. The skates are shoulder width apart and the knee of the lead skate is bent out over the toe with the weight transferred to the outside edge. Thrust out with the inside edge of the opposite (trailing) skate and extend the leg fully. The stronger both edges cut into the ice, the tighter and quicker the turn will be. The skater s hips should rotate in the direction of the turn with the shoulders level and the back straight. Key Elements direction changed quickly by doing a tight turn skates at least shoulder width apart lead skate has weight ransferred to the outer edge knee of lead skate bent over skate trailing skate thrusts out with inside edge hips rotated in direction of turn Upper body is erect; no leaning in direction of turn crossunder push of lead skate behind trail skate coming out of turn to accelerate Common Errors weight back on the heels of the skates bending forward at the waist failure to keep the shoulders level

14 14 FORWARD CROSSOVER The forward crossover is a two step maneuver. First, a crossover with the front leg is done with the inside edge. Second, is the back leg pushes under with the outside edge. This thrust should be out to the side rather than back and to full extension. Cross the left leg under and behind the right leg rolling the ankle under and pushing to full extension.
15 15 Once again the thrust should be against the entire length of the outside edge of the blade. Be careful to push the blade through rather than back. Immediately after thrusting to full extension with the left leg, return the left skate back to its original position parallel to the right skate. Keep the left skate close to the ice as it returns. Less skilled players may need to walk through the crossing steps to build confidence and feel in both inside and outside edges. Key Elements Stress the importance of the skate driving underneath (crossunder). Using the outside skate, push off inside edge, then pick up skate and cross knee over knee with inside skate. Using the inside skate, push under with outside edge as outside skate crosses over. Bend knee of gliding leg. Common Errors failure to roll the ankle and thrust off the entire length of the outside edge insufficient bend in the knee of the glide leg leaning into the turn by dipping the inside shoulder


16 16 PUCK CONTROL INTRODUCTION Until players learn to control the puck, their abilities to shoot, pass and receive the puck are severely limited. There are different stages of developing the skills of puck control. Youth ice hockey coaches must continue to pay special attention to the development of this and other fundamental skills during the early years of a player s growth and development. FUNDAMENTALS OF PUCK CONTROL To be a good puckhandler, it is essential that the player understands the importance of stick selection, stick length, grip, and basic stance. Length of Stick When standing on skates, the stick should be no longer than just under the chin and no shorter than the top of the shoulders. Size of Shaft It is very important that the fingers can grip around the shaft of the stick. Too many players start using an adult stick too early and have a difficult time controlling the stick. Peewee and younger players should use a junior shaft stick or have the shaft shaved down for a comfortable fit to their hand.
17 17 Blade of Stick The length of the blade must be small enough for the youth player to control the puck without having to fight the length and weight of the stick blade. Grip of Stick One of the most important components of puck control is the positioning of the hands on the stick. The hands should be a glove length apart on the stick. The grip is correct if the player can look down at the stick and see a V formed by the thumb and forefinger of each hand on the top side of the shaft. Basic Stance Players must hold the stick in front of the body. The elbows and arms should move freely as the puck is moved back and forth in front of the body. Knees are bent, with head, chest, and eyes up (ready position).


18 18 FUNDAMENTAL SKILLS FOR STICKHANDLING Wrist Roll and Cupping The Puck Every time the player moves the puck from side to side, it is essential to roll the wrist. It is this rolling of the wrists that will enable the blade of the stick to cup the puck, which results in increased puck control. Split Vision Split or peripheral vision refers to the ability to see the puck on the stick without looking directly at it. The player s eyes are up reading the play and what options are available. Indirectly, the player sees the puck out of the bottom of the eyes.
19 19 Basic Stickhandling Basic stickhandling is passing and receiving to oneself. Have the player concentrate on sliding the puck (don t slap the puck). Rolling the wrist and cupping the blade over the puck will result in the ability to control the puck better. The position of the puck on the stick is in the middle part of the blade. Have the players develop a feel for the puck by stickhandling 12 to 18 inches. PASSING AND RECEIVING INTRODUCTION The skill of passing and receiving extends puck control from an individual to a team skill. Two important sets of skills are necessary the delivery of the puck and the reception of it. Both are equally important. FOREHAND PASSING The forehand pass begins with the player in a solid, ready position. His or her eyes must be up and looking at his intended target. The blade of the stick must cup or cradle the puck. Start the passing action for the forehand pass from behind the back foot (Figure 14-1). The blade should be kept on the ice. Encourage the player to sweep rather than slap the puck. The desired result is a sweep and follow through toward the intended target with the blade of the stick kept low to the ice.

20 20 The puck should begin near the heel of the blade and roll down the blade as the stick is swept forward. The resulting spin on the puck is necessary to keep it flat on the ice. The accuracy of the pass is controlled by the follow through. The player should end the pass with the toe of his or her stick pointing at the intended target. Look Slide Guide-Point Key Elements The head is up with the eyes focused on the target. The blade of the stick should cup the puck. Use a sweeping (not slapping) action. The puck moves from the heel to the toe of the blade. Follow through low, pointing toward the intended target. Common Errors Passer is looking at the puck, not the target The puck starts at the toe of the blade, not the heel The passer slaps the puck Shortened or no follow through BACKHAND PASSING The backhand pass is similar to the forehand pass and the key elements listed above are the same. It is, however, a bit more difficult. The backhand pass involves looking at the target, using a sweeping action of the stick across the body to propel the puck, and a deliberate follow through towards the target. If the intended target is in front of the passer, he or she must follow through by rolling the wrists over, pointing the heel of the stick at the target. The puck begins on the backhand side. The hands are away from the body and the blade is cupped over the puck. Note that the shoulders are rotated toward the puck. The shoulders returning to a normal position, plus a pulling action of the lower hand, provide the sweeping action of the stick.
21 21 PASS RECEIVING Being able to receive a pass is equally as important as being able to make one. There are three keys to successfully receiving a pass: right angle give cup The receiver must learn to move the blade of the stick out toward the puck in preparation for receiving the pass. Just prior to (or at the point) of contact, move the blade in the same direction as the pass to allow the puck to gently come in contact with the stick blade. When a pass comes to either the backhand or forehand side, the reception techniques are basically the same. The player should keep his head up, watch the puck, and keep the stick on the ice. As the puck reaches the stick blade, the blade should be at a right angle to the line of the pass, cupped, and allowed to give by relaxing the wrists. This giving with the puck promotes control by allowing the momentum of the puck to be gradually absorbed. Key Elements The angle between the blade and the line of the pass should be 90 degrees. The blade must give to maintain puck control. The blade should be cupped over the puck as it glides along the ice. Common Errors The stick blade is not held perpendicular to the direction of the incoming puck. The blade of the stick is left open (top of blade angled away from the puck s direction), allowing the puck to bounce over the stick blade. The player s wrists are held stiff, causing the puck to rebound off the blade. The player fails to cup the puck.
22 22 SHOOTING INTRODUCTION Shooting is the most practiced of all fundamentals. The purpose of shooting the puck is to score a goal. This leads to the single most important factor to stress to the players: be sure the shot is on the net! There are several components associated with becoming an effective shooter: Head Up Players will have a better chance of hitting a spot on the net if they are looking at it. Form Players must execute the shots using the key elements of correct technique if they are to develop the speed, consistency, and accuracy necessary to be an effective shooter. Accuracy If the shot is not on the net, there is virtually no chance of scoring. Developing accuracy takes a great deal of concentration and practice by the player. Quickness Time spent handling the puck provides opposing players with the time needed to position themselves for strong defense. When the situation dictates, players must be able to shoot the puck quickly. Variety Shooting situations within the game vary greatly. The skillful player must, therefore, have a variety of shots that match the opportunities that develop. The amount of time a player has, the location, and defensive player positioning require that different shots (or variations of the same shot) be used. There are three types of shots discussed in this chapter. They are: 1. wrist shot 2. backhand shot Shooting, more than the other fundamentals, depends upon strength that is related to a player s physical maturity. Therefore, coaches of younger players are likely to find that, because of their age, they are unable to generate the speed and power desired to perform some shots such as the snap or slap shots. As players grow, develop and train for strength and power, their shooting will become more forceful. For younger players, however, emphasis should be placed on the development of correct technique, particularly of the forehand and backhand wrist shots.without this attribute even the shooting ability of the strong, powerful player will be limited. FOREHAND WRIST (SWEEP) SHOT The wrist shot is sometimes referred to as the sweep shot. Its attributes include speed and accuracy. Be sure that your players have mastered this shot before moving on to other types of shots. As the name implies, this shot involves sweeping the puck toward the target. Power is supplied by the arms, wrists, legs and through proper weight transfer. The hands are held approximately 12 to 15 inches apart. The puck should be positioned at the side of the body, behind the back foot, with the player s weight evenly distributed on both skates. The shot is initiated by a transfer of the body weight to the skate closest to the target (front skate).

23 23 As weight is transferred, the arms and hands complete the forward motion of the stick toward the target while dragging or sweeping the puck on the blade of the stick. The puck should be positioned at about the middle of the blade and travel to the toe as the shot is completed. The correct arm action includes the top arm/hand pulling back toward the body while the lower arm/wrist sweeps forward. To accomplish this push pull (wrist -sweeping) action, the player must exert maximal effort with the hands and arms. Weight may be best utilized in the shooting action by driving off the rear foot and following through to the front foot. The follow through of the stick usually will dictate the height and accuracy of the shot (low follow through, low shot; high follow through, high shot). The toe of the stick blade should be pointing at the target at the conclusion of the follow through. Weight transfer is important for another reason besides initiating the movement. As the weight moves toward the target, the force application to the stick through the lower hand causes a bending of the shaft. The release of this bend adds further speed to the stick blade, which results in greater puck speed.
24 24 Key Elements Hands held approximately 12 to 15 inches apart Shot begins with the puck at the side of the body and behind the back foot Blade of the stick cupped over the puck Weight transfer to the front skate Height and accuracy of the shot dictated by the follow through Puck movement from the middle of the blade to the toe Common Errors Insufficient weight transfer (results in weaker shots and causes players to fall away from instead of moving toward the target) Poor wrist action (results in slow movement of the stick blade, thus little force is transferred to the puck) Top arm and hand are held too close to the body (limits movement) Poor follow through (results in shots missing intended target) SUGGESTIONS FOR COACHING 1. Have your players practice the sweeping movement in a stationary position ensuring that the weight is transferred and the stick blade is moved quickly through the range of motion. 2. Use drills that allow the player to take at least 5 to 10 consecutive shots. Figure 15-3 shows two arrangements that work well for player practice. 3. The wrist shot involves a considerable amount of arm/wrist strength. Older players should be encouraged to improve their strength both off and on the ice. Younger players should concentrate on perfecting the technique for the shot. Shooting is easily practiced off-ice as well. 4. For young players, the technique of the shot may be better developed by using lighter pucks that are properly suited to their strength. The success this generates may go a long way to develop confidence through the satisfaction gained by shooting a crisp and accurate wrist shot. 5. Coaches should introduce shooting drills progressively, starting with stationary shooting, to shooting while moving, to situational drills simulating game conditions. BACKHAND SHOT The backhand shot is one of the most difficult shots to perform. Like the wrist shot, an important objective is to generate speed of the stick blade. The backhand shot is initiated with the puck on the backhand side of the stick and the blade cupped over the puck. The puck should begin between the heel and the middle of the blade. The wrist of the bottom hand is flexed while the upper arm is close to, instead of away from, the body. The shot begins with a weight transfer toward the target. The bottom hand pulls the stick and the puck simultaneously forward toward the target in a sweeping movement. The bottom wrist snaps from a flexed to an extended position. The top hand follows the bottom hand (rather than opposing, as in the wrist shot) and the top wrist snaps from extended to flexed position. This causes the top arm and elbow to move away from the body. Once again, the height of the follow through will determine the height and accuracy of the shot. At the conclusion of the shot, the toe of the blade should be pointing at the target. Like the wrist shot, you should stress form and accuracy with your players before working on speed.
25 25 Key Elements Hands held approximately 12 to 15 inches apart Shot begins with the puck at the side of the body and behind the back foot Blade of the stick cupped over the puck Weight transfer to the front skate Puck movement from the middle to the toe of the blade Height and accuracy of the shot dictated by the follow through Common Errors Poor sweeping action Improper wrist action Follow through goes toward ceiling instead of toward target
26 26 NOTEPAD:
Teaching Skills Through Progressions
 AGES 10 AND UNDER Teaching Skills Through Progressions LESSON WORKBOOK TY HENNES 2 INTRODUCTION At this level, the main focus is on the continued development of fundamental skills such as skating, puckhandling,
TECHNICAL. Shooting I. The USA Hockey Coaching Education Program is presented by REVISED 6/15
 TECHNICAL Shooting I The USA Hockey Coaching Education Program is presented by REVISED 6/15 OBJECTIVES To identify the shooting skills used by young players in ice hockey To outline for the coaches the
LEVEL 1 SKILL DEVELOPMENT MANUAL
 LEVEL 1 SKILL DEVELOPMENT MANUAL Lesson Manual C A Publication Of The USA Hockey Coaching Education Program The USA Hockey Coaching Education Program is Presented By LESSON C-1 SPECIFIC OBJECTIVES 1. Refine
AMATEUR HOCKEY ASSOCIATION ILLINOIS, INC. MITE 8 & UNDER AMERICAN DEVELOPMENT MODEL
 Mite 8 & Under American Development Model Week 1 This coach s manual is intended to provide the instructions and tools to conduct the Mite and 8 & Under Illinois Hockey - Skills Challenge. Mite
LEVEL 1 SKILL DEVELOPMENT MANUAL
 LEVEL 1 SKILL DEVELOPMENT MANUAL Lesson Manual D A Publication Of The USA Hockey Coaching Education Program The USA Hockey Coaching Education Program is Presented By 1. Proper Stance: LESSON D-1 SPECIFIC
A Publication Of The USA Hockey Coaching Education Program The USA Hockey Coaching Education Program is Presented By
 LEVEL 1 SKILL DEVELOPMENT MANUAL Lesson Manual B A Publication Of The USA Hockey Coaching Education Program The USA Hockey Coaching Education Program is Presented By LESSON B-1 SPECIFIC OBJECTIVES 1.
LEVEL 1 SKILL DEVELOPMENT MANUAL
 LEVEL 1 SKILL DEVELOPMENT MANUAL Lesson Manual A A Publication Of The USA Hockey Coaching Education Program The USA Hockey Coaching Education Program is Presented By LESSON A The Beginner Where to start?
GLOSSARY OF TERMS 112 HOCKEY CANADA SKILLS DEVELOPMENT PROGRAM
 The following terms and definitions can be found in the Skills of Gold DVD set. Reference number indicates the skill presented in this DVD set. SKATING BALANCE AND AGILITY 1.01 Basic stance Balance starts
LEVEL I STICK HANDLING TECHNICAL. January 2010 Page 1
 STICK HANDLING January 2010 Page 1 Page 2 January 2010 STICK HANDLING SKILLS Stick handling is a very important part of the game of hockey and it is one of the more difficult skill areas to learn. However,
Hockey Skills Challenge for Mite and 8 & Under
 Hockey Skills Challenge for and 8 & Under COACH S MANUAL This coach s manual is intended to provide the instructions and tools to conduct the and 8 & Under Minnesota Hockey - HEP (Hockey Education Program)
KEY INSTRUCTIONAL POINTS
 Skating is to hockey what running is to soccer. Skating is the foundation upon which all other skills are built. The level of performance attained by a player in passing, shooting, checking and stickhandling,
Goaltending Development
 AGES 8 AND UNDER Goaltending Development LESSON WORKBOOK JOE EXTER 2 Goaltending is a combination of sound structural technique and athleticism. It is important for coaches and goaltenders to consistently
Skating Coach Resource Package
 Skating Coach Resource Package 2005, Hockey Canada 1 of 15 Dear Coach, Specialty coach clinics are a national initiative of the Hockey Canada s National Coach Mentorship Program and designed on a modular
Teaching Body Contact and Checking
 AGES 16 / 18 AND UNDER Teaching Body Contact and Checking LESSON WORKBOOK KENNY RAUSCH 2 Body checking is a series of different skills which have to be learned, developed and trained. The goal of a body
INTRO TO HOCKEY PLAYER DEVELOPMENT
 As coaches navigate through the Intro to Hockey Model we have set priorities to simplify what is being worked on and in what format. Focussing on these five areas under each format will ensure players
S&DMHA Player Development Program Book Four - Goaltending
 S&DMHA Player Development Program Book Four - Compiled by Wayne King to be used as reference for all minor hockey coaches Good goaltending is essential to the success of your team. For individuals to be
LEARN TO SKATE CURRICULUM
 LEARN TO SKATE CURRICULUM INTRODUCTION The focus and goal of the Learn to Skate (L2S) curriculums are designed to teach beginner hockey players the fundamentals of skating. Every association will have
BURPEES BURPEES 10U/12U PHASE II - CORE & BACK 10U/12U PHASE II - CORE & BACK
 0U/U PHASE II - CORE & BACK BURPEES 0U/U PHASE II - CORE & BACK BURPEES Stand in athletic position: feet shoulder width apart and knees slightly bent. Squat down into a crouched position with hands on
FUNdamentals Pratice Plans
 FUNdamentals Pratice Plans At this stage the focus is on the development of agility, balance and coordination (ABC s). Basic ringette skills such as skating, passing, receiving, shooting and general knowledge
The information provided in this document came directly off the USA Hockey Website. All information is property of USA Hockey.
 The information provided in this document came directly off the USA Hockey Website. All information is property of USA Hockey. For more information on Goaltending or USA Hockey please visit www.usahockey.com
10U/12U PHASE II - RUNNING & JUMPING 180 JUMP WITH CHAOTIC JOG 10U/12U PHASE II - RUNNING & JUMPING 180 JUMP WITH CHAOTIC JOG
 0U/U PHASE II - RUNNING & JUMPING 80 JUMP WITH CHAOTIC JOG 0U/U PHASE II - RUNNING & JUMPING 80 JUMP WITH CHAOTIC JOG Players start in athletic stance and perform a 80 degree jump clockwise. Land softly
Field Hockey BC Coach Education and Mentorship Technical Skills
 Field Hockey BC Coach Education and Mentorship Technical Skills Robin D Abreo Provincial Development Coach Field Hockey British Columbia Tel: 604-730-7220 robin@fieldhockeybc.com www.fieldhockeybc.com
WILDCATS BASKETBALL CLUB SKILL SHEET
 Skill Sheets 1) Body movement / Agility 2) Ball Handling 3) Dribbling 4) Passing & Receiving 5) Rebounding 6) Shooting 7) Individual Defence 8) Individual Offence. Agility / Body movement fundamentals
Five Key Concepts for Goaltending Hockey Canada s Approach Skating The Goalie Stance (Athletic position) Stick Grip...
 Stick Grip...") s Level 1 Goaltending TABLE OF CONTENTS INTRODUCTION Five Key Concepts for Goaltending... 1 Hockey Canada s Approach... 2 Skating... 3 The Goalie Stance (Athletic position)... 3 Stick Grip... 4 Skating
s Level 1 Goaltending TABLE OF CONTENTS INTRODUCTION Five Key Concepts for Goaltending... 1 Hockey Canada s Approach... 2 Skating... 3 The Goalie Stance (Athletic position)... 3 Stick Grip... 4 Skating
The 5000 Puck Challenge Program Overview
 The 5000 Puck Challenge Program Overview The Ontario Minor Hockey Association is pleased to present the 5000 Puck Challenge as part of the OMHA Player s Club sponsored by Warrior Hockey. The program was
KWALIFICATIESTRUCTUUR SPORT IJSHOCKEYTRAINER/COACH 2 (Teambegeleider) HOOFDSTUK 2.5 PASSEN
 HOOFDSTUK 2.5 PASSEN") KWALIFICATIESTRUCTUUR SPORT 2012 IJSHOCKEYTRAINER/COACH 2 (Teambegeleider) HOOFDSTUK 2.5 PASSEN PASSING AND RECEIVING Being able to pass and receive the puck successfully enables a team to keep control
KWALIFICATIESTRUCTUUR SPORT 2012 IJSHOCKEYTRAINER/COACH 2 (Teambegeleider) HOOFDSTUK 2.5 PASSEN PASSING AND RECEIVING Being able to pass and receive the puck successfully enables a team to keep control
5000 PUCK CHALLENGE Program Overview
 5000 PUCK CHALLENGE Program Overview The Ontario Minor Hockey Association is pleased to present the 5000 Puck Challenge as part of the OMHA Players Club. The program was created as a development opportunity
Hockey Skills Challenge for Squirt and 10 & Under
 Hockey Skills Challenge for and 10 & Under COACH S MANUAL This coach s manual is intended to provide the instructions and tools to conduct the and 10 & Under Minnesota Hockey - HEP (Hockey Education Program)
Wayzata Skills Week 11 Drill Set
 Wayzata Skills Week 11 Drill Set Drill Diagram Legend S C = Student or player on the team = Coach = Player movement across the ice = Most often this represents a shot, but it can represent a specific type
Coach & Goaltenders GOALTENDER BASICS
 Coach & Goaltenders GOALTENDER BASICS STANCE To maximize net coverage and ability to move while maintaining balance. Body Position: Feet Little more than shoulder s width apart, slight ankle bend with
LEVEL I CHECKING TECHNICAL
 CHECKING Page 1 September 2007 CHECKING SKILLS Checking is carried out to gain possession of the puck. The coach must recognize that, before checking skills can be taught or developed, it is important
APPENDIX B: SHA Evaluation Drills and Criteria
 as of Feb 18, 2014 Page 1 of 13 as of Feb 18, 2014 Page 2 of 13 as of Feb 18, 2014 Page 3 of 13 Southland Hockey Association SKATER SKILLS Evaluation Criteria Forwards/Backwards M Weave Without Puck M
Coaching and skating kits every rink should have for practice and public skating.
 Coaching and skating kits every rink should have for practice and public skating Coaching and skating kits every rink should have for practice and public skating. I saw this sort of equipment at many of
8-AND-UNDER MITE Practice Plan Manual
 8-AND-UNDER MITE Practice Plan Manual A Publication Of The USA Hockey Coaching Education Program The USA Hockey Coaching Education Program Is Presented By Practice Plan Manual For 8-and-UNDER (Mite) Philosophy
Teaching Progression and the Fine Points For Contact In The Underhand Pass (Service Reception and Defense) Step 1: Catch & Throw
 Step 1: Catch & Throw") Teaching Progression and the Fine Points For Contact In The Underhand Pass (Service Reception and Defense) Step 1: Catch & Throw - Players can be in pairs or if working individually then the coach can
Teaching Progression and the Fine Points For Contact In The Underhand Pass (Service Reception and Defense) Step 1: Catch & Throw - Players can be in pairs or if working individually then the coach can
10U/12U PHASE I - AGILITY & BALANCE LADDER: SLALOM 10U/12U PHASE I - AGILITY & BALANCE LADDER: SLALOM
 0U/U PHASE I - AGILITY & BALANCE LADDER: SLALOM 0U/U PHASE I - AGILITY & BALANCE LADDER: SLALOM Stand and face the ladder at one end. Keep both feet together and jump into the first square. Upon landing
BEGINNING GOALKEEPING
 BEGINNING GOALKEEPING January 2010 Page 1 Page 2 January 2010 INTRODUCTION When many young players see the equipment a goalkeeper has to wear and they say to themselves Wow I want to be a goalkeeper. But
Coaching Points. SAFE LANDING When landing on one leg it is important to teach the players which foot they should be landing on.
 Footwork and Movement Skills Coaching Points INITIAL STANCE Forms the starting point for most attacking and defending skills. Feet shoulder-width apart Shoulders back and down Knees slightly flexed Knees
CIRCLE WRESTLING 10U/12U PHASE I - UPPER & LOWER BODY HAND WRESTLING & CIRCLE WRESTLING 10U/12U PHASE I - UPPER & LOWER BODY HAND WRESTLING &
 0U/U PHASE I - UPPER & LOWER BODY HAND WRESTLING & HAND WRESTLING SETUP Divide players into partners. Pair up players of similar size. Grasp partner s right hand like a handshake. Place left foot forward
National Coach Mentorship Program Specialty Clinics
 Time 3 5 MIN PER STATION Drill Name & Description Stationary Puck Control Narrow / Wide Combination - The goal is to keep the hand movements as smooth and quick as possible. -This technique moves the puck
HOW TO HOLD THE SHOT
 HOW TO HOLD THE SHOT Balance the shot in his hand so it is resting at the point where the fingers are connected to the palm of the hand. Keep their fingers together and allow their thumb to gently rest
RJT. Pupil Task Cards: Throwing JUMP THROW RUN
 RJT s: Throwing RUN JUMP THROW s: Introduction Introduction to the s An important part of every child s cognitive development is to encourage them to explore new things and use self-guided learning to
Softball Pitching Mechanics
 Softball Pitching Mechanics When teaching softball pitching mechanics, the best way to avoid injury, develop consistency, and see results is through repetition and attention to detail. Even a slight change
defenders get specific coaching for their respective positions, goalies require the same attention and guided skill development.
 POWER POINT SLIDES ACTIVITIES NOTES Mini-lecture: Over view- 10 RM- p. 1 1. Provide the following overview of the clinic: Rationale: Goaltending is a critical aspect of team play and requires direct &
# 3: Shooting. # 2: Shuttle Skate # 4: Backward Skate
 # 1: Ring Handling # 3: Goalie Assessment Station # 2: Shuttle Skate # 4: Backward Skate Tryout # 1 Timed Drills Ice Plan Layout Create 4 groups of skaters based on pinnie colour and number (e.g. Group
TECHNICAL. Checking. The USA Hockey Coaching Education Program is presented by REVISED 6/15
 TECHNICAL Checking The USA Hockey Coaching Education Program is presented by REVISED 6/15 OBJECTIVES To identify the skills involved in the introduction of checking To identify key components of each phase
AGES 16 / 18 AND UNDER. Small Area Games LESSON WORKBOOK ROGER GRILLO
 AGES 16 / 18 AND UNDER LESSON WORKBOOK ROGER GRILLO 2 The players are the ones that need to learn to play the game, learn to be in the right place at the right time. When we have the players practice skills
ACTIVITY TYPE. Coaching Points COACHING RESOURCE
 ACTIVITY TYPE Coaching Points COACHING RESOURCE 171 Footwork, Balance and Movement Skills Initial Stance Forms the starting point for most attacking and defending skills. Feet shoulder-width apart Shoulders
FIGURE 8s. FIGURE 8s 10U/12U PHASE II - PUCK HANDLING 10U/12U PHASE II - PUCK HANDLING. FOCUS Wrist action and cupped blade.
 0U/2U PHASE II - PUCK HANDLING FIGURE 8s 0U/2U PHASE II - PUCK HANDLING FIGURE 8s FOCUS Wrist action and cupped blade. Use hockey ball to perform drill. Place 2 cones 3-4 feet apart from each other. Stand
10U/12U PHASE II - AGILITY & BALANCE LADDER: TAPIOCA 10U/12U PHASE II - AGILITY & BALANCE LADDER: TAPIOCA
 0U/U PHASE II - AGILITY & BALANCE LADDER: TAPIOCA 0U/U PHASE II - AGILITY & BALANCE LADDER: TAPIOCA Begin by standing sideways at one end of the ladder with the lead foot directly next to the ladder. Move
LEARN TO PLAY PROGRAM
 LEARN TO PLAY PROGRAM Table of Contents Foreword.. 2 Lesson Format. 3 Cross-Floor Practicing and Playing 6 Basic Playing Rules & Equipment. 7 Teaching Tools. 10 Basic Lessons.. 12 Advanced Lessons.. 44
Novice (7-8) Development Zone Seasonal Plan
 Development Zone Seasonal Plan") Novice (7-8) Development Zone Seasonal Plan Introduction This document contains 20 different Novice Development Zone plans for Coaches to use as the foundation to their skill development plan for the Novice
Novice (7-8) Development Zone Seasonal Plan Introduction This document contains 20 different Novice Development Zone plans for Coaches to use as the foundation to their skill development plan for the Novice
Sitting. Volleyball. Skills and Systems
 Sitting Volleyball Skills and Systems Sitting Volleyball Skills Ready Positions There are two ready positions commonly used in sitting volleyball depending on the situation presented. Reception ready position
Sprinting. Relevant Knowledge** Overall Level. Assessment Criteria. Learning Outcomes
 Sprinting 1. coordinate their limbs. 2. be familiar with the starter s order.. swing their arms in rhythm. 1. coordinate their limbs. 2. swing their arms in rhythm.. react accurately to signals.. master
PERINTON YOUTH HOCKEY
 PERINTON YOUTH HOCKEY Player & Coaching Development Program 2003 2004 Player & Coaching Development Program Mission Statement The primary goal of the PYH Player and Coaching Development Program for the
SHOT PUT - GLIDE TECHNIQUE
 SHOT PUT - GLIDE TECHNIQUE The Shot Put can be broken down to four different phases. Preparation/Glide/Delivery & Recovery. Preparation - The thrower sets up correctly to commence the glide. Glide - The
Basic Offensive Fundamentals
 Basic Offensive Fundamentals Footwork Developing proper footwork will help with each player s balance and quickness while on the court. Emphasizing the importance of footwork from the beginning of the
Belton High School Marching Fundamentals 2016
 Belton High School Marching Fundamentals 2016 Fundamentals of Teaching Fundamentals: 1. Say the name of the maneuver (INSTRUCT) 2. State its purpose (INSTRUCT) 3. Demonstrate it slowly, several times,
GOALKEEPER DEVELOPMENT CURRICULUM
 GOALKEEPER DEVELOPMENT CURRICULUM U6 and U8 *Using goalkeepers is not recommended for these two age groups. *In today s game, goalkeepers must be able to control the ball with their feet and pass as well
10U/12U PHASE II - AGILITY & BALANCE LADDER: LATERAL 2 IN THE HOLE 10U/12U PHASE II - AGILITY & BALANCE LADDER: LATERAL 2 IN THE HOLE
 0U/U PHASE II - AGILITY & BALANCE LADDER: LATERAL IN THE HOLE 0U/U PHASE II - AGILITY & BALANCE LADDER: LATERAL IN THE HOLE Stand sideways at one end of the ladder with one foot directly next to the ladder.
Position #1: Reception
 Ready Positions There are two ready positions commonly used in sitting volleyball depending on the situation presented. Reception ready position is used primarily for serve receive and it allows the athlete
Level 1 Stroke Performance Criteria
 STROKE PERFORMANCE CHART Level 1 Stroke Performance Criteria Component Swim on Front (Combined Stroke Using Any Type of Arm or Leg Action) Swim on Back (Combined Stroke Using Any Type of Arm or Leg Action)
HOPPING Grade 1. Standard 1: The physically literate individual demonstrates competency in a variety of motor skills and movement patterns.
 HOPPING Grade 1 S1.E1.1: Hops, gallops, jogs and slides using a mature pattern. Hop in general space on preferred foot. 1. Students in scattered formation with personal space of at least 3-feet square
PHYSICAL EDUCATION CURRICULUM YEAR NINE
 PHYSICAL EDUCATION CURRICULUM YEAR NINE TOPIC: BADMINTON WEEK ONE Objective To introduce the Universal or forehand grip and teach the basic fundamentals of the forehand overhead clear. Universal/ forehand
USA BASKETBALL PLAYER DEVELOPMENT CURRICULUM INTRODUCTORY LEVEL. 40 USA Basketball Youth Development Guidebook
 USA BASKETBALL PLAYER DEVELOPMENT CURRICULUM INTRODUCTORY LEVEL 40 USA Basketball Youth Development Guidebook 41 INTRODUCTORY LEVEL BALL HANDLING & DRIBBLING GENERAL OVERVIEW: Ball-handling and dribbling
Home-Based Hockey Success Training Program. Novice/ Atom Player Manual
 Home-Based Hockey Success Training Program Novice/ Atom Player Manual Table of Contents Hockey Homework... 3 Week 1... 3 Week 2... 4 Week 3... 4 Week 4... 5 Week 5... 5 Week 6... 6 Week 7... 6 Week 8...
U.S. Shooting Team Balance, Strength and Stability Workout. Shooting Warm-Up
 U.S. Shooting Team Balance, Strength and Stability Workout Shooting Warm-Up Modified by Dan Durben and Sommer Wood from the program originally developed by Amber Darland for the USA Shooting National Rifle
AGES 14 AND UNDER. Small Area Games LESSON WORKBOOK ROGER GRILLO
 AGES 14 AND UNDER LESSON WORKBOOK ROGER GRILLO 2 The players are the ones that need to learn to play the game, learn to be in the right place at the right time. When we have the players practice skills
OFFENSIVE SKILLS FOOTBALL SKILLS-SUCCESSFUL OFFENSE TAKING A SNAP GRIPPING THE BALL QUARTERBACKS STANCE
 OFFENSIVE SKILLS S E C T I O N I I I QUARTERBACKS STANCE Stand up straight with feet even, shoulder width. Have weight even on each foot, toes pointing straight ahead. Bend knees, keep back straight and
ShuttlE. Schools Badminton. Module 5: 10 starter lessons
 ShuttlE Time Schools Badminton Teachers MANUAL Module 5: 10 starter lessons ShuttlE Time Schools Badminton Teachers MANUAL 10 starter lessons Badminton World Federation 2011. First published November
Shoulder Exercises for Combined Labrum Repair Rehabilitation Protocol
 Shoulder Exercises for Combined Labrum Repair Rehabilitation Protocol The exercises illustrated and described in this document should be performed only after instruction by your physical therapist or Dr.
Coaching Principles. 1. Introduce 2. Demonstrate 3. Explain 4. Organize 5. Execute 6. Correct 7. Practice
 5 Pin Bowling Drill Book Updated August 2008 Coaching Principles STEPS IN TEACHING A DRILL 1. Introduce 2. Demonstrate 3. Explain 4. Organize 5. Execute 6. Correct 7. Practice GENERAL PRINCIPLES Drills
RAHA HOCKEY DEVELOPMENT
 RAHA HOCKEY DEVELOPMENT Coaching & Player Development Guidelines & Expectation AUGUST 1, 2017 ROSEMOUNT AREA HOCKEY ASSOCIATION Purpose of the Coaches/Players Development Handbook As the RAHA organization
Rolled Ground Balls. Setup A bucket of balls and a coach to roll them
 Rolled Ground Balls To help infielders become comfortable with the proper mechanics of fielding a ground ball; verbal cue: wide base, butt down, hands out in front A bucket of balls and a coach to roll
5. Athletic & movement skills - Teach them how to run, jump and land, skip, stop, move laterally, squat, lunge and any other basic movements.
 EBYBA Practice Guidelines Have every player touching the ball as much as possible. Use games that keep all kids playing until the end. Don't have the weak players get knocked out and watch the stronger
There are a number of styles of goalkeeping, but all must have these common characteristics of the basic stance. Figure 1: Basic Stance (Front View)
") 15. GOALKEEPING 15. Goalkeeping Good goalkeeping is essential to the success of your team. For individuals to be effective goalkeepers, they must develop skills in a number of areas. They must be able
15. GOALKEEPING 15. Goalkeeping Good goalkeeping is essential to the success of your team. For individuals to be effective goalkeepers, they must develop skills in a number of areas. They must be able
The Golf Swing. The Fundamentals
 The Golf Swing The Fundamentals Fundamental #1 Grip & Set-Up The grip and set-up should be viewed as putting parts of a machine together. The right parts connected in the right way will allow the machine
IIHF COACH DEVELOPMENT PROGRAM LEVEL I TECHNICAL
 IIHF COACH DEVELOPMENT PROGRAM LEVEL I TECHNICAL 15. GOALKEEPING 15. Goalkeeping Good goalkeeping is essential to the success of your team. For individuals to be effective goalkeepers, they must develop
COACHING WINDMILL PITCHERS GETTING STARTED
 COACHING WINDMILL PITCHERS GETTING STARTED INTRODUCTION Coaching pitchers in NOT difficult. All you need is some interest and a little information to understand what you're doing. The interest has to come
Coaches Handbook. Coaches Handout Page 1
 Coaches Handout 2009 Page 1 General Session 1: How to Warm-up! Players are put through basic warm-ups and exercises that they should perform each week when they come to Tball. Stretching should be the
Welcome to the ABGC Basketball House League
 Welcome to the ABGC Basketball House League This is a program for 1st, 2nd and 3rd graders, all of whom are part of ABGC Development League for new basketball players. The idea is to make the sport as
Hockey Practice Plan
 Hockey Practice Plan Objectives: Stretching is very important: 10 minutes off-ice then five minutes on-ice Inside and outside edges, ready position power stroke slide and stride sequence, compass drill,
JUNIOR TOUCH BASICS level 1 & 2
 JUNIOR TOUCH BASICS level 1 & 2 Catch... 2 Carry... 3 Passing (orthodox)... 4 Effecting the Touch (When in Possession)... 5 Roll Ball... 6 Acting Half... 7 Tap Off Penalty... 7 Defending... 8 General...
CIRCLE WRESTLING CIRCLE WRESTLING 6U/8U - UPPER & LOWER BODY HAND WRESTLING & 6U/8U - UPPER & LOWER BODY HAND WRESTLING &
 6U/8U - UPPER & LOWER BODY HAND WRESTLING & HAND WRESTLING Divide players into partners. Pair up players of similar size. Grasp partner s right hand like a handshake. Place left foot forward and right
ESSO FUN DAY ESSO FUN DAY PROGRAM ESSO FUN DAY ON-ICE PLAN PHILOSOPHY BASIC PRINCIPLES TO FOLLOW
 ESSO FUN DAY - On Ice Instructors Manual hockeycanada.ca ESSO FUN DAY ESSO FUN DAY PROGRAM The following pages contain key teaching points and lesson plan information to introduce beginning hockey players
U.S. Shooting Team Balance, Strength and Stability Workout. Training Work-Out
 U.S. Shooting Team Balance, Strength and Stability Workout Training Work-Out Modified by Dan Durben and Sommer Wood November 2006 from the program originally developed by Amber Darland for the USA Shooting
Player Development. Pitching 1
 Pitching Player Development Pitching 1 Delivery Mechanics Checklist: 1. Feet slightly spread on throwing arm side of rubber 2. Body weight positioned over stride leg 3. Torso upright 4. Hips and shoulders
Shot Put - Glide Technique by Rob Lasorsa, M-F Athletic
 Shot Put - Glide Technique by Rob Lasorsa, M-F Athletic SHOT PUT GLIDE TECHNIQUE *ALL MOVEMENTS CONSIDER A RIGHT HANDED THROWER* GRIP, CARRY, RELEASE GRIP CARRY THROW INTO THE GROUND KNEELING THROW #1
TREMONTON RECREATION
 AT E R C E TON R N O M TRE ION SOCCE OK O B Y A L P R COACH SPORTSMANSHIP PLEDGE - MORE THAN More Than... As a Tremonton Youth Soccer Coach, you are a part of changing the landscape of youth sports for
New Berlin Athletic Association P.O. BOX New Berlin, WI MINIS BASKETBALL CLINICS
 New Berlin Athletic Association P.O. BOX 51123 New Berlin, WI53151-0123 MINIS BASKETBALL CLINICS Table of Contents 1. OVERVIEW 3 2. DEFENSE..4 2.1. SHUFFLE SLIDE ( )..4 2.2. MIRROR DRILL ( )..5 2.3. CLOSE-OUT
Puck Control - Coach Resource Guide
 Hockey anada Specialty linics Puck ontrol - oach Resource Guide Dear oach, Specialty coach clinics are a national initiative of the Hockey anada s National oach Mentorship Program and designed on a modular
WILDCATS BASKETBALL CLUB Coaches Pack
 Contents - Skill Sheets 1) Body movement / Agility 2) Ball Handling 3) Dribbling 4) Passing & Receiving 5) Rebounding 6) Shooting 7) Lay ups 8) Individual Defence 9) Individual Offence. 10)Acknowledgements.
Ultimate Hitting Drills
 If You Enjoy This Report, Please Check Out Ultimate Hitting Drills Discover 56 Game-Te Tested Hitting Drills For A Faster, Smoother, And More Powerful Swing! Get Instant Access To The Complete Report Today,
The BIG BOOK of Golf Drills
 The BIG BOOK of Golf Drills 1 How to Use This Guide Congratulations on purchasing the Big Book of Golf Drills! This book is designed to use as a reference guide. We do not recommend printing this out as
TECHNICAL. Shooting II. The USA Hockey Coaching Education Program is presented by REVISED 6/15
 TECHNICAL Shooting II The USA Hockey Coaching Education Program is presented by REVISED 6/15 OBJECTIVES To describe various shots To describe proper shooting areas of the net To describe various ways of
HOCKEY CANADA CORE SKILLS INITIATION
 INITIATION Balance and Agility Edge Control Starting and Stopping Forward Skating and Striding Basic stance Figure 8 s forward T-start C-cuts left foot / right Getting up from the ice inside & outside