Tick Kit. Assembly Instructions
|
|
|
- Rafe Price
- 6 years ago
- Views:
Transcription

1 Tick Kit Assembly Instructions

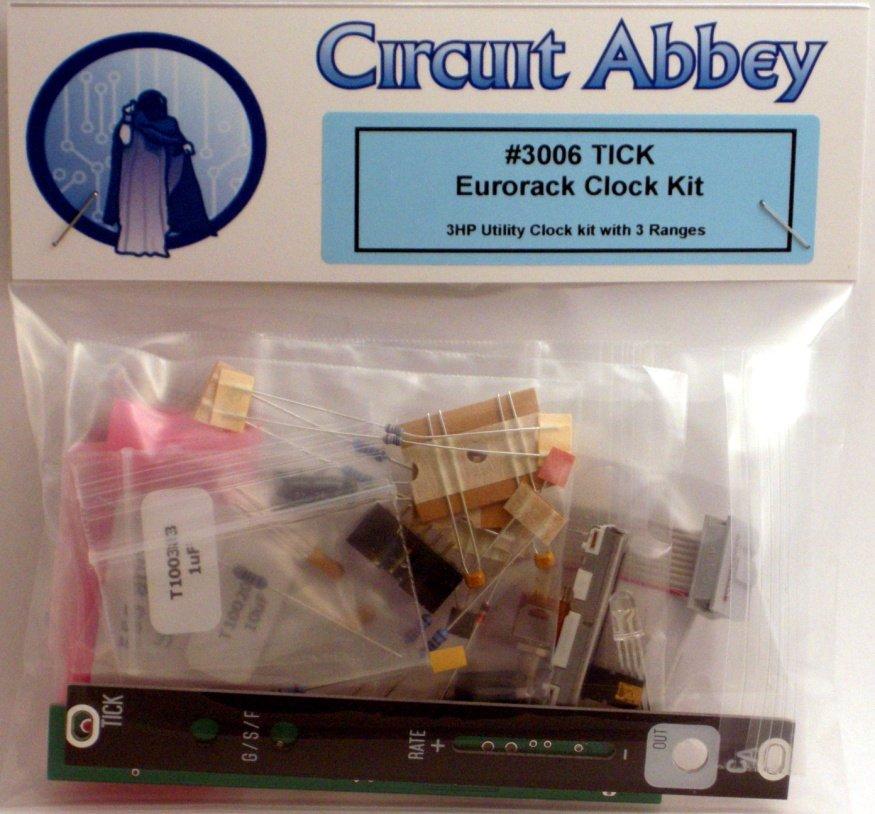
2 Tick Kit Description The Tick is a simple clock module kit. It has 3 ranges from fast to glacial, with a cool LED to show the range. The module puts out a square wave.this 3HP module has a maximum 20mA current draw. Module depth is 26mm. Main Parts Assembly First unpack the components and lay them out as shown: Make sure all of the components are present. If you are missing components, support@circuitabbey.com for replacements.

3 Main Parts List: Qty Title Reference 1 BAT85 Diode D n Capacitor C3,C4 2 10K Resistor R3,R4 2 1K Resistor R1,R2 2 2K Resistor R7,R8 1 3K Resistor R6 1 1 Ohm Resistor R9 1 22uF 25V Capacitor C5 1 78L05 U1 1 Header,2x5,shrouded J2 1 1u 25v TANT C2 1 10u 25v TANT C1 A lead forming tool is handy and speeds assembly.
4 Here is a picture of the board for reference:


5 Start by inserting the Resistors and the diode. They are placed on the silk screen side of the board: Flip the board over (carefully) solder, and trim the leads:


6 There are several techniques for holding parts in place while soldering. The first is bending the leads slightly. The second is to use tape like masking tape to hold the parts. The third is to tack solder the leads on the component side then flip the board and finish soldering. Next solder the 8-pin socket and the 2x5 shrouded connector. The socket can be found in the bag labeled 555 and Socket. Be sure to align the socket and connector properly before soldering. Clip the connector leads:


7 Now locate the tantalum capacitors. They are in separate bags: The 1uF goes in C2 and the 10uF goes in C1. Locate the 100n capacitors. The go in C3 and C4. Place the 78L05 regulator and the 22uF capacitor. Flip the board and solder the components. Trim the leads.


8 Control Parts Assembly Panel parts list: Qty Title Reference(m) 1 POT,500K SLIDE R5 1 LED,5MM RGB D2 1 Jack,3.5mm,Stereo,Vert J1 1 DPDT SUB MINI SWITCH SW1 1 Nut, Round J1 Locate the bag labeled Panel Parts These parts go on the opposite side of the board, the side with no silk screen.

9 Start with the slide pot, R5. Insert into the board as shown: Make sure the slide pot sits flush with the board. If the connector leads are too long they will push the slide pot up. If this is happening then remove the slide pot and trim the connector leads closer to the board. Solder in the slide pot but only tack solder 2 pins. Re-verify the pot is flush to the board. If it is not, carefully re-heat the tacked pins while pushing the pot against the board. Once the slide pot is flush, solder the rest of the pot pins.


10 Locate the switch. Assemble one nut onto the switch. Remove all other hardware. Insert the switch into the board as shown:


11 Make sure the switch is flush with the board. Turn the board over and solder the switch leads: Place the jack into the board, flip the board over, and solder the jack in place:


12 Now place the LED. The circle on the silk screen side of the board is where the long lead of the LED goes: To align the LED it is best to install the front panel at this time:

13 Put on the nuts for the jack and the switch as shown. Now use the panel to position the LED. We like to have the LED protruding out about half way, but this is up to the user. Solder the LED in place and trim the leads. Finally, install the 555 into the 8 pin socket: Congratulations! Your Tick kit is complete.
14 Usage There are many places where a clock can be handy. The most basic use, of course, is on modules that need a clock: counters, ADSRs, sequencers just to name a few. The Tick can be used as a master clock in a complicated patch. Mult the output of the Tick to the rest of your patch. Now everything is synced to one clock, and you didn t tie up an LFO to do it! The Tick is designed to go up to several hundred hertz to it can clock a counter and still have some speed. The low end is about seven seconds so it can do a fairly slow rate. This module is 3HP. This is literally as small as we could make it and still have good usability. 2HP is too small and 4HP wastes space. So 3HP is just right. Theory of Operation Simple enough. The design uses an astable 555 circuit straight from the data sheet. R3, R4+R5, and C1-3 set the frequency. The toggle switch selects one of three different timing capacitors: C1,C2 or C3. R4 sets the maximum frequency for the selected range, and the sum of R4 and R5 sets the lowest. The toggle switch also selects the color of the range LED. Blue is always on, and the switch turns on red or green. C4 is for noise suppression. R1 is a current limiting resistor for the output, and R2 set the current for the resistor in the slide pot.
15
Booster Pump PB4-60 Replacement Kits
 Booster Pump PB4-60 Replacement Kits FOR YOUR SAFETY - This product must be installed and serviced by a contractor who is licensed and qualified in pool equipment by the jurisdiction in which the product
Paddle Bar Replacement
 This procedure is to help facilitate the replacement of the 23 Paddle Bar Assembly on the ANKOM Dietary Fiber Analyzer. Note: The following items will be sent in a replacement package as part of the 23
QRPGuys Single Lever Paddle w/base
 QRPGuys Single Lever Paddle w/base First, familiarize yourself with the parts and check for all the components. If a part is missing, please contact us and we will send one. You must use qrpguys.parts@gmail.com
IMPALA CONTROL PANEL CONVERSION KIT an ISO 9001:2008 Registered Company REV E 4/13/ IMPALA CNTRL PNL INST PG 1 OF 16
 an ISO 9001:2008 Registered Company 1961-62 IMPALA CONTROL PANEL CONVERSION KIT 471062 20 30 40 50 60 70 80 90 100 110 120 C T E M P EF F U E L DEF AIR 901064 REV E 4/13/15 1961-62 IMPALA CNTRL PNL INST
ASSEMBLY INSTRUCTIONS
 ASSEMBLY INSTRUCTIONS Ballpark Classics Baseball Game MLB Edition Figure B Read the instructions completely before beginning g assembly. You will need a Phillips screwdriver. 1. Remove the game from the
-- SGP (NOVA TEAM SQUARE)
") -- SGP-100 -- (NOVA TEAM SQUARE) Installation Instructions Call Jaypro Sports Equipment at 1-800-243-0533 during regular business hours for technical support. www.jaypro.com Rev-B Page 1 of 9 JAYPRO SPORTS
-- SGP-100 -- (NOVA TEAM SQUARE) Installation Instructions Call Jaypro Sports Equipment at 1-800-243-0533 during regular business hours for technical support. www.jaypro.com Rev-B Page 1 of 9 JAYPRO SPORTS
WEIGHT STACK ATTACHMENT. Assembly Manual (888) FOR YOUR SAFETY READ ALL INSTRUCTIONS CAREFULLY
 FOR YOUR SAFETY READ ALL INSTRUCTIONS CAREFULLY") WEIGHT STACK ATTACHMENT Assembly Manual DF835 (888) 258-0533 FOR YOUR SAFETY READ ALL INSTRUCTIONS CAREFULLY *NOTE IF YOU ARE MISSING HARDWARE OR HAVE ANY FIT UP PROBLEMS PLEASE CONTACT DELTECH FITNESS
WEIGHT STACK ATTACHMENT Assembly Manual DF835 (888) 258-0533 FOR YOUR SAFETY READ ALL INSTRUCTIONS CAREFULLY *NOTE IF YOU ARE MISSING HARDWARE OR HAVE ANY FIT UP PROBLEMS PLEASE CONTACT DELTECH FITNESS
OMS P/N: Rev.: B. Description OMS: ASSY BACKUP POD 6.0. DCR# 3137 Date: Operation: Special Instructions: TQC. Torque.
 DCR# Date: -0- ASSY BACKUP POD.0 BPEVE OMS P/N: 00-09 Rev.: B Page: of NA P-Touch Labels Apply Label & Serial Number/Part Number Label onto the front of the chassis as shown. OMS Template: 00-00 Rev. A
Read through all the steps first before working on the camera. Make sure you know what to do.
 Step-by-step procedure to fix lack of contact in the end-of-travel switch of a D700 pop-up flash DISCLAIMER: PLEASE UNDERSTAND THAT IF YOU DECIDE TO FOLLOW THE INFORMATION PROVIDED BELOW YOU DO SO AT YOUR
Total solder points: 85 Difficulty level: beginner advanced MULTIFUNCTION RELAY SWITCH K8015 ILLUSTRATED ASSEMBLY MANUAL
 Total solder points: 85 Difficulty level: beginner 1 2 3 4 5 advanced MULTIFUNCTION RELAY SWITCH K8015 14 Different functions including timers, switching, flashing, interval, random switching,... ILLUSTRATED
Gerber Sabre 404 and 408 Installation Instructions
 1 TITLE: Gerber FastFact # Supplied by: Last Modified: Summary: Gerber Sabre 404 and 408 Installation Instructions 5002 Gerber Service November 13, 2001 This document provides the installation and set-up
Duo/Trio Office Bike Owner s Manual
 Duo/Trio Office Bike Owner s Manual Welcome Congratulations on choosing to enhance your productivity and wellness with LifeSpan. You ve made a healthy decision, as the need for increased amounts of daily
Module 2, Add on Lesson Depth Sensor. Teacher. 90 minutes
 Module 2, Add on Lesson Depth Sensor 90 minutes Teacher Purpose of this lesson Investigate the relationship between pressure and depth Construct a sensor to measure the depth of water Graph data and reason
10 DRIP NOZZLE WATERING DRIP KIT Model / Model 46095
 10 DRIP NOZZLE WATERING DRIP KIT Model 93261 / Model ASSEMBLY AND OPERATING INSTRUCTIONS Due to continuing improvements, actual product may differ slightly from the product described herein. 3491 Mission
Instructions for Assembly, Installation, and Operation of the Gas Addition Kit Accessory with the CEM Discover Systems
 Corporation Issued: 5/09 P/N: 600104 Rev. 2 Instructions for Assembly, Installation, and Operation of the Gas Addition Kit Accessory with the CEM Discover Systems The Gas Addition Accessory permits the
RB70 Automatic Diluent Valve Maintenance Manual. Version 1.1 November 2006 Written by Tino de Rijk. Page 1 of 23
 RB70 Automatic Diluent Valve Maintenance Manual Version 1.1 November 2006 Written by Tino de Rijk Page 1 of 23 Table of Contents 1. Introduction... 3 2. ADV diagram and parts list (Pre June 2006)... 4
3190A NEO-ANGLE DOOR INSTALLATION INSTRUCTIONS. Series MODEL NO
 NEO-ANGLE DOOR INSTALLATION INSTRUCTIONS Series 30A Please read these instructions carefully to familiarize yourself with the required tools, materials, and installation sequences. The Exploded Diagram
ASSEMBLY MANUAL HOBIE CATSY
 ASSEMBLY MANUAL HOBIE CATSY HOBIE CAT EUROPE ZI Toulon Est, BP 50 8078 Toulon cedex 9, France Tel : + (0)9 08 78 78 - Fax : + (0)9 08 99 Email : hobiecat@hobie-cat.net - http://www.hobie-cat.net ASSEMBLY
CZ52 Detail Strip, Disassembly, and Assembly Instructions Lonestar Fabrication & Design
 CZ52 Detail Strip, Disassembly, and Assembly Instructions 2008 Lonestar Fabrication & Design These instructions may be freely distributed and copied providing this page is included, and providing they
Service Installation: 48 V Power Supply September 27, 2018 SI Written by BTA
 Service Installation: 48 V Power Supply September 27, 2018 SI-92718 Written by BTA 48 Volt Power Supply Installation Guide PROCEDURE: Parts Needed: 48V Power Supply Kit Tools Needed: Standard screwdriver,
Written By: Matt Newsom
 PSP 300xc Power Switch Board Replacement Replacing the power switch board for a PSP 300xc. Written By: Matt Newsom ifixit CC BY-NC-SA www.ifixit.com Page 1 of 11 INTRODUCTION Has the power switch broken
Warnings: Notes: Revised: October 5, 2015
 Karl Suss MA6 Mask Aligner Standard Operating Procedure Faculty Supervisor: Prof. Robert White, Mechanical Engineering (x72210) Safety Office: Peter Nowak x73246 (Just dial this directly on any campus
First Team Sports, Inc. Stellar Recreational Volleyball System
 First Team Sports, Inc. Stellar Recreational Volleyball System BILL OF MATERIALS A 2 Volleyball Vertical Post K 1 ½ Centerlock Nut B 2 Height Labels L 2 Carabiner Clip C 3 Net Clamp M 1 ½ x 2 Hex Bolt
 www.allsportsystems.com Page 1 of 29 Page 2 of 29 Table of Contents Items You Supply: 4 MICROBAY Setup Instructions 5 Items Provided By AllSportSystems: 5 MEASURING AND CUTTING THE 1 EMT POLES FOR THE
Maintenance Manual. Note: This document is broken up into the following 6 sections of prescribed maintenance.
 How to Perform Maintenance On LPKF Circuit Board Plotters Requirements - LPKF Circuit Board Plotter - BoardMaster Software - 2.5 mm Allen wrench (for earlier model machines) - 3mm Allen Wrench - 4mm Allen
Repairing Vizio VHT 510 Sound Bar Volume
 Repairing Vizio VHT 510 Sound Bar Volume Indicator LED This is how I was able to repair a common issue where the blue led's for the volume indicator stop working. Written By: Johnny ifixit CC BY-NC-SA
Electronic Automatic Transmission for Bicycle
 Electronic Automatic Transmission for Bicycle Team 4 Tianqi Liu, Ruijie Qi, and Xingkai Zhou ECE 445 Project Proposal Spring 2018 TA: Hershel Rege 1 Introduction 1.1 Objective Nowadays, an increasing number
SERIES 2 RAMP OWNER S MANUAL TOOLS REQUIRED: BEFORE YOU BEGIN... Read and understand these instructions before beginning a ramp setup.
 SERIES 2 RAMP OWNER S MANUAL BEFORE YOU BEGIN... Read and understand these instructions before beginning a ramp setup. Use caution and care for your back when lifting, pushing, pulling, folding or unfolding
Quadair. Air Hockey Table Owners Manual. Assembly operation and care instuctions. Serial # Distributed By. Sales Person. Technical Service #
 Version 12.1.11 Quadair Air Hockey Table Owners Manual Assembly operation and care instuctions. Serial # Distributed By Sales Person Technical Service # QUADAIR PATENTED WORLDWIDE Forward First, we would
Installation of 2 Tier In Line Greeting Card Rack
 Installation of 2 Tier In Line Greeting Card Rack Material Sent to Store: Greeting Card Fixtures: 4ft Inline Tier Kit (1 per every 4ft based on planogram) 3ft endcap Tier Kit (will not receive if planogram
Drive Belt Instructions
 Drive Belt Safety Do not roll, pry, twist, invert or bend the belt back on itself. Do not zip tie the belt. The acceptable temperature range for your belt drive is -53 C to 85 C. Do not lubricate the belt
12ft JumpPOD Classic / Deluxe. Please start with the following parts: 1x Top Tube (Key No. 2) and 1 x Enclosure A Socket (Key No.
 and 1 x Enclosure A Socket (Key No.") User s Manual Update: Building the Frame The circular frame of the JumpPOD comprises 8 curved top tubes. There are 2 different types of Top Tube: Key No. 2 (detailed below) and Key No. 1(detailed overleaf).
User s Manual Update: Building the Frame The circular frame of the JumpPOD comprises 8 curved top tubes. There are 2 different types of Top Tube: Key No. 2 (detailed below) and Key No. 1(detailed overleaf).
QRPGuys Single Lever Mini Paddle
 QRPGuys Single Lever Mini Paddle First, familiarize yourself with the parts and check for all the components. If a part is missing, please contact us and we will send one. You must use qrpguys.parts@gmail.com
Butler Tactical Parachute Systems, LLC
 Butler Tactical Parachute Systems, LLC A division of Butler Parachute Systems Group, Inc. TT-600 TETHERED TANDEM BUNDLE DELIVERY SYSTEM PACKING MANUAL (REVISION A ) Page 1 of 62 INTRODUCTION This manual
Assembly Instructions. -Cantilever Boat Lifts
 Assembly Instructions -Cantilever Boat Lifts Winch Instruction Page Safety Information 1. The winch is built for the multipurpose of hauling and lifting operations. It is not to be used as a hoist for
G2W PRO ROBOT. User Manual. paddlepalace.com
 G2W PRO ROBOT paddlepalace.com 1-800-547-5891 503-777-2266 Putting Robot Technology to Work for You The Paddle Palace G2W Pro robot is everything you need in a robot! This robot has two throw wheels with
GV Standard X-Vent. Setup, Commissioning & Installation Guide
 GV Standard X-Vent Setup, Commissioning & Installation Guide Technical experts in the design, manufacture and supply of precision engineered, architectural rooflights for residential and commercial buildings.
RBI Solar One-Piece Ground Mount Solution GM-GS
 Solar Mounting System Installation Guide RBI Solar One-Piece Ground Mount Solution GM-GS Ballasted Ground Mount System RBI Solar 1292 Logan Circle NW Atlanta, GA 30318 513-618-7240 info@rbisolar.com OVERVIEW
HW #5: Digital Logic and Flip Flops
 HW #5: Digital Logic and Flip Flops This homework will walk through a specific digital design problem in all its glory that you will then implement in this weeks lab. 1 Write the Truth Table (10 pts) Consider
35 TON HYDRAULIC PUNCH WARNING
 OPERATORS GUIDE REL-35T-PNC 35 TON HYDRAULIC PUNCH NOTICE Sizes, weights and tool specifications listed in this manual are subject to change without notice. Please consult factory for information and updates.
CamRT Sun Top Bimini Installation Instructions
 CamRT Sun Top Bimini Installation Instructions C910-07 & C910-08 Rev. 16-Jun-15 Information: info@roswellglobal.com Warranty: warranty@roswellglobal.com Questions? Please call us at (31) 638-1331 Setup:
Misaligned Folds Paper Feed Problems Double Feeds Won t Feed FLYER Won t Run iii
 Operator s Manual Table of Contents Operator Safety... 1 Introduction... 2 Unpacking and Setup... 3 Unpacking... 3 Setup... 4 FLYER Overview... 5 FLYER Diagram... 5 Capabilities... 5 Control Panel... 6
INFERNO 20-IN-1 MULTI-GAME TABLE ASSEMBLY INSTRUCTIONS
 INFERNO 20-IN-1 MULTI-GAME TABLE ASSEMBLY INSTRUCTIONS NG1017M3 THANK YOU! Thank you for purchasing this product. We work around the clock and around the globe to ensure that our products maintain the
September 10, 2014 Revision 2. Puncher Unit-BE1/BF1/BG1/BH1 Service Manual
 1 4 September 10, 014 Revision Puncher Unit-BE1/BF1/BG1/BH1 Service Manual 0 0- Application This manual has been issued by Canon Inc. for qualified persons to learn technical theory, installation, maintenance,
LADOTD Roundabout Assistance Contract
 LADOTD Roundabout Assistance Contract Services Provided: Preliminary Design Development Quick 2D Layout & Analysis Ballpark Design and Capacity Software Training 2 Days of Design or 2 Days of SIDRA / CAD
OPERATION OF LIQUID PARTICLE COUNTER. GP-B P0045 Rev -
 1 W. W. Hansen Experimental Physics Laboratory STANFORD UNIVERSITY STANFORD, CALIFORNIA 94305-4085 Gravity Probe B Relativity Mission OPERATION OF LIQUID PARTICLE COUNTER GP-B P0045 Rev - May 23, 1997
Changing Out the Rear Hub and Sprocket on a 2012 Morgan Three Wheeler Calum Fraser 17/07/2015
 Intro The early Three Wheelers had the rear sprocket in a stepped arrangement relative to the front sprocket with the belt overhanging the sprocket on the outside face. While this is probably less of a
Le Maitre Ltd. Co2 propelled Electric Air Cannon Instructions. & Loading instructions for Chinese Confetti, Streamers and Glitter
 Le Maitre Ltd Co2 propelled Electric Air Cannon Instructions & Loading instructions for Chinese Confetti, Streamers and Glitter Produced by: Le Maitre Ltd, 6 Forval Close, Wandle Way, Mitcham, Surrey CR4
LENNOX SLP98UHV DIAGNOSTIC CODES
 Code Status of Equipment Action required to clear and recover - Idle mode (Decimal blinks at 1 Hertz -- 0.5 second ON, 0.5 second OFF) A Cubic feet per minute (cfm) setting for indoor blower (1 second
Sunrise Fountain Water Wonders Assembly & Mounting Instructions
 Welcome to the Water Wonders family. A few simple steps will ensure that your Sunrise Fountain remains a soothing, enjoyable fountain that brings the sights and sounds of nature to you. Two important considerations
FireHawk M7 and FireHawk M7XT Control Modules
 FireHawk M7 and FireHawk M7XT Control Modules MAINTENANCE AND REPAIR For More Information, call 1-800-MSA-2222 or Visit Our Website at www.msasafety.com CRANBERRY TWP., PENNSYLVANIA, U.S.A. 16066 TAL 1504
JEEP CHEROKEE XJ DIY FRONT BUMPER ASSEMBLY INSTRUCTIONS
 JEEP CHEROKEE XJ DIY FRONT BUMPER ASSEMBLY INSTRUCTIONS Please read the mounting instructions below carefully before attempting to install. Thank you for purchasing your new DIY Bumper from JcrOffroad!
Dual Electronic Basketball System Owners Manual
 Dual Electronic Basketball System Owners Manual Customer Service Center N53 W24700 South Corporate Circle Sussex, WI 53089 U.S.A. WARNING! READ AND UNDERSTAND OPERATOR'S MANUAL BEFORE USING THIS UNIT.
Assembly Guide ST200 FUNCTIONAL TRAINER
 Assembly Guide ST200 FUNCTIONAL TRAINER Assembly Guide ST200 FUNCTIONAL TRAINER To avoid possible damage to this Functional Trainer, please follow these assembly steps in the correct order. Before proceeding,
TOYOTA TACOMA 2005 TOW HITCH Preparation. Part Number: PT
 Preparation Part Number: PT791 04050 Kit Contents 1 1 Hitch Center Section 2 1 LH Frame bracket 1 RH Frame Bracket 4 2 Auxiliary Bracket Hardware Bag Contents 1 6 Hex Head Bolt, M12 x 1.2 (black) 2 6 Nut,
S4W PRO ROBOT. User Manual. paddlepalace.com
 S4W PRO ROBOT paddlepalace.com 800-547-5891 503-777-2266 S4W Pro Taking Robot Technology to the Next Level The Paddle Palace S4W Pro takes robot technology to the next level. This innovative robot has
Exercise 1: Control Functions
 Exercise 1: Control Functions EXERCISE OBJECTIVE When you have completed this exercise, you will be able to control the function of an asynchronous ripple counter. You will verify your results by operating
G250/G250 HP Compatibility of Upgrade Kit
 Engineering Bulletin December 15, 1999 #266 G250/G250 HP Compatibility of Upgrade Kit Page 1 of 9 The SCUBAPRO G250 HP is a marked improvement on the proven G250 second stage design. So much so that issues
User Manual GRI- 1500Li
 User Manual GRI- 1500Li Your Cart Tek caddy cart was thoroughly quality control checked and road tested before being shipped to your address. We do everything possible to assure that your caddy is in perfect
WIND CLIPPER KTS ILLUM SCALE INC DEC CLIPPER WIND SYSTEM
 CLIPPER WIND KTS ILLUM SCALE DEC INC CLIPPER WIND SYSTEM TABLE OF CONTENTS INTRODUCTION PRE-TEST OF INSTRUMENT INSTALLING THE MASTHEAD SENSOR UNIT INSTALLING THE DISPLAY NORMAL OPERATION CHANGING THE
iphone 6 Full Display Assembly Replacement
 iphone 6 Full Display Assembly Replacement INTRODUCTION Use this guide along with the Werx Repair Mat to replace the cracked or broken screen on your iphone 6. Follow Werx Repair Mat Steps 1,2,4 to disassemble.
Assembly, disassembly and user manual
 Assembly, disassembly and user manual D000A Product description: Plate-forme individuelle roulante légère "PIRL" (Lightweight rolling individual platform) compliant with norm NF P 9-. Single operator use.
Read Instructions carefully before use. Rollator is designed for indoor & outdoor use. Do NOT use as a wheelchair or as a transport chair.
 Charcoal Red Seat Height 500-10191 500-10195 19 500-10211 500-10215 21 500-10241 500-10245 24 User Manual Read Instructions carefully before use. Rollator is designed for indoor & outdoor use. Do NOT use
Speed control assembly model A-1
 Pressure Regulation 533a 1. DESCRIPTION The Viking Speed Control Assembly provides adjustment of the opening speed of Viking Deluge Valves, and adjustment of both the opening and closing speed of Viking
WINSAFE Corp. Operating Instructions For Outrigger Davit. Winsafe Part # WSOR208
 WINSAFE Corp. Operating Instructions For Outrigger Davit Winsafe Part # WSOR208 These instructions must be read and understood by anyone installing or suspending equipment from Winsafe modular beams and
Air Ball! Evaluation copy
 Air Ball! Computer 24 Do you ever wonder how the National Basketball Association (NBA) decides how much air should be in the basketballs used during a game? The NBA measures the pressure inside the ball
Approved by Principal Investigator Date: Approved by Super User: Date:
 Approved by Principal Investigator Date: Approved by Super User: Date: Standard Operating Procedure BNC OAI 200 Lithographic Mask Aligner (Aligner 3) Version 2011 June 2 I. Purpose This Standard Operating
Operation and Maintenance Manual for the Dive Control Helium Speech Unscrambler
 Operation and Maintenance Manual for the Dive Control Helium Speech Unscrambler Part Number: CO363AY Document Number: CO-OM-248 Revision: 6 (Intentionally Blank) APPROVAL SHEET Document Information Advitium
USER S MANUAL QUESTIONS? CAUTION. Model No. FMEX Serial No. Write the serial number in the space above for reference. Serial Number Decal
 Model No. FMEX81110.0 Serial No. Write the serial number in the space above for reference. USER S MANUAL Serial Number Decal QUESTIONS? If you have questions, or if parts are damaged or missing, please
Deluxe Gourd Racks I D E G A. Parts List. Shown above are parts for the two-level, Deluxe Gourd Rack (DGR 12V)with 12 arms for vertically hung gourds.
with 12 arms for vertically hung gourds.") Deluxe Gourd Racks H F K I D E J C G A Shown above are parts for the two-level, Deluxe Gourd Rack (DGR V)with arms for vertically hung gourds. Parts List Code Quantity A B C D E F G H I J 6, or 4 6, or
Deluxe Gourd Racks H F K I D E J C G A Shown above are parts for the two-level, Deluxe Gourd Rack (DGR V)with arms for vertically hung gourds. Parts List Code Quantity A B C D E F G H I J 6, or 4 6, or
Trampoline & Enclosure Assembly Instructions
 Trampoline & Enclosure Assembly Instructions Safe user weight 250 lbs (115 kg) Version 718602 The information in this document is subject to change without notice. Copyright Springfree Trampoline Inc.
Written By: Evan Noronha
 Replace the home button, including the Touch ID fingerprint reader in an ipad Pro 12.9". Written By: Evan Noronha ifixit CC BY-NC-SA www.ifixit.com Page 1 of 27 INTRODUCTION Use this guide to replace the
Trampoline & Enclosure Assembly Instructions
 Trampoline & Enclosure Assembly Instructions Safe user weight 330 lbs (150 kg) Version 718702 The information in this document is subject to change without notice. Copyright Springfree Trampoline Inc.
VISIT THE LIFETIME WEB SITE: **U.S. and Canada customers ONLY** IF ASSISTANCE IS NEEDED, COPY
 01/28/2011 VISIT THE LIFETIME WEB SITE: WWW.LIFETIME.COM **U.S. and Canada customers ONLY** IF ASSISTANCE IS NEEDED, DO NOT CONTACT THE STORE!!! CALL OUR CUSTOMER SERVICE DEPARTMENT at 1 (800) 225-3865
Model Aero Sportster Indroduction
 1 Model Aero Sportster Indroduction We are excited to introduce the Model Aero Sportster! Inspired by classic designs of the past, the Sportster is a relaxing slow flyer, equally at home indoors or outside
XpressFill XF4500 Counter Pressure Filler. Operating Instructions
 XpressFill XF4500 Counter Pressure Filler Operating Instructions ii XPRESSFILL Systems LLC lling machine. ank you for choosing our handcrafted bottle filler as the technology to bottle your passion. We
INSTALLATION. and INSTRUCTION MANUAL. for QUALITY AIR BREATHING SYSTEMS. Model 50 Systems Outfitted with ABM-725 Monitor C O M P A N Y
 INSTALLATION and INSTRUCTION MANUAL for QUALITY AIR BREATHING SYSTEMS Model 50 Systems Outfitted with ABM-725 Monitor M A R T E C H S E R V I C E S C O M P A N Y OFFICE: (507) 843-4700 P.O. BOX 7079 Toll
Agilent 1220 Infinity II LC Mobile Upgrade Kit
 Agilent 1220 Infinity II LC Mobile Upgrade Kit Note 1220 Infinity II LC Mobile Upgrade Kit This note describes the procedures to install an Mobile Upgrade kit to an existing Agilent 1220 Infinity II LC.
Chapter 9 Accessories for the Kirby Morgan BandMasks
 Chapter 9 Accessories for the Kirby Morgan BandMasks 9.1 Introduction This section provides the manufacturer s advice on how to install KMDSI accessories including the hot water shroud, low pressure inflator
New product release. Universal Rebreather Monitor (URBM) Single O2 cell and Dual HP package
 Single O2 cell and Dual HP package") New product release Closed Circuit Research is pleased to announce the launch of our range of Universal Rebreather Monitors Key features and benefits include: Universal Rebreather Monitor (URBM) Single
New product release Closed Circuit Research is pleased to announce the launch of our range of Universal Rebreather Monitors Key features and benefits include: Universal Rebreather Monitor (URBM) Single
Beach Dolly with cradle & keel pad Assembly Instructions
 Beach Dolly with cradle & keel pad Assembly Instructions H G B A D C I J L F PART NAME QTY A. AXLE... 1 with tongue bracket and cradle supports attached B. CRADLE SUPPORT BAR... 2 C. TONGUE... 1 D. TONGUE
Halsey Taylor Owners Manual STOP!
 Halsey Taylor Owners Manual 4710 Freeze Resistant Floor Mounted Steel Fountain STOP! PLEASE READ THE FOLLOWING INFORMATION. ITALLATION ITRUCTIO FOR THE 4710FR FTN. WITH 97243C SINGLE VALVE CONTROL ASSEMBLY
Warnings: Notes: Revised: January 8,
 OAI Model 204IR Mask Aligner Standard Operating Procedure Faculty Supervisor: Prof. Robert White, Mechanical Engineering (x72210) Safety Office: Peter Nowak x73246 (Just dial this directly on any campus
STATIONARY TRUCK INTERNAL HALYARD V-CLEAT FLAGPOLES FOR QUICK AND PROFESSIONAL INSTALLATION READ ALL INSTRUCTIONS BEFORE PROCEEDING
 9390 South 300 West, Sandy, Utah 84070 801-562-0123 800-782-0500 ColonialFlag.com STATIONARY TRUCK INTERNAL HALYARD V-CLEAT FLAGPOLES FOR QUICK AND PROFESSIONAL INSTALLATION READ ALL INSTRUCTIONS BEFORE
aero naut Electric Model Aeroplane Quido Order-No. 1303/00
 aero naut Electric Model Aeroplane Quido Order-No. 1303/00 Quido is a small model that accompanies you wherever you go. The prefabricated parts are mostly balsa and just need to be assembled according
Modifying the Con-Cor Air-car to use the TCS M4T decoder!
 Modifying the Con-Cor Air-car to use the TCS M4T decoder! BACKGROUND: by Charles Long Out of the box the Con-Cor car has the following deficiencies when compared to both the prototype and current NMRA
INSTALLATION AND USER GUIDE
 FIREARMS SAFETY 0 RULES OF SAFE GUN HANDLING. ALWAYS KEEP THE MUZZLE POINTED IN A SAFE DIRECTION. FIREARMS SHOULD BE UNLOADED WHEN NOT ACTUALLY IN USE 3. DON T RELY ON YOUR GUN S SAFETY 4. BE SURE OF YOUR
Troyer s Gourd Rack 8 unit F R H O P
 B E A D I M-N L Vertical Parts F R H O P Horizontal Parts C G J Updated 11/16 Parts List A: Top of Pole B: Bottom of Pole C: 48 Ground Stake D: Top Perch rods 48 long E: Hub F: Rope Winder w/ attached
Blazer Marine, Whiplash Sport 40
 Blazer Marine, Whiplash Sport 40 Thank you for choosing to build the Whiplash 40. We have spent over 12 years perfecting this design, and finally we are making it available to the world. We are excited
New product release. Universal Rebreather Monitor (URBM) Three cell / Independent backup
 Three cell / Independent backup") New product release Closed Circuit Research is pleased to announce the launch of our range of Universal Rebreather Monitors Universal Rebreather Monitor (URBM) Three cell / Independent backup Key features
New product release Closed Circuit Research is pleased to announce the launch of our range of Universal Rebreather Monitors Universal Rebreather Monitor (URBM) Three cell / Independent backup Key features
DIY - PC - Interface for Suunto Cobra/Vyper/Mosquito
 DIY - PC - Interface for Suunto Cobra/Vyper/Mosquito Summary This document is the distinct consequence of the Spyder/Stinger interface DIY. After having many e-mails concerning the application for the
Written By: Matt Newsom
 PSP 300xc UMD Door Replacement Replace the UMD door for a PSP 300xc Written By: Matt Newsom ifixit CC BY-NC-SA www.ifixit.com Page 1 of 13 INTRODUCTION Has the UMD door on your PSP 3000c seen better days?
SOP for Karl Suss MJB3 #1 Mask Aligner
 SOP for Karl Suss MJB3 #1 Mask Aligner Rev. 5 (30/11/2016) Safety UV Exposure: The high-energy light produced by the high-pressure Mercury Xenon lamp can cause eye damage and skin burns. Be sure that the
Soccer Goal. Model: SG20 Series. Installation, Operation and Maintenance Instructions
 Soccer Goal Model: SG20 Series Installation, Operation and Maintenance Instructions Please read all instructions before attempting installation or operation of these units SAVE THESE INSTRUCTIONS FOR FUTURE
O P E R ATING INSTRUCTIONS FOR MODEL SPR-45 Automatic Screen and Stencil Printer
 O P E R ATING INSTRUCTIONS FOR MODEL SPR-45 Automatic Screen and Stencil Printer TABLE OF CONTENTS I. SPECIFICATIONS...3. II. SAFETY INSTRUCTIONS...4. III. INSTALLATION...5. IV. SET-UP...6. V. SYSTEM OPERATION...9.
2019 MADONE ASSEMBLY MANUAL
 2019 MADONE ASSEMBLY MANUAL 2019 MADONE Rim brakes and Di2 drivetrain Rim brakes and mechanical drivetrain Disc brakes and Di2 drivetrain Disc brakes and mechanical drivetrain TABLE OF CONTENTS Common
RZR 900 Hitch Mount Plate
 RZR 900 Hitch Mount Plate Polaris RZR 900 2015+ Part #: 5801119 Rev. 031017 491 W. Garfield Ave., Coldwater, MI 49036. Phone: 517-278-7768 E-mail: sales-rtpro@sporttruckusainc.com SAFETY WARNING RT Pro
User s Manual. Model SWTC800. CAUTION: Adult Assembly Required
 User s Manual Model SWTC800 CAUTION: Adult Assembly Required Model SWTC800...3...4...4...5...6.........8...9...10-11 Part Identification Chart... 12 Exploded Drawing and Parts List...13-14 Ordering Replacement
Explain that this is how I did my tower, it does not necessarily represent the state of the art, nor even the right way to do any particular aspect
 Explain that this is how I did my tower, it does not necessarily represent the state of the art, nor even the right way to do any particular aspect of the tower. I invite those more experience to make
Universal Elevator Mount Owners Manual Customer Service Center N53 W24700 South Corporate Circle Sussex, WI U.S.A.
 REQUIRED TOOLS AND MATERIALS: 2 Capable Adults Carpenter s Level 15 Tape Measure Pencil Universal Elevator Mount Owners Manual Customer Service Center N53 W2400 South Corporate Circle Sussex, WI 530 U.S.A.