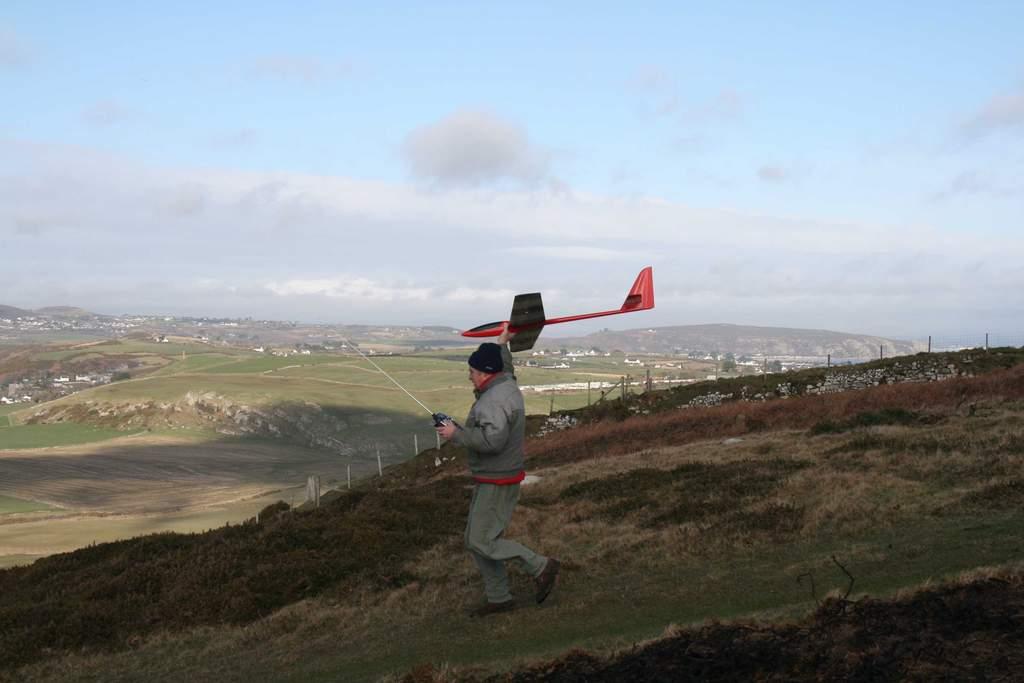
Yes! It s the very first one with me holding it! Top picture is the incredible Greg Dakin flying another prototype (Photo from Kevin Newton)
|
|
|
- Eugene Lawson
- 6 years ago
- Views:
Transcription


1 Vector III Instruction Manual Vector III is a CNC machine moulded, CAD designed slope aerobatics model aircraft. This plane has had a development period of over 20 years, and three separate models to evolve into the highly agile thoroughbred that you now own. We hope you have a lot of fun with it. James D. Hammond PhD, DBA designer RCRCM Aeroteam, proud manufacturers. Yes! It s the very first one with me holding it! Top picture is the incredible Greg Dakin flying another prototype (Photo from Kevin Newton)

2 Unpacking Please unpack the plane carefully making sure that you have retrieved all of the small parts. Don t throw the box out until you are 100% sure it s empty! Check that all the parts are supplied. If any are missing please contact your vendor immediately. Vector III parts

3 Before construction Start with a clean workbench and cover it with some foam, or a soft thick cloth to protect the finish of the wings and fuselage as you work. Be careful not to place the wings or fuselage on any screws or tools etc that can dent or scratch the skin. Be very careful using epoxy and CA so that you don't get any on to the surfaces of the model during assembly. You can tick off the bullet points on this instruction manual if you want to follow it to the letter. Remember - check twice cut once! Soft quilting to protect your baby! Wing Construction I always begin with the wings because it gives that already half done feeling. Wings:


4 First, do a dry assembly to make sure that the entire plane fits together well. If the carbon joiner seems too tight it probably is not. They tend to loosen a little after a few flights but adding some floor or car wax can help if it is particularly stiff. Check the control surfaces to make sure that they have enough up movement. If not, then open up the controls surface to expose the wipers, then carefully sand the wiper back a little and try again. When you are happy, use an air gun or similar to blow the sanding dust away. Install the control rods on each surface using the control horns that are already installed. Check that they don t bind in any way. Control rod installed Check for enough movement Sand the wipers if not enough Next, make up control rods and clevises using the parts supplied.

5 The flap rods should be about 85mm and the ailerons about 65mm including clevis length - but check before you cut! Make sure you have adjustment at both clevis ends! Control horns for ailerons and flaps Zero the servos by using your R/C unit. Remember! Aileron servo arms can be set to 90 degrees, but the flaps need to have about a 20 degree offset towards the leading edge and set at + 35 degrees.

6 Servo control rod and offset detail Make up your own, or use the RCRCM wiring harness and check continuity before installing. I use a thin piece of piano wire to thread through the wing plug holes to tape the wiring harness to pull it into position, servo plugs first. When the wiring harness is positioned inside the wing and accessible, servos can be installed. First, check the position of the plywood servo mounts and check that the servos fit them. Install the control rods on to the servos and check that they do not bind, are snug but not too loose or to tight. Tape the control surfaces flat with masking tape. Assemble the completed set of servos, servo mounts and control rods. Screw the servos to the mounts at this time too.
7 When you are satisfied that you have the correct position for the servo mounts glue them in using a slow set epoxy, or thick Cyano. Don t use 5-minute epoxy because it will probably let go at just the wrong time! Be careful not to use too much glue otherwise you will permanently set the servos. When cured and secure, mount the servos, connect them to the wring harness and check for zeros, then for free and adequate movement. Adjust using the clevises if needed. (See the control settings section a the back of this manual for control movements) Finally, check the fit of the servo hatch covers and sand if not snug. Then put some double sided tape on the underside and install all on to the servos hatches. WINGS DONE! CONGRATULATIONS! Fuselage construction: Canopy: Start with the canopy it s fast and easy! First check the canopy fit. Sand it carefully if it s too large. Take time on this because nothing looks worse than a badly fitted canopy. If the canopy has distorted and seems to wide use a hairdryer (carefully) to warm it up and squeeze it back to shape.


8 Canopy distorted use a hairdryer and squeeze it back! When you are completely satisfied with the fit, bend the supplied wire to the shape of the inside of the canopy remembering to leave wire equally at both front and rear ends. When you are happy with the wire fit, there are two ways to secure it: Epoxy blobs or glass fibre patches. For speed I used glass fibre set with cyano which works well and is a 1 minute job. Be carful with that cyano! Canopy with wire fitted but not installed. Check that the canopy fits and is secure. Another job well done!

9 Rudder and elevator controls: The elevator carbon snake or carbon rod should be already connected to the machined elevator bellcrank and bearing assembly. Check that it moves smoothly. If not, some Teflon spray will normally free it up. Be careful with this if you use it. It s quite possible to make it impossible to glue anything to the fuselage! Do a trial assembly with the tailplane halves and check for smooth movement. OK? Now for the rudder. First remove the control rod or snake inner. Attach the clevis to the rod with thick cyano, and when cured test that it is very well secured by pulling on it as hard as you can! Next, insert and epoxy the rudder control horn into the rudder. Just like this! Thread the control rod or snake back into the fuselage using the rudder fairing hole. Connect the rudder control horn to the control rod and check for movement and range.


10 Right OK? Left the same? If the right rudder movement is not enough then its back to sanding those damn wipers! Adjust until you have enough movement should be about 30mm each way more if you can get it. OK, rudder and elevator done! Installing the ballast tube: This can be a bit tricky! The ballast tube as supplied is too long but don t cut it! First. Check the fit of the glass tube inside the 2 ballast tube support formers. Sand the holes if needed to give a snug fit. Next check that the formers fit into the wing roots correctly sand if needed to provide a good fit. After that, using the wing joiner hole, assemble the rear former into the fuselage. Another way is to drill small hole and use a bit of Piano wire to impale it, the use that to get it to the right position. If it is OK and sits square then use cyano to tack it in. Be careful with that pesky Cyano! Remember! Put the Ballast tube back into the former before finally gluing it in.


11 Yeah take time I know it s fiddly! When you are 100% satisfied with the rear former position weld it in with thick slow set epoxy, this can be done with a dowel or a chopstick with epoxy blobs carefully daubed and smoothed until it s nicely fixed. OK when the rear former is in place, remove the ballast tube and put in the front former. Cyano tack the front former in position. Careful! Watch that cyano! Then check that the ballast tube still fits! If it s OK, then you can now finally slow set epoxy the front former in. Easy compared to the rear one right? Now the ballast tube can be finally positioned, cut to suit a CG of 95mm and then epoxied in. You cab dab a bit of epoxy at

12 the extreme end of the tube too for added support since it will likely contact the lower fuselage There, that was not hard was it? Servo tray: Note: The servo tray as supplied is generic This means that it is an attempt to design for all applications so of course it won t do that. If you don t like it then please make a new one that better suits you. Also note: The servo tray as supplied does not have a switch hole. If you decide to use it remember to make one! Last but not least: I use full size servos in the front because I hate non-paying payload such as LEAD! I also use the largest battery I can cram in for the same reason.

13 An example of a self-made servo tray whatever turns you on! First check the fit of the servo tray inside the fuselage in the position you like. Sand the edges to a gentle curve to fit snugly inside the fuselage. Now fit the servos and adjust the height of the tray to best connect the servos to the snakes or control rods. When you have it right and square, pencil a line where it fits on both sides of the cockpit wall. Now sand a chamfer all along the sides, maybe 3mm deep. This will help the epoxy to bond it to the fuselage sides. See the Chamfer? Yep just like that. OK, now remove the servos and tack cyano the tray into the fuselage. Check it again!

14 If it s OK then slow-set epoxy it in. After the epoxy has set, you might like to apply a coat of varnish or paint to keep moisture out. Done! Installing the rudder/elevator pushrods or snakes to the servos Set the rudder and the elevator to zero and tape them that way. Install the servos and use your RC unit to set them to zero. Then simply cut the rods or snakes to fit, remembering to leave space for the adjustment clevis. Check for movement and adjust accordingly. Note that this builder has spiffed it up with some carbon! Done! Installing the wiring harness

15 Use the RCRM wiring harness or make your own. Check continuity! Check that the wiring harness connectors fit snugly into the fuselage connector holes. If not file the holes out until they do. Thread the plugs through into the fuselage and rout the receiver plugs to the receiver area. Put in the receiver and battery temporarily and make sure the whole shebang actually works! Now cyano the connectors into the holes. Done! Neat huh? Battery Installation I made a couple of formers to keep the battery with holes in them so that I could use tie wraps to keep it in one place. It gets really boring when you are flying inverted and the battery ejects
 cup with sand not too wet, just damp.")
16 Examples of other battery/servo setups Nose weight This can be custom made or just fishing weights etc but it will need to be around 14 ounces. Here we will deal with the custom made version First, fill a paper (not plastic!) cup with sand not too wet, just damp. Alternatively an antique bone china coffee cup will do.
 and take it out to leave an impression or mould.")
 bung it into the sink and cool it with water: Not too bad! Cool maybe?")
17 There, see the impression of the nose? Then push the nose of the plane into the cup about 2 inches (50mm) and take it out to leave an impression or mould. Using your wife s best saucepans, melt about a pound (0.5KG) of lead and then careful! Stand as far away as possible and use eye protection! pour the lead into the mould. When its set (give it at least 5 minutes) bung it into the sink and cool it with water: Not too bad! Cool maybe? Now for the last part: Trial fit the nose weight into the fuselage. Note that you can fettle it with a hammer if it s a bit too big:
 Add or remove weight until the")

18 Bit of a banger huh? Now fully assemble the plane and test the CG (95mm from the Leading edge at the root) Add or remove weight until the plane balances correctly. When satisfied, epoxy the nose weight in. Just like that! Neat or what? Important note: Whatever you do, never make the nose weight too heavy its better to have a slightly underweight nose with a bit of lead added than it is to have to drill out lead from a too heavy nose. Wow looks like it time to go and test it!

19

20 Crikey...she flies! Now you might need the last bit: Control surface movements and CG settings C/G = *95mm from Leading Edge to start. Move back slowly in small increments to further improve responses. *Note for those conservatives, or possibly less experienced among us, it might be better to start at 85mm Control surface settings: (All measured form the outboard trailing edges) GENERAL: Ailerons +/- 20mm
21 Flaperon +/- 12 mm Rudder As much as possible Elevator +/- 12 mm CROW Crow- Flap -50 mm or more if desired Crow-Aileron +10 mm Crow-Elevator compensation -4 mm THERMAL (WHAT?) OR PUSSYCAT Thermal or Cruise flap -10 mm Thermal or Cruise Aileron -5mm AEROBATICS Aerobatics - coupled flap and elevator +/- 18 mm snap flap works well too. Finally, thanks to all those whose photographs I have shamelessly stolen for use here! James Hammond, February 2009
Sunbird 60 (1.5 Meter) Instruction Manual
 Instruction Manual") Sunbird 60 (1.5 Meter) Instruction Manual Who is that ugly bar-steward? Sunbird is a CNC machine moulded, CAD designed slope model aircraft. This plane has had a development period of over 2 years, and
Sunbird 60 (1.5 Meter) Instruction Manual Who is that ugly bar-steward? Sunbird is a CNC machine moulded, CAD designed slope model aircraft. This plane has had a development period of over 2 years, and
S A N S I B E A R S P L I N T 2 0 X
 SANSIBEAR SPLINT 20X This is just a short documentation of one way you can assemble the Cylon/Splint I'm sure the pics will speak for themselves. Good pictures are better than to many words. If you have
Akcent-2 - Building Instructions
 Akcent-2 Home Pictures Building Instructions Ordering Akcent-2 - Building Instructions Note! The pictures show older kits with "diser" wings. The new kits come with nicer D-box wings. Servo locations are
Aegea Assembly Notes:
 Aegea Assembly Notes: The Aegea model is a thermal Duration (TD) model made up of components from Phil Barnes 1 (bagged wing and tail group) and Terry Luckenback 2 (Pretty Mantis fuse). Due to its construction
aero naut Electric Model Aeroplane Quido Order-No. 1303/00
 aero naut Electric Model Aeroplane Quido Order-No. 1303/00 Quido is a small model that accompanies you wherever you go. The prefabricated parts are mostly balsa and just need to be assembled according
ANGEL 2000 glider ARF ASSEMBLY MANUAL. Specifications: MS: 129
 WWW.SEAGULLMODELS.COM ASSEMBLY MANUAL ANGEL 2000 glider Graphics and specifications may change without notice. MS: 129 ARF Specifications: Wingspan---------------78.7 in ( 200cm). Wing area---------------582.8sq.in
AVA Building Instructions
 Suggested Assembly Sequence: AVA Building Instructions 1. Insert fittings in rudder and trial fit rudder on boom 2. Attach stab to v-mount and position ahead of rudder ¼, sanding the v-mount as needed.
We hope you ll enjoy the Drifter as much as we have! Scott DeTray Model Aero Specifications:
 We are excited to bring you the Drifter RC airboat. You re probably thinking it doesn t fly so what is Model Aero thinking??? We have always liked RC vehicles of all types and have had a fondness for airboats
Dornier Do R 4 Super-Wal
 Dornier Do R 4 Super-Wal Model Aviation Laddie Mikulasko s Dornier Do R 4 Super-Wal Build the multiengine, record-setting seaplane. Article, plans, instructions, and photos by Laddie Mikulasko. Complete
MICRO - DLG. This kit should only take 30 minutes to compile, very simple and quick.
 MICRO - DLG This kit should only take 30 minutes to compile, very simple and quick. You will need: Hot Glue ( small tip preferably ) Sharp razor blade Ruler a strip of strong fiber tape Thin nose Pliers
Model Aero Sportster Indroduction
 1 Model Aero Sportster Indroduction We are excited to introduce the Model Aero Sportster! Inspired by classic designs of the past, the Sportster is a relaxing slow flyer, equally at home indoors or outside
Building Instructions ME 163 B 1a M 1:5 Turbine
 Building Instructions ME 163 B 1a M 1:5 Turbine Thank you for choosing our kit of the Me-163B. We ask you to read the instruction once in advance before building this kit in order to avoid mistakes. Make
Tugster. Tug Boat. Competition or Sport Tug Kit. A Zippkits R/C Boat. Building Instructions
 Z I P P M A N U FA C T U R I N G Tugster Tug Boat Competition or Sport Tug Kit A Zippkits R/C Boat Building Instructions 2016 JMP Hobby Group St. Paul, Indiana 47272 www.zippkits.com Toll Free (866) 922-ZIPP
FlyingFoam Nurf. General Assembly Instructions
 FlyingFoam Nurf General Assembly Instructions These instructions apply to the Nurf, an all EPP forward swept flying wing available from FlyingFoam.com. Building and operating a remote controlled aircraft
Designed by Steve Shumate Adapted from the North Star design by Laddie Mikulasko. Polaris EX Introduction
 1 Model Aero Polaris Designed by Steve Shumate Adapted from the North Star design by Laddie Mikulasko Polaris EX Introduction We re excited to introduce the Polaris EX seaplane parkflyer! Based on the
Model Aero AT-6 Texan Introduction
 1 Model Aero AT-6 Texan Introduction We are excited to introduce the Model Aero AT-6 Texan! Originally used as an advanced trainer by the U.S. Armed Forces, the AT-6 is a relaxing slow flyer, equally at
5. Tailplane assembly
 5. Tailplane assembly Overview This section covers the fitting of your completed tailplanes to the torque tube assembly. Included is the insertion of the TP13 bushes in the inboard rib and the fitting
AGM 33 PIKE ALL FIBERGLASS. Specifications Length: 92 Diameter 5.5 Weight: 24 lbs Motor Mount: 75mm Fins: 6-3/16 G10 CP: 68 from nose tip Parts List
 ALL FIBERGLASS AGM 33 PIKE Specifications Length: 92 Diameter 5.5 Weight: 24 lbs Motor Mount: 75mm Fins: 6-3/16 G10 CP: 68 from nose tip Parts List (1) Filament Wound Nose Cone w/ Metal Tip (1) Nose Cone
Last Revised 3/17/15 RMRC Mako
 Ready Made RC, LLC Assembly Instructions for: Last Revised 3/17/15 RMRC Mako Page 1 Thank you for purchasing the RMRC Mako! It is important to read the manual in its entirety before your maiden flight.
Pitts Model 12 Wing Leading edge Installation
 Pitts Model 12 Wing Leading edge Installation This procedure is used to install molded plywood leading edges included in the Pitts Model 12 kit. Nine (9) molded leading edge section are require per aircraft;
On the Wing... By Bill & Bunny Kuhlman,
 On the Wing... By Bill & Bunny Kuhlman, bsquared@themacisp.net Redwing XC, Part 4 August 2008 29 After nearly a year of work, our Redwing XC has finally taken wing. At the end of the last installment we
Blaster 2 & 2e Assembly Guide
 Blaster 2 & 2e Assembly Guide from 123 Radford Road Leamington Spa Warwickshire UK CV31 1LG www. sales@ 2009 HyperFlight Revision 5, 1/05/09 R5.odt Warning, this is not a toy! If you are new to the hobby
BUILDING INSTRUCTION Glider TASER unplugged. Taser unplugged Building instruction September
 Wingspan [mm]: 2000 Takeoff weight [g]: From 400 Airfoil: AG 455ct-02f AG47ct-02f by Mark Drela BUILDING INSTRUCTION Glider TASER unplugged www.pcm.at 1 CONTENTS DATA 1. Kit contents 2. What else do you
X-29 Canard Jet. A Simple Depron Foam Build.
 X-29 Canard Jet. A Simple Depron Foam Build. Two full sized X-29 s were built and the first flew in 1984. They were experimental aircraft, testing this unusual configuration of a canard jet with swept
Max Bee. Part II: Building Max Bee Stunt News 8. lighter: the building of Max. all published.
 Max Bee Can you say Exotic? Igor s World Championship winning design has lots of interesting aerodynamics as well as interesting aesthetic design cues. I know, I know, the designing article about Max Bee
1/10 th Scale 1956 Ted Jones Classic Hydroplane
 1/10 th Scale 1956 Ted Jones Classic Hydroplane Preparation These plans show outside sheeting of 3/32 balsa laminated with 1/64 birch ply. This makes a light and strong skin for this boat. Optionally you
BUIDLING INSTRUCTION GLIDER MINI-RACE. MINI-Race building instruction January
 Wingspan [mm]: 950 Aspect ratio: 7,7 Wing area [dm2]: 11,7 Wing loading [g/dm²] : 16 Takeoff weight [g]: 190 Airfoil: AG03 mod BUIDLING INSTRUCTION GLIDER MINI-RACE www.pcm.at 1 CONTENTS DATA 1. Kit contents
CARL GOLDBERG PRODUCTS, LTD. P.O. Box 818 Oakwood GA Phone # Fax #
 Superfloats 36 ARF WARNING A radio-controlled model is not a toy and is not intended for persons under 16 years old. Keep this kit out of the reach of younger children, as it contains parts that could
LITTLE TRI construction
 LITTLE TRI construction I have built almost anything that can sail. At the age of 12 my first sail thing, an ice boat. I used skates which had to be mounted on shoes as runners. Big fun, very fast, only
KWARCINSKI MODELS STARLING PRO. by Klaus Weiss. The Kit:
 KWARCINSKI MODELS STARLING PRO. by Klaus Weiss I had been looking at the Starling, fully moulded glider, for some months now, so it was a pleasant surprise to be in the position to write a review of this
BlueArrow. Venus DLG. Construction and Flight Manual. Note: Read this manual carefully before construction and flight!
 BlueArrow Venus DLG Construction and Flight Manual Note: Read this manual carefully before construction and flight! 1 1. Introduction Thank you for choosing this fantastic Venus DLG brought to you by BlueArrow
Pre-Paint>Fuselage>Empennage>Fit vertical tail fin. Objectives of this task: Materials and equipment required: Fit the spar extender
 Pre-Paint>Fuselage>Empennage>Fit vertical tail fin Objectives of this task: To fit the vertical tail fin to the fuselage, including fitting the static probe, static tube, optional strobe light wiring and
Parkzone Vapor Repair tutorials
 Propeller replacement The propeller is held on by the threaded shaft. You will need to grip the shaft/cog with your fingers or some pliers and rotate the propeller anticlockwise when viewed from the front.
WHITE WOLF. X-ray View MID POWER MODEL ROCKET KIT BUILDING INSTRUCTIONS KIT SPECIFICATIONS:
 WHITEWOLF-38 PARTS LIST 1 - Nose Cone 1-17" Airframe 1-6" Motor Tube 3 - Aft Fins 3 - Forward Fins 2 - Centering Rings 1-15" Parachute 2 - launch lugs 1-12 Kevlar Shock Cord 1 - Motor Retention >>(screw/washer)
Blazer Marine, Whiplash Sport 40
 Blazer Marine, Whiplash Sport 40 Thank you for choosing to build the Whiplash 40. We have spent over 12 years perfecting this design, and finally we are making it available to the world. We are excited
MiniTwin by Acer
 MiniTwin 250 - by Acer ASSEMBLY INSTRUCTIONS Thank you for choosing the MiniTwin 250 as your next project. This kit is easy to build and only requires a few hours to complete. Once finished, you will be
SEADUCER BOATS GAS MONO COME VISIT US ON THE WEB AT
 SEADUCER BOATS GAS MONO COME VISIT US ON THE WEB AT WWW.SEADUCERBOATS.COM 1 - Pkg. Of 440 push rod ends 1 - Pkg. of solder-on rod ends 2 -water outlet fitting 1-1/4" prop nut 1 -.250" x 24" flex shaft
Constitution Instructions
 Constitution Instructions This kit will build a 1:48 scale hull for the USS Constitution frigate. The kit contains the following parts. 1/8 deck with laser etched deck lines 1/8 railing Ribs Center keel
CARL GOLDBERG PRODUCTS LTD.
 CARL GOLDBERG PRODUCTS LTD. P.O. Box 818, Oakwood, GA 30566 678-450-0085 Fax: 770-532-2163 www.carlgoldbergproducts.com copyright 2003 Carl Goldberg Products, Ltd. WARNING! THIS IS NOT A TOY! THIS IS NOT
EPP Version Building Notes Updated
 EPP Version Building Notes Updated 12-10-2013 The Zulu covers a wide range of flying conditions: slope soaring in light to strong lift, thermalling, aerobatics, discus launches, and combat; for skill levels
18. Tailplane torque-tube
 18. Tailplane torque-tube Step 1 Fu se lage rear bulkhead Remove the three part templates of the rear bulkhead: an A4 size sheet from Annex A (page 5) and two A3 size sheets from Annex F of the manual,
SEADUCER BOATS GAS SPORT HYDRO
 SEADUCER BOATS GAS SPORT HYDRO COME VISIT US ON THE WEB AT WWW.SEADUCERBOATS.COM 2 - Pkg. Of 440 push rod ends 2 - Pkg. of solder-on rod ends 2 -water outlet fitting 1-1/4" prop nut 1 -.250" x 30" flex
Vacuum Bagging Wings Instruction Manual Purdue University
 Vacuum Bagging Wings Instruction Manual Purdue University Note: Do not leave the vacuum pump running unattended! Revision: Original Release 10/31/15 Vacuum bagged wings are quick to build, light weight,
In each step, the needed parts are shown the number right below. Locate all parts for the step.
 Tools Required for Assembly Phillips Screwdriver, Med Needle Nose Pliers Sandpaper (#400 grit) Hobby Knife Scissors CA Instant Glue Rubbing Alcohol Drill Bit 1/16", 1.6mm 5/64, 2mm 1/8, 3mm 5/32, 4mm Before
Annex E(M) - Final inspection checklist - monowheel
 - Final inspection checklist - monowheel") Annex E(M) - Final inspection checklist - monowheel A/C Reg... Owner...Kit S/N...Date... (U.K. Only) L.A.A No...Inspector...Insp. No... Note: This check list only covers specific items for inspection of
Annex E(M) - Final inspection checklist - monowheel A/C Reg... Owner...Kit S/N...Date... (U.K. Only) L.A.A No...Inspector...Insp. No... Note: This check list only covers specific items for inspection of
Miss Mayflower. Build Manual
 Miss Mayflower Build Manual Thank you for the purchase of the Miss Mayflower, this new exciting craft will give you fun on many types of terrain including snow, gravel, pavement, grass, water, and when
ANATOMY OF FUSELAGE REPAIRS
 ANATOMY OF FUSELAGE REPAIRS The first part of this file is about doing a repair on the glassed-over fuselage. The latter part covers some repairs on composite fuselages. The glassed-over fuse will stand
"Aircraft setup is a constant process really. Every
 The R/C Aircraft Proving Grounds - Aerobatics Setup Set Up for Success by: Douglas Cronkhite "Aircraft setup is a constant process really. Every time something is changed, there is the chance it will affect
Release :
 Release : 25.01.08 1 Technical datas : Wingspan : 936 mm Lenght : 444 mm Surface : 5.07 dm² Mass : 90g Wing loading : 17.8 g/dm² 2 A quick summary of the design The Nexus 900 is the result of a long research
Whisper 1400 Glider Operation Manual
 Whisper 1400 Glider Operation Manual Specifications: Wingspan: 55 (1400mm) Length: 32.5 (825mm) Wing area: 323 sq. in. Weight: 16 oz.(453g) Ace R/C Whisper 1400 Glider R/C Sailplane (4104-F) Distributed
Outbound Progress Report
 Outbound Progress Report 7-11-17 Tank Install The new 20 plus gallon fuel tank is underway. In a matter of weeks we should be getting the first article and placing a first run order. The tank fits like
Below are the instructions to build a roller-furling unit for under $10. Read the entire process before beginning the project.
 Greg Cowens' $10 PVC Roller Reefing for CP-16's by Greg Cowen Below are the instructions to build a roller-furling unit for under $10. Read the entire process before beginning the project. Materials: 2
WE GET PEOPLE FLYING INSTRUCTION MANUAL
 TM WE GET PEOPLE FLYING INSTRUCTION MANUAL 90% pre-built Pre-covered in Goldberg UltraCote transparent blue and white covering Includes sailplane hardware package with adjustable tow hook Superb stability
Horizontal Fuselage. Top Vertical Fuselage 1. Lay out the Top Vertical Fuse Front(1), Top Vertical Fuse Back(2), and Vertical Stabilizer(3).
, Top Vertical Fuse Back(2), and Vertical Stabilizer(3).") Rumbuilder 71 B-17 Congrats on your Rumbuilder B-17! We re glad you chose to fly with us! If you have any problems, or missing/broken kit pieces, please contact us. We d be happy to replace any damaged
Rumbuilder 71 B-17 Congrats on your Rumbuilder B-17! We re glad you chose to fly with us! If you have any problems, or missing/broken kit pieces, please contact us. We d be happy to replace any damaged
Miles M-57 Aerovan. Ok so on with the build.
 Miles M-57 Aerovan Now it s been a few years since I have produced a design for Model World so young Mr Van Geffen decided I had sat on my laurels for too long and it was time to get the thumb screws out
Carving a Custom Seat
 Carving a Custom Seat Seat Carving your own seat from mini-cell, high-density foam is really quite simple and has proven to be more comfortable than any commercially produced seat and often more reasonably
Your kit contains the following items. Additional Items You May Need. Pre- cut parts Propeller rigging and rubber Sandpaper Covering sheet
 Your kit contains the following items Pre- cut parts Propeller rigging and rubber Sandpaper Covering sheet The SkyFox offers great glide performance in a rubber powered plane due to its built up wing.
MiG-29 Scale EDF Radio Control model airplane
 MiG-9 Scale EDF Radio Control model airplane Wingspan : 45mm Model No : FF-D004 UNDER SFETY PRECUTIONS This radio control is not a toy! - lways keep this instruction manual ready on hand for quick reference.
Addiction Review by David Boyd
 Addiction Review by David Boyd Hi, I m Dave the guy flying the purple Addiction in GOT AN ADDICTION-The Movie. When PA asked me to do this Review I said I d love to. But I am just an average pilot and
Instructions for Fun Foam Critter 4/25/2007 BP Hobbies LLC 140 Ethel Road W Suite J Piscataway NJ,
 Instructions for Fun Foam Critter 4/25/2007 BP Hobbies LLC 140 Ethel Road W Suite J Piscataway NJ, 08854 http://www.bphobbies.com Specifications: Wing Span: 20" Length: 20" Flying Weight: 5.5-7.0 oz Controls:
Surfboard Repairs Chapter 7
 Surfboard Repairs Chapter 7 The Complete Surfing Guide for Coaches - Bruce "Snake" Gabrielson Repair Problems Boards continuously get bumped, hit rocks, break fins, get dropped, and many other things that
So at 18%, the weight of our 50 Hawk should around the 8lb mark I ll let you know later if this was achieved.
 50 DUCTED FAN HAWK It was in 2015 when the first Hawk offering was made to the readership of the RCM&E and it proved to be a great success especially when we made the ducted fan installation a lot simpler
Tailplane retention. All Europa Classic, XS and Motor-glider aircraft
 Tailplane retention Classification: Applicability: Compliance: Mandatory All Europa Classic, XS and Motor-glider aircraft Within 10 flying hours after the date of issue of this bulletin or before next
Southern Eagles Soaring
 Southern Eagles Soaring N56LS Standard Cirrus Disassembly / Assembly Procedure. Version 2, 2017 You landed out so what now? First, hopefully you made arrangements with someone who has a hitch on their
Bladerider X8 Assembly Help Notes
 2.1 Remove All Parts & Have Some Tools Handy Remove all items from the box and identify each part as per the packing sheet and check that nothing is missing. If there is something missing, please email
Aliphatic Resin Wood Glue. 18" Fabric Parachute Part #PNC50 Part # Part #11700 Part #J0016. Launch Lug
 ADANCED * What you will need to build the Quest High-Q Hobby Knife * Straight Edge Pencil Aliphatic Resin Wood Sanding Sealer & Brush Spray Paint Parts and exploded view of the Quest High-Q Nose Cone 18"
Construction Chapters Index
 Construction Chapters Index 9 7 8 Chapters Index c. c. c. c. c. c. c7. c8. c9. c0. c. c. c. c. c. c. c7. Balsa Wood Skeleton Strip Planking Hull Fairing Keel Bulb Mould Lead Bulb Casting Keel Construction
8-GUN CORVETTE ASSEMBLY INSTRUCTIONS
 8-GUN CORVETTE ASSEMBLY INSTRUCTIONS THE HULL STEP 1 Fasten the Deck to the Hull. Find the hull. This is a large, pink, ship-shaped piece of insulating foam board. This will form the base of your model
CONSTRUCTION NOTES BY: MARK HUNT ISSUED:
 INSIGHT V4 CONSTRUCTION NOTES BY: MARK HUNT ISSUED: 3/22/06 Pg.1 INDEX Title Page 1 Index 2 Introduction 3 Material list 4 Foam Cutting Notes 5 Wing 5 Stab 8 Vertical Fin 8 Fuselage Foam Parts 9 Fuselage
How to Make a Unique Industrial-Looking PVC Lamp
 How to Make a Unique Industrial-Looking PVC Lamp copyright 2014 by Brooks Owen Owen Publications Battle Ground, WA 98604-0305 USA ALL RIGHTS RESERVED No part of this publication may be reproduced or transmitted
Logo-Team GbR Dr. M. Wohlfahrt / Dipl.-Ing. F. Seibel Jägerstr. 19, GER Stegen
 Logo-Team GbR Dr. M. Wohlfahrt / Dipl.-Ing. F. Seibel Jägerstr. 19, GER-79252 Stegen 1 Introduction... 3 1.1 Limit of Liability... 3 1.2 Aerodynamic concept... 3 1.3 Construction... 4 1.4 RC-components
L-23 Super Blanik Rigging (assembly/disassembly) Guide Maj Carl Kerns
 Guide Maj Carl Kerns") L-23 Super Blanik Rigging (assembly/disassembly) Guide Maj Carl Kerns The L-23 Blanik is a difficult Sailplane to rig (assemble). The wings are heavy and are secured via a single
L-23 Super Blanik Rigging (assembly/disassembly) Guide Maj Carl Kerns The L-23 Blanik is a difficult Sailplane to rig (assemble). The wings are heavy and are secured via a single
CIRRUS AIRPLANE MAINTENANCE MANUAL
 RUDDER 1. GENERAL The rudder provides airplane directional (yaw) control and includes a rudder trim tab used for yaw trim adjustment. The rudder is of conventional design with skin, spar and ribs manufactured
How Scott Builds a Fighter Kite, May 2011 Updated Sept 2018
 How Scott Builds a Fighter Kite, May 2011 Updated Sept 2018 MAKE A TEMPLATE 1. Draw half sail plan on 17x22 pad with 4x4 (1/4 inch) grid. Add ¼ inch extra on nose (for reinforcement) and plenty of extra
Savage Cub RTF Assembly Manual
 Savage Cub RTF Assembly Manual Aircraft Type & Model: Savage Cub 912 100hp Aircraft Registration Number: Aircraft Serial Number: Zlin Aviation S.R.O. 2. Kvetna N.685 763 61 Napajedla Czech Republic www.zlinaero.com
STOL 500. Once you get past circuits and bumps. John Stennard tries out an ARTF model from Art-Tech with slats and flaps for short field performance
 John Stennard tries out an ARTF model from Art-Tech with slats and flaps for short field performance STOL 500 Once you get past circuits and bumps there is quite a bewildering number of different types
CIRRUS AIRPLANE MAINTENANCE MANUAL MODELS SR22 AND SR22T CHAPTER 55-40: RUDDER GENERAL. Rudder 55-40: RUDDER. 1. General
 CIRRUS AIRPLANE MAINTENANCE MANUAL Rudder CHAPTER 55-40: RUDDER GENERAL 55-40: RUDDER 1. General The rudder provides airplane directional (yaw) control and includes a rudder trim tab used for yaw trim
Steps for W17, W14,W07, Wing Assembly Sonex #815
 CAUTION: This document is in no way a publication of Sonex Aircraft LLC. or any other corporation. All products mentioned are not necessarily recommended for use, but are included for informational purposes
BUILDING INSTRUCTIONS
 Z I P P M A N U FA C T U R I N G A Zippkits R/C Boat BUILDING INSTRUCTIONS 2010 Zipp Manufacturing Frankfort, New York 13340 www.zippkits.com Table of Contents Introduction 1 Engine Mounting 30 S E C T
1982 Hydrostream Viking Restoration
 1982 Hydrostream Viking Restoration Part 2c: The Rebuild Daniel W. Rickey Winnipeg, Manitoba Canada daniel@cancercare.mb.ca 2000-09-22 Introduction Part one of this report showed how the shoddy manufacturing
Thanks for shopping with Improvements! 20 Reel Mower with Catcher Item #
 Thanks for shopping with Improvements! 20 Reel Mower with Catcher Item # 411837 To order, call 1-800-642-2112 West Chester, OH 45069 0313 If you have any questions regarding this product, call 1-800-642-2112
Trimming and Flying a Hand Launch Glider A basic and beginners guide by Kevin Moseley
 Trimming and Flying a Hand Launch Glider A basic and beginners guide by Kevin Moseley First and foremost, I am by no means a master at what I have done, or do, in hlg or the class. I am fortunate enough
Bench Trimming A Stunt Ship
 Bench Trimming A Stunt Ship by Brett Buck "Bench Trimming" - this refers to setting up the initial trim of the airplane in the shop prior to flight. Since people have been flying stunt in its current form
INSTALLING YOUR CLC RUDDER
 INSTALLING YOUR CLC RUDDER These instructions are written to help you install the CLC rudder kit on your wooden kayak. The rudder can be fitted to your boat during construction or after completion. Please
14. Ai le ron quick-connect system
 14. Ai le ron quick-connect system When attaching the wings to the fuselage the aileron control system is automatically coupled via angled bellcranks, two of which are mounted in the fuselage and one in
General Build Instructions for Mach 1 BT50 and BT55 Single Fin Kits. Needed Items for Assembly
 General Build Instructions for Mach 1 BT50 and BT55 Single Fin Kits 60-80 grit sandpaper Hobby knife Tape measure Scissors CA Super glue 30-minute epoxy 5-minute epoxy Masking tape 1/16 drill bit Needed
While flying in fairly windy conditions I got a bit clever during landing and a gust of wind picked up the 'dactyl and it "beaked in".
 Marston Pterodactyl - Build Log - Part Seven Well, I have clocked up almost a year of flights and I had my first major 'incident' today. I have quite a few hours on the 'dactyl now, because it flys so
PAY N PAK, 1/12 th Scale, Limited Sport Hydro P Sport Hydro
 1980 82 PAY N PAK, 1/12 th Scale, Limited Sport Hydro P Sport Hydro Introduction: The 1980 turbine Pay N Pak is a good subject for a model race boat. It has a low profile, mild pickle-fork setback, long
Bob's Card Models and [Resources]
![Bob's Card Models and [Resources]](/thumbs/89/98525234.jpg "Bob's Card Models and [Resources]") + Bob's Card Models www.bobscardmodels.altervista.org and www.zealot.com [Resources] Sikorsky S-40 (1:72) The Sikorsky S-40 was an American amphibious flying boat built by Sikorsky in the early 1930s for
+ Bob's Card Models www.bobscardmodels.altervista.org and www.zealot.com [Resources] Sikorsky S-40 (1:72) The Sikorsky S-40 was an American amphibious flying boat built by Sikorsky in the early 1930s for
Building a light indoor foamy aircraft
 Building a light indoor foamy aircraft THE PLUG The statistics for this foamy airplane are: Wing Span: 31 Wing Area: 288 sq/in Aircraft Flying Weight: 168grms (6.01oz) Wing Loading: 3oz/ft Building Material:
CONSTRUCTION OF A GUNBOAT A CLASS YACHT by Brian Dill
 CONSTRUCTION OF A GUNBOAT A CLASS YACHT by Brian Dill The Gunboat design is the latest Radio A class from Graham Bantock, optimised to provide the best boat speed below 4 knots and to be as good as possible
MEMO. Assembly Manual. Warranty
 MEMO Assembly Manual No.4344 Specifications Wing Span: 59.84" (1520mm) Length: 36.42" (925mm) Wing Area: 341sq. in.(22dm2) Weight: 1.3 lbs.(600g) Motor: OBL29/09-07A Airfoil: RG-15 Warranty This kit is
Rigging the Pitts by Doug Sowder, IAC #14590
 Rigging the Pitts by Doug Sowder, IAC #14590 Pitts not flying so straight anymore? Don t believe that a Pitts can fly hands-off? Maybe you need to set aside a Saturday and do some rigging. The maintenance
aero naut Order No. 3009/00
 aero naut Order No. 3009/00 Introduction: The model should be assembled following the sequence of the stages of construction described in these instructions. The laser-cut components are individually numbered.
SLR Missile Thunderboat
 J M P H O B B Y G R O U P L L C SLR Missile Thunderboat Zippkits R/C Boats BUILDING INSTRUCTIONS 2017 JMP Hobby Group LLC Indiana USA 1 Introduction Thank you for purchasing this kit. We are sure that
A6M3 Zero CONSTRUCTION. WW II Japanese Aerial Samurai. THE WING The wing is a basic foam-core affair, sheeted with balsa. Retracts are an option, but
 CONSTRUCTION By Mark Rittinger A6M3 Zero WW II Japanese Aerial Samurai T The Imperial Japanese Navy s Type 0 fighter is probably the most recognized Japanese aircraft of World War II. Coming as a bit of
Gross Weight Increase to 1370lb (621kg)
") Gross Weight Increase to 1370lb (621kg) Classification: Applicability: Compliance: Optional All pre XS Europa aircraft N/A Introduction The Europa aircraft was originally designed to operate at a maximum
Gross Weight Increase to 1370lb (621kg) Classification: Applicability: Compliance: Optional All pre XS Europa aircraft N/A Introduction The Europa aircraft was originally designed to operate at a maximum
BASIC AIRCRAFT STRUCTURES
 Slide 1 BASIC AIRCRAFT STRUCTURES The basic aircraft structure serves multiple purposes. Such as aircraft aerodynamics; which indicates how smooth the aircraft flies thru the air (The Skelton of the aircraft
ADVENTURES WITH. Both of my grandfathers fished, my dad fished, and. creating unique handles for custom rods. 22 RodMaker
 From RodMaker Magazine Volume 7 Issue #4 WOOD creating unique handles for custom rods ADVENTURES WITH story by Ray Jergensen photos by Les Jergensen 22 RodMaker Both of my grandfathers fished, my dad fished,
No.5550 INTRUCTION MANUAL WARRANTY WARNING. Notice This is not a toy. Assembly and operating of this boat requires adult supervision.
 INTRUCTION MANUAL WARRANTY Thunder Tiger guarantees this model kit to be free from defects in both material and workmanship. The total monetary value under warrant will in no case exceed the cost of the