ShuttlE. Schools Badminton
|
|
|
- Vivien Bridges
- 5 years ago
- Views:
Transcription

1 Schools Badminton Teachers MANUAL
2
3 Schools Badminton Teachers MANUAL
4 Schools Badminton Teachers MANUAL Acknowledgements The BWF would like to acknowledge and thank the following individuals and organisations who have made a significant contribution to the development of Shuttle. Materials Developers Heinz Kelzenberg Mike Woodward Ian Wright Stuart Borrie Continental Confederations Badminton Africa Badminton Asia Badminton Europe Badminton Pan Am Badminton Oceania More Information The resources for Shuttle are in different languages. The material can be downloaded from the BWF website. Badminton World Federation Unit Level 17 Amoda building Jalan Imbi Kuala Lumpur, Malaysia shuttletime@bwfbadminton.org
5 Contents Module 1 Getting Started Overview 1. Introduction Focus on Teachers Focus on Children Why badminton Your badminton Teaching Situation About Shuttle 6. Shuttle Goals Shuttle Teaching Resources About Badminton 8. An Ideal Sport for Schools Badminton Basics Aim of the Game Rules of the Game Elite Level Badminton Olympic Games Sport Badminton Around the World Origins of Badminton Regulating Badminton Worldwide BWF Vision, Mission, Goals Badminton in Your Area
6 Schools Badminton Tutors Teachers Guidelines MANUAL Module 2 Teaching Material and Content 1. Overview Badminton Teaching Material Content Overview Programme Structure Deciding Where to Start Lesson Structure General Lesson Format Flexibility Module 3 Managing Groups when Teaching Badminton 1. Motivating Pupils Teaching Badminton with Large Groups Feeding Skills Safety Playing Games Managing Groups Module 4 Physical Development Exercises 1. Introduction Aims and Objectives Core Physical Education Content Summary References to Lesson Plans and Videos Module 5 Starter Lessons Grips, Ready Position, Front Court Play (10 lesson plans) 1. Introduction Aims Content explanation Summary
7 Module 6 Swing and Throw Mid-court Play (2 lesson plans) 1. Introduction Aims Content explanation Summary Module 7 Throw and Hit Rear-court Play (4 lessons) 1. Introduction Aims Content explanation Summary Module 8 Learn to Win Tactics and Competition (6 lesson plans) 1. Introduction Aims and objectives Tactical Awareness Content explanation Summary Module 9 How to Organise Competitions Module 10 Simplified Rules of Badminton 3
8 Schools Badminton Teachers MANUAL Module 1 Getting Started CONTENTS Overview 1. Introduction 2. Focus on Teachers 3. Focus on Children 4. Why badminton 5. Your Badminton Teaching Situation About Shuttle 6. Shuttle Goals 7. Shuttle Teaching Resources About Badminton 8. An Ideal Sport for Schools 9. Badminton Basics 10. Aim of the Game 11. Rules of the Game 12. Elite Level Badminton 13. Olympic Games Spor 14. Badminton Around the World 15. Origins of Badminton 16. Regulating Badminton Worldwide 17. BWF Vision, Mission, Goals 18. Badminton in Your Area 4
9 Module 1 Focus Module 1 introduces you to Shuttle and the importance of badminton in schools. This describes the overall programme and gives a background to badminton the sport. This also helps you to focus on your badminton situation at school and badminton in your area. Learning Outcomes for Module 1 By the end of this module, you will better understand: the goals of Shuttle and the components of the programme. your badminton situation. the benefits of badminton for school children. badminton the sport, its rules and badminton around the world. 5
10 Schools Badminton Teachers MANUAL Overview 1. Introduction Shuttle is the BWF s Schools Badminton Programme. This programme aims to make badminton one of the world s most popular sports in schools. This resource is for teachers consists of 10 modules and they will help you to teach badminton in schools. The 10 modules in this Teachers Manual help you to: understand badminton better plan badminton lessons deliver fun, safe and enjoyable badminton lessons with groups of children deliver a positive image and experience of badminton. The main content and suggestions for teaching this are detailed in Modules 5, 6, 7 and 8. Module 5 10 Starter Lessons (10 lesson plans numbers 1.1 to 1.10) Module 6 Swing and Throw (2 lesson plans numbers 2.1 and 2.2) Module 7 Throw and Hit (4 lesson plans numbers 3.1 to 3.4) Module 8 Learn to Win (6 lesson plans numbers 4.1 to 4.6) The 22 Lesson Plans to teach badminton are in separate downloads. 6

11 2. Focus on Teachers Teachers are central to the success of Shuttle. Some teachers will already know about badminton they may have seen it played or may have played the sport. Some teachers will have coached badminton. Other teachers however will be experiencing badminton for the first time through this training resource. This Teachers Manual and Shuttle are for teachers from any background. Teachers... do not need badminton experience to be part of this programme. can use this resource independently to learn how to plan and deliver lessons in badminton. can attend an 8-hour / one day course which has been designed for teachers who want to learn how to deliver the programme. We suggest you contact your national badminton association to ask about their schools badminton programme contact details are listed on the BWF website 7

12 Schools Badminton Teachers MANUAL 3. Focus on Children Some children will already know about badminton they may have seen it played or may have played the sport. Other children however will be experiencing badminton for the first time through Shuttle. It is important that you know about the starting point of your children. Their previous badminton experience, their sporting experience. Children of all ages and abilities can be successful in developing badminton skills. learn basic badminton skills through the activities in the lessons. also develop physical skills while learning badminton through the activities. 8

13 4. Why Badminton Badminton is a great school sport for both boys and girls. It is suitable for children of all ages and levels of ability. It is a safe, fun, low impact sport for children. Badminton activities in Shuttle develop all-round physical skills important for school age children including: eye hand coordination catching and throwing stability and balance speed and agility the ability to quickly change direction jumping and landing skills The lessons and activities in this manual are designed for learning badminton skills in groups. Through these activities, children learn basic badminton skills. Children will also develop physical skills and learn tactical skills (skills in how to play and win the game). 9
. b. Do you have some basic badminton equipment rackets, shuttles and nets? c.")
14 Schools Badminton Teachers MANUAL 5. Your badminton Teaching Situation Before starting, think about your badminton teaching situation. a. Do you have a sports hall or indoor area to take badminton lessons? (Note you do not need an indoor sports hall to deliver most of the 10 Starter Lessons). b. Do you have some basic badminton equipment rackets, shuttles and nets? c. Does your national / regional / local badminton association run courses to help teachers with teaching badminton? d. Are there local clubs that deliver badminton lessons for school age children? e. Do you know any badminton coaches who coach badminton for school age children? f. Is badminton a school sport on the physical education curriculum at primary / elementary school? At secondary / high school? g. Are there local competitions for schools badminton? h. Are there regional or national schools badminton competitions? 10

15 About Shuttle 6. Shuttle Goals Shuttle aims to: enable teachers to deliver a positive image and experience of badminton. ensure that children experience success in badminton. achieve general physical education objectives through the badminton activities. The syllabus contains badminton techniques, tactics and physical elements. This means that children will experience the nature of badminton, without over complicating the content for teachers or children who are new to badminton. 11
16 Schools Badminton Teachers MANUAL 7. Shuttle Teaching Resources Teachers Manual Lesson Plans Video Clips Badminton Equipment Supplementary Material 10 Modules for teachers who are learning how to plan and deliver badminton lessons. 22 badminton lesson plans. More than 100 video clips. These show the badminton activities and teaching points in the lessons. Teachers need equipment to teach badminton see each lesson plan for the requirements. An ideal schools badminton kit consists of: 24 rackets 3 dozen plastic shuttles 4 nets 20 metre long rope or elastic cord that can be tied across a sports hall or practice area and be used as a net. New material to support the teaching of badminton is being developed. Teaching and learning resource material is available in a number of languages. These can be downloaded from the BWF website 12


17 About Badminton 8. An Ideal Sport for Schools There are many good reasons why badminton is an ideal sport for physical education programmes. Badminton is equally accessible to both girls and boys. Badminton is a safe, low impact sport for children. Badminton builds fundamental physical skills. Pupils of all abilities can be successful in developing skills which will allow them to play badminton for life. On a social level, boys and girls / men and women can play, train and compete together. Badminton is accessible for people with a disability. There are rules to govern that groups people according to their classes of disability. This ensures fair and safe competitions. 13
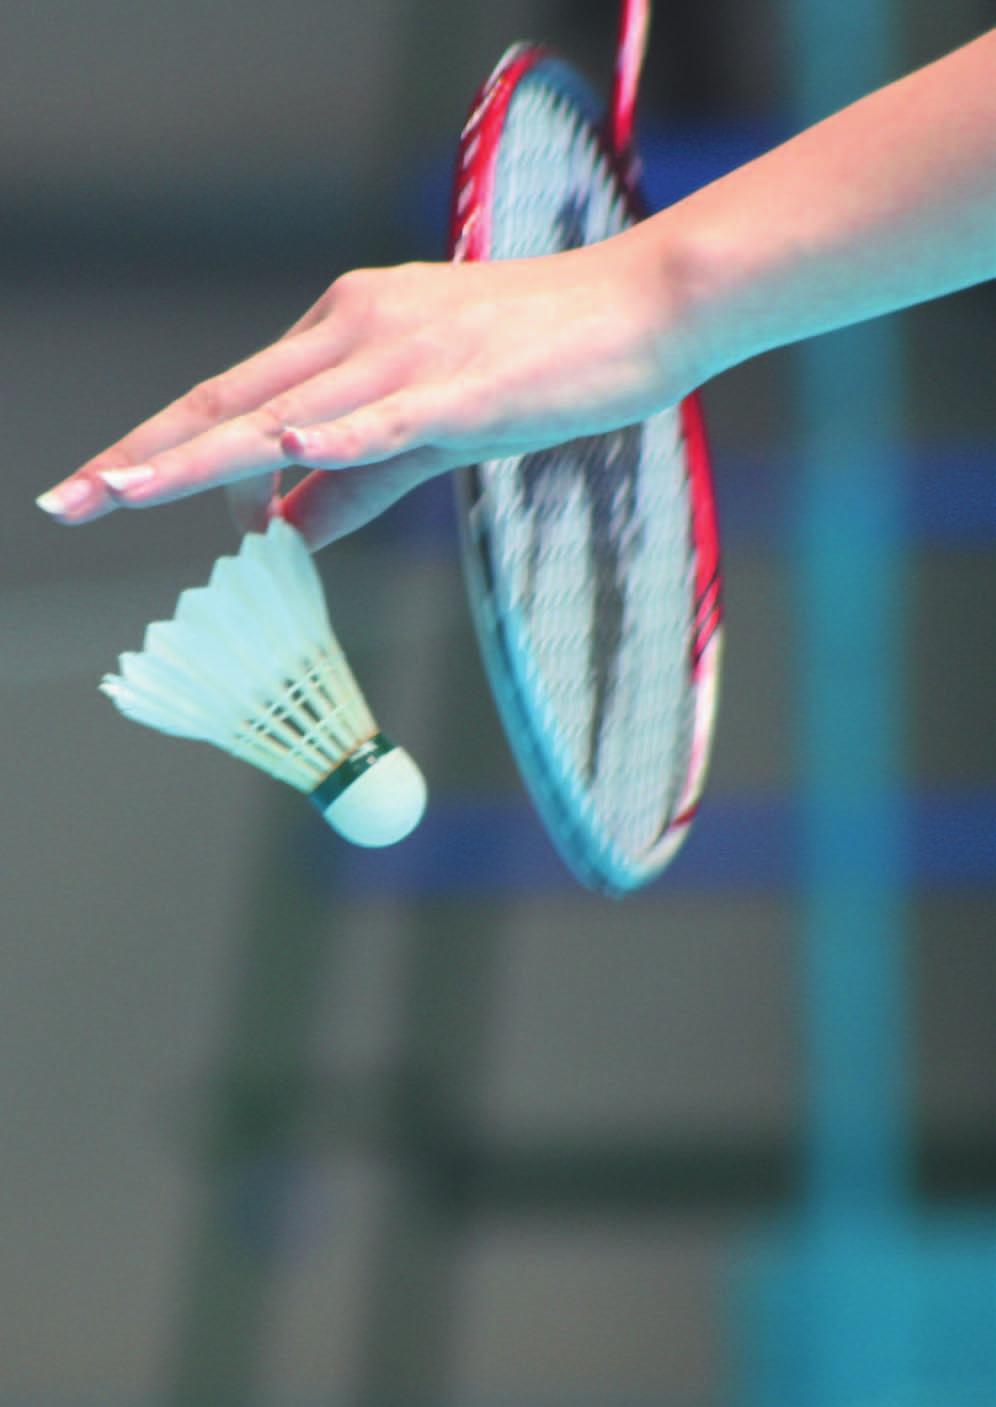
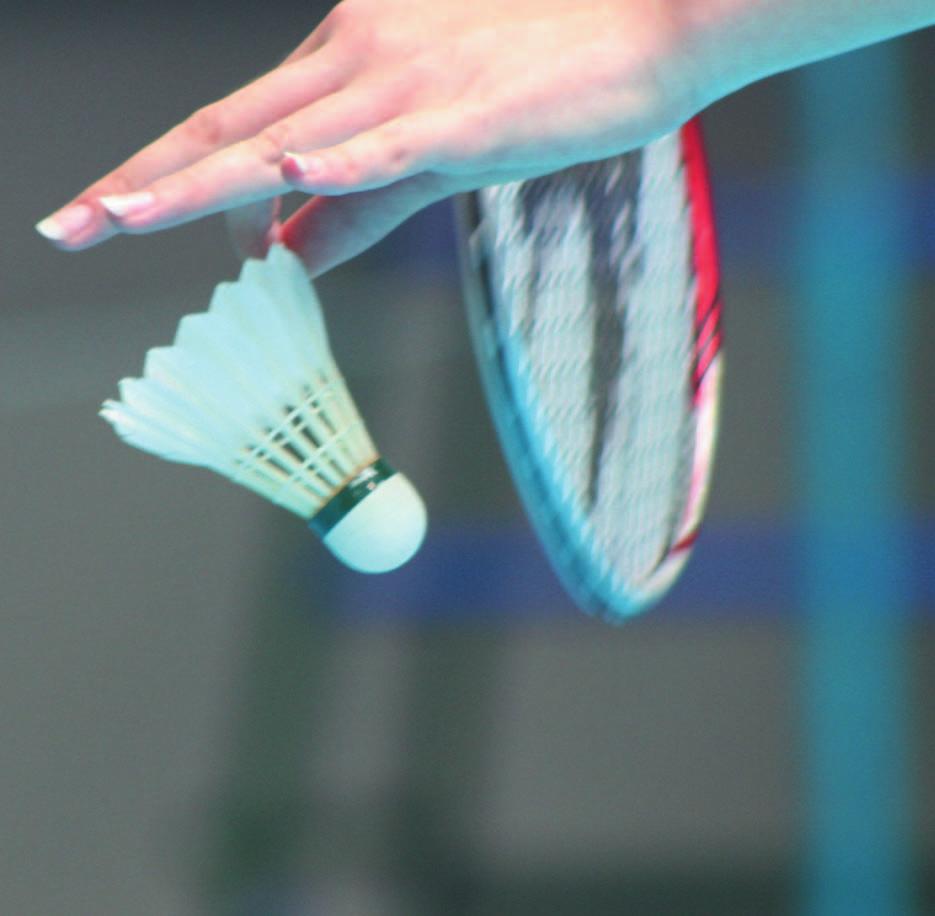
18 Schools Badminton Teachers MANUAL 9. Badminton Basics Badminton is: a net game. played on a rectangular court. a volleying game, with rallies beginning with an underarm serve. a game that has five disciplines singles (men / women), doubles (men / women and mixed). Singles badminton involves serving diagonally into a long, service box. Rallying then continues on a long court with the border on the first side line. The shuttle is served diagonally into the opponents service box. The shaded part shows the area of play for singles. A shuttle that lands outside this area means a point is won / lost. Doubles badminton involves serving diagonally into a shorter, wider service box than in singles badminton. After the serve, rallying takes place on the whole court area. The shuttle is served diagonally into a shorter, wider service box in doubles. After the serve, doubles rallies are played on the whole court area. For players with a disability, court sizes are adapted according to the category of player under a classification system. For more details of this, download the Laws of Badminton from the BWF website. 10. Aim of the Game The aim of the game is to score points by: landing the shuttlecock in your opponent s court. forcing your opponent to hit the shuttlecock out of the court area. forcing your opponent to hit the shuttlecock into the net. striking your opponent s body with the shuttle. 14
19 11. Rules of the Game The simplified rules of badminton are included in this training package Module 10. The complete set of rules Laws of Badminton and Regulations governing the sport, can be downloaded from the BWF website Elite Level Badminton At the highest levels of badminton, the sport requires extraordinary fitness, technical ability, perception and predictive skills as well as extremely fast reaction times. Players at the top level require extraordinary physical ability including: aerobic stamina agility strength explosive power speed At the top levels, badminton is very technical sport, requiring high levels of motor coordination, sophisticated racquet movements and precision when under pressure. Badminton is also a game where tactics are very important. 13. Olympic Games Sport Since 1992, badminton has been a Summer Olympic Games sport. Altogether 15 medals are available in Olympic badminton gold, silver and bronze for each of the five disciplines: Men s singles Women s singles Men s doubles Women s doubles Mixed doubles Badminton players from each region Asia, Africa, Europe, Oceania and Pan America compete at the Olympic Games. Since 1992, players from China, Korea, Indonesia, Malaysia, Denmark, Great Britain and the Netherlands have won medals at Olympic Games badminton events. 15
20 Schools Badminton Teachers MANUAL 14. Badminton around the World Badminton is played worldwide, but like most world sports, it is more popular in some regions of the world. Badminton is most popular in Asian countries including China, Korea, Indonesia, Malaysia, Japan, Thailand, India and Chinese Taipei. These countries produce many world class players. Badminton is also very popular in Europe and countries like Denmark, England, Germany, Poland and France also have world class players. In Pan America, badminton is emerging as a popular sport. With the 2016 Olympic Games being hosted by Rio, Brazil, badminton will develop much more in popularity in Pan America in the near future. Badminton is also played widely in regions in Oceania and Africa. Badminton has grown and become popular because it can be played by all ages and at all levels. At beginner level it offers early satisfaction, with rallies easily achievable without much technical expertise. At the highest level however it is a very dynamic sport, with shuttles being smashed at over 350 kph and players displaying the highest levels of athleticism. 15. Origins of Badminton Although the exact origins of badminton are unclear, games based on a shuttlecock and a bat were played in China, Japan, India, Siam and Greece over 2000 years ago. A game known as battledore and shuttlecock. The aim of battledore and shuttlecock was to keep the shuttlecock in the air for as long as possible. The reverse is true today. The aim now is to finish a rally as quickly as possible by scoring winning points against your opponent. British military officers based in India in the mid 18th century are believed to have added a net to the game and the game became more established in England when these officers returned home. The 1873, the game of badminton was first played at Badminton House, a stately home in Gloucestershire, England. This is where the modern name of the sport came from. 16. Regulating Badminton Worldwide Basic regulations for the sport were formed in 1887, but it was not until 1893 that the first set of rules were published in England. The International Badminton Federation (IBF) was established in 1934 and consisted of nine founding members badminton associations from Canada, Denmark, England, France, Ireland, Netherlands, New Zealand, Scotland and Wales. In 2006 the IBF changed its name to the Badminton World Federation (BWF). The BWF is the world governing body for the sport of badminton, recognised by the International Olympic Committee (IOC). 16
21 BWF s members are, with a few exceptions, the national governing bodies for badminton. These are organised into five confederations under the IOC system, with each Continental Confederation representing one of the five Olympic rings Africa, Asia, Europe, Oceania and Pan America. 17. BWF Vision, Mission, Goals The BWF works closely with National Badminton Associations and the five Continental Confederations for badminton and promotes, presents, develops, and regulates the sport worldwide. Vision Badminton is a global sport accessible to all a leading sport in participation, fan experience and media coverage. Mission To lead and inspire all stakeholders and deliver world class events and innovative development initiatives to ensure badminton becomes a leading global sport. Goals The BWF goals are: To publish and promote the BWF Statutes and its Principles. To encourage the formation of new Members, strengthen the bonds between Members and assist in resolving disputes between Members. To control and regulate the game, from an international perspective, in all countries and continents. To promote and popularise badminton worldwide. To support and encourage the development of badminton as a sport for all. To organise, conduct and present world class badminton events. To maintain an Anti-Doping Programme and ensure compliance with the World Anti-doping Agency (WADA) Code. 17
22 Schools Badminton Teachers MANUAL 18. Badminton in Your Area It is important that you find out more about badminton in your area. It is important to: find local coaches or badminton players who might be able to support your schools badminton programme. identify local clubs that you can refer talented badminton players to for coaching and practice after school. find local competitions suitable for children who want to compete. Local or regional directories should help locate badminton clubs, associations or people in badminton such as coaches and administrators of the sport. The BWF publishes the name and contact details of each national badminton associations on its website If you need further assistance, us: 18
23 Module 2 Teaching Materials and Content CONTENTS 1. Overview 2. Badminton Teaching Material 3. Content Overview 4. Programme Structure 5. Deciding Where to Start 6. Lesson Structure 7. General Lesson Format 8. Flexibility Module 2 Focus Module 2 gives an overview of the structure of Shuttle and the main badminton teaching focuses. The content and suggestions for teaching this are detailed in Modules 5, 6, 7 and 8. The 22 Lesson Plans are separate downloads. Module 5 10 Starter Lessons (10 lesson plans numbers 1.1 to 1.10) Module 6 Swing and Throw (2 lesson plans numbers 2.1 and 2.2) Module 7 Throw and Hit (4 lesson plans numbers 3.1 to 3.4) Module 8 Learn to Win (2 lesson plans numbers 4.1 to 4.6) Learning Outcomes for Module 2 By the end of this module, you will better understand the: structure of the badminton teaching programme. main content of Modules 5, 6, 7 and 8. structure of a typical badminton lesson from the resources. starting point in the programme for your children. 19
24 Schools Badminton Teachers MANUAL 1. Overview The Teacher s Manual and teaching resources are not about making teachers into coaches of badminton. This resource: helps develop teachers basic badminton skills and knowledge. provides the content for teaching badminton in schools (lesson plans / practical examples). builds teachers confidence in teaching badminton at school. describes some of the basics of badminton technical, physical and tactical elements. presents 22 lesson plans to develop childrens basic badminton skills and knowledge. describes in detail each lesson, the learning activities and learning sequences. shows how to do the exercises through video clips. provides suggestions on how to increase or decrease the level of difficulty. encourages teachers to create their own lesson plans to suit the level and motivation of their pupils. 20
25 2. Badminton Teaching Material The teaching material in this resource is divided into four sections or levels. Each section builds on the skills developed in the previous lessons or sections and introduces higher level / more complex elements of badminton. Each section contains a number of lessons depending on the complexity and importance of the topic. Learn to Win (6 lessons) Develops basic tactical skills. Throw and Hit (4 lessons) Introduces / develops overhead hitting. Swing and Throw (2 lessons) These prepare beginners for overhead hitting. Starter Lessons (10 lessons) The basic skills of badminton. The content for each section / level is presented as a separate module: Module 5 10 Starter Lessons (Lessons 1.1 to 1.10) Module 6 Swing and Throw (Lesson 2.1 and 2.2) Module 7 Throw and Hit (Lessons 3.1 to 3.4) Module 8 Learn to Win ( Lessons 4.1 to 4.6) See the different modules above for the detail of the content for each. The 10 Starter Lessons is the main starting point for beginning teachers and beginning children in badminton. The 10 Starter Lessons: cover basic badminton skills ensure beginners of all abilities have a positive first experience of badminton. 21
26 Schools Badminton Teachers MANUAL Teachers will have the flexibility to: move from one lesson to the next. move onto the subsequent sections / levels whenever they feel this is appropriate for the level of the individuals / group. repeat activities in the 10 Starter Lessons so they give children more practice time in the basic skills. The teacher should evaluate the progress of children after each lesson before planning the next badminton lesson. 3. Content Overview Section 1 Starter Lessons (10 lessons) The 10 Starter Lessons include: the general principles of badminton grips and an introduction to play at the net front court techniques and rallying physical elements including coordination, stability and balance. Grips and basic racket skills are taught first. Then hitting from the net area. These are the simplest badminton techniques and teaching them first will ensure success for young beginners. The more difficult overhead techniques are introduced later in the programme when the children have gained some basic techniques and have experienced success. By the end of the 10 Starter Lessons, pupils should be able to: enjoy rallying with basic grips hit from the net to the rear court use a serve to start rallies. Section 2 Swing & Throw (2 lessons) This is designed to assist children with the transition from underarm hitting to overhead hitting. This section includes related physical elements such as throwing and coordination. Here the character of badminton as a fast game is introduced. Therefore the speed of the rallies can be increased relative to the level of the pupils. Usually this increase in tempo will result in increased enjoyment. Children will have a lot of fun because of the speed of the rallies. Note that speed will need to be controlled to ensure continued development of good technique and so children experience success. By the end of Section 2, Swing & Throw, pupils should be able to: enjoy faster rallies from mid court to mid court demonstrate correct throwing technique 22

27 Section 3 Throw and Hit (4 lessons) This section introduces and develops overhead hitting and associated physical elements including jumping and landing as well as core stability. Most lessons in this section start with games to improve throwing technique, which is the core skill required to develop good overhead hitting technique. By the end of Section 3, Throw and Hit, pupils should be able to: enjoy overhead rallies move around the court with basic footwork enjoy rallies which incorporate all areas of the court. Section 4 Learn to Win (4 lessons) This section introduces basic tactical skill for both singles and doubles and introduces associated physical elements including speed and agility. In this section more exercises involve competitive situations, activities and games. They are designed to place more emphasis on developing tactical thinking to enhance the learning of basic badminton tactics. By the end of Section 4, Learn to Win, pupils should be able to: enjoy rallying strategically demonstrate basic positional play in singles and doubles enjoy match play. 23
28 Schools Badminton Teachers MANUAL 4. Programme Structure 4 lessons to introduction and practice basic tactical skills. Singles Tactics (4-1) Speed and Agility Tactical Games (4-2) Learn to Win Doubles Tactics (4-3) Tactical Games (4-4) 6 lessons to introduction and practise overhead hitting technique. Clear with Scissor Kick (3-1) Development Jumping and Throwing Games (3-2) Drop with Scissor Kick (3-3) Development Shoulder and Core Stability Games (3-4) Smash and Block (3-5) Development Games (3-6) Footwork Throw and Hit 2 lessons designed to prepare beginners for overhead hitting. Midcourt Drives (2-1) Midcourt Development (2-2) 10 lessons designed to give beginners a positive impression of Badminton. Throwing Games Throwing Games Swing and Throw Introduction Grips (1-1) Hitting Coordination Grip Change Footwork (1-2) Hitting and Catching Net and Lunge (1-3) Stability and Balance 1 Net and Starting (1-4) Stability and Balance 2 Revision Games (1-5) Revision Games (1-6) Backhand Serve / Rally (1-7) Hitting and Catching Backhand Lift (1-8) Dynamic Balance 1 Forehand Lift (1-9) Dynamic Balance 2 Revision Games (1-10) 10 Starter Lessons Above: Point of entry and selection of lessons from the programme should be relevant to the profile of the pupils. 24
29 5. Deciding Where to Start The lesson that you start teaching badminton with in the programme and the pace of progression from lesson to lesson depends on several factors: badminton experience and exposure of pupils age and physical development aptitude and previous sporting experience. It is not essential to follow each lesson progressively as described here -from 1.1 to 1.10 and then 2.1 and 2.2 and so on. The programme has been designed to allow teachers to select lessons and exercises relevant to the level of their pupils. Teachers are encouraged to adapt each exercise within the lesson plans to increase or decrease the difficulty to suit individuals and groups. This is to ensure their experience of badminton is a positive one. 6. Lesson Structure The lessons for badminton in this resource contain: physical exercises technical badminton exercises fun and competition activities. Every lesson is designed for 60 minutes, however the timing of the exercises can be adjusted to suit a shorter lesson period. Parts of the lesson are in different colours to help teachers following the plan. The three colours represent physical, technical/tactical and competitive / fun content. Lessons start with a warming up activity and specific physical development exercises. This is followed by technical elements and finally competitive elements, which makes up the largest part of the lesson. Fun competitive situations Technical elements Physical exercises This colour code allows the teachers to see the elements (physical / technical / competitive). These parts of the lesson are interchangeable. This allows the teacher to plan lessons according to the ability and motivation of the class. 25
30 Schools Badminton Teachers MANUAL 7. General Lesson Format Introduction lesson goals / focus (5 minutes) Physical development (30 40 minutes) Technical / Tactical (20 minutes) Review lesson focus (5 minutes) The teacher highlights what the pupils will learn. Fun type activities to improve motor skills and general warm-up movements specific to the lesson content. There are some exercises in the physical part of the lessons which need a pre-warming-up activity, because they require the pupils to work at maximum speed or agility. Therefore pupils will need 3-4 minutes general warming-up with running and flexibility exercises. See the lesson plans. The main part of the lesson is dedicated to technical exercises with racket and shuttle or fun/competitive games designed to reinforce the teaching points. All activities can be increased or decreased in level of difficulty, so the content is appropriate to the level of the pupils. This will assist in maintaining motivation of all levels of learner. The teacher summarises the main teaching points and cool down. Revision lessons using fun exercises and competition situations are interspersed in the programme to reinforce technical badminton learning. 26
31 8. Flexibility of the Programme This is a flexible resource to meet the needs of: teachers and learners from different cultural backgrounds. different teaching / learning situations location / equipment / size of groups / experience with badminton. mixed ability groups. Progress through the programme will depends on the skill level and motivation of the class. Teachers should evaluate progress of children after each lesson. This resource is designed to be flexible depending on the teachers experience and the ability (physical, badminton) of the pupils. There are many options for teachers to implement the course. This includes: varying the activities using the suggestions to make activities more or less difficult. varying the length of time for physical, technical, competition elements in the one lesson / or for one activity within the lesson. designing your own lesson plans relevant to your own teaching situation using the ideas and content of the lesson plans. creating new lessons with emphasis on more physical, technical or competitive content while maintaining core learning and the fun elements. repeating lessons and exercises where appropriate to meet the needs and progress of individual children or the group. 27
32 Schools Badminton Teachers MANUAL Module 3 Managing Groups When Teaching Badminton CONTENTS 1. Motivating Pupils 2. Teaching Badminton with Large Groups 3. Feeding Skills 4. Safety 5. Playing Games Managing Groups Module 3 Focus Module 3 provides examples of how to teach badminton to large groups of children. The module also focuses on safety, playing games and managing groups Learning Outcomes for Module 3 By the end of this module, you will better understand: some of the factors that affect motivation of children. how to organize groups of children when teaching badminton. the important of group practice. safety in teaching badminton. how to organize games with larger groups of children. 28
33 1. Motivating Pupils All lessons begin with warming up activities which are fun and have a variety of physical challenges for children. Exercises and games are included to motivate children as much as possible. The following factors will affect motivation. These should be taken into consideration: Appropriate level of tasks for the age and ability of the children. Variety of tasks. Exercises which allow success. Exercises with a partner, team or group. Tasks which are competitive, without too much pressure to succeed. Interesting equipment and resources. Enough rackets and shuttles to practise with, so practice is continuous. 2. Teaching Badminton with Large Groups Badminton requires space and it is important to consider how to manage groups of children in badminton sessions. Here are some ideas on how exercises can be organised effectively, so that many children can practice together at the same time. No nets, no courts. Changing court sizes. Using space between / behind the court. Exercises with more than four players on a court. Practising in pairs or groups. Organise practice with intervals time on / time off the court space. Teacher or pupil feeding shuttles. a. NO net and NO Courts Many of the exercises, particularly in the first 10 Starter Lessons, do not necessarily require badminton court markings or a net. Use lines which are marked on the floor for other sports, for example volleyball or basketball. Use these lines, markers, tape or chalk to assist in dividing up the practice areas in a sports hall. Targets such as hoops, cones or boxes can also be used in practice without court lines. 29

34 Schools Badminton Teachers MANUAL Example Backhand serve practice Backhand serve into a basket or aiming at a towel. Each child has a racket and shuttles. If the baskets are placed on the middle line of the court and the pupils hit from a parallel line, many pupils can practice at the same time on one badminton court. b. Changing Court Size For learning many of the skills, it is important to change the size of the court, mostly by shortening it. A smaller court can be covered much more easily by a player and this helps children to play longer rallies to hit more shuttles without making a mistake or stopping. Example Flat drive practice Pupils practice flat drive shots from the side line to the opposite side line across the court. Up to 12 children can play on one court area. c. Using Space Between / Behind the Courts While four or more children can practice on court, others can practice in the space between ( use a string or rope between the courts to use as a net ) or behind the courts (height of net, or targets, can be marked on wall). This can be with or without rackets (technical or physical). If a teacher has a good time management with a stop watch or a timer, the teacher can change groups between on court practice and off court practice. Use the space by letting the pupils off court practice the same exercises as those on court or give them different exercises which do not need a net or a court. d. Exercises Four or More Players on a Court If four players practise at the net and four in the rear court, players can practice only at the net or to/from the rear court. There are many variations. This example below shows how three courts differently: 1. Court 1 has 16 pupils practicing hitting exercises across the court, using no net to practice. It also shows the space between the court with two pupils practicing. 2. Court 2 has 14 pupils practicing. Four at each end of the court rallying between each other (no net) and three pairs practicing over the net. One other pair is practicing between the Court 2 and Court 3 with a cord / rope tied between the courts to use as a net. 3. Court 3 has two players playing against another two on the half court, with a pair playing against one on the second half. Behind the court, four other pupils are serving towards a target on the wall. 30

35 e. Practicing in Pairs or Groups of Three This is used mostly to practise with a technical focus. Especially when playing in the front court, three pairs / groups can play on one court. Teachers and pupils must take care of shuttles lying on the floor and ensure that there is enough space between the pupils / groups. For some exercises, pupils can be placed so that both sides of the net are used in an optimal way. f. Organise with Intervals Include rotations to change roles and positions. After a set time, rotate groups on and off the court areas. This helps to provide variety, focus attention and keep motivation levels high. g. Teacher (or pupil) Feed Shuttles Feeding is a term used in badminton where a coach / teacher / pupil hits or throws shuttles in succession, one after the other so that a player receiving the shuttle can have a lot of practice in a short time (see 5.3 below). Feed the group by hitting or throwing shuttles, pupils hit back, moving around in a circle so that each person gets a chance to hit a shuttle that is fed by the teacher. Feeding is not so easy to do for teachers or pupils new to badminton. So practice is required before the lessons. Good quality feeding is very important in order to have good conditions to practise. Every feeder must concentrate on good quality feeding and this helps his partner. 31
36 Schools Badminton Teachers MANUAL 3. Feeding skills The ability to distribute shuttles accurately and at an appropriate pace to pupils is an important skill. Coaches use this technique a lot in badminton. Badminton is an individual sport rather than a team sport however, players need to practice in groups and to support each others training and practice. Feeding is an important skill to learn for teachers and pupils. It is a skill which is required in several of the exercises included in the programme. Therefore pupils will need to be instructed in how to feed in a way which helps practice certain shots and develops skills. For example, pupils will need to feed or distribute shuttles from below to the net (for net play and lift) and from below or above to the rear court (for drop/clear shot) and to achieve this, the feeder will need to hold the shuttle correctly. Games of accuracy, speed and distance can be used to develop this skill in a fun manner. For some exercises it is useful to make a multi-feeding with many (10-15) shuttles lying in the free arm of the teacher or pupil. One shuttle is hit, or thrown, after another. Pupils who have problems with holding shuttles can be supported by a partner who holds the shuttles and gives one after the other to the feeder. 4. Safety Here are a few tips on safety when teaching badminton on court: Take care of shuttles lying on the floor when pupils are practising / playing. Ensure there is enough space between the pairs so they do not hit each other when practising swings and hitting. Ensure space is available when you have both right and left handed players practising together. Ensure safe positioning of feeders ensure there is sufficient space around the hitting area for the feeders and the receivers. Ensure net posts are stable and the base is not dangerous so that pupils can trip over them easily. 5. Playing Games Managing Groups A lot of exercises in the warm up phases are organised as games, relays or courses carried out in pairs or groups. This means organisation is important. Every teacher must consider the following: How many pupils and how many teams, courses or groups are in your class? Is there enough space in the hall so that all pupils can work at the same time? Equipment and logistics how is the equipment and groups going to be organised. Teachers own ideas and contribution it is important for the teacher to be creative with exercises and look at variations to suit the needs, age and level of ability of the children. 32
37 Module 4 Physical Skills CONTENTS 1. Introduction 2. Aims 3. Core Physical Education Content 4. Summary 5. References to Lesson Plans and Videos Module 4 Focus Module 4 providers an overview of the physical skills which are developed in each part of the programme. The module describes the core physical content that is integrated into the programme. The module also provides the references to lessons and activities that develop basic coordination, stability and balance skills. These physical skills are essential for developing the technical skills of badminton. Learning Outcomes for Module 4 By the end of this module, you will better understand: which physical skills are developed as part of the programme. the lessons and activities where these physical skills are practised. 1. Introduction Each lesson begins with a brief introduction of the key teaching points. This is followed by specific physical development exercises which are relevant to the technical content of the lesson. Both the technical and physical objectives are integrated into the exercises. 33
 Throw and Hit (4 lessons) Swing and Throw (2 lessons) Starter Lessons (10 lessons) Technical Content Basic tactical principles for singles and doubles.")

38 Schools Badminton Teachers MANUAL Each of the four sections has its own area of technical content integrated into the activities. Section Learn to Win (6 lessons) Throw and Hit (4 lessons) Swing and Throw (2 lessons) Starter Lessons (10 lessons) Technical Content Basic tactical principles for singles and doubles. Overhead hitting. Mid-court play. Transition from underarm hitting to overhead hitting. Grips, under arm hitting, rallying in the front court / at the net, short back hand serve, high forehand serve, lifts from the front court. Each of the four sections has its own area of physical content integrated into the activities. Section Learn to Win Throw and Hit Swing and Throw Physical Content Speed and agility skills. Jumping and landing skills together with core stability. Throwing and coordination skills. 10 Starter Lessons Basic coordination, stability and balance skills. 34
39 2. Aims All lessons begin with warm up activities which are fun-orientated physical activities with varying challenges. It is important that the pupils practise and experience all physical requirements for badminton. This process will allow the teachers to assess the physical strengths and weaknesses of pupils. Traditional warm up routines have been replaced by exercises to develop general and badminton specific physical ability, whilst remaining motivating for the pupils. Intensity and frequency, appropriate to the group and ability of the individual children, should be controlled by the teacher. Some physical exercises need a little pre-warming-up activity, because the exercises encourage the pupils to work at maximum speed or agility levels. Therefore pupils may sometimes need 3-4 minutes general warming-up with running and small flexibility exercises before the start the first warm-up exercise. Teachers can identify these situations from the lesson plans and video clips. It should be noted that many of these exercises and games are organised as team activities to allow mixed ability teams to reinforce positive experiences for less physically orientated pupils. 3. Physical Exercises Core Physical Education Content Section 1-10 Starter Lessons References to Lessons Development of basic coordination, stability and balance skills. Element Exercise Lesson (L) Video (V) Teaching Hints Eye-hand coordination. A feel for hitting a ball. Chasse steps. Very important running technique in badminton. Underarm throw and underarm catch. Balloon tap. L 1-1 V-1 Mirror chase with throw. L 1-2 V-1 Leader and chaser. L 1-2 V-2 Balloons are perfect to start with because speed of flight is very low. One foot chases the other but never quite catches up. Low centre of gravity. Throw and catch is a good preparation exercise for hitting a shuttle with a racket. Stamina in a tag game. Tag game with extrarunning after being tagged. L 1-5 V-1 Endurance and motivation to avoid being tagged. 35
40 Schools Badminton Teachers MANUAL Element Exercise Lesson (L) Video (V) Teaching Hints Balance. Balance an upturned shuttle on your head. Balance on one leg and throw and catch shuttle. Jump on one leg and back. L 1-3 V-2 L 1-3 V-2 L1-4 V-1 Balance is very important to control movements in badminton, for example, lunge movements and landing after jumps). Reaction times. Reactivity to starting quickly into different directions. Move on the spot - happy feet - and start after a signal. L1-4 V-2 Train this with signals using sound (clap, stamp or whistle). Stability and balance. Statue on the move. L1-6 V-1 Balance and stability are important elements in controlling badminton movements. Speed, agility and stamina skills. Relays with different challenges. Roll the dice and run. L1-7 V-1 L1-10 V-1 Tasks must be related to the abilities of pupils. To run for the team is a good motivation. Sprint, stop and balance. Relay Games. Balance the racket. L1-8 V-1 L1-9 V-2 The lunge technique helps to stop and go. Dynamic balance. Retrieve a shuttle placed far in front of oneself. L1-8 V-2 Repeat on opposite leg. Change of direction and agility. Calf touching. 1-9 V-1 Assists development of qualities required for effective footwork. 36
41 Section 2 and 3 Swing and Throw / Throw and Hit Development of: throwing and coordination skills. jumping and landing skills together with core stability. well-coordinated and fast footwork. References to Lessons Throwing, Agility and Coordination Activities Element Exercise Lesson (L) Video (V) Teaching Hints Learning to throw. Throwing games 1. Keep your court free. L2-1 V-1 L2-1 V-2 Encourage correct throwing technique. Throw with leg movement: Jumps and landings. Throwing games 2. Relay games with running and throwing. Shadow work. Throwing team game. L2-2 V-1 L2-2 V-2 L3-1 V-1 L3-2 V-1 Start throwing with chasse steps or forward running, progress to running backwards and then using a scissor jump. General coordination and flexibility. Clap exercises for mobility. L3-3 V-1 Cooperative exercises. Throwing and agility. Shuttle chase. Footwork L3-4 V-1 L3-6 V-1 Highlights individuals motivation and competitiveness. Core stability. Plank exercises. L3-4 V-2 Ensure correct posture. Coordinated at speed. Fast feet. L3-5 V-1 Teacher to demonstrate and control initial pace. Coordination and speed. Footwork exercises with sprints. L1-4 V-2 Ensure sufficient space. Mix groups. 37
42 Schools Badminton Teachers MANUAL Section 4 Learn to Win References to Lessons Development of speed and agility skills. Element Exercise Lesson (L) Video (V) Teaching Hints Speed and agility. Agility ladder 1. Agility ladder 2. L4-1 V-1 L4-2 V-1 Start with a slow pace to ensure correct execution of drills with good technique. Speed. The stone game. L4-4 V-1 A fun exercise which highlights motivation levels of individuals. 4. Summary Besides the technical skills that are needed for badminton, there are some general motor skills which are very important for physical development and for sport in general. The quality of these movements always depends on the best possible mixture of speed and control. Arm movements (throwing and catching) as well as leg movements (jumps, landings, starts, sprints and stops) need a lot of elasticity but also maximum control. To improve control badminton players need a good balance and core stability which are generic elements for many sports. In badminton, there is a mixture of physical elements from many sports, but badminton has its own unique profile. It should be noted that it is possible to select specific exercises which will be of benefit to an individuals development which can be practised by the pupils alone and without specific equipment. These can be practised and developed away from the lesson situation, especially for those children who are interested in practicing and developing higher level skills. 38
43 Module 5 10 Starter Lessons Grips and Introduction to Net Play CONTENTS 1. Introduction 2. Aims 3. Content explanation 4. Summary 5. References to Lesson Plans and Videos Module 5 Focus Module 5, 6, 7 and 8 provide the background and information for you for the teaching the main badminton content of Shuttle. The 22 Lesson Plans are separate downloads and should also be referred to when reading these modules in the Teachers Manual. Module 5 10 Starter Lessons (lesson plans numbers 1.1 to 1.10) Module 6 Swing and Throw (2 lesson plans numbers 2.1 and 2.2) Module 7 Throw and Hit (4 lesson plans numbers 3.1 to 3.4) Module 8 Learn to Win (6 Lesson plans numbers 4.1 to 4.6) The content in the 10 Starter Lessons, described in Module 5, is the main starting point for beginning teachers and beginning children in badminton. The 10 Starter Lessons: cover basic badminton skills. ensure beginners of all abilities have a positive first experience of badminton. 39
44 Schools Badminton Teachers MANUAL Learning Outcomes for Module 5 By the end of this module, you will better understand: the two grips used Thumb Grip and V Grip. lunges in badminton and the situations they are used in. hitting at the net including: Back hand net shot. Forehand net shot. Back hand lift. Forehand lift. serving Backhand serve and Forehand high serve 1. Introduction The section is divided into 10 lessons. Each lesson includes a technical subject and a related area of physical development. These are developed in parallel. For badminton, it is very important to teach badminton situations rather than teaching one specific technique after the other. Pupils must always understand in which situation the technique is useful. In the lessons in this resource, the technical content is intrinsic to the exercises and activities. 2. Aims The aim of the 10 Starter Lessons is to teach the basic movements in badminton, while introducing pupils to the sport. The focus of the 10 Starter Lesson plans is on: Grips simple exercises to learn the basic grips. This enables children to hit the shuttle with underarm movements and experience rally situations. Hitting children start hitting in the forecourt because underarm techniques are easier to learn. The first badminton techniques taught are net shots and lunges. Serving serves and the lifts to prepare the pupils for the introduction of the overhead shots are introduced towards the end of the 10 Starter Lessons. Moving movement skills in this section are 1) split steps, 2) chasse steps and 3) lunges. These are the foundation skills required to learn correct badminton footwork. 40


45 3. Content Explanation This part of the Teachers Manual focuses on the content of the 10 Starter Lessons. It helps to develop teachers knowledge. It is important to know that the lesson plans for this section also contain some information about the content. The main technical content of this part of the manual are: a. Thumb Grip, V -Grip and grip change b. Lunge and starting c. Introduction to hitting d. Net play Backhand and Forehand Net Shot e. Backhand serve f. Backhand and forehand lift g. Forehand High serve a. Grips and Grip Changes Two types of grip that are taught in the lessons are: 1. the Thumb Grip 2. the V-Grip. These two grips are explained below. 1. Thumb Grip The thumb grip is used to play basic backhand strokes in front of the body. Examples include net shots, net lifts, net kills, backhand serves and backhand drives (when struck in front of the body). The thumb is committed to the back of the racket handle, with a slight gap between the hand and the racket handle. Thumb position Long shot Close-up 41

46 Schools Badminton Teachers MANUAL References to Lessons Thumb Grip Element Exercise Lesson (L) Video (V) Teaching Hints Thumb Grip Keep balloon up with thumb grip. L1-1 V-3 For this grip the thumb is located to the back of the racket handle and parallel to the shaft, with a slight gap between the hand and the racket handle. Fingers should be a little relaxed. Back of hand is leading. 42

 Video (V) Teaching Hints Forehand V- Grip Keep balloon up with thumb grip.")
47 2. V-Grip The V-grip is used to play strokes where the shuttle is level with the player, on both the forehand and backhand sides. The thumb and first finger of the hand creates a V shape on the racket handle. The position of the bottom of the V is important and is shown in the illustrations below. The position of the bottom of the V shape. Level with player Close-up References to Lessons Grips and Grip Practice Element Exercise Lesson (L) Video (V) Teaching Hints Forehand V- Grip Keep balloon up with thumb grip. L1-1 V-4 Thumb and first finger of the hand creates a V shape on the racket handle. Palm is leading the movement, fingers are spread! Mark the racket handle as shown in the pictures above. Control of grips. Backhand and V-grip exercise in pairs. L1-1 V-5 Practice the two grips in isolation. Elbow in front of body. Movement of the hand is towards the (imaginary) shuttle. Hand moves to the shuttle. Backhand and V-grip exercise in pairs. L1-2 V-4 Elbow in front of body. Active movement of the hand towards the shuttle. 43
48 Schools Badminton Teachers MANUAL Element Exercise Lesson (L) Video (V) Teaching Hints Grip change from backhand to V-grip. Grip change without and then with shuttle. Game Hit the Targets L1-2 V-3 V-4 L1-2 V-5 Change between backhand and V grip with relaxed, but active fingers. Relaxed fingers to change between grips without turning the hand ( finger work ). Body position during exercises. Important during all exercises. Strokes are made away from the body not near the body. Hit the shuttle away from the body Underarm Movement. Grip change with shuttle. L1-2 V-4 Preparation: Elbow in front of body. Backswing: Loosen grip and pull hand back, arm becomes a little flexed. Forward swing: Move the hand actively and stretch arm to the shuttle (long arm), squeeze fingers when hitting. Follow through: Regain quick control of the racket after hitting. Chasse steps (fundamental badminton technique). Mirror chase. L1-2 V-1 One foot chases the other but never quite catches up. Low centre of gravity. Practise chasse and hit. Feeding exercises Chasse and Hit 1+2 and Choices. L1-5 V-3 V-4 V-5 Feeding exercises give the chance to get experience in running and hitting in a controlled manner. This helps to develop correct technique. 44
49 b. Introduction to Lunging Lunging and Starting Description Where and when the lunge is used. Technique Lunging Lunging is like a large stride. The pictures to the right show where and when the lunge is used on the court. Most lunging is done on the racket leg, but some non-racket leg lunging does happen. At the net when performing net kills, net shots and lifts. In the mid-court, when the shuttle is at the side of the body. In rear-court when the shuttle is behind the striking player. The lead foot points towards the shuttle. Take care that the first contact of the foot on the floor is with the heel. Knee and foot of the lead leg point in the same direction to protect knee and ankle joint. Foot rolls across the toes and points to the impact point (ensures stability and balance). Turn out rear-foot to help with balance and range of movement. Bend rear knee slightly to reduce strain on knee joint. Use an extended rear arm as a counter balance. Download the video clip of this technique from the BWF website 45
50 Schools Badminton Teachers MANUAL References to Lessons Lunge Element Exercise Lesson (L) Video (V) Lunge. Have a lunging. L1-3 V-3 V-4 Teaching Hints First only with shadowing net shots. Point out the importance of reach. No twisting of the foot. Balanced body position at the net. Have a lunging. L1-3 V-3 Body is straight with stretched racket arm. Upright posture. c. Introduction to Hitting 1. Developing Hitting Skills Catching and throwing involves the hands directly interacting and making contact with an object. Hitting with a racket requires the player to adjust, so the object being struck interacts or makes contact with the racket face, which is some distance from the hand. Practice therefore should help the player to make this transition from catching and throwing objects to hitting the shuttle using a racket. 46
51 2. Hitting with the Hand Hitting with the hand is an extension of throwing and catching. It requires you to watch the flying object carefully and adjust your feet and hands so the hand can strike that object successfully. Working alone and using the palm of the hand, strike a soft ball or balloon in the air. Experiment hitting with one hand, then the other, then alternating between them. Experiment with keeping the object in the air whilst doing tricks for example, get down on the floor and back up again). Working alone, and use the back of the hand to strike a soft ball or balloon in the air. Experiment hitting with one hand, then the other, then alternating between them. Experiment with keeping the object in the air whilst doing tricks for example, get down on the floor and back up again. Working alone, keep a soft ball or balloon in the air using the palms and backs of both hands. Try to make up a sequence of tricks. Holding a soft ball or balloon above your head, reach up with the other hand and rotate the arm so you can see your palm. Then strike the ball out of your hand using your palm. Try to complete a follow through that finishes so the player can see the back of their hand (forearm pronated). Using a soft ball or balloon, rally with a partner using the palms and the backs of the hand. This can be done seated or standing. 47


52 Schools Badminton Teachers MANUAL 3. Hitting with a Very Short Grip Hitting with a very short grip helps players achieve success because the object they wish to strike is still relatively close to the hand when it is struck.. Holding a racket near the T with the back of the hand upwards Keep a balloon, soft ball or shuttle in the air using forearm rotation. Holding a racket near the T with the first finger below and along the frame. Keep a balloon, soft ball or shuttle in the air using forearm rotation. Holding a racket near the T with the first finger below and along the frame. Touch a shuttle with the strings of the racket Take the racket head back using forearm rotation. Strike the shuttle using forearm rotation (the player can see the back of their hand). 48


53 d. Net play 1. Backhand Net Shot Where the shuttle goes When we use it Why we use it Net shots travel from forecourt to forecourt as close to top of the net as possible. When we are in the forecourt and the shuttle has dropped below tape height. To bring the opponent forwards, creating possible opportunities in the rear court. (defensive/neutral area) Trying to force the opponent to lift, in doing so creating an attacking opportunity. What it looks like Prepare Backswing Forward Swing Follow Through V grip. Hold racket out in front of body. Establish relaxed thumb grip. Relaxed reach. Rotate arm. Use momentum of whole body. Push through shuttle. Bring racket up ready to anticipate opponent s next stroke. Present racket strings to shuttle. Download the video clip of this technique from the BWF website 49
. To bring opponent forwards, creating possible opportunities in their rear court.")
54 Schools Badminton Teachers MANUAL 2. Forehand Net Shot Where the shuttle goes When we use it Why we use it Net shots travel from forecourt to forecourt as close to top of the net as possible. When we are in the forecourt and the shuttle has dropped below tape height (defensive / neutral area). To bring opponent forwards, creating possible opportunities in their rear court. Aims to force the opponent to lift, in doing so creating an attacking opportunity. What it looks like Prepare Backswing Forward Swing Follow Through V-grip. Hold racket out in front of body. Relaxed reach. Rotate arm. Present racket strings to shuttle. Use momentum of whole body. Push through shuttle. Bring racket up ready to anticipate opponent s next stroke. Download the video clip of this technique from the BWF website 50
55 References to Lessons Backhand and Forehand Net Shot Element Exercise Lesson (L) Video (V) Teaching Hints Net shots backhand and forehand. Net shots. Progression exercise. L1-3 V-4 L1-3 V-5 Preparation: hold racket out in front of the body (long arm). Backswing: very small with loose grip. Forward swing: a gentle push over the net with loose grip and good finger control. Follow through: as small as necessary. Start with backhand, then forehand, then alternately. Practice first without leg movement, then with lunge. Net shot rally. Progression exercise. L1-3 V-5 Loosen fingers to change between grips without turning the hand (finger-work). Net shots with movement. (start step -lunge) Fun games for net play. Net shot and start. L1-3 V-3 V-4 V-5 Games: Net king 1-3 L1-6 V-2 V-3 V-4 Keep control of arm movement during movement to the shuttle. Progress from only lunge, to chasse and lunge and finally split step, chasse and lunge. Read safety aspects in the description of the games. 51


56 Schools Badminton Teachers MANUAL e. Back Hand Serve Where the shuttle goes When we use it Why we use it To follow the laws of the game, the shuttle must travel from one service box to the diagonally opposite service box. Backhand low serves pass close to the top of the net and land at the front of the diagonally opposite service box. Used in doubles and men s singles to start the rally, from a defensive/neutral situation. To restrict your opponent s opportunity to attack. To create attacking opportunities for yourself. What it looks like Prepare Backswing Forward Swing Follow Through Stance can vary, but most common is with the racket foot forwards, close to the T. Use a short, relaxed thumb grip (for doubles). Take the racket back a short distance. Open racket face slightly. Swing racket head forwards slowly. Push through shuttle. Continue pushing action. Bring racket up to threaten service reply. Place the racket out in front of the body. Place shuttle on racket. Download the video clip of this technique from the BWF website 52
57 References to Lessons Backhand Serve Element Exercise Lesson (L) Video (V) Teaching Hints Backhand serve Repetition of thumb grip and then learning the backhand serve L1-7 V-3 V-4 Demonstration and description of the technique required. Advice: Hit from your hand. 53

 a defensive lift may be necessary.")
58 Schools Badminton Teachers MANUAL f. Backhand and Forehand Lift 1. Backhand Lift Where the shuttle goes When we use it Why we use it Net lifts travel from the forecourt to the rear court. Attacking lifts travel just high enough to beat your opponent s racket. Defensive lifts go higher. When you are in the forecourt and the shuttle has dropped just below tape height when you strike it (into the neutral area) creates opportunity for attacking lift. When you are in the forecourt and the shuttle has dropped well below tape height (into your defensive area) a defensive lift may be necessary. Attacking lifts aim to get the shuttle in behind your opponent to force a weaker return. Higher defensive lifts push your opponent back and allow more time for the player playing the stroke to recover their position and balance. What it looks like Prepare Backswing Forward Swing Follow Through V grip. Hold racket out in front of body. Establish relaxed thumb grip. Relaxed reach. Rotate arm outwards. Flick through shuttle. Racket momentum causes arm to rotate outwards as it relaxes. Download the video clip of this technique from the BWF website 54
.")

59 2. Forehand Lift Where the shuttle goes When we use it Why we use it Net lifts travel from the forecourt to the rear court. Defensive lifts go higher. More attacking lifts travel just high enough to beat your opponent s racket. When you are in the forecourt and the shuttle has dropped well below tape height as you strike it (in your defensive area). When you are in the forecourt and the shuttle has dropped just below tape height when you strike it (in your neutral area). Higher defensive lifts push your opponent back and allow more time for the player playing the stroke to recover their position and balance. Attacking lifts aim to get the shuttle in behind your opponent to force a weaker return. What it looks like Prepare Backswing Forward Swing Follow Through V grip. Hold racket out in front of body. Relaxed reach. Rotate arm outwards. Bend wrist. Straighten wrist. Flick through the shuttle. Racket momentum causes arm to rotate inwards as it relaxes. Download the video clip of this technique from the BWF website 55
60 Schools Badminton Teachers MANUAL References to Lessons Backhand and Forehand Lifts Element Exercise Lesson (L) Video (V) Teaching Hints Backhand Lift First practices and then Merry-go-round. L1-8 V-3 V-4 Preparation: Racket is held out in front of the body, racket head above hand with relaxed reach. Backswing: Quick, short elbow bend and short pronation of forearm Forward swing: Press thumb on racket handle, strike shuttle with flicking action, supinating the forearm and straightening the elbow. Follow through: Recover racket in front of body. Aim: Make a lift look like a net shot. Forehand Lift First practices and then Merry-go-round. L1-9 V-3 V-4 Preparation: Racket is held out in front of the body, racket head above hand with relaxed reach. Supinate forearm and bend wrist. Backswing: Go on bending wrist and supinating forearm. Forward swing: Pronate forearm and straighten wrist, strike shuttle with flicking action. Follow through: Recover racket in front of body. Aim: Make a lift look like a net shot. Games. Forehand and Backhand Lift Merry-go-round. L1-10 V-3 V-4 56


61 g. Forehand High Serve Where the shuttle goes When we use it Why we use it To follow the laws of the game, the shuttle must travel from one service box to the diagonally opposite service box. High serves travel to the rear of your opponent s service box, dropping vertically. High serves also tend to be towards the centre of the court, which restricts the angles of return that can be stuck by the receiver. The forehand high serve is used in singles to begin the rally, from a neutral/defensive position. Forehand high serves are used more in women s singles and sometimes in men s singles As a variation (creating a different challenge to low serves). Forces player to look up more, so they can be less aware of the servers position. What it looks like Prepare Backswing Forward Swing Follow Through Adopt a sideways stance within the service box. V-Grip. Racket and shuttle in elevated position. Weight on rear leg. Begin transfer of weight forwards. Drop the shuttle to the side/ in front. Lower the racket Bend the wrist and supinate the forearm. Continue weight transfer to front foot. Swing racket forwards. Accelerate racket head by pronating forearm and straightening wrist. Strike under shuttle hard, in front and to side of body. Momentum carries racket through high and long. Download the video clip of this technique from the BWF website 57
62 Schools Badminton Teachers MANUAL 4. Summary Starting in the forecourt allows more chance of initial improvement and all pupils to experience success. When teaching the strokes we subdivide the movement into four parts: Preparation. Backswing. Forward swing. Follow through. The division into the four parts helps us to give clear feedback and corrections to the pupils. Teaching techniques/ sequencing used: demonstrating imitation. Images. trial and error with feedback. shadows and chaining. The sequence of development in the first ten lessons is: Grips and grip change Lunge and start Net play Then followed by: Backhand serve. Backhand and Forehand lift. High forehand serve. 58
63 Module 6 Swing and Throw Mid-Court Development CONTENTS 1. Introduction 2. Aims 3. Content explanation 4. Summary Module 6 Focus Module 5, 6, 7 and 8 provide the background and information for you for the teaching the main badminton content of Shuttle. The 22 Lesson Plans are separate downloads and should also be referred to when reading these modules in the Teachers Manual. Module 5 10 Starter Lessons (lesson plans numbers 1.1 to 1.10) Module 6 Swing and Throw (2 lesson plans numbers 2.1 and 2.2) Module 7 Throw and Hit (4 lesson plans numbers 3.1 to 3.4) Module 8 Learn to Win (6 Lesson plans numbers 4.1 to 4.6) Module 6 focuses on mid-court practice. The activities for children in Swing and Throw are designed to prepare them for overhead hitting. The speed of the rallies increase in this section and teachers have an important role in controlling this so that the speed is relevant to the skill level of the children. 59
64 Schools Badminton Teachers MANUAL Learning Outcomes for Module 6 By the end of this module, you will better understand the: ready position. importance of racket speed, throwing action and rallying ability. Backhand drive and where it is used in badminton. Forehand drive and where it is used in badminton. 1. Introduction The areas covered by Section 2 Swing and Throw focus on the mid court and prepares beginners for overhead hitting. Section Swing and Throw Technical Content Mid court practice - activities are designed to prepare beginners for overhead hitting. Techniques introduced here are: Backhand drive Forehand drive Backhand block (introduced in Section 4) The learning points are intrinsic to the exercises. Traditionally beginners start with rear court techniques, which often leads to frustration and the development of incorrect technique. In this programme however, beginners first learn the basics in the front court and gain confidence, before mid-court and rear-court techniques are introduced. 2. Aims Mid Court Practice By the end of the 10 Starter Lessons pupils should be able to: feel confident at the net rally at the net hit from the net to the rear-court. The aim of the two midcourt lessons ( ) is: to increase the speed of rallies to prepare the pupils for overhead hitting. 60
65 When they move from the net to the midcourt, the pupils have more time than before to focus on the shuttle. This is the reason why we are now able to increase the speed of the rallies by speeding up the racket movements. In this part of the programme we emphasize that it is important to: prepare for all shots and after the shot recover to a good position ready for the next shot. This is easier to learn when the speed of the rally situation encourages the players to do this. 3. Content explanation References to Lessons Swing and Throw Element Exercise Lesson (L) Video (V) Teaching Hints Ready Position Explain, demonstrate and control in all exercises. L2-1 V-3 V-4 Leaning forward, slightly with flexed knees, heels lifted from floor, racket in front of body, racket head above the hand. Play with fast racket (racket speed) Throwing exercise for racket speed. Racket Exercises. L2-1 V-3 L2-1 V-4 L2-2 V-3 V-4 Hold racket in front of body, start with loose grip, then tighten grip to generate power, short racket movements, very small follow through. 61


66 Schools Badminton Teachers MANUAL 1. Backhand Drive Where the shuttle goes When we use it Why we use it Backhand drives are flat shots that tend to travel from midcourt to mid-court or the rear court of your opponent. Backhand drives tend to be used in neutral situations when the shuttle is neither high enough to attack downwards, nor low enough to use upwards defensive strokes. As well as on the backhand side, backhand drives are also used when the shuttle is directly in front of the body. Backhand drives can be used to: restrict the opponent s opportunity to attack. create an attacking opportunity for the player striking the drive by hitting into clear space in the opposite court or into the body of the opponent. What it looks like Prepare Backswing Forward Swing Follow Through Stand square to the net, racket ready. Establish a thumb grip, pronate the forearm (create an angle between the arm and racket), Bend the elbow, Begin to step out to shuttle with non-racket foot. Supinate the forearm. Extend the elbow and reach to strike the shuttle in front/ to side. Strike the shuttle with a tapping action, landing the non-racket foot on or after contact. Minimal follow through. Return to face the net, with racket in ready position. Download the video clip of this technique from the BWF website 62
67 References to Lessons Backhand Drive Element Exercise Lesson (L) Video (V) Teaching Hints Backhand drive Feeding exercise for racket speed and flat play
68 Schools Badminton Teachers MANUAL 2. Forehand Drive Where the shuttle goes When we use it Why we use it Forehand drives are flat shots that tend to travel from midcourt to mid-court or rear court of your opponent. Forehand drives tend to be used in neutral situations when the shuttle is neither high enough to attack downwards, nor low enough to use upwards defensive strokes. Backhand drives can be used to: restrict the opponent s opportunity to attack. create an attacking opportunity for the player striking the drive by hitting to space or into the body of the opponent. What it looks like Prepare Backswing Forward Swing Follow Through Racket ready. Step out to shuttle. Supinate the forearm. Minimal follow through. V-grip. Relaxed reach (slightly bent elbow). Supinate the forearm (create an angle between the arm and racket). Extend the elbow and reach to strike the shuttle in front/ to side. Strike the shuttle with a tapping action, landing the non-racket foot on or after contact. Return to face the net, with racket in ready position. Download the video clip of this technique from the BWF website 64
69 References to Lessons Forehand Drive Element Exercise Lesson (L) Video (V) Teaching Hints Forehand drive. Feeding exercise for racket speed and flat play. L2-1 V-3 Improving flat play. Flat play. Games for midcourt development. L2-1 V-4 L2-2 V-3 V-4 Games are very motivating and bring lots of fun but teacher must take care that strokes are made with the correct technique. 65
70 Schools Badminton Teachers MANUAL 4. Summary In lessons 2-1 and 2-2 the speed and variety of rallying situations are increased, whilst the physical elements of the lessons prepare pupils for overhead hitting. Areas developed are: racket speed. rallying ability. throwing action. 66
71 Module 7 Throw and Hit Rear Court Development CONTENTS 1. Introduction 2. Aims and objectives 3. Content explanation 4. Summary Module 7 Focus Module 5, 6, 7 and 8 provide the background and information for you for the teaching the main badminton content of Shuttle. The 22 Lesson Plans are separate downloads and should also be referred to when reading these modules in the Teachers Manual. Module 5 10 Starter Lessons (lesson plans numbers 1.1 to 1.10) Module 6 Swing and Throw (2 lesson plans numbers 2.1 and 2.2) Module 7 Throw and Hit (4 lesson plans numbers 3.1 to 3.4) Module 8 Learn to Win (6 Lesson plans numbers 4.1 to 4.6) Module 7 focuses on rear court practice and develops overhead hitting techniques. 67
72 Schools Badminton Teachers MANUAL Learning Outcomes By the end of this module, you will better understand: The stages of the hitting cycle. Mid court techniques which include: Forehand clear. Forehand drop shot. Forehand smash. Scissor jump. 1. Introduction This section builds on the two lessons that focused on mid court techniques. Section Throw and Hit Technical Content Rear Court Practice introduces and develops overhead hitting techniques. Techniques introduced here are: Forehand Clear. Forehand drop shot. Forehand smash. Scissor jump. As in the previous section, the learning points are intrinsic to the exercises. Traditionally beginners start with rear court techniques, which often leads to frustration and the development of incorrect technique. Having already focused on the basics in the front court and gained confidence in the mid-court, rear-court techniques are introduced. 2. Aims and Objectives In the six rear-court lessons pupils develop overhead hitting techniques with the main strokes: clear, drop and smash. These are developed in parallel to the techniques of movement required and in particular the scissor jump. Many aspects taught in the forecourt and midcourt now are also true in the rear-court. This experience, together with the confidence gained in the earlier lessons, now helps the pupils to learn new techniques faster than in the first lessons. 68
73 3. Content Explanation In this section the following techniques 1. Scissor jump. 2. Forehand Overhead Clear. 3. Forehand Overhead Drop Shot. 4. Forehand Smash. Before the above are described, it is important to explain how we can divide the strokes into several parts for the purpose of teaching. This is known as the hitting cycle. 4. Recovery 1. Preparation 3. Follow through 2a. Backswing Preparation 2c. Impact 2b. Forward swing Every stroke begins with a good ready position including position of the racket in front of the body. Players should adopt a starting racket position which is directed to the area where their opponent will intercept the shuttle. Hit The hit can be divided into two parts, the backswing and the forward swing. Many beginners have difficulty with the backswing due to the fact they are afraid to miss the shuttle. The throwing games and shadow exercises will allow them to gain confidence. Follow through The part after the impact is called follow through. The length is dependent upon the type and power of the stroke, the interception point and the technical situation. Recovery When the follow through is finished there is a fast recovery which fluently goes into the preparation of the next stroke. Beginners should be encouraged from the start to incorporate the recovery phase into their practice sessions. The hitting cycle helps us to describe the different parts of the strokes, to see faults and give the relevant corrections. 69
74 Schools Badminton Teachers MANUAL 1. Scissor Jump The scissor jump is the main technique used to hit in the rear-court. This technique allows the player to intercept the shuttle as high as possible and to recover quickly into an appropriate ready position. It is also used when the player is under pressure in the backhand corner and he wants to hit with a forehand stroke. Racket leg makes a step back into a side-on position with weight on racket leg. Jump from racket foot and pivot in the air (180 ), land on non-racket foot behind the point where you started, landing foot cross to running direction to facilitate an efficient stop and change of direction. Make the first step with racket foot. Then make one chasse step or running step with non-racket foot. Note: Steps 2 and 3 are fast and close together as possible. No break between. References to Lessons Scissor Jump Element Exercise Lesson (L) Video (V) Teaching Hints Scissor jump Introduction on scissor jump, without and then with steps. 3-1 Point out the correct rhythm of the steps by clapping or counting: one two / three four. 70


75 2. Forehand Overhead Clear Where the shuttle goes When we use it Why we use it Clears go from your rear court to the rear court of your opponent. Clears are used when we are in our attacking zone. Clears push your opponent back, creating space in the forecourt. Attacking clears travel at a height just out of reach of your opponent s racket. More defensive clears are slightly higher. Attacking clears aim to place the shuttle in behind the opponent, creating pressure and potentially weaker returns. Defensive clears allow the person playing the stroke more time to recover their balance and court position. What it looks like Prepare Backswing Forward Swing Follow Through V-grip Racket in overhead ready position. Front arm up. Sideways stance. Drive up and forwards off rear leg Push rear hip forwards Rear shoulder and upper arm move upwards and forwards. Upper and lower arm rotate outwards. Wrist bends. Front arm pulls in to control body rotation. Rear leg overtakes front leg. Upper and lower arm rotates inwards. Wrist straightens. Reach to strike shuttle powerfully above/slightly in front of racket shoulder. Racket momentum causes arm to rotate inwards as it relaxes. Rear foot lands to become the new front foot. Download the video clip of this technique from the BWF website 71
76 Schools Badminton Teachers MANUAL References to Lessons Forehand Overhead Clear Element Exercise Lesson (L) Video (V) Teaching Hints Forehand overhead clear Straight clear Forehand clear rally with trick. Straight overhead clear. Forehand clear rally. Game. L3-1 V-3 L3-2 V-3 L3-2 V-3 L3-2 V-2 L3-2 V-4 72


77 3. Forehand Overhead Drop Shot Where the shuttle goes When we use it Why we use it Drop shots go from your rear court to the forecourt of your opponent. Longer drops tend to land just beyond the low service line. Shorter drop shots land between the low service line and the net. Drop shots are used when we are in the attacking zone. We use drop shots to: make space in the rear court make our opponent offbalance encourage out opponent to lift What it looks like Prepare V-grip. Racket in overhead ready position. Front arm up. Sideways stance. Backswing Drive up and forwards off rear leg. Push rear hip forwards. Rear shoulder and upper arm move upwards and forwards. Upper and lower arm rotate outwards. Wrist bends. Forward Swing Upper and lower arm rotates inwards. Wrist straightens. Reach to strike shuttle above/ slightly in front of striking shoulder. Just prior to hitting rotation of arm stops push through the shuttle. Follow Through Rear foot lands to become the new front foot. Download the video clip of this technique from the BWF website 73
78 Schools Badminton Teachers MANUAL References to Lessons Forehand Overhead Drop Shot Element Exercise Lesson (L) Video (V) Teaching Hints Forehand overhead drop shot Shadow Straight Drop Continuous Play Lift-Drop-Net L3-3 V-3 L3-3 V-3 L3-3 V-4 L3-4 V-3 Same hitting action for clear and drop shot but finish a drop shot with a push instead of a full hit at point of contact. Clear and Drop shot parallel Choices. Half court singles. L3-4 V-4 L3-4 V-5 74
79 4. Forehand Smash Where the shuttle goes When we use it Why we use it Smashes go from your rear court to the midcourt of your opponent. Smashes can be struck into space, or into the body of the opponent. We use smashes when hitting down from our attacking zone. A forehand smash is a shot used in an attempt to win the rally, or to force a very weak return. What it looks like Prepare Backswing Forward Swing Follow Through V-Grip. Relaxed ready position. Step back to load rear leg, sideways stance. Jump and begin rotating in the air, elbow up-forwards, supinate forearm ( brush your hair ). Create angle between arm and racket. Continue rotation in the air, throw racket head powerfully (pronate forearm). Reach up to strike shuttle. impact in front of striking shoulder. Finish rotation and land. Relaxation allows continued forearm rotation. Racket stays in front of body. Download the video clip of this technique from the BWF website 75
80 Schools Badminton Teachers MANUAL References to Lessons Forehand Smash Element Exercise Lesson (L) Video (V) Teaching Hints Forehand smash. Smash and smashblock. Lift-Smash-Block. L3-5 V-2 V-3 V-4 L3-6 V-2 Smash ensure pupil is behind the shuttle to enable them to hit the shuttle from in front of the body. 76


. Extend elbow. Keep racket face open to hit slightly underneath shuttle. Push through shuttle.")
81 5. Backhand block off the Body Where the shuttle goes When we use it Why we use it Backhand blocks off the body travel from the mid-court to the forecourt/mid-court of your opponent. Backhand blocks are used when you are in defensive situations, returning a smash to the body. They are used mainly in doubles and less frequently in singles. Backhand blocks can be used to: restrict the opponent s opportunity to attack. create an attacking opportunity by striking the block into space and forcing the opponent to hit their next shot upwards. What it looks like Prepare Backswing Forward Swing Follow Through V-grip. Racket held out in front of body. Establish relaxed thumb grip. Elbow forwards. Bend elbow. Open racket face (upper and lower arm rotation, bent wrist). Extend elbow. Keep racket face open to hit slightly underneath shuttle. Push through shuttle. Racket momentum causes arm to rotate outwards as it relaxes. Re-establish basic grip and racket position in front of body. Download the video clip of this technique from the BWF website 77
ShuttlE. Schools Badminton. Module 5: 10 starter lessons
 ShuttlE Time Schools Badminton Teachers MANUAL Module 5: 10 starter lessons ShuttlE Time Schools Badminton Teachers MANUAL 10 starter lessons Badminton World Federation 2011. First published November
ShuttlE. Schools Badminton. Module 6: Swing and Throw
 ShuttlE Time Schools Badminton Teachers MANUAL Module 6: Swing and Throw ShuttlE Time Schools Badminton Teachers MANUAL Module 6: Swing and Throw Badminton World Federation 2011. First published November
ShuttlE. Schools Badminton. Module 8: Learn to Win
 ShuttlE Time Schools Badminton Teachers MANUAL Module 8: Learn to Win ShuttlE Time Schools Badminton Teachers MANUAL Module 8: Learn to Win Badminton World Federation 2011. First published November 2011.
ShuttlE. Schools Badminton LESSON PLANS Throw and Hit
 Schools Badminton LESSON PLANS Throw and Hit Schools Badminton LESSON PLANS Throw and Hit Badminton World Federation 2011. First published November 2011. Overview 1. Introduction Throw and Hit Before
ShuttlE. Schools Badminton LESSON PLANS 10 STARTER LESSONS
 Schools Badminton LESSON PLANS 10 STARTER LESSONS Schools Badminton LESSON PLANS 10 STARTER LESSONS Badminton World Federation 2011. First published November 2011. Overview 1. Introduction 10 Starter
ShuttlE. Schools Badminton
 Schools Badminton LESSON PLANS Learn to Win Schools Badminton LESSON PLANS Learn to Win Badminton World Federation 2011. First published November 2011. Overview 1. Introduction Learn to Win Before starting
ShuttlE. Schools Badminton LESSON PLANS Swing and Throw
 Schools Badminton LESSON PLANS Swing and Throw Schools Badminton LESSON PLANS Swing and Throw Badminton World Federation 2011. First published November 2011. Overview 1. Introduction Swing and Throw Before
PACIFIC COACH EDUCATION. Secondary School Teachers Module. Version
 PACIFIC COACH EDUCATION Secondary School Teachers Module Version 2010.1 INTRODUCTION This is an introductory coaching resource that has been created to assist the Secondary School teacher. This resource
VIDEO CLIPS DIRECTORY
 VIDEO CLIPS DIRECTORY MODULE 5: LESSONS 1-10 L1V1 Balloon Tap http://www.youtube.com/watch?v=yawuubjim5e L1V2 Balloon Tap Relay Game http://www.youtube.com/watch?v=yetenn-3f2g L1V3 Backhand Thumb Grip
PARA-BADMINTON WHEELCHAIR DEVELOPMENT
 PARA-BADMINTON WHEELCHAIR DEVELOPMENT Para-Badminton Wheelchair Development Introduction The use of the arms for both movement and hitting technique are the main challenges in the wheelchair sports class.
PACIFIC COACH EDUCATION. Primary Teachers Module. Version
 PACIFIC COACH EDUCATION Primary Teachers Module Version 2010.4 Introduction This is an introductory coaching resource that has been created to assist the Primary School teacher. This resource is suitable
contents QuickStart Tennis Practice Sessions Introduction ages 9 10 practice sessions
 contents QuickStart Tennis Practice Sessions Introduction I II practice 1 Forehands and Backhands with Control 1 10 practice 2 Serving 11 18 practice 3 Returning the Serve 19 24 practice 4 Net Play 25
The MTI Method Yellow Beginner Grade 3 lesson Plan Manual
 Modern Tennis International presents The MTI Method Yellow Beginner Grade 3 lesson Plan Manual Lesson Phases 1-3 MTI Yellow Beginner Grade 3 Lesson Plan Manual By Andrew Magrath & John Littleford www.playmoderntennis.com
The MTI Method Orange Beginner Grade 3 lesson Plan Manual
 Modern Tennis International presents The MTI Method Orange Beginner Grade 3 lesson Plan Manual Lesson Phases 1-3 MTI Orange Beginner Grade 1 Lesson Plan Manual By Andrew Magrath & John Littleford www.playmoderntennis.com
Mini Tennis. Lesson Three Game Situation Topic: When Serving and When Returning Tactic Topic: Over and In Skill Topic: Serve and Return
 Mini Tennis Lesson Three Game Situation Topic: When Serving and When Returning Tactic Topic: Over and In Skill Topic: Serve and Return Warm Up... Ball movement RACING RALLIES Player movement Facing each
Lesson 4. Introduction OVERVIEW. Equipment Tennis rackets, tennis balls orange/green, hoops, throw-down lines.
 Lesson Four Lesson 4 OVERVIEW This lesson focuses on net play and volleying. It then progresses to link ground strokes and volleys by practicing the approach shot. Equipment Tennis rackets, tennis balls
TENNIS XPRESS LESSON PLANS
 TENNIS XPRESS LESSON PLANS 2 TENNIS XPRESS WEEK 1: DISCOVERING ALL THE SHOTS Week 1 is all about getting active, meeting the other players and having fun. In this session your players will try all the
The Racket Pack Smash Festival. Key Stage 1 Ages 5-7
 The Racket Pack Smash Festival Key Stage 1 Ages 5-7 Meet the Racket Pack! Smash Tink Flo Wise 5-7 Years 7-9 Years 9-11 Years Club Player The Racket Pack Competition Overview The Racket Pack is a new primary
The MTI Method Green Intermediate Grade 1 lesson Plan Manual
 Modern Tennis International presents The MTI Method Green Intermediate Grade 1 lesson Plan Manual Lesson Phases 1-3 MTI Green Intermediate Grade 1 Lesson Plan Manual By Andrew Magrath & John Littleford
Teachers: Samantha Coles & Roland Wilson. Floor
 Unit 1: Football & Beep Week 1 Week 3 08/30-09/15 Day 1: Football Passing and Catching Day 2: Flag Football Introduction Lesson Objectives: Students practice sending and receiving the football in partners
Badminton Drills. Badminton court or similar space. Up to four players on one court. Two per side; half court. One per side; full court.
 Authentic Environment Drills Drill Equipment Teaching cues/ Teaching focus 1 Drill: Crocodile (Shaded area indicates the playing zone for the activity) Skills: Drop-shot and lunging This activity develops
Secondary Schools. Coaching Guide FUN ACTIVITIES AND ROUTINES A RESOURCE FOR TEACHERS
 Secondary Schools Coaching Guide FUN ACTIVITIES AND ROUTINES A RESOURCE FOR TEACHERS Introduction The purpose of this resource is to assist teachers/coaches to provide quality training for the players
UNDER 9 AND UNDER 12 PLAYER EVALUATION (fundamental and developmental stages)
") UNDER 9 AND UNDER 12 PLAYER EVALUATION (fundamental and developmental stages) PLAYER S NAME: CLUB: E-MAIL: PHONE: GENDER: BIRTHDAY: MONTH YEAR PLAYING HAND: BACKHAND: PROGRAM: COACH S NAME: E-MAIL: PHONE:
UNDER 9 AND UNDER 12 PLAYER EVALUATION (fundamental and developmental stages) PLAYER S NAME: CLUB: E-MAIL: PHONE: GENDER: BIRTHDAY: MONTH YEAR PLAYING HAND: BACKHAND: PROGRAM: COACH S NAME: E-MAIL: PHONE:
ORANGE BALL. CAMP 3 The All Court Player Draft
 ORANGE BALL CAMP 3 The All Court Player 2017 Draft ALL COURT PLAYER Practice Plan- Session 1 Theme of this camp: Resilience Warm-up Technical/Game Development (Players in Groups of 4 with Assigned Coach
PE Department Key Stage 3 Curriculum Map
 Sept 2018 Year 7 Year 8 Year 9 Athletics : In this unit pupils will accurately replicate running, jumping and throwing skills and learn specific techniques for events in order to improve performances Key
age any primary schools tennis Teacher s Handbook
 www.tennisfoundation.org.uk 00 887 7000 info@tennisfoundation.org.uk The Tennis Foundation 07 Charity Number 9875 Registered Company Number 8 TENNIS any age primary schools tennis Teacher s Handbook Primary
Inclusive Tennis Teacher Resource Activity Cards
 Inclusive Tennis Teacher Resource Activity Cards TESTIMONIALS This resource and equipment has made a huge impact on our students who have never played tennis before. Inclusive Tennis Teacher Resource TEACHER,
Activities for enjoyment and learning
 Activities for enjoyment and learning Teaching the game Before beginning it is important to work out what the child must learn in order to play badminton. For what the child must learn will determine the
contents QuickStart Tennis Practice Sessions Introduction ages 7 8 practice sessions
 contents QuickStart Tennis Practice Sessions Introduction I II practice 1 Develop Rallying Skills from the Baseline 1 8 practice 2 Underhand and Overhand Serve 9 14 practice 3 Receiving the Serve 15 20
Adapt, include and excel. INCLUSIVE TENNIS TEACHER RESOURCE Activity Cards
 Adapt, include and excel INCLUSIVE TENNIS TEACHER RESOURCE Activity Cards Inclusive Tennis Teacher Resource How to use these Activity Cards Testimonials This resource and equipment has made a huge impact
1. Forehand low crosscourt net from defensive (Square) stance: downward feed
 stance: downward feed") Badminton Ireland 1. Forehand low crosscourt net from defensive (Square) stance: downward feed This task will introduce some of the playing basics and encourage the following Starting in a defensive square
Badminton Ireland 1. Forehand low crosscourt net from defensive (Square) stance: downward feed This task will introduce some of the playing basics and encourage the following Starting in a defensive square
DRILLS AND GAMES FOR BEGINNERS: A STEP BY STEP GUIDE TO PRE-TENNIS PRACTICE
 AND FOR BEGINNERS: A STEP BY STEP GUIDE TO PRE-TENNIS PRACTICE 2 AND FOR BEGINNERS: A STEP BY STEP GUIDE TO PRE-TENNIS PRACTICE ITF School Tennis Initiative Introduction There are several tasks children
THE LESSONS. Considerations in planning lessons. When teaching young children the teacher should consider the following factors:
 THE LESSONS 21 THE LESSONS The lessons are arranged so that the children can learn what they need to know in a logical order. They are designed to help children first, to learn how to rally, to develop
BADMINTON. History. either two opposing players (singles) or two opposing pairs (doubles). The badminton court is rectangular and is divided by a net.
 or two opposing pairs (doubles). The badminton court is rectangular and is divided by a net.") PHYSICAL EDUCATION DEPARTMENT Bilingual Programme I.E.S. GUADALPEÑA BADMINTON BADMINTON is a racket sport played by either two opposing players (singles) or two opposing pairs (doubles). The badminton
PHYSICAL EDUCATION DEPARTMENT Bilingual Programme I.E.S. GUADALPEÑA BADMINTON BADMINTON is a racket sport played by either two opposing players (singles) or two opposing pairs (doubles). The badminton
PHYSICAL EDUCATION CURRICULUM YEAR NINE
 PHYSICAL EDUCATION CURRICULUM YEAR NINE TOPIC: BADMINTON WEEK ONE Objective To introduce the Universal or forehand grip and teach the basic fundamentals of the forehand overhead clear. Universal/ forehand
Oswaldtwistle Moor End Primary School
 Lancashire Year 2 Athletic Activities Core Task Key Stage 1 Colour Match Core Task The Colour match core task involves children throwing different pieces of equipment as accurately as possible in order
MLC Tennis Hot Shots Term 1 lesson planner Week: 1 4 Lesson time: 60 minutes Stage: Green
 ML Tennis Hot Shots Term lesson planner Week: 4 Lesson time: 60 minutes Stage: Green The aim of this series is to increase awareness of the court zones and targets, build attacking and defensive skills,
Course learning outcomes
 Young Leader Award Course learning outcomes By the end of the course, you will be able to: Understand what makes a good Leader Communicate effectively Plan activities appropriate to the abilities of the
KIWI HOOPS PROGRAMME PLAYER BASKETBALL NEW ZEALAND KIWI HOOPS PROGRAMME GUIDE.
 PLAYER PLAYER KIWI HOOPS PROGRAMME www.basketball.org.nz GUIDE TO THE KIWI HOOPS PROGRAMME CONTENTS Welcome 3 Programme Goals 3 Junior Basketball The State Of Play 4 Rationale For Change 4 The Kiwi Hoops
BADMINTON IN ENGLISH LESSON PLANS. Lluís Roca i Roca
 BADMINTON IN ENGLISH Lluís Roca i Roca October - December 2008 UNIT ONE Topic: History of Badminton to know the main events in the history of Badminton to ask and answer questions as a group and in groups
Loudoun Academy. Physical Education
 Loudoun Academy Physical Education S3 PE Studies Badminton Contents Factors Impacting on Performance 2 Nature and Purpose 3 Demands of Performance Physical Factor (Skills) 5 Demands of Performance Mental
OVERVIEW OF THE COMPLETE SCHEME OF WORK 4-11 YEARS (RECEPTION, KEY STAGES 1 & 2)... (i) - (ix) SECTION 1 - TEACHING GUIDE 1
... (i) - (ix) SECTION 1 - TEACHING GUIDE 1") TABLE OF CONTENTS PAGE OVERVIEW OF THE COMPLETE SCHEME OF WORK 4-11 YEARS (RECEPTION, KEY STAGES 1 & 2)... (i) - (ix) SECTION 1 - TEACHING GUIDE 1 AIMS AND PURPOSES OF PHYSICAL EDUCATION IN THE PRIMARY
TABLE OF CONTENTS PAGE OVERVIEW OF THE COMPLETE SCHEME OF WORK 4-11 YEARS (RECEPTION, KEY STAGES 1 & 2)... (i) - (ix) SECTION 1 - TEACHING GUIDE 1 AIMS AND PURPOSES OF PHYSICAL EDUCATION IN THE PRIMARY
TENNIS UNIT 10 LESSONS COURTESY OF
 TENNIS UNIT 10 LESSONS COURTESY OF LESSON ONE Lesson Name: Ball Carrying Lesson Length: 25 40 minutes Course: Physical Education Number of students: 20-30 Prescribed Learning Outcome: Gr 4 A1, A2, A3,
Playing the game. The singles game
 Playing the game Before it is possible to know what is involved in playing a game it is perhaps necessary to have some idea of what is meant by the word game. A simple explanation is that a badminton game
The basic V grip. Forehand Hold
 Forehand Hold The player will be required to change the way of holding the racket for different strokes. The first two ways are described here and should be introduced by the use of hitting against the
GREEN BALL 02 / GREEN BALL 01
 COACH S CURRICULUM Green Ball Practice And Play Plans GREEN BALL 02 / GREEN BALL 01 DEAR COACH, WELCOME TO NET GENERATION! On behalf of the USTA, we thank you for supporting Net Generation. You are the
contents QuickStart Tennis Practice Sessions Introduction ages 5 6 practice sessions
 contents QuickStart Tennis Practice Sessions Introduction I II practice 1 Controlling the Racquet and the Ball 1 8 practice 2 Learning to Hit the Ball at the Side of the Body 9 16 practice 3 Receiving
Lesson 3. Introduction OVERVIEW. Equipment Tennis rackets, Mini Tennis red balls, hoops, Mini Tennis net, throw-down lines.
 Lesson Three Lesson 3 OVERVIEW Work continues at Level 4 to establish the basics. This lesson teaches how to serve underarm and progresses from making contact with the ball from a single ball feed to attempt
ORANGE BALL. CAMP 1 The Expert Rallyer
 ORANGE BALL CAMP 1 The Expert Rallyer FINAL 2016 3.16.2016 Expert Rallyer Practice Plan- Session 1 Theme of this camp is RESPECT Warm-up Drill Objective Time Technical/Game Development (Players in Groups
H.Dh. AEC PE Scheme Grade 3 Term1 2008
 1 We ek First Week Dat e 9 th January Topic Objectives Activities Assessment Material Needed Physical Fitness Activity Build up physical strength while doing fun activities Exercise whole body parts while
PE Assessment: Basketball
 PE Assessment: Basketball Passing and Catching: 30% Attempt shoulder, overhead, chest and bounce passes but with little accuracy, power and consistency. 40% Demonstrate that my passing and catching skills
Advantage Press, Inc. This Learning Packet has two parts: (1) text to read and (2) questions to answer.
 text to read and (2) questions to answer.") Advantage Press, Inc. BADMINTON PACKET # 2 INSTRUCTIONS This Learning Packet has two parts: (1) text to read and (2) questions to answer. The text describes a particular sport or physical activity, and
Advantage Press, Inc. BADMINTON PACKET # 2 INSTRUCTIONS This Learning Packet has two parts: (1) text to read and (2) questions to answer. The text describes a particular sport or physical activity, and
MLC Tennis Hot Shots in schools
 MLC Tennis Hot Shots in schools Contents Page Introduction Introduction to MLC Tennis Hot Shots in schools 3 Safety and class management 3 What equipment and surface is required? 4 Differentiate lessons
Playing court dimensions
 Badminton Badminton is a recreational sport played by either two opposing players (singles) or two opposing pairs (doubles), that take positions on opposite halves of a rectangular court divided by a net.
NATIONAL / LOCAL DEVELOPMENT PROGRAMME INFORMATION
 NATIONAL / LOCAL DEVELOPMENT PROGRAMME INFORMATION Title of Programme: Junior 101 National Squash Federation: England Programme Organizer: Programme Duration / Period: 6 weeks Programme Summary: Junior
Y9 Curriculum Map: PE
 1 Autumn 1 (7 weeks) Basketball (7 lessons) Continue to develop the following key skills: passing, receiving, pivoting, To use the basic skills with consistency and accuracy in the game to outwit the opposition
Curriculum Map for PE. Games Gym Dance Swimming Athletics OAA
 Curriculum Map for PE Games Gym Dance Swimming OAA Year 3 Invasion: Tag Rugby; Passing and receiving, basic rules, drills/practices, introduction to tagging, small sided game (3v3) with adapted rules.
PART 5: TEACHING SKIPPING SKILLS
 : TEACHING SKIPPING SKILLS This section includes: Learning skipping skills Skipping skills Individual Skipping skills Partner Skipping skills Long rope Skipping skills Double Dutch There are hundreds of
ORANGE BALL. CAMP 2 The Net Dominator 2018 FINAL
 ORANGE BALL CAMP 2 The Net Dominator 2018 FINAL NET DOMINATOR Practice Plan- Session 1 Theme of this camp: MATCH PREPARATION Warm-up Drill Objective Tim e Skipping Side Step To teach the players the skills
Mini Tennis Coaching
 COMHAIRLE NÁISIÚNTA NA gcáilíochtaí GAIRMOIDEACHAIS NATIONAL COUNCIL FOR VOCATIONAL AWARDS Draft Module Descriptor Mini Tennis Coaching Level 5 N22970 www.fetac.ie 1 Title Mini Tennis Coaching 2 Code N22970
Special Olympics Junior Athletes. Basketball
 Special Olympics Junior Athletes Basketball BASKETBALL Basketball is a very popular sport around the world. The sport s success is due to the fact that it can be played by boys, girls, men and women of
UNDER 9 PLAYER EVALUATION (fundamental stage)
") UNDER 9 PLAYER EVALUATION (fundamental stage) PLAYER S NAME: E-MAIL: CLUB: PHONE: GENDER: BIRTHDAY: MONTH YEAR PLAYING HAND: BACKHAND: PROGRAM: COACH S NAME: E-MAIL: PHONE: How to use this evaluation Psychological/Tactical/Technical
UNDER 9 PLAYER EVALUATION (fundamental stage) PLAYER S NAME: E-MAIL: CLUB: PHONE: GENDER: BIRTHDAY: MONTH YEAR PLAYING HAND: BACKHAND: PROGRAM: COACH S NAME: E-MAIL: PHONE: How to use this evaluation Psychological/Tactical/Technical
Youth Floorball Coaching Manual
 Manual Floorball New Zealand 1 Earn Place Island Bay Wellington, New Zealand contact@floorball.org.nz www.floorball.org.nz June 2014 FNZ, June 2014 2 Floorball New Zealand Manual Table of contents 1. Introduction
Overhead clears A = Parent B = Child Use the half court. Both players stand at the rear of the court.
 Practising As the child becomes more competent in his ability to play the game so will the game become more complex. He will begin to use all his strokes to make use of all the space on the court. lie
Badminton Coaching e-zine for the Bay of Plenty
 Badminton Coaching e-zine for the Bay of Plenty Issue 4 October 2009 LEVEL 1 COACHING COURSE Bay of Plenty Badminton in conjunction with Waikato Badminton will be holding a Level 1 Coaching Course on 14th
OVERVIEW OF THE COMPLETE SCHEME OF WORK 4-11 YEARS (RECEPTION, KEY STAGES 1 & 2)... (i) - (ix) SECTION 1 - TEACHING GUIDE 1
... (i) - (ix) SECTION 1 - TEACHING GUIDE 1") TABLE OF CONTENTS PAGE OVERVIEW OF THE COMPLETE SCHEME OF WORK 4-11 YEARS (RECEPTION, KEY STAGES 1 & 2)... (i) - (ix) SECTION 1 - TEACHING GUIDE 1 AIMS AND PURPOSES OF PHYSICAL EDUCATION IN THE PRIMARY
TABLE OF CONTENTS PAGE OVERVIEW OF THE COMPLETE SCHEME OF WORK 4-11 YEARS (RECEPTION, KEY STAGES 1 & 2)... (i) - (ix) SECTION 1 - TEACHING GUIDE 1 AIMS AND PURPOSES OF PHYSICAL EDUCATION IN THE PRIMARY
STYLE. Cardio Tennis Teacher Resource
 STYLE Cardio Tennis Teacher Resource Cardio Tennis Teacher Resource CONTENTS INTRODUCTION 4 WARM-UP ACTIVITIES Hit and Move Harlem Shuffle 3 Grab and Go 4 Three Volley Across 5 Feel The Rhythm 6 Murray
in conjunction with Skills for Life: Hockey (KS2)
") in conjunction with Skills for Life: Hockey (KS2) Progressive child development through FOM, FMS, FMS will ensure every child has the opportunity to reach their full potential contributing to a healthy
in conjunction with Skills for Life: Hockey (KS2) Progressive child development through FOM, FMS, FMS will ensure every child has the opportunity to reach their full potential contributing to a healthy
in conjunction with Skills for Life: Basketball (KS2)
") in conjunction with Skills for Life: Basketball (KS2) Progressive child development through FOM, FMS, FMS will ensure every child has the opportunity to reach their full potential contributing to a healthy
in conjunction with Skills for Life: Basketball (KS2) Progressive child development through FOM, FMS, FMS will ensure every child has the opportunity to reach their full potential contributing to a healthy
BADMINTON. History. Badminton is a racket sport played by either two opposing players (singles) or two opposing pairs (doubles).
 or two opposing pairs (doubles).") BADMINTON Badminton is a racket sport played by either two opposing players (singles) or two opposing pairs (doubles). The badminton court is rectangular and is divided by a net. Players score points by
BADMINTON Badminton is a racket sport played by either two opposing players (singles) or two opposing pairs (doubles). The badminton court is rectangular and is divided by a net. Players score points by
6 Week Handball Lesson Plans
 Lesson 1 Handball - Beginner Lesson Topic: Strokes Learning Intentions: To understand the rules, and be able to execute the basic strokes of Handball. The strokes to be taught are the underarm and the
BADMINTON IN ENGLISH STUDENT S WORKSHEET. Lluís Roca i Roca
 BADMINTON IN ENGLISH STUDENT S WORKSHEET Lluís Roca i Roca October December 2008 UNIT ONE Lesson one Match to make true statements. Write the statements in chronological order. In the 16th century In 1876
1. How to teach movements 2. Basics 3. Ready position 4. Service 5. Drive 6. Push strokes / Volleys 7. Over head strokes 8. Footwork & Tacticals
 1. How to teach movements 2. Basics 3. Ready position 4. Service 5. Drive 6. Push strokes / Volleys 7. Over head strokes 8. Footwork & Tacticals 1 I. Pulse sequence & Strike phases (1) Preparation phase
Learning Outcomes (How achievement will be demonstrated by pupils) See Unit of Work
 See Unit of Work") Topic: Badminton Key Processes These are the essential skills and processes in PE that pupils need to learn to make progress within KS3 badminton. Learning Outcomes (How achievement will be demonstrated
Topic: Badminton Key Processes These are the essential skills and processes in PE that pupils need to learn to make progress within KS3 badminton. Learning Outcomes (How achievement will be demonstrated
The KING S Medium Term Plan Physical Education Netball Programme
 The KING S Medium Term Plan Physical Education Netball Programme 2015-16 Module Overarching subject challenge question Lines of Enquiry What makes an effective Netball player? Week 1: What is netball and
Tier Level 3-5 Length. 6/7 weeks
 Year group: 7 Netball Tier Level 3-5 Length Outwitting an Opponent Unit description Pupils will learn to use basic principles of play when selecting and applying tactics for defending and attacking. Pupils
Minor League Tennis (8-10yrs) Practice and League Play Overview
 Practice and League Play Overview") Minor League Tennis (8-10yrs) Practice and League Play Overview Week 1 and 2 Practice and Preparing for League Play Grips, Ball Roll, Ball Balance Self Rally, Drop and Pop to Catch Throw and Catch with
Minor League Tennis (8-10yrs) Practice and League Play Overview Week 1 and 2 Practice and Preparing for League Play Grips, Ball Roll, Ball Balance Self Rally, Drop and Pop to Catch Throw and Catch with
Generic Activity: Speed & Agility Soccer Theme: 1 v 1 A. WARM-UP
 Generic Activity: Speed & Agility Soccer Theme: 1 v 1 A. WARM-UP Yellows players take the ball and form a circle. Red players without a ball position themselves inside the circle. Yellow players with the
Key Stage 3 Curriculum Plan Year 8
 Year 8 Block 1 Key Topics What will ALL students learn? What will the most able students learn? Boys - Football Girls - Netball will learn how to: Play a range of passing techniques and control the ball
Badminton games in physical education
 Badminton games in physical education Lidija Petrinović Zekan, prof, dr.sc. Dubravka Ciliga Kineziološki fakultet (Petrinović-Zekan, L. i Ciliga, D. (2002). Badminton games in physical education. 2nd International
Coaching course. Czech Republic December 2013
 Coaching course Czech Republic December 2013 How to coach children They need to learn the technique, that is used as senior, when they are young juniors (grips, swings, footwork, tactics, etc.) Do not
Club Pro 1 Summary of Course Results Date: Evaluations Prof. Workbooks Practical Exam #1 Practical Exam #2 #1 #2 #3 #4
 Club Pro 1 Summary of Course Results Date: MS Met Standard DNMS Did Not Meet Standard Participant Names 1. NCCP MED Online Evaluations Prof. Workbooks Practical Exam #1 Practical Exam #2 #1 #2 #3 #4 Demonstration
BADMINTON LEADERS HANDBOOK JAKE DOWNEY
 BADMINTON LEADERS HANDBOOK JAKE DOWNEY 1 BADMINTON LEADERS HANDBOOK JAKE DOWNEY ex-director of Coach Education Badminton Association of England Ltd Published by Jake Downey (2004) First published in Great
CHORLTON HIGH SCHOOL: CURRICULUM. Key Stage 3 Framework for Learning Year : Creative Foundations. Curriculum Area:
 ELE 3 Days ELE 1 Day: Key Stage 3 Framework for Learning Year 8 2018-2019: Creative Foundations Curriculum Area: Year 8 Autumn 1 Autumn 2 Spring 1 Spring 2 Summer 1 Summer 2 Knowledge and rules and strategies
SPORTS AUTHORITY OF INDIA NETAJI SUBHAS NATIONAL INSTITUTES OF SPORTS:PATIALA DIPLOMA COURSE IN SPORTS COACHING REVISED SYLLABUS ( )
") SPORTS AUTHORITY OF INDIA NETAJI SUBHAS NATIONAL INSTITUTES OF SPORTS:PATIALA DIPLOMA COURSE IN SPORTS COACHING REVISED SYLLABUS (2015-16) THEORY AND SCIENCE OF VOLLEYABLL PAPER I 1 ST SEMESTER 1 History,
SPORTS AUTHORITY OF INDIA NETAJI SUBHAS NATIONAL INSTITUTES OF SPORTS:PATIALA DIPLOMA COURSE IN SPORTS COACHING REVISED SYLLABUS (2015-16) THEORY AND SCIENCE OF VOLLEYABLL PAPER I 1 ST SEMESTER 1 History,
Planning for Success. Young Gaelic Player Pathway Naomh Olaf GAA Club. Naomh Olaf GAA Club - Player Pathway 1
 Planning for Success Young Gaelic Player Pathway Naomh Olaf GAA Club Naomh Olaf GAA Club - Player Pathway 1 Introduction The purpose of this Player Pathway initiative is to help guide coaches, managers,
Jump Horizontal Run up Take off Flight- Long Jump Flight-Triple Jump Landing Jump- Vertical. Run up Take off Flight Landing
 Athletics (Jump) Level Ladder 10 9 8 7 6 Jump Horizontal Run up very fast and aggressive on the board, with very good sprinting action. Take off speed transferred into excellent lift at take-off. Flight-
MODERN TEACHING METODOLOGY OF TENNIS. DTB / VDT Congress 2002 Dr. Miguel Crespo ITF Development Department
 MODERN TEACHING METODOLOGY OF TENNIS DTB / VDT Congress 2002 Dr. Miguel Crespo ITF Development Department INTRODUCTION HAS TENNIS PLAYING CHANGED DURING THE LAST 30 YEARS? HAS TENNIS COACHING CHANGED DURING
MILO in2cricket Skills Program 7-10 The Australian Way
 MILO in2cricket Skills is a curriculum aligned program which uses cricket as the vehicle for promoting a healthy & active lifestyle. It s fun, inclusive, easy to facilitate & gives students the skills
Junior Netball Review. Key Findings and Summary
 Junior Netball Review Key Findings and Summary Contents Junior Netball Igniting a lifelong love of the game 3 Key Findings & Summary 4 The Junior Netball Pilot 5 Research 6 Summary of the New Player Pathway
- hire qualified sports coaches to work alongside teachers during PE lessons
 Primary Schools Sports Funding Due to our excellence and commitment to PE and sport we have been awarded the school games gold mark for the second successive year. The PE and sport premium is designed
Physical Education Year 1 to Year 6 Skills & Learning Outcomes. Curriculum Strands Games Dance Gymnastics Athletics - Year 3, 4, 5, and 6 Swimming
 Physical Education Year 1 to Year 6 Skills & Learning Outcomes Curriculum Strands Games Dance Gymnastics Athletics - Year 3, 4, 5, and 6 Swimming PHYSICAL EDUCATION Year 1 Games Dance Gymnastics Travel
Medway Rackets Festival skills stations
 Caterpillar (Team Event) 4 players in a team, each with one racket and one ball for the whole team The team lines up behind each other holding rackets forehand grip First player BALANCES the ball on the
HOW BADMINTON IS PLAYED
 Badminton Comstock Park HS Physical Education PowerPoint Review Taken from Physical Education Learning Packets #2 Badminton Text 2010 The Advantage Press, Inc. INTRODUCTION Badminton is a popular and physically
U8 CURRICULUM. S t o u g h t o n A r e a Y o u t h S o c c e r A s s o c i a t i o n. Page 9
 S t o u g h t o n A r e a Y o u t h S o c c e r A s s o c i a t i o n Page 9 STYLES OF PLAY: GENERAL MATCH OFFENSIVE STYLE All teams will be encouraged to display an offensive style of play based on keeping
Spring 2010 Coaching Sessions U14
 Spring 2010 Coaching Sessions U14 Coaching Ages 13 to 14 Years This section provides you with a eight week training program for children ages 13 through 14 years. Each practice features four fun and progressive
Camp 3- Net Dominator
 Camp 3- Net Dominator FINAL VERSION 2015 NET DOMINATOR Practice Plan- Session 1 Theme of this camp is MATCH PREPARATION Warm-up Drill Objective Time Technical/Game Development Drill Objective Time 2 laps
SPORTS AUTHORITY OF INDIA: NETAJI SUBHAS EASTERN CENTRE KOLKATA. Semester I [Paper-I]THEORY PAPER. Teaching Hours
![SPORTS AUTHORITY OF INDIA: NETAJI SUBHAS EASTERN CENTRE KOLKATA. Semester I [Paper-I]THEORY PAPER. Teaching Hours](/thumbs/85/92050359.jpg "SPORTS AUTHORITY OF INDIA: NETAJI SUBHAS EASTERN CENTRE KOLKATA. Semester I [Paper-I]THEORY PAPER. Teaching Hours") SPORTS AUTHORITY OF INDIA: NETAJI SUBHAS EASTERN CENTRE KOLKATA DIPLOMA COURSE IN SPORTS COACHING REVISED SYLLABUS 2015-16 THEORY & SCIENCE OF BADMINTON Semester I [Paper-I]THEORY PAPER Teaching Hours
SPORTS AUTHORITY OF INDIA: NETAJI SUBHAS EASTERN CENTRE KOLKATA DIPLOMA COURSE IN SPORTS COACHING REVISED SYLLABUS 2015-16 THEORY & SCIENCE OF BADMINTON Semester I [Paper-I]THEORY PAPER Teaching Hours